Short curly hair has a way of changing its mind before you even reach the front door. One side lifts, the other shrinks, and a style that looked neat in the mirror can loosen or puff out on the walk to school.
That’s exactly why the best school hairstyles for short curly hair are the ones that work with the curl pattern instead of fighting it. You want shapes that hold, stay off the face, and still let the curls look like curls — not a flattened helmet pretending to behave.
A spray bottle, a satin scrunchie, a few small clips, and a handful of bobby pins do more work than a drawer full of fancy tools. I’m a fan of styles that keep tension low and leave some softness around the hairline, because short curls look best when they still have a little bounce.
These 15 easy school hairstyles are built for real mornings: sleepy hands, rushed mirrors, backpack straps, and hair that needs to survive class, lunch, PE, and whatever the weather decides to do. Some take two minutes. Some need a little more finger work. All of them are doable once you know where the curl wants to fall.
1. Deep Side Part with Snap Clips
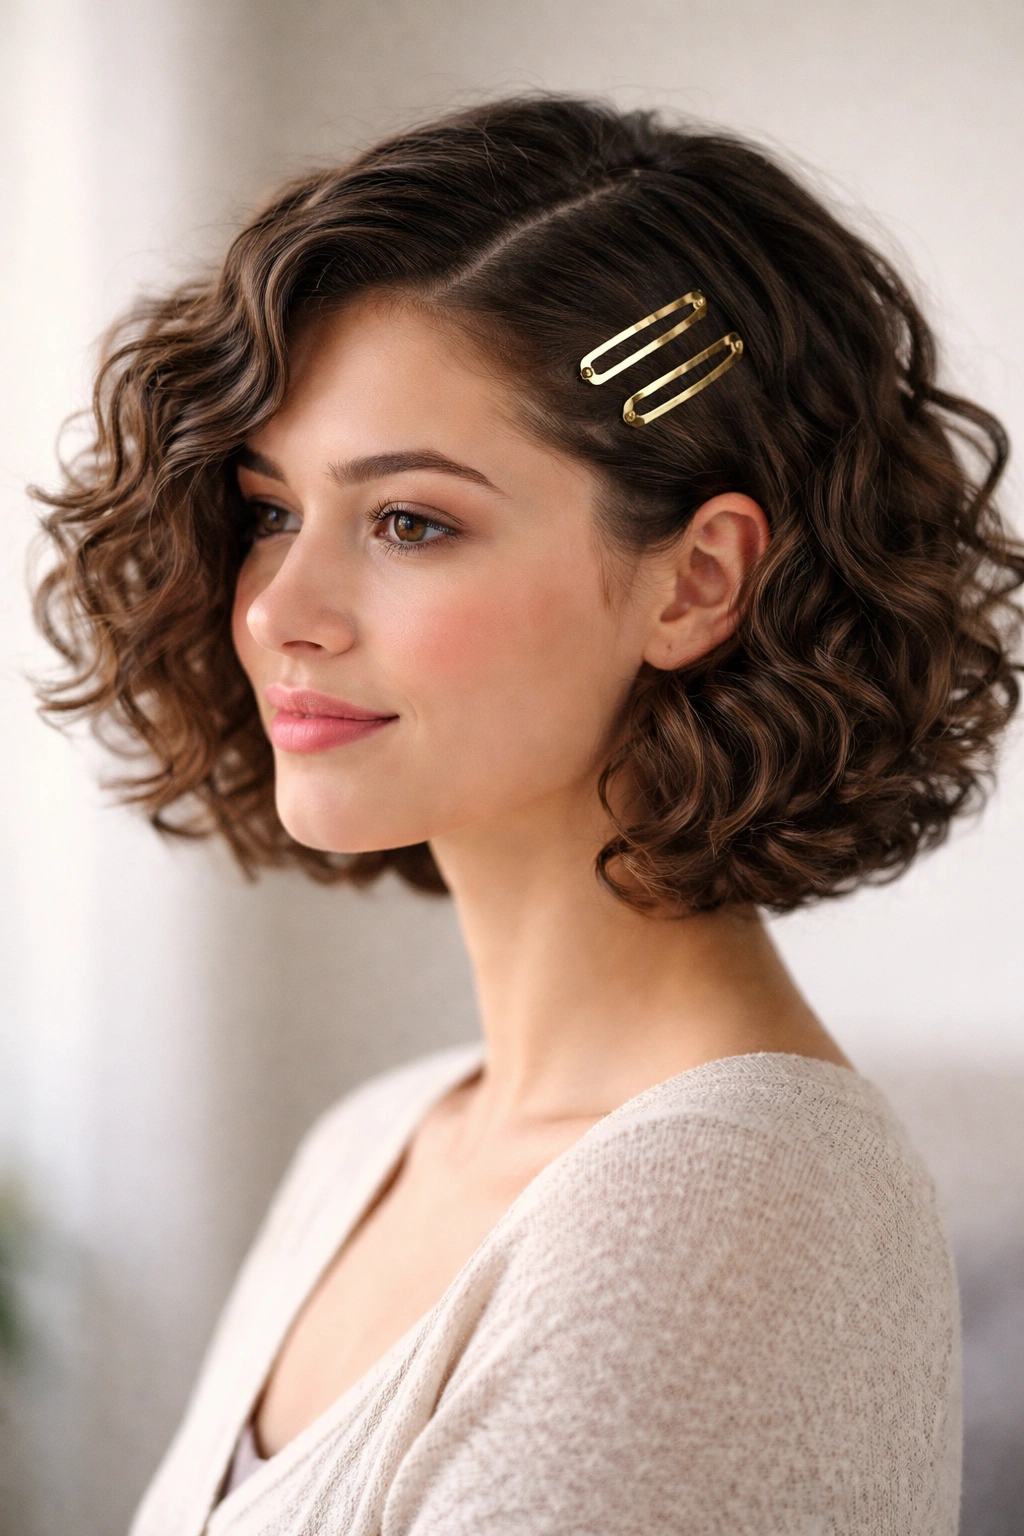
A deep side part is one of the fastest ways to make short curly hair look intentional. The trick is simple: move the part farther over than feels normal, then tuck the smaller side back with two snap clips or slim barrettes.
This style works especially well on chin-length curls and curly bobs because it keeps the front from falling into your eyes all day. If the roots are fluffy, mist them lightly with water, smooth in a pea-size dab of leave-in, and use your fingers to draw the part instead of a brush. Brushes can break up curl clumps and leave the front looking frizzy by second period.
Use clips that grip instead of giant decorative ones that slide around.
- 2 snap clips or small barrettes on the heavier side
- A light mist of water or curl refresher
- A tiny bit of gel at the part line
- Fingers, not a fine comb, for the first pass
Small tip: place the clips slightly above the temple so the curls underneath still have room to spring. That tiny detail matters more than people think.
2. Half-Up Puff with a Satin Scrunchie
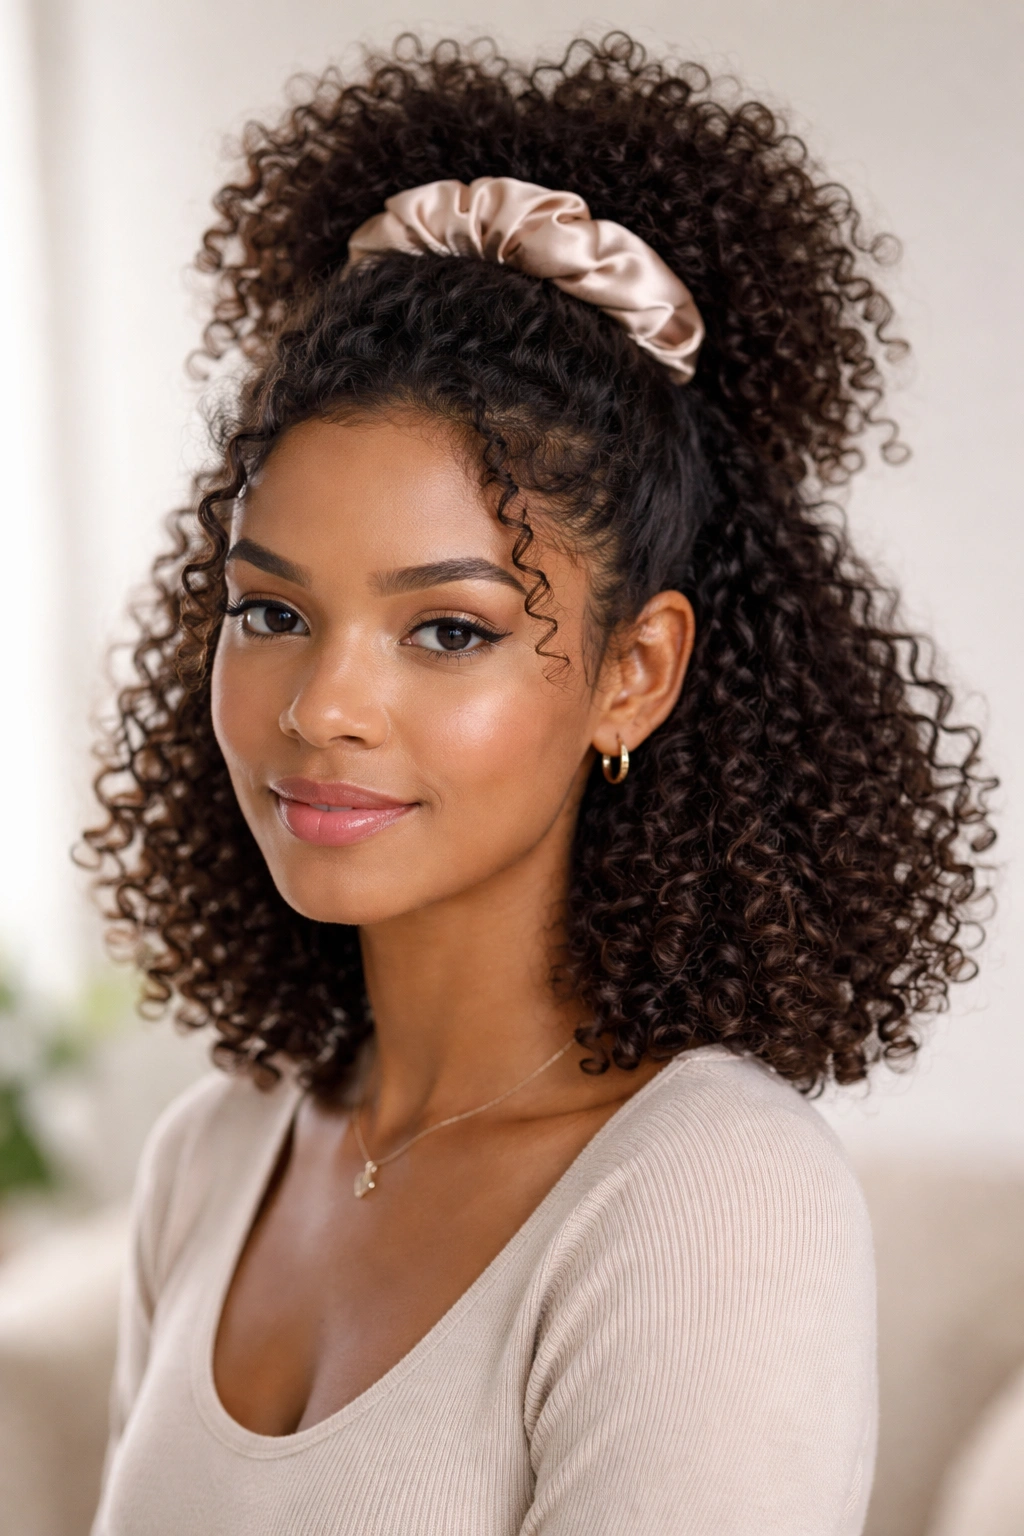
If you only learn one school style, make it the half-up puff. It lifts the top away from the face, leaves the bottom curls loose, and still looks good when the rest of the hair is having a rough morning.
Gather the section from temple to temple with your hands, not a brush, and secure it with a satin scrunchie. If you pull too hard, the puff gets tiny and the sides go flat. If you leave a little softness around the temples, the style looks fuller and less stiff. That softness helps a lot on short curly hair, because short layers do not always lie neatly when they’re forced.
How to keep it from looking crushed
- Tilt your head down before tying.
- Loosen the puff once it’s secured.
- Smooth the edges with a fingertip, not a hard brush.
The whole point is to keep some shape at the top without flattening the curls you actually want people to see.
3. Curly Headband Tuck
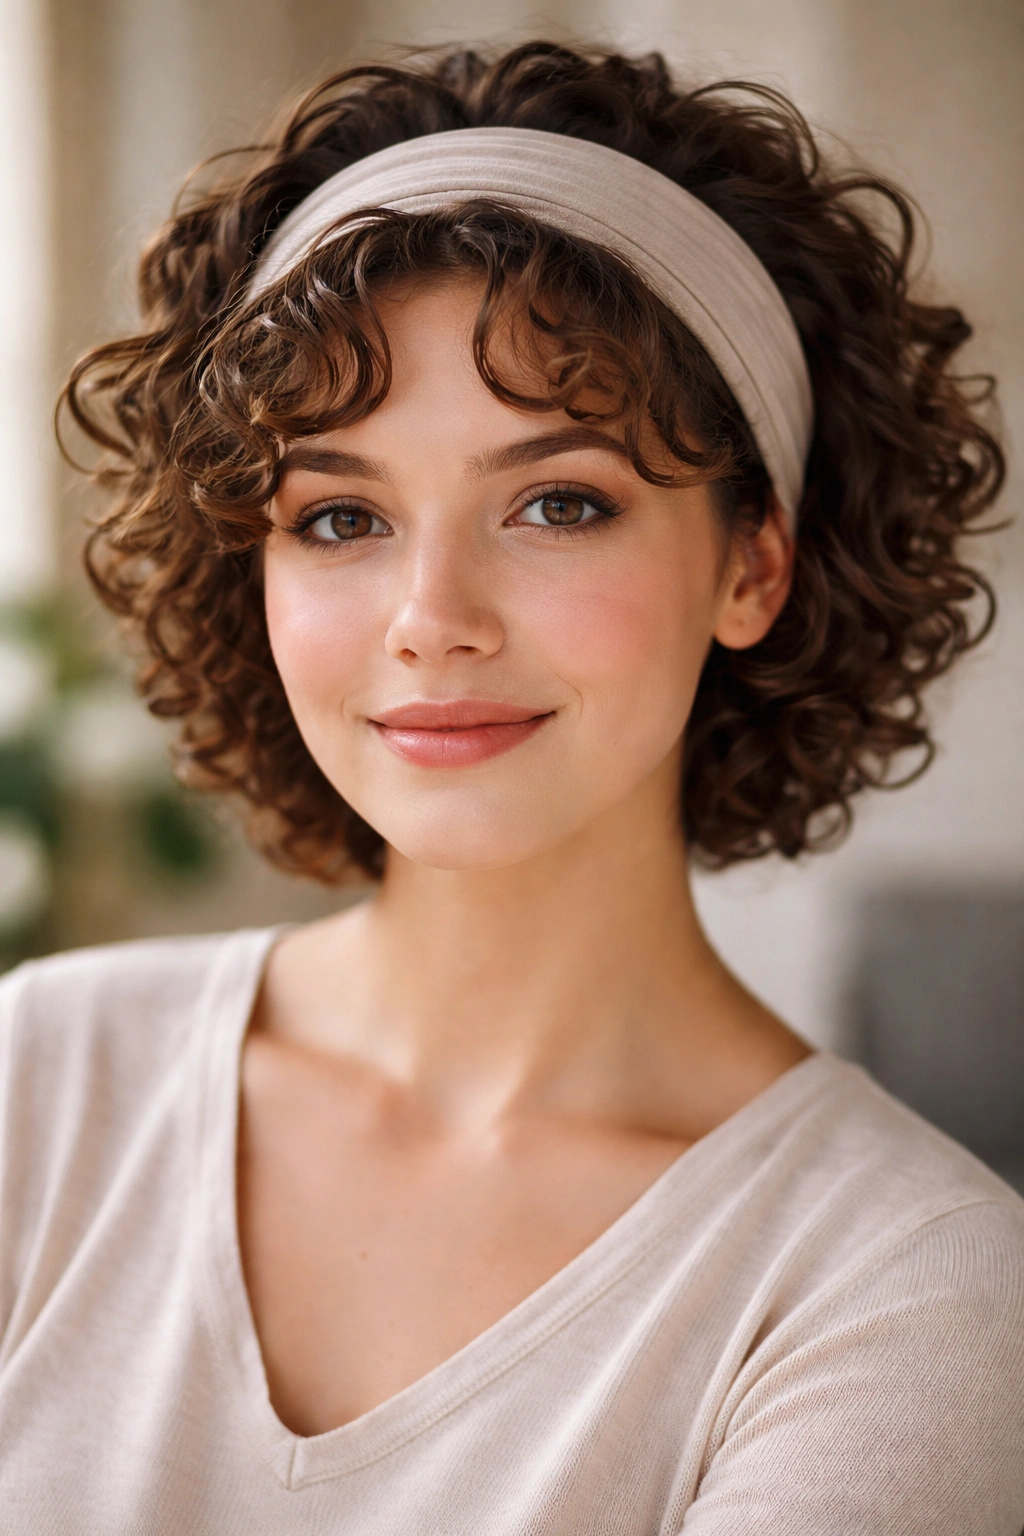
Why does a headband solve so many curly-hair problems? Because it handles the front section without asking the rest of the hair to behave.
Choose a wide, stretchy cloth band rather than a hard plastic one. Put it just behind the hairline, then gently pull the front curls forward so they sit over the band instead of under it. On short hair, the curl ends can stop at the cheekbone, and that’s fine. You do not need a full tuck all the way around for this style to work.
Best headbands for this style
- Wide cloth bands
- Soft sports bands
- Satin-lined bands if your hair frizzes easily
Skip narrow bands if your curls puff at the roots. They tend to slide, then pinch, which is miserable by lunchtime. A wider band looks calmer, sits better, and keeps your face open while still letting the curls do their thing.
4. Two Mini Puffs

Some mornings the top of the head looks bigger than the ends. Two mini puffs fix that shape fast, and they can look playful without feeling fussy.
Make a clean center part, then gather each side into a small puff above or just behind the ears. On very short curly hair, the puffs may sit lower and smaller than you expect. That’s fine. The style still reads clearly, and tiny puffs often look better than overstuffed ones that start slipping by the last bell.
Use small, snag-free elastics so you do not create dents or breakage around the crown. If your curls are soft and springy, a little water at the roots helps each puff hold its shape. If the front pieces are shorter, leave a few curls out around the temples so the whole style feels softer and less boxy.
This one works especially well when you want something cute, neat, and fast. It also handles a little grow-out better than a lot of polished styles. Honest truth? That matters on school mornings.
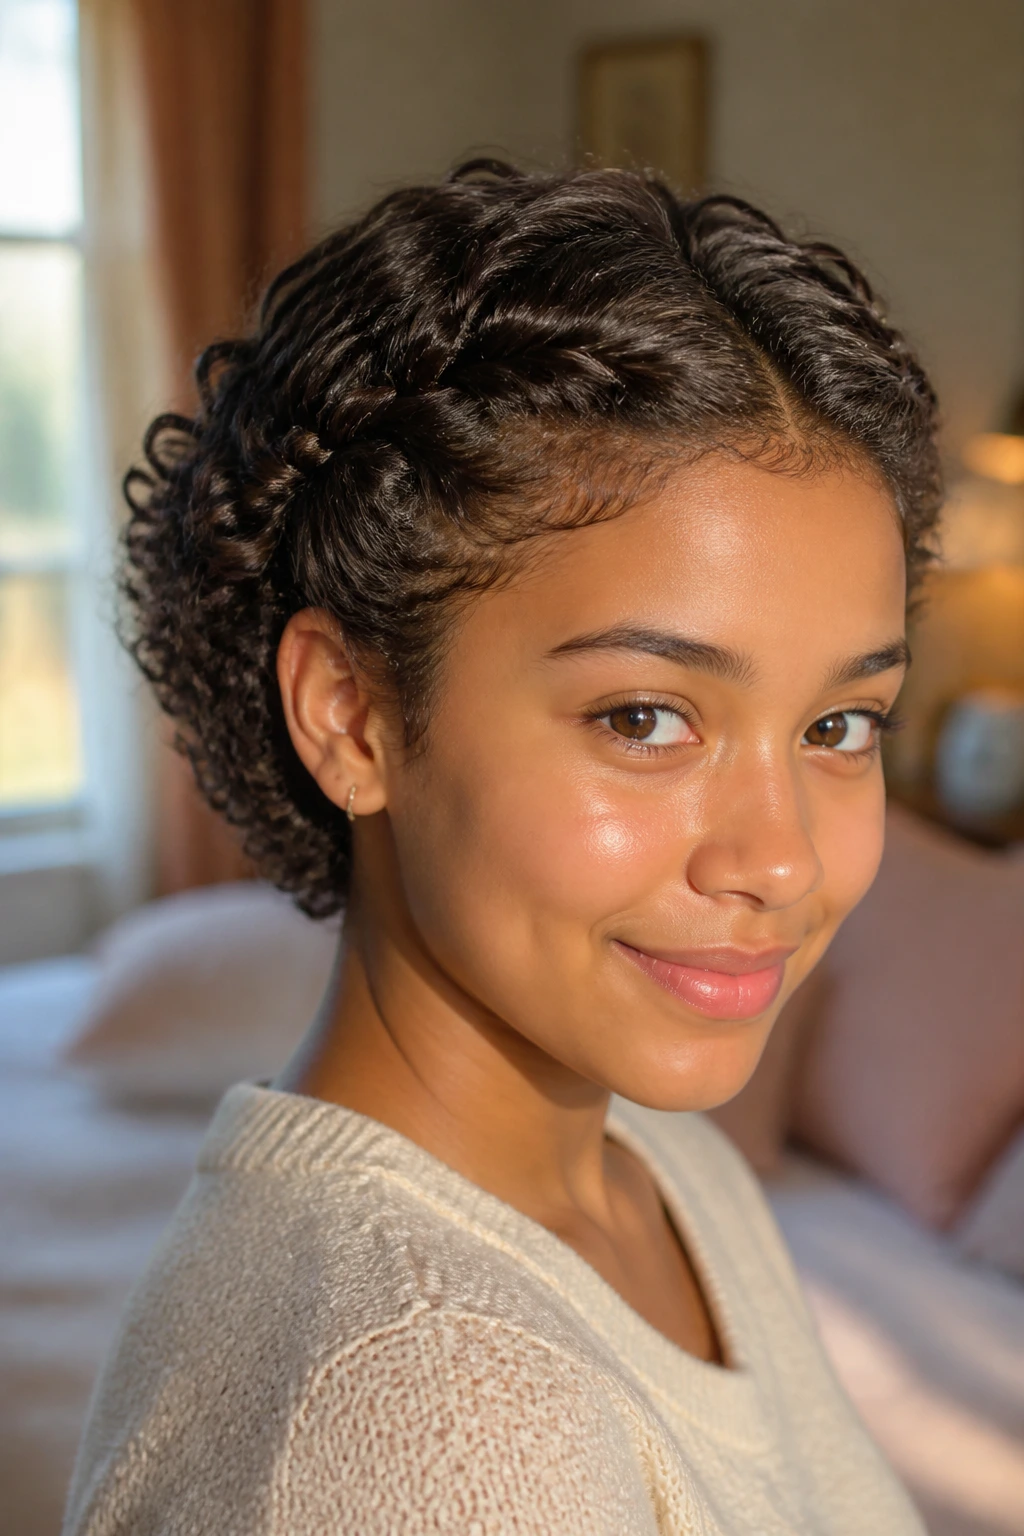
5. Flat Twists at the Hairline
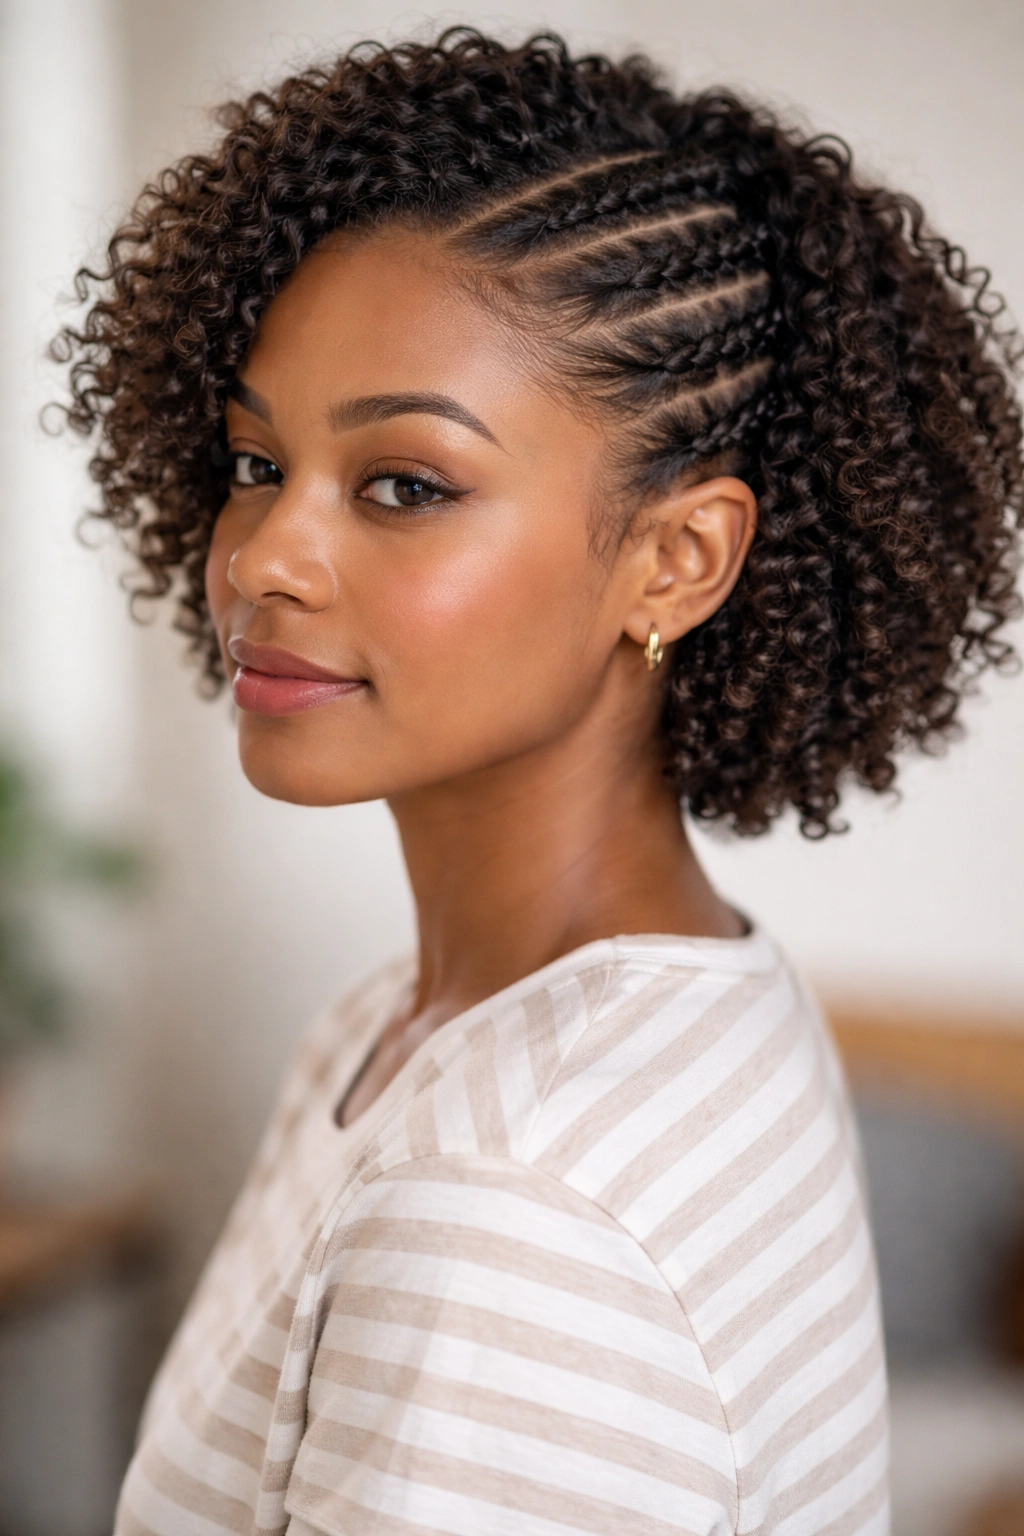
Flat twists are the style I reach for when I need the front of the hair off the face all day. They look more detailed than they are, which is half the appeal.
Take a small section near one temple, split it into two pieces, and twist them back along the hairline toward the ear. Repeat on the other side, then pin or tuck the ends behind the ears. If your curls are very short, stop the twists earlier and secure them with bobby pins instead of trying to force extra length.
This style holds better on hair that’s slightly damp or lightly misted. A tiny amount of styling cream helps the twist stay smooth, but too much product makes it slippery. That is the part people get wrong. They load on product, the twist slides, and suddenly the whole front looks loose before lunch.
Flat twists are especially useful when your bangs or front layers refuse to settle. They keep the face clear, hide uneven grow-out, and give short curly hair a cleaner outline without flattening the whole head.
6. Side-Swept Barrette Stack
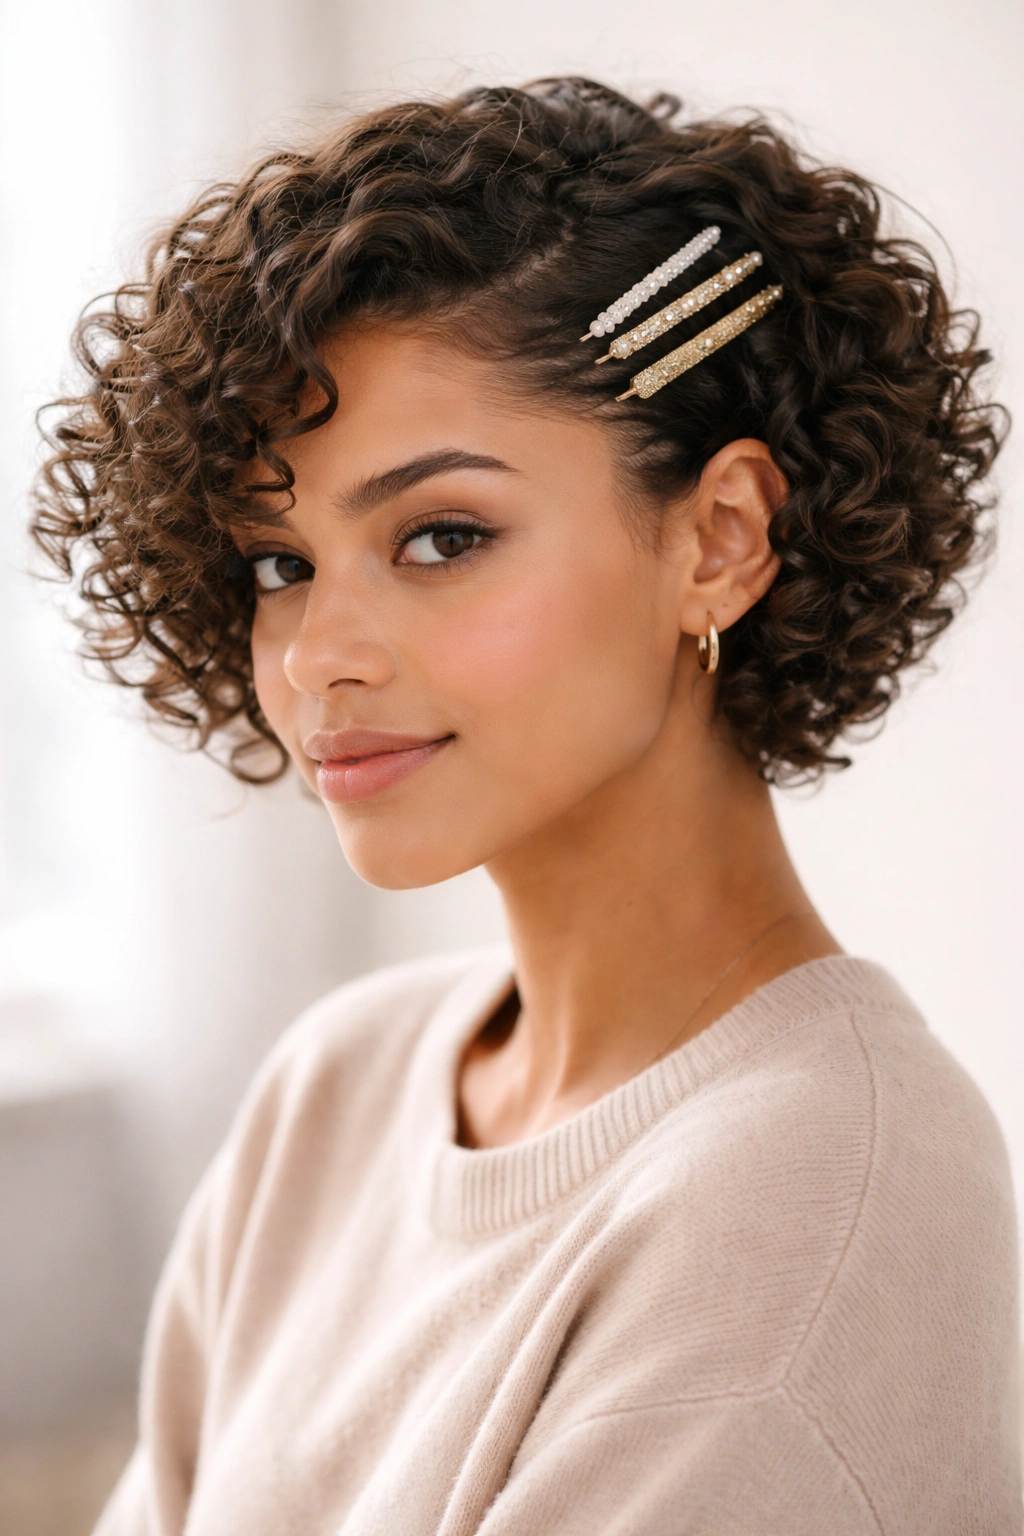
Three barrettes can do more than a dozen pins. That’s the whole idea here.
Instead of trying to pin every curl in place, sweep the front section to one side and stack two or three barrettes in a diagonal line from the temple toward the ear. The arrangement matters. A straight row can look stiff, while a slight slant feels more natural and gives the style some shape. On short curly hair, that shape helps a lot because the curls usually have more volume than length.
This style is a good answer for curls that spring out of clips by midday. Metal snap clips usually grip better than heavy fashion barrettes, especially if the hair is thick or layered. If the front pieces are extra fluffy, smooth only the top layer with your palm and leave the underneath curls alone. Trying to flatten all of it usually backfires.
It’s a small move. It makes a bigger difference than it should.
7. Low Puff at the Nape
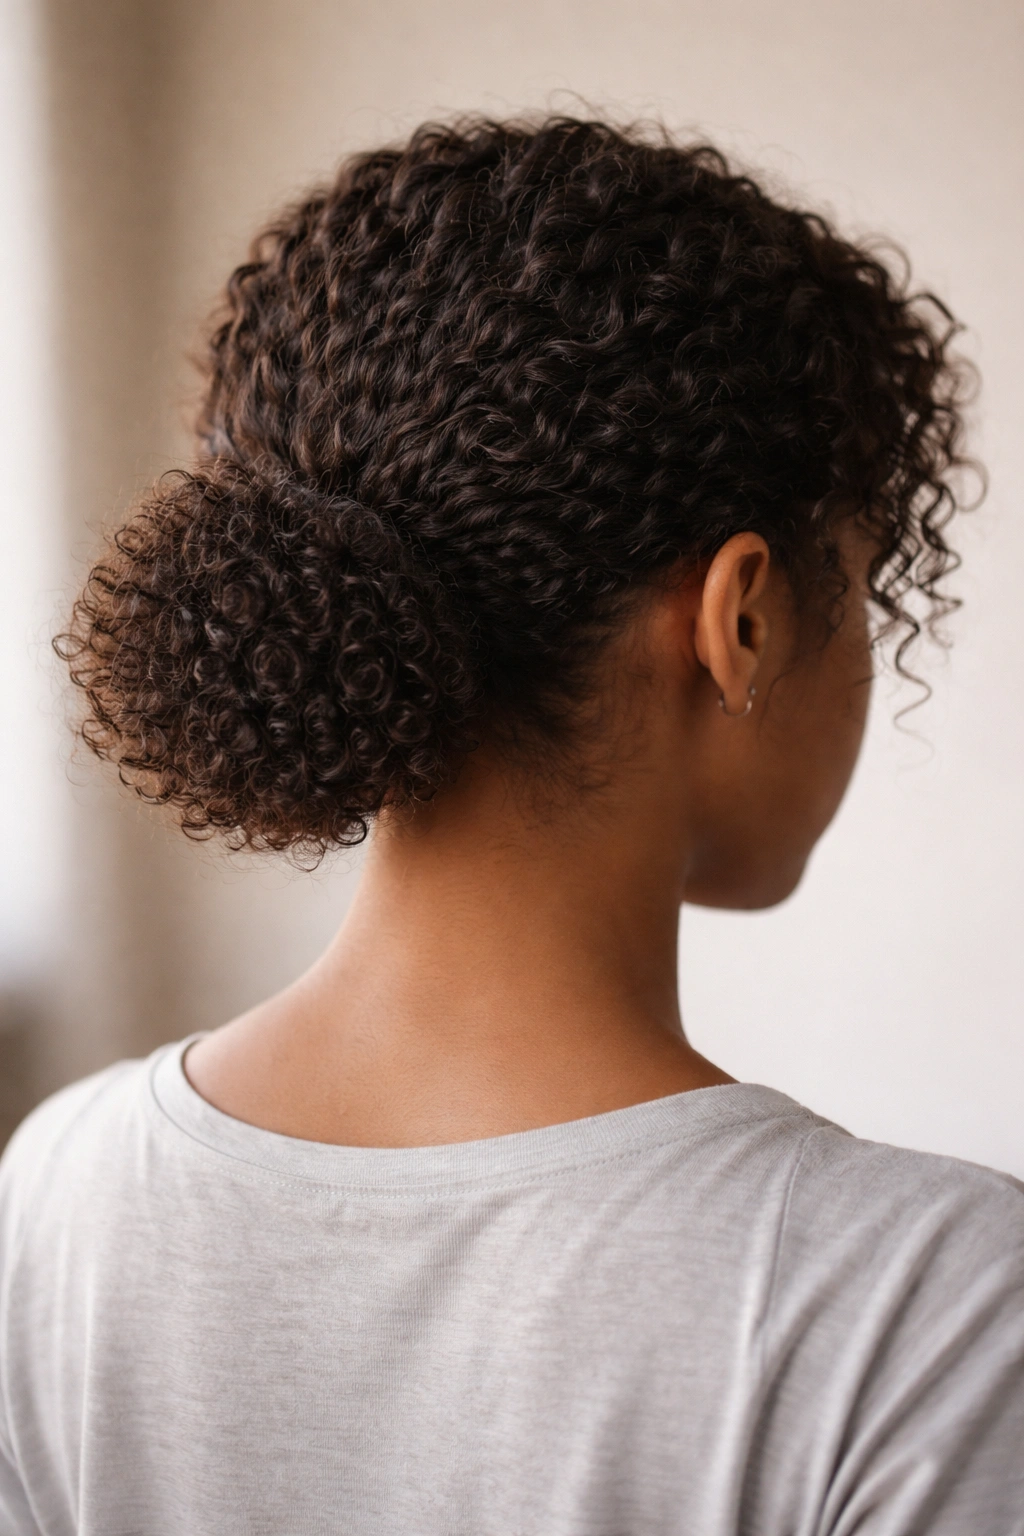
A low puff looks plain from the outside. That is exactly why it works.
When the hair sits low at the nape, it stays out of the way of backpacks, hoodie collars, and constant head turning in class. It also keeps the curls from getting crushed at the top, which is a real problem when the school day includes a desk, a bus seat, and a jacket hood.
Where the tie should sit
- Just above the nape, not halfway up the head
- Low enough that the puff feels relaxed
- Loose enough that the curls keep their shape
- With a soft elastic or mini bungee instead of a tight rubber band
Use your hands to gather the hair, then smooth the sides back with your palms. Don’t chase every little flyaway. Some texture is fine; it keeps the style from looking too tight. If the hair is especially short at the back, leave a few curls out and let them sit naturally. That tiny bit of softness keeps the puff from looking stiff.
This is one of the most reliable school hairstyles for short curly hair because it survives busy days without asking for much touch-up.
8. Half-Up Top Knot
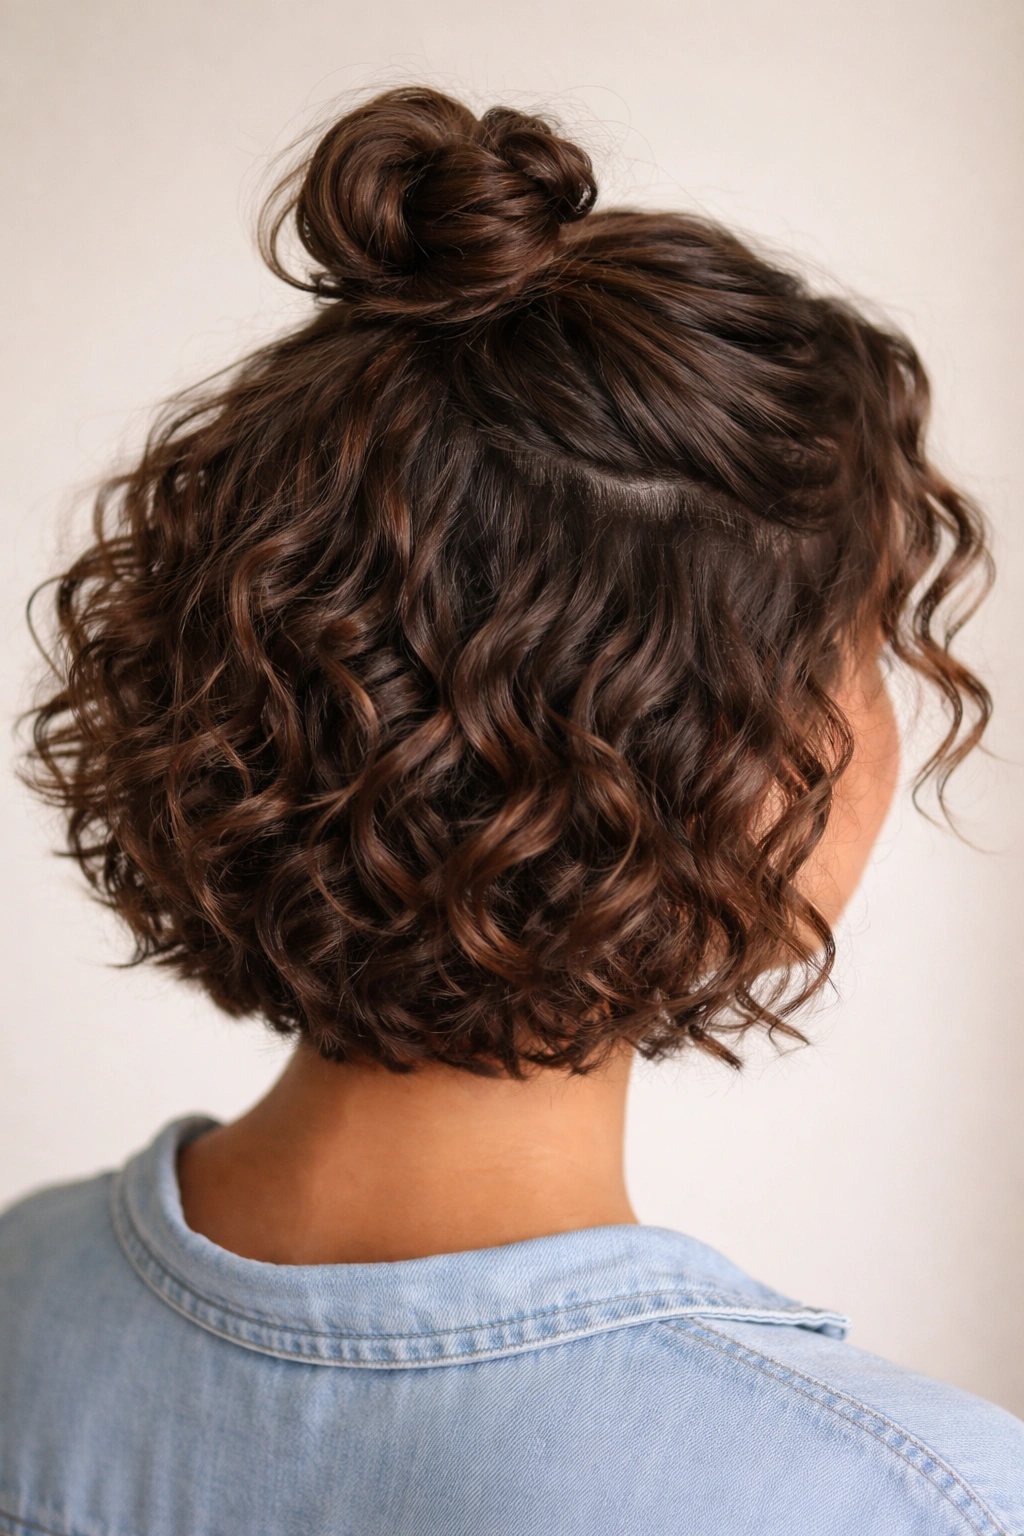
What if your curls are too short for a full bun? Easy. Make the bun smaller.
A half-up top knot uses only the top third or half of the hair, which is usually enough for short curly hair that reaches the ears or the jawline. Gather the crown section, twist it once or twice, and secure it with a small elastic or a soft tie. If the ends stick out, let them. A half-up top knot looks better when it has some texture instead of pretending to be sleek.
The sweet spot is the placement. If the knot sits too far back, it can look flat. If it sits too high, it starts to wobble. Right around the front half of the crown is usually the best spot. That gives the face some lift and keeps the curls at the sides free.
This one is useful on days when you want a bit more shape than a puff but less commitment than a full updo. It’s neat, fast, and forgiving. That last part matters.
9. Mini Space Buns
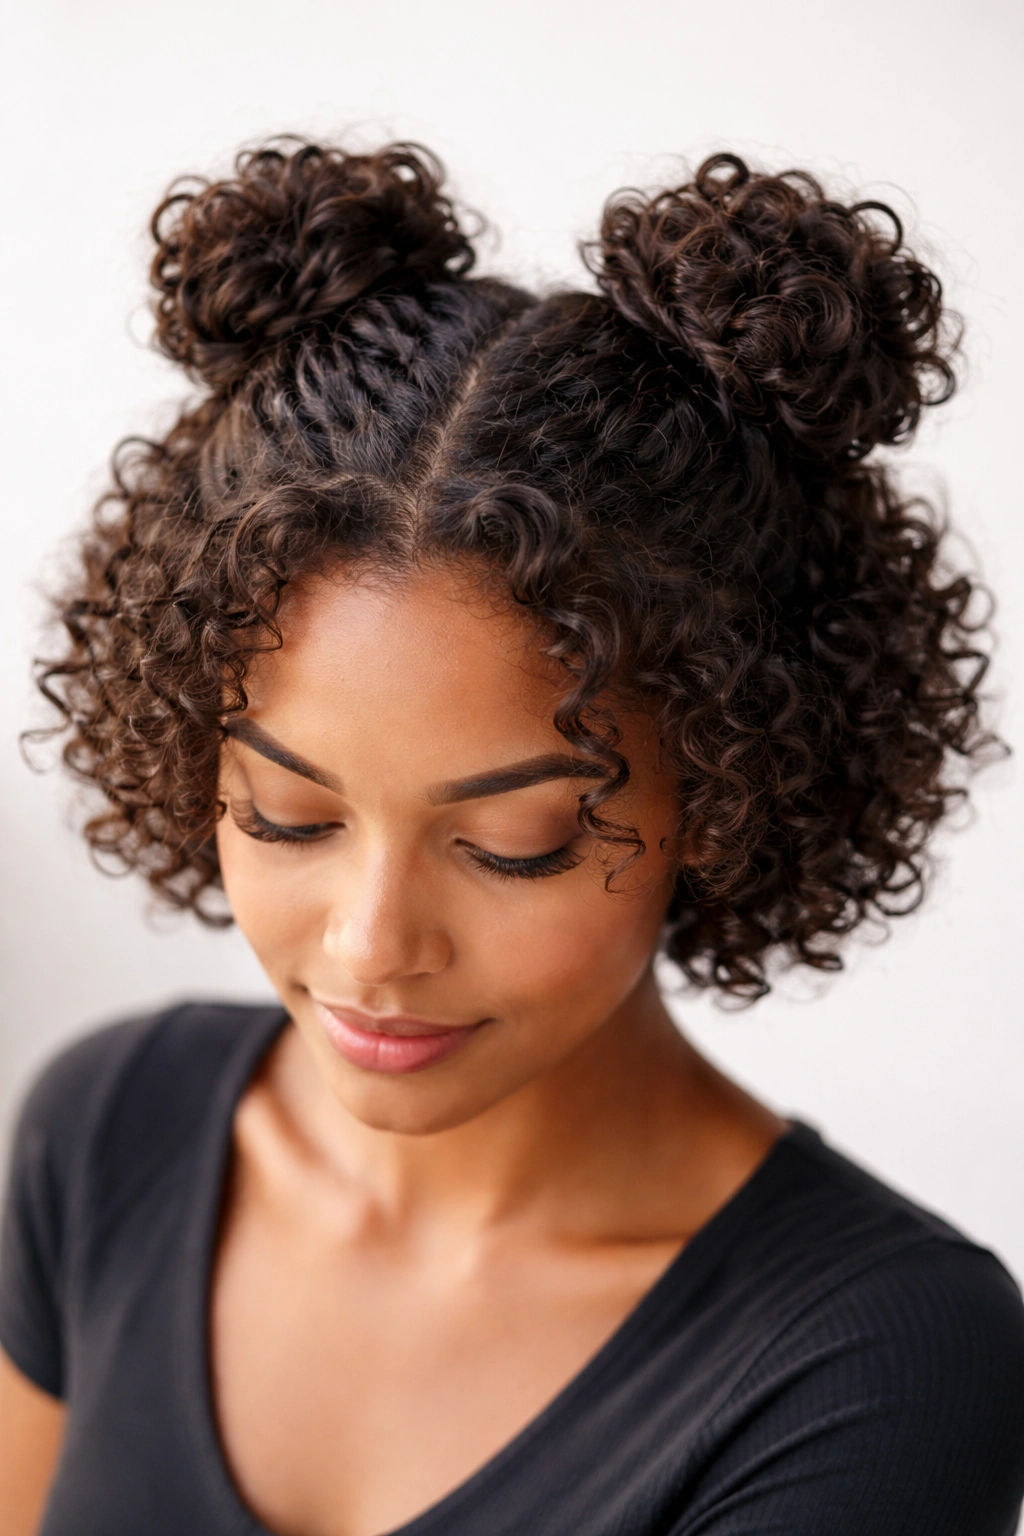
Some mornings call for a style that looks a little playful. Mini space buns do that job without needing long hair.
Part the curls down the middle, then gather the top sections into two small buns. On short curly hair, the buns may sit high and compact, or low and tiny. Both versions work. The important part is keeping the sections balanced so one side doesn’t end up twice the size of the other.
A few loose curls around the face help the style feel softer. If your hair is thick, use tiny elastics first, then wrap the ends into little knots and pin them down with bobby pins. If it’s finer, a small claw clip or two mini elastics can hold the buns without dragging the roots.
- High buns give more lift.
- Lower buns look calmer.
- A pair of face-framing curls keeps the style from feeling too tight.
This is one of those school hairstyles that looks more complicated than it is. It isn’t. It’s just a clever way to use the curls’ own volume.
10. Curly Faux Hawk
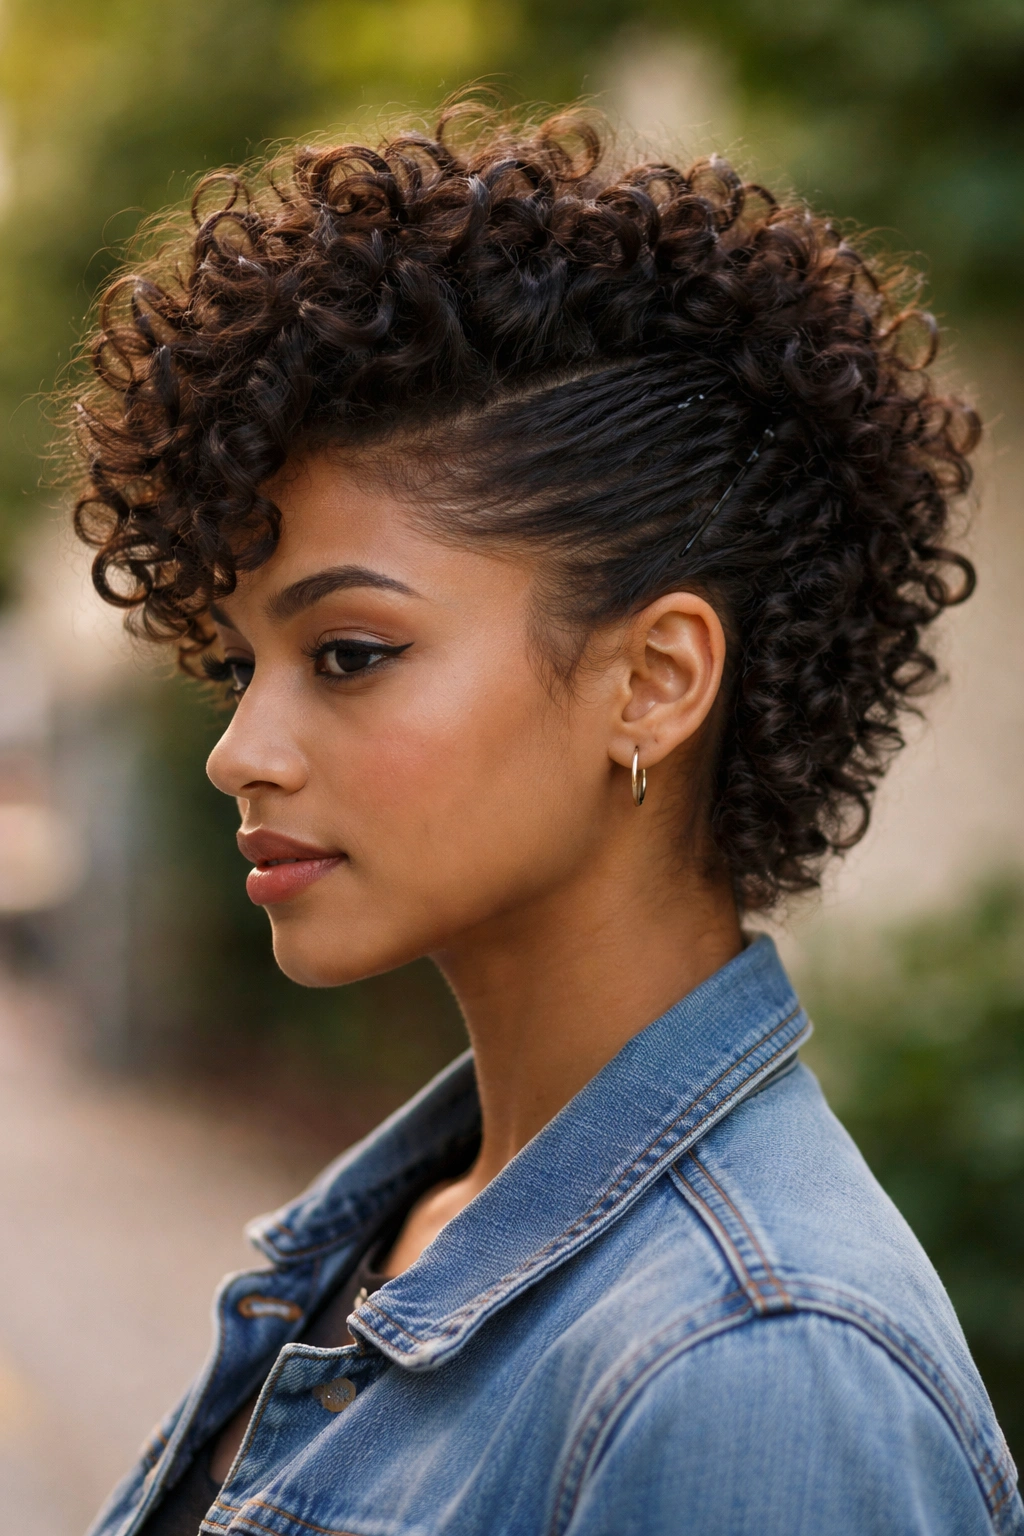
The curly faux hawk is the style that makes short hair look sharper without making it stiff. I like it because it has shape, but it still feels like curly hair.
Pin the Sides First
Start by taking the sides of the hair and pinning them upward toward the center. Use 4 to 6 bobby pins, crossing them in an X when you can. That gives the pins a better grip on short strands, which can be slippery if the curls are soft or freshly refreshed.
Leave the Center Alone
The middle section should stay loose and full. That’s what creates the faux hawk shape. If you press the center flat, the whole style loses its edge and starts looking like a regular pinned-back look. Let the curls rise on their own. They usually do the work for you.
What to Do with Short Layers
Short layers near the ears can stick out. Don’t fight every piece. Pin the larger sections, then leave the tiny curls alone unless they’re poking straight into the face. A little asymmetry is normal here.
This style is good for school days when you want something a bit bolder but still easy to wear. It holds the curls away from the eyes and leaves room for the natural texture to show off.
11. Claw Clip Twist
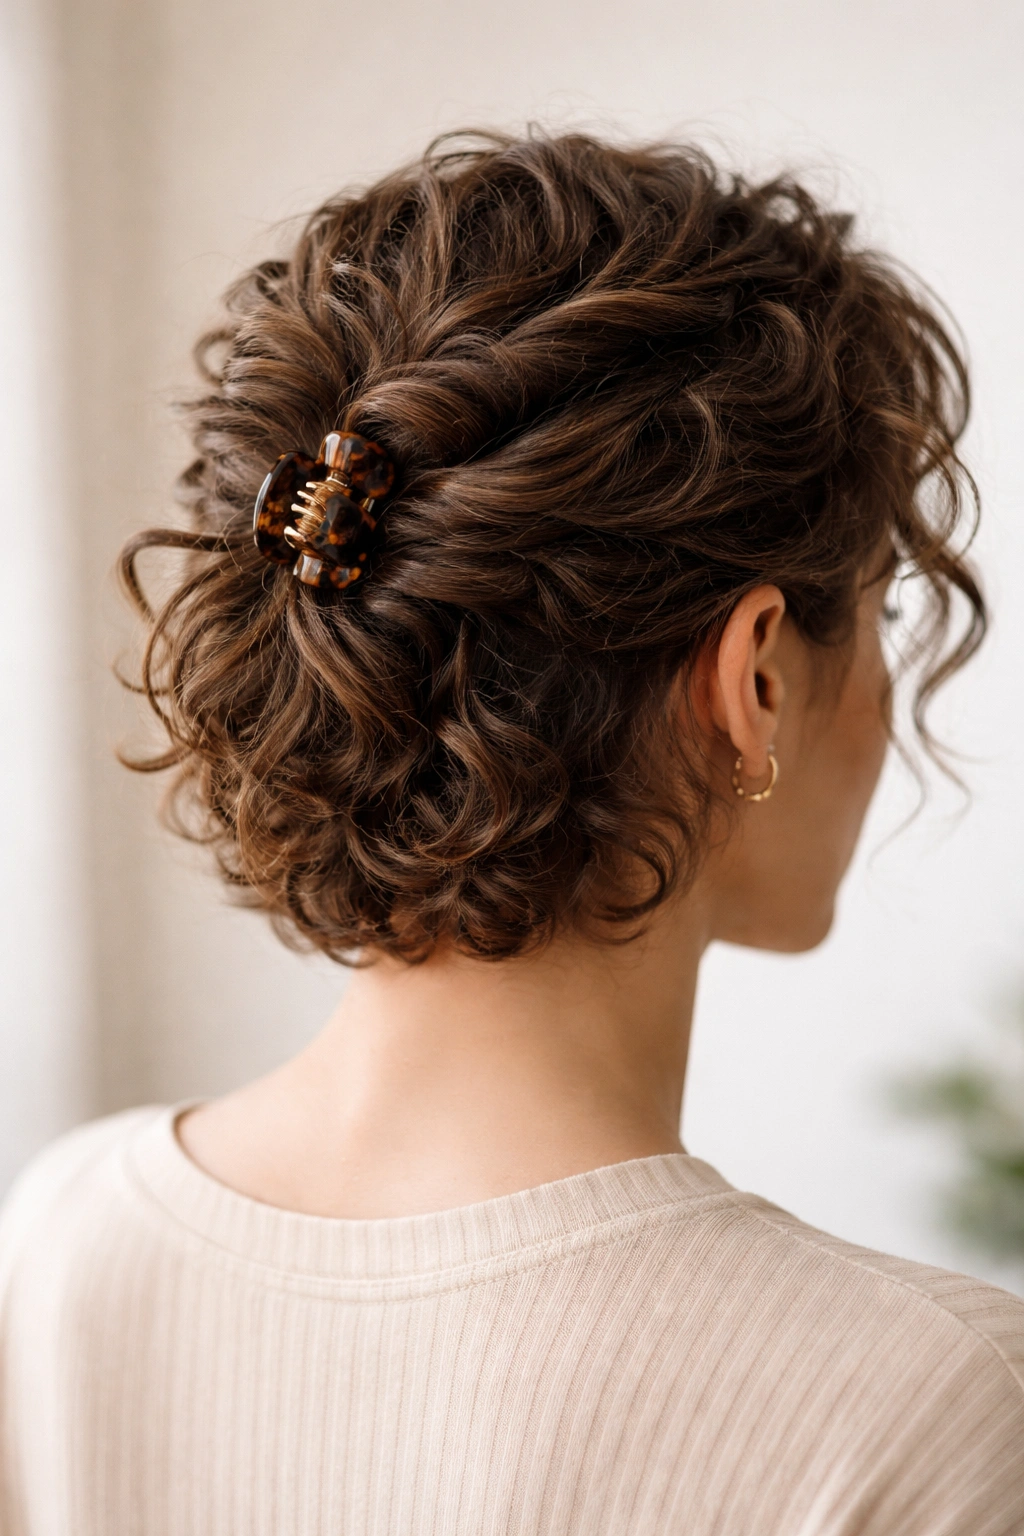
Claw clips are easier on short curls than most elastics. There, I said it.
A small or medium claw clip can hold a twisted section of short curly hair without pulling the roots too hard. Gather the hair at the back, twist it upward, then clip it so the ends spill out a little. That loose finish is part of the look. It’s not messy in a bad way; it’s the shape that makes the style work.
Pick the right size
- Mini claw clips for pixie-length curls
- Medium clips for bob length
- Teeth that close firmly, not loose decorative ones
If the clip feels too heavy, it will slip. If it’s too small, it will snap the hair in an awkward way. The sweet spot is a clip that closes cleanly and grips the twist without flattening it. On short curly hair, that balance matters more than the color or finish.
This is the kind of style that saves time on busy mornings. It gets the hair up, keeps the ends secure enough, and still leaves some texture showing.
12. Front Braid and Release
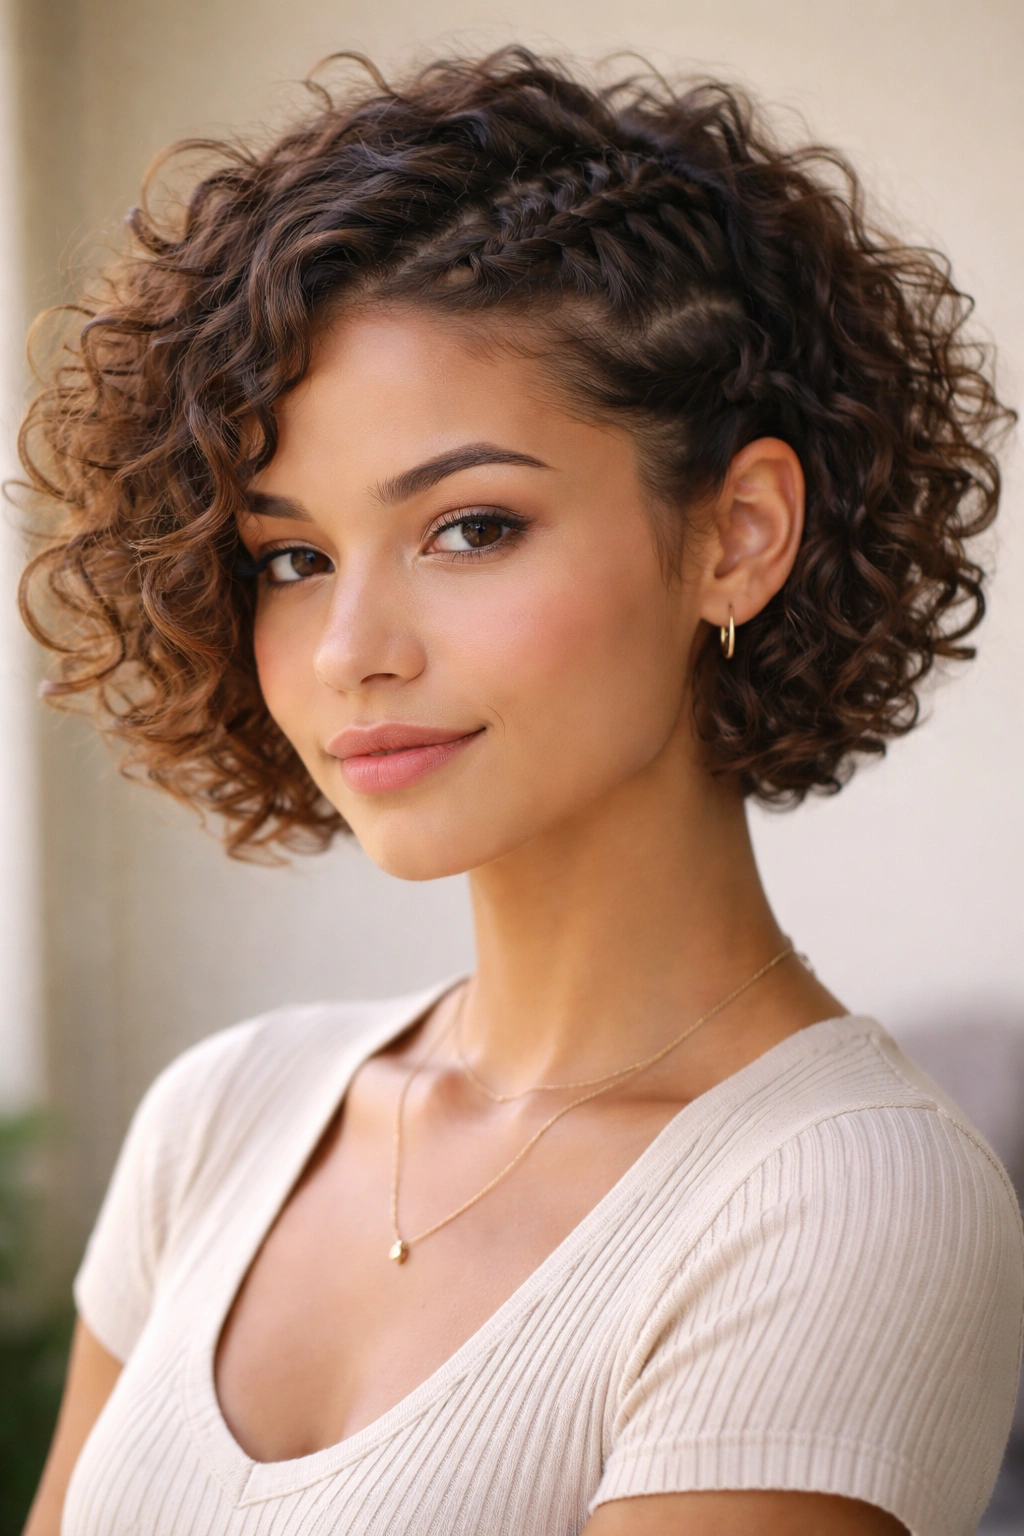
If the front of your hair is always the part that looks messy first, braid only that section. It’s a small fix with a big payoff.
Take one front section from the hairline to just above the ear and braid it back, then let the rest of the curls stay loose. You can do one braid on one side for an asymmetrical look, or two tiny braids for a more balanced frame. If braiding feels awkward on short hair, a rope twist works too. The idea is the same: control the front without locking down the whole head.
How far back to braid
- Stop at the ear for a subtle look
- Go a little farther for more face coverage
- Keep the braid loose enough that it doesn’t tug at the scalp
- Secure the end with a tiny elastic or bobby pin
This style works well on second-day curls that need a little structure. It also handles uneven front layers better than a full pull-back style, which can make short hair stick up in all the wrong places. A small braid at the front gives the whole cut more shape. That’s the whole trick.
13. Finger Coils for the Front Line
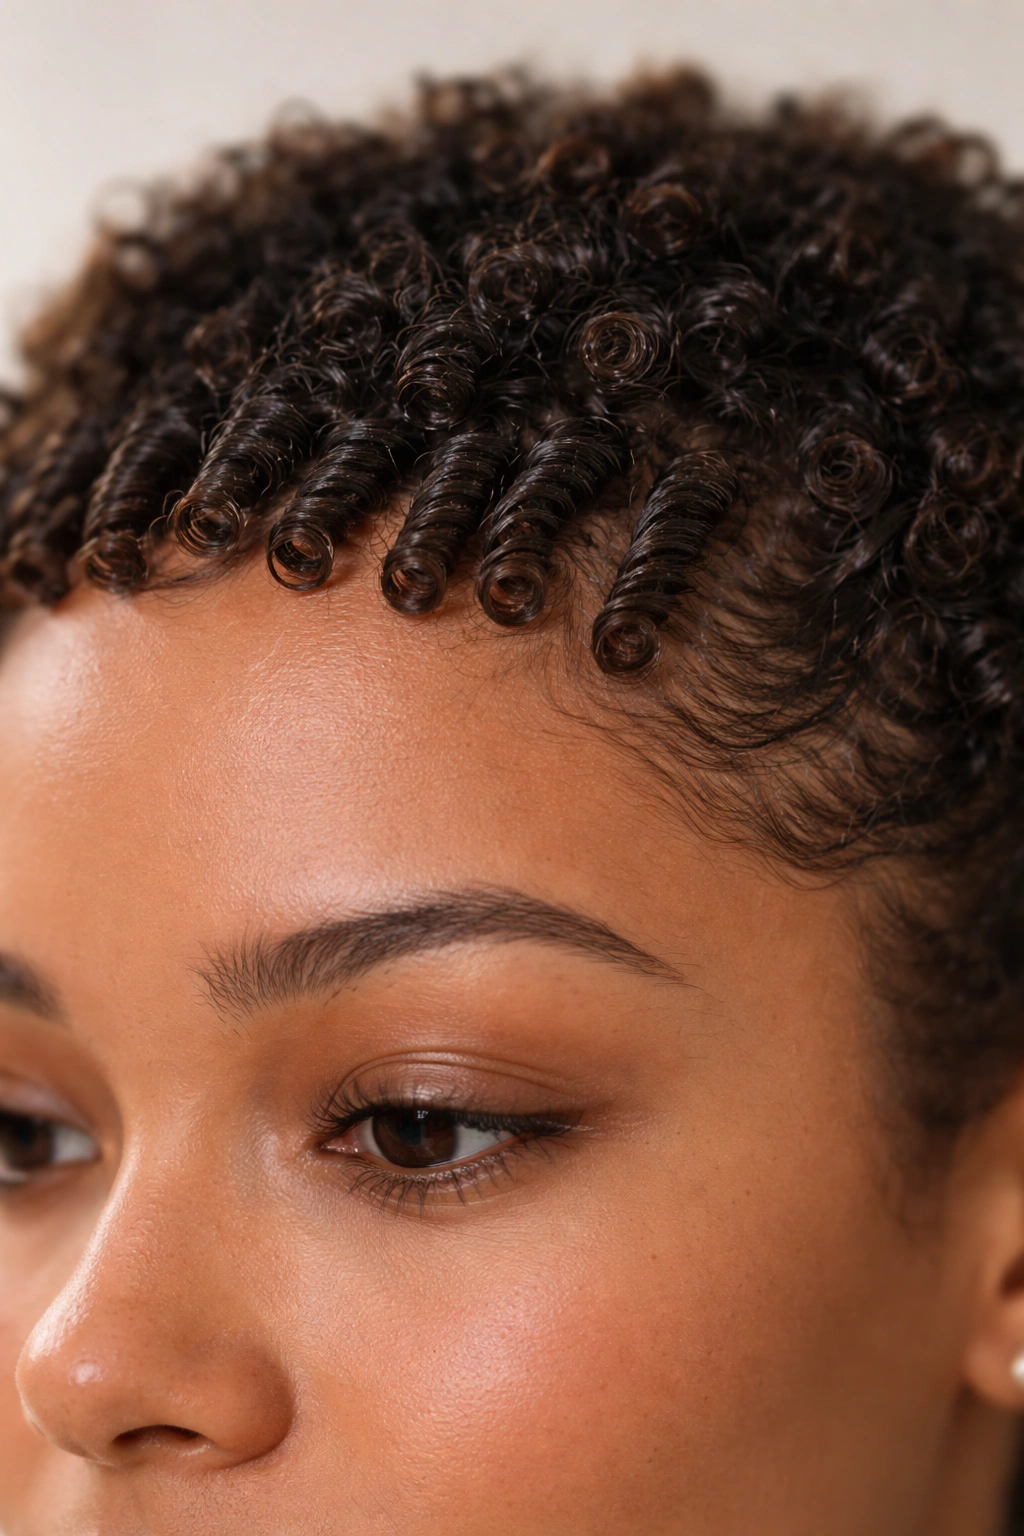
Finger coils sound fussy until you see how much they calm frizz. Then they start making sense.
You do not need to coil the entire head. Focus on the front line, the pieces near the part, and any short curls that keep flipping into your eyes. Use a pea-size amount of gel or curl cream on each small section, wrap it around your finger, and let it spring off carefully. The goal is to define the bits everyone sees first, not to redo every curl on your head.
Small detail. Big payoff.
A lot of school mornings are saved by fixing just the top front inch or two of hair. That area is where frizz shows first, especially on short curly hair that’s been slept on or brushed too hard. Once the front looks neat, the rest of the style can be a little looser and still read as finished.
If your hair tends to puff up near the temples, coil those pieces a little tighter and leave the back alone. That keeps the style quick and avoids the heavy, overdone look that can happen when every curl is treated the same.
14. Curly Bob with a Scarf Band
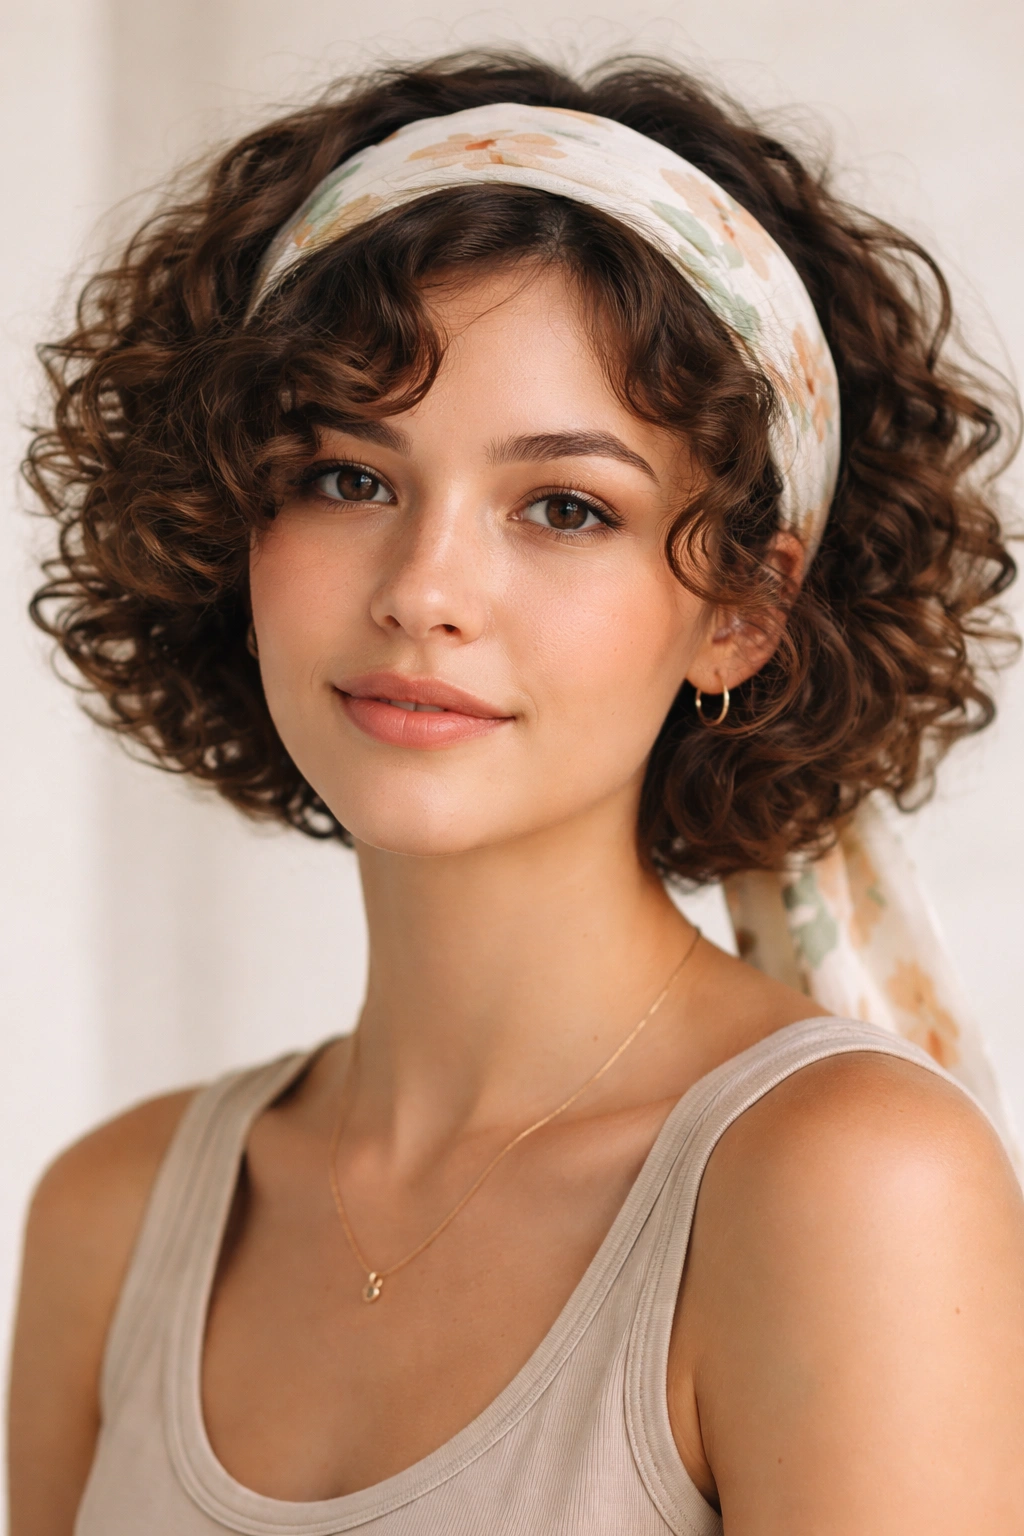
Can one band make a bob look more finished? Yes, if you pick the right one.
A soft scarf band or wide headband can give short curly hair a cleaner outline without hiding the curls. Place it across the crown, then let the curls sit freely above and below it. If you use a scarf, tie it low and tuck the knot behind one ear or under the hair so it doesn’t bunch up at the back of the neck.
Best fabrics for school
- Satin if your hair frizzes easily
- Soft cotton for a lighter hold
- Stretchy fabric if you need the band to stay put during PE
Avoid stiff, thin bands that dig in or slide. They tend to create a line across the hair and make the style feel more rigid than it needs to be. A wider band lets the curl shape stay visible while giving the front a little control. That balance is the whole reason this style works.
This is a good option when the bob needs a bit of polish but you don’t want a full updo. It also works nicely with simple earrings or a plain uniform, since the hair does a lot of the talking.
15. Twist-and-Pin Crown
The twist-and-pin crown is the quiet overachiever in this group. It handles short curls that are too short for a full braid but still need a little structure around the face.
Take a small section from each temple, twist it back toward the crown, and pin it just behind the side of the head. If you want more shape, repeat with a second section a little lower down. The result is a soft frame that keeps the front controlled while leaving the rest of the curls free.
How to keep it from slipping
- Pin into dry or mostly dry hair
- Cross two bobby pins if one isn’t enough
- Use 4 to 6 pins instead of forcing the style with one
- Mist the front lightly, not the whole head
This style is especially good when you need something that lasts through a full school day without a lot of touch-up. It also works on curly hair that’s growing out unevenly, because the twists help disguise different lengths instead of making them obvious. If you keep one style in your back pocket for picture day, presentations, or any morning where the clock is rude, make it this one.
And keep a spare bobby pin in your bag. Curly hair has a talent for dropping one at the worst possible moment.