Shrinkage can be a trickster. A curly afro hairstyle that looks shoulder-length when it’s wet can spring up two inches once it dries, and that single detail changes everything about shape, balance, and the way your face reads from across the room.
The smartest curly afro hairstyles do not fight the curl pattern. They work with it, which means the same cut can look soft, full, sharp, or almost sculptural depending on whether the hair is tapered, layered, finger-coiled, or stretched a little at the roots. I still think too many people get stuck chasing a “length” instead of asking a better question: what shape does this hair want to make?
That question matters because afro hair can look totally different from one wash day to the next. Density, shrinkage, and how much definition you build into the front all change the final result, sometimes more than the actual inch count. A 3-inch coil can look fuller than a 6-inch curl if it’s cut and styled with a clearer shape.
Start with the shape that matches your length, then borrow the finishing tricks that fit your routine.
1. Tapered Curly Afro for Short Hair
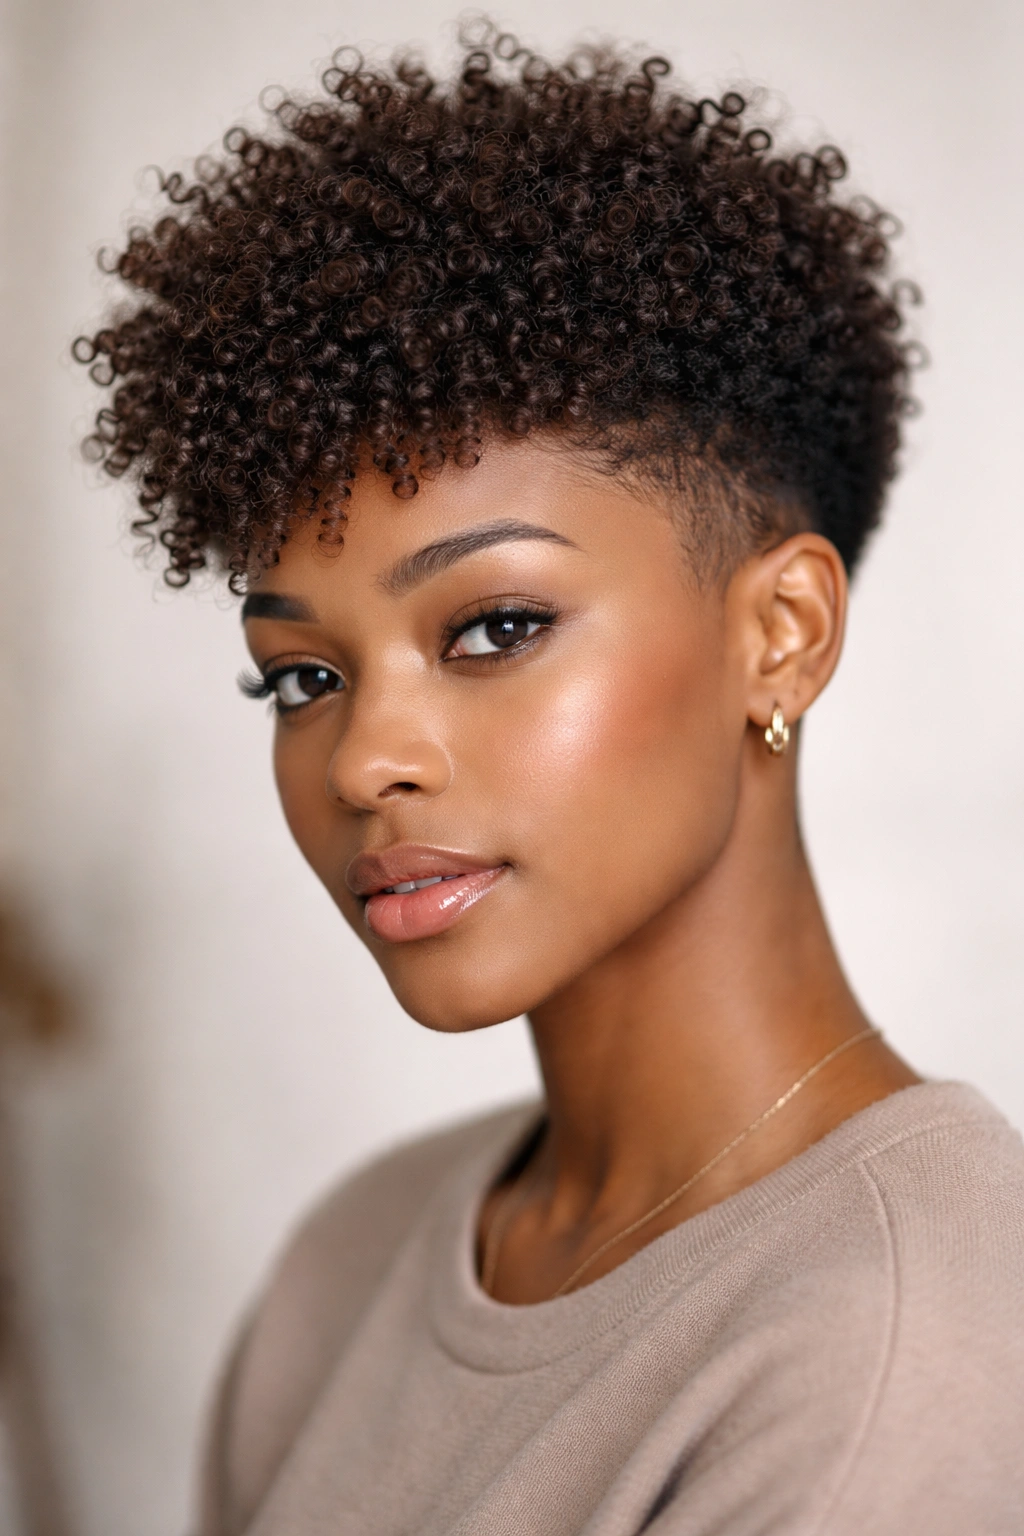
A tapered cut is one of the cleanest ways to make short curls look deliberate. The shorter sides clear out visual noise, so the top can bloom into a tight little halo instead of reading as “I’m growing it out.”
Why the taper matters
When the neckline and temples are clipped close, the eye goes straight to the curl texture on top. That makes a short afro look fuller without adding length, which is handy if your hair shrinks hard and sits closer to the head than you expect. I like this shape because it does not need much product to look finished.
Keep the top moisturized with a lightweight leave-in and a dime-size curl cream. If the curls are loose enough, a diffuser on low heat for 5 to 7 minutes helps lift the roots without blowing the pattern apart.
- Ask for a soft taper, not a skin fade, if you want the shape to stay afro-like.
- Use a pick only at the crown.
- Trim the sides every 3 to 4 weeks if the outline starts to blur.
- A satin bonnet at night keeps the top from flattening into one side.
Best for: short hair, high shrinkage, and people who want shape without a lot of daily work.
2. Mini Curly Afro with Finger-Coiled Definition
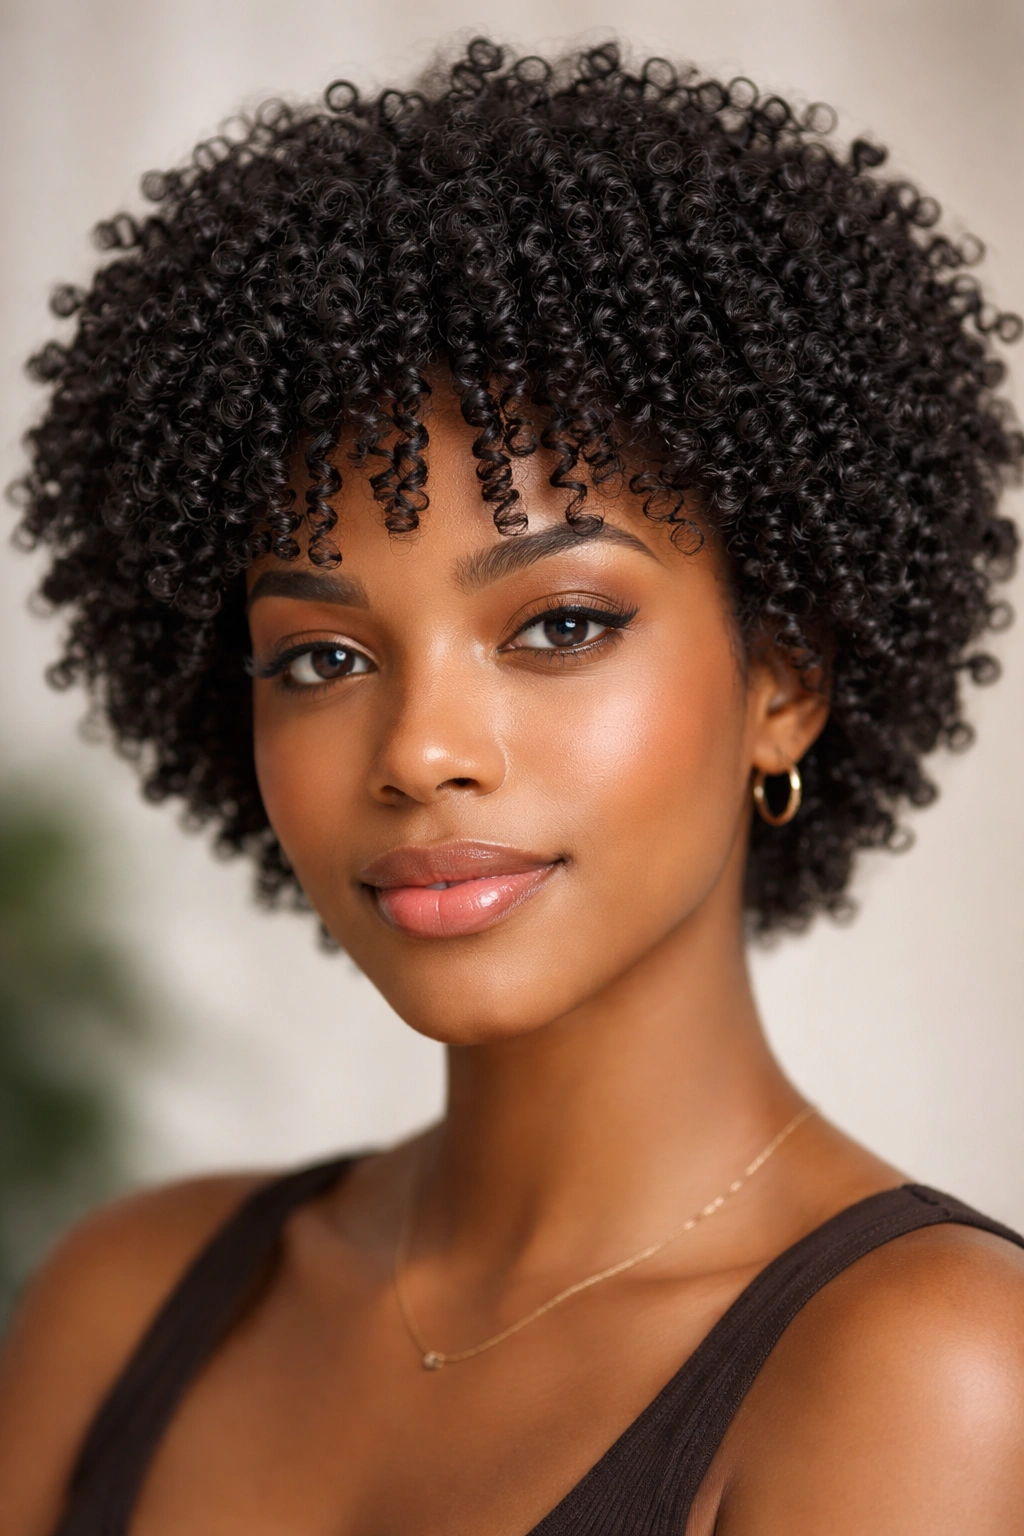
What if your shortest curls are the prettiest part of your hair? Then a mini afro with finger coils is the move, because it lets each little curl read clearly instead of hiding inside a bigger shape.
How to get the coils to stay put
The trick is not more product. It’s patience and small sections. Work on damp hair, take 1/2-inch pieces, and twist each one around your finger until it forms a neat coil. If the section is too large, the coil drops fast and the style starts to look fuzzy by lunch.
Use a small amount of leave-in first, then a pea-size gel or custard on each section. Let the hair dry all the way before you touch it. Wet coils unravel when you separate them too soon, and they can lose that crisp spring that makes the look feel intentional.
This style is tiny, but it’s not shy. It has a neat, fresh shape that looks especially good when you want your hair to frame the face instead of spreading outward.
Quick note: if your curls are tightly packed, separate only the roots. Leave the coils themselves alone.
3. Rounded Curly Afro with a Soft Side Part
A soft side part can save a short afro that feels a little boxy. It shifts the weight just enough to make the shape look lighter, and it gives the curls a place to fall instead of sitting in a perfect sphere.
I keep coming back to this one because it works on hair that is too short for obvious layers but too long for a close crop. The part does most of the styling work. That is the nice part. You do not need a dramatic line or a sharp comb mark; a slight off-center part is enough.
What makes the shape different
The whole point here is asymmetry. A little more volume on one side softens the outline around the temples and makes the afro feel less rigid. If your face is round, the side part helps stretch the shape. If your face is long, it keeps the style from feeling too tall.
A light mousse or foam on damp hair helps the curl set without stiffening the ends. Then use your fingers, not a brush, to nudge the top into place. A pick is fine at the roots, but only in a few spots.
- Part on damp hair, not soaking wet hair.
- Keep the front looser than the back.
- Fluff the crown last.
- Stop separating once the curl pattern starts to frizz.
It is a simple look. That is part of the charm.
4. High Curly Afro Puff for Grow-Out Days
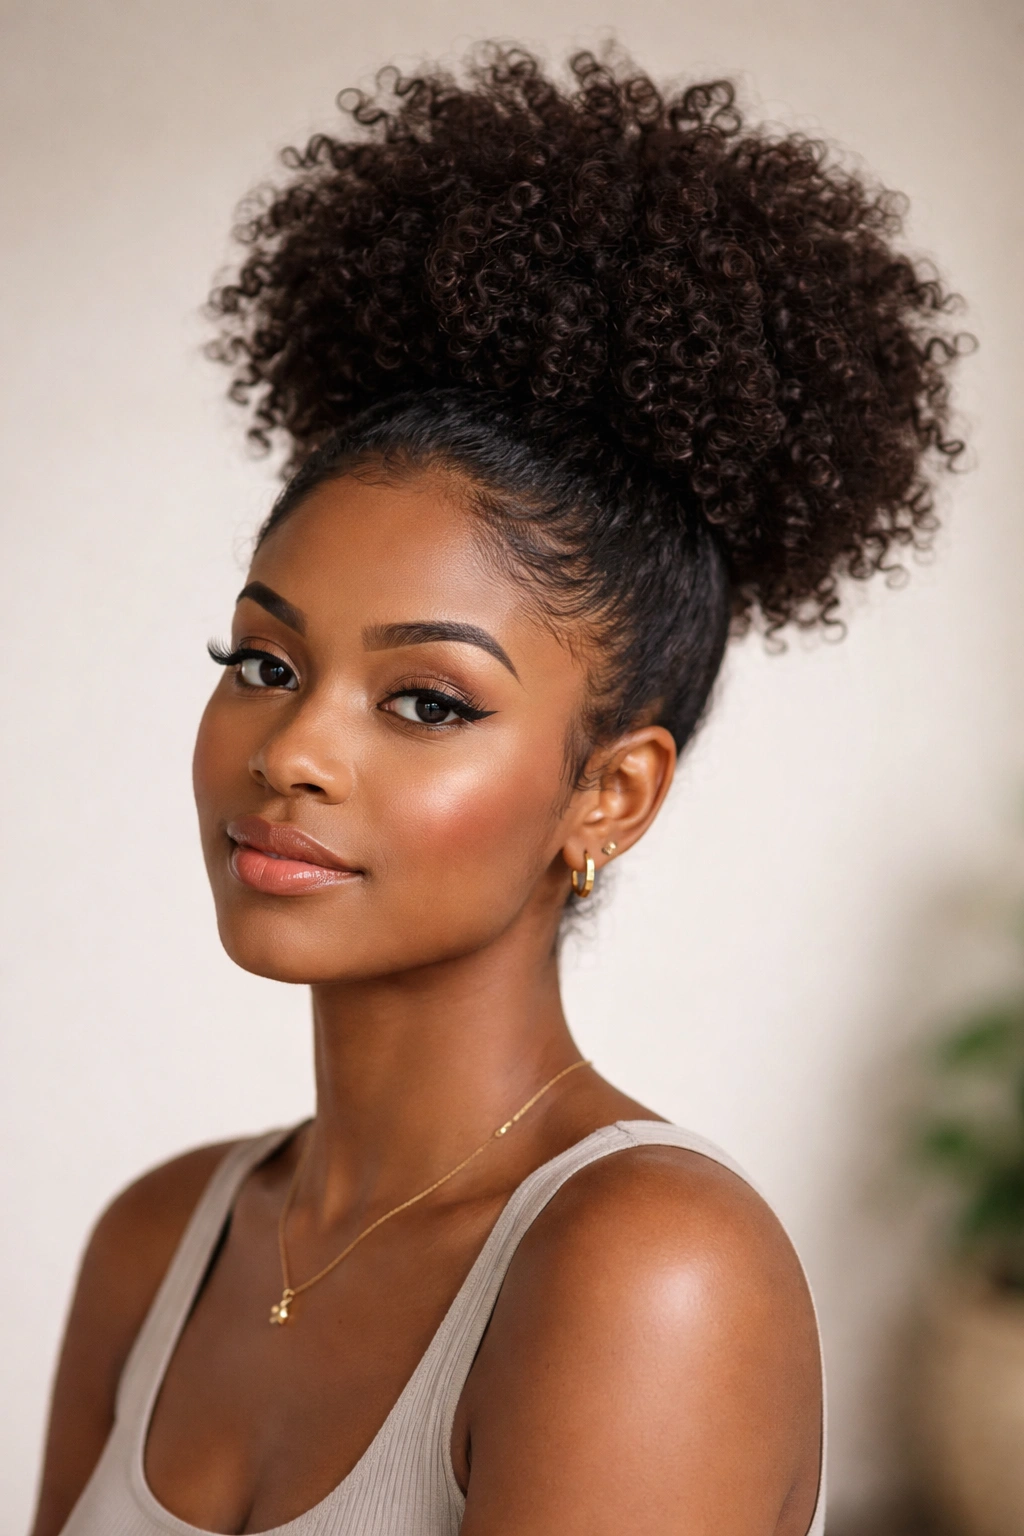
A high puff is what I suggest when someone has short-to-medium hair and wants a style that looks fuller in ten minutes. It lifts the curls away from the neck, gives the face more open space, and buys you another day or two before wash day starts shouting at you.
This is the style I reach for when the roots are flat but the ends still have life. A high puff uses that contrast on purpose. You gather the hair high on the crown, secure it with a soft band, and let the curls spill upward instead of outward.
Product order matters
Start with a leave-in on damp hair, then smooth a curl cream through the outer layer, then seal with a little gel at the edges if you want the puff to stay neat. If you skip the gel, the hairline can puff out faster, especially around the temples.
Use a snag-free elastic or a puff cuff so you do not crush the base. A tiny brush can smooth the perimeter, but do not press the curls so hard that they lose their shape. The puff should look soft, not pasted down.
Best for: grow-out stages, medium-short hair, and days when you want height without making a full style of the whole head.
5. Curly Frohawk for Short-to-Mid Length
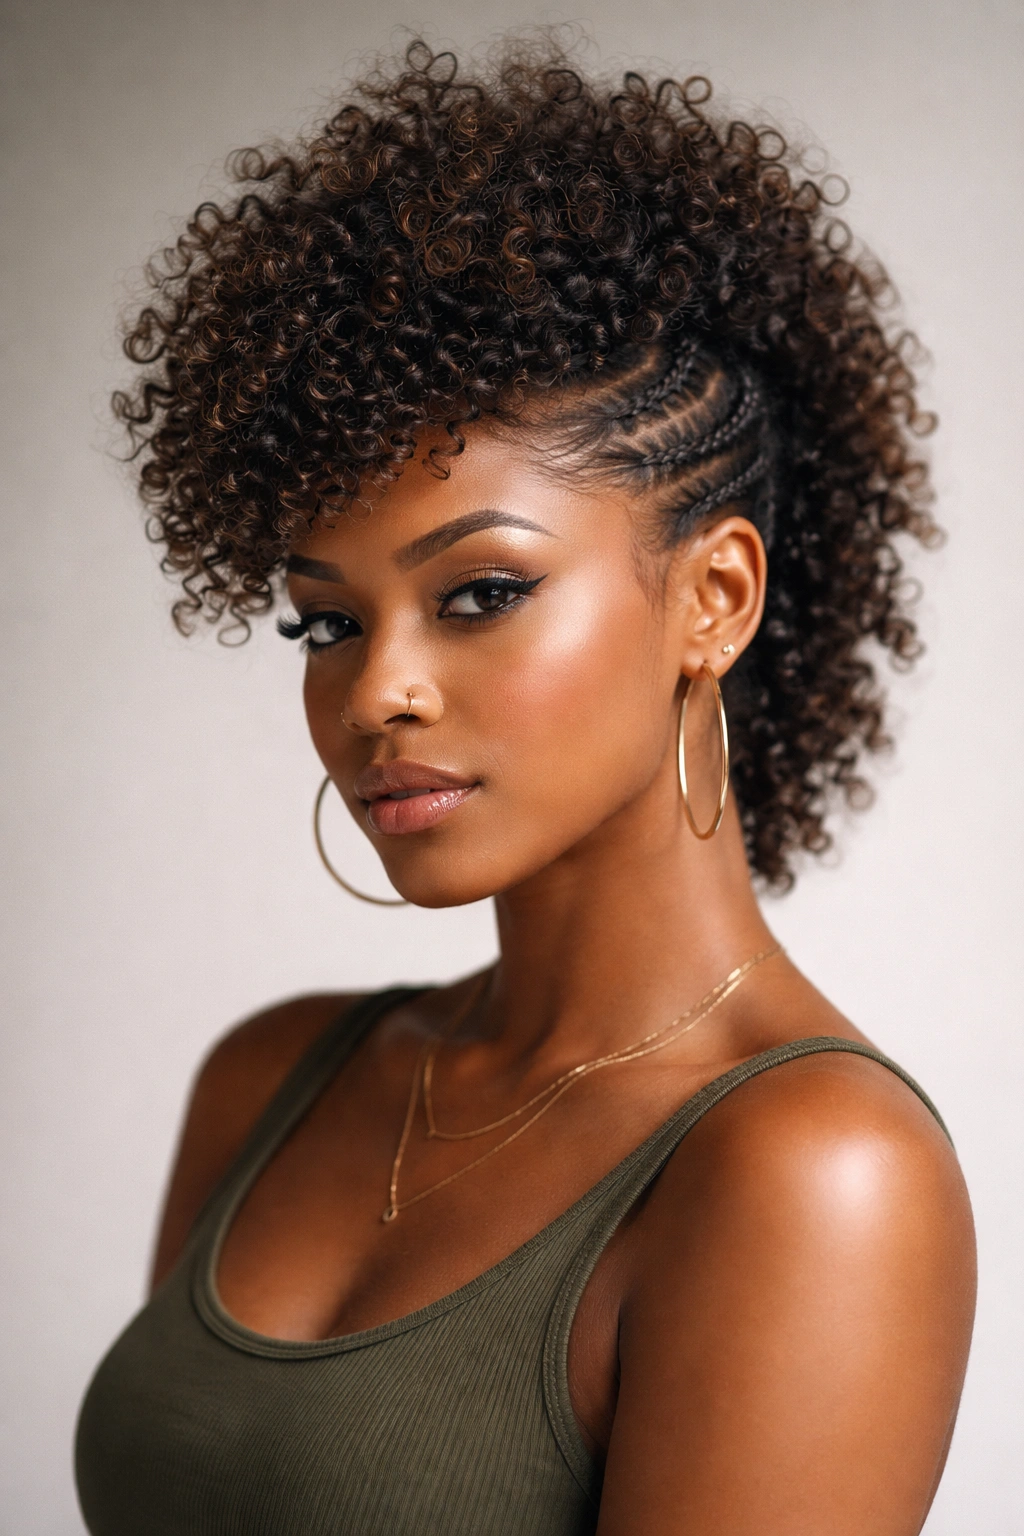
Unlike a low puff, a curly frohawk turns the center section into the main event. The sides are tucked, pinned, or slicked close, and the middle ridge gets all the volume. It gives you shape, attitude, and a little edge without needing long hair.
That little lift changes the whole mood. The style looks deliberate even when your curls are on the shorter side, which is why it works so well for people who want something between playful and polished.
Who it suits best
- Hair that has enough length on top to stand up on its own.
- Dense curls that hold shape once they dry.
- Anyone who wants a style that feels sharper than a puff but easier than a full twist set.
You can make the sides sleek with a bit of gel, then pin them flat with bobby pins or small clips. Leave the center loose and lift the roots with your fingers. If the top is too short to stand high, stretch it gently with a diffuser for 5 minutes before you pin the sides.
Pro tip: keep the ridge narrow if your hair is short, and wider if your curls are longer. A narrow strip gives drama; a wider strip looks softer.
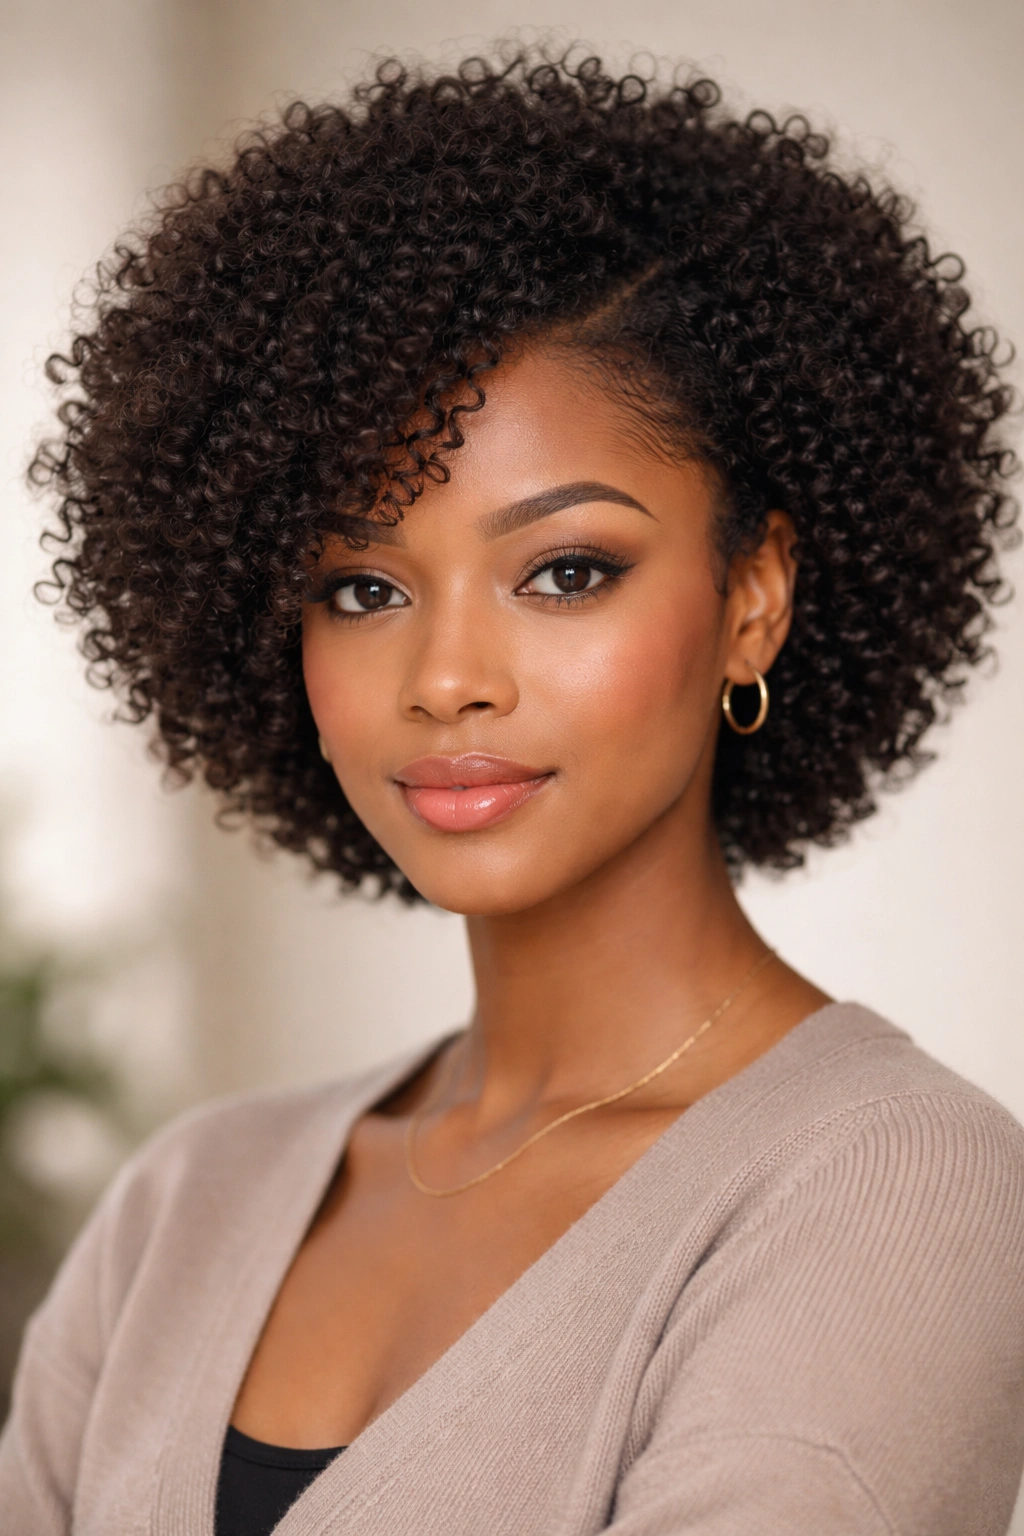
6. Wash-and-Go Curly Afro for Medium Length
A good wash-and-go is not lazy styling. It is controlled styling with a low tolerance for nonsense. On medium-length hair, it lets the curl pattern set the shape, which is exactly why the result can look so fresh when the routine is done well.
I am not a fan of styles that need half a jar of gel to behave. A better wash-and-go starts with clean, damp hair, then a leave-in, then a curl cream or foam, then a light gel layer to keep the outer curls from puffing up too fast.
Product order matters
Use your fingers to smooth product through 1-inch sections. Raking too hard creates frizz at the cuticle, and that frizz gets louder once the hair dries. If you want more definition, do a quick prayer-hands motion on the outer layer, then stop touching it.
Medium-length curls usually benefit from a diffuser on low heat for 10 to 12 minutes. You do not need to dry every strand all the way. Just set the roots so the shape holds. Once the hair is dry, shake it out at the base and lift the crown with your fingers.
The best part of this style is the balance. It gives you shape without forcing the hair into one heavy direction.
7. Layered Shoulder-Length Curly Afro
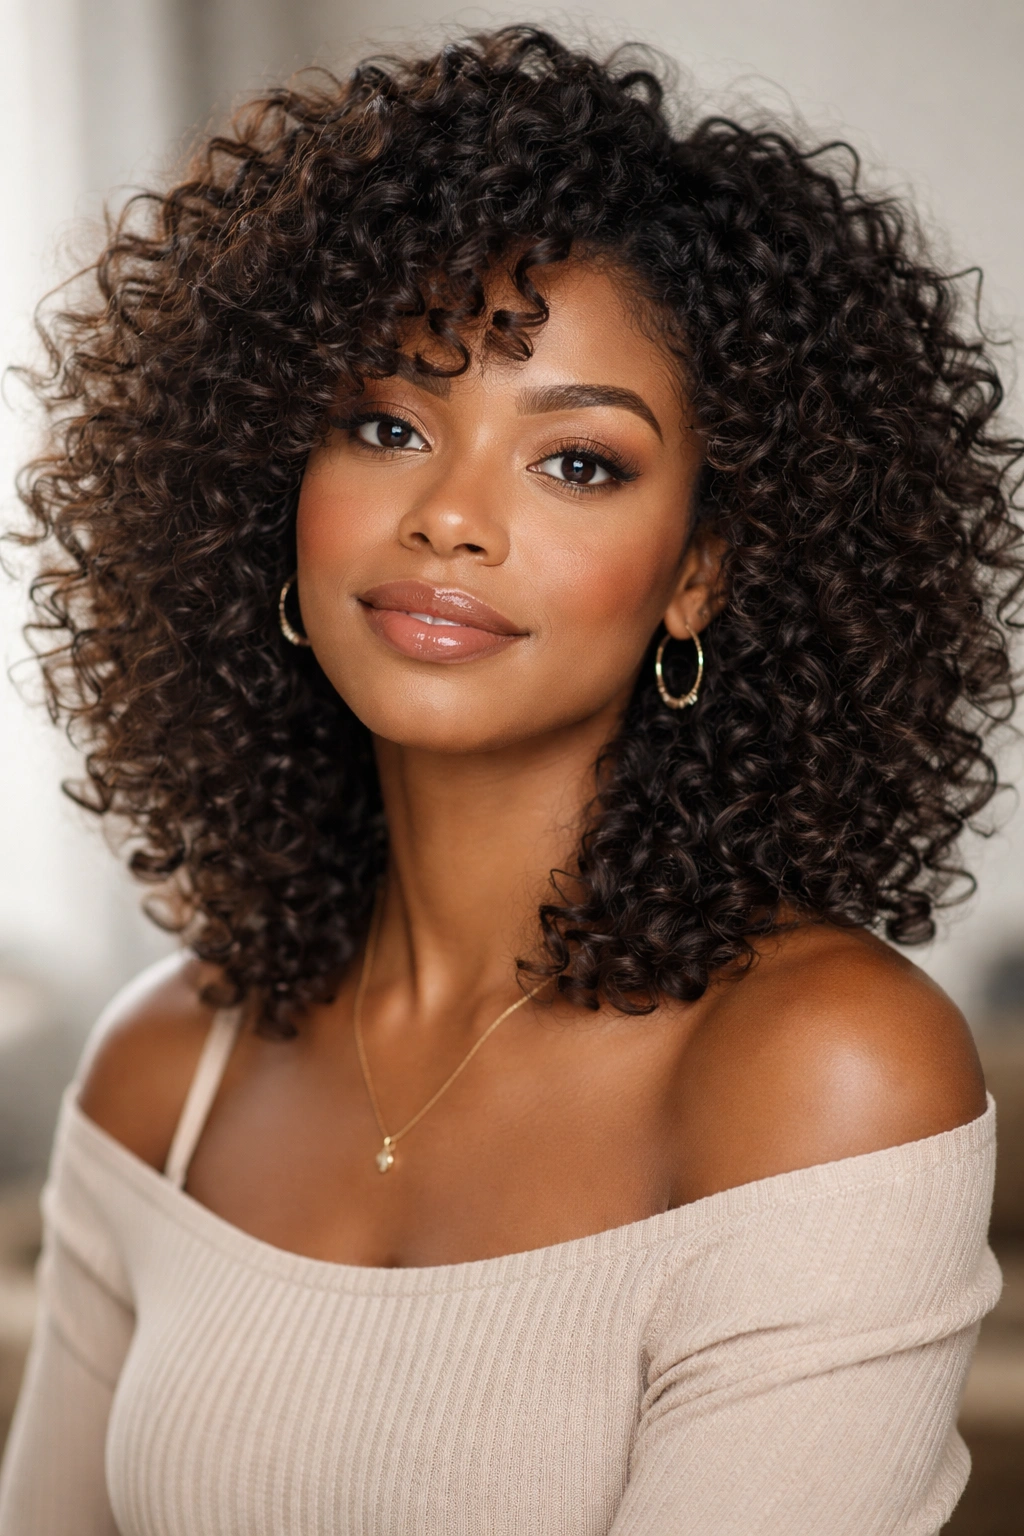
Shoulder-length curls can go triangular fast. Layers fix that before the shape gets stubborn. They remove weight from the bottom, let the top sit lighter, and stop the whole style from hanging like a bell.
This is the cut I recommend to anyone who has enough length to show movement but does not want a wide, blunt edge. Layers make the curls stack on top of each other instead of only dropping downward. The difference is huge in person. One looks airy; the other looks heavy.
A dry cut works better here than a wet cut because shrinkage can hide the true length. Ask for long layers around the crown and face-framing pieces that start around the cheekbone if you want softness near the front. Then keep styling simple: leave-in, cream, a small amount of gel on the top layer, and finger fluffing once it is dry.
The shape does most of the talking. That is the whole point.
8. Side-Swept Curly Afro with Crown Volume

Why does a side sweep change the whole feel of a curly afro? Because it pulls the eye diagonally instead of straight up and down. That diagonal line softens the face and makes medium-to-long curls feel a little more styled without looking stiff.
The crown does the heavy lifting here. Lift the roots on the fuller side with your fingers or a pick, then tuck the flatter side slightly behind the ear or pin it near the temple. You want the part to look easy, not overdrawn.
How to build the sweep
- Make the part on damp hair.
- Use a rattail comb if you want a cleaner line.
- Clip the flatter side while the hair dries.
- Fluff the higher side last so the volume stays where you want it.
A light mousse helps the front fall in one direction without making the curls crunchy. If your hair is dense, a side sweep keeps the shape from spreading too wide. If your hair is fine, it gives the illusion of more body at the crown.
This is one of those styles that looks good from the front and even better from the side. That matters more than people admit.
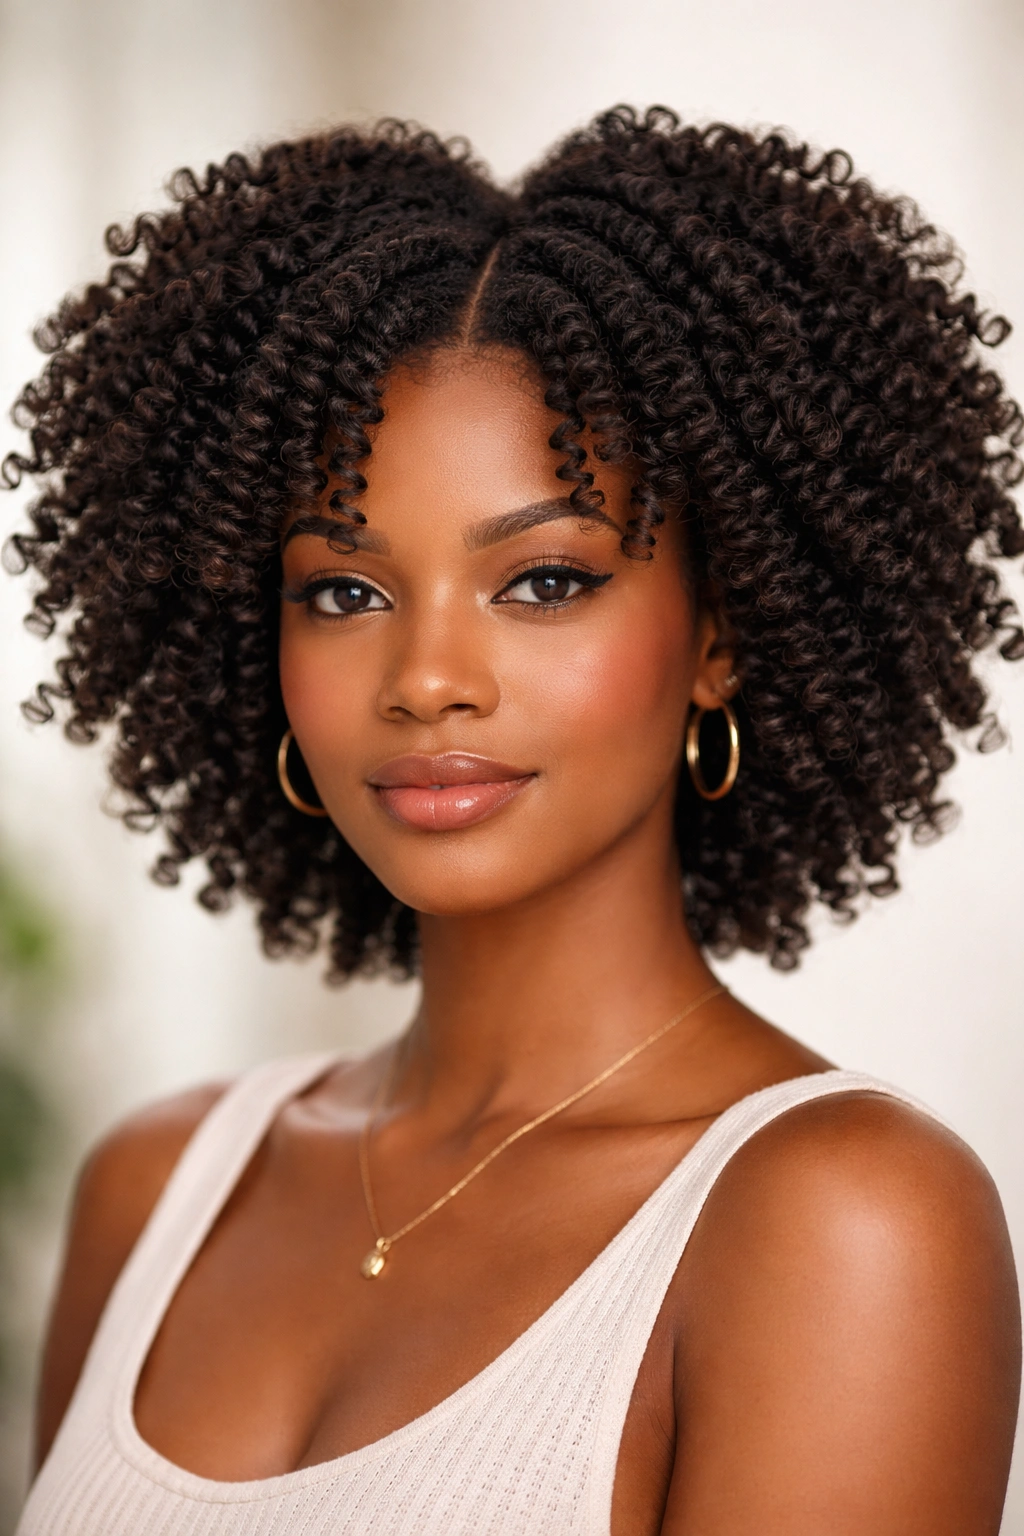
9. Half-Up Curly Afro with Face-Framing Front Pieces
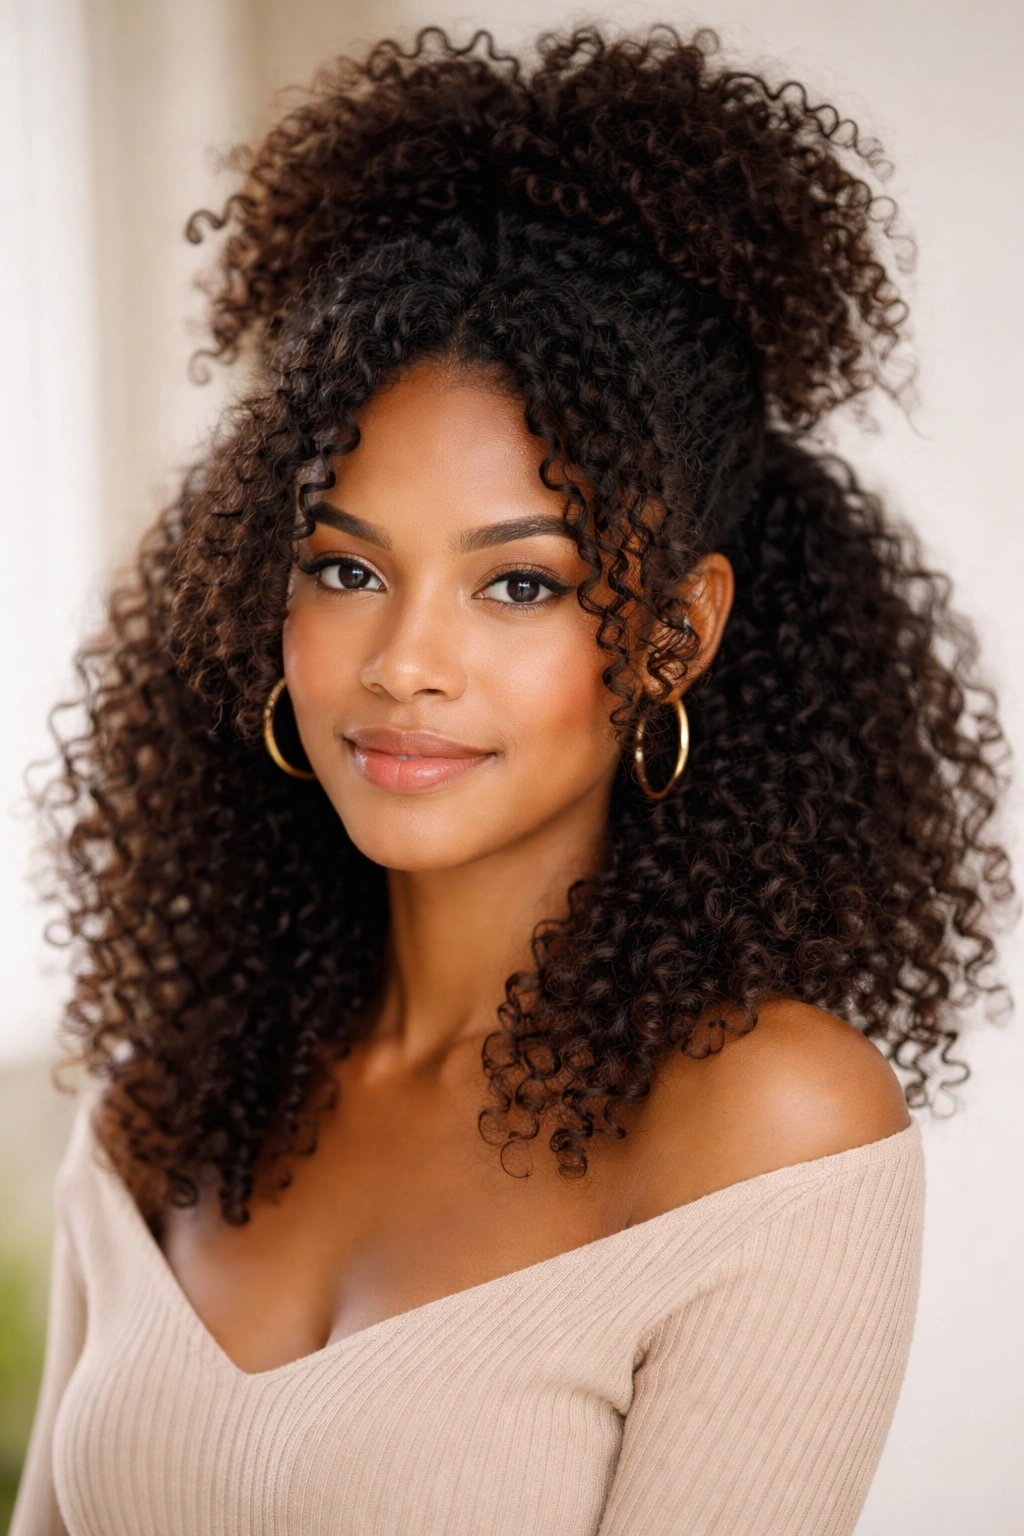
The half-up curly afro is basically a peace treaty between wanting your hair out of your face and not wanting to lose the fullness. You keep the top or upper half lifted, leave the bottom loose, and let a few front curls sit free around the cheeks.
It works especially well on medium-to-long hair because there is enough length for the top section to gather without looking thin. The face-framing pieces matter more than people think. Two loose curls in front can stop the style from feeling too formal.
A small clip or a soft elastic is enough. Pull the top section back loosely, not tightly, or the style starts to look strained. Then separate the front curls with your fingers and leave them alone. Too much fiddling makes them frizzy before you even leave the house.
Best for: office days, brunch plans, and any time you want a shape that looks friendly instead of severe.
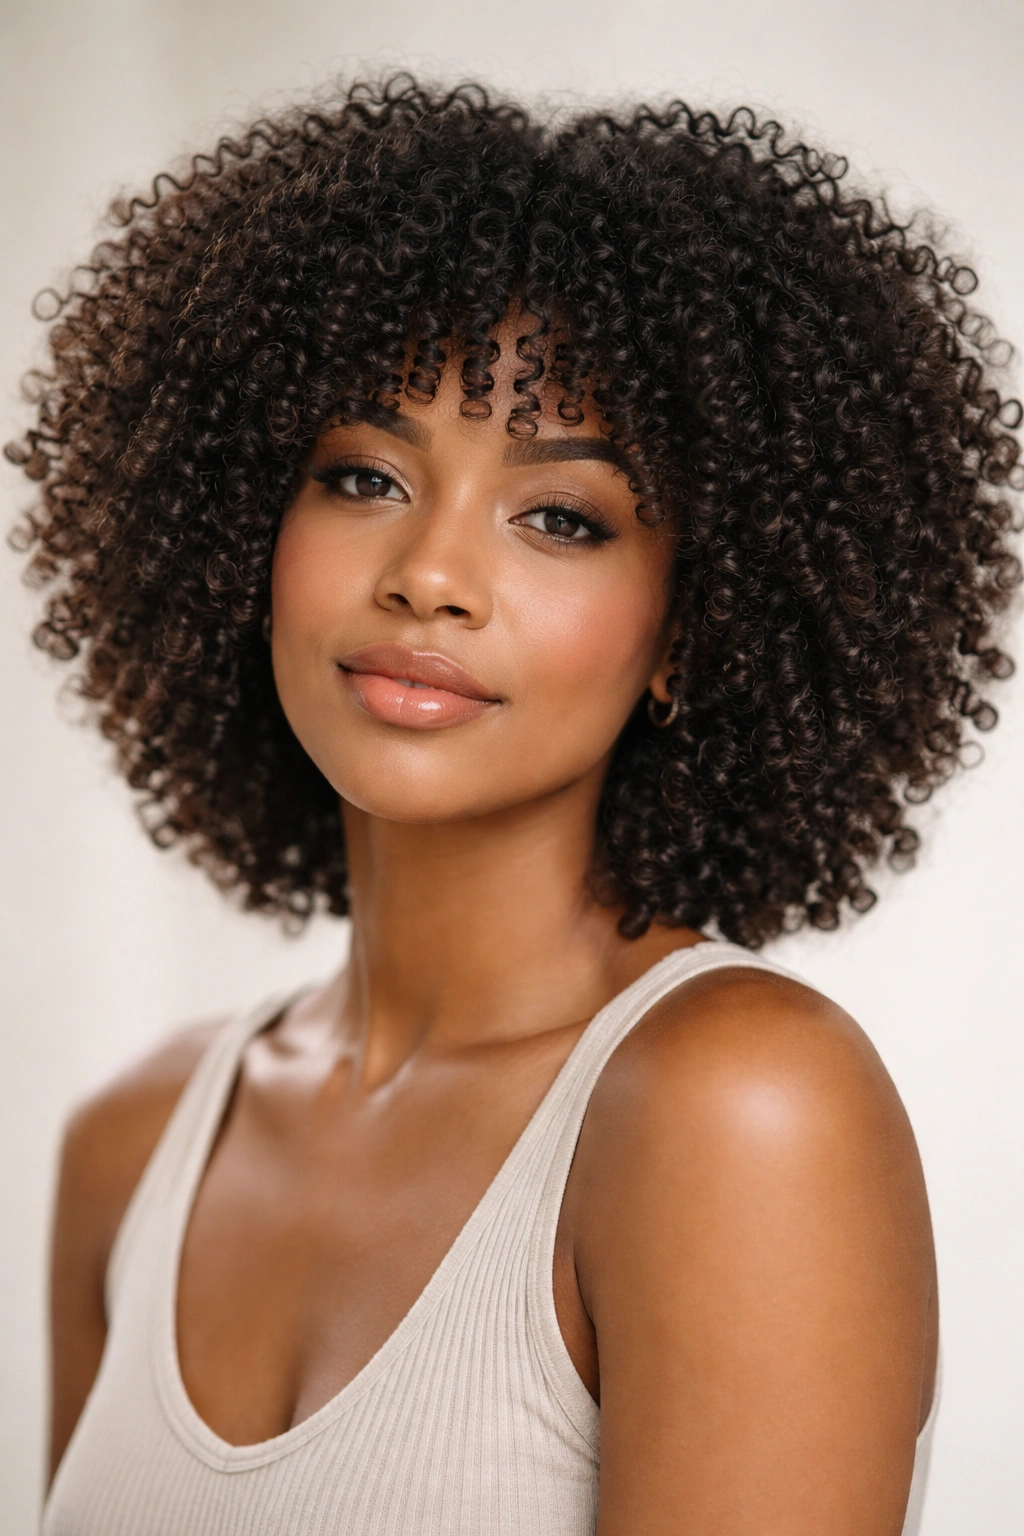
10. Curly Afro with Bangs
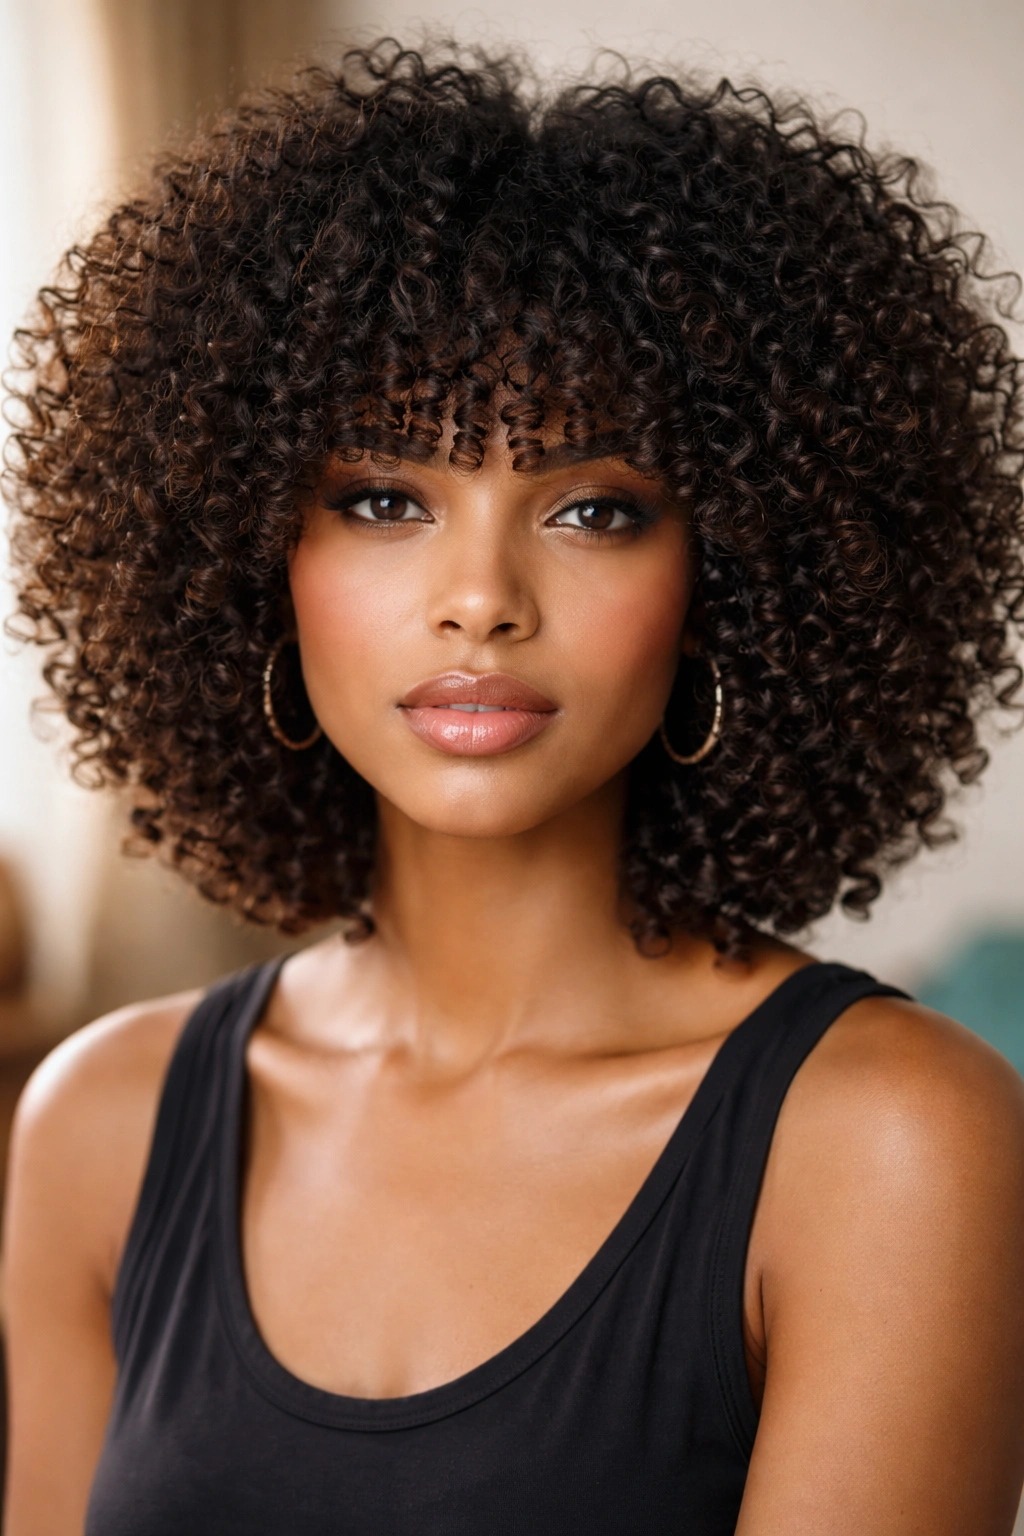
Curly bangs can be brilliant, but only if you accept that the hair will shrink and move. Wet hair lies. Dry curls tell the truth, which is why bangs should be cut dry or nearly dry if you want the length to land in the right place.
The right fringe adds personality without taking over the whole head. It works well on medium-length hair because the rest of the afro carries enough volume to balance the front. On long hair, bangs can stop the style from feeling bottom-heavy.
Why curly bangs need a dry cut
Curly fringes rarely sit where you think they will once they dry. A wet bang that looks perfect at eyebrow level can bounce up to the middle of the forehead later. That is not a mistake; it is shrinkage doing what shrinkage does.
Ask for curls that skim the eyebrows at the longest point, with a little softness on the sides. Then style the fringe with less product than the rest of the hair so it does not clump into a heavy curtain. A diffuser on low heat helps the front keep its shape.
If you want a softer result, part the bangs a little off-center and let a few curls fall across the forehead instead of all of them sitting in one blunt line. It looks easier. It is easier.
11. Flat-Twist Crown Curly Afro
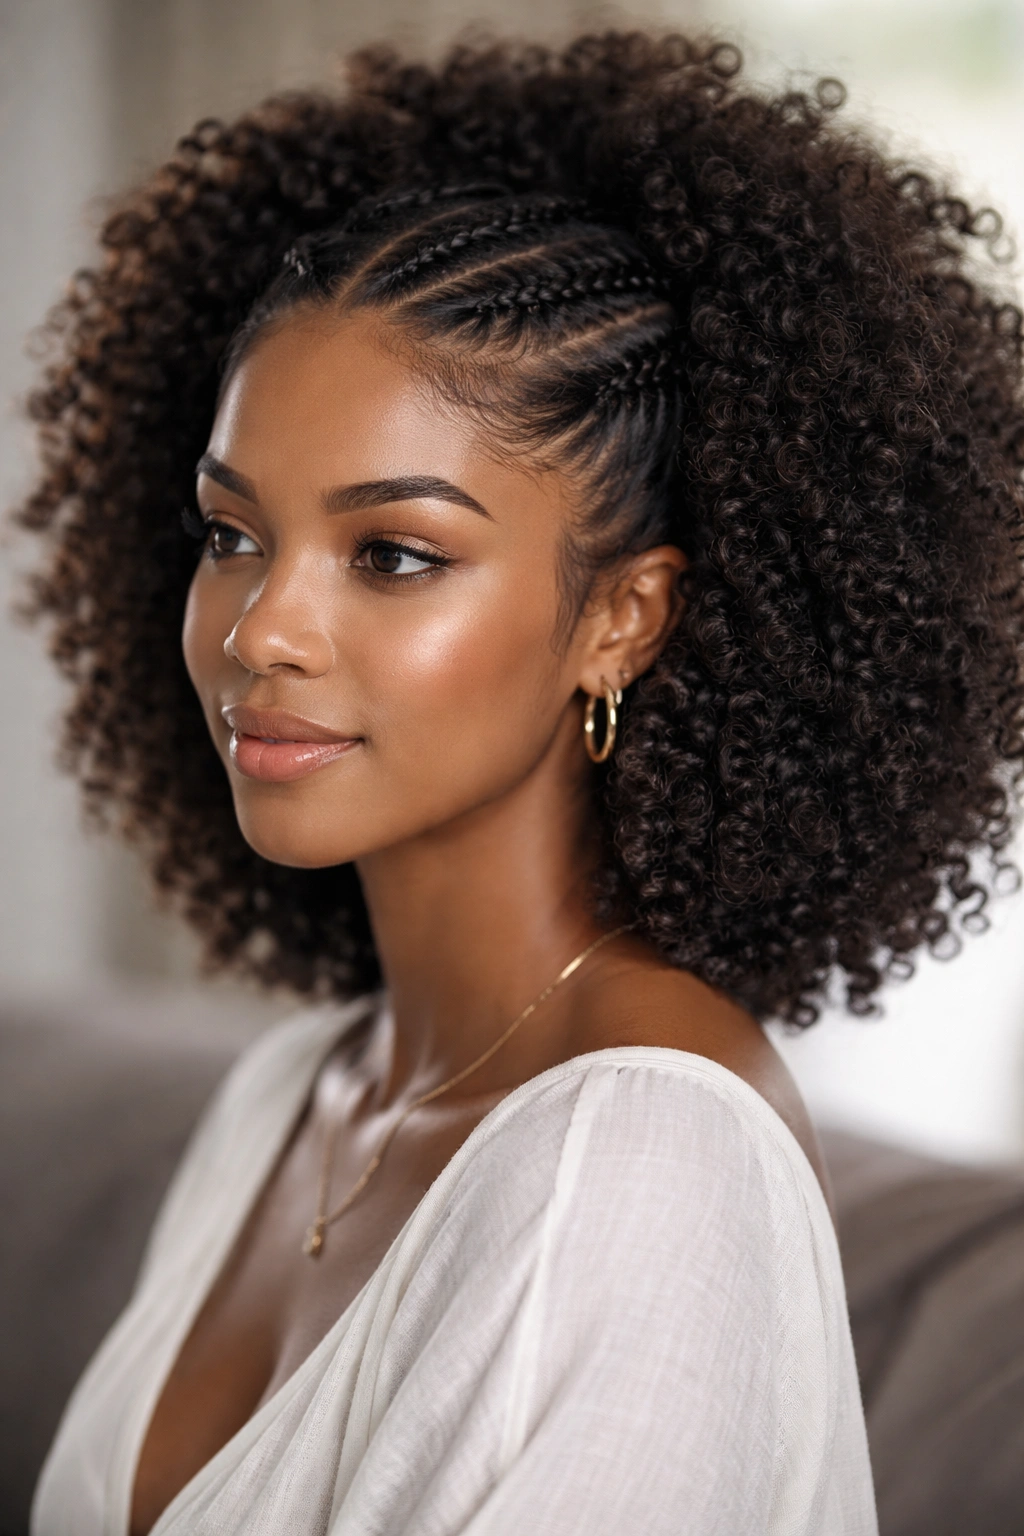
A flat-twist crown gives you structure at the hairline and freedom everywhere else. That is a rare combination, and it is why this style stays useful for so many curl patterns and lengths.
The twists pull the front back in a neat band, then the rest of the hair stays loose and full. It feels protective without looking overly busy. On medium hair, the crown twist can anchor the style; on long hair, it keeps the front from getting heavy.
How the crown section changes the shape
Make two to four flat twists along the front hairline, depending on density. If your hair is thick, use smaller sections so the twists lie flat. If your hair is finer, wider twists are easier and faster.
Secure the ends with small pins or tuck them under the loose curls. A bit of edge gel at the temples helps the twists stay clean, but keep it light. Heavy gel can make the front look stiff compared with the rest of the afro, and that contrast is rarely flattering.
This style is a good answer when you want your face open but do not want a full updo. Simple. Neat. Still full.
12. Fluffy Long Curly Afro with Stretched Ends
Long curls can get weighed down if every strand stays tightly coiled from root to tip. A fluffy, slightly stretched afro solves that by letting the curls expand while softening the shrinkage at the ends.
I like this look because it keeps the volume, but it does not turn the silhouette into a perfect sphere. A little stretch at the bottom gives the hair more swing when you move. You can get there with loose banding, a twist-out that is gently separated, or a diffuser used on low heat while the hair is partially stretched.
How to keep the crown from collapsing
Lift the roots first. If the roots go flat, the whole style loses energy. After that, separate the curls only once they are fully dry, and stop before the hair gets fuzzy.
- Use a wide-tooth comb only at the ends if they need help.
- Band loosely, not tight enough to leave dents.
- Sleep on a satin pillowcase so the stretch lasts longer.
- Refresh the ends with a mist of water and a tiny bit of leave-in the next day.
This is one of the most forgiving long styles because it does not demand perfect curl clumps. It wants softness. That is the charm.
13. Big Rounded Afro for Dense Hair
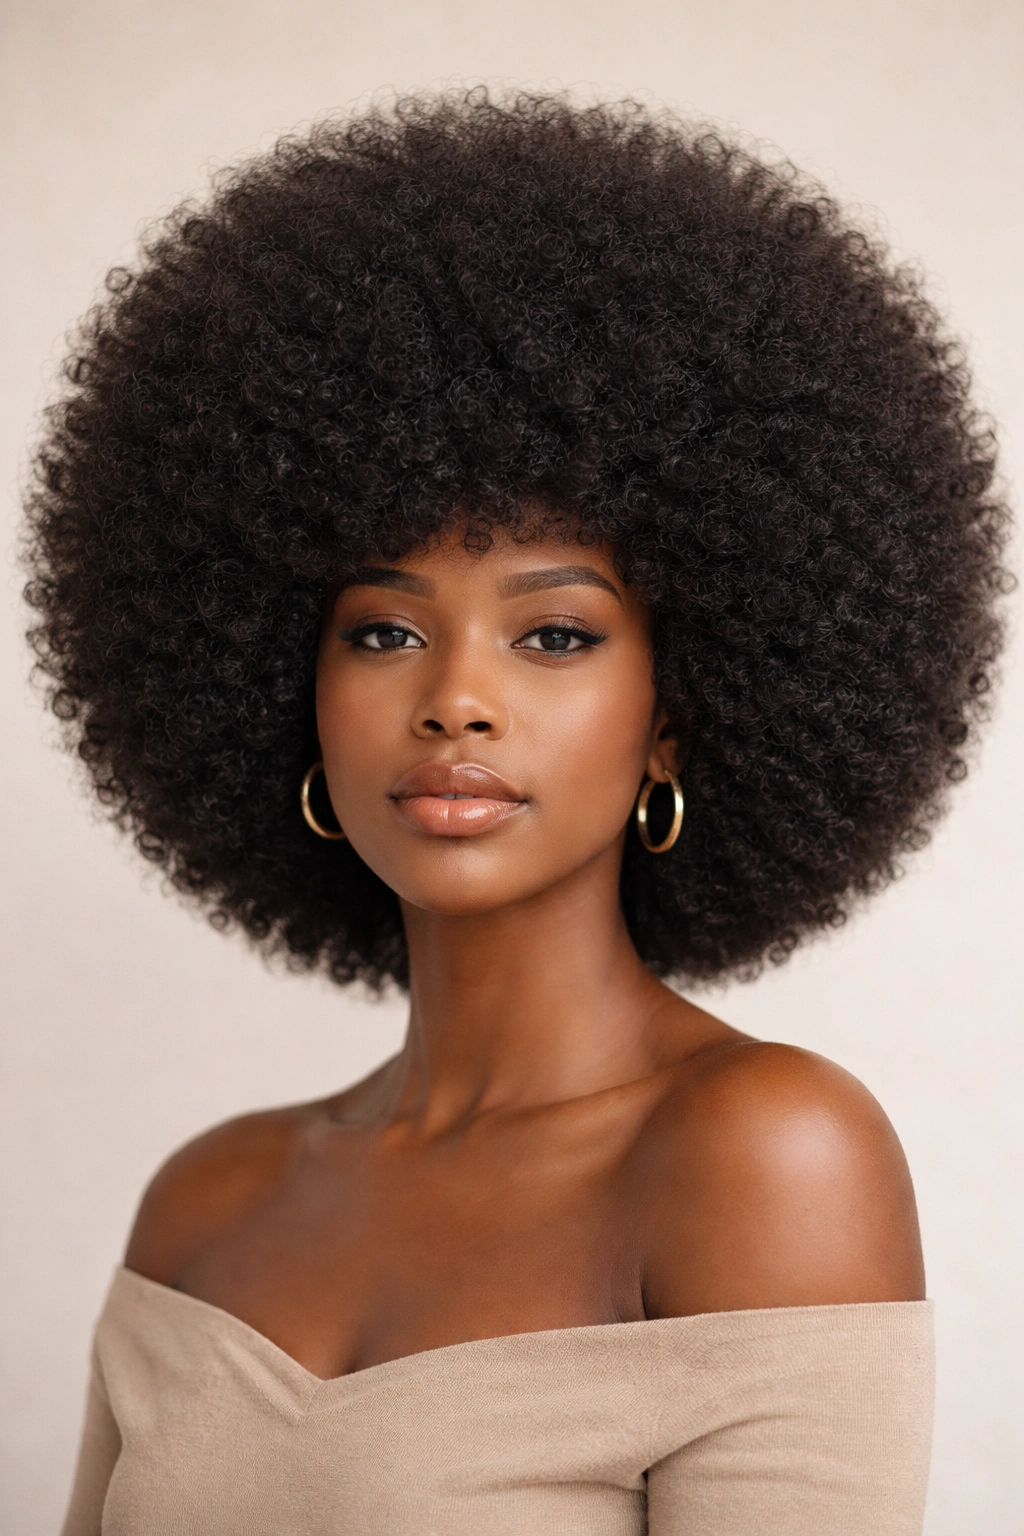
Dense hair often looks best when it is allowed to be big on purpose. A rounded afro makes that volume feel shaped instead of accidental, which is a nice shift if your hair naturally expands faster than you’d like.
The secret is balance between the top, sides, and back. If one area gets too wide, the whole shape can drift into triangle territory. A rounded cut keeps the silhouette even, and a pick at the roots helps the shape stay lifted instead of collapsing under its own weight.
How to keep the silhouette round
Cut or trim the shape on dry hair if you can. Wet curls shrink too much to show the true outline. Then use a light cream or lotion that softens the hair without coating it in heaviness. Heavy oils can weigh the outer layer down and make the round shape droop by the end of the day.
A medium-size pick is your friend here. Lift in small sections, start at the roots, and stop once the hair stands where you want it. Don’t drag the pick all the way through. That turns definition into fuzz.
This style loves confidence, but it also loves clean lines. A round shape with a smooth perimeter is much sharper than a giant shape with no outline.
14. Bantu Knot-Out Curly Afro
What if you want curl definition and stretch at the same time? A Bantu knot-out gives you both. The hair sets in small knots, then releases into a pattern that looks more separated and springy than a standard wash-and-go.
The style works across medium and long lengths, but it shines when the curls need help holding shape for more than one day. The knots create uniform curl sections, which means the final afro has a clearer pattern and less random puff at the roots.
How to set the knots
Start on damp hair with leave-in and a light cream. Section the hair into 6 to 12 parts, depending on density, then twist each section until it coils into a small knot. Secure the ends snugly, but not so tight that they leave dents.
Let the knots dry fully. Overnight is better than half-dry. When you unravel, coat your fingertips with a drop of oil and separate the curls gently. If you rush the takedown, the style loses definition before you even fluff it.
It is a little more work than a wash-and-go. The payoff is a fuller, more springy afro shape with a bit of stretch built in.
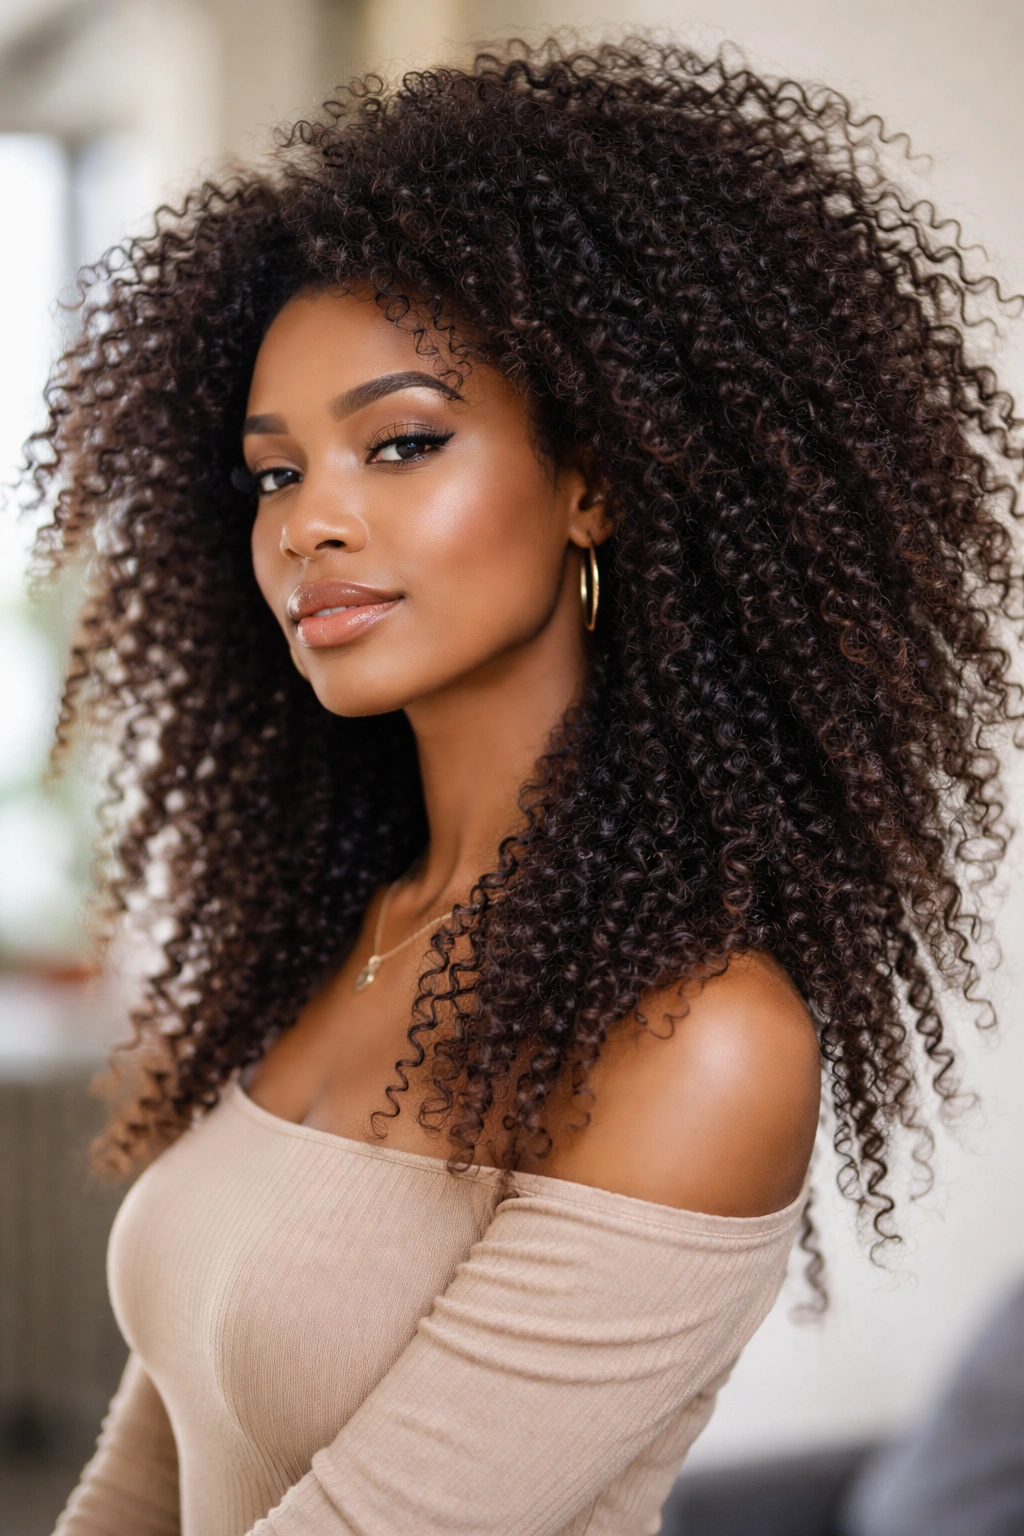
15. Defined Long Curly Afro with a Deep Side Sweep
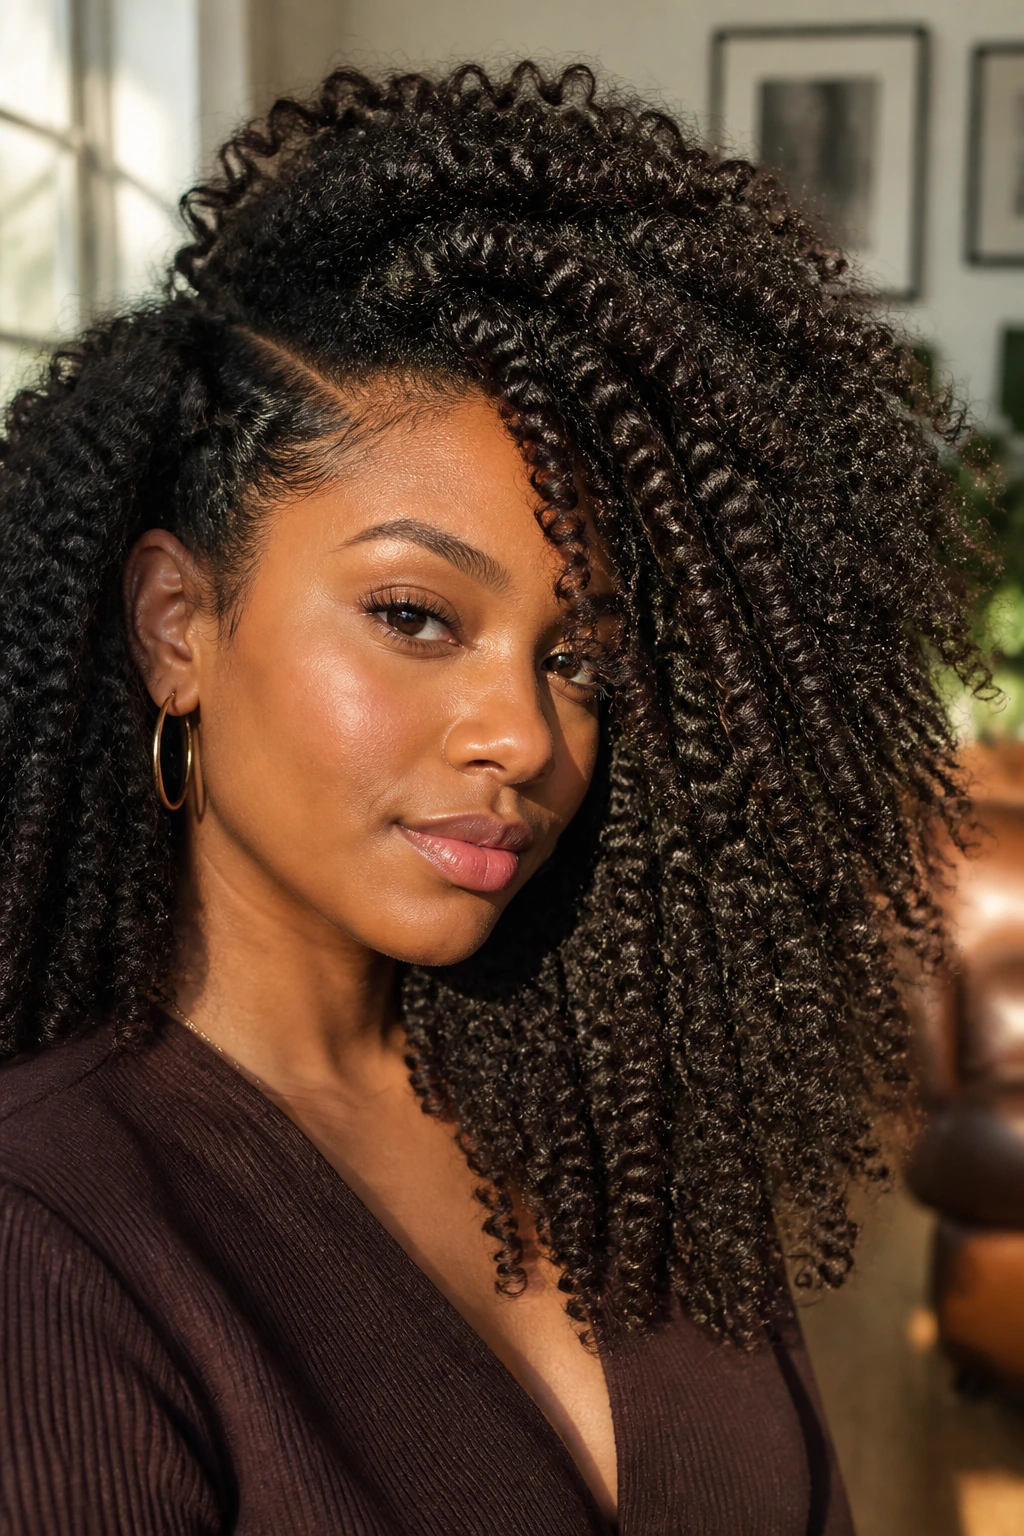
A deep side sweep gives long curls a little drama without asking for a new cut. It creates a strong line through the front, lets one side carry more volume, and makes the whole shape feel finished even when the hair is long enough to do most of the work itself.
This is the style I reach for when the length is there and the curls are already healthy. You do not need to force every strand into place. You need a clear part, a clean root lift, and enough definition in the front pieces so the sweep does not collapse by midday.
A rattail comb can help you draw the part on damp hair. After that, clip the heavier side while the roots dry, then fluff the lifted side with your fingers. If the curls near the face are too loose, twist just the front two sections away from the face and let them set that way for a few minutes. It keeps the sweep neat without turning it stiff.
The real advantage of this style is how flexible it is. It works with tight coils, looser curls, and anything in between, as long as the crown has enough support. And if you are stuck between two shapes, pick the one that asks for the least rescue work in the morning. A curly afro should feel like a good habit, not a full-time job.