A small afro can do more than people expect. The right shape, part, twist pattern, or puff can make small afro hairstyles for natural hair look polished without asking your hair to be longer, looser, or anything other than itself.
That matters because short natural hair has its own rules. Shrinkage is real. So is the way curls bunch up after washing and dry into a shape that looks smaller than it feels in your hands. Some styles celebrate that tight shape; others stretch it a little so you get more height or movement. The trick is picking the one that fits your texture instead of fighting it.
And yes, the details matter. A section that is 1 inch too wide can ruin finger coils. A flat twist that starts too far back can make the front look sparse. A puff with a cheap elastic can flatten the shape by noon. Small styles depend on clean parting, good moisture, and a little patience. Not a lot. Just enough.
Some days you want soft and fluffy. Other days you want hair off your face and out of your neck. A short afro can do both, and then some, once you stop treating length like the only thing that counts. The first style is the easiest place to start because it works with the texture you already have.
1. Defined Wash-and-Go for a Small Afro
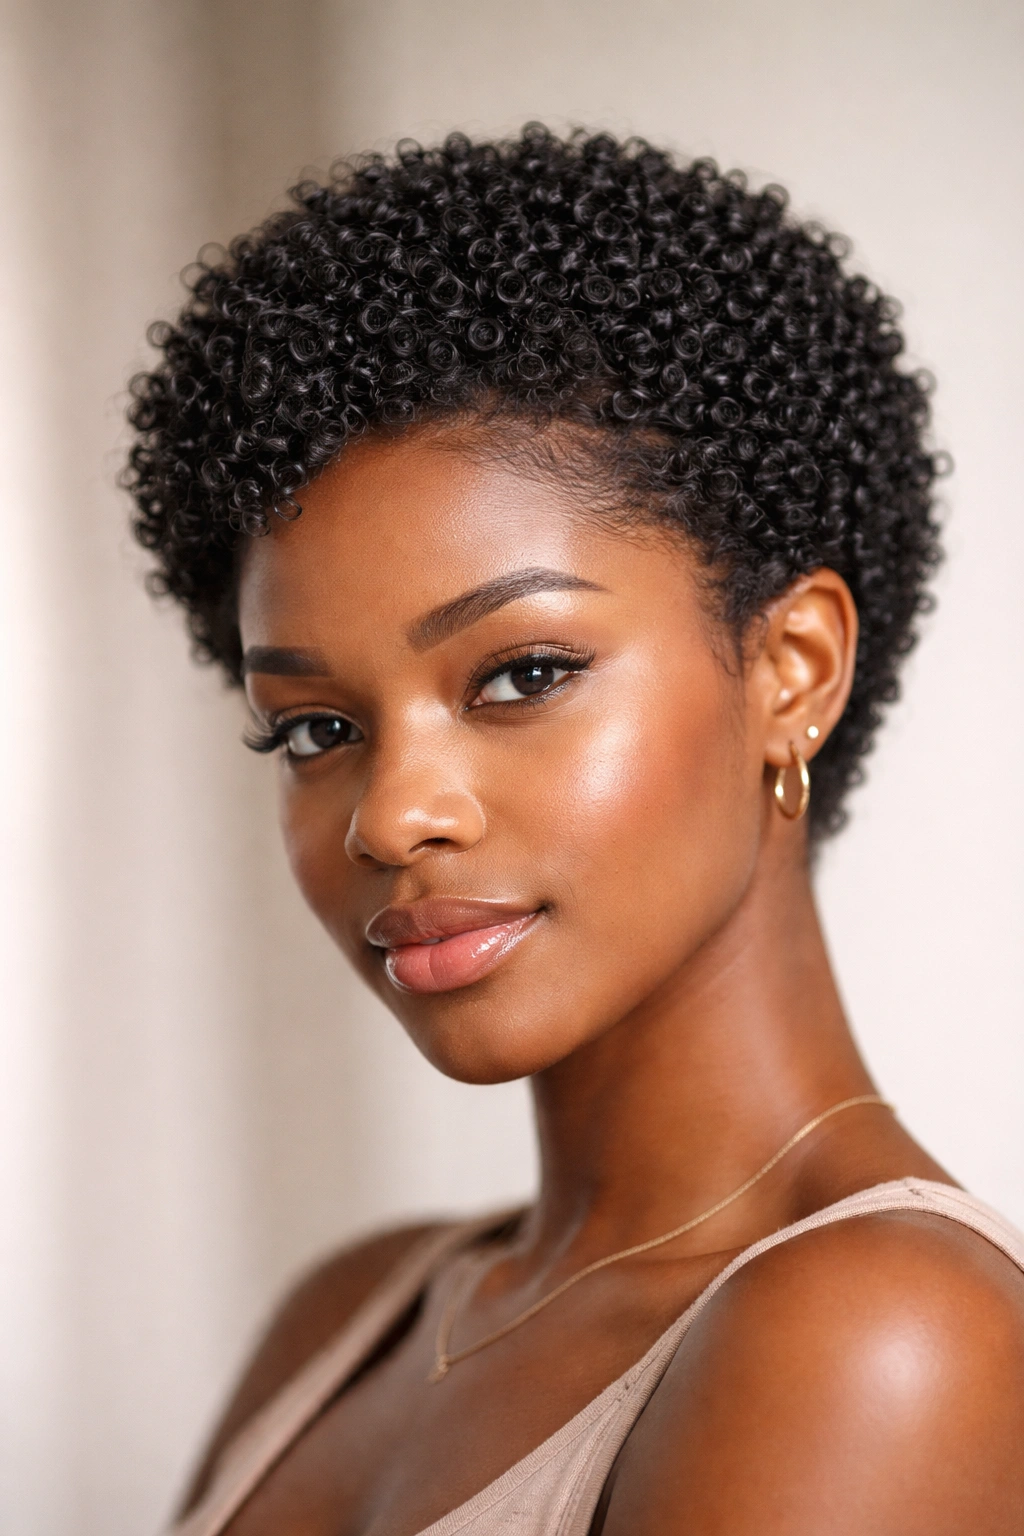
A defined wash-and-go is the style I’d hand to anyone with a short natural cut who wants maximum payoff for minimum fuss. It keeps the afro shape visible, but it sharpens the curl pattern so the hair looks intentional instead of sleepy. On a small afro, that definition can make the whole style read as neat and full at the same time.
The key is product order. Start with soaking-wet or very damp hair, then layer a lightweight leave-in, a curl cream if your hair likes cream, and a gel if you need hold. Use your fingers or a wide-tooth comb to distribute everything, then scrunch gently from the ends upward. If the curls are tighter, tiny sections about 1 inch wide give cleaner clumps than big rushed ones.
What Makes the Shape Work
A good wash-and-go on short natural hair is not about perfect curls. It is about balance. You want enough definition at the crown and sides so the afro keeps its shape, but not so much product that the hair turns sticky or stiff.
- Apply product in small sections so the curls clump instead of frizzing apart.
- Use a microfiber towel or an old T-shirt, not a rough bath towel.
- Let the hair dry all the way before fluffing the roots.
- If the top shrinks too much, lift the roots with a pick after the hair is dry.
A diffuser helps if you want faster drying and a little more lift at the root. Keep it on low heat and low speed, and stop when the curls feel dry to the touch. If you touch wet curls too much, they puff up in the wrong way. That is the annoying part, but it is also the part that decides whether the style lasts.
My blunt advice: if your wash-and-go always turns into a fuzzy cloud by lunchtime, use less product, not more. Heavy layers can sit on short hair and make it collapse.
2. Finger Coils With a Soft Afro Shape

Why do finger coils look so polished on short natural hair? Because they give each curl a clear path to follow. Instead of hoping the hair will define itself after washing, you physically set the pattern with your fingers. The result is tidy, springy, and easy to refresh for several days.
Finger coils work especially well if your hair is in that in-between stage where a tiny afro is just starting to gain length. The coils make the hair look more finished, but they still leave you with texture and movement. I like them when a style needs to hold up under a scarf, a hat, or a long day without constant fixing.
How to Set Them Without Making Them Crusty
Start with damp hair and a slip-heavy cream or gel. Take a section about the size of a pencil, smooth the product from root to end, then wrap the curl around your finger until it forms a neat coil. Release it slowly so it keeps the shape. If you rush the release, the coil loosens before it has a chance to set.
You do not need huge sections. You really don’t. Smaller coils give a more uniform look, while larger ones can look chunky and uneven on short hair.
What to Watch For
- Coils that are too wet can take forever to dry.
- Coils that are too dry will frizz before you finish the row.
- Too much product makes the style feel gummy at the roots.
- Touching the coils before they dry can flatten the pattern.
If you want a softer finish, separate the coils only once after they dry. If you want more definition, leave them alone and pick the roots lightly the next day. Either way, finger coils give a small afro a neat frame without making it feel overworked. That is why they stay useful.
3. Flat Twist Crown on Short Natural Hair
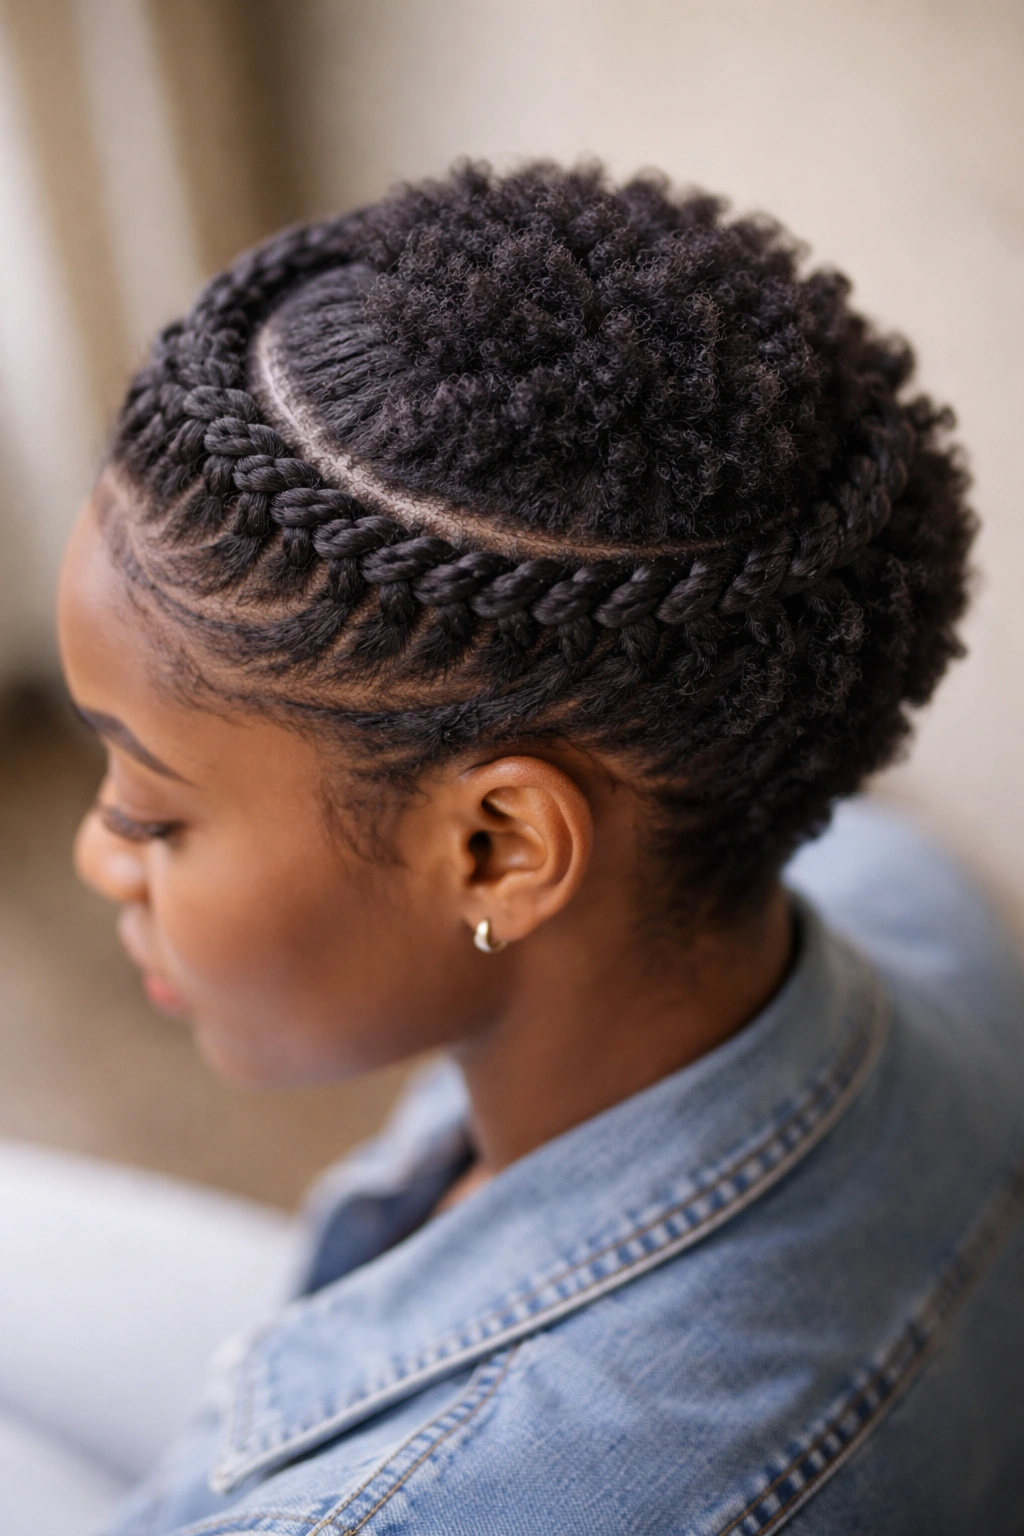
A flat twist crown is one of those styles that makes short hair look more intricate than it really is. It pulls the hair back from the hairline, wraps it across the head, and leaves the crown area looking clean and shaped. If the front of your afro tends to puff out too early in the day, this solves that problem without flattening everything.
The style works best when the parting is clear from the start. A rat-tail comb is worth having here. Create a side part or a middle part, then take two flat twists from the front corners of the hairline and direct them toward the back. On a short afro, the twists may be tiny, and that is fine. Tiny is not a flaw here. Tiny is what keeps the style neat.
Where the Part Should Sit
A side part gives the style a softer line and helps the crown look fuller. A middle part gives more symmetry, which can be nice if your hair is evenly dense on both sides. If one side is thinner, don’t fight it. Shift the part a half inch and work with the thicker side.
Use a little gel at the roots for grip, but do not pile it on. Flat twists look best when the hair can still move a bit. If the product hardens too much, the style starts to look helmet-like, and nobody wants that.
A few bobby pins at the back can pin the twists in place if your hair is too short to tuck them under neatly. Cross the pins in an X if you want extra hold.
The result feels clean, but not stiff. That’s the sweet spot.
4. Mini Twist-Out for Extra Stretch and Volume
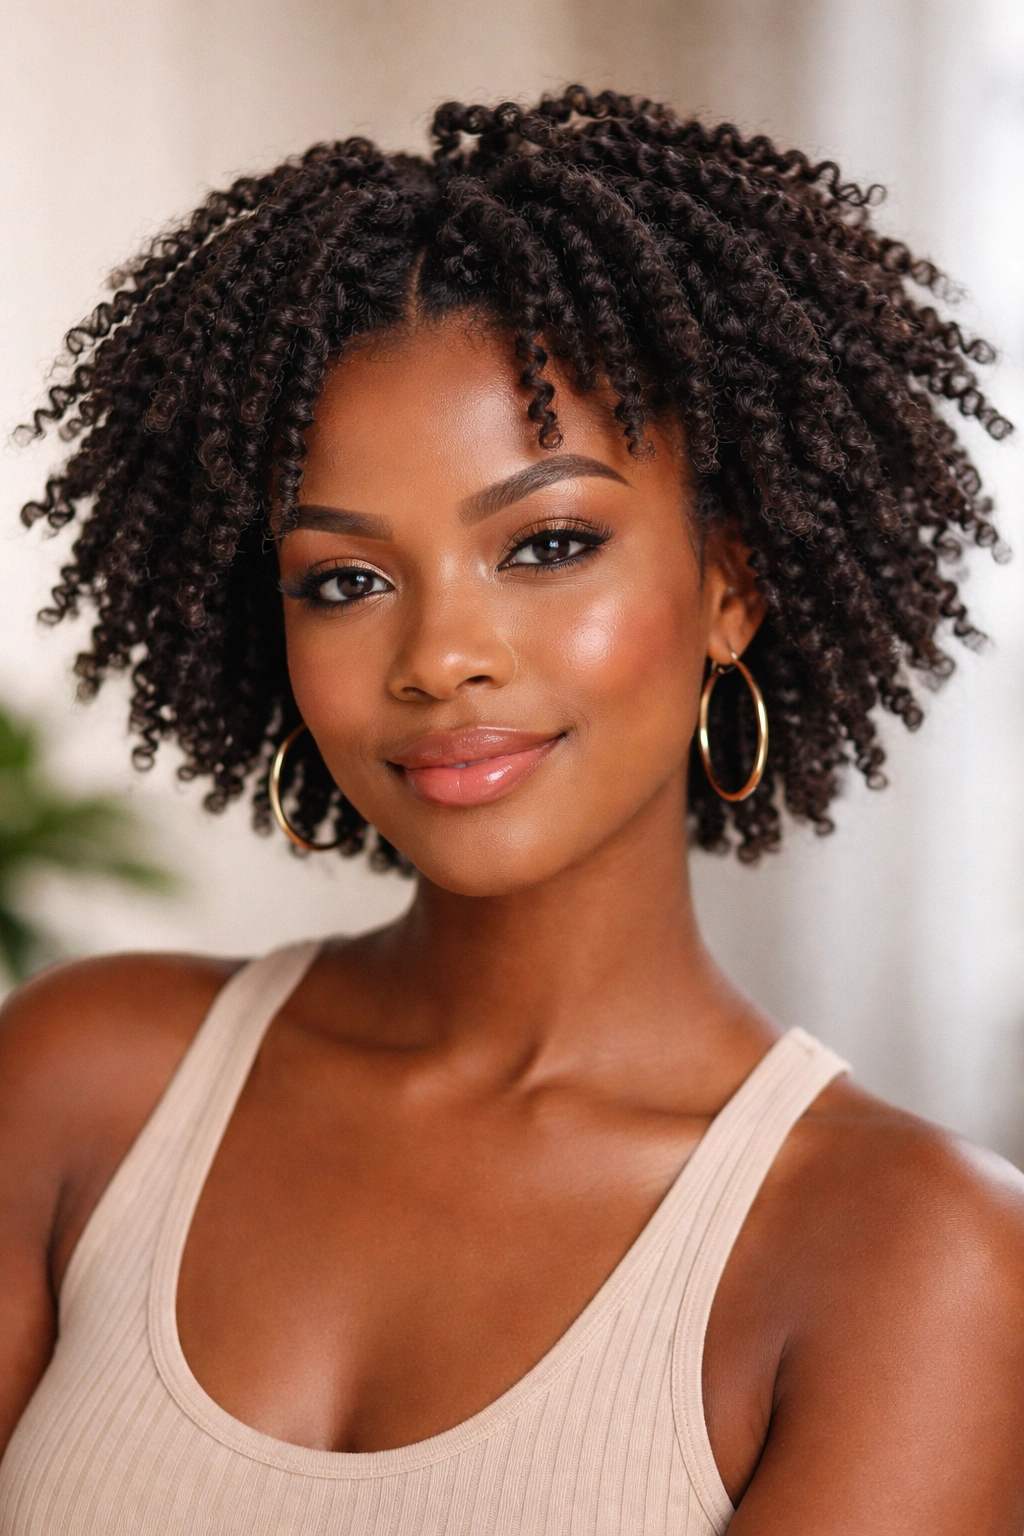
Twist-outs are not only for shoulder-length hair. On a small afro, they can give you a soft halo of texture with a little stretch at the ends, which is useful when you want the hair to look fuller without losing its natural curl pattern. The style can be tiny and neat, or loose and fluffy, depending on how you set it.
The part that changes everything is section size. Use twists that are about pencil-thin if you want more definition. Go slightly bigger if you want more volume and less curl pattern separation. Start on damp hair, coat each section with a creamy styler, twist from root to end, and let the hair dry completely before separating. Half-dry twist-outs are a mess. They puff in odd places and collapse in others.
Common Mistakes That Make Twist-Outs Frizzy
- Separating the twists too early.
- Using a heavy butter on hair that only needs cream.
- Twisting sections that are too large for the length.
- Forgetting to coat the ends, which leaves them rough and bent.
A twist-out on short natural hair often looks better on day two than day one. The curls loosen a touch, the shape softens, and the volume settles into something more natural. If the roots need a lift, pick only the first inch from the scalp and leave the ends alone.
I like this style for people who want more fullness without adding extensions or heat. It gives a small afro a little drama, but not the fake kind. Just texture doing what texture does.
5. Side-Part Puff for Short Natural Hair
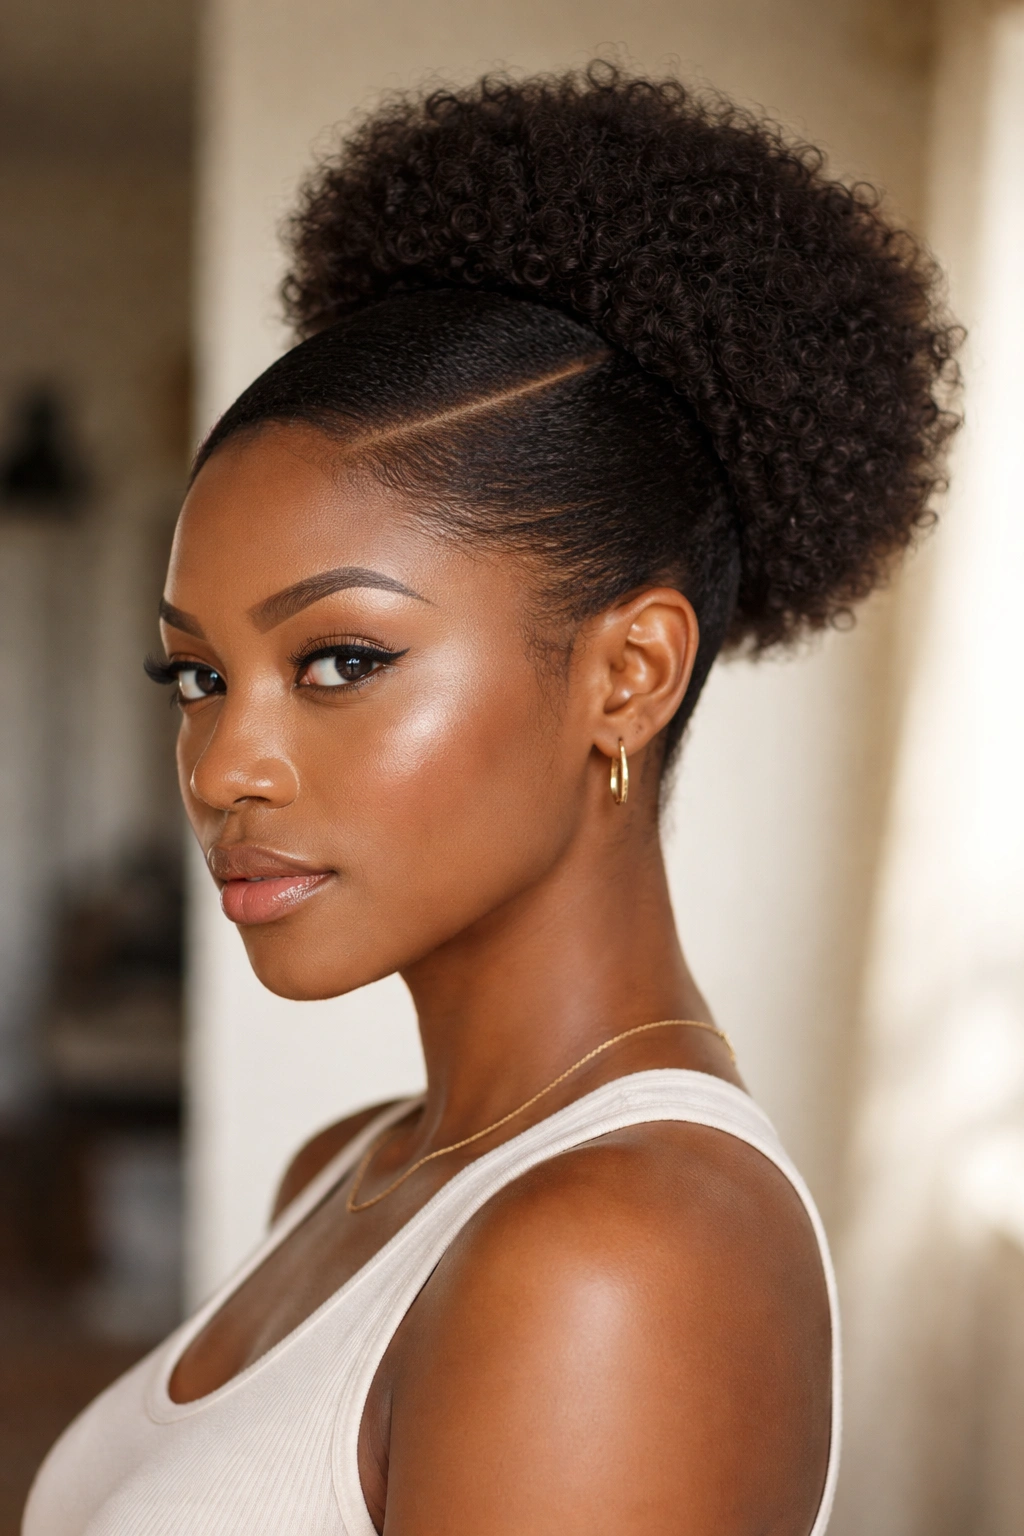
A side part makes a small puff look deliberate, not accidental. That sounds simple, but it changes the whole mood of the style. Without the part, short puff styles can feel like a quick backup plan. With the part, they read as a choice.
This works well when the hair is long enough to gather at the crown, even if only barely. Smooth the front with a little gel or edge control, then use a soft elastic or puff cuff to gather the hair. If your hair is too short for a full puff, create a mini puff at the top and let the sides stay close to the head. That version looks sharp and works especially well with earrings or a bold lip.
A side part also helps if your curls grow in different directions. It gives the eye one clean line to follow. Keep the part about 1 inch off center if you want balance without looking too severe. More than that can turn the style into a deep side sweep, which is a different look entirely.
One small warning: don’t stretch the elastic too hard. Tight bands can leave a dent that lasts all day and pull at the edges. A satin scrunchie or puff cuff is kinder to short natural hair, and it usually keeps the shape better than a regular rubber band.
A puff may be simple, but simple doesn’t mean boring. On a small afro, it can look crisp, cool, and finished with almost no effort at all.
6. Bantu Knots on a Small Afro
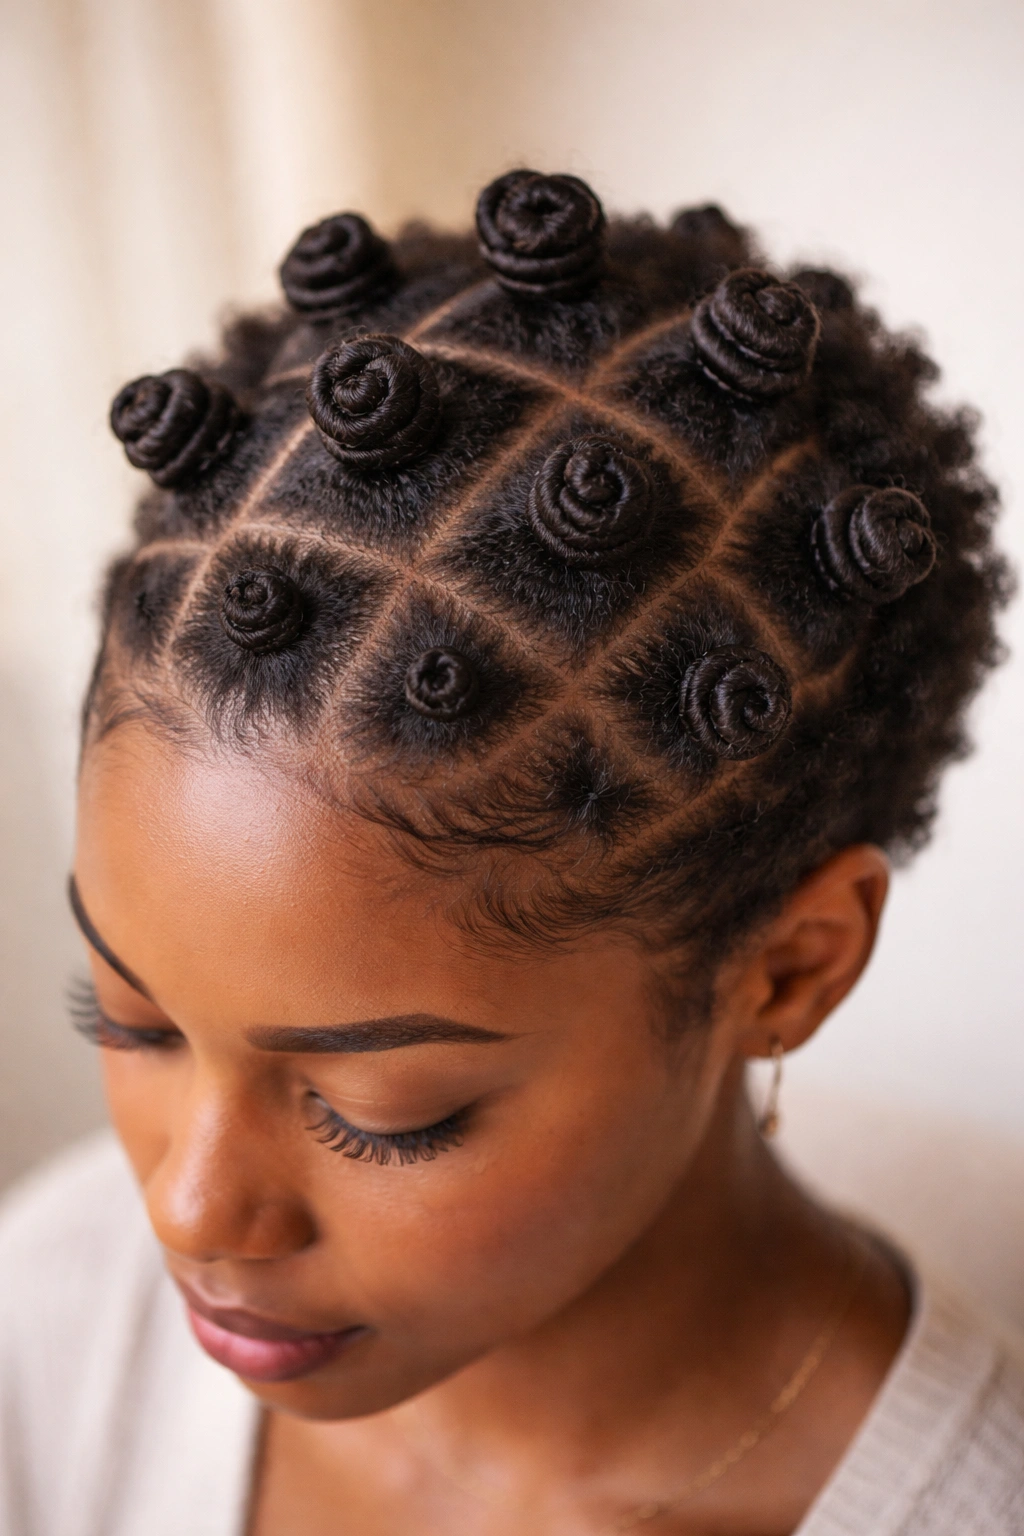
Fresh Bantu knots feel like tiny coiled buttons across the scalp. They’re neat, sculptural, and a little bit bold without demanding a lot of length. On short natural hair, they can sit close to the head and still look full, which is part of why they work so well on small afros.
The best version starts with hair that is moisturized but not slippery. Too much oil makes the knots unravel. Too little moisture makes them look dry and fuzzy by the time you finish the last one. Divide the hair into even sections, twist each one until it begins to coil on itself, then wrap the twist into a knot and tuck the ends under. Hair that is around 2 to 4 inches long usually gives the easiest hold, but shorter hair can still work if the sections are small.
When to Wear Them as Knots or Knot-Outs
Bantu knots can stay in place as a style on their own, or you can take them down later for a knot-out with more texture. The knot version looks sharper and usually lasts longer. The knot-out gives you a fluffy, stretched finish that feels less formal.
If you plan to wear the knots out for a while, make them even in size. Uneven knots look messy fast. If you only want the knot-out, you can make them a little looser and sleep on a satin bonnet so the shape stays smooth.
A few details matter here:
- Section size changes the final look more than product does.
- A tail comb helps make the parts crisp.
- Shorter ends may need a small pin or extra tuck.
- A satin scarf keeps the knots from flattening overnight.
Bantu knots are not subtle. That is the point. They bring structure to short natural hair in a way that feels strong, not fussy.
7. Faux Hawk With Pinned Sides
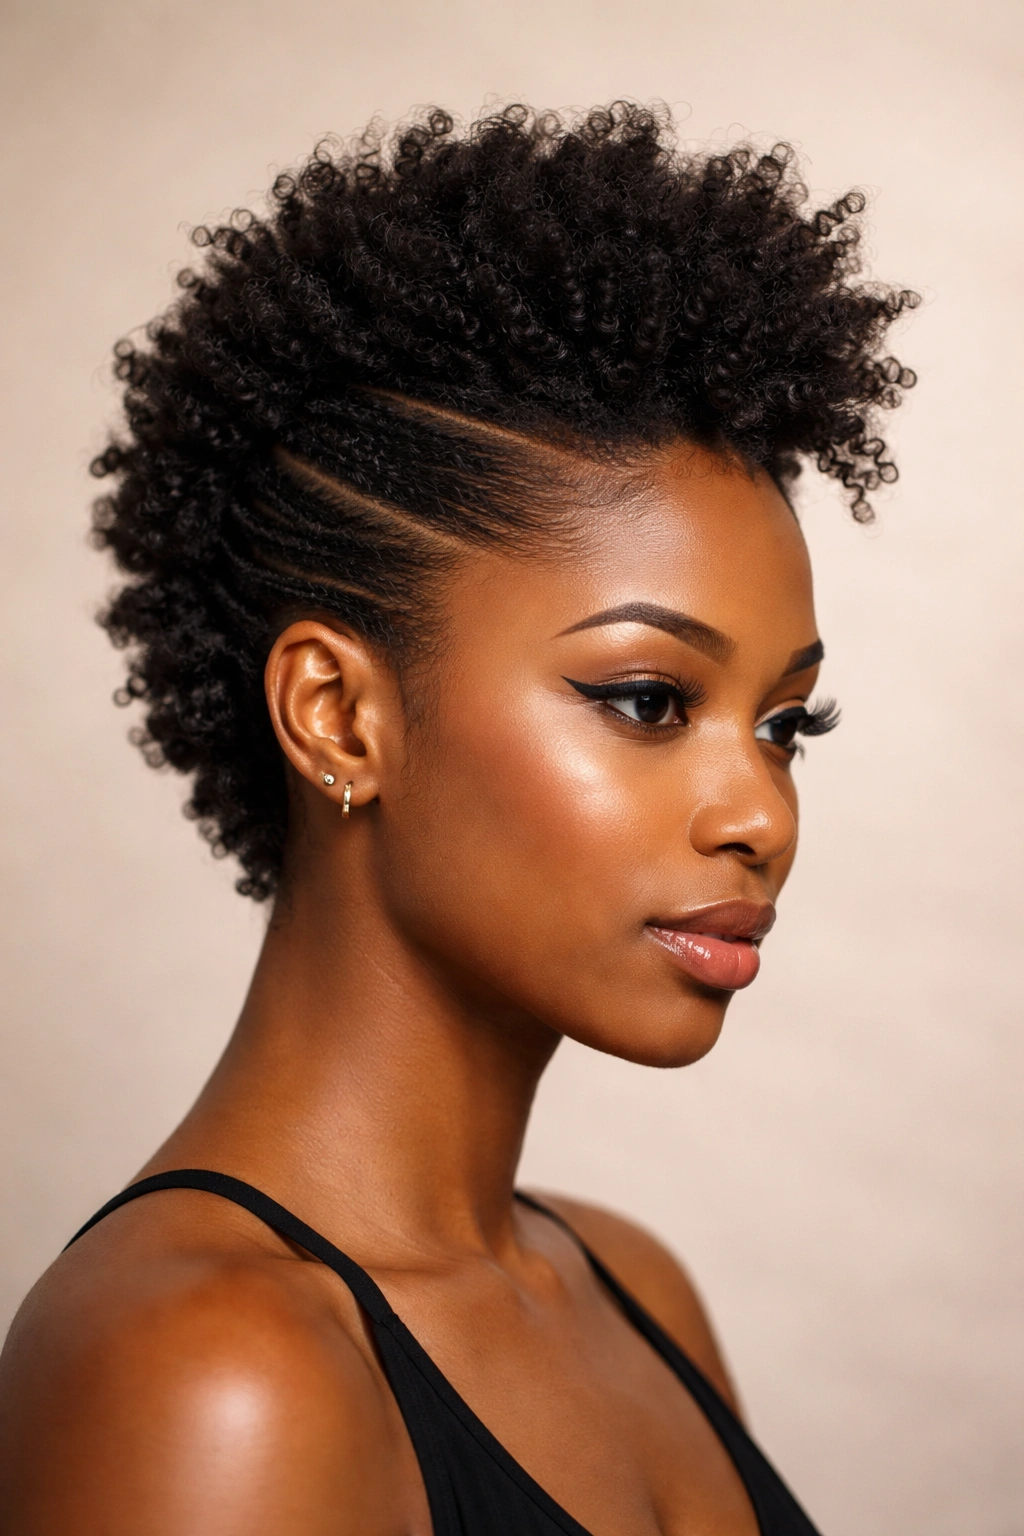
Need a style that looks dressed up without a salon chair? Pinning the sides up into a faux hawk does the trick. It keeps the center section full and tall while pulling the sides inward, which gives a small afro a stronger shape instantly.
This style is useful when your hair is short enough that a full updo would fight you. Instead of trying to gather everything into one ponytail, you split the hair into a center strip and two side sections. Twist or smooth the sides upward, pin them close to the head, and let the middle section keep its height. On a tapered cut, the contrast looks especially good because the cut already gives you clean lines to work with.
Tools That Make the Style Easier
- 6 to 10 bobby pins, depending on thickness.
- A few duckbill clips for sectioning.
- Edge control if you want the hairline sleek.
- A pick for lifting the center section after the pins are set.
A faux hawk works because it plays with shape. The eye goes straight down the center ridge, which makes the hair seem taller and more defined. That ridge does not need to be huge. Sometimes 2 to 3 inches of lift is enough to change the whole look.
The catch is pin placement. If the pins sit too far out, the sides puff loose. Too close, and the style gets flat at the temples. Cross the pins whenever you can. It sounds tiny, but that little X pattern keeps the shape from slipping.
I like this one for evenings, events, or any day when a plain puff feels too casual. It has edge without needing length. That’s a good trade.
8. Space Buns on Natural Hair
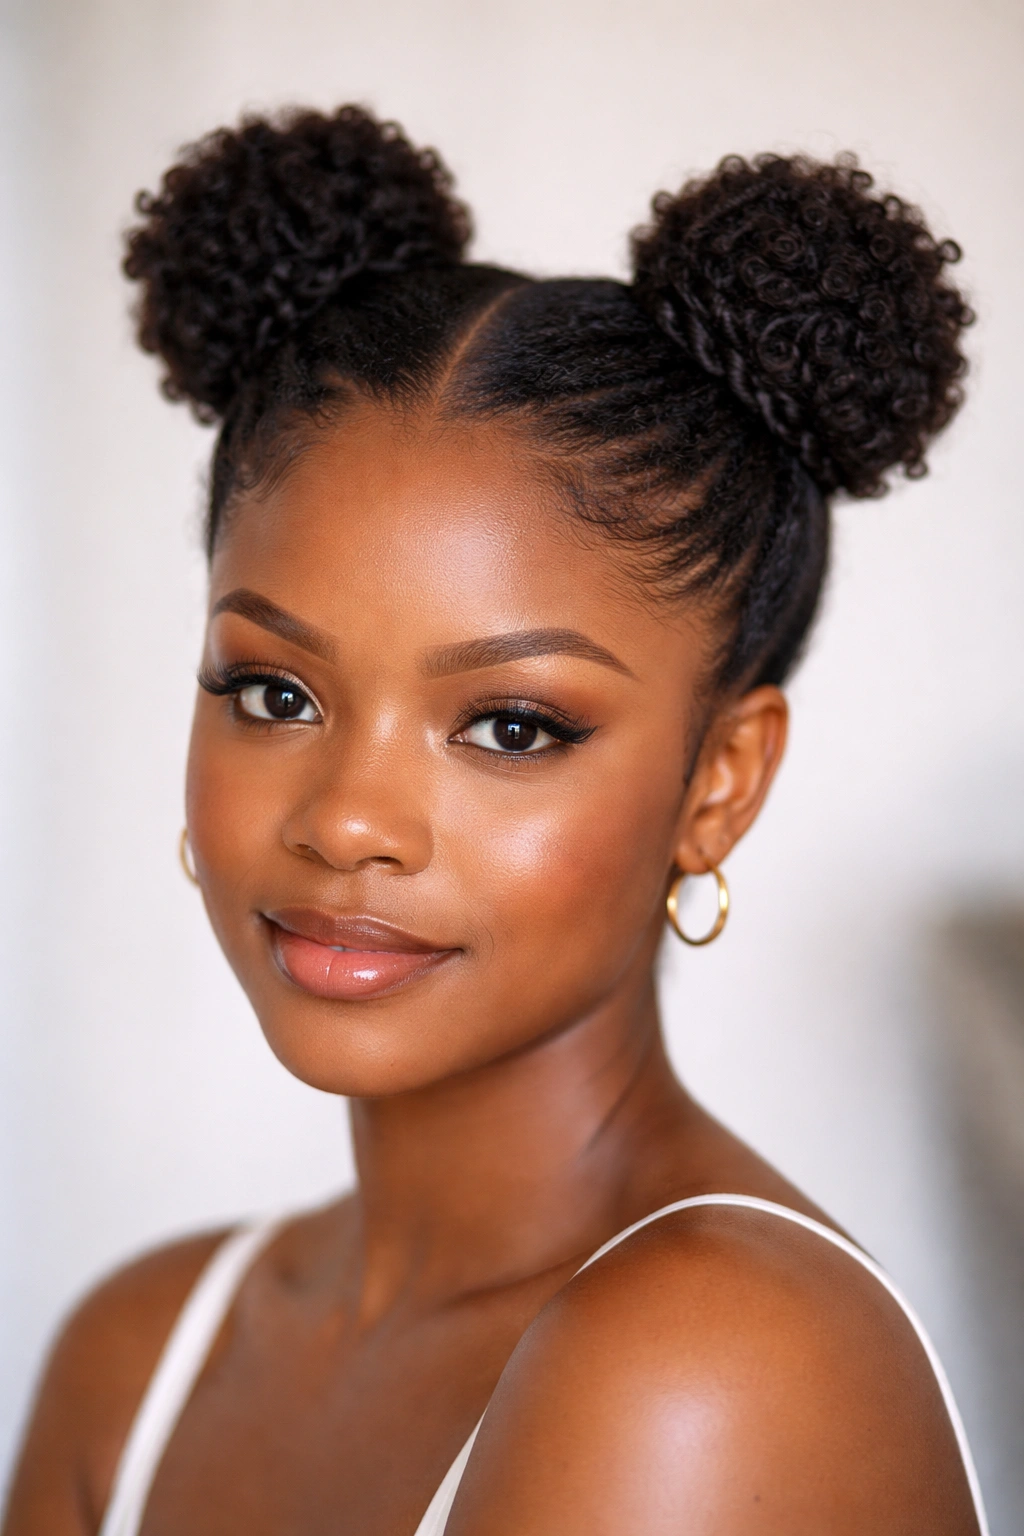
Can short natural hair do space buns? Yes, and the answer is more fun than people expect. The trick is to make the buns small enough to hold, then shape them so they look cute instead of strained. On a small afro, space buns can sit high on the head, low near the nape, or just above the ears if the length is limited.
The easiest version uses two mini puffs or two tiny twisted buns. Part the hair straight down the middle, smooth each side with a little gel, and gather the sections into two buns. If the hair is too short to wrap fully, twist each section first and pin the ends into place. That gives the buns more shape and less frizz.
Best Hair Length for Them
Hair that reaches about 3 inches or more at the crown usually gives enough hold for neat buns. Shorter hair can still work, but you may need to tuck and pin more. That is normal. The style just changes a bit.
If the buns keep sliding, make the sections smaller and the base tighter. A satin scrunchie helps, but don’t use one that is so stretchy it has no grip. The bun needs a bit of tension to stay where you put it.
Space buns can look playful, but they also work as a protective style for a day or two if you keep the parts neat and sleep with a scarf. Add little cuffs, clips, or beads if you want more personality. The style can read cute, sharp, or sporty depending on what you place around it.
Short hair does not make the style less useful. It just makes it more compact. That can be a good thing.
9. Headband Tuck Style for a Low-Drama Day
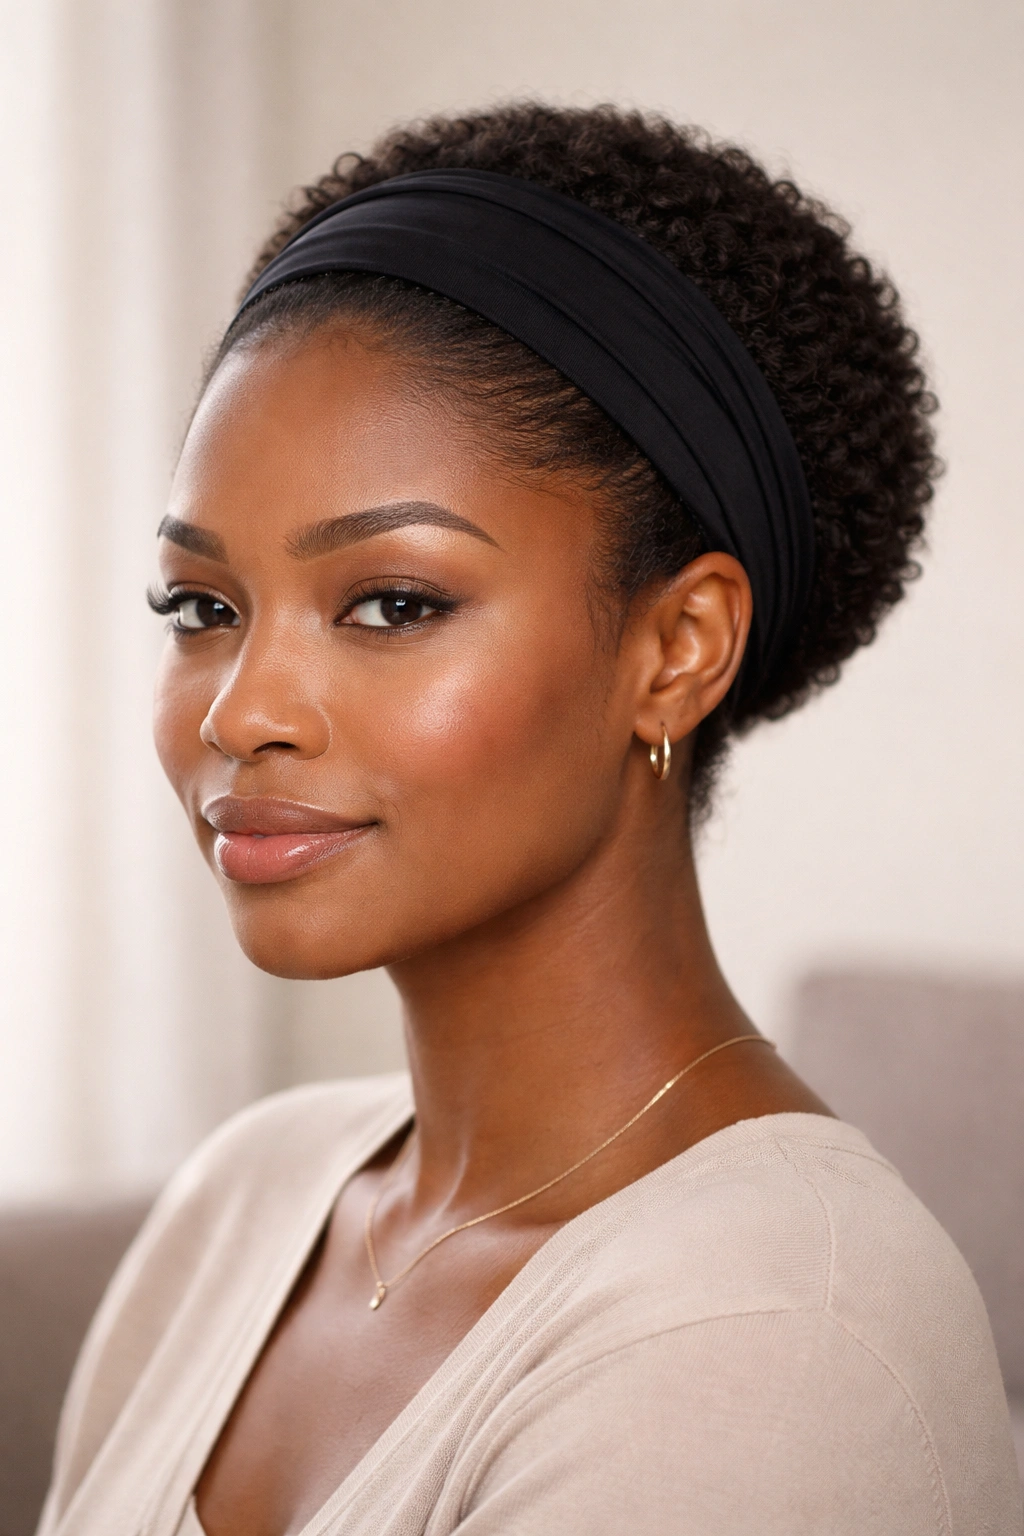
Unlike a puff, a headband tuck keeps the hair low and close to the scalp. That makes it one of the best small afro hairstyles for natural hair when the goal is to get the job done fast and still look intentional. It also works on hair that is a little stretched, a little old, or a little too frizzy to cooperate with anything fancier.
Use a wide elastic headband or a satin-lined one if you have it. Place it across the hairline, then tuck sections of hair up and under the band, working around the head until the ends are hidden. On a short afro, you may need to tuck in smaller pieces rather than one big sweep. That is fine. The style looks better when the folds are even.
There’s a quiet benefit here: the tuck creates a soft rolled shape that frames the face without making the crown flat. If you want more height, pull the band slightly forward before tucking the back section. If you want a cleaner finish, keep the band close to the hairline and smooth the sides with your palms.
This style gets overlooked because it seems plain. It isn’t. It is one of the easiest ways to make short natural hair look polished in under 10 minutes, and it leaves room for earrings, a strong brow, or a patterned scarf if you want to layer it up.
The only real mistake is using a band that cuts into the scalp. If it leaves a dent after 20 minutes, it is too tight. Toss it and use a softer one.
10. Tapered Picked-Out Afro With Accessories
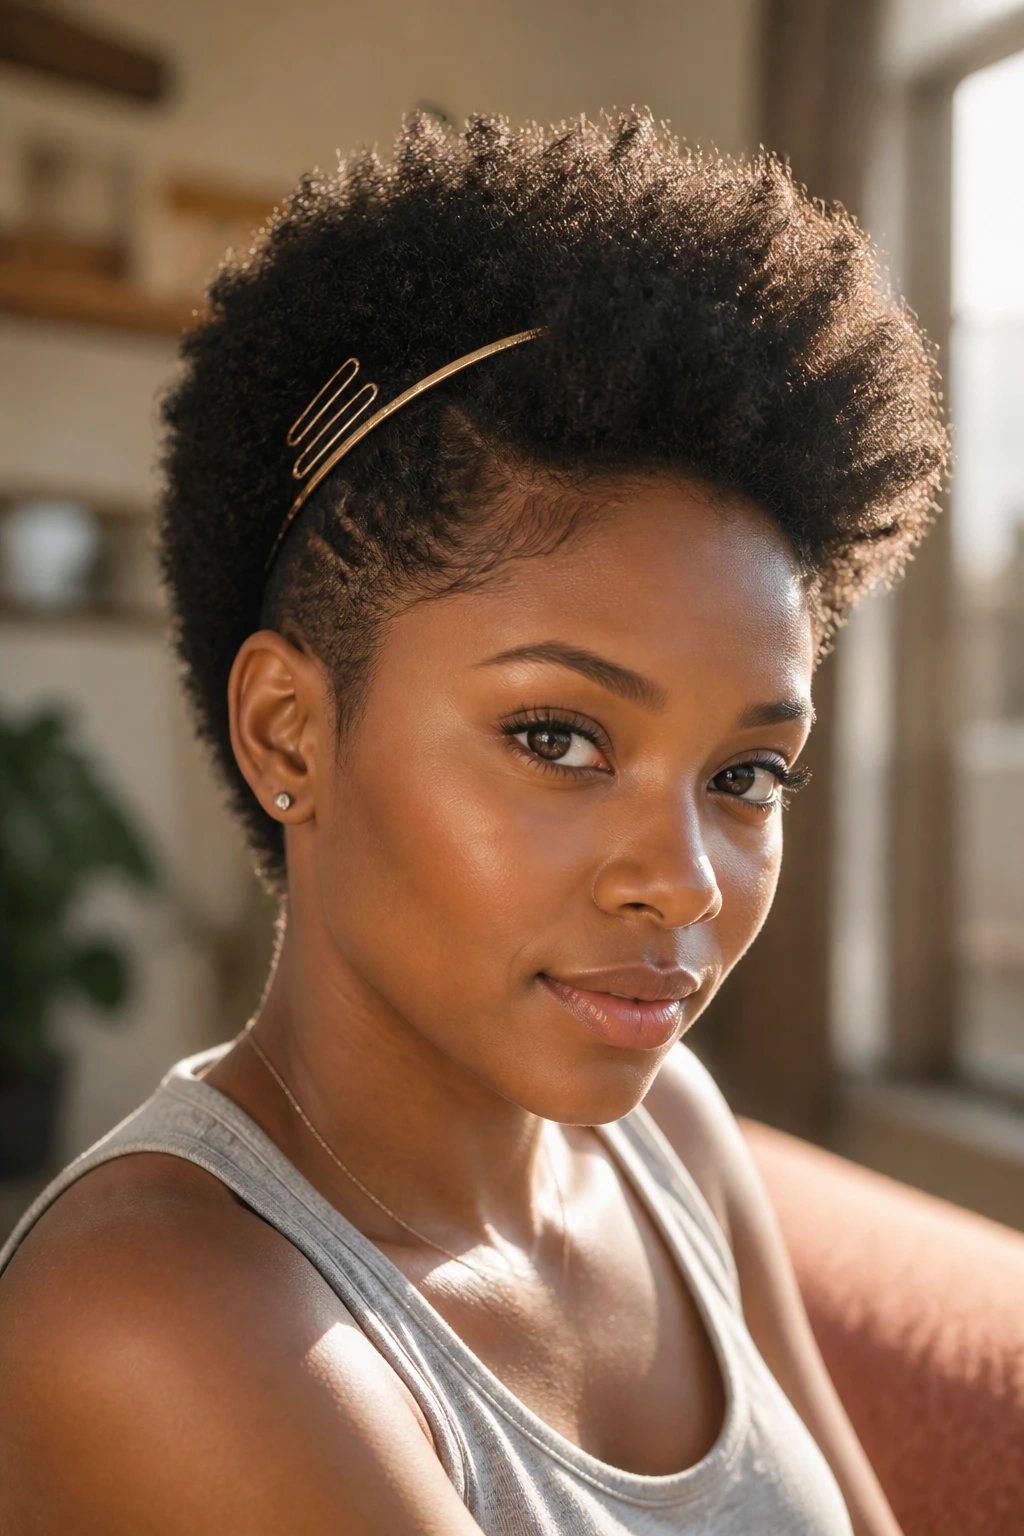
A tapered cut with the top picked out looks small, tidy, and intentional all at once. It is one of the cleanest looks for short natural hair because the shape is already doing part of the work. The sides stay close, the crown gets a little lift, and the whole style ends up looking sharper than a basic round afro.
Start with dry or mostly dry hair. Use a pick at the roots only, lifting about 1 inch from the scalp so you keep fullness without breaking up the curl pattern too much. Work in sections from the back to the front, and stop when the top has height but the ends still hold their shape. If you keep picking all the way through the ends, the style can turn fuzzy fast.
A few accessories change the look without adding clutter:
- A thin metal headband for a cleaner shape.
- 2 or 3 snap clips placed on one side.
- A scarf tied low at the crown.
- Small cuffs or beads if the hair has enough length near the front.
This style is especially good when you want your hair to look full but not bulky. The taper gives structure. The pick gives lift. Together, they make a small afro look balanced from every angle.
If I had to pick one style from this whole list for day-to-day wear, it would be this one or the defined wash-and-go. They both show off texture without making you work too hard. And that, honestly, is the point. Good shape beats a lot of effort.