Short wavy hair with highlights is one of the most transformative combinations you can try. When you add dimension through color to textured waves, you’re creating movement that catches light from every angle — it’s naturally flattering, visually dynamic, and honestly, it makes your hair look thicker and fuller than it actually is. The highlights work like natural dimension, breaking up the line of your hair and creating depth that a single color simply can’t achieve.
The beauty of this combination is that it works across every hair texture, face shape, and skin tone. Whether your waves are loose and beachy, tightly coiled, or something in between, highlights add a sophisticated edge that elevates even the simplest cut. Plus, short length means less styling time, less maintenance overall, and way more versatility than you’d expect. You can wear it sleek and polished one day, tousled and textured the next — same cut, completely different look.
What makes highlights specifically powerful on short wavy hair is that they draw attention to the movement itself. Instead of flattening your texture, they emphasize it. Your waves catch light differently at each highlighted section, which makes the wave pattern itself more pronounced and interesting. This is why some of the most-asked-for styles at salons combine texture with strategically placed color — they’re the kind of hairstyles that look effortlessly expensive even when you’re just running errands.
Let’s walk through 14 specific short wavy styles that genuinely shine with highlights, along with exactly what makes each one work and how to keep it looking fresh.
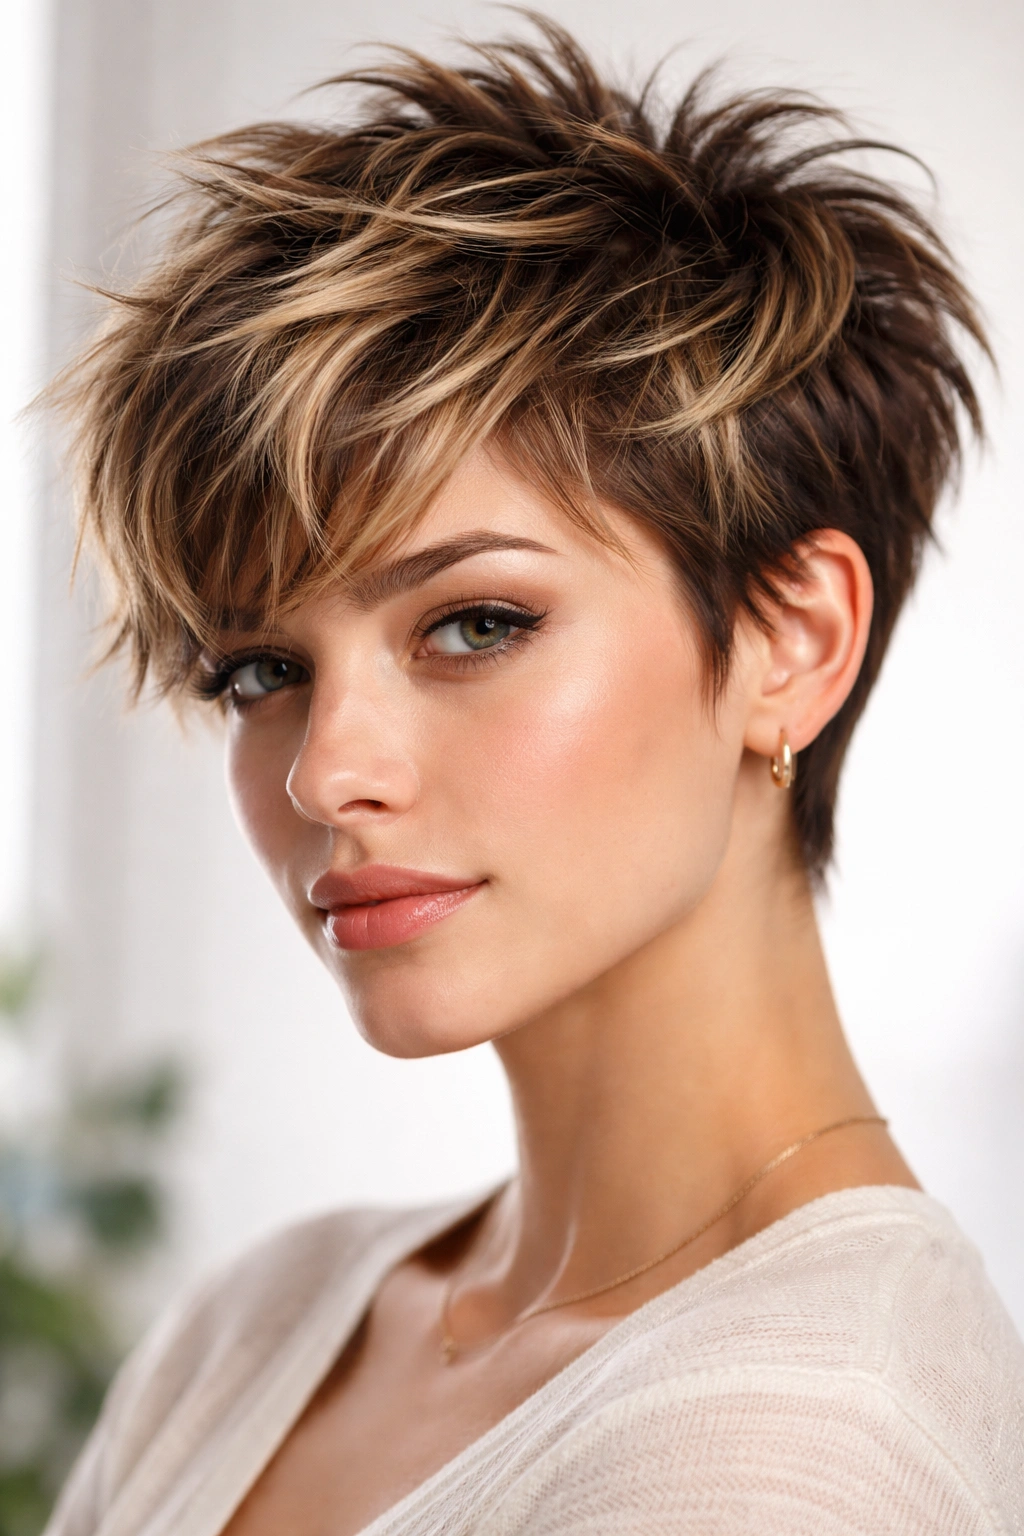
1. The Textured Pixie With Subtle Balayage
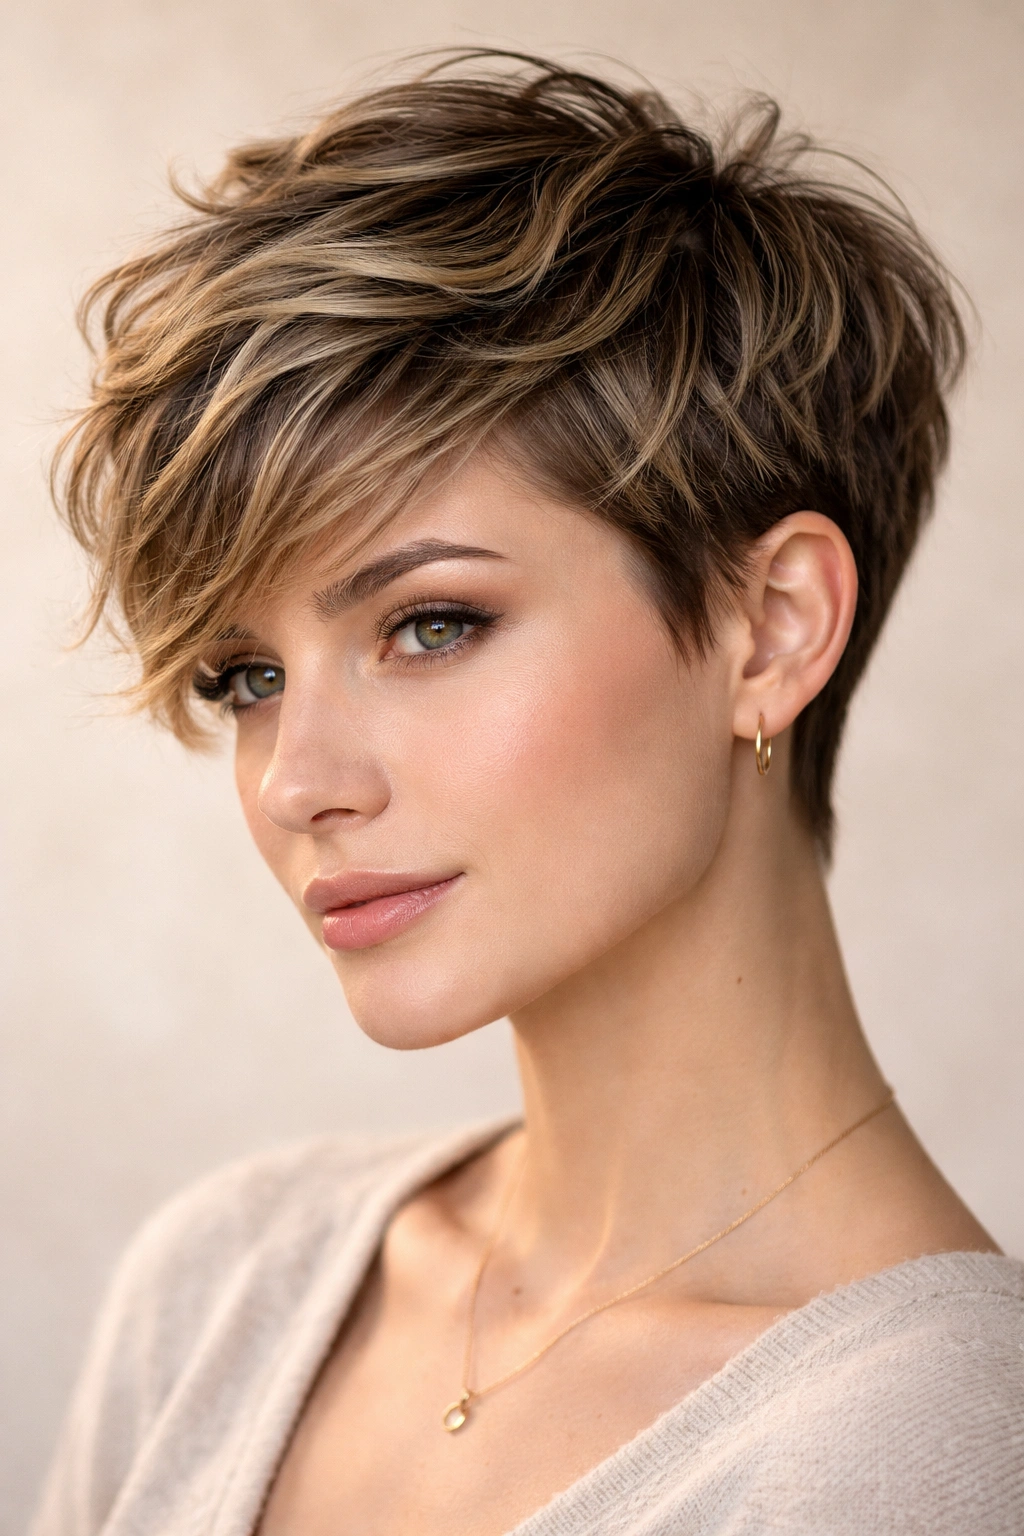
This is the short cut for people who thought they couldn’t pull off short hair. A textured pixie keeps length on top (usually 2 to 3 inches) while tapering the sides and back close to the scalp. What makes it wavy instead of just spiky is the cut itself — your stylist creates movement in the layers so your natural wave pattern comes through rather than fighting against it.
Why This Cut Works With Highlights
Subtle balayage — hand-painted highlights that look naturally sun-kissed rather than striped — transforms a pixie from edgy to elegant. The color variation catches light every time you move, and it adds dimension without making the cut feel harsh. Balayage is especially kind to short hair because it doesn’t require frequent touch-ups the way root-heavy techniques do.
How to Make It Your Own
- Place highlights primarily on the top layers where movement is most visible — this creates the impression of thicker, fuller hair
- Keep the color within 2-3 shades of your base to maintain softness around the face
- Ask your stylist for piecey, disconnected layers rather than blunt ones — this maximizes how much the wave pattern shows
- Get a cut every 4-6 weeks to maintain texture and prevent it from looking overgrown
Styling tip: Textured pixies look best when you emphasize their natural wave. Use a texturizing spray or sea salt spray on damp hair, then rough-dry with your fingers — no brush needed. The highlights will shine most when your waves are separated and defined rather than flattened.
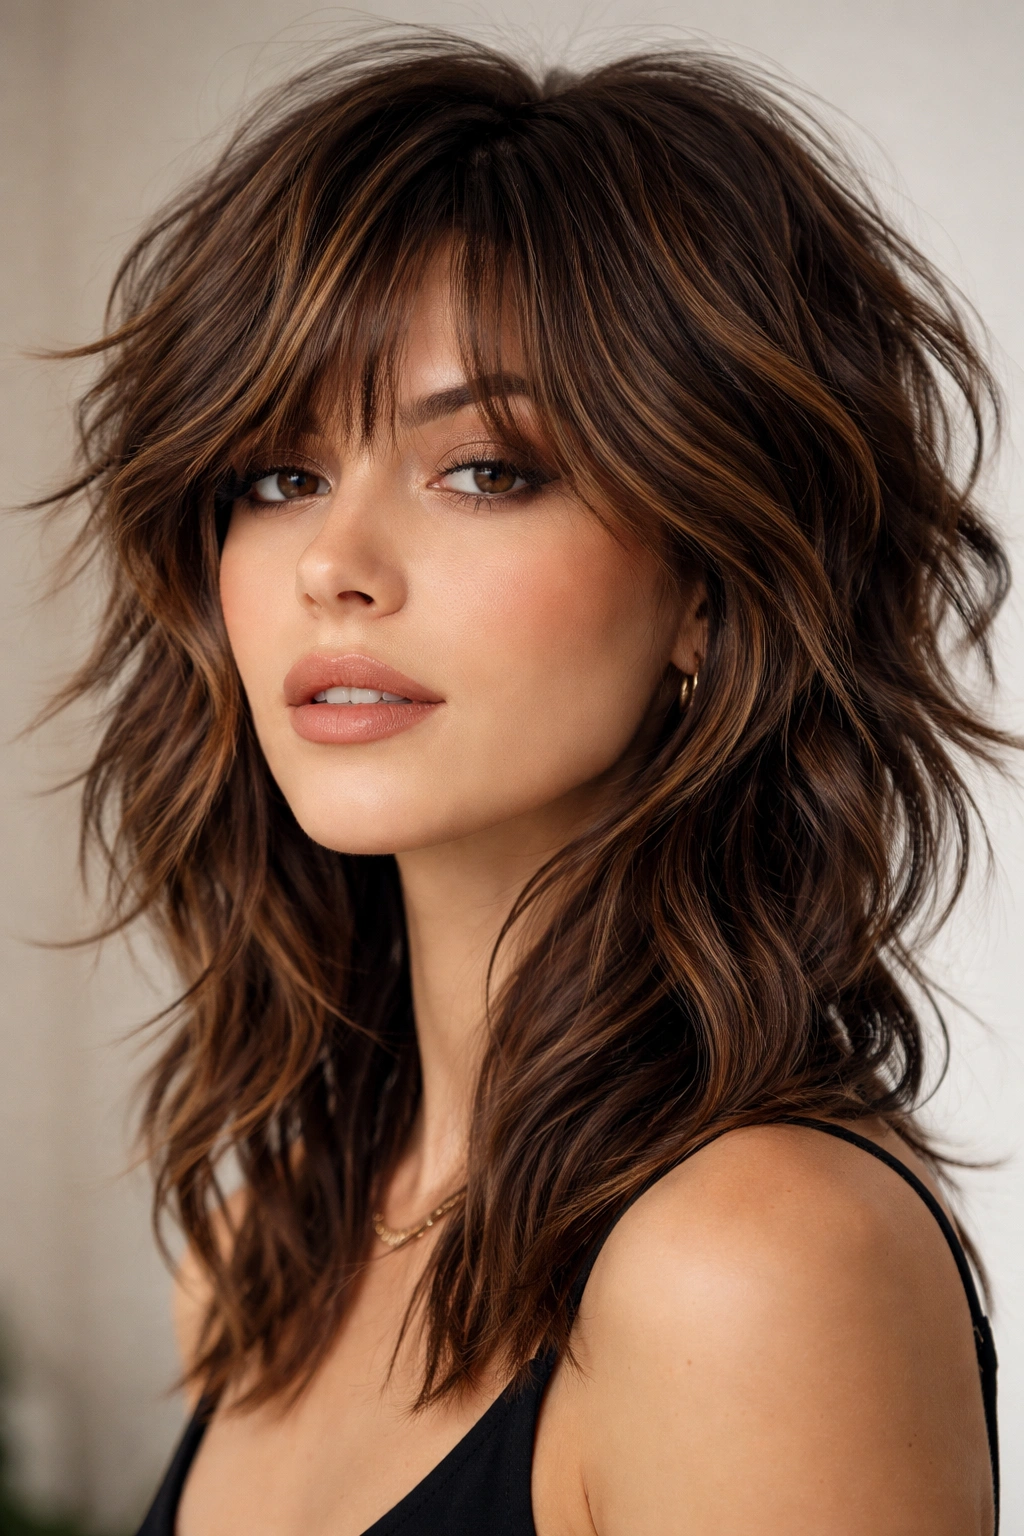
2. The Modern Shag With Dimensional Highlights
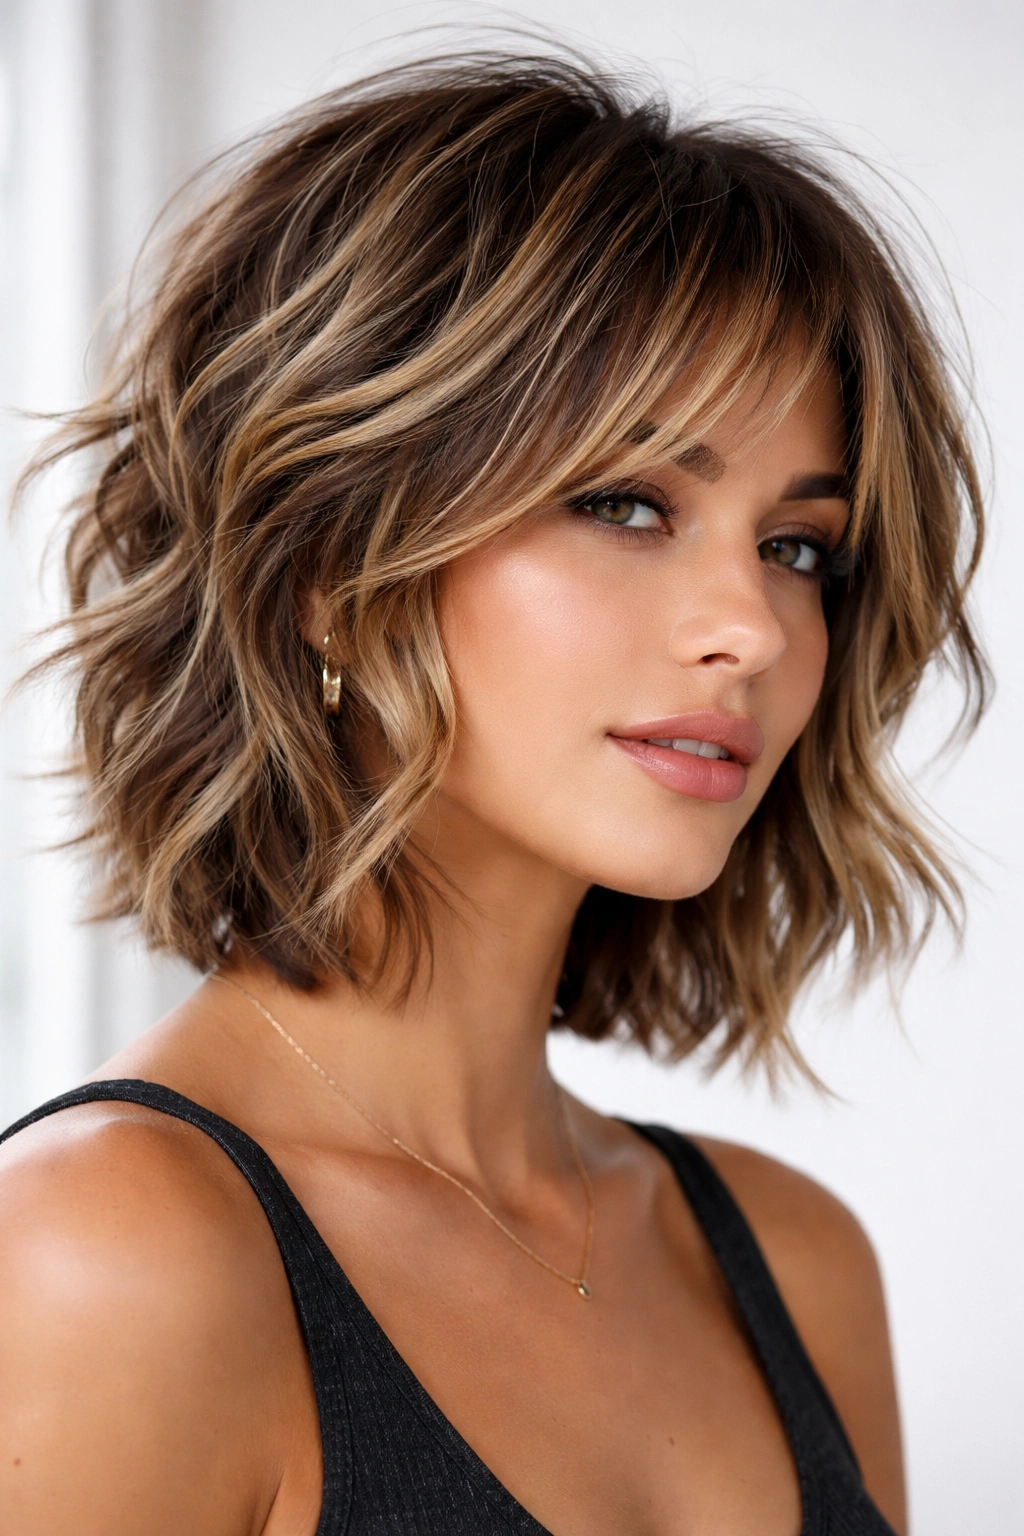
The shag is back, but it’s nothing like the 1970s version. A modern shag on short hair means lots of layers in varying lengths, creating a shaggier, piecey texture throughout. It’s deliberately undone-looking, but that carefully textured appearance actually requires a very precise cut.
What Makes the Shag Special
Shags are texture incarnate, which means they’re the perfect canvas for dimension. Highlights make the layer lines visible and interesting rather than looking like a messy accident. The color variation emphasizes the movement and separation that makes a shag feel modern rather than dated.
Highlighting Strategy for This Style
- Go with a blend of dimensional highlights — some lighter pieces woven throughout, some richer tones blended in
- Concentrate lighter pieces on the top and around the face where they frame your features
- The shaggy texture means longer hair at the back and crown catches more light, so distribute highlights throughout
- Consider adding some darker shadow tones at the roots to create depth and make the style feel intentional
Pro tip: Shags look best with a light curl or wave pattern — they’re chaotic in the best way. If you have straight hair, you might get a perm or use a curling iron to create texture. The combination of cut texture plus wave pattern plus highlights creates that effortlessly textured look that’s so difficult to describe but instantly recognizable.
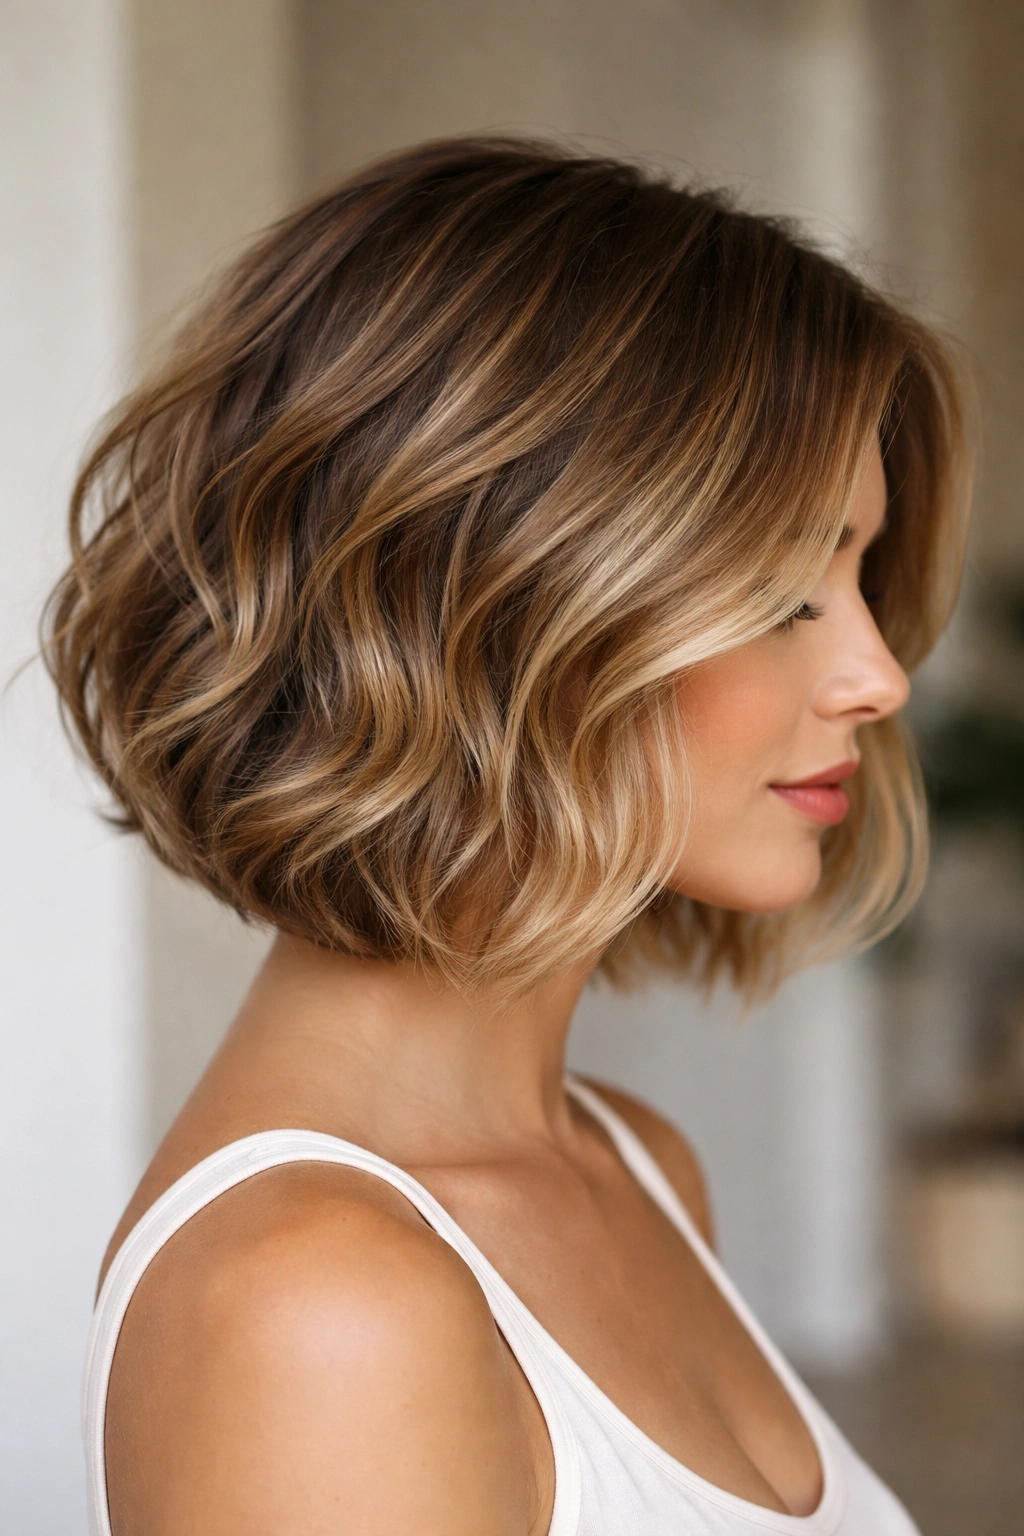
3. The Layered Bob With Face-Framing Highlights
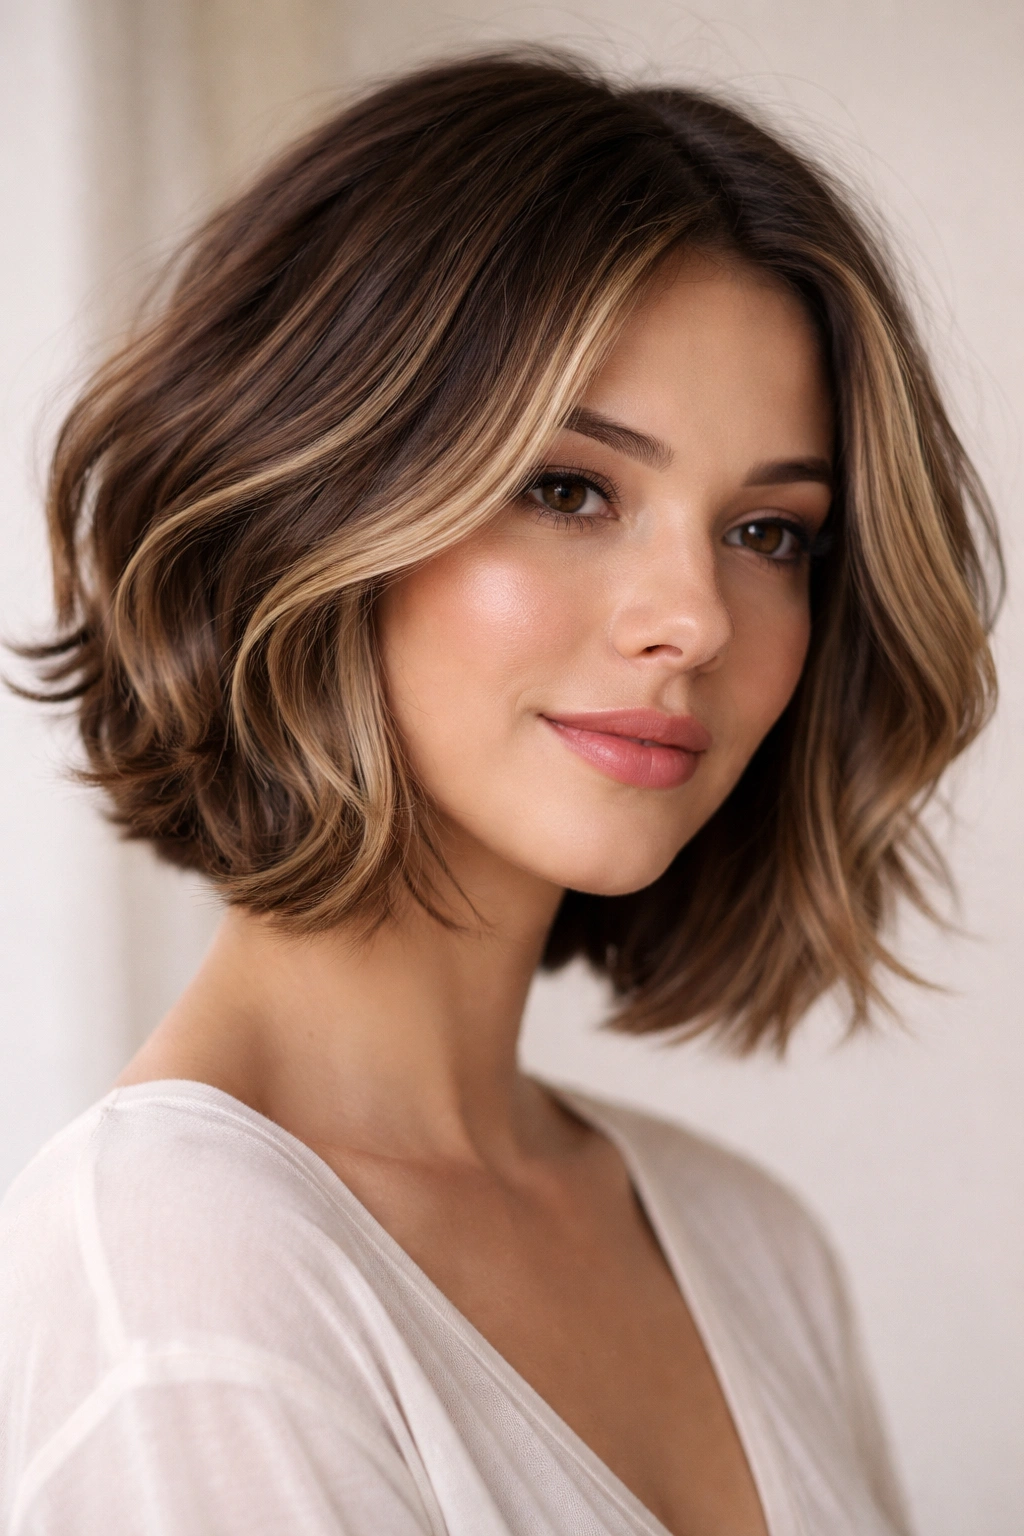
A layered short bob sits somewhere between a pixie and a longer bob — usually 3 to 4 inches long on top with shorter layers throughout. Face-framing layers are intentionally cut shorter at the front, so they sit right at your cheekbones and jawline, creating a flattering frame for your face.
Why Face-Framing Highlights Matter Here
The whole point of a layered bob is to draw attention to your face, and face-framing highlights intensify that effect. Lighter pieces around the face brighten your complexion and make your eyes pop. This technique is especially powerful if you have a round or square face — the highlights create definition and length where you need it.
Getting the Color Right
- Ask for highlights concentrated on the face-framing pieces — this is where maximum brightness helps your features
- Add some additional dimension throughout the mid-lengths and ends to prevent the color from looking too forefrontal
- If you have darker skin, warm-toned highlights (golds, coppers, warm blondes) look more flattering than cool platinum tones
- Consider babylights — thin, subtle highlights throughout — for a softer, more natural appearance than chunky pieces
Worth knowing: Face-framing highlights require a good cut to work properly. Your stylist needs to position those pieces exactly at your jawline, so when you add color to them, they frame your face rather than getting lost in the rest of your hair. This is one style where investing in a skilled colorist and stylist pays off immediately.
4. The Tousled Waves With Rooted Balayage
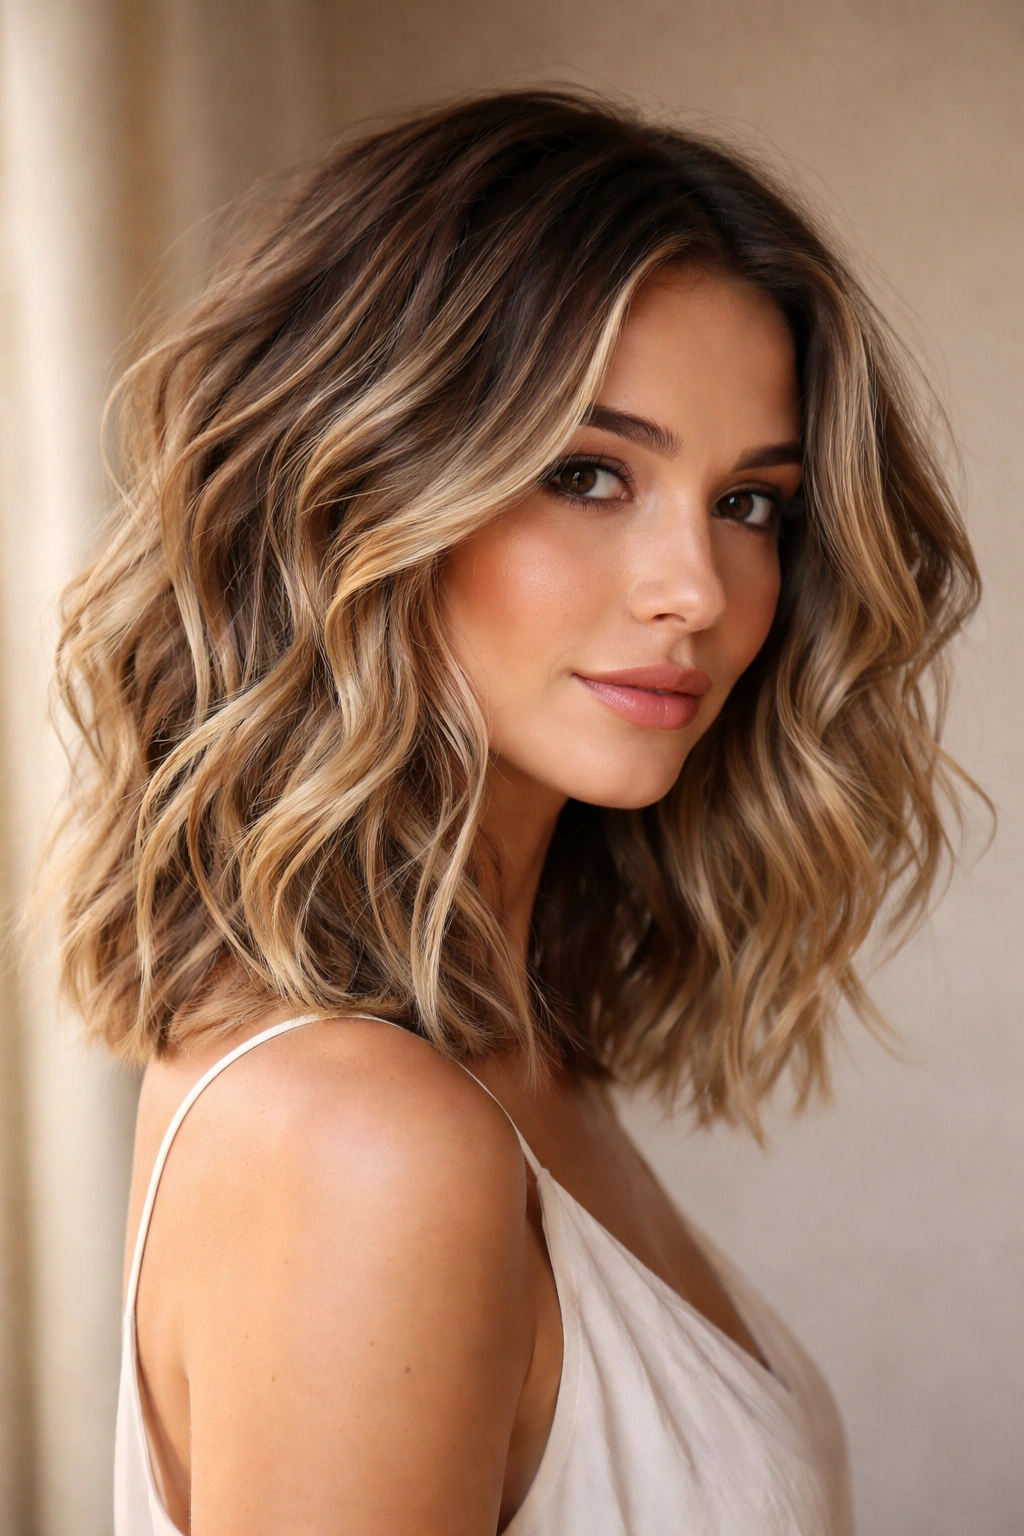
This style is pure movement — think of it as medium-short hair (2 to 4 inches) that’s cut to encourage texture and then styled with deliberate, undone waves. It’s the “just rolled out of bed looking this good” aesthetic that actually takes some intentional styling to achieve.
The Role of Rooted Balayage
Rooted balayage means your natural color is left dark at the roots (usually 1 to 2 inches), and lighter tones fade in gradually through the mid-lengths and ends. This creates an ombré effect that looks intentional and modern. The dark roots prevent the style from looking washed out, and they also mean you can go longer between salon visits without visible regrowth.
Making This Style Work
- Your cut should have lots of texture built into it — ask for choppy, disconnected layers
- Use a curling iron or wand on damp hair to create loose waves (1.5-inch barrel works best for short hair)
- Apply the waves before the rooted balayage takes effect so your colorist can see how light they need to go
- Embrace products — a texturizing spray and sea salt spray are essential for keeping these waves defined
Real talk: This style requires daily styling. If you’re not willing to spend 5-10 minutes with styling tools each morning, you might want something lower-maintenance. The waves don’t naturally stay tousled throughout the day — they need product and heat to maintain that look. But if you’re someone who enjoys a styling routine, this is incredibly rewarding.
5. The Choppy Crop With Strategic Highlights
A choppy crop is a super-short style (1 to 2 inches on top) with intentional texture. Instead of being slicked back or styled one way, the chop has disconnected pieces that stick up and out in different directions. It’s bold, modern, and unapologetically short.
Why Highlights Elevate the Crop
Strategic highlights on a crop prevent it from looking flat or one-dimensional. Each piece catches light differently, which makes the texture and movement more apparent. This is especially important on crops because the style is so short that every element needs to contribute visually.
The Highlighting Approach
- Use a blend of 2-3 complementary tones rather than one flat highlight color
- Highlight random pieces throughout rather than following a specific pattern — this matches the choppy, textured vibe of the cut
- Don’t be shy with placement — short hair can handle bolder color placement because the pieces are small and the overall effect is proportional
- Consider adding some shadow tones or darker pieces blended through for depth and to frame your face
Insider note: Choppy crops work best on people with fairly good hair texture naturally — if your hair is completely straight, this style is harder to maintain because every piece needs to stand out individually. If you have wavy or curly hair, this cut is made for you.
6. The Soft Waves With Lived-In Color
Lived-in color is exactly what it sounds like — it looks like your natural hair, but better. There’s no harsh line between colors, no stark roots, no obvious blonde versus brunette sections. Instead, there’s a seamless blend that looks like you were just in the sun and picked up some natural highlights.
Pairing Lived-In Color With Soft Waves
Soft waves (gentle, romantic wave pattern rather than crispy or defined waves) need color that matches their softness. Lived-in color is perfect because it doesn’t shout — it whispers. The combination feels sophisticated and low-key, which is why it’s become the default request for people who want to upgrade their look without making a statement.
How to Achieve This
- Work with a colorist who understands the concept of “blended dimension” rather than traditional highlighting
- Use a natural base color that complements your skin tone, then add subtle lighter pieces throughout
- Place highlights on the pieces that move most — usually the top and around the face
- Use a gloss or toner after coloring to make everything look soft and cohesive
What to watch for: Lived-in color requires more maintenance than you might think. Because there are no harsh lines, any regrowth is more visible than it would be with traditional balayage. You’ll need color touch-ups every 6-8 weeks, though they’re usually quick appointments. The payoff is that your hair always looks intentional and expensive.
7. The Wavy Undercut With Bold Highlights
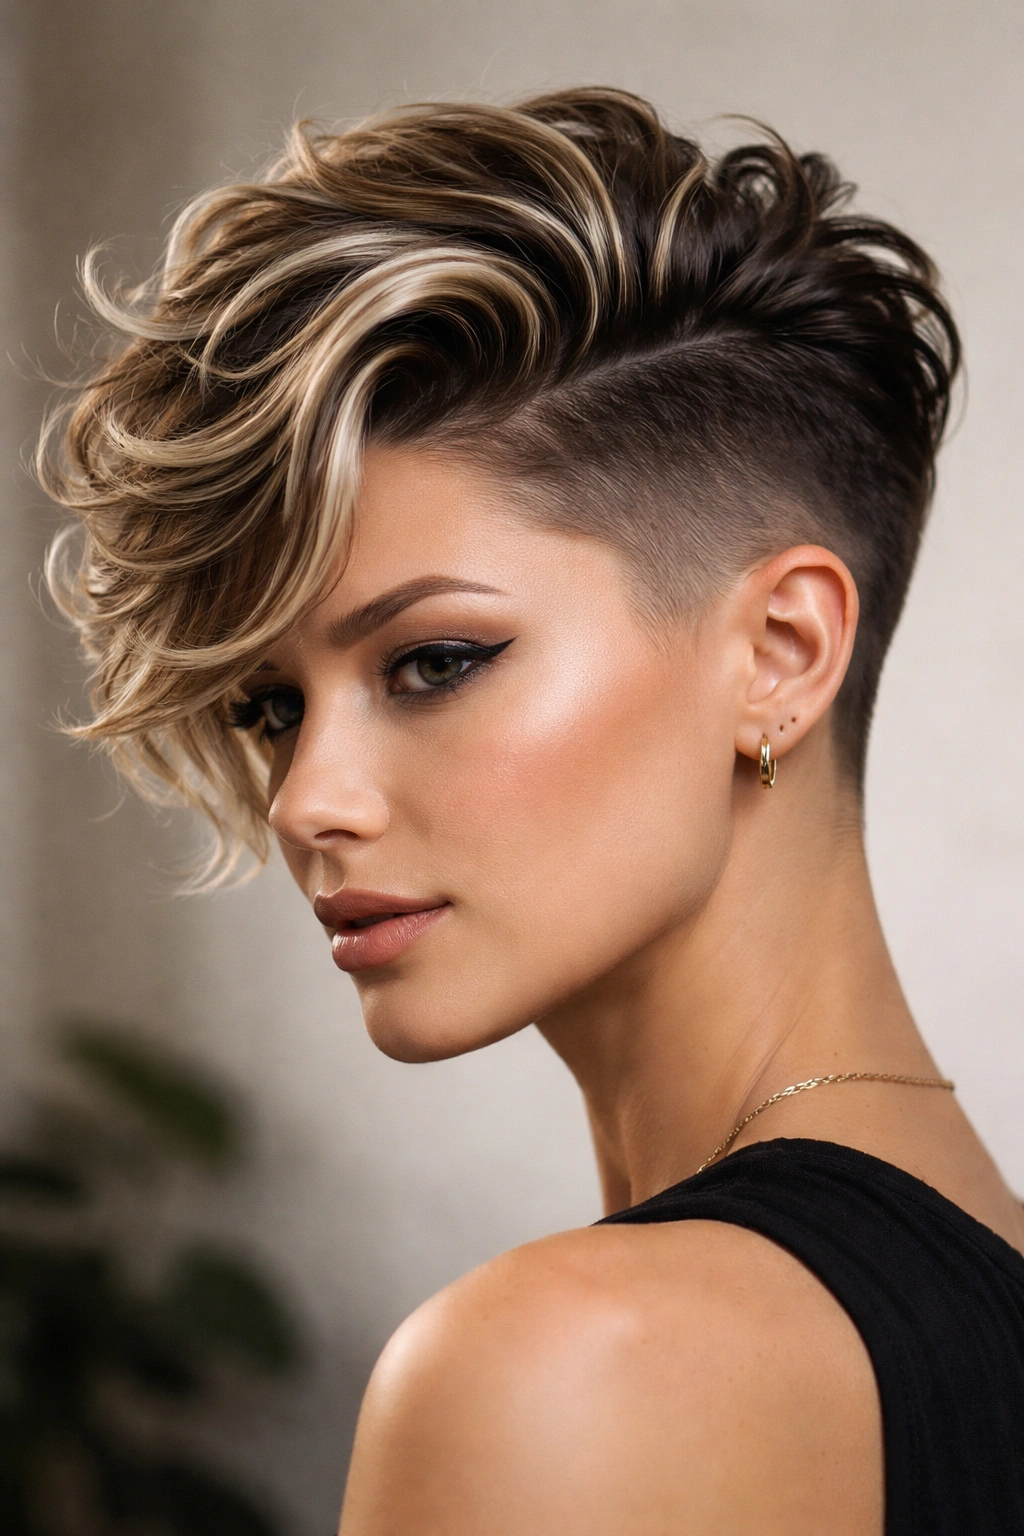
An undercut is when the bottom and sides are cut very short (nearly shaved) while the top is left longer and layered. On wavy hair, this creates dramatic contrast — you have sculpted, defined waves on top and clean lines underneath. Add bold highlights and you’ve got something genuinely striking.
Why Bold Highlights Work Here
The shaved undercut already provides visual contrast, so you can go bolder with your highlight color without it feeling overwhelming. Brighter blondes, contrasting tones, or even fashion colors look intentional on an undercut rather than accidental.
Making Bold Highlights Work
- Make sure your undercut reveals enough of your scalp to show the shaved sections clearly — this is what provides the visual framework for bold color
- Use highlights on the top section where your waves are, not on the shaved parts
- Consider an asymmetrical cut (longer on one side than the other) to increase the drama
- Use cooler-toned highlights if you have fair skin and warm-toned if you have deeper skin
- Wear your hair down or tucked behind your ears to showcase both the cut and the color
Pro tip: Undercuts look best if you’re comfortable with edgy, modern styles. They’re not subtle. They require maintenance too — the shaved parts need touch-ups every 2-3 weeks as your hair grows out. But if you love high-impact style, this is your move.
8. The Textured Lob With Melted Highlights
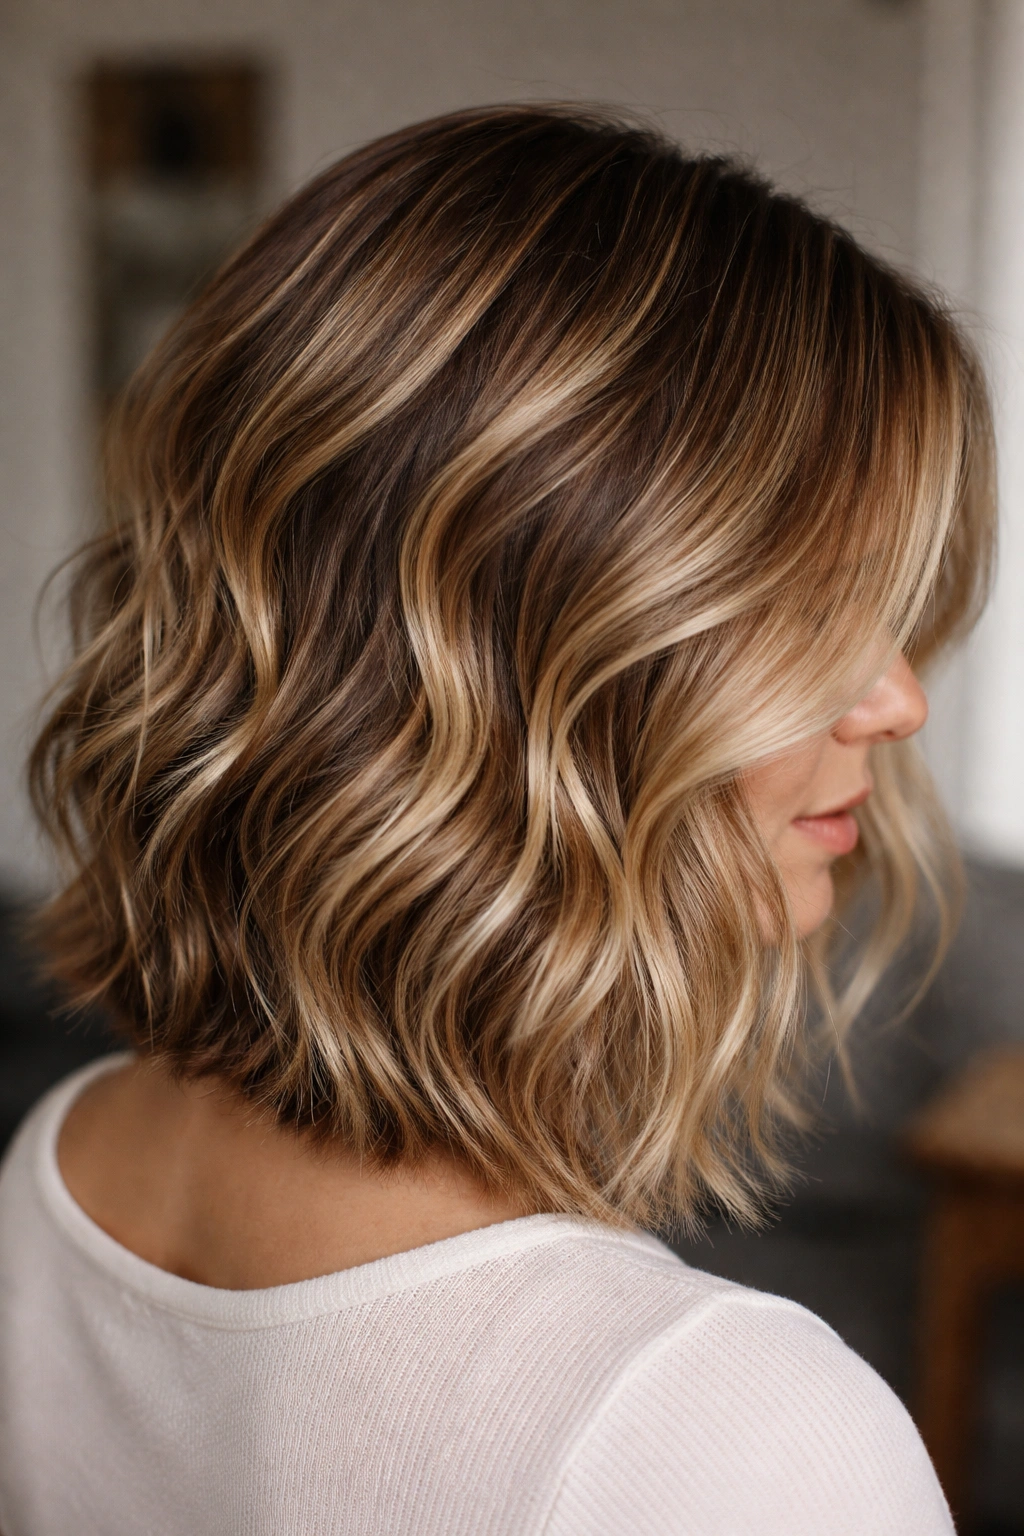
A lob (long bob) on the shorter end — usually 5 to 7 inches — combined with lots of texture, gives you the best of both worlds. You have enough length to style multiple ways, but it’s still short enough to be manageable. Melted highlights (where multiple tones blend seamlessly together) add dimension without harsh lines.
What Melted Highlights Bring to a Textured Lob
Melted highlights work beautifully on longer textured hair because the length gives the color room to blend and shift. As your hair moves, you see different tones catching light. It’s like you have natural dimension built in.
The Cut and Color Combo
- Ask for lots of layers throughout to create texture and movement
- Use at least 2-3 different tones in your highlights for that melted effect
- Blend the colors gradually rather than placing them in specific sections
- The longest pieces (usually at the back) should have the most color to create a frame
Worth knowing: Melted highlights and textured lobs both require professional execution. You can’t really DIY this successfully. But the investment in a skilled stylist and colorist pays back immediately — this is one of those combinations that always photographs beautifully and looks polished without being overdone.
9. The Curly Pixie With Copper Highlights
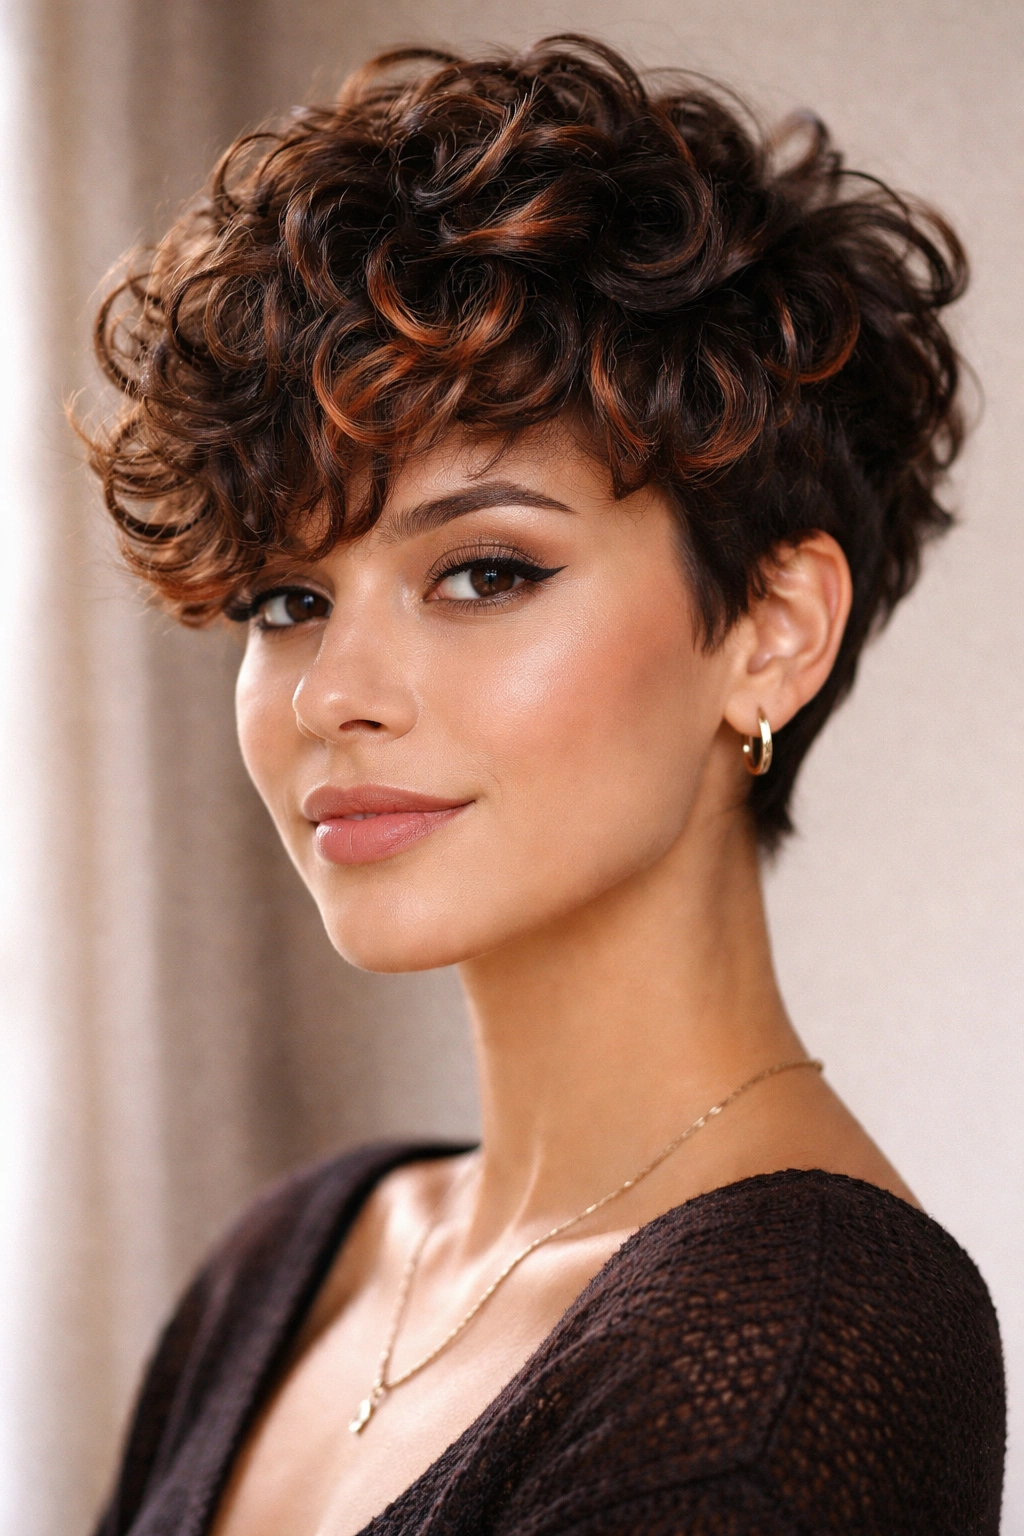
If you have naturally curly hair, a curly pixie is one of the best short cuts you can do. Instead of fighting your curl, you’re working with it — the cut is specifically shaped to let your curls sit properly and define themselves. Copper highlights on curly hair are stunning because they add warmth and catch light in the most gorgeous way.
Why Copper Suits Curly Pixies
Copper tones work on almost every skin tone and are particularly stunning on deeper skin. They add warmth and richness without looking brassy or dated. On curly hair, copper creates this luminous effect as your curls catch the light at different angles.
Making Curly Pixies Shine
- Keep your curl pattern in mind when cutting — your stylist should cut your curls dry so they can see the actual curl shape
- Place copper highlights where your curls have the most definition — usually on top and around the face
- Use a curl-enhancing cream or gel to define your curls, not a smoothing product
- Diffuse-dry rather than blow-drying straight (or don’t blow-dry at all if you can)
Styling tip: Curly pixies need way less maintenance than you’d think. Your natural curl pattern does most of the styling work. You’re mostly just keeping them moisturized and defined with the right products. Add copper highlights and you’ve got a style that looks intentional and expertly done every time you leave the house.
10. The Sideswept Wave With Dimensional Blonde

Sideswept means one side of your hair is longer (sometimes tucked behind your ear, sometimes falling across your face) and the other side is shorter. This asymmetrical cut is incredibly flattering and works well with a wave pattern. Dimensional blonde (multiple tones of blonde, from pale to honey to golden) adds richness and movement.
What Dimensional Blonde Does for This Cut
The asymmetry of the cut means light hits different sides of your hair at different angles. Dimensional blonde emphasizes this by catching light differently on each section. Your face also gets framed differently on each side, and highlights amplify that framing.
How to Style and Maintain It
- Your longer side (usually on top of your face) should get the brightest highlights — this draws attention to your face
- Add some warmer, deeper blonde tones in the back for depth
- Use a curling iron to create waves on both sides, not just the longer side
- Wear it sideswept most of the time, but you can also tuck the longer side back for variety
Real talk: Sideswept styles require regular trims to maintain the asymmetry. Every 4-6 weeks, your stylist needs to recut it to keep the length difference clear. It’s worth it if you love the look, but it’s not a wash-and-go style.
11. The Shaggy Wolf Cut With Caramel Highlights
A wolf cut is basically a shag with added dimension — it’s longer and fluffier than a traditional shag, with lots of layers that create a fluffy, voluminous silhouette. On short hair, a wolf cut means lots of texture, usually 3 to 5 inches on top. Caramel highlights add warmth and richness that makes the texture even more visible.
Why Caramel Highlights Enhance Wolf Cuts
Caramel is a warm-toned honey blonde that bridges light and dark, making it incredibly versatile. On a wolf cut with all its layers and movement, caramel creates dimension that emphasizes each layer without looking overly high-contrast.
Getting the Texture Right
- Your cut should have tons of choppy, disconnected layers throughout
- Layers should be shorter on the sides and back, longer on top
- Caramel highlights should be placed throughout — not just on top, but woven through the whole cut
- Use a texturizing product and your fingers (not a brush) to style
Pro tip: Wolf cuts look best with some natural wave or curl pattern. If you have straight hair, you’ll need to style with a curling iron daily to get the full effect. If you have natural waves or curls, this cut is almost effortless to style.
12. The Tapered Wave With Blonde Babylights
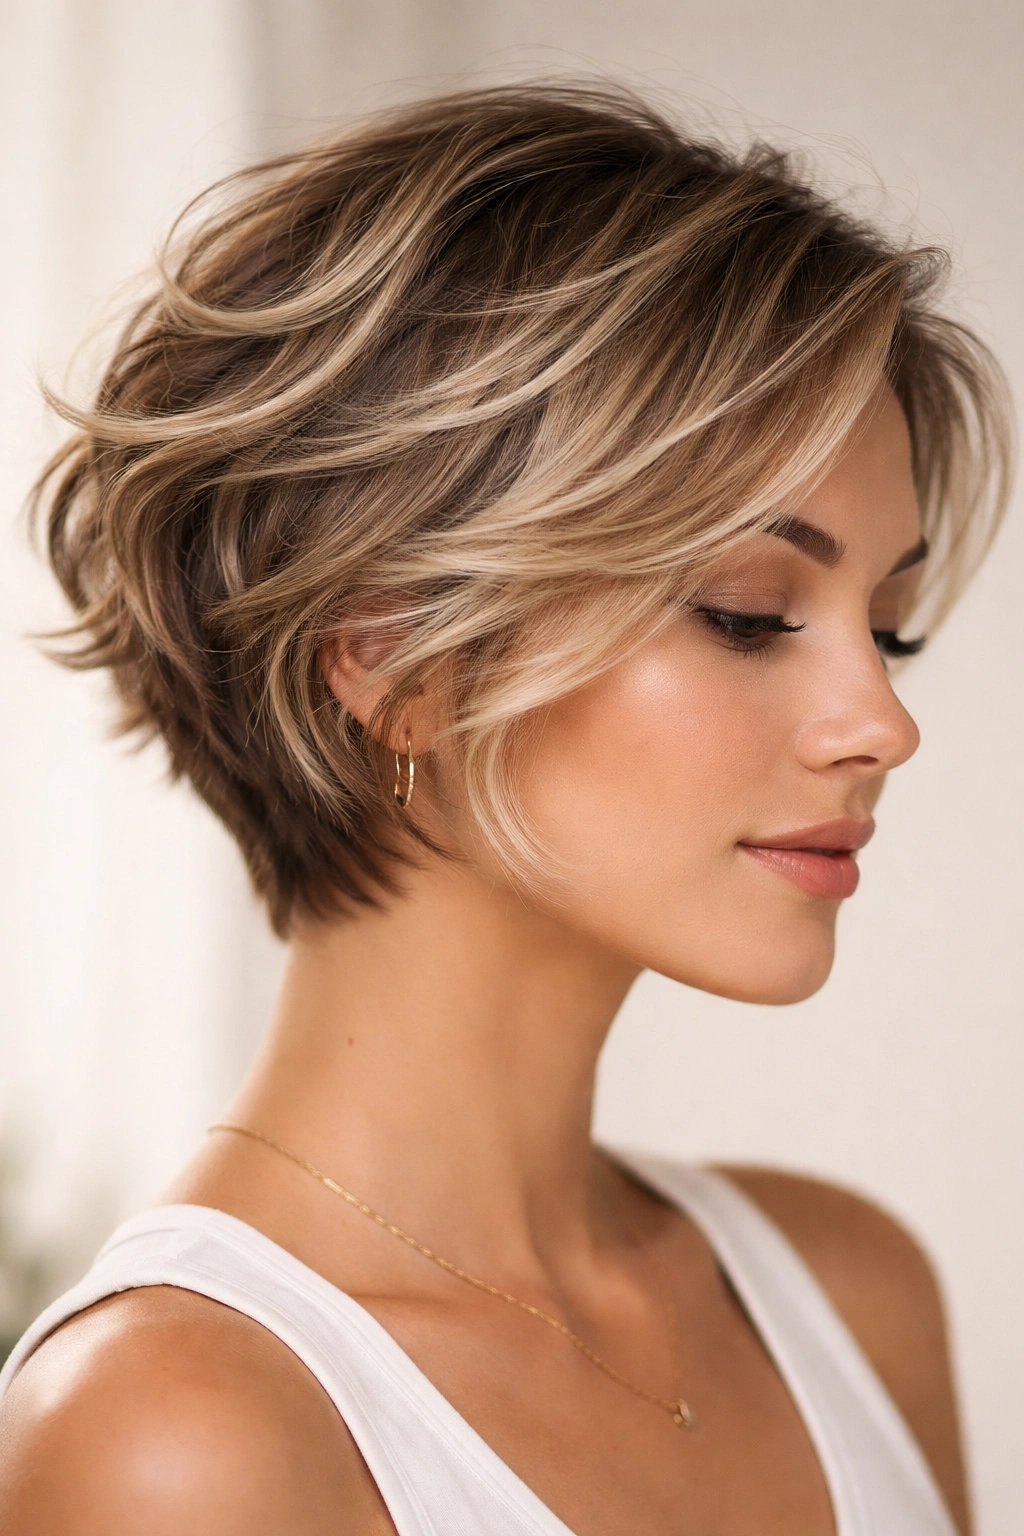
A tapered wave is a textured cut that’s longer on top and shorter on the sides and back, creating a tapered silhouette. It’s got that “grown out in a cute way” vibe without actually being overgrown. Blonde babylights — super-thin, natural-looking highlights — add subtle dimension that looks like you’ve been in the sun.
The Power of Subtle Babylights
Babylights are named for the light, dimensional strands you see in babies’ hair. They’re not noticeable as “highlights” — they just look like your hair got lighter. On a tapered wave, this subtlety is perfect because the movement of the cut is already interesting enough.
Making Babylights Work
- Babylights are thin and scattered throughout rather than concentrated in specific sections
- They work best when they’re within 1-2 shades of your base color
- Ask your stylist to place them throughout the top section and around your face
- They require less frequent touch-ups than traditional highlights because the thin pieces blend with regrowth
Worth knowing: Getting good babylights requires a patient, skilled colorist. They’re time-consuming to apply because each piece is thin and placed individually. But the payoff is a super-natural look that actually improves as your hair grows out, rather than looking worse.
13. The Choppy Texture With Honey Blonde Balayage
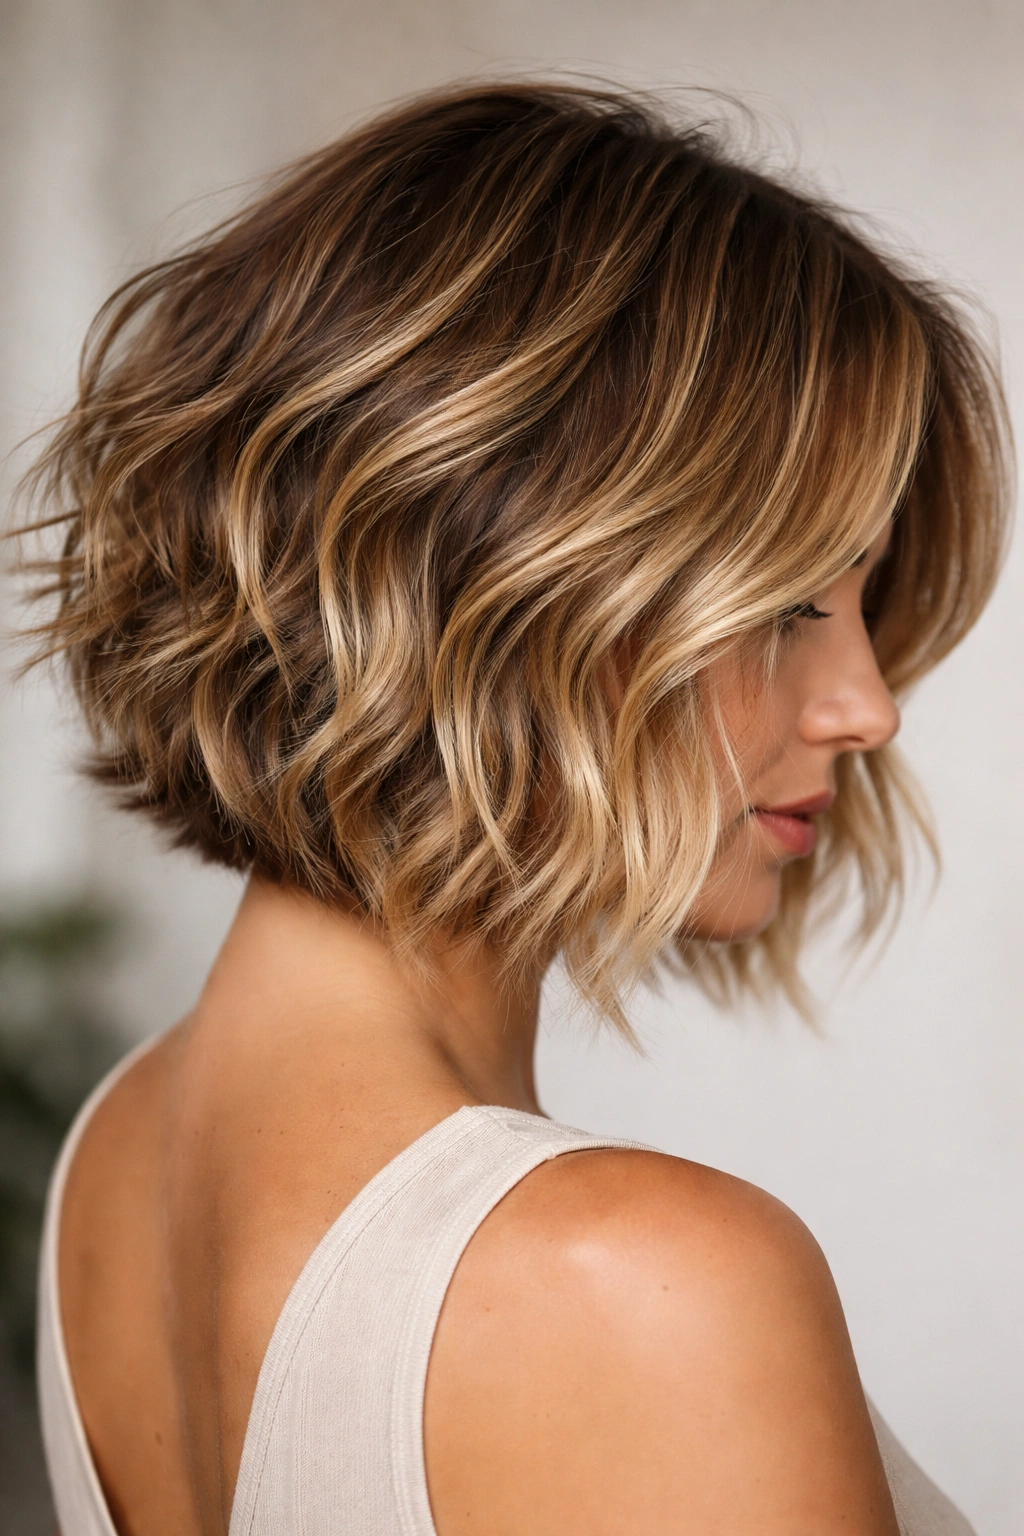
This style is all about texture and movement combined with honey blonde balayage. The cut has lots of short, choppy layers that create a piecey, disconnected look. Honey blonde balayage adds warmth and makes the texture even more apparent because light hits each piece differently.
Why Honey Blonde Balayage Works
Honey blonde is flattering on more skin tones than almost any other blonde shade. It has warmth that feels welcoming rather than cold or icy. On a choppy, textured cut, honey balayage creates a soft-yet-defined look that’s modern and approachable.
Creating Maximum Texture
- Ask for choppy, blunt-edged layers rather than feathered or groomed layers
- Place balayage pieces throughout, concentrating slightly on top and around your face
- Use a texturizing spray or dry shampoo to enhance the piecey look
- Rough-dry your hair with your fingers rather than smoothing it
Real talk: This style requires styling product. A texturizing spray is non-negotiable. Without it, the choppy layers can look messy rather than intentionally textured. But with the right product, you’re basically creating a textured look and letting the cut and color do the work.
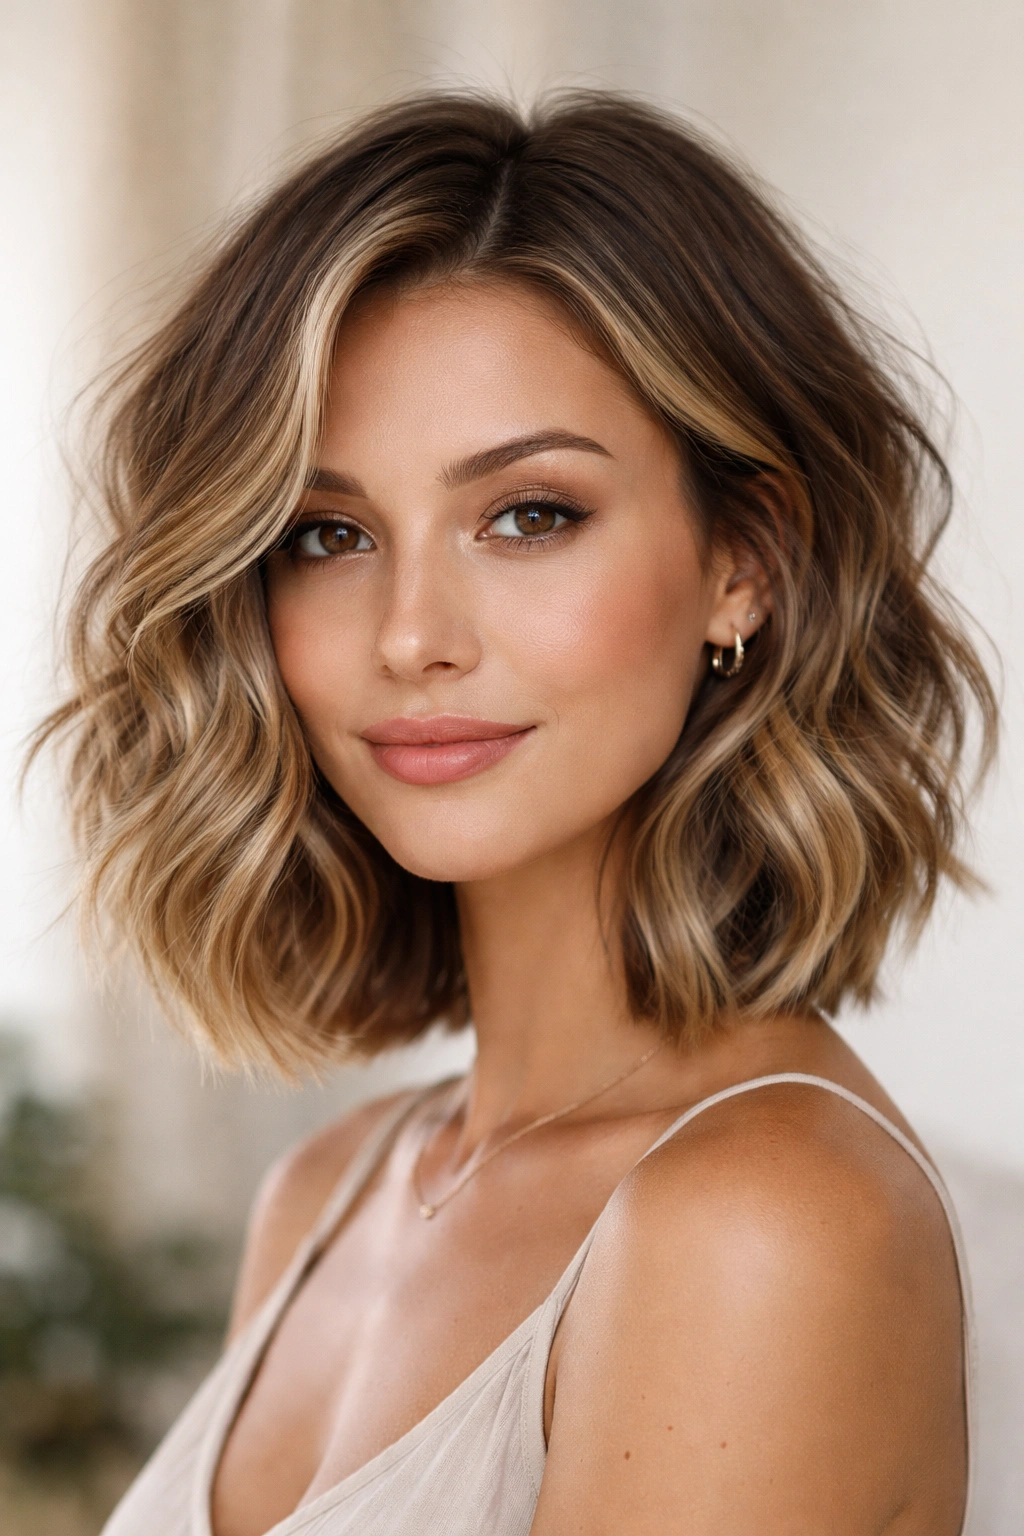
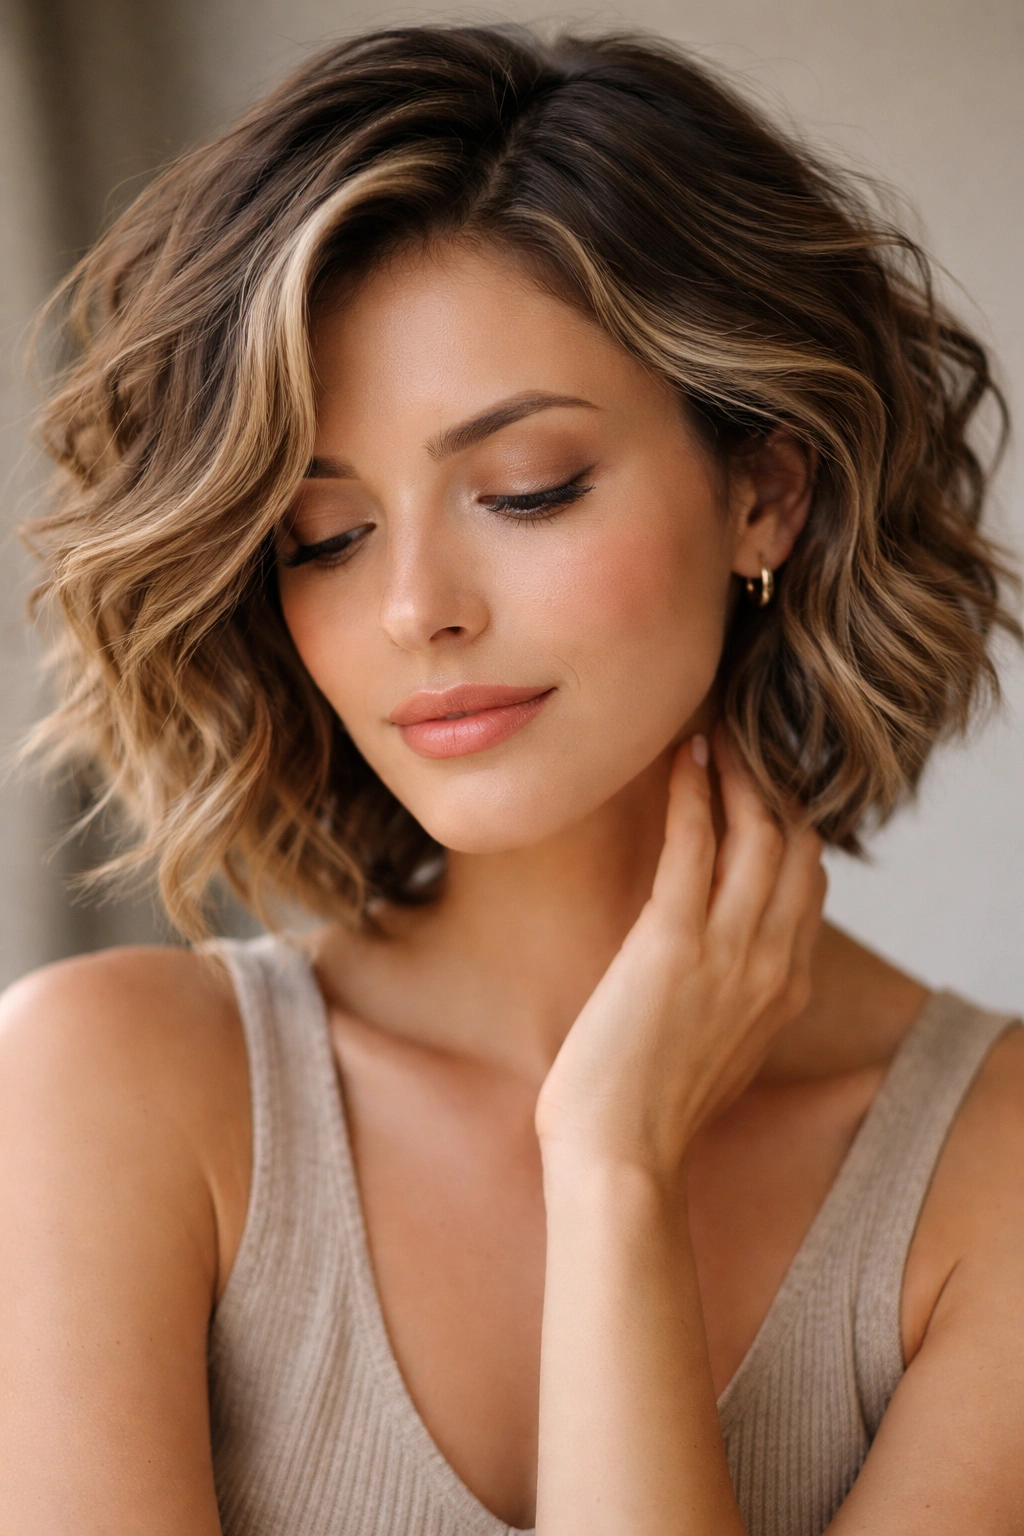
14. The Softly Layered Bob With Bronde Balayage
A softly layered short bob (4 to 6 inches) has layers throughout, but they’re blended and soft rather than choppy and piecey. It’s classic but updated, and it works on almost every face shape and hair type. Bronde balayage combines brown and blonde tones for a rich, multidimensional look that’s less commitment than going full blonde.
What Bronde Brings to the Party
Bronde is a hybrid of brunette and blonde, giving you the best of both colors. On a softly layered bob, bronde creates warmth, richness, and dimension without being as high-maintenance as full blonde. It grows out beautifully because the color melts from darker roots into lighter pieces.
Making Softly Layered Bobs Work
- Your layers should blend together, not be obviously separated pieces
- Bronde balayage should include some lighter pieces around your face and throughout the top
- Add some darker, richer tones in the back for depth and to frame your overall look
- Style with a curling iron to create soft waves — blow-dry straight for a polished look
Styling tip: Softly layered bobs work beautifully styled multiple ways. You can wave them for a romantic look, blow-dry them straight for polish, or rough-dry them for texture. The versatility is part of what makes them so popular.
Final Thoughts
Short wavy hair with highlights is genuinely one of the most rewarding combinations you can choose. You’re getting style impact from both the cut and the color, which means you’re investing once but getting visible results every single day. The highlights make your waves more interesting, and the waves make your highlights more dimensional — they work together.
The most important thing is finding a stylist who understands both cutting for texture and applying color strategically. A great cut without good color is just okay, and great color without a great cut is wasted. When you get both right, you end up with a hairstyle that actually makes you feel more confident walking out of the salon.
Start with the style that feels most aligned with your lifestyle and personality. If you like low-maintenance, go with something like the textured pixie or curly pixie. If you enjoy styling, the sideswept waves or tousled waves give you something to work with. And if you’re somewhere in between, any of the bobs with highlights will give you flexibility and polish without requiring an intense daily routine.
Your short wavy hair is a canvas, and highlights are the paint that brings the whole picture into focus. The right combination of cut, texture, and color isn’t just a hairstyle — it’s something that actually makes you look and feel better.