Thick wavy hair comes with a glorious problem: you’ve got major volume and texture to work with, but not every updo style translates beautifully to your hair type. Generic updos from straight-hair tutorials often fall flat or feel lumpy when you try them, because they don’t account for the natural movement, density, and grip that your waves naturally provide. The truth is, your hair type is actually an advantage for creating stunning, long-lasting updos — you just need to know which styles play to your strengths instead of fighting against them.
The best updos for thick wavy hair lean into texture rather than trying to smooth it flat. They use your natural waves as a built-in styling tool, they hold beautifully without requiring a dozen bobby pins, and they actually look better as the day goes on and your waves relax slightly. These aren’t the tight, polished styles you’ll see on straight-haired celebrities — they’re the kind of updos that look intentional, romantic, and effortlessly put-together.
What makes an updo work for thick wavy hair is understanding a few core principles: waves anchor pins more securely than smooth hair, so you can create looser, more voluminous shapes; textured bases grip better, which means you can get away with fewer styling products; and movement is your friend. An updo that might look messy or unfinished on straight hair often looks perfectly intentional on waves because the texture reads as deliberate texture rather than disheveled.
Whether you’re styling for a wedding, a professional setting, a casual weekend, or just a day when you want your hair off your neck, you’ll find options here that actually work with your hair rather than against it.
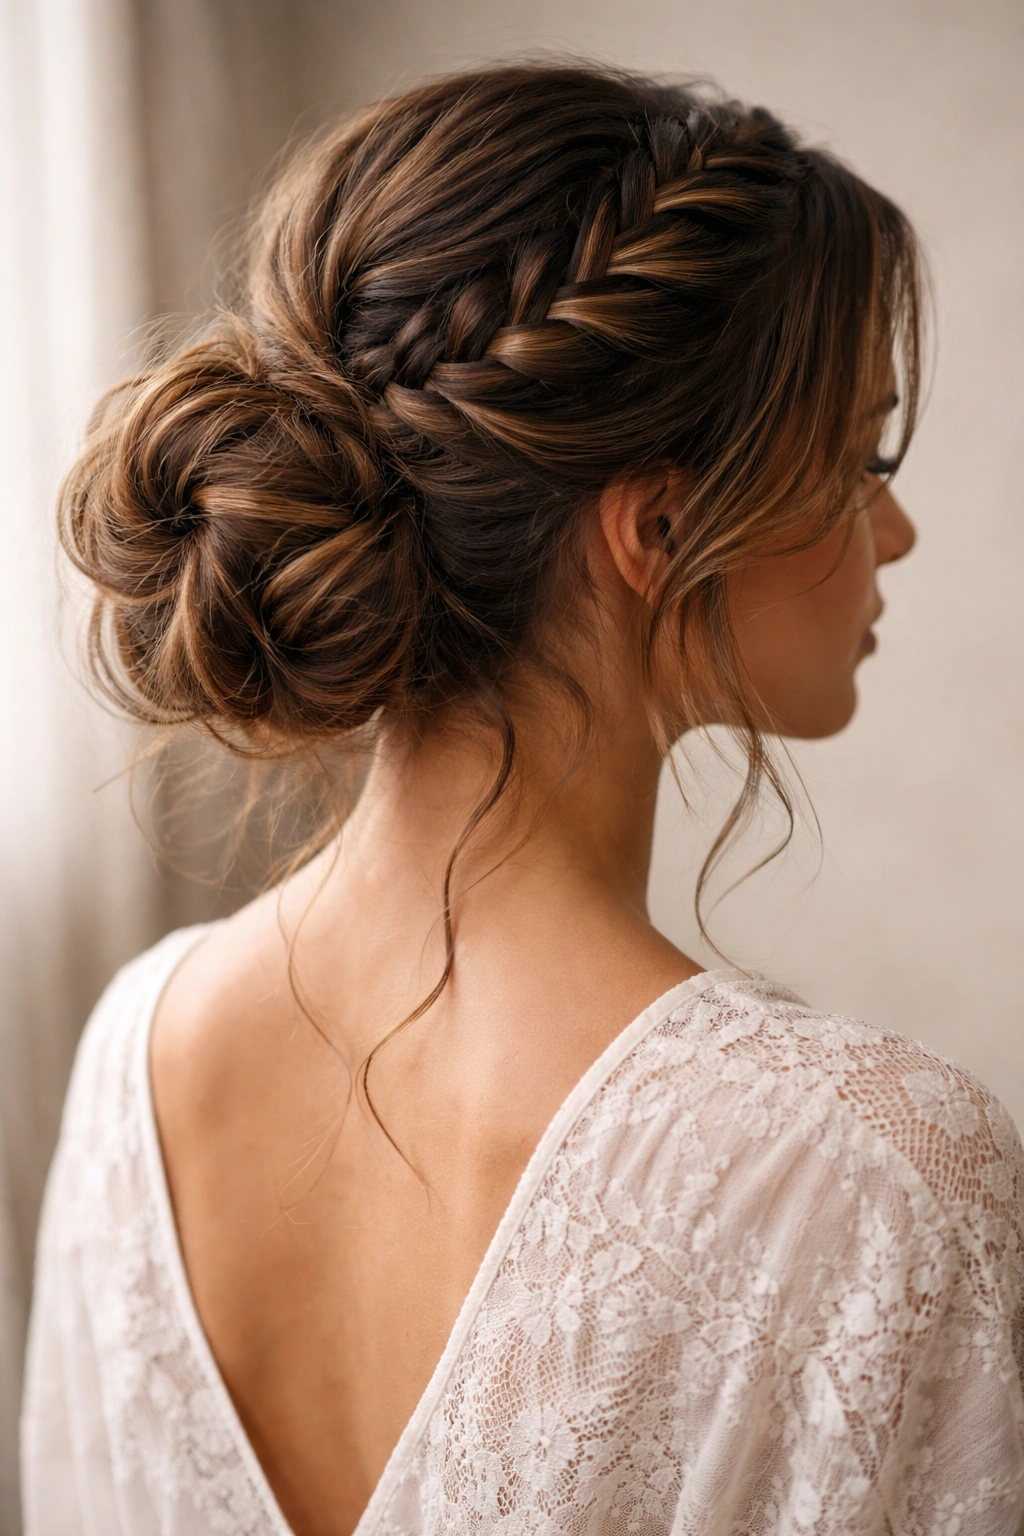
1. The Twisted Crown Bun

This updo works beautifully with thick wavy hair because the twists create natural anchor points that keep everything secure without excessive bobby pins. You’re essentially wrapping two or three twists around your head and tucking the ends into a bun at the crown, letting your waves peek through for soft, romantic texture. The result is a style that reads as both polished and undone — perfect for days when you want something that looks intentional but not overly fussy.
Why Twists Create the Perfect Hold
The magic of twisted styles on wavy hair lies in how texture grips texture. Your natural waves catch on each other as you twist, creating natural tension that holds the twist in place without needing to pull tightly. This means you can keep twists loose and romantic-looking while still having a secure base. Tight, slicked-back twists often look harsh on thick wavy hair, but loose, slightly textured twists look effortless and modern. The waves actually do the work of holding the style instead of your hands having to fight the hair.
How to Create This Look
- Start with wavy hair that has some texture — day-two waves or waves you’ve enhanced with a curling iron work perfectly
- Separate a section from one side of your head (about 2 inches wide) and twist it loosely while moving toward the back of your head, gathering hair as you go
- Create a second twist on the opposite side, mirroring the first, and twist it toward the same direction
- Gather both twists at the crown and loosely roll them together, securing with bobby pins as you go
- Pull out a few face-framing pieces and let small waves escape from the bun for a romantic finish
- Use a light texture spray or dry shampoo to enhance grip if needed, but avoid heavy pomades that will weigh down your waves
Pro tip: This style actually looks better when it’s slightly undone. Leave some flyaways, let your waves break free, and skip the smoothing products entirely.
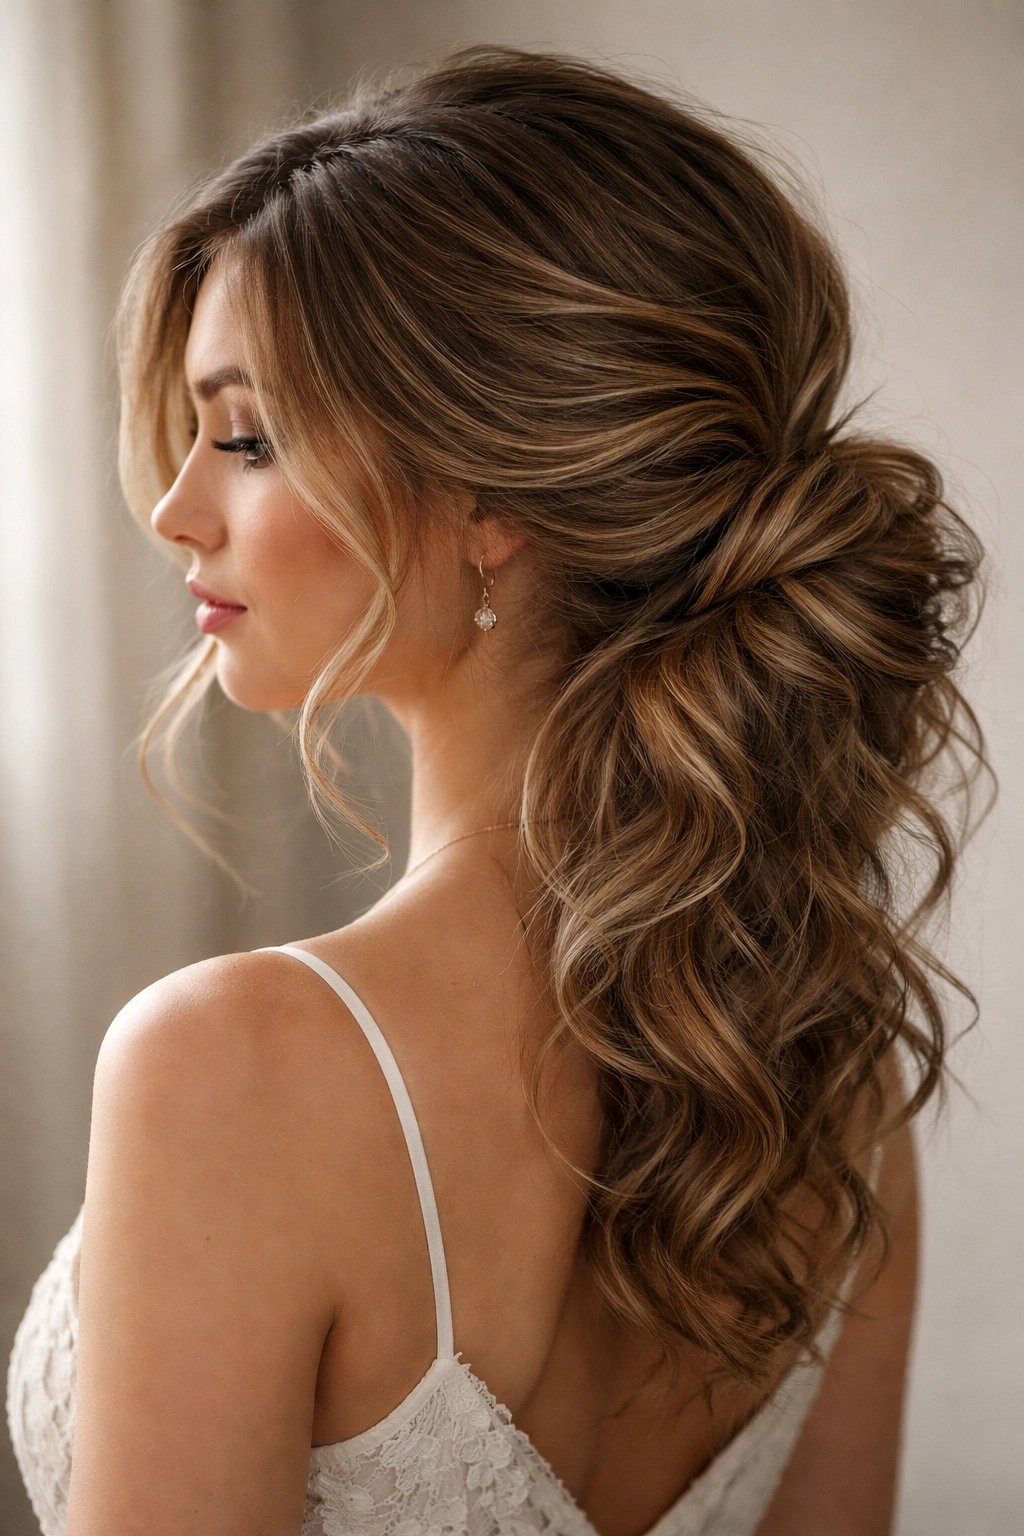
2. The Textured High Ponytail Updo

A high ponytail works wonderfully on thick wavy hair because the volume naturally sits at the crown, creating a lifted, youthful effect without any styling effort. The key difference between a basic high pony and an actual updo is how you finish the tail: instead of leaving it down, you wrap it into a loose bun, braid it, or coil it, creating a polished look that’s still casual enough for everyday wear. This style is particularly flattering because your natural waves add dimension to what could otherwise be a flat, sleek style.
How Texture Changes a High Pony
On straight hair, a high ponytail can look severely pulled or overly athletic. On thick wavy hair, the same technique creates a style that has movement, shape, and effortless appeal. Your waves naturally create separation and texture in the ponytail, so it never looks like a boring, uniform rope of hair. This means you can wear the style loose and relaxed rather than tight and polished, which tends to look better on thicker hair types anyway. The waves do the visual heavy lifting.
Styling Steps for Maximum Impact
- Flip your head forward and gather hair into a high ponytail at the crown, keeping the gather slightly loose rather than yanking hair back tightly
- Smooth the sides gently with your hands rather than a comb — you want to keep texture intact rather than flattening everything
- Secure with a clear elastic that won’t snap your thick hair or leave a dent
- Wrap a small section of hair from the ponytail around the base to cover the elastic, pinning it under the ponytail
- Loosely braid the ponytail or twist it and coil it into a bun, securing gently with bobby pins
- Tease slightly at the base of the crown for added lift, and pull out a few waves around the face
- Use a light mist of texture spray to enhance the wave pattern and set everything in place
Pro tip: Roughing up the ponytail base with a teasing brush before you start styling gives you way more grip and makes the style last longer without tightening it.
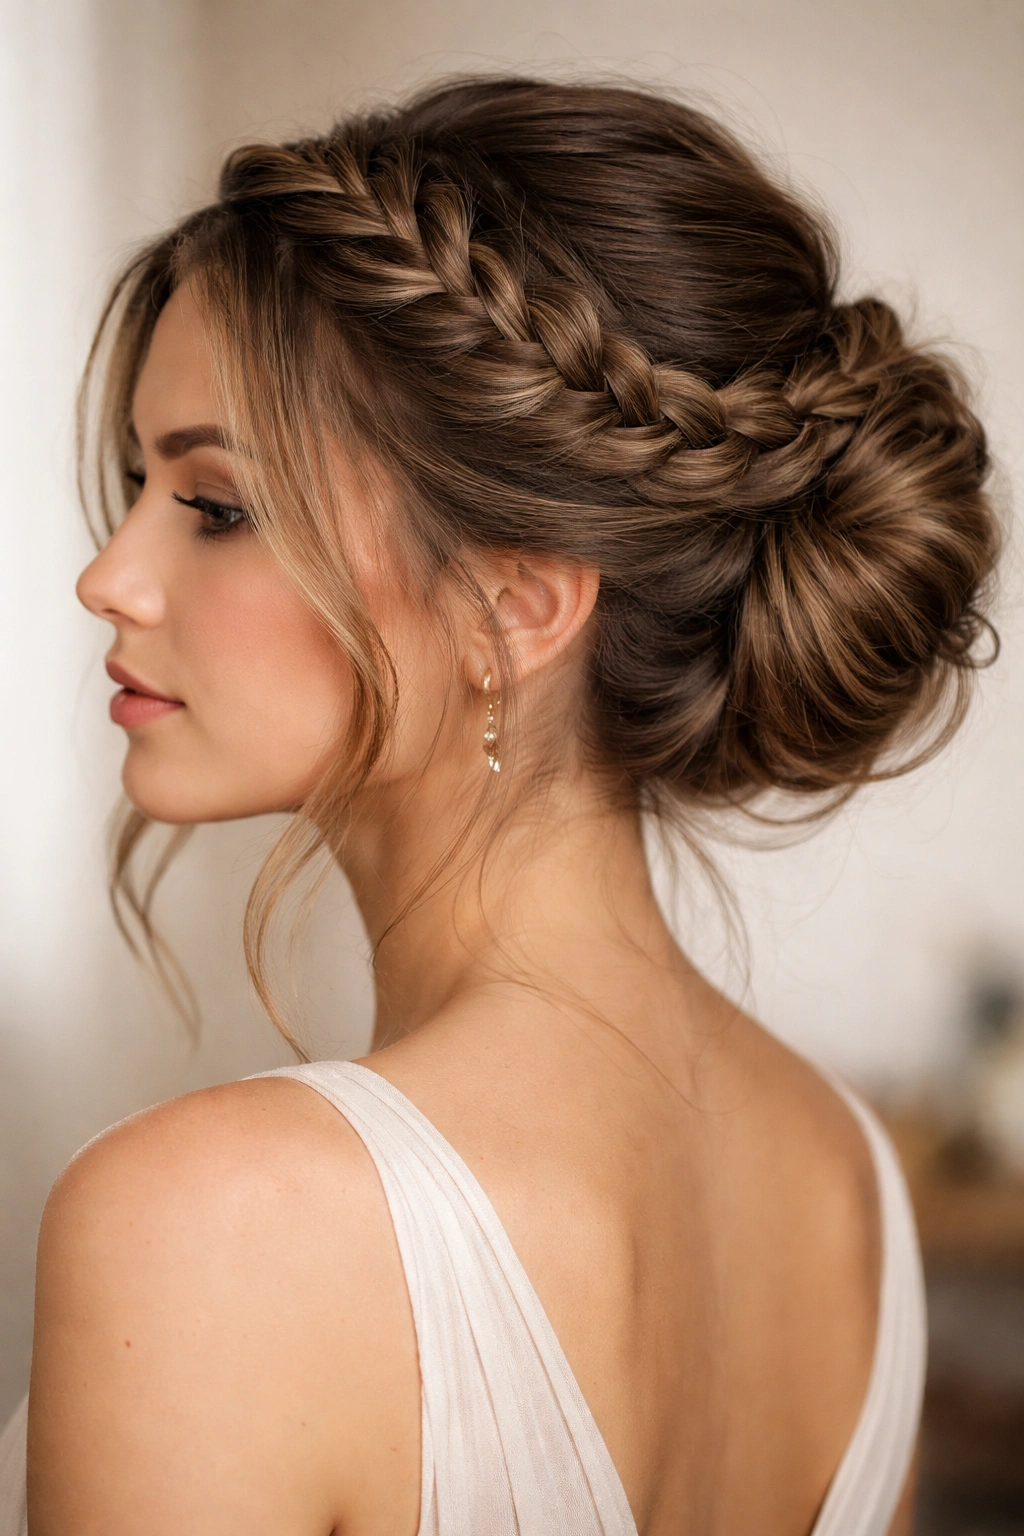
3. The Braided Wrap Around
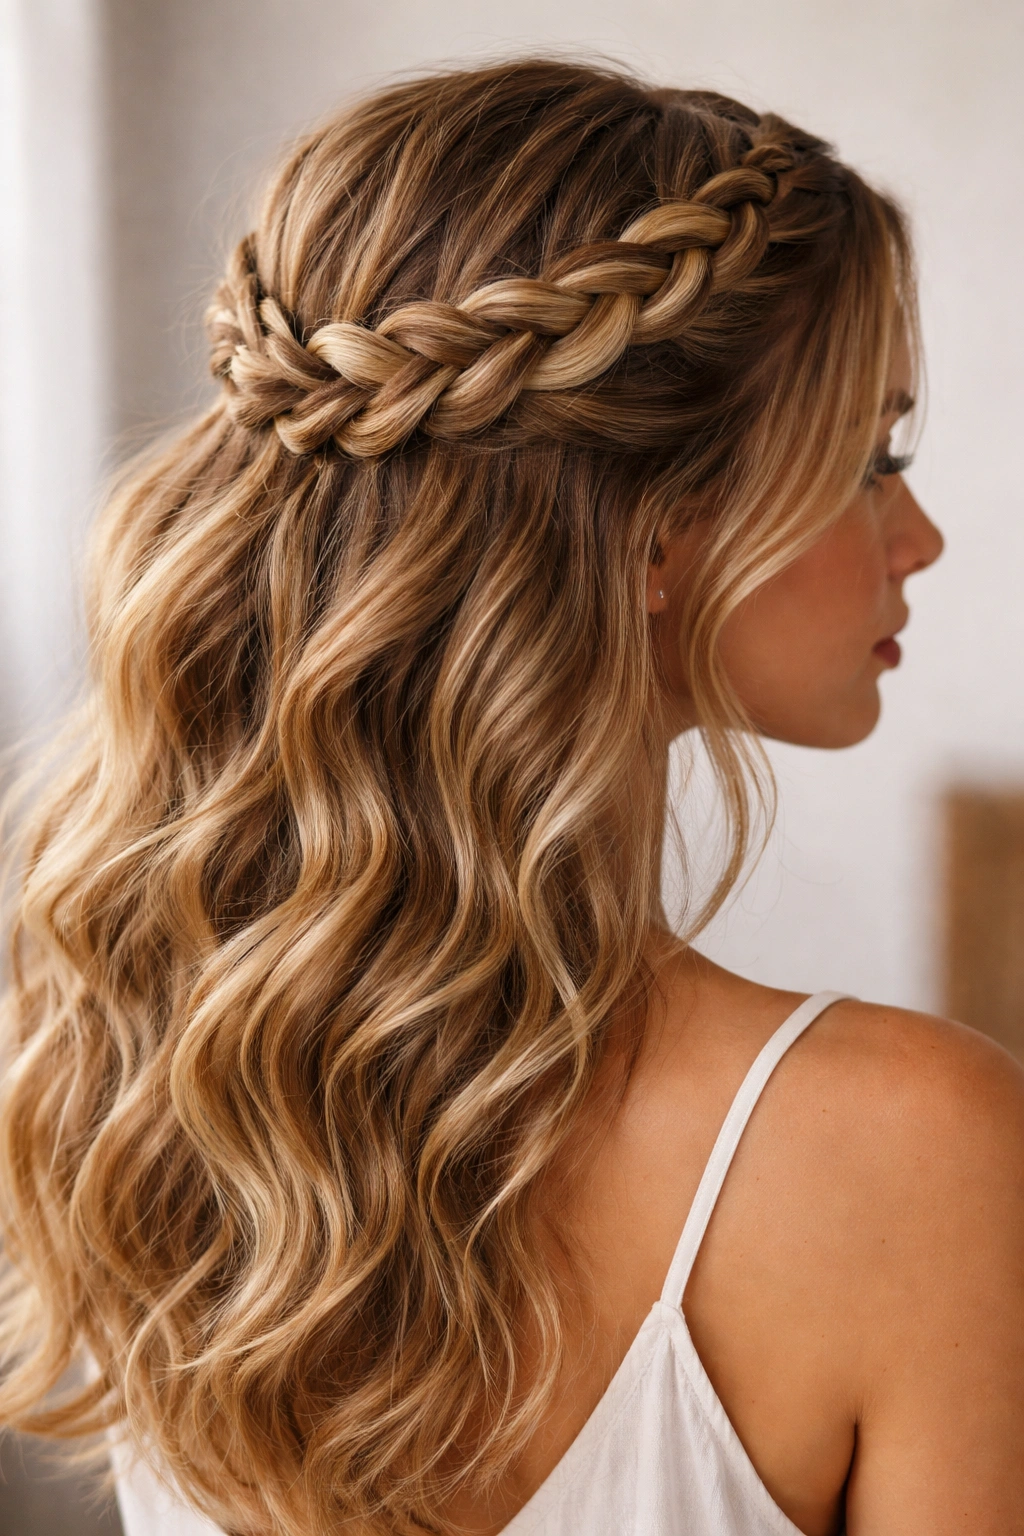
This elegant updo involves creating one or two Dutch braids (braids that sit on top of the hair rather than under it) that wrap around your head like a crown, pinned into place at the back. The beauty of this style with thick wavy hair is that the braid automatically picks up dimension from your waves, so it never looks like a flat, sterile French braid. It works equally well for everyday styling or special occasions, and your waves naturally peek through the braid for a romantic, textured finish.
Why Dutch Braids Suit Wavy Texture
Dutch braids have more visual texture than French braids because they sit on top of the hair rather than embedding within it. When your wavy hair is already textured, this creates a gorgeous layered effect where the braid itself becomes a design element rather than just a containment strategy. Your waves weave through and around the braid path, adding volume and movement. This means you can create a style that looks intentionally textured and romantic rather than tight and controlled. The braid doesn’t flatten your hair — it enhances it.
How to Execute a Braided Crown
- Start with your natural waves or enhance them slightly with a curling iron
- Begin a loose Dutch braid on one side of your head at about ear height, braiding toward the back of your head and gathering hair as you go
- Continue the braid all the way around to the opposite ear, creating a crown effect
- Pin the braid securely at the back with bobby pins placed underneath the braid so they’re hidden
- Gently pull the braid slightly wider at the back to create more texture and volume
- Release any pieces that want to come free around your face — these add to the romantic vibe
- Mist the entire updo with a light texture spray to hold everything and enhance your natural waves
Worth knowing: You can do this with one braid for a sleeker look or two braids for maximum romance and texture. Two braids work particularly well if you have very thick hair, since one braid won’t contain the volume as nicely.
4. The Voluminous Low Chignon
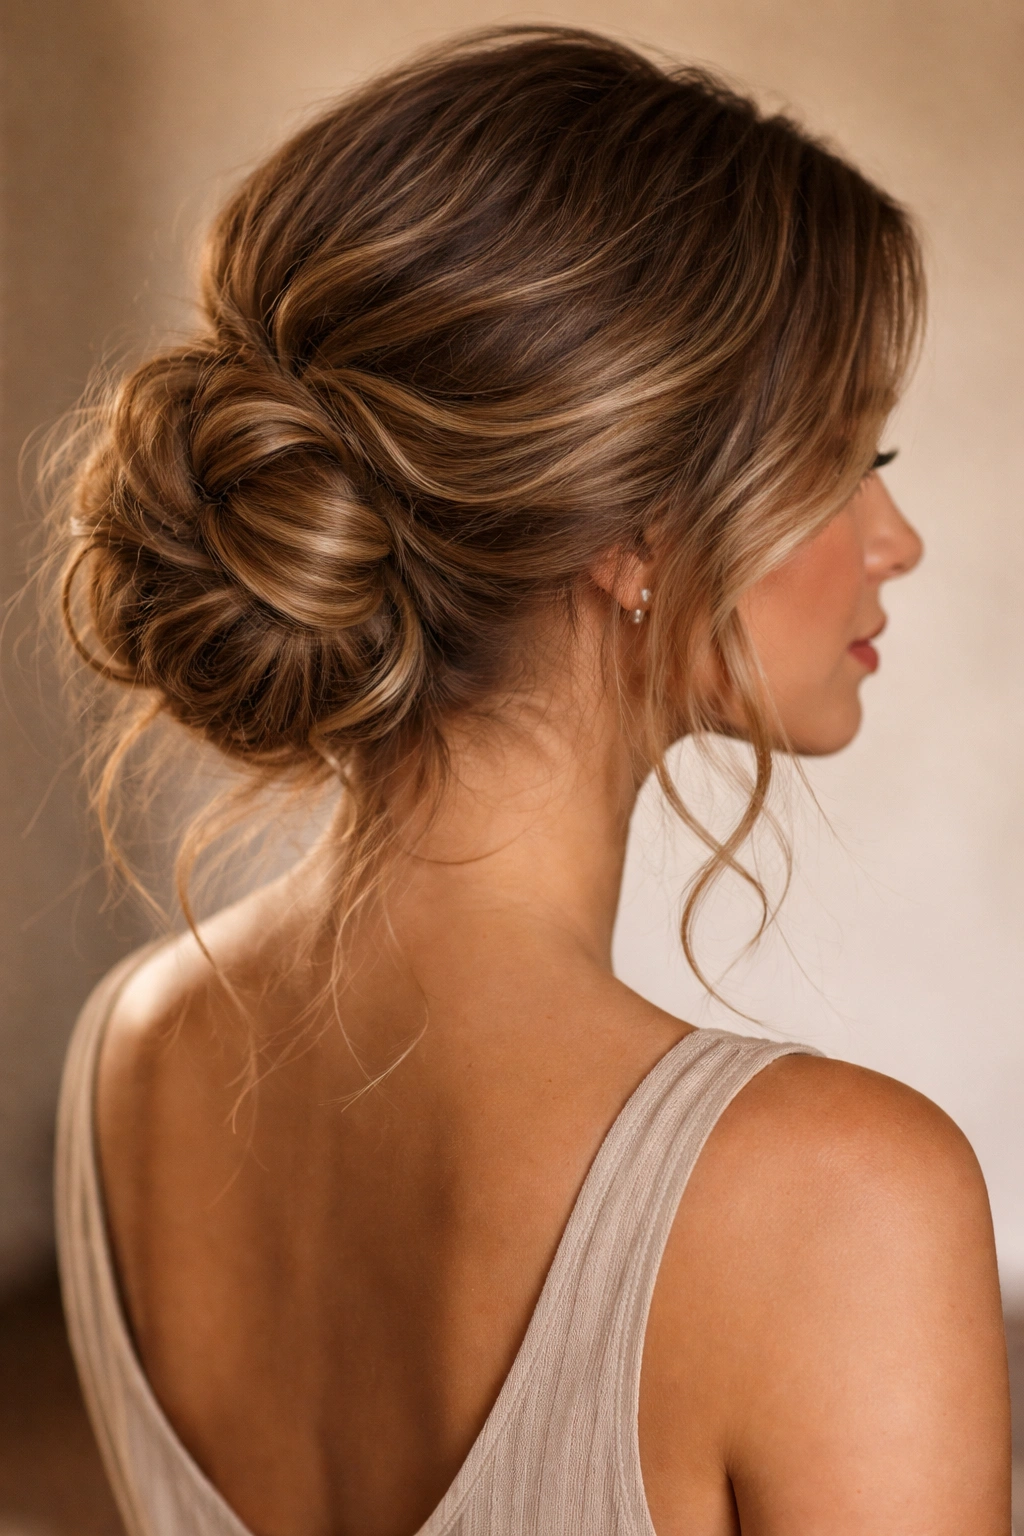
A chignon is essentially a gathered bun at the nape of your neck, but when you style it for thick wavy hair, it becomes something much more dimensional and romantic than the tight, sleek versions you might see on straight hair. The key is keeping the gather intentionally loose, letting waves break free throughout, and pinning in a way that creates volume rather than flattening everything. This style is ideal when you want something polished enough for professional settings but still relaxed enough for everyday wear.
What Makes a Chignon Work on Wavy Hair
A low chignon on wavy hair naturally has height and dimension because the waves don’t compress the way straight hair does. When you gather your thick wavy hair into a loose bunch at the nape, the waves create pockets of texture and separation that prevent the whole thing from looking flat or heavy. This is actually the opposite of what happens with straight hair, where you have to work harder to create volume and shape. Your hair type does this automatically. The key is trusting that looseness and letting the waves show.
Building Your Low Chignon
- Start with your natural waves or create them with a curling iron or wave-enhancing product
- Flip your head upside down and gather hair loosely at the nape of your neck, collecting it between your hands rather than combing it back tightly
- Flip your head back up and secure the gathered section with bobby pins in an X pattern to distribute weight evenly
- Gently pull and separate the gathered section to create volume and texture, letting small pieces escape around the nape
- Pull a few face-framing pieces out and arrange them to soften the style
- Tease gently at the base of the chignon for more lift and dimension
- Use a flexible hold spray to set everything while maintaining movement
Pro tip: Don’t aim for a perfectly smooth, contained chignon. The best versions on thick wavy hair look slightly undone, with texture showing through and waves breaking free. That’s intentional, and it looks significantly better than trying to contain everything perfectly.
5. The Half-Up Half-Down with Waves
This style bridges the gap between wearing your hair fully down and pulling it completely up, making it ideal when you want your hair off your face without committing to a full updo. You’re essentially gathering the top portion of your hair and securing it at the back of your head, leaving the bottom half down in full waves. With thick wavy hair, this style is particularly effective because the top section contains just enough volume to feel secure, while the bottom section has room to wave freely without getting caught under the weight of more hair.
How the Half-Up Style Flatters Thick Waves
The half-up look works beautifully on thick wavy hair because you’re not trying to contain all your volume in one spot. Instead, you’re strategically using the top half to frame your face and manage the thickest parts of your hair, while allowing the waves in the bottom half to move freely. This creates a balanced look that showcases your texture without overwhelming your face. The style is naturally flattering because it opens up your face with the half-up section while giving your full wave texture room to shine below.
Styling Steps for a Half-Up Half-Down Look
- Start with your natural waves or enhance them with a curling iron or sea salt spray
- Gather the top half of your hair (everything above ear level) into a loose bunch at the crown
- Secure with a bobby pin or clear elastic, positioning it just slightly forward of where you’d put a full ponytail
- Gently tease the gathered section to add volume at the crown
- Take a small section from the gathered hair and wrap it around the base to cover any elastic, pinning underneath
- Pull out face-framing pieces from the gathered section and release them into your waves
- Arrange the bottom waves so they cascade freely, and mist the entire style with texture spray
- For extra hold, bobby pin the gathered section at the crown using a crisscross pattern hidden under the top layer
Worth knowing: Twisting or lightly braiding the gathered top section before securing it adds texture and makes the style look more intentional and polished.
6. The Messy Twisted Updo
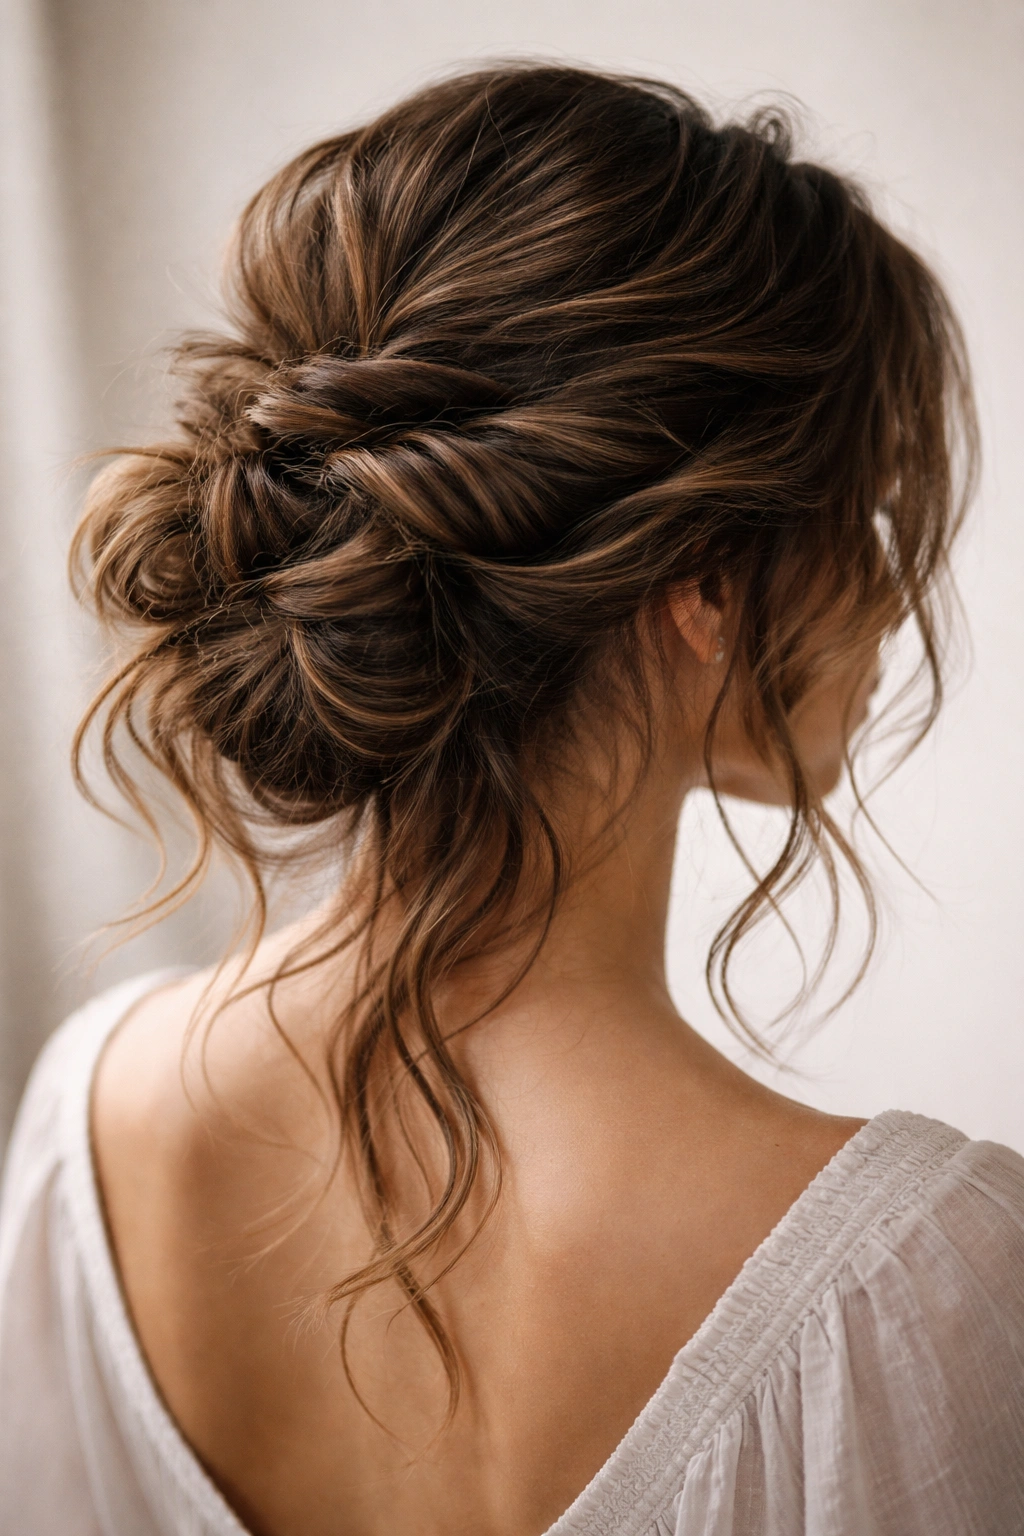
This is the updo for days when you want maximum impact with minimum effort. You’re creating multiple loose twists throughout your hair and pinning them into a relaxed shape at the back of your head, intentionally leaving pieces out and letting your waves show through. The “messy” aspect isn’t a failure — it’s the entire design. This style works beautifully on thick wavy hair because the messiness actually looks intentional when your hair has inherent texture. What might look disorganized on straight hair looks perfectly planned on waves.
Why Messy Works Better on Textured Hair
Messy updos need texture to work. On straight hair, they risk looking actually messy rather than intentionally undone. On thick wavy hair, the texture immediately reads as deliberate because that’s what your hair naturally does. You can leave flyaways, let pieces escape, and not worry about everything looking polished, and it will actually look more stylish than if you tried to control every strand. This is one of the only updos where embracing the chaos of thick wavy hair is exactly the right approach.
Creating a Messy Twisted Updo
- Work with your natural waves or enhance them with curl-enhancing products or a curling iron
- Starting at the front of your head, create a loose twist and pin it at the back of your crown
- Create a second twist from another section and pin it nearby, overlapping with the first twist slightly
- Add a third twist from the opposite side of your head, pinning it to intersect with the previous twists
- Let some twists be tighter and some looser for visual interest — uniformity looks too polished
- Purposefully leave face-framing pieces out before twisting them
- Gently tease around the pinned twists to create volume and soften any defined shapes
- Allow small waves to escape and frame your face, and don’t tuck in every flyaway
- Mist everything with a flexible-hold texture spray that will move with your waves
Pro tip: The secret to a great messy updo is actually doing it pretty deliberately, then making it look accidental. Create twists with intention, place them strategically, then pull and separate to dishevel it in all the right ways.
7. The Dutch Braided Bun
Combine the hold and elegance of Dutch braiding with the finish of a bun, and you’ve got an updo that’s secure, stunning, and uniquely flattering on thick wavy hair. You create a Dutch braid from your hairline back to the crown, then gather everything into a bun and secure it. The braid becomes the visual focal point while the bun contains all your volume, creating a style that’s both intricate and practical. This works equally well for weddings, professional settings, or just a day when you want something that will last all day without falling apart.
How a Dutch Braid Anchors a Bun
The advantage of starting with a Dutch braid before gathering into a bun is that the braid creates anchor points throughout the back of your head. Your thick wavy hair threads through these anchor points naturally, which means the final bun doesn’t need to be yanked tight to stay secure. This is crucial for thick hair, which can actually feel uncomfortable when pulled very tightly. The braid does the heavy lifting in terms of security, allowing you to keep the bun itself loose and relaxed. Your waves remain full and dimensional instead of flattened by tension.
Building a Dutch Braided Bun
- Start with textured waves that have some grip — either natural waves or waves you’ve created with styling tools
- Begin a Dutch braid at your hairline (the very front of your head), braiding straight back toward the crown
- Add hair as you braid, incorporating all the hair from your hairline backward
- Continue until you reach the crown, then gather all remaining hair (both from the braid and the unbraided hair at the back) into a loose bunch
- Secure the bunch with bobby pins positioned at the base, distributing pins in an X or Y pattern
- Loosely roll the gathered hair into a bun shape, securing with additional bobby pins placed underneath so they’re hidden
- Gently pull the braid slightly wider in places to increase texture and volume
- Tease gently around the bun base for added dimension
- Release a few pieces around your face and allow some waves to escape from the bun
Worth knowing: The beauty of this style is that it looks much more intricate than it actually is. A single Dutch braid plus a simple bun reads as a complicated, special-occasion updo.
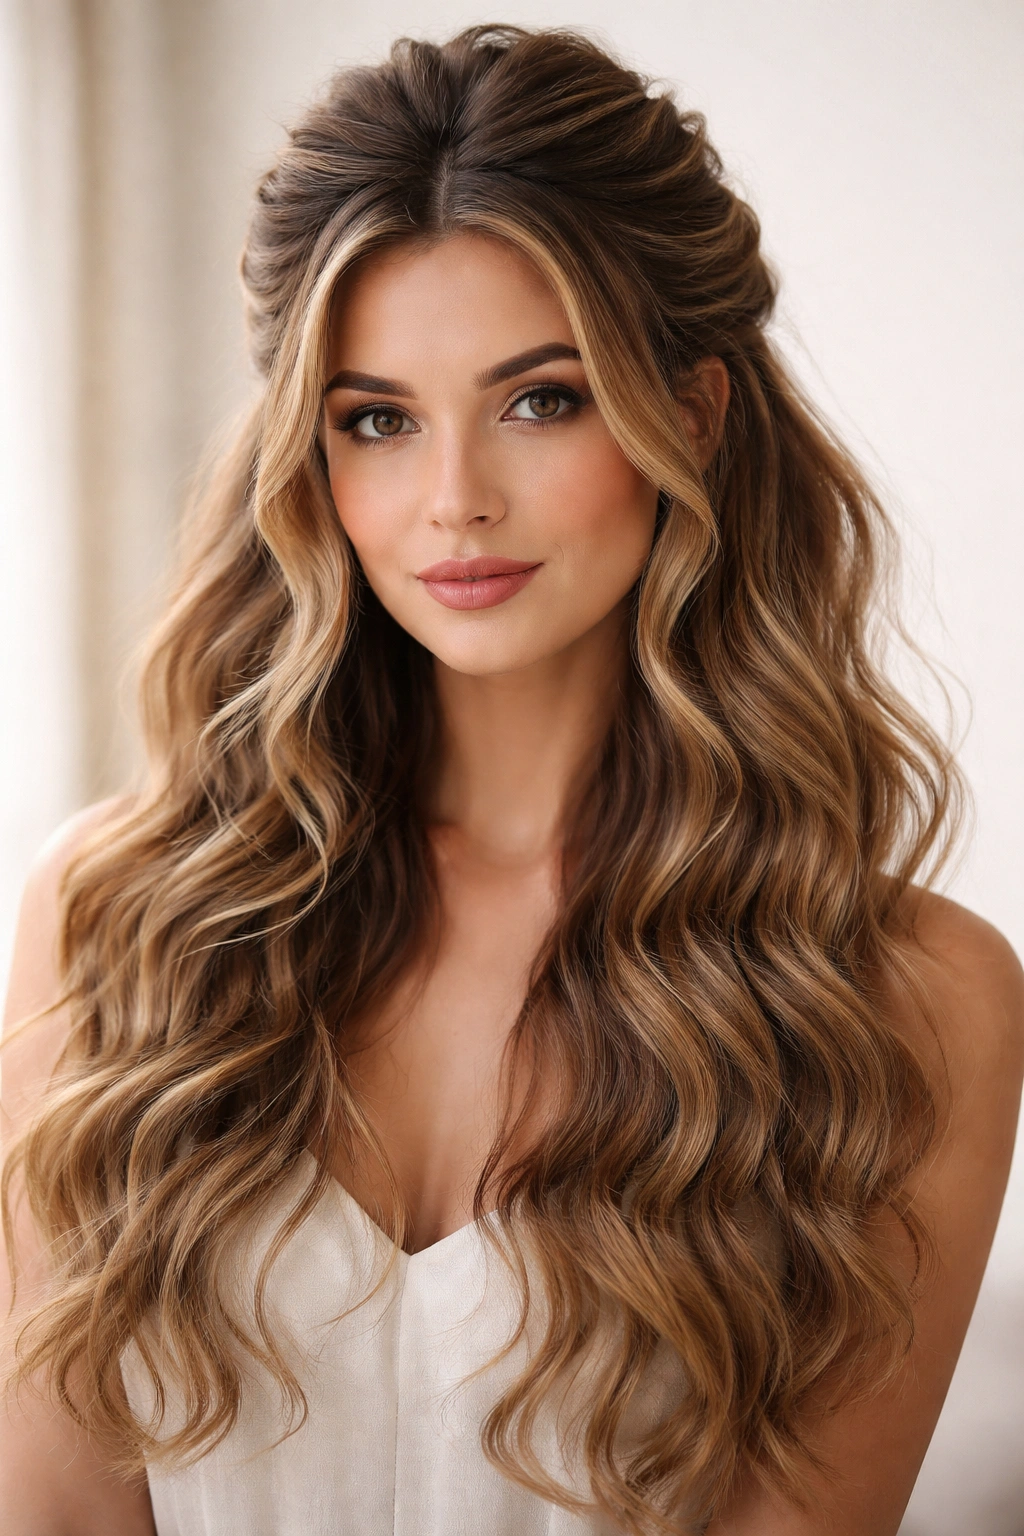
8. The Romantic Pinned Waves
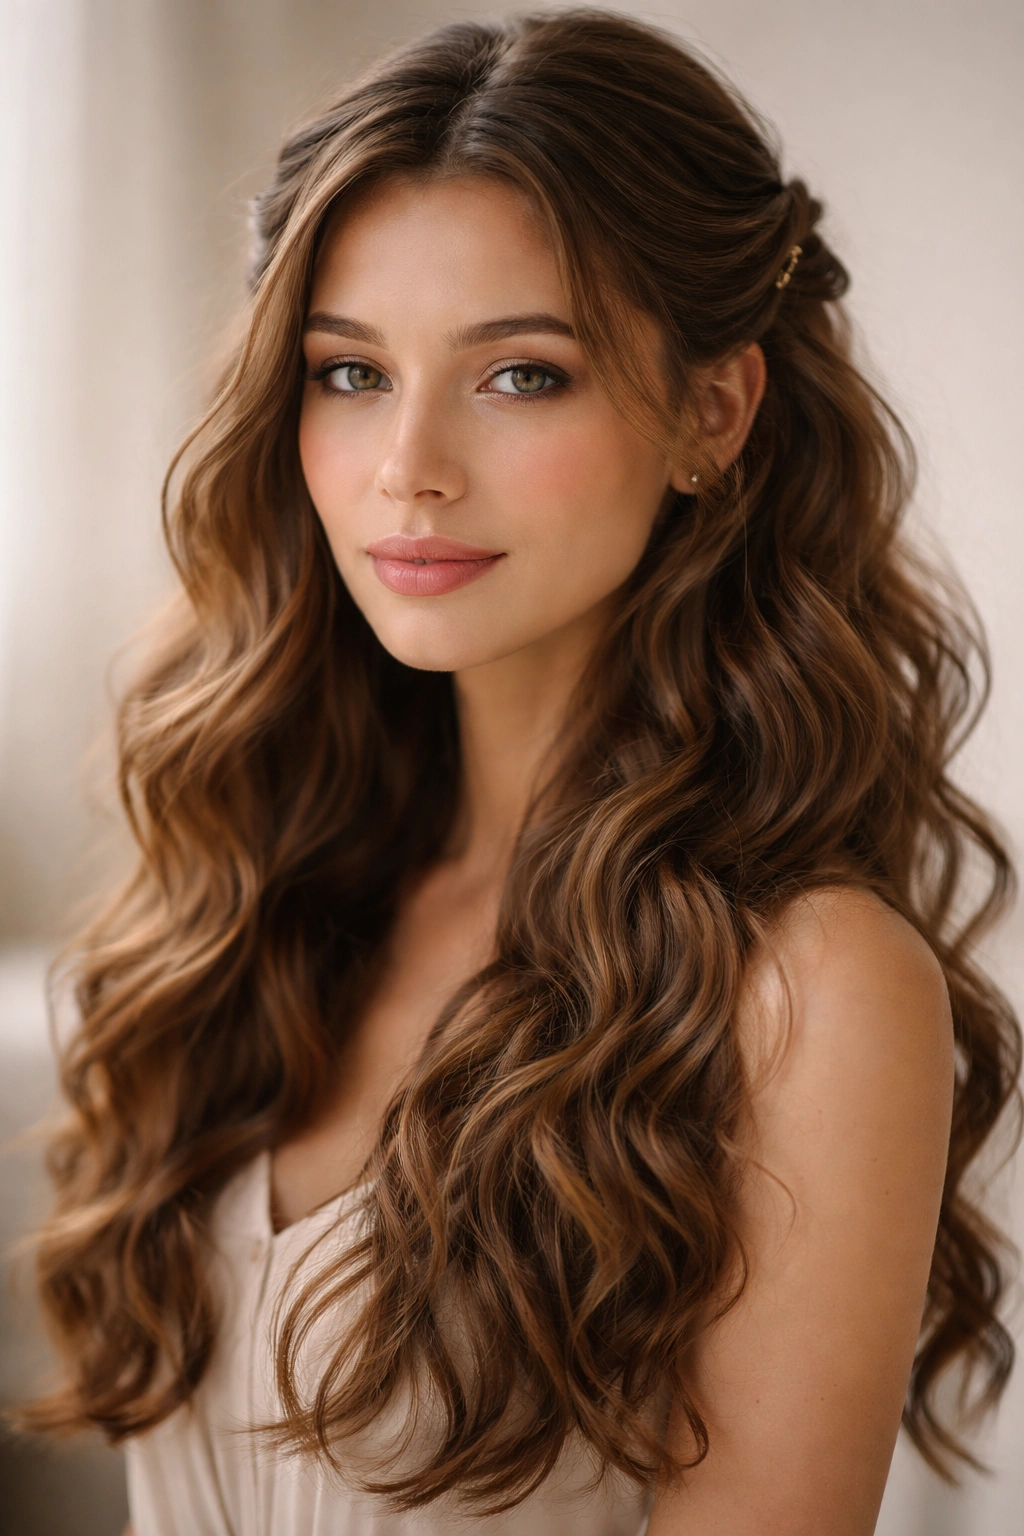
This updo celebrates your natural waves rather than containing them. You’re creating or enhancing your waves with heat styling or products, then strategically pinning sections back to open up your face while leaving the majority of your waves down and visible. It’s technically an updo because you’re using pins to hold it in place, but it feels and looks like a hairstyle that features your waves as the main event. This style is perfect when you want a polished look without sacrificing the beauty of your full wave pattern.
Why Pinned Waves Suit Thick Hair
Thick wavy hair can feel like too much when it’s entirely down — it takes up space, it can look heavy, and it often falls in your face. But pulling it all back removes the feature that makes your hair special. Pinned waves strike the perfect balance: you’re opening up your face and managing some of the volume, but you’re keeping the gorgeous wave texture front and center. The pins are just tools to hold back strategic sections, not a vehicle for containing everything. This allows your waves to be the star of the show.
Pinning Your Waves for Maximum Impact
- Start with enhanced waves — either your natural waves or waves you’ve created with a curling iron or curling cream
- Take a section from one side of your head (about 2-3 inches wide, from above the ear) and twist it gently or braid it loosely
- Pin it back at the crown using bobby pins placed underneath the twist or braid so they’re hidden
- Take a section from the opposite side and pin it back in the same way, mirroring the first side
- You can stop here for a simple look, or add additional pins along the sides if you want more face-framing
- Leave the back section and the lower waves entirely down
- Gently pull your pinned sections slightly to create a softness and fullness
- Mist the entire style with texture spray to enhance your wave pattern and keep pins secure
Pro tip: This style works best when your pinned sections are very slightly undone. Tease gently along the base of your pinned sections and let some texture show through the twists or braids.
9. The Side-Swept Knot
This chic, modern updo involves gathering your hair to one side and tying it into a loose knot, creating an asymmetrical look that’s flattering and surprisingly easy to execute. The side-swept aspect creates a romantic, flowing feel while the knot keeps everything secure and off your neck. On thick wavy hair, this style works beautifully because the knot naturally picks up dimension from your waves, so it never looks flat or one-dimensional. The side-swept approach also showcases one side of your face while your waves create movement on the other side.
The Visual Impact of Side-Swept Styling
A side-swept updo immediately looks more interesting and intentional than centered updos because of the asymmetry. Your eye is naturally drawn to the dimension created by pulling hair to one side. On thick wavy hair, this asymmetry is even more striking because your waves create pockets of texture and light reflection. The knot isn’t trying to be perfectly smooth or uniform — it’s textured and romantic-looking, which matches the overall aesthetic of side-swept styling. This is a style that actually benefits from the thickness and wave pattern of your hair.
Creating Your Side-Swept Knot
- Start with your natural waves or create them with a curling iron or wave-enhancing product
- Gather all your hair to one side of your head (typically the side that falls naturally, or whichever side you prefer)
- Loosely tie the gathered hair into a knot at roughly mid-nape level on the side
- Secure the knot with bobby pins placed underneath so they’re hidden
- Gently pull the knot slightly wider and looser to create volume and softness
- Let some pieces escape from the knot around the nape and fall loosely
- Pull out face-framing pieces from the opposite side (the swept side) and arrange them around your face
- Tease gently at the knot base for added dimension
- Use a flexible texture spray to set everything while maintaining movement
Pro tip: The looser and more relaxed your knot, the better this style looks. You’re aiming for something that looks casually romantic, not tightly contained.
10. The Multi-Braid Updo Crown
This sophisticated updo involves creating two or three Dutch or French braids and wrapping them around your head in a crown pattern before gathering everything into a bun at the back or side of your head. It’s an updo that reads as intricate and special-occasion appropriate, but it’s actually quite manageable to create once you understand the technique. On thick wavy hair, the braids automatically have dimension and texture, so they look intricate without requiring extra work. This style is perfect for weddings, formal events, or just a day when you want to feel extra polished.
How Multiple Braids Create a Focal Point
A single braid can sometimes look plain or severe. Multiple braids woven together create a visual focal point that draws the eye upward and adds sophistication to any style. On thick wavy hair, multiple braids also provide multiple anchor points, which means your entire updo is incredibly secure without requiring excessive bobby pins or tight pulling. The braids distribute weight evenly across your head, so you can keep everything looser and more comfortable while still maintaining security. Your waves weave naturally through the braids, adding dimension that makes the whole look feel intentional and beautiful.
Building a Multi-Braid Crown
- Start with wavy hair that has texture — either natural waves or waves you’ve enhanced with styling tools
- Create a Dutch or French braid on one side of your head, starting near your temple and braiding toward the back of your head
- Create a second braid on the opposite side, mirroring the first, and bring both braids to the back of your head
- Optionally, create a third thinner braid down the center back of your head, from the crown to the nape
- Gather all the braids and any remaining hair into a bun at the back or side of your head (side is more romantic, back is more formal)
- Secure the bun with bobby pins, distributing them in a pattern that supports all the weight
- Gently pull and tease around the bun to create volume and softness
- Release a few pieces from the braids and let small waves escape around your face
- Gently separate the braids slightly to increase their apparent width and texture
- Mist everything with a flexible-hold spray designed for textured hair
Worth knowing: The more you practice this style, the faster it gets. Your first time might take 15-20 minutes, but once you’re comfortable with the braiding pattern, you can execute it in about 10 minutes.
Final Thoughts
The common thread running through every one of these updos is that they work with your hair type instead of fighting against it. Thick wavy hair doesn’t need to be slicked down, flattened, or tightly controlled to look elegant. Your waves are an asset that creates volume, dimension, and hold all on their own — you’re just using strategic techniques like twists, braids, and strategic pinning to arrange that volume in a style that works for your day.
The beauty of having a collection of updo options for thick wavy hair is that you can choose based on your mood, your schedule, and the occasion. Some of these styles take five minutes with practice, while others are worth the extra ten minutes when you want to feel extra polished. Some look best fresh and intentional, while others actually improve as the day goes on and your waves relax slightly.
Start with whichever style appeals to you most, practice it a few times, and trust that your hair’s natural texture is doing a lot of the heavy lifting. You’re not fighting against your waves — you’re celebrating them. That’s what makes these updos look so effortlessly beautiful on thick wavy hair.