Fulani braids represent far more than just a hairstyle—they’re a connection to West African heritage, a celebration of natural texture, and one of the most versatile, protective styling options available for textured hair. If you’ve scrolled through natural hair communities and felt drawn to those elegant, often adorned braids that seem to effortlessly combine simplicity with impact, you’re looking at the artistry of Fulani styling. What makes these styles particularly appealing is that they work beautifully on every curl pattern, from loose waves to tight coils, and they don’t require complicated teasing, heat damage, or hours in the chair.
The Fulani people, historically from West Africa, developed these braiding traditions over centuries, and the styles carried deep cultural significance—indicating heritage, identity, and sometimes marital status. Modern Fulani braids have evolved into an accessible, practical solution for anyone with natural hair looking for low-manipulation styles that last weeks while allowing the hair underneath to breathe and retain moisture. Whether you’re completely new to natural hair or a seasoned texture enthusiast, these ten simple Fulani variations prove that you don’t need complex techniques or expensive products to create stunning, head-turning styles.
The beauty of these styles lies in their flexibility—you can wear them sleek and minimal, or dress them up with beads, rings, and cuffs that reflect your personal aesthetic. More importantly, they actually work with your natural hair rather than against it, reducing breakage and supporting healthy growth when installed and maintained properly. Let’s walk through ten distinct approaches, from understated minimalist braids to dramatic statement-making variations, so you can find the exact style that matches your lifestyle, hair texture, and comfort level.
1. The Classic Center-Parted Fulani Braids
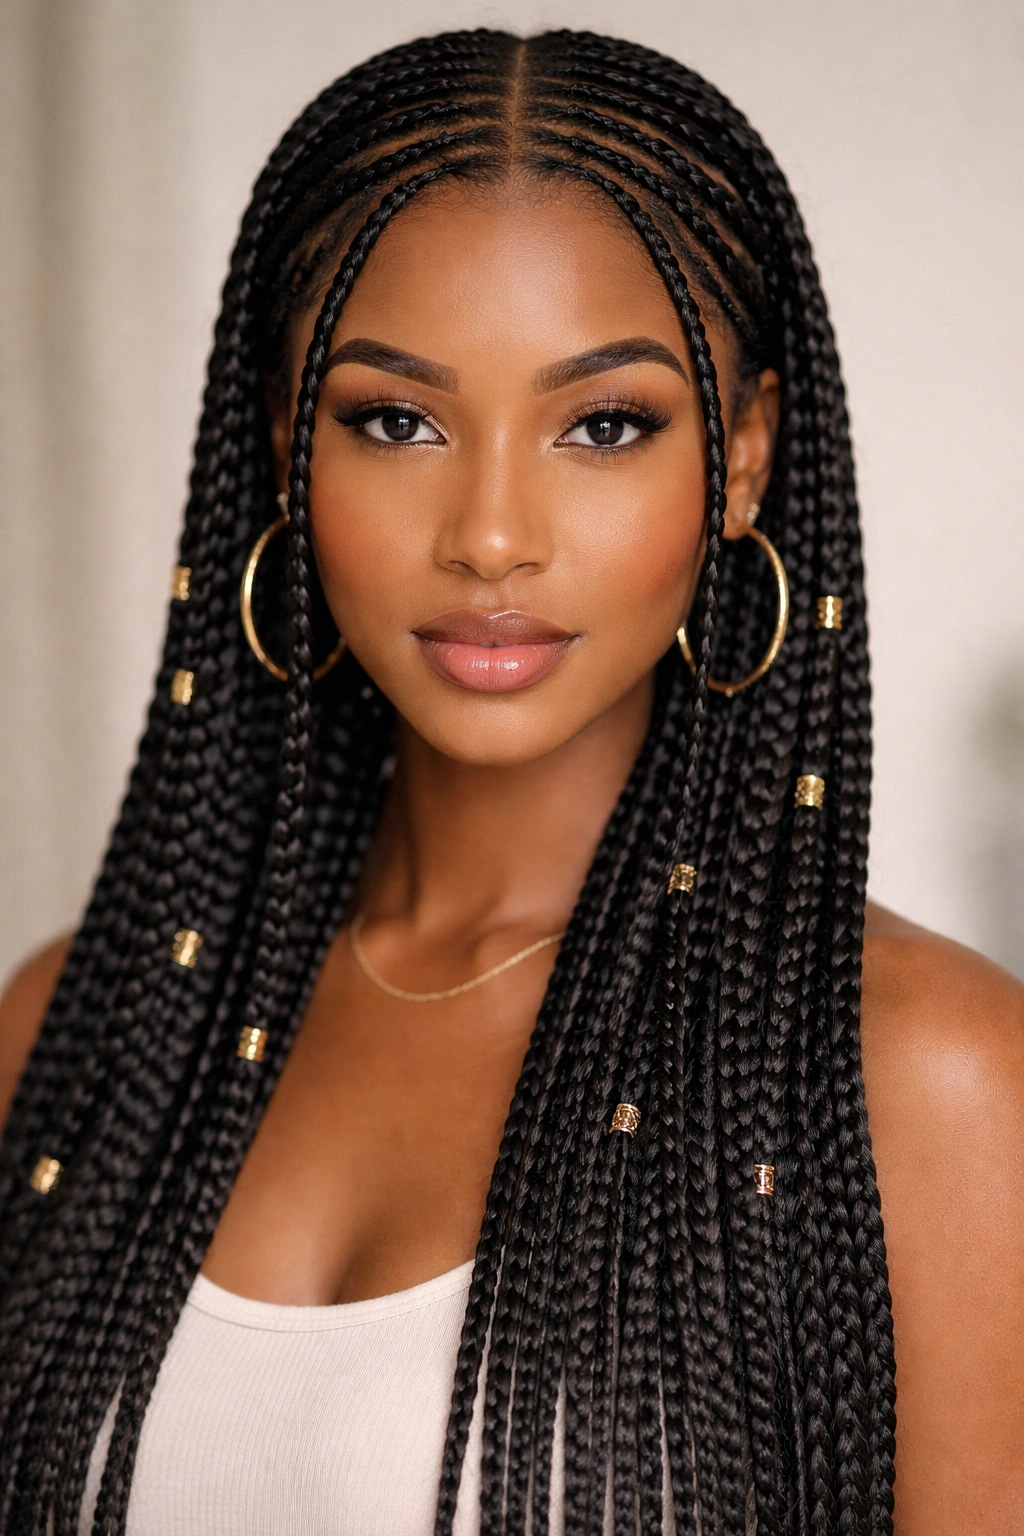
Classic center-parted Fulani braids represent the most recognizable version of this style, featuring two thick, carefully constructed braids that run from the crown straight down the center of your head, framing your face symmetrically. This particular variation works across every hair texture and length because the visual impact comes from the precision of the parting and the thickness of the braids themselves, not from intricate underbraiding or complex patterns.
Why This Style Stands Out for Natural Hair
The center-parted approach distributes tension evenly across both sides of your scalp, making it one of the gentler Fulani options for regular wear. The visible parting actually showcases your natural hairline and scalp health, so it’s ideal if you’re working toward edge retention and don’t want to compromise your hairline with overly tight styles. Many natural-haired women find this version feels less heavy on the neck and shoulders compared to styles with additional side braids or added extensions.
How to Style and Maintain It
Start with freshly moisturized, detangled hair—either damp or completely dry, depending on your preference. Create an exact center part using a fine-tooth comb or rattail comb, then divide each side into two sections. Braid from the crown downward using a three-strand or four-strand technique, keeping tension consistent but not tight enough to feel uncomfortable. You can leave the ends loose for a relaxed vibe or wrap them with thread for a polished finish. Maintenance is straightforward: refresh the braids every 3-4 weeks by unbraiding the bottom inch and rebraiding with fresh product, and wrap your hair at night with a silk or satin scarf to prevent frizz and reduce unraveling.
Styling tip: Add gold or silver cuffs at intervals along the braids for an elevated, intentional look without overwhelming the simplicity of the style.
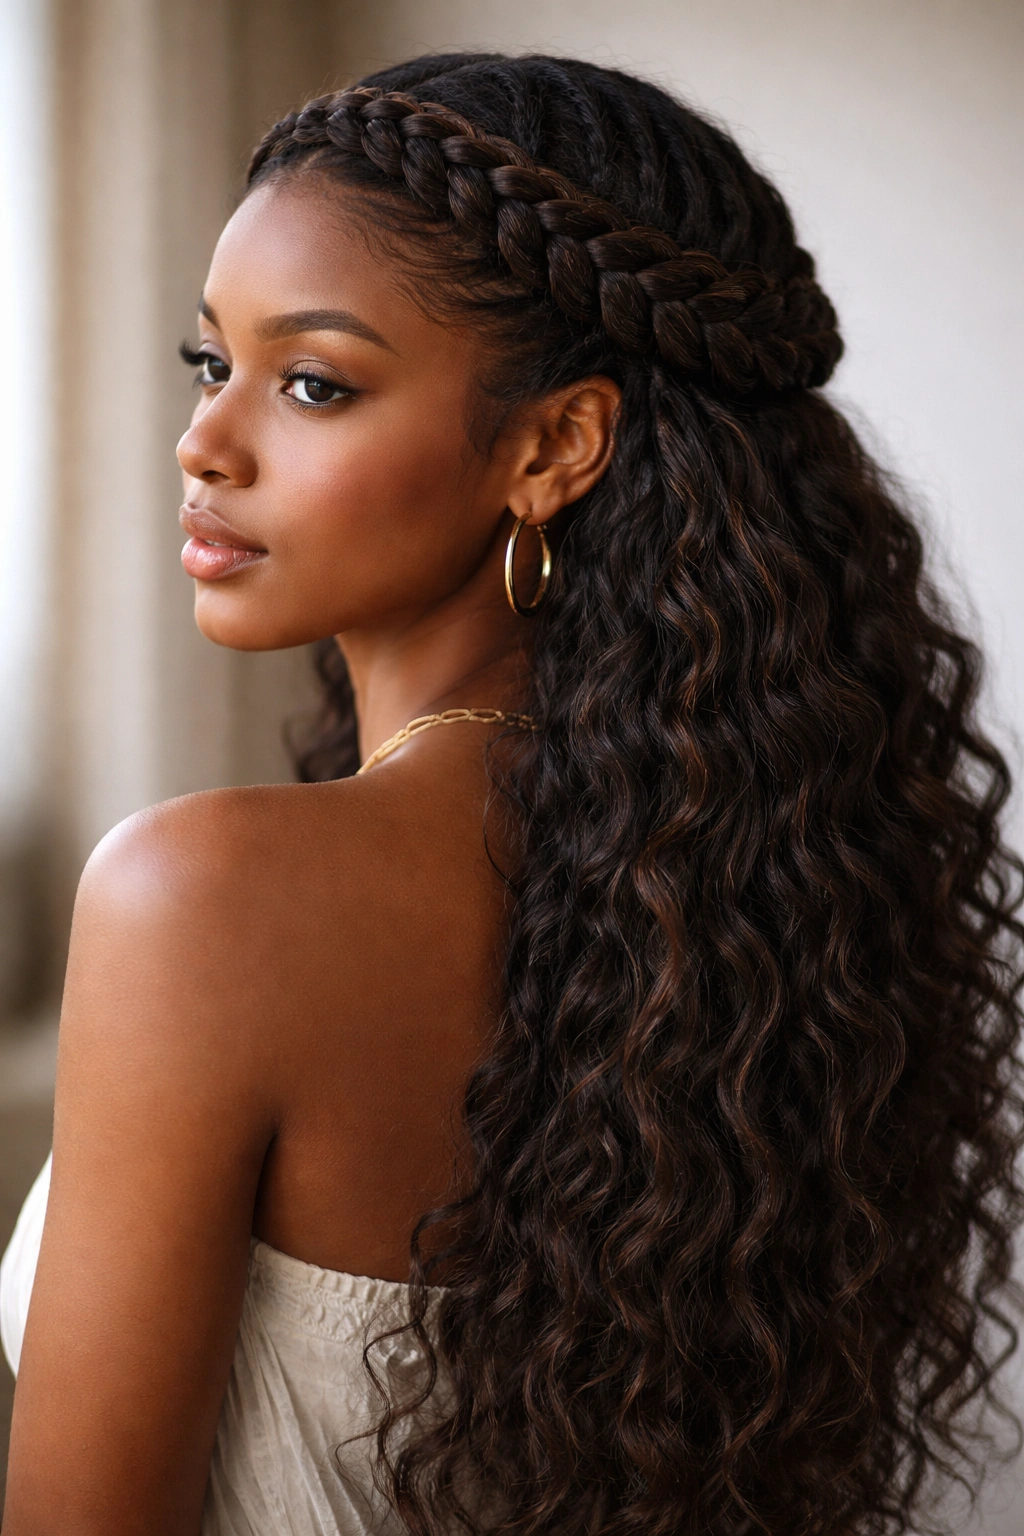
2. The Wraparound Fulani Style with Hoop Accents
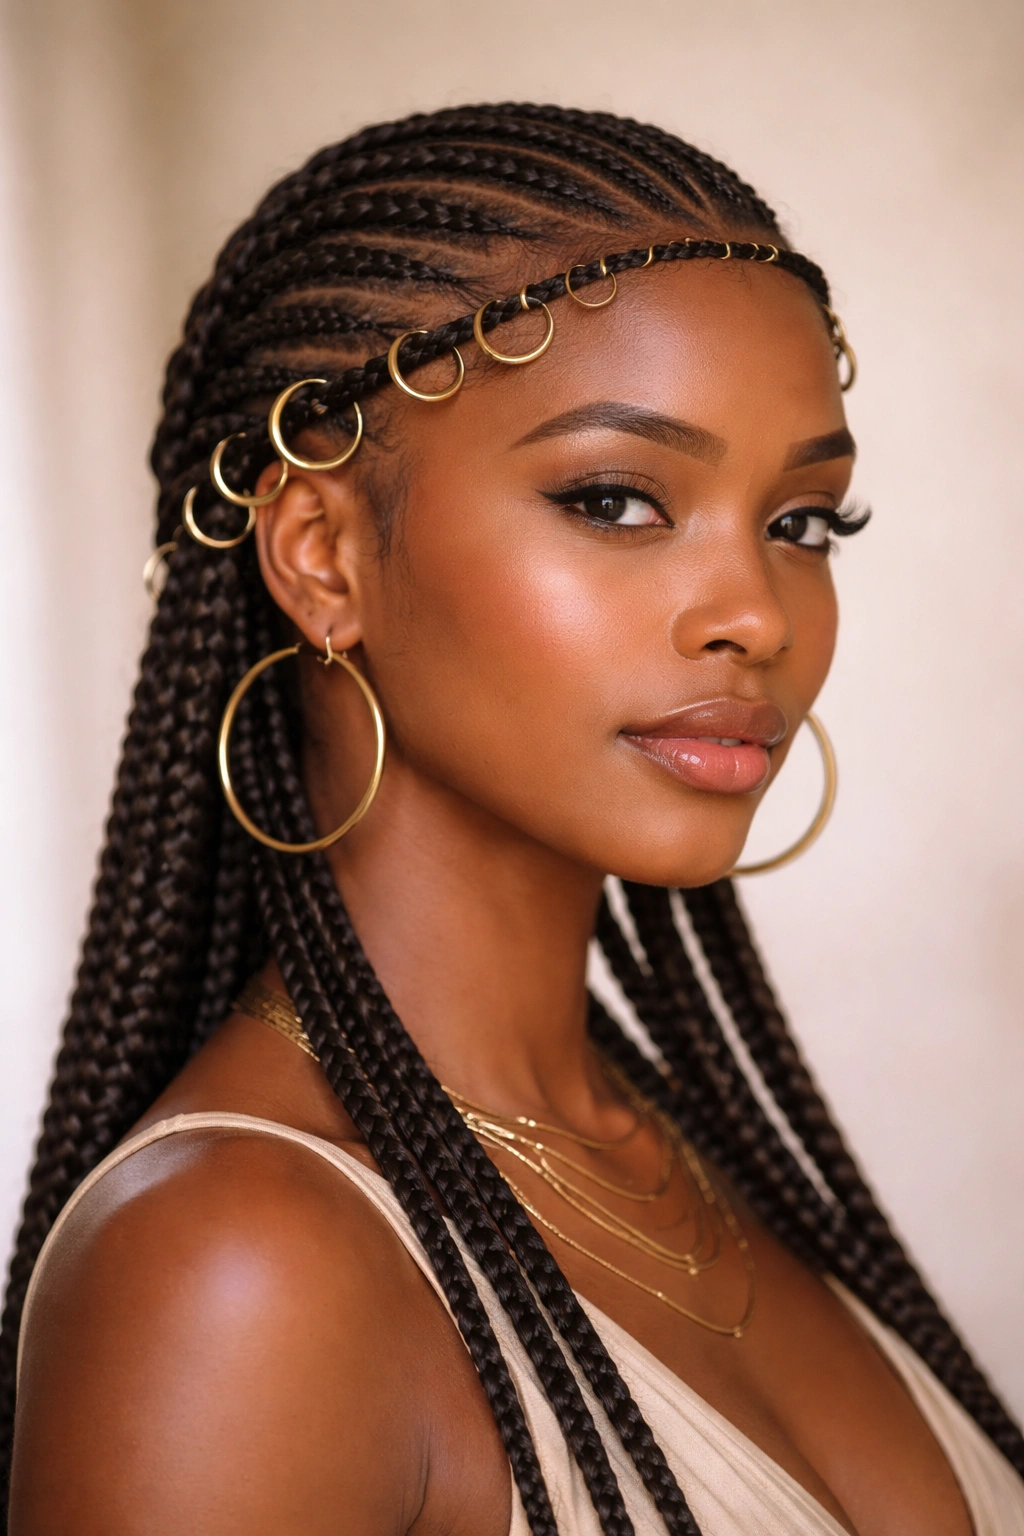
The wraparound Fulani uses thin, delicate braids that curve around the crown of your head in a continuous loop, creating a halo effect that feels simultaneously elegant and effortlessly cool. This version incorporates the signature Fulani aesthetic of combining braids with decorative metal accessories, typically large hoop rings threaded onto specific braids for visual emphasis and cultural authenticity.
Why It Works as a Protective Style
Wraparound styles excel because they keep the bulk of your hair lifted away from your shoulders and back, reducing friction and tangles throughout the day and especially while sleeping. The thin braids mean less weight on your scalp compared to chunky versions, making this ideal if you experience scalp tenderness or want to wear this style frequently without extended breaks. The design naturally encourages the hair at the back of your neck to stay secure and undisturbed, which means your nape area—often the most vulnerable to breakage—stays protected.
Creating the Wraparound Effect
Begin by sectioning out a horizontal band of hair from your temple on one side, wrapping around the back of your head to your temple on the other side—think of it like an invisible crown. Divide this section into 4-6 thin braids depending on how full you want the wraparound to feel. Each braid should start thin and remain consistent throughout its length. Once all braids are in place, you’ll have hair flowing freely from the center of your head downward, creating a beautiful contrast with the structured braids circling your crown. Thread gold or brass hoops onto 2-3 of these braids (the hoops should be large enough to slide over the braid thickness without binding), positioning them at different heights for visual interest.
Real-world advantage: This style actually looks better over a few days as the braids relax slightly and the overall texture becomes a bit softer—it’s one of the few styles that improves with age rather than looking increasingly unkempt.
3. The Cornrow-and-Braid Hybrid with Top Knot
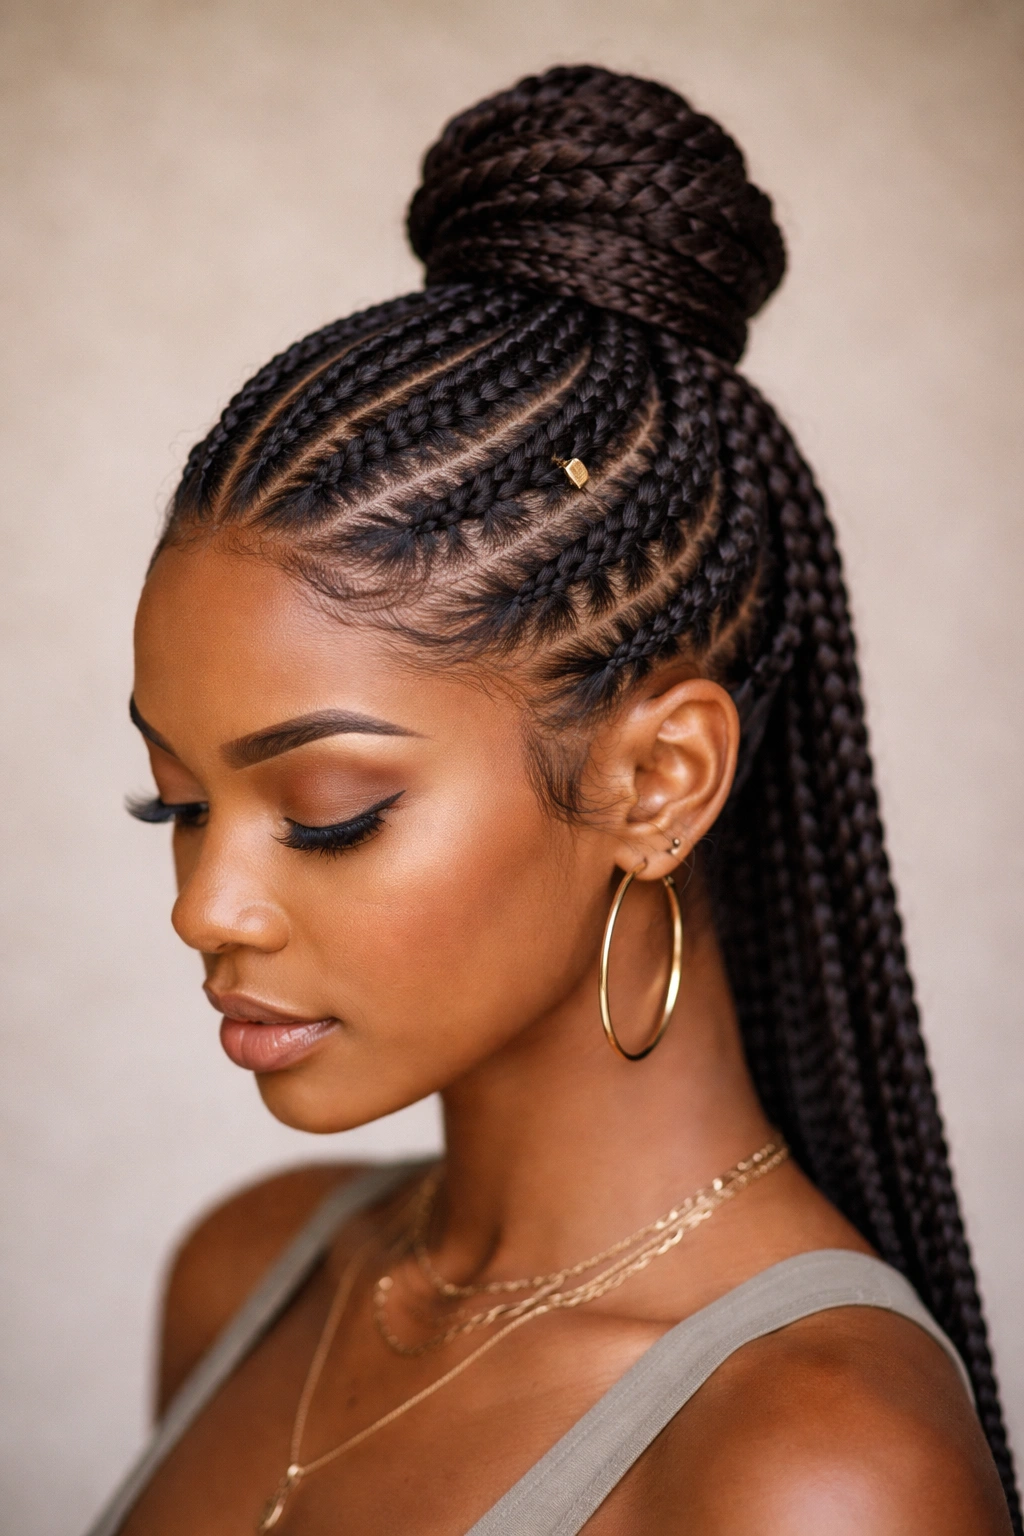
This variation blends the sleekness of cornrows with the relaxed volume of Fulani braids, featuring thin cornrows braided from your edges and temples that converge at the crown, where the remaining hair is gathered and styled into either loose braids or a bun. This hybrid approach gives you sculptural edge definition while maintaining the soft, natural aesthetic that makes Fulani styles so appealing.
What Makes This Hybrid Different
The cornrow component gives structure and definition to your edges, which many natural-haired women appreciate both for the polished appearance and because the minimal tension on edge hair makes this very scalp-friendly. The looseness of the braids at the crown prevents that “pulled too tight all over” feeling that can come with fully cornrowed styles, while still delivering the protective benefits of braiding. It’s genuinely a best-of-both-worlds approach if you love the look of cornrows but worry about the tension factor on your hairline.
Step-by-Step Installation
Cornrow from both temples along the hairline, angling the braids toward where your crown/top knot will sit. You can make these two cornrows meet at a single point or let them merge into the freestyle braids above. Once the cornrowed section is complete, gather the remaining hair and divide it into 2-4 braids (depending on your hair volume), leaving them relatively loose with an intentionally undone quality. Secure the braids into a low or high bun at the crown using bobby pins or by wrapping one braid around the others and tucking the ends in. For longevity, bobby pins work better than elastic bands because elastics can cause breakage where they sit.
Pro tip: Install this style with slightly damp hair—it’ll dry smoother and feel more secure, but not so wet that the braids take days to fully dry.
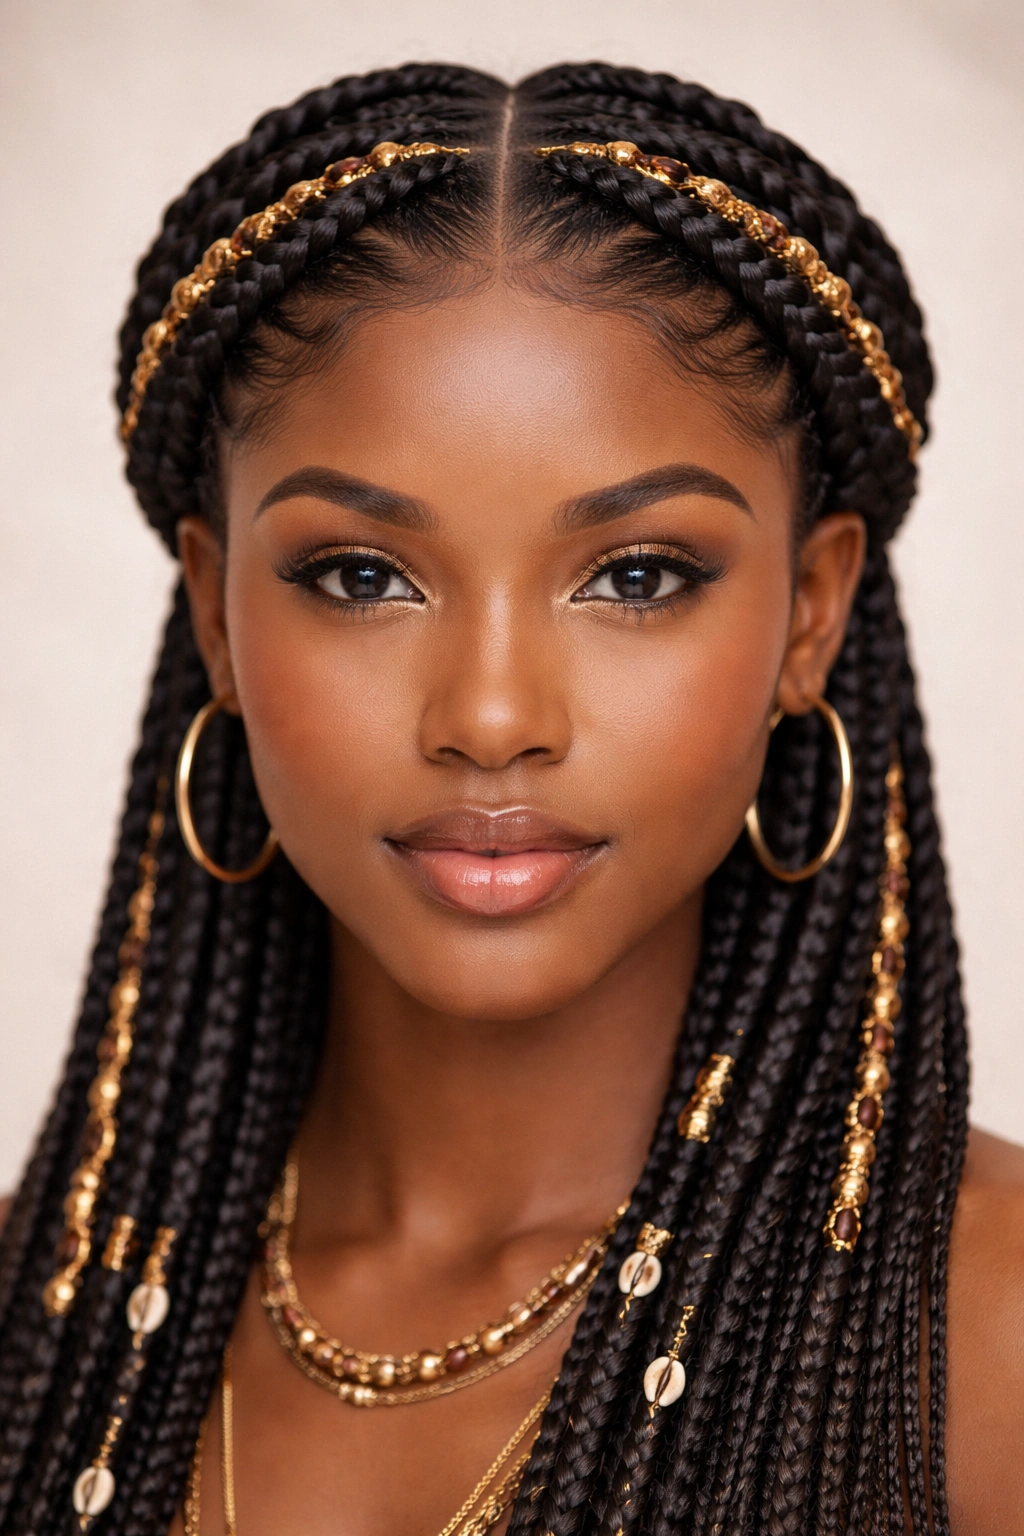
4. The Double-Crown Fulani with Delicate Threading
Double-crown Fulani braids feature two parallel lines of braids that frame your face and run down the center or slightly off-center, creating a sophisticated, mirror-image effect. This version incorporates fine embroidery thread woven throughout the braids themselves, a technique that adds visual texture, color contrast, and an unmistakably authentic Fulani aesthetic.
Why Threading Elevates the Style
Threading doesn’t just add visual appeal—it actually supports your braids structurally, making them less likely to unravel and extending wear time from 3-4 weeks closer to 5-6 weeks. The thread should be secured at the base of each braid and woven in and out through the three strands as you braid, creating a unified visual effect. Use thread in contrasting or complementary colors to your hair for maximum impact: gold thread on dark hair, burgundy thread for subtle warmth, or jewel tones for something bolder.
Installation Technique with Threading
Section out two equal-width partitions down the center of your head from your hairline to your nape, ensuring they’re perfectly parallel for the mirror-image effect. Gather your threading material—embroidery floss works beautifully and comes in infinite colors—and tie it to the hair at the base of the first braid before you begin braiding. As you execute your three-strand braid, incorporate the thread by laying it alongside one strand and weaving it through with that strand on each rotation. The thread becomes part of the braid structure rather than something applied on top. Maintain consistent tension with both the hair and the thread so the effect looks intentional and unified.
Worth knowing: Embroidery thread shows wear and dirt less noticeably than leaving the braids bare, so this version actually stays looking fresher longer between maintenance appointments.
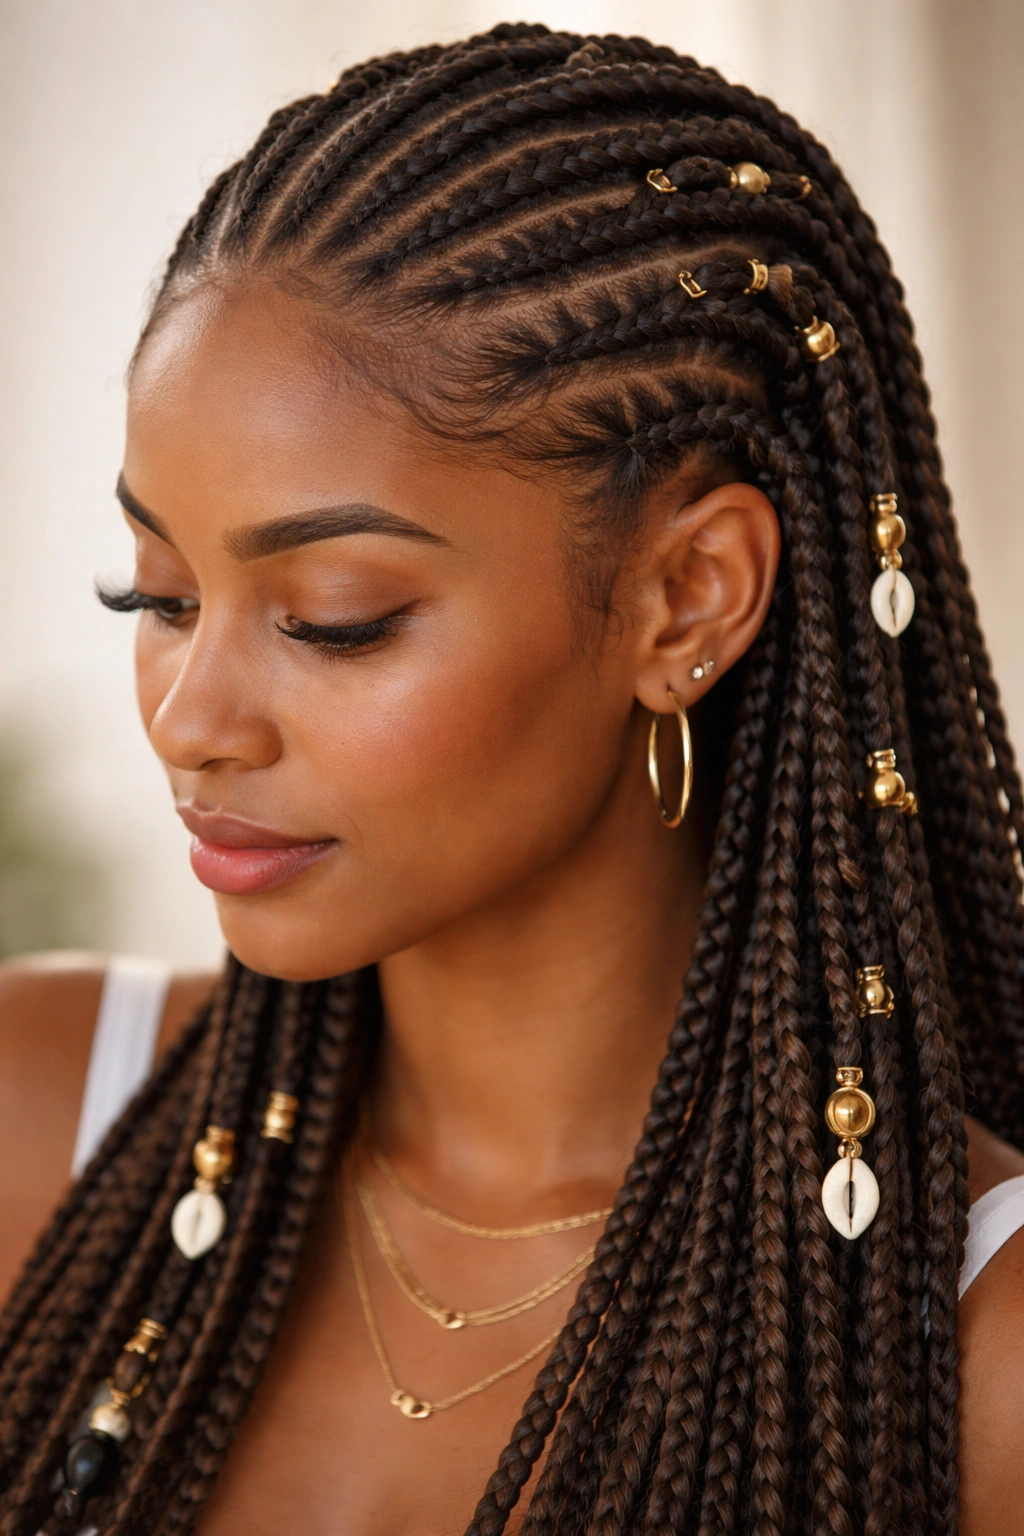
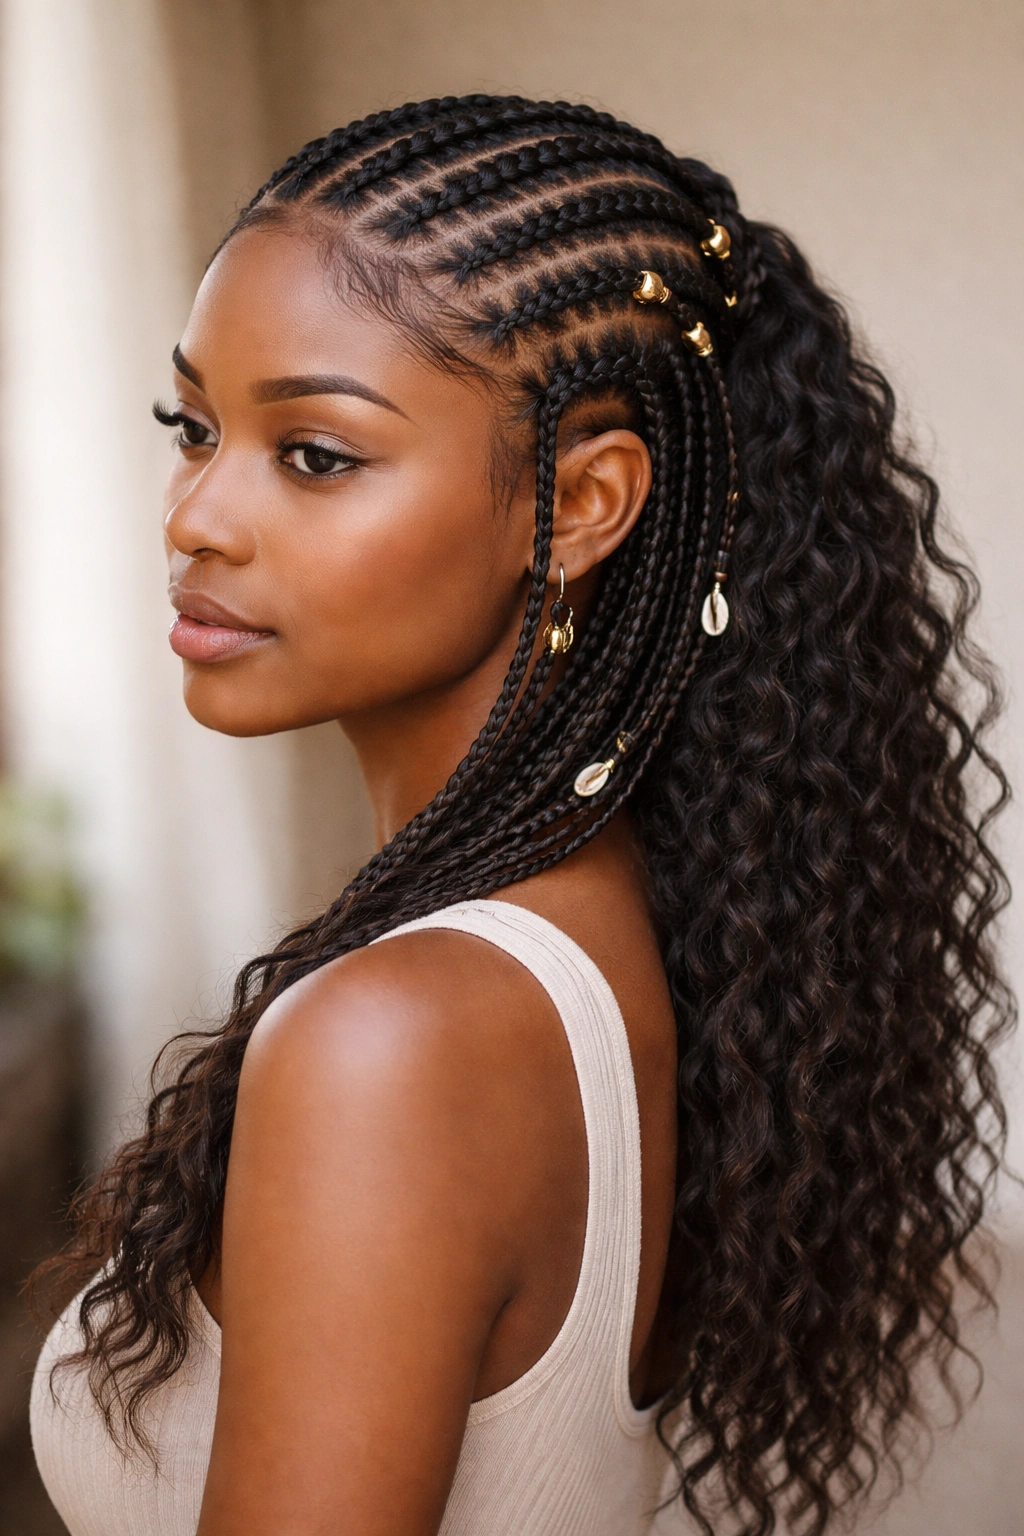
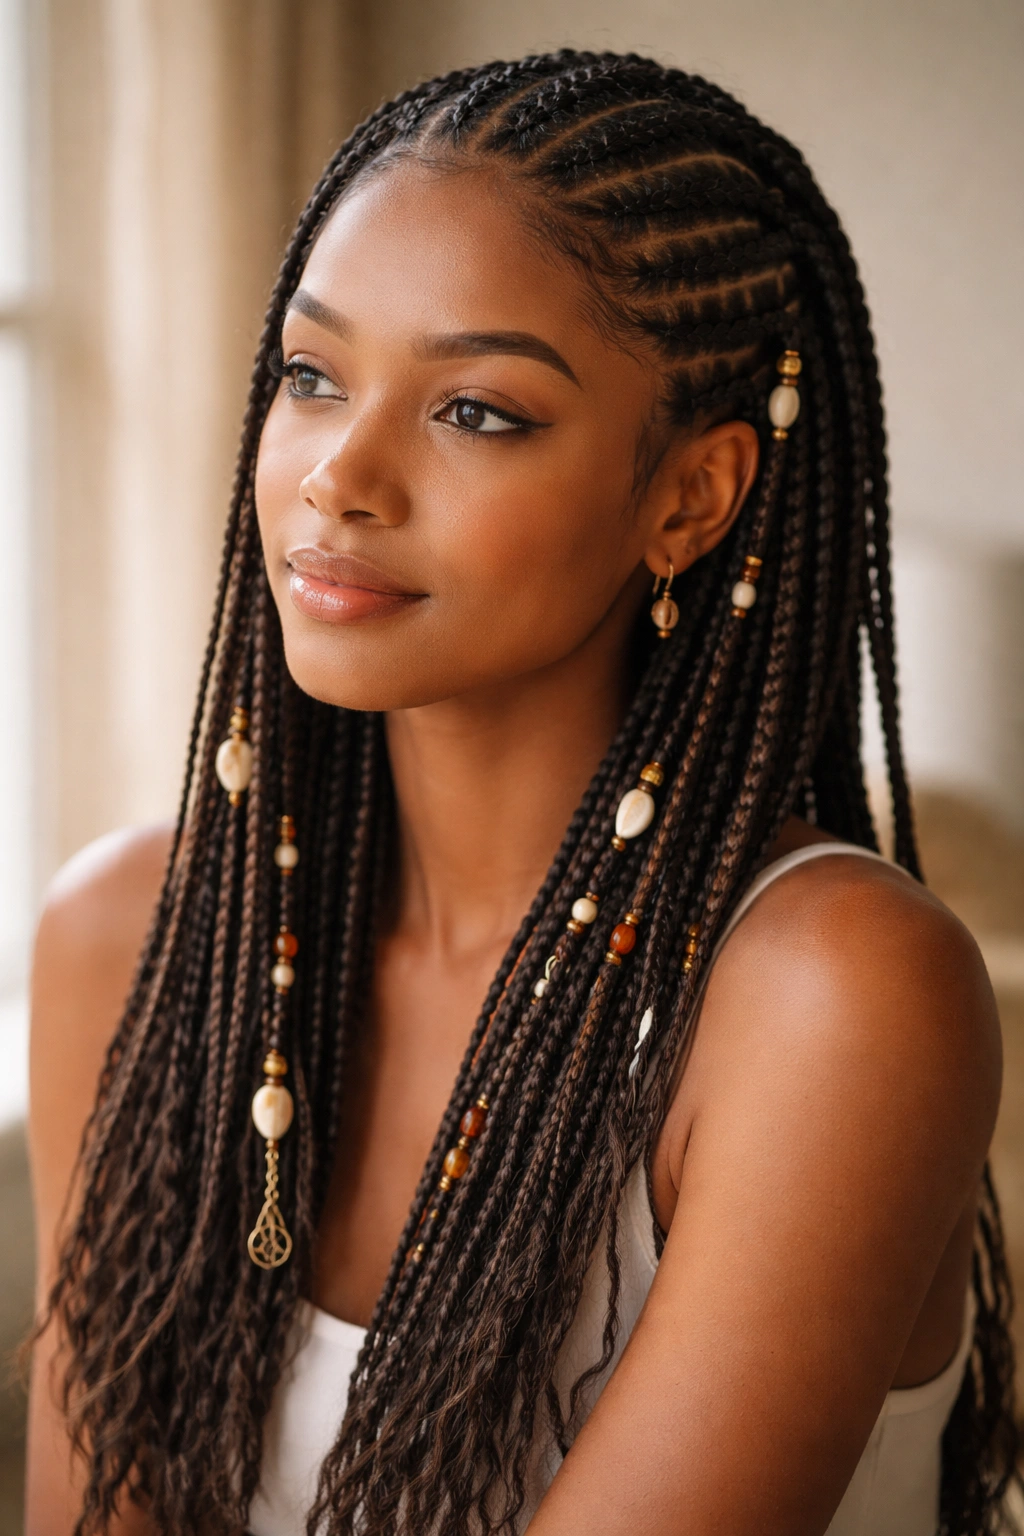
5. The Thin, Intricate Fulani Braids with Scattered Beads
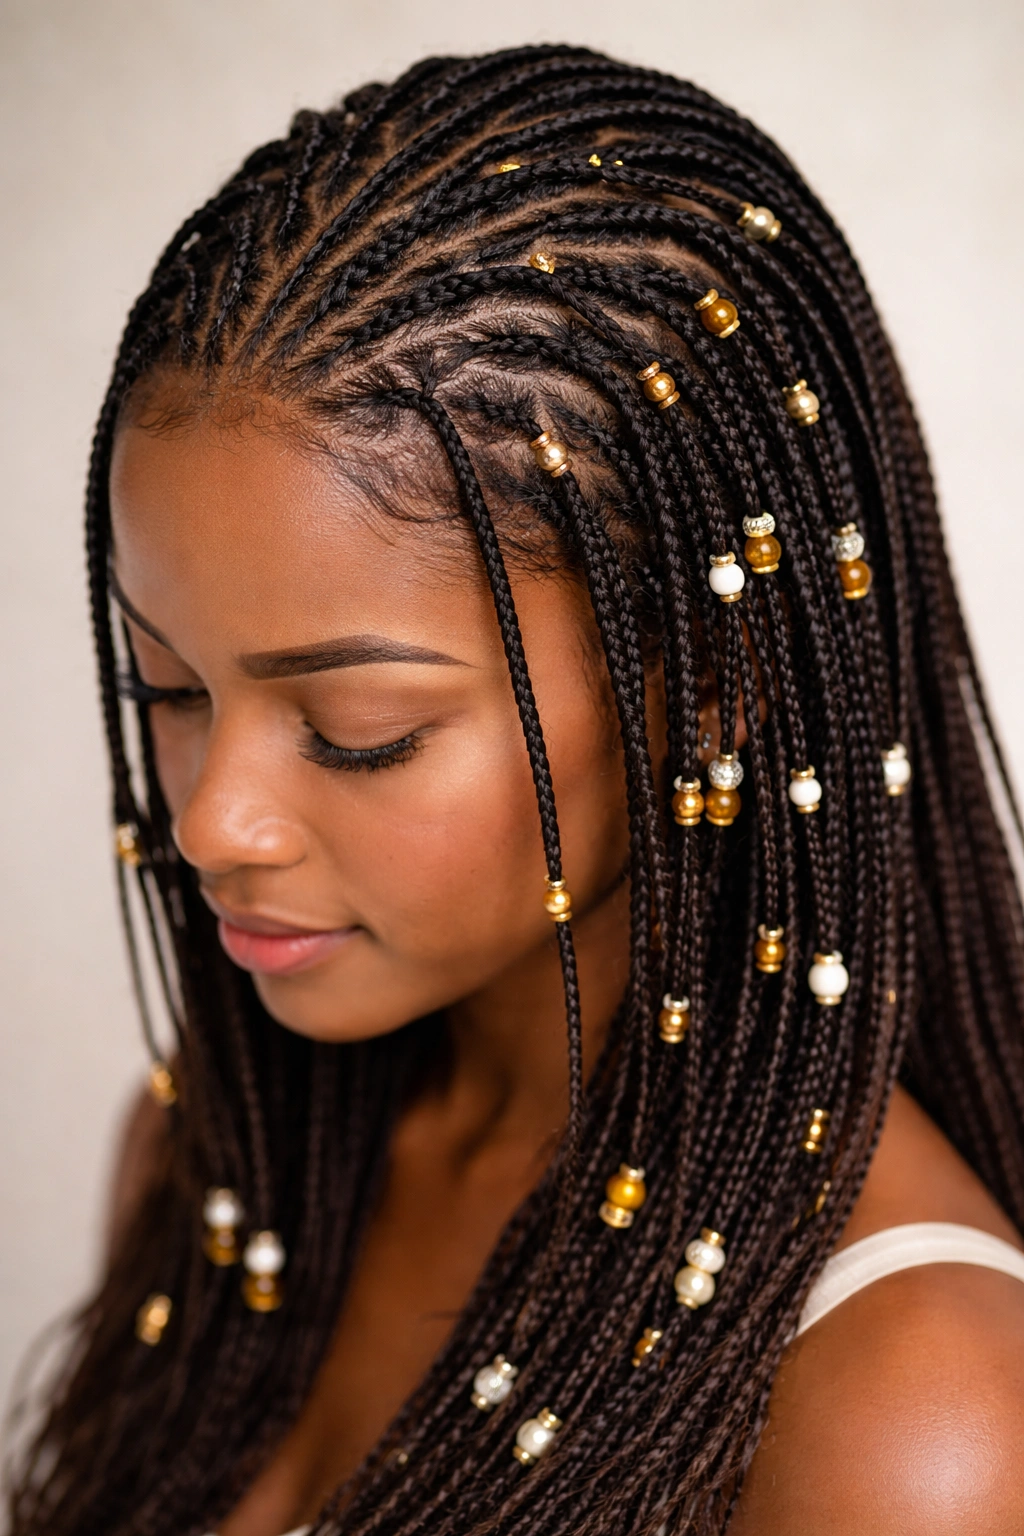
This version maximizes the “delicate and detailed” side of Fulani aesthetics by creating numerous thin braids (often 10-20+ depending on hair volume) scattered across your entire head rather than confined to a specific pattern. Wooden or metal beads—often with cultural or spiritual significance—are threaded onto individual braids at varying heights, creating a dynamic, curated appearance that feels both intentional and playfully organic.
The Appeal of Scattered Placement
Rather than a predictable pattern, scattered beading allows each bead’s placement to feel natural and personalized. Some beads sit at the end of braids, some cluster in the middle, others are spaced far apart—the irregularity actually makes the style feel more authentic and less constructed. This approach also works beautifully across different hair volumes; thicker hair accommodates more braids while thinner hair looks equally polished with fewer, slightly thicker braids and more strategic bead placement.
Bead Selection and Installation
Choose beads with holes large enough to slide over your braids without excessive friction that could cause breakage. Wooden beads, bone beads, or decorative metal cuffs all work; the key is selecting pieces that feel comfortable against your scalp when you’re braiding them in. Rather than waiting until after you’ve braided to add beads, thread them onto individual braids as you go—it’s faster and ensures the bead sits exactly where you want it. Position beads at the end of braids (about 2-3 inches from the tip), along the middle section, or clustered in groups of 2-3 beads per braid for a jeweled effect.
Insider note: Avoid rubber bands at braid ends if you’re using beads; they create weak points where hair can snap. Instead, let beads sit at the very end of the braid and secure with thread wrapped tightly around the final strands.
6. The Side-Swept Fulani with Flowing Braids
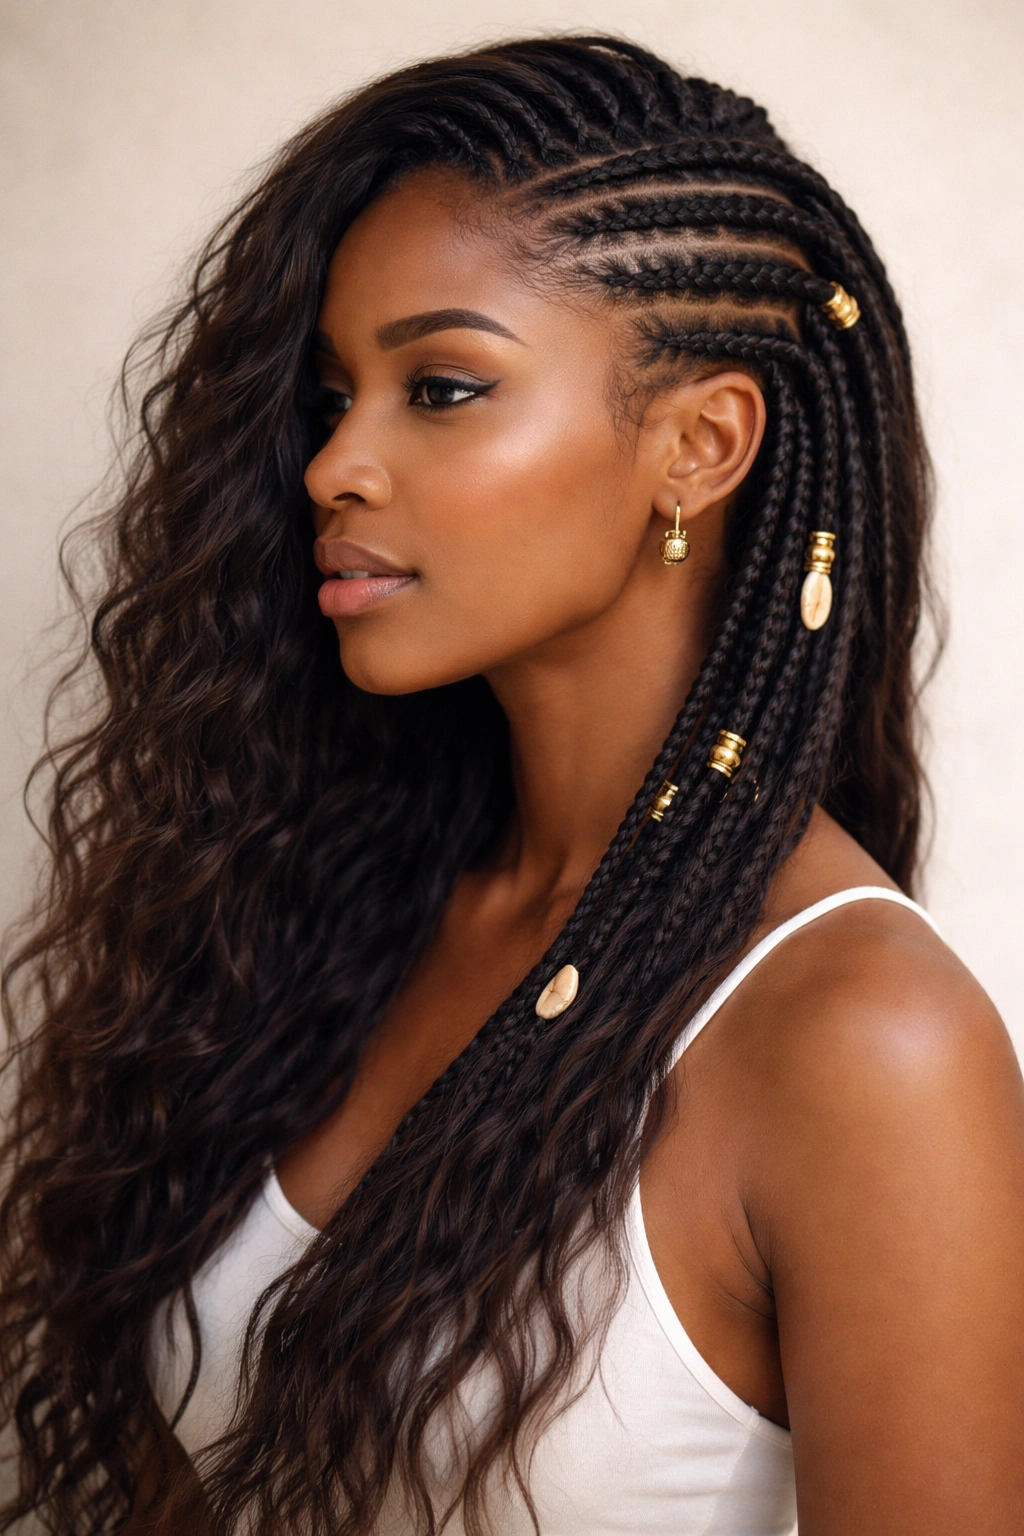
The side-swept version shifts the visual weight of your braids dramatically to one side, creating an asymmetrical, fashion-forward aesthetic that feels modern and edgy while maintaining the essence of traditional Fulani styling. Most of your hair remains unbraided and flows freely, with an accent braid or group of braids sweeping across one side of your face and down toward your shoulder.
Why Asymmetry Works for Natural Hair
Side-swept braids allow you to show off the texture and volume of your natural hair while still getting the protective benefits and visual interest of braiding. The majority of your hair flows freely, which means less weight and tension overall, and the style naturally encourages your unbraided hair to catch light beautifully, showing off curl definition and shine. Many people find this version feels less “styled” and more like an intentional, effortless aesthetic—you can wear it to professional settings without feeling overdressed, or style it up with jewelry for nights out.
Achieving the Perfect Sweep
Begin by creating a deep side part, exaggerating it more than you might for everyday wear. On the side with less hair, create 2-4 thin to medium braids that angle from your temple toward the back of your head, following the natural line of the side part. You can braid all the way to the ends or stop at your shoulder length and let remaining hair flow. The braids should feel like an accent rather than the main event. For maximum impact, apply a lightweight smoothing cream to the unbraided portion to enhance shine and definition without making hair appear greasy or weighed down.
Styling tip: This version pairs beautifully with minimal jewelry—perhaps just one gold cuff on the main braid and a simple gold fill or hoop in your ear, letting your natural hair be the star.
7. The Minimalist Two-Braid Fulani (Sleek and Refined)
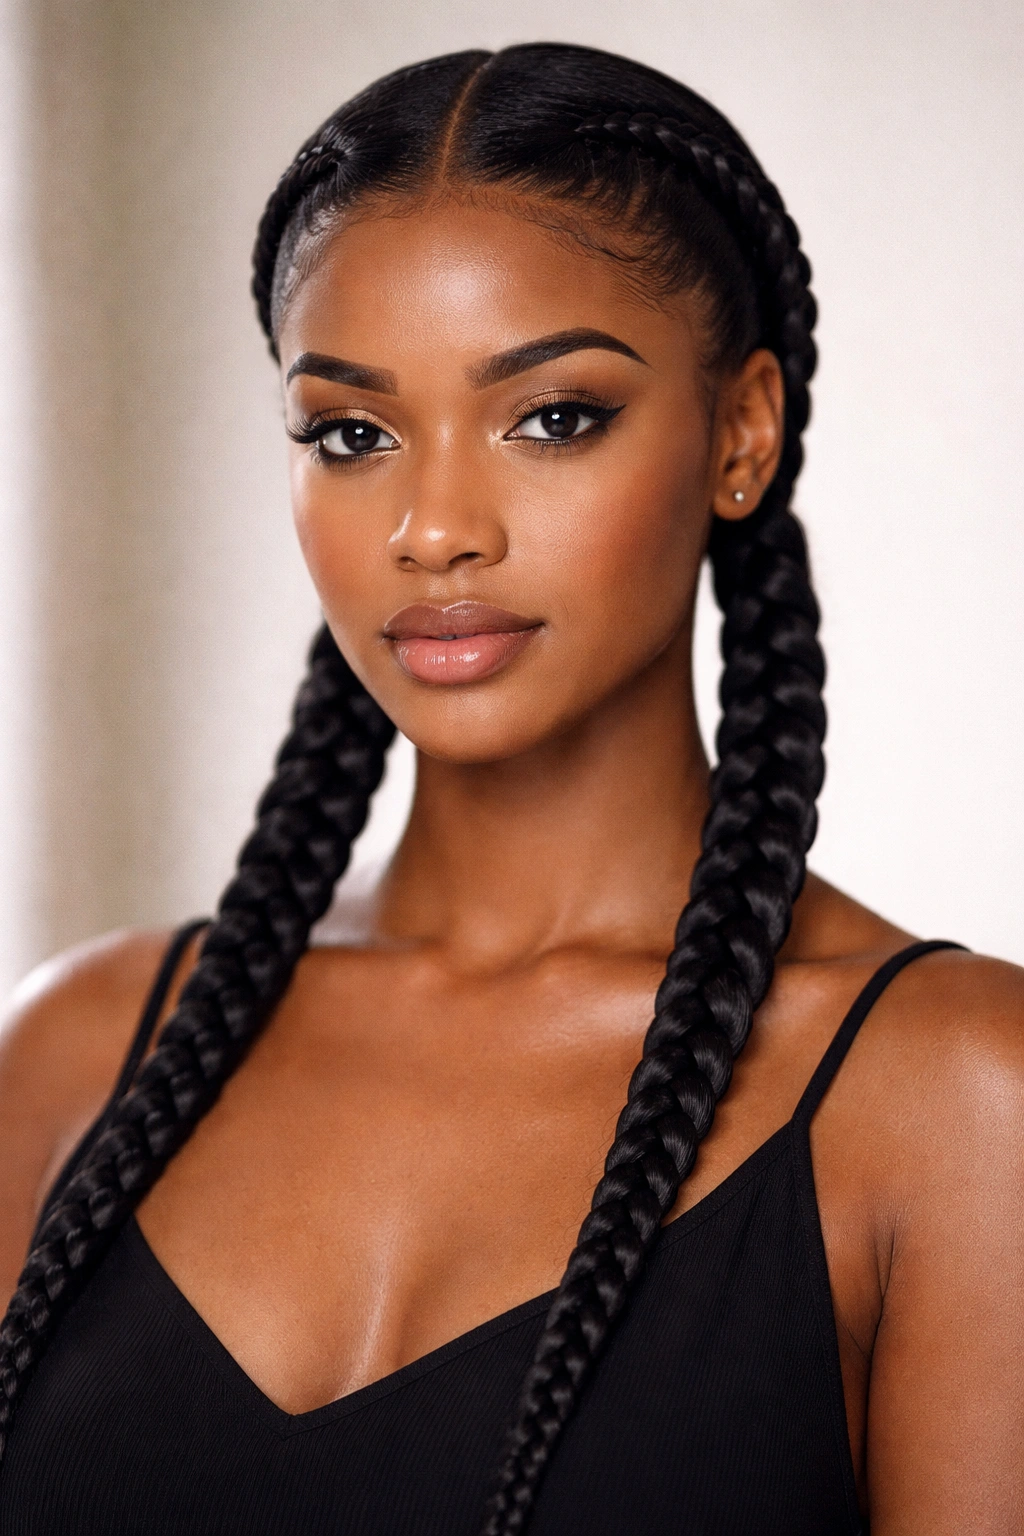
Sometimes less truly is more—the minimalist two-braid approach strips away all extra elements and focuses on perfect execution of two thick, beautifully braided sections. This version celebrates the purity of the braiding technique itself and works especially well if you have thick, voluminous hair or prefer a streamlined, sophisticated aesthetic over maximalist decoration.
The Power of Simplicity
Two thick braids have remarkable visual impact precisely because there’s nowhere to hide—imperfect technique becomes immediately visible, but perfect braiding looks absolutely stunning. This version actually takes the most skill to execute well because the braids must be consistent, even-tensioned, and truly beautiful; you can’t distract with beads or complexity. It’s the choice for anyone who loves clean lines, minimalist fashion, or wants a style that reads “polished professional” as much as “cultural celebration.”
Installation for Maximum Impact
The key to stunning two-braid Fulani is starting with perfectly detangled, moisturized hair and creating the most precise center part you can manage—use a rattail comb and take your time. Divide your hair into two equal sections. For each side, gather the hair at your crown and begin braiding using either a three-strand or four-strand technique (four-strand creates a more dimensional look). Keep your hands relaxed but your tension consistent—too tight causes discomfort and breakage, while too loose means the braids won’t hold their shape through several weeks of wear. The braid should feel snug but not pinching, like you could slip a single finger under the braid with minimal resistance.
Real advantage: With only two braids, your maintenance appointments are quick and budget-friendly—you’re essentially just unbraiding a couple of inches and rebraiding, versus spending hours touching up numerous braids.
8. The Feed-In Fulani with Invisible Roots
Feed-in braiding is a technique where you gradually incorporate small sections of new hair into your existing braid as you go, creating a braid that appears to grow directly from your scalp rather than starting with a thick bundle at the root. Applied to Fulani braids, this technique delivers a softer, more blended appearance that feels less constructed and more organically grown-out.
Why Feed-In Technique Matters for Natural Hair
Feed-in braiding distributes tension more evenly across your scalp because the pressure point moves gradually down the braid rather than concentrating at the roots. This means longer wear between maintenance and significantly reduced risk of traction alopecia or tender scalp. The visual effect is equally valuable—feed-in braids blend seamlessly with your natural hairline, which means your edges and baby hairs integrate into the style rather than being pulled and exposed.
Executing the Feed-In Method
Begin at your hairline with a very small section of hair—maybe 1/8 inch of your natural hair divided into three thin strands. Start braiding with these strands, and as you braid downward about ½ inch, add a small section of new hair to one of your three strands by incorporating it into that strand’s next rotation. Continue this process, alternating which strand receives the new hair addition, and gradually incorporating hair from the entire section you’re working with as you braid downward. By the time you’ve braided 2-3 inches, your entire section has been incorporated into the braid, and the braid now flows straight from your scalp without a thick bundle at the root.
Worth knowing: Feed-in braiding takes more time during installation (usually 30-45 minutes longer than traditional Fulani braids), but pays dividends in longevity—feed-in braids often last 5-6 weeks versus 3-4 weeks for standard braids.
9. The Braided Crown with Flowing Back
This romantic variation pairs a crown of braids that circle your head (similar to a flower crown effect) with completely unbraided hair flowing freely down your back and shoulders. It’s ideal if you want maximum protection at the crown—where hair is most fragile and prone to breakage—while showing off length and curl pattern in your free-flowing hair below.
Visual and Practical Benefits
The braided crown keeps the hair at your hairline and crown secured and protected, which means you’re specifically addressing the areas most vulnerable to stress and damage. Simultaneously, the unbraided back section means less overall weight and heat buildup, making this style comfortable for warm weather or extended wear. The visual effect is stunning—defined, structured braiding contrasts with soft, textured waves or curls below, creating dimensional, fashion-forward styling that photographs beautifully.
Creating the Crown Effect
Section out a band of hair from temple to temple, going around the back of your head (imagine drawing a line that would sit where a headband would sit). Divide this band into 4-6 braids depending on the fullness you want. Braid from one temple around to the other, securing the end at the opposite temple with bobby pins tucked discretely into the braid itself or secured underneath where it’ll be hidden by your free-flowing hair. Allow all hair below this crown to remain unbraided and free. For extra polish, apply a lightweight leave-in conditioner to the unbraided section to define curls and add shine without creating frizz.
Pro tip: This style works beautifully overnight styled—sleep on your braided crown and wake with defined, crimped texture in your free-flowing hair, multiplying the visual impact.
10. The Textured Fulani with Cornrows and Loose Ends
This final variation embraces intentional texture and movement by combining cornrows or defined braids with deliberately loose, undone-looking braided or twisted ends that flow and shift naturally. It’s perfect if you love the Fulani aesthetic but want a style that feels lived-in and relaxed rather than perfectly structured from crown to tip.
Why Loose Ends Feel Modern and Authentic
Perfectly tight braids from root to tip can feel like a costume or dated styling choice, whereas braids that are structured at the roots and intentionally relaxed toward the ends feel contemporary and sophisticated. This approach celebrates natural texture—your hair’s curl pattern becomes a visible, intentional part of the design rather than something hidden by ultra-tight braiding. The style also feels more forgiving in terms of maintenance; loose ends won’t show frizz and disarray the way super-tight braids will.
Styling Technique for Relaxed Ends
Braid your roots using your preferred technique—whether that’s straight braids, cornrows, or feed-in styles. Once you’ve braided approximately 2/3 to 3/4 of your hair’s length, transition to a looser braiding style, keeping the three strands looser and the tension minimal. Allow your natural curl pattern to show through. Some people prefer stopping the braid entirely at this point and separating the remaining hair into individual braided or twisted sections that you then deliberately separate and fluff with your fingers for an even more relaxed effect. You can also apply a lightweight curl cream to the loose-end sections to enhance and define your natural curl pattern.
Insider note: This version actually improves significantly over 1-2 weeks as the braids relax naturally and the ends become progressively looser and more textured—plan accordingly if you’re styling for an important event.
Final Thoughts
Fulani braids represent one of the most accessible, versatile, and beautiful approaches to styling natural hair, regardless of your texture, length, or lifestyle. Each of these ten variations proves that simplicity and cultural authenticity don’t require complicated techniques or extensive time investment—they require understanding your hair’s needs, respecting the tradition you’re engaging with, and committing to consistent maintenance that keeps your hair healthy beneath the braids.
The true power of these styles lies in their protective function combined with their visual impact. You’re not just creating a beautiful look; you’re practicing a form of low-manipulation styling that allows your natural hair to thrive, retain moisture, and grow stronger over weeks of wear. Whether you choose elaborate beading and threading or embrace minimalist simplicity, the foundation of beautiful Fulani braids is the same: clean, moisturized hair; even, consistent tension; and the understanding that what makes these styles truly stunning is how they respect and celebrate natural hair texture rather than fighting against it.
Take time to find the version that resonates most with your aesthetic, commit to learning proper installation (or finding a talented braider who respects your hair), and approach these styles as both a protective choice and a meaningful cultural statement.