


If you’ve ever scrolled through pictures of West African hairstyles and found yourself mesmerized by intricate, sculptural braided patterns that seem to defy gravity, you’ve likely seen Yoruba didi styles. These aren’t just hairstyles — they’re an art form rooted in centuries of cultural tradition, a way to express identity, mark special occasions, and celebrate the beauty and versatility of natural hair. The Yoruba people of Nigeria and other West African regions have perfected the art of creating stunning protective styles that are as functional as they are breathtaking.
What makes didi styles particularly special is their ability to transform natural hair into wearable sculpture. The name itself comes from Yoruba, and these styles range from simple geometric patterns to elaborate designs that can take hours to create. Whether you’re looking to give your natural hair a break from daily styling, prepare for a significant event, or simply want to explore a protective style that honors African beauty traditions, didi styles offer endless possibilities. Each variation tells a story and showcases the skill of the person creating it — and yes, that can be you with practice and the right guidance.
The beauty of learning about didi styles extends far beyond aesthetics. These braided styles protect your natural hair from breakage, reduce daily manipulation, and let your hair thrive while you enjoy a gorgeous finished look that can last weeks. They work beautifully with coily, kinky, and textured hair types, though the specific method and durability can vary depending on your hair texture, thickness, and length. Understanding the different variations available helps you choose a style that fits your lifestyle, hair goals, and the occasion you’re dressing up for.
1. Classic Straight-Back Didi
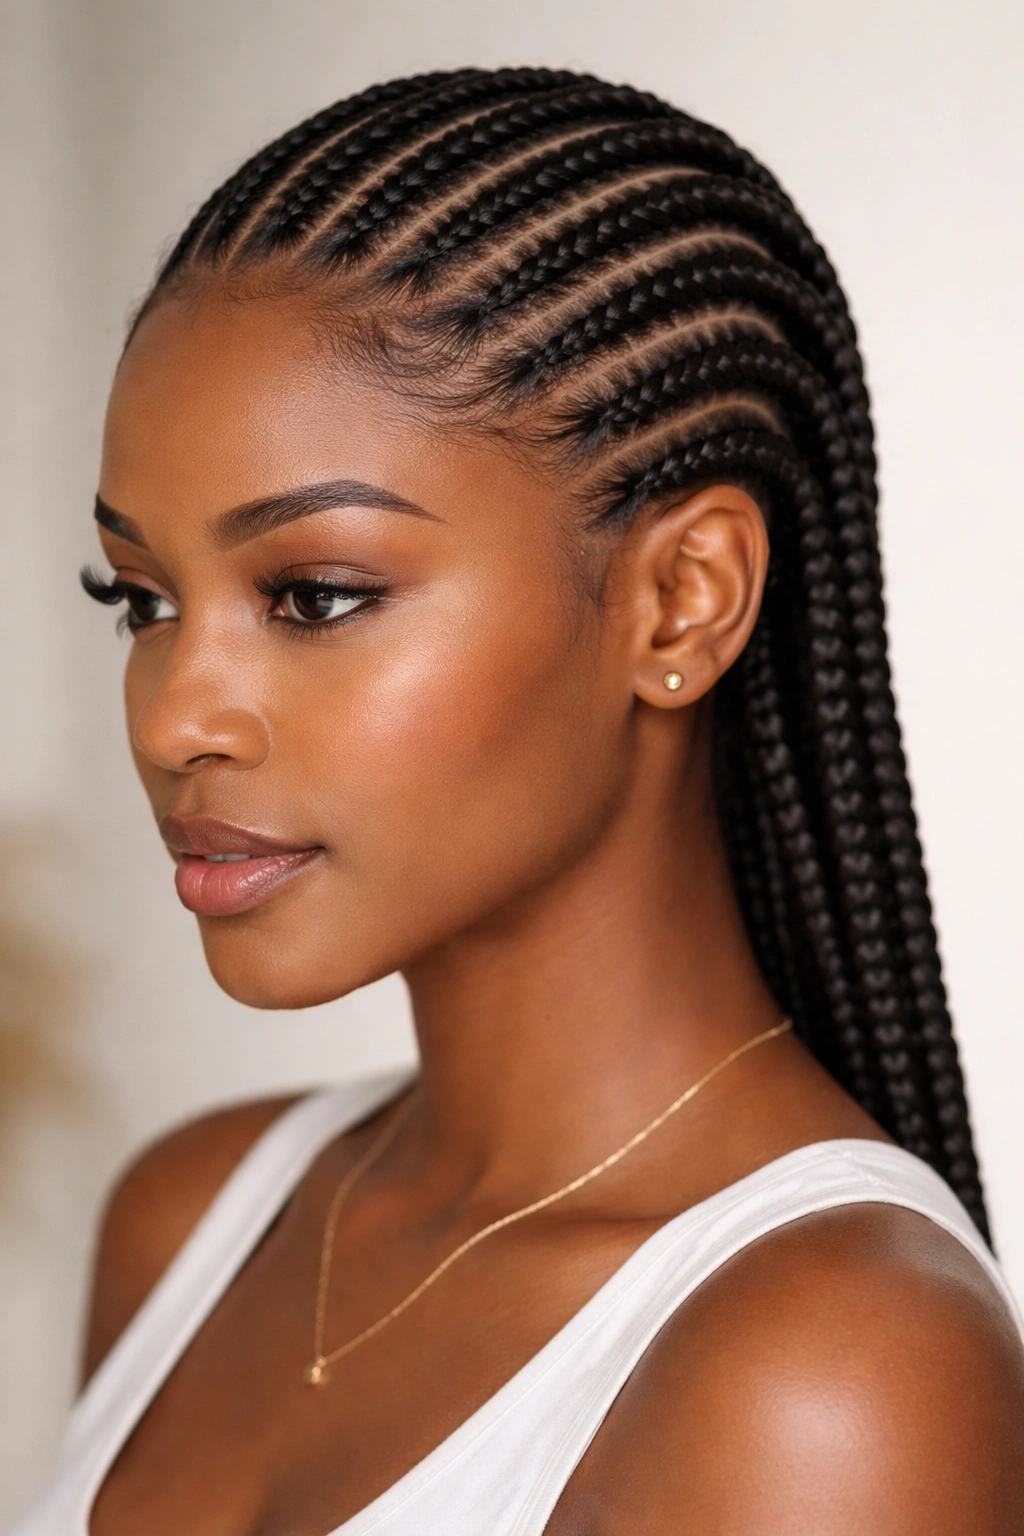
The straight-back didi is where many people begin their didi journey, and it remains one of the most elegant and timeless Yoruba styles. This style features neat, parallel braids that run straight back from the front hairline to the nape of the neck, creating clean lines that frame the face beautifully. The braids sit close to the scalp and taper gradually toward the ends, which can be finished with thread, beads, or left natural depending on your preference and the occasion.
Why It’s a Foundational Style
The straight-back didi works as both an everyday protective style and as a starting point for creating more complex patterns. The simplicity of the design means less tension on your edges compared to tighter styles, making it an excellent choice if you’re new to didi styling or if you have a sensitive scalp. The finished look is elegant enough for professional settings and casual enough for everyday wear, which explains its enduring popularity.
How to Create It
The process begins with parting your hair into vertical sections from your hairline straight back to your nape. Most straight-back didi styles use between 4 to 8 sections depending on your desired braid thickness and total hair volume. Section the hair cleanly using a rat-tail comb, then braid each section smoothly and evenly from root to tip. You can add thread or lightweight beads as you braid for added aesthetics and weight distribution. The key is maintaining consistent braid tension throughout — tight enough to last, but loose enough that you’re not experiencing scalp discomfort after a few hours of wearing the style.
Care and Longevity Tips
A well-executed straight-back didi can last 3 to 4 weeks depending on your hair’s growth rate and how well you maintain it. Sleep on a silk or satin pillowcase to reduce frizz and friction against your hair. Spritz your braids lightly with a hydrating braid spray every few days to keep your natural hair underneath moisturized. At night, you can wrap your braids loosely with a silk scarf to protect the style and reduce unraveling.
2. Crisscross Cornrow Didi
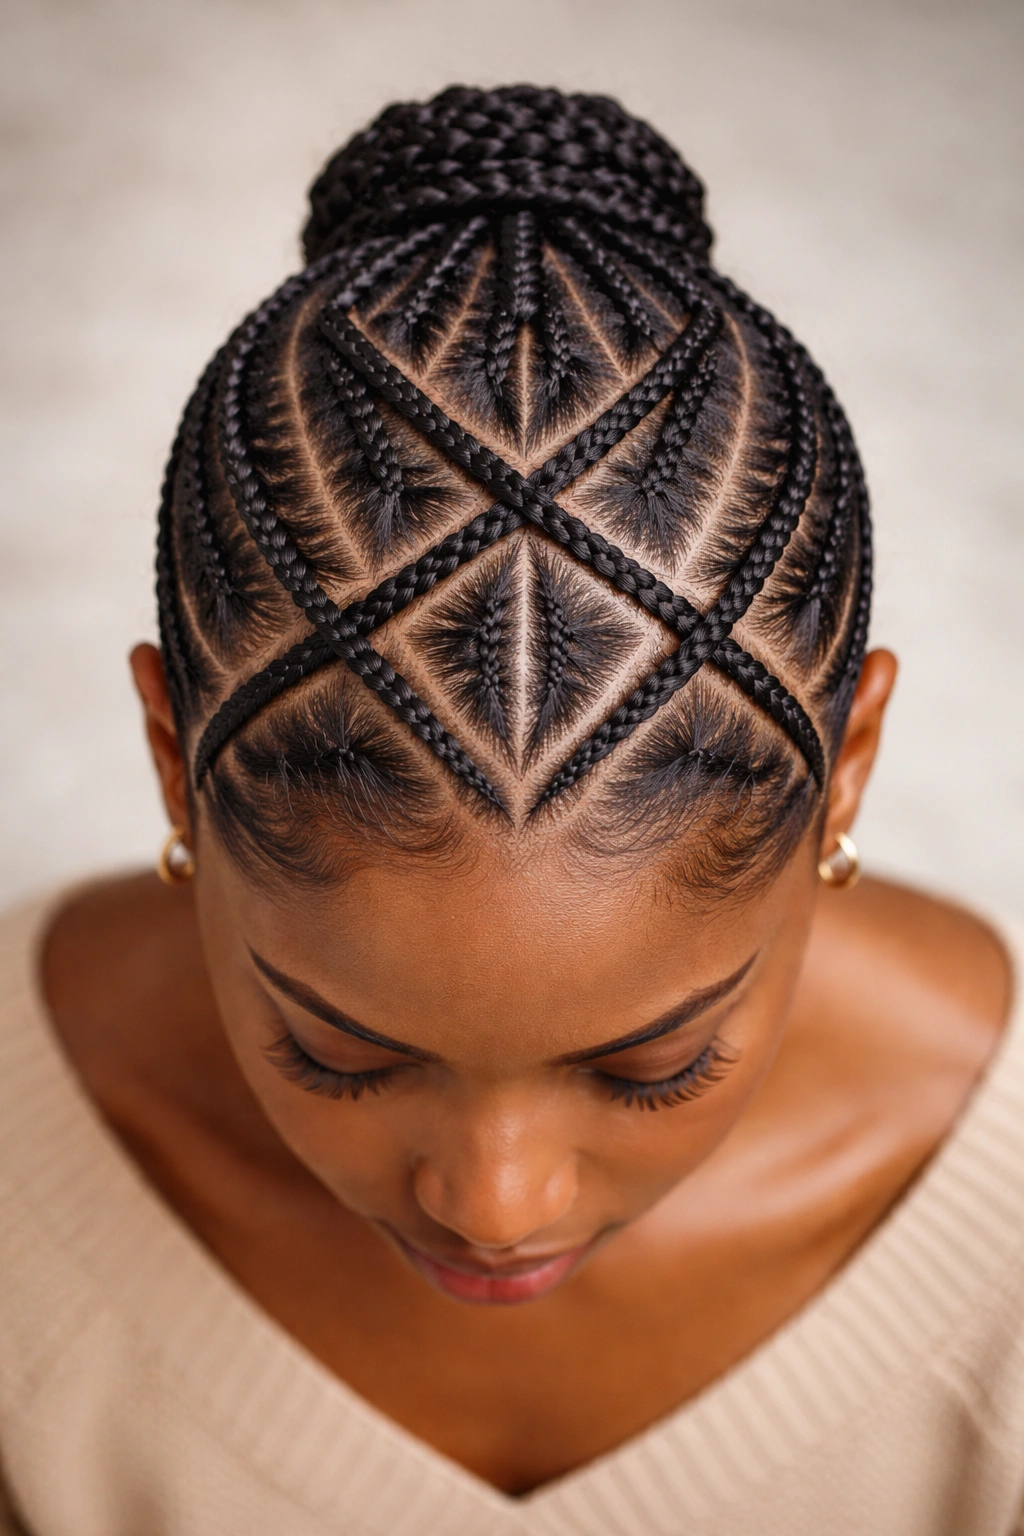
The crisscross cornrow didi elevates the classic didi style by adding visual complexity and movement. Rather than braiding straight back, this style uses two or more sets of braids that angle across the scalp in diagonal or crossing patterns before meeting at the back. The crisscross pattern creates geometric shapes on the scalp — diamonds, squares, or triangles depending on how the braids are routed — making this style particularly striking when viewed from above.
The Visual Impact
What makes the crisscross didi so visually interesting is how the braids interact with each other and the scalp beneath. The crossing pattern creates depth and dimension, transforming a simple protective style into something that looks sculptural and intentional. The crisscross effect also distributes tension across your scalp more evenly than straight braids, since the weight and pulling is distributed across multiple angles rather than focused along straight lines.
Execution Techniques
Creating a crisscross didi requires more planning than a straight-back style. You’ll want to map out your braid pattern before you start — this might mean using temporary sections or clips to visualize how many braids you’ll need and where they should cross. Some versions use two sets of three or four braids that cross in the middle; others use more complex patterns with multiple intersection points. The actual braiding technique remains the same — you’re just changing the direction and pathway of each braid as it moves across the scalp.
Best Practices for Symmetry
The trickiest part of a crisscross didi is achieving symmetry so both sides mirror each other. Work slowly and take breaks to step back and assess your progress. Taking a photo from directly above can help you see if your pattern is even and balanced. If you’re braiding your own hair and finding it difficult to see the back of your head, ask a friend to help you, or invest in a handheld mirror positioned to give you that overhead view while you work.
3. Spiral Didi with Coils
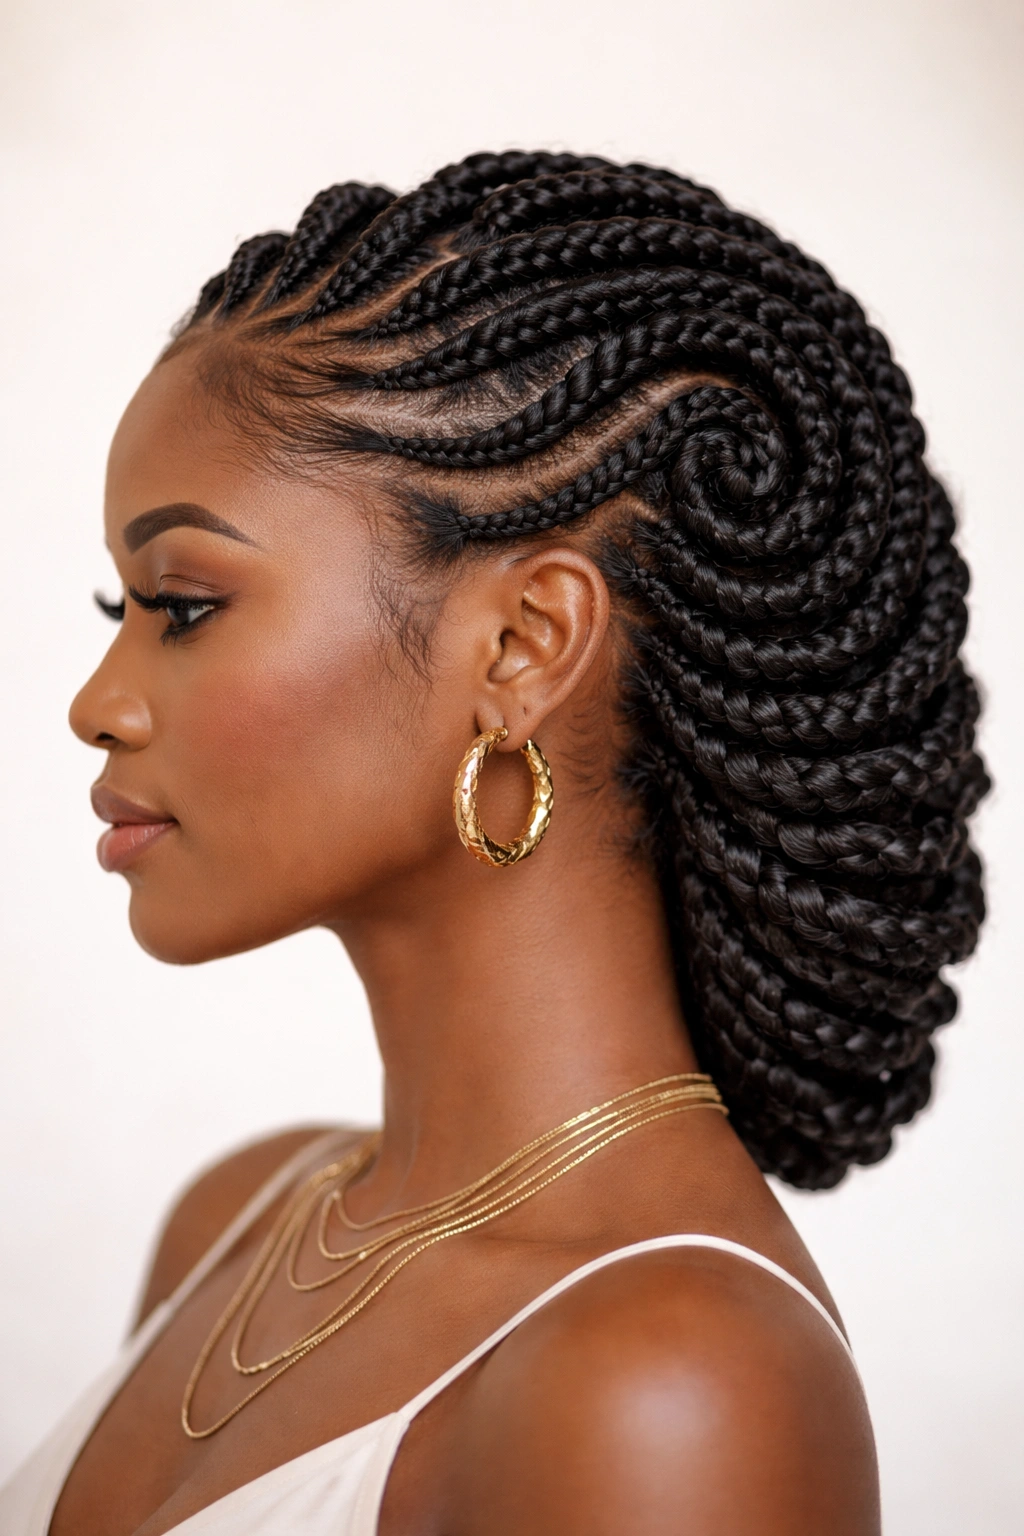
The spiral didi incorporates twists or coils rather than traditional three-strand braids, creating a texture that’s visually distinct and offers a slightly different feel against the scalp. In this style, two sections of hair are twisted together, and the twist either continues straight back or spirals around toward the back of the head, hence the name. Spiral didis have a more flowing, organic appearance compared to the geometric precision of straight or crisscross styles.
The Texture Difference
Twists create less tension on the scalp than tight braids while still providing excellent protection for your natural hair. Many people find that twist-based didis are more comfortable for extended wear, especially if they have a sensitive scalp or thinning edges. The twisted texture also catches light differently than braids, giving your style a different visual quality throughout the day depending on how you move.
Creating the Spiral Pattern
Begin by parting your hair into sections, similar to the straight-back didi. Instead of three-strand braiding, divide each section into two subsections and twist them together, adding small pieces of hair as you move toward the back — this is a two-strand twist. The spiral element comes from how you route these twists; you can twist in a straight line backward, or you can angle them to create a spiral or helical pattern that wraps partially around the head. Some people create multiple spirals that meet at the crown or nape.
Styling Options
Spiral didis look beautiful finished with beads at the bottom, thread wrapping, or even small cuffs and rings positioned along the twist. Because twists are less rigid than braids, you have more flexibility in how tightly you can secure the finished ends. You can leave them fluffy and soft, or tightly twist them for a sleeker appearance. The choice depends on your personal style preference and the impression you want the finished look to give.
4. Five-Braid Crown Didi
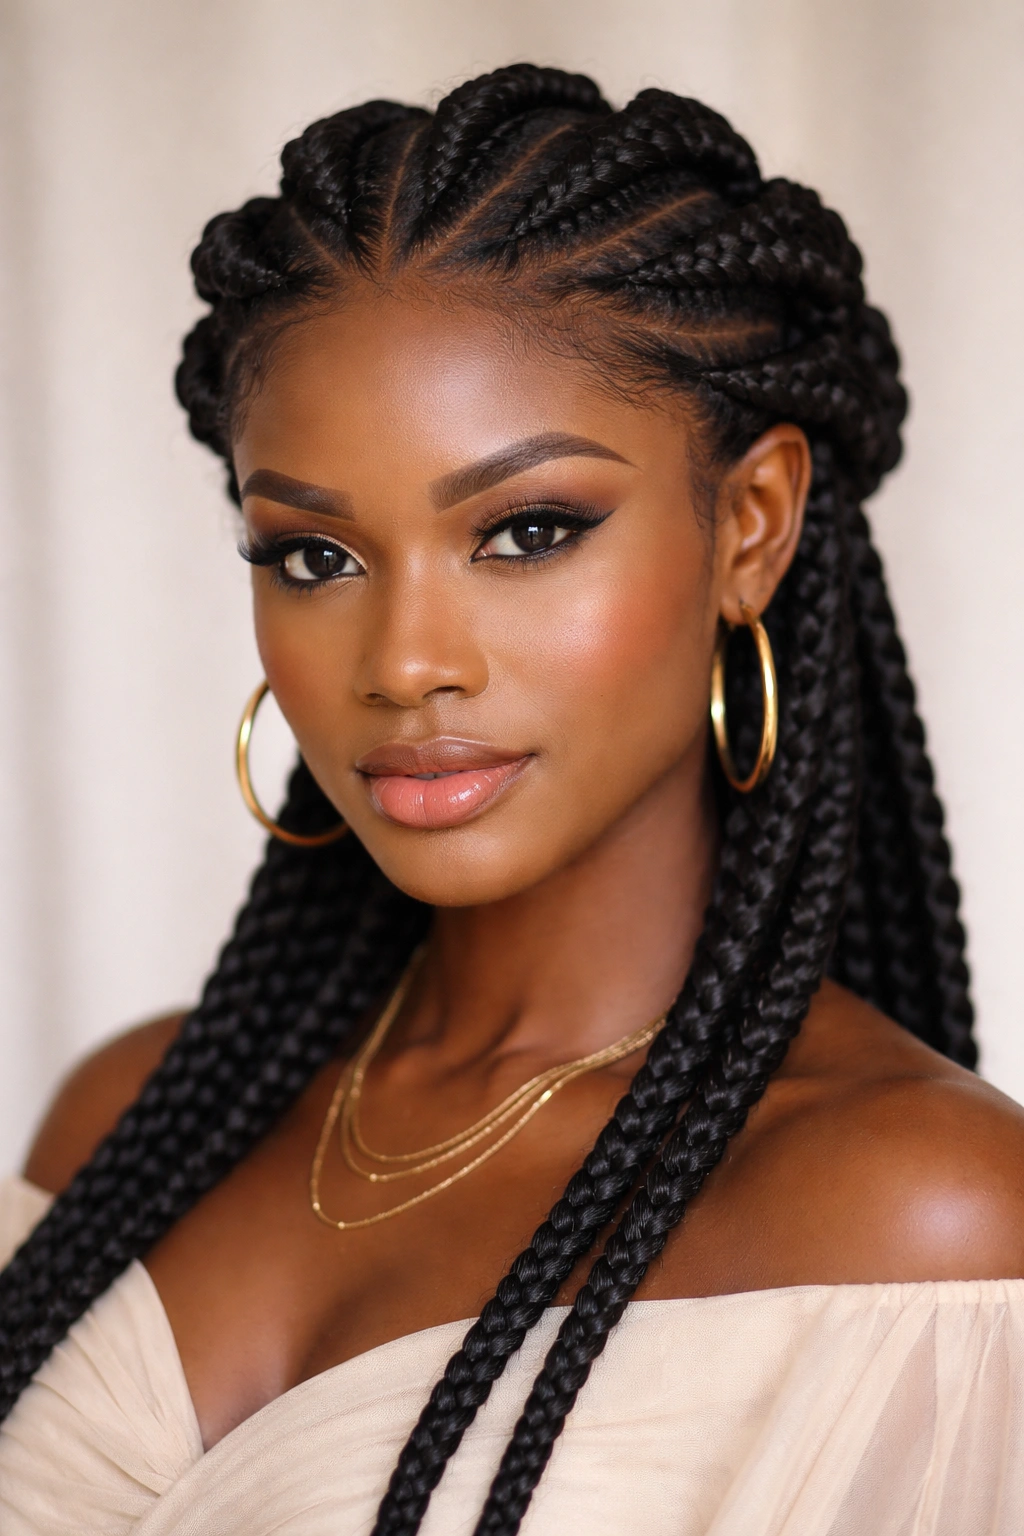
The five-braid crown didi creates an elegant, regal effect by positioning five braids around the head in a crown-like formation. This style features braids that begin at one side of the head, travel across the crown, and end on the opposite side, with the remaining braids positioned down the back. The result is a halo-like effect that’s particularly popular for special occasions, celebrations, and cultural events where you want your styling to feel elevated and intentional.
Creating the Crown Effect
The classic five-braid crown begins with two braids positioned at the temples that angle toward the crown, creating an X pattern when viewed from the front. The remaining three braids are positioned down the back of the head, typically parted vertically. The braids that form the crown portion require careful parting to ensure they start at the right points on your hairline to create symmetry. This is a style where planning your section placement before you begin braiding makes a huge difference in the final result.
Occasion and Versatility
The crown didi works beautifully for celebrations, religious ceremonies, cultural festivals, and formal events. It’s also becoming increasingly popular as a bridal hairstyle for women who want to incorporate their cultural heritage into wedding day styling. The style can be customized with gold thread, colored thread, beads, or cowrie shells woven into the braids for added ceremony and personal expression. Many people choose to keep their edges smooth and gelled for a polished, intentional appearance.
Supporting the Style
Because the crown braids are positioned higher and carry more visual weight, the supporting braids down the back need to be positioned correctly to balance the overall look. Make sure your back braids are evenly spaced and match the thickness of your crown braids so the style feels cohesive rather than like two different styles combined. The finished style should feel balanced whether you’re looking at it from the front, side, or back.
5. Zig-Zag Didi Pattern
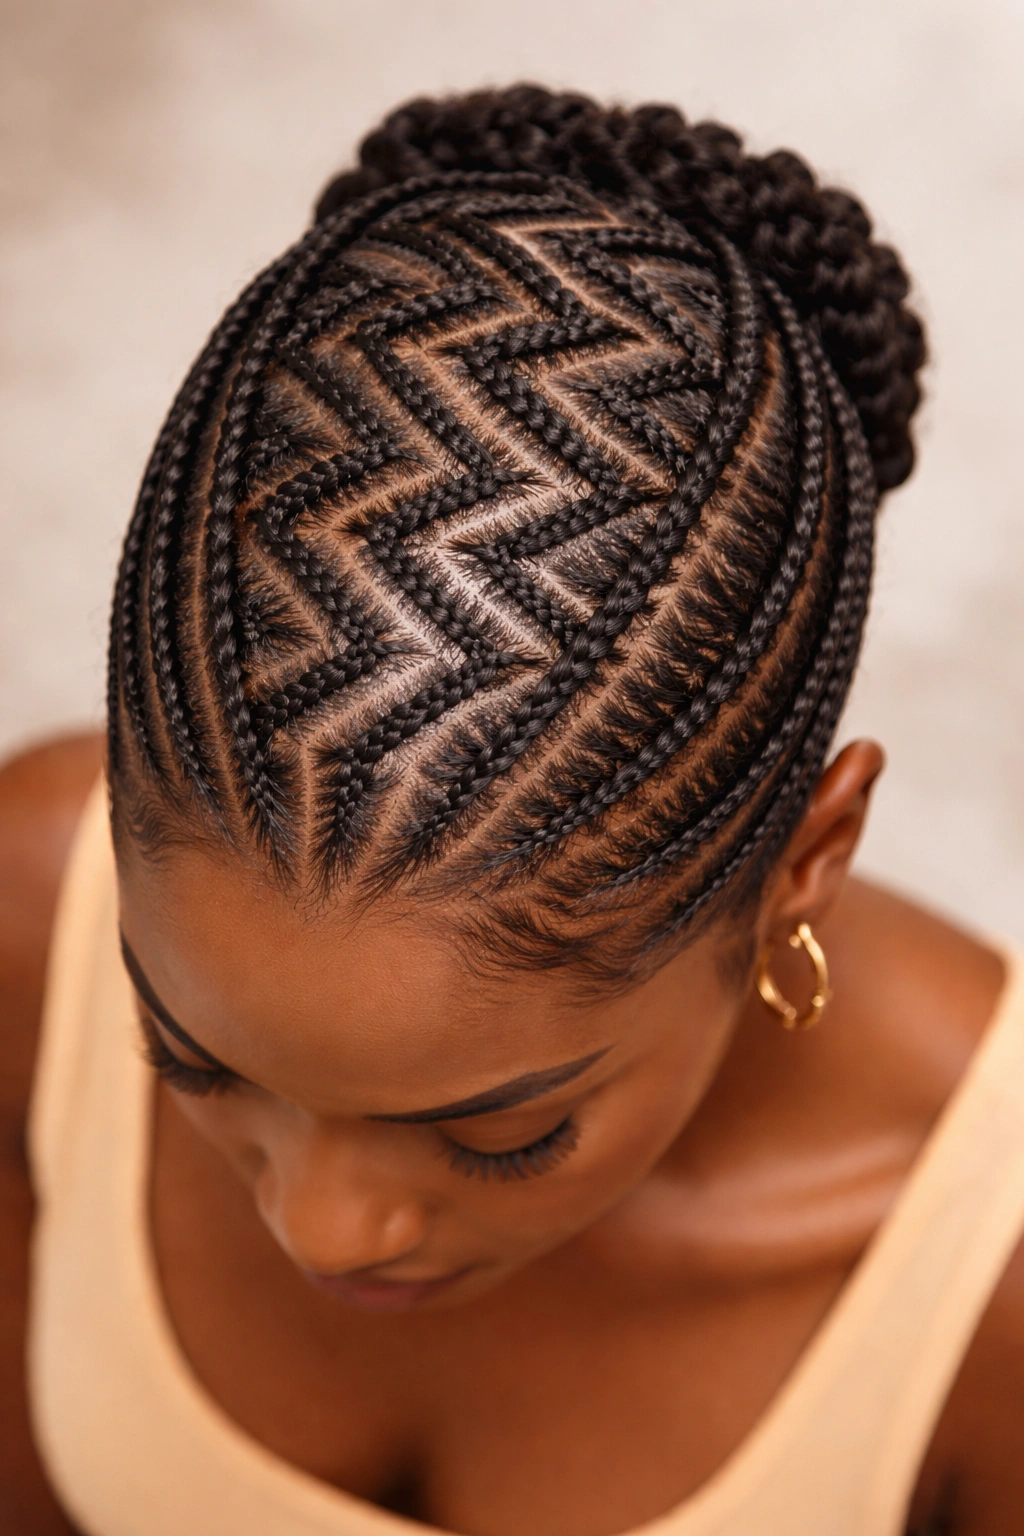
The zig-zag didi is exactly what it sounds like: braids that follow a zigzag pattern across the scalp rather than moving in straight lines or crossing over. This style creates dynamic visual movement and angular lines that can make your head look beautifully sculpted. The zigzag pattern is created by angling the braid sections so they move right, then left, then right again as they move from front to back.
Understanding the Zig-Zag Geometry
The key to a successful zig-zag didi is consistent angling. You’ll want your braids to move at a predictable angle — perhaps 30 to 45 degrees — so the pattern looks intentional and balanced rather than random or accidental. Plan your pattern before you part; you might want to use clips or light sections to map out where each braid will begin and end so you can visualize the final zig-zag before you start braiding.
Visual and Protective Benefits
Beyond aesthetics, the zig-zag pattern actually provides excellent weight distribution and protection. Rather than concentrating tension along straight lines or specific intersection points, the zigzag spreads tension across your entire scalp in a balanced way. This makes it an excellent choice for people with fine hair, sensitive scalps, or anyone who has experienced tension alopecia in the past and needs to be cautious about style choices.
Finishing the Look
Zig-zag didis look particularly striking when finished with contrasting thread or beads that follow the same zigzag pathway. Using thread in a color that contrasts with your hair — copper, gold, silver, or a bright jewel tone — can really emphasize the geometric pattern you’ve created. Some people add small beads at regular intervals along the braid to add dimension and weight distribution.
6. Dutch Braid Didi Variation
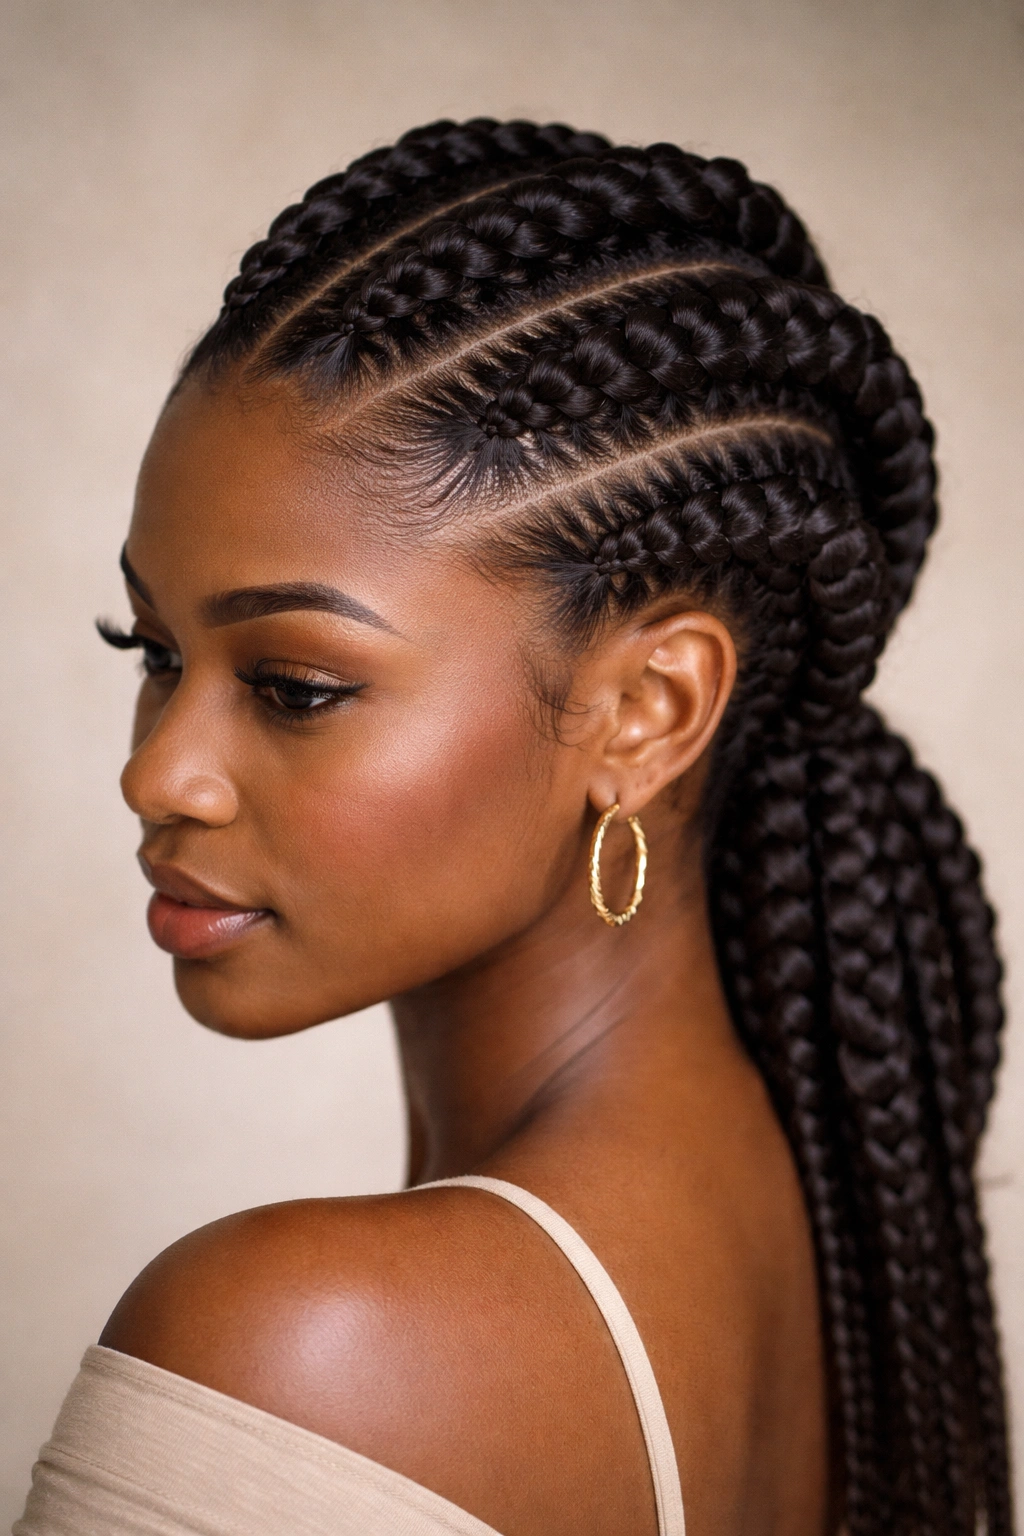
The Dutch braid didi takes the principle of the Dutch braid — where you braid over rather than under, creating braids that sit atop the scalp — and applies it to the didi style format. This variation creates braids with a raised, dimensional appearance that catches light beautifully and has a more textured, sculptural quality than traditional under-braids. Dutch braid didis have been gaining popularity because they offer a different aesthetic while maintaining all the protective benefits of the classic style.
The Technical Difference
While a traditional didi uses three-strand braiding where you pass each strand under the center, a Dutch braid involves passing each strand over the center. This creates a braid that stands slightly proud of the scalp rather than lying flat. The visual result is more dramatic and three-dimensional, especially when photographed or viewed from certain angles. Dutch braids also create a slightly different tension pattern, which some people find more comfortable.
Styling Considerations
Dutch braid didis work beautifully with beads, thread wrapping, and decorative accessories because the raised nature of the braids gives these additions more prominence and visual impact. The style requires a bit more precision in execution since the over-braiding technique has less room for error — loose sections or uneven tension becomes more noticeable on Dutch braids than on traditional braids.
Duration and Maintenance
Dutch braid didis typically last a similar length of time as traditional didis — 3 to 4 weeks depending on your hair growth and maintenance routine. However, because the braids sit more prominently on the scalp, loose hairs and frizz become more visible over time. Regular maintenance with a small brush and braid cream can help keep your Dutch braid didi looking fresh and intentional throughout its wear time.
7. Geometric Triangle Didi
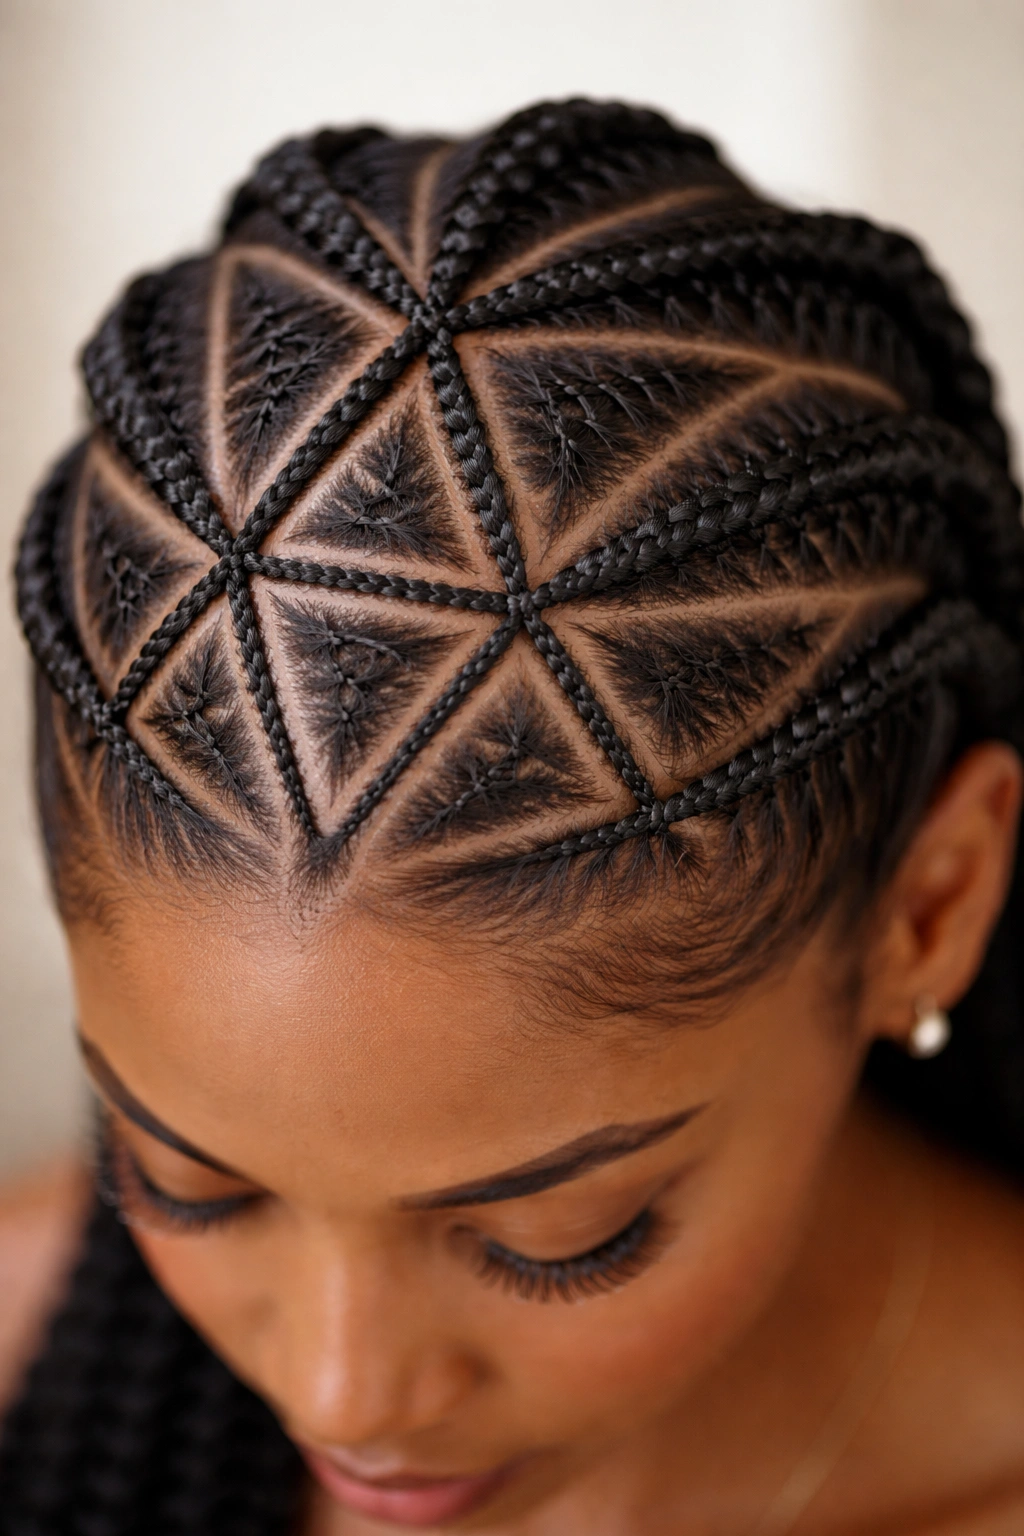
The geometric triangle didi creates triangular sections on the scalp by positioning braids in a way that forms repeated triangular shapes. This style can feature small, tight triangles or larger, more open triangles depending on how many braids you use and how you space them. The geometric nature of this style makes it particularly popular with people who appreciate structured, intentional styling and those who want a style that looks visually impressive and takes advantage of the sculpting possibilities of braids.
Creating the Triangular Pattern
The triangular pattern is achieved through careful parting and section placement. Begin by identifying how many triangles you want across your head and parting accordingly. For example, if you want four triangles across the front and back, you’d create sections whose boundaries form the sides of triangles. The braids you create within these triangular sections will define the pattern. Each braid doesn’t necessarily need to fill the entire triangle — you might have one braid per triangle, or multiple braids creating smaller triangles within the larger geometric grid.
Scalp Designs and Artistry
The geometric triangle didi is essentially a canvas for scalp artistry. Many people who wear this style incorporate color into the braids, use different thread colors in different triangular sections, or add beads in patterns that emphasize the geometric design. The style is particularly popular for creative expression, cultural celebrations, and anyone who views their protective styling as a form of wearable art rather than simply a functional necessity.
Symmetry and Planning
Achieving perfect symmetry in a triangle didi requires careful planning and measurement. Use a ruler or measuring tape if needed when creating your initial sections to ensure your triangles are evenly sized and positioned. Taking before photos from multiple angles can help you assess your pattern and make adjustments before you fully commit to braiding. Many people who specialize in geometric didis use marking tools or clips to plan out their design completely before touching a comb to the hair.
8. Didi with Woven Patterns and Color
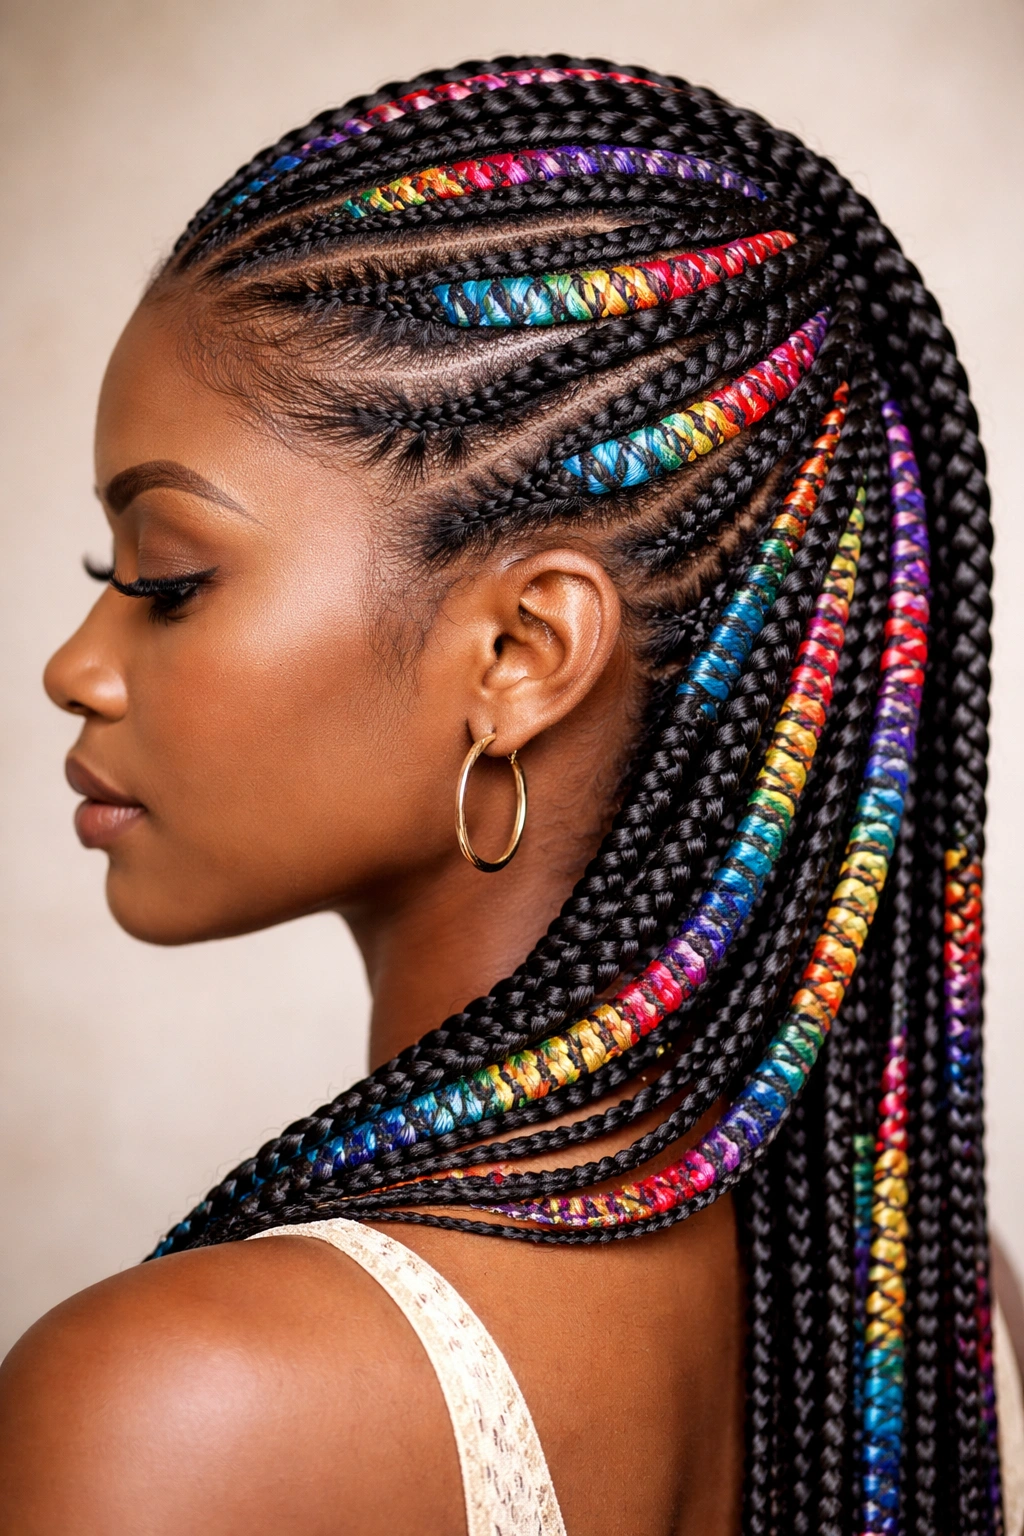
This style takes the fundamental didi concept and elevates it by incorporating multiple colors of thread or hair into the braids themselves, creating woven patterns that add depth, movement, and visual interest. Rather than braiding purely with natural hair, you might integrate colored thread, synthetic hair, or even contrasting yarn to create stripes, patterns, or accents within each braid. This variation allows for incredible creative expression while maintaining all the protective benefits of a traditional didi.
Color Integration Techniques
There are several ways to incorporate color into didi braids. You can wrap individual strands with colored thread before braiding, allowing the thread to become part of the braid structure. You can add synthetic hair in contrasting colors directly into the braid as you create it, alternating between your natural hair and the added hair to create stripes. You can also wrap finished braids with colored thread in specific patterns — perhaps wrapping only the bottom third in one color, or creating diagonal stripe patterns with thread.
Planning Your Color Pattern
Before you start incorporating color, have a clear idea of what you want the finished result to look like. Will you use color in every braid, or only select braids? Will the pattern be consistent throughout the style, or will it vary? Some people create a gallery of inspiration images showing different color techniques and patterns to help them decide what appeals to them. Color integration requires more planning and supplies than a traditional didi, so taking time upfront saves frustration later.
Materials and Safety
If you’re incorporating synthetic hair or added materials into your braids, make sure everything you’re using is designed for this purpose and won’t cause damage to your natural hair. Human hair is gentler than synthetic hair, but it’s also more expensive. Thread designed specifically for braiding is ideal because it’s less likely to snag or catch on your natural hair. Avoid materials that feel rough against your scalp or that might absorb moisture or heat differently than your natural hair.
9. Reverse Didi (Cornrows from Back to Front)
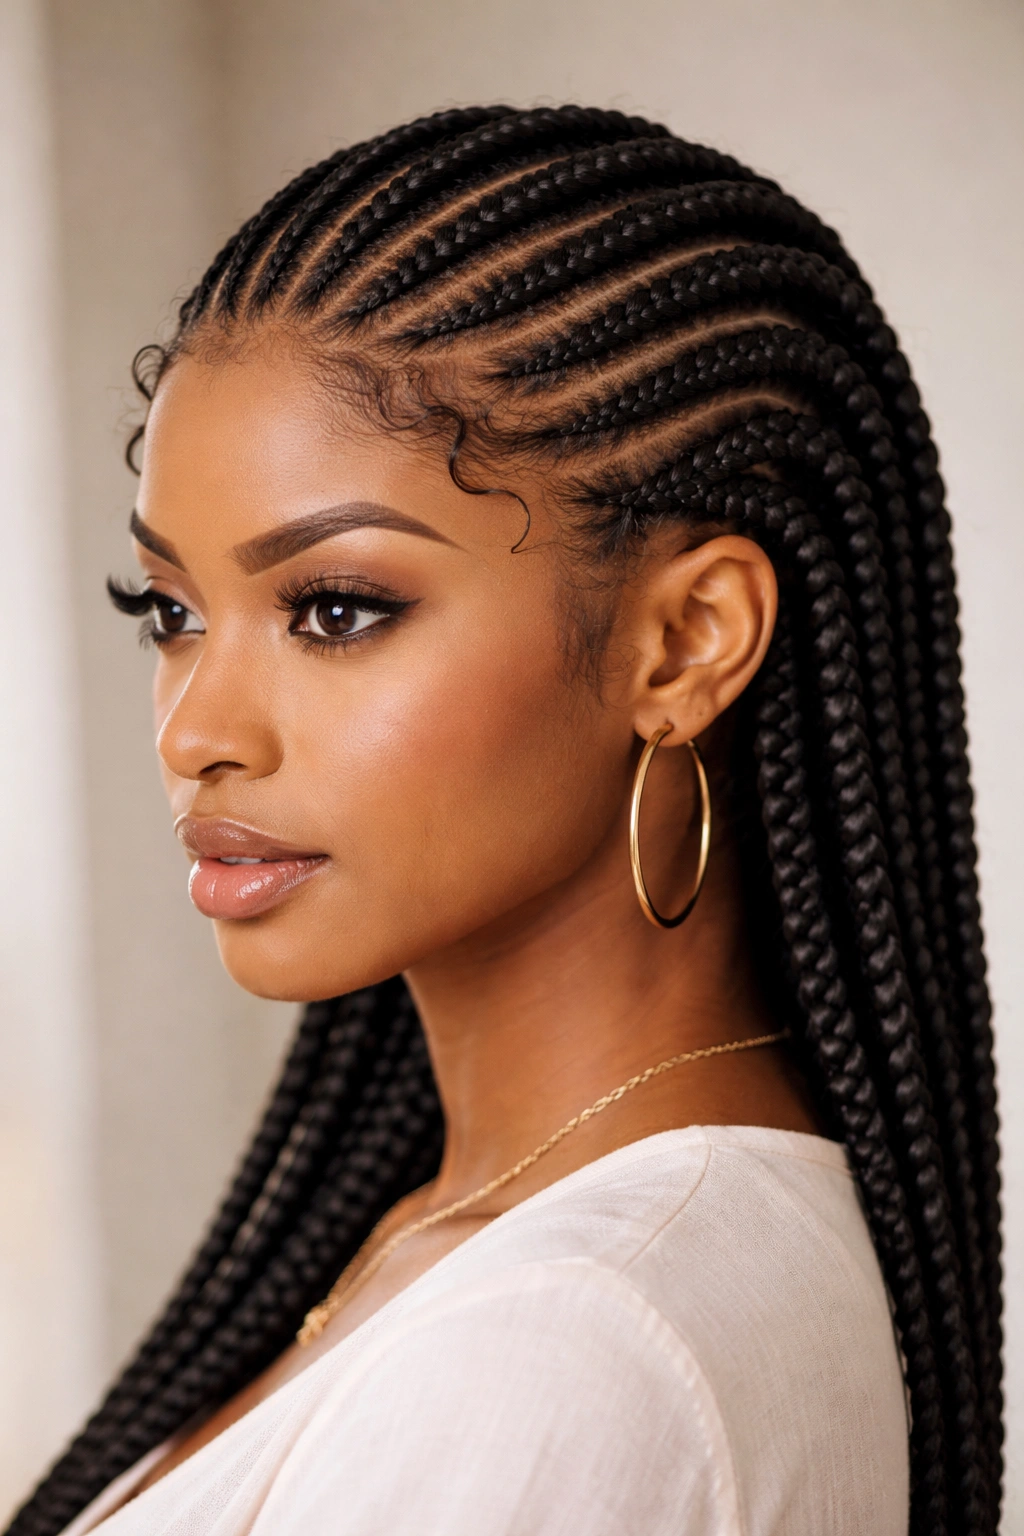
The reverse didi breaks from the typical front-to-back direction by braiding from the back of the head toward the front hairline. This creates a unique visual effect where your braids appear to be flowing forward rather than backward. The style looks striking because it goes against what viewers might expect, creating a fresh, modern take on a traditional style. Reverse didis work particularly well for people who like their braids to frame their face more prominently.
The Visual and Practical Difference
Because the braids are directionally opposite to a traditional didi, the way they frame your face and how they interact with your natural hairline creates a distinctly different effect. The braids travel toward your face rather than away from it, which can be flattering for certain face shapes and can create a more youthful or modern appearance. Some people prefer the reverse didi because it feels like the braids are cradling their face rather than extending away from it.
Creating the Reverse Pattern
Parting for a reverse didi begins at the nape of the neck instead of the hairline. Create your vertical sections at the back of your head, then braid toward the front, adding hair as you move forward. This requires some spatial awareness because you’re working on an area of your head you can’t easily see without a mirror. Many people prefer to ask a friend to help with a reverse didi, or they position multiple mirrors so they can see the back of their head clearly as they work.
Styling Variations
Reverse didis can follow any of the patterns mentioned in previous sections — you can create straight-back (or in this case, straight-forward) braids, crisscross patterns, zigzags, or geometric shapes. The only variable is the direction in which you braid. Reverse didis look beautiful with beads or thread at the front, near your face, which frames your face and draws attention to your features and facial expressions.
10. Didi with Wire or Flexible Framing Elements
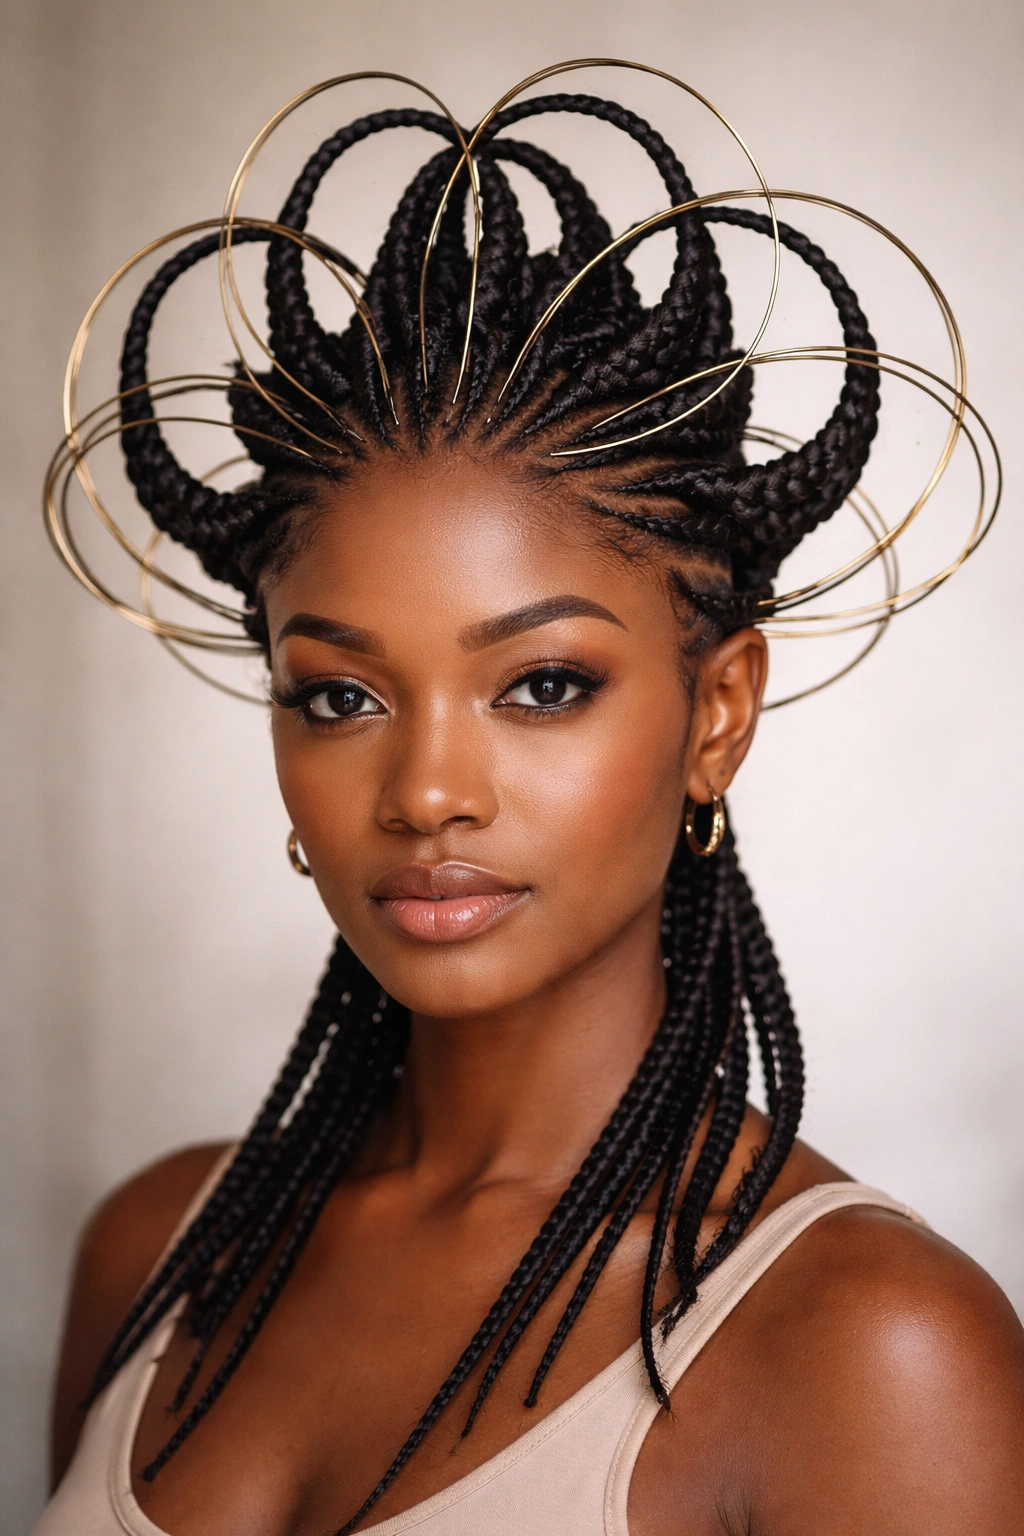
The final style we’re exploring is a modern innovation that incorporates flexible wire, jewelry, or other framing elements into or around the didi braids. This technique allows you to position your braids in specific shapes or to create additional dimensional structure around your face or crown. This style is less about traditional braiding technique and more about using braids as a base for creative, sculptural styling that can be adjusted and repositioned as desired.
Understanding the Framing Concept
Flexible wire or elements allow you to control the shape and position of your finished braids in ways that pure braiding doesn’t. You might use flexible wire to create a spiral effect, position braids in a crown-like formation that holds its shape, or create a specific silhouette. Some people use decorative wire jewelry, flexible hair jewelry designed specifically for this purpose, or even carefully placed accessories that work with the braids to create the desired effect.
Installation and Adjustment
This style requires braiding first, then adding your framing elements afterward. Some people weave thin, flexible wire through their finished braids to lock them in a specific shape. Others use wire-based jewelry that can be twisted around braids and positioned as desired. The advantage of this approach is flexibility — if you want to adjust the style, reposition certain braids, or change the overall shape, you can do so without unbraiding everything.
Comfort and Practicality
If you’re using wire or other materials as framing elements, ensure they’re smooth and won’t snag on your natural hair or irritate your scalp. The framing elements should feel comfortable to sleep on and shouldn’t create pressure points that cause discomfort. Some people find that this style works best for special occasions or shorter wear periods rather than as an everyday protective style, since the additional elements might require more careful handling than a traditional didi.
Final Thoughts
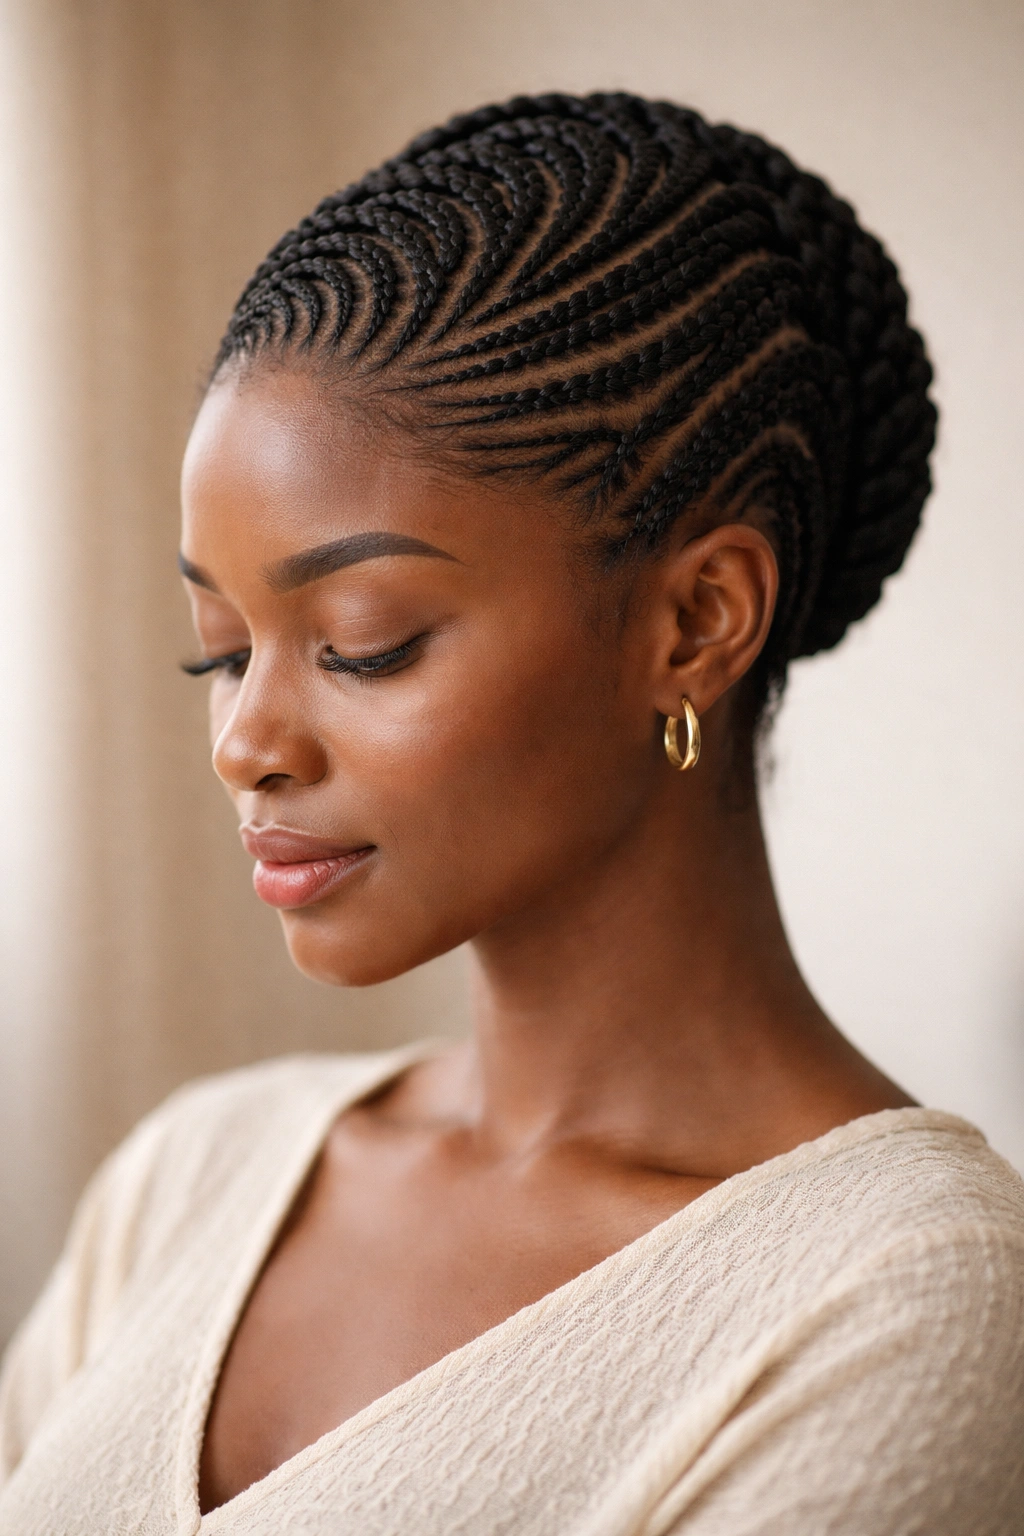
Yoruba didi styles represent a beautiful intersection of protective hair care, cultural heritage, and personal artistry. Whether you’re drawn to the clean simplicity of a classic straight-back didi or the complex sculptural possibilities of geometric and patterned variations, there’s a didi style that will work for your hair, your lifestyle, and your aesthetic preferences. The protective benefits — reduced manipulation, retained moisture, and a break from daily styling — are consistent across all these variations; what changes is how you express yourself within that framework.
The journey of learning to create didi styles is iterative. Your first attempt might not look exactly like you imagined, but each time you braid, you’ll develop better spatial awareness, more consistent technique, and a clearer vision of what you want to create. If you’re having someone else braid your hair, bring reference photos and discuss your expectations clearly so you and your braider are on the same page about thickness, tension, pattern, and finishing elements. Whether you’re creating these styles yourself or working with a professional, approach the process with patience, care for your natural hair, and appreciation for the artistry and cultural significance these styles carry.