A tight tie can flatten good curls in about ten seconds. A sloppy one can leave dents, frizz, and that half-hearted “I gave up” look that never quite feels intentional. The sweet spot is different: tie the hair up, yes, but keep the curl pattern alive, keep the crown soft, and let the shape do some of the talking.
That’s why tied-up hairstyles for curly hair live or die on placement. Not on perfection. A curl-friendly ponytail, bun, twist, or clip style should work with the bend of your hair, not drag it into something it isn’t. When the roots still have lift and the ends still have movement, the whole style feels better.
Curly hair also has a memory that straight hair people often underestimate. Pull it too hard and it snaps back with dents. Use the wrong elastic and you get breakage around the band. Use a dry brush and, well, good luck. A satin scrunchie, a coil tie, or a few pins placed where the curl clumps already want to sit usually does more for the style than a whole drawer of expensive products.
The good news is that tied-up styles do not need to look stiff to be polished. A pineapple ponytail can look sharp. A low bun can look soft and clean. A claw-clip twist can save a rough curl day without making you look like you’ve surrendered to it. Pick the shape that suits your curl pattern, your length, and your patience level, because the hair you actually wear matters more than the hair you think you should wear.
1. Pineapple Ponytail for Curly Hair
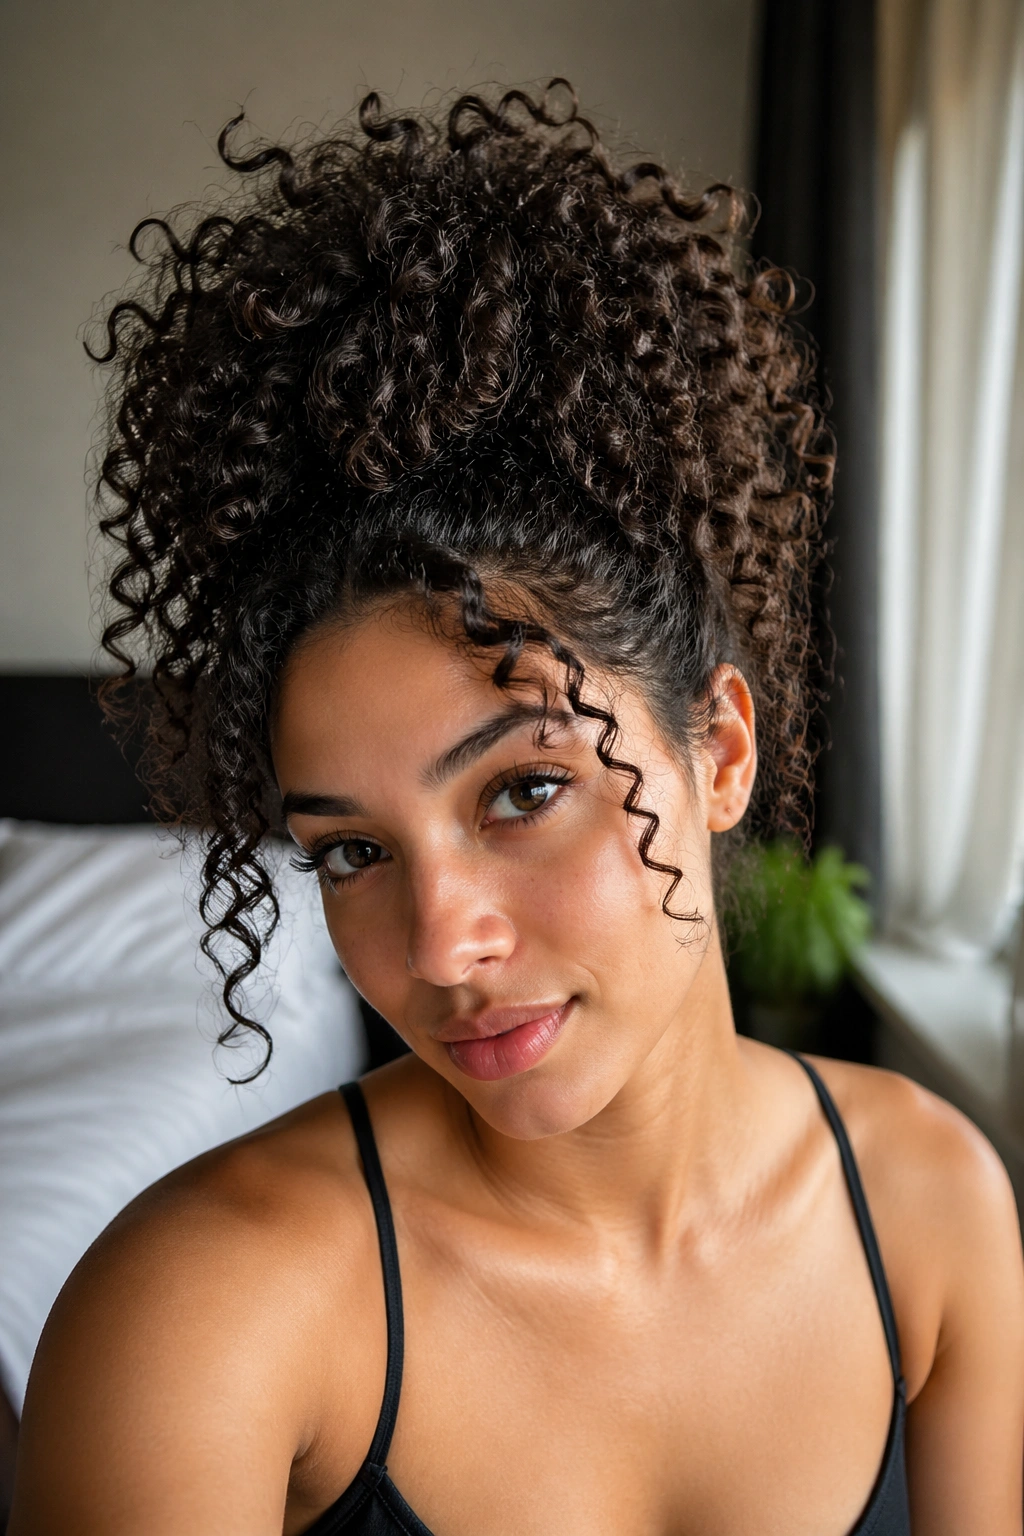
The pineapple ponytail is the style I reach for when curls need to stay bouncy and the crown needs to stay lifted. It sits high on the head, usually near the top of the crown or a touch forward, so the curls fall around the face instead of being crushed flat at the sides.
Why the Pineapple Works
The trick is simple: you are not trying to smooth every strand into submission. You’re gathering the curls loosely enough that they stack on top of each other and keep their shape. That makes this one of the easiest tied-up hairstyles for curly hair when your roots still have volume but the lengths feel a little too wide to leave down.
Use a satin scrunchie or a soft coil tie. A regular elastic can pinch the curl bundle and leave an ugly dent that takes hours to recover. If your hair is dense, wrap the tie twice and stop there. Tight enough to hold. Loose enough to breathe.
- Gather the hair with your hands, not a brush.
- Tilt your head slightly forward so the curls land high and soft.
- Leave the ends loose and fluffy instead of forcing them into a sleek ball.
Small detail, big payoff: leave a few curls around the hairline untouched. They soften the whole look and keep the style from turning severe.
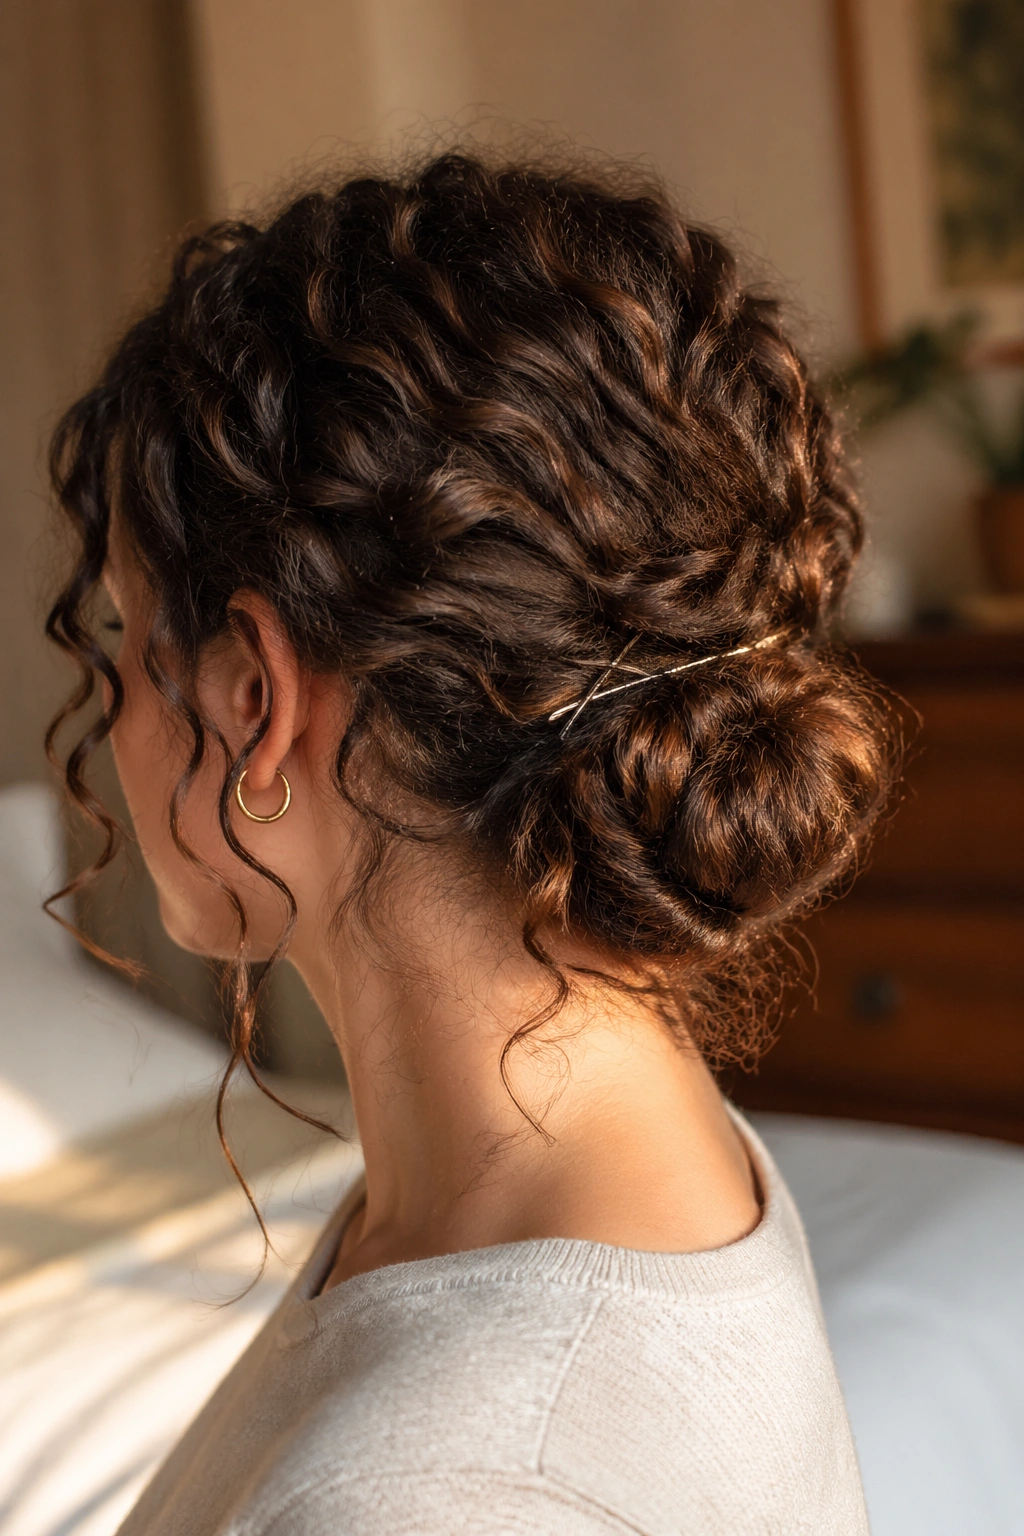
2. Low Curly Bun with Face-Framing Tendrils
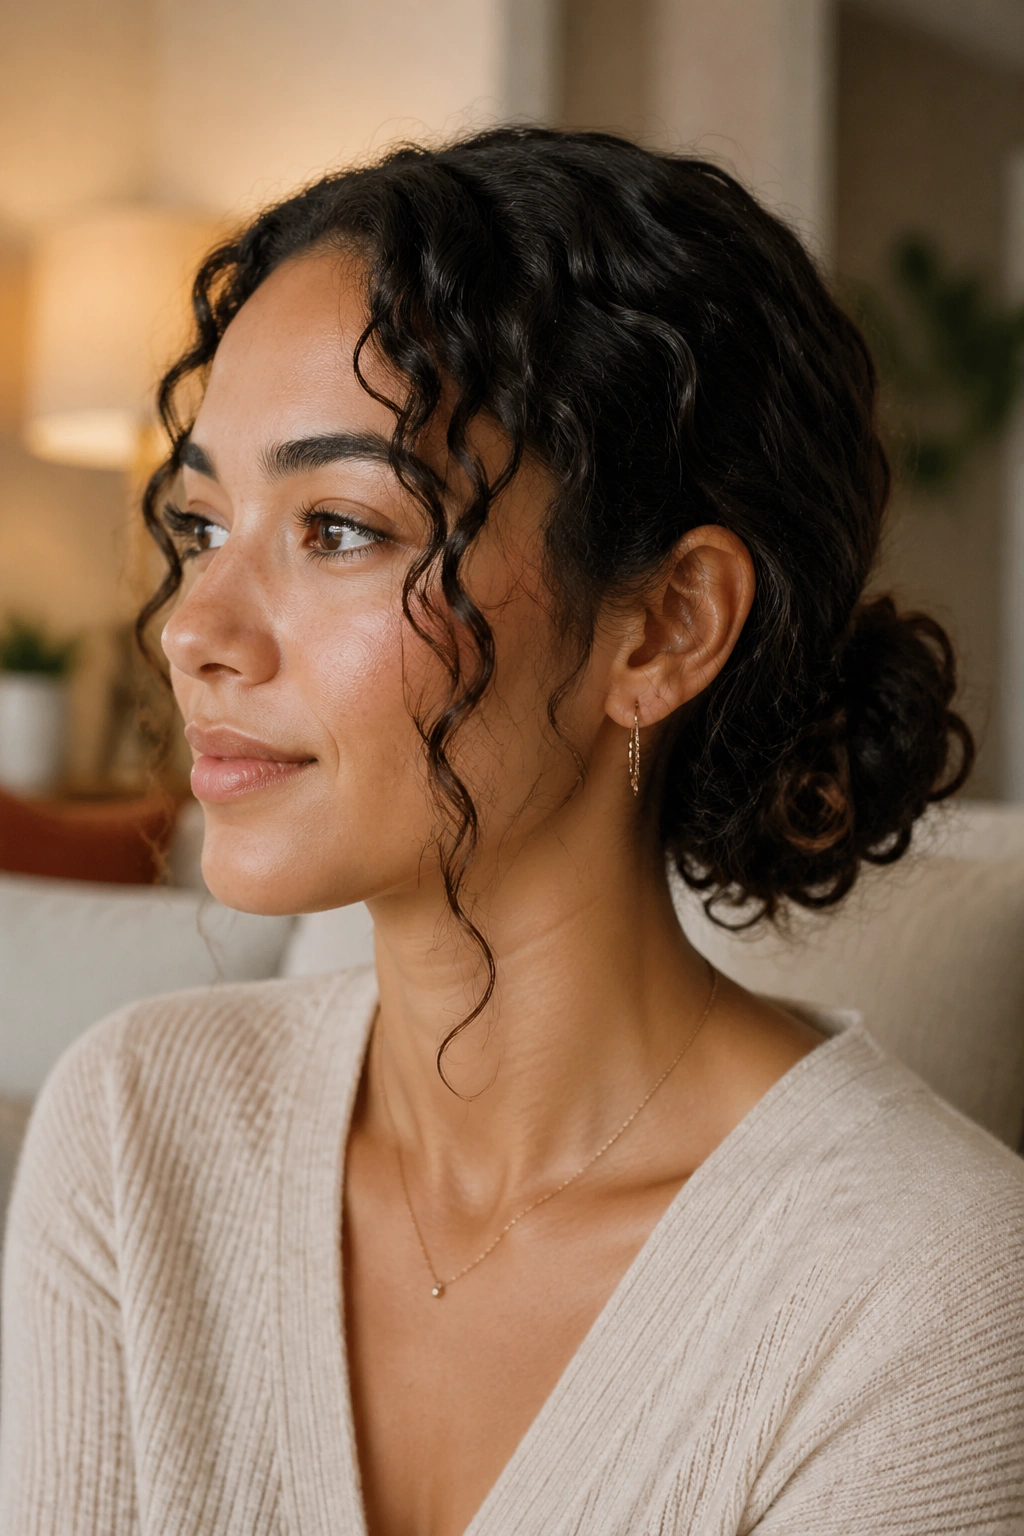
A low curly bun has a calm, almost effortless feel that straight hair buns rarely manage on their own. The curl texture does half the styling for you, which is nice, because the style looks considered even when the actual process takes about five minutes.
The bun should sit at the nape, not jammed up against the scalp. That low placement matters. It lets the curls coil into a fuller shape and keeps the top from looking scraped back. I like this one best when the hair is a bit stretched out from day two or day three wear; fresh curls can be too springy and make the bun harder to control.
Leave a slim curl or two at the temples and near the ears. Not a giant curtain. Just enough softness to break up the outline of the face. Then twist the ponytail once or twice, wrap it around itself, and pin the ends underneath with two or three bobby pins. Cross the pins. Don’t just slide them in and hope for the best.
The result should feel stable, but not rigid. If the bun looks too neat, tug a few curls free from the outer edge and let them sit a little unevenly. That tiny bit of mess makes the whole thing look richer.
3. Half-Up Puff with a Scrunchie
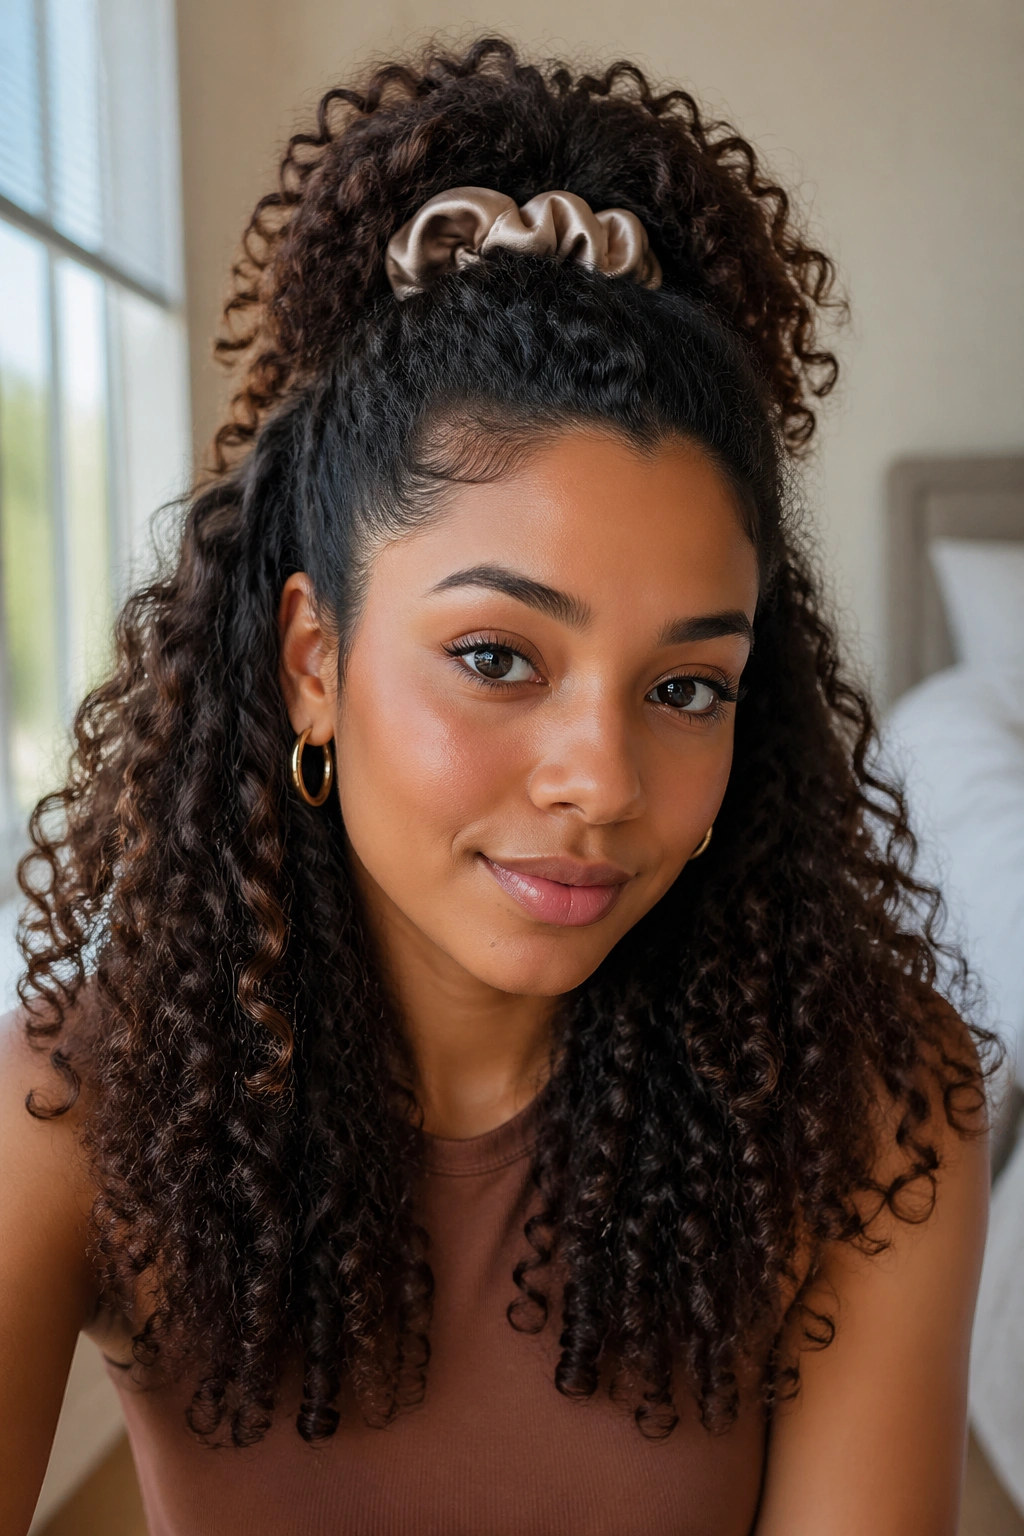
Want the lift of an updo without losing your length? The half-up puff is the answer I always come back to for curly hair that needs shape at the crown and freedom everywhere else.
How to Place the Tie
Start by sectioning the top half from temple to temple, or a little higher if you want more height. Pull that section back with your fingers and tie it once with a satin scrunchie. The lower curls stay loose, so the style keeps all the movement that makes curly hair interesting in the first place.
This is one of those styles that looks polished even when the parting is not perfect. Good. It should look lived-in. If the top section is too tight, the puff loses its shape and the crown goes flat. If it’s too loose, the style slips around. There’s a narrow middle ground, and that’s where the good version lives.
- Use a soft scrunchie, not a thin elastic.
- Leave the section slightly higher than your natural crown for lift.
- Fluff the loose curls below the tie with your fingers, not a comb.
A little root volume at the front keeps the whole thing from looking sleepy. And if your curls are thick, don’t be shy about using two hands to gather the section evenly. One hand alone usually makes a lopsided puff.
4. Twisted Crown Ponytail
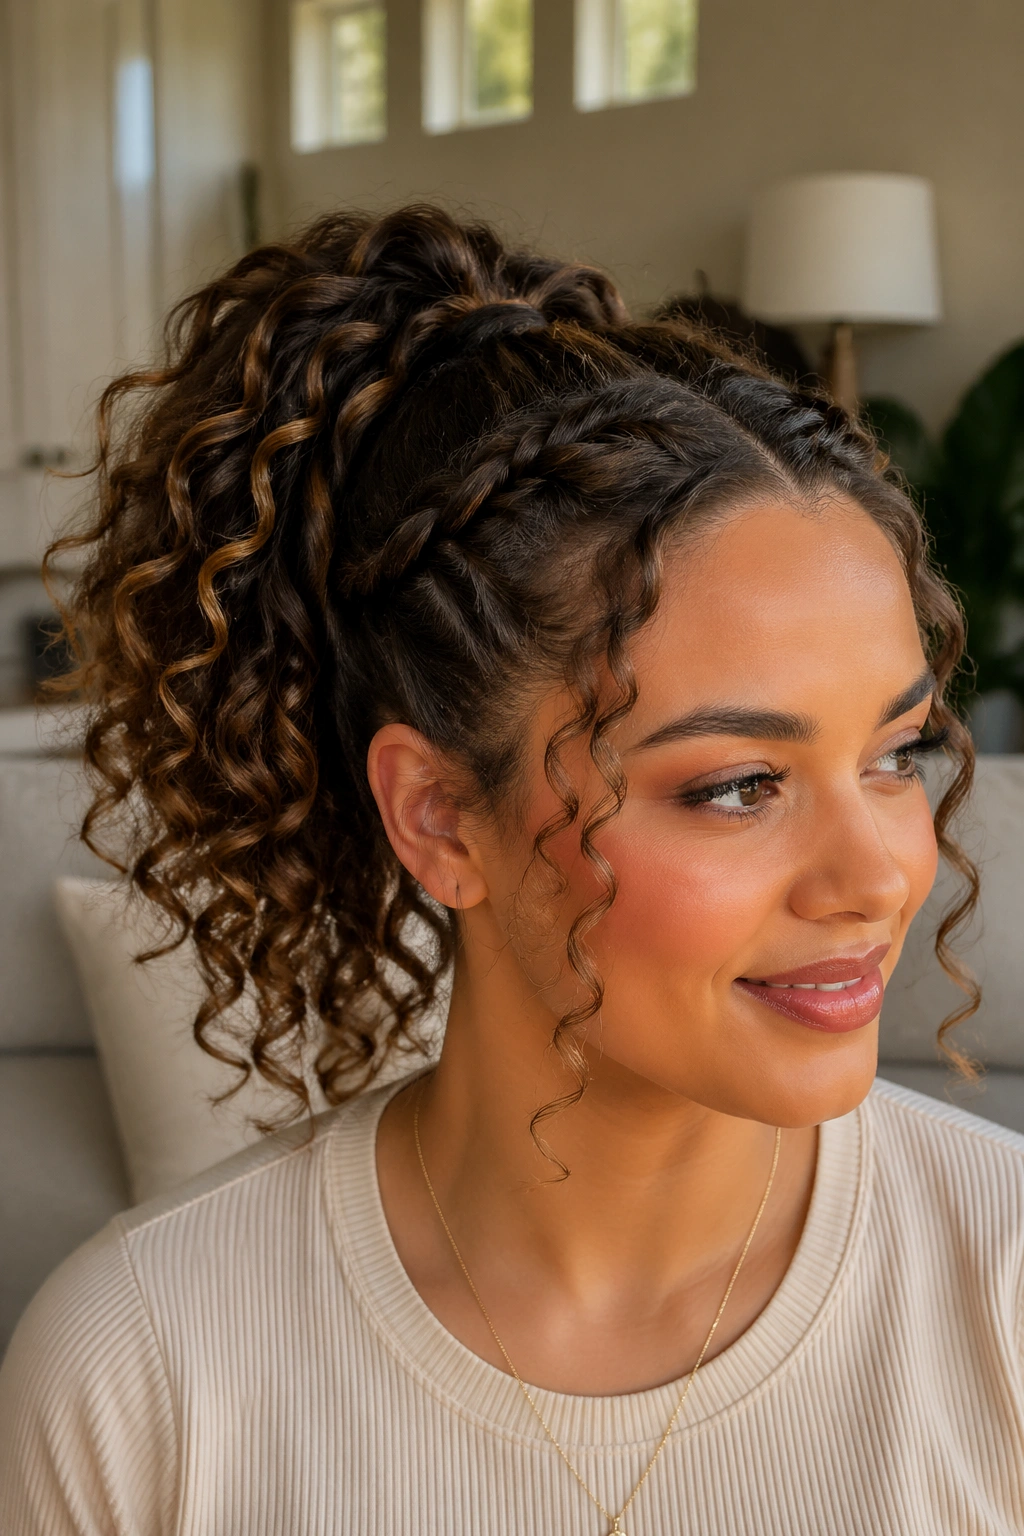
Two small twists can carry an entire hairstyle. That’s the real charm of the twisted crown ponytail.
Instead of relying on one big sweep of hair from the front, you take a section from each side, twist them back along the hairline, and secure them into a ponytail at the back or a little lower. The twists frame the face and keep the front controlled without flattening the rest of the curls.
What I like here is the balance. The style feels tidy near the temples, where curly hair can sometimes puff out in ways you didn’t ask for, but the back still gets to stay curly and loose. It’s especially useful when you want something cleaner than a half-up puff but less formal than a bun.
Make the Twists Stay Put
- Twist each side back in the direction the hair naturally wants to move.
- Pin the twist before you gather the ponytail if your hair is slippery.
- Keep the ponytail tie low enough that the twists don’t yank upward.
A narrow ribbon or a soft elastic can finish it nicely, but the twist itself is the main event. If the ends curl out a bit around the tie, leave them. That little bit of texture is the whole point.
5. Curly Space Buns
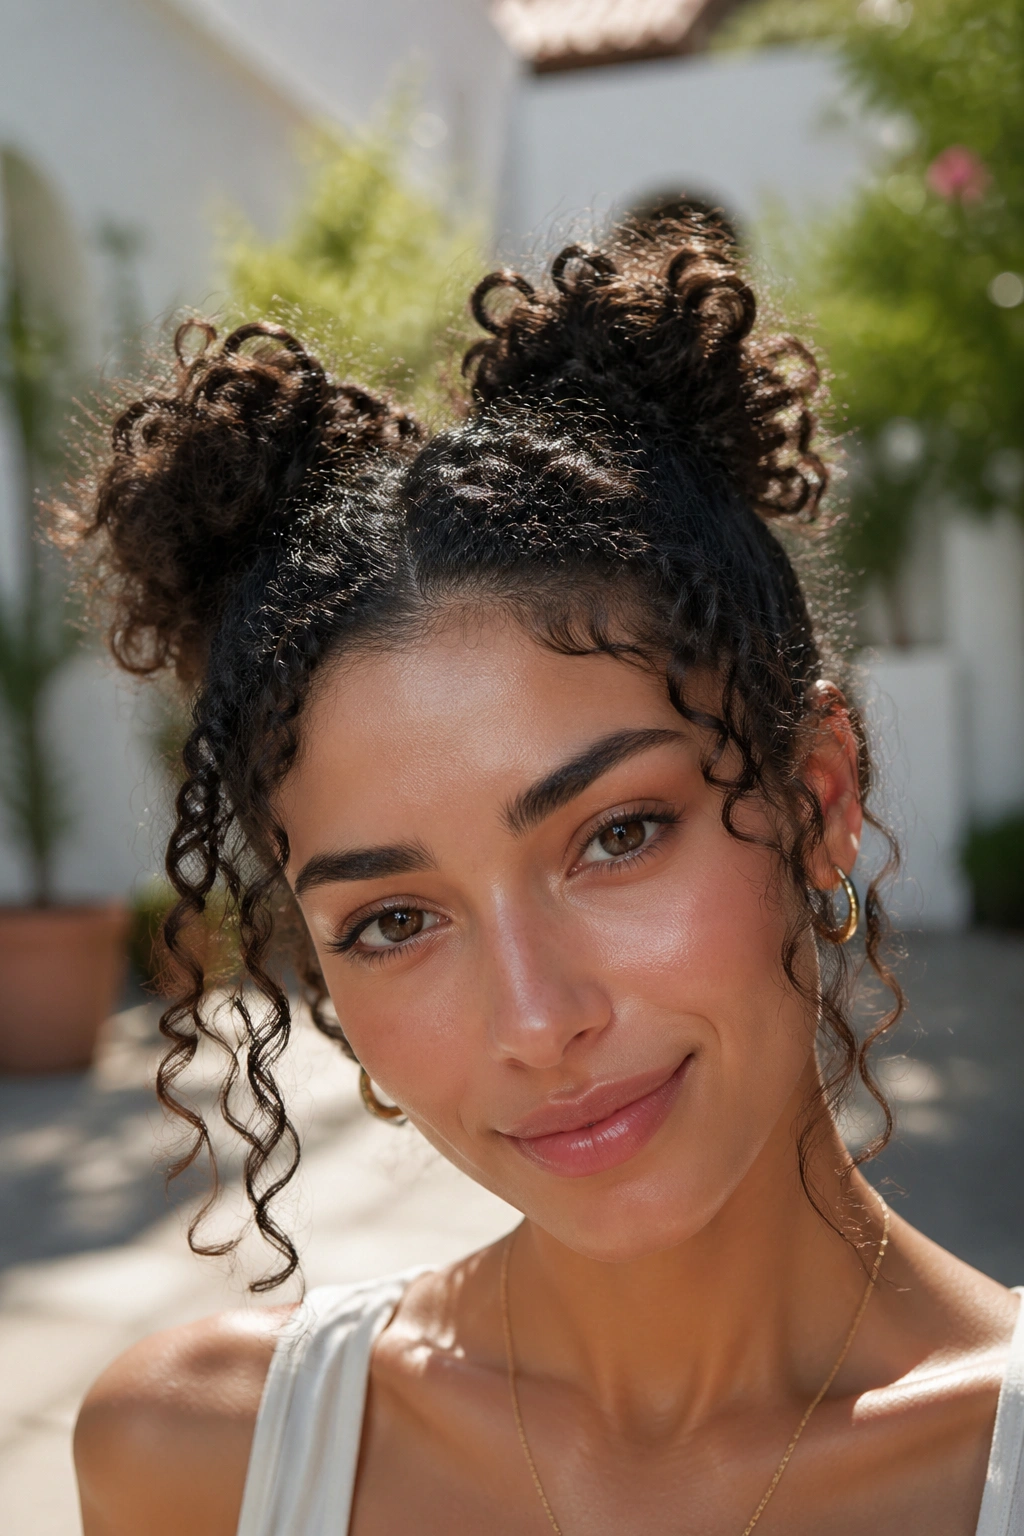
Space buns can go playful fast, which is exactly why they work so well on curly hair. The shape is bold, but the texture keeps it from looking childish unless you really lean into that.
Split the hair into two sections, either down the center or slightly off-center if you want the style to feel less symmetrical. Build two high ponytails first, then twist each one into a bun and secure with pins or a second tie. If your curls are thick, keep the buns a little looser so they don’t turn into tight knots that sit awkwardly on the head.
There’s a nice trick here: don’t aim for identical buns. Seriously. One can be a little fuller, one a touch more flat, and the style still looks deliberate. Perfect matching often makes curly styles look overworked. A small difference in size feels more natural.
A few face-framing curls soften the edges, especially if your part line is sharp. You can also leave the back sections a little puffier for more volume under the buns. That makes the whole head shape look more balanced and less top-heavy.
This is one of the most forgiving tied-up hairstyles for curly hair because the texture hides the pins and the elastic, which is a gift on busy days.
6. Sleek-Front High Puff

How do you keep a high puff from looking messy at the hairline? You smooth the front on purpose and let the puff do the talking.
A sleek-front high puff starts with the hairline and crown gently laid down with water, leave-in, or a light styling gel. Not drenched. Just damp enough to calm the frizz and give the front some control. Then the rest of the hair is gathered high and left full, so the puff sits up like a crown of curls.
This style has a sharper outline than a pineapple ponytail, which is why I like it for times when you want your curls to look structured rather than casual. The contrast between the neat front and the big puff gives the style a strong shape. It also works beautifully for coils and tighter curl patterns, where the puff can stand on its own without extra teasing.
What to Use at the Hairline
- A small toothbrush or edge brush for the front only.
- A light gel or styling cream, used sparingly.
- A satin scarf for 10 to 15 minutes if you want the hairline smoother.
Do not pile on heavy product. Too much and the front gets crunchy, flakes show up, and the puff loses its softness. The best version looks clean, not shellacked.
7. Claw-Clip Twist-Up
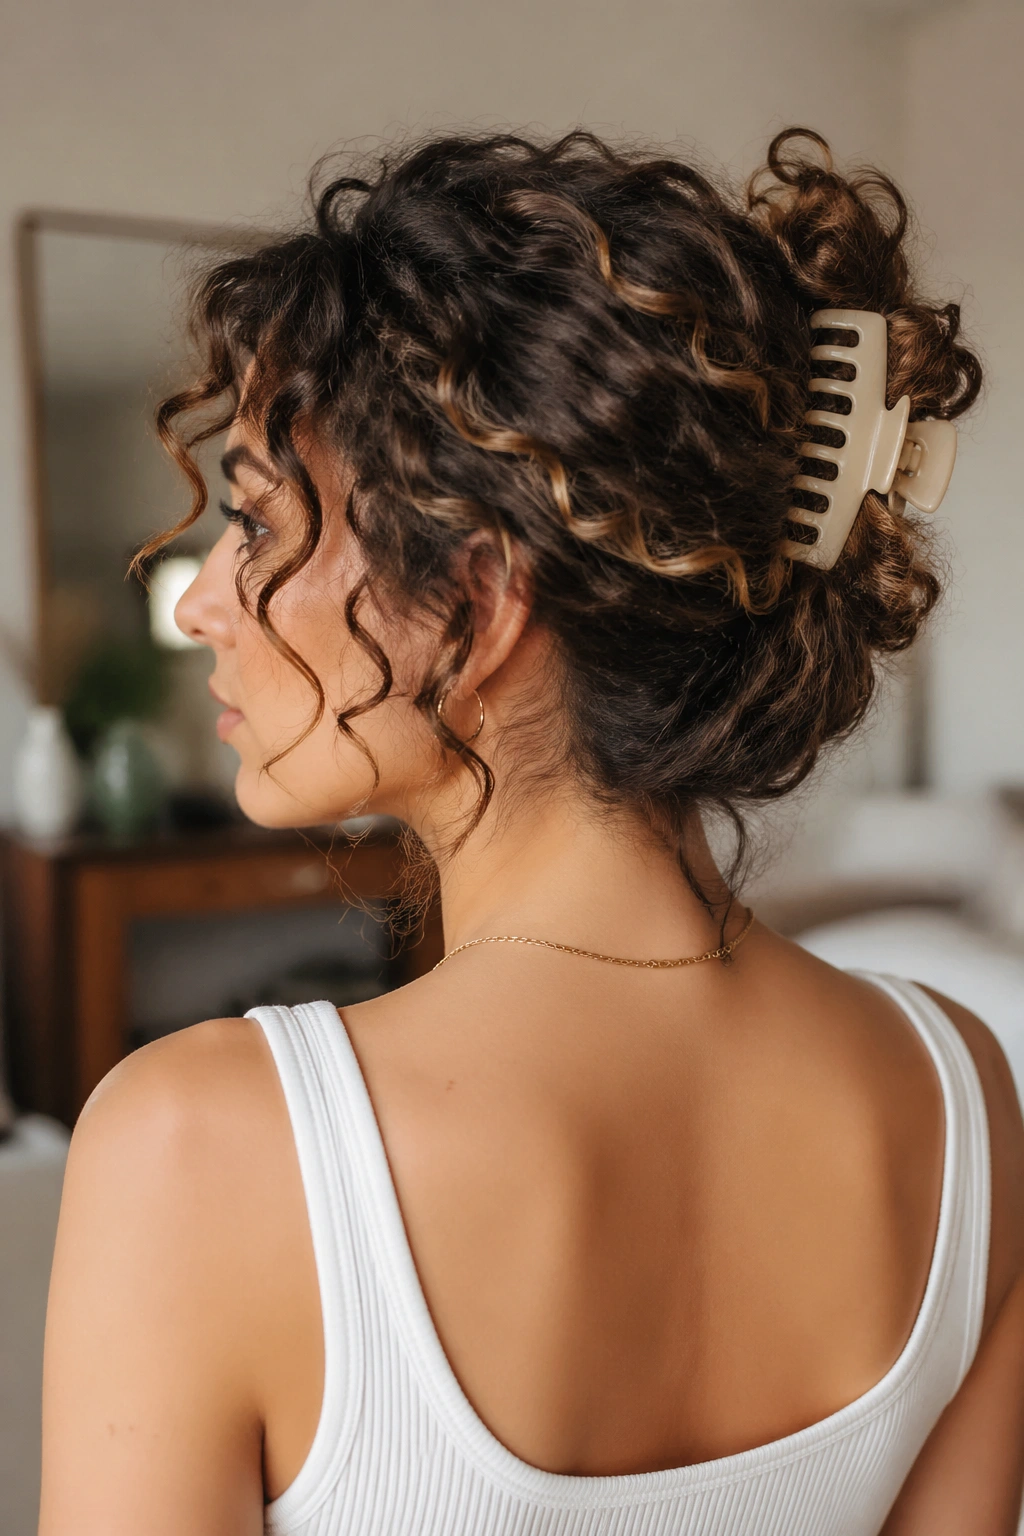
A claw clip is not lazy if you use it well. It’s practical, fast, and, on curly hair, often prettier than an over-tight ponytail.
The trick is to gather the curls as if you’re making a loose twist at the back of the head, then fold that twist upward and catch it with the clip. The ends can spill out a little. They should, honestly. That little spill is what keeps the style from feeling too severe.
This works especially well when your curls have a few days of wear and a bit of separation. Fresh curls can be too springy for some clips, but older curls tend to stay put better and settle into the shape faster. If your hair is thick, choose a large clip with a wide jaw. Tiny clips pinch and slide.
The best part is how little damage this causes when compared with tight ties. There’s less pulling at the root and less tension around the hairline. That matters if your edges are sensitive or if you’re trying to keep breakage down.
A few curls can escape around the ears. Leave them. The style looks better with some movement, and curly hair always looks happier when it’s not forced into a box.
8. Half-Up Top Knot
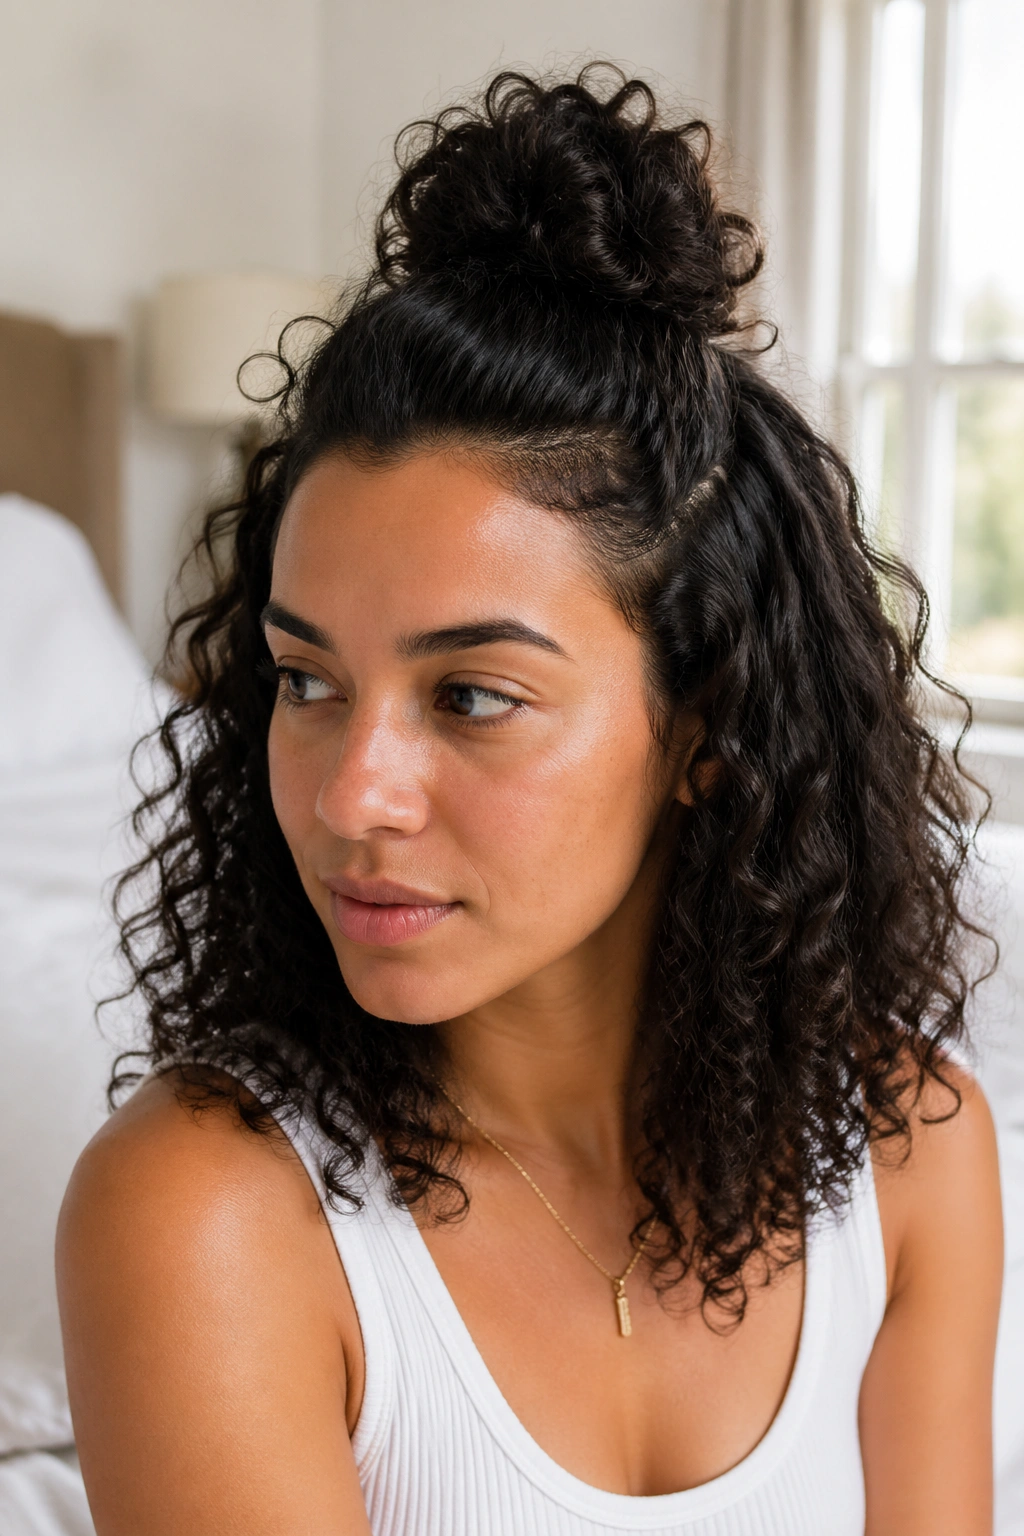
The half-up top knot is the style I recommend to people who want something clean but not fussy. It takes the top section of the curls and puts it into a knot at the crown, while the rest stays loose and curly below.
The knot should be small enough that it doesn’t bully the rest of the hair. That’s the mistake I see most often. People build a giant knot, and suddenly the head shape gets lopsided. Keep it compact. Let the bottom section keep most of the visual weight.
Keep the Knot Soft
A good half-up top knot still looks curly at the top. You are not aiming for a slick knot with every strand pinned down like a helmet. Pull the section back with your fingers, twist it once or twice, wrap it, and secure it with a tie or two pins. Then loosen the outer edge a little so the knot looks cushioned.
This style is especially nice for shoulder-length curls that sit awkwardly when worn fully down. It lifts the front away from the face and gives the ends room to move. That makes a big difference on days when the hair wants shape but not full control.
A middle part gives it a cleaner look. A soft side part makes it feel looser. Neither is wrong. I tend to prefer the side part when the curls are extra dense, because it prevents the top from looking too round.
9. Side-Swept Curly Ponytail

A side-swept ponytail changes the whole mood of curly hair with one simple move: shift the weight over one shoulder. The curls feel softer there, and the neckline opens up in a way that a center ponytail rarely does.
Start by gathering the hair just below the ear on one side or at the back, then pull it gently toward the shoulder you want to feature. The ponytail should sit low enough that the curls can drape naturally, not jammed under the ear. If you pull it too tight, you lose the shape. If you leave it too loose, it slides around. Again, that middle ground matters.
I like this style when the curls are layered. The shorter pieces around the face fall forward and the longer lengths pool over the shoulder, which gives the ponytail more movement. A wrapped elastic or a ribbon makes it feel finished without making it formal.
- Sweep the hair in the direction it already wants to fall.
- Keep the tie at the nape or slightly to one side.
- Finger-fluff the ponytail after tying so the curl clumps open up.
A side-swept ponytail works for casual days, dinner plans, and anything that needs a little shape without a full updo. It’s easy. That’s the appeal.
10. Braided-Front Curly Updo
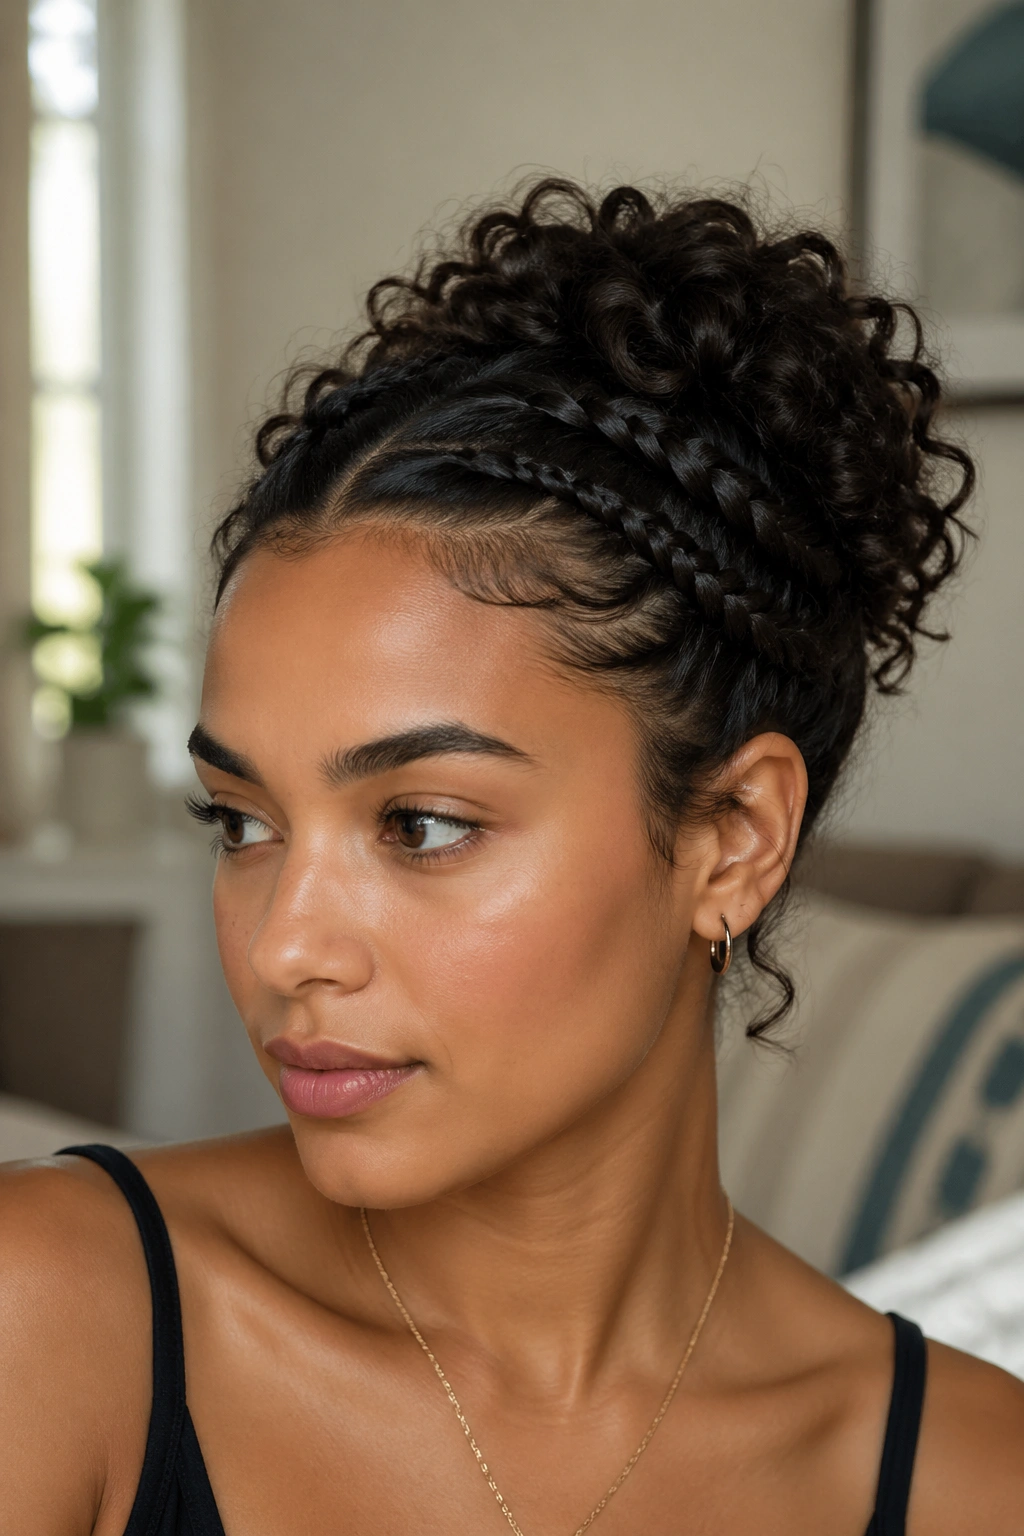
Braiding the front sections is a smart way to control curly hair without flattening the whole head. It gives structure where you need it and leaves the length or bulk in the back to do its own thing.
Braid Only the Front
Take one section from each temple and braid it back along the hairline, or twist it if your hair is too short for a clean braid. Then pin the pieces behind the ears or let them feed into a low ponytail, bun, or puff at the back. The front stays secure. The rest stays curly.
This style is useful when the front pieces keep falling into your face but you do not want a fully tied-back look. It also works when your curls have a mix of patterns. A tighter front can behave better if the back is left more open.
A few details matter here:
- Keep the braid flat to the head so it does not puff out.
- Pin the ends underneath the back section.
- Do not over-brush the braiding section, or the curls will frizz out before you even finish.
The braided front gives a bit of polish, but the back keeps the shape soft. That contrast is what makes the style feel balanced instead of overdone.
11. Folded-In Chignon
A folded-in chignon is the quiet one in the group, and I mean that in a good way. It’s neat, low, and calm, but the curl texture keeps it from looking hard or stiff.
Unlike a tight ballerina bun, this version lets the hair fold back on itself at the nape. You start with a low ponytail, split it lightly above the tie, and tuck the length up and inward. Then pin it flat against the head. The curls create their own little architecture, which sounds fancier than it is. Mostly, it just means the style has shape without needing much force.
This is the one I’d reach for when you want your curls to look tidy for something more formal, but you still want them to look like curls. That difference matters. A chignon that respects texture always looks better than one that tries to erase it.
The pins should sit crosswise, not parallel. Crosswise pins grip the hair better and keep the fold from sliding down. If the ends are long, tuck them under in small sections instead of stuffing the whole tail in at once. Stuffing makes lumps. Small sections settle cleaner.
A slight side part or a soft face curve keeps the style from looking too severe around the forehead.
12. Scarf-Wrapped Curly Ponytail
A scarf can save a plain ponytail in about thirty seconds. That’s why the scarf-wrapped curly ponytail is one of my favorite tied-up hairstyles for curly hair when the goal is to look finished without doing much.
Tie the hair into a low or mid ponytail with a soft elastic first. Then wrap a silk or satin scarf around the base, knot it off to one side, and let the tails hang or tuck them in depending on the look you want. The scarf does two jobs at once: it hides the elastic and gives the style a little color or contrast.
The ponytail itself should stay loose enough for the curls to keep their shape. If you yank it tight, the scarf has less to do and the whole thing gets stiff. Leave the curl bundle full and springy. That’s the point.
Small Details That Matter
A narrow scarf gives a cleaner look. A wider one makes the base feel fuller and more decorative. I prefer silk because it slides less against the hair and feels gentler around the tie, but a soft satin scarf does the job too.
- Tie the elastic first, then wrap the scarf.
- Keep the knot off-center for a softer line.
- Let a few curls spill near the ears if you want the style to feel less formal.
The scarf changes the mood fast. The ponytail stays easy, but it stops looking plain.
Curly hair looks best when it’s given a shape that makes sense for the texture already there. That’s the real common thread across every style here. Some days call for a puff, some for a twist, some for a low bun that sits quietly at the nape and does its job without asking for applause.
Pick the style that matches the curl pattern in front of you, not the one you wish you had that morning. That’s usually where the good hair days start.