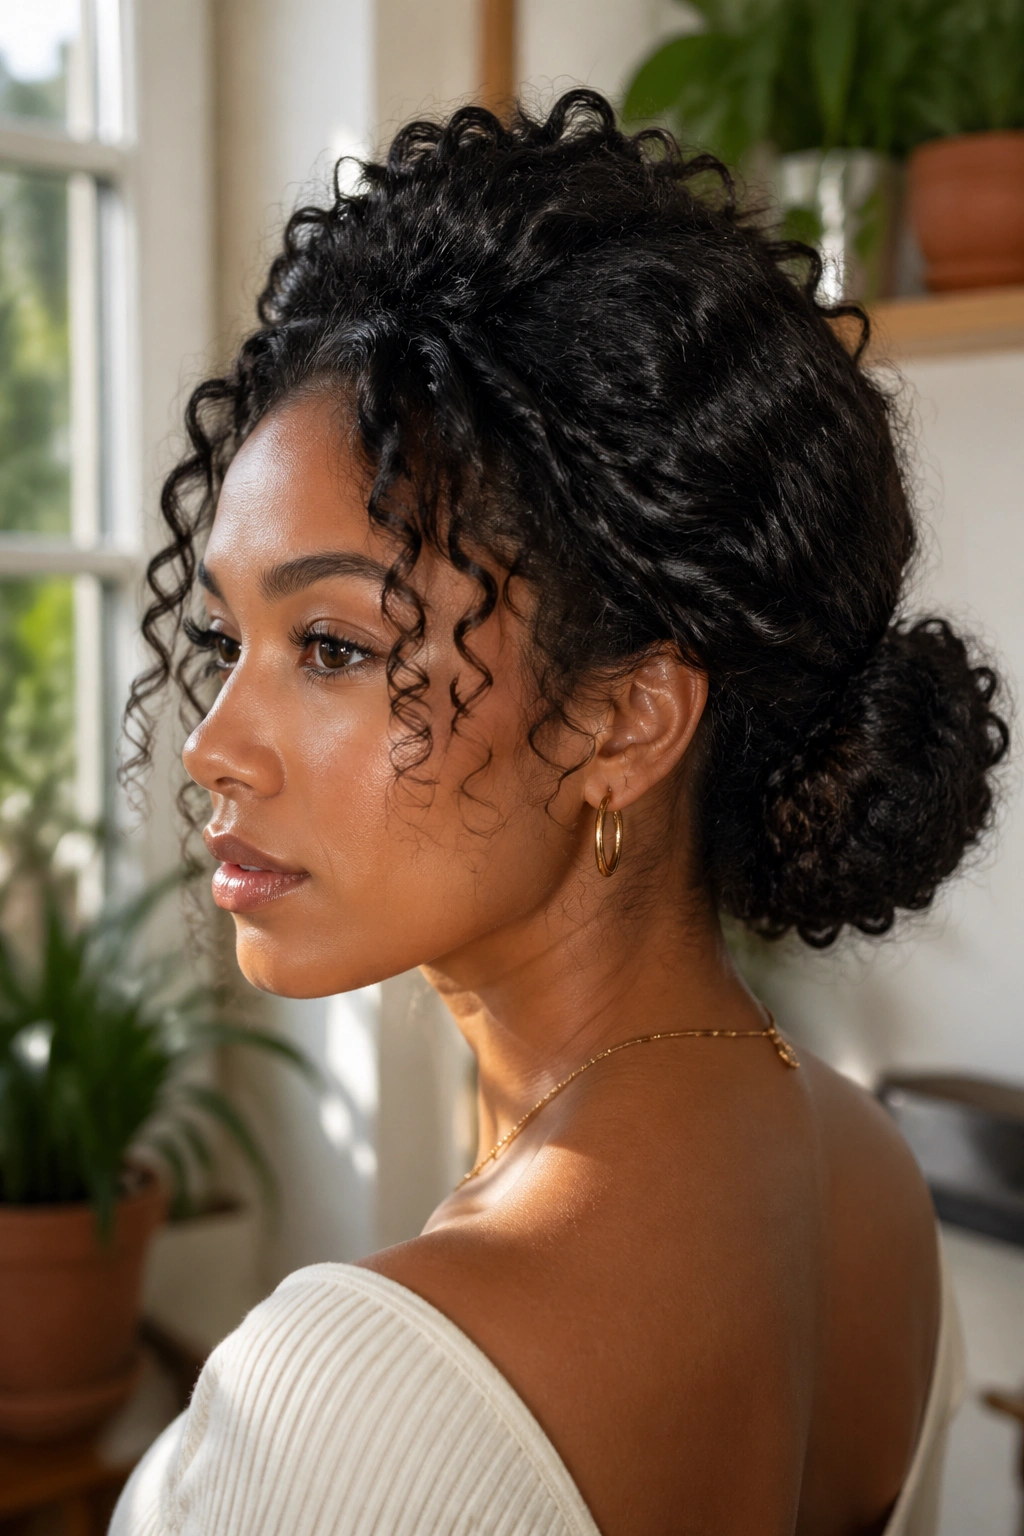
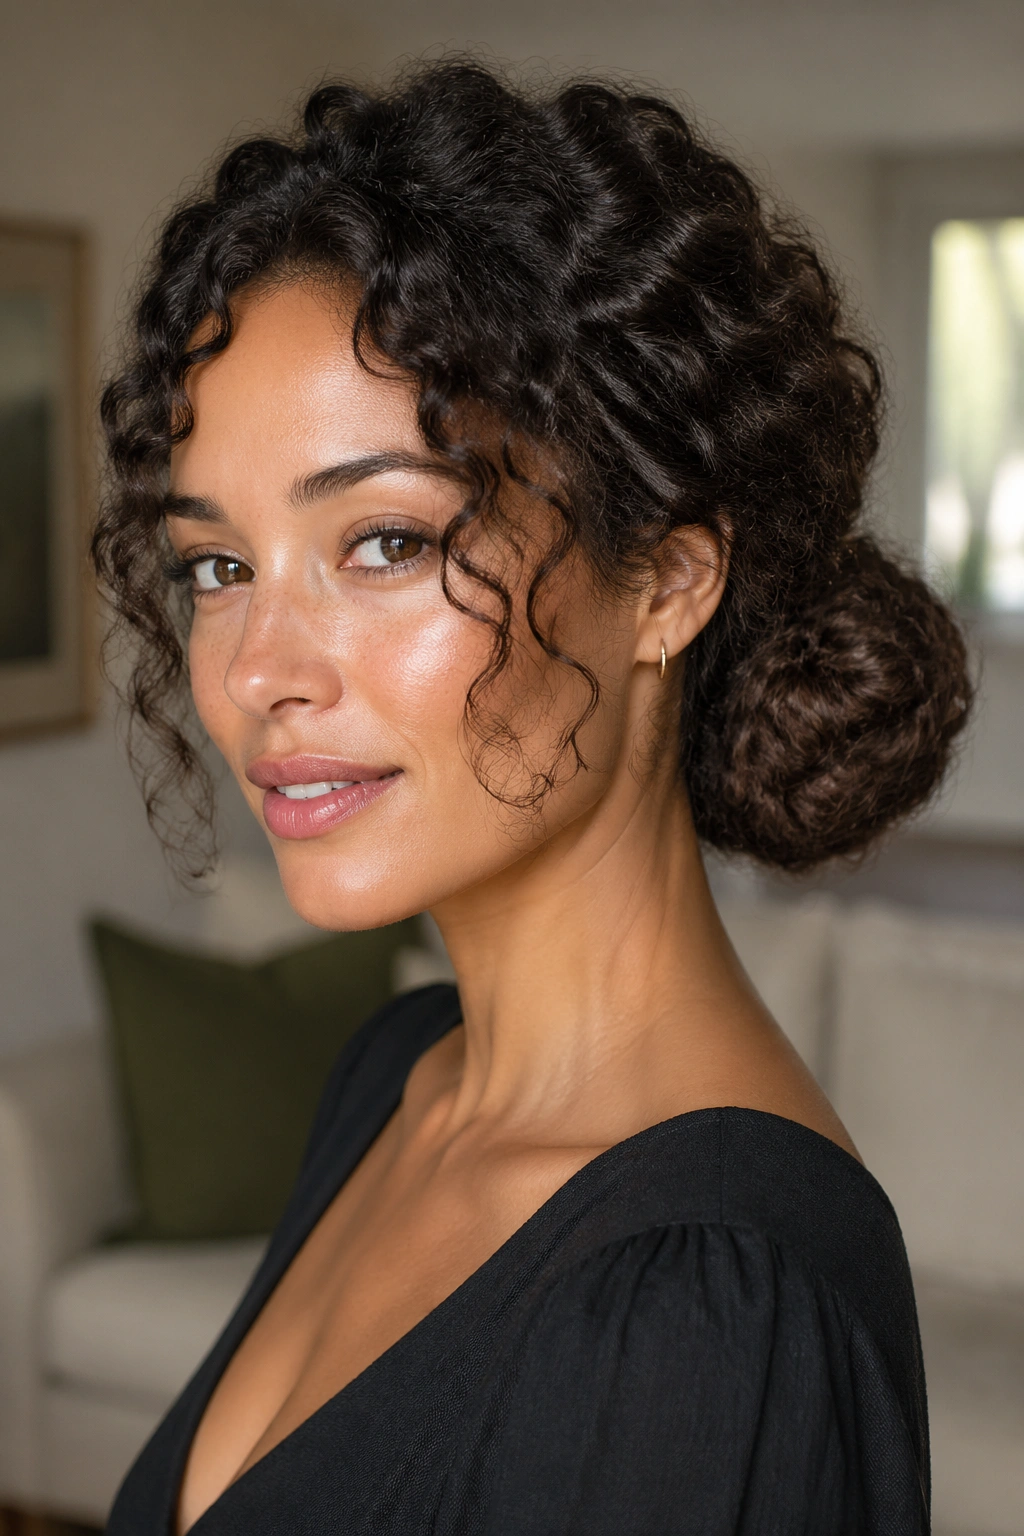
A low bun on curly hair can look polished, soft, or a little rebellious, depending on what you leave alone. The best low bun hairstyles for curly hair don’t fight the curl pattern; they work with it, which is why the same base shape can feel romantic one day and sharp the next.
The mistake I see most often is trying to flatten every curl into obedience. Curly hair usually looks better when the crown is smoothed and the bun itself stays textured, because that contrast keeps the style from turning into a stiff little helmet at the nape. A good low bun also gives you room to hide frizz, save second-day curls, and make use of the volume straight hair never has in the first place.
What makes these styles worth knowing is how differently they behave on real hair. A bun built from twists stays soft; a braided version hangs on through humidity; a center-part version can look sharp enough for a formal dinner without a mountain of product. Pick the wrong construction and the style falls apart in an hour. Pick the right one and your curls do half the work for you.
1. Soft Twisted Low Bun
Twists are the easiest way to make a low bun look intentional without dragging every curl into a tight knot. I reach for this style when the hair has a little bend, a little fluff, and not much patience. It keeps the curl pattern visible around the bun, which is the whole point.
Why It Works
A twist gives curly hair grip. You are not trying to smooth every strand into submission; you are folding the texture back on itself so the style can hold without a ton of pins. That matters, because curly hair tends to slip in places where straight hair would sit still.
Start by parting the hair down the middle or slightly off-center. Take 2-inch sections from each temple, twist them back toward the nape, and gather everything into a low ponytail before wrapping the ends into a soft bun.
- Use 4 to 6 bobby pins crossed into an X shape for grip.
- Keep the top smooth with a pea-size amount of curl cream or styling milk.
- Leave the bun a little airy so the coil doesn’t look packed down.
- Pull out two small face-framing pieces if you want a softer finish.
The nicest part is the balance. You get enough structure to look finished, but the curls still show up where they count.
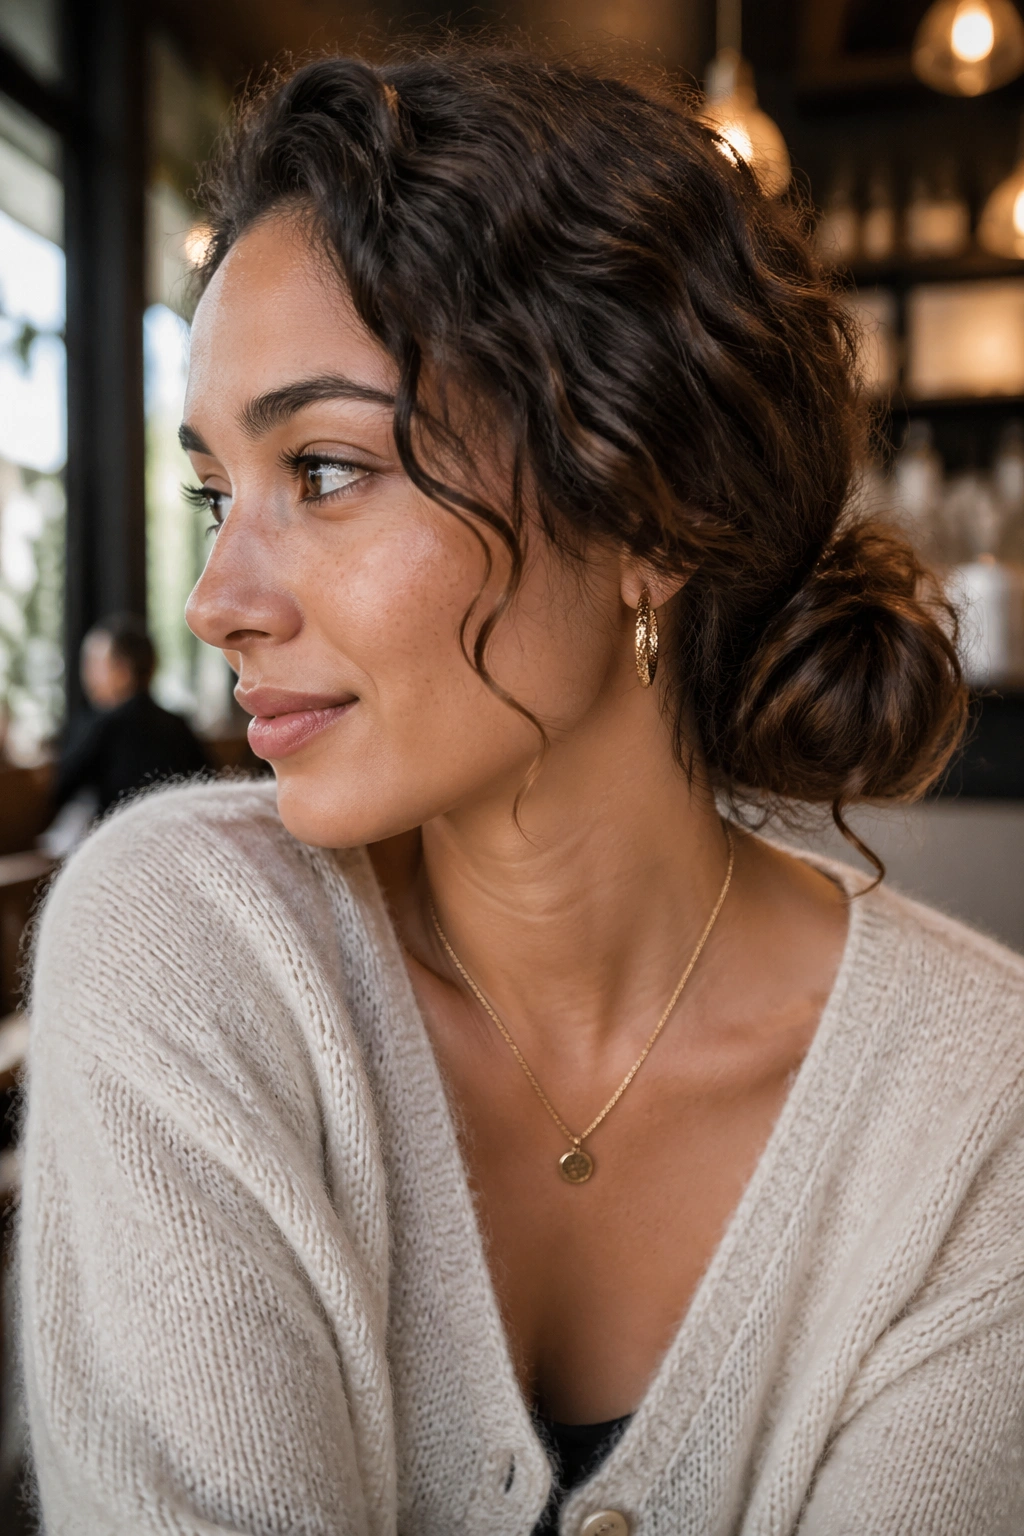
2. Sleek Center-Part Low Bun
Want the cleanest possible version of a low bun without making curly hair look stiff? Start with a center part and keep the smoothness limited to the top third of the head. The bun itself can stay soft and textured; that contrast is what keeps this style from looking overworked.
A fine mist of water or leave-in spray helps the front layers lie flat without soaking the whole head. After that, use a small brush or edge brush and about 1 teaspoon of gel per side to press the hair toward the nape. Do not chase every curl. You’ll only make the crown frizzy.
The trick is keeping the part crisp and the bun relaxed. That sounds simple, but it matters. If you flatten the bun too much, the whole thing gets severe. If you leave the top too puffy, the center part loses its point.
What Makes It Clean
- A sharp center part, not a wandering one.
- Smooth sides that sit close to the head.
- A bun with visible curl texture, not a slick knot.
- A few hidden pins placed under the bun so the shape stays low and neat.
This style works especially well when you want your earrings, makeup, or collar to do some of the work.
3. Curly Chignon
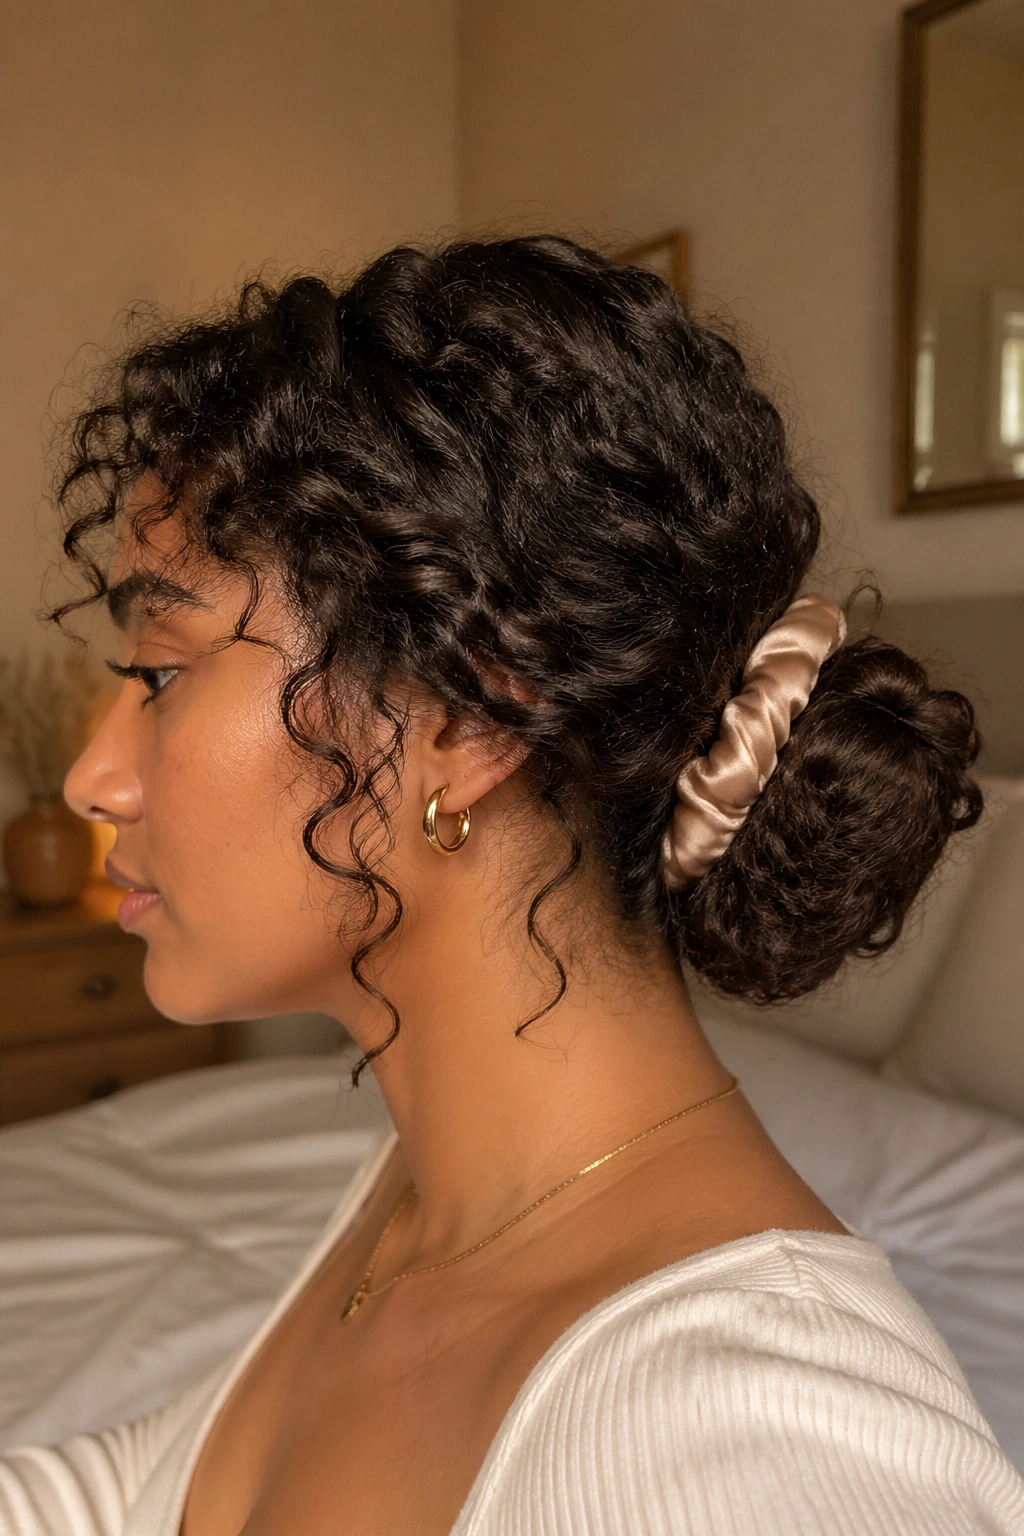
A curly chignon has a little old-school charm, but not the stiff kind. Think of it as a tucked, rounded bun that keeps some softness at the edges instead of sealing everything into a hard knot. It looks especially good on hair that has enough length to wrap once and tuck under cleanly.
The shape matters more than the polish here. Gather the hair low, twist the tail upward, then fold the ends under so the bun sits like a small cushioned roll at the nape. You want the curl ends to disappear into the fold, but not so tightly that the style turns flat.
A satin scrunchie underneath helps if your hair is dry or layered. Then use 3 or 4 pins around the base to pin the bun into place, not just the surface. If you only pin the outside, the chignon will sag.
The Shape That Works Best
- Keep the bun slightly rounded, not pancake-flat.
- Let a few curl tips peek out at the bottom edge.
- Place the bun about 1 inch below the center of the nape for a softer line.
- Use a light mist of flexible spray, not a crunchy shell.
This is one of those styles that looks better from the side than people expect. Very few buns do that. This one does.
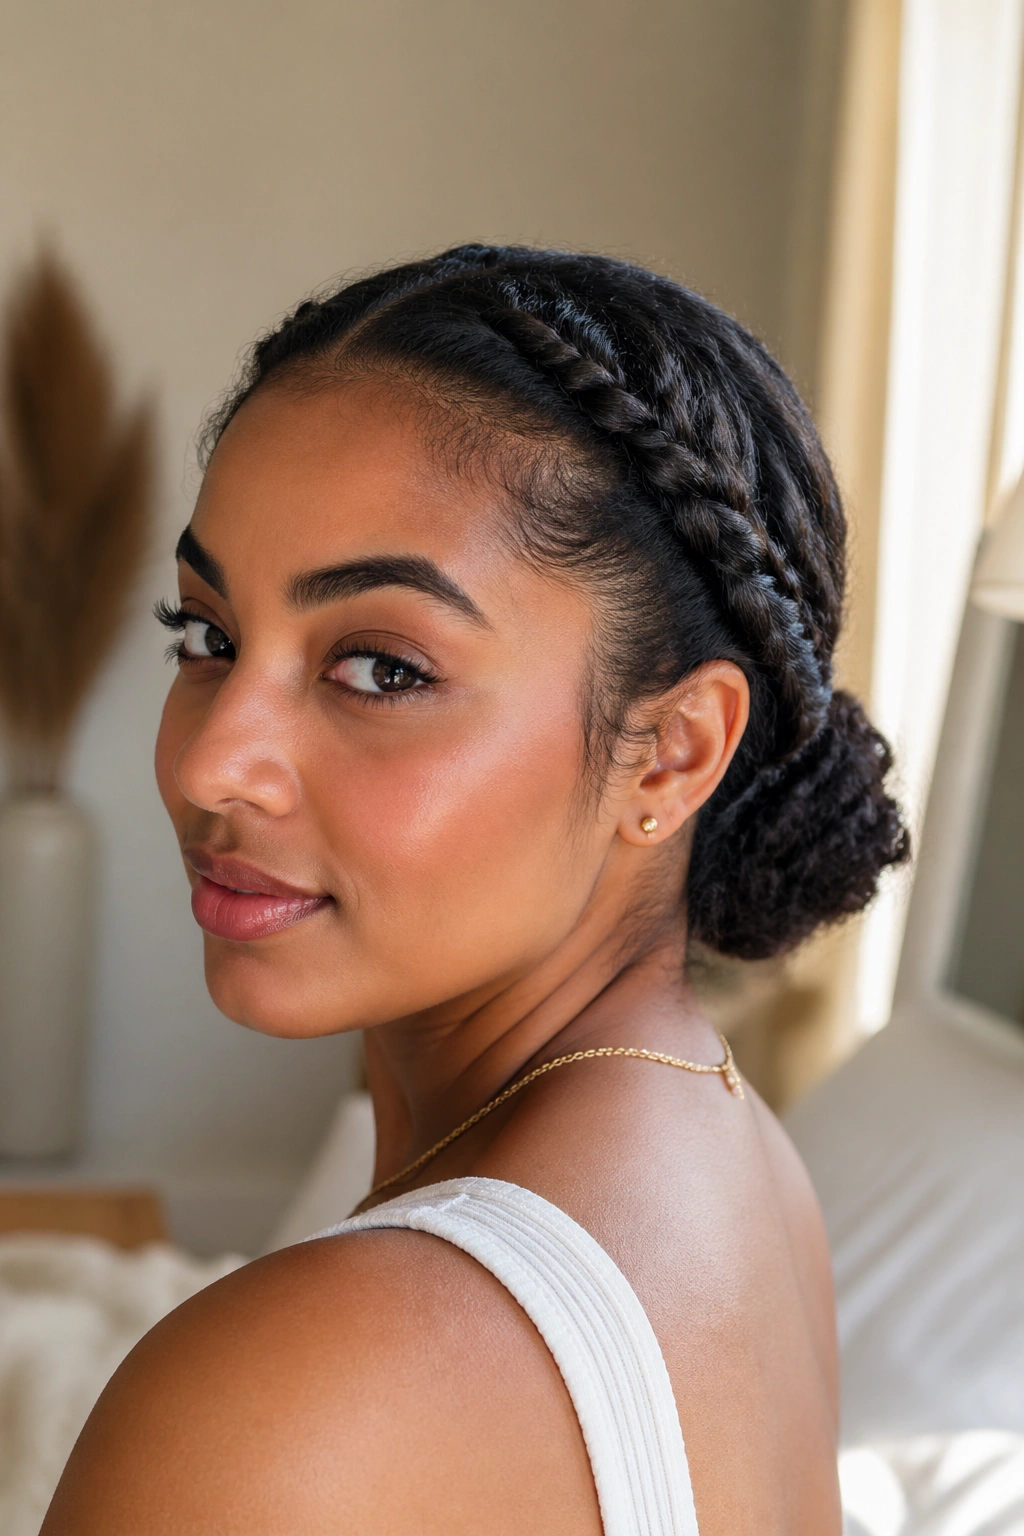
4. Braided Crown Low Bun
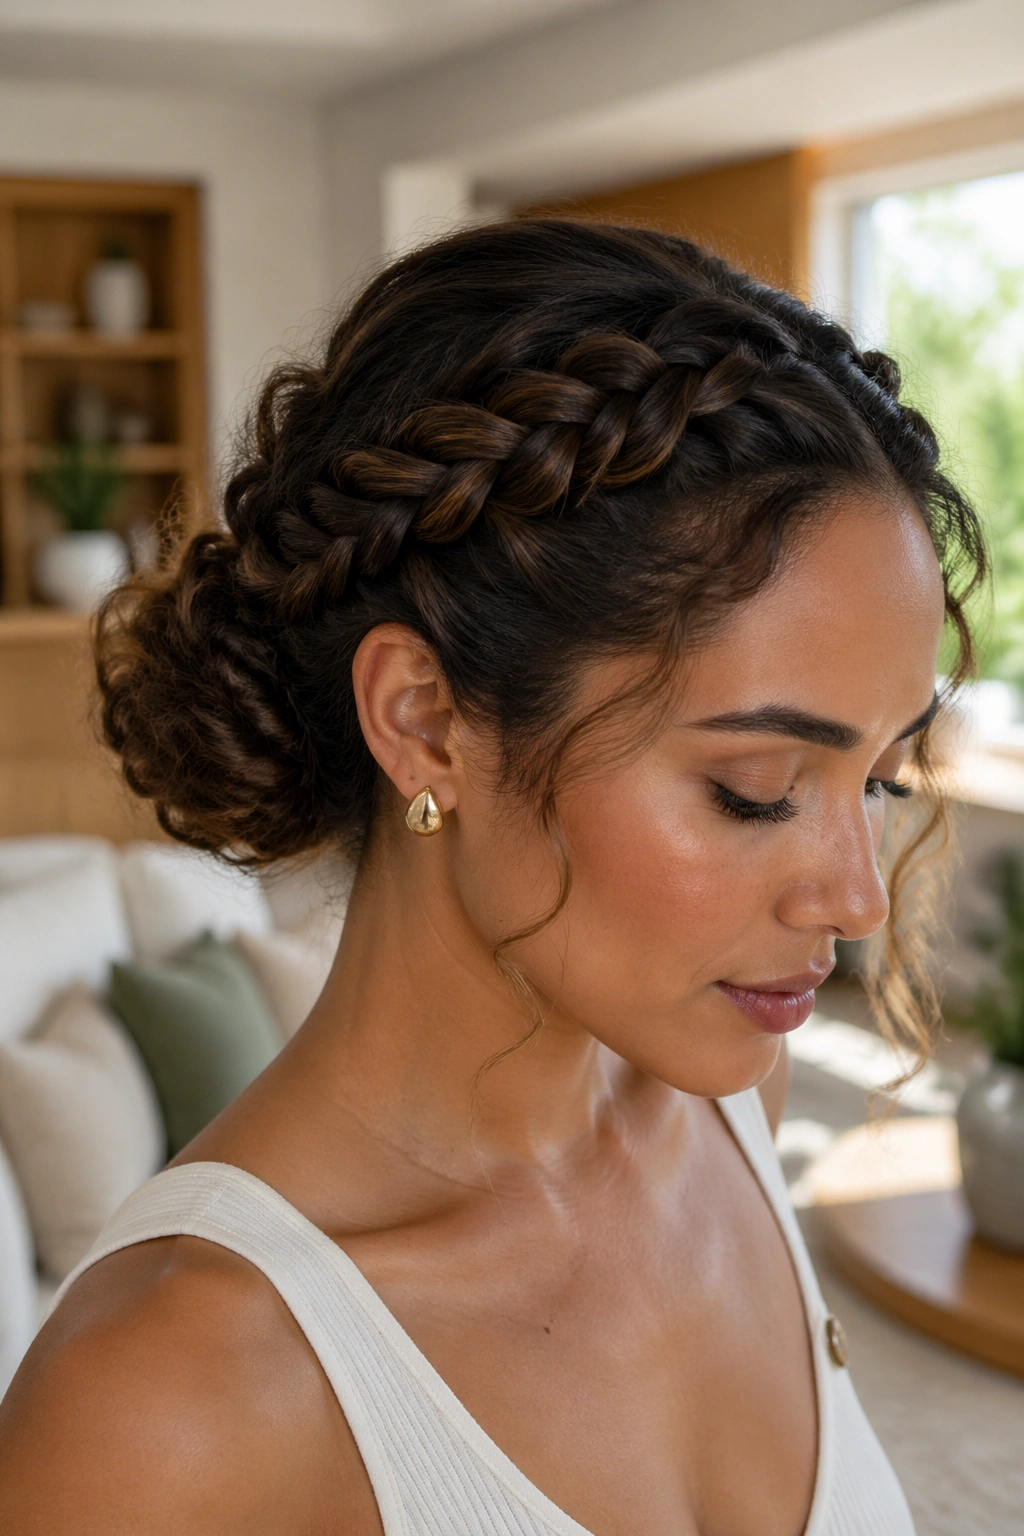
Braids do the heavy lifting here. If your curls tend to slip or puff up in humidity, a braided crown feeding into a low bun gives the style enough structure to stay put without feeling severe. It is also one of the best ways to make thick curly hair look controlled without flattening the life out of it.
Start by parting the hair where you normally wear it, then braid each front section back toward the nape. The braids should sit close to the scalp for the first few inches, then loosen slightly as they travel back. That gives the style a nice curve instead of a rigid line. Once the braids meet, gather the rest into a low bun and pin the whole thing at the base.
Why the Braid Matters
The braid acts like a built-in anchor. It keeps the front from sliding forward, and it gives you a clean frame around the face before the bun even starts. That is especially useful if your curls are layered or if the front pieces are shorter than the rest.
How to Pin It
- Use 2 small elastics for the braid ends.
- Secure the bun with 6 to 8 bobby pins.
- Tuck the braid tails under the bun so they disappear.
- Press a little styling cream along the hairline before braiding.
The style feels polished, but not precious. That’s the sweet spot.
5. Side-Swept Low Bun
A low bun does not have to sit dead center to look balanced. In fact, a slight shift to one side can make curly hair feel softer and more relaxed, especially when the bun is paired with a side part or a sweep of curls across the forehead.
The placement is the whole story. Move the bun about 1 inch off center, usually toward the side with less volume, and let the opposite side carry a little more shape. That tiny adjustment changes the mood fast. The style stops looking formal and starts looking lived-in in a good way.
I like this version on hair that has a lot of texture at the ends but not much patience at the crown. You can smooth the front with a dab of curl cream, then let the bun itself stay fluffy. If you tuck one ear back and leave the other covered, the style gets a little asymmetry, which can be much more interesting than a perfectly even bun.
One small detail matters here: keep the bun low enough that it still feels like a low bun. If it creeps up toward the middle of the head, the side sweep loses its shape and the style starts to look accidental.
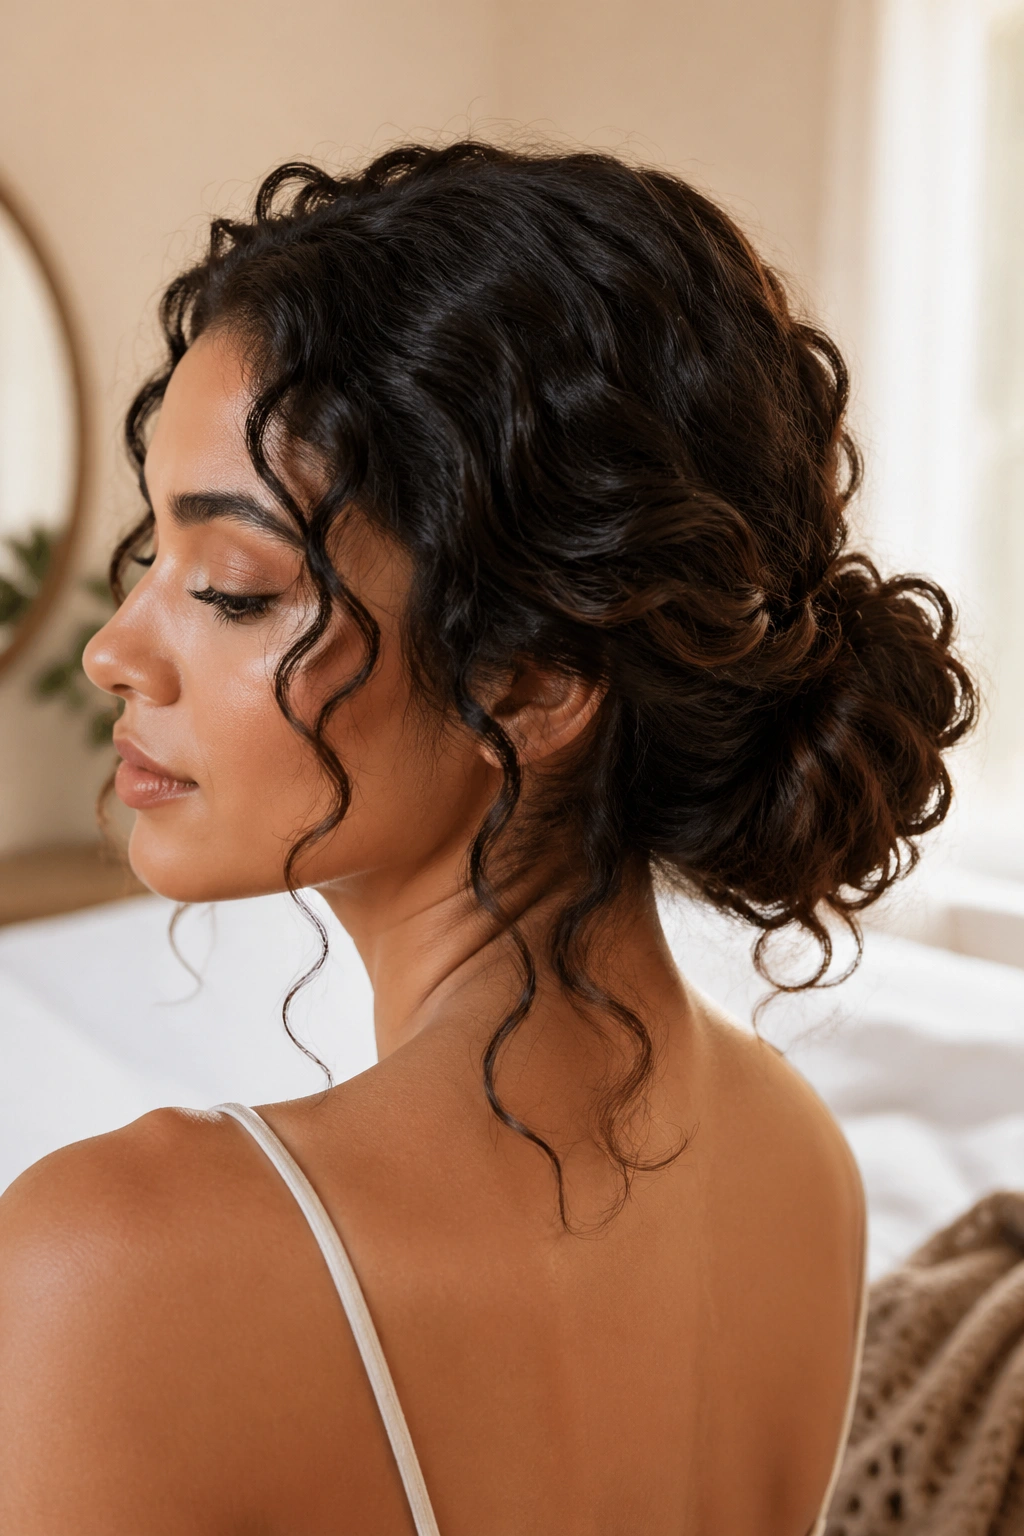
6. Messy Low Bun with Face-Framing Curls

Second-day curls, a few frizzed edges, and not much time. That is exactly where this bun makes sense.
A messy low bun with face-framing curls is not a lazy hairstyle if you build it with a bit of care. The messiness should live in the bun, not in the whole head. Leave 2 tendrils on each side, each about 1/2 inch to 3/4 inch wide, and shape them with your fingers so they curve around the cheekbones instead of sticking out like stray wires.
What to Watch For
The biggest mistake is brushing the front too hard. Curly hair tends to puff when you overwork it, and then the style loses the relaxed shape that made it appealing in the first place. Use your hands or a soft brush only at the hairline.
- Keep the bun loose enough to show curl clumps.
- Pin the base first, then adjust the top.
- Smooth the crown with a tiny bit of cream or gel.
- Refresh the face-framing pieces with water before twisting them back into place.
This bun is especially good when the weather feels humid or the day is long. A little frizz reads as texture here, not failure. That’s a nice change.
7. Double Twist Low Bun
Need a bun that stays put without feeling locked down? Two flat twists can do that job better than most styles. They add grip, keep the sides tidy, and make the bun look deliberate even when the rest of the hair has plenty of curl and movement.
Start with two sections near the temples or just behind the ears. Twist each one backward along the head, keeping the twists close to the scalp for the first few inches. Once they reach the nape, join them into a single low bun and pin the ends underneath.
Best for Thick or Slippery Hair
Double twists work especially well when the hair is thick, layered, or soft enough to slide out of plain buns. The twists create a sort of path that holds the hair in place before the bun even begins. That means fewer pins fighting for control at the nape.
How to Get the Most From It
- Use 2 small elastics if the ends feel loose.
- Add 4 to 6 pins around the bun, not just at the center.
- Mist the twists lightly before wrapping if the hair is extra dry.
- Keep the bun compact so the twists stay visible.
The style has a neat, grounded feel. Not rigid. Just steady.
8. Volume-Forward Low Bun
Some curls look better with the volume left in. If your hair naturally has a lot of body, trying to flatten it into a tiny bun can make the whole thing look smaller than it should. A volume-forward low bun keeps the crown lifted and the bun full, which usually feels more honest on dense curl patterns.
I like this version when the top has a soft puff and the bun sits low and round at the nape. The shape should feel balanced: a little lift at the crown, a little fullness at the bun, and no hard lines cutting through the middle. You are not hiding the curl pattern here. You are letting it show in a controlled way.
How to Keep It From Looking Untidy
- Smooth only the first 2 to 3 inches at the hairline.
- Leave the crown slightly lifted instead of pressing it flat.
- Use a larger elastic or satin scrunchie to hold the bulk.
- Pin the bun from underneath so the outer coils stay visible.
This style has a nice side effect: it makes dense hair look intentional instead of wild. That’s a subtle difference, but a useful one.
9. Knot-Wrapped Low Bun
Unlike a basic coil, this version hides the elastic inside a small wrapped knot. The shape looks compact, but not boring, because you can still see the curve of the hair as it folds around itself. It is a smart choice for shoulder-length curls or stretched hair that has enough length to loop cleanly.
Gather the hair at the nape, tie it into a low ponytail, then split the tail into two parts. Wrap one section around the base and tuck the end underneath, then wrap the second section in the opposite direction. That crossing motion creates the knot-like look without needing a complicated braid or dozens of pins.
The style works best when the hair has a little stretch in it. Freshly washed curls can be too springy and unpredictable. Day-old curls usually cooperate better because they hold shape and stay where you place them.
- Use 2 hidden pins through the wrapped knot.
- Keep the elastic close to the scalp.
- Finish with a light mist so the outer coils do not fray.
- Leave the bun slightly off-center if you want more shape.
It is a neat option when you want structure but not stiffness.
10. Low Bun with Curly Bangs
The best part is the contrast: a snug bun at the nape, springy curls at the forehead. Low buns with curly bangs have a lot of personality because the bun does the clean work while the fringe gets to stay loose and expressive.
Curly bangs can be blunt, rounded, curtain-like, or a little piecey. Any of those can work here. The key is not over-smoothing them. If you brush them flat, they lose the bounce that makes the whole style feel alive. Use damp fingers or a tiny bit of curl cream to shape them, then leave them alone.
What to Leave Loose
- A short fringe that stops above the eyebrows.
- Curtain pieces that fall into the cheekbones.
- Two tiny front curls that sit just ahead of the bun.
- A few wisps around the temples if your hairline needs softness.
This style does need a little maintenance. Bangs frizz faster than the rest of the head, and they shrink more than people expect. A mini spray bottle helps. So does a tiny clip if one piece refuses to stay in line.
The bun should stay simple here. The curls at the front are the feature.
11. Low Bun with a Scarf
A scarf changes the whole mood in one move. It can make a low bun look softer, neater, or more styled without asking the curls to behave any differently than they already do. I like it especially on days when the hairline is a bit frizzy and you do not feel like fighting it.
A silk or satin scarf gives the smoothest finish, but a cotton scarf has more grip if your hair is slippery. Fold the scarf into a band about 2 to 3 inches wide, place it along the hairline or around the bun base, then tie it once or twice depending on the length. If the scarf is long enough, let the ends trail down the back. If not, tuck the knot under the bun and pin it.
Where the Knot Should Sit
- At the nape for a quiet, low-key look.
- Above the bun if you want the scarf to frame the style.
- Slightly off to one side when you want the face to stay open.
A scarf is not only decoration. It can hide pins, smooth edges, and keep the style from looking unfinished. That makes it one of the most practical add-ons in the whole list.
12. Braided Sides Low Bun
Want more structure without making the style look severe? Side braids solve that problem fast. They give the bun a framed shape, but because the braids sit low and narrow, the result still feels soft and wearable.
This version is different from the braided crown style. Here, the braids start closer to the temples or just behind the ears and stay focused on the sides instead of wrapping the whole head. That keeps the center open and lets the bun remain the main event.
The Cleanest Way to Build It
- Make 2 braids, each about 1 inch wide.
- Keep the braid tension even so they lie flat.
- Gather the rest into a low bun at the nape.
- Pin the braid ends under the bun, not beside it.
If the braids are too chunky, the bun can start to feel crowded. Thin, tidy braids tend to work better with curls because they frame the texture instead of competing with it.
This is a good style when you want the hair to stay controlled through a long day. It holds up well, and it still leaves enough softness around the face to feel human.
13. Tucked Low Bun for Short Curly Hair
Short curly hair can do a low bun, even when the ends look too short at first glance. The trick is not trying to force one giant coil. Instead, you tuck the length in small sections and pin them where they land.
A shoulder-length cut or curly lob usually works better with this style than people expect. Pull the hair into a small low ponytail, twist the tail upward, then fold the ends flat against the head and pin them in a little crescent shape. If the layers are very short, split the hair into two low sections and tuck each one separately. That gives you more control.
What Helps the Most
- 6 to 10 bobby pins for short or layered lengths.
- A small elastic that can hold without slipping.
- A light cream to keep the ends from puffing out.
- A hair net if the layers keep escaping.
The bun will be smaller than on long hair, and that is fine. A compact low bun on short curls can look clean and modern, especially when the texture is left visible at the edges. You do not need the bun to be large to make it work.
14. Wet-Look Formal Low Bun
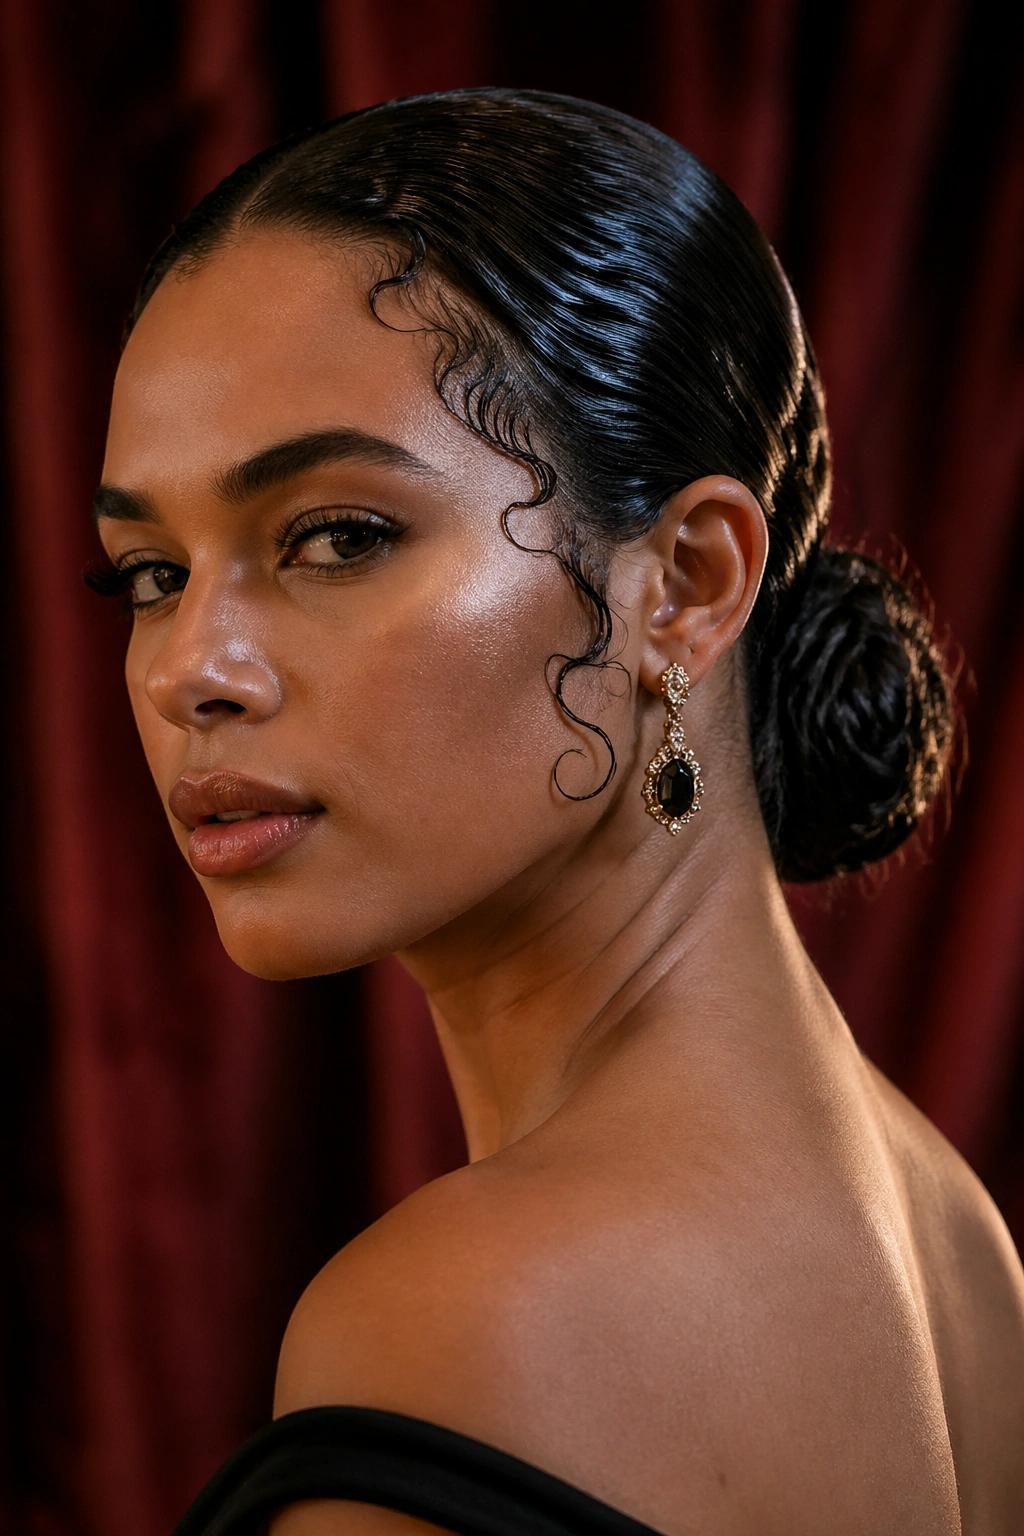
If you want shine, this is the sharpest bun in the bunch. The wet-look low bun takes curly hair and pushes it toward sculpted, glossy, and a little dramatic. It works for formal events, evening dinners, or any moment when you want the hair to look deliberate from the first glance.
Start on damp hair, not dripping hair. Apply a small amount of strong-hold gel from the hairline through the crown, then smooth it with a brush toward the nape. The bun itself can stay a touch softer, but the surface should look pressed and controlled. If you use too much oil, the style gets slippery. If you use too little gel, it frizzes before you walk out the door.
Where the Shine Should Live
- Along the part.
- At the hairline and temples.
- On the outer layer of the bun, not buried inside it.
Once the bun is pinned, do not keep touching it. That is how the gloss disappears and the frizz shows up. A tiny dab of serum on the palms is enough to smooth flyaways without breaking the shape.
This style has a clean edge to it. Not cold. Just sharp.
15. Roll-and-Pin Low Bun
When I want a bun to look soft from every angle, I stop trying to make one big coil. A roll-and-pin low bun breaks the hair into smaller pieces, rolls each section inward, and pins it where it lands. The result feels gentler than a single twist, which is useful if your curls vary a lot in texture from root to end.
Start by dividing the hair into 3 or 4 sections at the nape. Roll each section toward the center, tuck the ends in, and pin them one by one. The bun builds almost like a little cushion, with each curl clump contributing to the shape. That makes it a good choice for layered hair, mixed curl patterns, or hair that tends to puff in one spot and collapse in another.
A few details matter. Keep the first roll tight enough that it anchors, then loosen the outer layer with your fingertips so the shape stays soft. Use 4 to 6 pins placed from different angles, not all in the same line. If one piece sticks out, fold it back and pin it again rather than stuffing everything under at once. That usually creates a flatter, cleaner finish.
This is the style I’d hand to someone who wants the bun to feel easy but not lazy. It has shape. It has texture. And it leaves room for the curls to look like themselves, which is usually the whole point.