Short hair doesn’t mean you’re limited to casual styles or constant variation. When you’re working with shorter lengths, sleek ponytails become your secret weapon—they’re polished enough for important meetings, practical enough for everyday wear, and surprisingly versatile when you know the right techniques. The key to nailing short-hair ponytails is understanding how to work with your hair’s natural length while creating that clean, intentional look that reads as intentional, not like you’re just pulling hair back because you overslept.
Sleek ponytails work beautifully on short hair for a specific reason: they eliminate the bulkiness that longer hair can sometimes create, and they draw attention to your face and neck in ways that feel modern and deliberate. Whether your hair is shoulder-length, collarbone-length, or falls somewhere in between, these styles emphasize that you’ve chosen this look carefully—you’re not hiding your hair, you’re styling it.
The styling techniques matter more with short hair because you have less length to work with, which means every small detail becomes noticeable. A perfectly smooth scalp, an elasticated ponytail positioned exactly right, and the way baby hairs frame your face all contribute to whether a style reads as intentionally chic or hastily thrown together. The good news is that once you understand the mechanics of these 12 styles, you’ll have endless options that work for your daily routine, professional environments, and anywhere else you want to feel put-together.
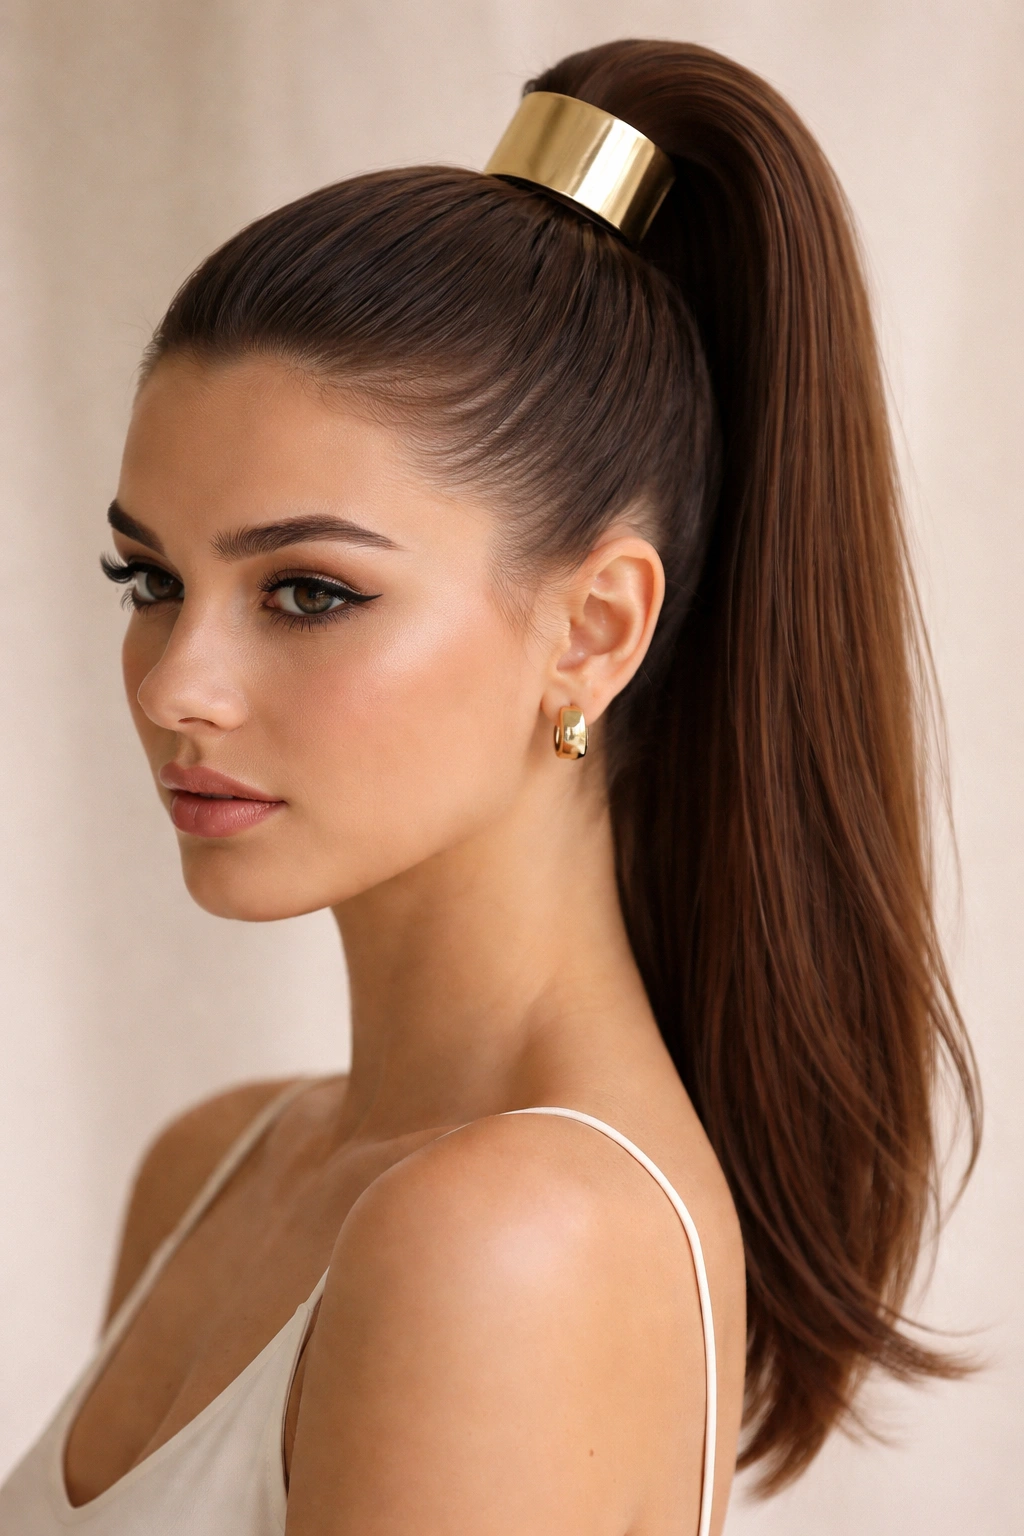
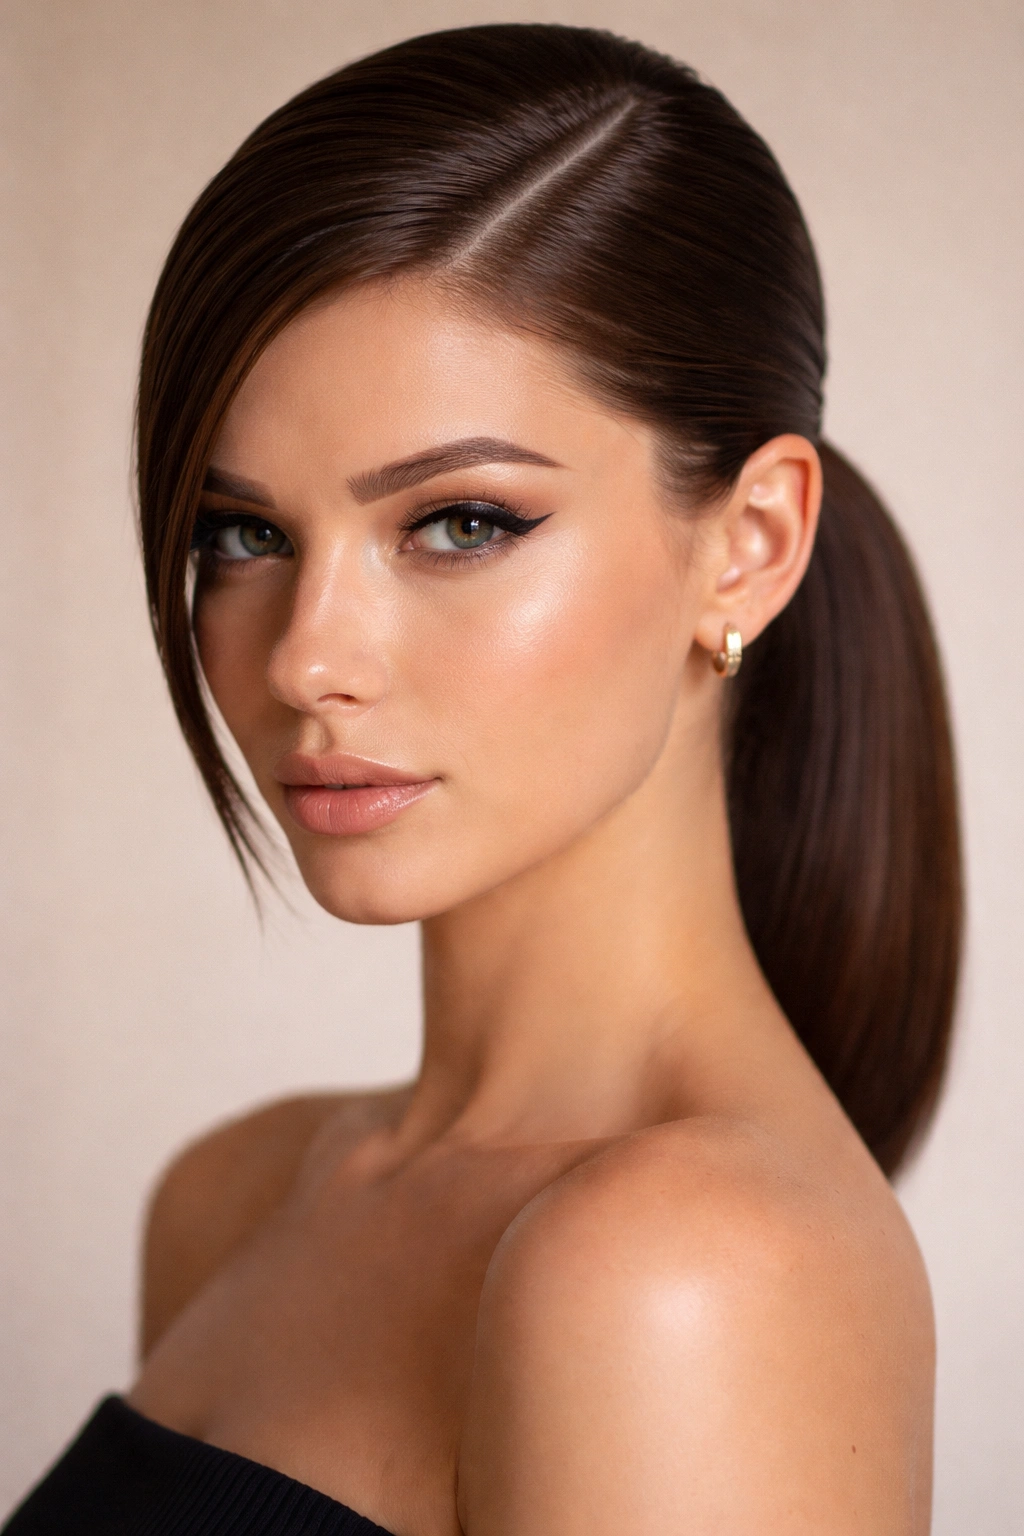
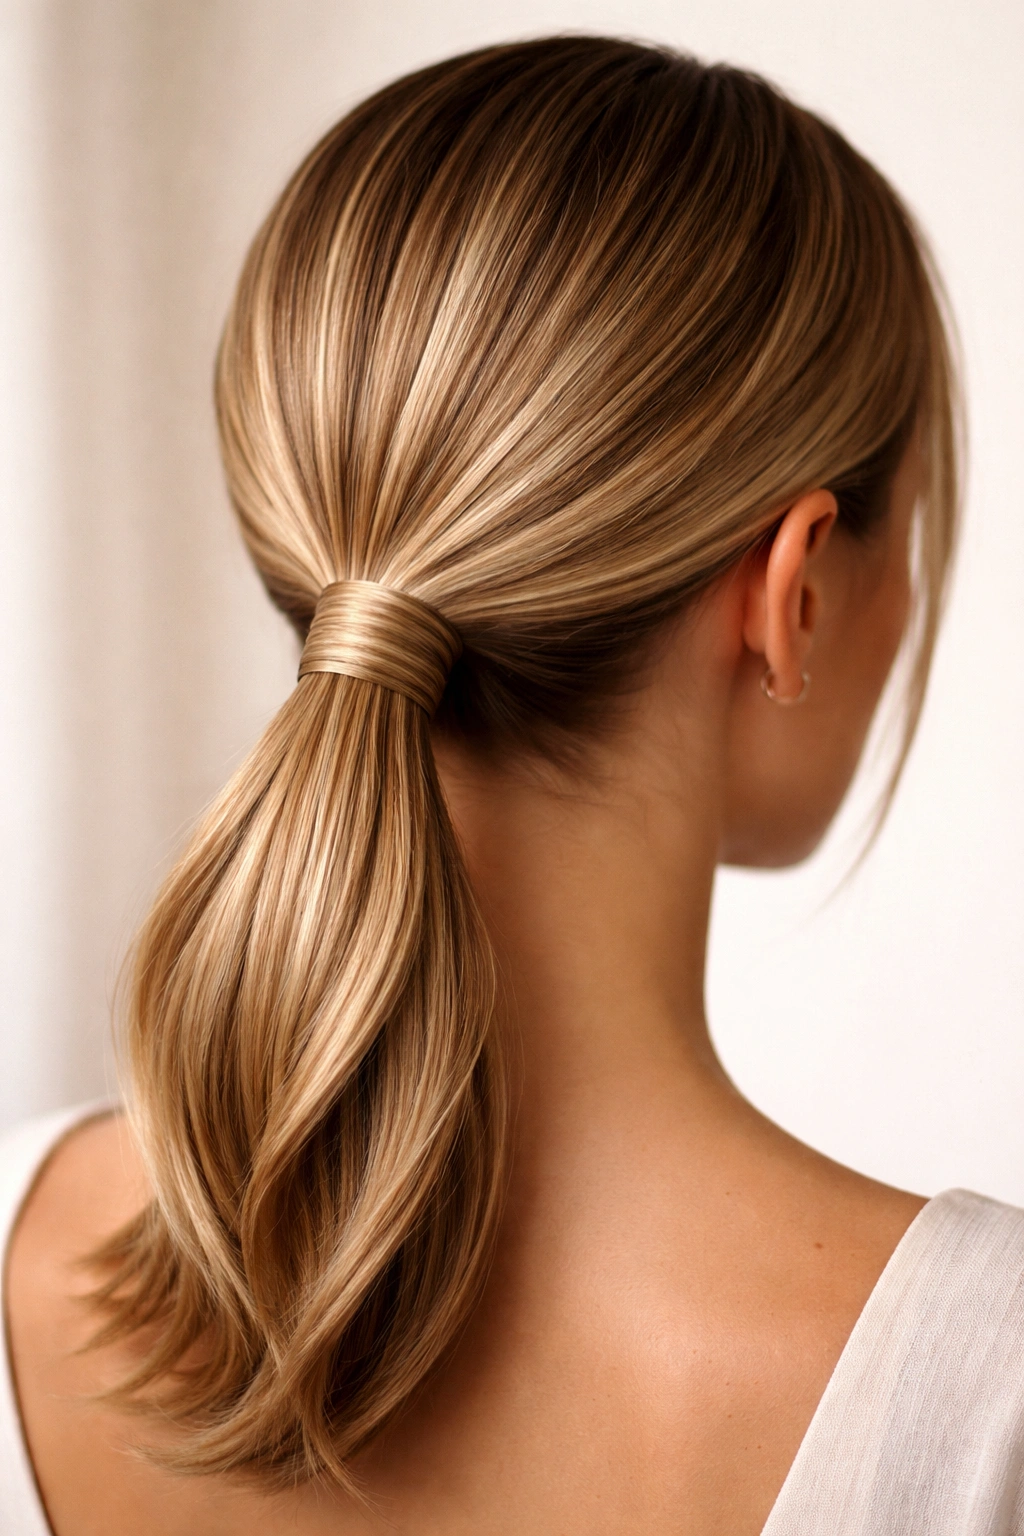
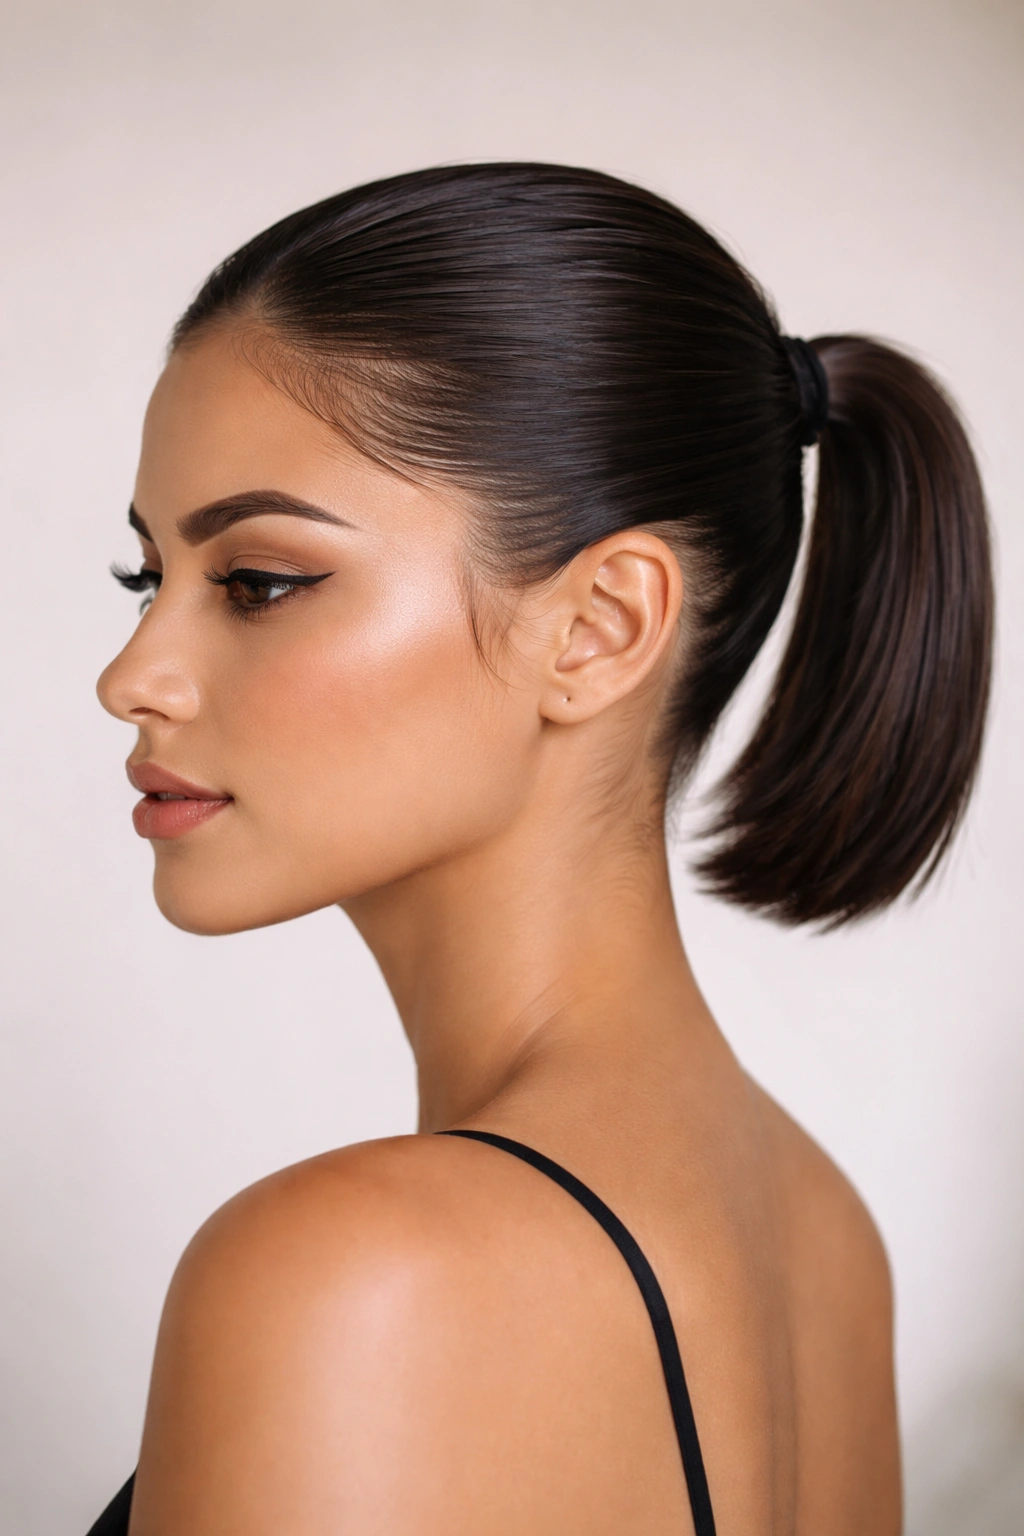
1. High and Tight Sleek Pony
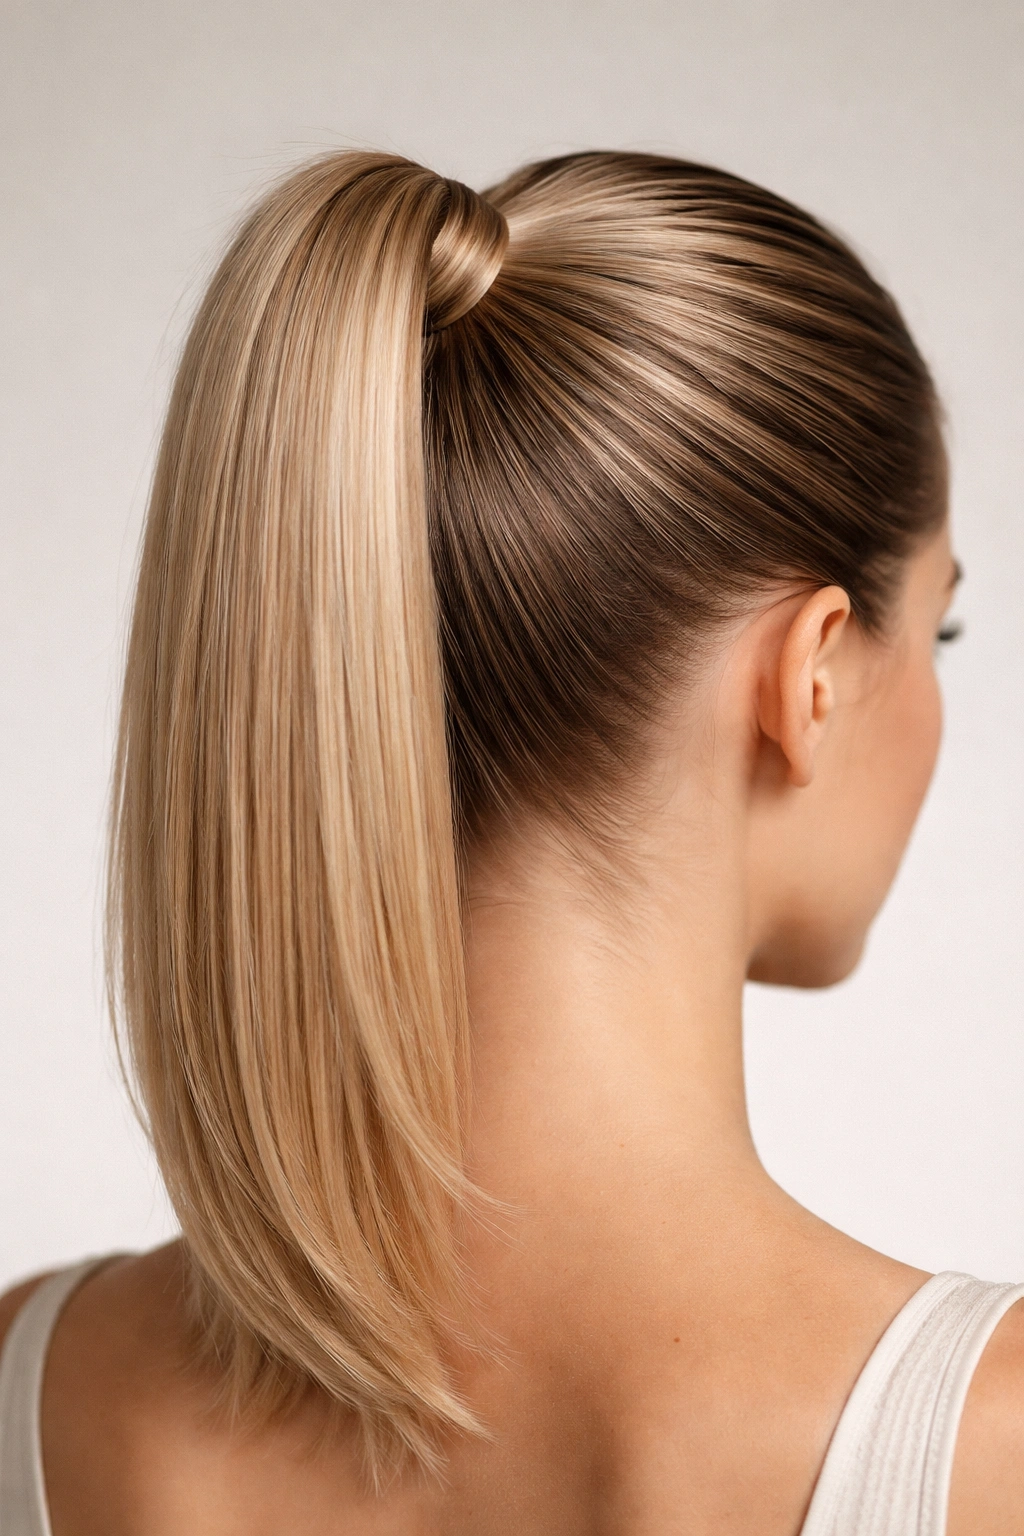
This is the quintessential short-hair ponytail—polished, modern, and surprisingly forgiving because it works at almost any short length. A high, tight pony pulls your hair straight up from the crown and sits at the very top of your head, creating clean lines and emphasizing cheekbones. The “tight” part matters: the smoother and more controlled your gather, the more polished the final effect becomes.
How to Create the Perfect Grip
Start by applying a light smoothing serum or gel to damp hair—this prevents flyaways before they start. Flip your head upside down and brush your hair straight up toward the crown, gathering all of your strands with your fingers in the exact spot where you want the pony to sit. Flip back up, keeping tension on the gathered hair the entire time. Use a fine-tooth comb to smooth any baby hairs back from your hairline, then secure with a sleek elastic. The key is maintaining constant tension—if you let the hair relax even slightly before the elastic is fully fastened, the style loses its crispness.
Polishing the Final Look
- A slightly damp brush smooths down any texture before securing
- Wrap a small strand of hair around the elastic base to hide it—this elevates the whole style instantly
- Apply a tiny amount of pomade or gel to your hairline and use a toothbrush to smooth every single hair into place
- Finish with a light hairspray to lock everything without creating that crunchy texture
Pro tip: This style actually looks more polished with a slightly tighter gather than feels comfortable at first—after five minutes, your hair naturally relaxes slightly into the perfect tension.
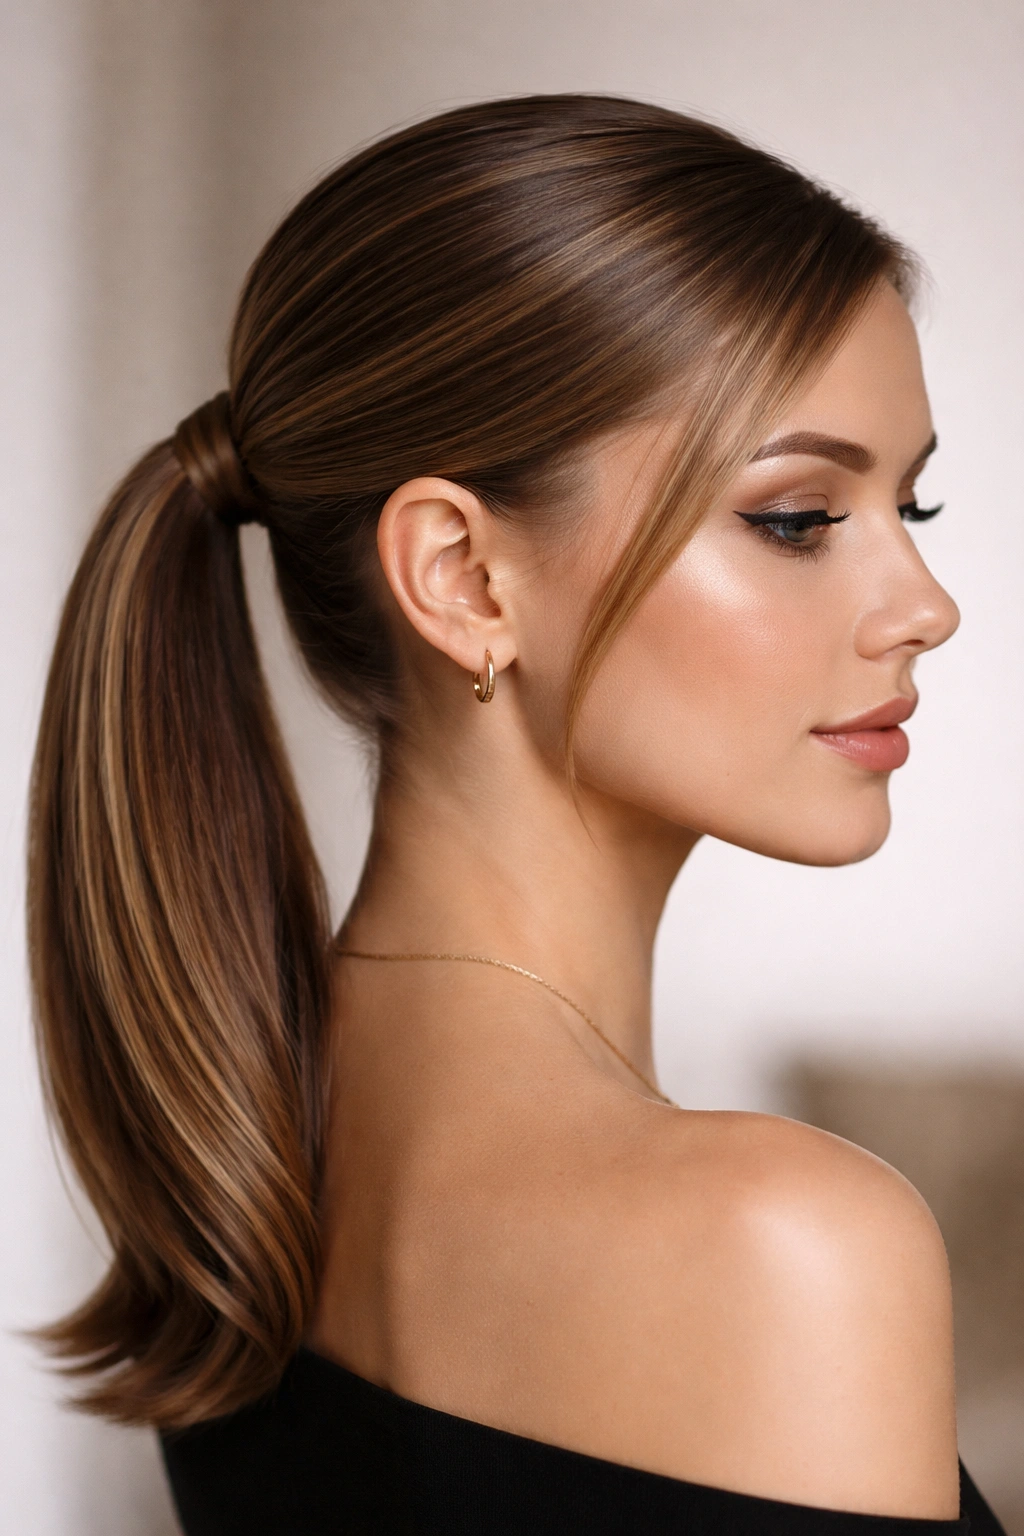
2. Low Ponytail with Face-Framing Pieces
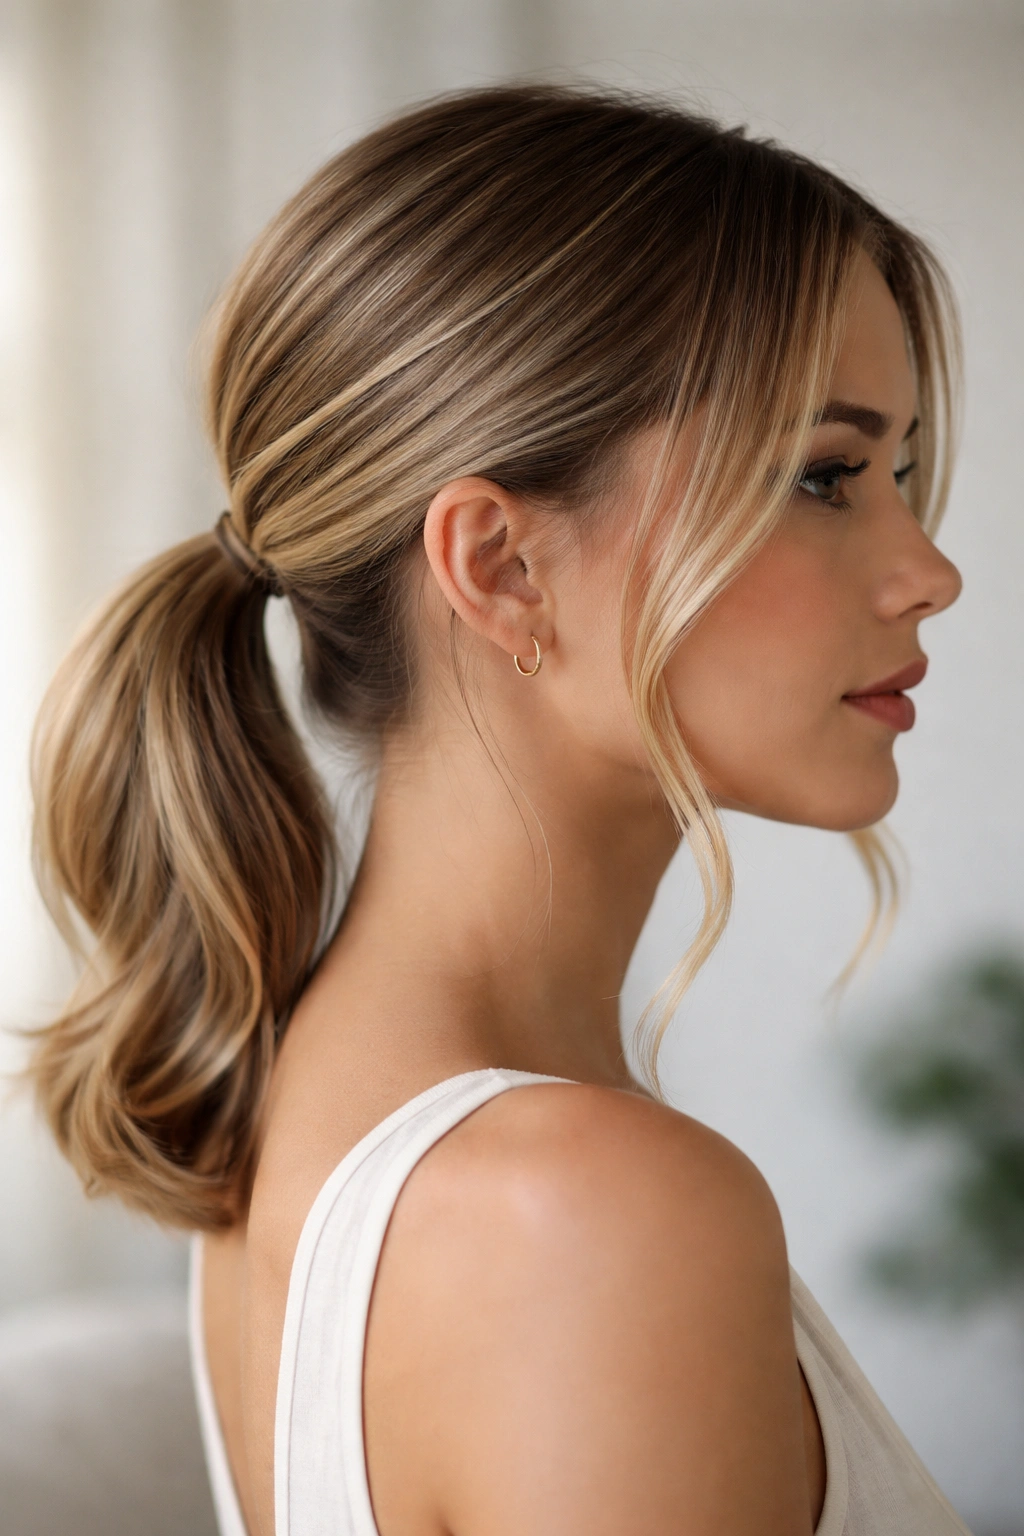
A low pony is inherently more romantic and softer than a high one, especially when you intentionally leave two or three delicate pieces of hair loose around your face. This style says you’re polished but not overly formal, and it’s particularly flattering for short hair because the framing pieces draw attention to your face while the gathered pony keeps everything controlled.
Creating Intentional Face-Framing Pieces
Don’t just accidentally let a few pieces slip out—plan this deliberately. Before gathering your main ponytail, identify the two small sections you want to frame your face (typically starting from your temple area on each side). Clip these aside with bobby pins. Gather the rest of your hair into a low ponytail at the nape of your neck, then release the clipped sections one at a time and smooth them gently along your jawline. Lightly curl the ends inward with a 1-inch curling iron for added softness.
Why This Style Works on Short Hair
- The loose pieces actually make short hair appear longer and fuller
- Low positioning balances the proportions of short hair by shifting visual weight downward
- The contrast between the sleek gathered section and soft face-framing pieces creates dimension
- This works beautifully with both straight and slightly textured hair
Worth knowing: This style is one of the few that actually looks better slightly undone, so don’t stress about achieving perfect sleekness—a few fine flyaways actually enhance the romantic quality.
3. Sleek Side Ponytail
A side ponytail shifts the entire energy of your look by moving the bulk of hair from the center to one side, creating an asymmetrical silhouette that feels distinctly stylish. On short hair, a side pony is particularly effective because it’s a bold statement that’s easier to execute cleanly on shorter lengths.
Positioning Your Side Pony Perfectly
The placement makes all the difference. Brush your hair to one side, then identify where the pony should sit—typically this is slightly lower than a traditional pony, positioned behind your ear on whichever side you choose. Gather your hair with tension, keeping everything smooth against your scalp as you pull toward that side position. Use a fine-tooth comb on the smooth side to ensure zero texture, and use a strong-hold elastic that won’t slip throughout the day.
Styling for Maximum Impact
- Deep side parts work better than straight center parts for this style
- Pull the pony slightly tighter than feels natural—it will loosen as you move
- A wraparound elastic cover in a matching color makes the style feel more refined
- Consider clipping the pony in place with a small bobby pin on the opposite side to prevent it from gradually rotating toward the back of your head
Insider note: If your hair is very short (pixie to chin-length), a side pony actually reads more dramatically because it creates the illusion of more hair concentrated in one area.
4. Textured Low Pony with Grip
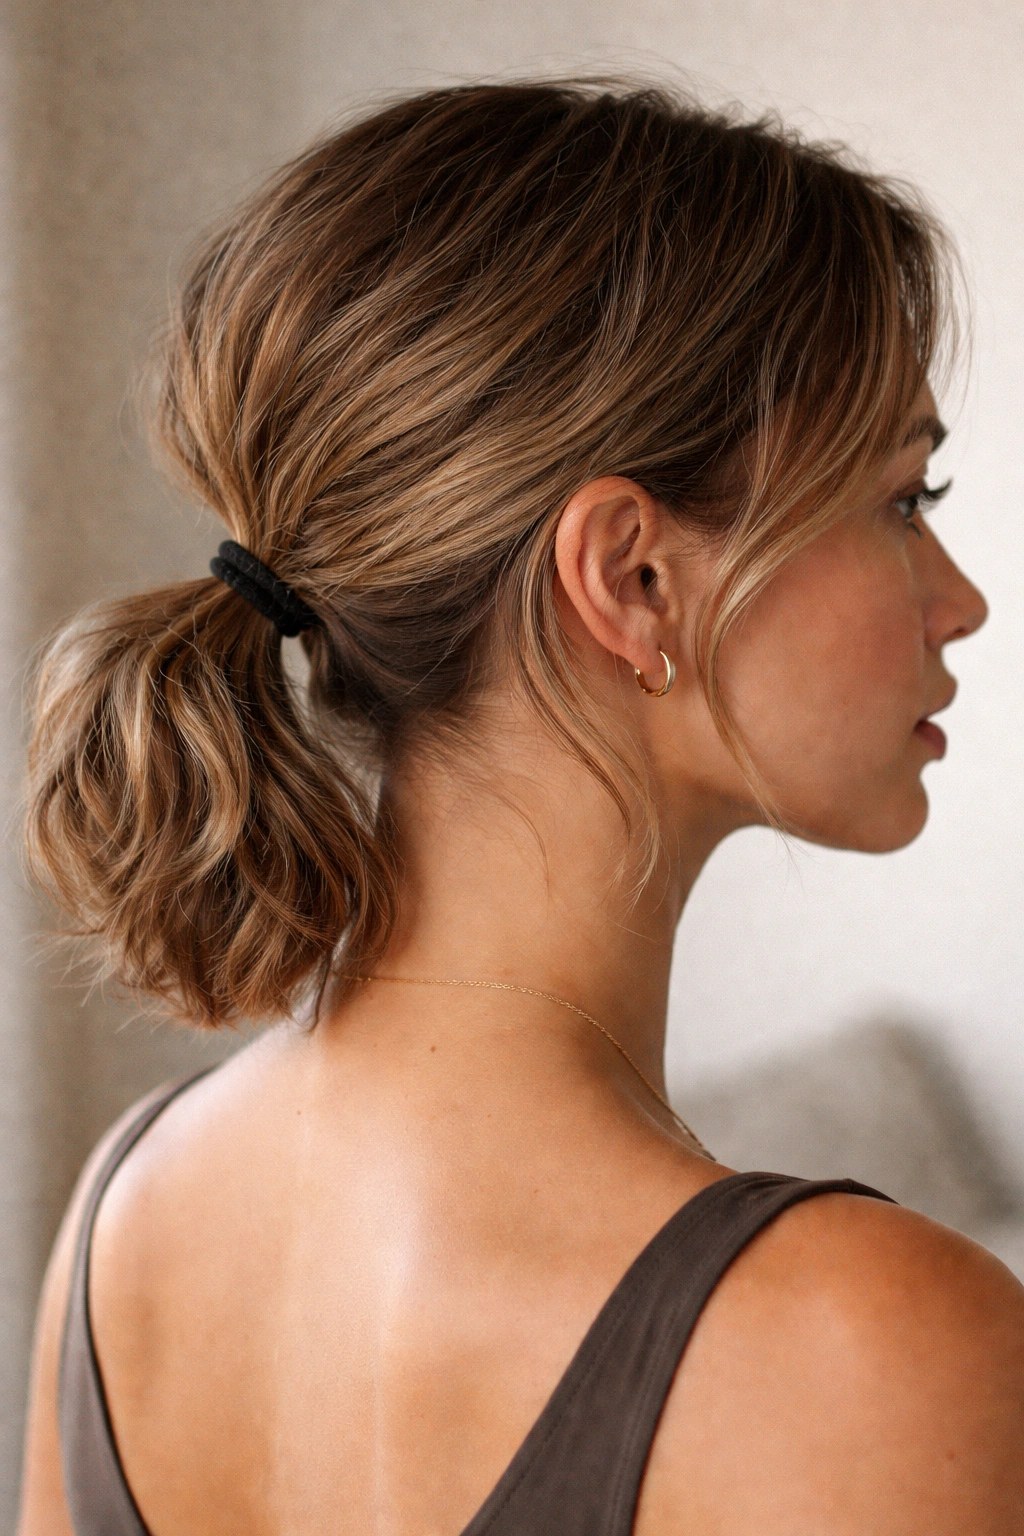
For short hair with natural texture or wave, fighting your hair’s movement is exhausting and usually counterproductive. Instead, work with your texture by creating a low ponytail that celebrates rather than smooths your hair’s natural character. This style is particularly stunning on short curly or wavy hair because it gathers the texture while keeping everything controlled and intentional.
Enhancing Your Natural Texture
If your hair is naturally curly or wavy, apply a curl-defining cream or gel to damp hair and allow it to fully dry before creating your pony. This gives you defined texture throughout. Flip your head to the side and use your fingers (not a brush) to gather your hair loosely into the position where you want your pony. Secure with an elastic that grips well—textured hair requires stronger elastics because it doesn’t collapse flat like straight hair. Once secured, gently pull apart the base of the pony with your fingers to create a slightly separated, piecey look.
Maintaining the Grip Throughout the Day
- Textured hair tends to gradually slip out of elastics, so consider securing it with a second tiny elastic or a bobby pin
- A light hairspray helps textured ponytails last longer without making them crunchy
- This style works beautifully slightly undone, so don’t worry about achieving perfect sleekness
- Refresh texture as needed throughout the day by scrunching the gathered section gently
Quick facts about textured ponytails:
- They often look better after sitting overnight
- Humidity affects them more dramatically than smooth ponytails
- This is one of the few styles where slight puffiness actually enhances the look
- Textured ponytails read as more effortless and modern than overly sleek versions
5. Sleek High Pony with Statement Accessory
A bare sleek ponytail is clean and professional, but a sleek pony paired with a statement accessory becomes instantly more memorable and personalized. With short hair, the proportion of accessory to overall style matters more—delicate clips disappear, but bold cuffs, metallic clips, or interesting hair jewelry make a real impact.
Choosing the Right Accessory for Short Hair
Scale matters significantly. On shoulder-length or shorter hair, an accessory needs to be noticeable without overwhelming the style. A chunky hair cuff in gold or silver makes an immediate statement, as does a jeweled clip positioned at the base of your pony. Alternatively, consider interesting elastics—velvet-covered elastics, wire-wrapped elastics, or metallics transform a basic pony into something intentional. Position any accessory slightly off-center rather than dead center, which feels more contemporary.
Styling the Pony to Showcase Your Accessory
- Create an extra sleek, smooth base so the accessory stands out
- A wraparound hair strand around the elastic adds polish and frames your accessory beautifully
- Consider parting your hair slightly off-center rather than straight down the middle—this creates visual interest that complements the accessory
- Match your accessory’s finish (matte, shiny, metallic) to your overall aesthetic
Pro tip: Positioning the accessory slightly lower than the very top of your pony (about an inch down) feels more contemporary and less pageant-y than positioning it at the absolute base.
6. Bubble Ponytail
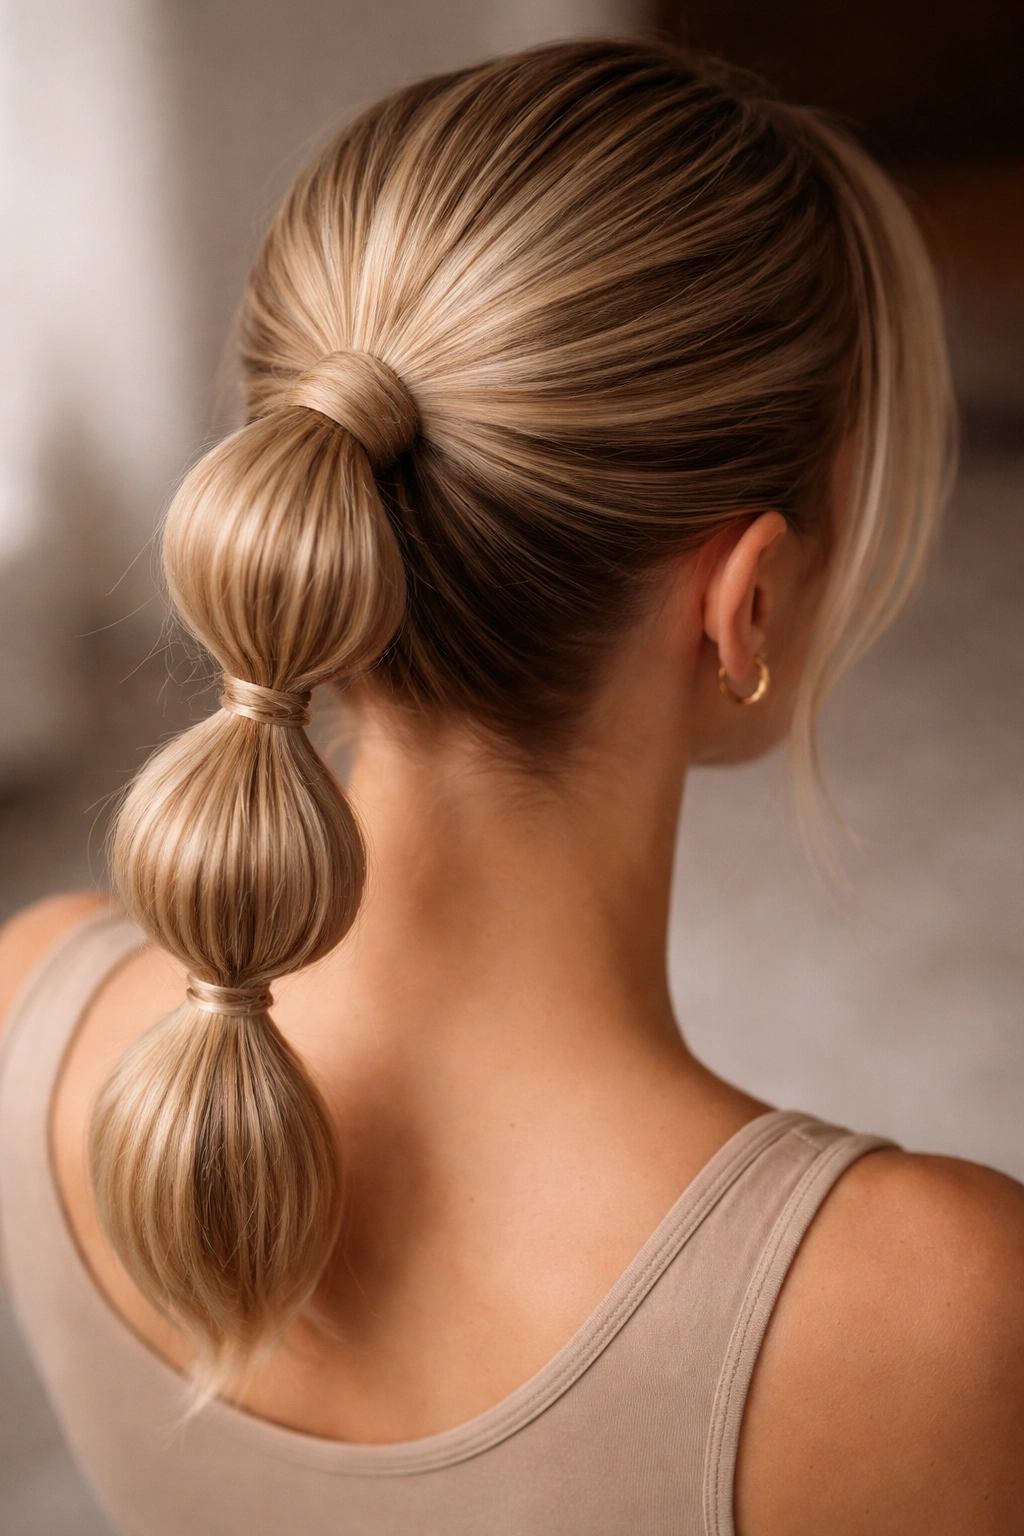
A bubble pony is a graduated ponytail where you create three to five sections stacked vertically, secured with elastics at each section, then gently pull out sections between each elastic to create dimensional “bubbles.” This style looks intricate and fun, but it’s actually achievable on short hair—the bubbles are simply smaller because your hair length is shorter.
Creating Defined Bubbles Without Damaging Hair
Start with a sleek, smooth base ponytail gathered high on your head. Position your first elastic about an inch down from the base, then continue placing elastics at one-inch intervals down the length of your pony. Now comes the fun part: using your fingers, gently grab the hair between the first and second elastic and pull outward and slightly upward, creating a bubble effect. Repeat between each elastic, working from top to bottom. Light hairspray after each bubble keeps the style intact all day.
Why Bubble Ponytails Work on Short Hair
- The bubbles themselves are the statement, so shorter length doesn’t diminish impact
- You can create 3-4 good-sized bubbles on most shoulder-length hair
- The style works beautifully with slightly textured hair as well as smooth hair
- It’s significantly more forgiving of flyaways than a sleek pony
What to watch for: If you pull the bubbles too aggressively, you’ll stretch your hair and create frizz. Gentle, deliberate pulling creates cleaner bubbles. Also, this style works best on slightly dirty hair (day-two or three hair) because fresh-from-a-wash hair can be too slippery.
7. Sleek Braided Wrap Pony
Instead of wrapping a strand of hair around your elastic base, create a tiny three-strand braid and use that to wrap around the ponytail elastic. This small detail elevates a basic pony into something noticeably more polished and intentional. The technique works beautifully on short hair because even a small braid reads as a deliberate design choice.
Executing the Braided Wrap
After securing your main ponytail with an elastic, carefully separate a thin section of hair from the outer edge of the pony (an inch from the elastic). Divide this section into three thin strands and create a neat three-strand braid working downward. Once your braid is long enough (typically 2-3 inches), wrap it around the elastic base, hiding the elastic completely. Secure the braid end with a tiny bobby pin that matches your hair color, positioning it underneath so it’s hidden from view. This takes practice, but after a few attempts, you’ll be able to execute it in about 30 seconds.
Design Details That Enhance the Look
- A braid wrap automatically reads as more intentional than a simple wrapped strand
- Match the wrapped braid exactly to your hair color for seamless blending
- A slightly loose, piecey braid feels more modern than a tight, controlled one
- This works with straight hair, textured hair, and everything in between
Quick facts about braided wraps:
- They’re an excellent solution for covering visible elastics and bumps
- The braid creates the illusion of added texture and dimension at the base
- This small detail is the difference between “I threw my hair up” and “I styled my hair”
- The braid remains intact even as the rest of the pony loosens throughout the day
8. Sleek Top Knot

A top knot is technically a ponytail twisted and looped on itself, creating a knot effect at the crown. For short hair, this style requires at least shoulder-length length to work, and it’s best executed on hair that’s at least 2-3 inches long all around. When done right, a sleek top knot reads as intentional and modern rather than rushed.
Creating a Structured Top Knot
Begin with a high, tight ponytail gathered at the crown using the same technique as your basic high pony. Once secured, separate the pony into two equal sections. Twist each section independently, then twist the two sections around each other, creating a thick rope. Wrap this rope into a knot shape at the base of your pony and secure it with bobby pins hidden inside the knot. Use several bobby pins to ensure the knot sits securely—there’s nothing worse than a wobbly top knot that gradually loosens throughout the day.
Polishing Your Top Knot for Maximum Impact
- A perfectly smooth scalp is non-negotiable for this style
- Smooth flyaways before twisting and again after securing the knot
- Place bobby pins strategically so they’re hidden within the knot structure itself
- A light hairspray keeps the entire knot sleek without making it stiff
Worth knowing: A slightly loose, undone top knot reads as more contemporary than a tight, structured one. Don’t stress about achieving perfection—soft, intentionally piecey knots are very modern.
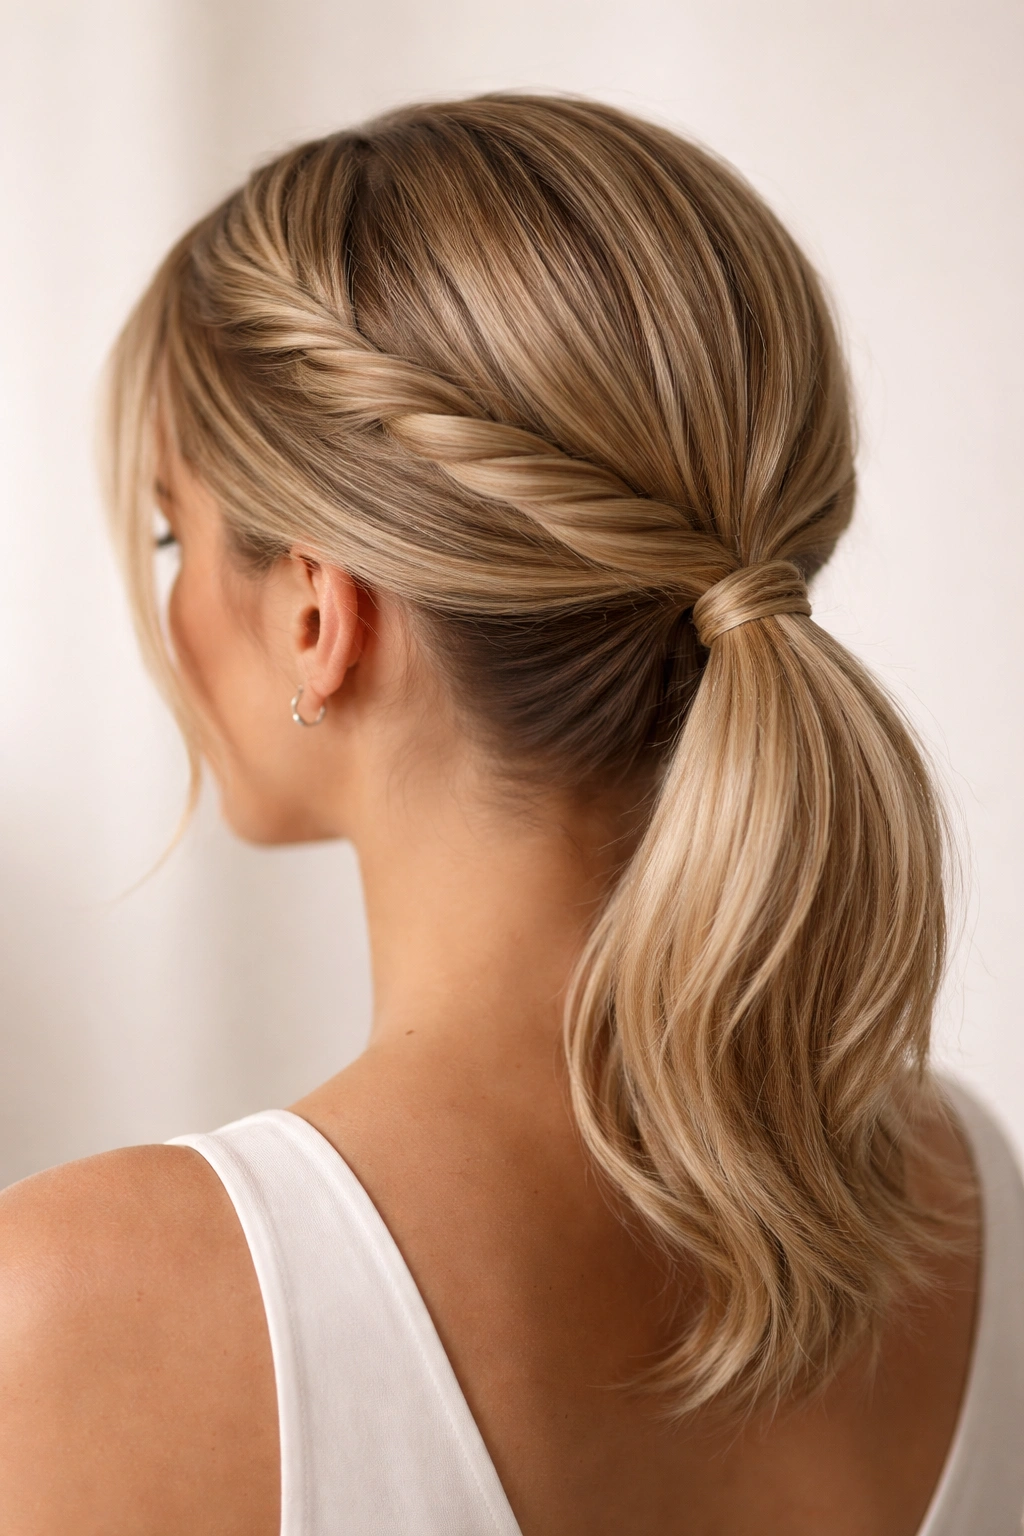
9. Deep Side Part Pony
A deep side part (also called a side part on the dramatic side) completely changes the proportion and balance of your face, and when paired with a sleek low ponytail, it creates a surprisingly sophisticated look. This style works especially well on short hair because the dramatic part creates visual interest that compensates for shorter length.
Creating a Deep Side Part That Lasts
Part your hair dramatically to one side—aim for a part that’s about two-thirds of the way across your scalp rather than down the middle. Use a rattail comb or the end of a fine brush to create a sharp, clean line. Set this part with a bit of smoothing gel or hairspray while your hair is damp, which helps it stay in place as it dries. Once your hair is fully dry, gather it into a low ponytail at the nape of your neck, keeping tension on the deeper side of the part to emphasize the asymmetry.
Why Deep Parts Amplify Short Hair
- A dramatic part creates visual interest that makes short hair feel more intentional
- The proportional shift changes how your face reads, often making cheekbones and jawlines more pronounced
- This works beautifully with every face shape, though it requires you to commit to the dramatic angle
- Paired with a sleek low pony, the overall effect is distinctly contemporary
Pro tip: Don’t shy away from making your side part truly dramatic—timid side parts read as accidental rather than intentional. The deeper you go, the more modern and stylish the look becomes.
10. Sleek Asymmetrical Pony

An asymmetrical ponytail—where the pony itself sits slightly off-center rather than directly down the middle—is a subtle design choice that creates significant visual impact. This style is particularly flattering on round or square face shapes because the asymmetry creates balance and visual interest.
Positioning Your Asymmetrical Pony Correctly
Instead of gathering your hair dead center at the back of your head, gather it slightly toward one side—about an inch to 1.5 inches off-center. This small shift changes the entire proportion of the style. The side toward which you gather becomes the emphasis, so consider your face shape and personal preference. Gather with consistent tension to ensure the pony feels intentional rather than accidental, and smooth your scalp thoroughly on both sides using a fine-tooth comb before securing.
Styling Elements That Enhance Asymmetry
- A deep side part naturally complements an asymmetrical pony
- Use the opposite-side bobby pins to hold any flyaways in place, which adds to the asymmetrical aesthetic
- This works beautifully with face-framing pieces on the longer side of your part
- A wrapped strand or braided wrap around the elastic becomes a design element that emphasizes the asymmetry
Quick facts about asymmetrical ponytails:
- They require intentional styling or they read as accidental
- This style works particularly well on oval and oblong face shapes
- Pairing asymmetry with other design elements (like a statement accessory) creates visual harmony
- This is one of the few ponytail styles that actually improves with slight undone-ness
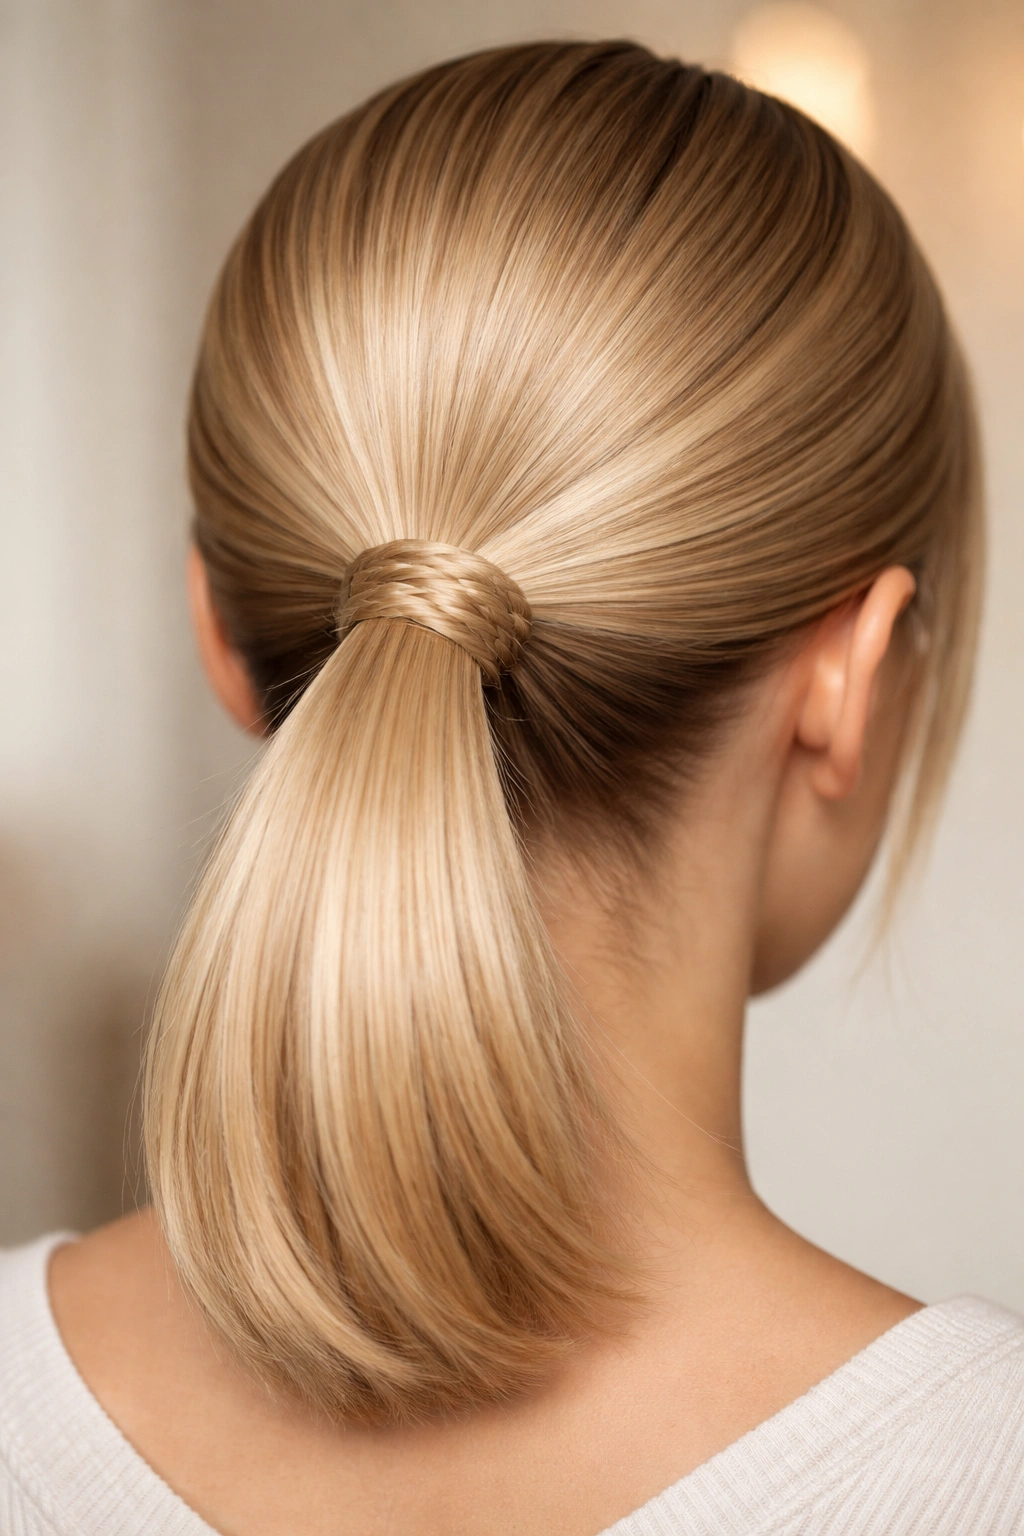
11. Low Pony with Hidden Elastics
This technique creates the optical illusion of a continuously smooth ponytail by securing the hair in multiple places with elastics hidden beneath the hair itself. The result looks like you have a single, incredibly sleek, impossibly smooth ponytail—even though it’s actually secured in stages. This style requires patience but creates an incomparably polished final result.
Building Your Hidden-Elastic Pony
Gather your hair into a low ponytail and secure it with your first elastic about 1.5 inches from the base of your pony. Separate a thin section of hair from the outer edge of this first section and wrap it around the elastic, securing the wrapped strand with a bobby pin. Now, gather that wrapped strand along with the rest of the ponytail below the first elastic, and position your second elastic about 1.5 inches down. Repeat this wrapping process with each subsequent elastic. The result is a ponytail that looks smoothly secured at the base but is actually held in place at multiple points.
Why Multiple Hidden Elastics Matter
- They distribute tension evenly, reducing stress on any single point of your hair
- The ponytail stays secure all day because you’re not relying on a single elastic doing all the work
- The smooth appearance is achieved through the wrapping technique, not through having impossibly sleek hair
- This style is particularly useful for thicker or longer short hair that might otherwise slip out
Worth knowing: This technique takes about two minutes longer than a basic pony, but the results last noticeably longer and read as significantly more polished. It’s worth practicing until it becomes intuitive.
12. Sleek Pony with Twisted Crown
A twisted crown creates a romantic, elevated look by taking a section of hair from one side of your head, twisting it loosely, and pinning it across your crown before gathering your remaining hair into a low ponytail. This style is particularly beautiful on short hair because the twisted section adds dimension and visual interest without requiring excessive length.
Creating the Twisted Crown Section
Starting at your temple on one side of your head, separate a section of hair about 1.5 inches wide. Twist this section loosely (not too tightly—you want it to look soft and romantic) and pin it across the crown of your head using bobby pins that match your hair color. The twist should travel from one side of your head toward the back, creating a crown-like effect. Once secured, gather the remaining hair (including the ends of your crown twist) into a low ponytail at the nape of your neck.
Styling Details for Maximum Romance
- A loose, piecey twist reads as more modern than a tight, controlled one
- Consider leaving a few baby hairs loose around your face for added softness
- The twist works beautifully with a slightly textured or wavy base
- This pairs beautifully with minimal makeup and a fresh, glowing complexion
Pro tip: Secure your twisted crown with at least three bobby pins to ensure it stays in place all day—a shifting crown twist completely changes the visual impact of the style.
Final Thoughts
Sleek ponytails on short hair aren’t a compromise—they’re a completely different category of styling that offers incredible versatility within its scope. Each of these 12 styles demonstrates that ponytails aren’t just practical; they’re an intentional design choice that communicates polish, intention, and confidence. The techniques that matter most with short hair are the foundational ones: a perfectly smooth scalp, consistent tension throughout the gathering process, and thoughtful attention to details like baby hairs and wrapped elastics.
The beauty of short-hair ponytails is that they reveal your effort and intention immediately. You can’t hide behind length, which means that a well-executed sleek pony reads unmistakably as a styling choice rather than a default. This is actually an advantage—it means that even subtle variations (a deep side part, an asymmetrical gather, face-framing pieces) make significant visual impact.
Start with whichever style resonates with your personal aesthetic and daily routine. Once you’ve mastered one or two, adding the others to your repertoire takes minimal additional effort. What matters most is practice and understanding the mechanics—smooth scalp, consistent tension, thoughtful finishing touches. After a few rounds of each style, you’ll develop the muscle memory to execute them in under five minutes, which means a completely new look option whenever you need it. That’s the real power of mastering short-hair ponytails.