Mid-weave ponytails have become a go-to hairstyle for anyone who wants that polished, sleek aesthetic without sacrificing volume or dimension. The magic lies in the placement—sitting somewhere between your crown and the lower part of your head, this style hits the sweet spot where you get structure from the placement while maintaining the flow and movement that makes hair look fuller and more intentional than a standard high pony. What makes mid-weave ponytails particularly appealing is their versatility: they work equally well for a professional presentation, a casual weekend look, or a night out with friends.
The term “weave” in hairstyling refers to the blended, woven texture that creates dimension and movement throughout the hair. When you combine that weaving technique with the mid-placement of a ponytail, you get a style that’s sleek and refined but never looks flat or overly tight. These ponytails have become increasingly popular because they’re forgiving—they work with different hair types, lengths, and textures when styled correctly, and they require fewer styling products than some of the more elaborate updos.
The best part? Mid-weave ponytails are surprisingly achievable at home once you understand the fundamentals. Whether you’re working with natural hair, extensions, or a blend of both, there’s a mid-weave ponytail variation that will suit your hair goals and daily routine. Let’s explore ten of the most flattering and sleek versions you can create.
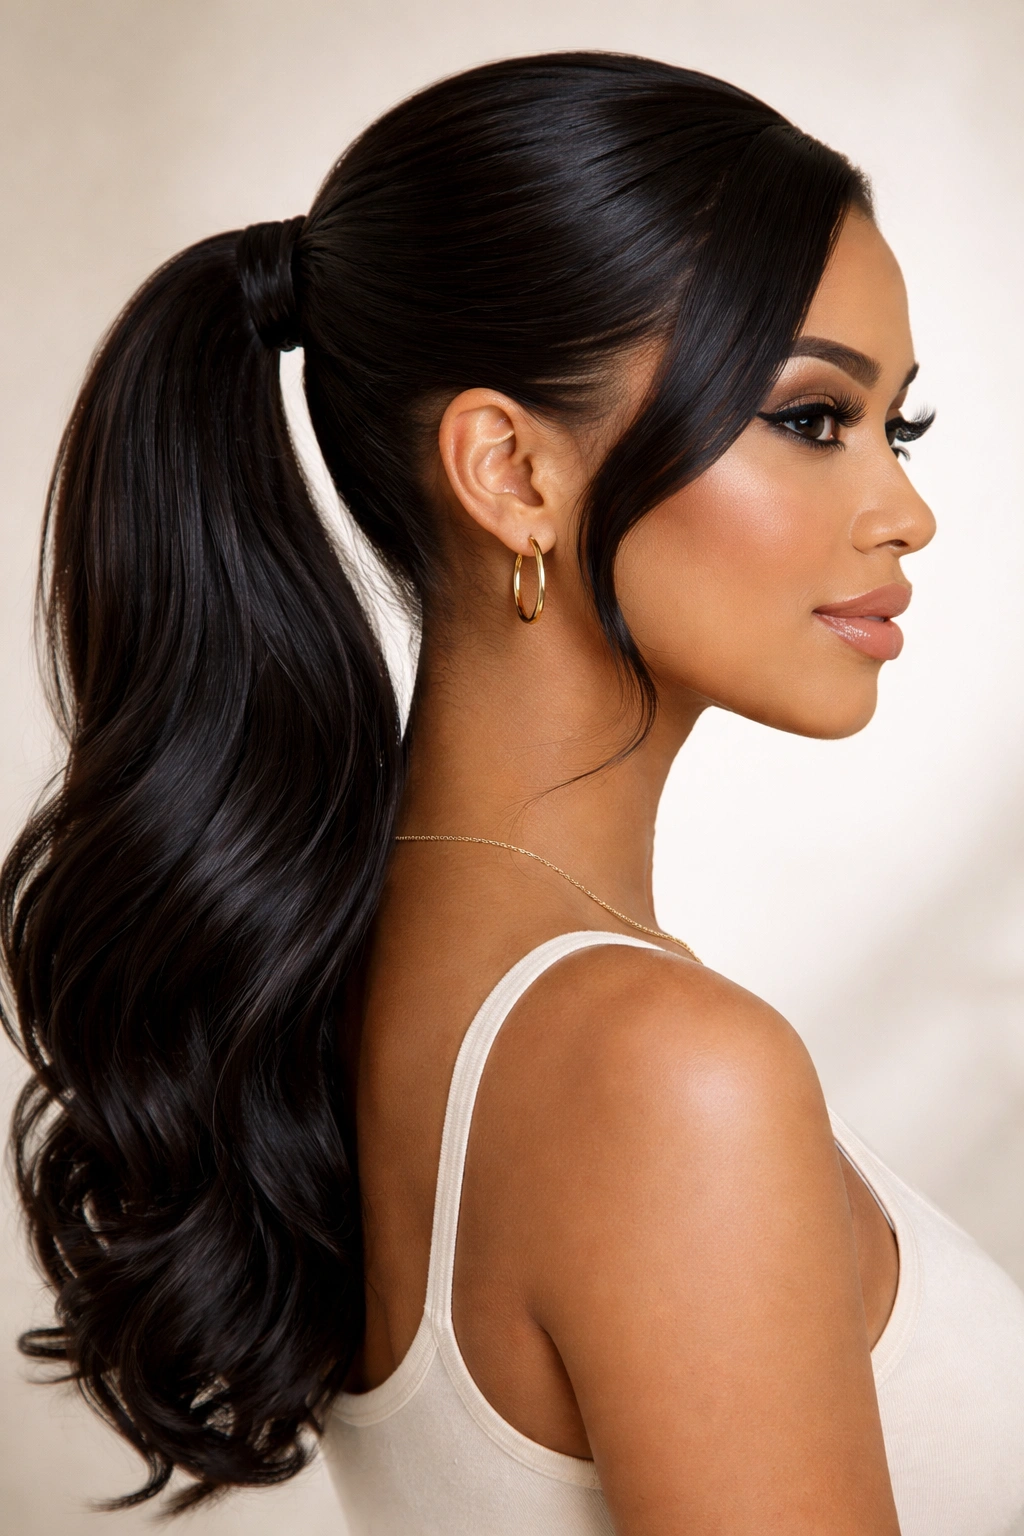
1. The Classic Mid-Weave Sleek Pony
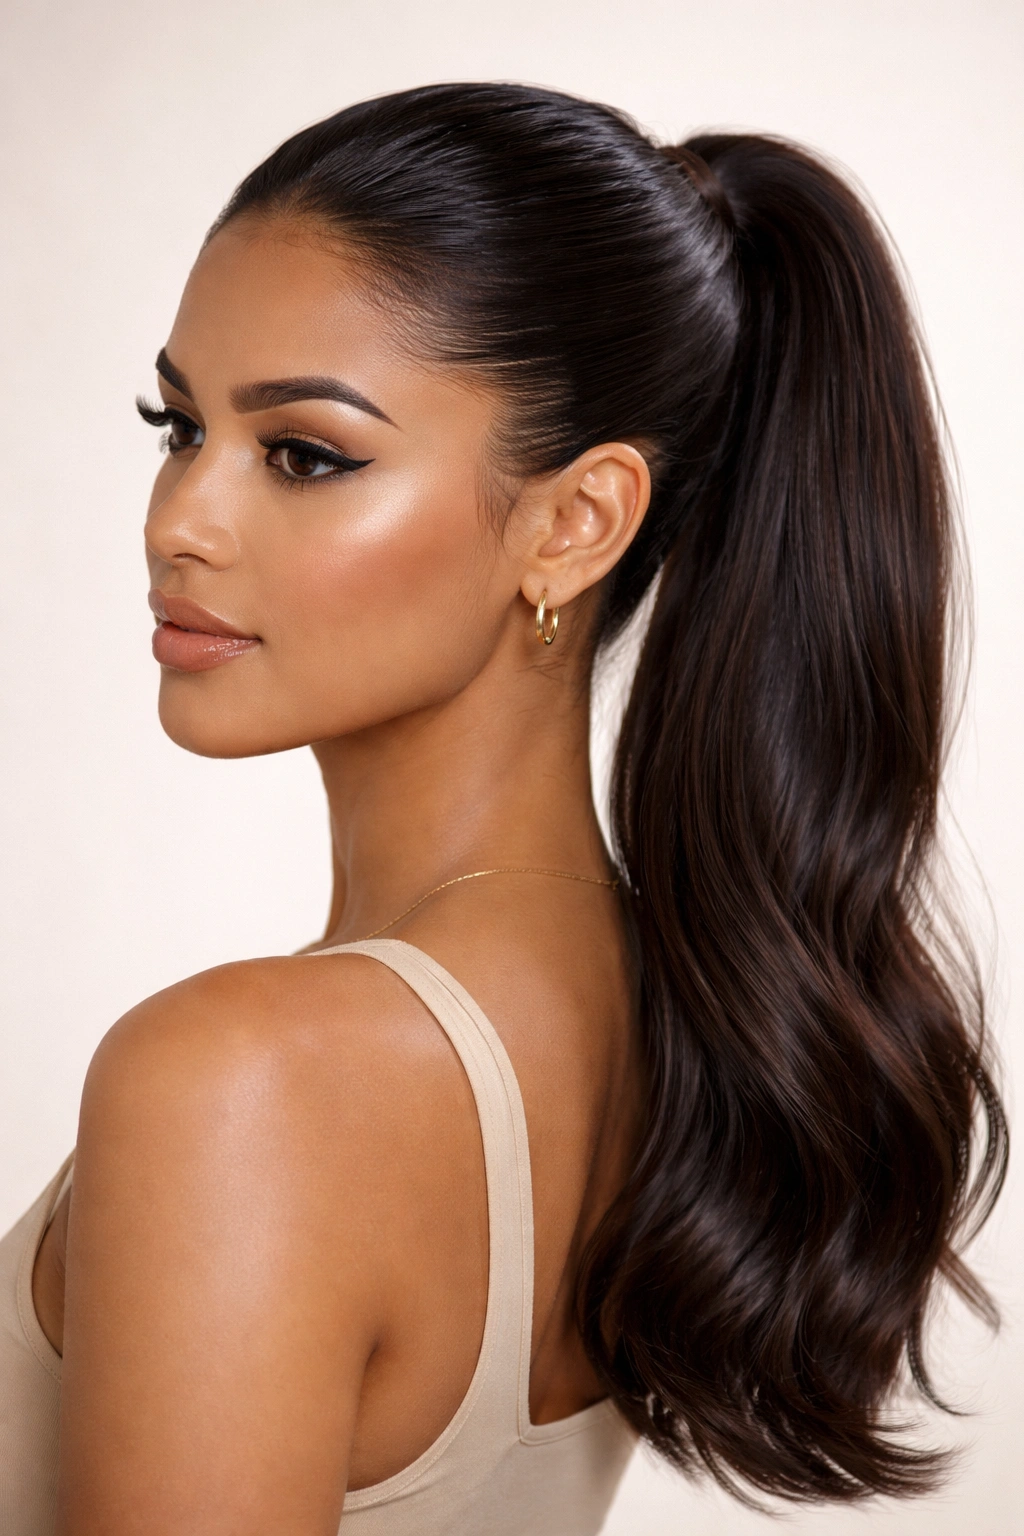
This is the foundation style that defines the category—a smooth, polished ponytail positioned at the midpoint of your head with hair that’s been carefully smoothed and texturized to create subtle dimension. The key to nailing this look is in the preparation: you’re not going for a bone-straight appearance, but rather a soft sleekness that shows off the individual strands and their movement without looking frizzy or undone.
Why It Stands Out
The classic mid-weave sleek pony works because it balances refinement with accessibility. You’re getting the polish of a formal hairstyle with the ease of a practical everyday look. The mid-placement means the style flatters most face shapes, and the subtle weaving gives your hair dimension that reads as intentional and styled, not just pulled back.
What Makes It Work
- Smooth base with textured ends: The roots and crown are sleekly brushed backward, but the ponytail itself maintains some texture or subtle wave. This contrast is what makes it feel sophisticated rather than slicked-down.
- Clean section lines: Taking time to create precise, even sections around the crown and sides elevates the entire look. Messy sections read as accidental; clean ones read as intentional.
- Right-sized elastic: Using a clear or matching elastic keeps the focus on your hair texture rather than the fastener. Thick, visible elastics can cheapen the effect.
- Smoothing serum or gel: A light-hold smoothing product applied to damp hair before blow-drying creates that polished finish without crunchiness.
Pro tip: Blow-dry your hair in the direction you want it to lay before creating the ponytail. Hair styled dry holds its sleekness far better than hair gathered while wet.
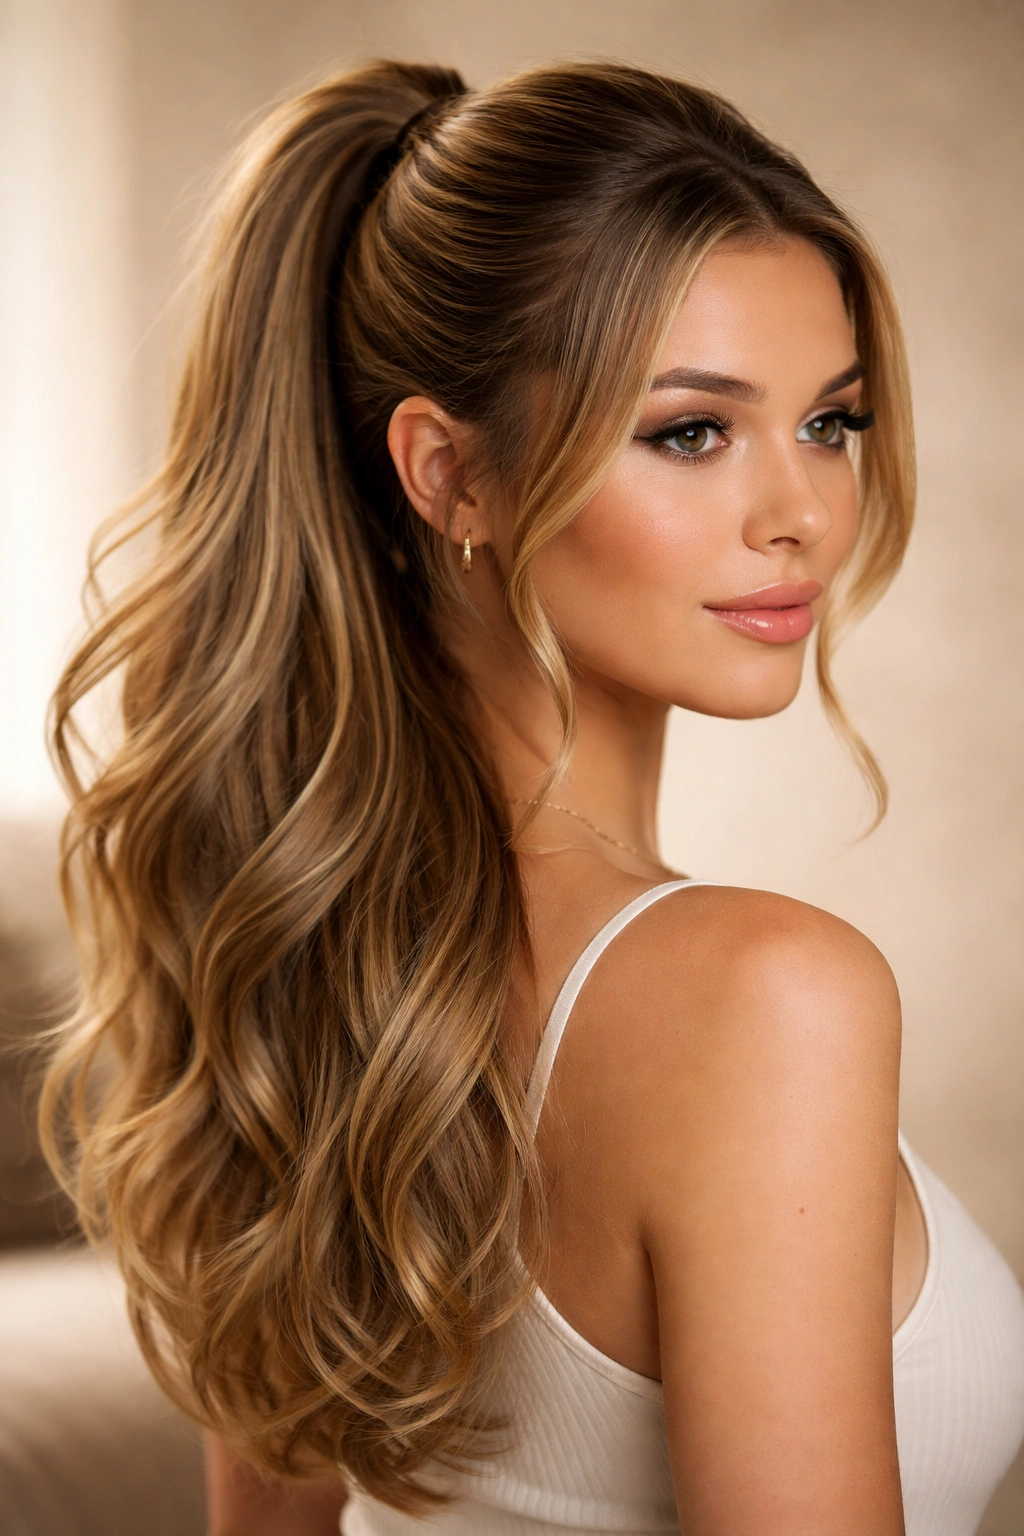
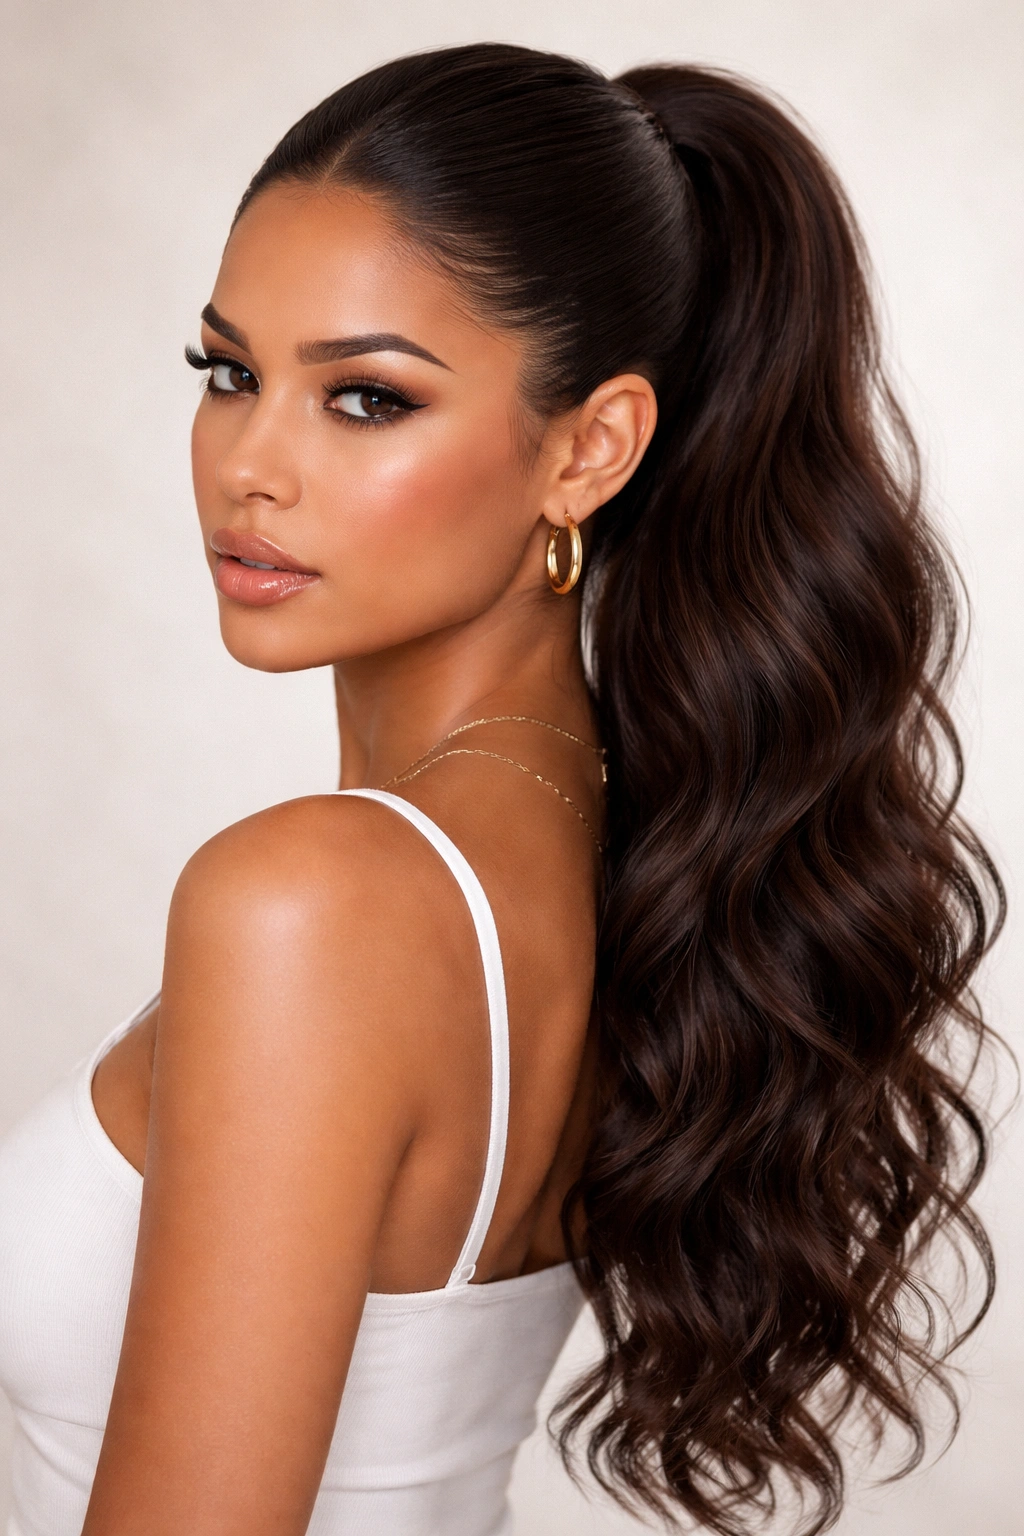
2. The Mid-Weave High-Volume Ponytail
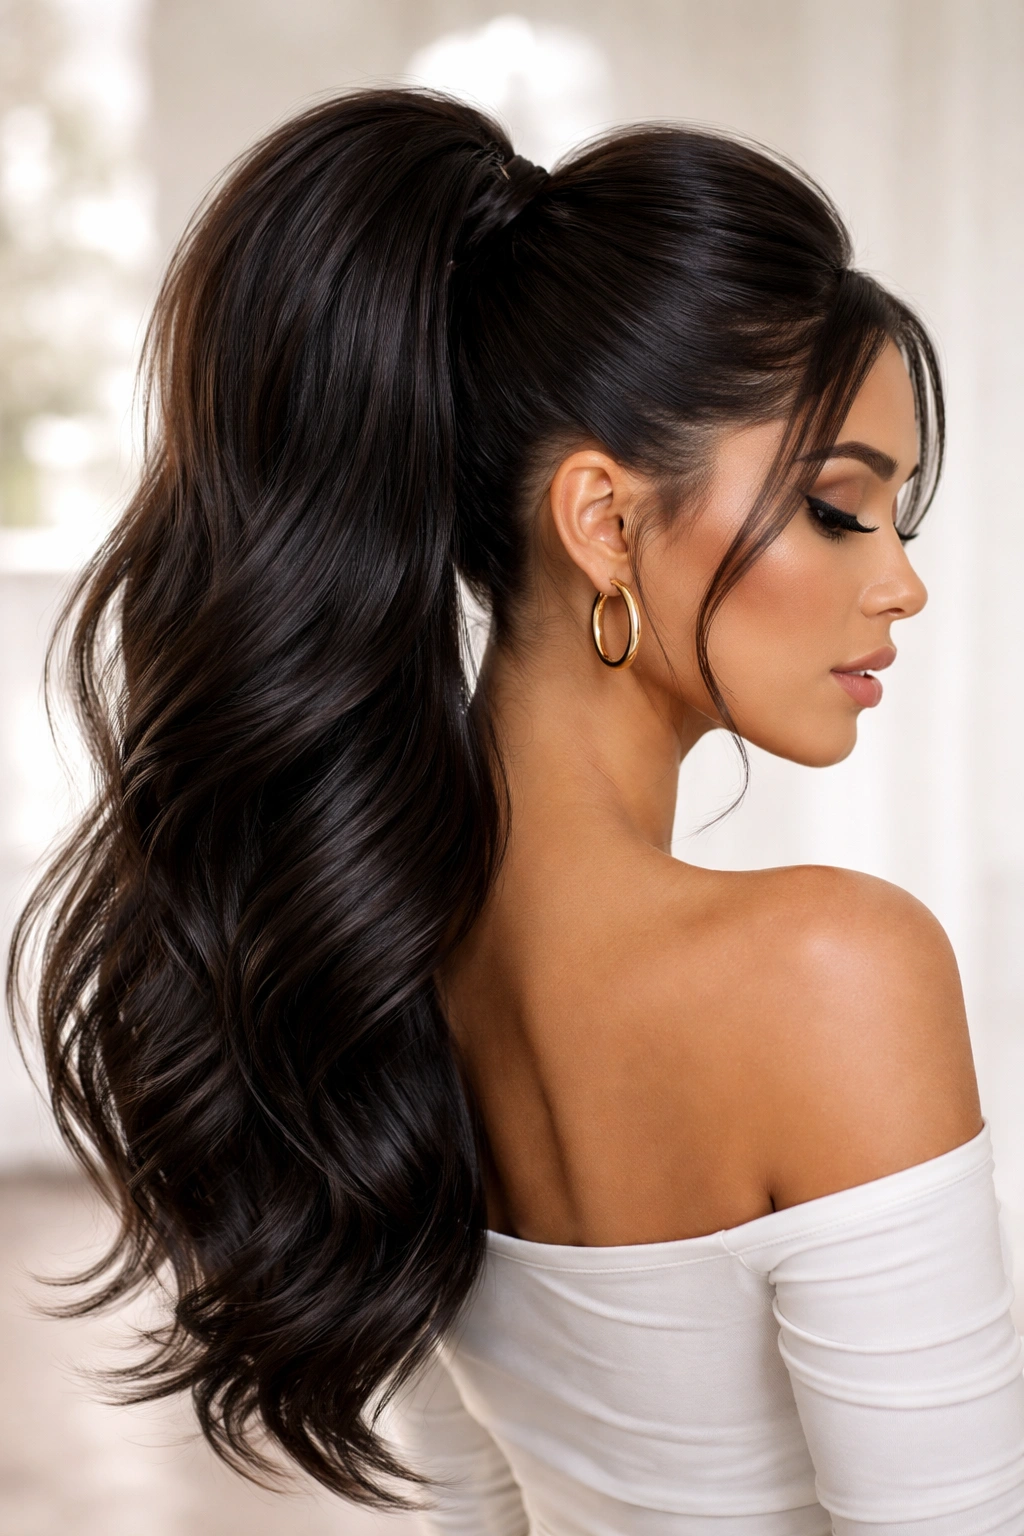
Some people want their mid-placement ponytail with serious height and fullness—this style delivers exactly that. The high-volume mid-weave pony uses strategic layering, texturizing, and often extensions or hair pieces to create a ponytail that’s visibly full and dimensional while still maintaining that sleek foundation.
Why It Stands Out
This style works beautifully for people who love the polished aesthetic of a sleek look but don’t want to sacrifice the drama that comes with abundant hair volume. It photographs incredibly well, catches light beautifully, and makes a statement without appearing over-the-top.
Building the Volume
- Tease strategically: Use teasing only in specific zones—usually the crown and the area immediately above where your elastic sits—rather than throughout the entire head. This keeps the look intentional and prevents the frizz that comes from over-teasing.
- Layer your hair thoughtfully: If you’re working with your own hair, longer layers around the crown and shorter layers throughout the ponytail create the illusion of more volume. If you’re using extensions, weaving them in at varying heights achieves the same effect.
- Blow-dry with a round brush: A medium to large round brush creates volume at the roots and throughout mid-length hair. Brush each section away from the face, then finish with cool air to set the style.
- Use texturizing powder or mousse: Applied to damp roots before blow-drying, these products grip your hair and prevent it from falling flat as the day goes on.
Worth knowing: High-volume ponytails require more maintenance throughout the day—a light mist of flexible-hold hairspray every few hours keeps them looking fresh.
3. The Textured Mid-Weave Pony with Loose Waves
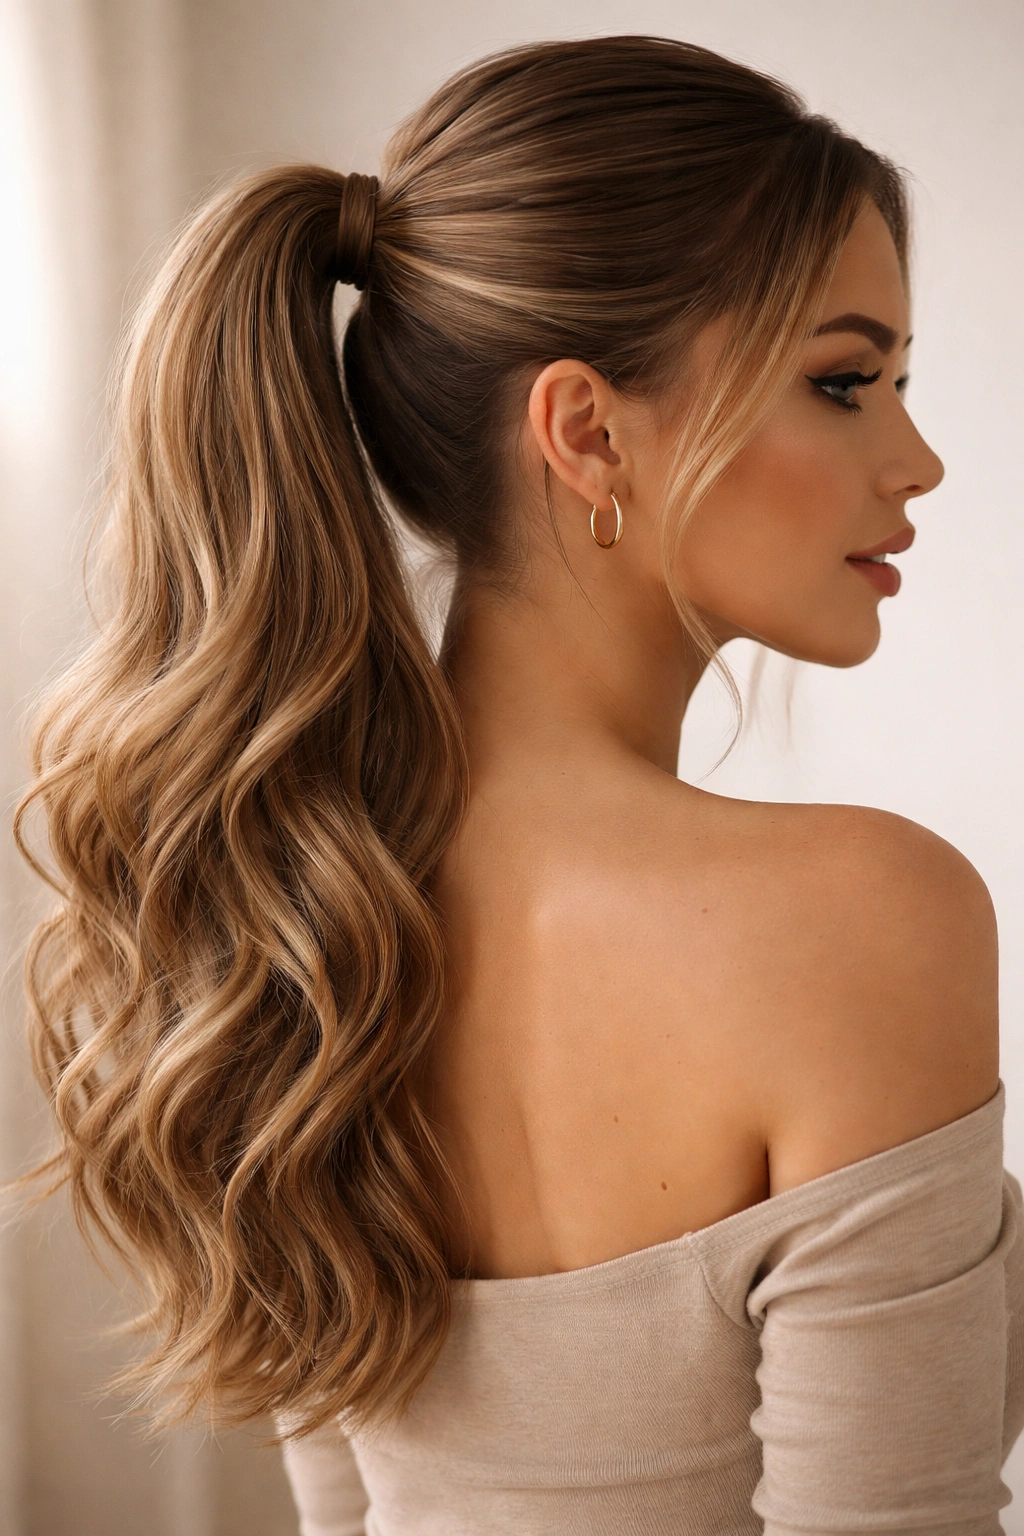
If your goal is sleek sophistication with a softer, more romantic edge, this variation adds loose waves or curls to the ponytail portion while keeping the crown area smooth and controlled. The contrast between the sleek top and the textured tail is what creates visual interest and makes this style feel both polished and relaxed.
Why It Stands Out
This style is perfect for people who love the refinement of a ponytail but don’t want to look overly formal or severe. The waves soften the overall effect while the sleek top keeps it looking intentional and put-together. It’s a genuinely versatile look that moves easily between professional settings and casual outings.
Creating the Wave Texture
- Blow-dry smooth first: Start with a sleek crown and top section, exactly like you would for the classic mid-weave pony. This foundation is non-negotiable.
- Create waves in the ponytail: Once your hair is gathered, use a curling iron, wand, or even braiding technique to add loose waves to the tail section. Aim for waves that are soft and relaxed, not tight ringlets.
- Vary the wave direction: Curl some sections away from the face and some toward it, or alternate directions as you work down the ponytail. This prevents the waves from looking uniform or artificial.
- Tousle gently after cooling: Once your curled sections have cooled completely, run your fingers through them to break up the waves slightly. This softens the effect and makes it look less done.
Insider note: Creating waves the night before and sleeping on them (with a silk pillowcase to minimize frizz) often yields the most natural-looking, long-lasting texture.
4. The Mid-Weave Bubble Ponytail
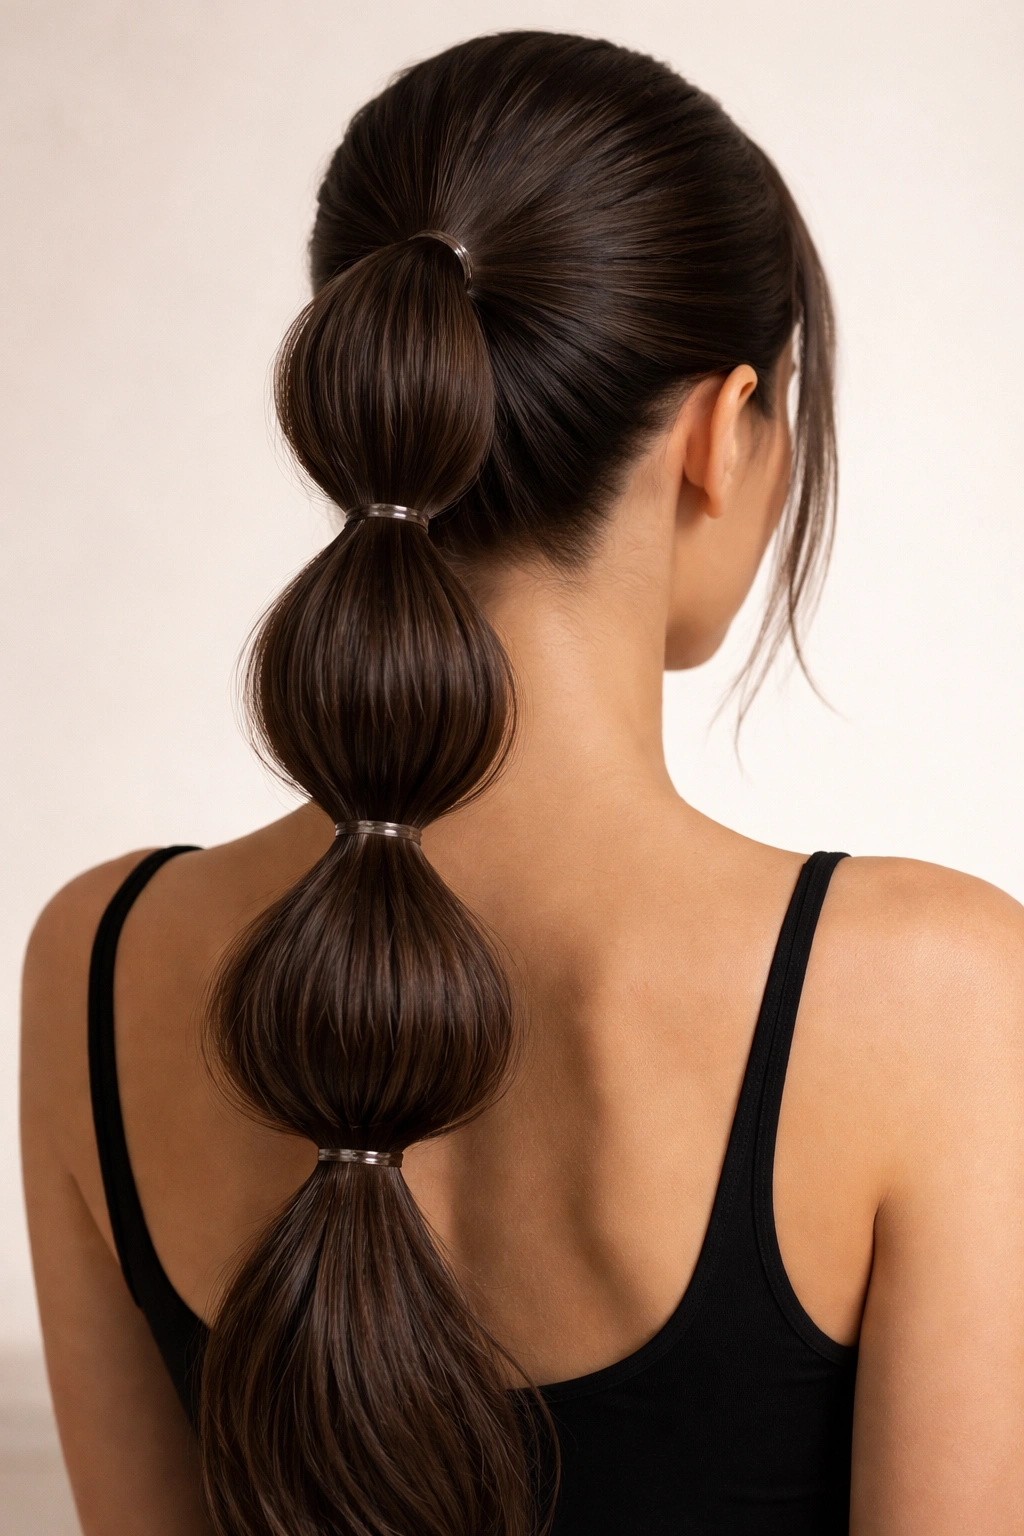
This playful variation divides your mid-placement ponytail into distinct sections, each gathered with its own mini elastic, creating the illusion of “bubbles” of hair stacked on top of each other. Despite sounding complicated, it’s actually quite simple to execute and creates a style that feels modern, dimensional, and undeniably sleek.
Why It Stands Out
The bubble ponytail draws the eye with its visual rhythm and movement. Each bubble creates a new line and adds height to the overall style. It’s the perfect choice when you want something that feels more fashion-forward than a standard ponytail but still reads as polished and put-together.
Building the Bubbles
- Start with a solid base: Create your mid-placement ponytail with a sleek crown section, just like the classic style. Make sure this foundation ponytail is smooth and secure before you move forward.
- Divide into equal sections: Using a comb, create 3 to 5 sections down the length of your ponytail, depending on how many bubbles you want. Each section should be roughly equal in size for visual balance.
- Secure each bubble: Place a small, clear elastic around each section. The elastics should be visible and intentional—this is part of the design.
- Gently fluff each bubble: Using a teasing brush or your fingers, gently backcomb each bubble section to make it appear fuller and rounder. This creates that distinctive bubble shape.
- Smooth the edges: Use a small amount of smoothing serum or gel to smooth the very outer edge of each bubble section. This keeps the look polished rather than frizzy.
Pro tip: Thin elastics work better for bubble ponytails than thick ones—they’re less visible and create a more seamless-looking effect.
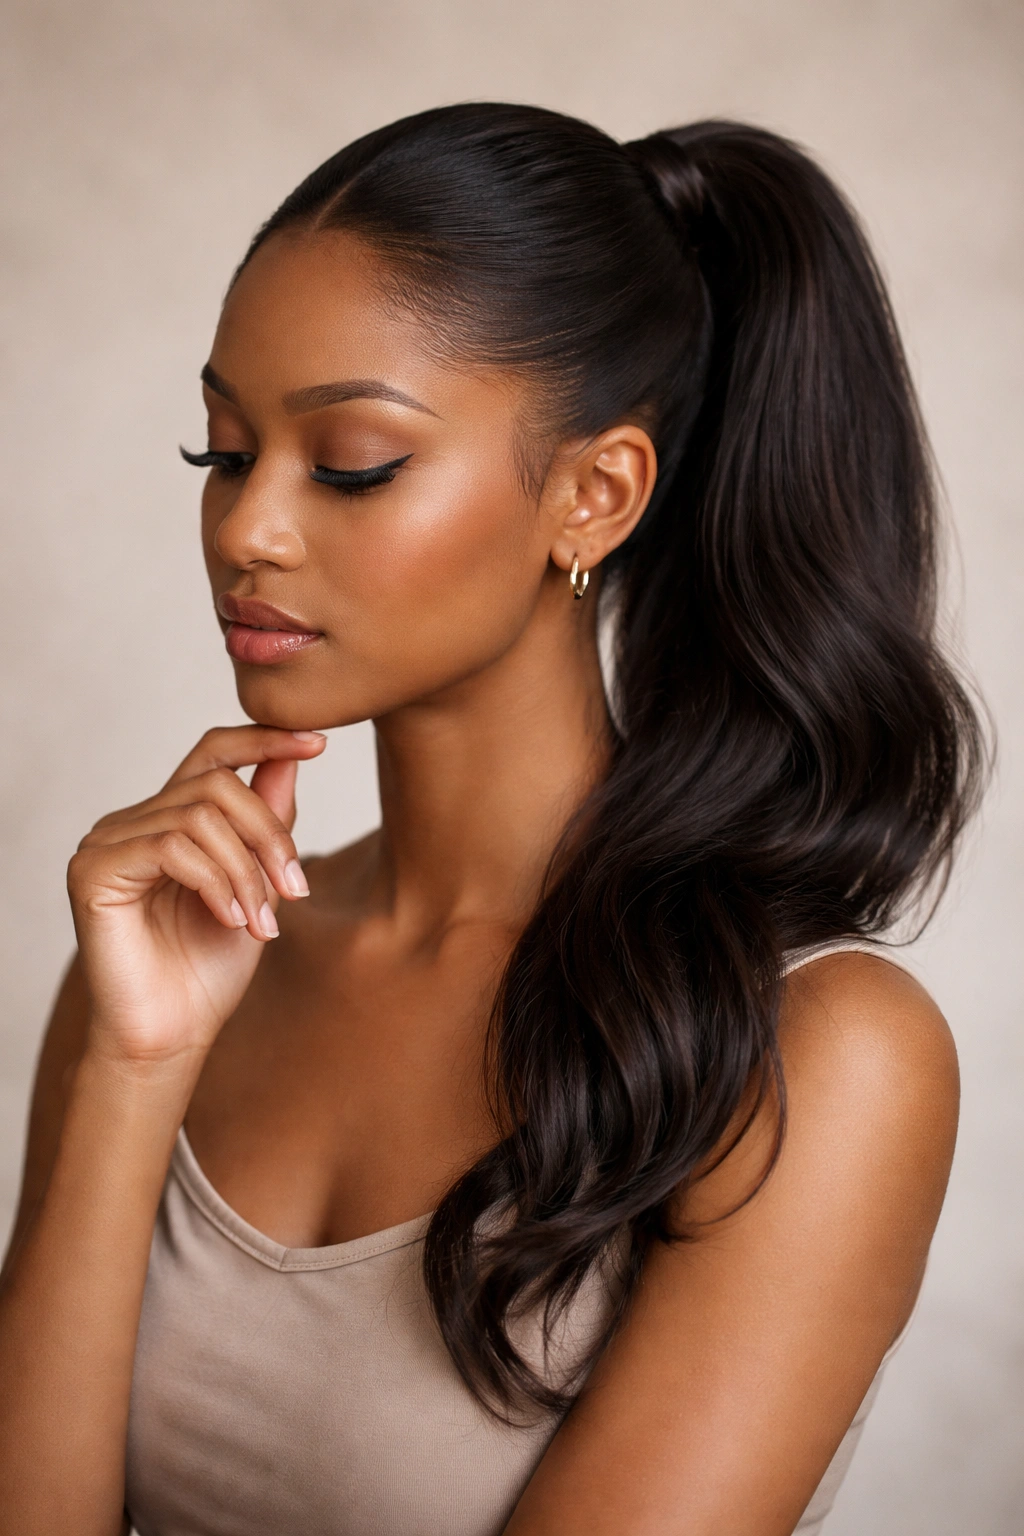
5. The Sleek Mid-Weave Low-Midpoint Pony
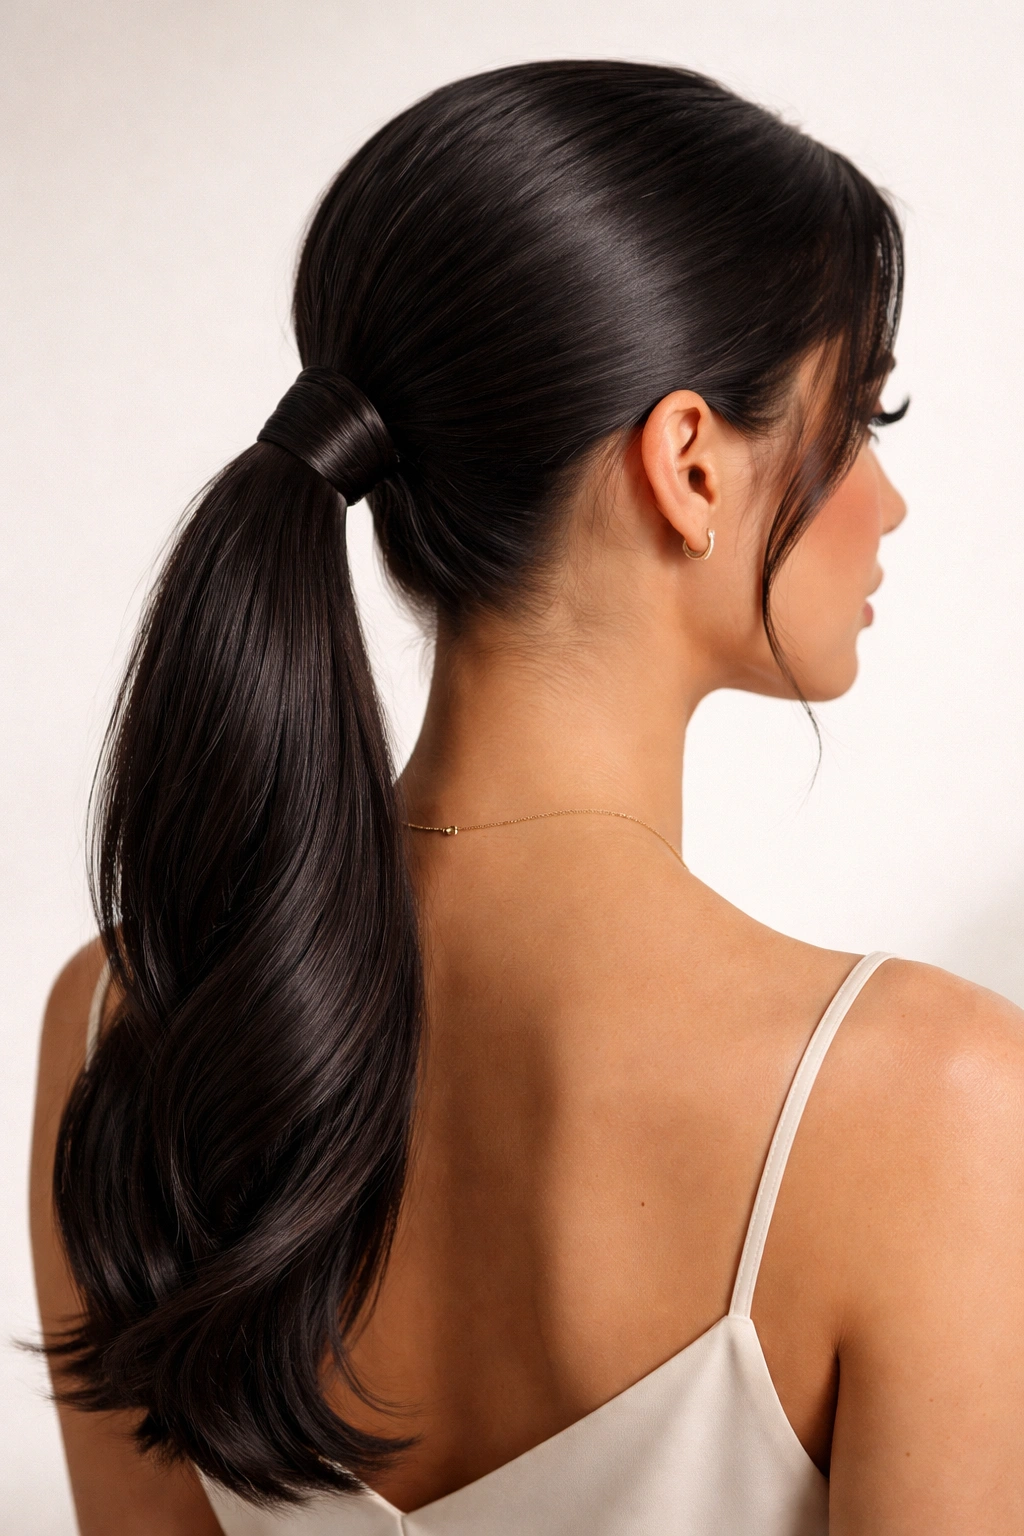
This variation takes the mid-placement concept and lowers it slightly, positioning the ponytail closer to the nape of your neck while still maintaining that sweet midway zone. This placement is incredibly flattering because it elongates the neck and creates an elegant, sophisticated line from the crown down through the ponytail.
Why It Stands Out
Lower-midpoint ponytails have a distinctly elegant quality—they’re the style you’ll see on red carpets and in high-fashion editorials. This placement also tends to be more practical for everyday wear because the ponytail sits closer to your body, minimizing the risk of it getting caught or pulled throughout the day.
Achieving the Perfect Lower Placement
- Map your placement: Your elastic should sit roughly at the base of your skull, about 2 to 3 inches above where your neck begins. This is the sweet spot for the lower-midpoint zone.
- Create a smooth base: Section your hair horizontally across the crown and sides, smoothing each section backward. The smoother your base, the more elegant the overall effect.
- Use a sleek gathering technique: Rather than casually gathering your hair, use a fine-tooth comb or brush to methodically smooth each section backward as you add it to the ponytail. This deliberate approach creates that polished aesthetic.
- Finish with a sleek elastic and wrap: Once your ponytail is secured, wrap a small section of your own hair around the elastic base to hide it completely. This creates an ultra-refined, finished appearance.
Worth knowing: Lower-midpoint ponytails require less maintenance throughout the day because they sit closer to your body and experience less wind resistance than higher placements.
6. The Mid-Weave Braided Wrap Detail
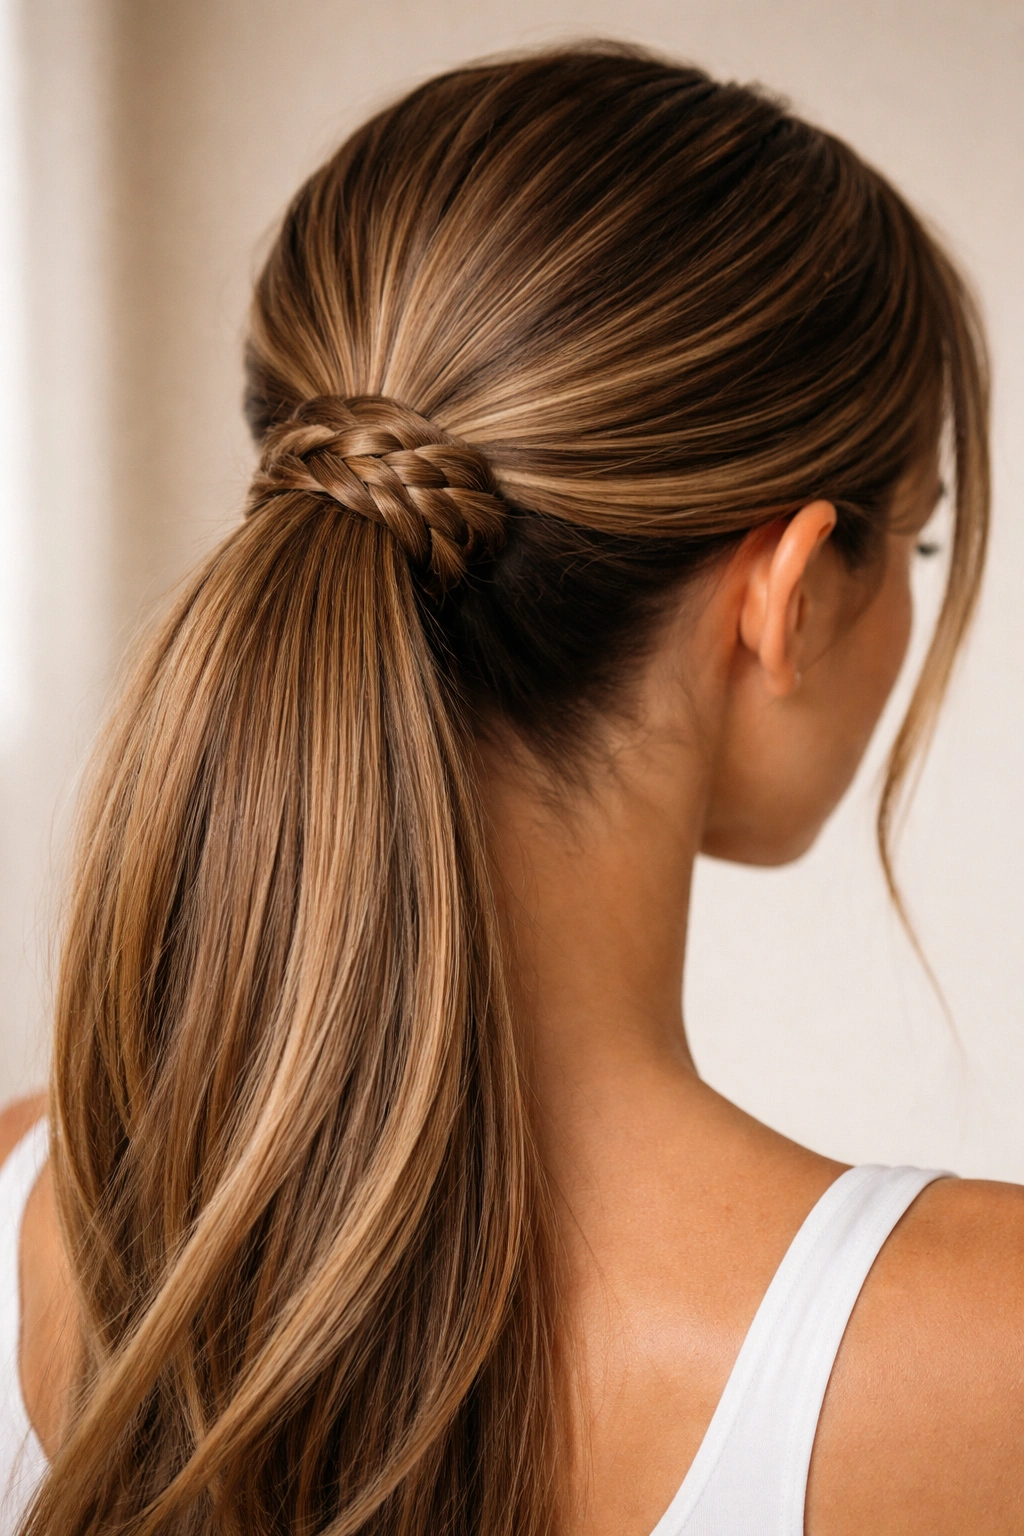
This style takes a classic mid-weave ponytail and adds an unexpected detail—a small Dutch or French braid that wraps around the base where the elastic sits. This transforms a simple ponytail into something that feels more intricate and fashion-forward while remaining sleek and refined.
Why It Stands Out
The braided wrap detail elevates a basic ponytail into something that looks like you spent significant time styling your hair, even if the actual process only takes a few extra minutes. It’s the perfect choice when you want your hairstyle to feel special without being overly complicated.
Creating the Braided Wrap
- Secure your base ponytail first: Create your mid-placement sleek ponytail exactly as you would normally. Make sure it’s smooth and secure before adding the braid detail.
- Take a small section from the ponytail: Pull a thin section of hair from one side of the ponytail base—roughly 1 to 2 inches wide.
- Braid and wrap: Braid this section into a Dutch or French braid (whichever you prefer), and wrap it around the base of the ponytail, covering the elastic as you go. Secure the end of the braid underneath the ponytail with a bobby pin.
- Alternative: Braid from the side: Instead of using hair from the ponytail itself, you can create a braid along the side of the head that incorporates into the ponytail at the base. This creates a more integrated, intentional-looking design.
- Finish and smooth: Use a tiny bit of gel to smooth any flyaways around the braid detail, keeping everything looking polished.
Insider note: A thin, delicate braid wrapped around the base feels more elegant and modern than a thick, obvious one. Less is more with this detail.
7. The Romantic Mid-Weave Half-Up Pony
This style is a hybrid—it combines the sleek sophistication of a mid-weave ponytail with the softness and romantic quality of a half-up, half-down hairstyle. The top half of your hair is gathered into a mid-placement ponytail while the bottom half remains down, creating a layered, dimensional effect.
Why It Stands Out
The half-up configuration is universally flattering because it keeps hair off your face and neck while maintaining the movement and flow of wearing your hair down. It’s polished enough for professional settings but casual and pretty enough for everyday wear. The sleek top paired with flowing bottom sections creates a genuinely elegant silhouette.
Building the Half-Up Structure
- Blow-dry with volume at the crown: Start by blow-drying your entire head with a round brush, paying special attention to the crown area. You want the top section to have visible volume and dimension.
- Section carefully: Take a horizontal section from ear to ear across the top of your head. This section will become your half-up ponytail. Everything below this line stays down.
- Smooth and gather: Smooth your top section backward with a brush, then secure it into a mid-placement ponytail. The placement here is key—you want it positioned at the back of your crown, roughly midway up your head.
- Add texture to the down section: Wave or curl the bottom half of your hair using a curling iron or other heat tool, or create waves using the braiding-overnight method. Loose waves or soft curls work beautifully.
- Mist everything lightly: A light flexible-hold hairspray keeps the sleek top in place while allowing the bottom section to move naturally.
Pro tip: Blow-dry the bottom section of your hair downward (in the direction it naturally grows) to maximize volume and movement, rather than blow-drying it upward, which can create unwanted curl or frizz.
8. The Mid-Weave Curved Side Pony
This variation positions your mid-placement ponytail off to one side rather than directly in the center back. The side placement, combined with a sleek, curved styling around the crown and sides, creates an asymmetrical, fashion-forward look that feels both modern and refined.
Why It Stands Out
A side-positioned mid-weave ponytail is visually interesting in a way that a centered ponytail can’t quite match. The asymmetry draws attention and creates a sense of intentional styling. This placement also flatters people with round face shapes particularly well, as the side positioning creates the illusion of more vertical length.
Creating the Side Placement
- Determine your side: Decide which side feels more flattering for your face shape. This often depends on your natural hair part and which side of your face you prefer to emphasize.
- Smooth and sweep: Using a fine-tooth brush or comb, smooth your hair back and to the side you’ve chosen. Create a curved line from your temple area around to where you want the ponytail base to sit.
- Position the ponytail slightly lower: Placing your side ponytail a bit lower than a centered midpoint ponytail (closer to ear level) creates a more balanced, intentional-looking style.
- Leave a face-framing section: Allow a small section of hair to remain down and frame your face on the side opposite your ponytail. This prevents the style from looking too severe and adds softness.
- Add subtle waves to the side section: Curl or wave the face-framing section lightly to soften the overall look and create dimension.
Worth knowing: Side ponytails work beautifully with a curved part that follows the line of your cheekbone, rather than a straight center part.
9. The Mid-Weave Sleek Pony with Metallic Accent
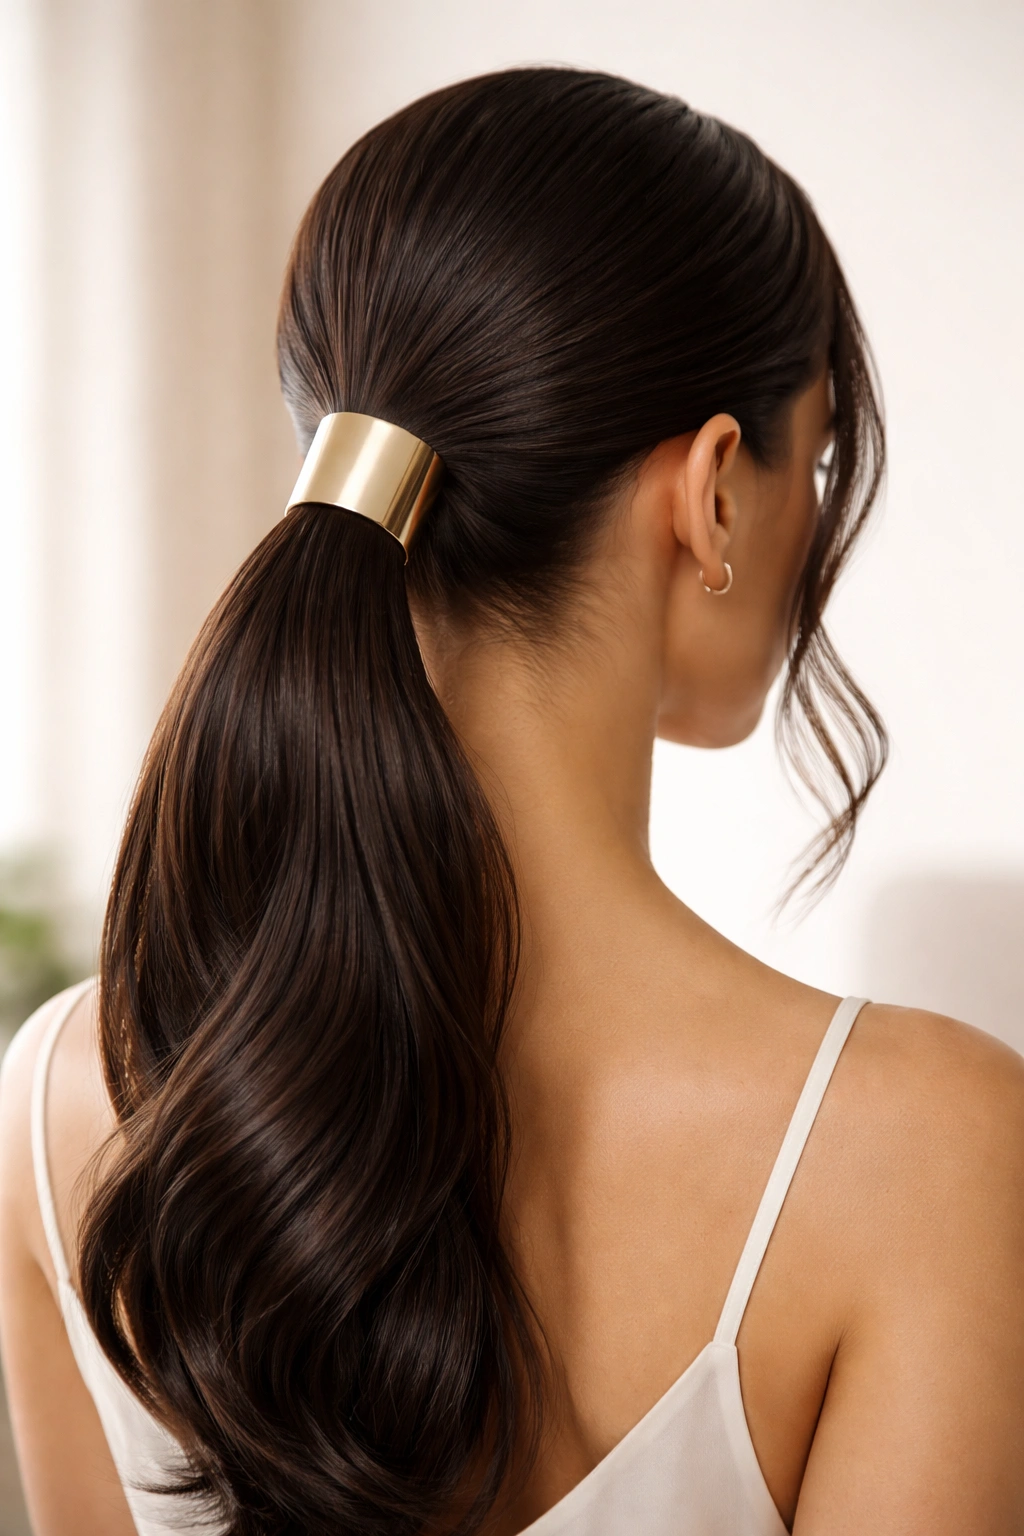
This style takes the classic mid-weave ponytail and adds a subtle, glamorous touch—a metallic hair cuff, decorative elastic, or wrapped metallic thread around the base. The metallic element catches light beautifully and transforms an everyday style into something that feels special and intentional.
Why It Stands Out
A metallic accent is a small detail that creates significant visual impact. Gold metallic accents feel warm and elegant, silver feels cool and modern, and rose gold splits the difference. The key is keeping the rest of the style sleek and refined so the metallic element becomes a focal point rather than feeling busy or over-the-top.
Adding Metallic Elements
- Choose your metallic element: Hair cuffs (which slide over your ponytail), decorative elastics embedded with metallic beads or chains, or even metallic thread wrapped around the base of your ponytail all work beautifully. Pick something that coordinates with your skin tone and personal style.
- Keep the ponytail sleek: The simpler and more refined your base ponytail, the more impact your metallic accent will have. Avoid competing textures or multiple details.
- Position carefully: Your metallic cuff or wrapped element should sit right where the elastic is, covering it completely. Proper placement makes the difference between looking intentional and looking accidental.
- Balance with minimal other jewelry: If you’re wearing a metallic hair accent, keep other jewelry relatively minimal so your hairstyle remains the focal point.
- Consider your occasion: Metallic accents work wonderfully for events, date nights, or anytime you want your everyday style to feel elevated and special.
Pro tip: Metallic hair cuffs that are smooth and polished look more luxe than ones with heavy embellishments or stones.
10. The Mid-Weave Textured Top Sleek Bottom Pony
This final variation is about contrast—while your crown and top sections are smooth and sleek, the ponytail itself is deliberately textured, with waves, curls, or a braided texture creating visual interest and movement. This style achieves that modern, intentional aesthetic that comes from deliberately mixing different textures.
Why It Stands Out
The textured-bottom-sleek-top approach feels contemporary and intentional in a way that a uniform texture can’t quite capture. You’re getting the polish of a sleek style with the movement and dimension of a textured one. It’s a genuinely versatile look that works for casual settings and more polished occasions alike.
Creating the Texture Contrast
- Start with your sleek base: Smooth your crown and top sections back with a brush, creating that polished foundation. Make sure this section is genuinely sleek, as it provides the contrast that makes the textured portion stand out.
- Gather into your mid-placement ponytail: Secure your sleek top section into a ponytail at the midpoint of your head.
- Add texture to the tail: This is where you get creative. You can:
- Curl the entire ponytail with a curling iron, leaving the curls loose and touchable
- Braid the ponytail (a loose, romantic braid or a more structured Dutch braid, depending on your preference)
- Use a texturizing product to add grit and dimension without formal curls or braids
- Create waves using a waving tool or the overnight-braid method
- Blend the transition: The point where your sleek top meets your textured tail should feel intentional rather than abrupt. You can achieve this by leaving the first inch or so of the ponytail near the elastic relatively smooth before introducing texture.
Insider note: This style photographs beautifully because the contrast between sleek and textured creates natural dimension and visual interest in photos.
Final Thoughts
Mid-weave ponytails have earned their place as a legitimate styling choice because they genuinely deliver on their promise: they’re sleek, polished, and refined, yet they remain accessible and wearable for actual daily life. Whether you’re reaching for the timeless classic sleek pony, adding playful bubbles, or experimenting with textures and metallic accents, the underlying principle remains the same—the placement and the balance between smooth and dimensional create the magic.
The best mid-weave ponytail for you depends entirely on your hair type, your lifestyle, and what makes you feel confident. If you have fine hair, the classic sleek version will probably be your go-to. If you love drama and movement, the high-volume variation might feel more like you. And if you’re someone who gets bored with the same style, rotating through several of these options keeps your look feeling fresh throughout the week.
Start with whichever style resonates most with you, and don’t hesitate to experiment. These techniques build on the same foundational skills—smooth base sections, clean gathering, proper elastic placement, and finishing touches that make the difference between a casual ponytail and a polished, intentional style. Once you master the basics, you’ll find that creating different variations becomes easier each time you try.