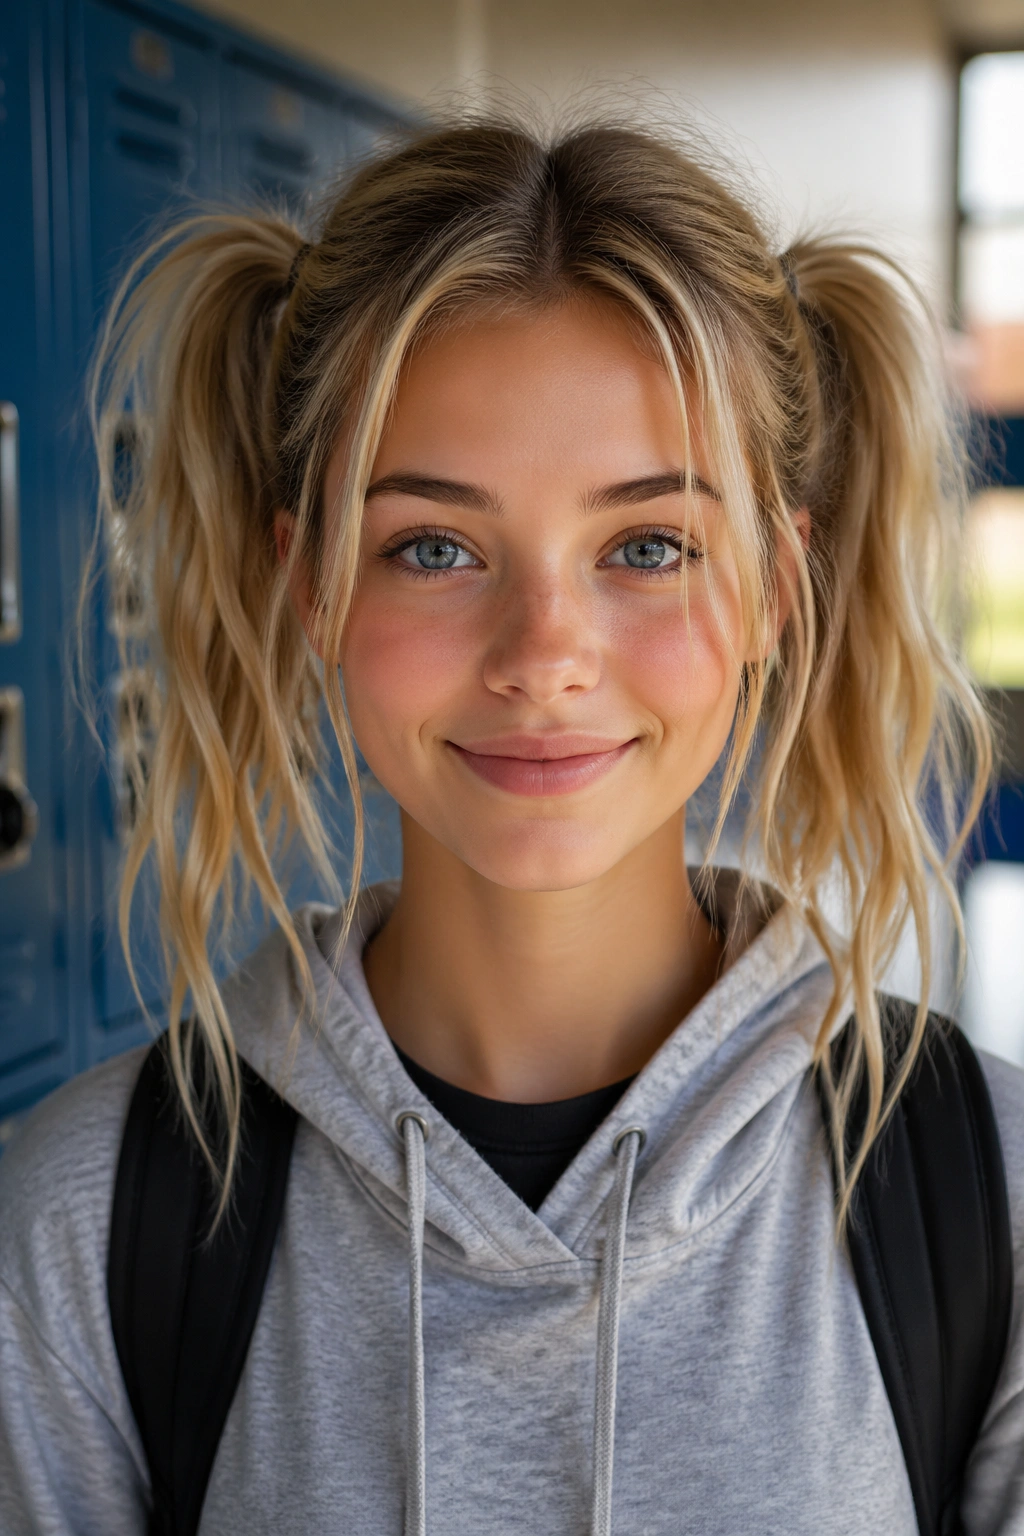
Double ponytails are the go-to hairstyle for school days when you need something that stays put through recess, PE class, and all the moving around that comes with a typical school day. They’re practically indestructible once you get them secured properly, and they look polished enough for photos or school events without requiring a blow dryer or professional styling. The best part? There’s an endless number of ways to style them depending on your hair texture, the time you have in the morning, and what kind of vibe you’re going for that day.
Whether you’re dealing with thick curly hair that needs to be tamed, fine straight hair that needs texture added, or anything in between, there’s a double ponytail style that’ll work for your hair type and your schedule. Some versions take five minutes flat, while others give you room to get creative if you have an extra ten minutes before heading out the door. Let’s walk through twelve distinct ways to style double ponytails that actually hold up through a full school day.
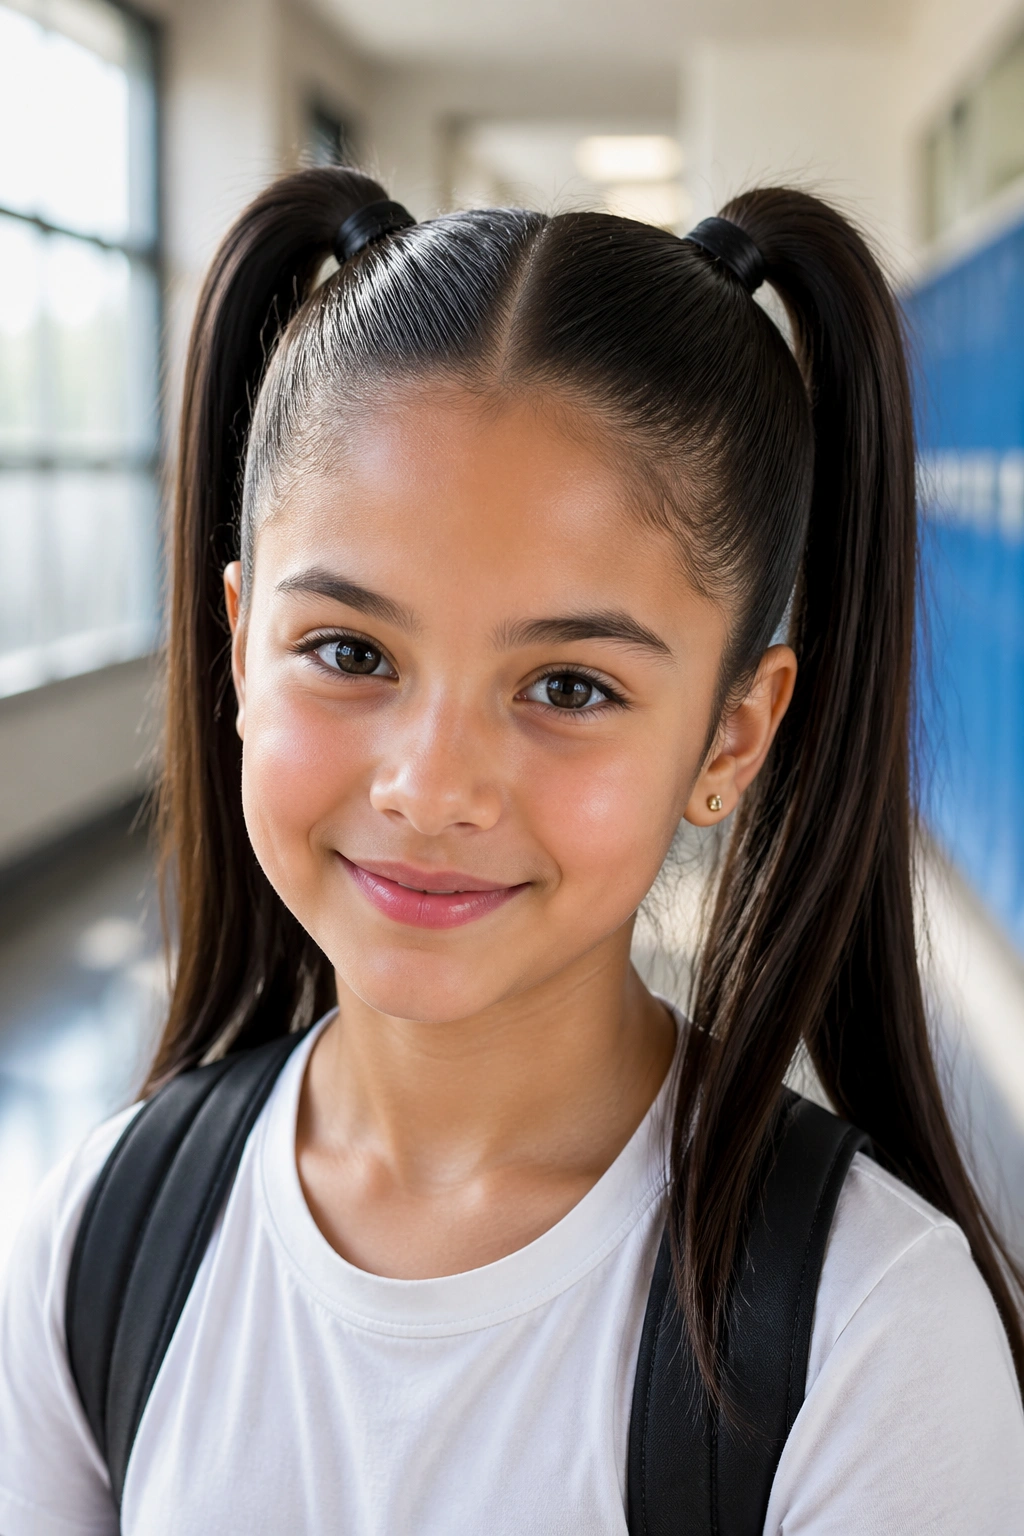
1. Classic Side-by-Side Double Ponytails

This is the most recognizable double ponytail look—one ponytail on each side of the head positioned at roughly the same height. The placement creates perfect balance and works beautifully for almost every face shape and hair type. What makes this version work so well for school is that it’s quick, professional-looking, and the side-by-side structure distributes the hair’s weight evenly so there’s minimal tension on any one spot of the scalp.
Why It Works for Daily School Wear
The side-by-side positioning keeps hair completely off your face and neck, which matters when you’re sitting at a desk or focusing in class. Because the two ponytails sit on opposite sides of your head rather than stacked, they don’t tug on a central part line the way some other styles do, making it more comfortable for all-day wear. This style also photographs well for school pictures, and it’s versatile enough to dress up or down depending on your accessories.
How to Create the Look
- Brush hair back toward the crown to create a straight, centered part line from your forehead to the back of your neck
- Gather all the hair from the left side of that part line and secure it into a ponytail at ear level, pulling it slightly back and toward the side rather than straight back
- Repeat on the right side, matching the height and angle of the first ponytail so both sit at the same level
- Use smooth elastic bands that match your hair color to keep the look clean and intentional
- For a polished finish, take a small section from each ponytail and wrap it around the base of the elastic to hide it completely
2. High Double Ponytails with Sleek Finish
High ponytails positioned at the crown create an energetic, youthful look that’s perfect for active school days filled with movement. When done with a sleek, smooth finish rather than a textured one, they read as more mature and polished than you’d expect from such a playful placement. The height gives you tons of styling flexibility—you can leave them as-is, curl them, or add accessories at the ends.
What Makes the Height Matter
Positioning the ponytails at your crown rather than midway down your head creates a completely different proportional effect on your face and overall silhouette. High ponytails actually make your face appear smaller and more defined because the bulk of the hair sits above your head rather than framing your face. This placement also keeps the most hair off your neck, which helps on warm school days when you need maximum breathability and comfort.
Getting the Sleek Texture Right
- Start with damp hair and apply a smoothing serum or anti-frizz cream from mid-length to ends before blow-drying
- Blow-dry with a paddle brush, pulling the hair taut to create a smooth surface with no flyaways
- Use a fine-tooth comb to smooth down any baby hairs or texture at the scalp before sectioning and securing
- Choose elastic bands that are snug enough to hold through the day but not so tight they leave creases in your hair
- For extra polish, apply a tiny bit of edge control or gel along your part line and smooth it down with the comb
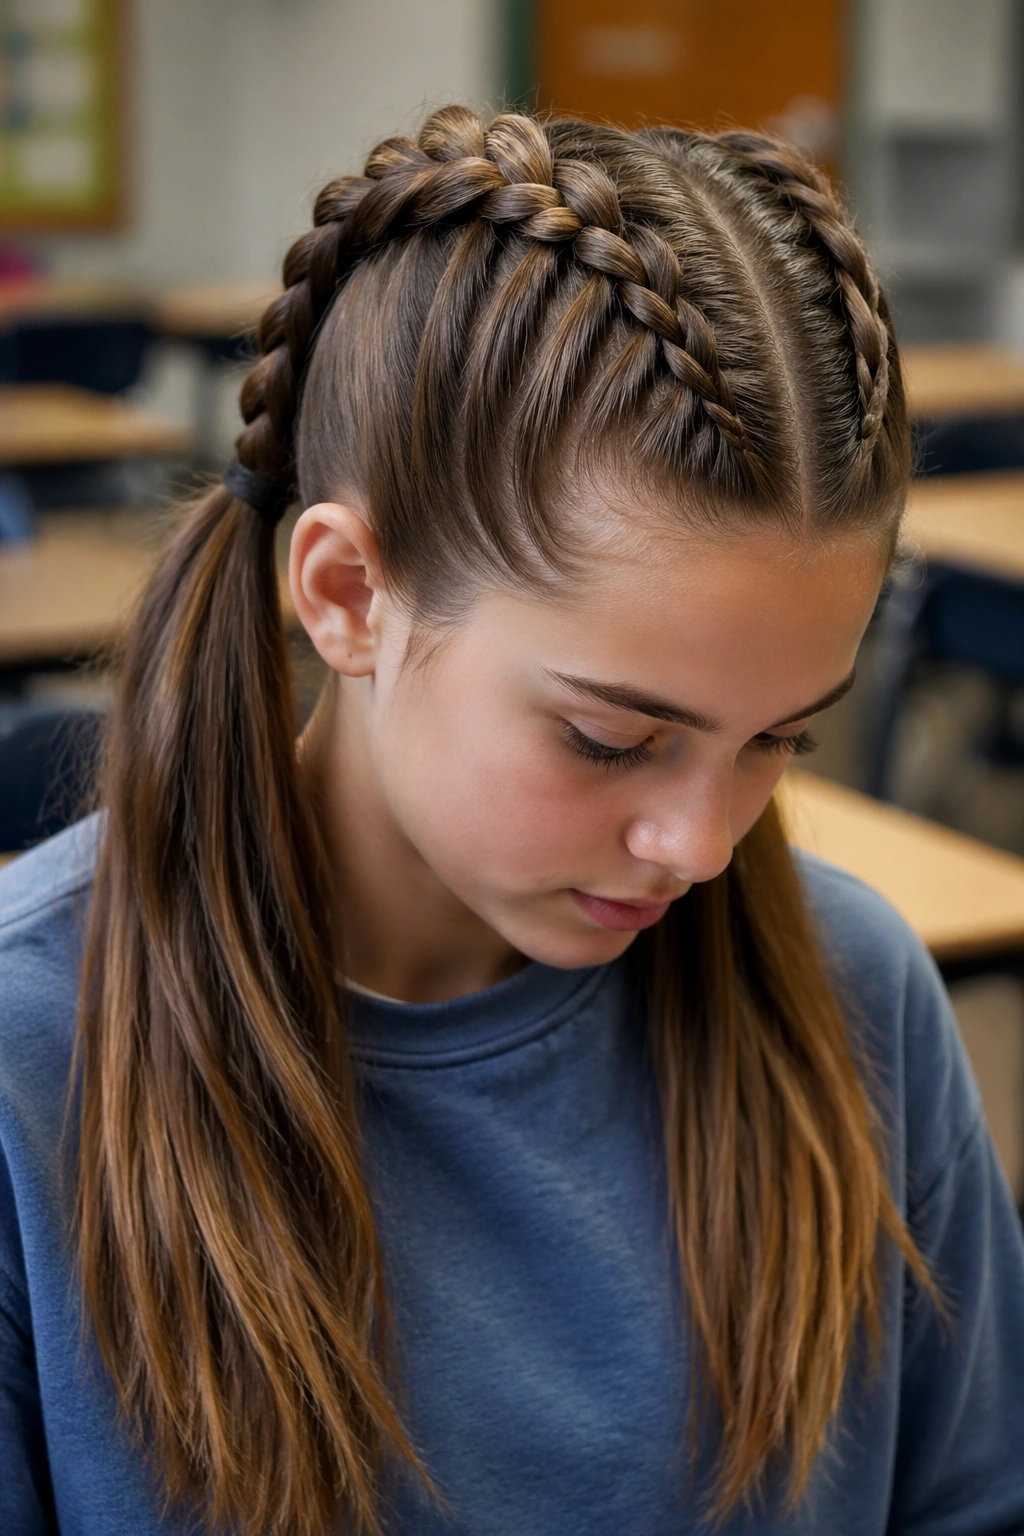
3. Braided Double Ponytails for Extra Detail
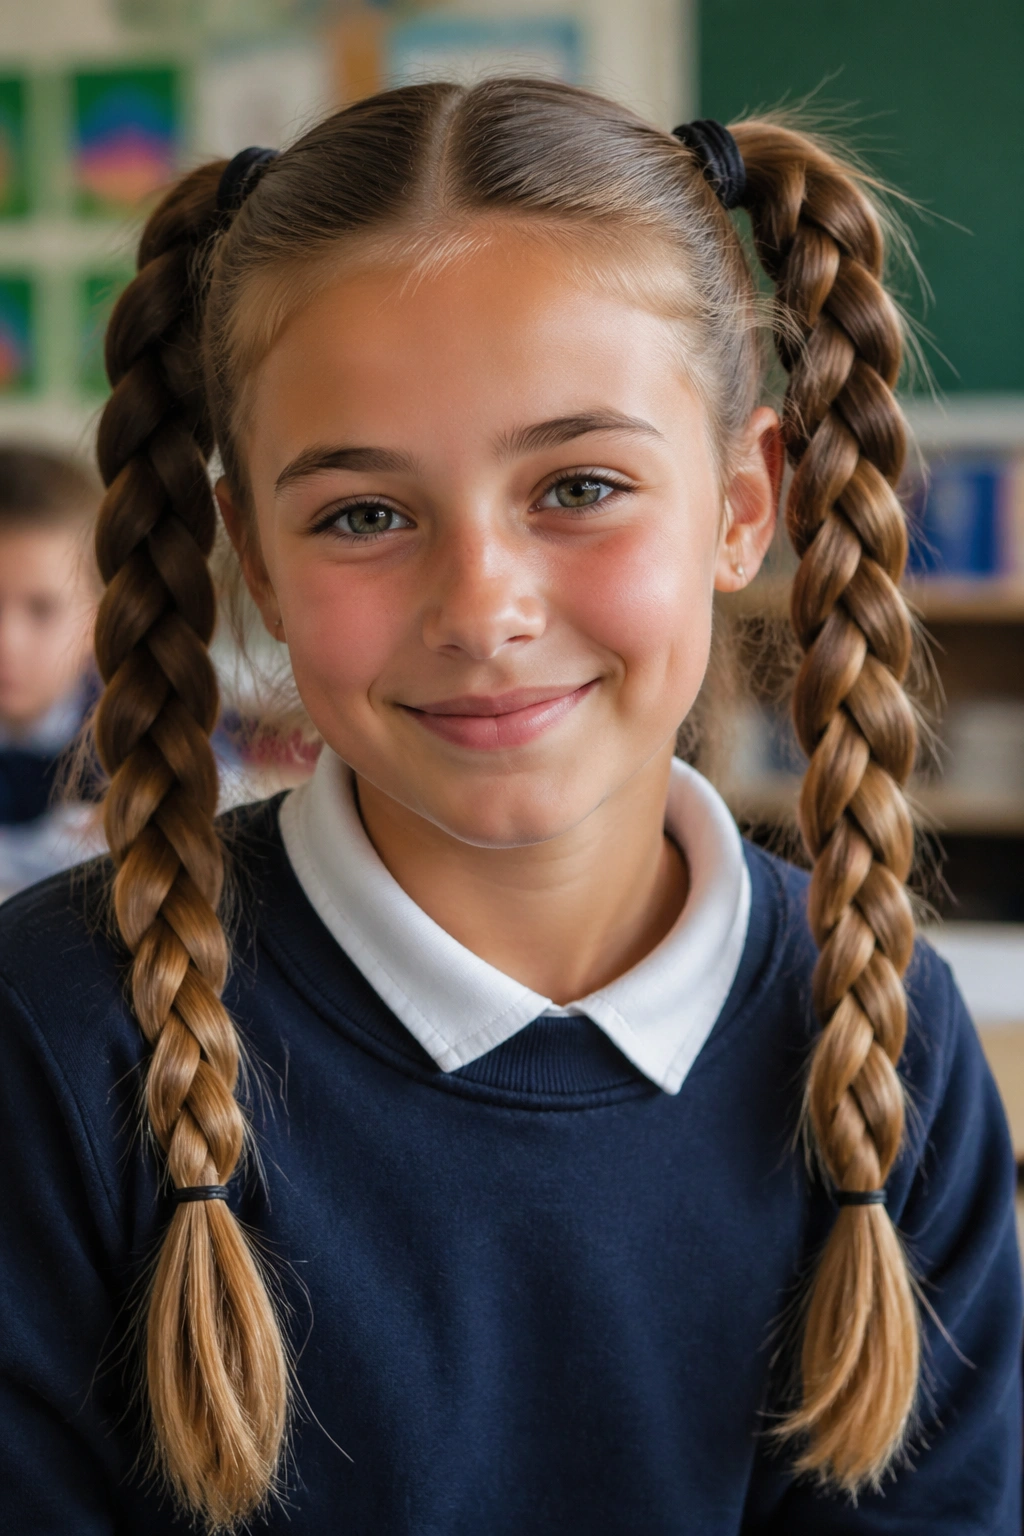
Adding a braid to each ponytail transforms the look from simple to something that shows intentionality and skill, even though it’s not actually complicated to create. Whether you’re doing a three-strand braid, a Dutch braid, or a fishtail braid, the texture adds visual interest and actually helps the ponytails hold their shape better throughout the day. Braided versions look especially striking when you’re wearing them for school events, presentations, or days when you want to look a little more put-together.
How Braids Strengthen the Style
Braiding the ponytails locks the hair in place in a way that an elastic band alone can’t quite achieve, which means even if the elastic loosens slightly as the day goes on, the braid itself keeps everything neat. The interlocking pattern of a braid also distributes the weight of the hair more evenly throughout the length, reducing the tension at the base where the ponytail is secured. This matters for comfort if you wear double ponytails regularly and want to avoid tension headaches or damage to your hairline.
Braid Variations to Try
- Three-strand braid starting at the elastic and continuing down the full length of the ponytail for a classic, recognizable look
- Dutch braid (reverse braid) braided down the middle of each ponytail for a more textured, dimensional appearance
- Fishtail braid for a finer, more delicate looking texture that works beautifully with thin or medium-thickness hair
- Hybrid approach: braid just the top half of each ponytail and leave the bottom sections straight for balance
- Loose, relaxed braids that look intentionally undone rather than perfectly tight and controlled
4. Half-Up Double Ponytails
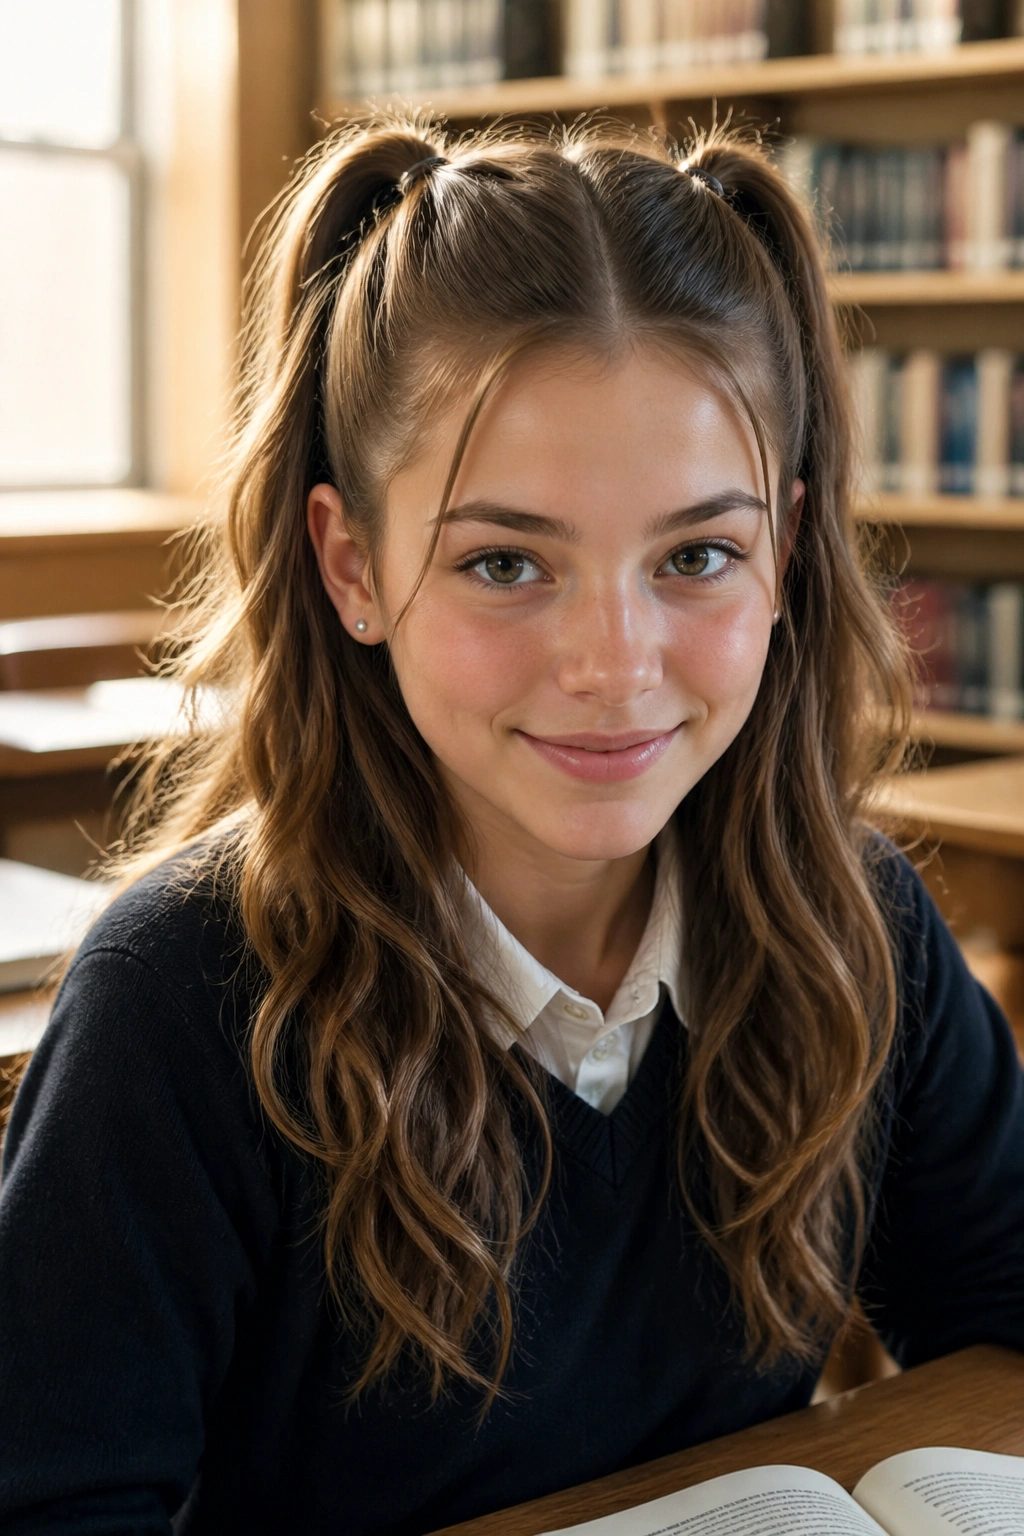
The half-up variation uses only the upper portion of your hair for the ponytails while leaving the bottom half loose, creating a hybrid style that’s less severe than a full double ponytail but still keeps hair off your face. This approach works especially well when you have long, thick hair because it reduces the overall weight on your scalp while still clearing your face and neck. It’s also a smart choice if you love the look of loose waves but need some of your hair pulled back to prevent it from getting in your way at school.
Why Half-Up Works for School Days
This style gives you the best of both worlds—the practicality of ponytails where it matters (keeping hair off your face and out of your way) while maintaining the softer, more relaxed appearance of wearing your hair down. The loose bottom section bounces and moves more freely, which adds visual interest and softness that a full double ponytail sometimes lacks. If your school day includes activities like PE or sports, the half-up positioning keeps the critical face-and-neck area clear while the bottom section doesn’t get as tangled or sweaty.
Creating the Half-Up Effect
- Start with hair that’s either straight or gently waved—the style looks best when the bottom section has some texture or movement
- Draw a horizontal line across the back of your head from ear to ear at about mid-scalp
- Gather only the hair above that line and divide it into two sections at your natural part line
- Secure each section into a ponytail at roughly ear height on each side, being careful not to pull in any of the hair below your dividing line
- Leave the bottom section down and either blow-dry it straight for contrast or add waves for a more romantic feel
- Optional: gently backbrush or tease the ponytails slightly at the base to create more volume and visual separation from the loose hair below
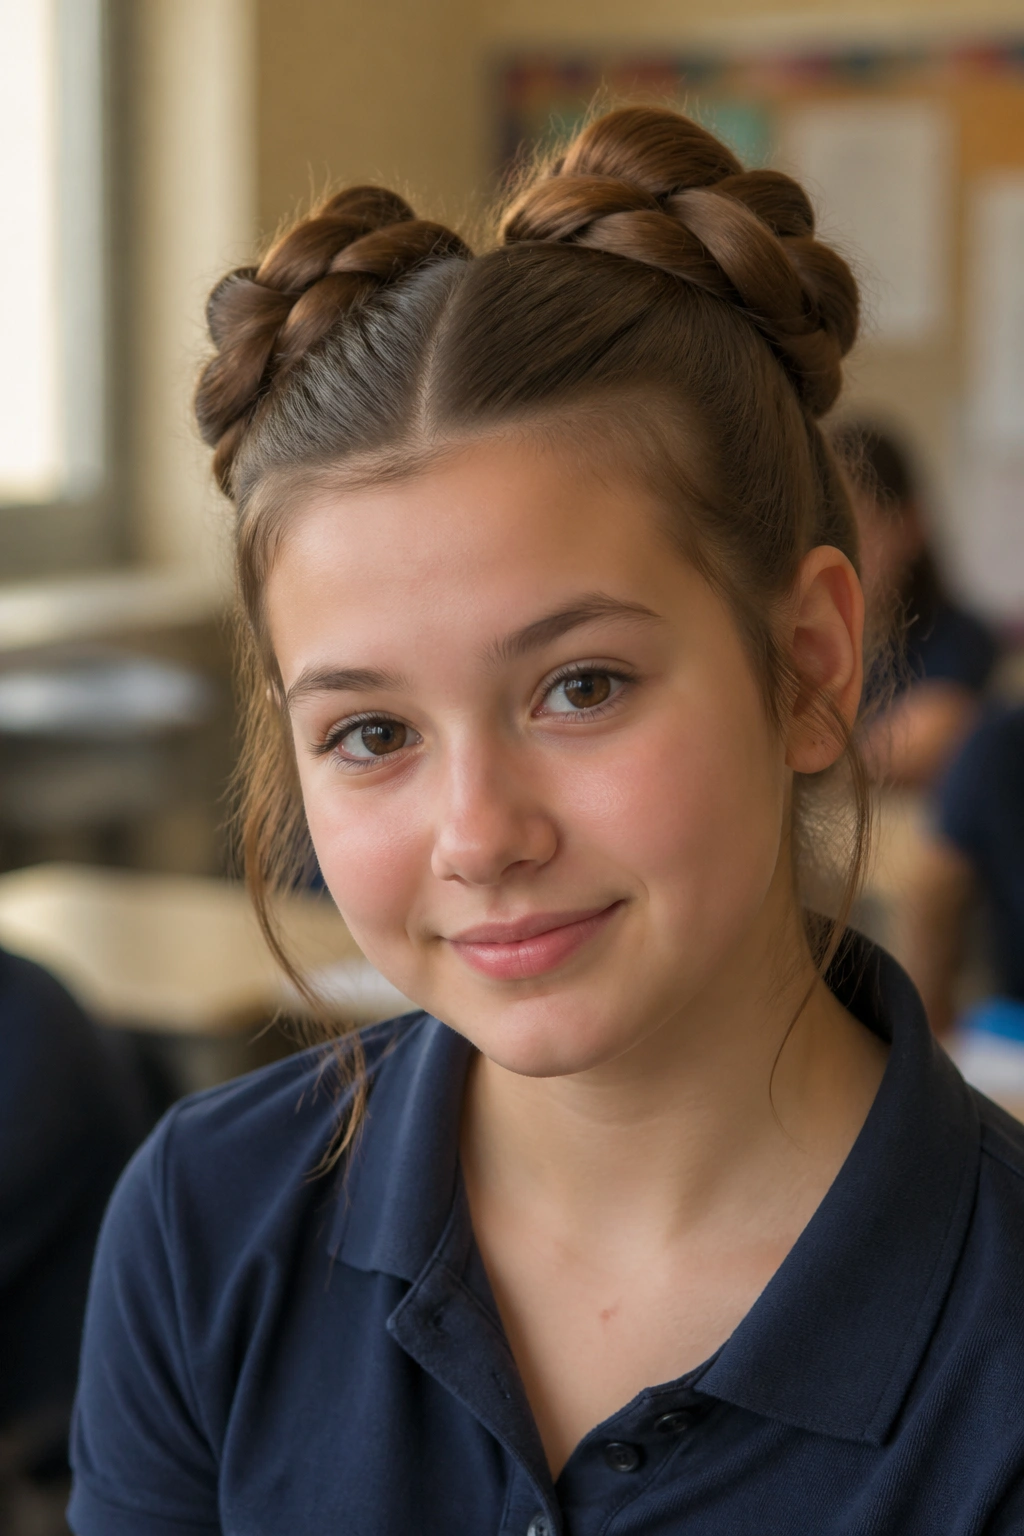
5. Double Ponytails with Space Buns at the Ends

This playful version takes double ponytails and transforms the ends into space buns (also called double buns), creating a look that’s fun and youthful without being babyish. Space buns at the end of ponytails give you significantly more volume and visual interest than straight ponytails, and the buns stay more secure throughout the day because they’re anchored by the ponytail sections. This style is perfect for casual school days and looks great in photos.
Making Space Buns Work at the Ends
The key to successful space buns at ponytail ends is getting the tension right—tight enough that they don’t unravel but not so tight that you’re creating tension on your scalp or causing discomfort. Starting with a ponytail actually makes space buns easier to create because the hair is already gathered and held in place, so you just need to twist or wrap the ponytail section around itself to form the bun. Depending on how much hair you have and how full you want the buns to be, you might need to use a bun former or hair net to help maintain their shape.
Step-by-Step Space Bun Creation
- Create two standard ponytails positioned where you want the buns to sit (usually midway down the back or higher)
- Take the first ponytail and twist it loosely around itself, coiling it into a flat disc shape
- Secure the coiled bun with bobby pins inserted from underneath so they’re hidden by the hair
- Repeat with the second ponytail, matching the size and positioning of the first bun
- For extra security and fullness, wrap a small elastic band around the base of each bun on top of the bobby pins
- Gently pull and tease sections of each bun outward to add volume and create a fuller, more textured appearance
- Smooth down any flyaways with a light hairspray or edge control for a intentional, polished look
6. Twisted Double Ponytails
Twisting the hair as you gather it into ponytails adds texture and visual interest while also helping the ponytails stay in place longer throughout the day. This version works beautifully with medium to long hair and looks more sophisticated than a simple straightforward ponytail while still being relatively quick to create. The twisted effect catches light differently than a smooth ponytail, which photographs well and looks especially nice in afternoon light.
The Mechanism Behind Twisted Ponytails
When you twist hair as you’re pulling it back, you’re essentially pre-styling it and locking it into a shape that’s more stable than loose, untwisted hair gathered at the back of your head. The twisting motion also has a subtle smoothing effect on the hair’s surface, which helps reduce frizz and flyaways without requiring product or styling tools. Because the hair is already twisted, even if the elastic band loosens slightly as you move through your day, the twisted structure holds its shape and won’t completely deflate.
Creating Symmetrical Twisted Ponytails
- Brush your hair back and establish a clear center part from your forehead to the nape of your neck
- Take a section of hair from the left side at about temple height and begin twisting it toward the back of your head, adding more hair as you twist
- Continue twisting and adding hair from the left side until you reach your ear, then gather all the twisted hair at the back
- Secure the twisted section with an elastic band positioned where you want the ponytail to sit
- Repeat the process on the right side, mirroring the starting point and direction of the twist so both sides look balanced
- You can leave the twisted sections as-is or untwist the very top inch to soften the look at your face
7. Messy Textured Double Ponytails
The intentionally messy version plays into that “I didn’t try too hard but my hair still looks great” vibe, which actually works perfectly for school because it looks current and effortless while being incredibly practical. Messy double ponytails work best when you start with textured hair—either naturally wavy, curly, or artificially textured with a curling iron or texture spray before you gather the ponytails. The texture hides imperfect sectioning and actually makes the style look more intentional the slightly messier it is.
Why Messy Works for Busy School Days
There’s a psychological advantage to a deliberately messy style when you’re attending school—it gives you permission to have flyaways and loose pieces, because that’s literally the point of the style. You’re not constantly trying to smooth down baby hairs or tuck things back in, because the whole aesthetic is built on controlled texture and loose pieces framing your face. This style also requires minimal maintenance throughout the day, which means you’re not spending class time worrying about whether your hair still looks neat.
Achieving Intentional Messiness
- Start with damp hair and apply a texturizing spray or mousse to add grip and hold before blow-drying
- Blow-dry with a diffuser on low-to-medium heat to enhance your hair’s natural texture or create waves if your hair is straight
- Use a curling iron on individual sections to create loose waves or curls throughout, especially in the bottom half of your hair
- Gather the hair into two ponytails but don’t worry about pulling it perfectly taut—leave some texture and waves visible
- Once secured, gently pull and tease small sections of each ponytail to add volume and create texture throughout the length
- Allow some loose pieces around your face and neck to stay out rather than tucking everything back—this is part of the style, not a failure
- Use a light texture spray rather than heavy-hold hairspray to maintain the effortless appearance
8. Curly Double Ponytails with Bounce
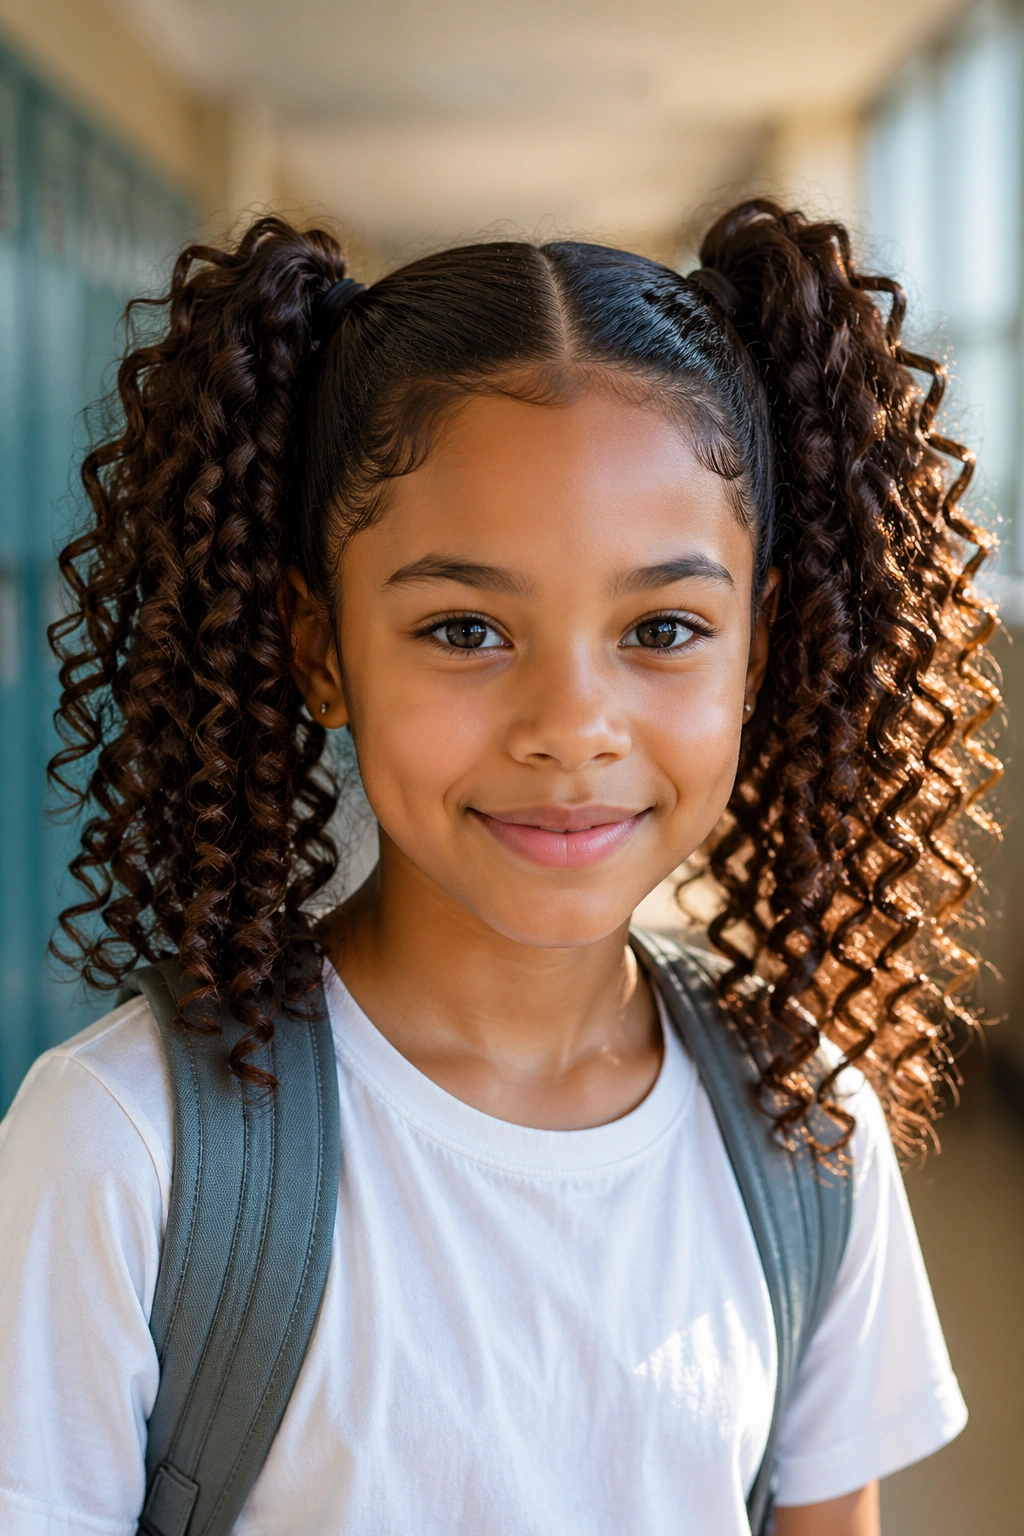
For anyone with naturally curly or coily hair, double ponytails are an excellent styling option that actually showcases your curl pattern rather than fighting against it. Curly double ponytails look best when you’re working with your hair’s natural texture rather than trying to smooth it out, and the curls add so much visual interest and dimension that the style feels luxe even though it’s quite simple to create. The weight of the two ponytails actually helps define curls and can reduce frizz compared to wearing curls completely down.
How Ponytails Define Curls Better
When curls sit completely down around your shoulders and back, they’re more prone to frizz and losing their curl definition because of friction from clothing and movement. Pulling curly hair up into ponytails removes that friction factor and actually allows the curls to hold their shape and definition much longer throughout the day. The elevation also creates bounce and movement in the curls, which photographs beautifully and looks much more intentional and styled than flat curls.
Styling Curly Hair Into Double Ponytails
- Start with curls that have been freshly washed and are either air-drying or freshly styled with your usual curl products and technique
- Use a wide-tooth comb or your fingers to gently gather the curls at the base of one side without disrupting the curl pattern
- Secure with an elastic band or hair tie, positioning the ponytail where you want it and allowing the curls to fall freely from that point
- Repeat on the other side, matching the height and position of the first ponytail
- Avoid using a brush, which will disrupt curls—fingers or a wide-tooth comb are your best tools for curly hair
- If flyaways or frizz appear around the secured base, use a bobby pin or two to tuck loose curls back into place rather than smoothing with product
- Consider using a silk or satin elastic band rather than standard rubber bands, which can snag and break curls
9. Double Ponytails with Colorful Accessories
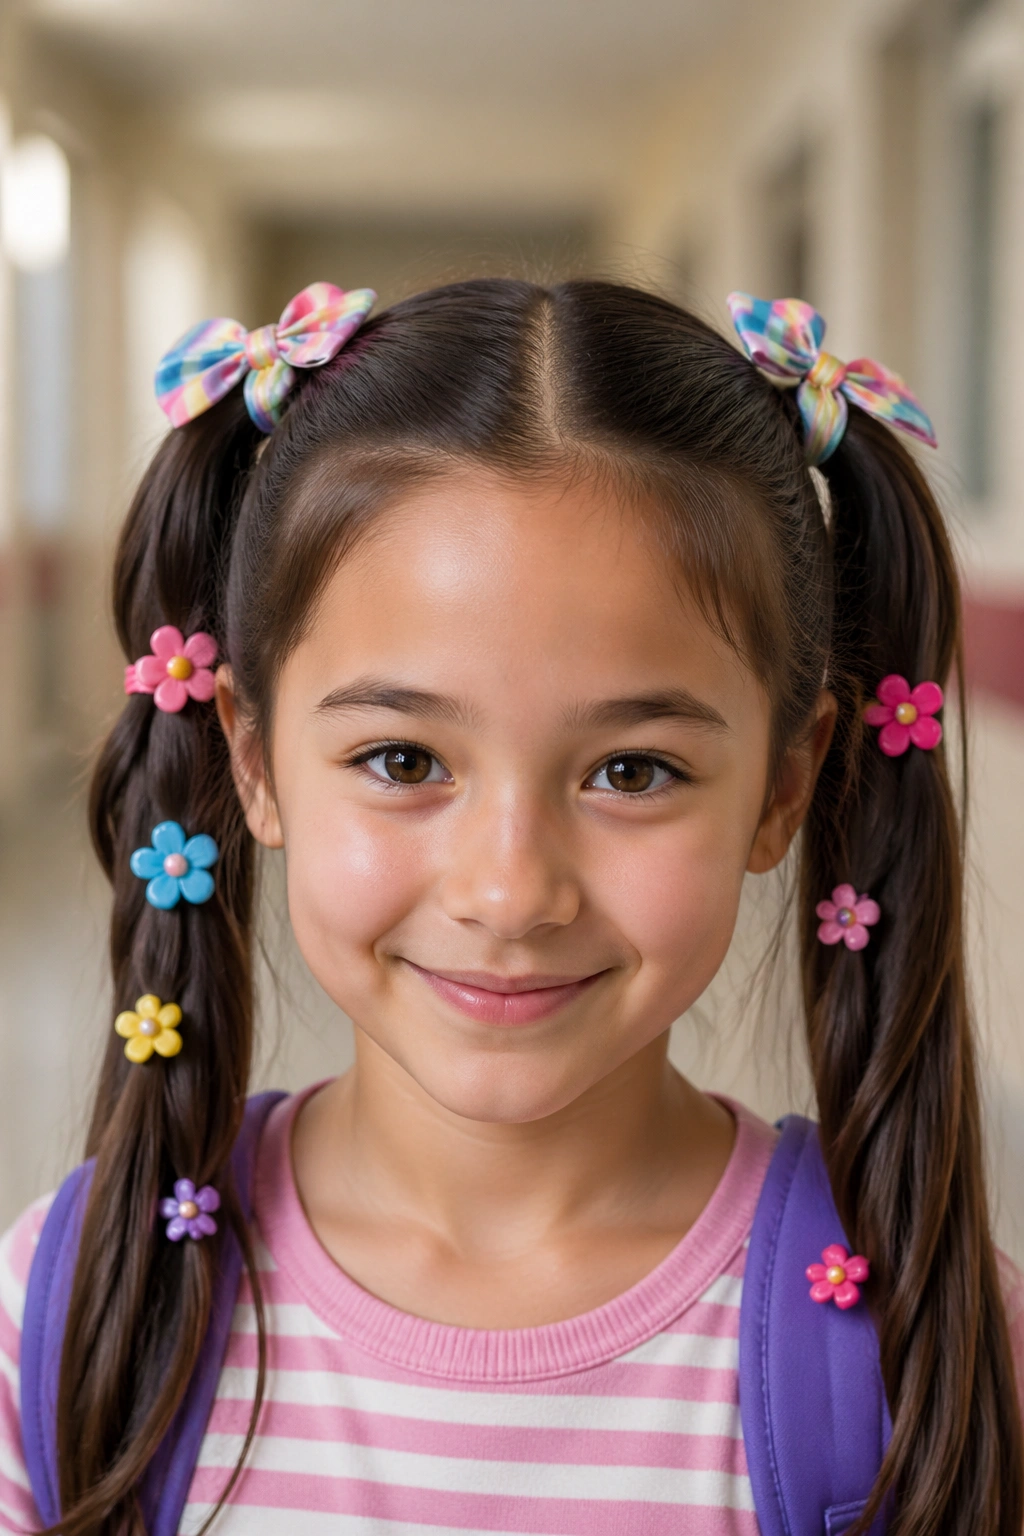
Adding colorful hair clips, ribbons, beads, or ties to your double ponytails instantly elevates the style and makes it feel more intentional and fashion-forward without adding any complexity to the actual hair styling. Accessories give you a way to incorporate school colors, match an outfit, express personality, or coordinate with friends wearing the same hairstyle. The great thing about accessorized double ponytails is that you can change the accessories to completely transform the look from day to day without restyling your hair.
Strategic Accessory Placement
The most flattering placements for hair accessories in a double ponytail style are at the base of each ponytail (covering the elastic and adding visual interest right at the pivot point) or woven throughout the length of the ponytail for scattered color and interest. Clip-style accessories work well at the base or mid-ponytail, while ribbon or yarn can be woven from top to bottom for a more integrated look. The key is making sure the accessories stay secure throughout your active school day without snagging or pulling on the hair.
Accessory Ideas That Actually Stay Put
- Elastic hair ties in contrasting colors or metallics that coordinate with your outfit or school colors
- Metal claw clips positioned at the base of each ponytail to cover the elastic and add shine
- Ribbon woven through each ponytail by taking small sections of hair and threading ribbon through them as you move down the length
- Beaded hair ties or beaded clips that add texture and color without adding much weight
- Hair scarves tied around the elastic at the base of each ponytail for a bohemian or preppy look depending on the pattern
- Gold or silver hair cuffs slipped onto each ponytail to frame the base and add a touch of metallic shine
- Vintage-style snap clips that you’ve owned for years or collected from thrift stores for a retro, intentional look
10. Double Ponytails with Ribbon or Yarn Weaving
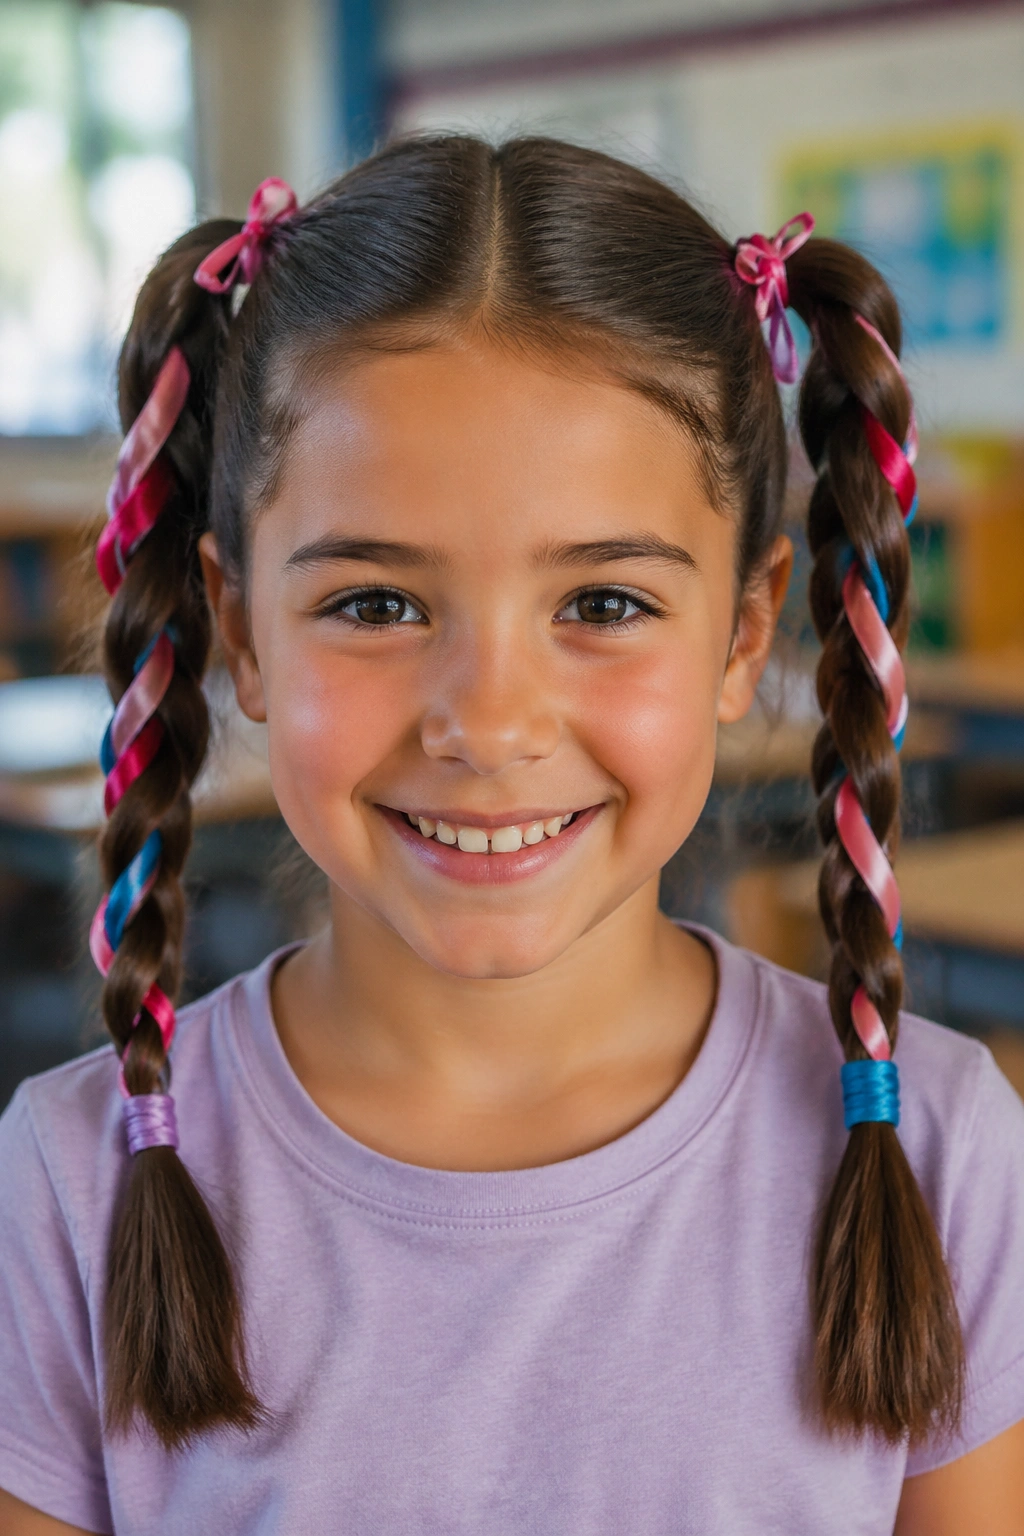
Weaving ribbon or yarn through your double ponytails creates a layered, dimensional look that feels handcrafted and special without being overly complicated. This technique works with any length hair and looks particularly striking when you choose ribbon or yarn in a contrasting color or pattern to your actual hair. The weaving also adds visual bulk and texture that makes thin or fine hair appear fuller, and it keeps the ponytails secure without requiring extra elastic bands.
How to Weave Ribbon or Yarn
The most straightforward method is to take a length of ribbon or yarn and thread it through sections of your ponytail by dividing the hair into small subsections and passing the ribbon alternately through and around each section. You can create a simple alternating pattern where the ribbon goes over one section and under the next, creating a corded appearance, or you can use multiple colors of ribbon and weave them side by side for a more intricate effect. The texture and thickness of the ribbon or yarn you choose dramatically affects the final look—thin ribbon creates a delicate, dainty effect while thicker yarn creates a bolder statement.
Ribbon and Yarn Options to Try
- Thin satin ribbon in a single contrasting color woven through the entire length for an elegant, polished look
- Multiple thin ribbons in coordinating colors woven side by side for a rainbow or ombré effect
- Chunky yarn or embroidery floss in a contrasting color for a bolder, more playful appearance
- Metallic ribbon that catches light and adds shine throughout the ponytail
- Patterned ribbon or decorative yarn that picks up colors from your outfit or accessories
- Natural jute or cotton twine for a more bohemian, casual aesthetic
- Grosgrain ribbon in your school colors that shows team spirit and school pride
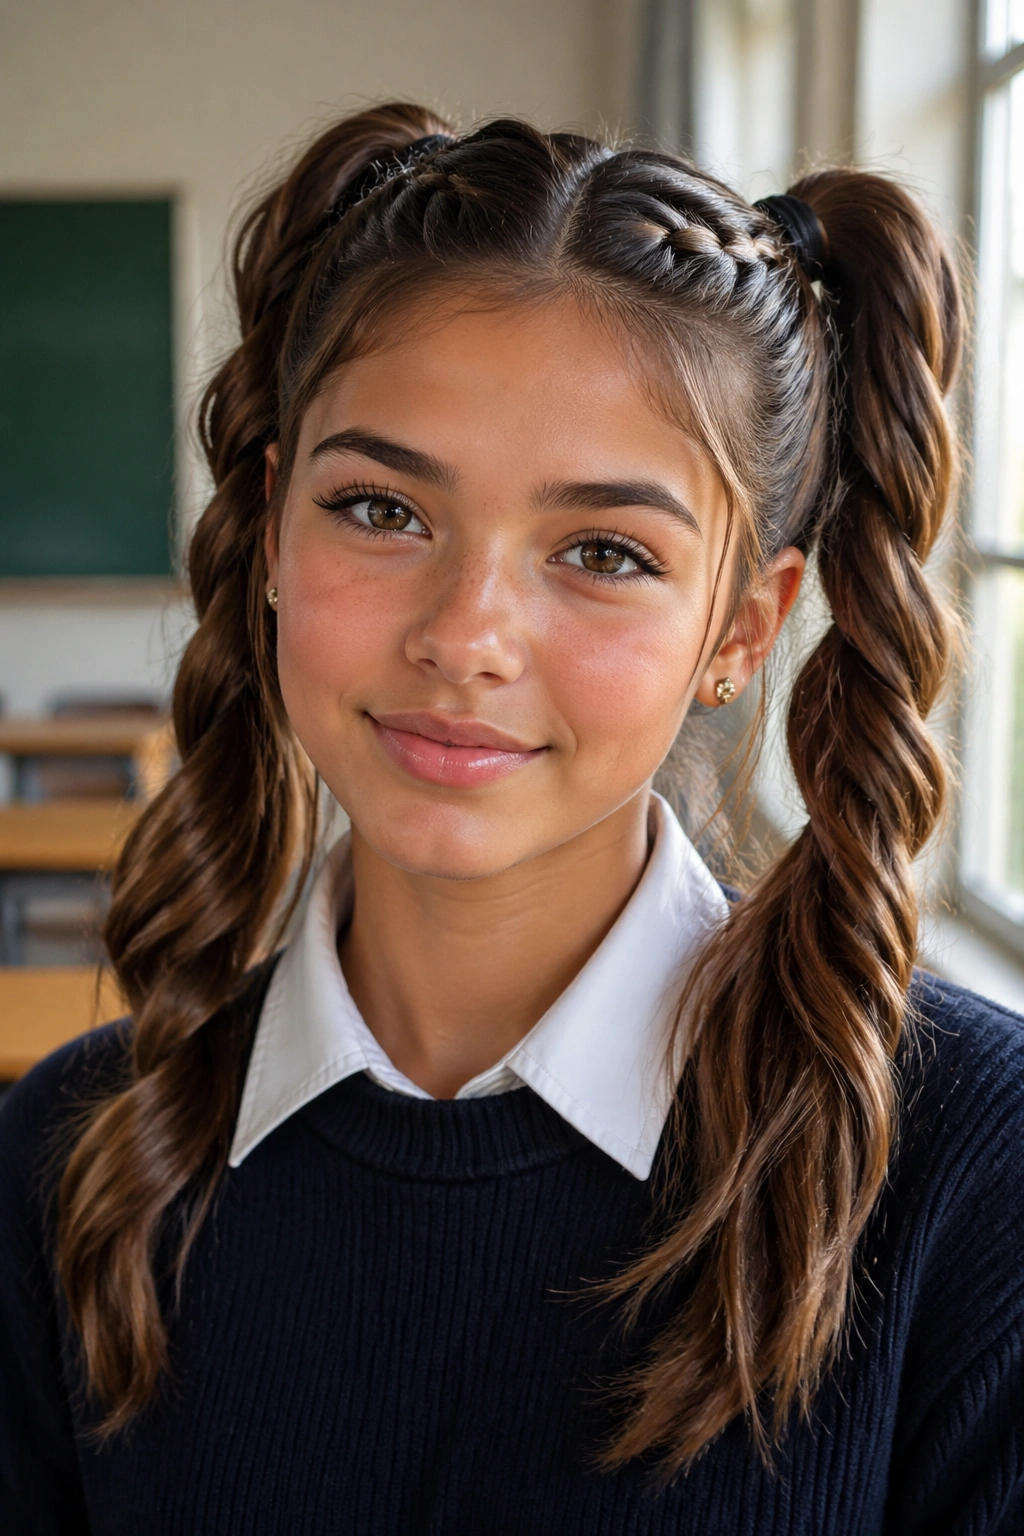
11. Dutch Braided Double Ponytails
Dutch braids (which are reverse three-strand braids with the sections braided underneath rather than over) create a raised, dimensional texture that looks much more complex and intricate than it actually is. Starting Dutch braids at your temples and bringing them back to create your double ponytail anchors is a gorgeous way to add visual interest while also securing the ponytails even more firmly. This version is excellent for active school days when you need confidence that nothing will come loose, and it photographs beautifully.
The Dutch Braid Advantage
Because the braid is constructed by tucking sections underneath rather than pulling them over the top, the braid sits raised on top of your scalp rather than flat against it, creating volume and visual interest. Dutch braids actually appear fuller and more textured than traditional three-strand braids, which makes thin hair appear thicker and adds significant visual drama to the entire style. The raised structure also helps distribute weight more evenly across your scalp since the hair is divided and interlocked rather than hanging entirely from your elastic.
Creating Dutch Braid Ponytails
- Establish a center part and section off the left side of your hair, starting at your temple
- Begin a Dutch braid by dividing this section into three strands and braiding by crossing each section underneath the middle strand rather than over it
- Continue braiding and adding small pieces of hair as you move toward the back of your head, angling toward where you want your left ponytail positioned
- When you reach the back, gather all the loose hair from the left side along with the ending of the braid into a ponytail and secure
- Repeat the Dutch braiding process on the right side, starting from your right temple and moving toward the back
- Tighten the braids by gently pulling small sections outward to add volume and create texture
- Optional: curl the ends of the ponytails with a curling iron for added dimension, or braid the ponytail sections as well for a double-braided effect
12. Crown-Style Double Ponytails
The crown style positions the ponytails higher and slightly more forward than a standard high ponytail, creating the visual effect of a crown or tiara circling your head. This regal-looking version actually works beautifully for everyday school wear because it’s unique enough to feel special but still practical and secure enough for active movement. Crown-positioned ponytails make excellent use of space and actually feel surprisingly comfortable because the hair is distributed along the top of your head rather than all pulling from one central point.
Why Crown Positioning Feels Special
Positioning your ponytails in a crown-like pattern across the top and back of your head creates a completely different silhouette than traditional side-by-side or top-and-back positioning. This style makes your face appear smaller and more defined because the bulk of the hair sits above and behind your head, and it photographs beautifully from most angles. The crown effect also feels dressy enough for school photos or special events while still being practical enough for everyday wear, and it looks equally good on fine hair and thick hair.
Creating the Crown Effect
- Instead of dividing hair into a left and right section with a center part, divide it into three or four sections that will circle your head like a crown
- Gather the first section (starting from one side at temple) and secure it into a ponytail at the side-back area
- Take the next section and secure it slightly higher and more toward the back, overlapping the secured area of the first ponytail
- Continue around your head, securing each section and positioning each ponytail slightly higher and further back than the previous one
- The final ponytail should sit directly at the crown with the ends flowing down the back
- For a unified look, make sure all ponytails are secured with matching elastic bands in the same style
- Gently pull sections of each ponytail to add volume and create texture that blends the different sections together
- Optional: loosely braid each ponytail section for added texture, or leave them straight for a sleek appearance
Final Thoughts
Double ponytails are one of the most reliable and versatile hairstyles for school because they’re quick enough for rushed mornings while still looking intentional and styled. The twelve variations here range from super simple versions you can throw together in under five minutes to more elaborate styles that let you spend extra time on your hair if you’re in the mood. The beauty of double ponytails is that you can absolutely style your hair differently every single day and never run out of creative options, especially once you start mixing and matching these techniques—adding braids to crown-positioned ponytails, incorporating accessories into twisted versions, or weaving ribbon through curly hair.
The key to making any double ponytail style actually work through a full school day is getting the elastic tension right in that first securing moment. Too loose and everything falls apart by lunchtime; too tight and you’re dealing with a headache and potential hair breakage. Somewhere in the middle—snug enough that you can’t slide the elastic around but not so tight you feel pressure at your scalp—is the sweet spot. Most importantly, pick the style that actually matches your morning timeline and your hair texture, rather than forcing yourself into something that requires more styling than you realistically have time for.