Feed-in braids have become a beloved protective styling option for curly hair, and when paired with a ponytail, they create a look that’s equal parts chic and functional. The beauty of feed-in braids lies in their versatility — they can be styled sleek and polished for professional settings, or kept textured and voluminous to celebrate your natural curl pattern. Unlike traditional box braids or locs that are typically added in as full extensions, feed-in braids gradually incorporate your own hair into the braid structure as you work from the roots, making them feel more integrated and natural to your curl texture.
What makes feed-in braids particularly appealing for curly-haired folks is that they protect your ends while allowing you to style your hair in a way that feels authentically you. When you combine this protective technique with a ponytail — whether it’s positioned high on the crown, low at the nape, or gathered to the side — you unlock a collection of styles that work for everything from gym sessions to date nights. The braids add dimension, interest, and movement that bounces beautifully with curls, while the ponytail keeps everything secure and manageable.
The following twelve feed-in braid ponytail styles showcase the range of possibilities this technique offers. Each one works beautifully on curly hair and can be adapted based on your specific curl pattern, hair density, and personal style. Some styles lean more protective and low-maintenance, while others are statement-making and artistic. Whether you’re looking for something you can wear while traveling, something that lets your natural texture shine, or something bold enough to turn heads, you’ll find inspiration in these options.
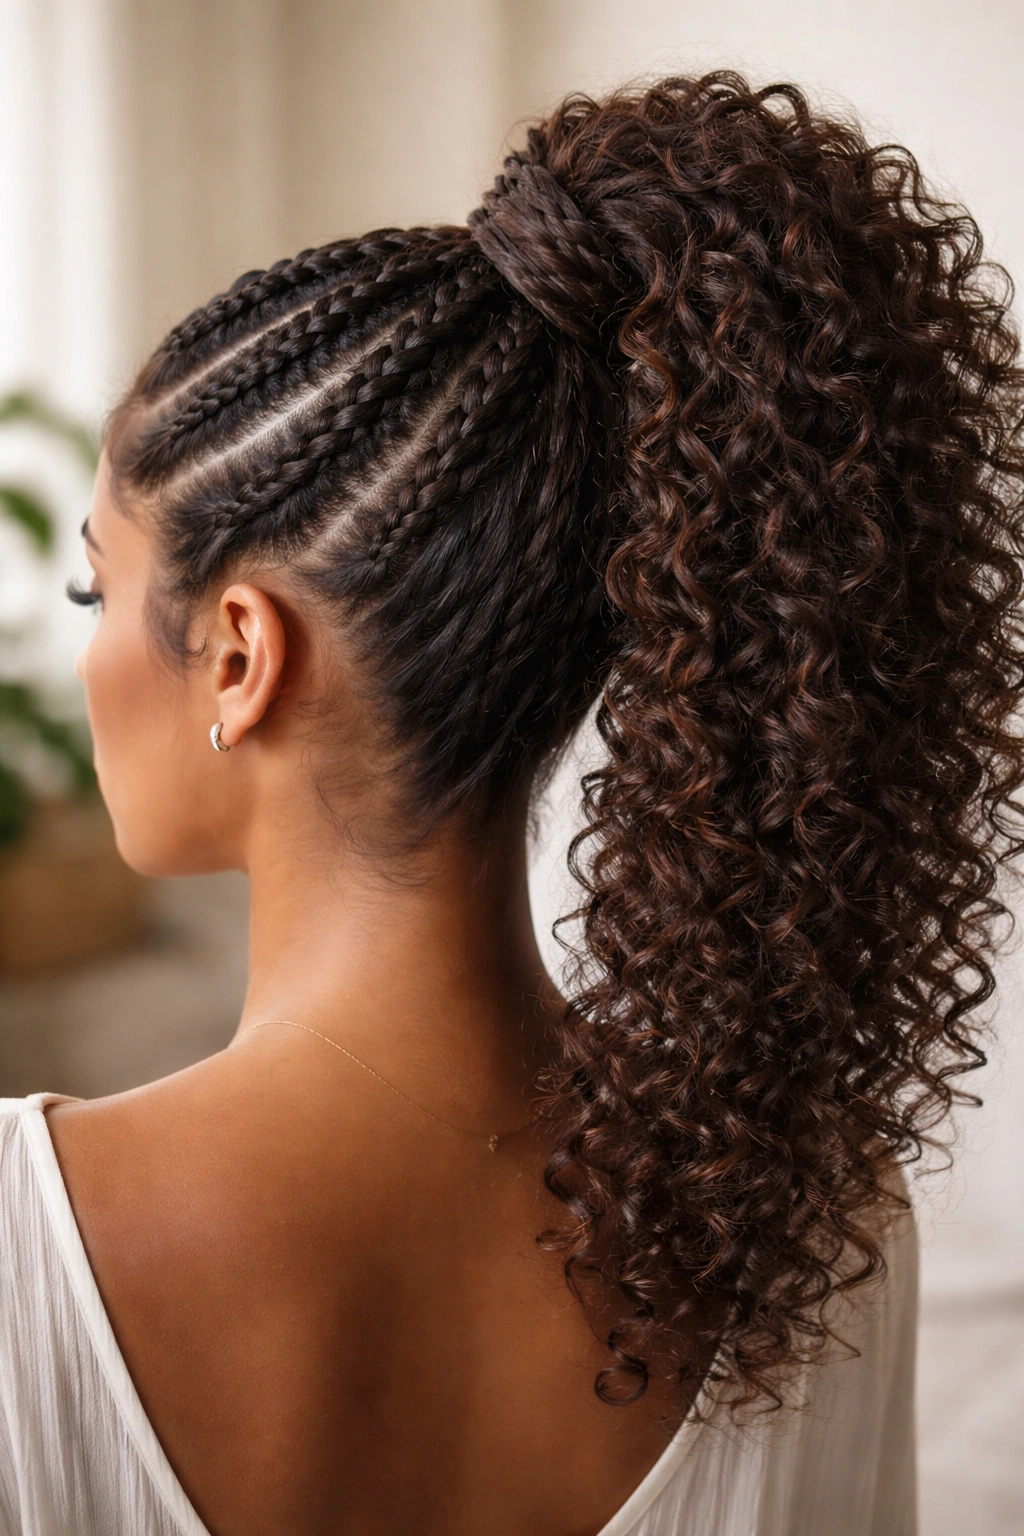
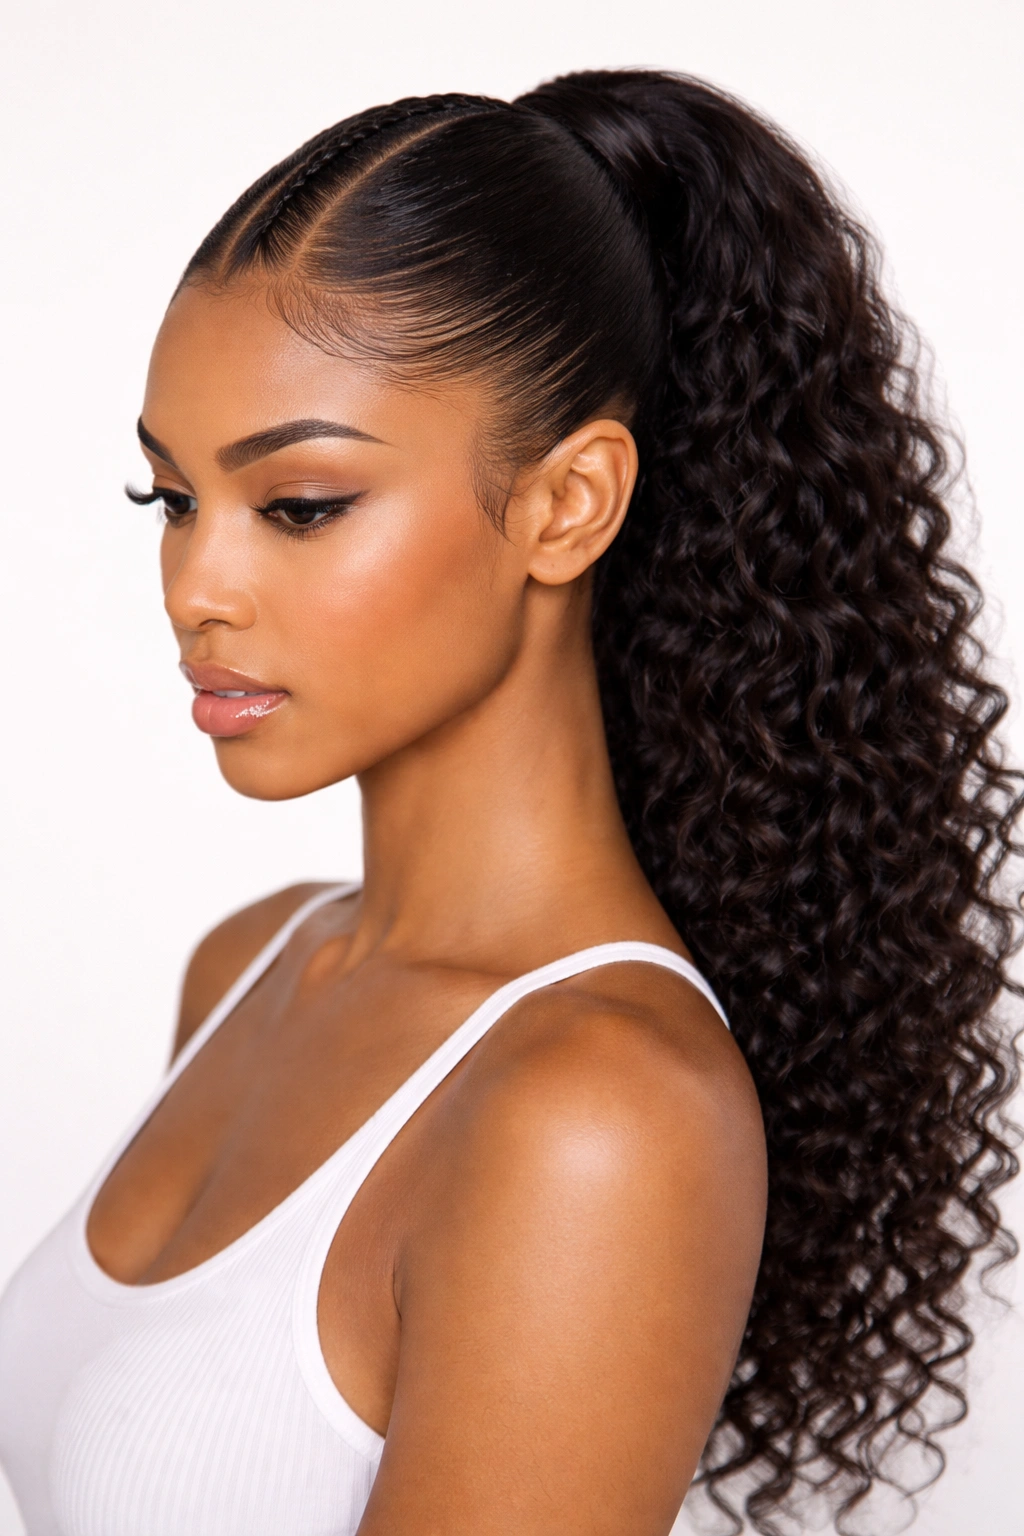
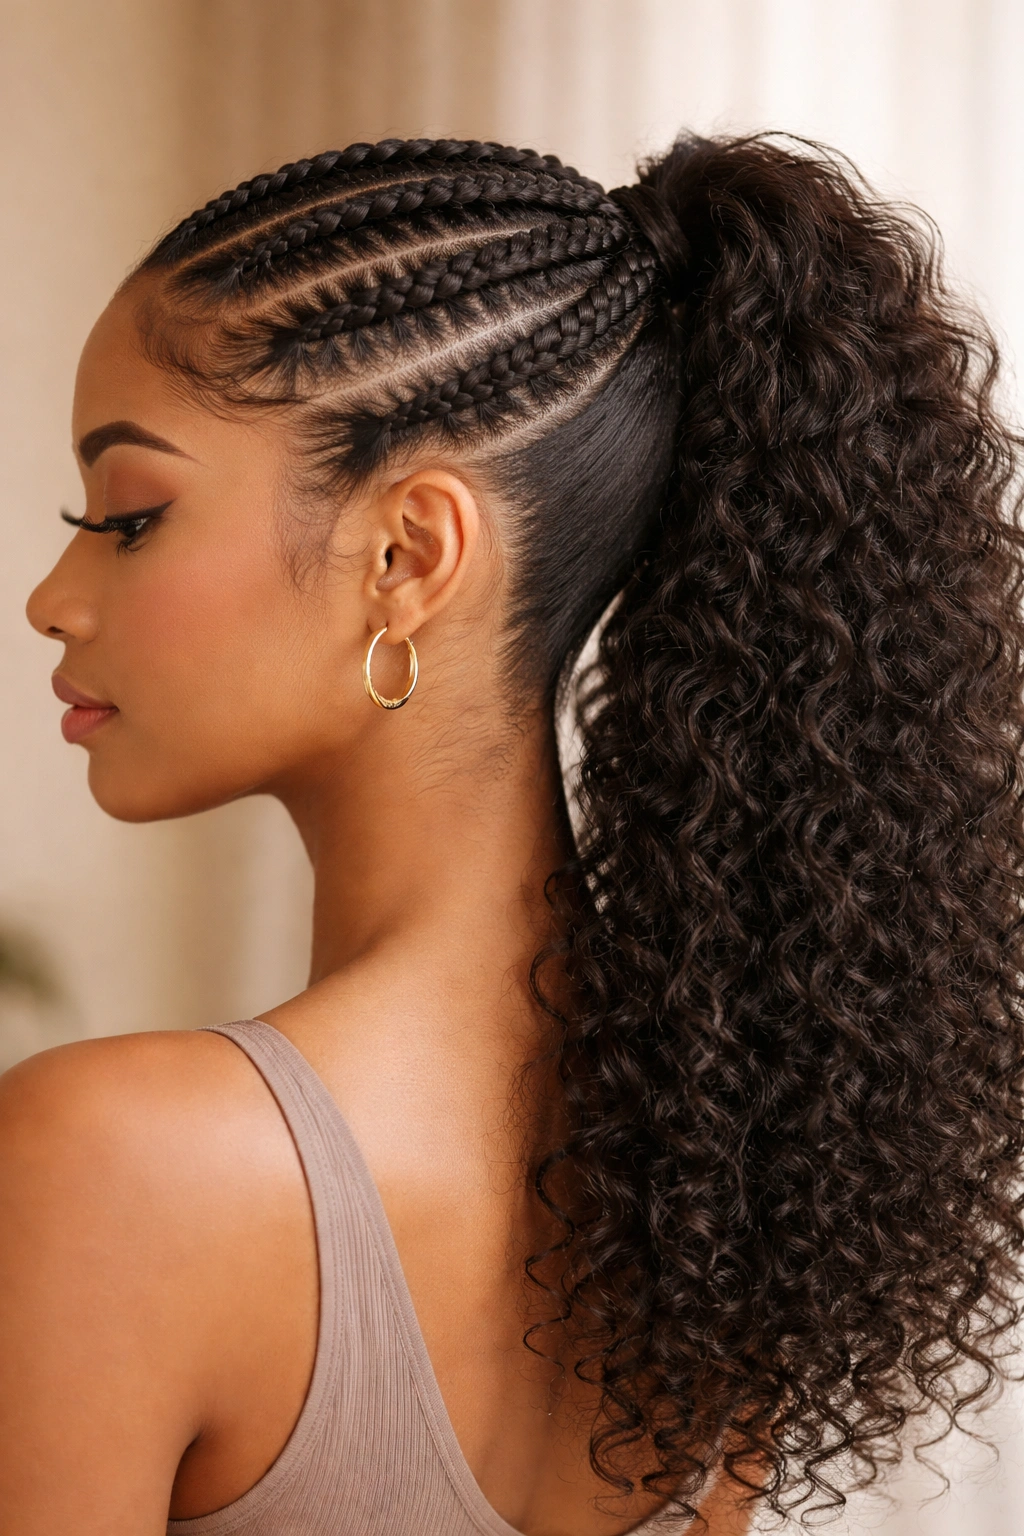
1. The Classic High-Crown Feed-In Braid Ponytail
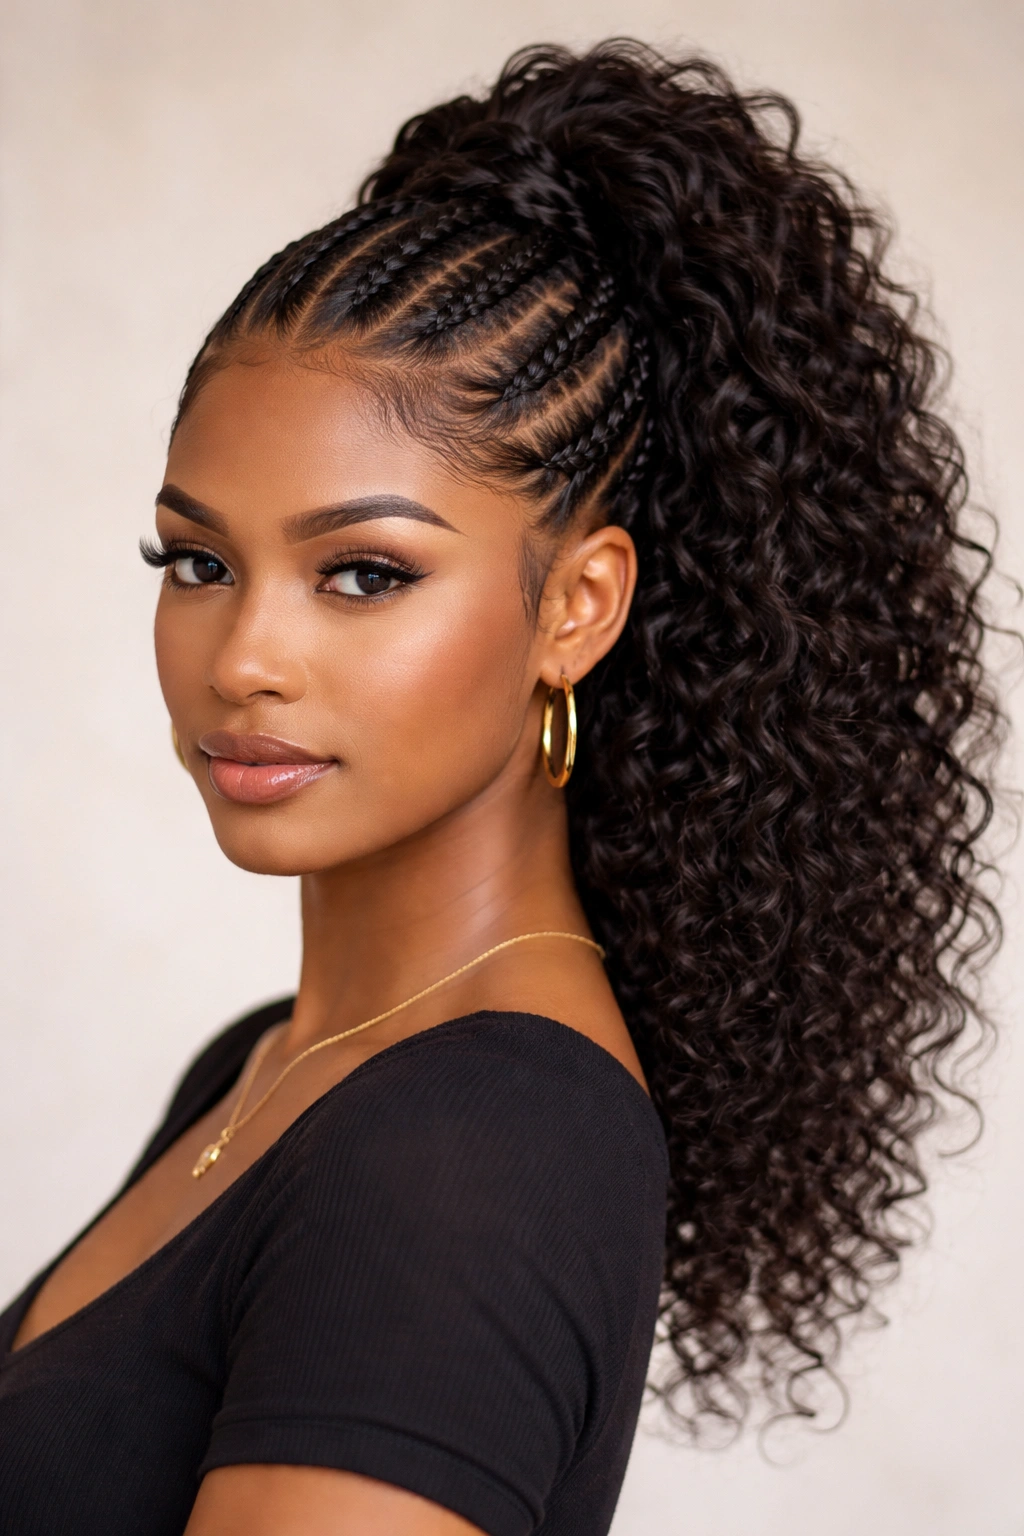
This timeless style features multiple feed-in braids that begin at the hairline and travel back toward the crown, where they merge into a voluminous, textured high ponytail. The braids frame your face beautifully on curly hair, and the lifted placement shows off your facial features and the gorgeous spirals of your curls. The contrast between the structured braids and the loose, bouncy ponytail creates visual interest that commands attention.
How to Create This Look
Start by creating 2-4 feed-in braids (depending on your hair density and how detailed you want them to be) from your hairline moving backward. The number of braids depends on your preference — fewer braids create a bolder look, while more braids offer finer detail and more control. Feed in small sections of your own hair as you braid, gradually incorporating more hair to create that seamless, embedded appearance. Once your braids reach the crown area, gather all of them along with the remaining hair into an elastic band positioned as high on your head as feels comfortable.
Styling Tips for Maximum Curl Definition
The key to keeping your curls looking their best in this style is protecting them while you sleep and refreshing them before you wear the style. Use a silk or satin bonnet to preserve the ponytail’s shape and keep individual curls intact. In the morning, you can mist the ponytail lightly with a curl-refreshing spray and gently separate sections to reactivate the curl pattern. Consider using a lightweight, hold-focused product to smooth the braids without weighing down your curls.
Pro tip: Create this style on the second day of your curl refresh cycle when your curls have settled into their pattern but still have plenty of definition and bounce.
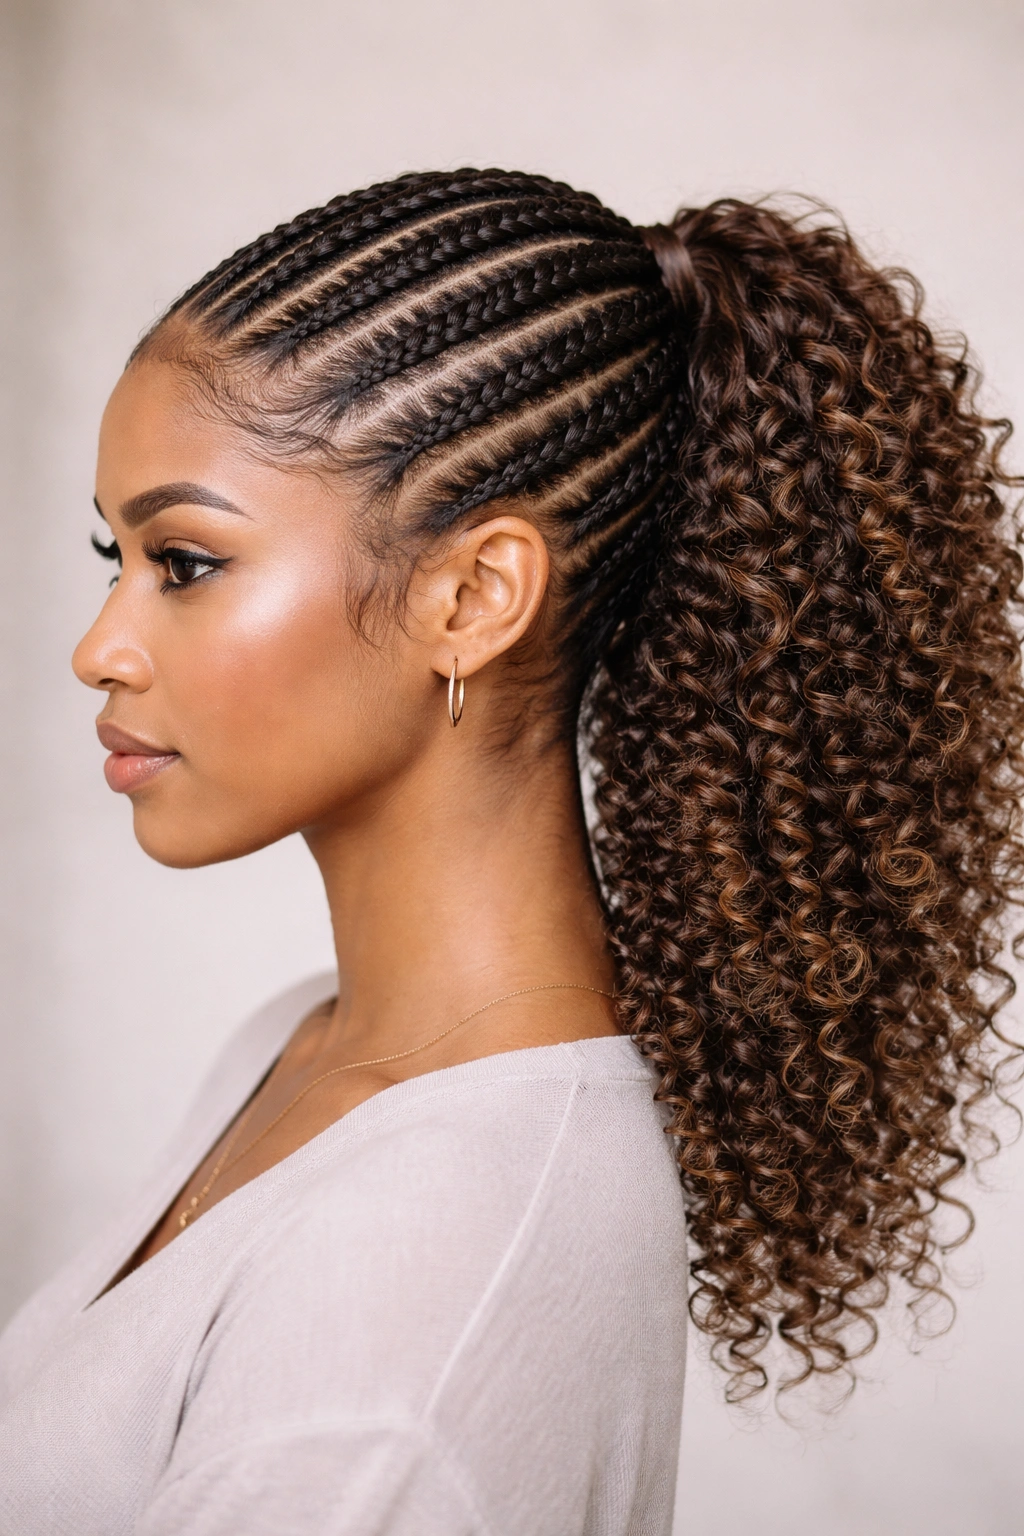
2. The Sleek Feed-In Cornrow into Low Ponytail
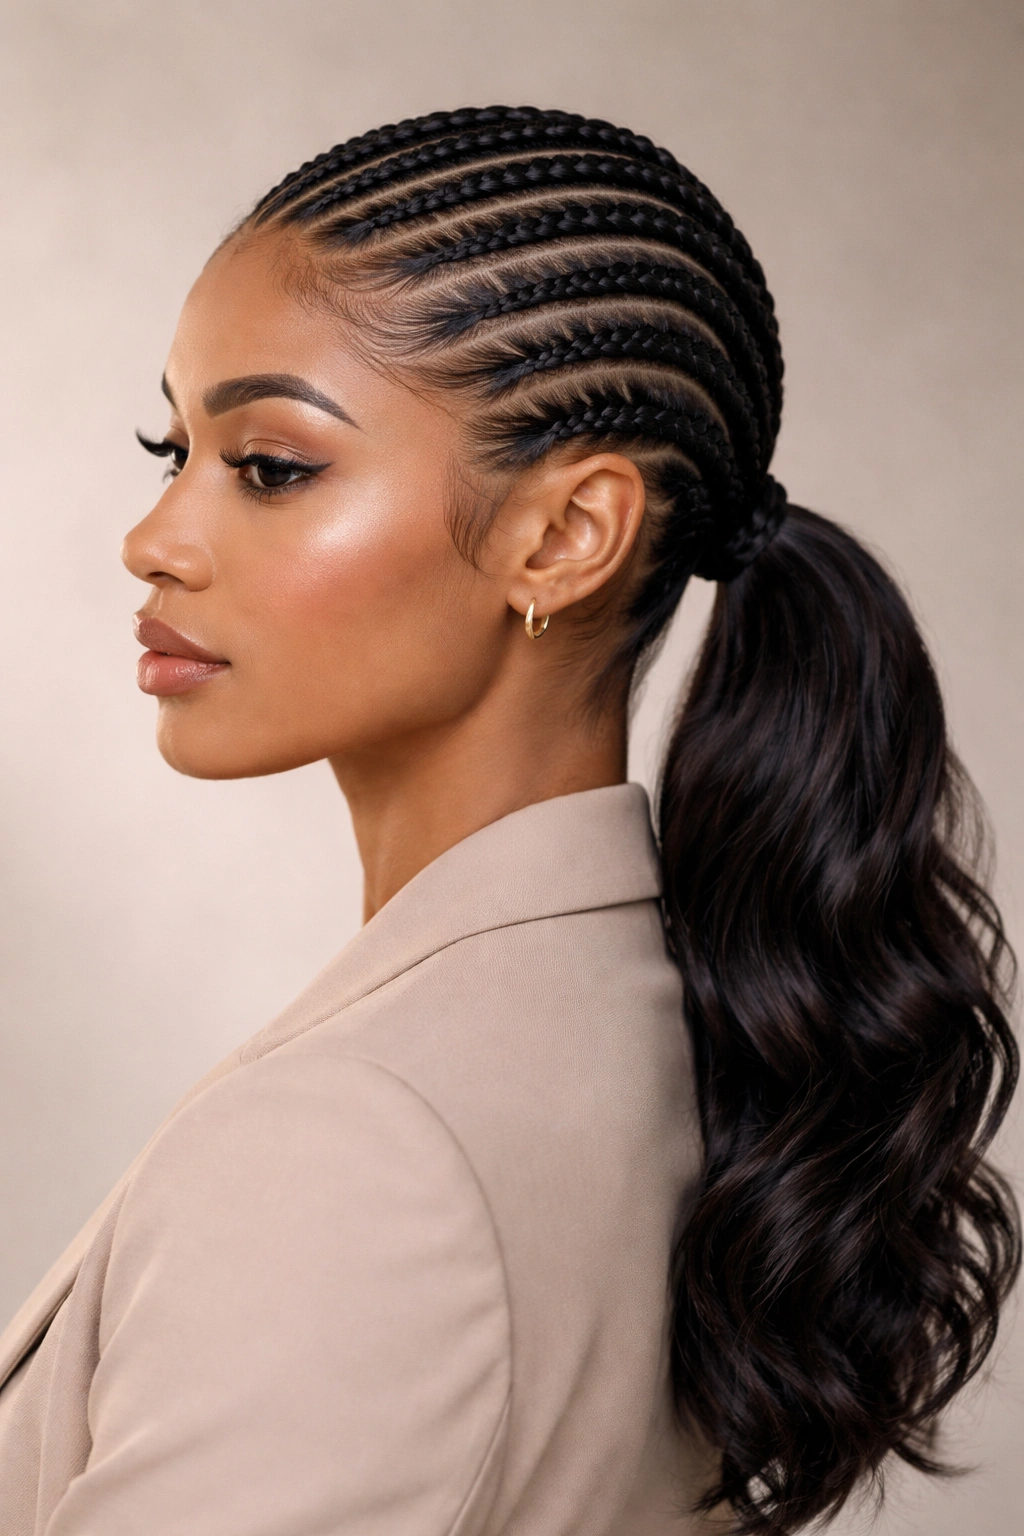
For a polished, understated aesthetic, feed-in cornrows (a tighter, smoother version of feed-in braids) travel from your forehead straight back to a sleek low ponytail at the nape of your neck. This style communicates sophistication and control while still honoring your natural curl texture — the ponytail itself can remain textured and full, creating a striking contrast with the smooth cornrows. It’s an excellent option for professional environments, special occasions, or days when you want maximum polish with minimal fuss.
Achieving That Sleek Cornrow Finish
The difference between cornrows and regular feed-in braids is tension and smoothness. Pull gently but firmly as you braid, keeping the rows evenly spaced and parallel. Use a smoothing gel or edge control on the cornrows to keep flyaways at bay and create that glass-like finish. Work in sections — you might do one cornrow on each side of your head and one down the center, or arrange them in whatever pattern appeals to you.
Why This Works for Professional Settings
Cornrows signal intentionality and polish in professional contexts. They show that you’ve invested time in your appearance without relying on heat styling or damaging practices. The low ponytail placement keeps the focus on your face and any accessories you choose to wear. This style can easily transition from day to night — you can freshen it up with a light spritz of hair mist and maybe swap your elastic for a statement cuff or clip.
Worth knowing: This style holds beautifully for 3-5 days without refreshing, making it ideal if you travel frequently or prefer low-maintenance styling periods.
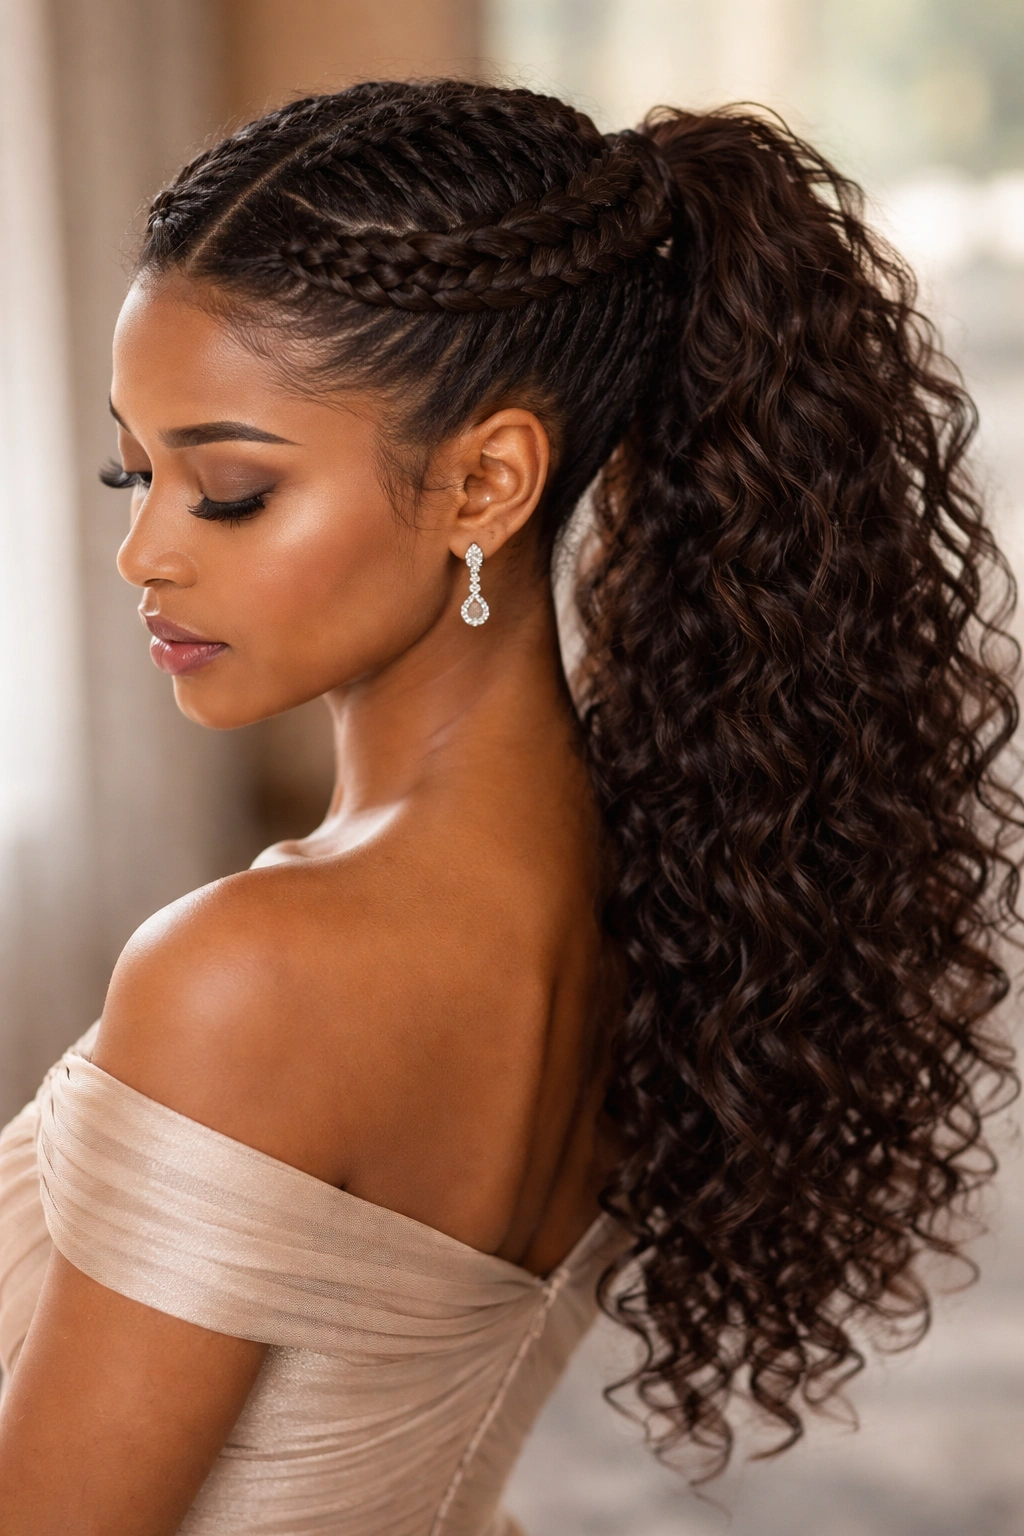
3. The Side-Swept Feed-In Braids with Curved Ponytail
Create multiple feed-in braids that start from one side of your head and sweep diagonally across toward the opposite ear, then gather into a low, off-center ponytail. This romantic, fashion-forward style works wonderfully with curly hair because the curves and angles complement your natural texture’s movement. It photographs beautifully and feels special enough for date nights, weddings, or any occasion where you want to feel elevated.
Mapping Out the Braid Pattern
Begin your first braid near one temple and curve it back and around toward the opposite side, feeding in hair as you go. Add 2-3 additional braids that mirror this curved trajectory, creating a cohesive pattern that guides the eye from one side of your head to the other. The path of the braids should feel intentional and flowing, not random. Take time when you’re fresh and have good energy to plan where each braid will sit.
Styling for Romance and Movement
Let your ponytail remain voluminous and textured — this is where your most beautiful curls should shine. You can very gently separate the ponytail into a few sections to increase its fullness and showcase the curl pattern. Leave a few face-framing pieces out if desired, or keep everything smoothly pulled back — both options work. The braids should feel like they’re cradling your head, so take photos from multiple angles to make sure the positioning feels balanced and flattering.
Insider note: This style is absolutely stunning under soft, warm lighting — perfect for evening events or sessions during golden hour.
4. The Reverse Feed-In Braids with Crown Ponytail
Instead of starting at your hairline and working backward, reverse feed-in braids begin at the back of your head and travel forward, creating an almost halo effect. Once the braids reach the crown area, gather everything into a high, full ponytail that sits gloriously on top of your head. This style celebrates curly hair’s natural volume and creates a statement look that’s both playful and chic.
Creating Braids That Travel Forward
This technique requires a slightly different mindset than traditional braids. Begin at the nape of your neck and braid upward and forward, gradually incorporating more of your hair. It takes practice to get the tension right when you’re working in reverse, so don’t expect perfection your first time. Start with one center braid to build confidence, then add side braids once you’ve got the feel for the technique.
Building Maximum Ponytail Height
Once your braids meet at the crown, gather all your hair into a elastic positioned as high as you can comfortably secure it. For maximum dramatic effect, don’t smooth this ponytail — let your curls express themselves fully. You might gently fluff the ponytail and separate it into 2-3 sections to amplify its volume. This is a style that celebrates bigness and boldness, so lean into it.
Quick tip: If your natural volume isn’t quite as full as you’d like, consider adding a lightweight hair extension or pony wrap (matching your curl pattern and color) to create extra fullness without adding weight.
5. The Twisted Feed-In Hybrid with Wrapped Ponytail
Blend the look of feed-in braids with twisted sections for a softer, more romantic variation. Instead of traditional three-strand braids, create twisted sections that spiral around and converge at your crown, then wrap one of the twisted sections around the base of your high ponytail. This style feels less structured than pure braids while still being protective and intentional.
Creating Soft, Pretty Twists
Twisted sections are created by taking two strands of hair and intertwining them around each other — it’s simpler than braiding but creates a beautifully elegant effect. As you twist, gradually incorporate more hair from around your head, feeding it in just as you would with a braid. You can create 2-4 twisted sections depending on how defined you want the look to be. Twists work especially beautifully on curly hair because they enhance your natural texture and create an almost vine-like appearance.
Wrapping and Securing
Once you’ve gathered your twisted sections and loose hair into a ponytail at the crown, take one of the twisted sections and wrap it around the elastic band at the base of the ponytail. Secure it with a few bobby pins inserted into the ponytail itself. This wrapped detail transforms a simple ponytail into something noticeably more polished and intentional.
Real talk: This style is the perfect bridge if you love the idea of feed-in braids but find traditional three-strand braiding intimidating — twists are genuinely easier once you get the feel for them.
6. The Stacked Feed-In Braids with Bubble Ponytail
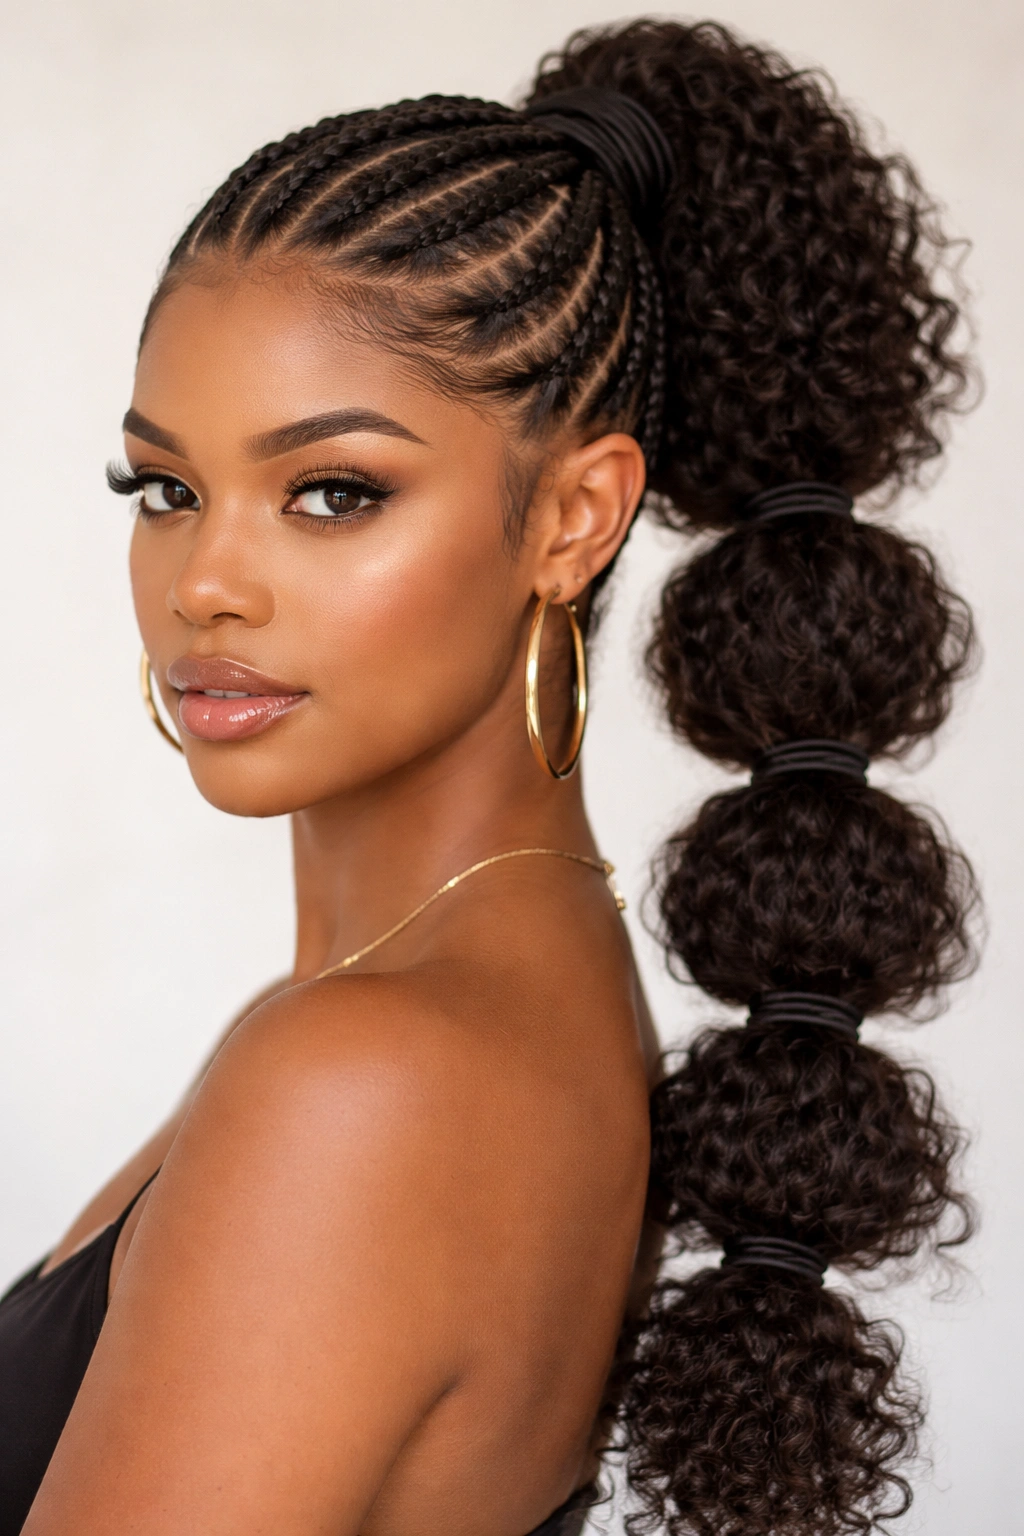
Create feed-in braids that begin at your hairline and travel straight back, then gather them into a ponytail that you section off with elastic bands at intervals, creating a bubble or beaded effect. This playful, modern style works beautifully with curly hair because each bubble allows your curls to expand and show off their texture. It’s energetic without feeling juvenile, and it transitions well between casual and slightly dressier settings.
Creating Even, Visually Pleasing Bubbles
Once your hair is in a ponytail, carefully divide it into 3-4 sections using small elastic bands or hair ties. Space them evenly — you can measure by eye or even use a ruler if you want them perfectly precise. The distance between each band determines how full each bubble appears. Gently fluff out each section after banding to make the bubbles appear larger and bouncier. This action also helps your curls pop visually and reduces the chance of the style looking too tight or pulled.
Accessorizing the Bubble Effect
This style gives you opportunities for creative accessorizing. Consider threading thin ribbon, yarn, or beads through each bubble section, or using decorative hair cuffs or rings. You can also leave it simple and let the bubbles speak for themselves, especially if you use metallic or jeweled hair ties.
Style note: This is an excellent style for active people — the banding keeps everything secure and in place while you move, making it ideal for workouts, hikes, or active outings.
7. The Diagonal Feed-In Braid Pattern with Side Ponytail
Create multiple parallel feed-in braids that run diagonally across your head from one side toward the opposite ear, then gather everything into a ponytail positioned at ear level or slightly below. This asymmetrical style is modern, artistic, and incredibly flattering — the diagonal lines complement most face shapes beautifully. On curly hair, the diagonal braids create visual interest while the textured ponytail adds dimension and movement.
Planning Your Braid Placement
Sketch out where you want each braid to travel before you start. If you’re right-handed, starting braids from the right side of your head and braiding toward the left usually feels most natural. Create your braids so they follow a consistent diagonal trajectory — they should look intentional, not haphazard. Spacing them evenly across your head creates visual balance.
Securing the Side Ponytail
Gather all braided and remaining hair into an elastic positioned at your temple or ear level, slightly to the side. The advantage of this placement is that it shows off more of your face and creates an informal, youthful vibe. You can let the ponytail fall loosely or tie it higher up your head — both options look equally great depending on your mood and outfit.
Pro tip: This style is forgiving because the diagonal lines naturally draw the eye, so small imperfections in your braiding technique become invisible.
8. The Full-Head Feed-In Braid Map with Gathered Ponytail
Instead of creating just a few braids, create a full map of feed-in braids across your entire scalp, with braids traveling in various directions before all converging into one large, luxurious ponytail. This intricate, artistic style is a statement maker — it requires more time and skill than simpler styles, but the result is absolutely stunning on curly hair. It’s the kind of style that works for special occasions, creative events, or any time you want to showcase your hair artistry.
Designing Your Braid Pattern
This style demands planning. You might create braids that radiate from your crown like sun rays, or braids that run parallel across your head, or a combination of patterns. Sketch your design mentally or even on paper before you start. Consider your face shape — you want the braids to frame your features beautifully. The converging point (usually somewhere at the crown or slightly back) should feel natural and not forced.
Managing the Complexity
With multiple braids, consider having a friend or professional stylist help if this is your first time attempting the style. It’s easy to lose track of where you are in the pattern once you have four or five braids going. Hair that’s been cleansed 2-3 days prior holds braids better than freshly washed hair because the natural oils provide grip. Divide your sections clearly so you don’t accidentally braid the same hair twice.
Worth knowing: This style can last 5-7 days with proper care, making it worth the investment in creation time. Sleep on it gently with a silk bonnet, and refresh the ponytail section every couple days.
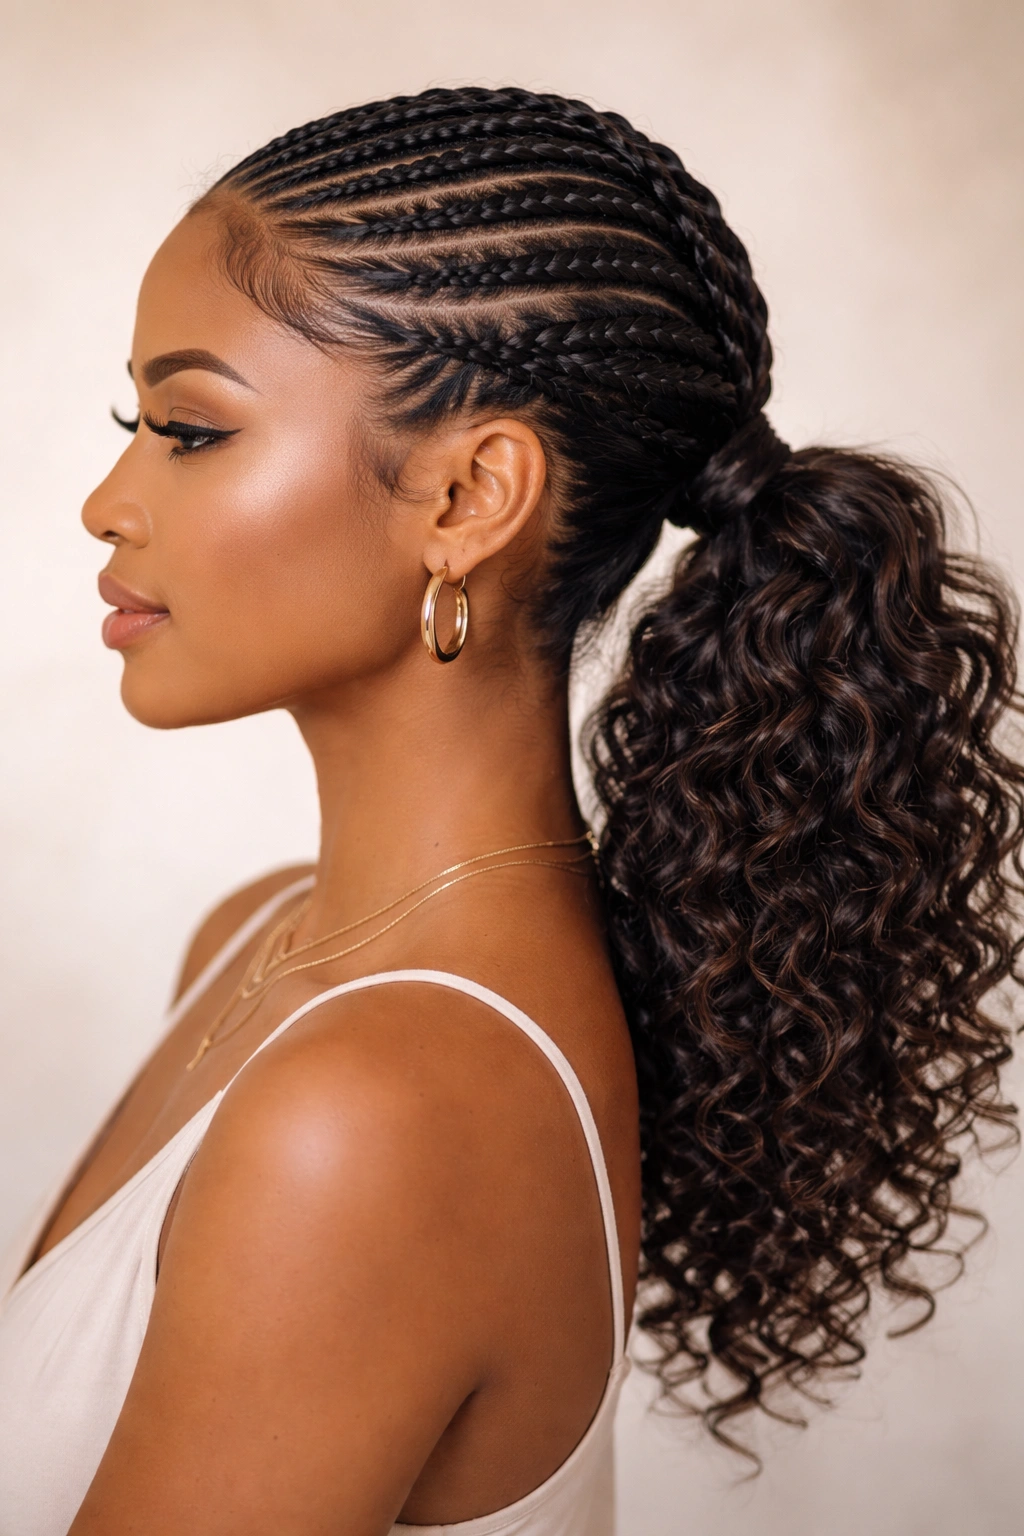
9. The Minimalist Single Feed-In Braid with Sleek Ponytail
Sometimes less is more. Create just one statement feed-in braid that starts from your hairline and travels down the center (or slightly off-center) of your head, then gather all your hair into a smooth, sleek ponytail. This minimalist approach is elegant, easy to execute, and allows your natural curl texture to remain the focus. It’s perfect for everyday wear, workdays, or any time you want something polished without requiring tons of styling effort.
Making One Braid Feel Impactful
A single braid needs to be well-executed and prominent to feel intentional rather than accidental. Ensure it’s straight and even, with consistent tension throughout. Position it where it will be visible — down the center-back of your head works beautifully. Feed in hair gradually so the braid sits flush against your scalp.
Complementing with a Clean Ponytail
Smooth your ponytail using a light smoothing balm or gel, or keep it textured depending on your vibe. A single braid pairs beautifully with either aesthetic. For a clean, controlled look, smooth it. For a more relaxed, authentic curly-girl vibe, let it remain naturally textured. Both approaches respect the minimalist philosophy of this style.
Insider note: This is the perfect “starter style” if you’re new to feed-in braids — it’s forgiving, requires minimal time, and it’s nearly impossible to mess up badly.
10. The Feed-In Braid Crown with Drop-Down Ponytail
Create feed-in braids that form a crown pattern around your head, beginning at one ear, traveling around the back, and ending at the opposite ear. Then, gather your remaining hair (the hair that wasn’t incorporated into the crown braid) into a ponytail that drops down from where the braid ends. This romantic style balances structure with softness and works beautifully for weddings, special events, or any time you want an elevated, princess-like aesthetic.
Building Your Crown
Start your first braid at one ear and braid across the back of your head toward the opposite ear, feeding in hair as you go. If you want, add a second braid that mirrors the first, creating a layered crown effect. Both braids should follow a similar curved path that hugs the back of your head, creating an actual crown-like appearance.
Creating the Contrast
The beauty of this style is the dramatic contrast between the structured crown and the free, textured ponytail that drops below it. Let that ponytail celebrate your curls — the movement, the bounce, the individual spirals should all be visible and celebrated. This is not a style where you want everything slicked and smooth; the loose ponytail is the style’s emotional center.
Real talk: This style works best when you’re wearing your hair down otherwise — if you normally keep your hair pulled back, this style might feel dramatic, and that’s perfectly fine. Sometimes special occasions call for dramatic beauty.
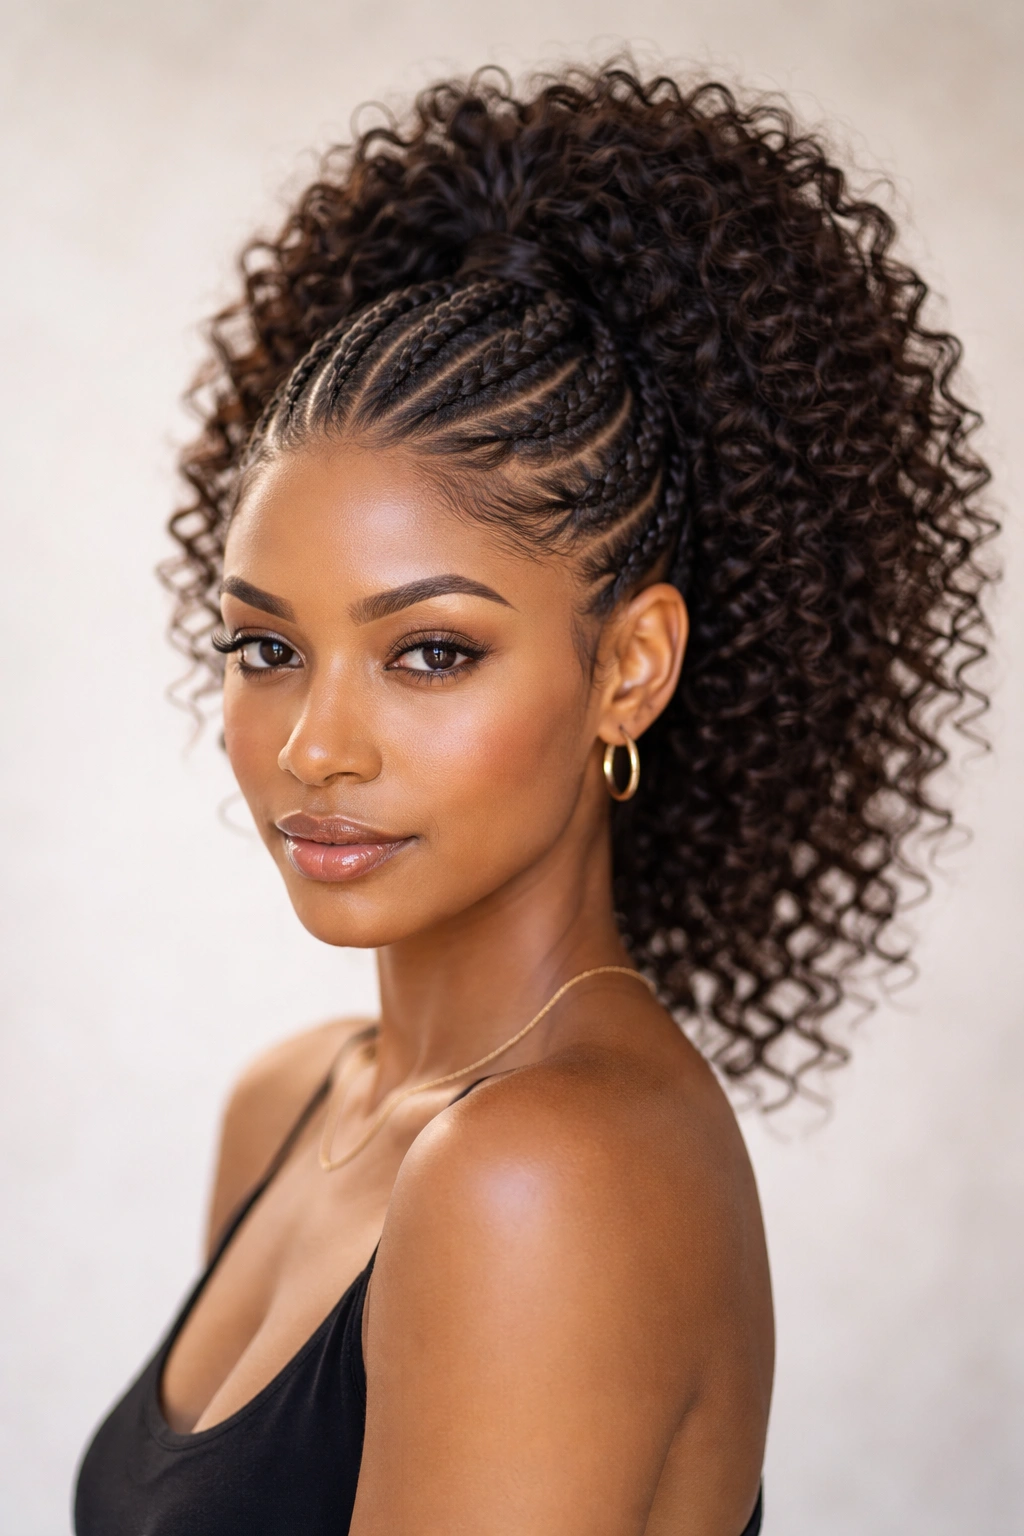
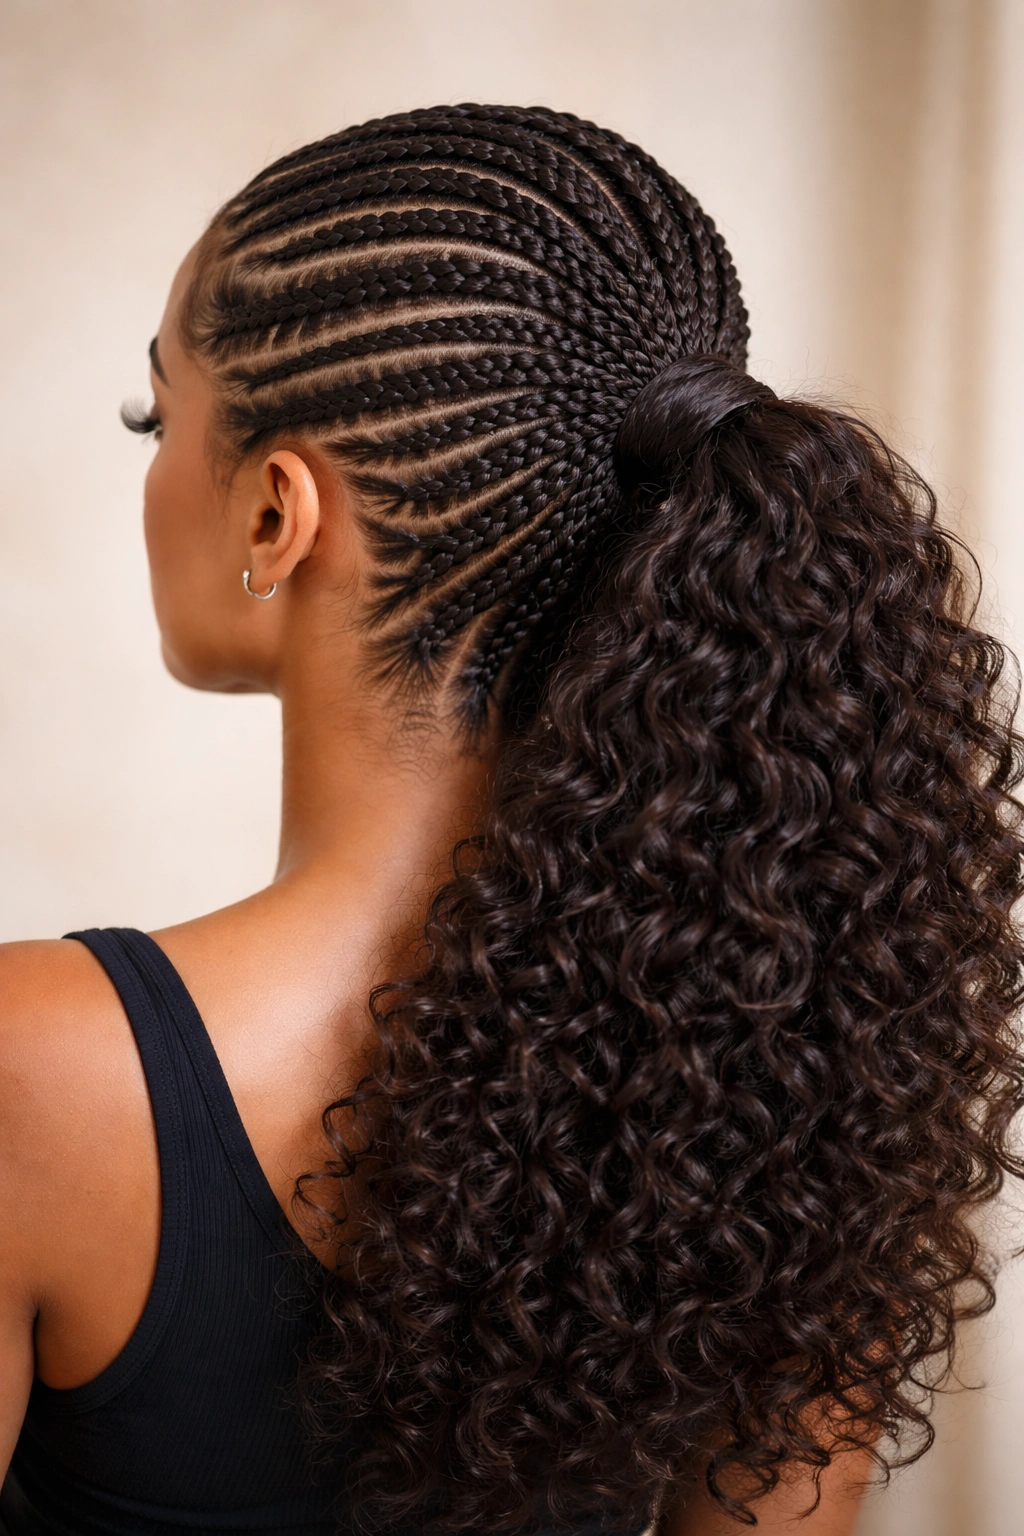
11. The Half-Head Feed-In Braids with Lifted Ponytail
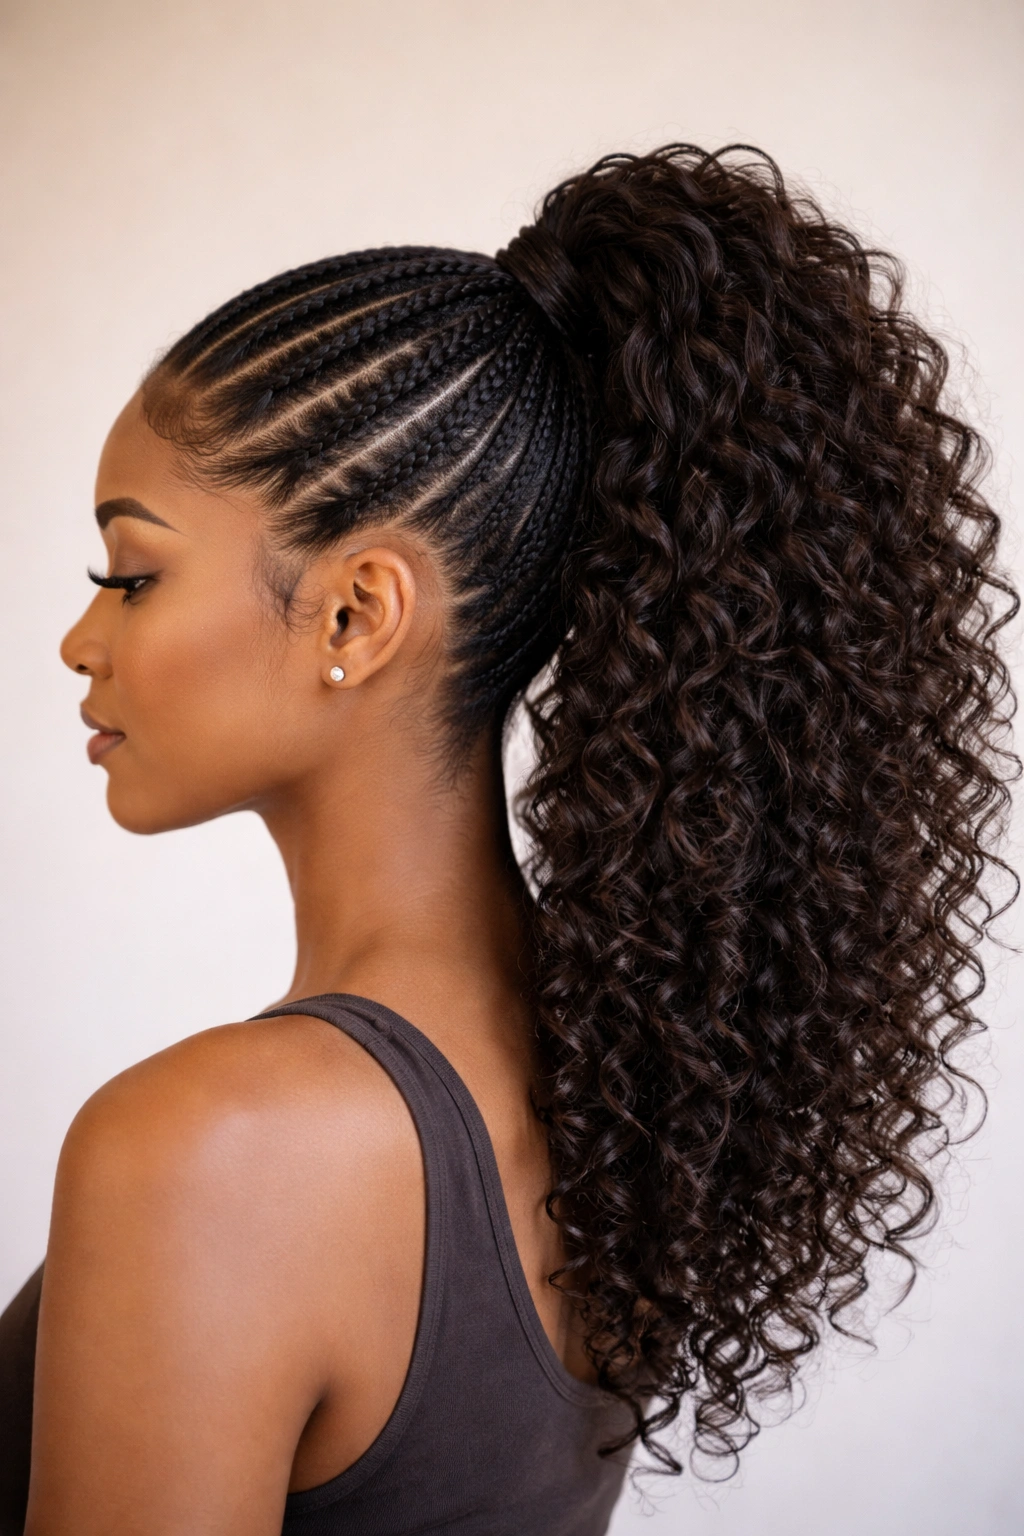
Create feed-in braids on just the upper half of your head, starting from your hairline and working toward the crown, then gather all your hair (braided and unbraided) into a high ponytail positioned at the crown. The lower half of your hair remains free from braids, maximizing curl definition and demonstrating your natural texture. This practical style balances the protective benefits of feed-in braids with the freedom to showcase your actual curls.
Strategically Placing Your Braids
Decide how many braids you want — typically 2-3 work well for this style — and space them evenly across the upper section of your head. They should all travel toward a gathering point at the crown. This creates visual flow that guides the eye upward. Leave plenty of hair unbraided in the lower sections so that the ponytail remains full and textured rather than thin or wispy.
Maximizing Curl Visibility
Since this style deliberately leaves significant portions of your hair unbraided, use products that enhance your curl pattern rather than flatten it. Apply curl-defining cream or gel to the loose ponytail section before styling. You can even finger-coil or twist individual curls to further enhance definition. The braided upper section provides structure, while the curly lower section provides personality.
Quick tip: This style photographs beautifully from the back because it shows the full journey of your hair — from intentional braids to free, natural curls.
12. The Asymmetrical Feed-In Braids with Side-Swept Ponytail
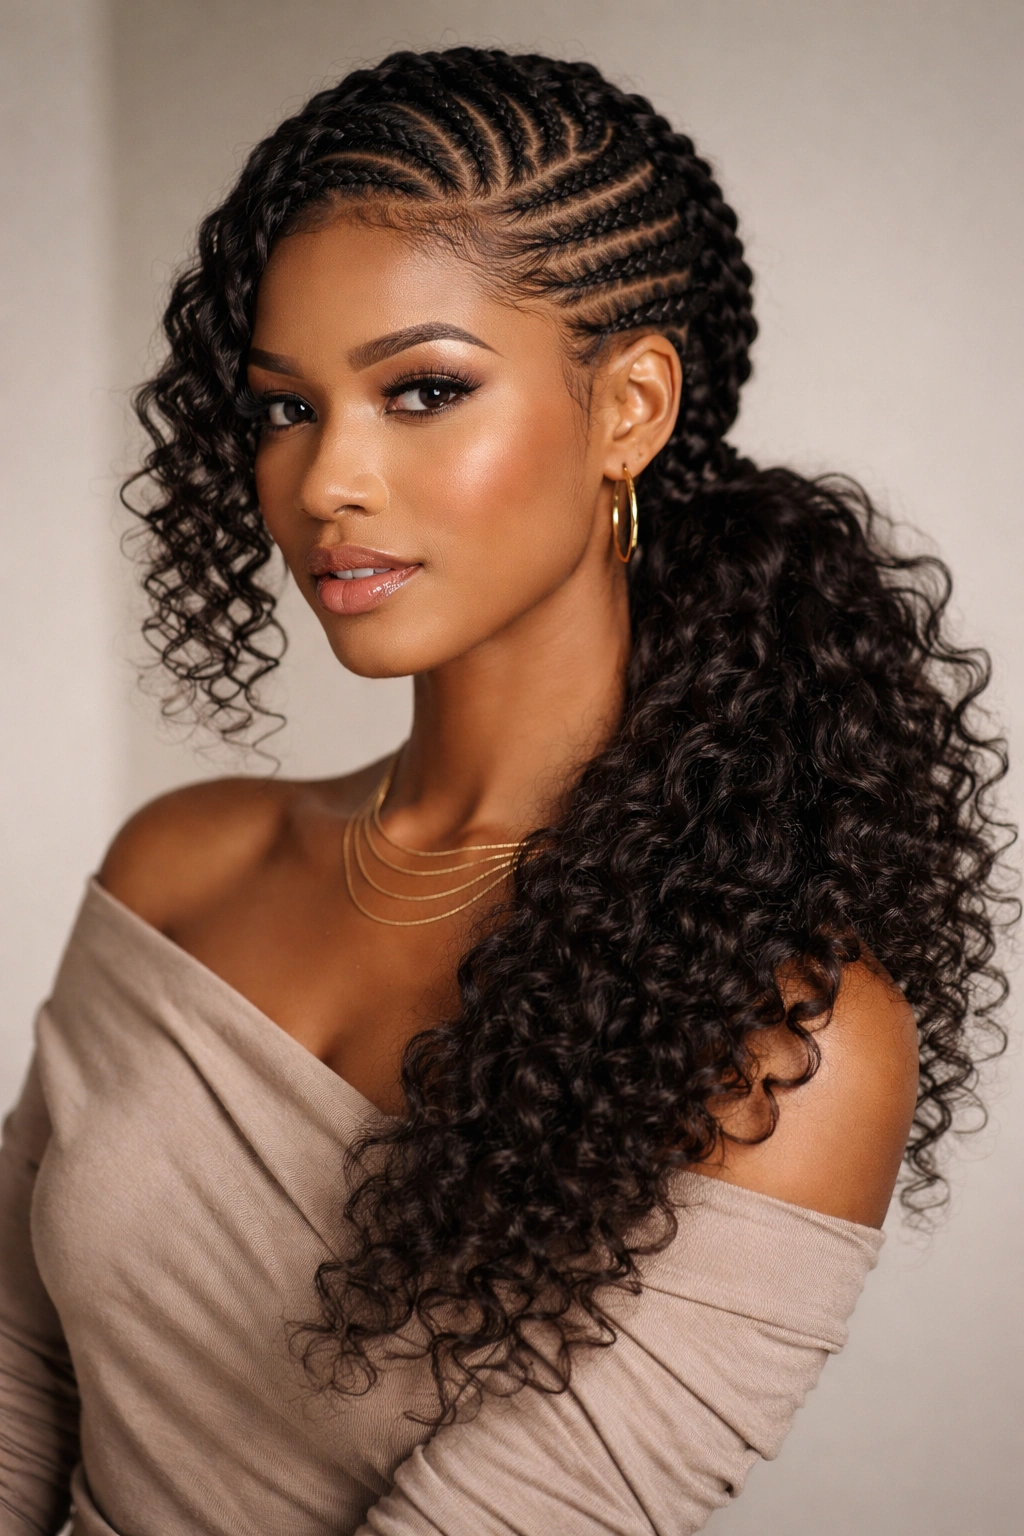
Create multiple feed-in braids on one side of your head only, starting from your temple and traveling toward the opposite side, then sweep all your hair into a low, side ponytail that sits across your shoulder. This bold, fashion-forward style is for people who aren’t afraid to make a statement. The asymmetry creates intrigue and visual interest, and the side-swept placement is undeniably romantic.
Building Unilateral Braids
Start your braids on the side of your head closest to your hand dominance — if you’re right-handed, start on your right side. Create 2-4 braids that travel diagonally across your head toward the opposite side, feeding in hair as you work. The braids should look intentional and well-planned, creating visual lines that guide the eye across your head. Leave the opposite side of your head entirely unbraid — this unilateral approach is what makes the style feel modern and artistic.
Creating Drama with the Ponytail
Gather all your hair into a low, off-center ponytail positioned to one side. The contrast between the structured braids and the free, flowing curly ponytail creates beautiful visual drama. You can let individual curls define themselves or gently separate the ponytail into sections to amplify its volume. This is a style that feels confident and intentional.
Pro tip: Pair this style with a deep side part on the opposite side from your braids to maximize the asymmetrical aesthetic and create additional visual interest.
Final Thoughts
Feed-in braid ponytails offer curly-haired individuals a versatile way to protect their hair while celebrating their natural texture and expressing their personal style. Whether you choose a minimalist single braid or an intricate full-head pattern, the key to success is understanding your specific curl pattern and choosing a style that honors rather than fights against your natural texture. These styles work because they incorporate your own hair, respect the space your curls need to thrive, and allow for personalization based on your mood, occasion, and styling preference.
The beauty of feed-in braids is that they’re forgiving as you’re learning the technique. Your first attempt might not be perfect, but it will still look intentional and beautiful. Each time you create a feed-in braid ponytail, you’ll develop better intuition about tension, spacing, and placement. You’ll also discover which styles feel most natural and comfortable for your hands, hair texture, and lifestyle.
Consider which of these twelve styles resonates most with you and start there. You can always experiment with other variations once you’ve found your foundational style. And remember — these are protective styles that keep your ends safe and allow your hair to maintain moisture and health. That dual purpose of protection plus style is genuinely rare, making feed-in braids an investment in both your appearance and your hair’s long-term wellness.