Double braided ponytails are one of the most versatile and protective styling options for natural hair. Whether you’re rocking coils, curls, or kinks, combining two braids into a ponytail creates a polished look that works for work, school, dates, or casual hangouts—without requiring constant manipulation of your strands. The beauty of this style is that it holds texture beautifully, reduces breakage at the ends, and gives you room to get creative with placement, braid pattern, and finishing touches.
What makes double braided ponytails so appealing for natural hair is that they work with your hair’s natural pattern instead of fighting against it. You’re not forcing your curls into submission; you’re actually enhancing them. The braids frame your face, protect your ends, and create a focal point that says you’ve put thought into your look—even if it only took you 20 minutes to create. Plus, once the ponytail is secured, you can refresh it every few days by taking it down, fluffing the braids, and re-tying without re-braiding the entire style.
The key to nailing double braided ponytails is understanding tension, braid thickness, and how your particular hair texture responds to different braid patterns. A braid that’s too tight will stress your hairline and cause breakage. A braid that’s too loose will frizz immediately and unravel by midday. This guide walks you through 10 stunning variations—from classic to creative—so you can find the style that fits your hair type, skill level, and aesthetic.
1. Classic Side-Swept Double Braids
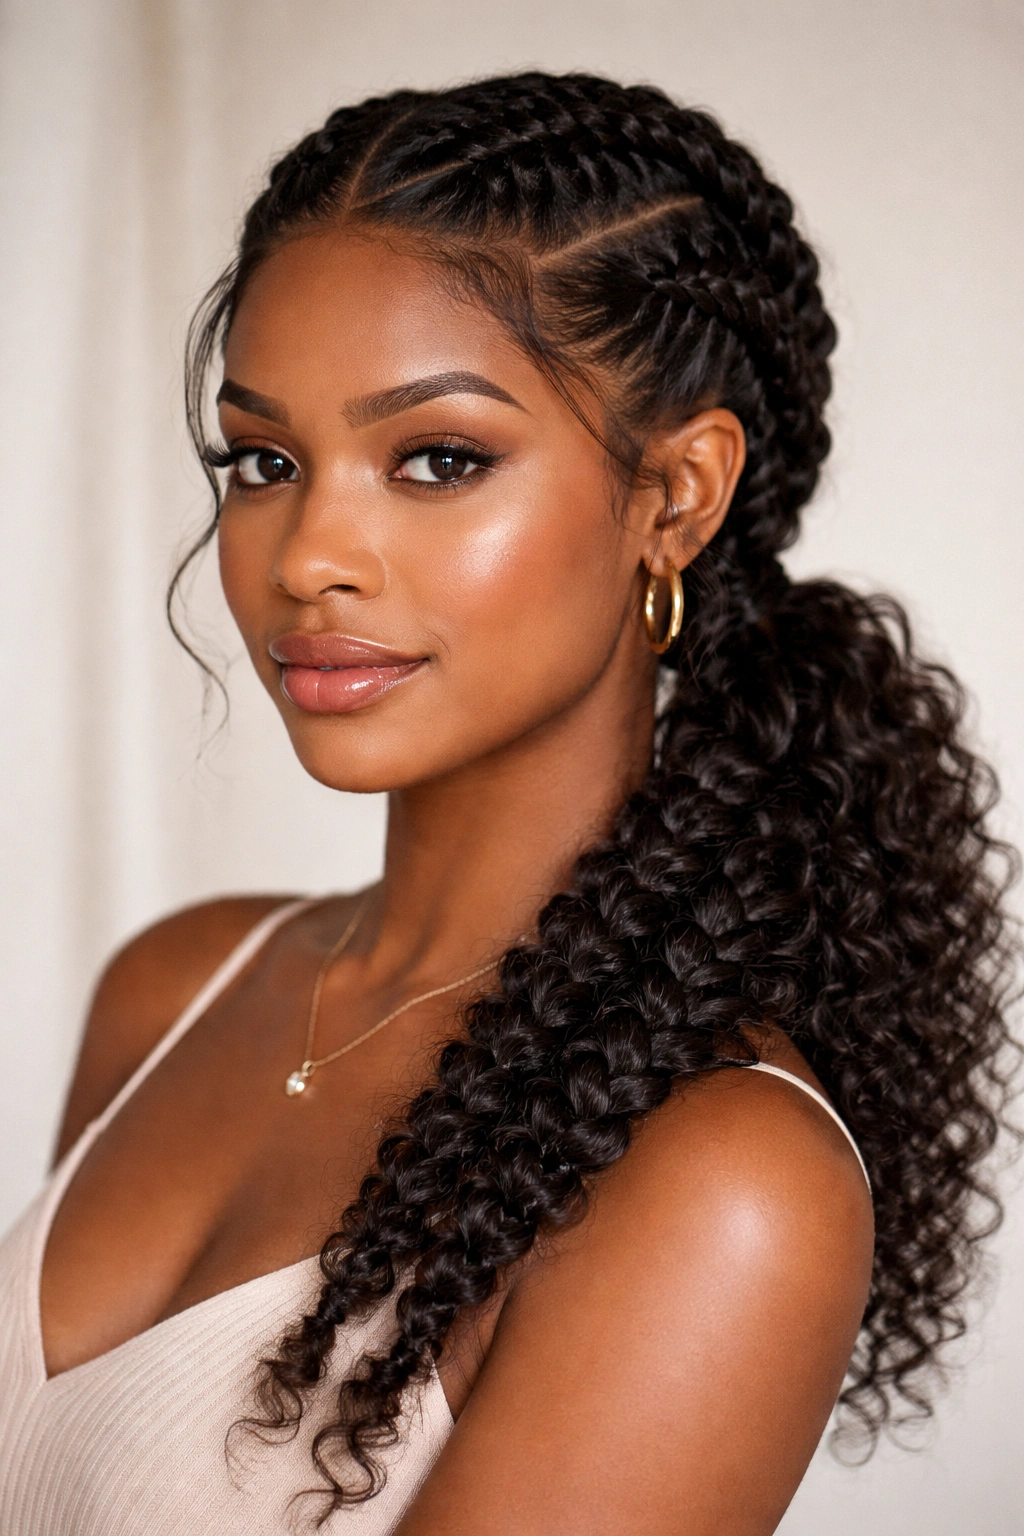
This is the foundational double braided ponytail everyone should know how to execute. You’ll start with two Dutch or French braids on opposite sides of your head, both angled toward one side to create that romantic, intentional side-sweep effect. The braids meet in the middle-to-back area and combine into a single ponytail, usually positioned toward one side rather than dead center at the nape.
Why This Style Works for Natural Hair
Side-swept double braids are forgiving and flattering on most face shapes because they soften the jawline and create movement. The angled approach also means you can adjust which side gets more visual weight based on how you want to frame your face that day. For natural hair specifically, the slight tension from the braids helps define your curl pattern while the gathered ponytail keeps the ends protected and contained.
How to Create the Side Sweep
Start by parting your hair down the middle or creating an off-center part, depending on which direction feels more natural for your face. Section out your first braid from one temple, and begin with a Dutch braid (braiding under instead of over) that angles diagonally back toward the opposite side of your head. Repeat with the second braid on the other side, angling it to meet the first braid around the center-back area. As you braid, keep your hands relaxed and your fingers light—natural hair responds better to gentle tension than aggressive pulling. Once both braids reach the meeting point, twist them together briefly or simply tie them into a ponytail holder with the rest of your loose hair.
Pro Tips for Long-Lasting Results
- Braid thickness matters: Make your braids thick enough that they feel substantial but thin enough that they don’t pull uncomfortably on your scalp. A pencil-width to finger-width braid is usually the sweet spot for natural hair.
- Use a light gel sparingly: A tiny bit of lightweight gel on your edges helps keep baby hairs smooth without hardening or flaking. Avoid heavy products that will make your braids look greasy.
- Refresh the style mid-week: Take down the ponytail but leave the braids intact. Fluff them with your fingers, re-wet the ponytail section lightly, and re-tie in a fresh position for an extended wear cycle.
2. Feed-In Double Braids into Voluminous Puff
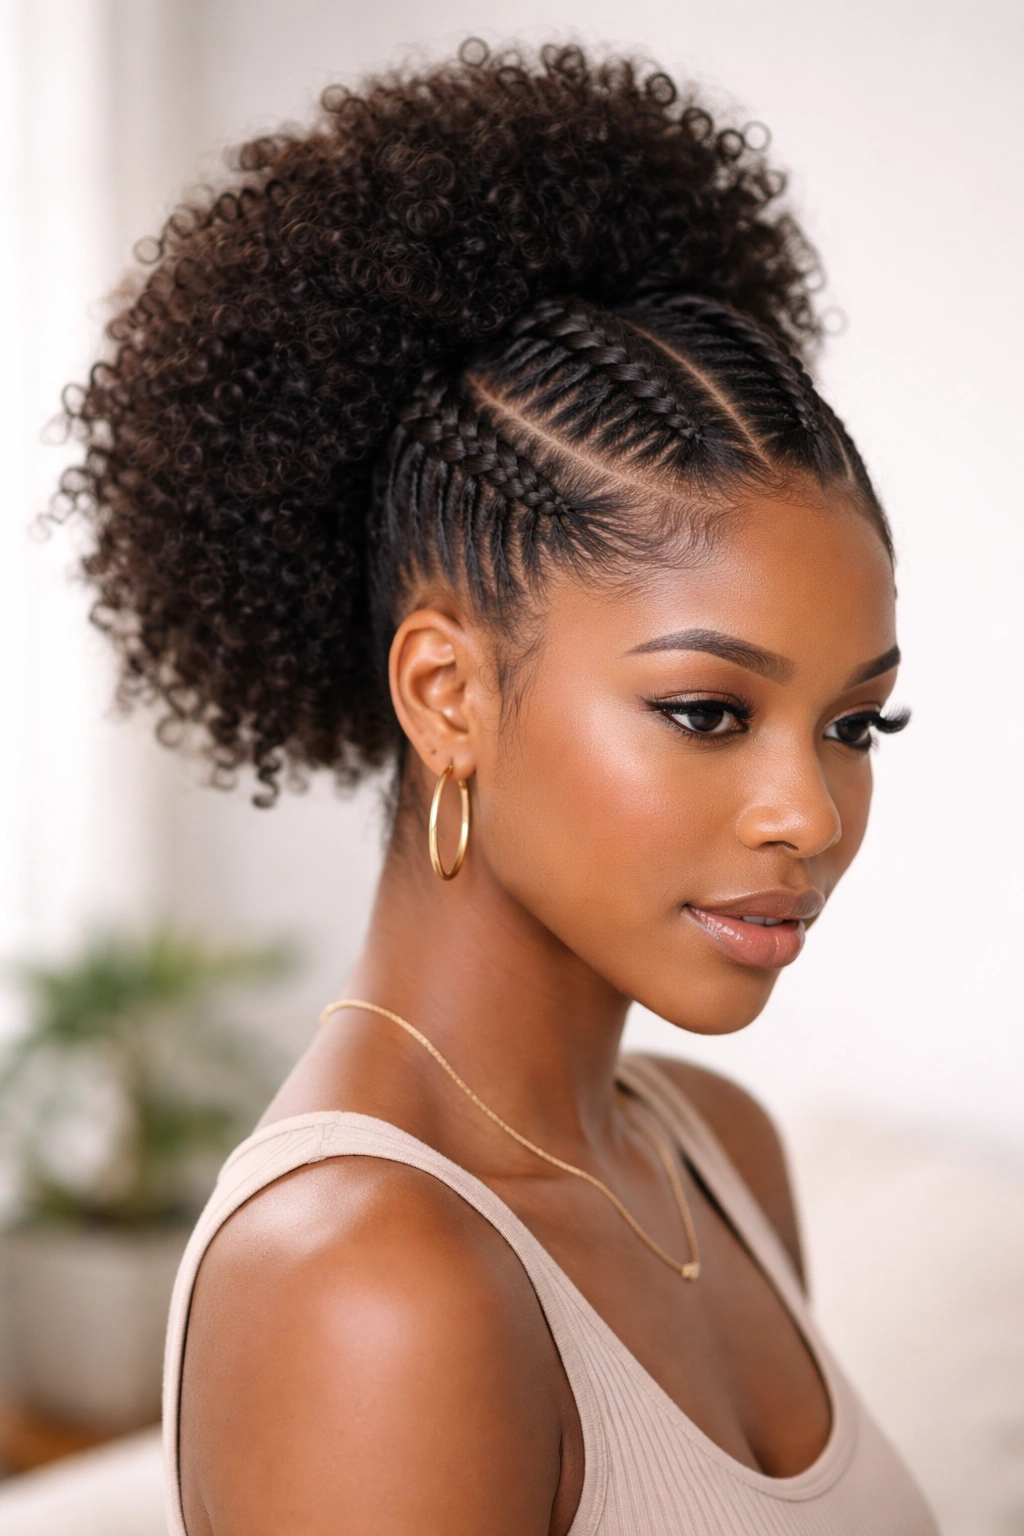
Feed-in braids are a game-changer for reducing tension on the scalp while creating beautifully defined braids that look fuller and more textured. With this variation, you’ll create two feed-in Dutch braids starting from the top of your head and feeding in sections of hair as you work downward, eventually gathering everything into a high or mid-height ponytail topped with a voluminous curly puff.
The Feed-In Technique and Its Benefits
Feed-in braiding means you’re starting with a small three-strand section and gradually adding hair from your section area as you braid downward, rather than starting with a thick section from the root. This distributes the tension more evenly across your scalp and creates a braid that looks like it’s floating slightly above your head—incredibly elegant and much more comfortable for everyday wear. The puff on top adds dimension and shows off your natural curl pattern beautifully.
Step-by-Step Execution
Divide your hair into two sections from front to back. Start your first braid at the top-center of your head with a small three-strand section. Braid downward using the Dutch method (braiding under), and as you progress, pick up small sections from the left and right sides, adding them into the corresponding strands of your braid. The braid should travel down the side of your head toward your ear. When you reach ear level, you can either continue braiding loosely past the ear or gather everything into the ponytail at that point. Repeat on the other side. Once both braids are complete, gather all your hair—braids and loose hair—into a ponytail at your preferred height, and fluff the loose hair into a puff shape.
Styling Notes
- Puff size control: The tighter you gather the ponytail, the smaller and sleeker the puff. Looser gathering creates a bigger, airier puff. Choose based on your mood and what works with your outfit.
- Scalp comfort: This style is genuinely more comfortable than many braid styles because the tension is distributed. Wear it as long as you like without worrying excessively about tension damage.
- Longevity: Feed-in braids hold their shape beautifully for 5-7 days because there’s less frizzing at the braid edges compared to standard braids.
3. Two-Strand Twist Double Braids with Kinky Coil Accent
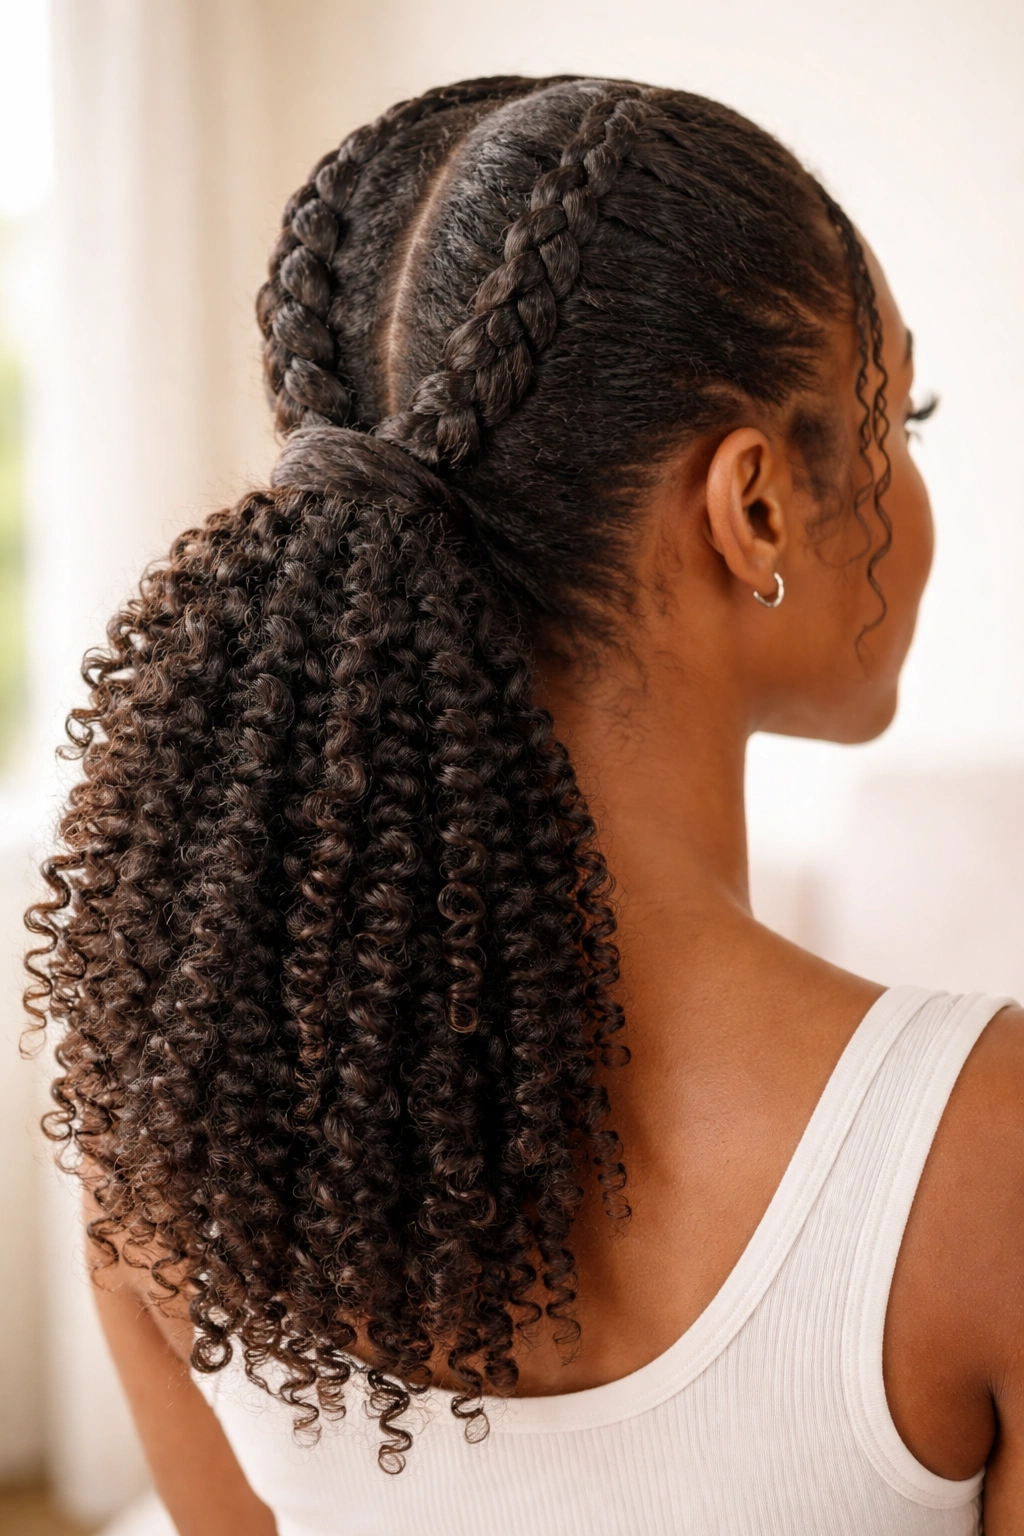
If you love the look of braids but your hair texture thrives on twists, this hybrid style gives you the best of both worlds. You’ll create two thick two-strand twists that travel down the back sides of your head and meet into a ponytail, then incorporate kinky coils or smaller twists into the ponytail section for a textured, dimensional finish that celebrates your natural curl pattern.
Why Two-Strand Twists Work Differently
Two-strand twists define curl pattern beautifully and require less precision than braids—there’s no “wrong way” as long as you’re twisting consistently. This style is ideal if you find traditional braiding tedious or if your hair texture (especially very coily or kinky hair) gets fuzzy when braided but looks stunning when twisted. The twists also tend to last longer without unraveling because of how the strands grip each other.
Creating the Twist Ponytail
Start by sectioning hair for two twists on either side of your head. Divide the first section into two substantial strands. Twist one strand clockwise while twisting the other counterclockwise, then wrap them around each other as you work downward. Keep your twists thick and loose enough that they feel soft but defined. Travel the twists down the back sides toward the nape of your neck. Once both twists meet your ponytail section, secure everything with a tie. From here, you can leave the ponytail smooth and straight, or divide it into 3-4 sections and two-strand twist each section for extra texture and visual interest.
Finishing Touches for Maximum Impact
- Coil definition: Apply a light curl cream or leave-in conditioner to the ponytail section before twisting for enhanced coil definition and shine.
- Tapered ends: Rather than blunt ponytail ends, let some twists hang looser and unraveled slightly at the very bottom for a trendy, intentional tapered effect.
- Scalp health: Two-strand twists are gentler on the scalp than tight braids, making them a solid choice for frequent styling without sacrificing your hairline.
4. Twisted Double Braids Crown Style
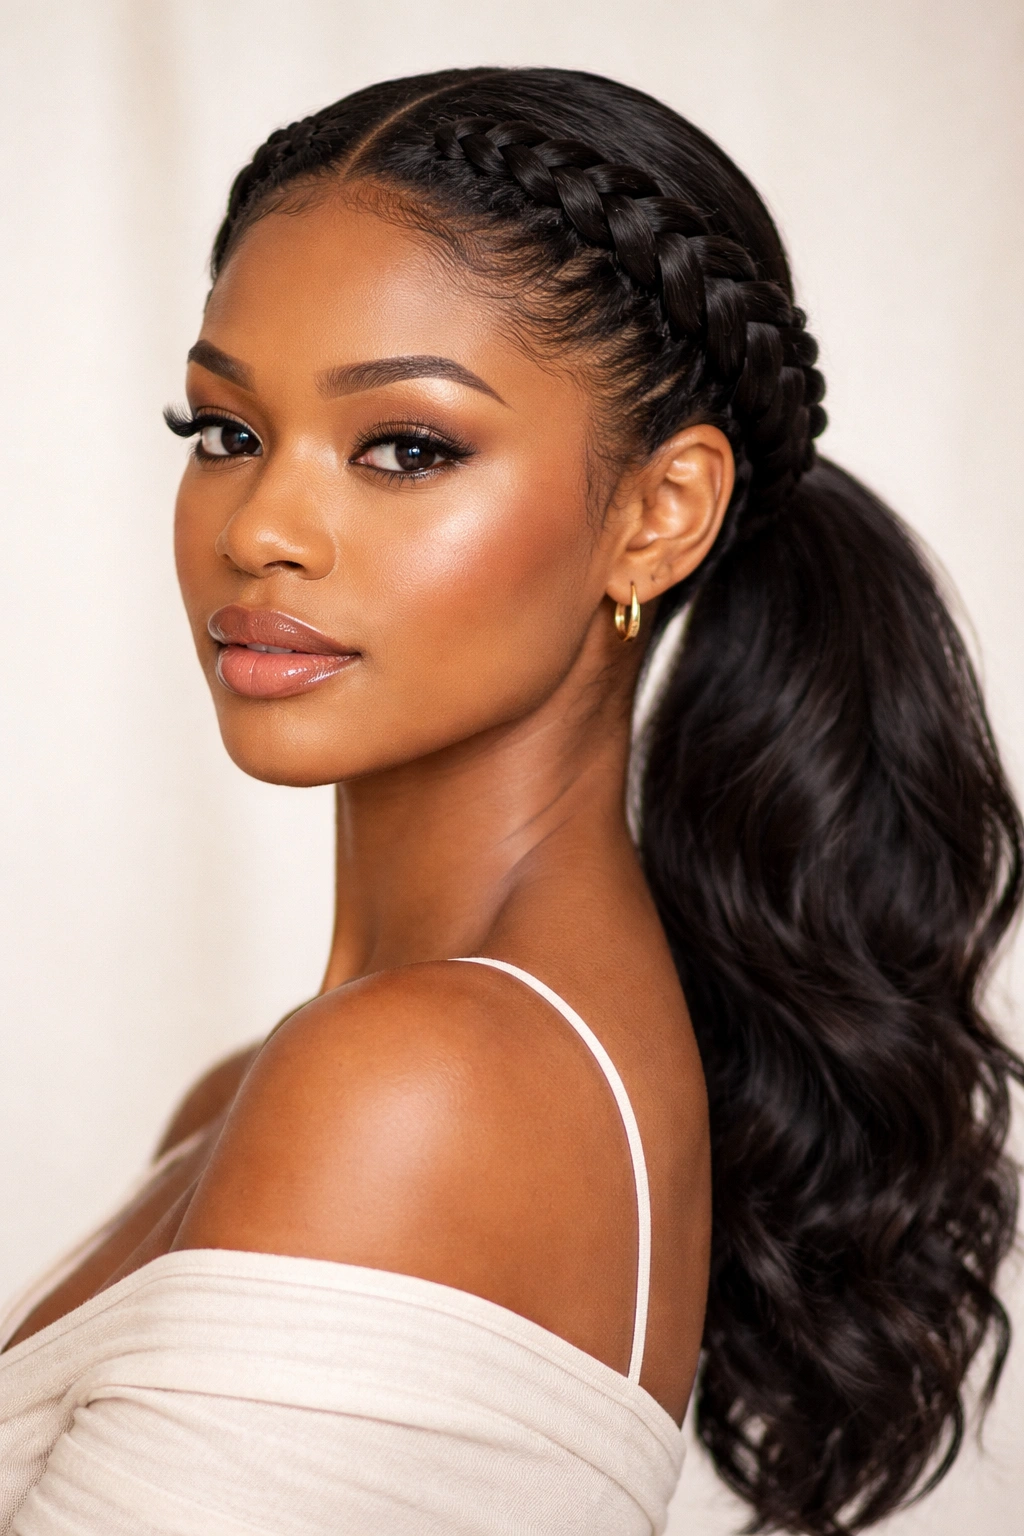
This regal style positions two braids as a crown around the top and back of your head, meeting at a low ponytail at the nape. It’s the perfect style when you want something more polished than a casual puff but still protective and beautiful. The crown placement draws attention upward and creates an elegant frame that works for professional settings, special events, or whenever you want to feel extra put-together.
The Crown Placement Strategy
Instead of creating side-swept braids, you’ll position both braids along the perimeter of your head—one along the left side starting near your temple, traveling back and around toward the right ear. The second braid mirrors this path on the right side. Both braids angle downward toward the nape of your neck, where they meet with loose hair to form a low ponytail. This creates a literal crown effect that’s both protective and visually striking.
Braid Patterns That Work Best
For a crown, a standard three-strand French braid works beautifully because it sits prominently and shows off clean, defined lines. A Dutch braid creates a slightly more dimensional look with the braid sitting more on top of the hair. A feed-in braid offers the most scalp-friendly option if you’re wearing this style frequently. Choose based on your scalp sensitivity, skill level, and how much definition you want the braid to have.
Elevating the Final Look
- Accessory placement: A decorative hair clip, wooden bead, or hair cuff positioned where the braids meet the ponytail instantly elevates the style and gives it intentional polish.
- Ponytail texture: Keep the gathered ponytail smooth and straight for formal occasions, or create voluminous curls or coils for a softer, more romantic vibe.
- Braid tightness: A slightly tighter braid holds the crown shape all day, but don’t go so tight that your edges hurt or your scalp feels stressed.
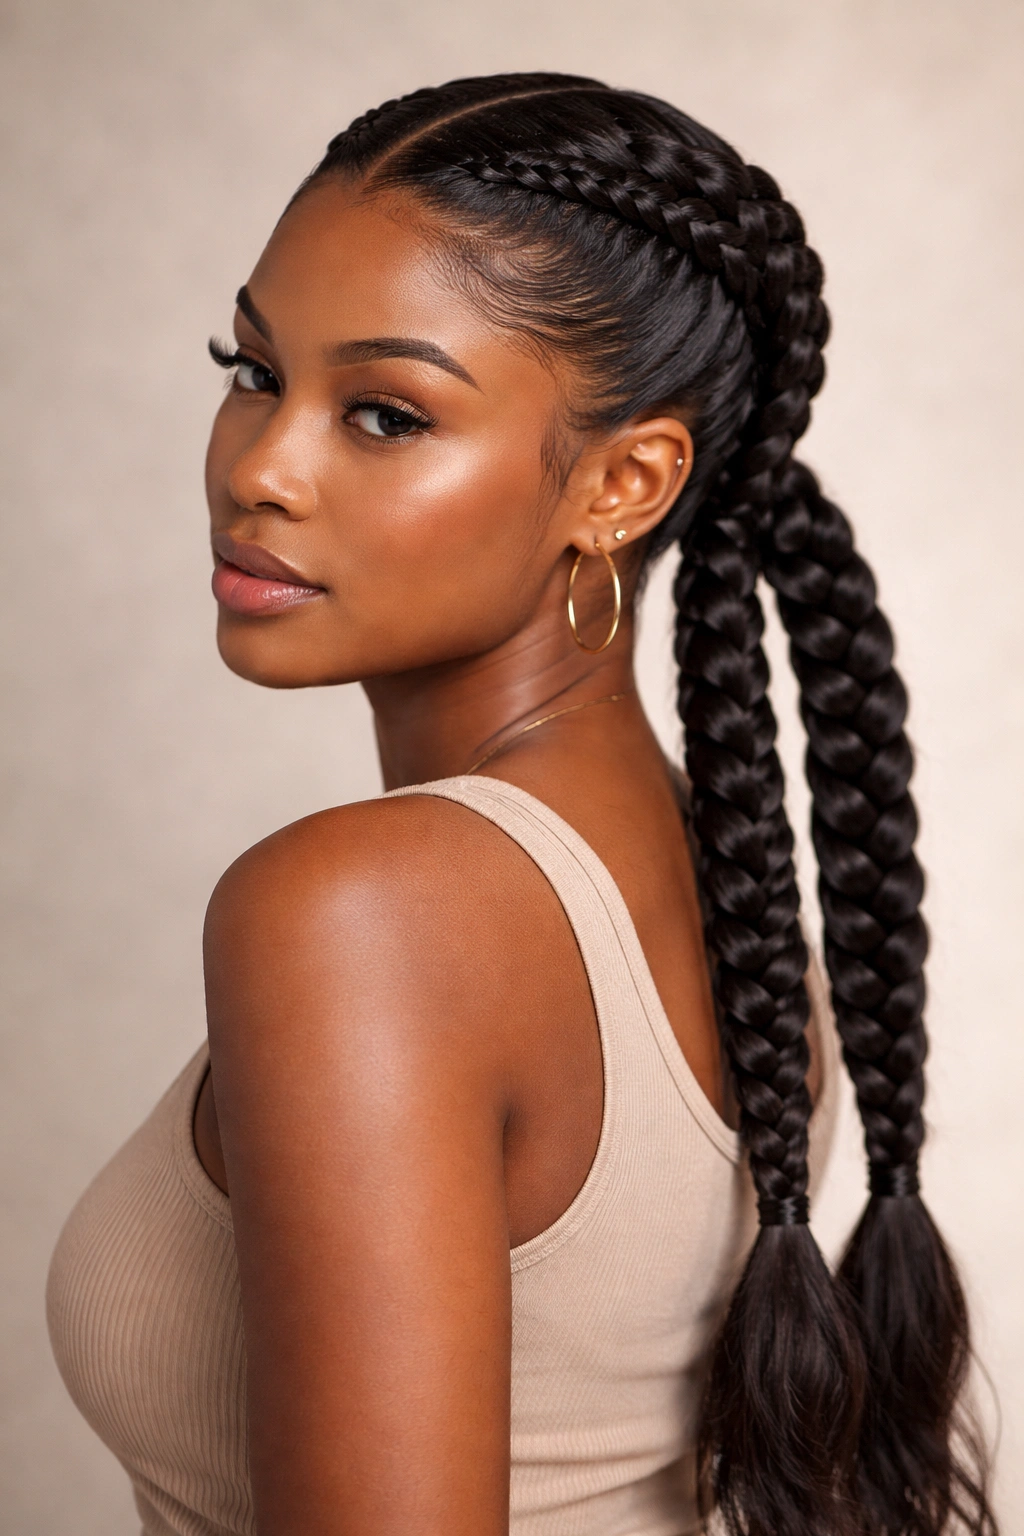
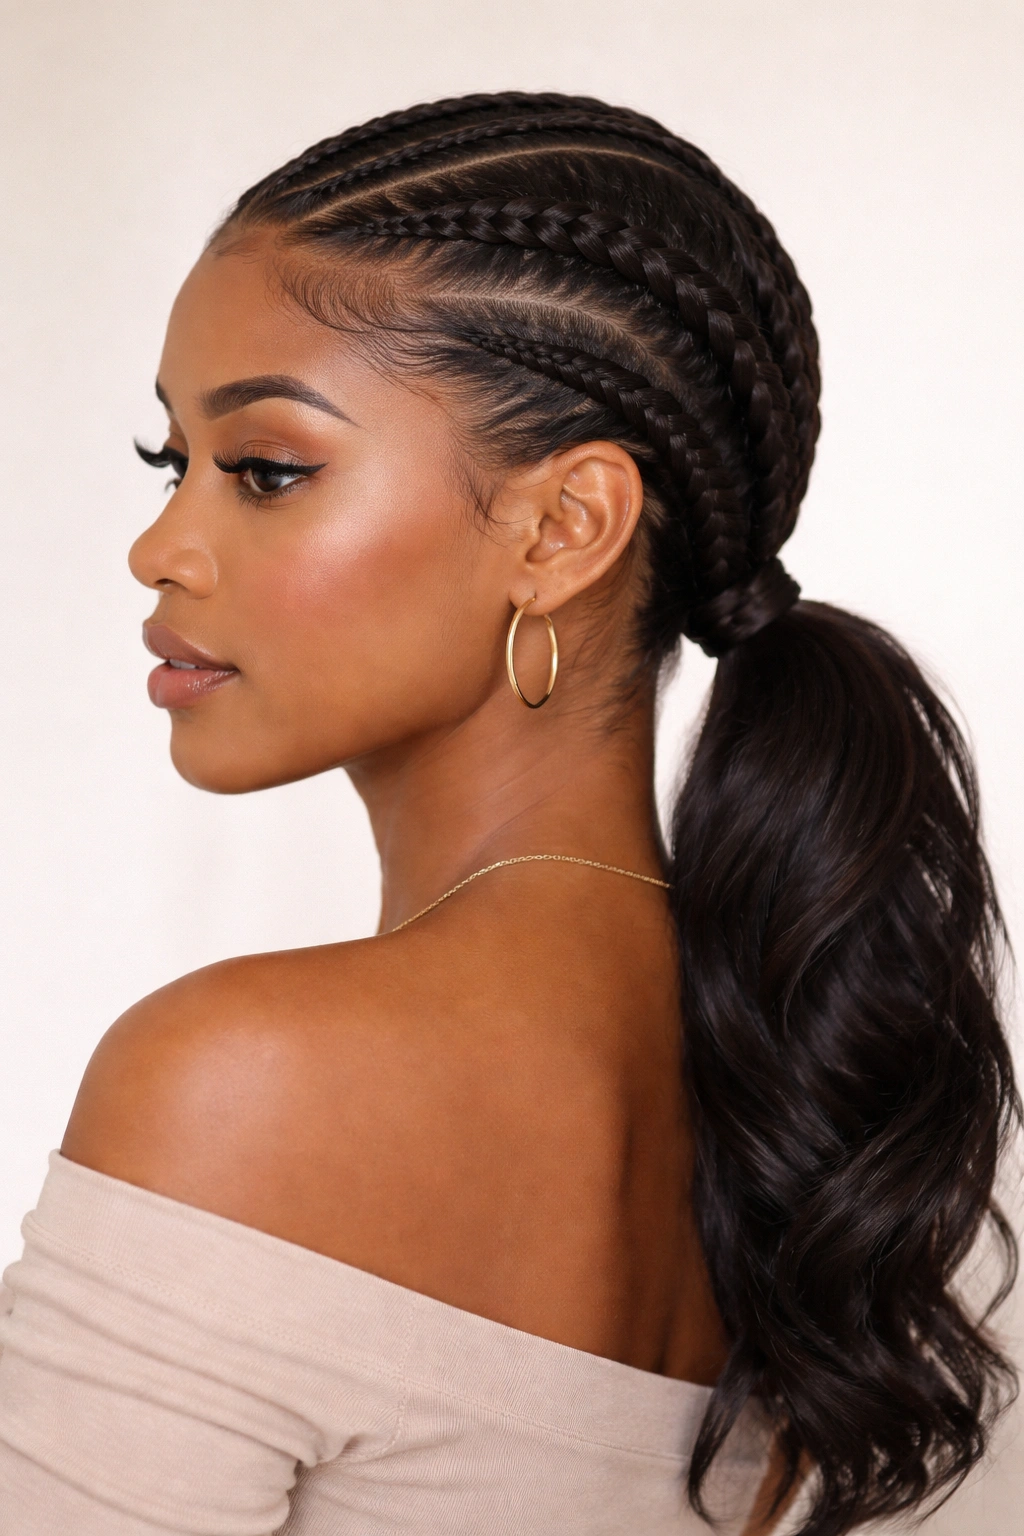
5. Double Dutch Braids into High Ponytail
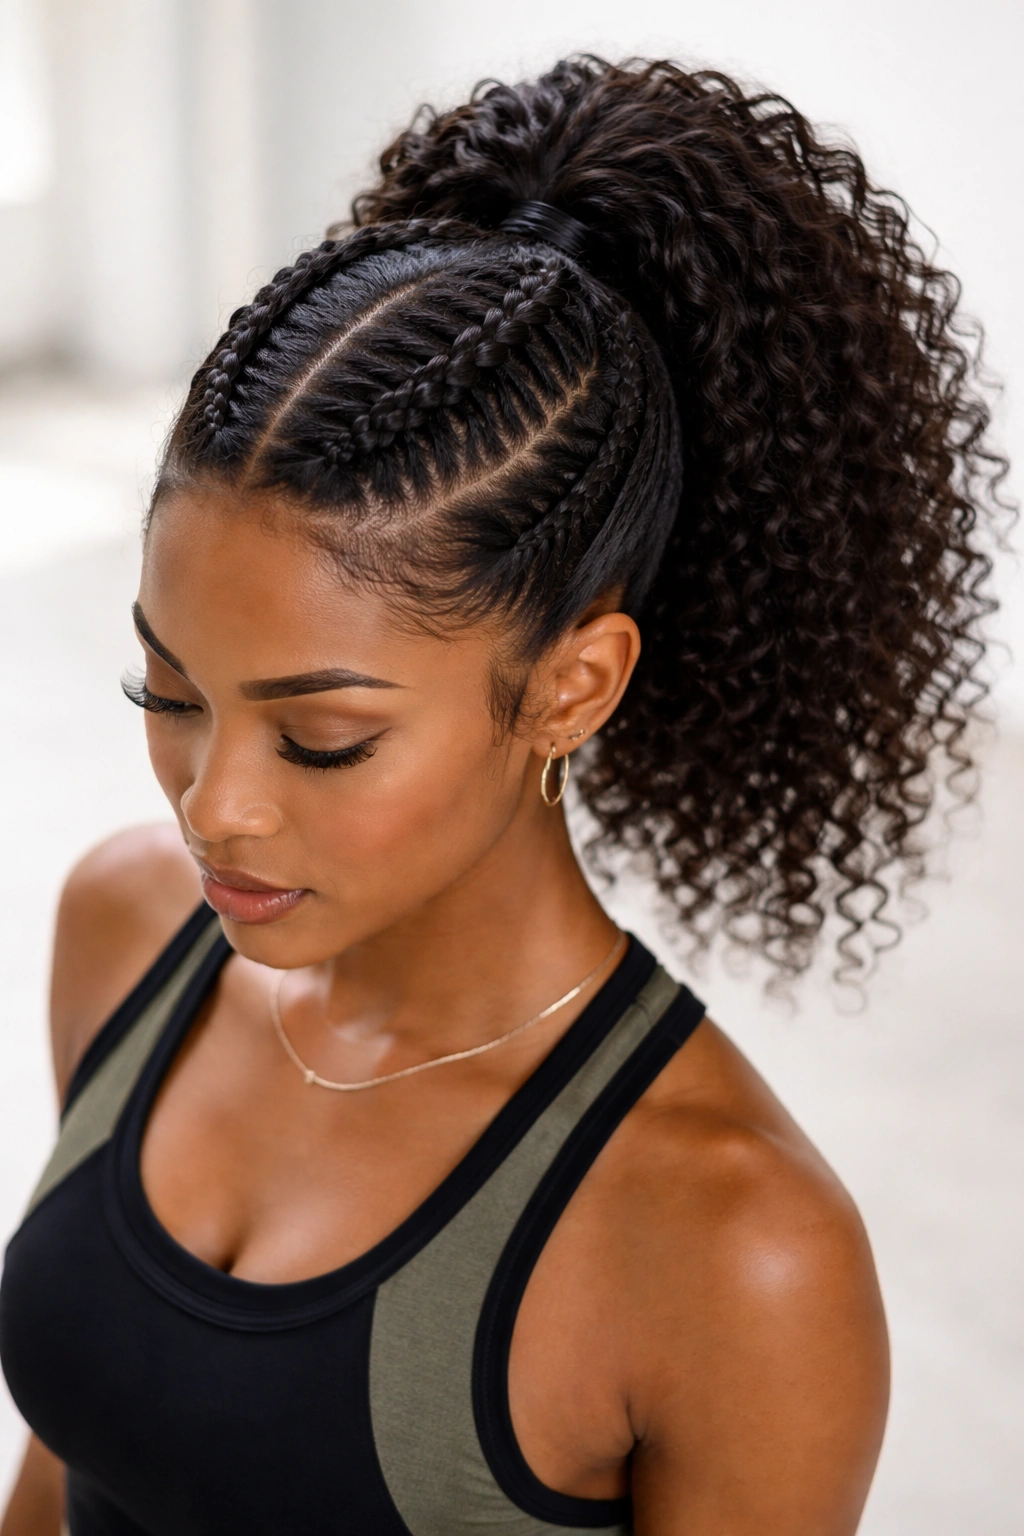
This sporty, energetic style combines two Dutch braids (which sit on top of the hair for maximum visibility) into a high, bouncy ponytail. It’s the style choice for gym days, active outings, or anytime you want your braids to be the star of the show rather than subtle framing elements. The Dutch braids create a bold visual statement, and the high ponytail keeps everything secure and off your face.
Understanding Dutch Braids vs. French Braids
The main difference is the direction: French braids go over (you pick up hair and braid on top of the existing braid), while Dutch braids go under (you pick up hair and braid underneath). Dutch braids sit more prominently on the scalp and create a puffier, more textured appearance. For double braids into a high ponytail, Dutch braids are ideal because they give you visual interest and make it clear you’ve styled intentionally—this isn’t a rushed morning look, it’s a statement.
Execution for Maximum Hold
Section your hair into two halves with a center part that runs from your forehead back through your crown. Start your first Dutch braid at the front hairline, picking up sections of hair and braiding under as you work straight back toward your crown. Keep the braid centered in its section and aim for consistent thickness throughout. Repeat on the other side. Both braids should travel straight back and converge at the crown area, where you’ll gather all your hair into a high, tight ponytail. Make sure your braids are tight enough to withstand movement and sweat if you’re wearing this for activity.
Best Scenarios and Maintenance Tips
- Gym readiness: This style genuinely holds through workouts. Even if you sweat heavily, the braids and ponytail stay in place without slipping.
- Sweat management: Tie a lightweight scarf or fabric headband low on your forehead if you’re concerned about sweat rolling down your face. This also helps define your edges and adds style.
- Refreshing: Dutch braids frizz slightly faster than other braid types due to their dimension, so a light misting with water and refresher spray mid-week helps them look fresh longer.
6. Thick Box Braid Double Braids with Metallic Wrap
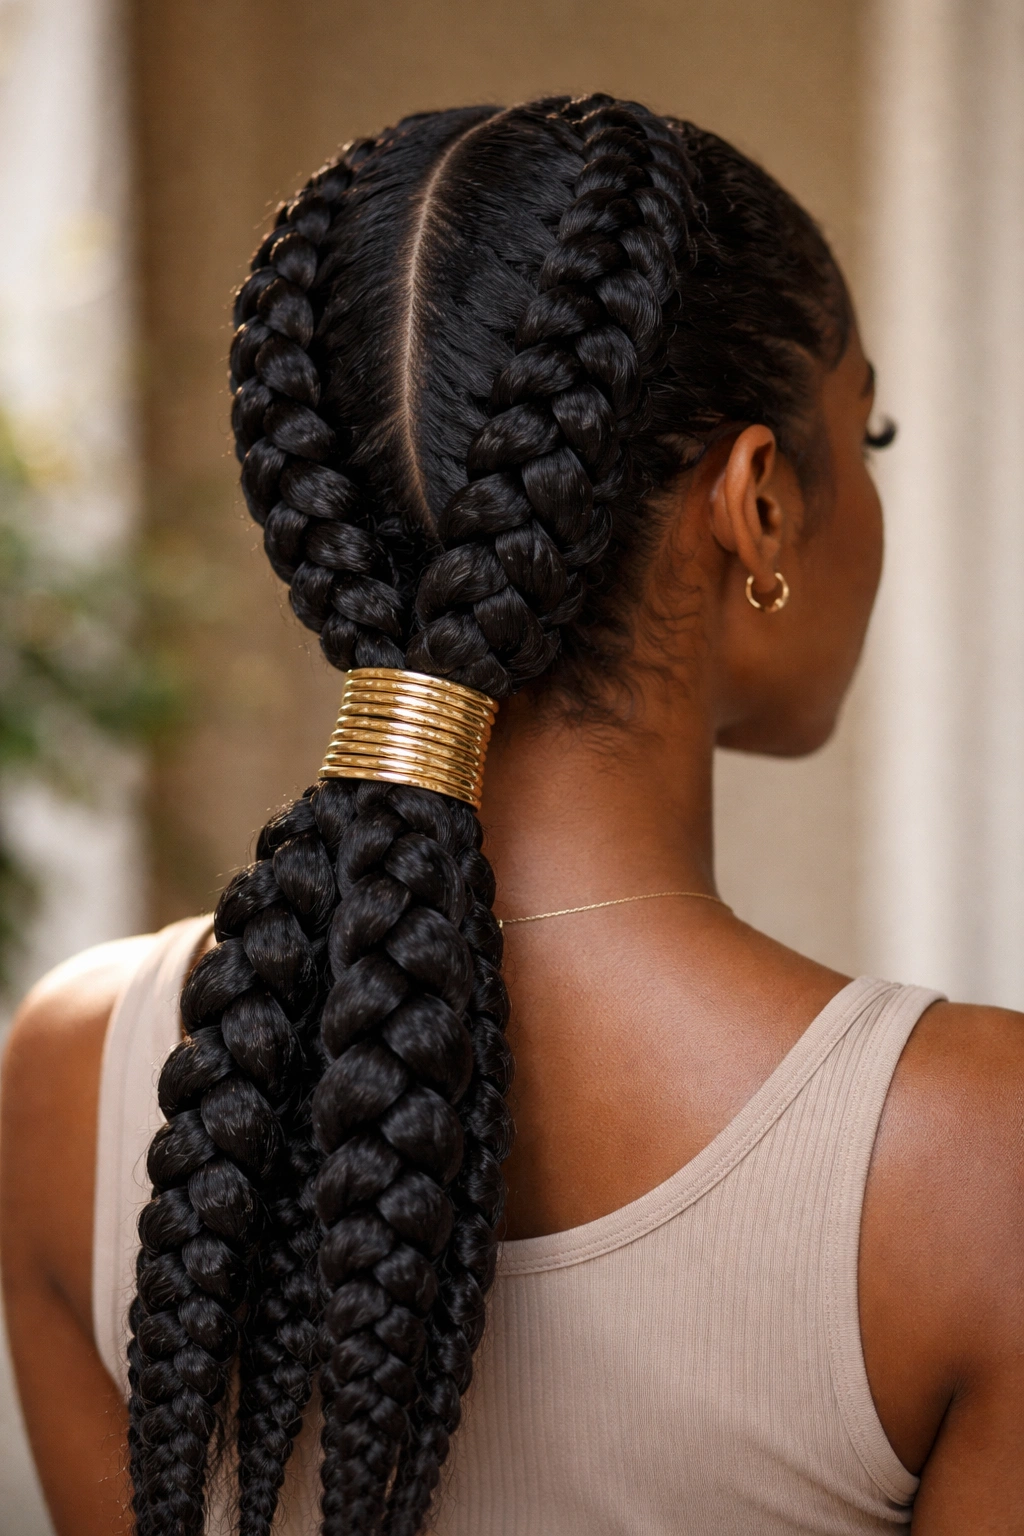
This style combines substantial, statement-making box braids (thicker, square-shaped braids that showcase your natural hair pattern) into a low or mid-height ponytail, with a decorative wrap—think metallic thread, yarn, or fabric—wound around the section where the braids meet the ponytail. It’s bold, modern, and particularly stunning on darker skin tones where the shimmer really pops.
Why Box Braids as Double Braids
Box braids are inherently thicker and more prominent than traditional three-strand braids, so using two box braids creates immediate visual impact. They’re also protective because the thickness means less manipulation of individual strands. Box braids can last longer without frizzing because of their structured, chunky nature. For those with very thick or dense natural hair, box braids are often the only braid style that doesn’t pull uncomfortably.
Creating Box Braids with Precision
A box braid starts with a square section of hair divided into three strands (or sometimes four for a quad braid, which is even chunkier). You braid using the standard over-under method, keeping your strands even and your braid square-shaped rather than rounded. The key is dividing your sections cleanly—use your fingers or a rat-tail comb to create crisp lines before you start braiding. The braid should have visible angles and clean edges that look intentional and structured.
The Decorative Wrap Element
Once both box braids are complete and secured into a ponytail, wrap decorative thread, yarn, or metallic fabric tightly around the elastic or the base where the braids meet the ponytail. Secure the wrap by tucking the ends underneath or tying them off. This single element transforms the look from simple to striking. Gold wrap on dark hair is classic. Silver and holographic wraps feel modern. Colorful embroidery thread adds playfulness.
Longevity and Care
- Braid durability: Box braids hold their shape incredibly well, often lasting 1-2 weeks with minimal frizzing if you braid tightly and maintain them properly.
- Scalp protection: The thickness means genuinely less tension and manipulation, making this ideal if you’re aiming for protective styling.
- Moisture: Box braids can trap moisture against the scalp, so use a light oil or leave-in conditioner on your scalp 2-3 times per week to maintain hydration.
7. Rope Twist Double Braids into Sleek Bun
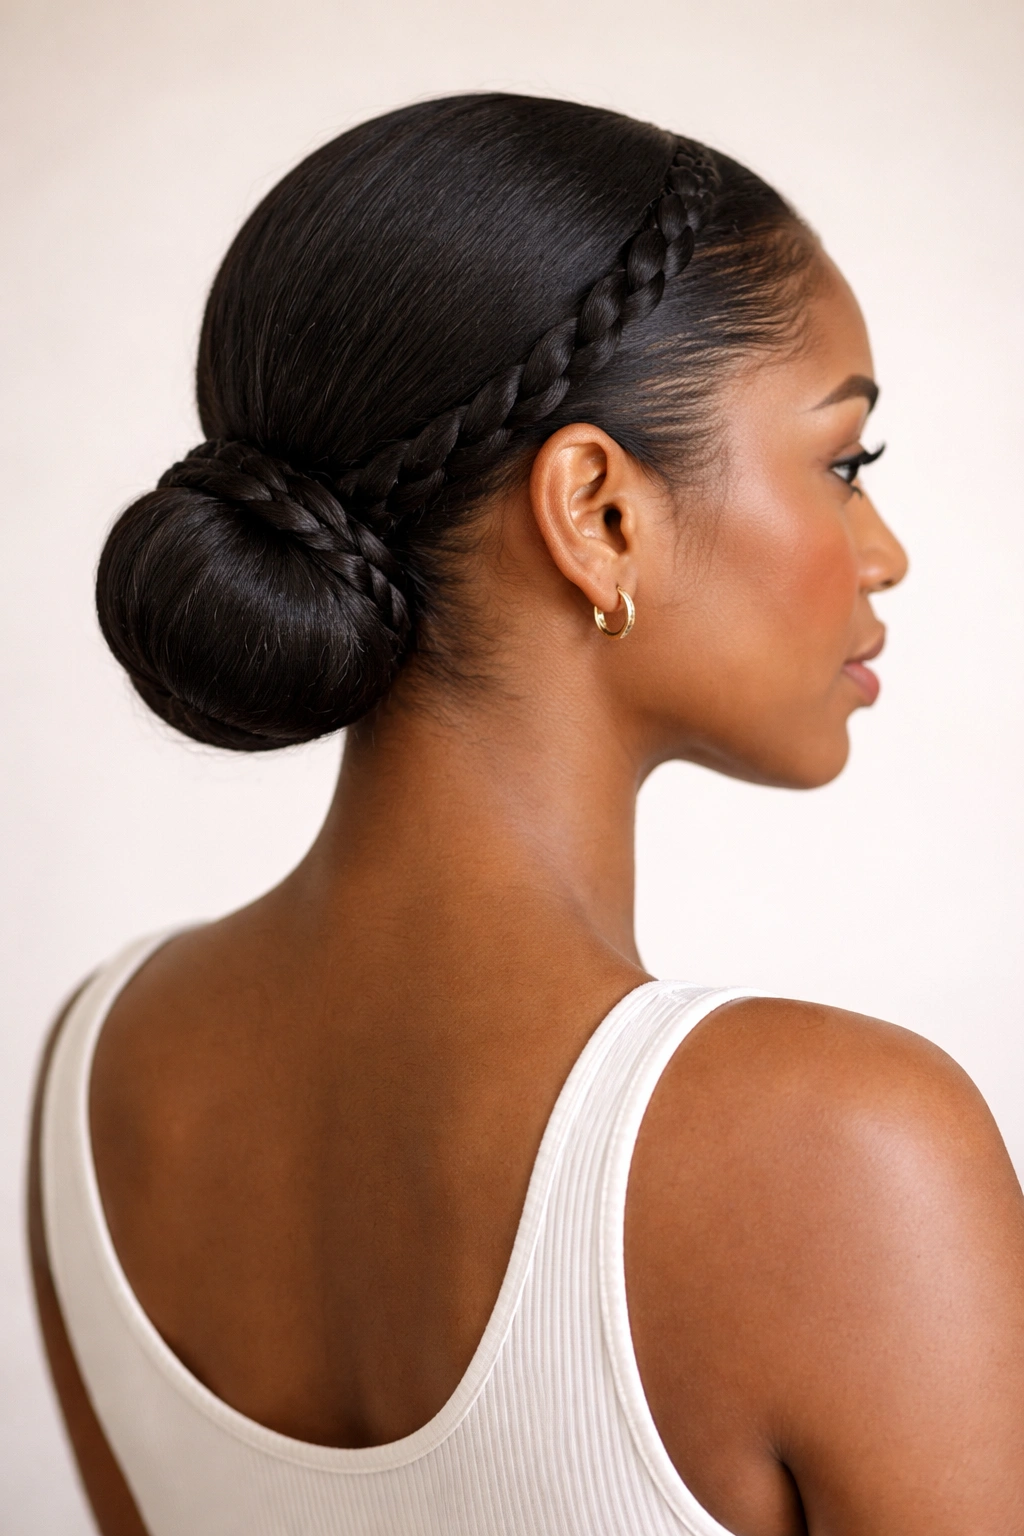
Rope twists create a completely different aesthetic from traditional braids—they’re smooth, slightly rope-like in texture, and create clean lines that feel modern and refined. This style pairs rope twists with a gathered bun at the nape, making it the ultimate professional, polished double braid option for work, interviews, dates, or formal events.
Understanding Rope Twists
A rope twist uses only two strands of hair twisted tightly together, rather than three or more strands braided. The result is smooth, shiny, and elegant—especially on natural hair where the twist enhances your curl definition without the visual bulk of a traditional braid. Rope twists require less hair than braids, so they’re ideal if you have finer hair or if you want a sleeker overall look.
Creating Smooth Rope Twists
Section your hair for two twists, one on each side. Divide the first section into two substantial strands. Twist one strand clockwise and the other counterclockwise, then wrap them around each other as you work downward, maintaining consistent tension. The twist should feel smooth and defined, not chunky. Both twists should travel down the back sides of your head toward the nape. Once they reach the base, gather both twists plus any remaining loose hair into a bun, twisting the entire section into a coil and wrapping it around the base to secure.
Professional Styling Notes
- Sleekness factor: Use a light smoothing cream or gel on your edges and on the rope twists themselves for a seamless, polished look that photographs beautifully.
- Bun height: A bun at the nape reads as formal and professional. A bun at the crown reads as casual or creative. Choose your height based on the occasion.
- Longevity: Rope twist buns hold beautifully all day and into the next day if you sleep on a silk or satin pillowcase.
8. Flat Twist Double Braids Statement Style
Flat twists are similar to cornrows or Dutch braids but use only two strands twisted together rather than three strands braided. They’re incredibly versatile, visually striking, and perfect if you want something that looks intentionally sculptural and artistic rather than traditionally braided. Two thick flat twists create a strong focal point and work beautifully as a style statement piece.
The Flat Twist Technique
A flat twist starts with two strands of hair at the root and twists them together while simultaneously picking up sections of hair from the sides, similar to how you’d create a cornrow but with twisting instead of braiding. The result is a flat, dimensional line of texture that appears to be braided but has a different quality—smoother and less chunky, with visible depth and visual interest.
Positioning for Maximum Impact
Position your two flat twists either straight back down the center of your head (creating a symmetrical, balanced look), diagonally from temple to nape (creating a dynamic, asymmetrical effect), or even in a curved pattern (creating an artistic, unconventional vibe). The positioning itself is the statement—you’re not aiming for a neutral hairstyle; you’re creating art. Once the twists meet your ponytail section, gather everything together and choose a finish (straight ponytail, puff, curls, coils) that complements the boldness of the flat twists.
Skill Level and Precision
- Learning curve: Flat twists require more practice than regular braids to get smooth and even, especially when picking up sections cleanly. Don’t get discouraged if your first attempts are uneven.
- Camera-ready: Because of their sculptural quality, flat twists photograph incredibly well and make any hairstyle look more intentional and polished.
- Texture showcasing: Flat twists beautifully display your natural curl pattern, especially if you have very coily or textured hair that shows the definition between the twists.
9. Curved Double Braids into Low Pony
Rather than traveling straight back, this style curves both braids along the sides of your head in a slightly swooping pattern before they meet into a low ponytail at the nape. The curved path is more interesting to look at than straight braids and creates a softer, more romantic vibe while still being protective and practical.
Creating the Curved Path
Start your first braid at your temple but angle it to curve slightly backward and downward rather than traveling straight. It should follow a path that’s roughly the shape of a gentle parenthesis. The braid curves behind your ear and travels down the back side of your head before meeting the ponytail section at the nape. Repeat on the other side with the braid curving in a mirror-image path. The two curves create a soft, intentional frame for your face and neck.
Why Curved Braids Feel Different
Curved braids soften the overall look compared to geometric, straight braids. They’re slightly more forgiving because small imperfections are less visible in a curved line than in a straight one. They’re also flattering on wider face shapes because the curves create vertical lines rather than horizontal ones. And they just feel intentional—like you spent time thinking about the best way to frame your face, not like you braided on autopilot.
Low Ponytail Styling Options
- Sleek and smooth: Brush the ponytail smooth and add shine serum for a sophisticated look.
- Loose and textured: Leave the ponytail section with its natural texture showing, maybe adding a curl cream to enhance coils.
- Decorated: Add a hair cuff, wrap, or clip at the ponytail base to draw attention to the gathering point.
- Length playing: If you have longer hair, let the ponytail drape down your back. If you have shorter hair, the low gathering point sits at the nape and creates a sleek, compact look.
10. Mixed Braid Double Braids with Accessories

This final style is about creative freedom and personal expression. You’ll combine two different braid types—perhaps one Dutch braid and one rope twist, or one three-strand braid and one four-strand braid—into a ponytail, and then accessorize intentionally with clips, cuffs, beads, or wraps that reflect your style and personality. This approach works because natural hair is endlessly versatile, and mixing techniques creates visual interest and tells the world that you’re intentional about how you show up.
Choosing Your Braid Combination
Think about what interests you aesthetically. Maybe you love the sculptural quality of Dutch braids but want one side to feel softer, so you pair it with a rope twist. Maybe you want one side to be chunky and dimensional (a four-strand braid or box braid) and the other side to be sleek and smooth (a rope twist or feed-in braid). Maybe you want both sides to be technically identical braids but with one braided tightly and one braided more loosely to create visual variety. The combination is entirely up to you.
Accessory Strategy
- Intentional placement: Rather than randomly adorning your braids, choose one focal point—maybe just the ponytail base, or perhaps one accent bead on one braid. Restraint makes accessories look sophisticated rather than chaotic.
- Color coordination: Match your accessory metals to your skin undertone (gold for warm undertones, silver for cool undertones, rose gold if you’re not sure) or match the accent color to an outfit you wear regularly.
- Secure everything: Make sure all clips and wraps are genuinely secure. A clip that falls out mid-day ruins the whole vibe.
- Personal meaning: Choose accessories that reflect something about you—a particular culture, a hobby, a color that makes you feel powerful. The best accessories tell a story.
Creating a Signature Look
Developing a signature hairstyle is part of building your personal aesthetic. Maybe mixed braids with gold cuffs becomes your thing. Maybe you wear this style weekly because it’s protective, beautiful, and entirely you. That intentionality and consistency is what makes a hairstyle feel like a signature look rather than just a random style you tried once.
Final Thoughts
Double braided ponytails offer endless possibilities for protective, beautiful styling that works with your natural hair rather than against it. Whether you go classic with side-swept braids, bold with Dutch braids into a high ponytail, or creative with mixed techniques and accessories, the key is choosing a style that feels genuine to you and that you enjoy maintaining. These styles can last several days with proper care, they reduce daily manipulation and heat styling, and they give your hair real breaks from daily stressors.
The most important thing is listening to your hair and your scalp. If a style causes pain, creates too much tension, or leaves you with broken hair or damage, adjust it. Braid looser. Try a different pattern. Use a different technique. Your hair’s health is far more important than any single style, no matter how beautiful. When you prioritize comfort and health while also having fun with your styling creativity, you end up with beautiful hair that looks and feels amazing—which is the whole point.