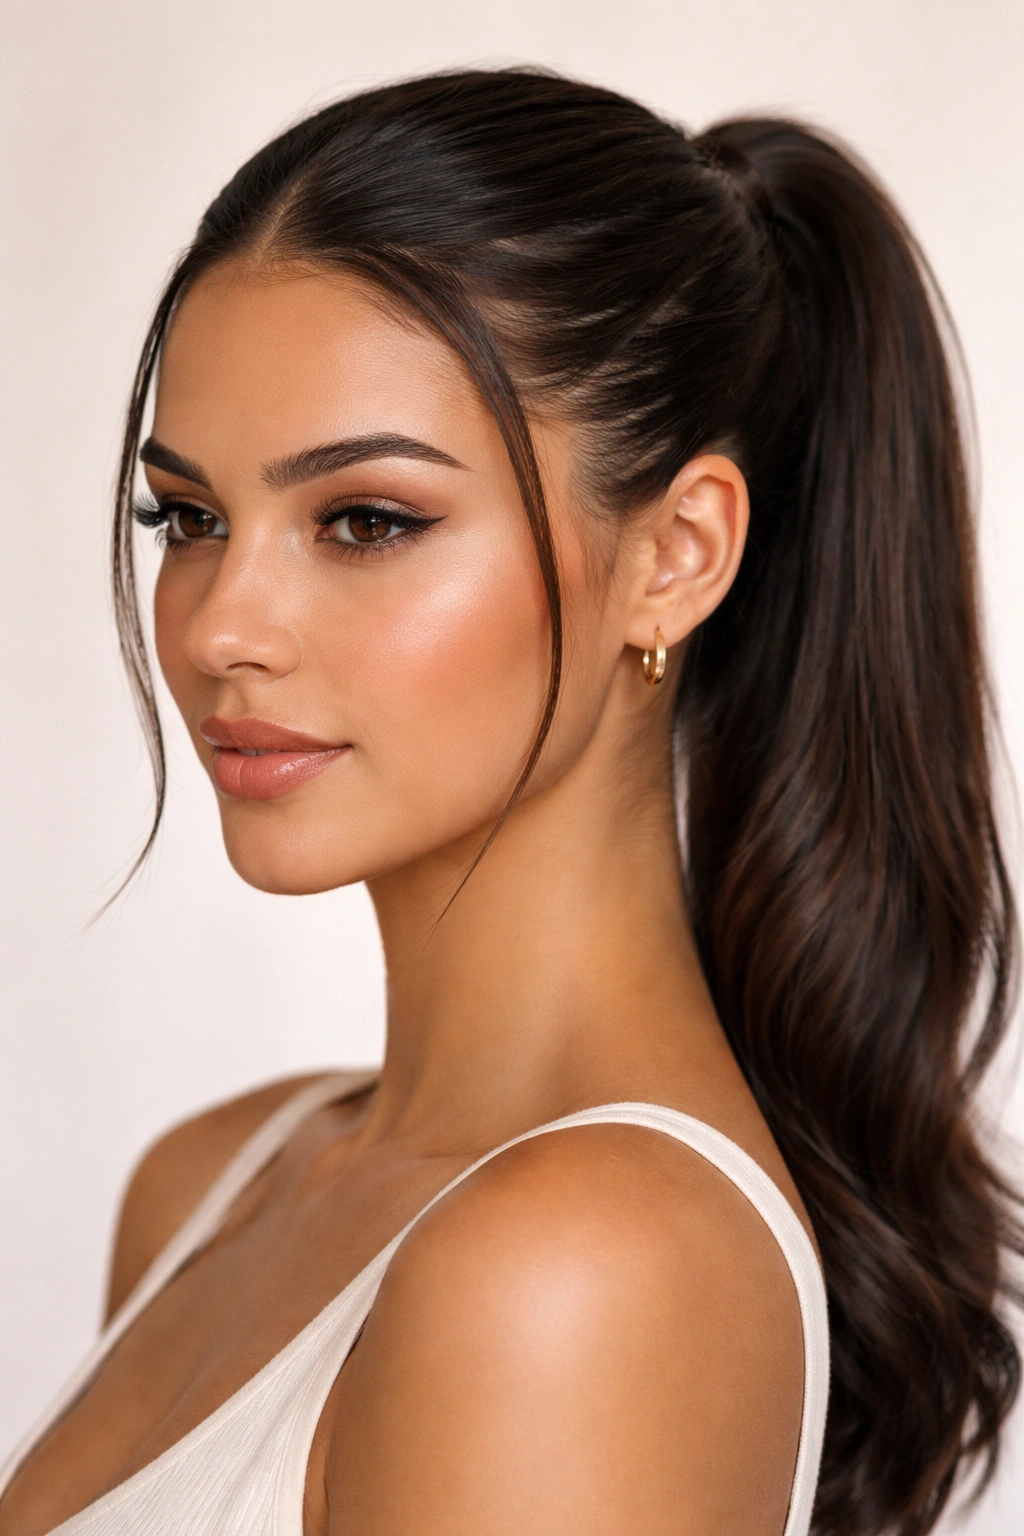
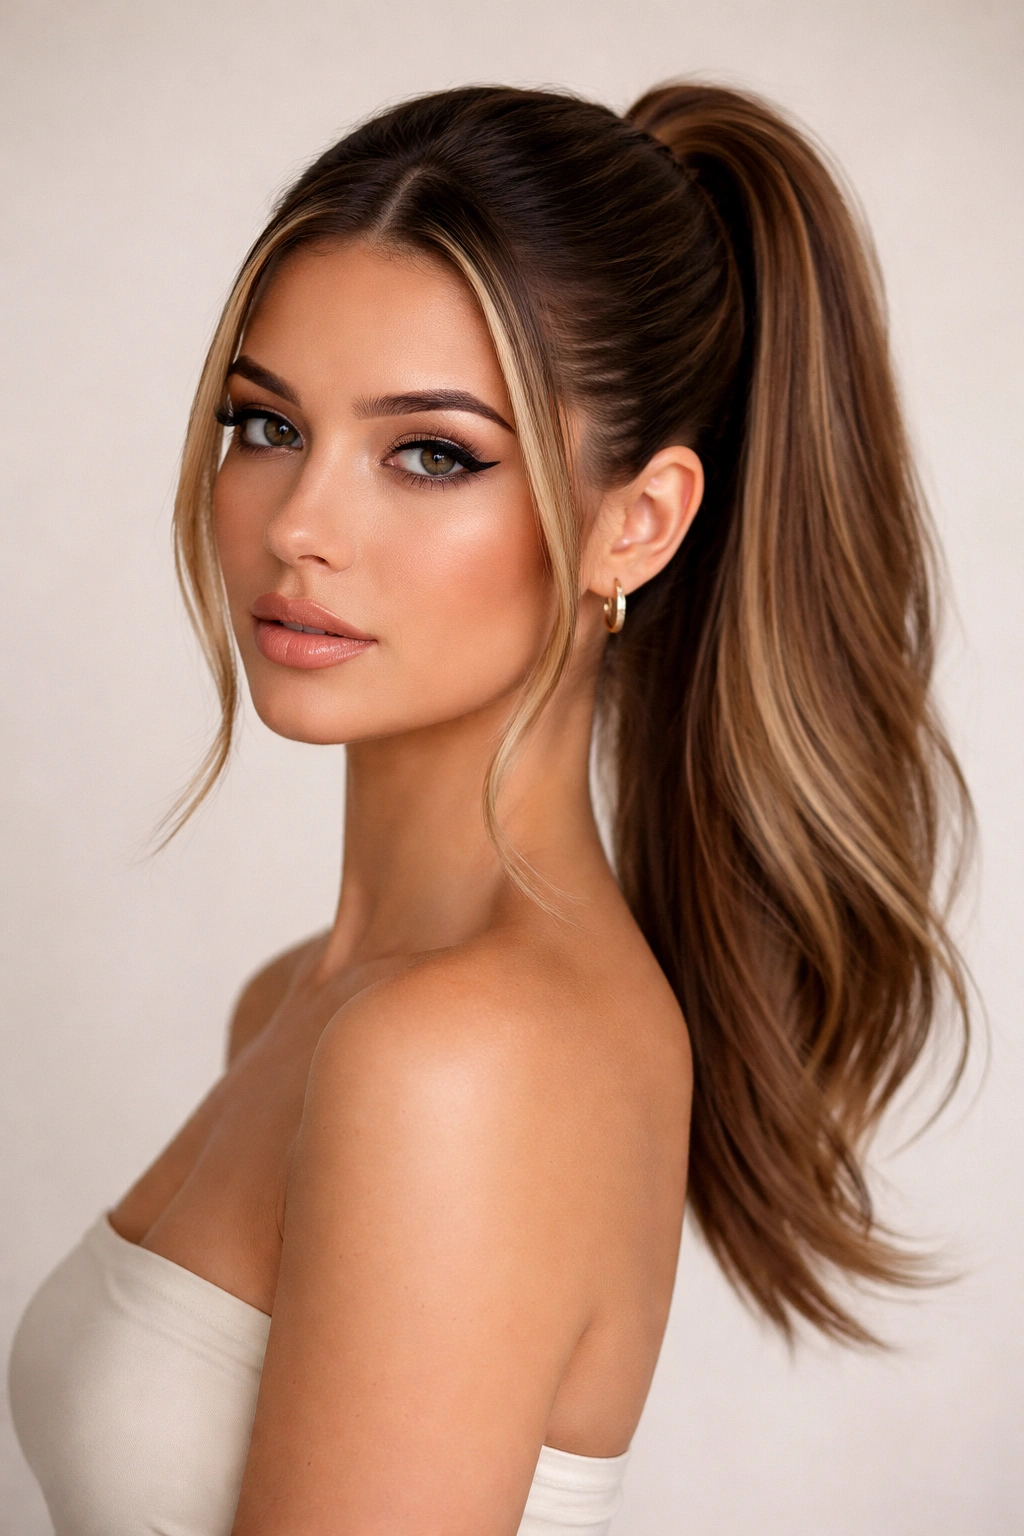
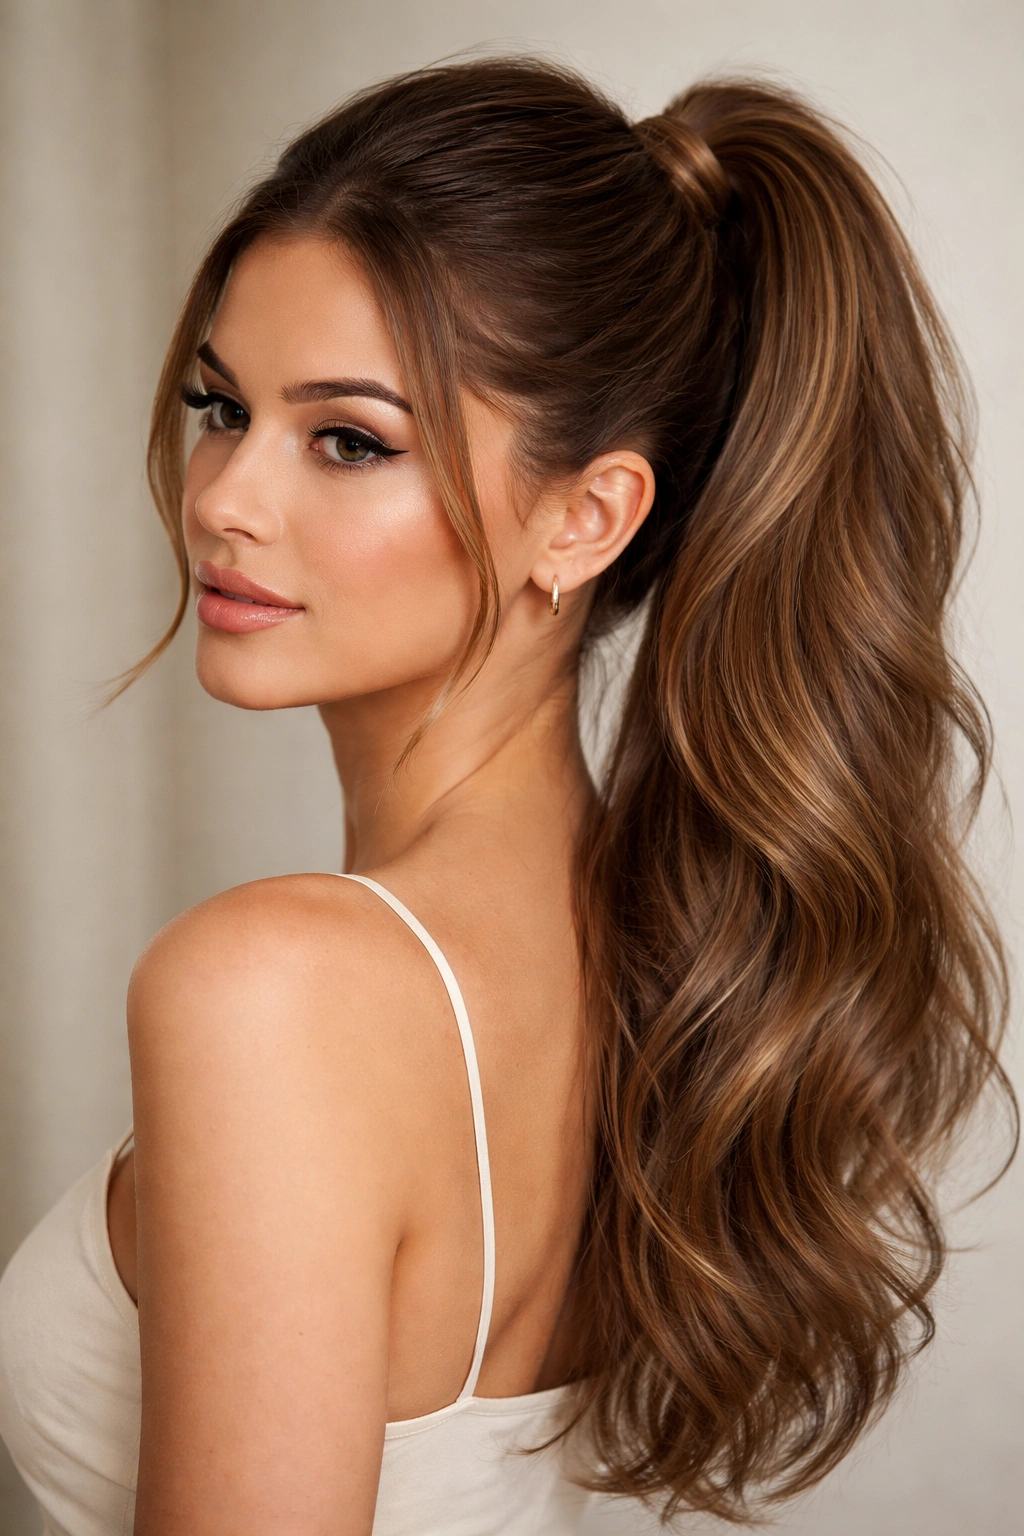
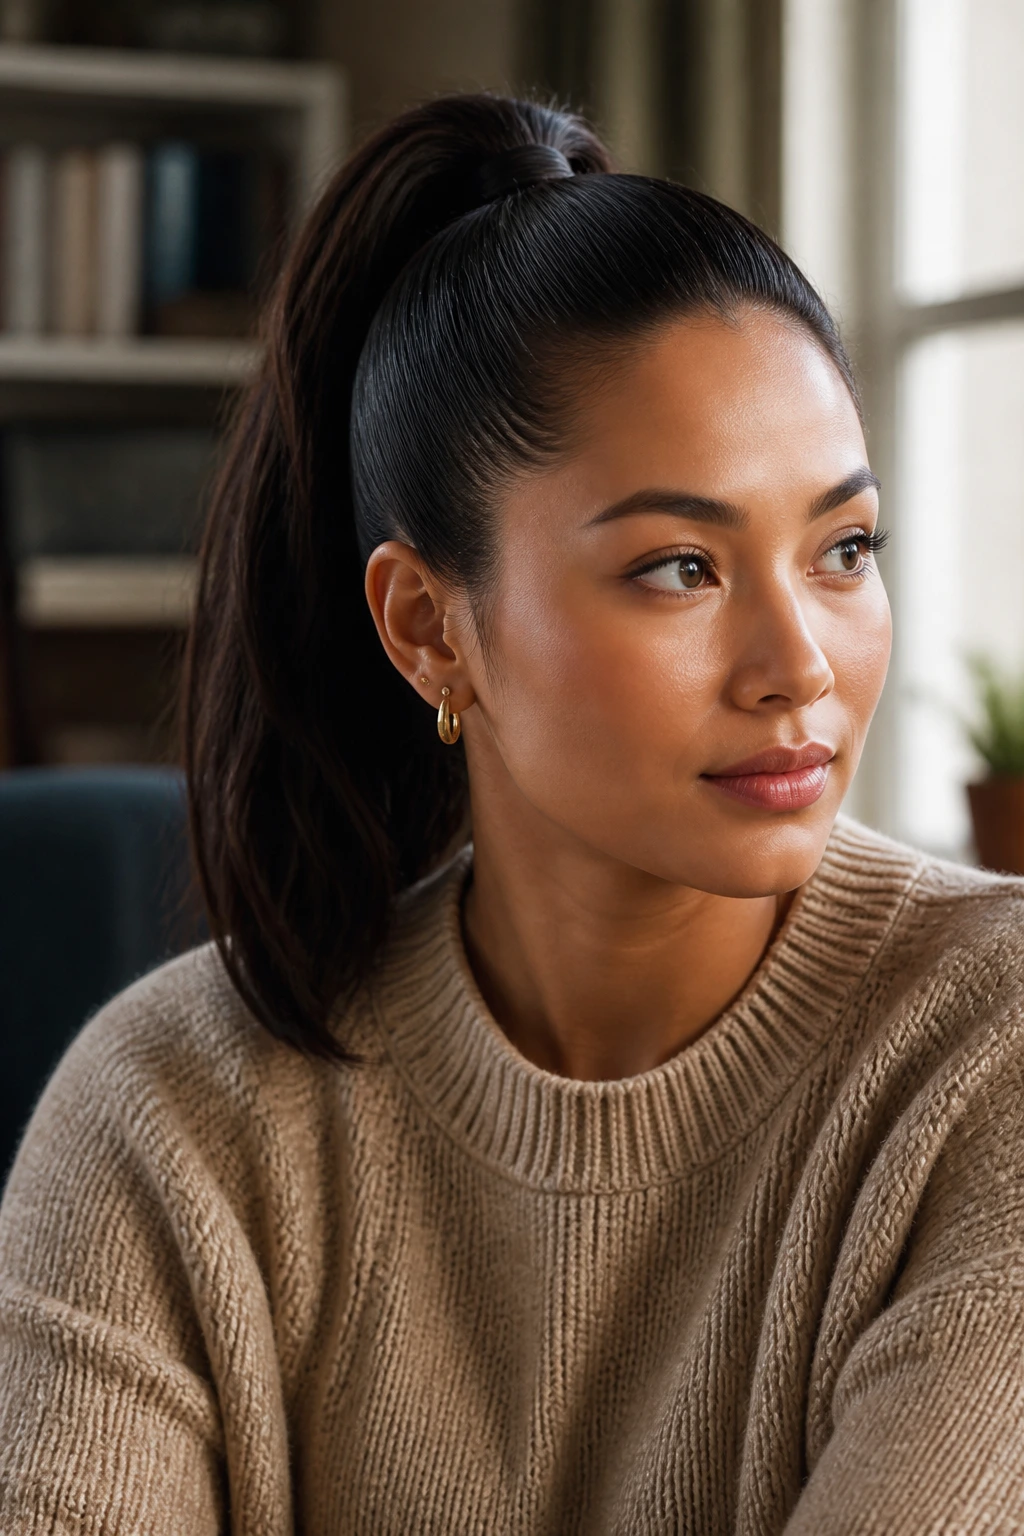
A mid frontal ponytail sits right at that sweet spot—low enough to feel polished and mature, high enough to keep hair away from your face without that severe, all-business vibe. The key word here is “seamless.” A seamless mid frontal ponytail doesn’t have bumps, gaps, or visible elastic. It doesn’t look hastily gathered. Instead, it appears intentional, sculptural, and effortlessly put-together—the kind of style that makes people ask what salon you visit, even if you created it in your bathroom in ten minutes.
The difference between a bumpy ponytail and a seamless one comes down to technique, tool selection, and a few strategic styling tricks that most people never learn. The best mid frontal ponytails use face-framing pieces, texture placement, and smart finishing touches to look like they’re part of your hair’s natural architecture, not something clamped onto it. Whether you prefer sleek and minimalist or tousled and romantic, there’s a mid frontal ponytail style that’ll make you feel put-together without looking overdone.
What makes these styles particularly valuable is their versatility. A seamless mid frontal ponytail works equally well for the office, a date night, a gym session, or a casual weekend. It’s professional enough for video calls, soft enough for intimate settings, and practical enough for an actual workout. You’re not sacrificing style for function or vice versa. This is the rare hairstyle that genuinely does it all.
1. Mid Frontal Ponytail with Sleek Side Part
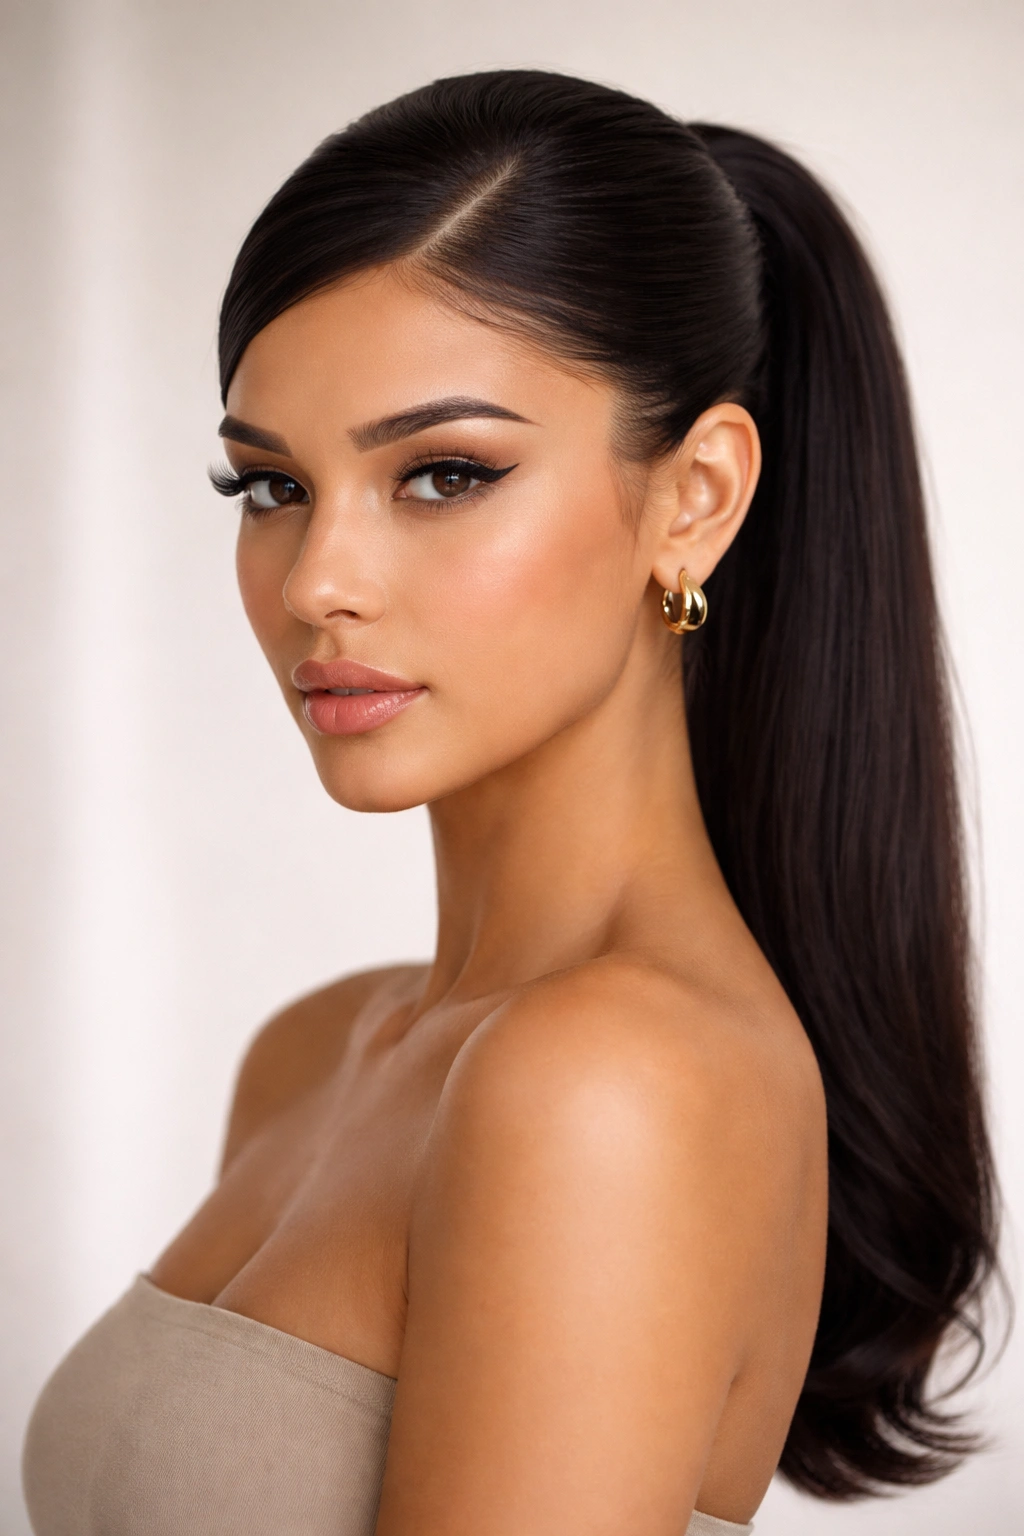
This is the most minimalist version of the mid frontal ponytail, and it’s deceptively difficult to execute well because there’s nowhere to hide. A harsh side part paired with slicked-back hair can read as severe, but the right technique creates something polished and modern instead.
Start by creating a clean, deliberate side part that runs from your natural hairline down the back of your head. Use a fine-tooth comb or even a rattail comb to draw this line precisely—precision here sets the tone for the entire look. On the smaller side (usually the right side if you’re parting left), smooth that section with a smoothing serum or lightweight gel. The goal isn’t to plaster it flat but to create a sense of intentional styling.
Brush your hair back into a mid-height ponytail positioned roughly where your ear would be if you drew an imaginary line straight back. Gather the hair at the crown and back, using a boar-bristle brush to smooth the surface and eliminate flyaways. The sleekness comes from using the right products—a bit of smoothing balm on your fingers, pressed gently over the surface, works better than spraying product that can make hair look wet or hard.
Why This Works for Seamless Hair
The simplicity is actually the point. When a ponytail is too decorated or textured, imperfections hide behind the decoration. A sleek ponytail demands flawless technique, but once you nail the smoothing and securing, it looks impossibly polished. The side part also creates the illusion of face-framing without actually leaving hair down, so you get softness without sacrificing the utility of the ponytail.
How to Achieve the Look
- Use a boar-bristle brush to smooth sections and tame the cuticle layer
- Apply smoothing serum to damp hair before blow-drying for a sleeker foundation
- Secure with a thin, dark elastic that blends with your hair color
- Run your fingers gently over the surface one more time before the elastic fully locks in
- Finish with a light hairspray to keep flyaways from escaping
Pro tip: If your hair tends toward frizz or flyaways, dampen your fingers slightly with water and run them over the smoothed sections just before securing—the moisture helps seal the cuticle and keeps everything in place longer than if you applied product to completely dry hair.
2. Textured Mid Frontal Ponytail with Face-Framing Pieces
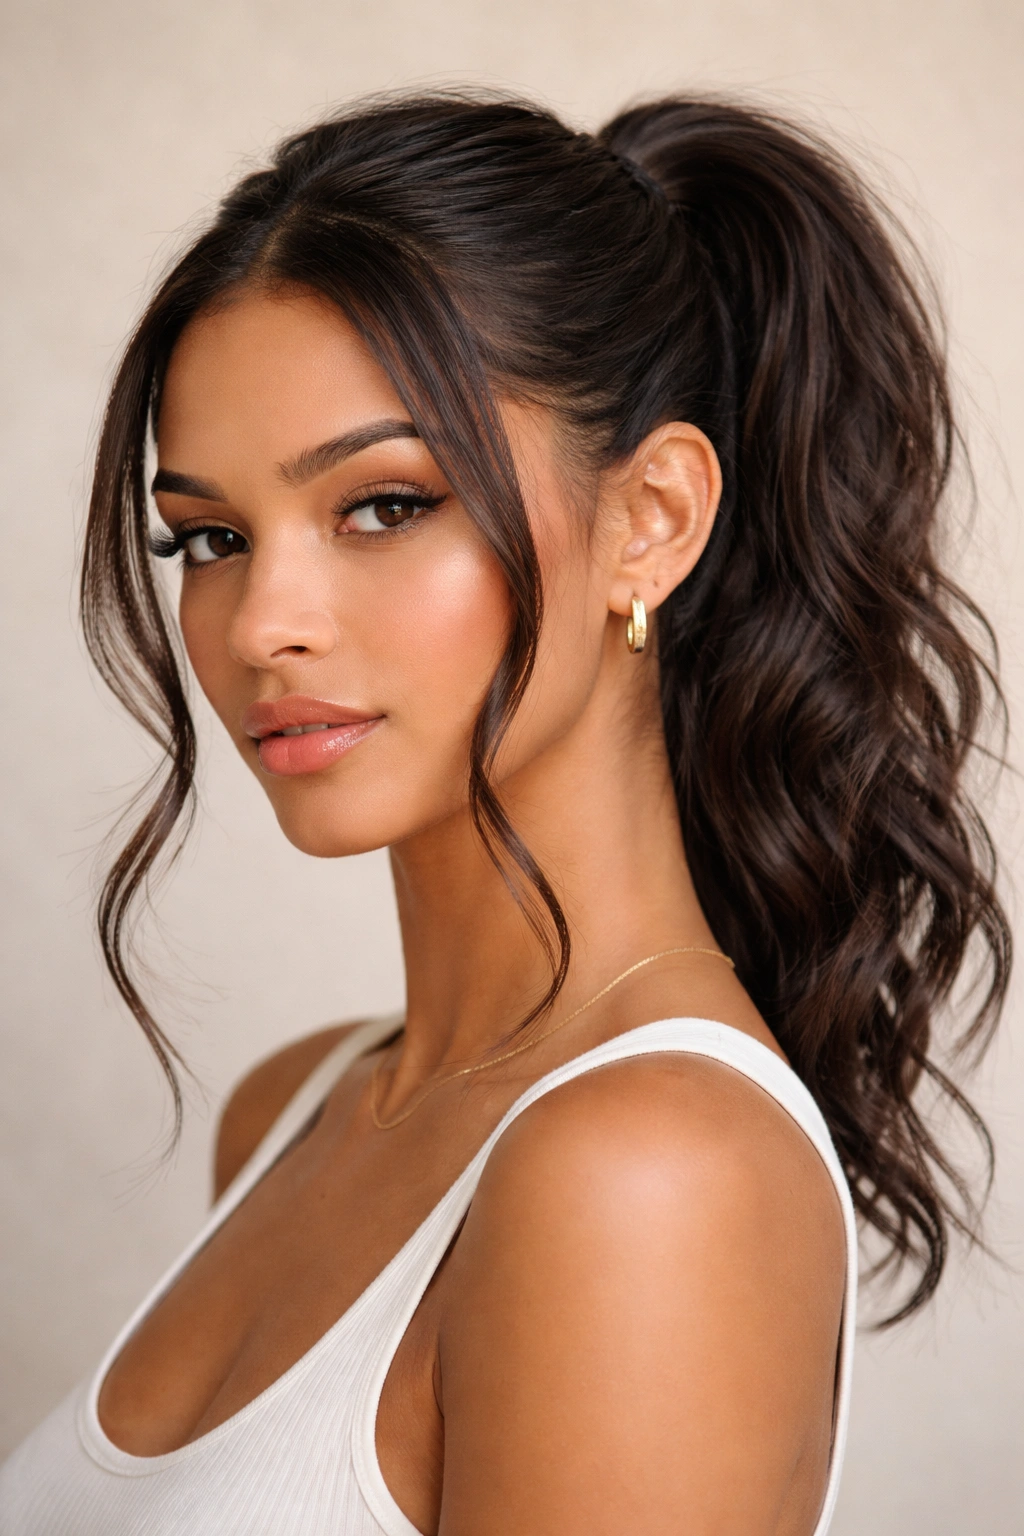
This style takes everything chaotic about texture and channels it into something intentional and beautiful. Instead of fighting your hair’s natural wave or curl, you’re celebrating it while maintaining that seamless ponytail at the base. The face-framing pieces do the visual heavy lifting, softening your features while the secured ponytail stays clean and controlled.
Begin with hair that already has some texture—whether that’s natural waves, curls you’ve created with a curling iron, or volume from a second-day texture spray. The texture prevents the style from feeling too matchy and creates dimension that actually hides minor imperfections at the base of the ponytail. Gather hair into a mid-level ponytail, but before securing it fully, pull out two or three small, deliberate sections from near your face on each side.
These face-framing pieces should be about one inch thick and pulled from the area just above your temple. They frame the face without looking like you forgot to brush them back. Twist or wave these sections slightly if they’re not already textured, securing them loosely behind the base of the ponytail with bobby pins that match your hair color. The textured ponytail itself should feel voluminous at the crown, even if it narrows as it extends down the back.
Why This Works for Seamless Hair
Face-framing pieces act as visual camouflage for the ponytail’s base. Instead of having a stark line where all your hair suddenly gathers, you have these softer, graduated sections that create a transition. Your eye follows the frame-framing texture down to the ponytail, and the effect feels purposefully layered rather than hastily gathered. The texture throughout also forgives you if you have any bumps or imperfect sections at the base—the eye gets distracted by the pretty waves and curls.
How to Achieve the Look
- Create texture throughout your hair before ponytail placement—use a curling iron or allow waves to set overnight
- Section off face-framing pieces and secure separately with bobby pins rather than including them in the main ponytail elastic
- Use a dry texture spray on the face-framing pieces to help them hold their wave without looking stiff
- Keep the main ponytail slightly higher than you might otherwise place it to allow the face-framing pieces to show
- Backcomb the ponytail slightly at the crown for dimension without the weight of all the hair pulled tight
Worth knowing: This style actually looks better on day-two hair than freshly washed hair. The texture holds better, and you get more volume without having to work as hard with styling tools.
3. Mid Ponytail with Soft Braided Crown
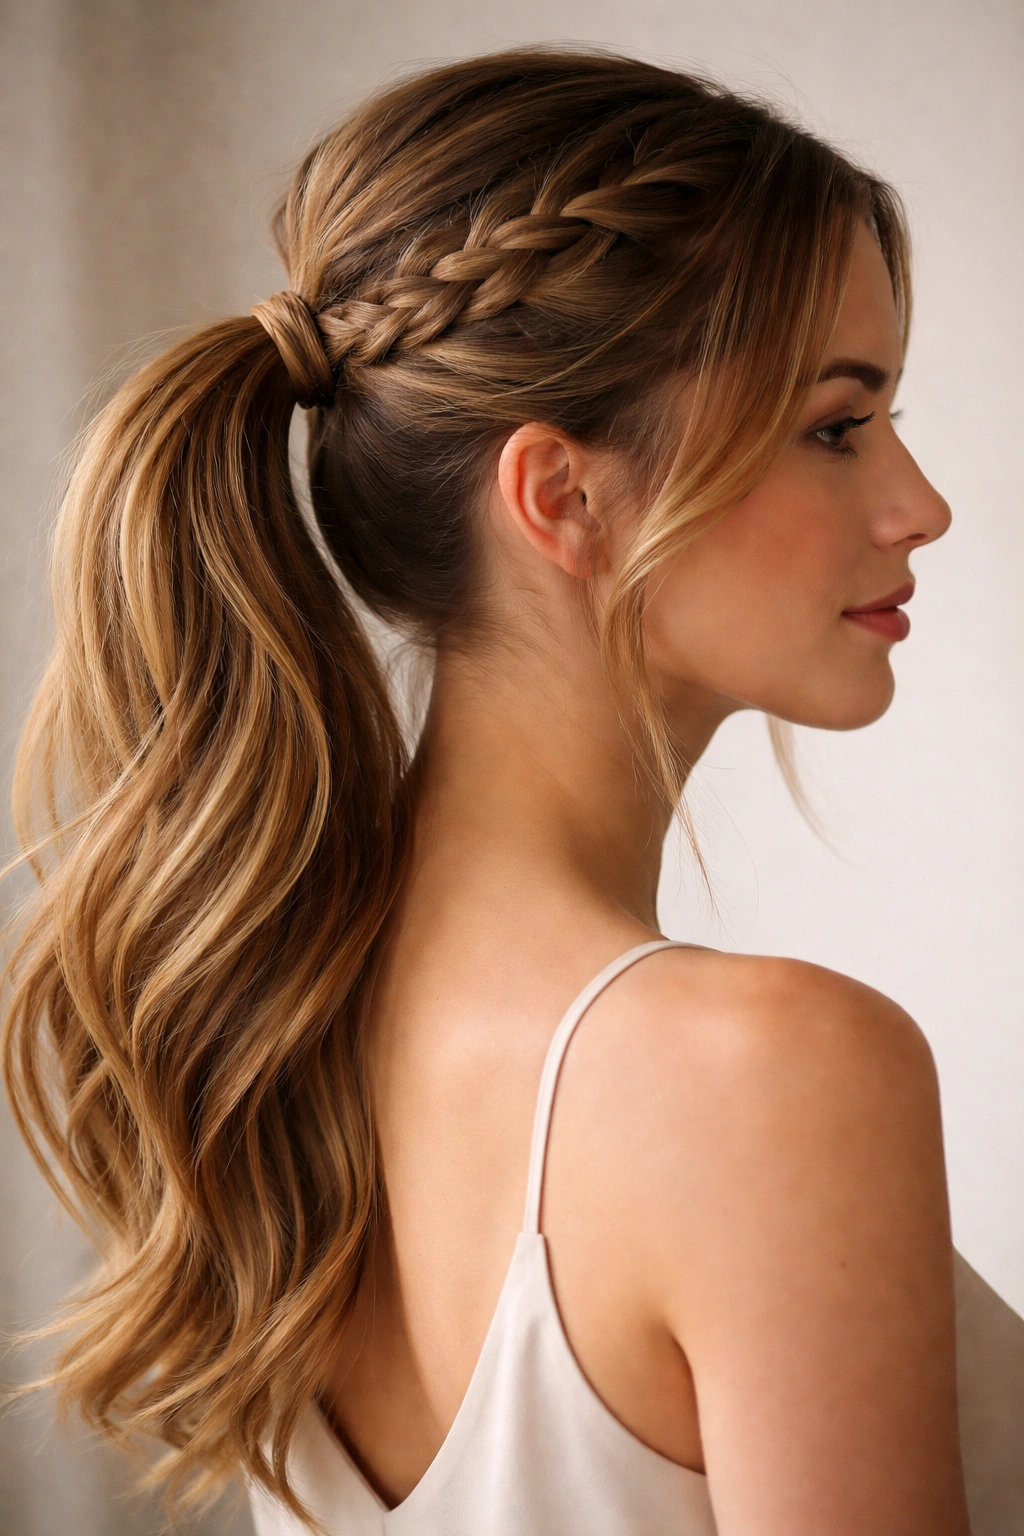
This style combines the softness of a braid with the utility of a ponytail, and the seamless element comes from how the braid transitions into the secured ponytail—there’s no visible line between them. It’s feminine and detailed without being complicated or requiring hours of styling time.
Start by sectioning off the hair you’ll use for the crown braid. This typically includes the hair from your part line across the top and back of your head—think of it as a halo section that frames your face and crown. Create a basic three-strand braid using this section, but braid it loosely. A tight braid won’t look soft, and it won’t blend visually with the ponytail below it. The braid should feel intentionally relaxed, like you styled it five minutes ago and forgot about it.
Once your braid reaches the back of your head (usually around where you’d place a mid-level ponytail), incorporate all that braided hair plus any remaining hair into your ponytail elastic. The braid becomes the top third of your ponytail rather than a separate styling element. This is the key to the seamless effect—the braid and ponytail aren’t competing elements; they’re one unified style with a thoughtful transition. Tease the ponytail slightly at the base of where the braid meets the gathered hair for added dimension.
Why This Works for Seamless Hair
The braided crown serves a real function beyond aesthetics—it actually secures the front sections of your ponytail, making the whole style feel more stable and intentional. A braid naturally disguises any bumps or imperfect sections where hair is being pulled back. The soft braiding style also looks effortless, which paradoxically makes the ponytail look more polished overall. Your brain registers “this person has good hair texture and styling skills,” not “this person gathered their hair back.”
How to Achieve the Look
- Braid only the crown section, leaving the sides and back unbraided to incorporate into the ponytail
- Use a three-strand braid without any complex weaving—simple is what reads as intentional here
- Gently pull the braid slightly to create a fuller, softer appearance once it’s complete
- Secure the braided section with the rest of your hair using a single elastic positioned lower than you might expect
- Leave a small section of hair at the elastic and wrap it around the base to hide the tie completely
Insider note: This style is genius for people with finer hair because the braid creates the illusion of volume at the crown without requiring actual teasing or backcombing—the texture of the braid itself provides the visual fullness.
4. Mid Frontal Ponytail with Twisted Section Detail
This style uses a twisted section to add visual interest and dimension without requiring a full braid. It’s less commitment than a braided crown but creates a similarly polished, intentional look. The twisted section can be as minimal or as prominent as you want—just one thin twist or multiple thicker twists, depending on your hair type and personal style preference.
Begin by sectioning out a one-inch wide piece of hair from near your temple. Twist this section loosely toward the back of your head—not tightly, but with enough definition that the twist is visible. You can twist it once around your fingers for a subtle effect, or twist it the entire length for something more prominent. Secure the twisted section to the back of your head with a bobby pin that matches your hair color, positioning it so it’ll sit just above or at the base of your mid-level ponytail.
Repeat this process on the opposite side if you want symmetry, or keep it asymmetrical with just one twist for a more artistic feel. Gather all remaining hair into your mid-level ponytail, incorporating the twisted sections into the elastic or securing them just above it. The twists create visual breaks in what might otherwise be a plain gathered ponytail, making the whole style feel more sculptural and intentional. The texture and movement created by the twists also make any minor imperfections at the base completely invisible.
Why This Works for Seamless Hair
Twisted sections act almost like architectural elements in your hairstyle. They draw the eye from the base of the ponytail and create visual interest that makes you look away from where all the hair is gathered. A twisted section also has inherent volume compared to a smooth section, so it disguises any gaps or bumps you might have where the ponytail was secured. The technique itself is foolproof—even if your twist isn’t perfectly executed, it still looks intentional and styled.
How to Achieve the Look
- Section hair into 1-inch pieces rather than trying to twist your entire head at once
- Twist loosely, focusing on consistent direction rather than tension
- Secure each twisted section with a bobby pin before gathering the rest into the ponytail
- Leave the twists slightly loose and full rather than tight and sleek
- Use the same pin color as your hair for maximum seamlessness
Pro tip: Apply a lightweight texturizing spray to your hair before twisting—this gives the twist more grip, so it holds its shape longer without needing to be pulled uncomfortably tight.
5. Tousled Mid Ponytail with Wispy Bangs
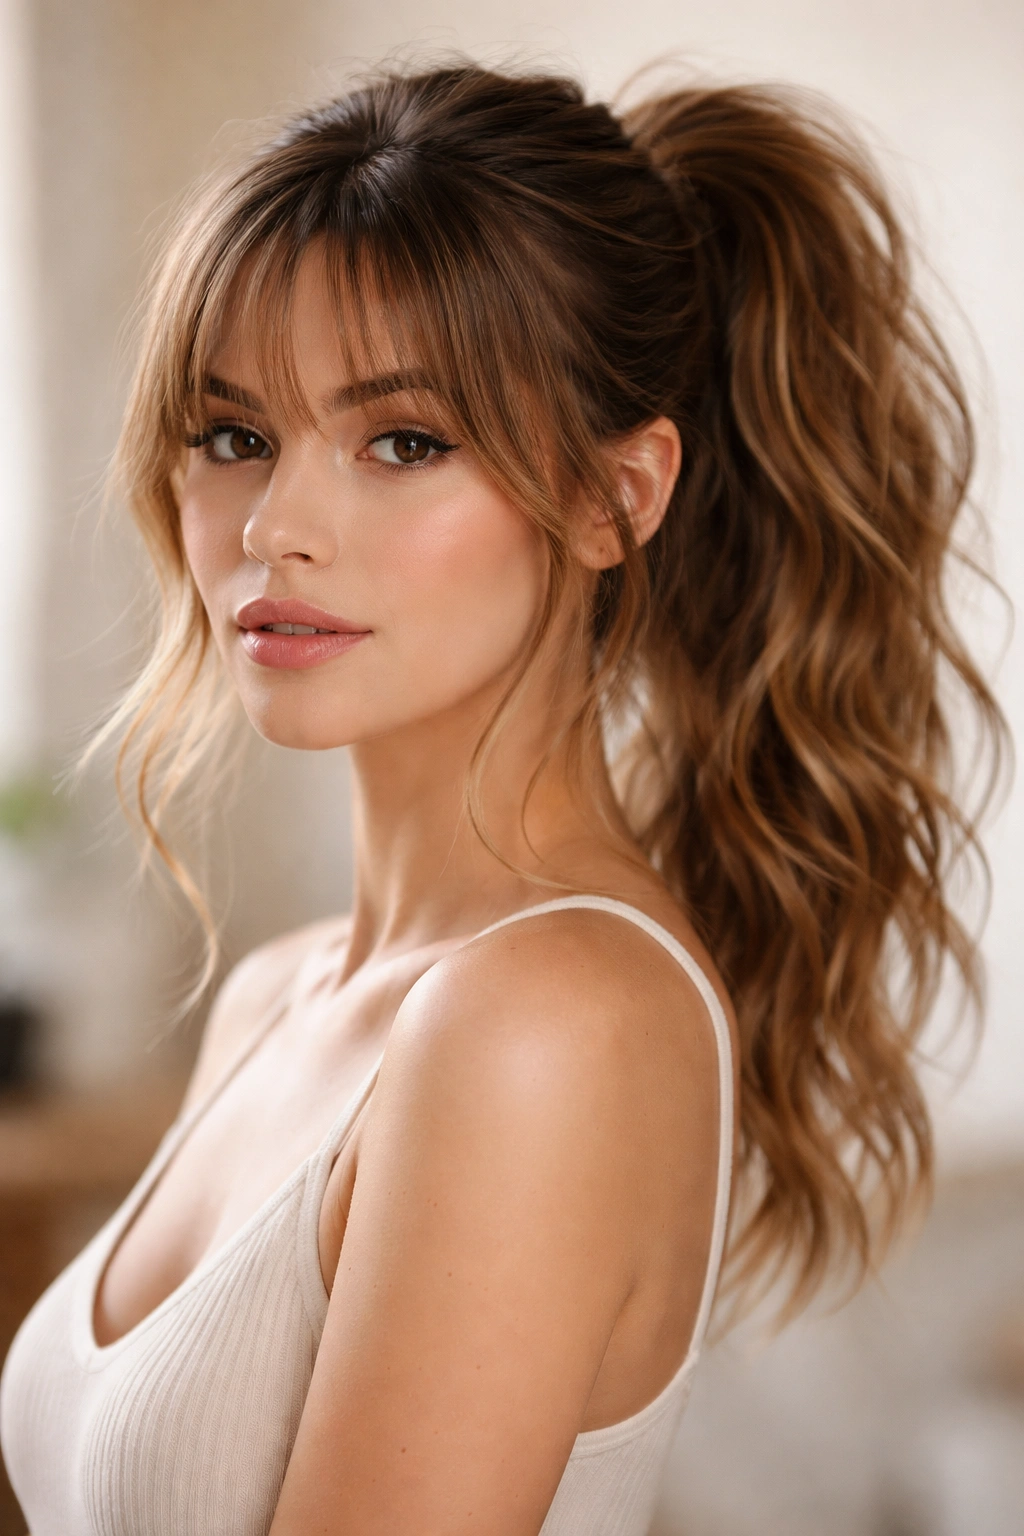
This style is pure romance—tousled texture throughout with delicate wispy bangs that frame the face and soften the overall appearance. The seamlessness comes from how intentionally tousled and lived-in the entire style feels, making any minor imperfections at the ponytail’s base completely expected and fitting with the overall aesthetic.
Create soft waves throughout your entire head before gathering the ponytail. You can use a curling iron, overnight braids, or a texture spray depending on your hair’s natural behavior. The goal is piecey, separated texture, not a uniform wave. Once your hair has this movement and volume, take a small section from each side of your face and cut them (or designate them if you don’t actually want to cut bangs) as your “wispy bangs.” These shouldn’t be heavy or blunt—they should be delicate strands that frame your face gently.
Gather the remaining hair into a mid-level ponytail, leaving those wispy bang sections out. The ponytail itself should feel tousled too—don’t worry about making it perfectly smooth or sleek. In fact, deliberately rough up the ponytail slightly at the base by teasing it with a fine-tooth comb or your fingers, creating a soft, undone appearance. Wrap a small section of hair around the elastic base to hide the tie, and use bobby pins to secure any flyaways that frame your face in exactly the right way.
Why This Works for Seamless Hair
The entire aesthetic of this style is “beautifully undone,” which means small imperfections aren’t flaws—they’re features. A bumpy or uneven ponytail base looks like part of the intentional tousled effect rather than a styling mistake. The wispy bangs draw significant visual attention to your face, away from where the ponytail is secured. The overall softness and texture make even a relatively tight ponytail feel effortless rather than controlled.
How to Achieve the Look
- Create texture throughout before ponytail placement using your preferred method
- Designate wispy bang sections and secure them separately or allow them to fall naturally
- Don’t smooth the ponytail—leave it intentionally textured and slightly messy
- Tease at the base where the ponytail gathers for added softness and dimension
- Use a light hairspray that doesn’t feel stiff or sticky to preserve the effortless quality
Worth knowing: This style actually works better on slightly dirty hair or hair that’s been in texture for at least a few hours—fresh, freshly washed hair doesn’t hold the tousled look as well.
6. Mid Frontal Ponytail with Pearl Hair Clips
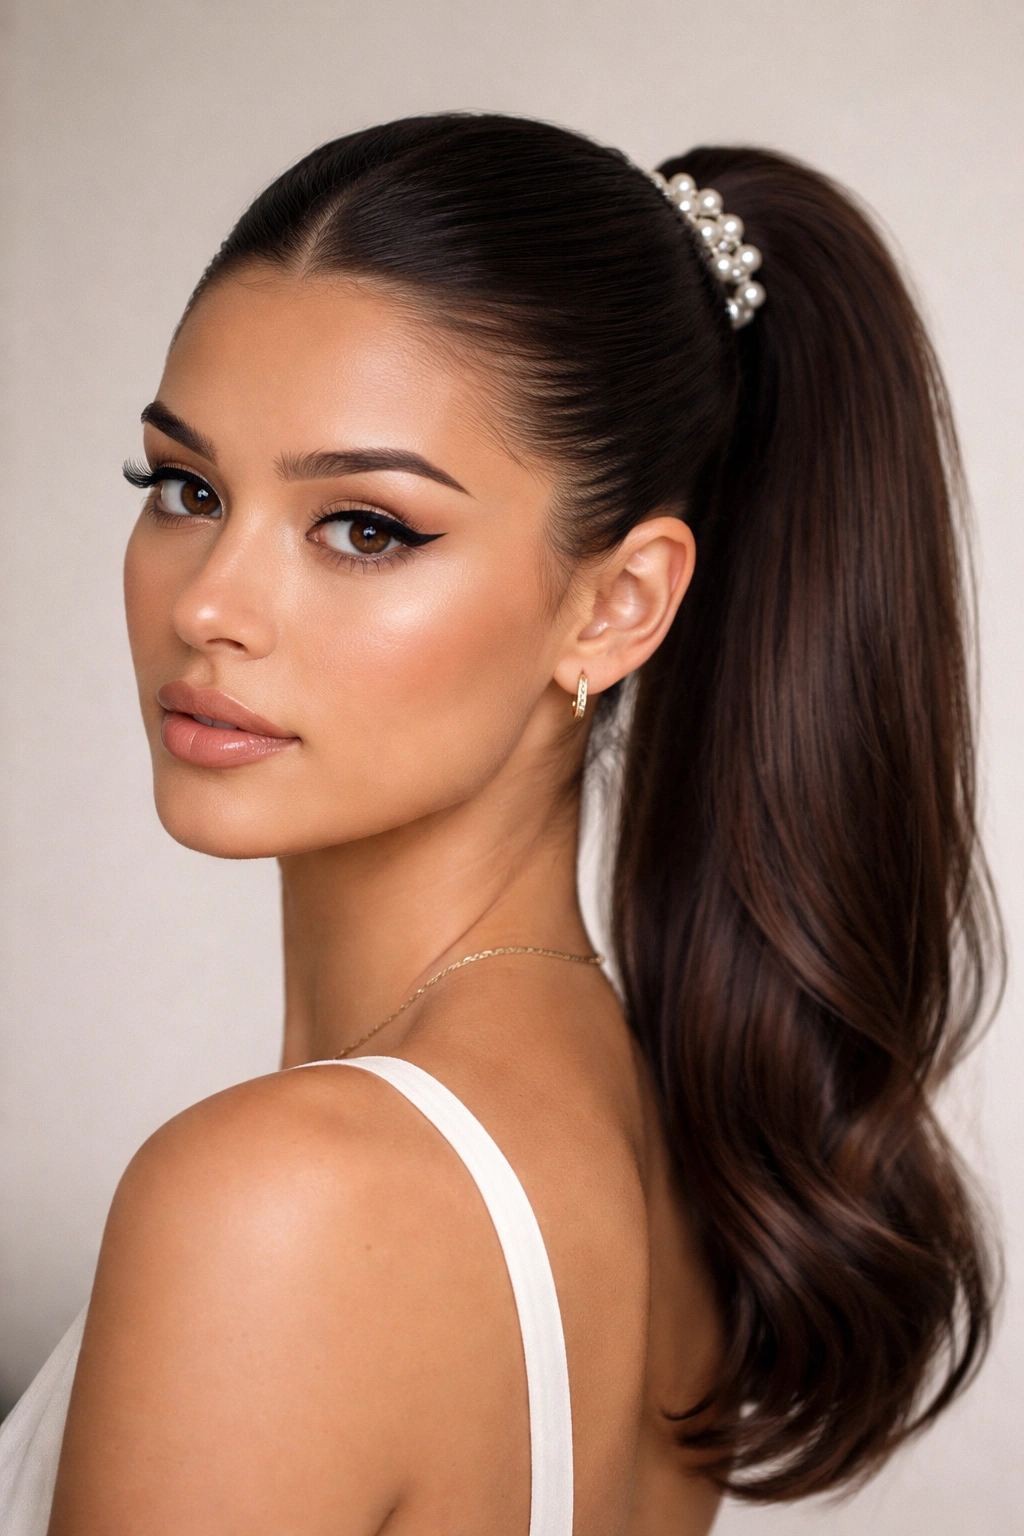
Details matter, and pearl hair clips elevate a simple ponytail into something that feels intentional and precious. The clips serve a functional purpose—securing sections or decorating the base of the ponytail—while creating a visual anchor that makes the style feel thoroughly planned and polished.
Start with a clean, smooth mid-level ponytail. You want the base to be neat and secure before adding any decorative elements, so spend extra time smoothing and securing this first. Use a boar-bristle brush and a light smoothing serum to create a polished finish. Once your ponytail is secure, position two or three pearl hair clips around the base of the ponytail, securing any flyaways or creating a deliberately designed pattern.
Pearl clips work particularly well because they’re both decorative and functional. They catch light, drawing the eye to a specific area of the style, and they hold sections in place while looking like intentional accessories rather than necessary tools. You can cluster them on one side of the ponytail, space them symmetrically, or even weave them through a subtle braid at the ponytail base. The key is intentionality—the placement should feel designed, not accidental.
Why This Works for Seamless Hair
Pearl hair clips are an underrated styling tool. They immediately signal that you’ve put thought into your appearance, and they make even a basic ponytail feel elevated and special. The clips also genuinely help hold sections in place, which can make your ponytail feel more secure and controlled. If you do have any minor bumps or flyaways at the base, the clips draw the eye toward the decorative element rather than toward any imperfections. The overall effect is one of intentional styling and careful attention to detail.
How to Achieve the Look
- Secure your basic mid-level ponytail with a thin elastic in a matching hair color
- Choose pearl clips that match your hair tone or create a subtle contrast
- Position clips to secure any flyaways that emerge around the ponytail base
- Ensure clip placement feels balanced—either symmetrical or intentionally asymmetrical
- Use clips that actually grip your hair rather than purely decorative clips that slide around
Pro tip: If you have fine hair or hair that’s prone to breaking, choose clips with smooth edges rather than rough or textured grips—the gentler the clip, the less stress on your hair.
7. Mid Frontal Ponytail with Invisible Elastic and Flyaway Smoothing
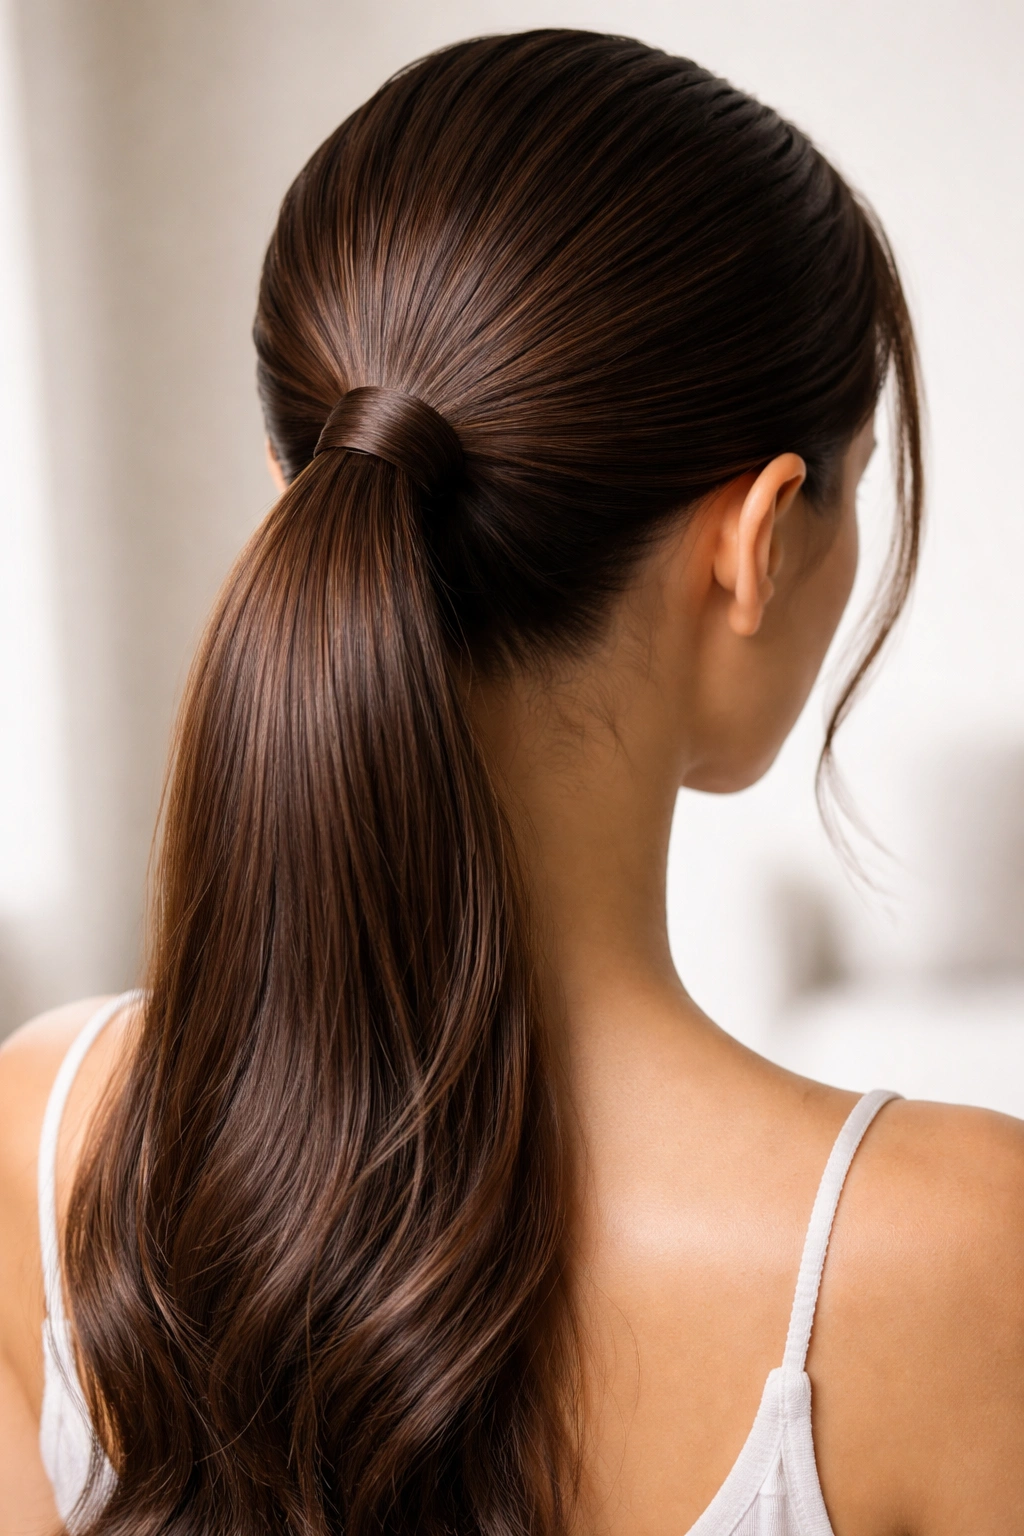
The secret to a truly seamless ponytail is making the elastic completely invisible and managing the tiny flyaways that make otherwise perfect ponytails look messy or imperfect. This technique is about mastering the tools and methods that create an almost unrealistic level of polish.
Start with smoothing serum applied to damp hair before blow-drying. This foundation keeps your hair smoother than starting with dry hair and then trying to smooth it backward. Blow-dry your hair straight, using a paddle brush to keep everything smooth and directional. Once dry, use a fine-tooth comb to brush your hair back into your desired mid-level ponytail position, creating a smooth surface without any bumps or loose strands.
Secure your ponytail with an elastic that exactly matches your hair color—this is non-negotiable for the seamless effect. Clear elastics, white elastics, or colored elastics that don’t match your hair will always be visible. Take a small section of hair from your ponytail (about the width of a pencil) and wrap it around the elastic base, securing that section with a bobby pin. This wrapped section completely hides the elastic and creates the illusion that your hair is naturally gathered at that point. Finally, use a smoothing balm on your fingertip to gently smooth any flyaways around your face and hairline, taming them without making them look plastered down.
Why This Works for Seamless Hair
An invisible elastic is 90 percent of the seamlessness equation. When you can’t see where the ponytail is secured, your brain registers the whole style as more polished and intentional. The flyaway smoothing completes the effect by eliminating the tiny hairs that make even well-executed ponytails look imperfect or hastily thrown together. This combination creates a level of polish that signals “I care about how I look” without requiring complicated techniques or excessive product.
How to Achieve the Look
- Choose elastics that match your hair color exactly—this single choice makes more difference than you’d expect
- Wrap a thin section of hair around the base to hide the elastic completely
- Use a fine-tooth comb to create a smooth surface at the crown before securing
- Apply smoothing serum to damp hair before blow-drying for a smoother starting point
- Address flyaways with smoothing balm on your fingertips rather than hairspray
Worth knowing: The best elastics for this effect are thin, seamless hair ties in colors specifically matched to various hair tones. Thicker elastics are harder to hide, and thick bands tend to break hair over time anyway.
8. Curved Mid Ponytail with Underneath Styling
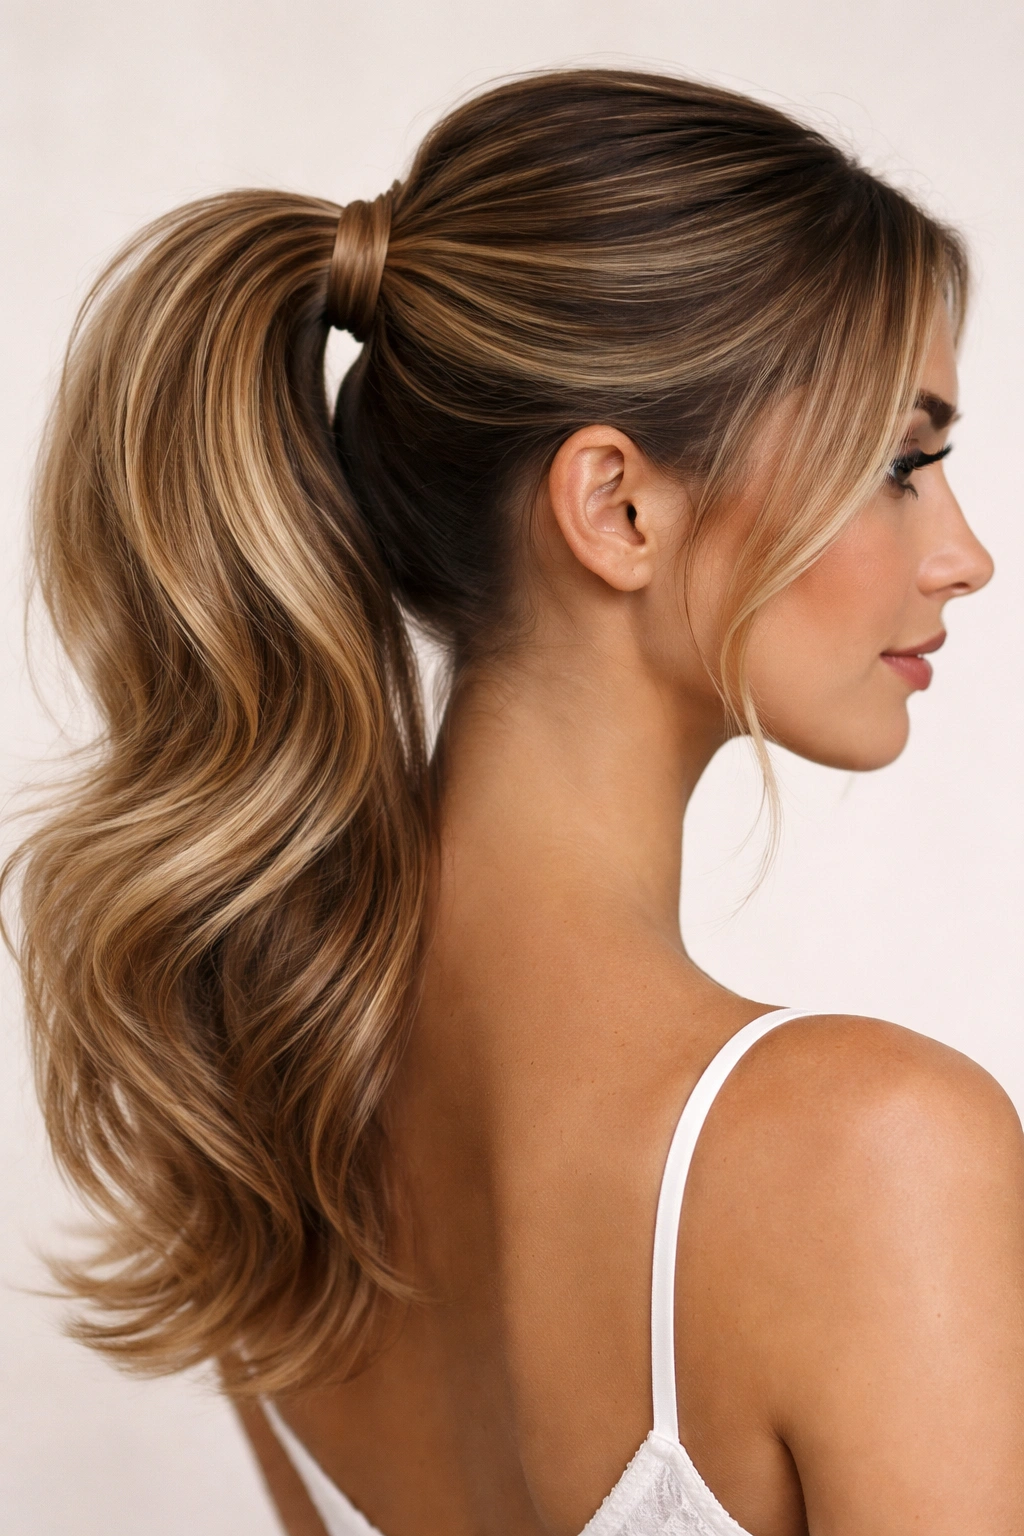
This style uses an optical illusion to create a more flattering shape—the ponytail curves slightly to one side rather than dropping straight down the back of your head. The underneath styling keeps the ponytail looking effortlessly full and textured rather than like a single, heavy cord of hair.
Position your mid-level ponytail slightly off-center, favoring one side of your head rather than centering it at the back. This curved placement is subtle but creates visual interest and looks more fashion-forward than a centered ponytail. Secure the ponytail with an elastic that matches your hair color, then address the underneath styling by teasing or backcombing the ponytail from underneath. This creates volume and texture without visible tools or obvious styling—the full, rounded appearance looks like your hair naturally has that much volume.
You can also use a small section of your ponytail to wrap around the base, but instead of placing it at the center back, offset it to one side to emphasize the curved effect. This small detail adds dimension and makes the whole style feel more carefully considered. The underneath teasing prevents the ponytail from looking like a single, flat cord—instead, it has volume and movement that reads as effortlessly beautiful rather than severely gathered.
Why This Works for Seamless Hair
The curved placement is genuinely flattering for most face shapes. It softens a round face, adds interest to an angular face, and just generally feels more dynamic than a centered ponytail. The underneath teasing creates volume that makes your ponytail look fuller and healthier while disguising any bumps or imperfections at the base. The offset wrapping section emphasizes the curve and creates an asymmetrical detail that feels intentional and stylish. The overall effect is polished, flattering, and distinctly more interesting than a standard mid-level ponytail.
How to Achieve the Look
- Position the ponytail slightly to one side rather than centering it at the back of your head
- Secure with a matching elastic and ensure the base is smooth and bump-free
- Tease the ponytail gently from underneath using a fine-tooth comb
- Wrap a small section of ponytail hair around the base, positioning it to emphasize the curve
- Use bobby pins that match your hair color to secure the wrapping section
Pro tip: The curve should be subtle, not extreme. You’re aiming for a style that looks naturally beautiful, not obviously off-center. Most people notice the improvement in how the style frames your face without consciously registering that the ponytail is off-center.
9. Mid Frontal Ponytail with Subtle Color Blend
If you have highlights, balayage, or dimensional color in your hair, this style showcases those details beautifully while maintaining the clean, polished effect of a seamless ponytail. The subtle color blend comes from how strategically you place face-framing sections and how deliberately you style them to highlight your color work.
Start with a smooth, polished mid-level ponytail as your base. Before you gather everything, pull out two small sections from near your face—one on each side—that showcase any highlights or dimensional color you have. These sections should be smooth and controlled, not textured or wild, so they read as intentional styling choices rather than random pieces left down. Position them to frame your face elegantly, securing them behind the base of the ponytail with bobby pins that match your hair color.
The color blend works because those framing sections are the lightest, brightest parts of your hair that move and catch light as you move. They draw the eye and showcase whatever dimensional color you have throughout your hair. A balayage with this style looks particularly beautiful because the color variation naturally creates movement and interest in those face-framing sections. The main ponytail remains clean and controlled, but those color-rich pieces create a visual narrative about dimension and intentional styling.
Why This Works for Seamless Hair
Color automatically draws the eye. If your eye is following your highlights and color work, it’s not analyzing the base of your ponytail. This style is particularly smart if you’ve invested in quality color work—the style showcases that investment while maintaining the practical benefits of a ponytail. The framing sections also soften the overall effect, preventing the ponytail from reading as severe or clinical. The color blend creates an almost three-dimensional quality to the style, where dimension exists both in the ponytail and in the color placement.
How to Achieve the Look
- Choose face-framing sections that showcase your highlight or dimensional color
- Keep framing sections smooth and sleek rather than textured
- Secure the ponytail first, then pull out and pin the framing sections
- Position framing sections symmetrically for a balanced, intentional look
- Use bobby pins that match both your hair color and the shade of hair being pinned
Worth knowing: This style is actually more forgiving with imperfect ponytail bases because your eye is following the color and the face-framing pieces rather than analyzing the back of your head where the ponytail is gathered.
10. Mid Ponytail with Wrapped Section and Faux Length
This final style uses a clever technique to create the illusion of longer, fuller hair than you actually have. A wrapped section at the base creates dimension, and a deliberately styled underneath creates movement that reads as both seamless and beautifully full.
Gather your hair into a mid-level ponytail using an elastic that matches your hair color perfectly. The base should be smooth and secure. Take a small section from your ponytail—about the width of a pencil—and wrap it tightly around the elastic base. This creates a cuff effect that completely hides the elastic and adds visual dimension at the crown. Secure this wrapped section with a bobby pin and smooth it with a light touch of smoothing balm.
For the faux length effect, use a blow dryer on low heat and low speed to gently create movement and volume throughout the ponytail. You can also carefully use a curling iron to create subtle waves or waves throughout the length, which creates the illusion of more hair through texture and movement. The volume created by these techniques makes your ponytail read as thicker and fuller than it might actually be. The overall effect is one of effortless, abundant hair—the kind of ponytail that makes people wonder if you have extensions (you probably don’t).
Why This Works for Seamless Hair
The wrapped section is a legitimate game-changer for ponytail styling. It completely transforms how a ponytail looks by making it impossible to see where the hair is gathered. The wrapped section itself becomes a design feature—a cuff that frames the base and creates a focal point. The faux length techniques make the ponytail look fuller and more abundant, which ironically makes it look more intentional and polished. A thin, flat ponytail looks like you just threw your hair back. A textured, voluminous ponytail looks like you spent time on your appearance, even if you didn’t.
How to Achieve the Look
- Secure your base ponytail with a thin, color-matched elastic
- Take a small section and wrap it tightly around the elastic until completely hidden
- Secure the wrapped section with a bobby pin and smooth it with balm
- Create volume and movement in the ponytail using a blow dryer or curling iron
- Tease very gently at the base underneath to create additional fullness without visible bumps
- Finish with a light-hold hairspray that maintains movement without stiffness
Pro tip: The wrapped section technique works best with slightly textured hair rather than completely smooth hair—the texture gives the wrap something to grip, and it stays in place longer without needing excessive bobby pins or styling products.
Final Thoughts
A seamless mid frontal ponytail isn’t about luck or naturally perfect hair. It’s about understanding which techniques create visual polish, where to position your ponytail for the most flattering effect, and how to use styling tools and products strategically rather than haphazardly. The ten styles outlined here represent different approaches to the same goal—creating a ponytail that looks intentional, carefully considered, and beautifully executed.
The common thread across all of these styles is that seamlessness comes from three foundational elements: choosing an elastic that matches your hair perfectly, smoothing the base section completely, and wrapping a small section around the elastic to hide it entirely. Master these three techniques and you can create any of these styles successfully. The decorative elements—the twists, braids, clips, and color-framing pieces—are the personality you add on top of that foundation.
Your ponytail choice also affects how others perceive you, whether that’s fair or not. A polished, seamless ponytail reads as intentional and put-together. A bumpy, hastily gathered ponytail reads as thoughtless or rushed, even if you actually just have thick hair that’s difficult to manage. The difference in effort is minimal, but the difference in impact is substantial. Spend an extra ninety seconds smoothing, wrapping, and addressing flyaways, and you’re not just creating a ponytail—you’re communicating that you care about how you present yourself to the world.