Low ponytails offer the perfect sweet spot for natural hair — they’re elegant enough for any occasion, protective enough to shield your ends from damage, and versatile enough to work with virtually any curl pattern or hair type. Whether your texture is coily, kinky, wavy, or anything in between, a well-executed low ponytail can be a go-to style that takes just minutes to create and lasts for days.
The magic of low ponytails lies in their balance. Unlike their high-pony cousins, which can create tension at the crown and hairline, low ponytails distribute weight more evenly and place less stress on your roots. This makes them genuinely protective — a quality that matters immensely when you’re focused on growing and maintaining healthy natural hair. They’re also incredibly forgiving; low ponytails work beautifully whether your hair is freshly washed and styled or several days into your wash cycle.
What makes this style particularly appealing is its range. You can wear a low ponytail sleek and polished for professional settings, textured and chunky for casual weekends, with added extensions for length and drama, or with creative accessories that transform the basic style into something uniquely yours. The techniques and variations are nearly endless, which means you’ll never get bored and you’ll always have options depending on your mood, time availability, and the occasion.
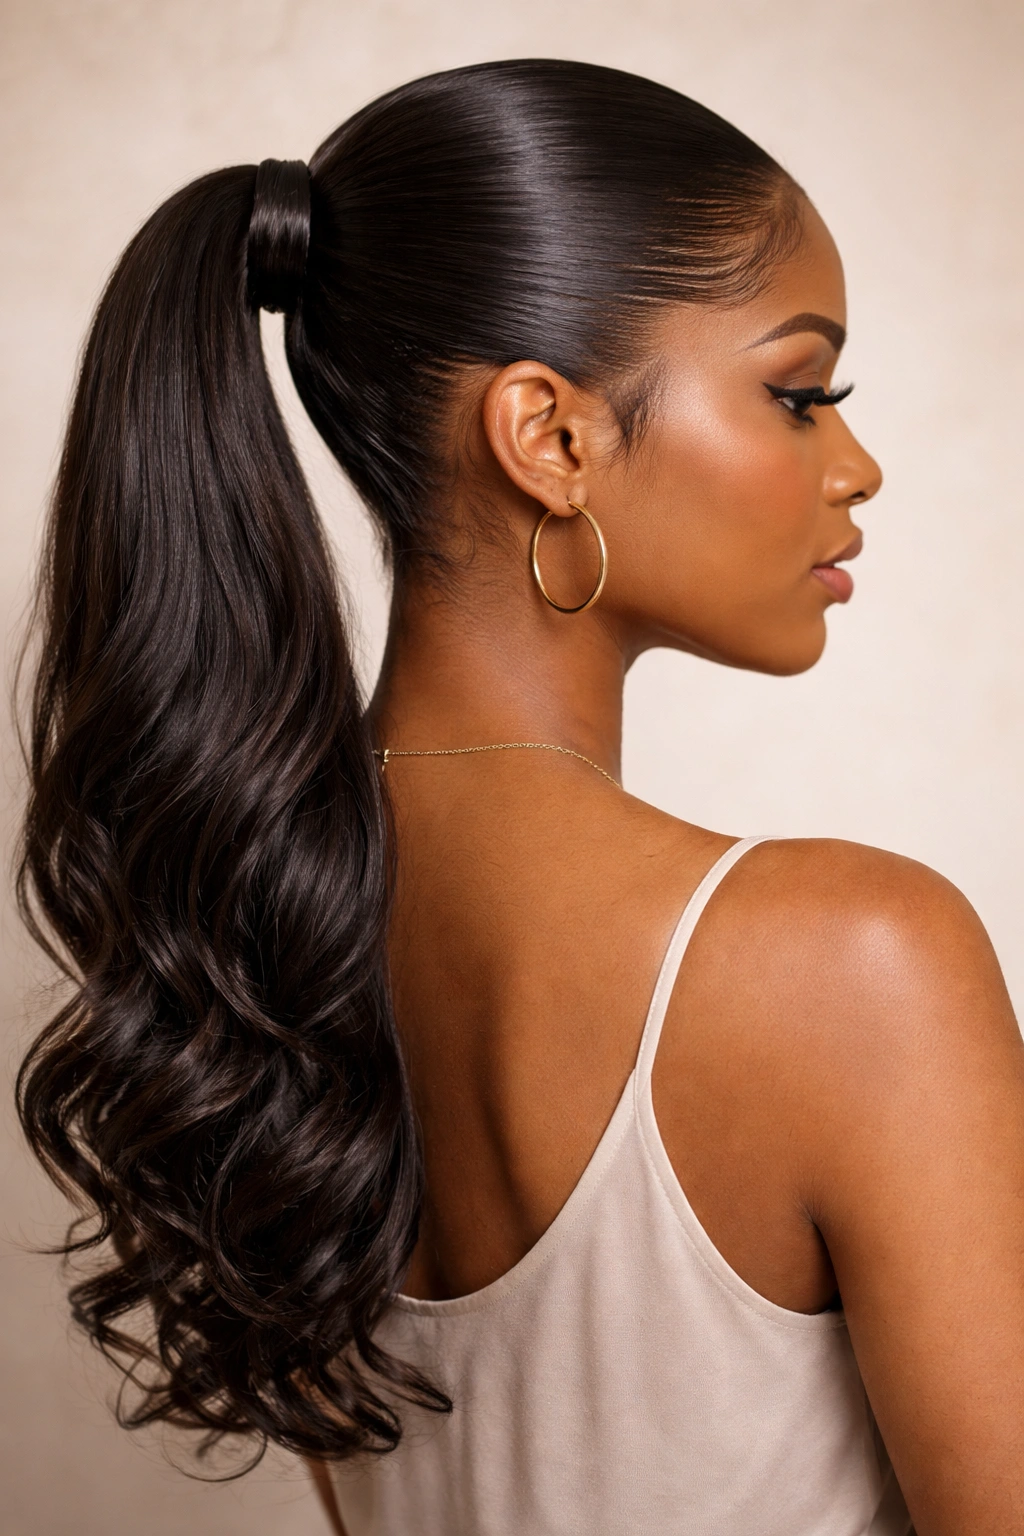
1. The Classic Sleek Low Ponytail
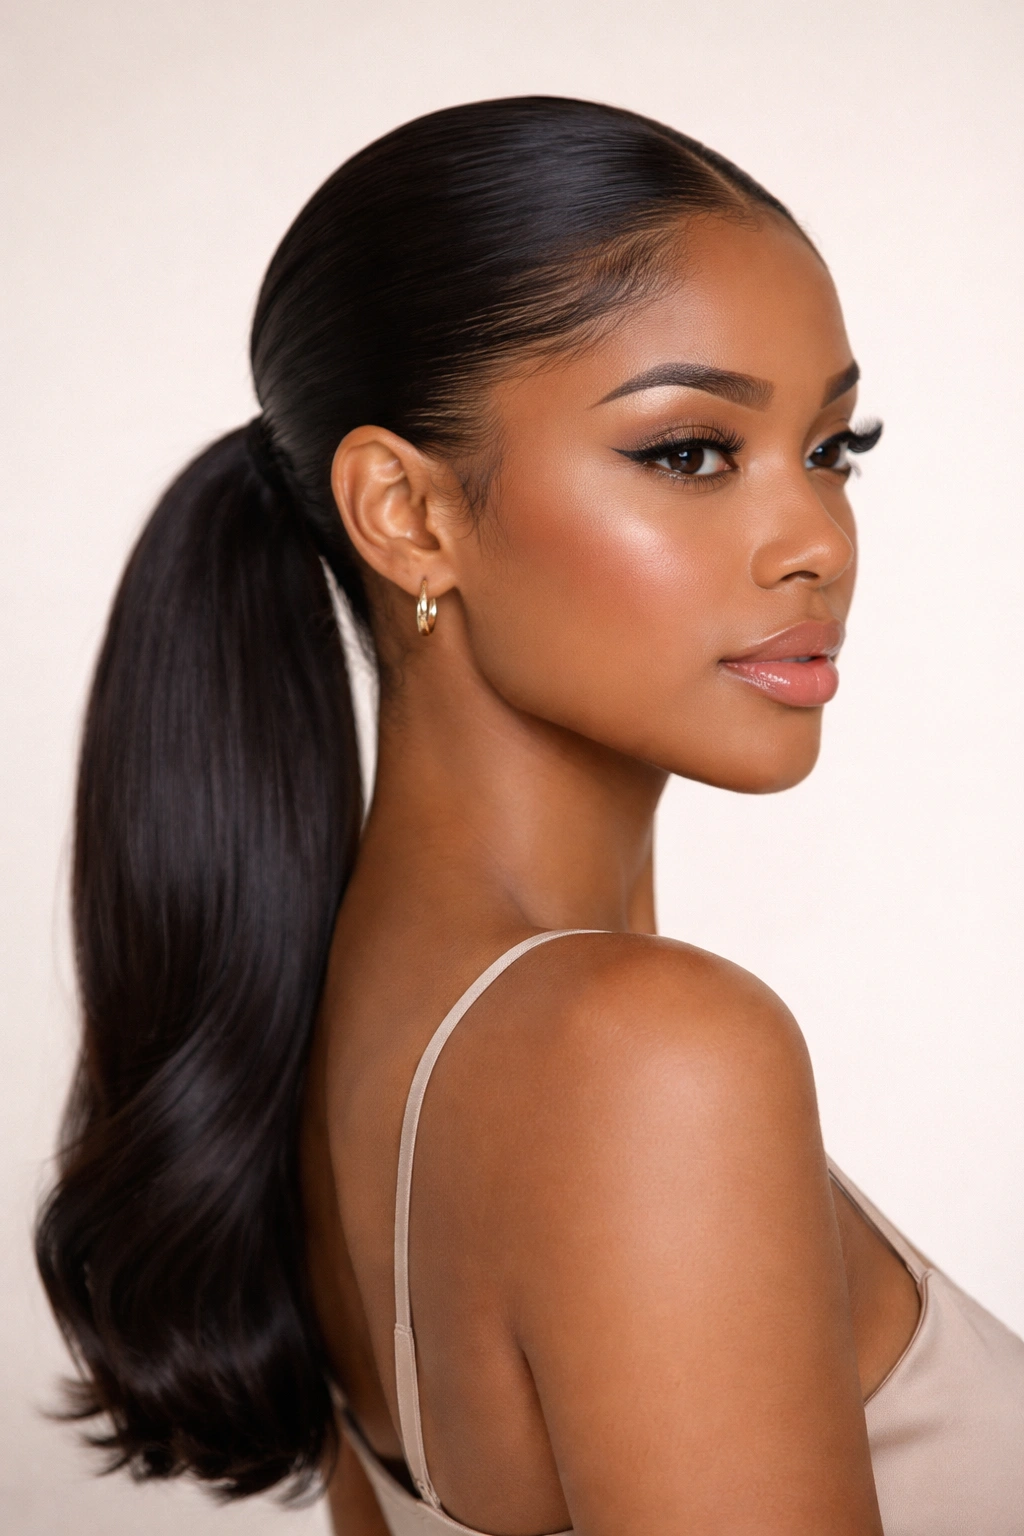
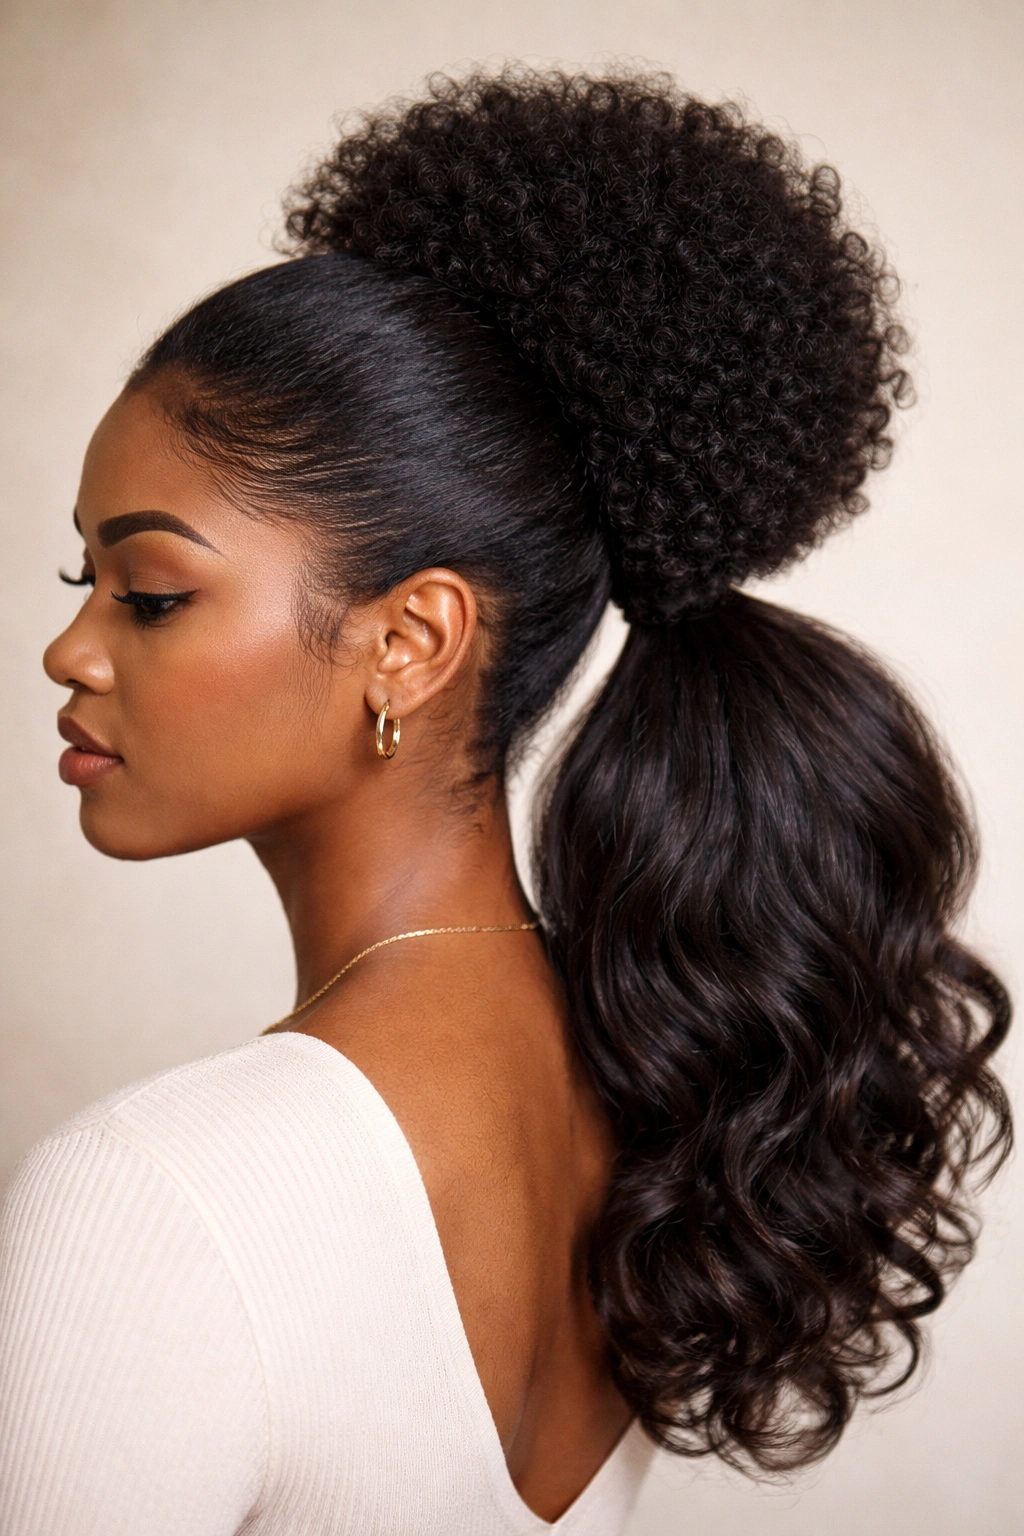
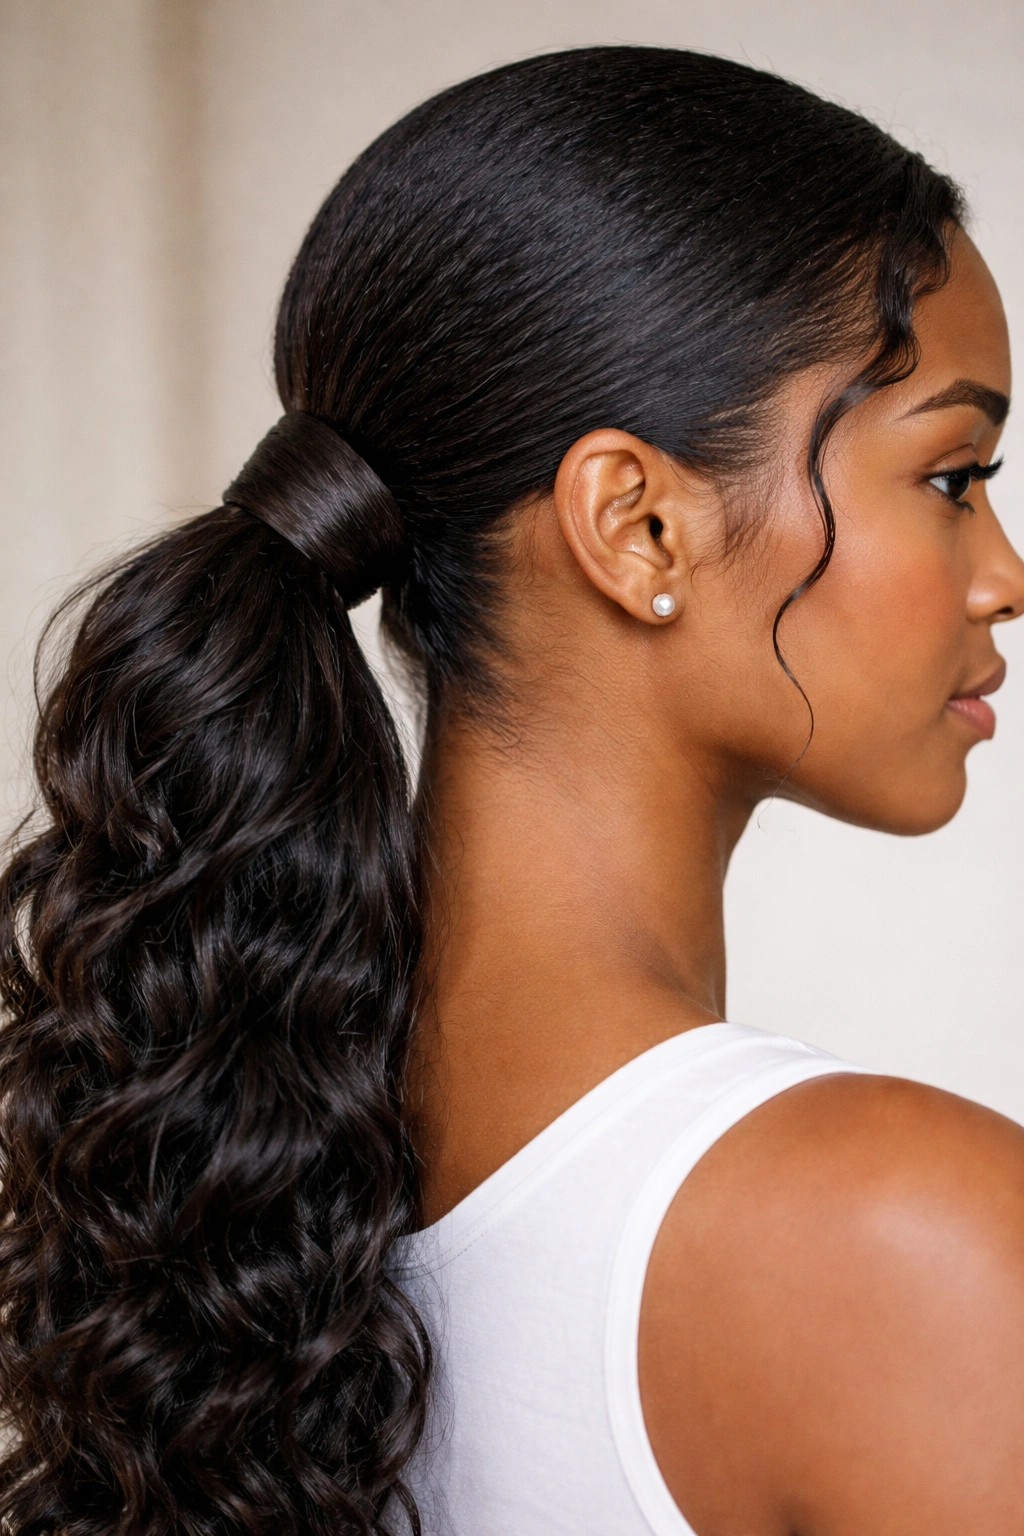
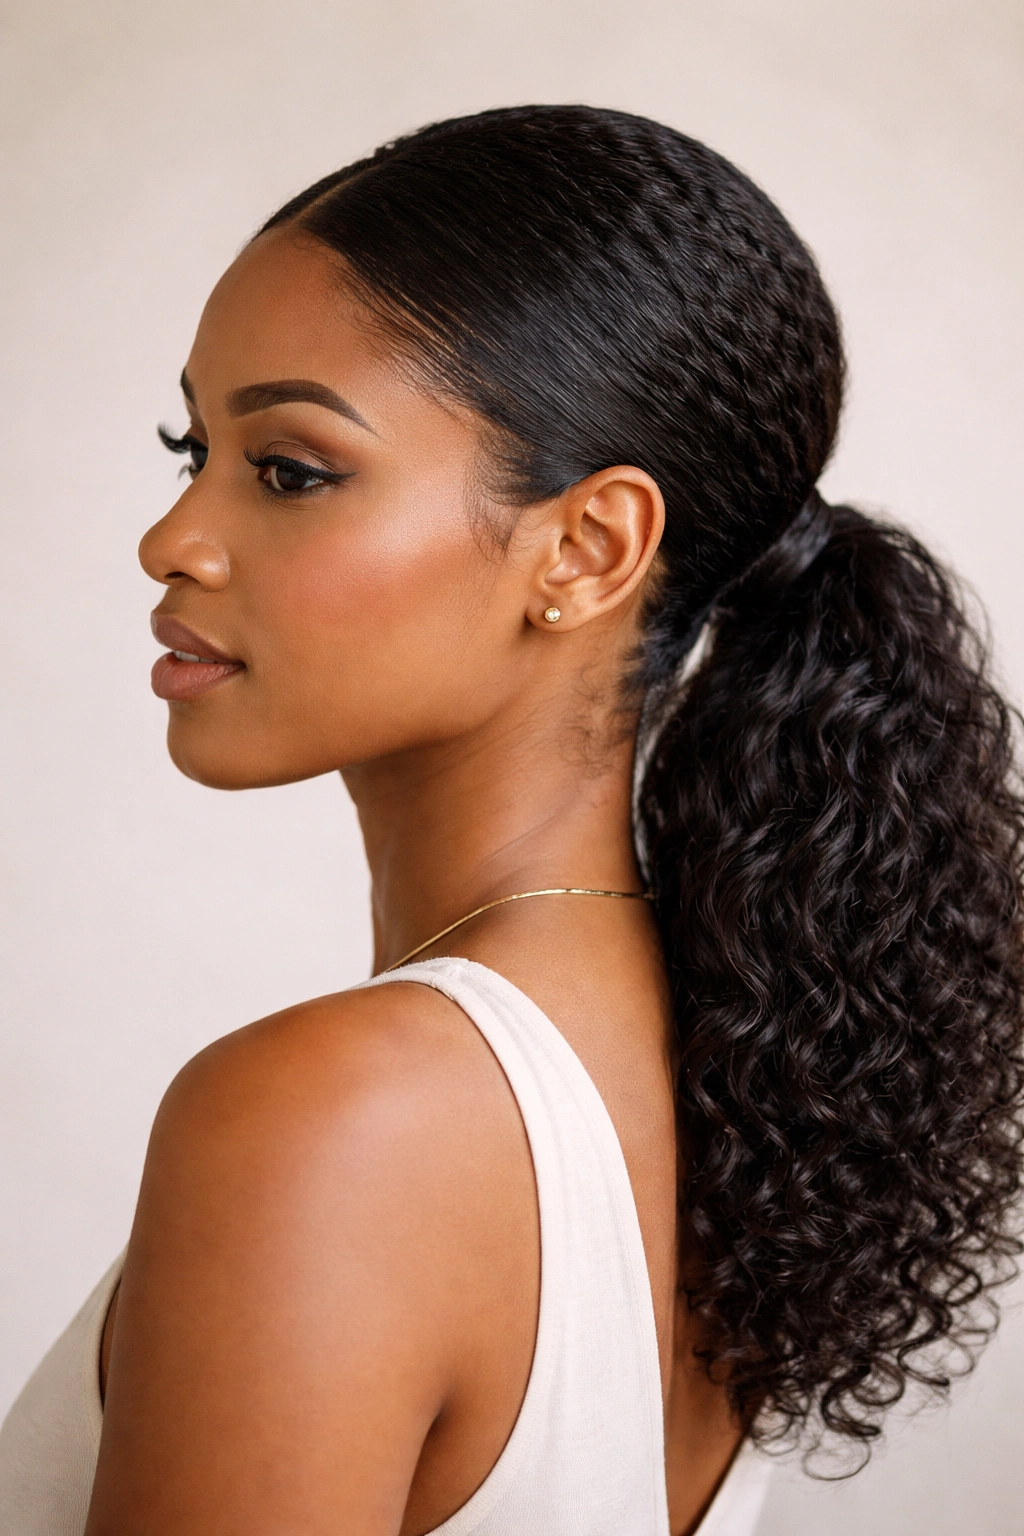
The classic sleek low ponytail is your foundational style — the one you return to when you want polished, put-together hair without fuss. This version sits just below the nape of your neck and features smooth, taut edges that create an intentionally refined aesthetic. It’s the kind of ponytail that transitions seamlessly from the office to dinner without a single adjustment needed.
How to Achieve the Sleek Look
Start with hair that’s either freshly washed and blow-dried or freshly moisturized and air-dried until it reaches your desired smoothness level. Use a fine-tooth comb or brush to smooth your hair back from your face and around the sides, applying a lightweight edge control or mousse to your edges as you work. The key here is patience — take your time brushing, working in small sections, because rushing creates bumps and breakage.
Pro Tips for Perfect Smoothness
- Apply your edge control with a soft brush rather than your fingers for more even distribution and a smoother finish
- If flyaways plague you, a light spritz of hair mist or water mixed with a tiny drop of oil can tame them without creating that wet, greasy look
- For maximum staying power without damaging your hair, use a hair tie made of silk, satin, or fabric-covered elastic — these create significantly less friction than traditional rubber bands
- If you’re wearing this style for more than one day, gently refresh your edges at night by re-applying a small amount of edge control and smoothing with your brush
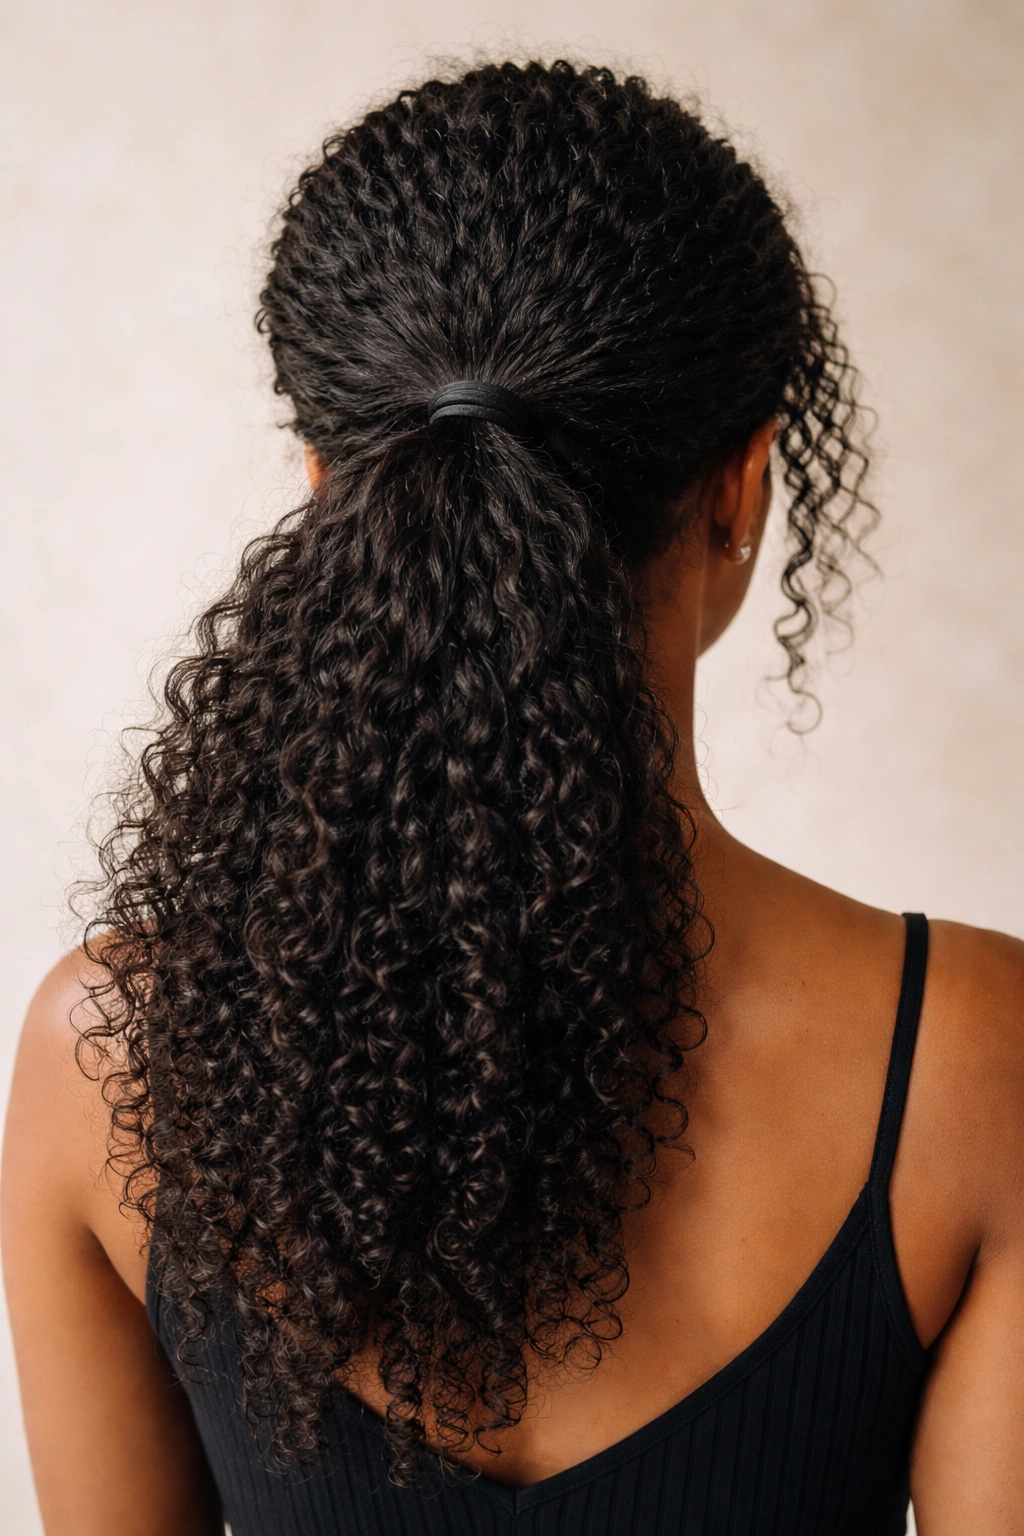
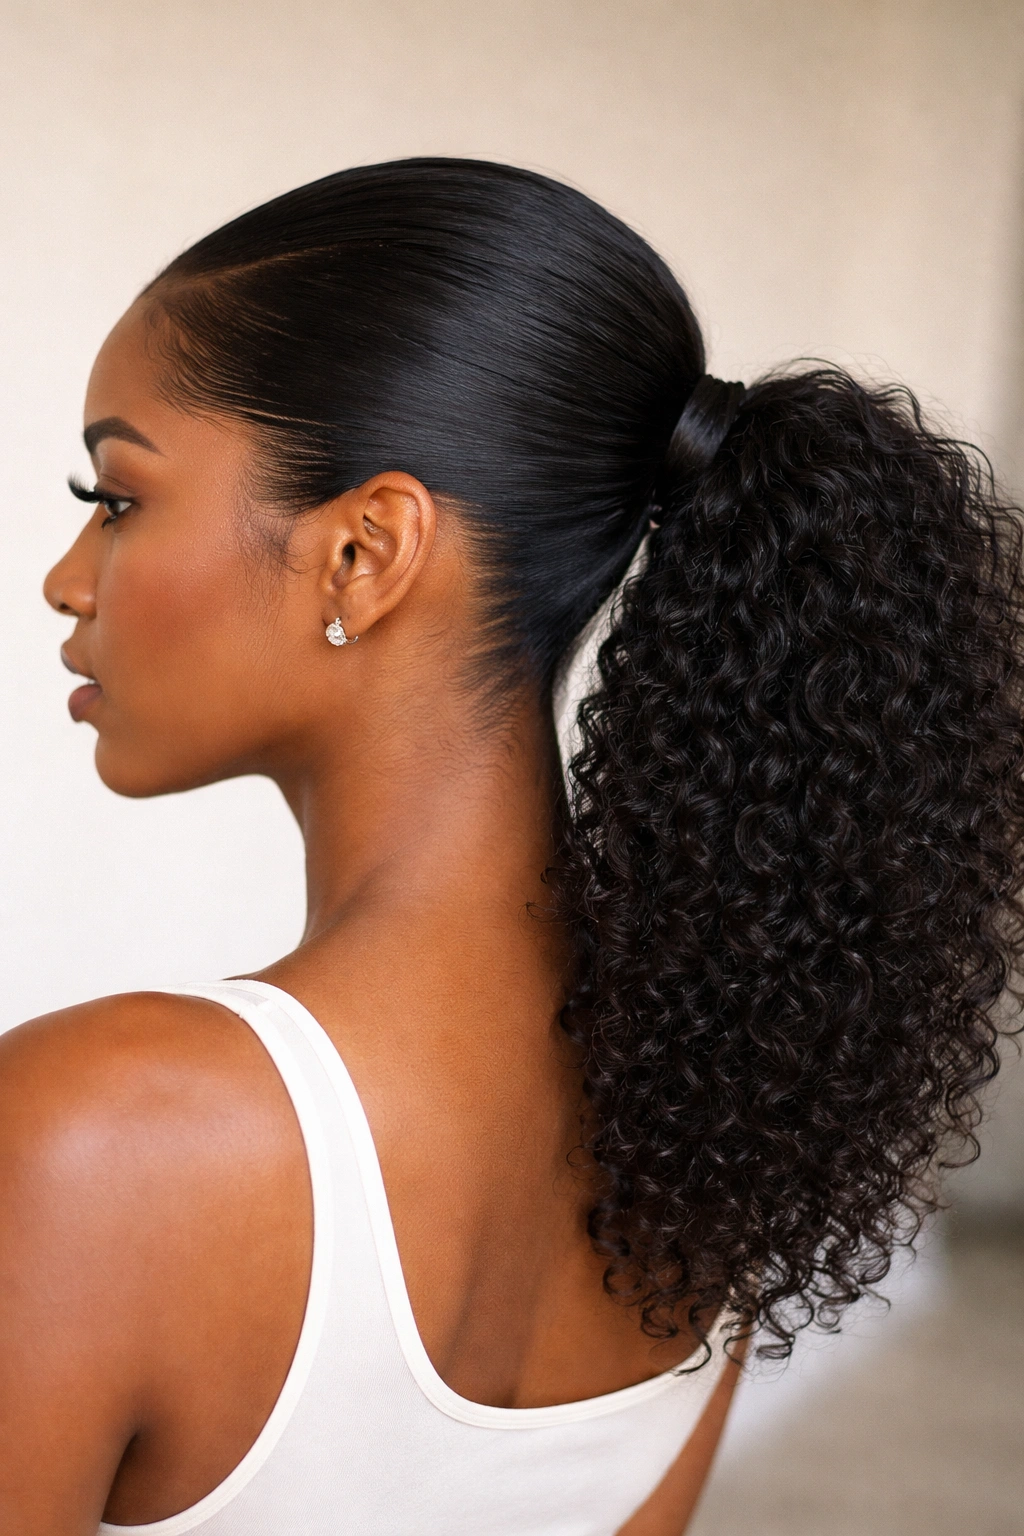
2. The Textured Low Ponytail with Defined Curls
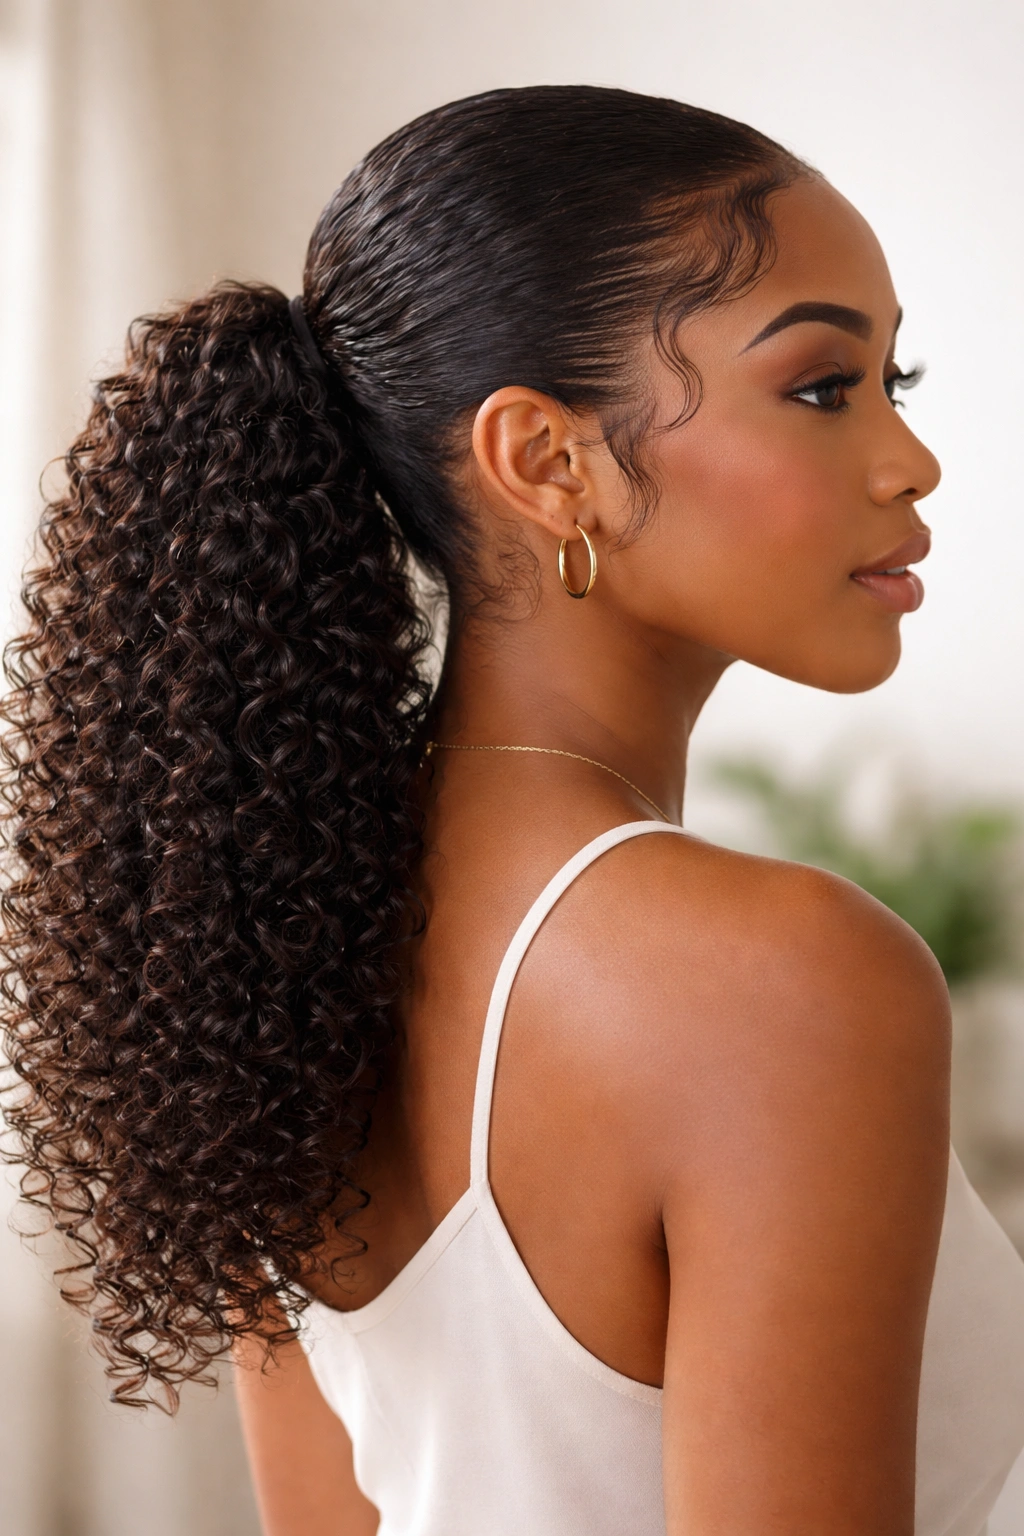
If you love your natural curl definition and want to show it off while keeping your hair off your face, a textured low ponytail is your answer. This style celebrates your curls rather than fighting against them. Your coils, spirals, or waves cascade from the ponytail base, creating movement and dimension that flat, sleek styles simply can’t match.
Bringing Out Your Natural Texture
The secret to definition in this style is moisture and product. On the morning of or the night before styling, apply a curl-defining cream or gel to damp hair, scrunching upward to encourage curl formation. You can either allow it to air-dry or use a diffuser attachment on your blow dryer to set your curls. Once your hair is completely dry, gently gather it into a low ponytail at the nape of your neck.
Making Your Curls Last
- Refresh your curls mid-week by spritzing them lightly with water mixed with a leave-in conditioner, then re-scrunching them back into shape
- Sleep on a silk pillowcase or in a silk or satin cap to preserve curl definition overnight
- Avoid touching or handling your curls throughout the day — the less you manipulate them, the longer they hold their shape
- If your curls start to droop by day three, a light touch of curl cream applied to your fingertips, then scrunched into just the ponytail portion, can revive them without affecting the rest of your hair
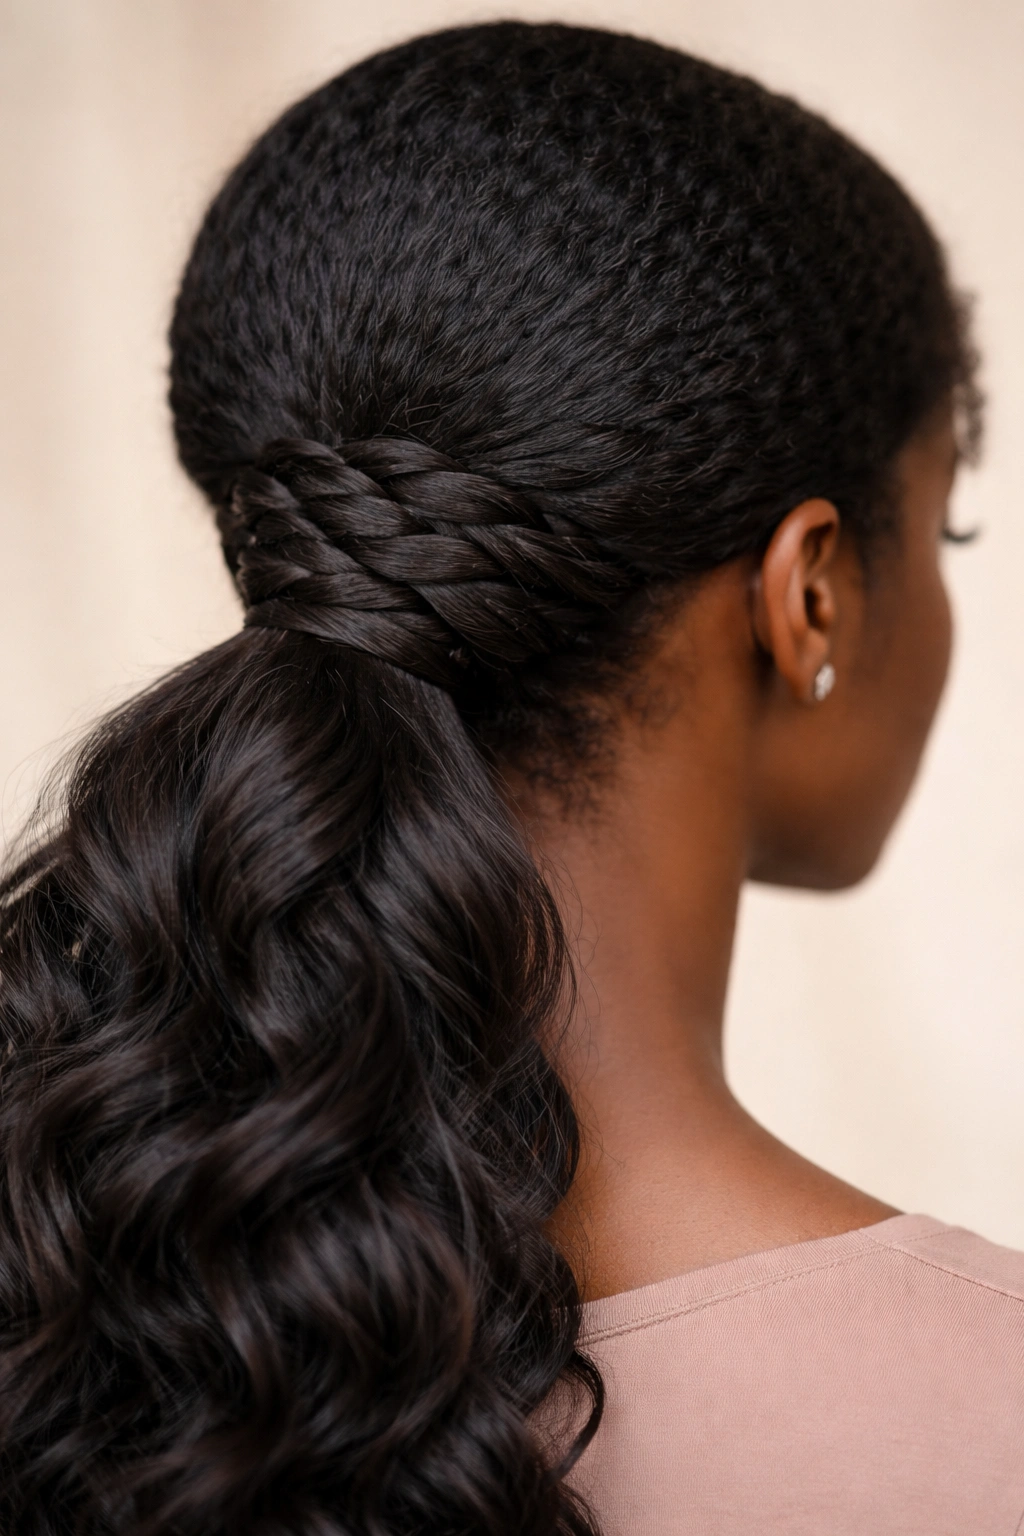
3. The Twisted Low Ponytail
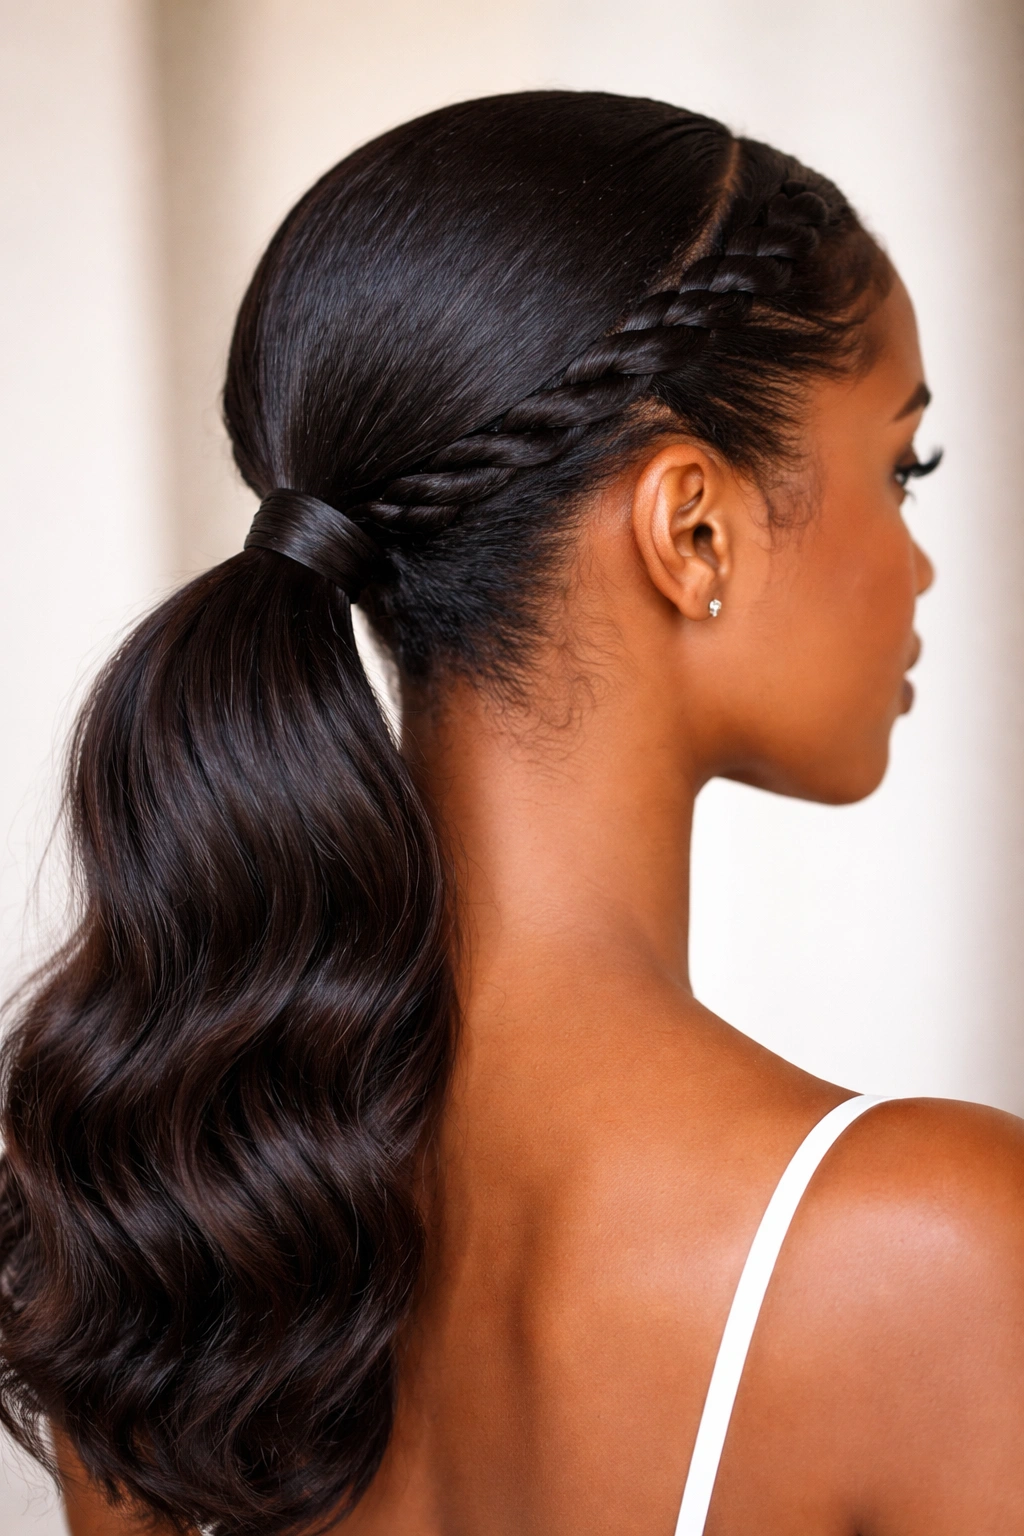
Twists add sophistication and visual interest to a basic ponytail, and the good news is that twisted ponytails work beautifully on all natural hair textures. The twist can start at your crown and wrap around into the ponytail base, or you can twist sections of hair and wrap them around the elastic for a crown-like effect. Either way, you’re creating a style that looks more intricate and intentional than it actually is.
Creating Defined Twists
Section your hair into two equal parts straight down the middle from your forehead to the nape of your neck. Take one section and twist it tightly as you move downward, allowing the twist to coil naturally as it spirals. Secure the end with a small clip temporarily. Repeat on the other side. Once both twists are complete, gather all your hair — including the twists — into a low ponytail at the nape and secure with an elastic.
Twist Variations Worth Trying
- Single twisted ponytail: Create just one large twist from one side of your head to the other, then incorporate it into your ponytail base for an asymmetrical effect
- Multiple mini twists: Separate a small section of hair from each side of your head, twist each one, and wrap them around your ponytail elastic before securing, creating a decorated ponytail base
- Senegalese twists incorporated: If you’re wearing Senegalese twists or crochet twists, you can gather them into a low ponytail for a protective style that lasts longer
- Chunky two-strand twists: Divide your entire head into larger sections and two-strand twist each one, then gather into a low ponytail for a bold, textured look
4. The Braided Low Ponytail
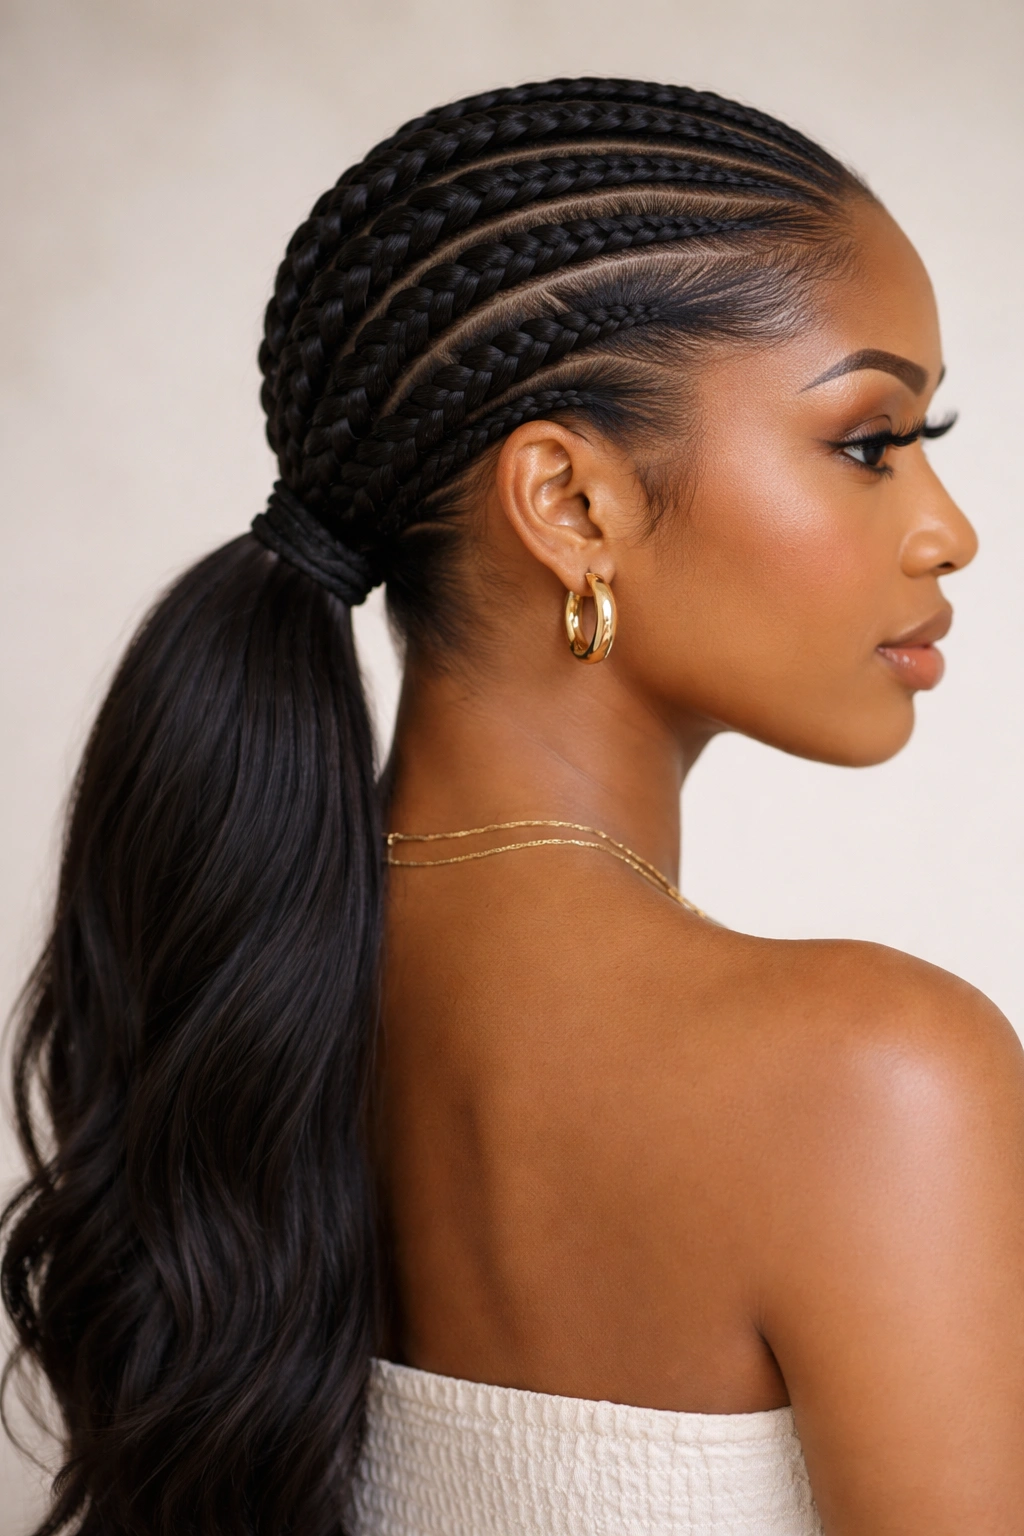
Braids are natural hair magic — they’re protective, they last for days, and they add a polished, purposeful quality to any style. A braided low ponytail combines the protective benefits of braiding with the elegance of a low pony, giving you a style that’s both low-maintenance and visually striking.
Building Your Braided Base
Cornrow or Dutch braid your hair straight back from your hairline toward the nape of your neck — one braid down the center, or two symmetrical braids, depending on your preference and the thickness of your hair. Continue braiding until you reach the nape, then gather all your remaining hair (including the ends of your braids) into a low ponytail. The gathered ponytail can be smooth, textured, twisted, or even braided itself, depending on how much time you have and the look you’re going for.
Braid Styling Options
- Single center braid: A single Dutch or cornrow down the middle creates a clean, centered effect that’s both modern and timeless
- Twin braids: Two braids framing your face converge at the nape and flow into your ponytail, perfect if you want a balanced, symmetrical look
- Reverse braids: Braid away from your face toward your crown, then turn and braid toward the nape for an unexpected, creative effect
- Partial braids: Braid only the top section of your head, then release into waves or curls that flow into your ponytail for a softer effect
5. The Puff-Based Low Ponytail
This style takes the beloved top knot puff and extends it into a low ponytail, giving you volume at the crown while keeping hair off your face and neck. It’s particularly striking on natural hair with significant body and coil, though it works beautifully on other textures too.
Creating Your Puff Base
Flip your head forward and gather all your hair into a high ponytail at the very crown. Create a puff by wrapping a section of the ponytail around the elastic to hide it — this usually takes 4 to 6 inches of your ponytail length, depending on how full you want your puff. Once your puff is set, release the remaining length of the ponytail down to where you want it to sit, then re-gather it into a low ponytail position. It sounds complicated, but once you do it twice, it becomes muscle memory.
Styling Your Puff and Ponytail
- Use a generous amount of leave-in conditioner or styling product on the section you’re using to wrap your elastic — this prevents breakage and gives you more grip
- If your puff seems reluctant to hold its shape, a light application of gel around the puff perimeter can help it stay put
- The ponytail length below the puff can be left loose and textured, twisted, or even braided for variety
- This style is excellent for protective styling because the puff sits high while your actual ponytail length receives minimal tension
6. The Wrapped Low Ponytail
A wrapped ponytail adds a jewelry-like quality to your hair. Instead of using a standard elastic, you wrap a section of hair, a piece of yarn, or a decorative band around your ponytail base multiple times, creating a polished, finished look that draws the eye immediately.
The Hair-Wrapping Method
Gather your hair into a low ponytail and secure it loosely with a clear elastic. Take a small, thin section of hair from the bottom of your ponytail (or from a previously separated piece of hair), and tightly wrap it around the ponytail base, spiraling upward toward your scalp. Continue wrapping until you’ve covered the elastic completely, then tuck the end of your wrap hair under the wrapped section and secure with bobby pins. This method looks elegant and feels secure.
Alternative Wrapping Materials
- Yarn or embroidery thread: Use jewel tones, metallics, or pastels to add color without dyeing your hair
- Fabric strips: Cut strips from silk, satin, or cotton fabric and wrap them around your ponytail base for a soft, textured effect
- Beads: Thread small beads onto yarn and wrap, allowing the beads to sit visibly around your ponytail base
- Wire-wrapped sections: Thin decorative wire can hold your wrap in place while adding an edgy, modern aesthetic
7. The Half-Up, Half-Down Low Pony
This style offers a compromise between down-and-free and fully contained hair. You’re pulling back a top section into a low ponytail while letting the rest of your hair flow freely, creating movement and volume while keeping hair out of your face. It’s perfect for days when you want some structure without total commitment.
Creating the Perfect Half-Up Pony
Take a section of hair from your temples and crown — roughly the top third to half of your hair — and pull it back gently to meet at the nape of your neck. Secure with an elastic. The key is making this look intentional rather than accidental, which means the gathered section should be clearly defined without being tight or severe. The remaining half of your hair flows freely, creating a stark and pleasing contrast.
Variations on Half-Up Styling
- Twisted half-up: Twist the top section from both temples as you move back, then secure the twists in a low ponytail
- Braided half-up: Cornrow or Dutch braid the top section on each side, allowing the braids to converge at the nape into a low ponytail
- Voluminous half-up: Tease the top section before pulling it back to create height and drama at the crown
- Textured half-up: Apply curl cream to the gathered section to enhance definition, creating texture contrast between the gathered section and the flowing length
8. The Bubble Ponytail
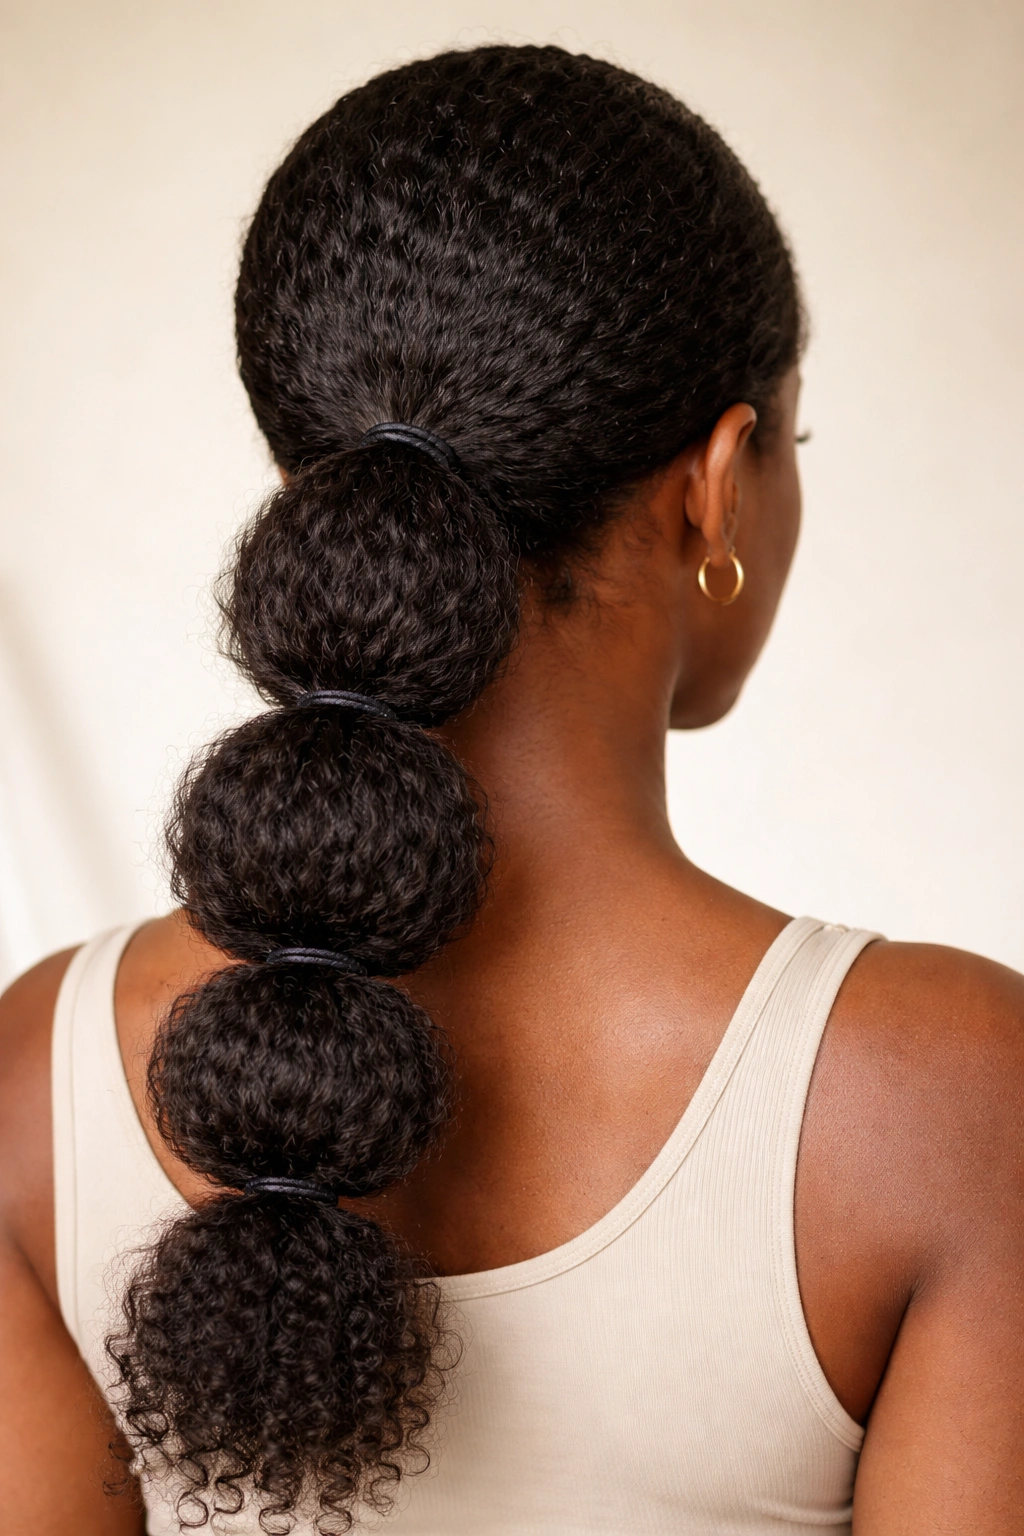
Bubble ponytails are playful and eye-catching, with distinct sections separated by elastics that create a stacked, textured effect. This style works especially well on natural hair because your hair’s texture and body naturally fill out each bubble, making the style look fuller and more polished.
Stacking Your Bubbles
Gather your hair into a low ponytail and secure with an elastic. About 2 to 3 inches below the first elastic, place a second elastic around your ponytail. Gently pull the hair between the two elastics upward and outward to create a “bubble” effect. Repeat this process — add an elastic 2 to 3 inches down, then bubble the section above it — three to five times depending on your ponytail length. Each bubble should be full and rounded rather than flat.
Bubble Ponytail Styling Ideas
- Curly bubbles: The textured nature of natural hair creates automatic visual interest in each bubble — lean into this by using curl-defining products
- Wrapped bubbles: Wrap each bubble section with a contrasting yarn or thread color, creating a rainbow or ombré effect
- Mixed textures: Create bubbles using different techniques — one section smooth, one section twisted, one section with braids — for maximum visual interest
- Extended bubbles: Use hair extensions in each section to create even fuller bubbles and add length to your style
9. The Sleek High-to-Low Ponytail
This style starts with the smoothness of a high ponytail at the crown but transitions into a low ponytail position, creating an elegant diagonal line. It’s sophisticated without being severe, and it works beautifully for both casual and formal occasions.
Creating the High-to-Low Effect
Gather your hair into a high ponytail at the crown and secure tightly with an elastic. Now, working from underneath the elastic, gently push the elastic down toward the nape of your neck — some of your hair will slide through and create new texture and shape as it moves. Position the elastic where you want your low ponytail to sit, and secure with additional bobby pins if needed. The smooth texture at the crown transitions beautifully into the fuller shape at the nape.
Finishing Touches
- Use a lightweight smoothing serum on your crown and edges for a polished, almost glass-like appearance
- If your hair is very slippery, roughing up your hands slightly before handling your hair gives you more grip
- This style pairs beautifully with statement earrings since it exposes your face and neck completely
- The smooth crown creates a perfect canvas for hair accessories like clips or bars positioned at the point where your ponytail sits
10. The Woven Low Ponytail
Weaving creates an intricate, almost three-dimensional effect that makes a standard ponytail look far more intentional and artistic. You’re essentially braiding sections of hair around your ponytail base, creating a woven appearance that frames your neck beautifully.
Weaving Your Ponytail Base
Gather your hair into a low ponytail and secure it loosely with an elastic. From one side of your ponytail base, take a thin section and weave it alternately under and over the remaining sections of your ponytail, as if you’re braiding, but working around the outside of your ponytail rather than incorporating new hair. Continue this weaving pattern around your entire ponytail base, working your way back to where you started.
Woven Ponytail Variations
- Single-strand weave: Use just one thin strand to create delicate weaving lines around your ponytail
- Multi-strand weave: Use two or three strands woven simultaneously for a bolder, more dramatic effect
- Colored thread weave: Incorporate embroidery thread or yarn into your weaving for added color and visual interest
- Braided weave: Braid sections of hair before weaving them around your ponytail for texture on top of texture
11. The Faux-Loc Low Ponytail
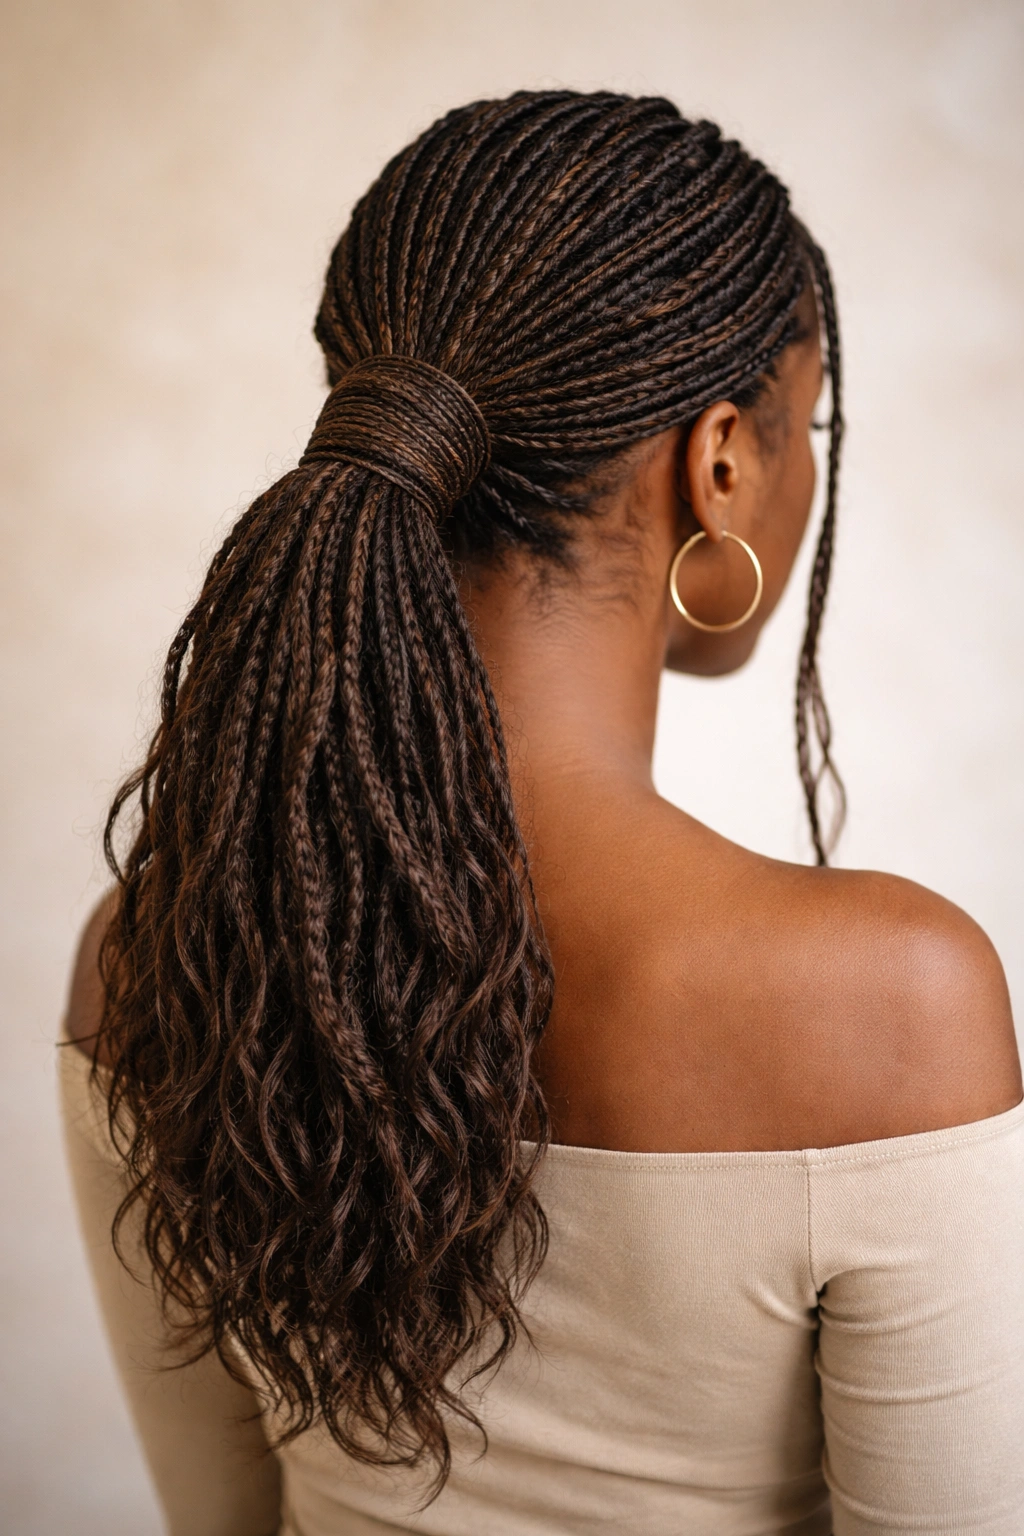
If you love the look of locs but want a temporary style, faux locs gathered into a low ponytail offer the best of both worlds. You can wear this style for two to four weeks, then take it down and return to your natural hair without any permanent commitment or damage.
Installing Your Faux Locs
Faux locs are typically created by wrapping yarn or thread around sections of hair in a spiral pattern, or by using a crochet method where hair is looped through braids. Once your faux locs are complete, you simply style and gather them as you would your natural hair. For a low ponytail, gather your locs at the nape and secure with an elastic. The locs themselves provide incredible texture and visual interest, making a faux-loc ponytail a showstopping style.
Faux-Loc Ponytail Care
- Faux locs can last longer if you sleep on a silk or satin pillowcase and cover your hair at night
- You can manipulate your locs into different ponytail positions — high, low, off to the side — without undoing the entire installation
- Refresh your edges with lightweight edge control as needed, but avoid heavy products that can accumulate on the locs
- This style is genuinely low-maintenance once installed, making it perfect for busy periods
12. The Slicked-Back Low Ponytail with Volume
This style splits the difference between sleek and textured — your edges are smooth and tamed, but your ponytail itself remains full and textured, creating contrast and visual interest. It’s sophisticated yet relaxed, polished yet natural-looking.
Achieving the Slicked-Back Effect
Apply a lightweight edge control or mousse to your hairline and edges, then smooth them back firmly using a soft brush. Once your edges are taut and smooth, gather your hair at the nape into a low ponytail — but instead of smoothing the ponytail itself, keep it loose and textured. The contrast between your smooth, controlled edges and your full, free ponytail creates an intentional, modern aesthetic. Use a clear elastic so the focus remains on your hair texture rather than the tie.
Styling for Maximum Impact
- The textured ponytail portion should feature your natural curl pattern, coils, or waves — use a curl-defining product on damp hair before gathering your ponytail to enhance definition
- Your edges can be as sleek or as gently curved as you prefer; even slight curve looks intentional and polished
- Pair this style with minimal jewelry to let your hair’s texture be the statement
- This style works beautifully on days three through five of a wash cycle when your curls have settled and developed additional texture
Final Thoughts
Low ponytails for natural hair offer remarkable versatility — you can choose a style based on your hair texture, the time you have available, the occasion you’re dressing for, and your mood that day. Whether you’re gravitating toward the protective benefits of braids, the polish of sleek edges, the textural beauty of defined curls, or the creativity of wrapped and woven variations, there’s genuinely a low ponytail option for every situation.
The beauty of mastering multiple low ponytail techniques is that you develop a toolkit you’ll rely on for years. A style that takes you fifteen minutes today becomes a five-minute style once your hands learn the pattern. As you experiment with different variations, you’ll discover which ones make you feel most confident and most like yourself.
Natural hair thrives when you’re giving it regular breaks from tension and heat, and low ponytails offer this protection without sacrificing style or elegance. Whether you wear these styles for a single day or stretch them across an entire week, you’re choosing a protective approach that celebrates your hair’s natural texture while keeping you looking polished and put-together.