The side part has long been a staple of elegant hairstyling, and when paired with a ponytail on natural hair, it creates a polished, sophisticated look that works for everything from casual outings to formal occasions. What makes side part ponytails particularly appealing for natural hair is their versatility—they accommodate curls, coils, waves, and straight textures with equal grace, and they can be styled sleek and refined or kept textured and full of volume depending on your mood and the occasion. The side part itself adds instant visual interest and asymmetry that feels modern and intentional, while the ponytail keeps everything neatly contained and low-maintenance.
Natural hair responds beautifully to this combination because the weight and dimension of textured hair naturally creates depth and movement. Whether you’re working with loose waves, tight coils, or anything in between, a side part ponytail draws attention to the shape of your face and allows your hair’s natural texture to shine. Unlike some hairstyles that require your natural texture to be stretched, smoothed, or heavily manipulated, many side part ponytail variations celebrate texture exactly as it is—coils intact, curl pattern visible, and volume preserved.
The challenge, though, is knowing which variation of the side part ponytail will work best for your specific hair type, face shape, and lifestyle. Some techniques work better for finer hair, while others really shine on thicker, densely coiled texture. Some styles take minutes to create, while others benefit from more careful styling and securing. This guide walks you through twelve distinct approaches to the side part ponytail, each with specific techniques, styling tips, and honest guidance about which hair types and situations they suit best. You’ll find everything from sleek, gel-smooth versions to bouncy, texture-forward styles—enough variety that you can rotate through them depending on how you’re feeling and what your hair needs that day.
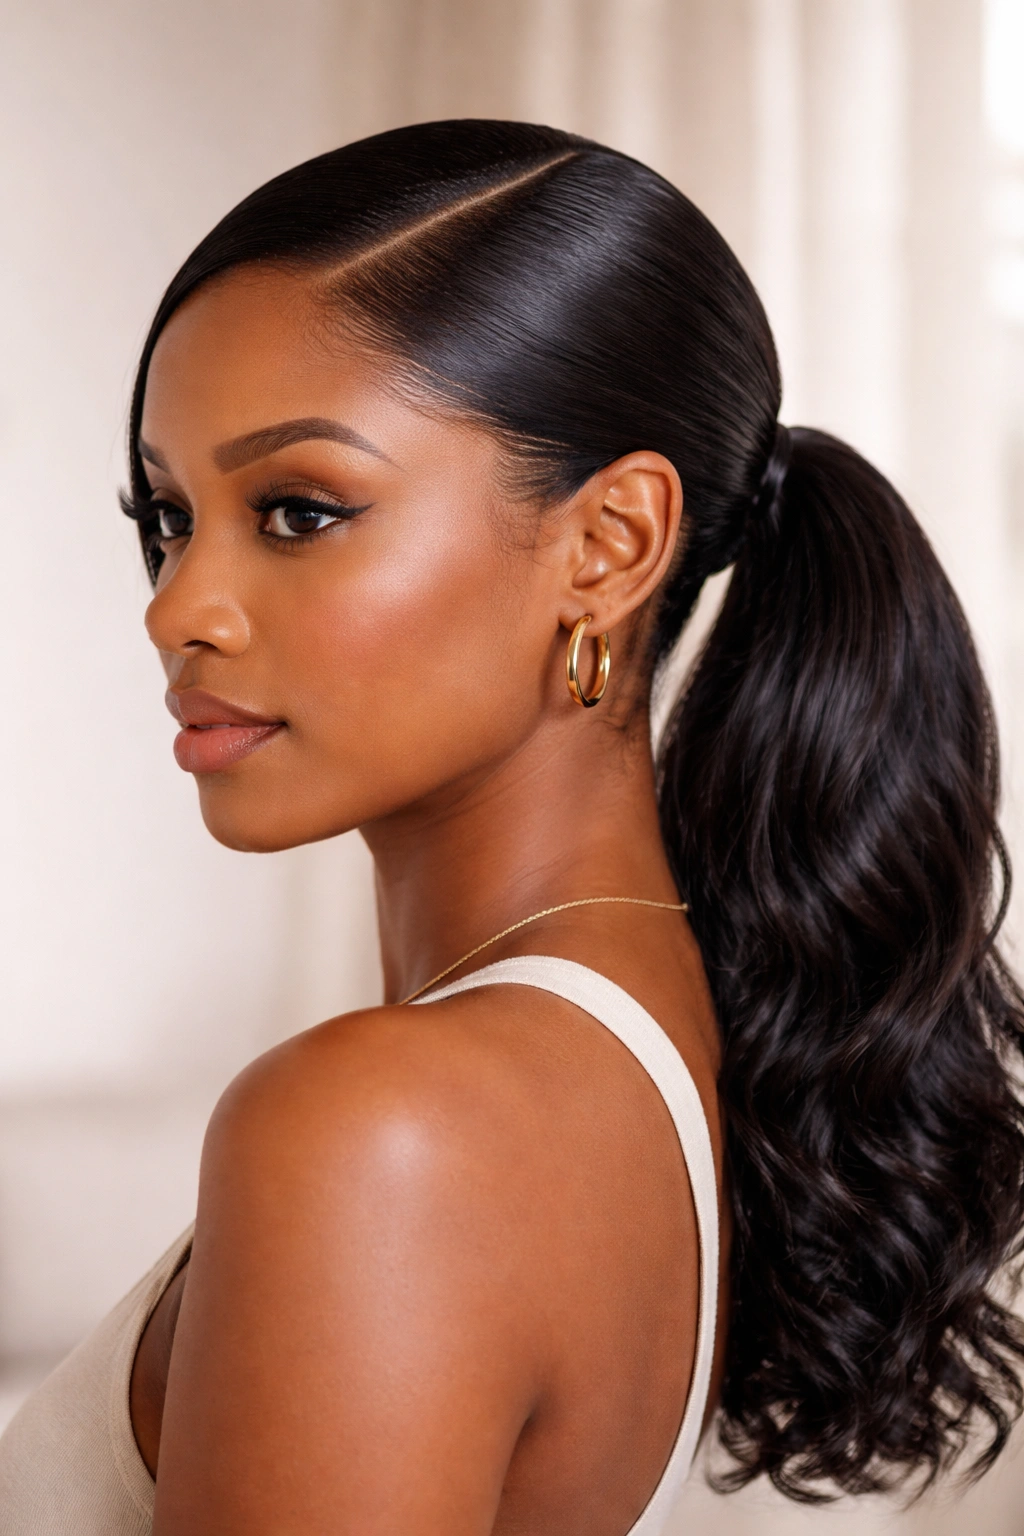
1. Sleek Side Part High Ponytail
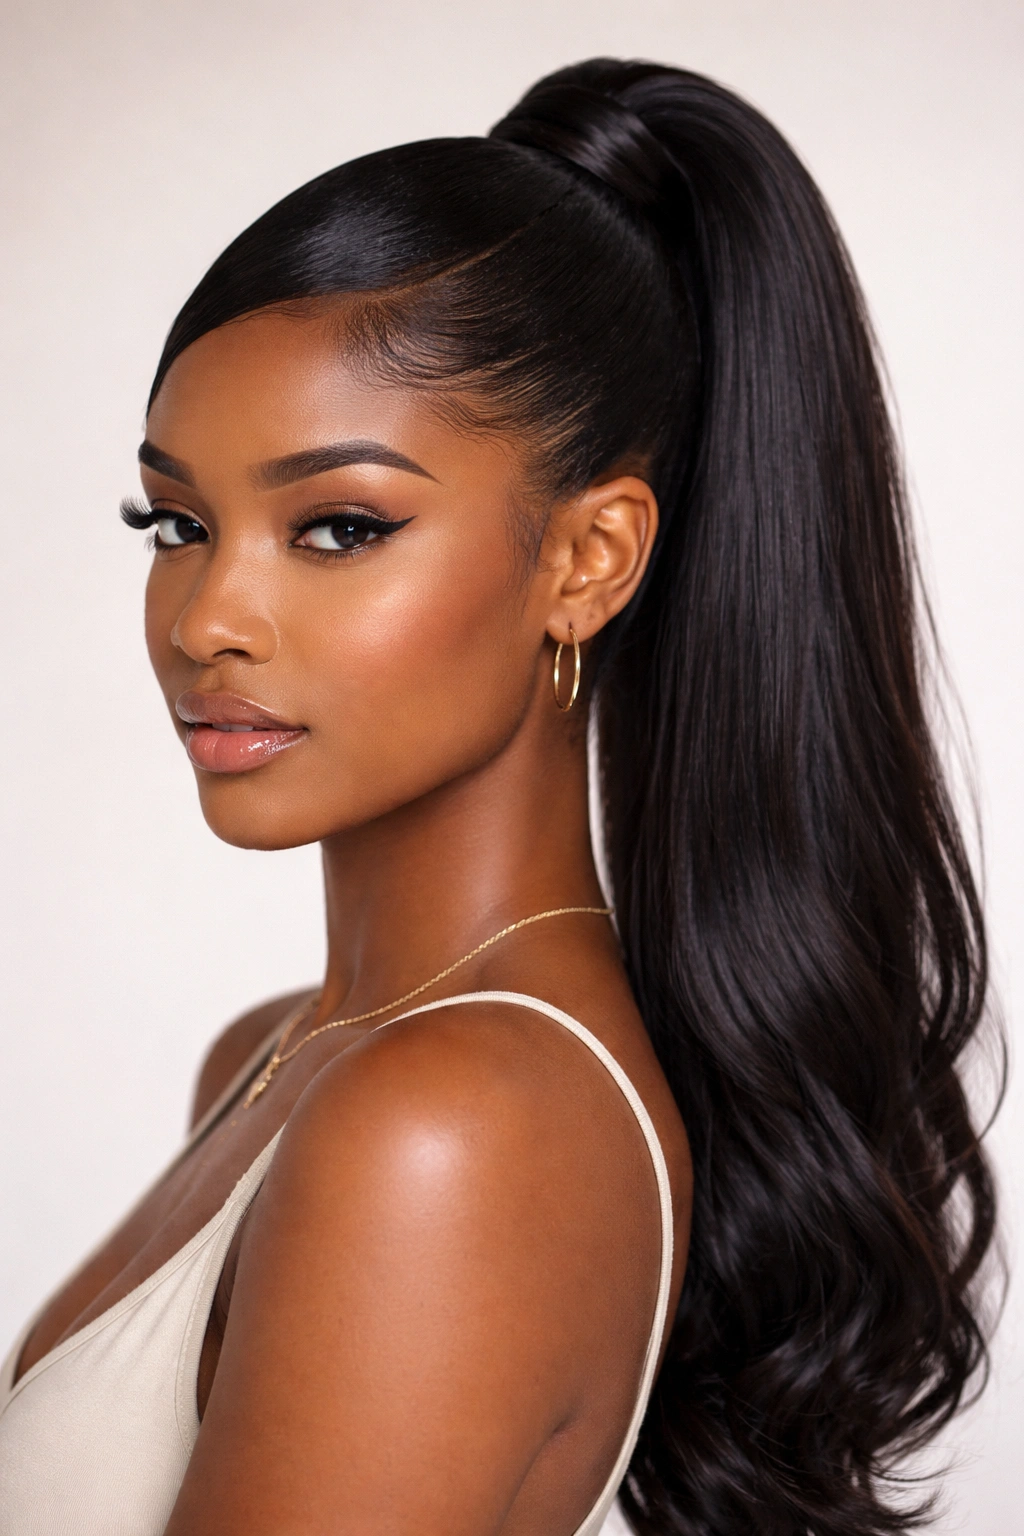
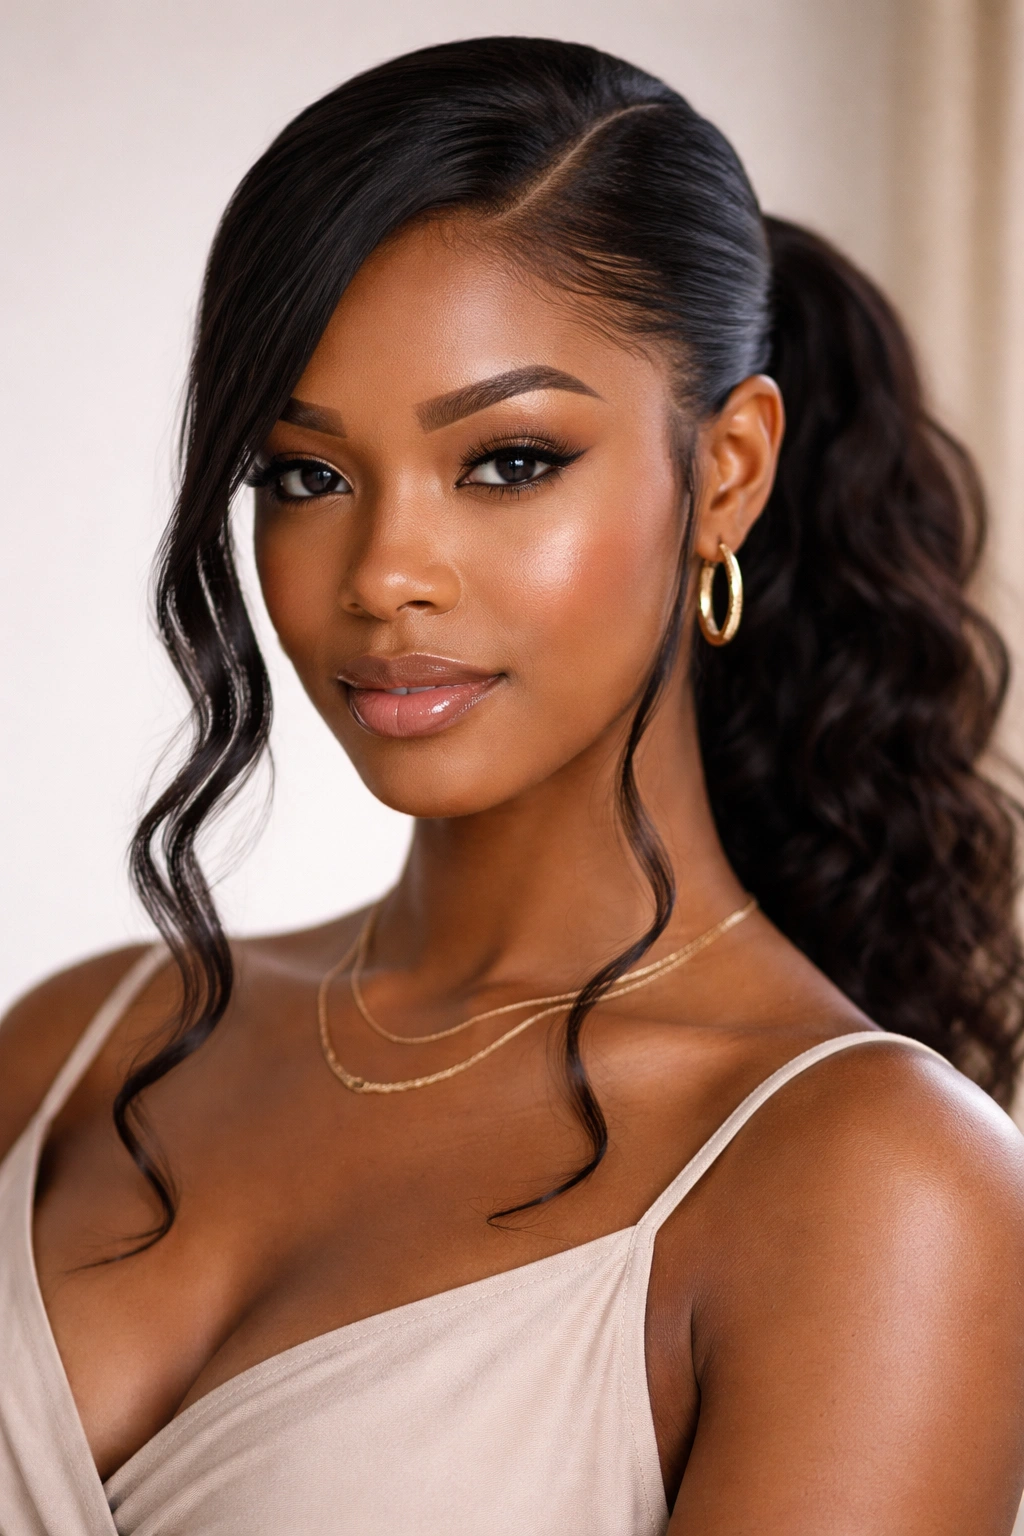
The sleek side part high ponytail is the ultimate polished version of this style—hair smoothed completely, with a sharp side part running from temple to the back of the crown, and all the hair gathered high at the back of the head. This version reads professional and put-together instantly, making it ideal for work, events, or any time you want your styling to announce that you’ve made deliberate effort.
How to Perfect the Sleek Version
Getting true sleekness on natural hair requires the right products and technique. Start with damp (not wet) hair, apply a smoothing cream or gel to your entire head in the direction of your desired style, then use a fine-tooth comb or paddle brush to smooth everything firmly into place. The key is patience—rushing this step results in flyaways and frizz. Work through your hair methodically, brushing in one direction repeatedly until you see shine and smoothness developing. Once you’ve achieved the sleek base, create your side part by using the comb to draw a clear line from your temple all the way back to the crown, parting the hair cleanly to one side.
Essential Steps for Maximum Hold
- Apply your smoothing product (gel, cream, or mousse) to damp hair, section by section, combing through thoroughly as you go
- Use a fine-tooth comb rather than a brush when you’re near completion—this catches frizz and creates definition
- Part your side by drawing the comb along the exact line you want—a crooked part becomes obvious on sleek hair
- Gather all hair into a high ponytail at the back of the crown and secure tightly with a elastic band
- Smooth any remaining flyaways with extra gel and a small brush, working them back into the ponytail
- Let the smoothing product dry completely before touching your hair—this sets the sleekness for the day
Pro tip: For maximum hold that lasts all day without flaking or stiffness, mix a smoothing gel with a lightweight leave-in conditioner. This gives you control without that stiff, crunchy finish that some products create.
2. Textured Side Part Pony with Volume
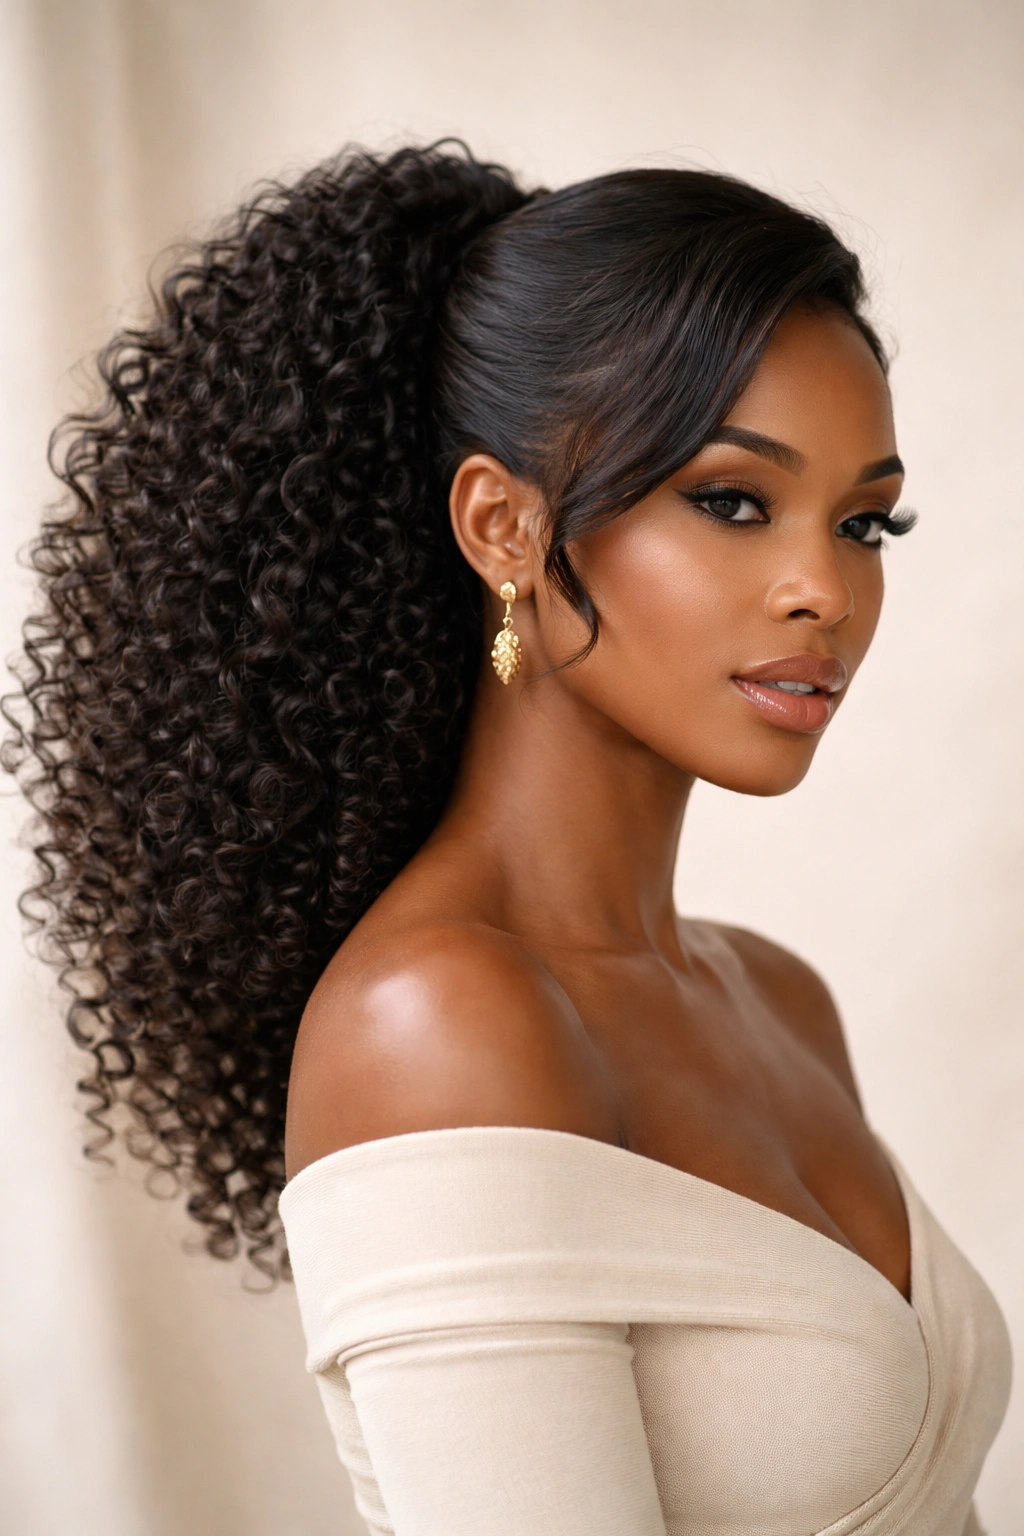
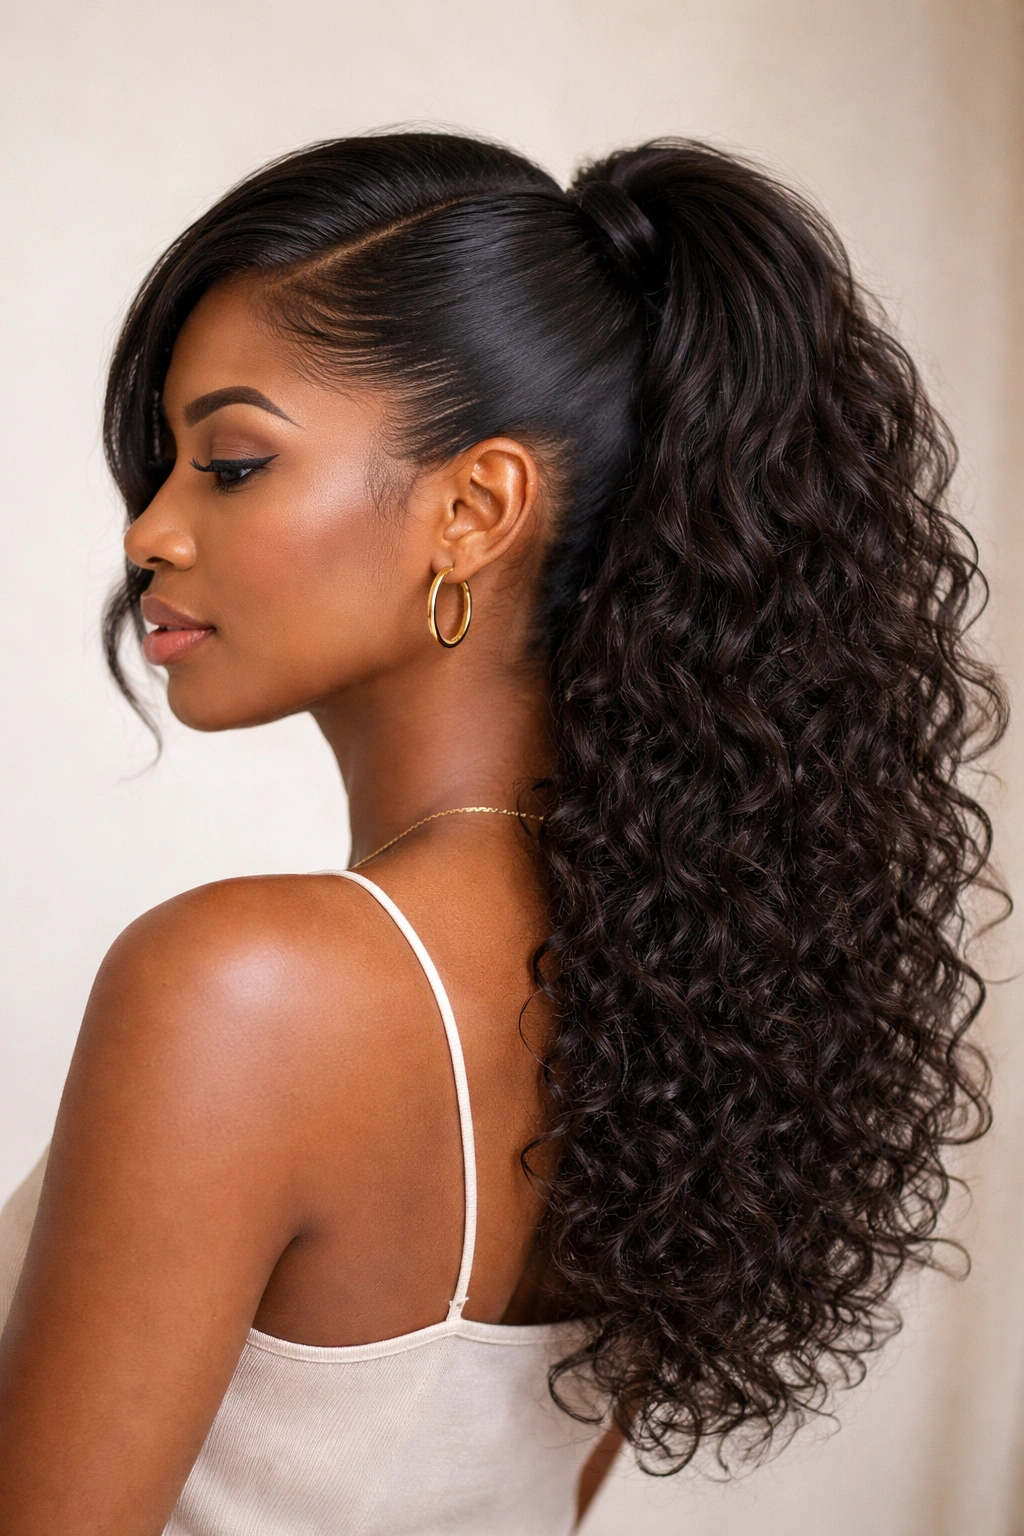
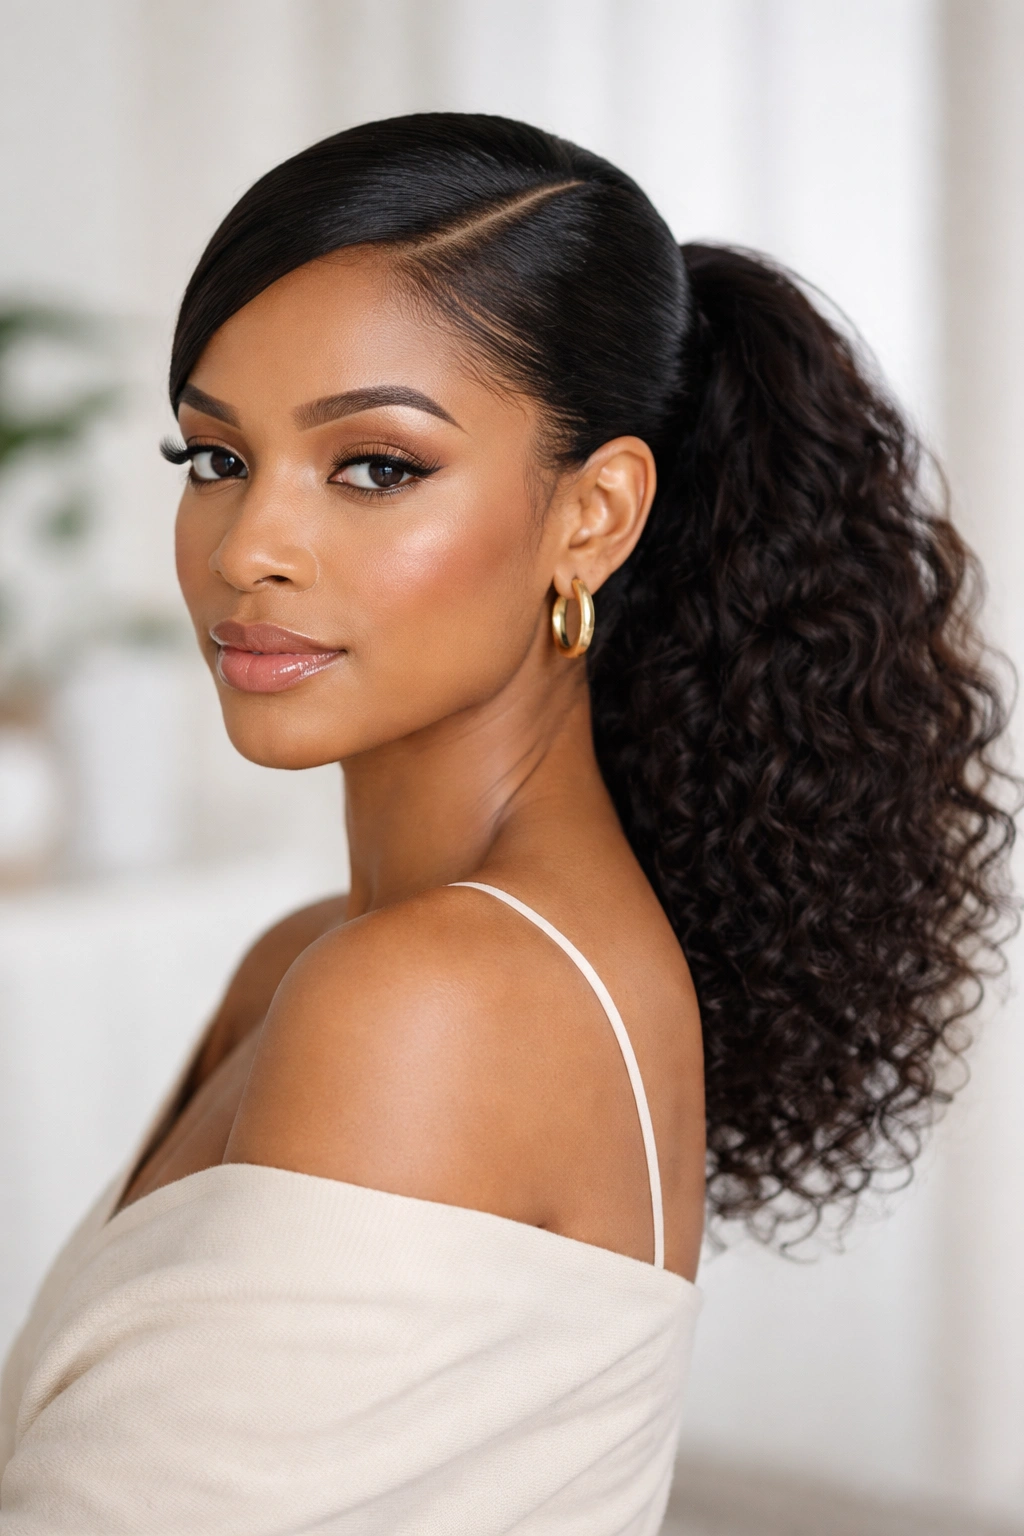
This is the opposite approach—instead of smoothing everything flat, you lean into your natural texture, creating a voluminous, dimensional ponytail that celebrates curl and coil as the main visual feature. The side part still creates that asymmetrical elegance, but the hair itself is full, bouncy, and undeniably textured, making this ideal for when you want to honor your hair’s natural state while keeping it out of your face.
Celebrating Texture Without Flattening It
Start with hair that’s been moisturized and styled in its natural pattern—whether that’s curls, coils, waves, or a combination. You don’t want to disturb the curl pattern with heavy combing, so use your fingers to gently separate and define curls as needed, working with products that enhance texture rather than suppress it. Create your side part by using your fingers to push hair to the side, rather than dragging a comb through; this preserves the curl pattern while still creating a visible part line.
Product and Sectioning Strategy
- Use a curl-defining cream or gel applied to damp curls, scrunching upward to encourage coil formation
- Allow curls to dry completely before styling—wet curls are harder to manage and more prone to frizz
- Create your side part with your fingers, gently pushing and arranging curls rather than combing
- Gather the ponytail loosely at first, securing it at medium height on the back of your head
- Use a curl-refreshing spray or light oil mist on the ponytail to reactivate curl and add shine without weighing it down
- Gently fluff and separate curls around the ponytail to create the fullest possible volume
Real talk: This style works best when you’ve got time to let your hair dry in its natural pattern beforehand. Trying to create textured volume from soaking-wet hair typically results in frizz rather than definition.
3. Twisted Side Part Ponytail
The twisted version adds intricate detailing that makes a simple ponytail feel special—instead of simply pulling hair straight back, you twist sections of hair as you gather them toward the ponytail, creating a spiral texture that catches light and adds visual sophistication. This technique works on all natural hair textures and takes only a few extra minutes.
The Twist Technique
Begin with your side part in place and hair that’s been lightly moisturized. Starting from one side of your head, take a two-inch-wide section of hair and begin twisting it gently, working from your temple back toward the crown. As you twist, you’re creating a rope-like texture—keep the tension even and consistent. Once you’ve twisted that section all the way to the back, secure it temporarily with a small clip. Repeat on the other side, creating a matching twist.
Creating Balanced Twists
- Start twists on both sides of your side part, working simultaneously so they meet at the back
- Keep twist tension moderate—too tight and your scalp feels uncomfortable; too loose and they unravel
- Use bobby pins to secure the ends of each twist at the crown before gathering the ponytail
- Once both twists are pinned, gather all hair (including the twist sections) into your ponytail
- Smooth the twists gently with a brush or your fingers before tightening your ponytail elastic
- For extra definition, spritz the twists with gel or a light hairspray
Worth knowing: Twists hold better on slightly drier hair rather than soaking-wet hair. If you’ve just showered, give your hair 20-30 minutes to air-dry before attempting this style.
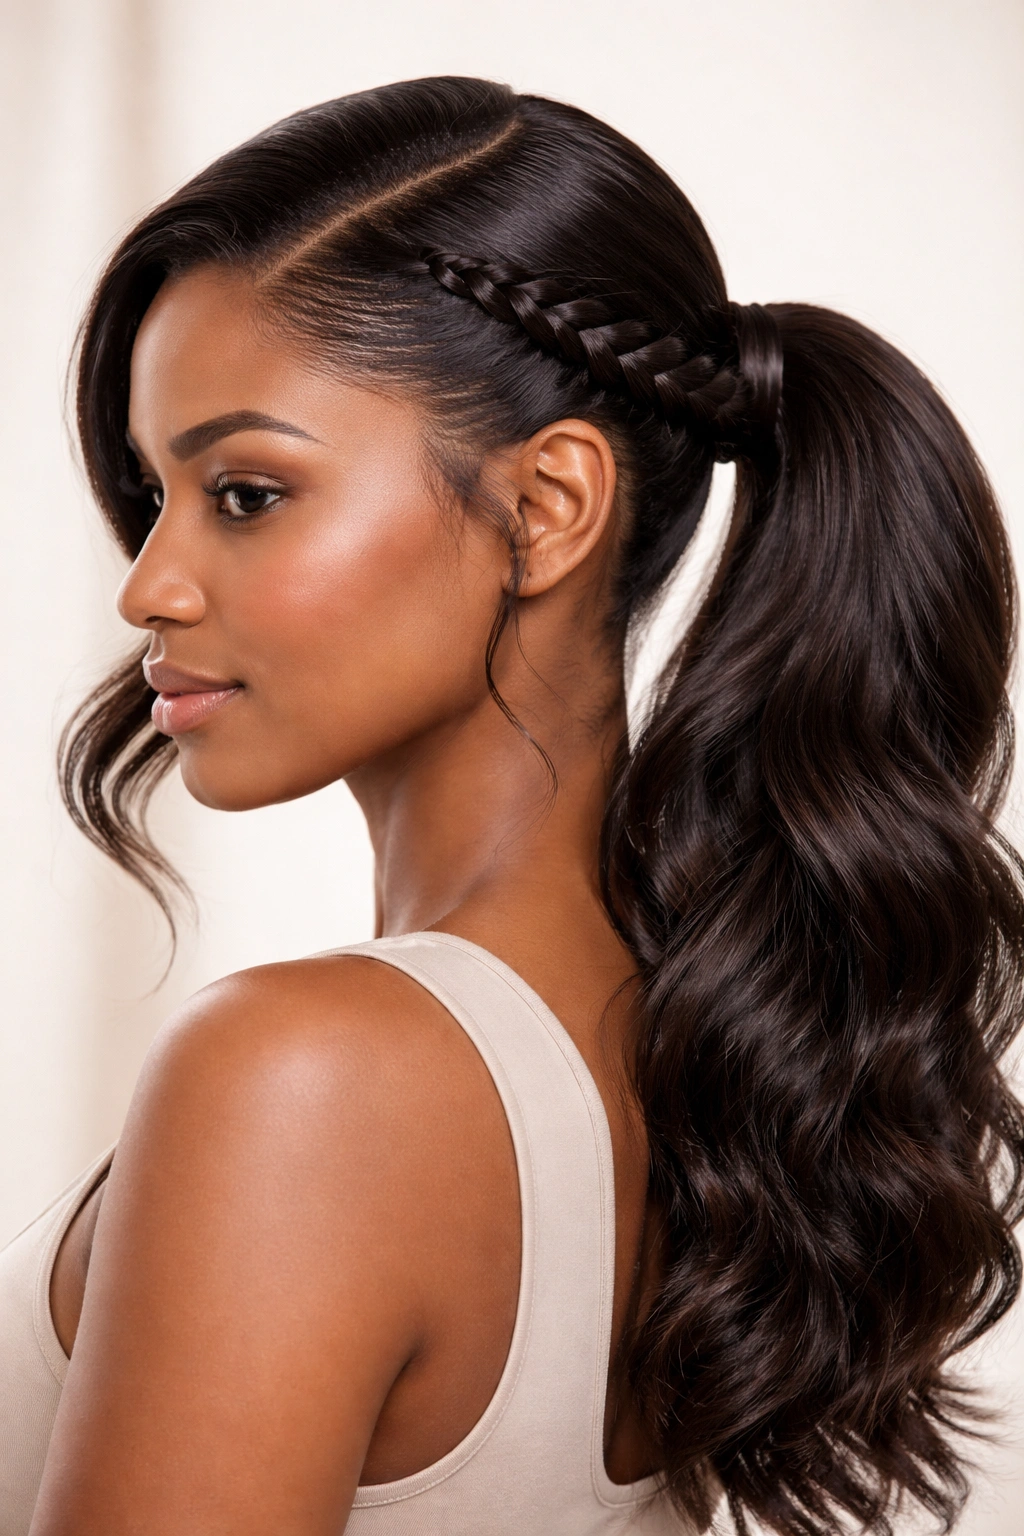
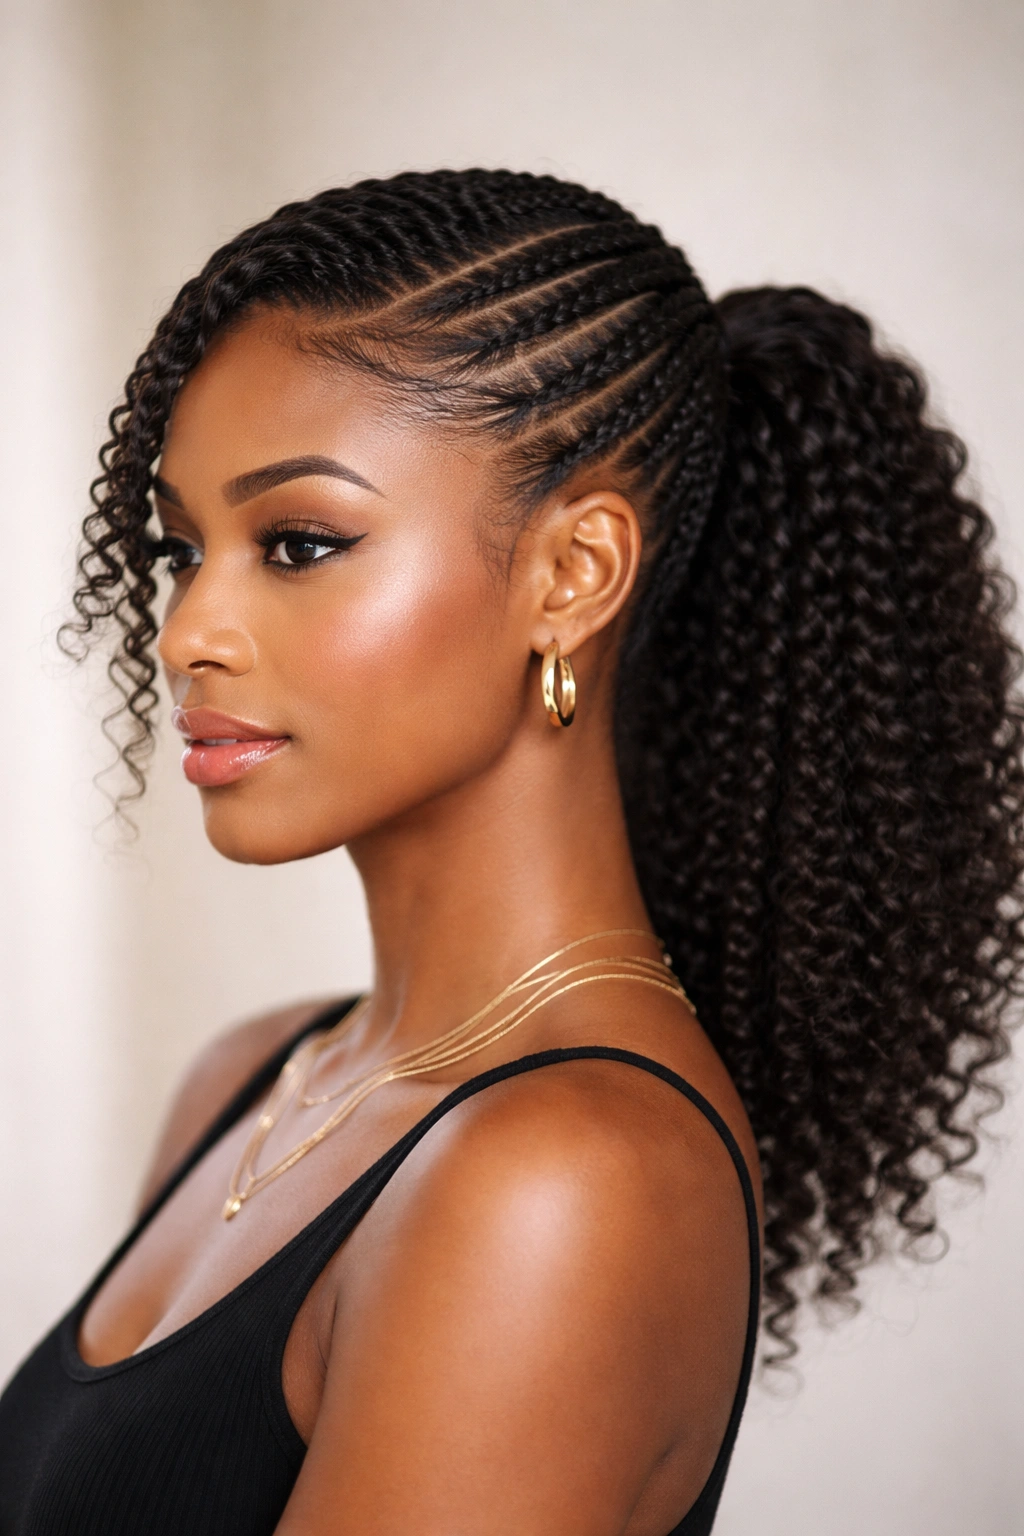
4. Braid-Adorned Side Part Pony
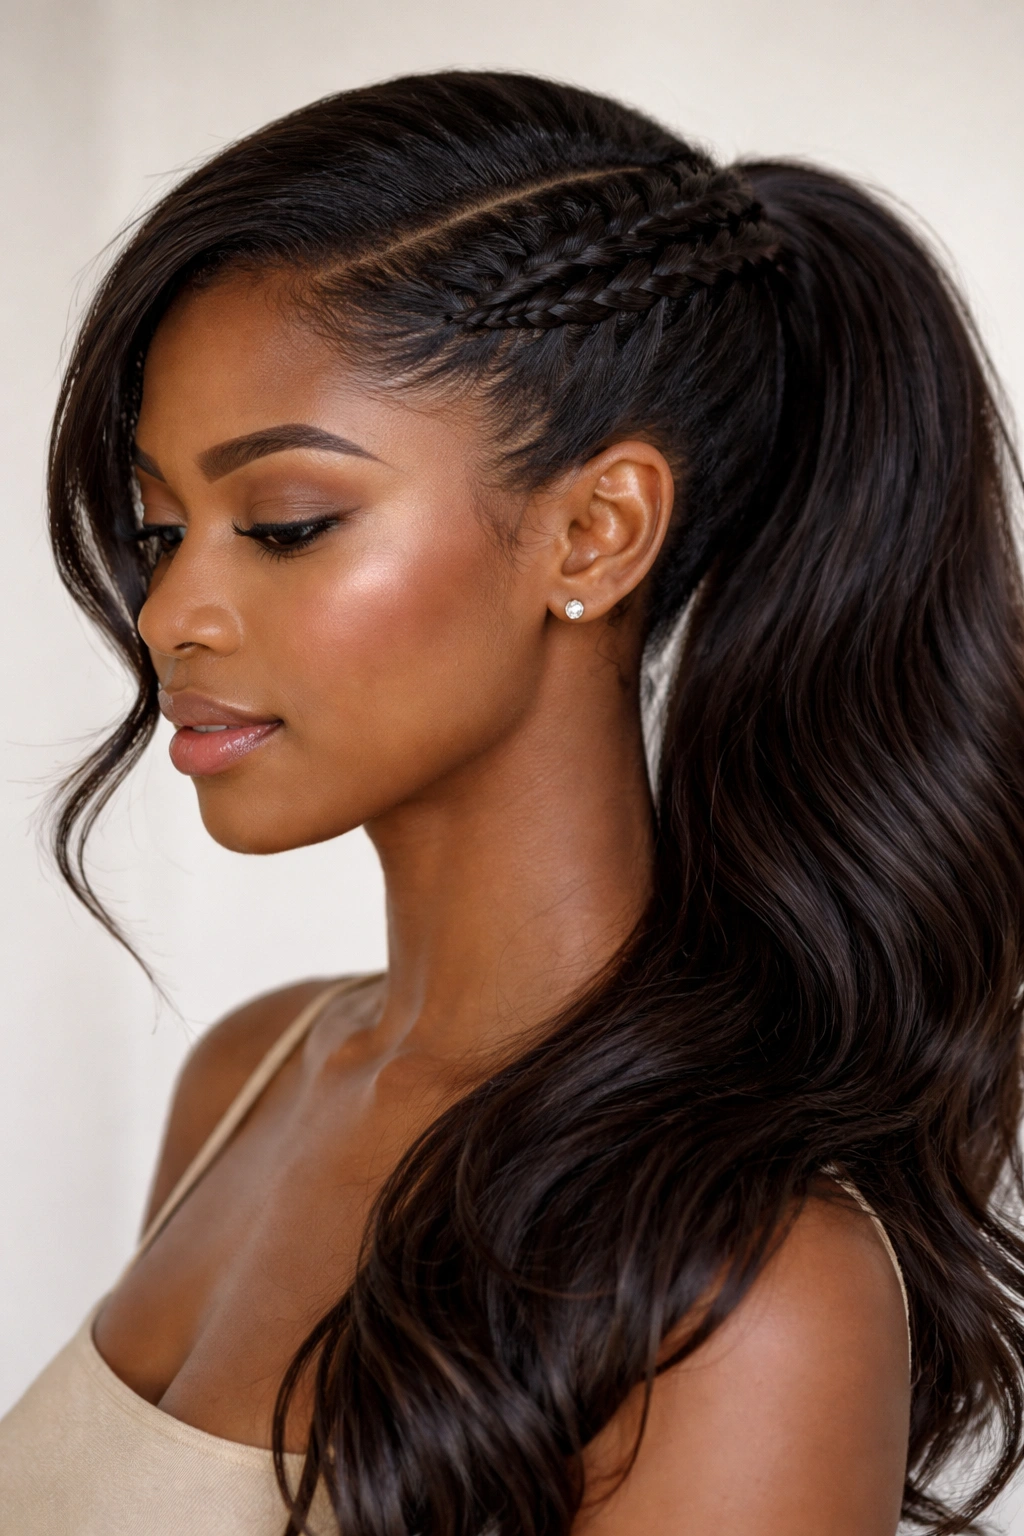
Braids woven into or alongside a side part ponytail create a romantic, intricate look that feels far more complicated to create than it actually is. Whether you’re doing a full braid from the temple back or a partial braid that feeds into the ponytail, the braid becomes a focal point that elevates the entire style.
Braid Placement Options
A Dutch braid starting at your temple and traveling back toward the crown works beautifully with a side part—the braid becomes the accent that draws the eye. Alternatively, you can do a simple three-strand braid using just a section of hair from your side part and then incorporate that braid into your main ponytail. Both approaches create that woven, intentional look. The key is ensuring your braid stays clean and defined; this requires practicing your braid tension so it’s firm enough to hold but not so tight it creates discomfort or breakage.
Building Your Braided Ponytail
- Section a thick piece of hair from your side part area (about three inches wide) and begin a Dutch or French braid at your temple
- Direct the braid backward along your scalp toward the back of your crown
- As you braid, maintain even tension and keep the braid close to your scalp—a floating or loose braid looks unfinished
- Once your braid reaches the back, secure the end with a small elastic
- Gather all remaining hair plus the braid into your main ponytail
- Use a fine comb to gently tease the ponytail slightly, which adds volume and texture to balance the braid
Insider note: If full braiding feels intimidating, start with two-strand twists instead of three-strand braids. Twists are more forgiving and create a similar visual impact.
5. Puff with Side Part Detail
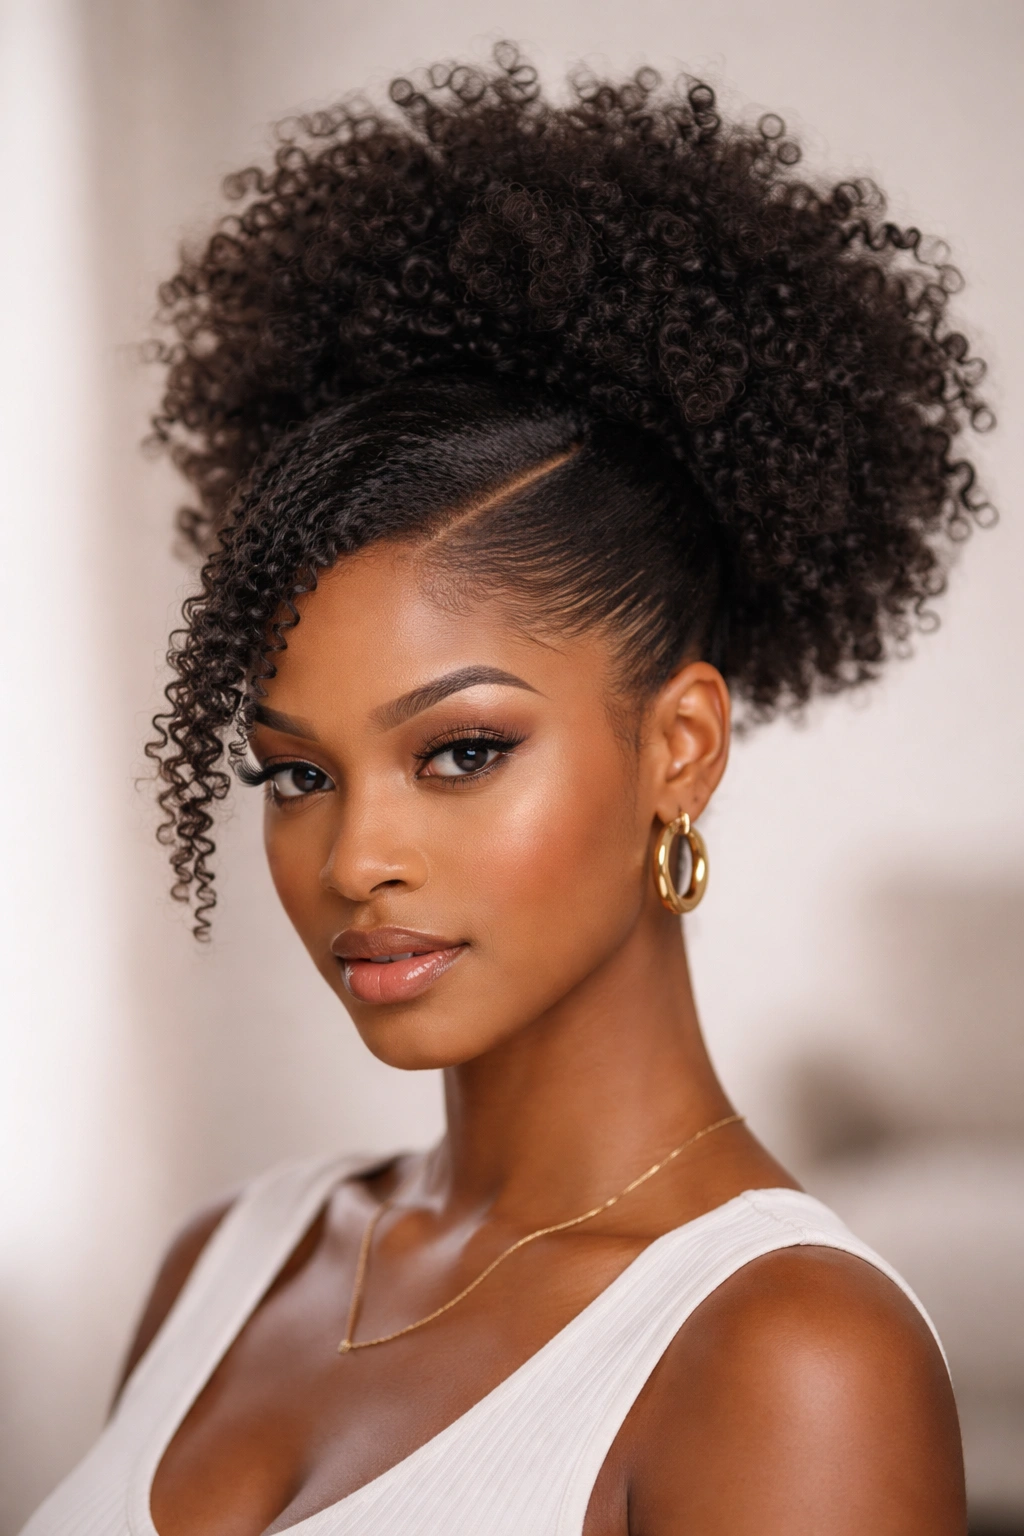
A puff is a gorgeous way to gather natural hair while preserving maximum texture and volume. When you add a side part, you’re creating architectural interest that prevents the puff from looking flat or one-dimensional. This style works especially well for coily and densely textured hair where the hair naturally wants to gather upward rather than hang down.
Creating a High-Volume Puff
Start with hair that’s been moisturized and styled in its natural texture. Create your side part, then gather all the hair (honoring the side part as you do) into a high ponytail at the crown. Instead of tightening the elastic all the way, leave the ponytail slightly looser, then flip the ponytail forward and gently separate and fluff the hair to create a full, rounded puff shape. The key is separating the curls and coils enough that they stand away from your head rather than lying flat.
Puff Structure and Maintenance
- Use moisturized hair that’s been refresh-styled or freshly styled in its natural curl pattern
- Create your side part first, before gathering the ponytail—this ensures the part remains visible
- Gather the ponytail high on your crown for maximum puff volume
- Leave slight slack in your elastic (this prevents tension headaches and allows more fluff)
- Flip the ponytail section forward and use your fingers to separate and lift each curl cluster
- Spritz with a curl-refreshing product and allow to air-dry this way for 5-10 minutes to set the shape
Fair warning: Very high and very full puffs can create tension at your hairline if not done carefully. If you’re prone to tension sensitivity, try a slightly lower puff position or use a broader elastic band that distributes pressure more evenly.
6. Slicked Side Part Low Ponytail
The low ponytail offers a more relaxed, approachable version of the sleek side part style. Rather than gathering hair high at the crown, you’re creating a sleek part and then smoothing everything down into a ponytail gathered low at the nape of your neck. This version feels softer and less severe while still maintaining that polished, intentional appearance.
Positioning and Smoothing Technique
Use a smoothing product and fine-tooth comb to create your side part and sleek the hair down the back of your head toward the nape. Instead of pulling everything tightly, allow for a subtle amount of volume at the crown—this prevents the style from looking flat and aging. Gather the low ponytail at the nape of your neck, securing it firmly but not so tightly that you feel tension. This version often looks beautiful with a slightly fuller ponytail (not as compressed and sleek as a high ponytail), so don’t be afraid to allow some gentle volume in the ponytail itself.
Low Ponytail Execution
- Apply smoothing cream or gel to damp hair and work through section by section with a fine-tooth comb
- Create your side part using the comb tip to draw a clear line from temple to back
- Smooth hair down toward the nape, using a brush or comb to keep everything in place
- Gather the ponytail low at the back of your neck, positioning the hair tie about an inch above the nape
- Leave the nape area slightly smooth but don’t worry about perfect sleekness—this style suits a little softness
- Secure the elastic firmly but not aggressively—you want hold without tension
- Use a light edge control around the hairline to define your side part and smooth any flyaways
Quick tip: This style looks especially elegant with a metallic or decorative hair cuff worn over your elastic at the base of the ponytail.
7. Curly Coil Side Part Ponytail
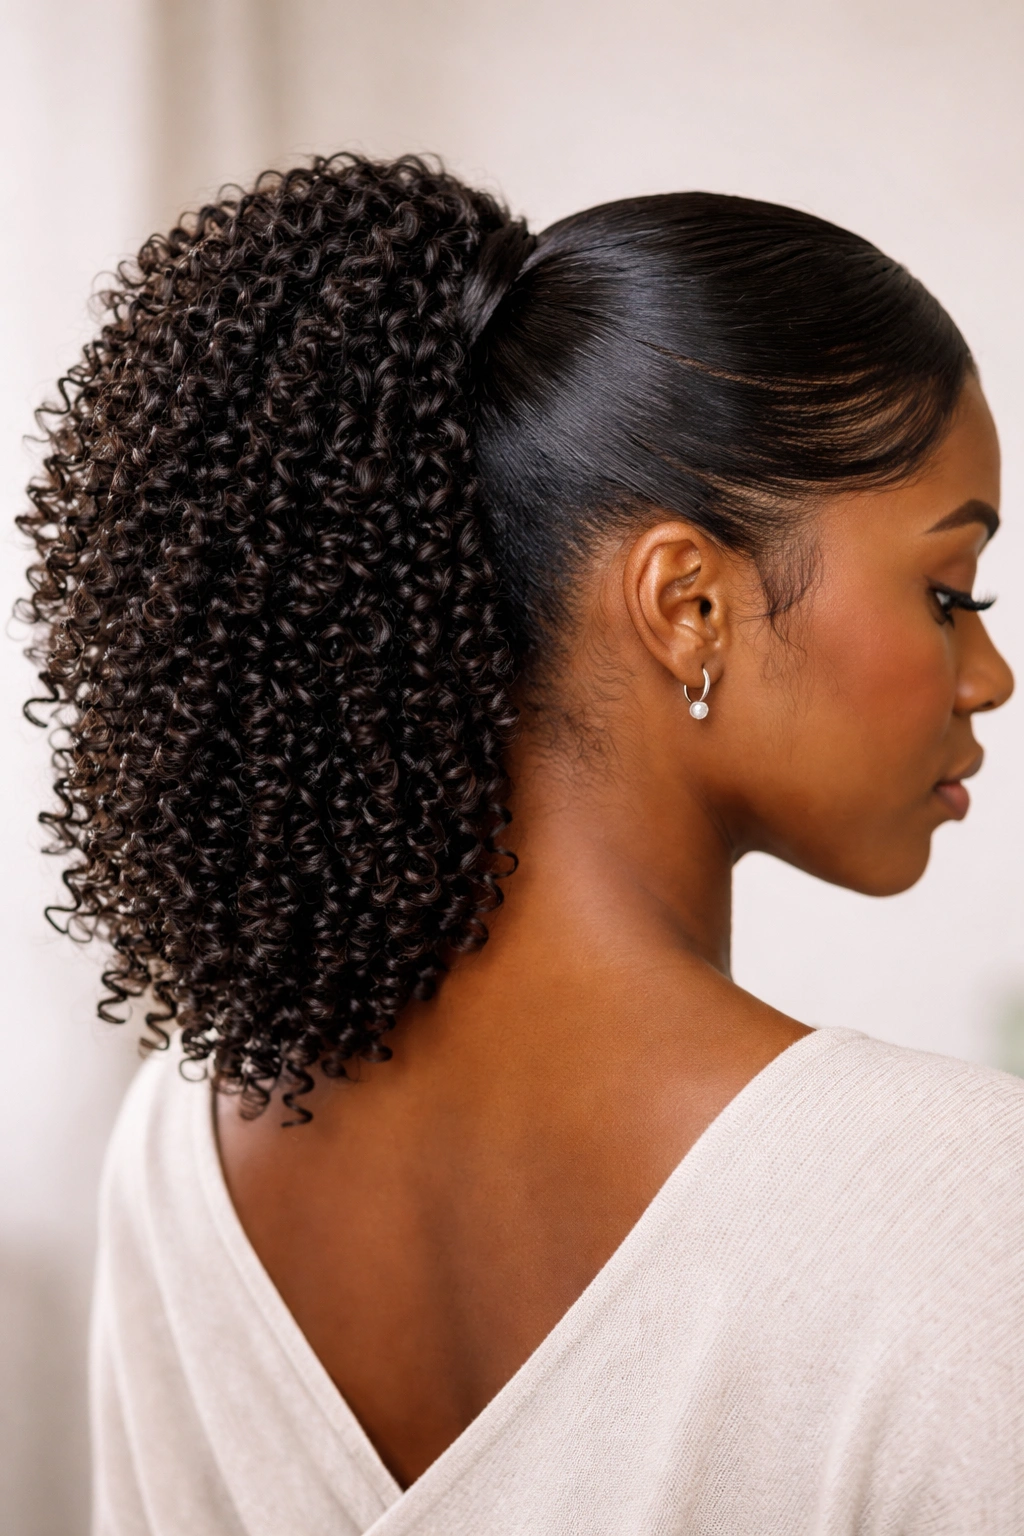
For hair with tight, defined coils, a side part ponytail that celebrates those coils as individual, separate units is absolutely stunning. Rather than compressing the coils or smoothing them, you’re encouraging each coil to stand and twist independently, creating a textured, three-dimensional ponytail that catches light and showcases your curl definition.
Coil-Honoring Styling Method
Begin with hair that’s been moisturized with a heavy cream or butter. Create your side part gently, using your fingers to arrange coils rather than combing, which can disrupt the coil pattern. As you gather your ponytail, use a wide-tooth comb or your fingers to move hair rather than pulling and flattening. Once the ponytail is secured, take time to separate individual coil clusters from the base of the ponytail all the way down, encouraging each coil to hang as a distinct unit rather than as a compressed mass.
Coil Definition and Separation
- Use a rich moisturizing product on damp coils before styling, ensuring complete hydration
- Create your side part by gently moving coils with your fingers rather than combing forcefully
- When gathering the ponytail, use a gentle, rotating motion rather than aggressive pulling
- Separate coils into distinct clusters starting at the base of the ponytail and working downward
- Use a medium-hold gel or mousse on individual coils to encourage definition and prevent frizz
- Allow the ponytail to air-dry completely after styling so coils can set into their individual shapes
Important note: Coil separation looks most beautiful when your hair is completely dry. If you separate coils when hair is damp, they’ll tend to cling back together as they dry.
8. Two-Strand Twist Side Part Style
Two-strand twists offer a sophisticated middle ground between simple ponytails and complicated braids. Multiple twists gathered into a side part ponytail create an intricate, woven appearance that’s visually complex but actually quite achievable. This works beautifully on medium to thick natural hair and suits any curl pattern.
Multi-Twist Assembly
Create your side part first, then divide each side of the part into two or three sections. In each section, create a two-strand twist by dividing the hair into two strands and rotating them around each other. Work from the scalp backward, maintaining even tension as you twist. Once you’ve created twists on both sides of your head, gather all the hair—including the twists—into a side part ponytail at the back.
Executing Multiple Twists
- Create your side part and identify two to three sections on each side of the part
- Working with one section at a time, divide it into two strands
- Twist the strands around each other, rotating in the same direction throughout
- Keep twists close to the scalp and maintain even, moderate tension
- Once you’ve completed twists on both sides, secure each twist at the back with a bobby pin
- Gather all hair into your ponytail and secure firmly
- Spritz twists with a light gel or mousse to define them and prevent unraveling
Pro tip: Twists show up much more prominently on the second or third day of styling when they’ve had time to set and any frizz has settled. Don’t judge the final look immediately after styling.
9. Side Part with Frontal Framing
This variation keeps your hair partially down around your face while gathering the bulk of it back into a side part ponytail. The framing pieces create softness and draw attention to your face, making this style particularly flattering and suited for when you want polish without severity.
Framing Section Strategy
Determine which side of your face you want to frame, then create your side part slightly deeper than usual—this gives you more hair on the side where you’ll leave framing pieces down. Gather your main ponytail using all hair except for two or three strands on each side of your face. These framing pieces can be left as-is or curled, twisted, or braided for additional detail. The framing pieces should be about one to two inches wide and should hit your jawline or chin length.
Creating Flattering Frames
- Create your side part, making it slightly deeper than your usual part line
- Identify two strands on each side of your face to leave out as framing pieces
- Gather the remaining hair into your side part ponytail at the back of your head
- Secure the ponytail firmly so it won’t loosen throughout the day
- Curl or braid your framing pieces if desired, or leave them straight for a cleaner look
- Use a light product on the framing pieces to define them without making them look separate
Worth knowing: The width of your framing pieces matters—too narrow and they disappear, too wide and they create bulk that looks unbalanced. Aim for roughly one-inch-wide pieces on each side.
10. Layered Bun Side Part
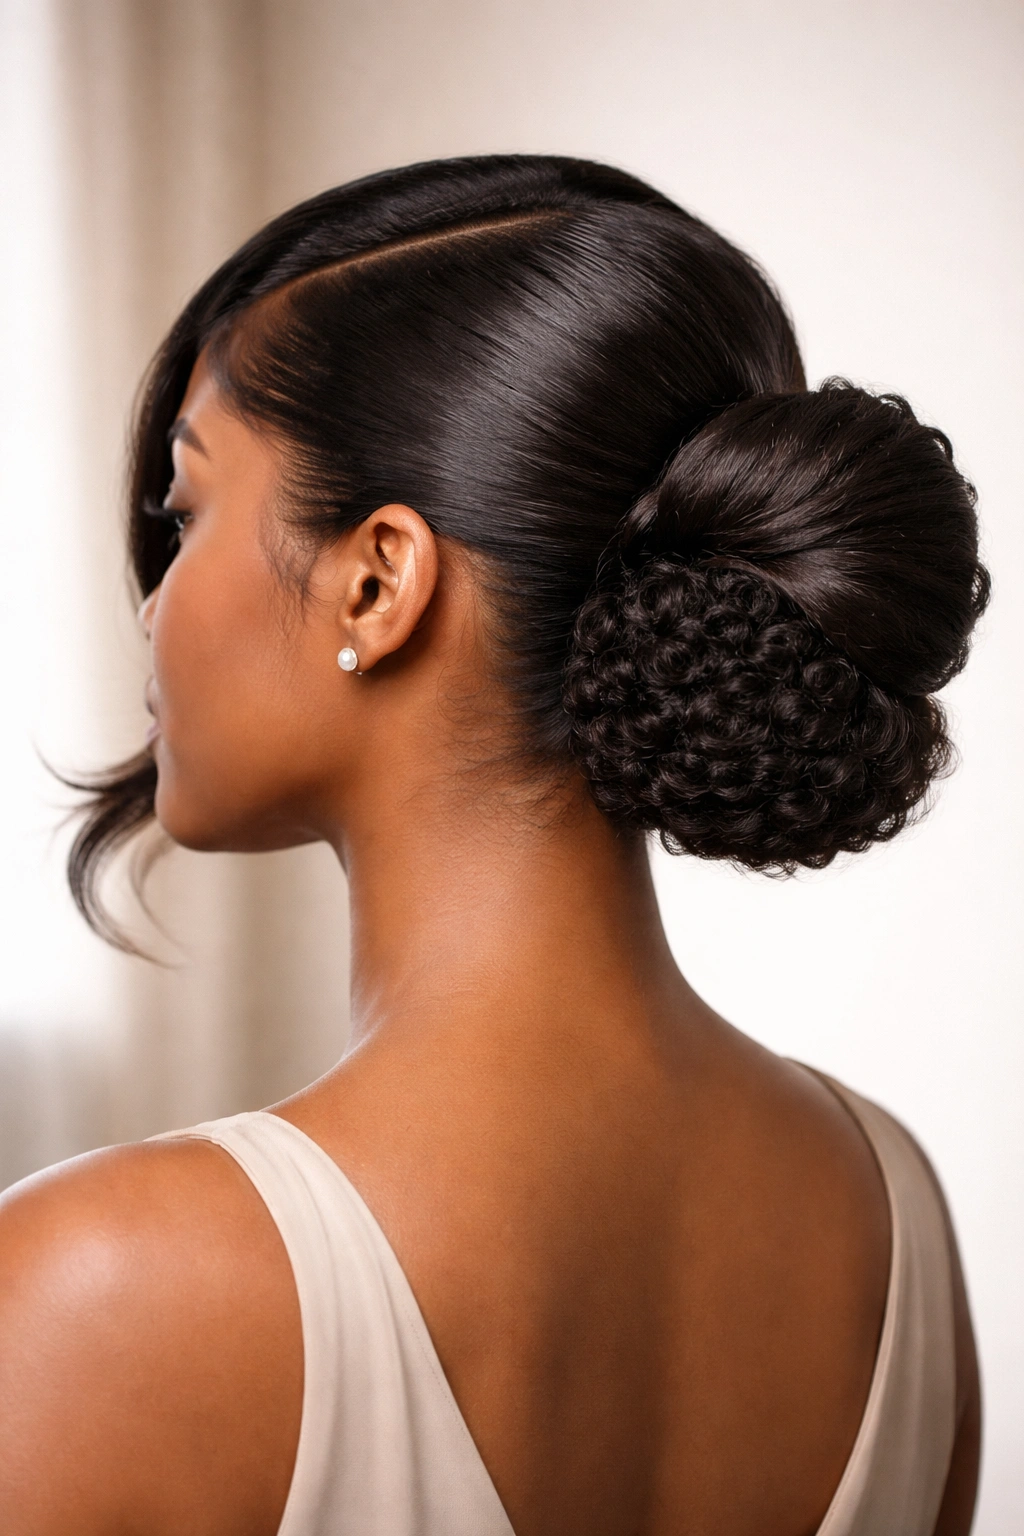
This style combines a side part with a gathered bun, creating a romantic, intentional look that feels feminine without being overly fussy. By creating layers within the bun (one section smoothly gathered, another section more textured and voluminous), you’re adding dimension and visual interest.
Creating Layered Texture in a Bun
Start with your side part in place, then gather your main ponytail slightly lower than where a traditional high pony would sit—this gives you room to create layers. Secure the main ponytail with an elastic. For the second layer, take a section of hair from just above your elastic and create a second, smaller ponytail just above the first. This two-tier approach creates the layered effect. Wrap the first ponytail around the elastic to form a bun, then wrap the second ponytail around the first, creating a more voluminous bun shape.
Bun Building Technique
- Create your side part and gather a first ponytail mid-to-low on the back of your head
- Secure this ponytail firmly with an elastic
- Gather a second, smaller section of hair from the top just above the first elastic
- Create a second ponytail with this hair, just above the first one
- Wrap the first ponytail around its elastic to create a base bun
- Wrap the second ponytail around the first bun to add height and volume
- Pin both buns securely with bobby pins, tucking in any loose ends
- Soften the overall look by gently tugging at the bun layers to create slight fluff
Insider note: This style holds much better with some texture—completely slicked hair makes layering difficult because there’s nothing for the layers to grip. A bit of wave or curl actually helps this style work.
11. Half-Up Half-Down Side Part
The half-up, half-down style with a side part captures the casual-but-intentional aesthetic perfectly. You’re gathering roughly the top half or crown area of your hair into a side part ponytail while leaving the bottom half down, creating movement and softness while still getting hair off your face.
Half-Gather Positioning
Create your side part as usual, then gather just the top half or crown section of your hair (imagine a horizontal line across the back of your head at ear level—everything above that line is gathered). This section gets gathered into your side part ponytail at the back of your crown. The bottom section of hair remains down, framing your shoulders and creating flow. This style suits nearly every hair texture and is especially beautiful on wave or curl patterns where the loose hair shows off your natural texture.
Half-Up Sectioning and Securing
- Create your side part in the usual location
- Identify the top half of your hair by mentally drawing a line from ear to ear across the back of your head
- Gather only the hair above this line into a side part ponytail at your crown
- Secure this ponytail firmly so it won’t slip down throughout the day
- Leave all hair below your ear line down and loose
- Use a light product on your loose ends to define texture without creating frizz
- If desired, curl or braid the loose bottom section for additional styling
Real talk: This style works best when your loose bottom section has some dimension or curl—completely straight hair below with a ponytail on top can look a bit disconnected visually. If your hair is naturally straight, consider adding some curl to the bottom section.
12. Side Part Ponytail with Accessories
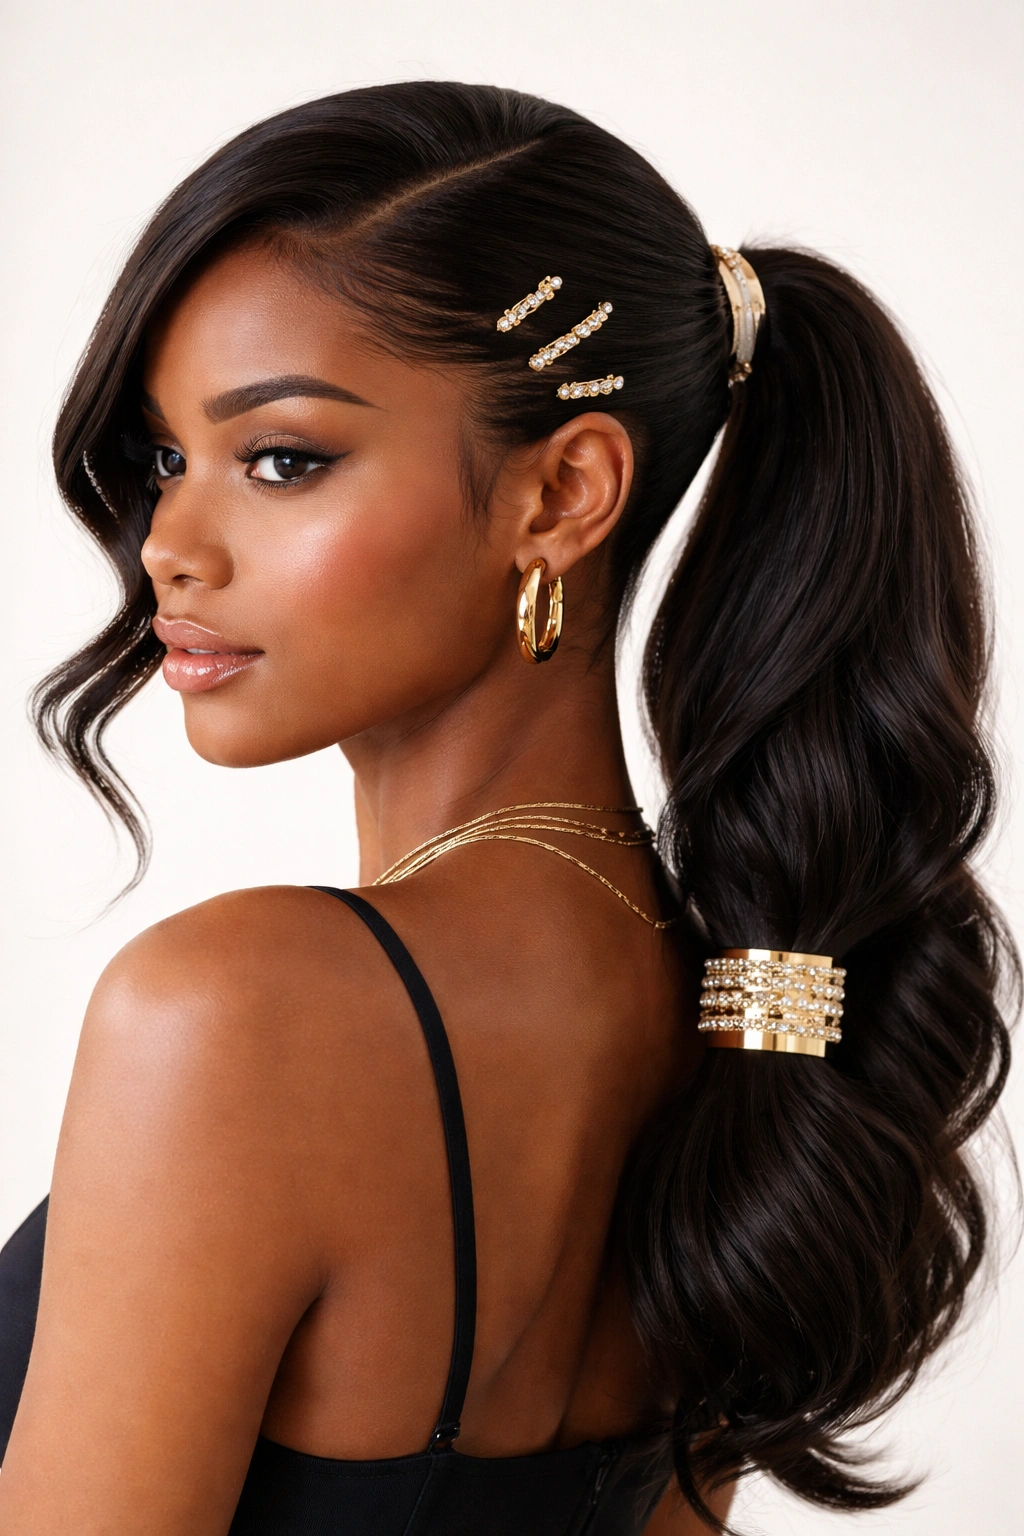
The most versatile side part ponytail becomes even more special with the right accessories. Whether you’re adding decorative elastics, jeweled hair clips, scarves, or metal cuffs, accessories transform a simple side part ponytail into something statement-making and intentional.
Accessory Integration Methods
Accessories can be integrated at multiple points: you can use a decorative elastic for your main ponytail tie, add hair clips or jewelry around the base of the ponytail, wrap a silk scarf or fabric strip around your elastic, or secure clips along your side part line itself. The key is ensuring accessories feel purposeful rather than random. A single metallic cuff at the base of a sleek ponytail feels intentional. Three different clips scattered through the ponytail feels scattered. Consider your overall aesthetic and choose accessories that complement rather than overwhelm.
Accessory Placement Ideas
- Use a decorative hair elastic (pearl, metal, jeweled) as your ponytail tie for a polished look
- Add a metal hair cuff over your elastic once the ponytail is secured
- Place decorative bobby pins or clips around the base of your ponytail
- Wrap a silk scarf or fabric strip around the base and tie it in a bow
- Use pearl hair sticks crossed through a low bun to create an elegant, sculptural effect
- Add small clips along your side part line for a subtle but intentional detail
- Weave delicate chain or beaded accessories through your ponytail for added shine
Pro tip: The heavier your accessories, the lower your ponytail should be. A heavy metal cuff pulls down on a high ponytail and creates discomfort. Light accessories (thin clips, small charms) work better positioned high.
Final Thoughts
Side part ponytails offer remarkable versatility for natural hair—from sleek and polished to textured and voluminous, from simple to intricately detailed. The beauty of this style category is that you can rotate through different versions depending on your hair’s needs, your daily schedule, and what kind of look you’re aiming for on any given day.
The most important thing to remember is that natural hair thrives when styling choices honor your texture rather than fight against it. Whether you’re creating sleekness (which requires the right products and patience), celebrating curl and coil (which means using your fingers more than combs), or adding intricate details through twists and braids (which works best on hair that’s been properly moisturized), your technique should always work with your hair’s natural patterns, not against them.
Give yourself permission to practice these styles multiple times—that first attempt at a Dutch braid or a perfectly separated coil puff won’t necessarily look like your fifth attempt. Hairstyling is genuinely a skill that improves with repetition. Keep the products that work for you readily available, invest in good tools (a fine-tooth comb and paddle brush are essential), and approach styling with patience rather than frustration. Your natural hair is beautiful exactly as it is, and a side part ponytail simply gives you a way to showcase that beauty while keeping everything neatly in place.