Low weave ponytails have become the go-to move for anyone craving effortless volume without the commitment of teasing or backcombing your entire head. There’s something undeniably appealing about a style that sits at the nape of your neck, creates the illusion of dramatically fuller hair, and somehow manages to look both polished and relaxed at the same time. The beauty of wearing your ponytail lower is that it gives you more real estate to work with—more hair to weave, more texture to layer, and more strategic placement to maximize the fullness you’re actually creating from root to tip.
What makes low weave ponytails so universally flattering is how they work with your hair’s natural dimensions rather than fighting against them. When you position the base lower on your head, you’re not trying to create lift from a tiny section of hair at the crown—you’re distributing the visual weight across a larger surface area. This is especially powerful if you have finer hair, thinner density in certain areas, or if you’re dealing with a style that’s been growing out and has texture variations. The weaving technique itself (whether it’s a traditional three-strand braid, a Dutch braid, a fishtail, or something more experimental) adds another layer of dimension that catches light and creates the appearance of thicker, fuller strands.
The versatility of low weave ponytails is genuinely remarkable. You can dress them up for a wedding or polished dinner, wear them casually with a weekend outfit, style them for the gym, or even work them into a more editorial, fashion-forward look depending on which weaving pattern you choose and how you finish the tail. The techniques that follow show you exactly how to build volume at the base, position your weaves strategically for maximum fullness, and adapt the core idea to whatever your hair texture and length allow. Whether you’re starting with wavy, straight, curly, or coily hair—and whether you’re working with your natural texture or wearing extensions—there’s a low weave ponytail approach here that’ll make your hair look its absolute fullest.
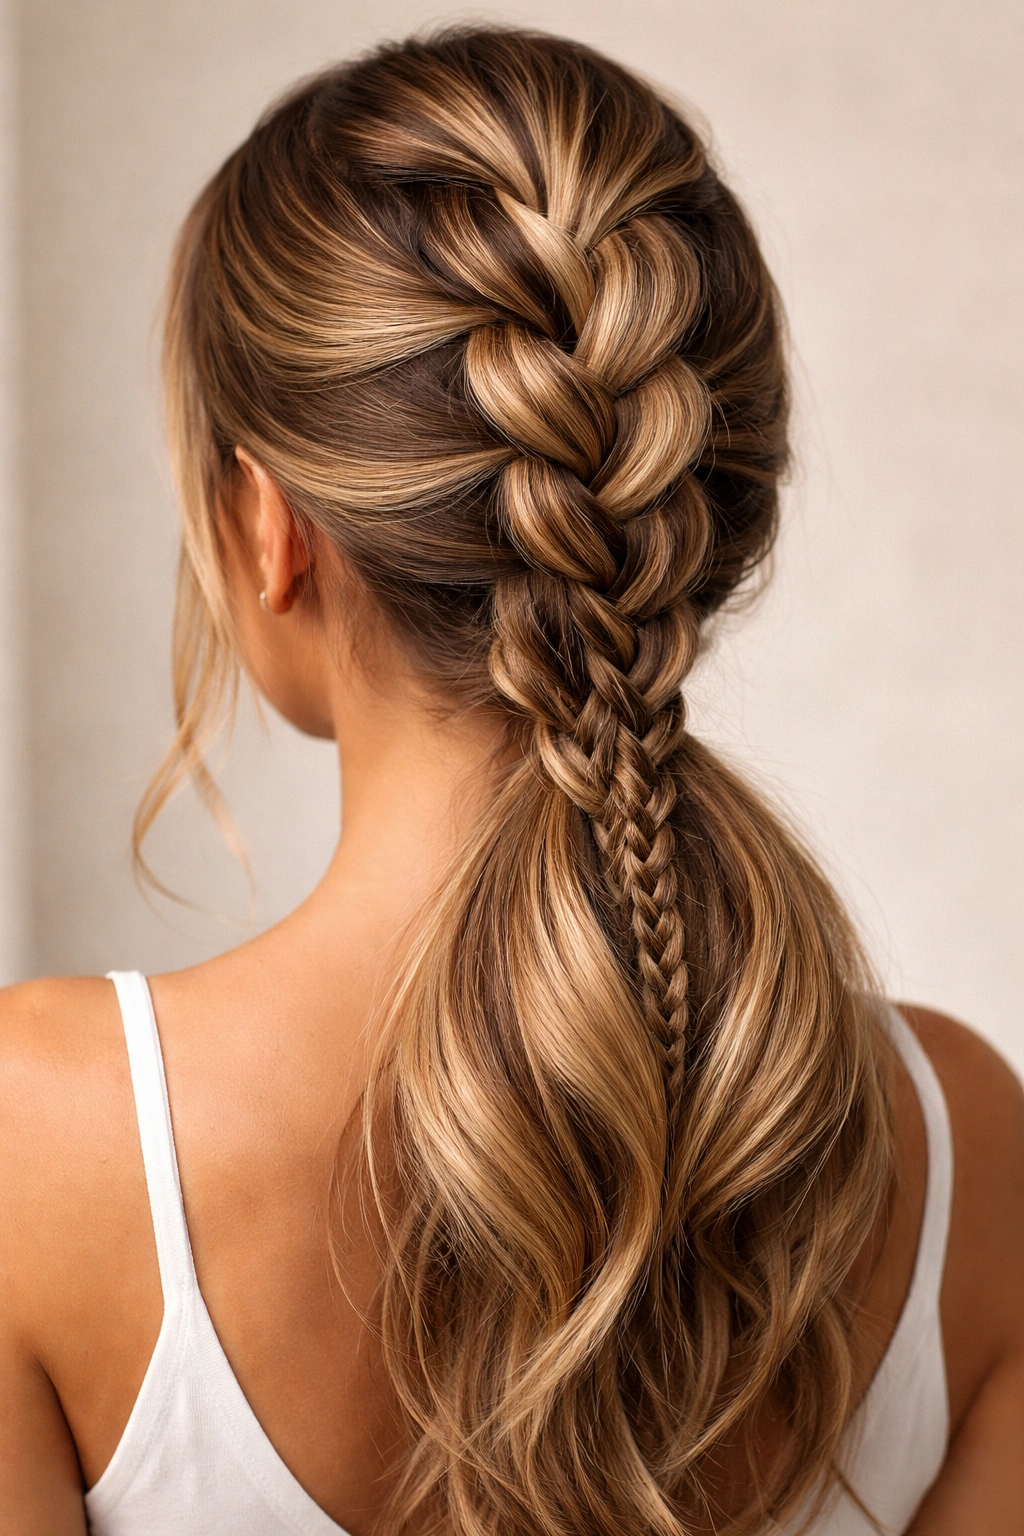
1. The Classic Three-Strand Dutch Braid Ponytail
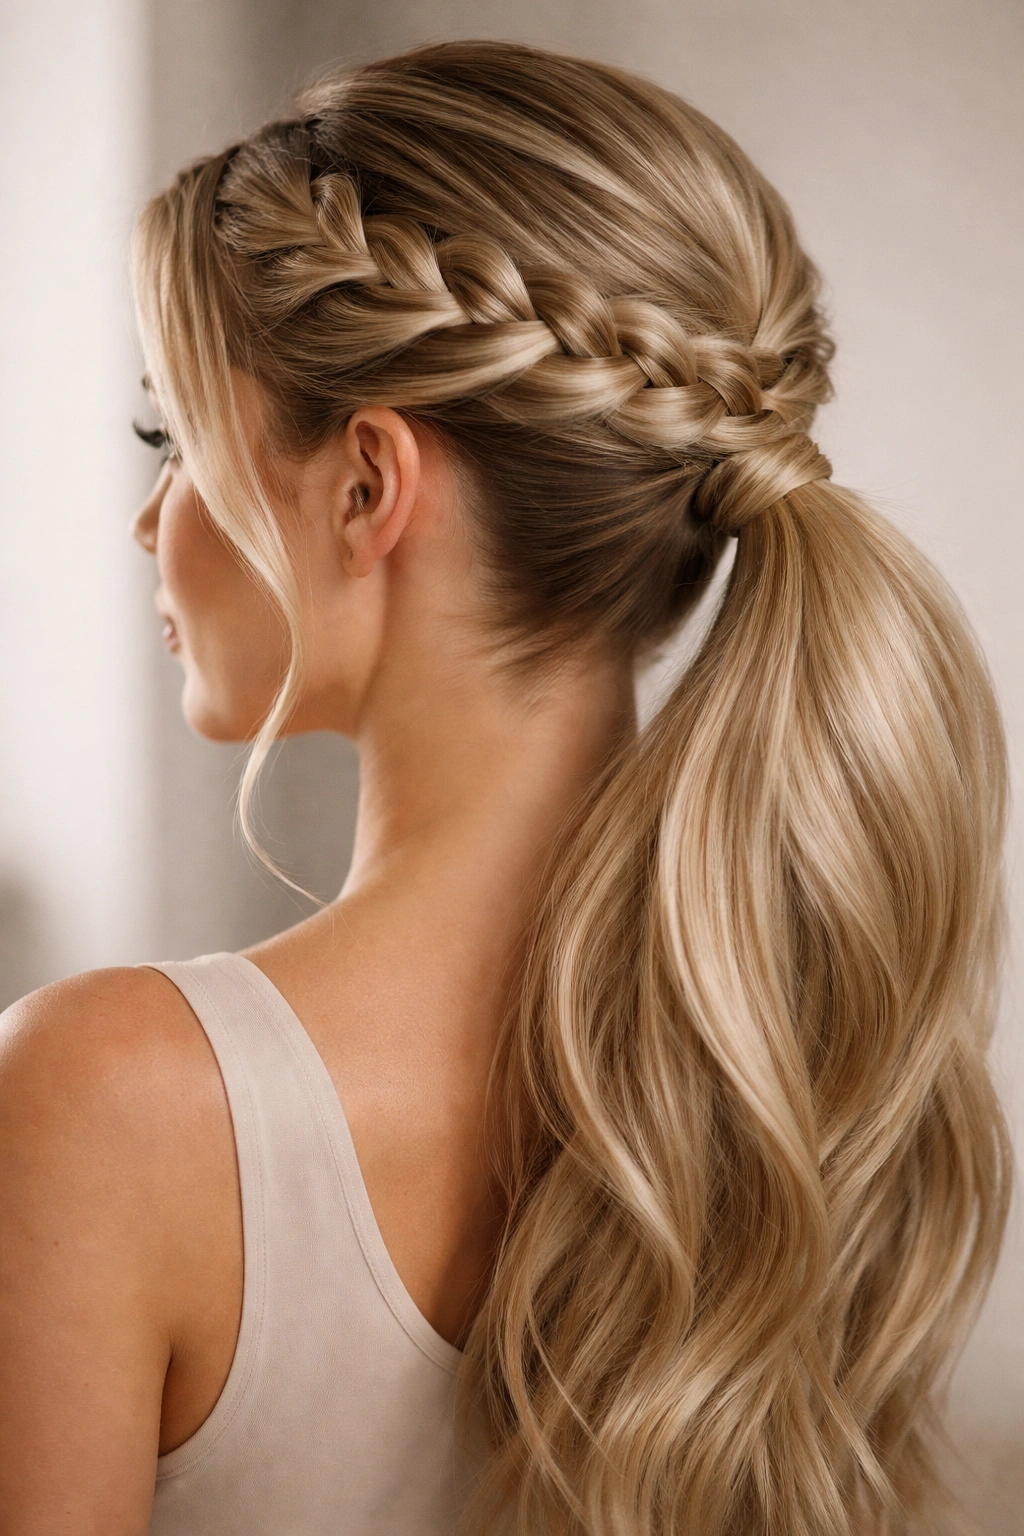
The Dutch braid—also called an inverted French braid because the strands go under each other instead of over—is the foundational technique that creates the most dramatic fullness illusion. When you Dutch braid your hair, the braid sits slightly raised above the strands, which visually expands the size of your braid and makes it appear much fuller than a regular three-strand braid ever could. Starting this braid low on your head, roughly at ear level or slightly below, means you’re working with maximum hair volume from the start.
Why It Creates That Full Effect
The under-braiding motion of a Dutch braid naturally pulls strands outward as you work, which loosens the structure just enough that the braid looks textured and dimensional rather than tight and thin. After you’ve braided down to your low ponytail point, you’ll anchor the remaining hair with an elastic, and then you can gently pull the braid’s loops outward to amplify that fullness even more. This technique of intentionally loosening the braid after it’s secured is called pancaking, and it’s genuinely one of the most effective ways to transform a braid from neat into voluminous.
How to Achieve It
Start by sectioning your hair into three even strands at the crown. Begin your Dutch braid by crossing the right strand under the center strand, then the left strand under the new center. Continue this pattern down the back of your head, adding small sections of new hair to each of the three strands as you go—this is what makes it a braid that incorporates all your hair. When you reach the nape of your neck, secure everything into a low ponytail with an elastic. Go back through and gently pull each loop of the braid outward to create that full, textured appearance.
Best for: This works beautifully on straight to wavy hair and looks especially stunning if you’ve added some texture to your hair with waves or a salt spray beforehand. Fine hair benefits enormously from Dutch braiding because the technique itself creates visible dimension.
2. The Double Dutch Braid Low Ponytail

Instead of one central braid running down the middle of your head, you’re creating two Dutch braids that sit on either side of your part, then bringing them together into a single low ponytail. This approach gives you twice the opportunity to create fullness and texture, and the visual impact is substantially more dramatic than a single braid ever could be. The two braids merge at the back of your head around the nape, creating a natural gathering point where the remaining hair can flow into a full, dimensional tail.
The Fullness Advantage of Doubling Up
Two braids meeting at a low ponytail point means you’re compressing more textured, visually complex hair into a smaller space than you would with a single braid. That compression creates density and height at your ponytail base. Additionally, because you’re working with two separate sections of hair rather than one, you can control the tightness and looseness of each braid independently, allowing you to pancake (pull out and loosen) each one to different degrees depending on which areas need more volume.
Execution Steps
Start with a clear center part from your forehead to the nape of your neck. On the right side, begin a Dutch braid at your temple and braid it down toward your right ear, then continue braiding toward the nape. On the left side, mirror this exact process. Where the two braids meet at the back of your head—usually around your lower occipital bone—gather all your hair (the ends of both braids plus any remaining loose hair) into a low ponytail. Secure with an elastic, then pancake both braids by gently pulling the loops outward.
Best for: This style is exceptionally flattering on people with longer hair (shoulder length or beyond) and works beautifully on both straight and wavy textures. It’s also one of the more protective styles if you’re looking to reduce daily manipulation of your hair.
3. The Fishtail Braid Low Ponytail
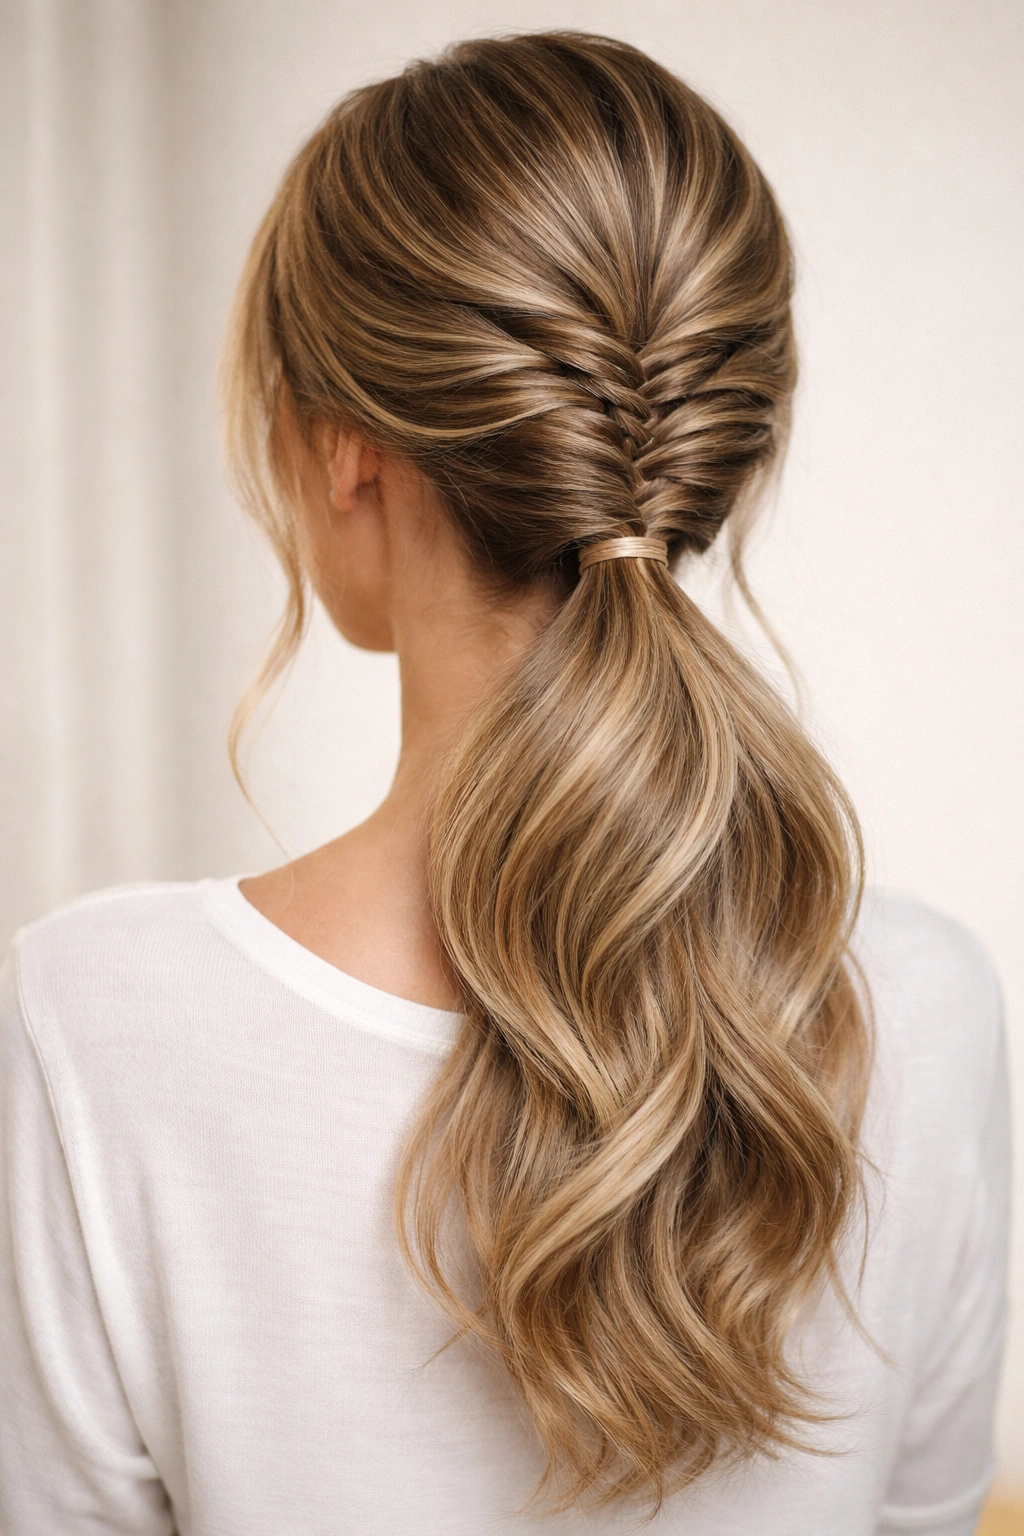
A fishtail braid is created by dividing your hair into two equal sections and repeatedly taking a small strand from the outer edge of one section and crossing it over to join the other section. The result is a braid that looks intricate and woven despite using just two strands, and it creates a naturally fuller, more textured appearance than a standard three-strand braid because the crossing pattern creates more visible intersections and dimension.
Why Fishtail Creates Visual Fullness
The fishtail pattern inherently produces a wider braid structure because of how the strands cross and overlap. Even when a fishtail braid is pulled relatively tightly, it still reads as fuller and more dimensional than a tight three-strand braid. When you start this braid low on your head and then pancake it afterward, you get extraordinary fullness with minimal actual hair manipulation.
How to Create It
Divide your hair into two sections at the crown. Take a small strand from the outer right edge of the right section and cross it into the left section. Take a small strand from the outer left edge of the left section and cross it into the right section. Continue this alternating pattern all the way down. The smaller the strands you pull, the more intricate and fuller your fishtail will appear. When you reach your low ponytail point, secure the remaining hair with an elastic and gently pancake the fishtail by pulling the loops outward.
Best for: Fishtails look incredible on medium to long hair and are particularly striking on people with naturally wavy or textured hair. They also photograph beautifully, making them perfect for occasions where you want your hairstyle to stand out.
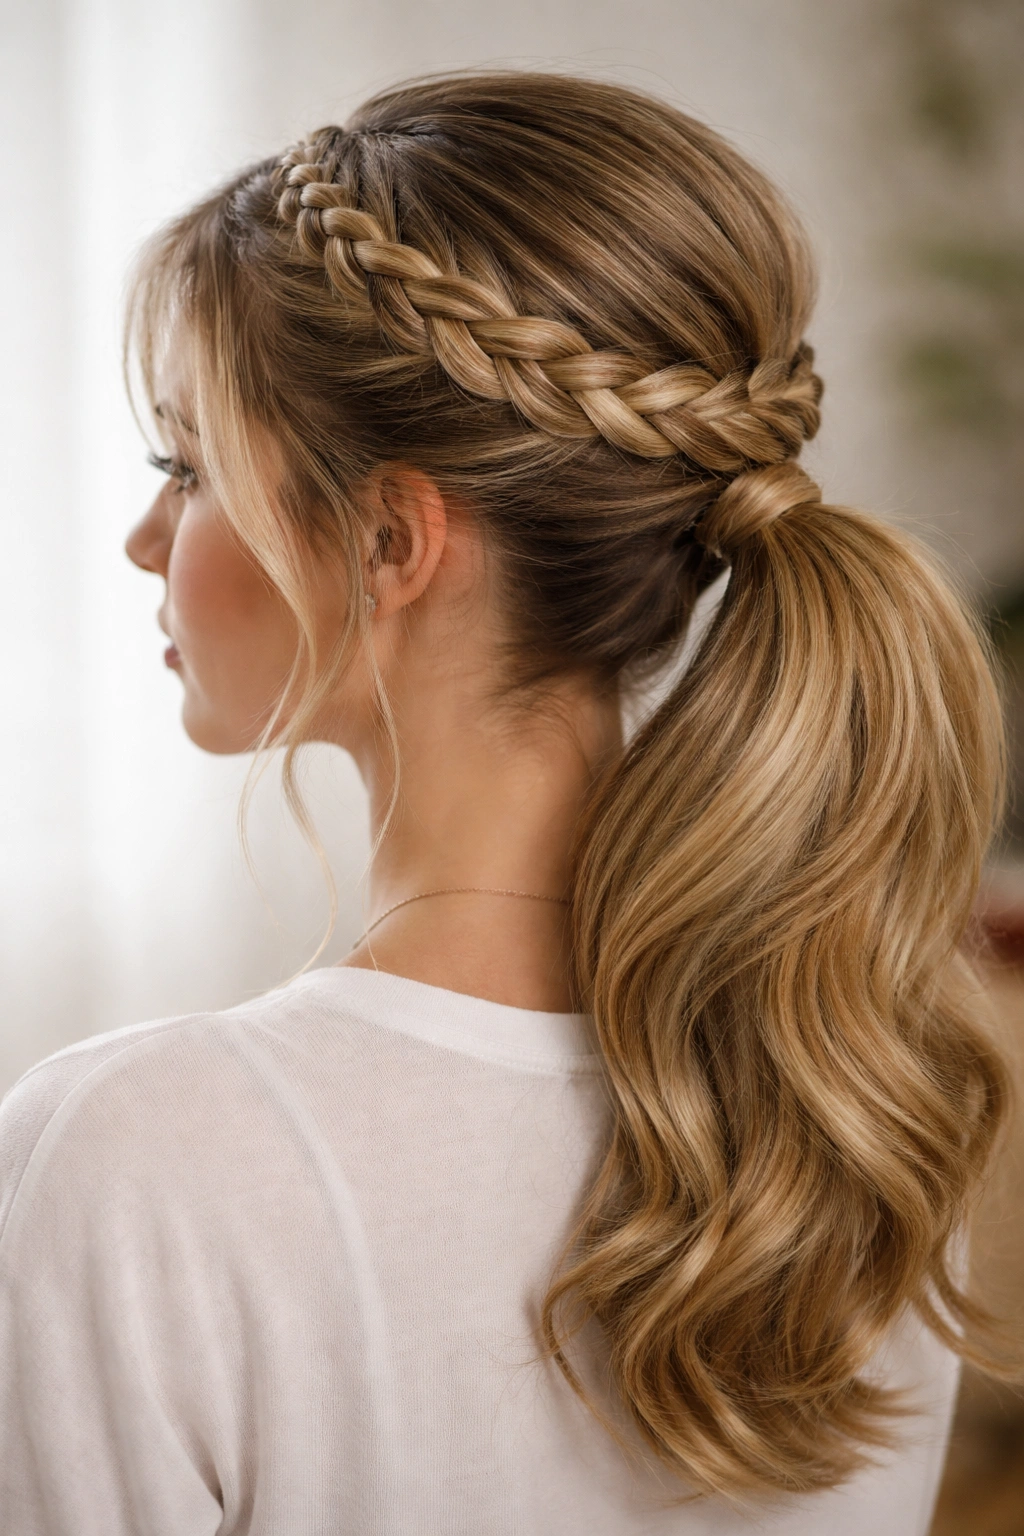
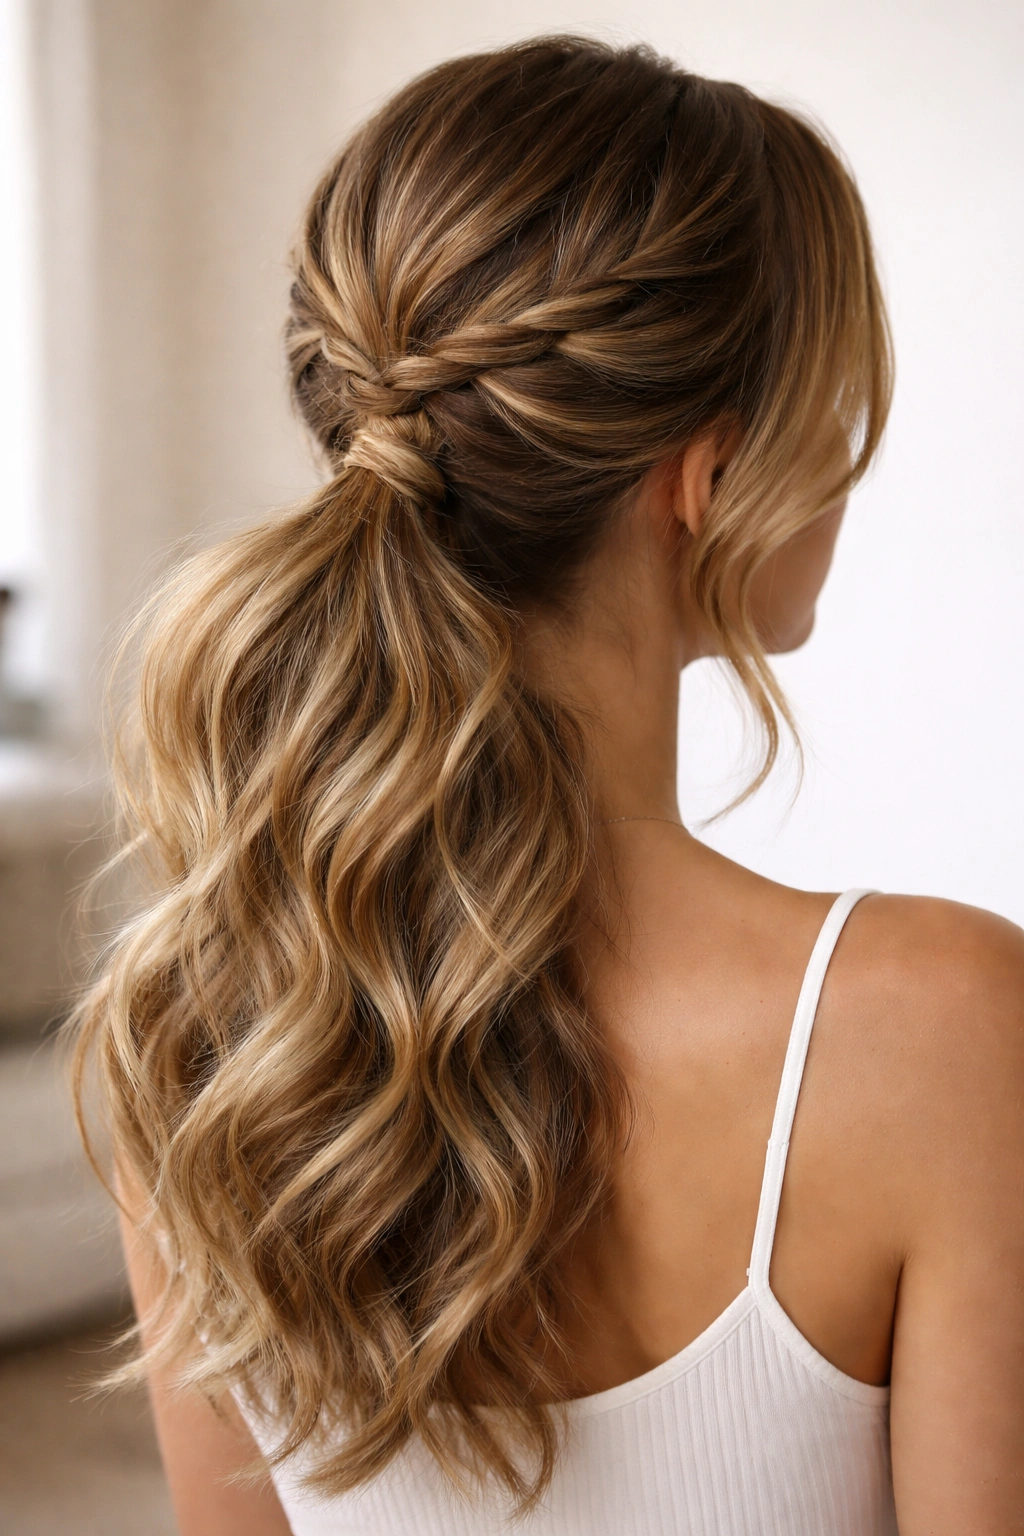
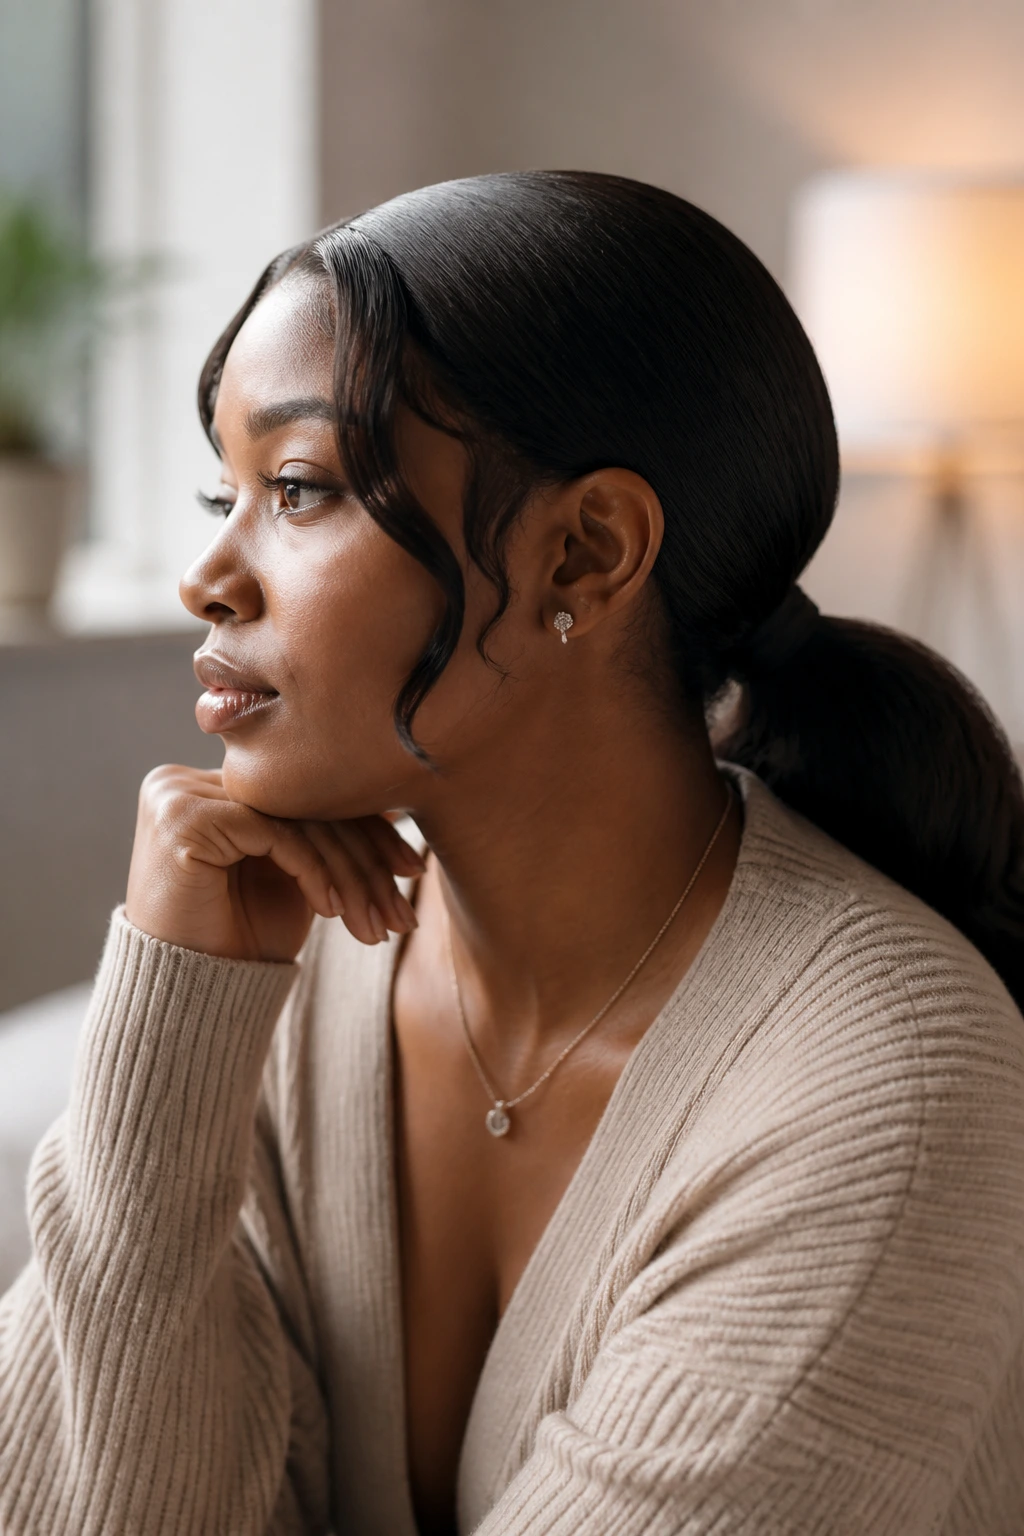
4. The Twisted Low Ponytail with Wrap Detail
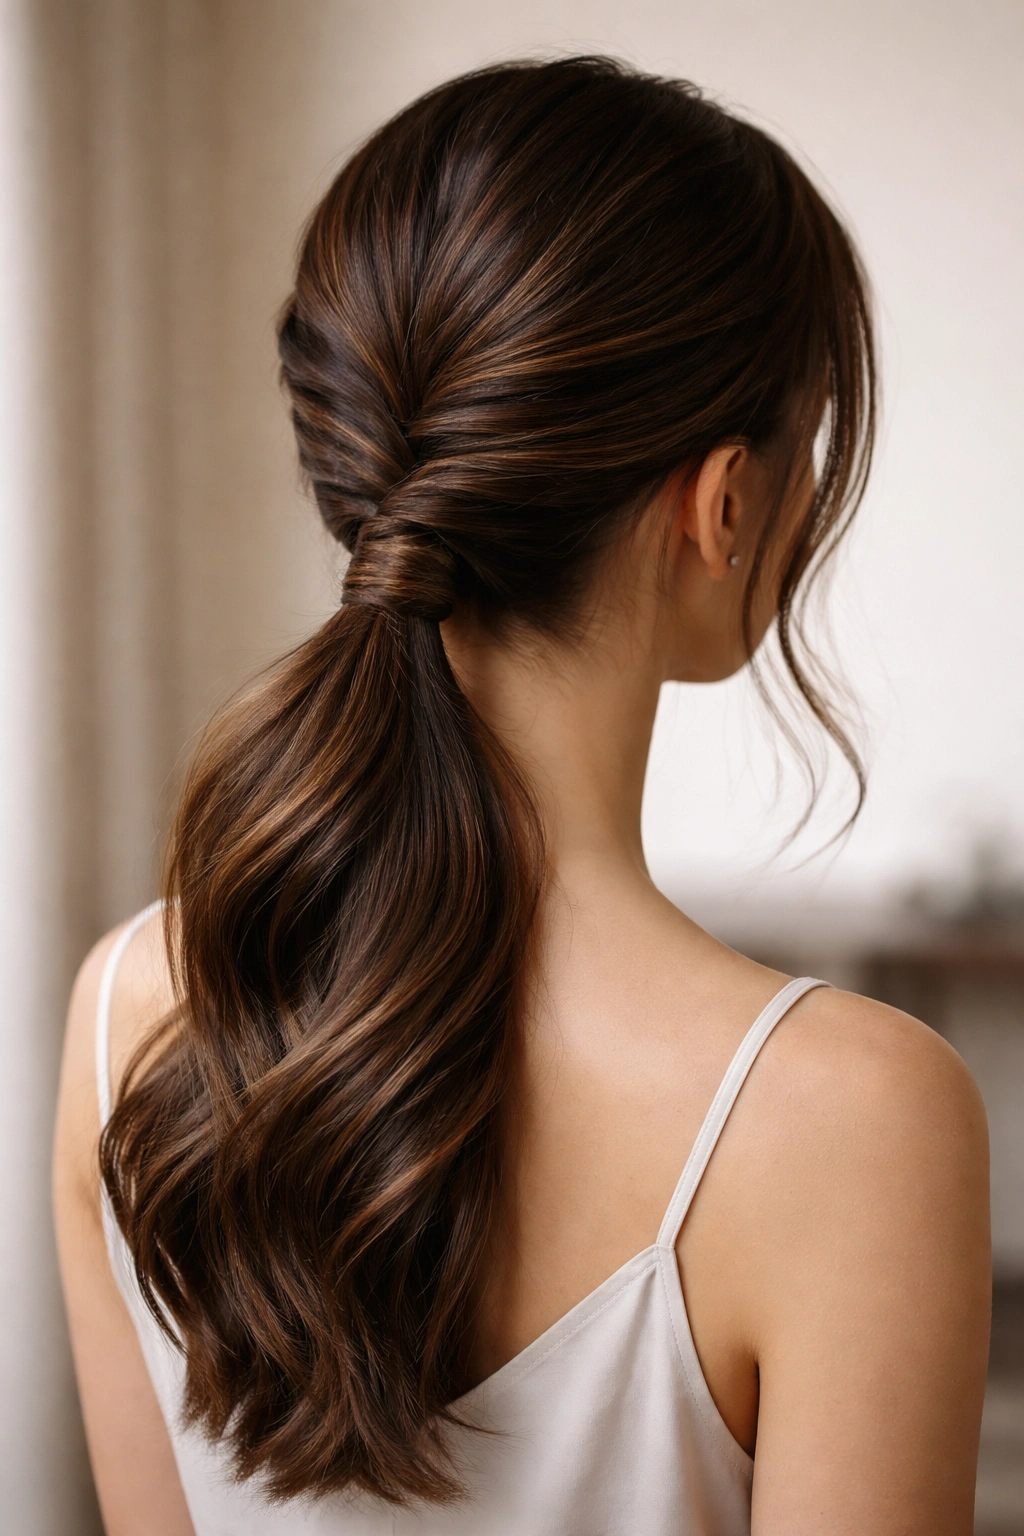
Rather than braiding, you’re creating fullness by twisting two or three sections of hair around each other as they travel down the back of your head, then securing everything into a low ponytail. Twists are simpler than braids but create surprising dimension, especially if your hair has any texture to it. The wrap detail—where you take a small section of hair from the ponytail and wrap it around the elastic to hide it—adds a polished finish that makes this style feel intentional and put-together.
The Twist Creates Volume Through Dimension
When you twist strands around each other, especially if you’re using two or three separate twisted sections that you’re also twisting together, you create multiple layers of visual complexity. This layering reads as fullness even when your actual hair density might be moderate. Twists also have a slightly looser, more relaxed appearance than braids, which contributes to that effortless-but-polished vibe.
Step-by-Step Process
Divide your hair at the crown into two or three sections. Twist each section tightly as you move down the back of your head, adding small sections of new hair to each twist as you go (this is called a twisted crown). Once all three sections have been twisted to your low ponytail point, secure them together with an elastic. Take one small strand from the ponytail itself and wrap it around the elastic several times to conceal the band, then secure the wrapped strand with a small bobby pin. Gently tease apart the twisted sections to add dimension.
Best for: This works beautifully on all hair types and textures. It’s particularly good for people with finer hair who want volume without the density of a full braid.
5. The Messy Weave with Face-Framing Pieces
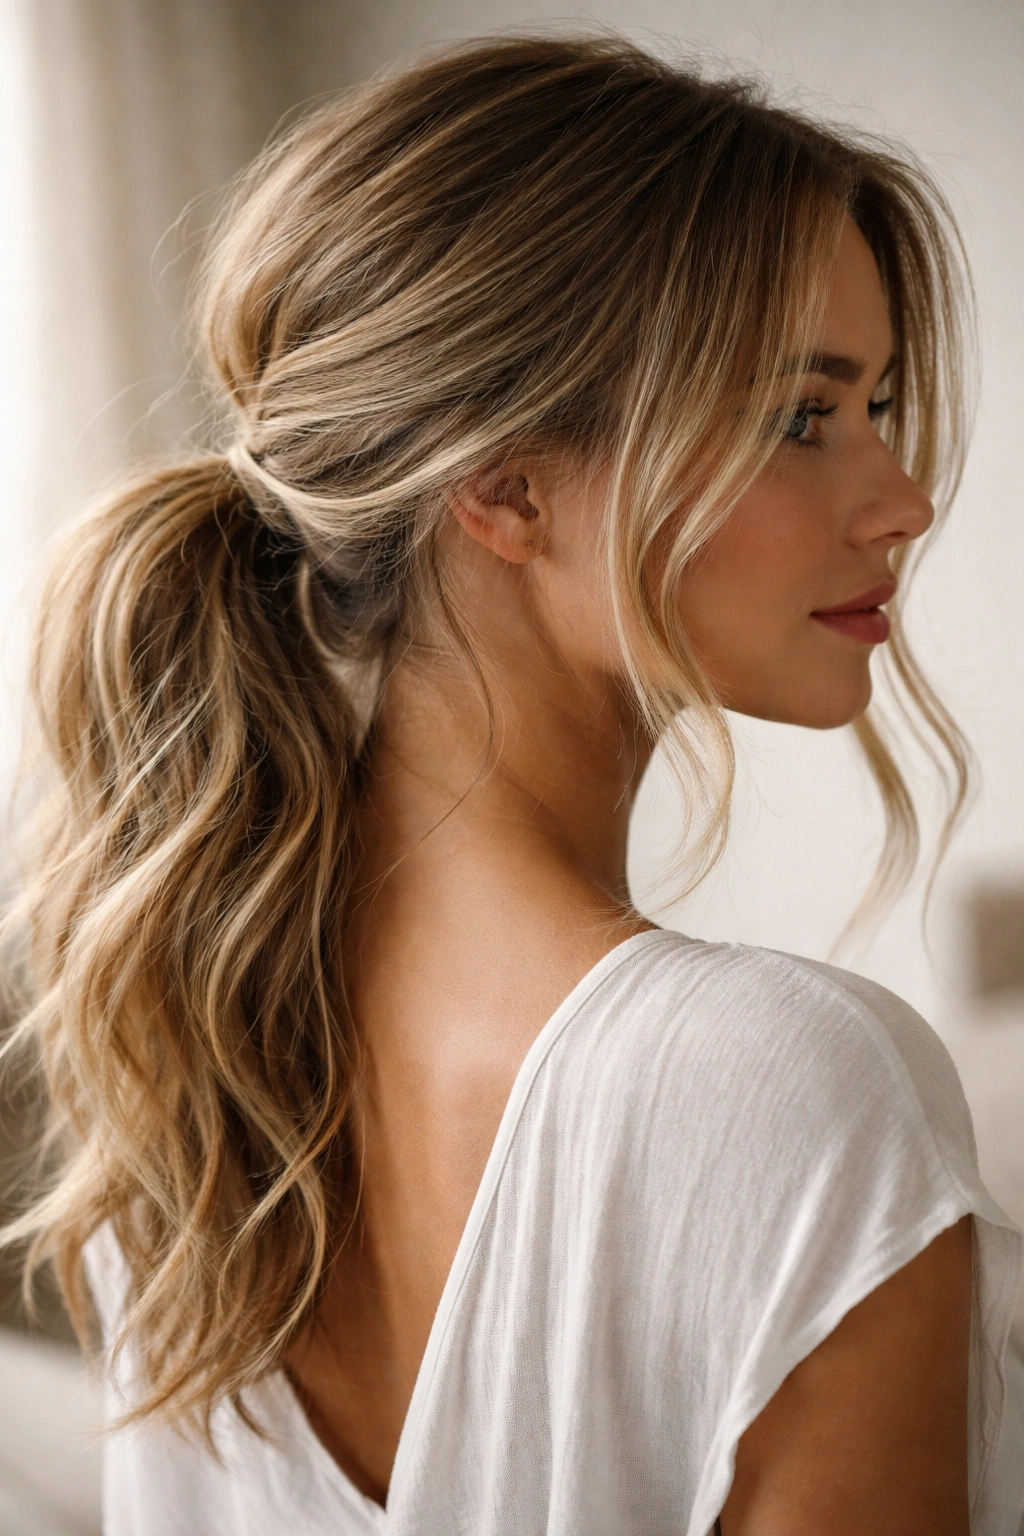
This is less of a structured, tight weave and more of an intentionally undone, romantic interpretation of weaving where you’re creating the visual of a braid or weave pattern but keeping it deliberately loose and textured. You’re leaving small sections of hair out around your face, weaving the back portion loosely, and letting everything feel soft and organic rather than controlled and perfect.
Why Intentional Messiness Creates Fullness
A messy weave works because the looseness itself becomes part of the fullness. All those intentionally loose sections, the face-framing pieces, the strands that aren’t fully secured into the pattern—they all add visual volume. The eye sees more hair because there’s more hair moving freely. This style also works beautifully with your hair’s natural texture rather than fighting against it, which means less manipulation and more authentic dimension.
Creating the Messy Weave Effect
Start by leaving small pieces around your face and temples completely free. Begin a loose Dutch braid (or any braid pattern you prefer) at the crown, braiding relatively loosely and not adding much new hair to keep it textured rather than structured. As you work down to your low ponytail point, intentionally leave some strands out of the braid pattern. Secure everything into a low ponytail. Pancake the braid generously and pull out additional strands from the ponytail base to create that full, soft, intentionally undone appearance.
Best for: Messy weaves work exceptionally well on wavy, textured, or naturally curly hair. They’re ideal for people who prefer a more relaxed, romantic aesthetic over something structured and precise.
6. The Crown Weave into Low Pony with Volume at the Base
This style creates a structured weave that circles your head like a crown or halo, then gathers into a low ponytail where the real fullness happens. The weave itself is relatively thin and refined, but the ponytail base is intentionally pumped with volume through strategic teasing or by backcombbing the hair right at the elastic line.
Building Volume at the Ponytail Base
The secret to this style is focusing your fullness-building efforts not on your entire head but specifically on the section of hair right where your ponytail begins. This concentrates the volume exactly where it’ll be most visible and impactful. You can achieve this by gently backcombingthe hair at your nape right before you secure the ponytail, or by using a texturizing spray and a teasing brush to create height in that specific area.
How to Build It
Create a thin Dutch braid that starts at one temple and weaves around the back of your head like a crown, ending near the opposite temple. The braid should be relatively neat and refined, not loose and pancaked. Gather all remaining hair—including the braid ends—into a low ponytail at the nape. Before securing with an elastic, use a teasing brush to gently backcomb the hair at the elastic line, focusing on creating height and texture at the base of the ponytail. Secure with an elastic, then wrap a small strand around the elastic to hide it.
Best for: This style works beautifully on all hair types and is particularly flattering if you have finer hair, because the fullness is concentrated where it matters most rather than spread across your entire head.
7. The Braided Wrap-Around Low Ponytail
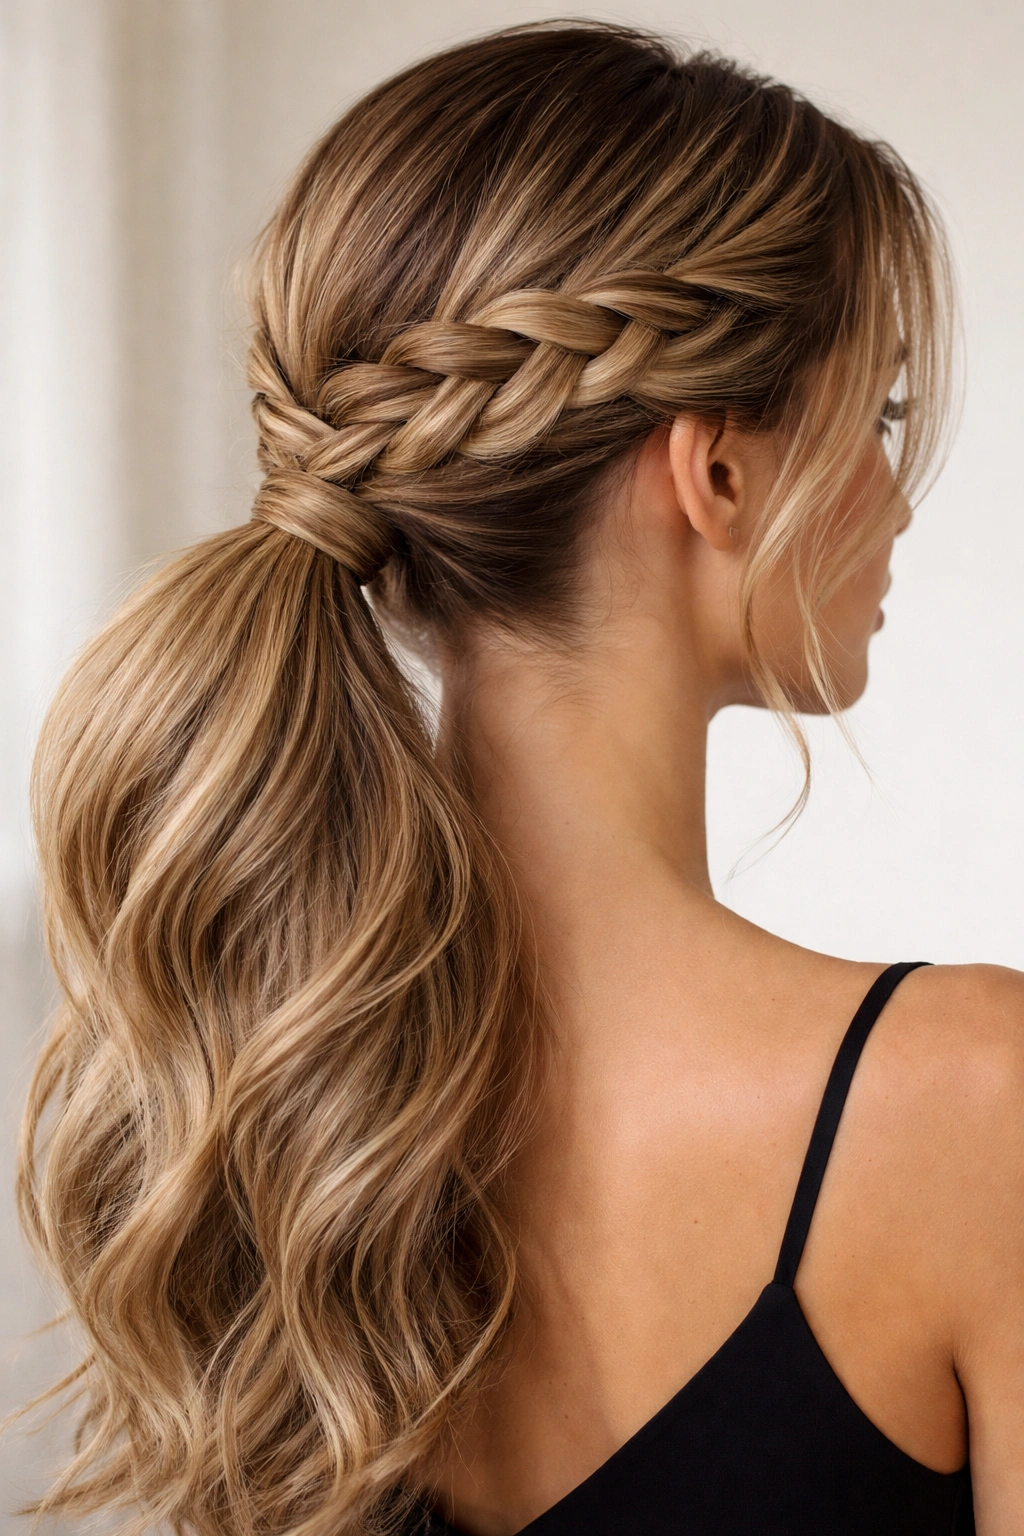
Instead of having your braid go down the back of your head like a traditional braid, you’re creating a braid on one side of your head that wraps around the back to meet a low ponytail. This creates an asymmetrical, interesting visual that feels more fashion-forward than a centered braid, and the wrapping motion means the braid is visible from multiple angles.
Why Wrapping Creates a Fuller Appearance
A wrap-around braid is visible across a wider surface area of your head than a centered braid, which means people see more of your braid pattern and the texture it creates. This increased visibility translates to the impression of more fullness and dimension. The angle of the braid also creates visual interest and movement that makes your overall style feel more voluminous.
Creating the Wrap-Around Effect
Start a Dutch braid on one side of your head (let’s say the right side) at your temple. Instead of braiding straight down the back of your head, angle your braid diagonally across the back of your head toward the opposite side (the left side). Continue braiding until you reach the left side of your nape, then gather all remaining hair—including the braid end—into a low ponytail on the left side. Pancake the braid generously to amplify fullness.
Best for: This works beautifully on longer hair and is particularly striking on people with medium to thick hair density. It’s an excellent choice if you want something that feels special and intentional rather than everyday.
8. The Textured Rope Twist Low Ponytail

A rope twist is created by twisting two sections of hair around each other in a very tight, controlled way—tighter than a standard two-strand twist, actually wrapping the strands around each other like a rope. The result is a compact, rope-like structure that, when you pancake it, creates extraordinary dimension and texture. It’s deceptively simple but looks incredibly complex.
The Textural Impact of Rope Twists
Because rope twists are twisted so tightly, they compact a lot of hair into a relatively small space. When you pancake a rope twist by pulling it apart, you’re revealing all those twisted layers and creating dramatic dimension. The twist pattern itself catches light differently than a braid would, creating visual interest and making your style feel more intentional.
How to Execute It
Divide your hair into two sections at your crown. Begin twisting these two sections tightly around each other as you move down the back of your head. To make it a rope twist that incorporates all your hair, add small sections of new hair to each of the two sections as you twist. Continue this pattern until you reach your low ponytail point, then secure all hair into a low ponytail with an elastic. Now generously pancake the rope twist by pulling it apart in sections, creating maximum texture and fullness.
Best for: Rope twists work beautifully on all hair types and are especially effective on straight or wavy hair where the texture of the twist really shows. They’re ideal if you want maximum impact with a relatively simple technique.
9. The Heatless Wave Low Ponytail with Subtle Braid
This approach starts with creating texture in your hair using heatless methods—like sleeping in braids, using a curling ribbon, or using flexi-rods the night before—then building a subtle braid or twist into your low ponytail style. The pre-existing waves in your hair create fullness even before you add any braiding, and the braid amplifies that effect.
Pre-textured Hair Creates Built-In Fullness
When your hair already has wave or curl texture, every braid or twist you add looks fuller because the texture is working with you rather than against you. The waves catch light, create dimension, and make your overall style appear much thicker than it actually is. This is why heatless waves are such a game-changer for anyone trying to maximize the appearance of fullness.
Creating the Style
The night before, create texture in your hair using your preferred heatless method (braid waves, flexi-rods, curling ribbons, etc.). The next morning, gently release the texture to create soft waves throughout your hair. Create a loose Dutch braid or a rope twist at the crown, and guide it down to your low ponytail point. Gather all hair into a low ponytail and lightly pancake the braid. The combination of your pre-existing waves plus the braid creates remarkable fullness.
Best for: This style is perfect for anyone with naturally wavy or curly hair, or anyone willing to create texture the night before. It’s ideal if you want maximum fullness with minimal effort on styling day.
10. The Half-Up Weave into Low Pony Hybrid

This style is a hybrid between a half-up hairstyle and a full low ponytail. You’re taking roughly the top half of your hair and weaving it, while the bottom half stays loose. The weaved portion is then gathered together with the loose hair into a low ponytail, creating fullness from multiple hair layers meeting at a single point.
Why Layering Creates Visual Fullness
When you have a weaved section of hair meeting loose hair at a single gathering point, the combination creates dimension that’s more interesting than a uniform texture throughout. The eye sees multiple layers—the structured weave at the top meeting the softer, looser hair at the bottom—and this visual variety reads as fullness. The gathering point itself becomes a natural focal point where all that dimension congregates.
How to Build It
Create a Dutch braid with just the top half of your hair, starting at your crown and working down to roughly ear level on both sides. Leave the bottom half of your hair completely loose. Gather the end of your braid plus all the loose hair at the bottom into a low ponytail at your nape. Secure with an elastic and pancake the braided portion. The contrast between the structured braid and the loose waves creates a fuller overall appearance.
Best for: This works beautifully on longer hair and is especially flattering if you have finer hair, because you’re building fullness in the areas that matter most without trying to texture your entire head.
11. The Chunky Braid with Underbraid Detail
This style uses a chunky three-strand braid as your main element, but incorporates a secondary “underbraid”—a thinner braid that runs underneath the main braid—to add complexity and dimension. From the front, people see the chunky, bold main braid; but from the side and back, they also notice the secondary braid running underneath, creating a layered, intricate appearance.
Why Underbraiding Creates Fullness Illusion
An underbraid essentially doubles the amount of visible braid structure without actually doubling your hair volume. The secondary braid creates additional visual interest and dimension, making your overall style feel more complex and fuller. It’s a technique that looks incredibly intentional and fashion-forward, even though it’s not exponentially harder than a single braid.
Creating the Underbraid Effect
Start a chunky three-strand braid at your crown using relatively large sections of hair. Simultaneously, begin a thinner three-strand braid using smaller sections, positioning this second braid slightly underneath and parallel to your main braid. Both braids travel down the back of your head together, ending at your low ponytail point. Gather all hair into a low ponytail, then pancake both the main braid and the underbraid. The layering of the two braids creates substantial visual fullness.
Best for: This technique works beautifully on medium to thick hair and is especially effective on longer hair where there’s enough length to really see both braids. It’s ideal if you want a style that feels editorial and intentional.
12. The Textured Bubble Ponytail Base with Woven Top
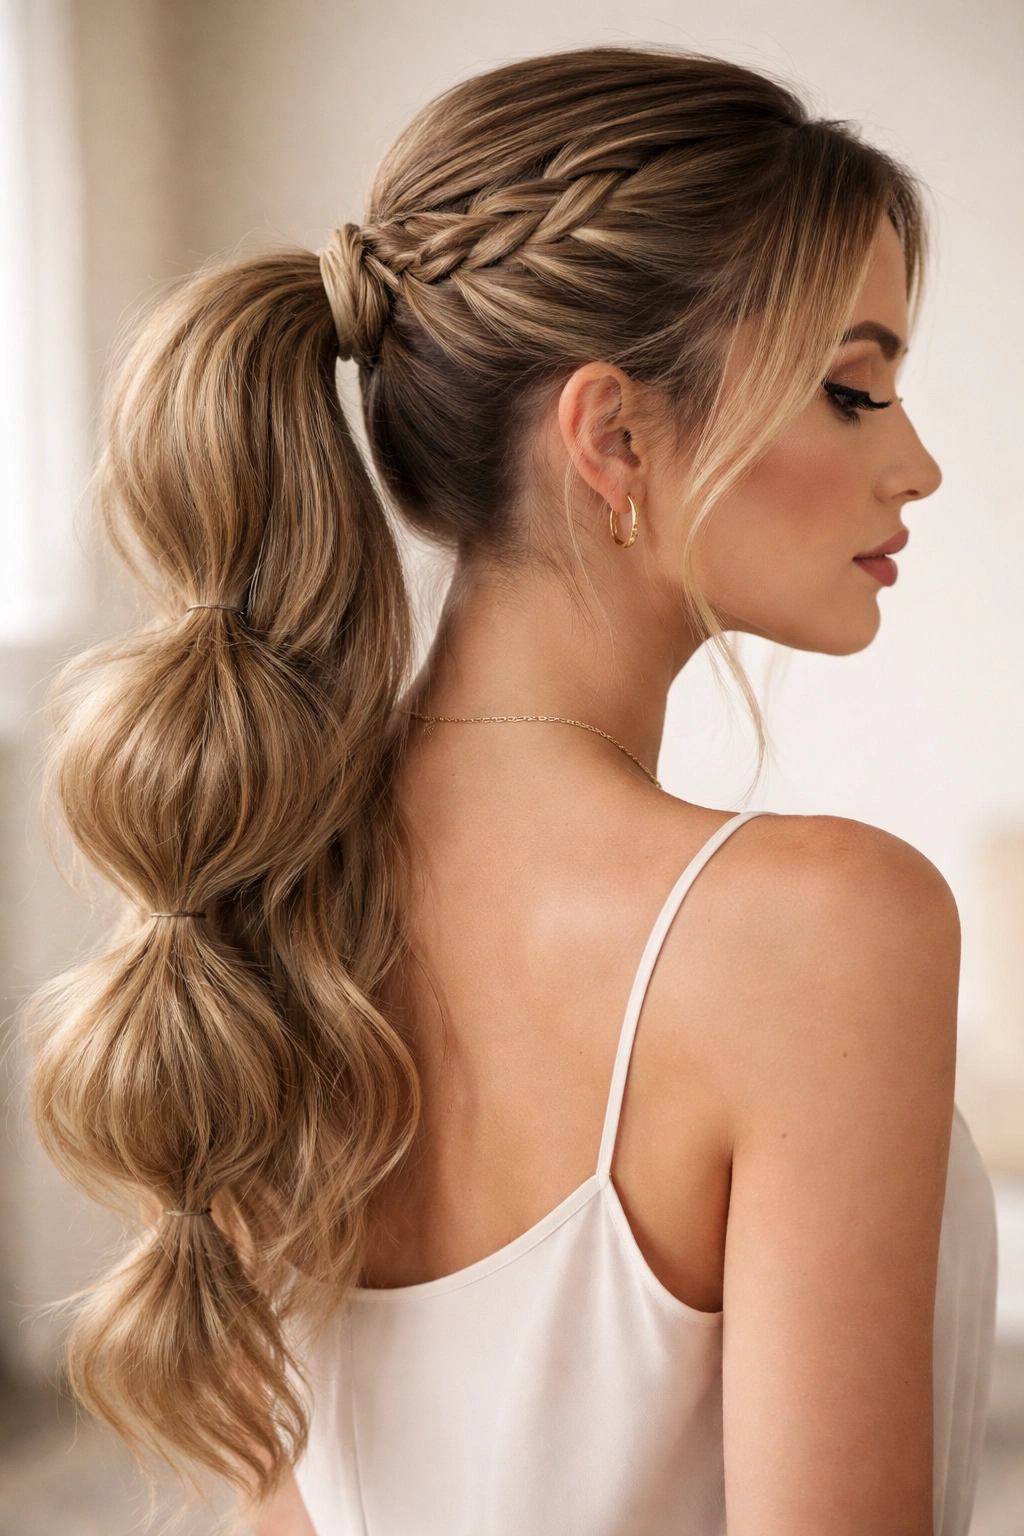
This is a hybrid style where the bottom half of your low ponytail is a bubble ponytail (sections separated by elastics, each section gently fluffed), while the top portion features a weave or braid. The bubbles create height and fullness in the ponytail itself, while the weave at the top creates texture and dimension at the gathering point.
Bubbles Create Dimension in the Ponytail Itself
Most people focus on creating fullness at the base of their ponytail and then ignore the actual tail itself. But a bubble ponytail actively creates dimension throughout the entire length of your ponytail, which makes your overall style feel exponentially fuller. Each bubble is like a mini pom-pom of texture, and when you have multiple bubbles running down the length of your ponytail, the effect is genuinely striking.
How to Build This Style
Create a Dutch braid or weave at the crown that travels down to your low ponytail point. Gather all hair into a low ponytail with an elastic. Now, starting about 2 inches down from the elastic, place a second elastic around your ponytail. Gently pull the hair between the first and second elastic upward and outward to create a bubble. Repeat this process, spacing elastics about 2 inches apart all the way down your ponytail, creating multiple bubbles. Pancake each bubble individually to maximize fullness. The combination of the weaved top and the bubbled tail creates remarkable dimension and volume throughout your entire ponytail.
Best for: This works beautifully on medium to long hair and is especially effective if you have naturally wavy or textured hair. It’s a style that photographs incredibly well and works for everything from casual wear to special occasions.
Final Thoughts
Low weave ponytails aren’t just a hair trend that’ll fade—they’re a genuinely useful technique for anyone who wants to maximize the appearance of fullness without the commitment of cutting layers or dealing with heavy extensions. The positioning alone (keeping the ponytail low rather than centered at the crown) gives you more working space and a more flattering line that works with most face shapes. The weaving techniques themselves—whether you’re choosing Dutch braids, fishtails, twists, or rope weaves—add dimension and texture that create the optical illusion of thickness.
The real power of these styles is how adaptable they are to your specific hair type, length, and texture. You don’t need thick, long, perfectly healthy hair to make a low weave ponytail work beautifully. Fine hair benefits from the dimension that weaving creates. Shorter hair works with modified versions of these techniques. Textured, curly, and coily hair actually has advantages because pre-existing texture amplifies the fullness effect of any weaving pattern you add on top.
Start by choosing whichever style feels most achievable for your current skill level and hair type, then play with variations. Once you master the basic technique—whether that’s a Dutch braid, a fishtail, or a rope twist—you can experiment with placement, tightness, and how aggressively you pancake or loosen the braid afterward. Every small adjustment changes the fullness effect slightly, giving you dozens of unique looks from a handful of core techniques.