Black women’s hair is incredibly versatile, and ponytails are one of the most practical, stylish ways to showcase that versatility. Whether you’re managing a busy schedule, protecting your natural hair, or just wanting a quick refresh that looks effortlessly put-together, a good ponytail can do it all. The key is finding styles that work with your hair texture, suit your lifestyle, and take minimal time to create.
The ponytails in this collection range from sleek and polished to textured and playful—and every single one can be created in 10 minutes or less, even if you’re new to styling. Many of these styles double as protective styling options, meaning they keep your ends tucked away and reduce breakage while looking intentional and beautiful. You’ll see variations that work for coily hair, curly hair, wavy hair, and straight hair, so there’s genuinely something here no matter your natural texture or your current styling preference.
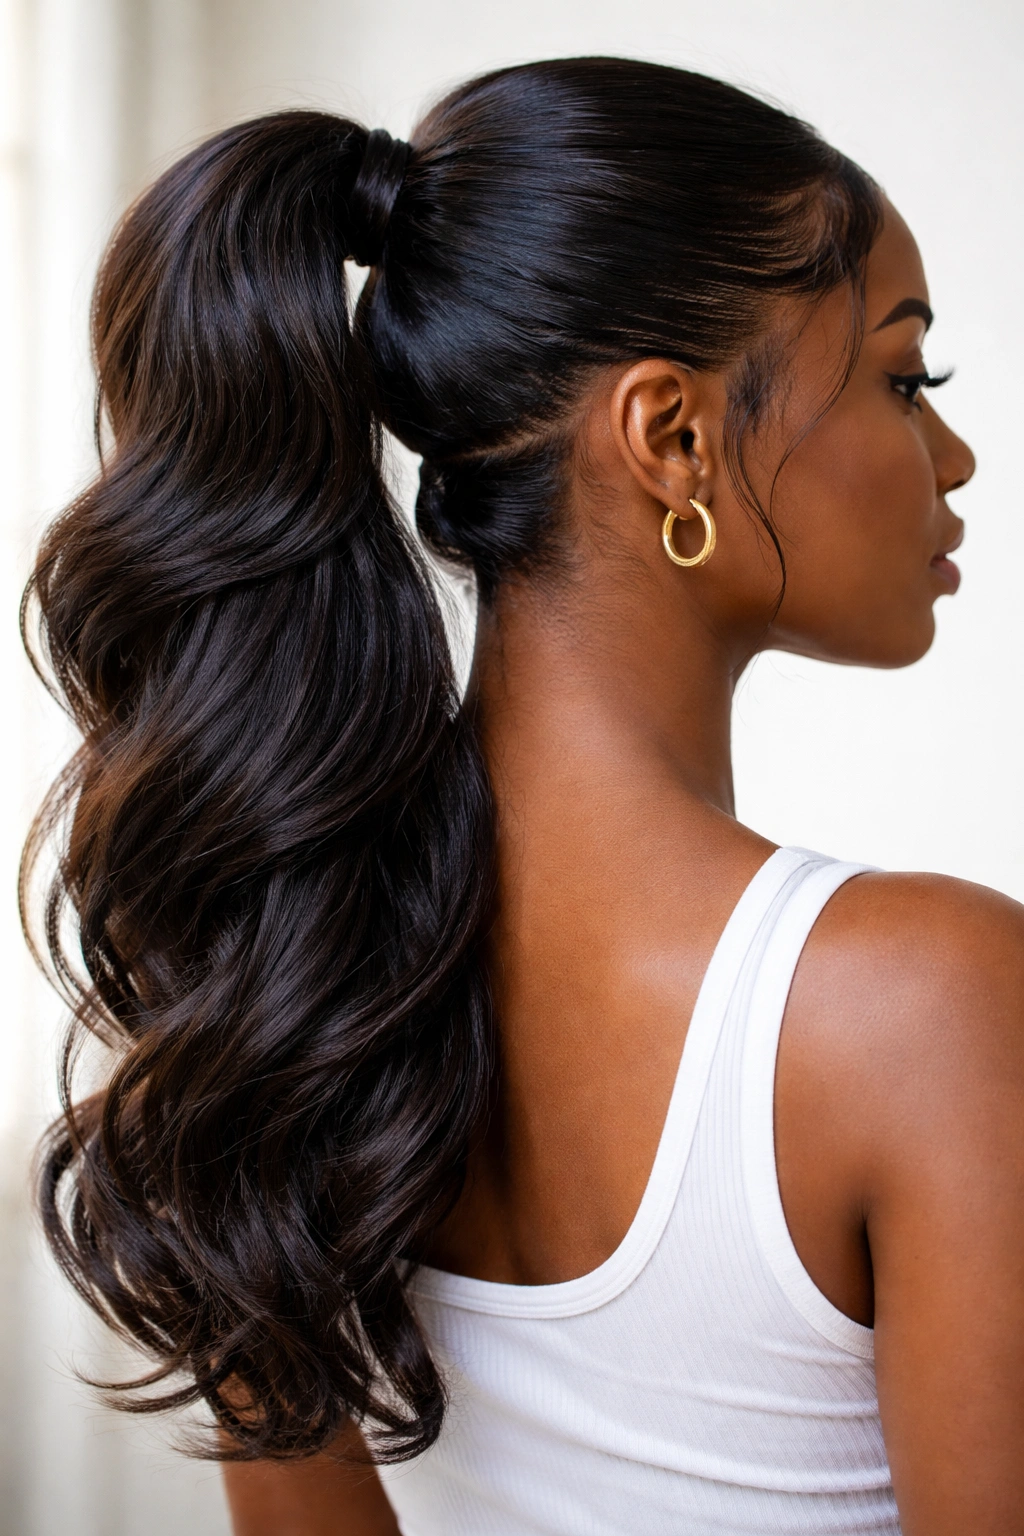
1. High Sleek Ponytail
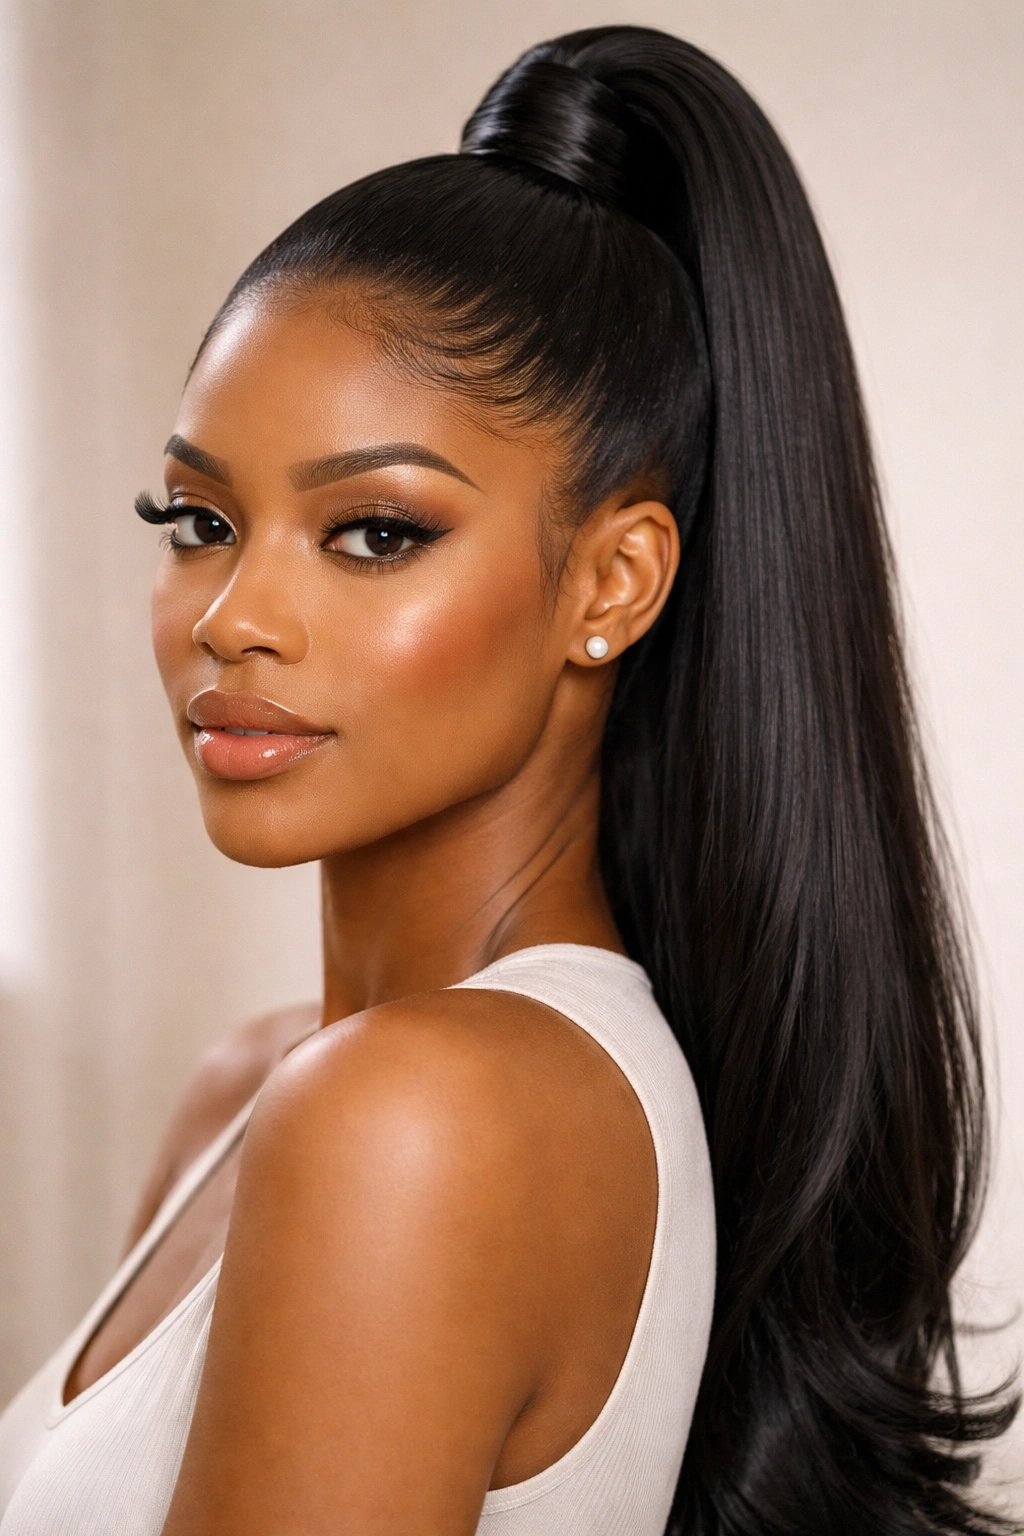
This is the no-fuss workhorse of ponytail styles—clean, professional, and timeless. A high sleek ponytail sits at the crown, pulled tightly back with every baby hair smoothed down. It works as a gym look, an office look, or a going-out look depending on how you finish it. The simplicity is actually the whole point: this is the style you can throw together in five minutes and still look intentional.
Why This Style Works So Well
A high ponytail instantly lifts your face and elongates your neck, which is why it flatters so many face shapes. The sleek finish makes the style look polished and intentional rather than hurried, even though it’s genuinely one of the fastest ponytails to create. For natural hair, this style works particularly well because the tension at the crown actually helps keep the style in place for several days, making it an excellent low-maintenance choice for busy weeks.
How to Create It
Start with damp or lightly dampened hair and a smoothing product—gel, edge control, or mousse all work beautifully depending on your hair texture and how much hold you want. Use a fine-tooth comb to brush your hair straight back from your face, working from your hairline to the crown. Gather everything at the highest point you can comfortably reach (or where you want the ponytail to sit), secure with a strong elastic, and smooth any flyaways with gel applied with a toothbrush. For extra polish, wrap a thin section of hair around the base of the elastic to hide it completely—this takes 30 extra seconds and transforms the look from casual to refined.
Pro tip: Use a boar bristle brush rather than a plastic comb when you want maximum smoothness. The natural bristles distribute your hair’s natural oils and create an even silkier finish.
2. Bubble Ponytail
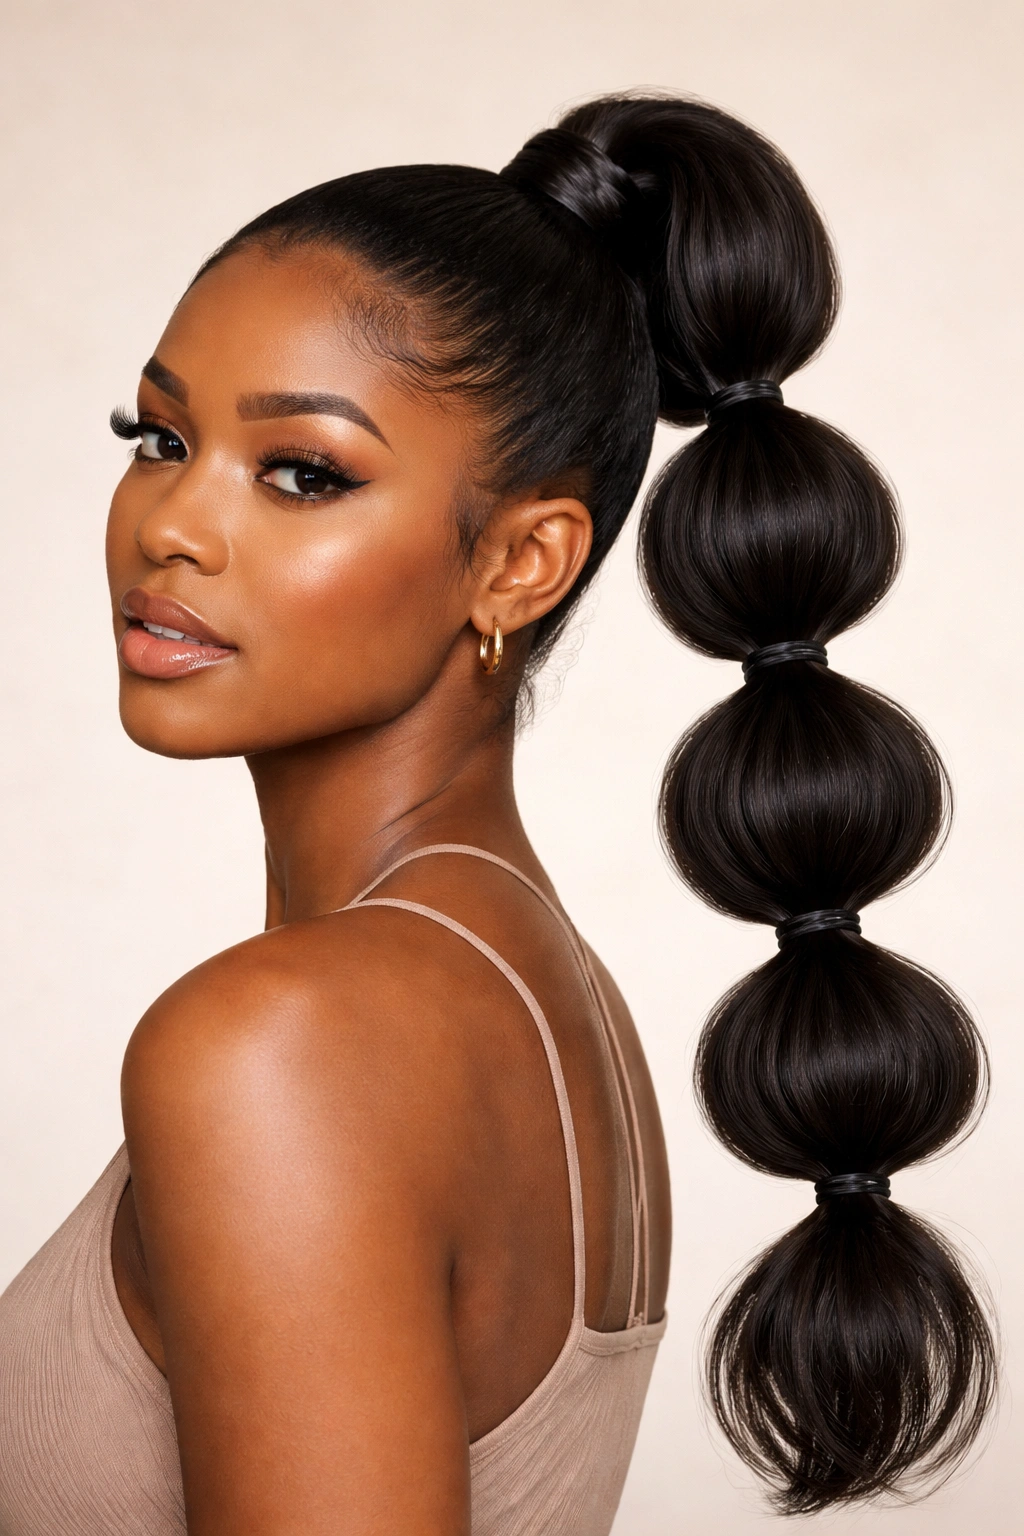
A bubble ponytail is playful, eye-catching, and honestly more fun than it has any right to be. You create the effect by making a high ponytail, then using additional elastics spaced a few inches apart down the length to create distinct “bubbles” along the tail. Between each elastic, you gently pull and fluff the sections to create volume and dimension.
What Makes Bubble Ponytails So Charming
This style works on virtually every hair length and texture because the bubbles add visual interest and movement even if your hair is on the thinner side. It’s actually a style that looks better with a bit of texture—coily or curly hair creates fuller, rounder bubbles than straight hair, which is why it’s particularly stunning on natural Black hair. The style reads as youthful and creative, making it perfect for weekend outings, social events, or whenever you want to feel a little more playful than usual.
Creating Your Own Bubble Ponytail
Make a high ponytail first and secure it tightly. Measure approximately 2 to 3 inches down from the base, place another elastic around all the hair at that point, and secure it firmly. Repeat this process down the entire length of your ponytail, keeping the spacing even. Once all elastics are in place, take the section of hair between the first and second elastic, gently pull it upward and outward to create a bubble shape, and hold for a few seconds so the bubble sets. Repeat between every pair of elastics. For more dramatic bubbles, flip your head upside down and work on the ponytail in reverse—gravity helps create fuller, rounder shapes.
Worth knowing: Use clear elastics if you want the style to look more delicate, or metallic and colored elastics if you want to lean into the playful, bold aesthetic.
3. Low Twisted Ponytail
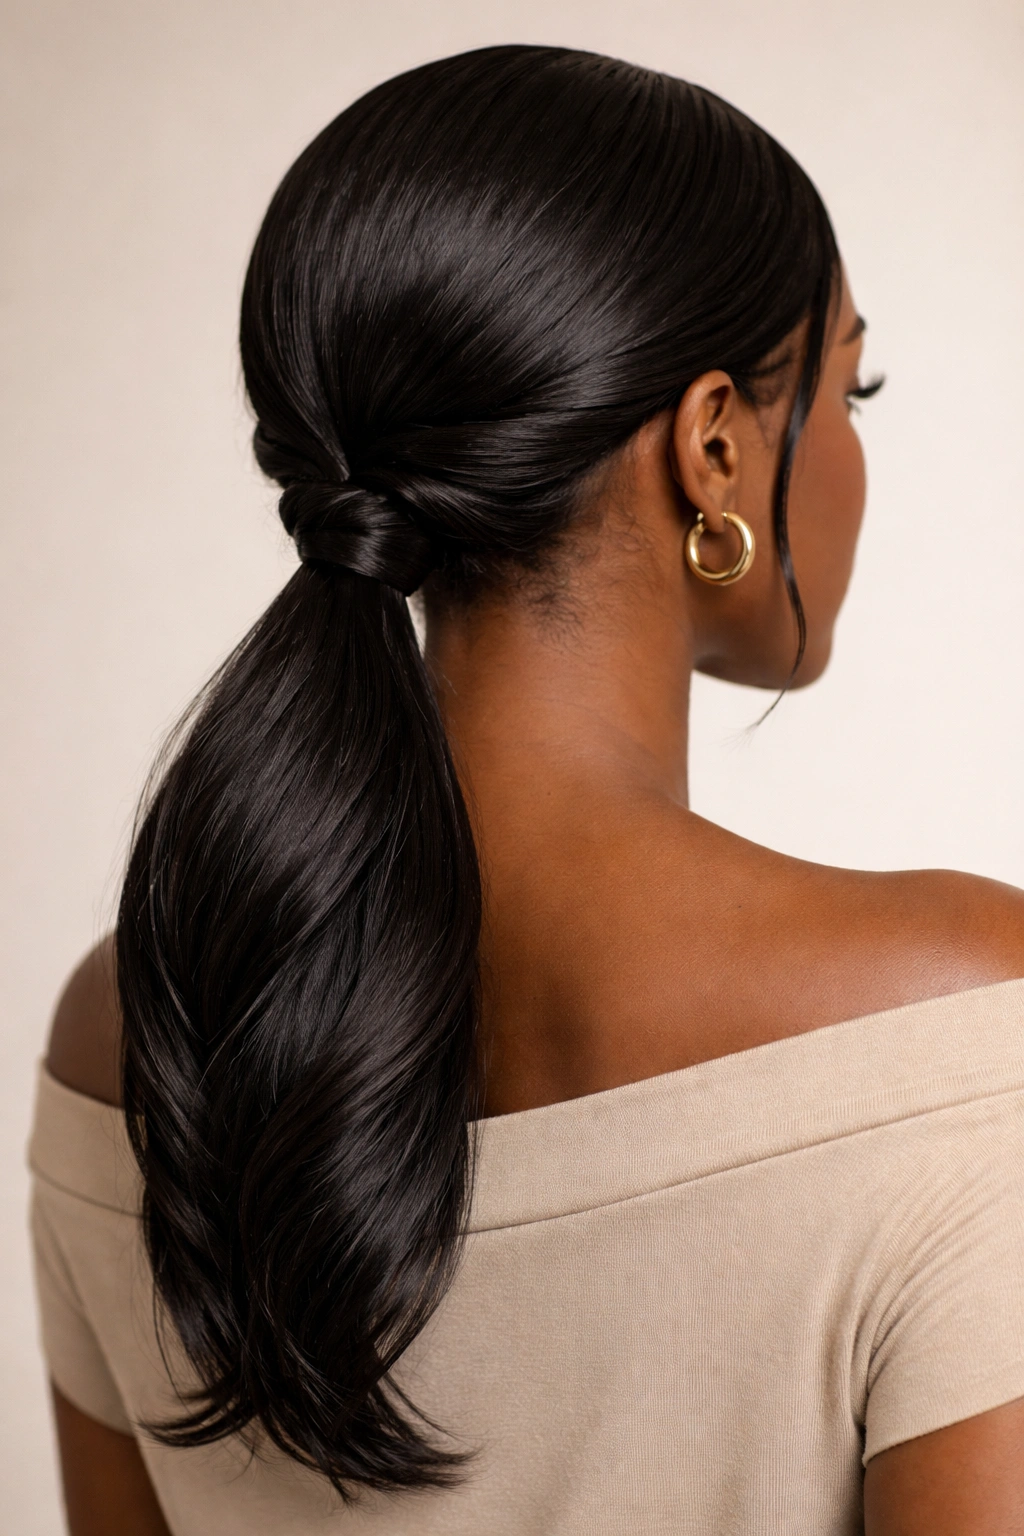
A low twisted ponytail sits at the base of your neck and gets its visual interest from the actual structure—the hair is twisted as it’s gathered, creating texture and dimension. This is the ponytail version of “I put in effort even though it took almost no time,” which makes it perfect for days when you want to look more done than you actually feel.
Why Twisted Ponytails Have That Extra Something
Twisting the hair as you gather it does two things simultaneously: it adds texture that catches the light beautifully, and it makes the style last longer because the twist keeps everything tighter and more secure than a simple gathered ponytail would be. The low placement is flattering and feels sophisticated, making this style work for both casual and slightly dressier occasions. For natural hair, the twist creates definition that shows off your texture in a really beautiful way.
Styling Steps for a Twisted Low Pony
Gather a section of hair from each side of your head at about ear level—you’re aiming to create a low ponytail that sits just above the nape of your neck. Twist one section clockwise and the other counterclockwise as you gather them toward the center back, letting the twists wrap around each other naturally. Secure everything with an elastic once you’ve twisted them to the point where you want the ponytail to begin. You can leave the tail straight or continue twisting it all the way down for extra dimension. Smooth the crown if you prefer a more polished look, or leave it slightly textured for a softer, more organic feel.
Pro tip: If your twists start to unwind as you’re gathering the ponytail, dampen your fingers slightly and re-twist as you secure the elastic—the moisture helps the twist hold.
4. Wrap Around Bun Ponytail
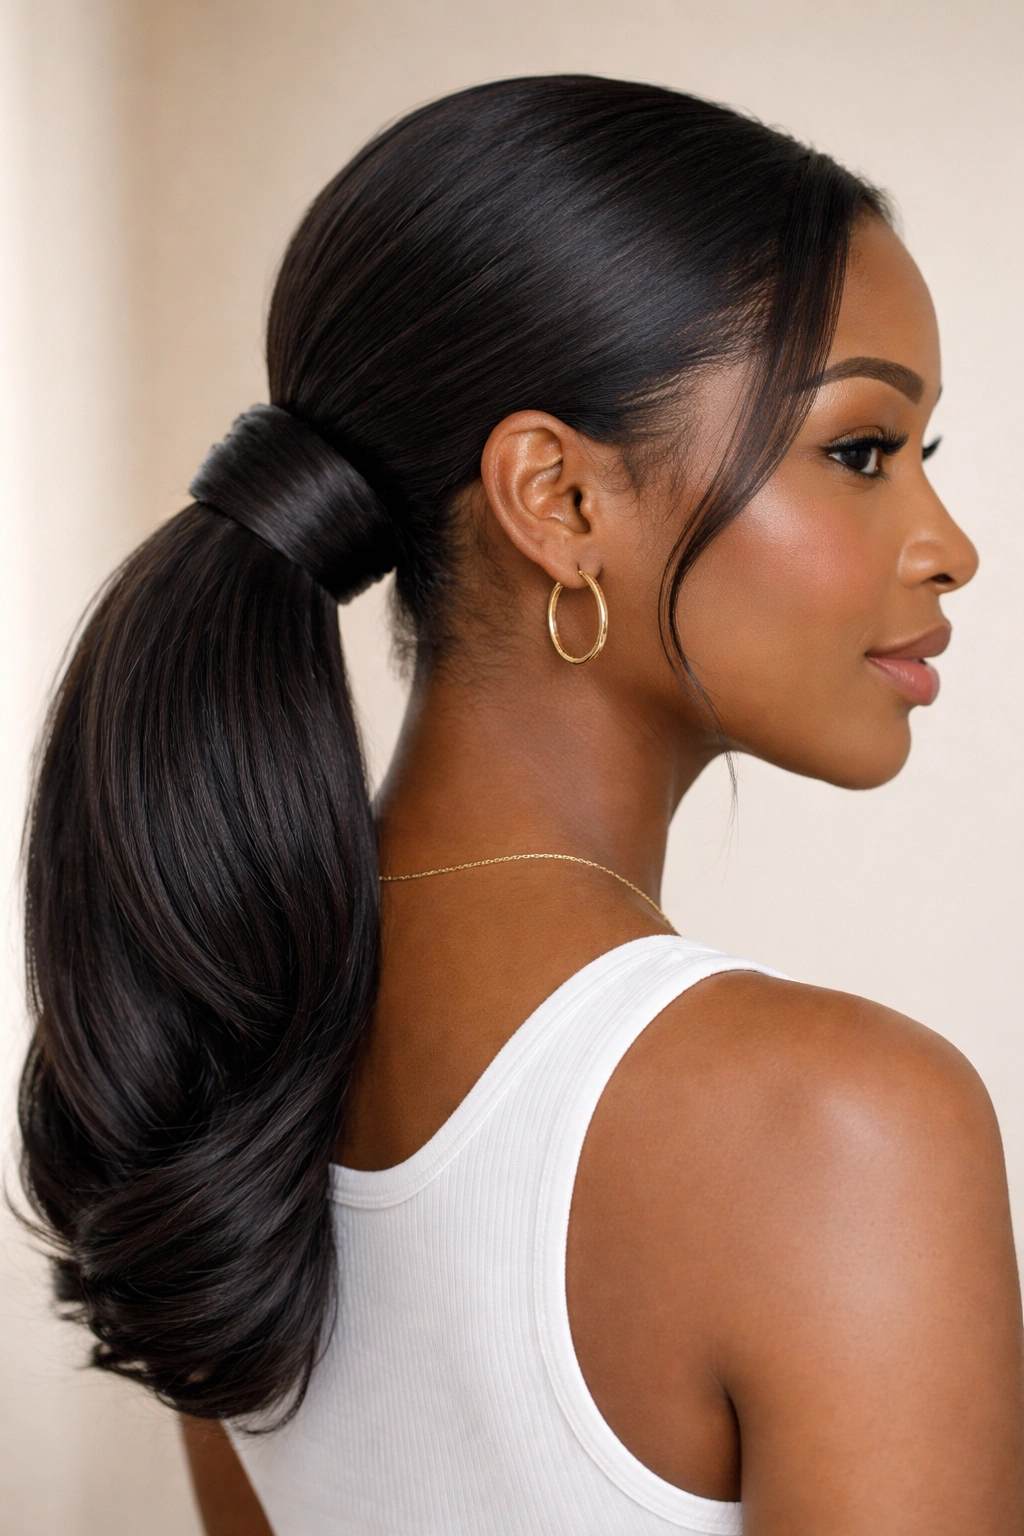
This style looks way more complicated than it actually is, which makes it feel like a win every single time you create it. You make a low ponytail, then wrap sections of the tail around the base to create a bun-like effect. The result is a style that’s somewhere between a ponytail and a bun—protected, polished, and definitely more interesting than either on its own.
The Beauty of the Wrapped Design
When you wrap the ponytail around its base, you’re creating a style that protects the ends of your hair while keeping the look relatively sleek and close to the head. This makes it an excellent protective style for working out, sleeping, or protecting your hair during transitional periods. The wrapped layers also add visual interest and texture, so even a sleek finish doesn’t look boring or flat.
How to Build Your Wrapped Ponytail
Start with a low ponytail secured at the nape of your neck. Take a small section of hair from the ponytail (about an inch wide) and wrap it around the base of the elastic, pinning it in place with a bobby pin as you complete the wrap. Take another small section and wrap it in the opposite direction, overlapping slightly with the first wrap, and pin that as well. Continue this process, alternating directions and slightly overlapping each wrap, until you’ve wrapped the entire base and created a bun-like shape. Smooth the wrapped sections with edge control or gel if you want a polished finish, or leave them slightly textured for a softer look.
Insider note: Use bobby pins that match your hair color so they disappear completely into the style—bobby pins in the wrong color are the only thing that pulls this look from polished to unfinished.
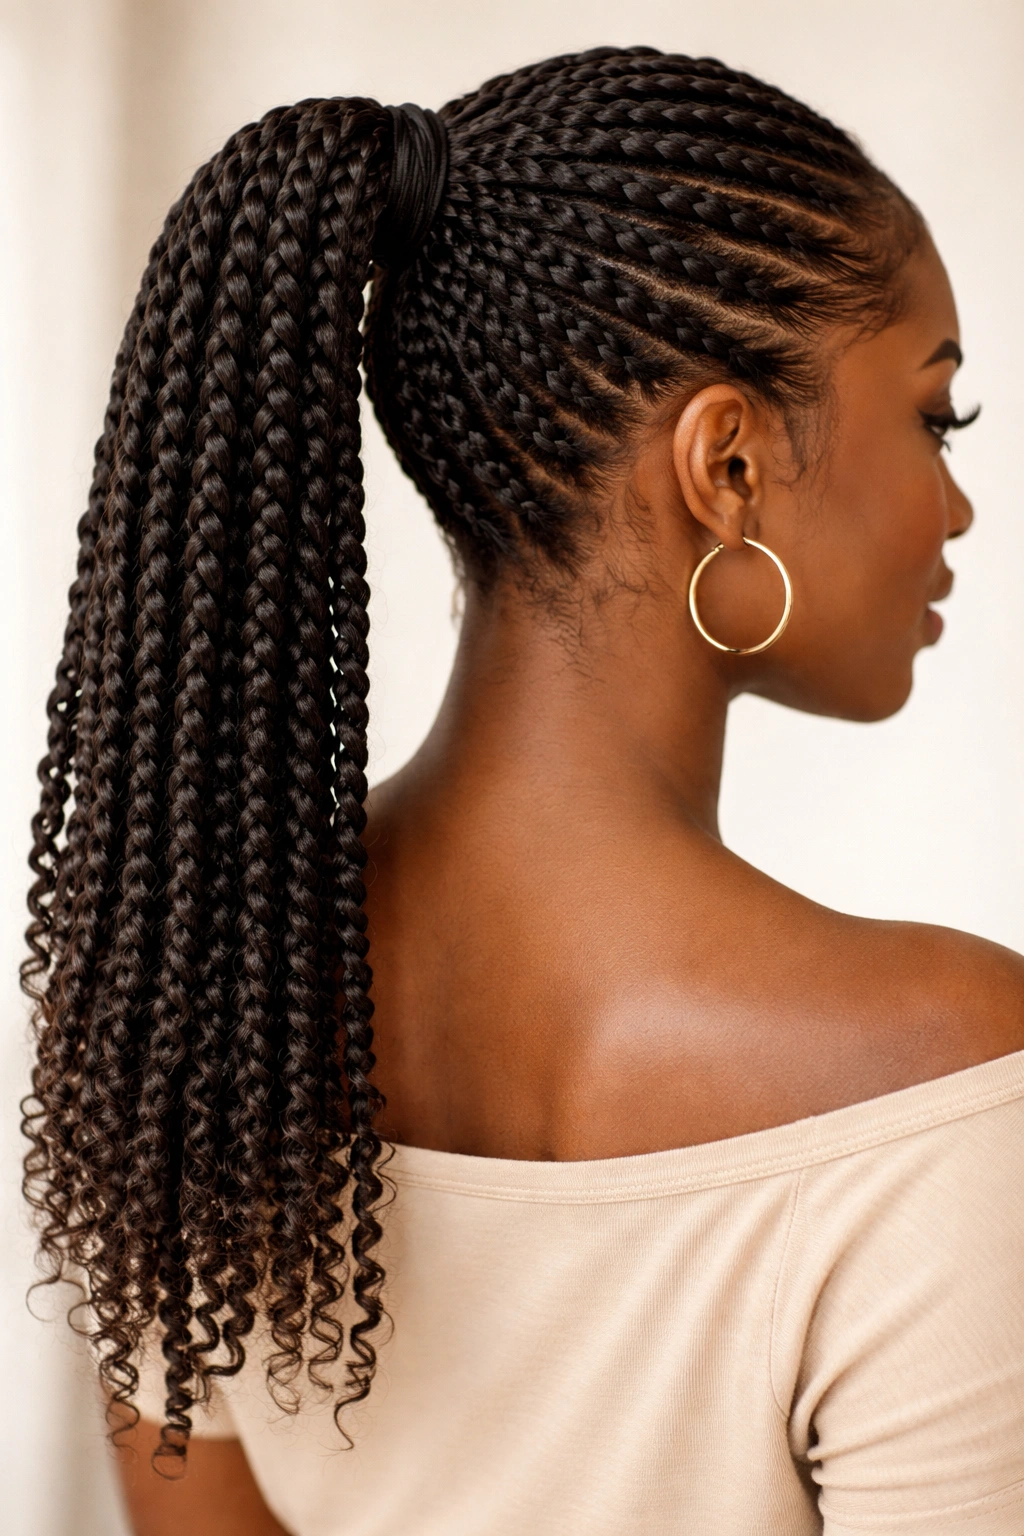
5. Braided Ponytail

A braided ponytail combines the protective benefits of braiding with the simplicity and ease of a ponytail, making it one of the smartest protective styles you can create. You can braid the entire ponytail from the base, or braid just the top section for a hybrid look that’s a little less intense.
Why Braids Inside Ponytails Make Sense
Braiding keeps your ends protected while adding texture and visual interest that a plain ponytail doesn’t have. The braiding also naturally keeps everything tighter and more secure, so the style lasts longer without looking loose or messy. For natural hair, the braid creates beautiful definition that shows off your texture, and because it’s contained within a ponytail, it’s less bulky and intense than a full head of braids would be.
Creating a Braided Ponytail
Gather your hair into a ponytail at whatever height you prefer—high, mid, or low all work beautifully. Divide the ponytail into three equal sections and create a basic three-strand braid, working all the way down the length of the tail. You can keep the braid neat and tight for a polished look, or loosely braid it and gently pull the braid outward to create a fuller, more textured appearance. If you want a hybrid approach, you can braid just the top few inches of the ponytail, then leave the rest as a regular tail—this gives you the textured look without committing to a full braid.
Pro tip: If you’re braiding a ponytail that’s quite long or thick, consider doing a two-strand twist instead of a three-strand braid. It’s faster, looks equally beautiful, and requires less strength in your hands.
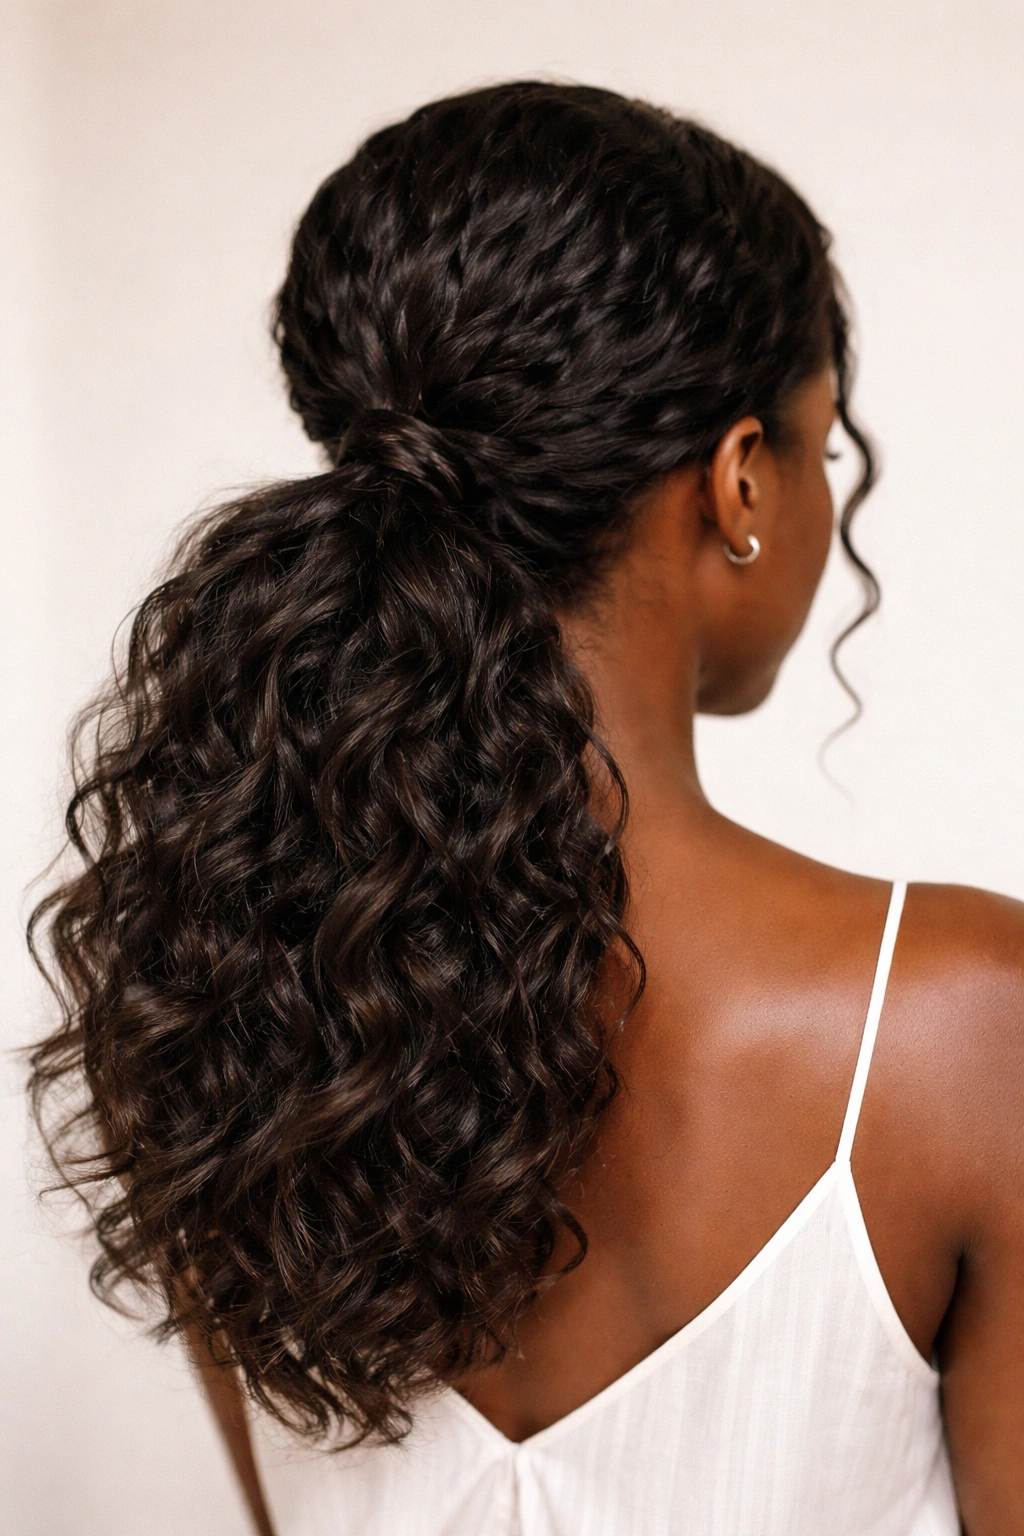
6. Curly High Ponytail

This is the ponytail for celebrating your natural curl pattern. A curly high ponytail works with your natural texture rather than against it—whether you’re working with coils, curls, waves, or anything in between. The key is gathering your curls in a way that preserves their shape and bounce while keeping them contained and intentional.
The Magic of Embracing Your Natural Texture
When you style a ponytail that honors your natural curl, the entire look feels authentically you in a way that a sleek ponytail, however beautiful, might not. Curly ponytails are also remarkably low-maintenance: once you gather them, they stay gathered without needing the constant smoothing or touching up that sleek styles sometimes require. This makes a curly ponytail genuinely easy even if you’re someone who doesn’t love spending time on your hair every single day.
How to Style a Curly Ponytail
If your curls are already defined from a wash day, you can simply gather them at the crown with a gentle hand and secure with an elastic designed for textured hair—look for larger, softer elastics or spiral hair ties that grip without breaking hair. If you need to refresh your curls, apply a lightweight curl cream or mousse to damp hair, scrunch it upward to encourage curl formation, and allow it to air dry or use a diffuser on low heat. Once your curls are set, gather them into a ponytail, using your fingers rather than a comb to avoid disrupting the curl pattern. Smooth the crown slightly if you want more polish, or keep it textured for a softer vibe.
Worth knowing: Gather your curly ponytail with the elastic slightly lower than you think you want it. Curls expand as they dry and set, so a ponytail that feels high when wet will settle into a more mid-height position once your curls are fully formed.
7. Two-Strand Twist Ponytail
Two-strand twists are a classic protective style on their own, and they work beautifully as the foundation for a ponytail too. With this style, you create two-strand twists from your hairline or from your temples, bring them together at the back of your head, and secure them into a ponytail. The visual result is textured, defined, and undeniably stylish.
Why Twists Make Such a Strong Foundation
Two-strand twists naturally hold together better than loose hair, which means a twist-based ponytail will stay secure and look neat throughout your day with minimal maintenance. The texture of the twists catches light beautifully and adds dimension that plain hair just can’t create. Because twists are protective by nature, a twist ponytail also doubles as a low-manipulation style that keeps your ends safe.
Building Twist-Based Ponytails
You can approach this a few different ways depending on how much texture you want. For a full-coverage look, create two-strand twists starting from your hairline and working backward, bringing all the twists together at the back of your head and securing them into a ponytail. For a less intense look, create twists from your temples toward the center back, leaving the top and sides loose, then gather everything—loose hair plus twists—into a ponytail. Either way, start with damp or dampened hair, apply a twisting cream or gel to each section before you twist, and work methodically so all your twists are roughly the same size and thickness. The ponytail secures everything in place and gives the look a finished, intentional vibe.
Pro tip: If you want your twists to last as long as possible, create them slightly tighter than feels comfortable (not painfully tight, just snug), and plan to sleep in a bonnet or pineapple to protect them overnight.
8. Side Sweep Ponytail
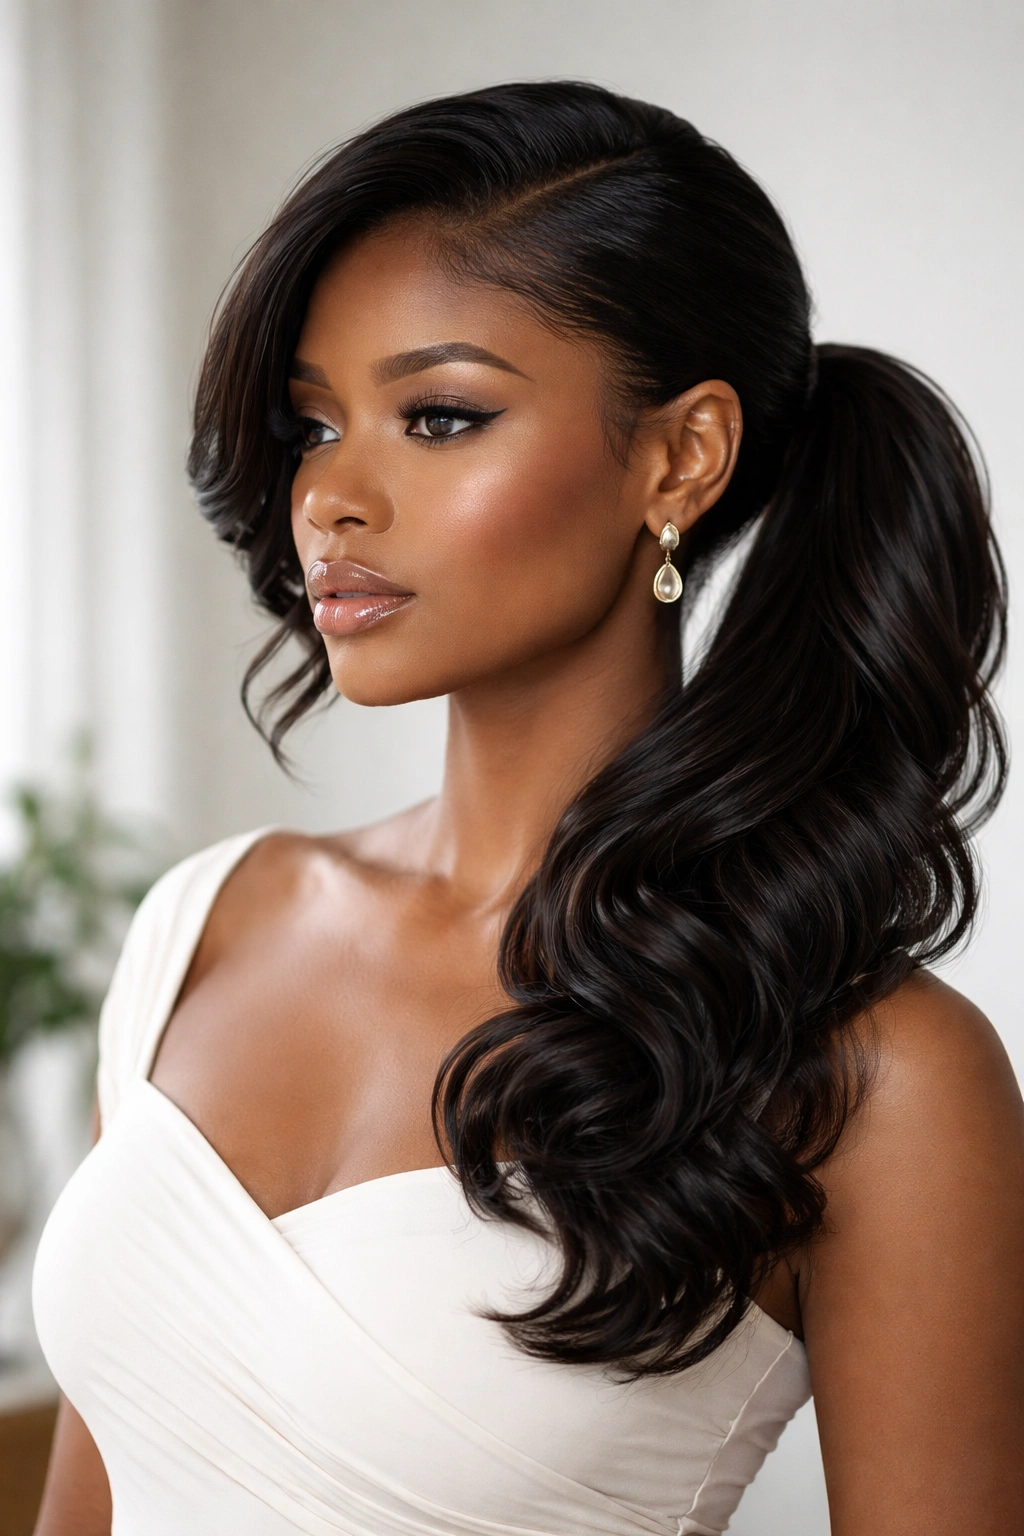
A side sweep ponytail gathers all your hair to one side of your head rather than the back or crown, creating an asymmetrical, romantic look that’s genuinely flattering on almost every face shape. This style works whether you prefer sleek or textured, and it’s one of the easiest ponytails to customize to your mood or outfit.
What Makes Side Ponytails So Universally Flattering
Asymmetrical styles draw attention across the face in ways that centered styles don’t, which is why a side ponytail can actually make your face look more balanced and structured. The side placement also feels a bit more relaxed and intentional than a centered style—it reads as “I made a choice about my look today” rather than just pulling your hair back. For natural hair, a side sweep is also a great option because you can show off the full beauty of your hair’s length and texture without anything pulling your face back in a way that might feel too severe.
Creating Your Own Side Sweep
Decide which side you want the ponytail on, then brush or comb your hair toward that side, gathering everything at a point just behind your opposite ear (so if you want the ponytail on the right, gather at a point behind your left ear). Secure with an elastic and smooth any flyaways with gel or edge control if you want a polished finish. The beauty of this style is how adaptable it is: you can keep the crown smooth and sleek, or you can create soft waves or twists before you gather the ponytail. You can place the ponytail higher or lower, closer to your ear or more toward the back of your head—play with placement until you find what feels right for your face and your mood.
Worth knowing: A side ponytail looks particularly striking when you have length, so this is a great style to reach for when you’re in the grow-out phase and want to show off your progress.
9. Textured Low Ponytail
A textured low ponytail is the sweet spot between “I definitely tried” and “I didn’t spend hours on my hair.” You create intentional texture—through curling, braiding, or twisting—then gather that textured hair into a low ponytail. The result feels sophisticated and polished while still looking effortless and natural.
Why Texture Is a Game-Changer
Texture automatically makes any style look more intentional and finished. A plain gathered ponytail reads as functional; the same ponytail with texture reads as a deliberate styling choice. Textured styles also move better, catch light more dynamically, and feel more interesting to look at. For natural hair, creating intentional texture is often just about letting your hair be fully itself rather than trying to smooth it down, which makes textured ponytails genuinely easier than fighting your texture would be.
Building Texture Into Your Low Pony
Start by creating your texture of choice. You might braid sections of hair loosely and leave them for a few hours, apply curl cream to damp hair and let it air dry, create two-strand twists, or even sleep in braids and shake them out the next morning for an undefined, wavy texture. Once your texture is set, gather your hair at the base of your neck into a low ponytail and secure with an elastic. Use your fingers rather than a comb to gather the hair so you don’t disturb the texture you’ve created. For extra polish, you can smooth the crown area slightly while leaving the rest textured, or keep the entire style equally textured for a softer, more organic feel.
Pro tip: Create your texture in the morning but don’t gather it into a ponytail until evening or the next day. The longer texture sits, the more defined and longer-lasting it becomes.
10. Half-Up Half-Down Ponytail
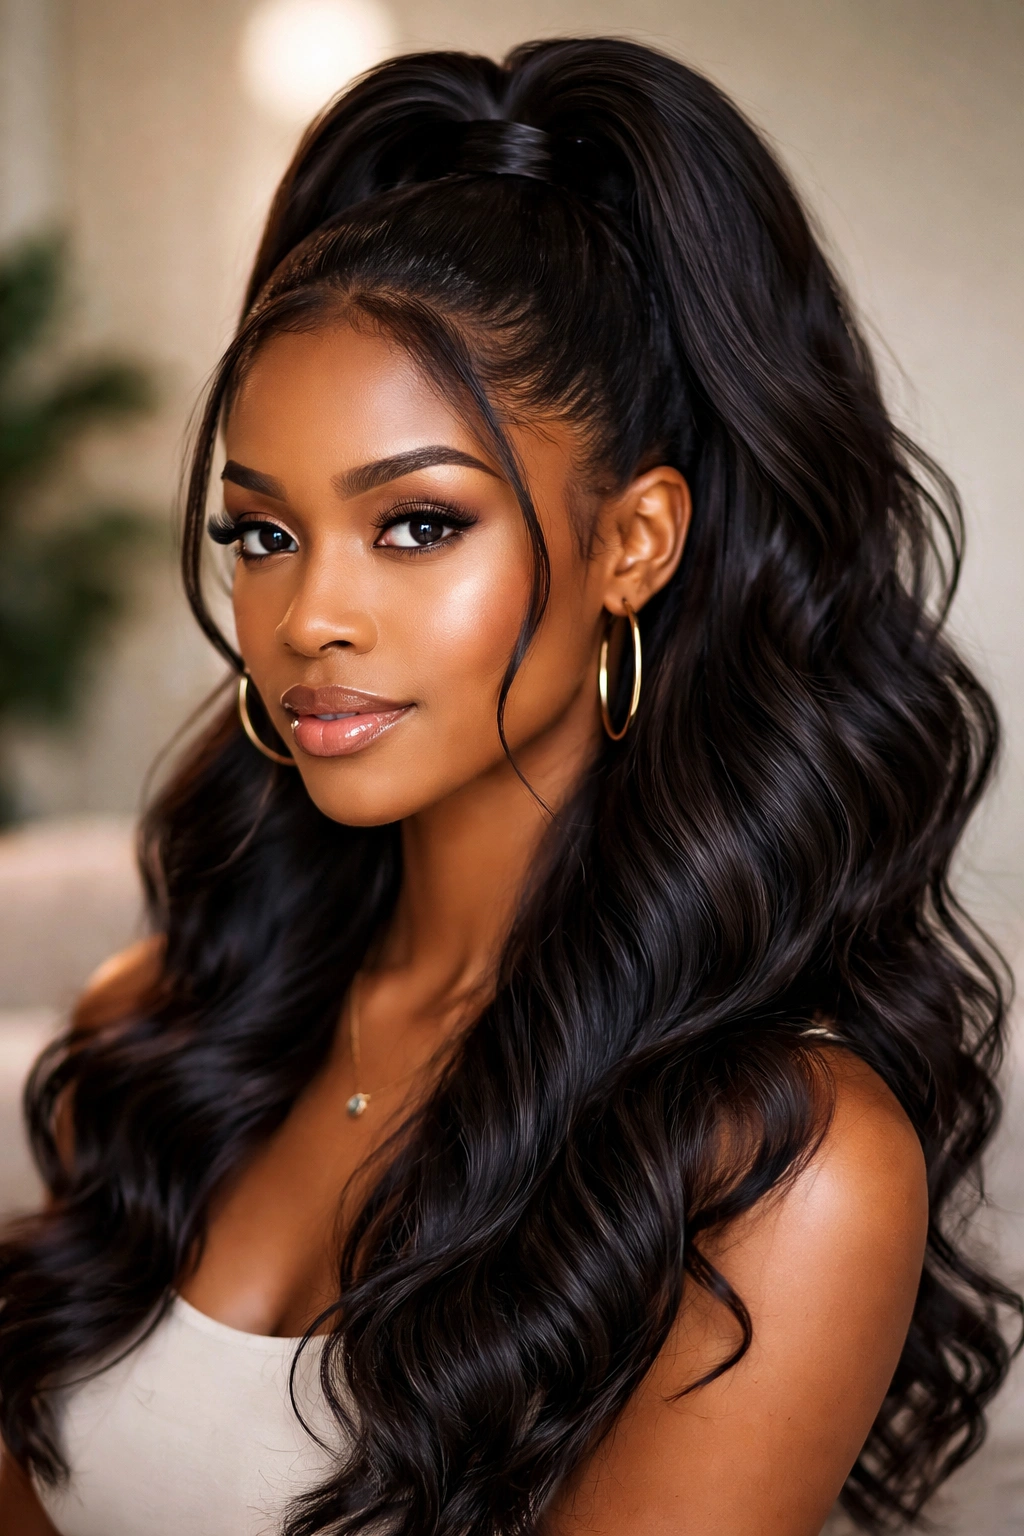
A half-up half-down ponytail bridges the gap between wearing your hair fully down and pulling it fully up, giving you volume at the crown while keeping the length flowing. This is perfect for days when you want some structure without committing to a full ponytail, or when you want to show off length while keeping hair out of your face.
The Balanced Appeal of Half-Up Styles
Half-up styles give you the best of both worlds: the face-framing softness of wearing your hair down, combined with the security and functionality of an updo. The style naturally creates dimension and visual interest without requiring much technique. For natural hair, a half-up style is particularly nice because you can show off your full length and texture while keeping the crown area contained and controlled.
How to Create a Half-Up Half-Down Look
Gather the hair from your temples to about the middle of the back of your head—essentially the top half of your hair—and secure it into a small ponytail at the crown. The bottom half stays completely loose and flowing. For more visual interest, you can twist the gathered section before securing it, or create a small braid before bringing it into the ponytail. You can also create a few braids or twists within the down-portion of your hair and let them hang freely—this adds texture and visual interest without the commitment of a full ponytail. The key is that this style works just as well sleek and polished as it does textured and soft.
Insider note: If your hair is very thick or full, use two elastics instead of one when securing the half-up section—one positioned slightly higher, one slightly lower. This distributes the weight better and makes the style last longer without the crown getting loose.
11. Layered Ponytail
A layered ponytail creates the illusion of shorter, fuller hair by securing different sections at slightly different heights before bringing them all together into one unified ponytail. The visual effect is movement, dimension, and fullness that a single gathered ponytail can’t create on its own.
What Layering Does for Your Ponytail
Layering tricks the eye into perceiving more volume and movement than actually exists, which is why it’s such a smart move if you have finer hair, thinner hair, or hair that feels flat when it’s all pulled straight back. The layered structure also adds visual interest and sophistication—this is the ponytail for days when you want to look like you put real thought into your styling. It works on every hair texture and can be as sleek or as textured as you want.
Creating a Layered Ponytail
Divide your hair into 3 sections: top (crown to mid-head), middle (mid-head to mid-length), and bottom (mid-length to nape). Start by creating a small ponytail with just the top section at the crown. Secure it with an elastic. Take the middle section of hair and gather it just below the first ponytail, securing it with a second elastic—this second elastic should hold only the middle section, not the top ponytail. Finally, gather the bottom section at the nape of your neck and secure with a third elastic. Now you have three distinct ponytails stacked on top of each other. Take all three and gather them together in one final, larger ponytail, securing with a larger elastic. The effect is layered, textured, and noticeably fuller than a single ponytail would be.
Worth knowing: The tighter you make each individual layer, the more defined and structured the final look will be. Looser layers create a softer, more romantic appearance.
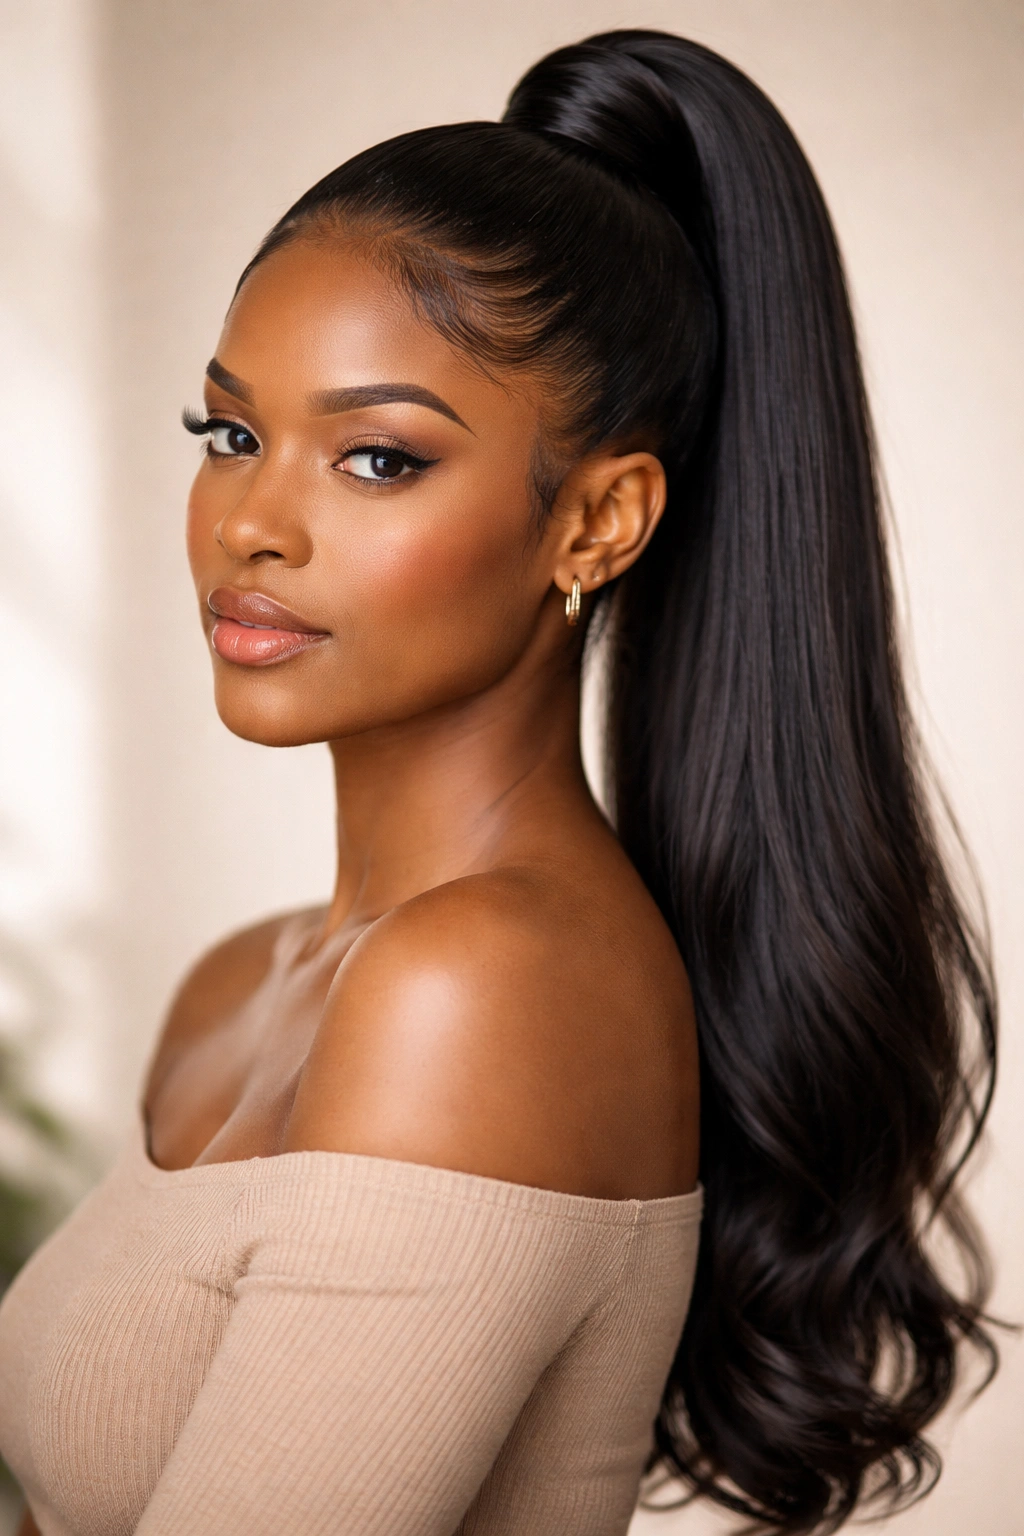
12. Slicked Back Long Ponytail
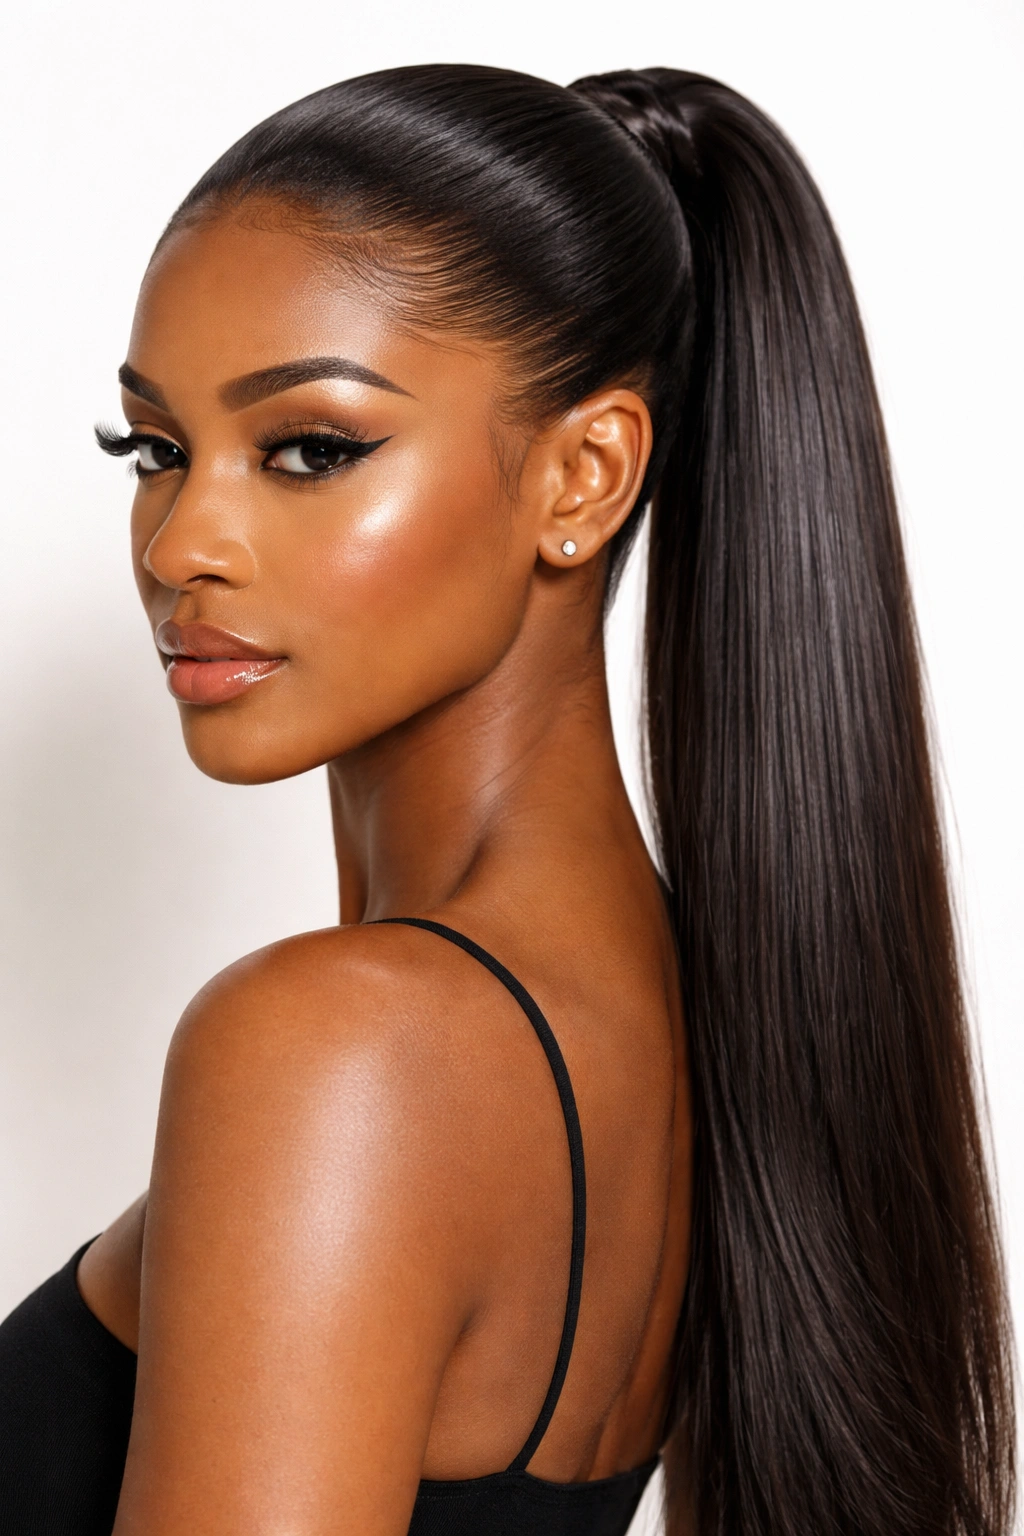
A slicked back ponytail is bold, clean, and undeniably chic. Every hair is smoothed straight back from your face and secured into a tight ponytail that can sit high, mid, or low depending on your preference. This is the style for when you want maximum polish and you’re not afraid to show off your forehead, your bone structure, and the full beauty of your face.
Why Slicked Styles Never Go Out of Style
A slicked back ponytail is architectural and graphic in a way that other ponytails aren’t. It emphasizes your features, it looks intentional and powerful, and it works on virtually every face shape when you own it with confidence. For Black women, slicked styles have deep cultural significance and history—this is a style that has always belonged to us, and wearing it is a beautiful assertion of that heritage. It’s also incredibly practical: once you’ve smoothed everything back and secured it, the style holds all day with minimal fussing.
How to Achieve Maximum Slickness
Start with damp hair and a strong-hold smoothing product—gel, mousse, or an edge control applied liberally will do the job. Using a fine-tooth comb, brush your hair straight back from your face, working methodically from your hairline to the crown. Make sure you’re covering every section and smoothing as you go. Gather everything at your chosen height (high, mid, or low all work), secure with a strong elastic, and go back over the crown with your comb and additional product to make sure there are absolutely no flyaways. For the ultra-polished look, wrap a thin section of hair around the base of the elastic and pin it in place. Use a toothbrush and gel to smooth down any baby hairs along your hairline and temples.
Pro tip: Apply your smoothing product the night before and sleep in a bonnet or silk scarf, then brush the style smooth in the morning and secure the ponytail. Overnight setting helps the slickness look almost wet and reflects light beautifully.
Final Thoughts
The beauty of ponytails is that they’re genuinely one of the most versatile and accessible styles in your styling arsenal. Whether you’re reaching for a sleek high ponytail on a Monday morning, a playful bubble ponytail for the weekend, or a textured twist-based style that protects your ends, you have options that look intentional, feel manageable, and work with your actual hair rather than against it.
The styles that will become your go-to favorites are often the ones you return to again and again—maybe it’s a particular ponytail that just makes you feel good, or one that works perfectly with your daily routine. Let yourself experiment without pressure, and notice which styles make your hair feel healthy and happy. A good ponytail isn’t just a hairstyle; it’s a way to express yourself, protect your hair, and feel confident in your look, and with twelve different options to choose from, you’re genuinely never short on possibilities.