If you’ve scrolled through Korean beauty content lately, you’ve probably noticed one thing: high ponytails are everywhere. But these aren’t the casual “throw your hair up” ponytails you might be thinking of. Korean high ponytails are meticulously styled, incredibly polished, and engineered to last from morning through evening without falling flat or slipping down. They’re a cornerstone of Korean hair aesthetics—sleek, youthful, and distinctly chic.
The difference between a regular ponytail and a Korean-inspired high ponytail comes down to technique, product choice, and how you anchor the base. Korean stylists have perfected the art of creating volume exactly where it matters, keeping the ponytail secure with strategic layering and teasing, and maintaining that coveted glossy finish that photographs beautifully and feels substantial to the touch. Whether you have thick, fine, straight, or textured hair, there’s a Korean high ponytail style that’ll work for your hair type and stay put all day long.
These styles have become so popular because they’re versatile enough for professional settings, casual outings, workouts, and even formal events—yet they maintain that effortlessly polished aesthetic that defines Korean beauty. The secret isn’t complicated, but it does require knowing which techniques work best and how to build longevity into your styling from the very first step. Let’s break down twelve specific Korean high ponytail styles that actually hold up, complete with exactly how to create each one and what makes it unique.
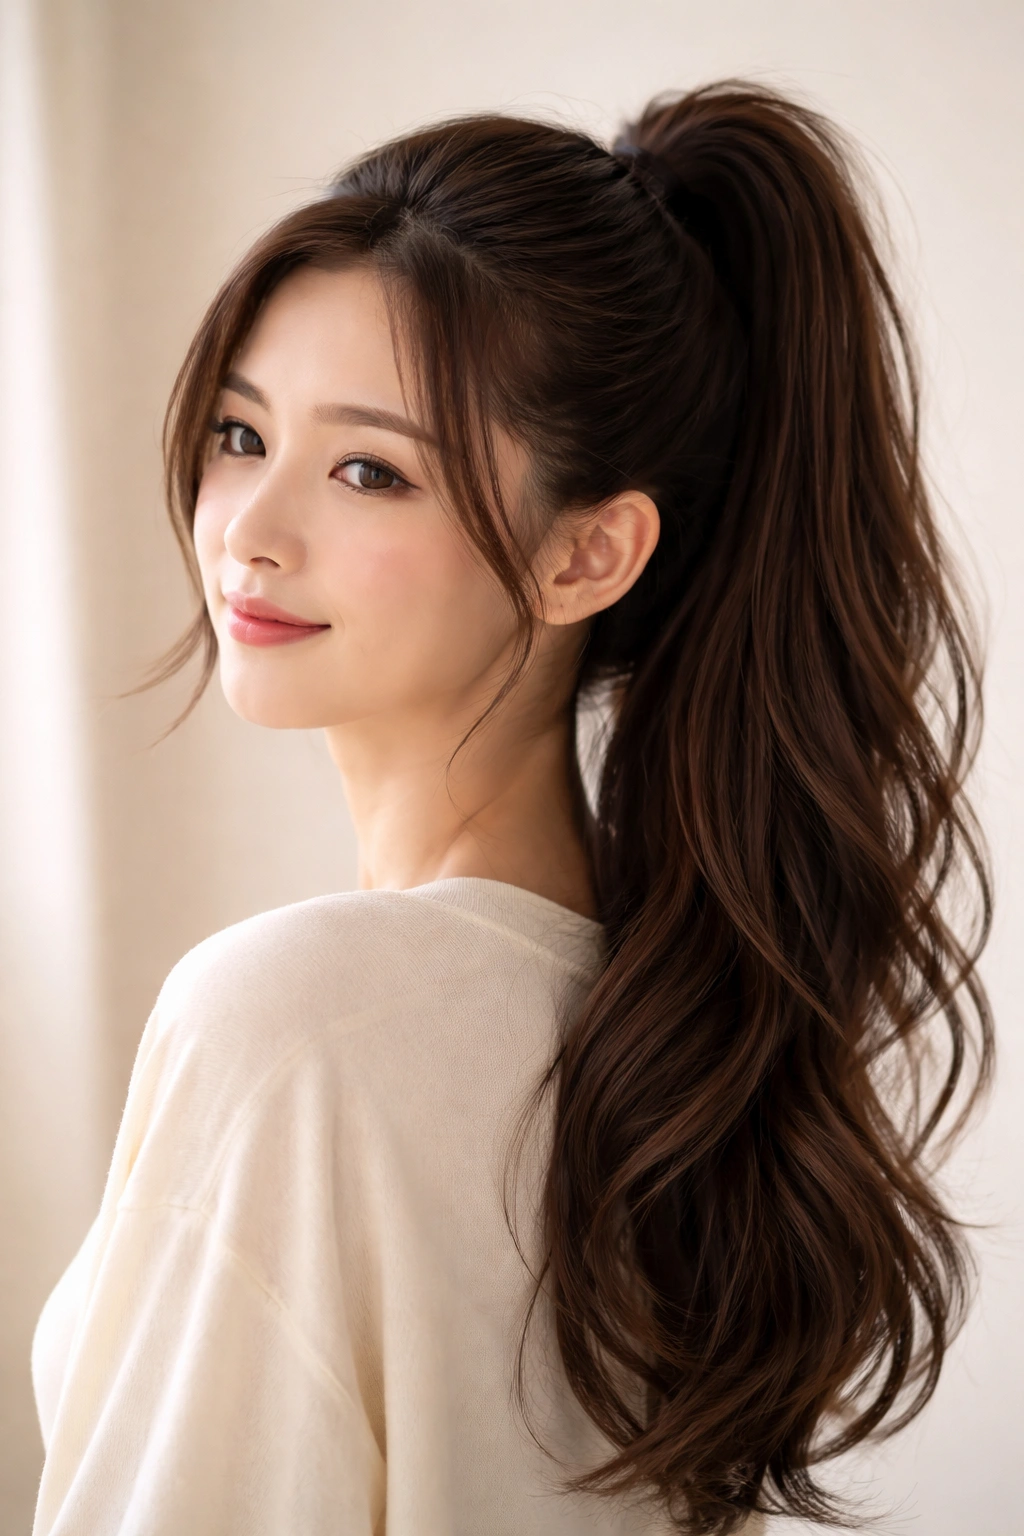
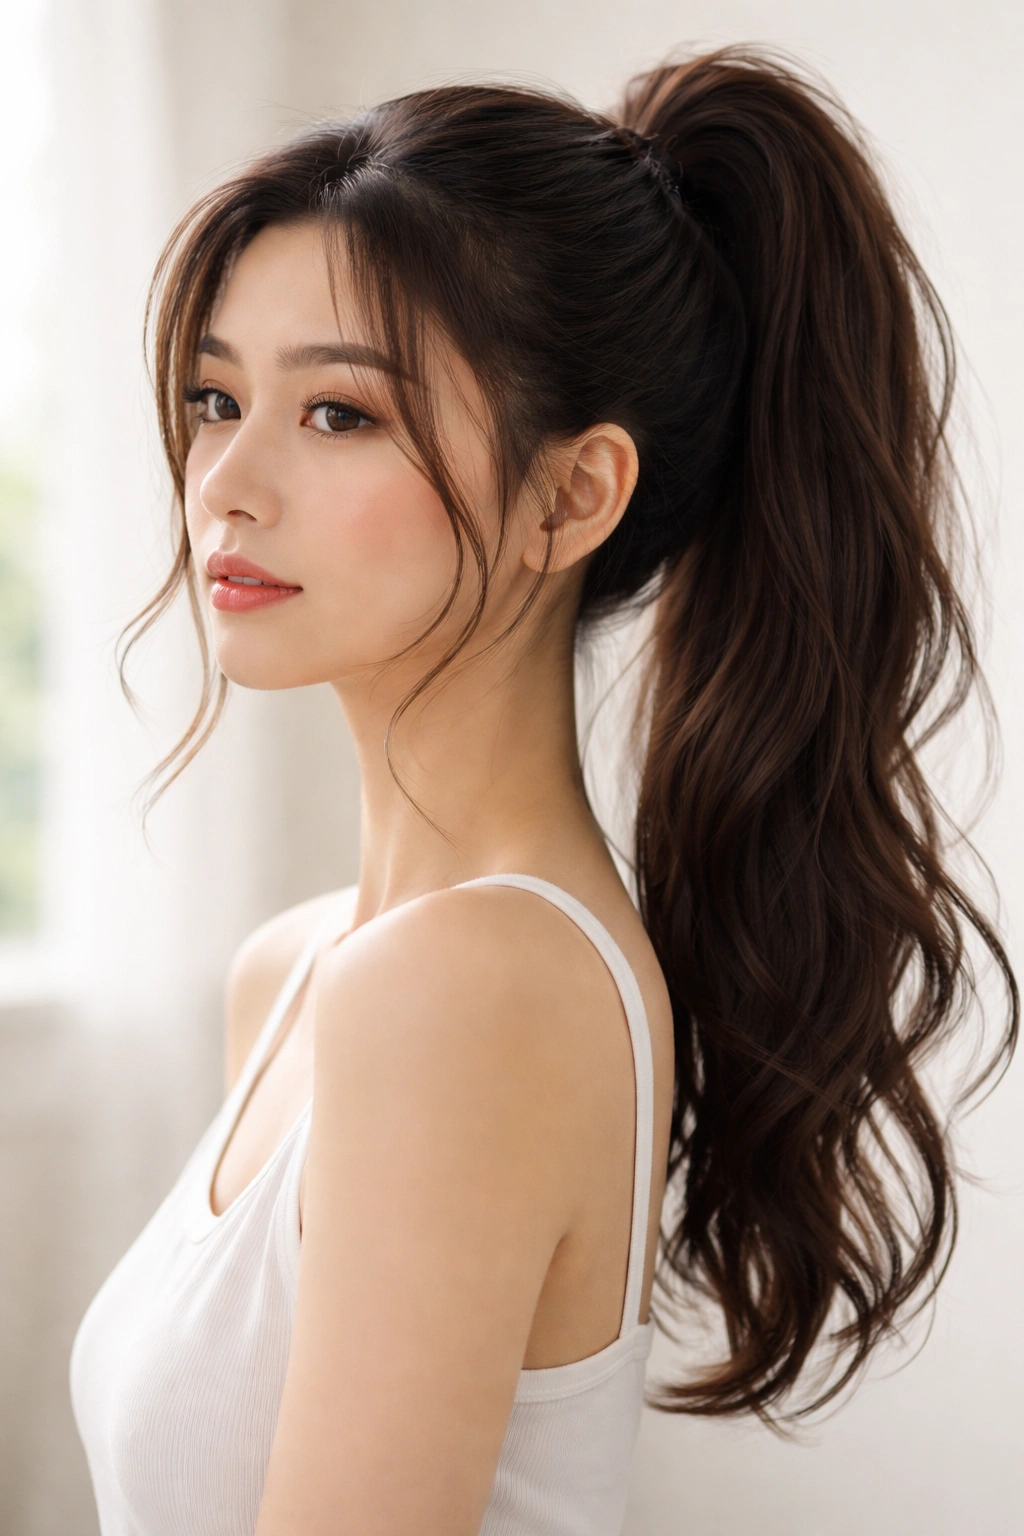
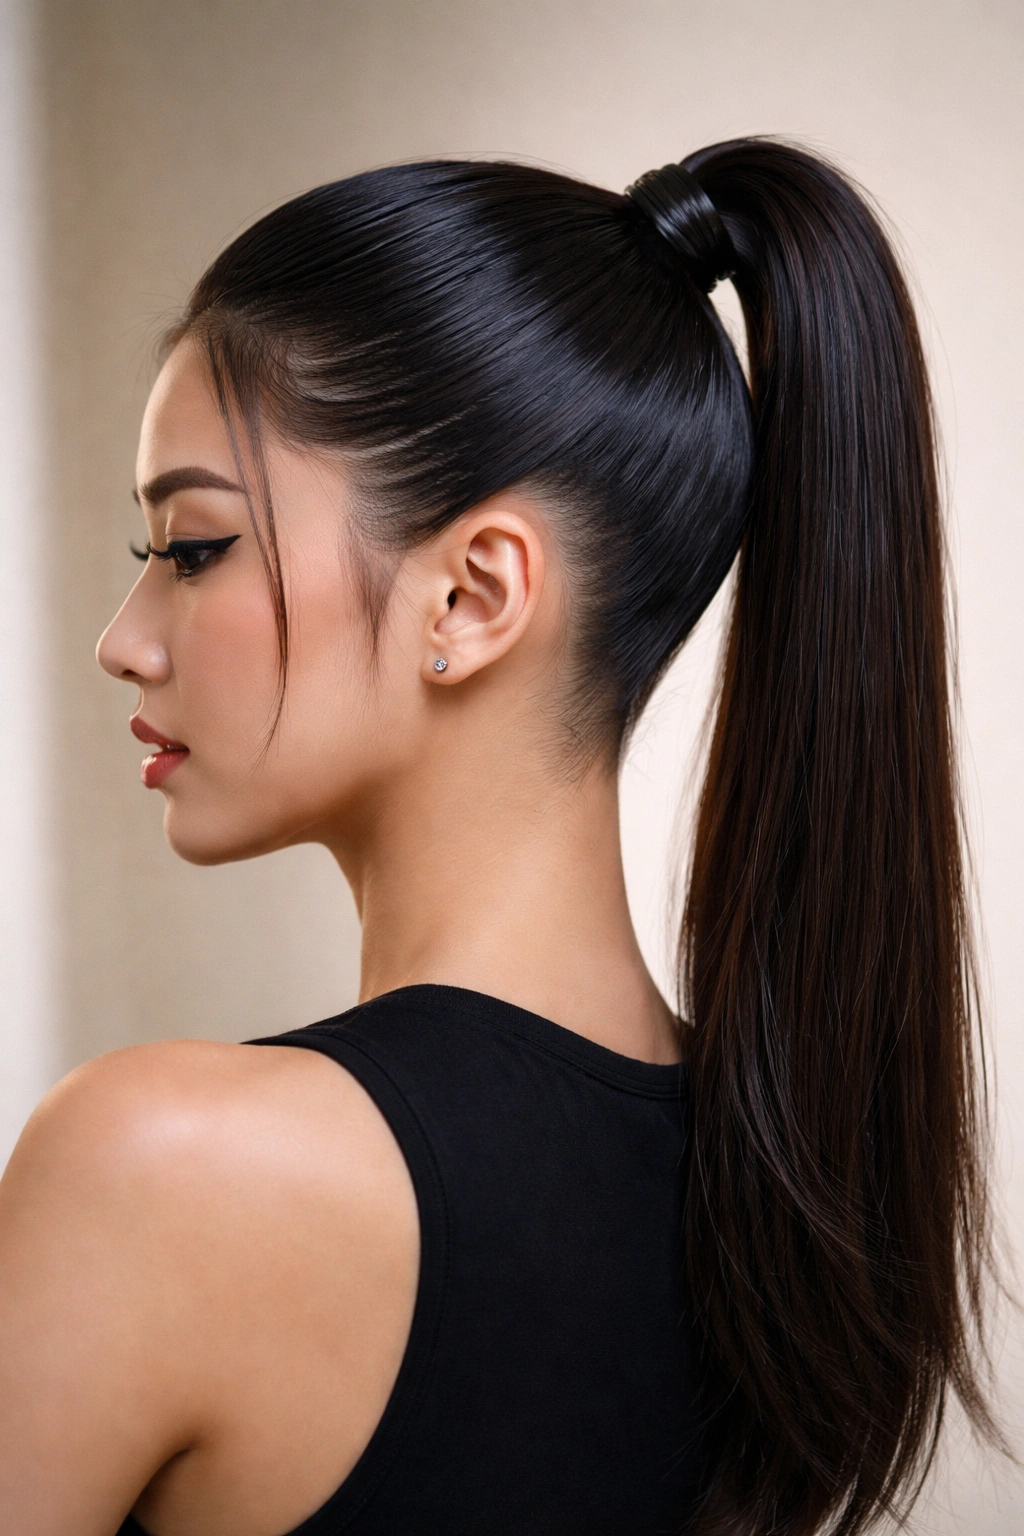
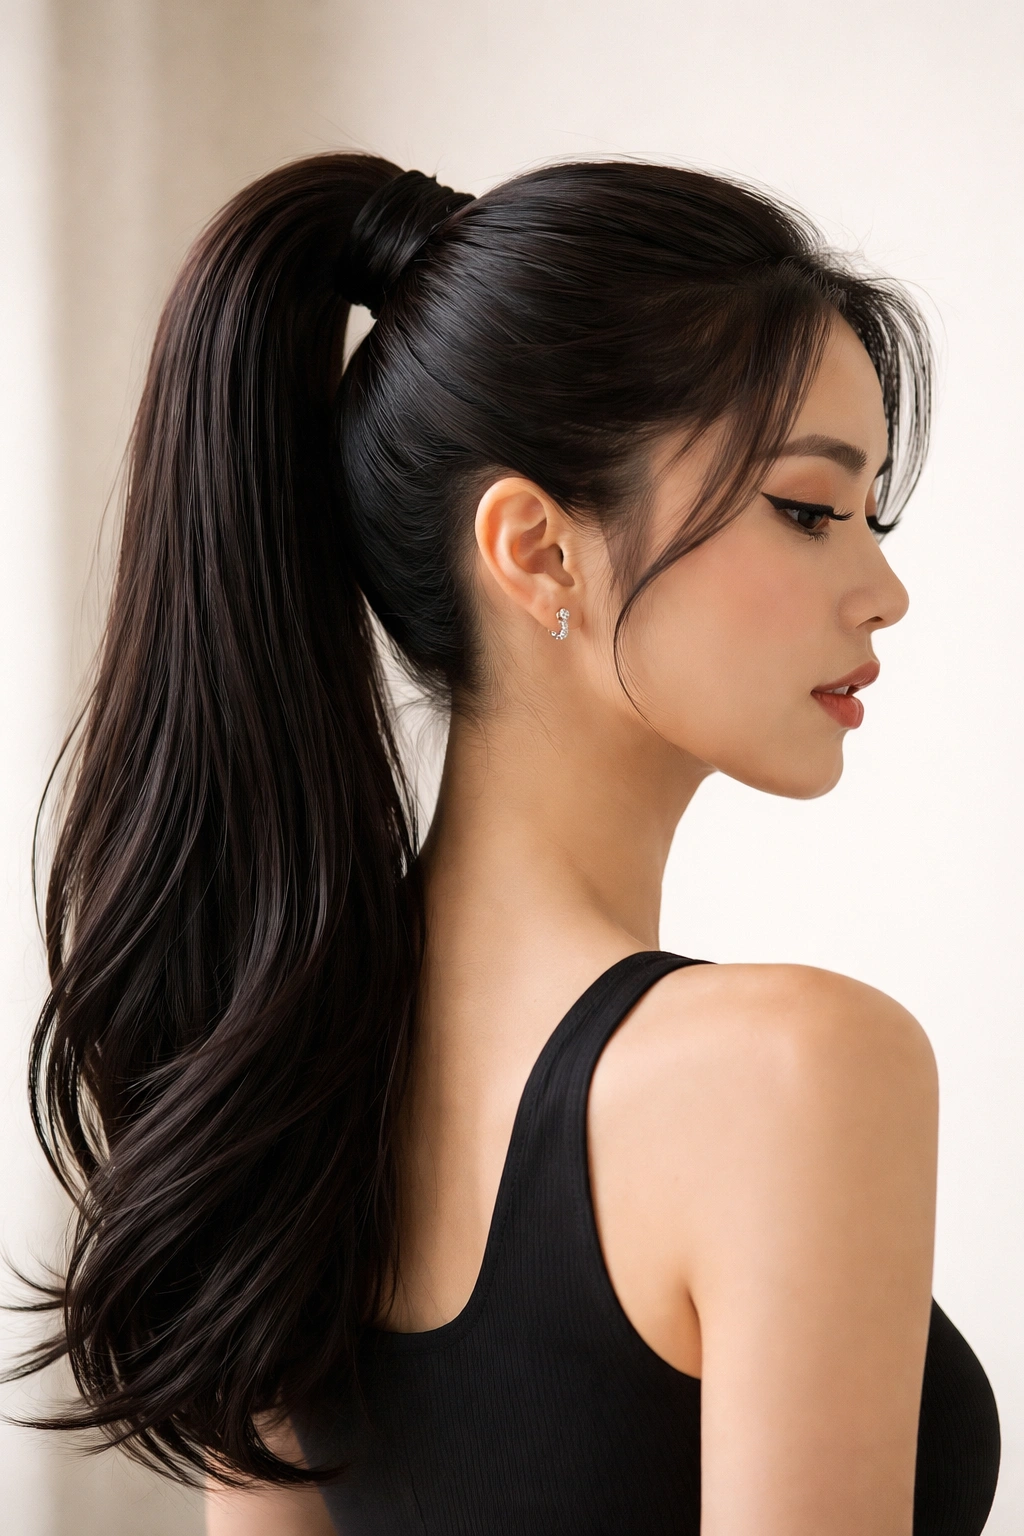
1. The Classic Sleek High Ponytail with Straight Texture
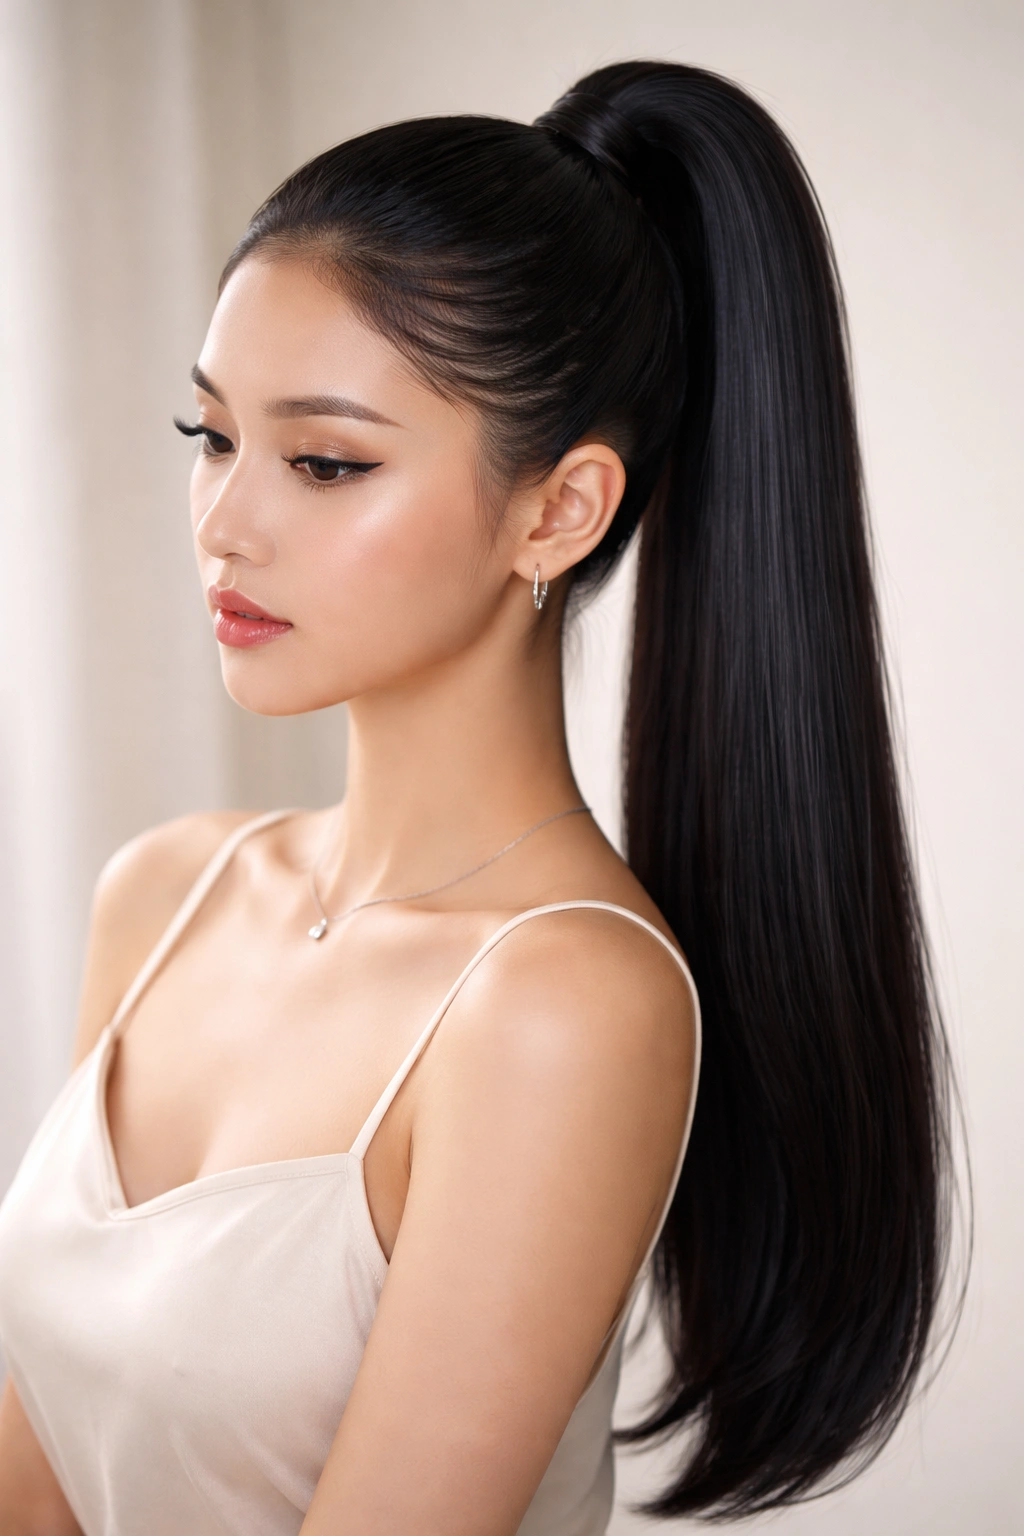
This is the foundation of Korean ponytail styling—the look you see on K-beauty influencers, in Korean drama scenes, and in almost every Korean salon mood board. It’s sleek, it’s polished, and it reads as intentional without looking overdone. What makes this version different from a standard sleek ponytail is the emphasis on ultra-smooth edges, a perfectly positioned high anchor point, and a base that’s been prepped for maximum staying power.
Why This Style Works Best
The sleek high ponytail succeeds because it relies on a few non-negotiable steps rather than complex layering. Starting with thoroughly brushed hair that’s been treated with a smoothing serum ensures your ponytail looks intentional and glossy from every angle. The positioning matters enormously—a true Korean high ponytail sits closer to the crown than most people initially position it, creating that youthful lift that’s essential to the aesthetic. Korean stylists emphasize that this isn’t about pulling your hair as tight as possible; it’s about positioning it high enough that it appears full and elevated naturally.
How to Create It
Start by applying a lightweight smoothing serum or hair oil to damp hair before blow-drying. This creates the foundational slip and shine that defines the style. Blow-dry your hair straight using a paddle brush, directing all hair smoothly back and away from your face. Once dry, use a fine-tooth comb to smooth the crown area completely, removing any flyaways or texture. Gather your hair into a high ponytail positioned about an inch forward from where you’d normally place it—closer to your crown, not directly at the back of your head. Secure with a small elastic, then take a thin section from the ponytail base and wrap it around the elastic to conceal it, securing that wrap with a bobby pin. Apply edge control or smoothing gel to your hairline and any flyaways, using a small brush to create a polished perimeter. Finish with a light hairspray to lock everything in place.
What keeps this style up all day: The key is the positioning itself—higher placement naturally resists gravity better. The wrapped elastic also prevents slipping by covering the base completely.
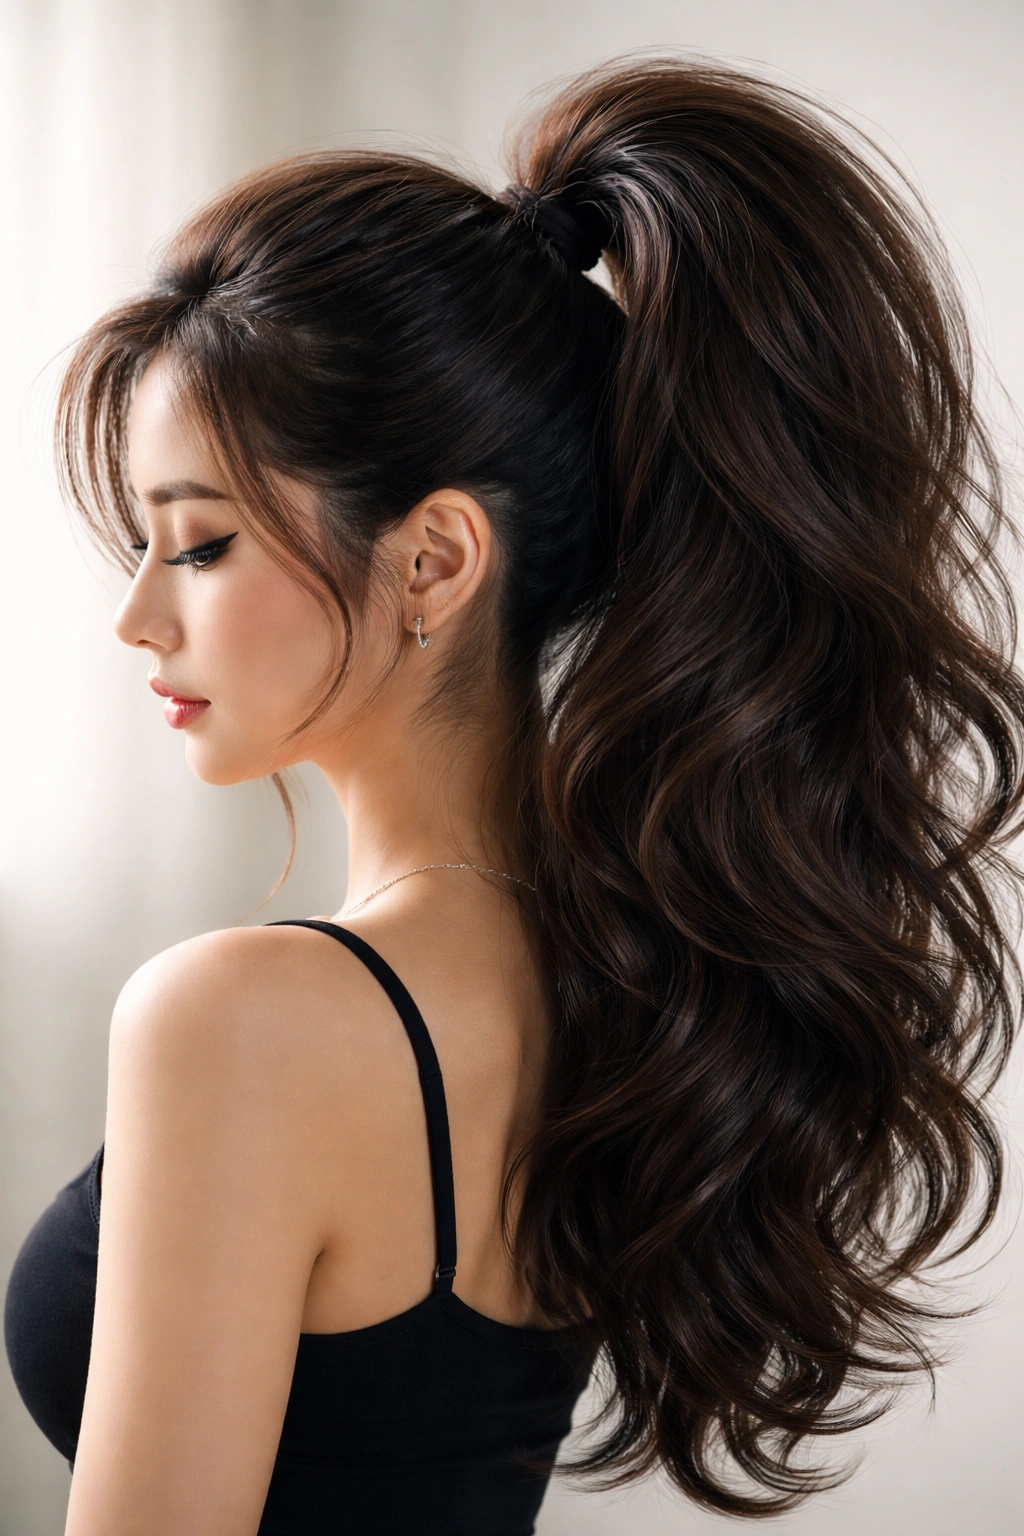
2. The Voluminous Teased Crown High Ponytail
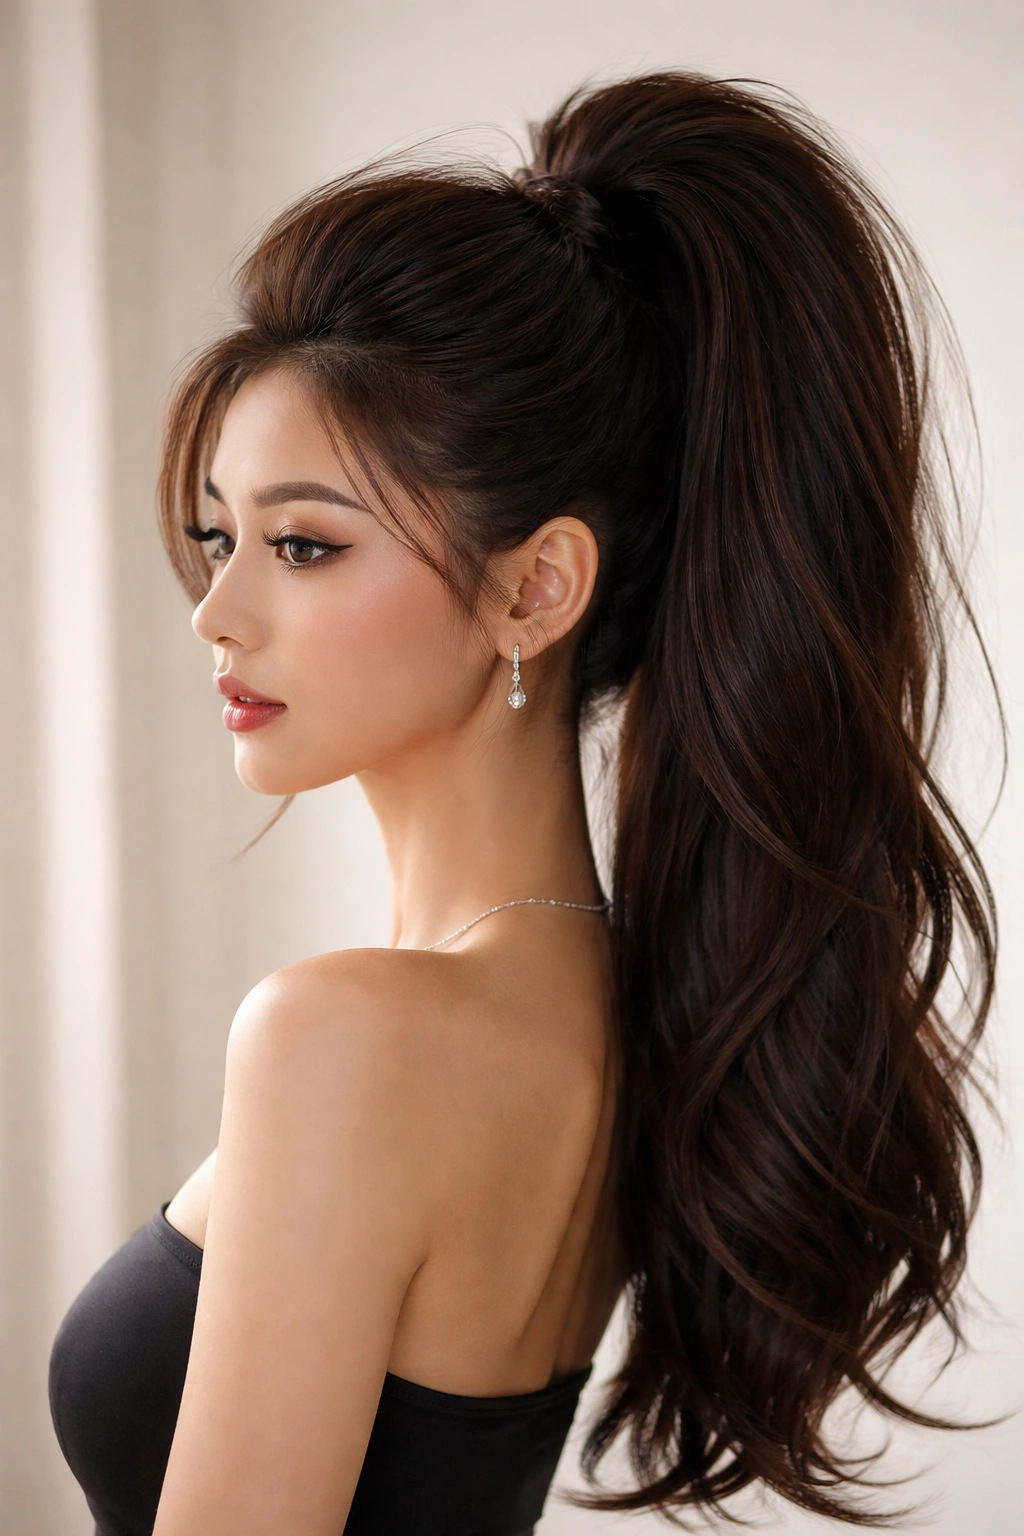
If you have thinner hair or want maximum visual impact, the teased crown version is your answer. This technique builds significant volume at the base without requiring you to have naturally thick hair. Korean stylists use teasing strategically—not throughout the entire crown, but in specific zones that create the illusion of fullness while keeping edges smooth and intentional. This style looks dramatically different than the sleek version but requires the same commitment to a high anchor point.
The Teasing Technique That Actually Works
The secret to Korean-style teasing is using the right tool and knowing exactly where to tease. A fine-tooth teasing brush (or a thin, narrow comb with closely spaced teeth) works better than a paddle brush because it creates tighter, more controlled volume. You’re not trying to create the poofy, obvious texture that teasing sometimes produces—instead, you’re building structure underneath a smooth surface layer. Start by sectioning off a two-inch square of hair at your crown. Brush that section backward, then use your teasing brush to backbrush the hair in short, controlled motions, working from the roots upward. The goal is to create a padded base underneath, not a puffy visible layer on top. Once you’ve teased, smooth the top layer with your paddle brush, sealing the texture underneath.
Creating the Final Style
Tease your crown area as described above, then smooth the top layer. Gather your hair into a high ponytail, making sure to position it directly over your teased base—the teasing becomes your ponytail’s anchor. Secure with an elastic, then wrap a thin section around the base to conceal it. The wrapped section helps seal in the teased texture and prevents the ponytail from slipping downward through the day. Apply smoothing serum to the visible ponytail length to create contrast between the volumized crown and the sleek ponytail body.
Pro tip: Tease only the crown area, not the sides or lower back—this keeps the style looking intentional and modern rather than dated or overly dramatic.
3. The Twisted Wrap High Ponytail
This style adds elegant detail without requiring complex braiding skills. Two twisted sections wrap around the crown, creating visual interest and adding an extra layer of security to your ponytail base. It’s particularly effective if you have medium to thick hair and want something slightly more intricate than the sleek version but still very wearable for everyday occasions.
The Wrapping Technique
Begin with smooth, blow-dried hair. Create a deep side part, slightly off-center. Take a one-inch section of hair from behind your ear on the deeper side of the part and begin twisting it away from your face, moving upward toward your crown. As you twist, you’re essentially moving this twisted section diagonally up and back. Stop when you’ve twisted about three-quarters of the way to your crown, then secure that twisted section temporarily with a bobby pin. Repeat on the other side, starting from behind your opposite ear and twisting upward and back, so both twisted sections meet at approximately the same point at your crown.
Securing the Ponytail
Once both twisted sections are pinned in place, gather all your hair into a high ponytail that incorporates the twisted sections. Secure with an elastic, then remove the temporary bobby pins—the twisted sections now hold the elastic in place. Take a thin section of hair from the ponytail base and wrap it around the elastic, securing with a bobby pin. The twisted wraps add visual interest from the front and side angles while providing extra grip that keeps your ponytail secure.
Worth knowing: This style photographs beautifully because the twisted wraps create dimension and catch light differently than a plain ponytail base. It’s a favorite choice for Korean beauty creators and influencers specifically because it’s visually interesting without looking overly complicated.
4. The Bubble Ponytail with High Anchor Point
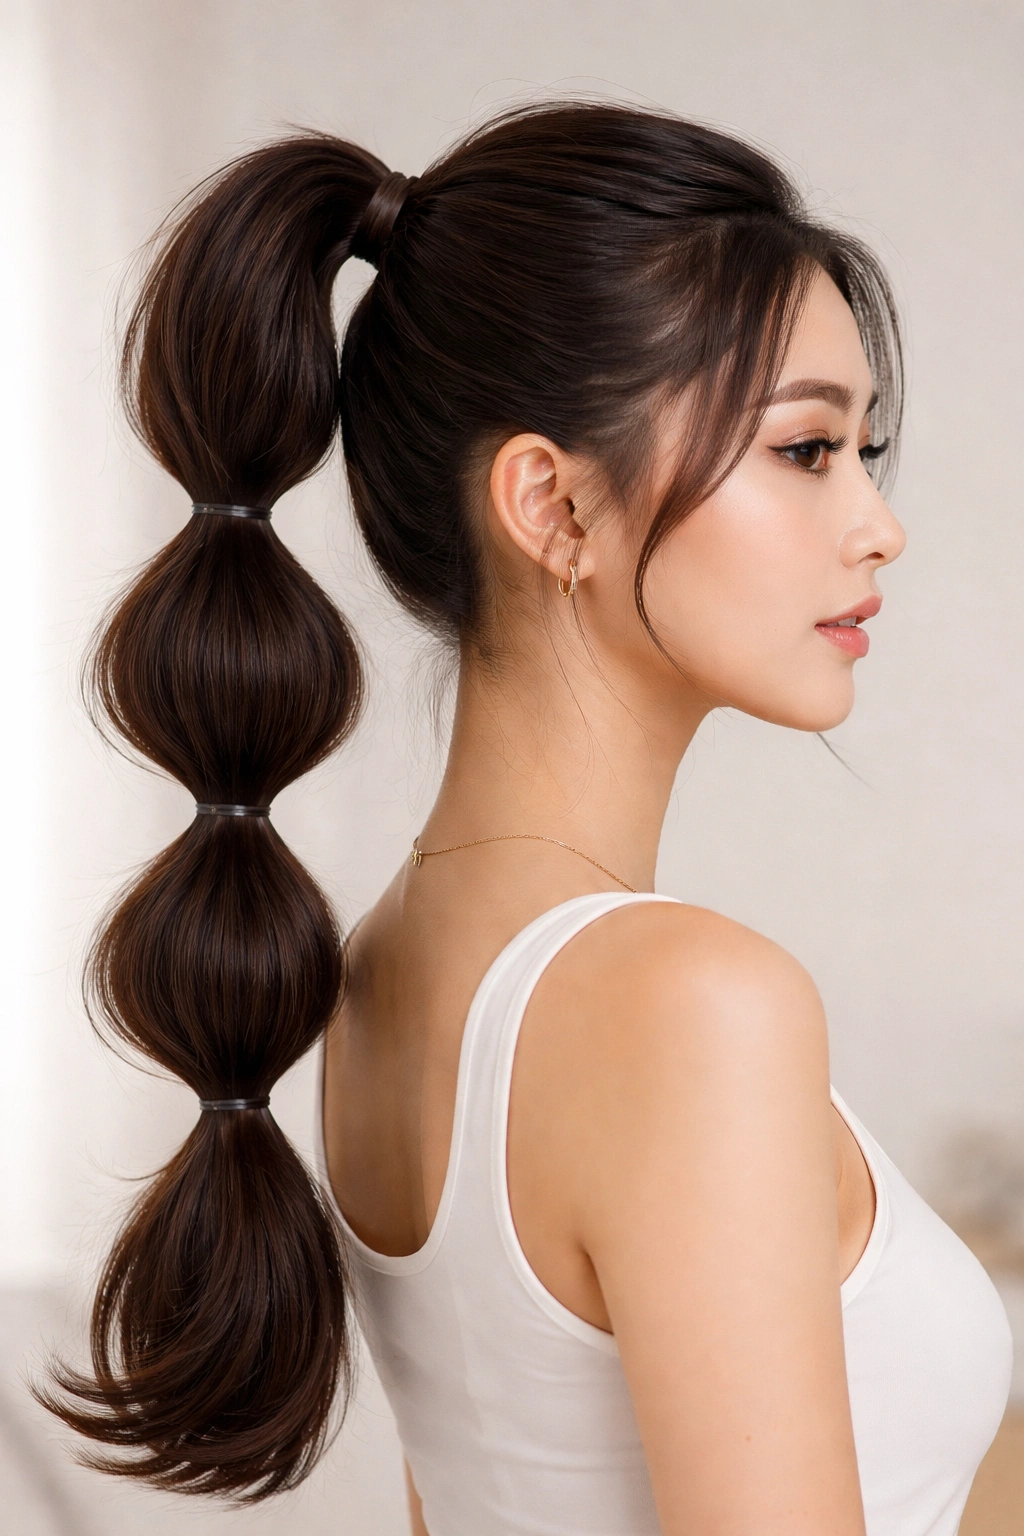
The bubble ponytail trend originated in Korea and has remained hugely popular. Instead of a single, continuous ponytail, you create stacked sections separated by elastics, producing a playful, dimensional effect. When styled in a high position, it maintains that youthful Korean aesthetic while being fun enough to wear to casual settings, dates, or even some professional environments depending on how you style the bubbles.
Building the Bubble Structure
Start with your hair gathered into a high ponytail secured with a clear elastic. This is your first bubble base. Now, about two inches down the length of your ponytail, place another elastic, creating your first visible bubble above it. The gap between the two elastics should be approximately two inches—this is your “bubble” size. Continue placing elastics every two inches down the length of your ponytail. How many bubbles you create depends on your hair length; most people create between three and five bubbles in a standard bubble ponytail.
Creating Volume in Each Bubble
Once all your elastics are in place, gently tease each bubble section slightly to create a fuller appearance. Use your fingers to fluff and adjust the volume. Some Korean stylists curl the ends of each bubble section lightly with a small curling iron to create a rounded, bubble-like appearance. Others leave the texture straight but tease heavily for volume. Apply a light hairspray as you build each bubble to help it hold its shape.
Key detail: The charm of this style is the intentional, visible elastics. In Korean styling, these aren’t hidden—they’re styled deliberately, often using colored elastics that coordinate with your outfit or hair color. If you prefer hidden elastics, you can wrap thin sections around each one, but the modern Korean approach celebrates the graphic line the elastics create.
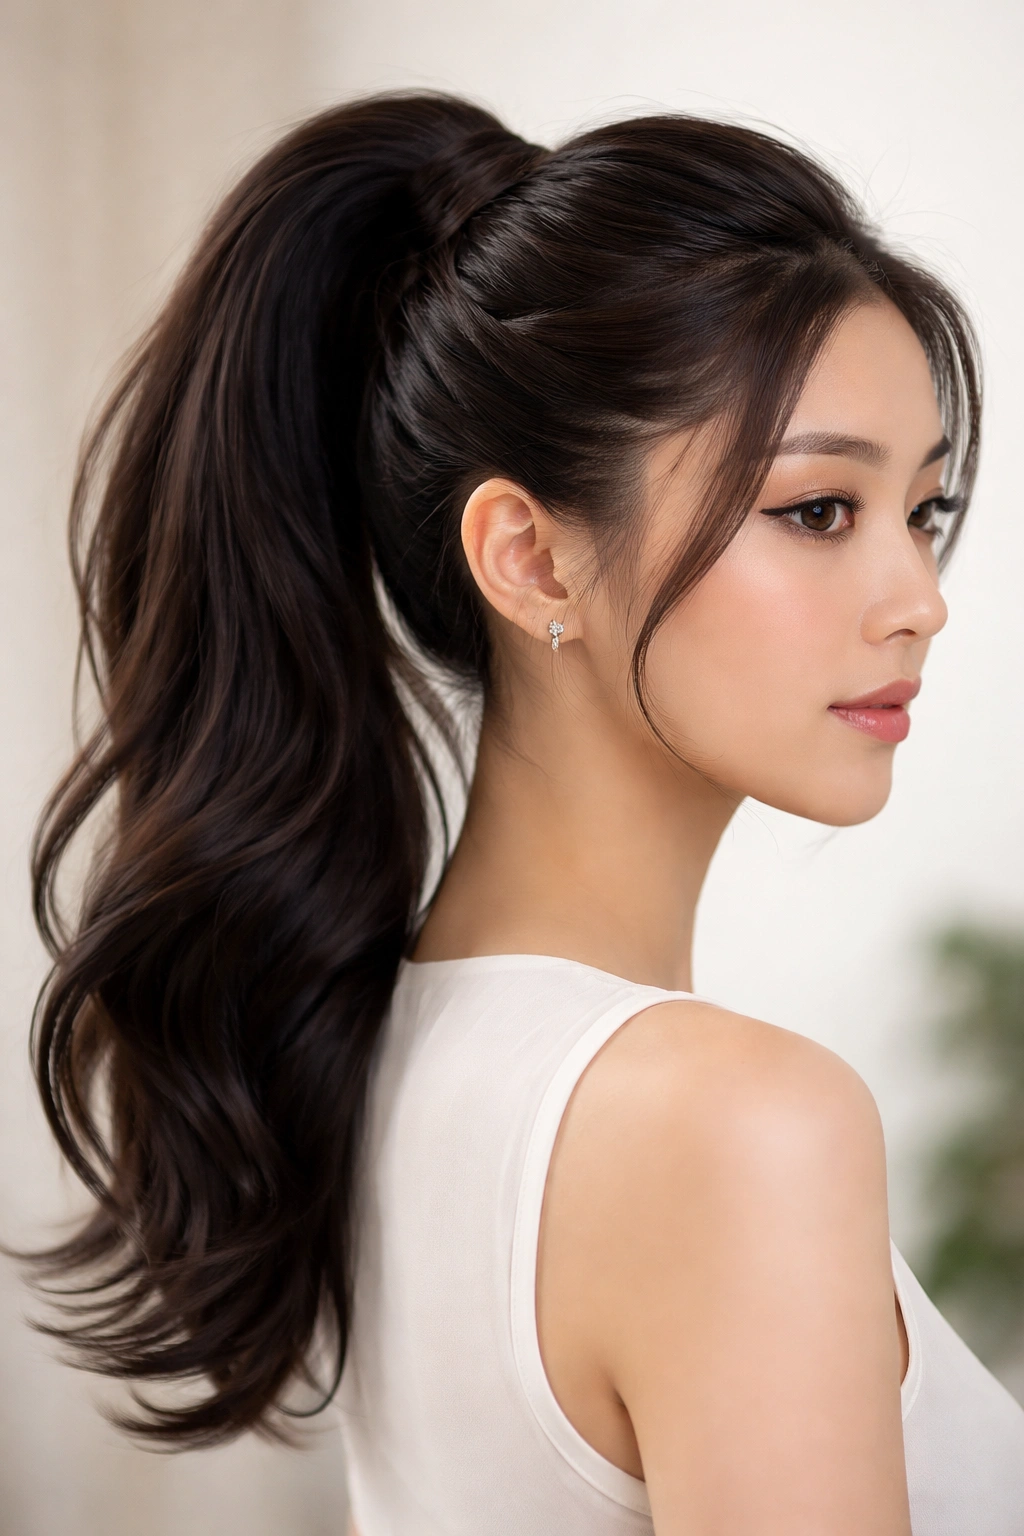
5. The Half-Up Half-Down High Ponytail
This style offers a compromise between a full ponytail and wearing your hair completely down. You gather the top half of your hair into a high position while leaving the bottom half loose, creating movement and dimension. It’s perfect for days when you want some of the security of a ponytail without committing to a full updo, and it’s particularly flattering if you’re concerned about your hair looking too severe pulled completely back.
The Sectioning Approach
Determine where your natural half-way point falls—typically around your temples and ears. Create a horizontal section from temple to temple across the top of your head, essentially creating a dividing line between your top and bottom sections. You want the top section to include your crown and the area forward of it, while the bottom section stays completely loose. Clip the bottom section out of the way temporarily.
Creating Volume at the Top
Take the top section and tease at the crown to build volume, using the same technique described in the voluminous ponytail section. Smooth the outer layer, then gather this top section into a high ponytail positioned at your crown. Secure with an elastic. Wrap a thin section around the elastic to conceal it, and consider taking a small section from the loose bottom half and wrapping it around the base as well—this blends the two sections visually.
Finishing the Style
Release the lower section, which now falls naturally around and in front of the half-up ponytail base. If you want more dimension, curl the loose lower section loosely or leave it straight depending on your preference. The key is creating contrast between the structured, polished top section and the softer, looser bottom section. This style photographs beautifully and feels versatile enough to wear to work, casual outings, or date settings.
Practical advantage: This style is easier to maintain through the day because you’re only securing half your hair. Gravity works less aggressively on a half-up ponytail than on a full high ponytail, so it tends to stay secure longer without requiring mid-day adjustments.
6. The Slicked Gel High Ponytail
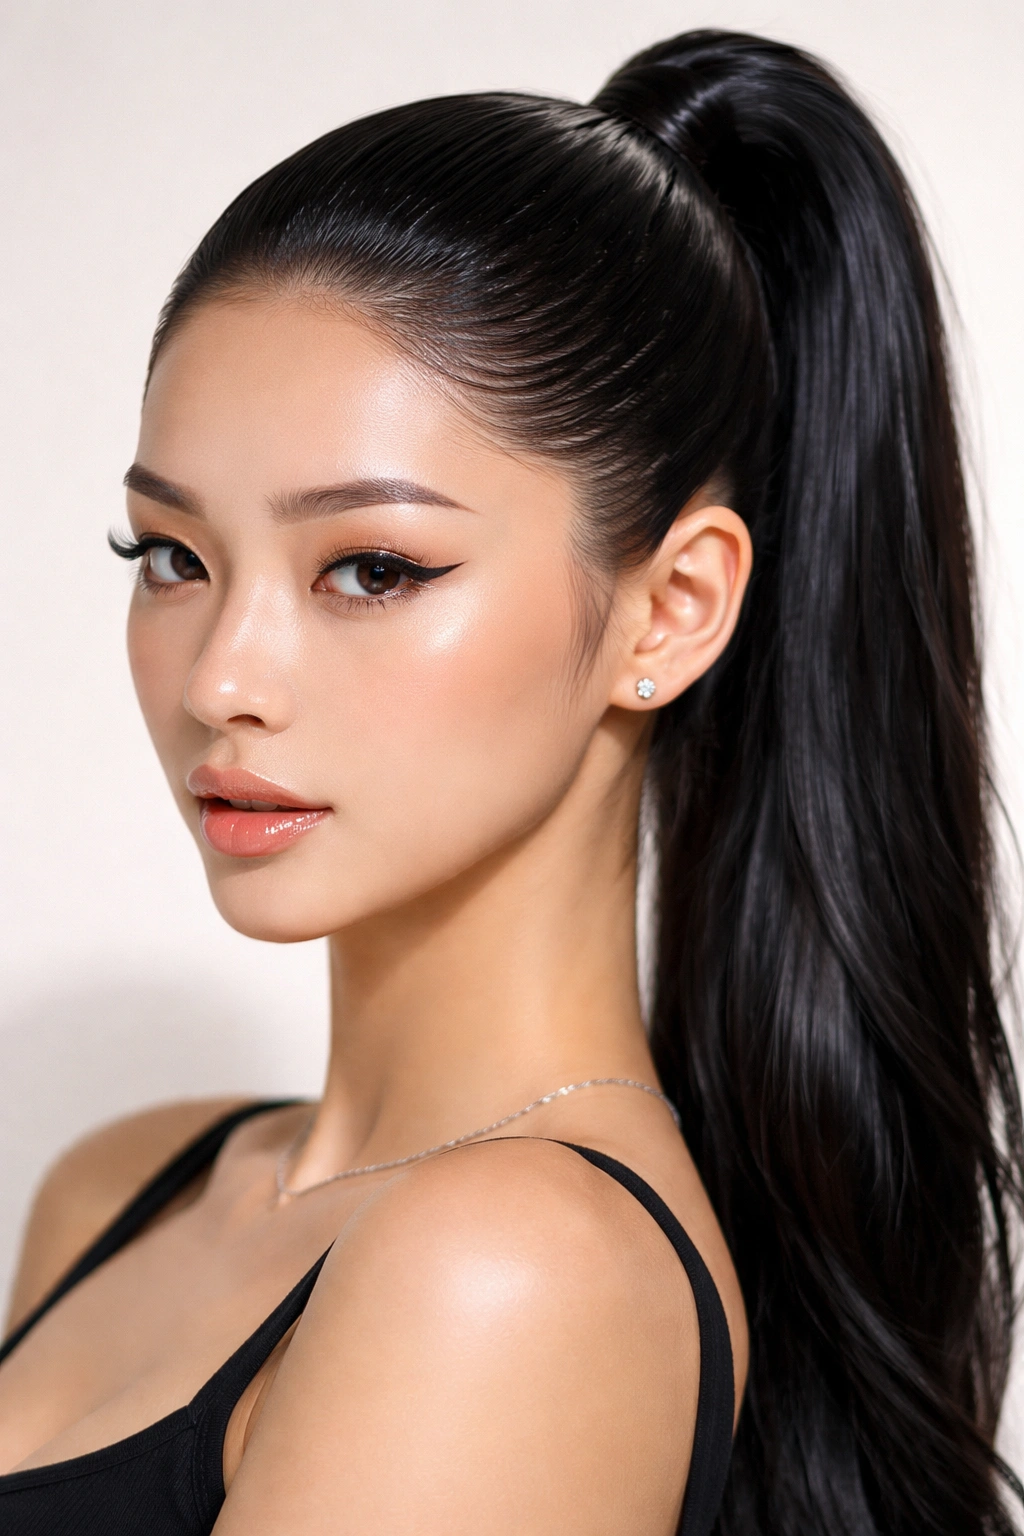
Korean beauty culture has embraced the slicked-back aesthetic with particular enthusiasm. Rather than the soft, blended edges of the sleek ponytail, this version uses edge control and styling gel to create a very polished, graphic look. It’s bold and modern, and it requires commitment to the aesthetic—but when done well, it’s striking and thoroughly on-trend within Korean styling circles.
Achieving the Slicked Look
The foundation is the same as the sleek ponytail—smooth, blow-dried hair is essential. Once your hair is dry, take a fine-tooth comb and smooth all hair completely backward, starting from your hairline and moving toward your crown. Apply a strong-hold gel to your hairline and along your hair’s natural part line, using the comb to push hair back and seal it smoothly. Some Korean stylists apply gel to the entire crown area, creating a very sculpted appearance.
The Ponytail Placement
Gather your smoothed, gelled hair into a high ponytail. The gelled base will hold this position very firmly. Secure with an elastic, then wrap a thin section around the base. Here’s where this style differs from the sleek version: you’ll apply additional edge control or gel around your hairline and the entire perimeter of your face, creating sharp, defined edges. Use a small brush to push hair back from your forehead, temples, and the nape of your neck, creating clean lines.
The Finish
Apply a medium to strong-hold hairspray to lock the style. The gelled edges should feel firm and hold their shape throughout the day. This style is particularly popular in Korean professional settings and among beauty creators because it photographs with dramatic clarity—the sculpted lines and polished finish read beautifully on camera.
Fair warning: This style requires daily commitment. You’ll need to re-gel your edges if you plan to wear it multiple days a week, and it’s not ideal for situations where you might need to touch your hair frequently throughout the day, as touching can disrupt the gelled lines.
7. The Textured Permed Hair High Ponytail
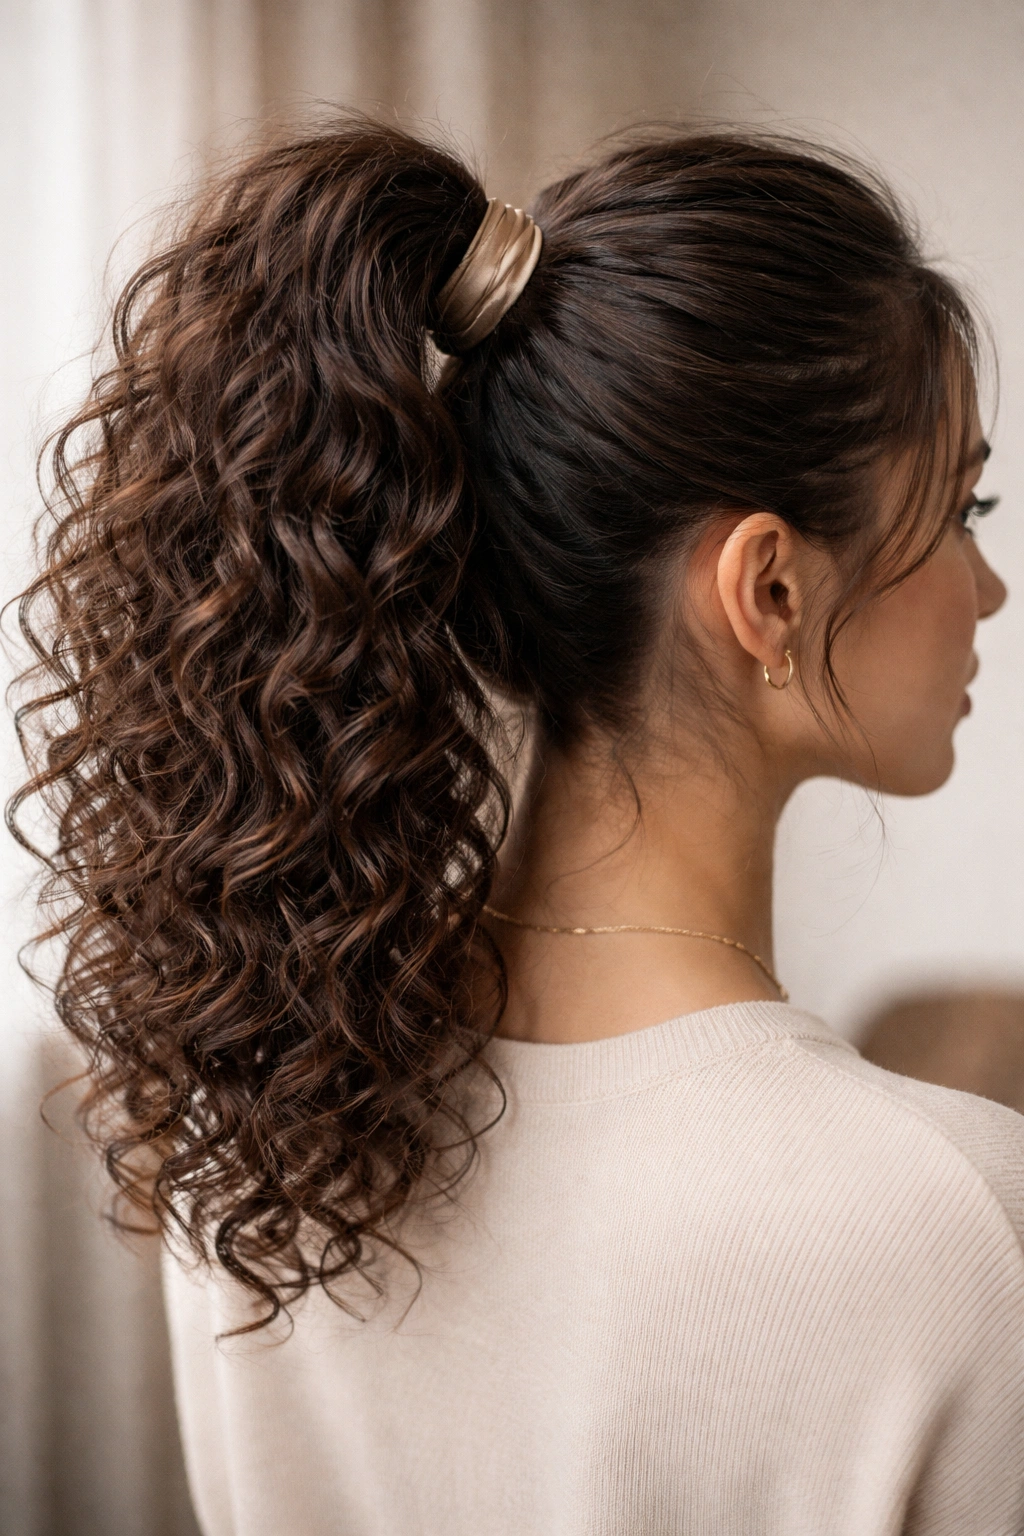
If you have permed or naturally curly hair, Korean stylists have developed specific techniques for styling high ponytails that work with your texture rather than fighting it. A perm or natural curl can actually create volume and dimension in a high ponytail that straight-haired people need to tease to achieve. The goal is embracing your texture while maintaining enough polish and intentionality that the style reads as deliberately designed rather than casually thrown together.
Prepping Textured Hair
Textured hair requires more moisture and definition than straight hair. Start with a curl-enhancing product or mousse applied to damp hair. Diffuse-dry your curls to define them, or air-dry if you have time and patience. Once your texture is set and dry, gently separate any curls that have stuck together, but avoid over-manipulating them into frizz.
Creating Your High Ponytail
Gather your textured hair into a high ponytail, being gentler than you would with straight hair when securing it—tight elastics can break curls and create breakage. Use a satin-lined elastic or wrap your elastic with a satin band to reduce friction. Don’t comb through the ponytail once you’ve gathered it; instead, use your fingers to gently arrange curls into the shape you want.
Adding Polish
The key to making a textured high ponytail read as intentionally styled (rather than just having your curly hair up) is adding a finishing product that creates shine and definition. A curl-enhancing cream or a light oil applied to the finished ponytail creates that polished aesthetic while maintaining your curl texture. Some Korean stylists with textured hair also apply a small amount of edge control to the front hairline and around the face to create clean lines, even while celebrating the textured body of the ponytail.
What makes this work: Korean beauty culture increasingly celebrates natural texture, and textured high ponytails are now featured prominently in Korean styling content. The texture itself becomes the design feature—the curl pattern creates visual interest that straight-haired styles need to build through other techniques.
8. The Face-Framing High Ponytail
This style leaves intentional pieces of hair loose around your face while securing the bulk of your hair into a high ponytail. The loose pieces frame your face and soften the overall look, making this style more forgiving if you’re worried a full high ponytail might feel too severe. It’s also practical if you’re having a low-ponytail day but want the hair-off-your-face security of a high style.
Strategic Sectioning
Begin by identifying which pieces you want to frame your face. Most commonly, this is a section about two inches wide on each side, starting from your temple area and running back toward your ear. You might also include a small piece at your center front hairline. Clip these pieces separate.
Creating the Ponytail
Gather all the remaining hair (everything except your framing pieces) into a high ponytail, securing it with an elastic. Position this ponytail slightly higher and farther back than you might normally, since the front pieces will frame forward.
Styling the Framing Pieces
This is where the style becomes intentional rather than accidental. Gently curl the framing pieces using a small curling iron, creating soft waves that frame your face. Alternatively, you can leave them straight but smooth and styled with a slight bend. Some Korean stylists tease the framing pieces lightly to create texture and movement. Apply a light hairspray to lock the styling.
Why this works: Face-framing pieces add movement and softness while keeping hair off your neck and shoulders. It’s the perfect style if you want the benefits of a high ponytail (clean neckline, professional appearance, longevity throughout the day) without the severity of having every single hair pulled back.
9. The Braided Base High Ponytail
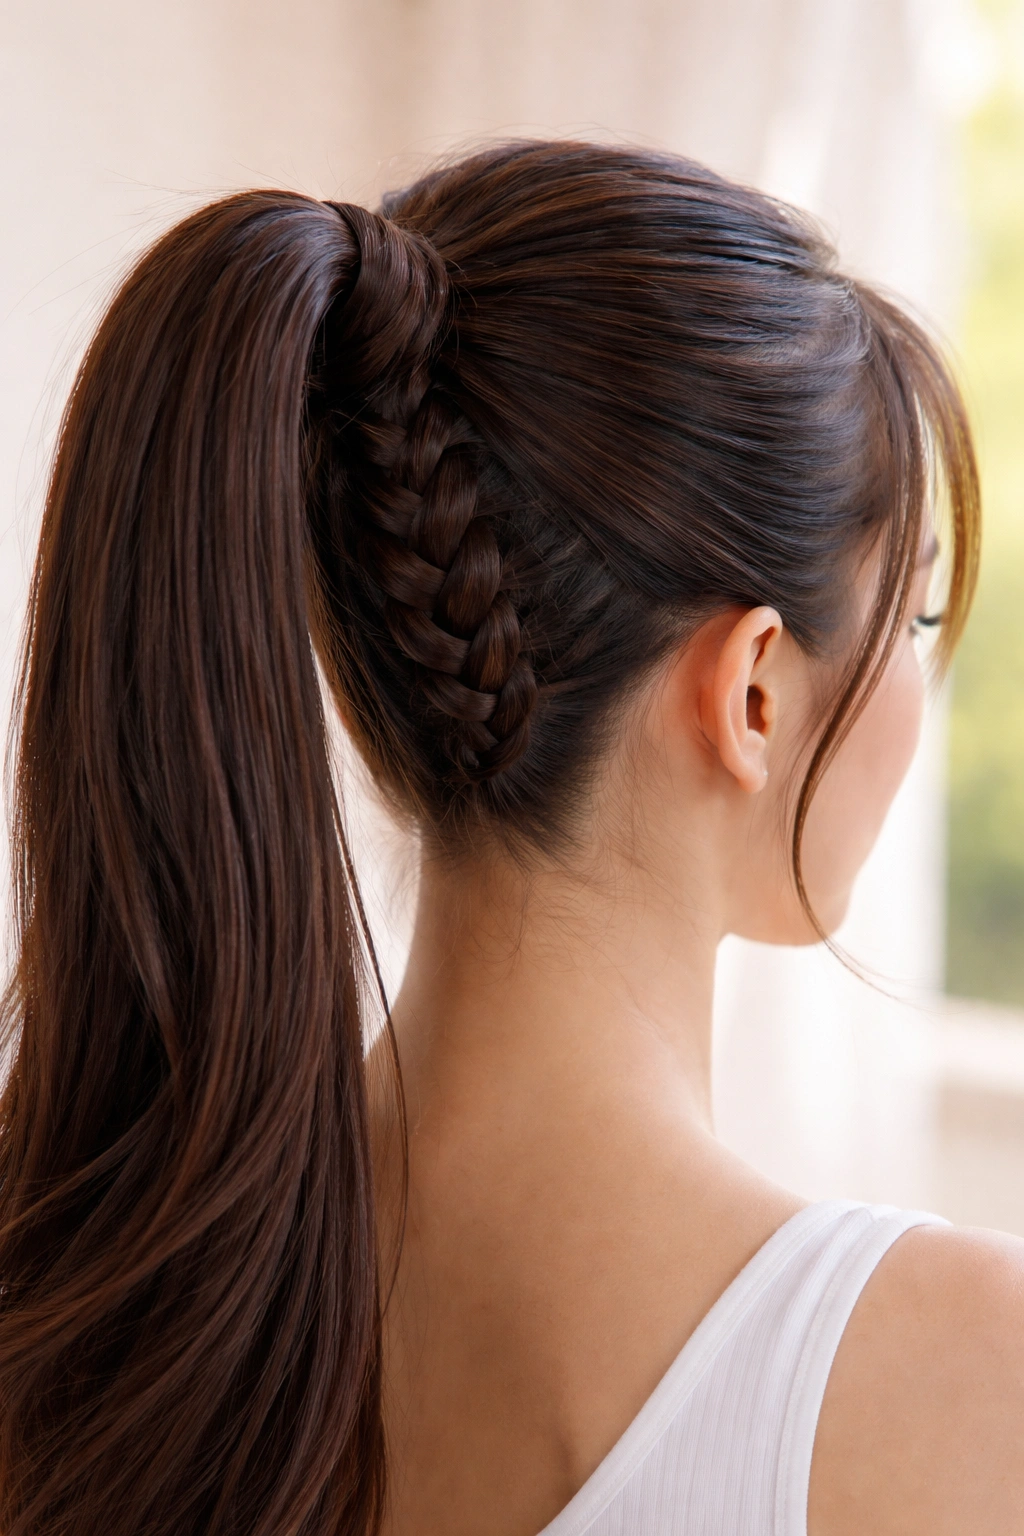
Instead of twisting sections around the crown, this style incorporates a braid into the base of the ponytail. A three-strand braid, a Dutch braid, or even a fishtail braid can serve as the anchor. This adds structural integrity to your ponytail base—the braid essentially acts as a second elastic, making it nearly impossible for your ponytail to slip down throughout the day.
The Braiding Setup
Start by creating a Dutch braid (braiding away from you, rather than toward you) starting at your crown and moving downward. A Dutch braid creates a raised, sculptural appearance that reads as intentionally designed. Braid down about three to four inches. You’ll finish this braid by gathering the three strands and incorporating them into your ponytail base.
Incorporating the Braid into Your Ponytail
Once your Dutch braid has traveled three to four inches down, gather all your hair—both the remaining loose hair and the braided section—into a high ponytail, positioning the braid at the base. The braided section becomes part of your ponytail anchor. Secure everything with an elastic, then wrap a thin section around the base to conceal the elastic and the braid’s end.
Visual Impact
The braid is visible at the base of your ponytail, creating an elegant detail that’s particularly striking when viewed from behind or the side. This style is popular for Korean formal events, photo shoots, and special occasions because the braided element adds sophistication and visual interest.
Longevity advantage: The braid structure provides multiple anchor points, making this style essentially impossible to slip. If you’re planning a long day with lots of activity, a braided-base ponytail will outlast other versions.
10. The Multi-Strand Twisted High Ponytail
Similar to the two-strand twisted wrap described earlier, this version incorporates multiple twisted sections that wrap around your crown in different directions. Rather than two simple twists, you might incorporate four or more twisted sections, each wrapping partially around the crown before being incorporated into the ponytail. This creates an intricate-looking style that’s surprisingly manageable.
The Multi-Twist Framework
Begin with a deep side part. Create twisted sections by taking small (about half-inch) sections from multiple points along your hairline and crown, then twisting each section and securing it temporarily with bobby pins. A common approach is creating four or five twists that wrap around your crown from different directions, but you can adjust the number based on your hair thickness and desired effect.
Incorporating Into Your Ponytail
Once all your twisted sections are pinned in place, gather all your hair into a high ponytail. The twisted sections naturally distribute throughout the ponytail, and when you secure the elastic, these twists are incorporated into the base. Remove all the temporary bobby pins—the elastic now holds the twists in place.
The Visual Effect
This style creates significant visual interest and texture throughout your ponytail base without requiring a full braid. From the front and sides, the multiple twists create dimension and intentionality. From the back, your ponytail looks beautifully structured and polished. It’s a perfect option if you want something more elaborate than a simple high ponytail but lack the time or confidence to incorporate a full braid.
Time-saving aspect: While this sounds complicated, it’s actually faster than braiding and creates a similarly sophisticated effect. Most people can master this style with just a few practice attempts.
11. The Sleek Low-Fade High Ponytail
This style combines the sleekness of a gel-based ponytail with an intentional undercut or fade on the lower back of your head. If you have an undercut fade or have recently shaved the nape of your neck, this style showcases that detail beautifully. The upper hair is secured in a high, sleek ponytail, while the faded lower section remains visible and creates contrast.
The Foundation Work
An undercut fade requires previous cutting work—this isn’t something you create just with styling. However, if you have this cut already or are willing to get one specifically for this style, you’re ready to proceed. The fade should be relatively fresh so the lines are clean and the contrast between longer and shorter hair is sharp.
Creating the Styled Ponytail
Smooth all your longer hair back using the gel slicked method described in the slicked gel ponytail section. Apply strong-hold gel to your hairline and crown, smoothing everything firmly back. Create your high ponytail from the longer hair, securing it with an elastic.
Highlighting the Fade
The undercut should remain visible—don’t try to cover it up. Apply edge control to the boundary between your fade and the longer hair at the nape of your neck, creating sharp, clean lines. Some people apply a very light gel or edge control to the fade itself to create shine and make it visually stand out.
Important note: This style is bold and modern. It’s becoming more popular in Korean beauty content, but it reads as fashion-forward and intentional. It’s best suited for creative professional environments, special occasions, or casual settings where you want to make a style statement.
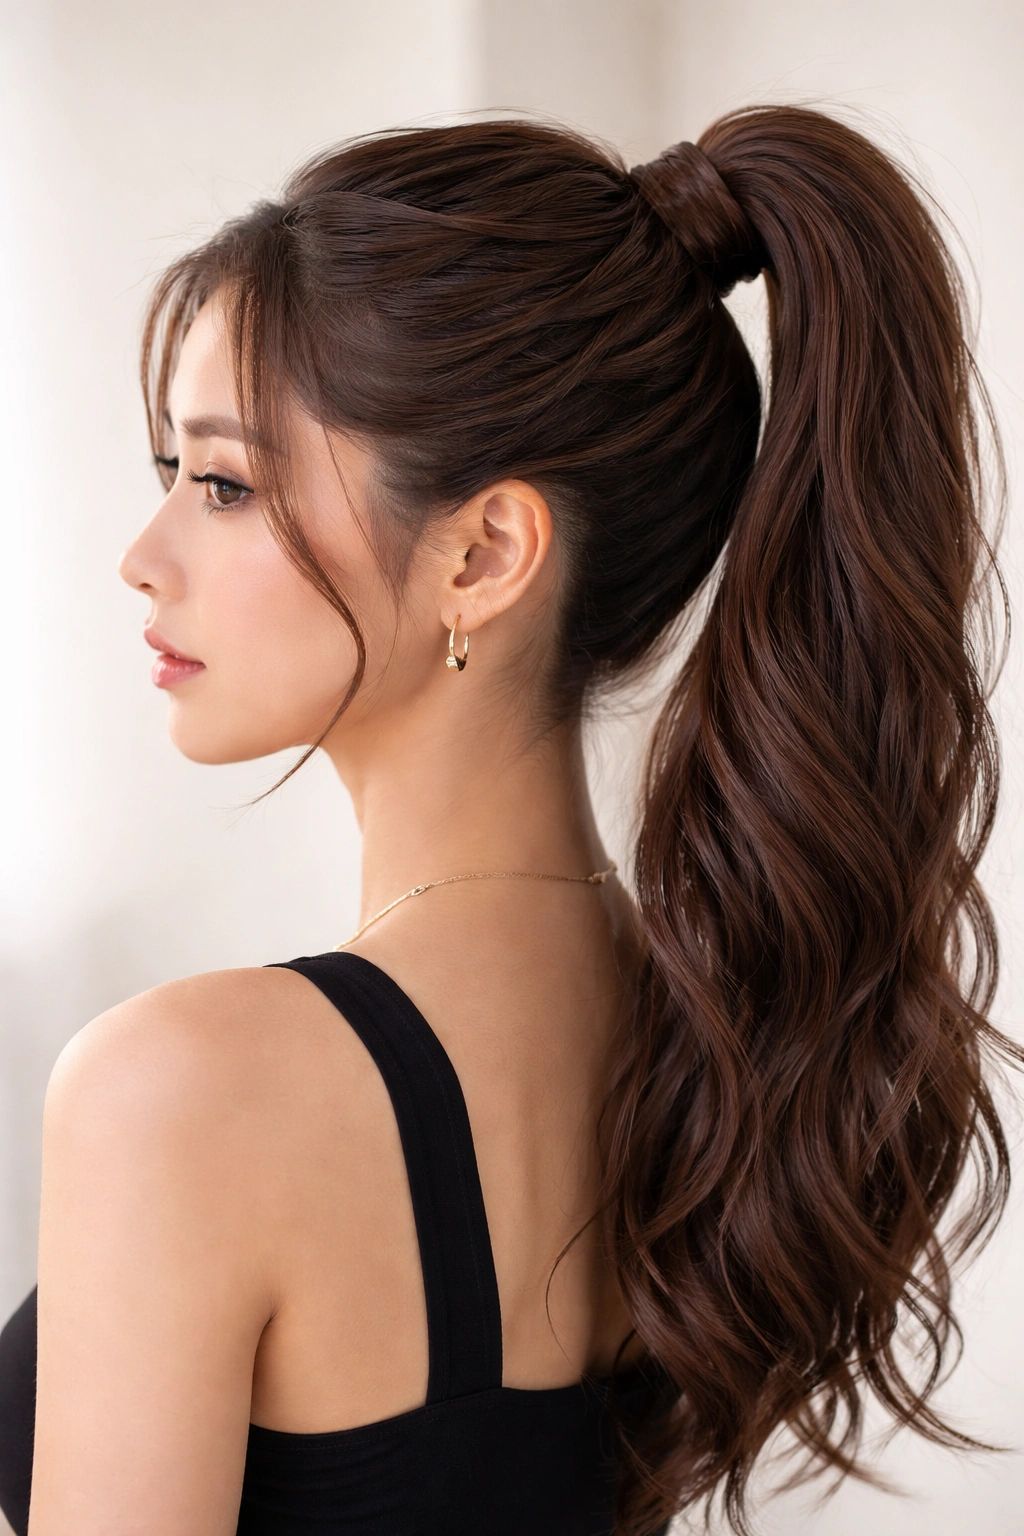
12. The Voluminous Fluffy High Ponytail
This final version prioritizes maximum volume and fluffiness throughout the entire ponytail, not just at the crown. It’s particularly suited to people with thinner or medium-thickness hair who want their ponytail to look full and substantial. Korean stylists create this effect through a combination of teasing, product layering, and specific blow-drying techniques.
The Volumizing Base Coat
Start with a volumizing mousse or texture spray applied to damp roots. Blow-dry your hair with your head tilted forward, directing the blow dryer up and away from your scalp. This creates maximum lift and fullness at the roots. Once your hair is dry, flip your head back to normal position.
Strategic Teasing Throughout
Rather than teasing only the crown, tease multiple sections throughout where your ponytail will sit. Create a teased base at your crown, then tease sections throughout the length of your future ponytail—at the mid-length and even near the ends. Smooth each teased section’s outer layer gently, sealing the texture underneath.
Building the Ponytail
Gather your teased, volumized hair into a high ponytail. Don’t smooth it down—let it maintain its fluffy texture. Secure with an elastic. Rather than using a traditional wrap, some Korean stylists with this style use a colorful elastic or scrunchie that coordinates with their outfit, letting the texture and fullness be the design focus rather than trying to conceal the base.
The Finishing Touch
Apply a lightweight texture spray or dry texture powder throughout the ponytail to enhance the fluffy appearance and help it hold its shape. This style reads young, playful, and intentionally voluminous. It’s perfect for casual settings, creative industries, or anywhere you want your style to make a fun, confident statement.
Maintenance note: Fluffy ponytails require a touch-up texture spray mid-day if you’re dealing with humidity or general settling throughout the day. Keep a lightweight texture spray in your bag for quick refreshes.
Final Thoughts
Korean high ponytails have become a global styling phenomenon because they solve real problems—they look polished and professional while being practical and long-lasting. Whether you choose the sleek simplicity of the classic version, the textured interest of a braided or twisted style, or the voluminous drama of a teased crown, these twelve variations give you options for every hair type, face shape, and occasion.
The common thread running through all these styles is intentionality. A Korean high ponytail doesn’t look like you just threw your hair up in a rush—it looks like you made a deliberate choice about how you wanted to present yourself that day. That intentionality comes from positioning, preparation, product choice, and finishing details. Once you’ve internalized the core techniques—proper sectioning, strategic teasing where needed, securing with wrapped-elastic bases, and applying finishing product to lock everything in place—you can move between these styles fluidly based on your mood and the occasion.
The staying power these styles offer comes from building security into the foundation rather than relying on a single elastic and hope. Every technique described here incorporates multiple layers of anchor points, whether through positioning, wrapping, braiding, or twisting. This redundancy is why Korean stylists’ ponytails actually stay up all day, even with lots of movement and activity.
Invest time in finding the one or two styles that feel most natural for your hair type and lifestyle, then practice them until the techniques become automatic. Once you’ve got your go-to style dialed in, exploring the other variations becomes much easier because you understand the underlying principles. Your high ponytail becomes a reliable part of your styling toolkit—something you can create in minutes without thinking, knowing it’ll look polished and stay secure from morning through evening.