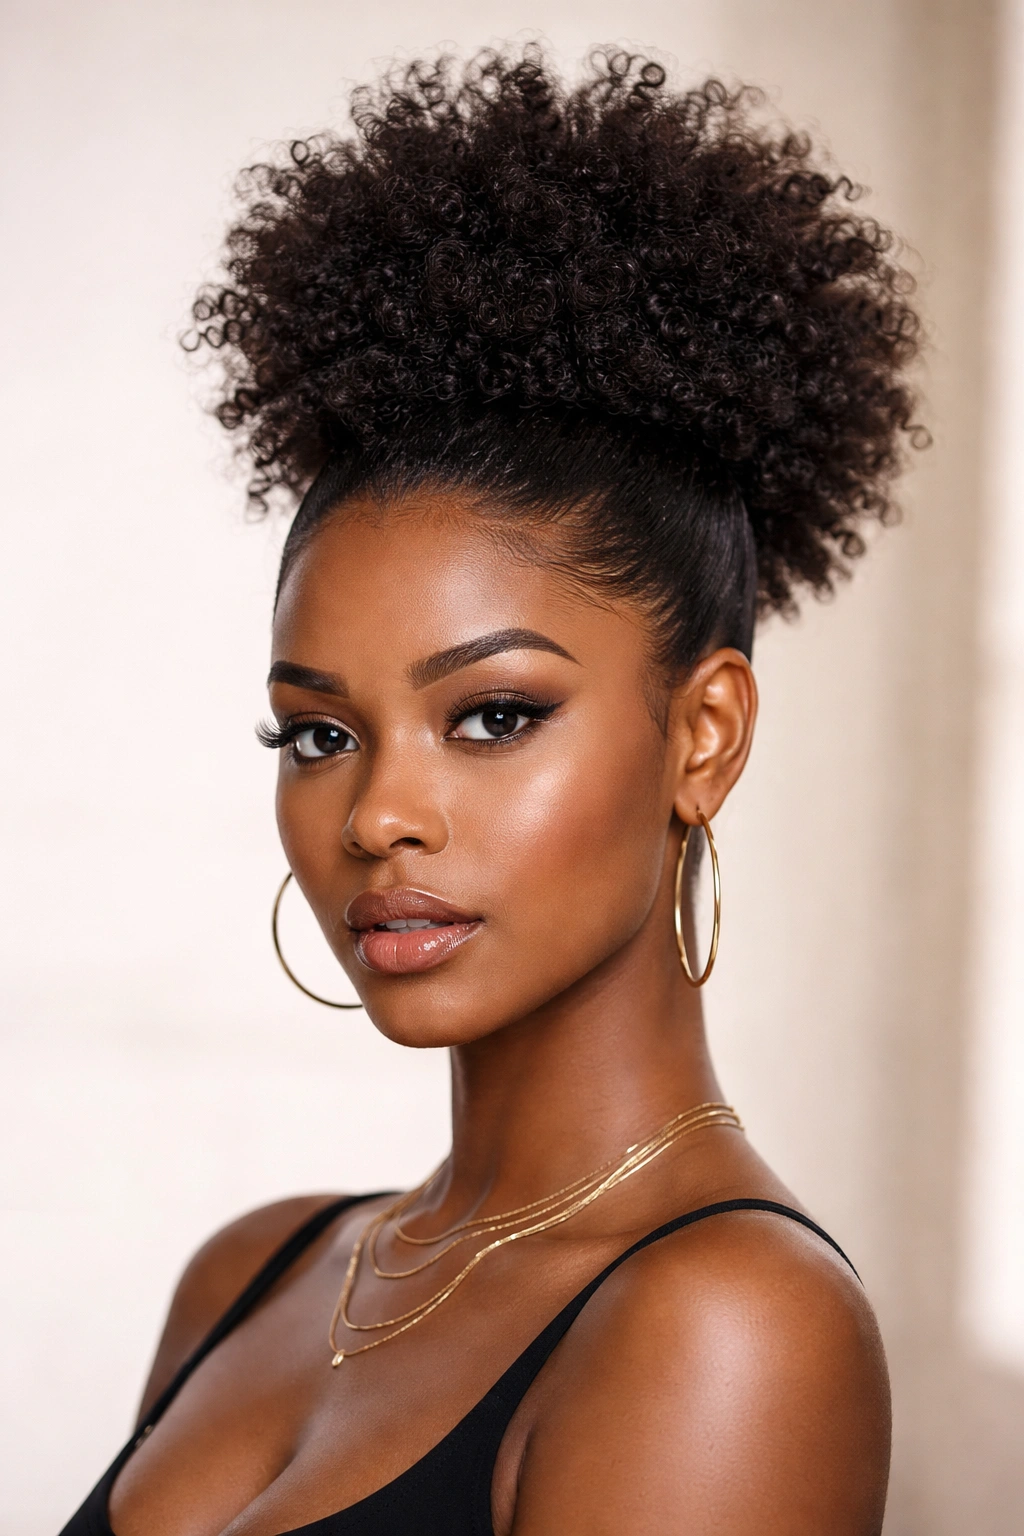
A well-shaped afro puff can do more work than half the styles in a salon menu. It can look neat at a desk, soft at brunch, sharp with hoops, and still survive a long day without needing a full redo.
The trick is that the puff itself is only part of the story. Placement matters. So does the amount of stretch at the roots, how smooth the front is, and whether you want the puff to sit high and proud or low and tucked in. Coily hair shrinks on its own timetable, which is part of its charm and part of the reason a puff can look different from one hour to the next.
That’s why afro puff styles are so useful. They’re fast, but not lazy. They can be simple, but they don’t have to look plain. A puff with a clean edge and a sharp part reads one way; a puff with twists, a scarf, or a braided crown reads another. Same basic structure. Completely different mood.
Pick the shape that fits the day, and the rest gets easier.
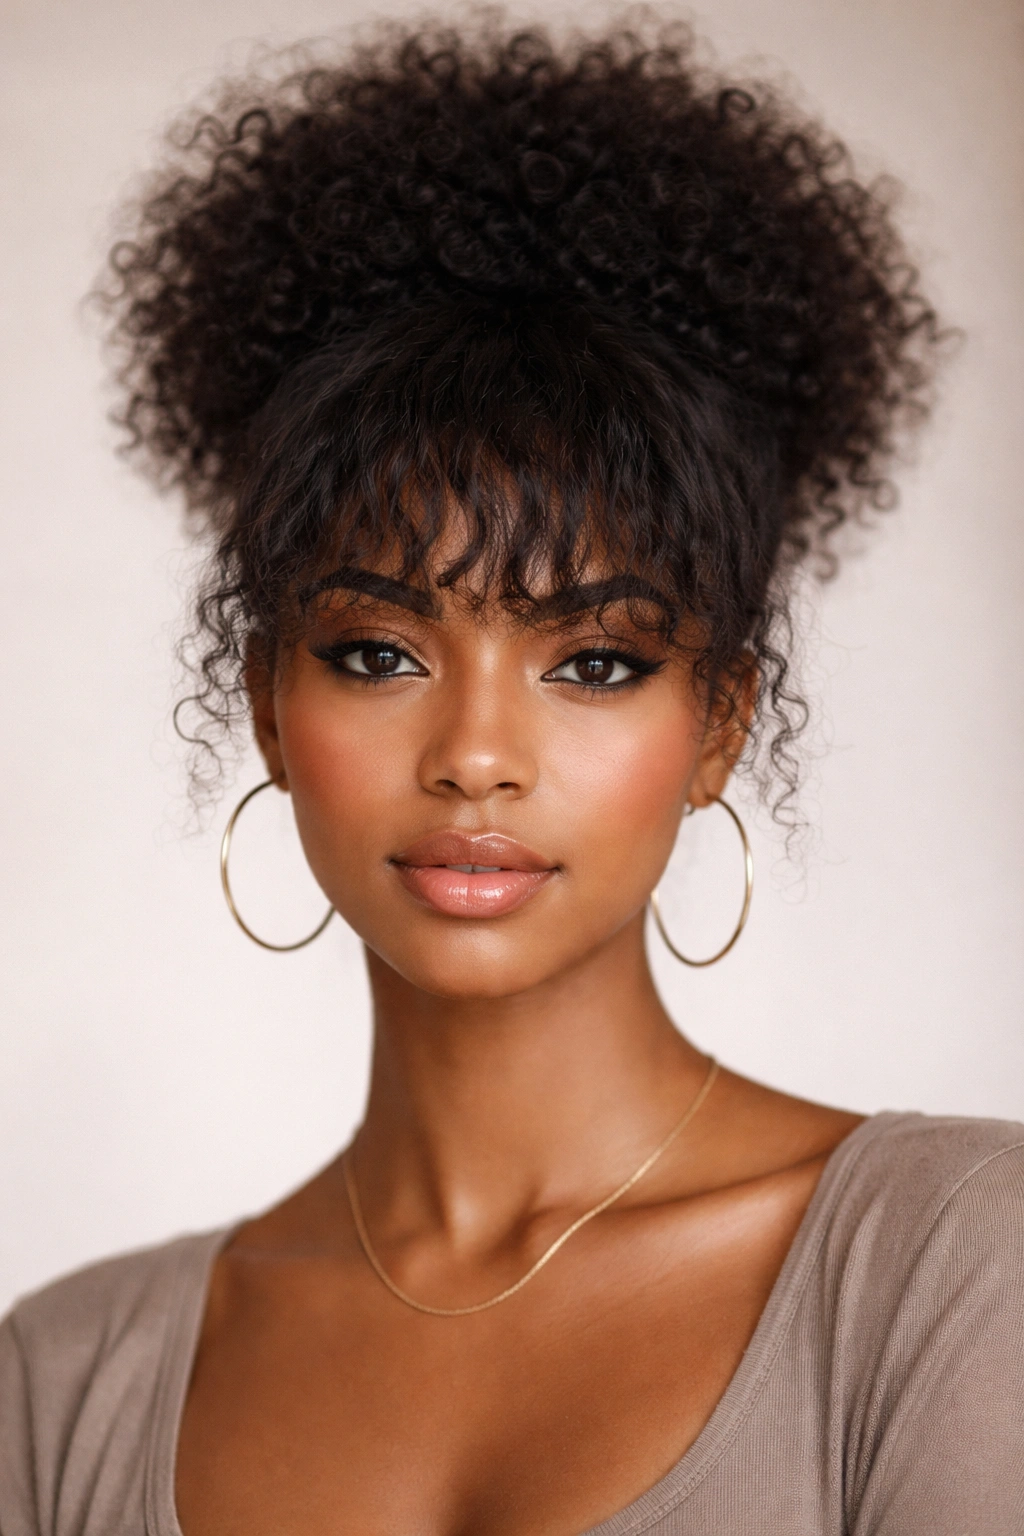
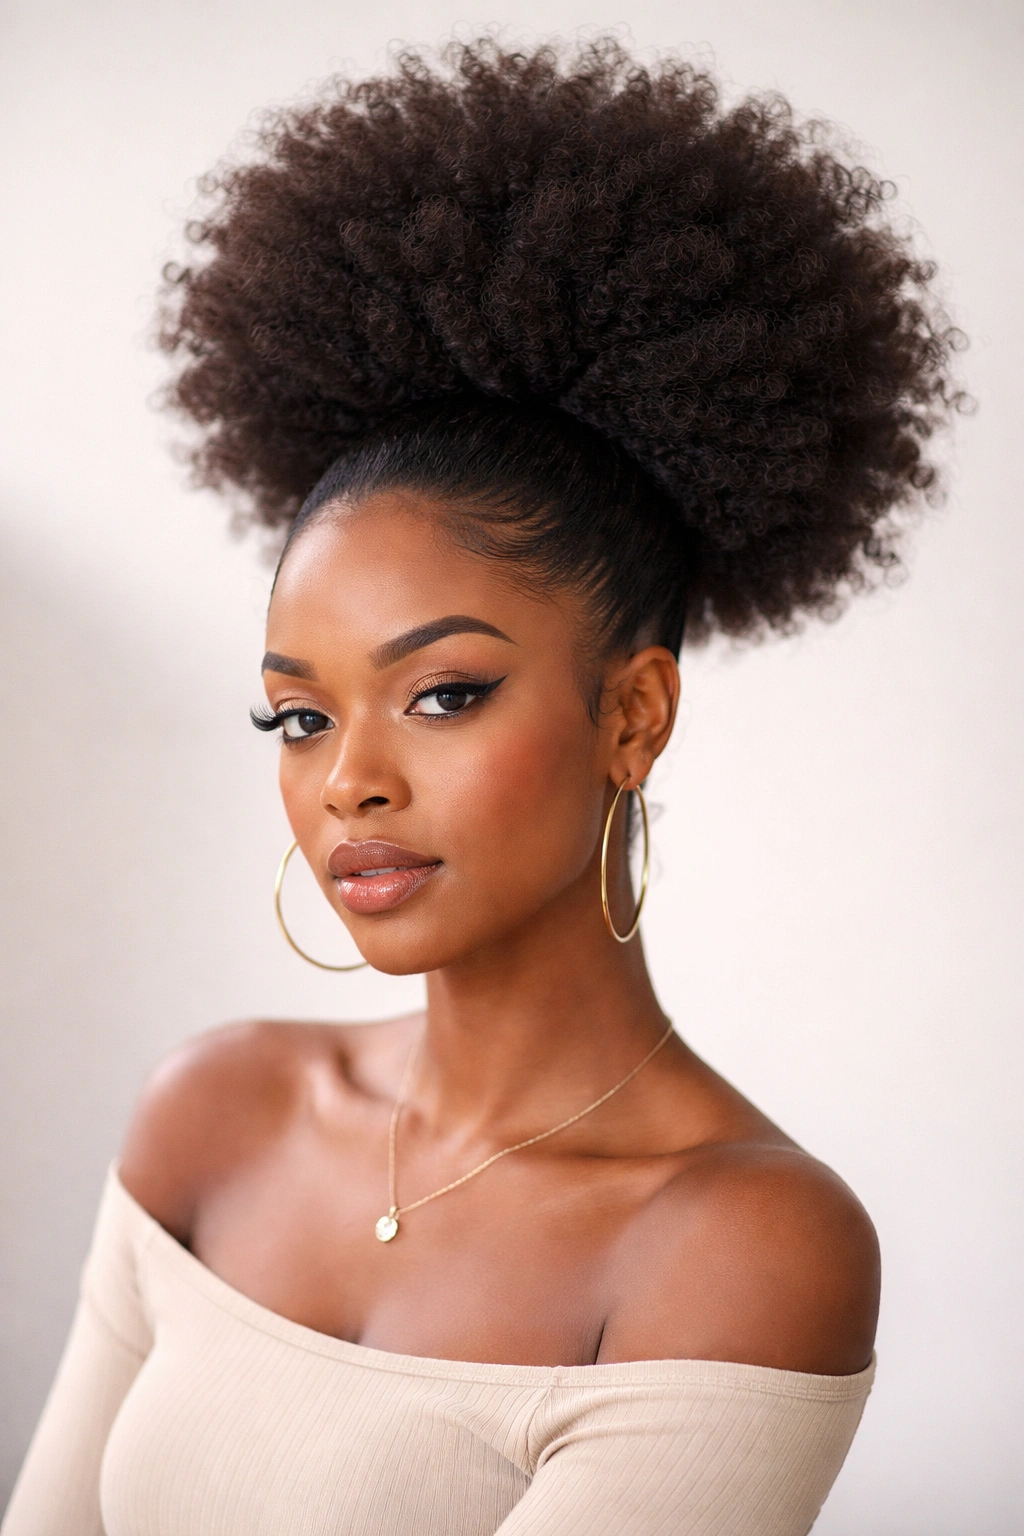
1. The High Crown Puff That Feels Polished Without Trying Too Hard
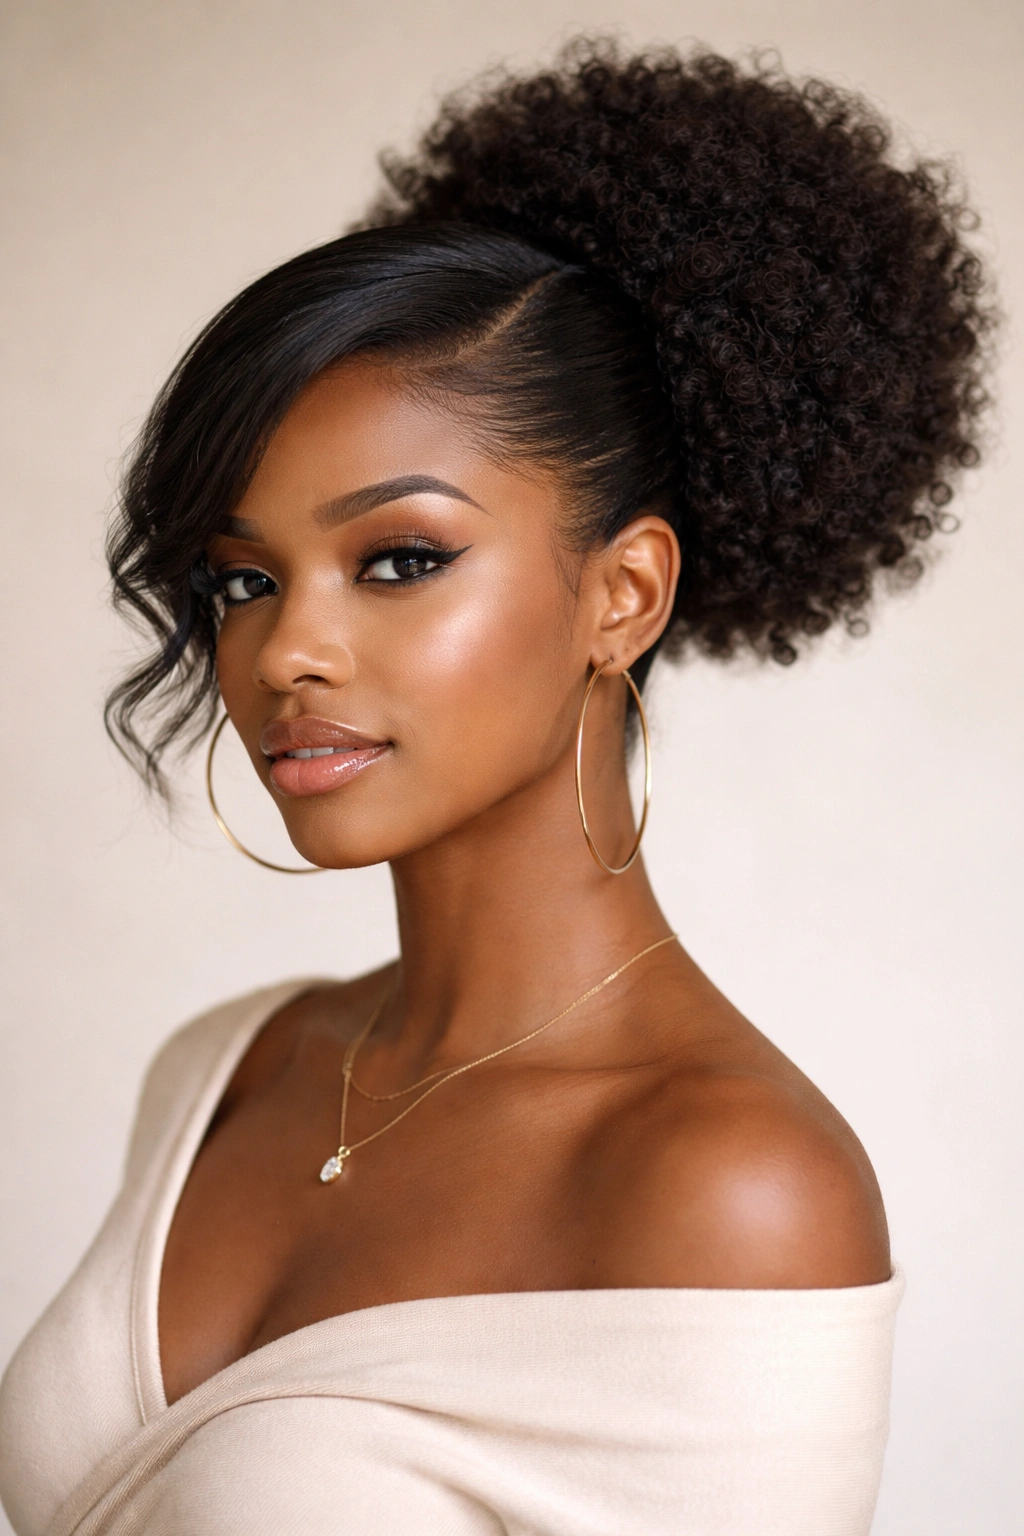
A high crown puff is the one people notice first, because it lifts the whole face upward and gives the hair a clean, open shape. It works especially well when your roots are stretched a little, not bone-dry and tangled, because that little bit of length helps the puff sit where you want it instead of collapsing toward the crown.
Why It Works
The height changes everything. A puff that sits near the top of the head looks brighter and more dressed up than one that sits lower, even if the actual styling takes five minutes. That’s why this version is a favorite for work, class presentations, dinner plans, and the kind of day where you want to look finished without acting like you spent the whole morning on it.
The cleanest version starts with moisturized hair, brushed upward in sections, and secured with a soft elastic or puff cuff. A smooth base and a fluffy crown give the style that tidy-but-full look people usually want from a high puff. If the front is a little sleek and the puff itself is full, you get balance instead of a lopsided blob.
Quick Details That Help
- Use a light leave-in first, then a small amount of cream or gel on the front.
- Stretch the roots with twists, banding, or a blow-dryer on low heat if you want more height.
- A satin scrunchie is kinder than a tight rubber band.
- A pick can lift the puff after it’s secured, but use it gently.
Best move: place the puff slightly above the crown, not all the way at the hairline. That keeps the face open and the style from looking cramped.
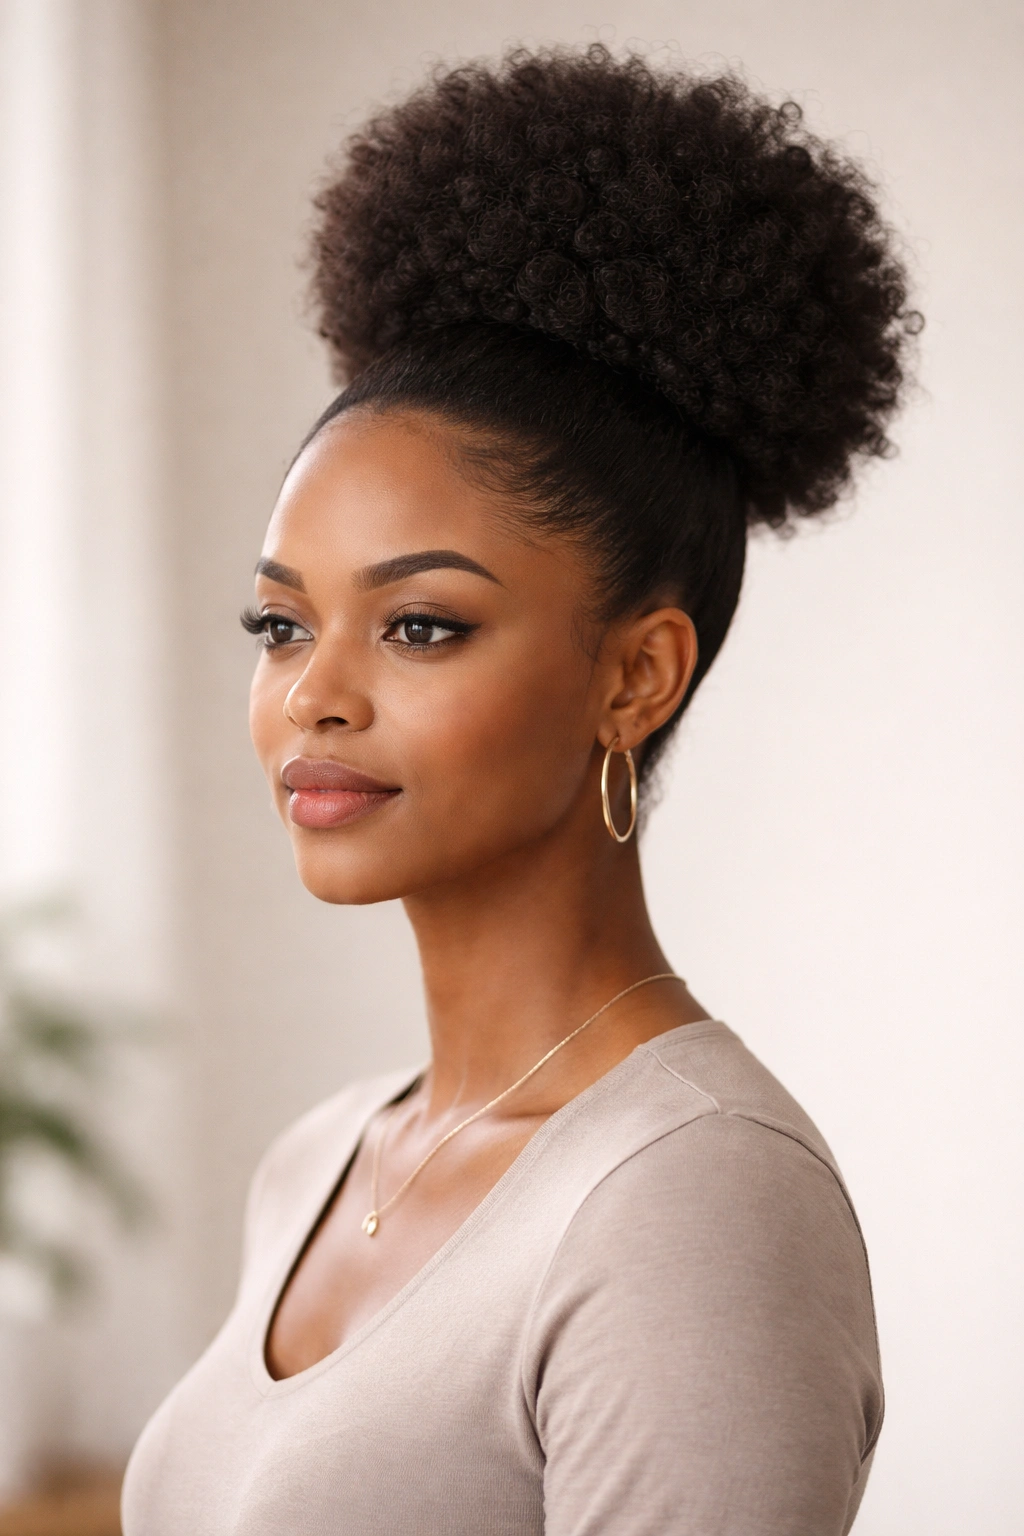
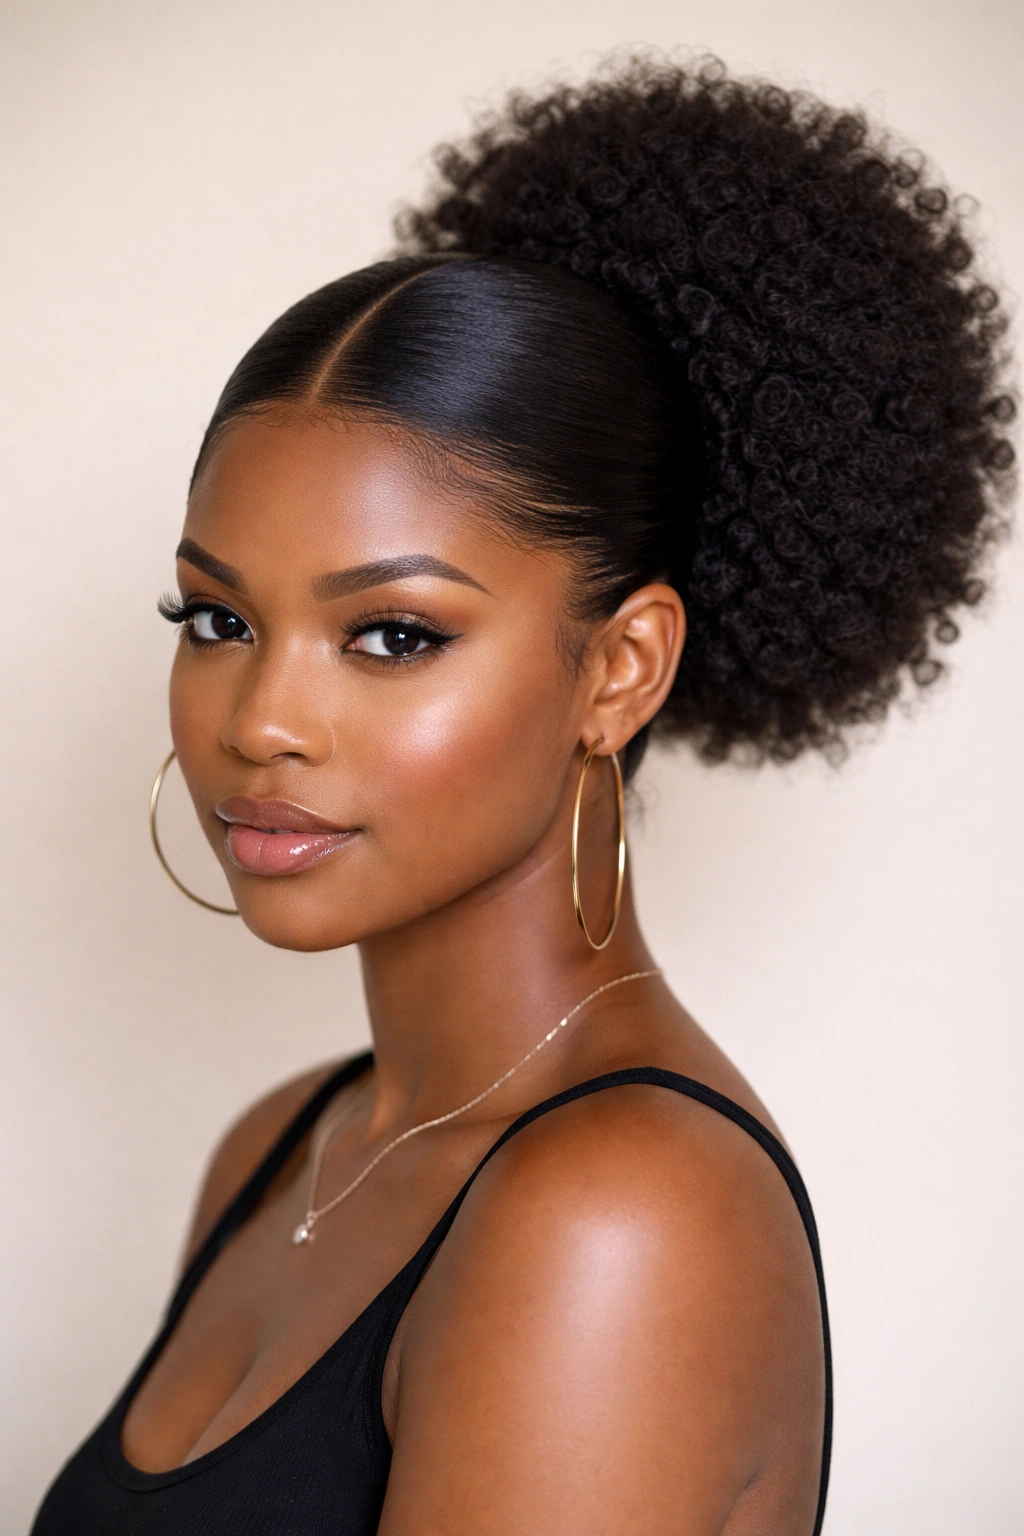
2. The Low Nape Puff That Looks Calm and Elegant
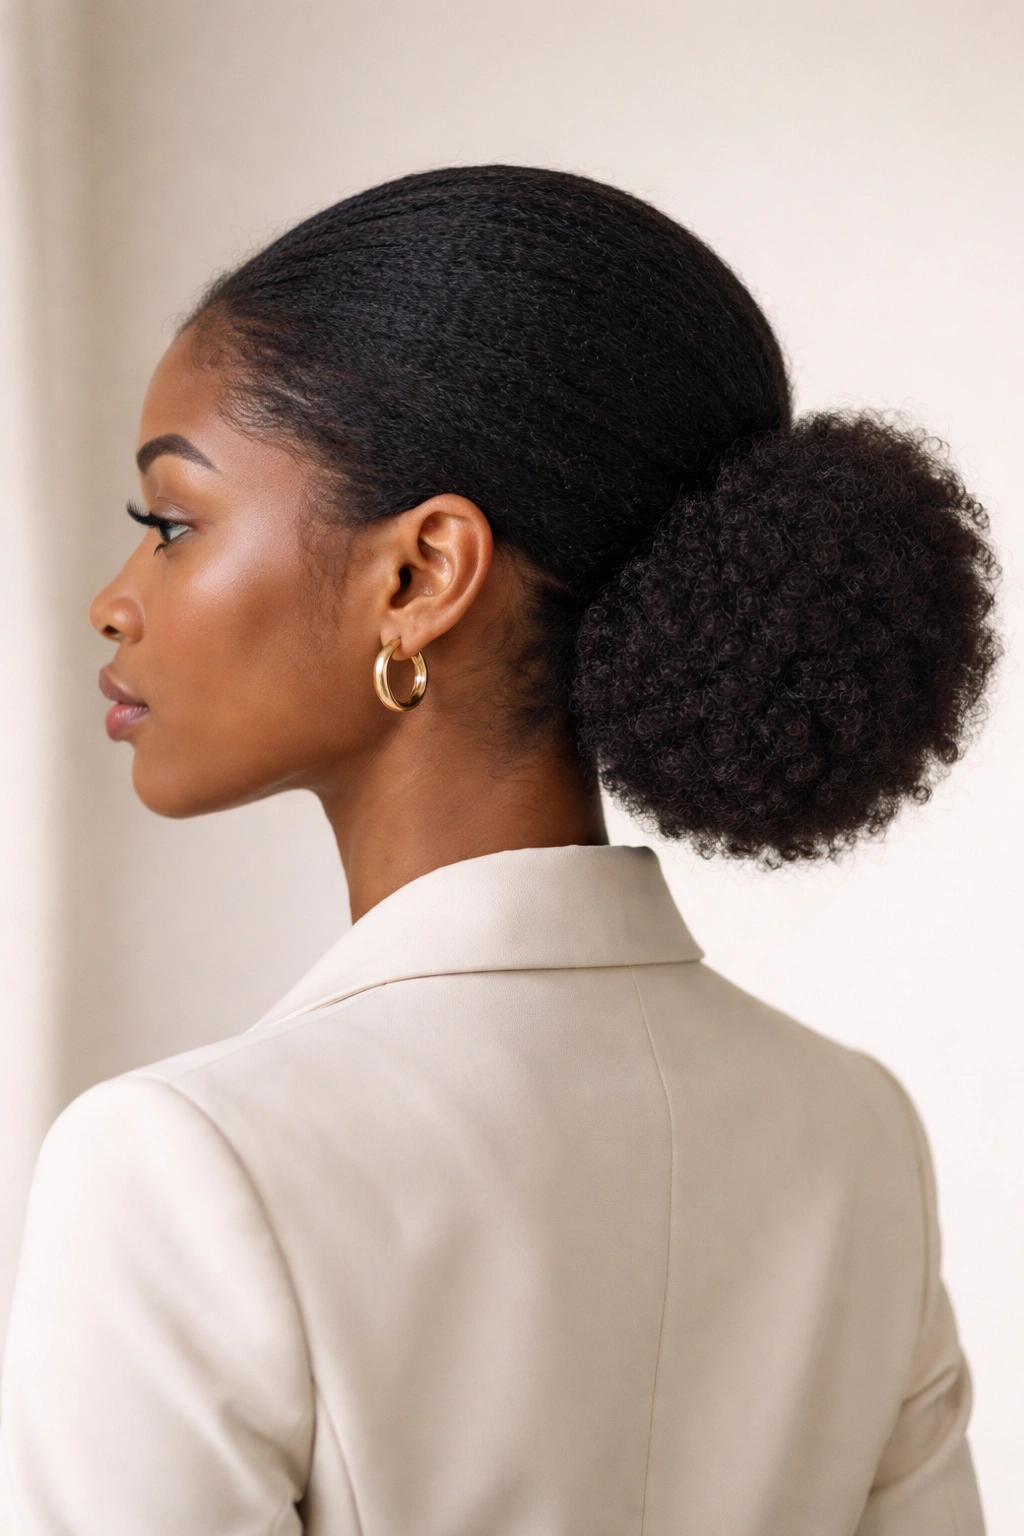
A low puff is the one I reach for when the outfit is doing most of the talking. It sits close to the nape, which makes the silhouette softer and a little more grounded, and that shape works beautifully with hoop earrings, turtlenecks, and structured jackets.
No, it is not boring. It just has manners.
The low placement also helps if your edges are tender or you don’t want much tension around the crown. You can smooth the front back with a soft brush, gather the hair near the base of the neck, and leave the puff full enough to feel intentional. If the hair is very dense, a low puff keeps the weight from pulling on the scalp. If your hair is shorter, this style still works; you may just need a puff cuff or two slim ties to hold the shape.
What makes it feel polished is restraint. Don’t pile on too much product, and don’t force the puff into a giant sphere if your hair wants to sit in a smaller shape. A low puff with a neat base and a little shine at the front can look more refined than a bigger style that fights your texture.
I like this one for dinners, gallery openings, and days when I want the hair to stay out of the way but still read as styled. It’s calm. That’s the point.
3. The Side-Swept Puff That Softens the Whole Face
Why does a side-swept puff feel softer than a centered one? Because the eye gets a little movement before it reaches the puff itself, and that small shift changes the whole balance of the style.
A side part gives the hair a bit of direction, which makes the puff feel less rigid and more natural. It works especially well if you like one eyebrow showing, if you wear glasses, or if you want the style to feel less symmetrical and more relaxed. The part can be deep or shallow, and both versions work. A deep side part gives drama. A shallow one just breaks up the straight lines.
How to Place the Side Part
Start the part where your hair naturally wants to split, or where your comb glides without tugging. Then smooth one side tighter than the other, gathering the hair just off-center rather than directly in the middle. A puff that leans a little left or right looks deliberate, not crooked. That distinction matters more than people think.
A side-swept puff also gives you room to show off earrings, a strong lip color, or a high-neck top. It’s a good choice for brunch, date night, and family photos because it feels a touch dressed up without looking stiff. If the hair on the front side is a little shorter, let it be. A few face-framing coils make the style feel lived-in instead of overworked.
4. The Double Puff Set That Keeps Things Playful
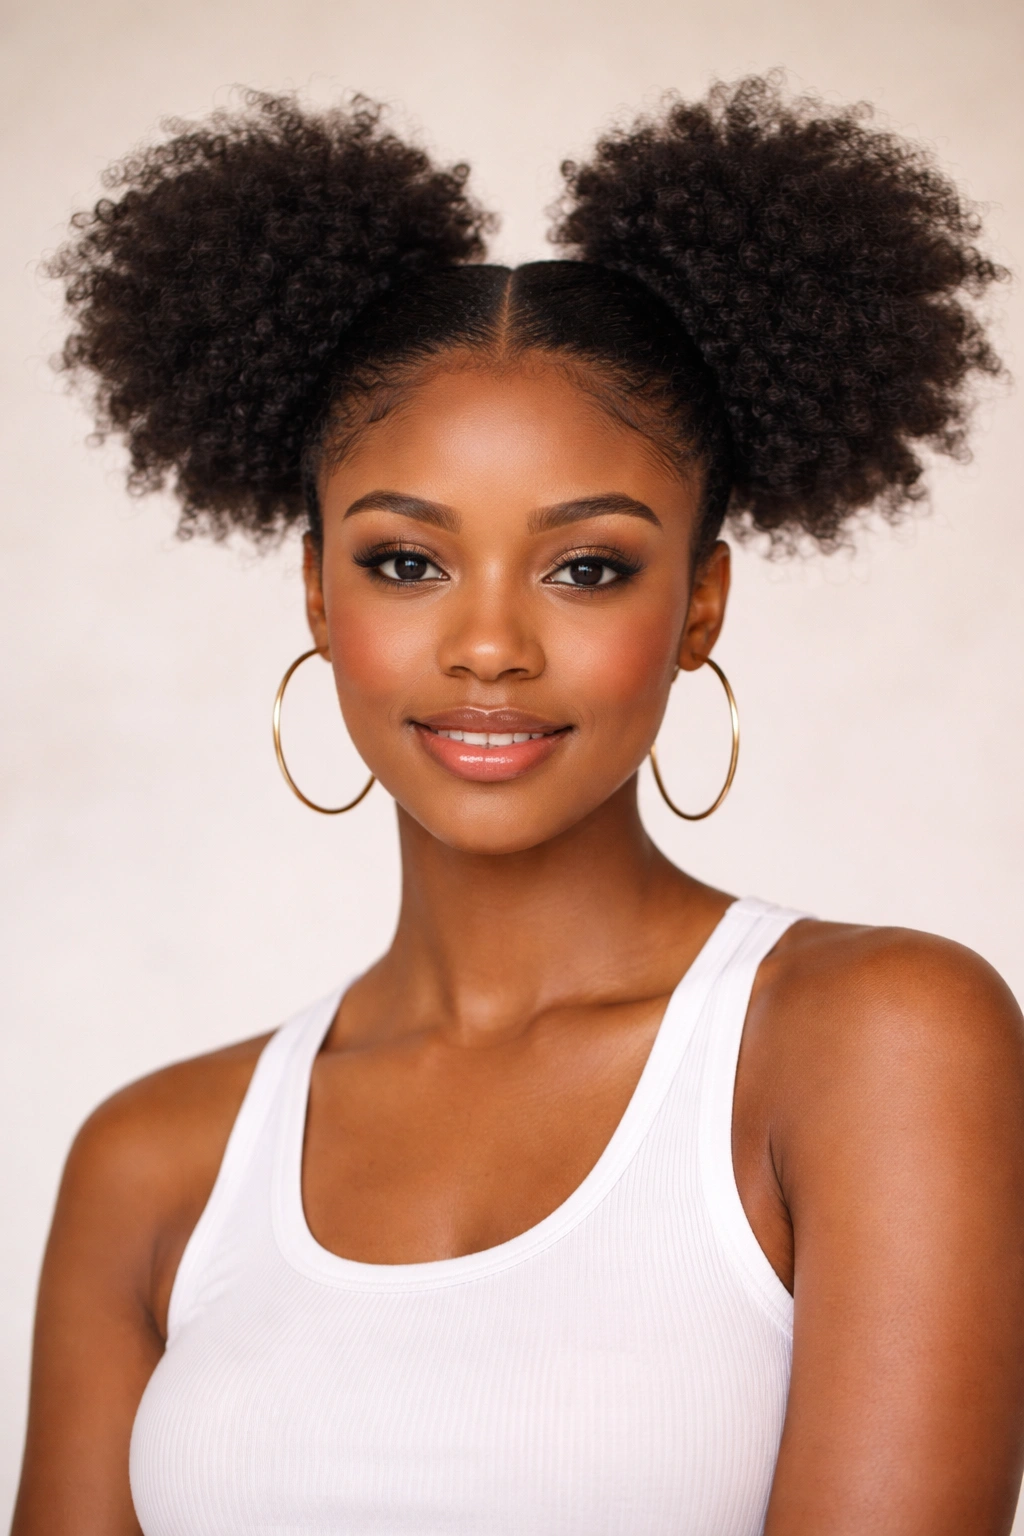
If you want something playful without sliding into costume territory, double puffs are the sweet spot. Two puffs change the whole mood of the style, especially when they sit high and a little outward rather than straight up like cartoon ears.
I’ve seen this style save plenty of rushed mornings. One side is uneven? Split the difference with two puffs. Hair not long enough for one big puff? Two smaller ones often look better anyway. There’s a reason this style keeps showing up for school, errands, concerts, and lazy Saturdays that still need a little personality.
Small Details That Make It Work
- Part the hair cleanly down the middle before securing anything.
- Keep the puff bases about the same size so one side doesn’t look heavier.
- Use soft ties or mini puff cuffs instead of tiny elastics that snag.
- If you want a neater finish, brush the front and temple area before lifting the sections.
The vibe changes depending on height. Low double puffs feel sweet and casual. Higher ones look sharper and a little bolder. Either way, the style gives you movement, and movement keeps it from looking flat.
The best part? You can stop fussing earlier than you expect. Double puffs look best when they’re not over-tweaked. A few loose coils at the temples can make the style better, not worse.
5. The Puff With Bangs That Feels Soft and Intentional
A puff with bangs is one of those styles that makes people think you spent much longer on your hair than you did. That’s partly because the fringe breaks up the forehead area, which creates an instant frame around the face, and partly because bangs have a way of making natural hair look styled even when the rest of the puff is loose and airy.
The bangs don’t have to be blunt. In fact, blunt bangs can be a lot of work on coily hair unless you really enjoy maintenance. A better version is usually a curly fringe, a few stretched front pieces, or a set of twist-out bangs that sit just above the brows. That gives shape without making the front feel too heavy.
I like this style for brunch, birthdays, and date nights because it brings attention to the eyes and cheekbones. It also gives you a nice excuse to keep the puff itself a little smaller, which can be useful if your hair is thick and expands the second it gets humid. The whole look feels balanced when the bangs are defined and the puff stays loose.
One detail people skip: the fringe should be dry before you shape it. Wet or damp bangs can flatten fast. A soft diffuser, a set of twists, or a roller set in the front helps the curl pattern keep its shape longer. Tiny effort. Big payoff.
6. The Headwrap Puff That Solves a Bad Hair Day Fast
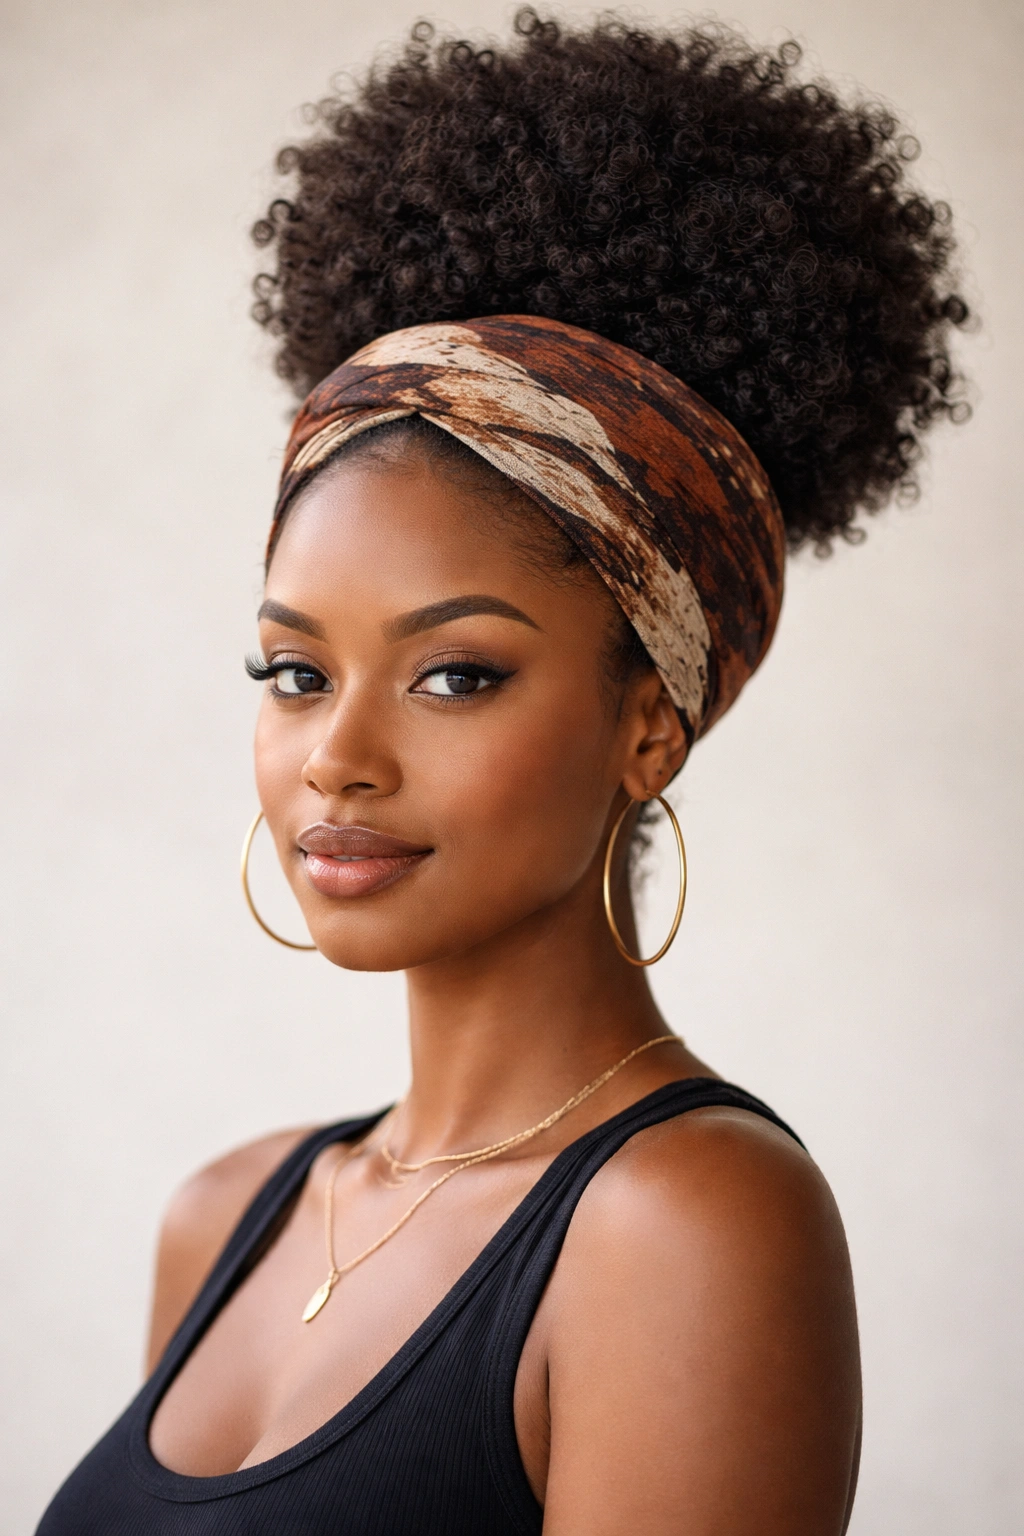
Unlike a bare puff, a headwrap puff lets the fabric do part of the styling for you. That matters when the roots need a rest, the front is not cooperating, or you want the outfit to carry more of the visual weight.
The scarf can sit around the hairline, fold over the edges, or wrap under the puff to create a cleaner base. You can go with a bright print, a solid color, or a satin scarf tied into a knot at the front. The puff stays visible, but the wrap gives it shape and makes the whole style look finished. It’s a smart choice for long trips, humid days, and events where you want comfort first and fuss second.
This is also one of the easiest ways to make an afro puff feel occasion-ready. A plain puff can read casual. Add a scarf with a clean fold and suddenly the same style looks planned. That’s the whole trick. The fabric acts like a frame.
Best for: protective styling days, travel, church, errands, or mornings when your edges need a break from brushing.
If you’re picking a scarf, choose one that stays put without needing twenty pins. A slippery tie that keeps sliding off will make you hate the style by lunch. A cotton or satin blend with enough grip is far easier to live with.
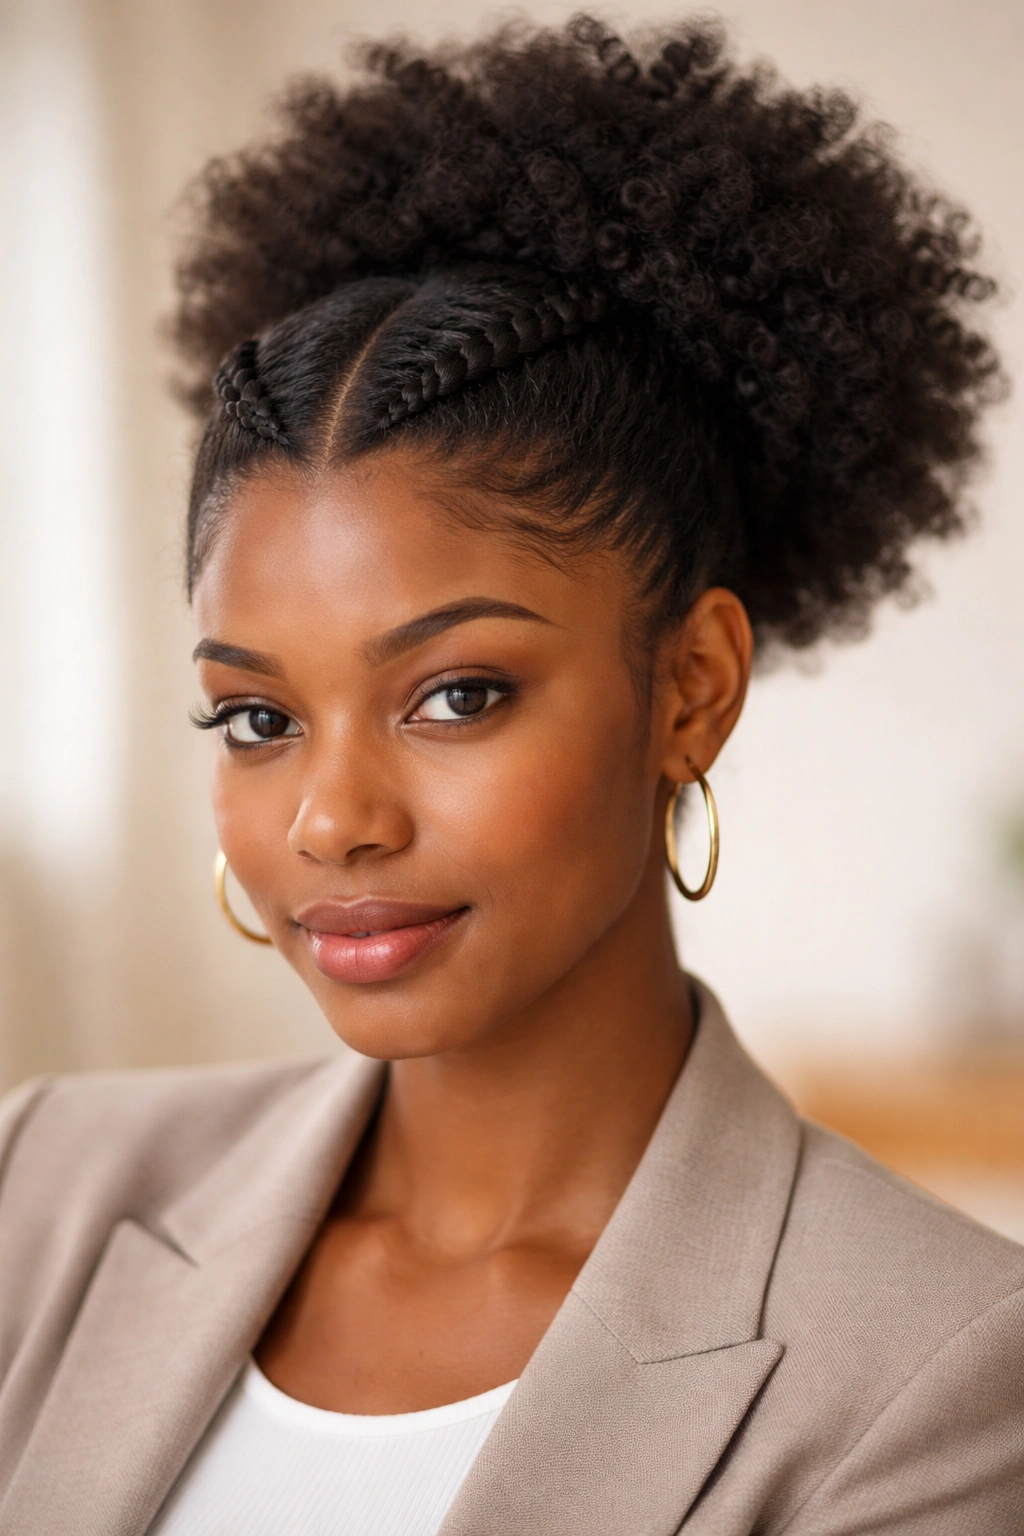
7. The Braided Crown Puff That Dresses Up Anything
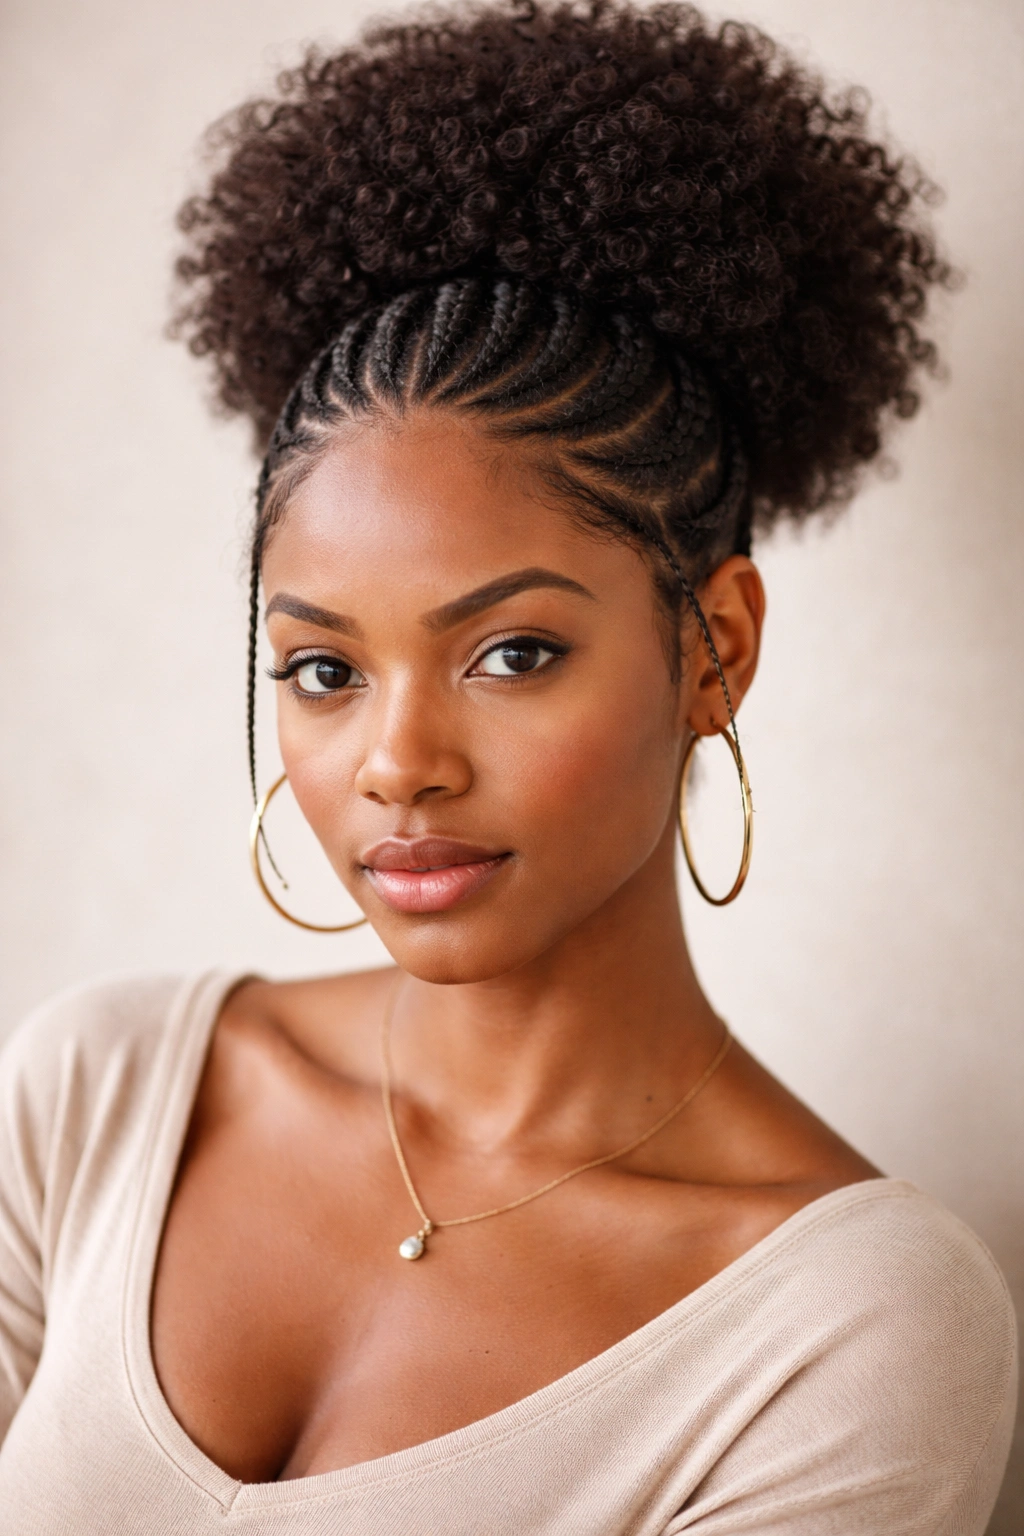
Braids around the hairline change the whole mood of a puff. They add structure at the front, then leave the body of the hair loose and full, which is a nice contrast when you want the style to feel finished but not stiff.
Where the Braids Sit
The cleanest version uses two to four slim braids across the front or around the temples, then gathers the rest into a puff at the crown or slightly lower. You can make the braids flat and neat if you want a more formal look, or looser if you like a softer finish. Either way, the braids act like a frame that pulls the eye upward.
What Makes It Feel Balanced
The puff does not need to be massive for this style to work. In fact, a medium puff often looks better because the braids already add detail. If the puff gets too large, the front and back can feel like two separate hairstyles. Keep the base tidy, and let the texture do the rest.
What Not to Do
- Don’t braid too tightly at the hairline.
- Don’t overload the front with gel until it flakes.
- Don’t hide the braids completely under the puff.
- Don’t make the puff so small that it loses the contrast.
This is a lovely option for weddings, parties, graduations, and photo days. It feels dressed up without needing extra ornaments, although a few gold cuffs or a small pin near one braid never hurt.
8. The Twisted Front Puff That Looks Fancy in Fifteen Minutes
You know those mornings when you want your hair to look like you had time, even though you did not? A twisted front puff is perfect for that exact mood.
The front section gets twisted into two or more rope twists, flat twists, or chunky two-strand twists, then the rest is gathered into a puff behind them. That small bit of texture in front gives the style structure, and structure is what keeps a simple puff from looking rushed. The twists can meet in the middle, sweep to one side, or curve back toward the puff, depending on what flatters your face shape.
What I like about this version is that it works with a lot of hair lengths. If your hair is short, the twists can be tiny and still do their job. If your hair is longer, the twists can be thicker and more visible, almost like a design element. Either way, the puff stays the main event.
A quick mist of water or leave-in before twisting helps the sections smooth down without getting crunchy. Then use a small amount of cream or gel on the roots so the twists stay neat for the day. The goal is control, not stiffness. Stiff twists tend to look scraped back, and that is not the same thing at all.
This style fits office days, dinner plans, and anything that needs a touch of polish without looking formal.
9. The Faux Hawk Puff That Brings Attitude Without Losing Shape
The faux hawk puff is the style that says you know exactly what you’re doing. It lifts the hair through the center and keeps the sides sleeker, which gives the profile a sharper line than a regular puff.
That shape is the reason it works so well with leather jackets, statement earrings, fitted tops, or even a plain T-shirt that needs a little energy. The style creates height down the center of the head, so the eye moves upward and forward instead of widening out at the sides. It looks bold, but it still belongs in a natural hair wardrobe, which is why I keep coming back to it for concerts and nights out.
The sides usually need more smoothing than the puff itself. A soft brush, a little gel, and a few bobby pins can keep the sides close to the head without making them feel glued down. Then the center section gets gathered and lifted into a puff or a mini puff chain, depending on how much length you have.
A clean part down the middle helps, but it doesn’t have to be perfect. Slight asymmetry can make the style look less rigid. If your hair is thick, use two separate ties to support the middle section before fluffing it. That keeps the lift without snapping the base.
Seriously, this is a good one when you want a little edge.
10. The Stretched Blowout Puff That Gives You Maximum Fullness
Why does a stretched puff feel so much bigger than a fresh-wash puff? Because stretched hair keeps more visible length, and that extra length changes the silhouette before you even fluff it out.
This version works best when the hair has been stretched by banding, braiding, twists, or a careful blow-dry on low heat. You do not need pin-straight hair. You just need less shrinkage at the roots and mid-lengths so the puff can sit high and full instead of compact and tight. A stretched puff has that fluffy, cloud-like look people often want for special events, photos, and days when they want the hair to make a statement on its own.
How to Stretch Without Flattening the Texture
A gentle stretch matters more than a dramatic one. If you blow-dry, use low heat, keep the nozzle moving, and stop once the hair is dry and elongated, not heated until it feels brittle. If you band or twist, make the sections large enough that the roots don’t crease in a weird pattern. Tiny, overdone sections can leave the puff looking frizzy in the wrong places.
The beauty of this style is that it pairs well with simple clothing. The puff itself carries enough presence. Add a clean part, a little shine at the front, and maybe a single accessory, and the whole look feels intentional. It’s a strong choice for photo days, birthdays, and evenings when you want volume more than shine.
11. The Center-Part Puff With a Sleek Front
A center-part puff has a cleaner, more symmetrical feel than side-parted versions, and that symmetry is what makes it a strong pick for office settings, family gatherings, or anything where you want the hair to read neat first and playful second.
The middle part creates a clear line from the forehead to the puff, which naturally frames the face in two halves. If you smooth the front hair with a brush and a little gel or mousse, the style gets a tidy base that contrasts nicely with the fullness of the puff. That contrast is the whole point. Slick in front. Soft in back.
This style can be done high or mid-height, but I prefer it around the crown because the middle part feels most balanced there. Too low, and the part can look heavy. Too high, and the puff can crowd the top of the head. A medium placement gives you the clean line without making the front look overworked.
One thing to watch: don’t drown the front in product. A pea-sized amount of edge control or gel on each side is often enough. If the hair gets flaky or hard, the part loses the polished look you wanted in the first place. Smooth, yes. Crusty, no.
It’s a quietly strong style. Not loud. Not fussy. Just clean.
12. The Wrapped Puff Bun Hybrid for Formal Nights
A wrapped puff bun hybrid gives you the softness of a puff with the tucked-in shape of a bun, and that combination is useful when you want something that feels a little more formal than the everyday version.
The idea is simple: gather the hair high or low, then fold or tuck part of the length inward with a puff cuff, pins, or a wrapped tie so the shape reads closer to a rounded bun than a free-floating puff. The result is neater at the edges and more compact around the base, which makes it a strong choice for evening events, dinner parties, church, or any setting where you want your hair to hold its own against a dressier outfit.
This is one of those styles that works best when the front is smooth and the puff portion is evenly fluffed. If the base is sloppy, the bun effect disappears. If the puff is too loose, it stops looking intentional. The balance sits in the middle: enough volume to keep the natural texture visible, enough structure to keep the silhouette controlled.
I’d reach for this when I want the feel of an afro puff but need the finish to lean formal. It’s also useful if you’re trying to reduce snagging on scarves, jackets, or statement necklaces. A tucked shape keeps the hair closer to the head, and that makes the whole style easier to wear for a long evening.
A few gold pins near the side or a small comb tucked into the base can be enough. Anything more starts to compete with the shape, and this one does not need much help.