A medium-length wavy hairstyle strikes the perfect balance for a wedding day—long enough to feel formal and bridal, short enough to keep you comfortable and confident throughout hours of dancing, photos, and celebration. There’s a reason waves have become the go-to texture for brides and wedding guests alike: they photograph beautifully, they feel romantic without being overdone, and they work with nearly every face shape and hair type. Unlike stick-straight hair that can look limp in photos or tight curls that demand constant touch-ups, waves offer movement, dimension, and a naturally polished aesthetic that says “I made an effort” without looking stiff or overly constructed.
The challenge, though, is that not all wavy styles are created equal—especially when you’re dressing up for such an important occasion. The difference between a casual beach wave and a wedding-worthy sculpted wave matters. Your choice needs to complement your dress, suit your wedding role (bride, bridesmaid, guest), work with your hair texture, and be something you can either maintain yourself or have a stylist recreate if needed throughout the day. You also need to know exactly how to ask for it at the salon and what products and styling techniques will keep those waves looking intentional and polished rather than accidentally tousled.
What follows are eleven of the most versatile, photograph-worthy wavy hairstyles for medium-length hair, each suited to different wedding vibes, dress styles, and personal preferences. Whether you’re going for glamorous Old Hollywood waves, soft and romantic texture, sleek and modern movement, or bohemian undone elegance, you’ll find detailed guidance on what makes each style work, how to style it, and exactly who should (and shouldn’t) consider it for their wedding day.
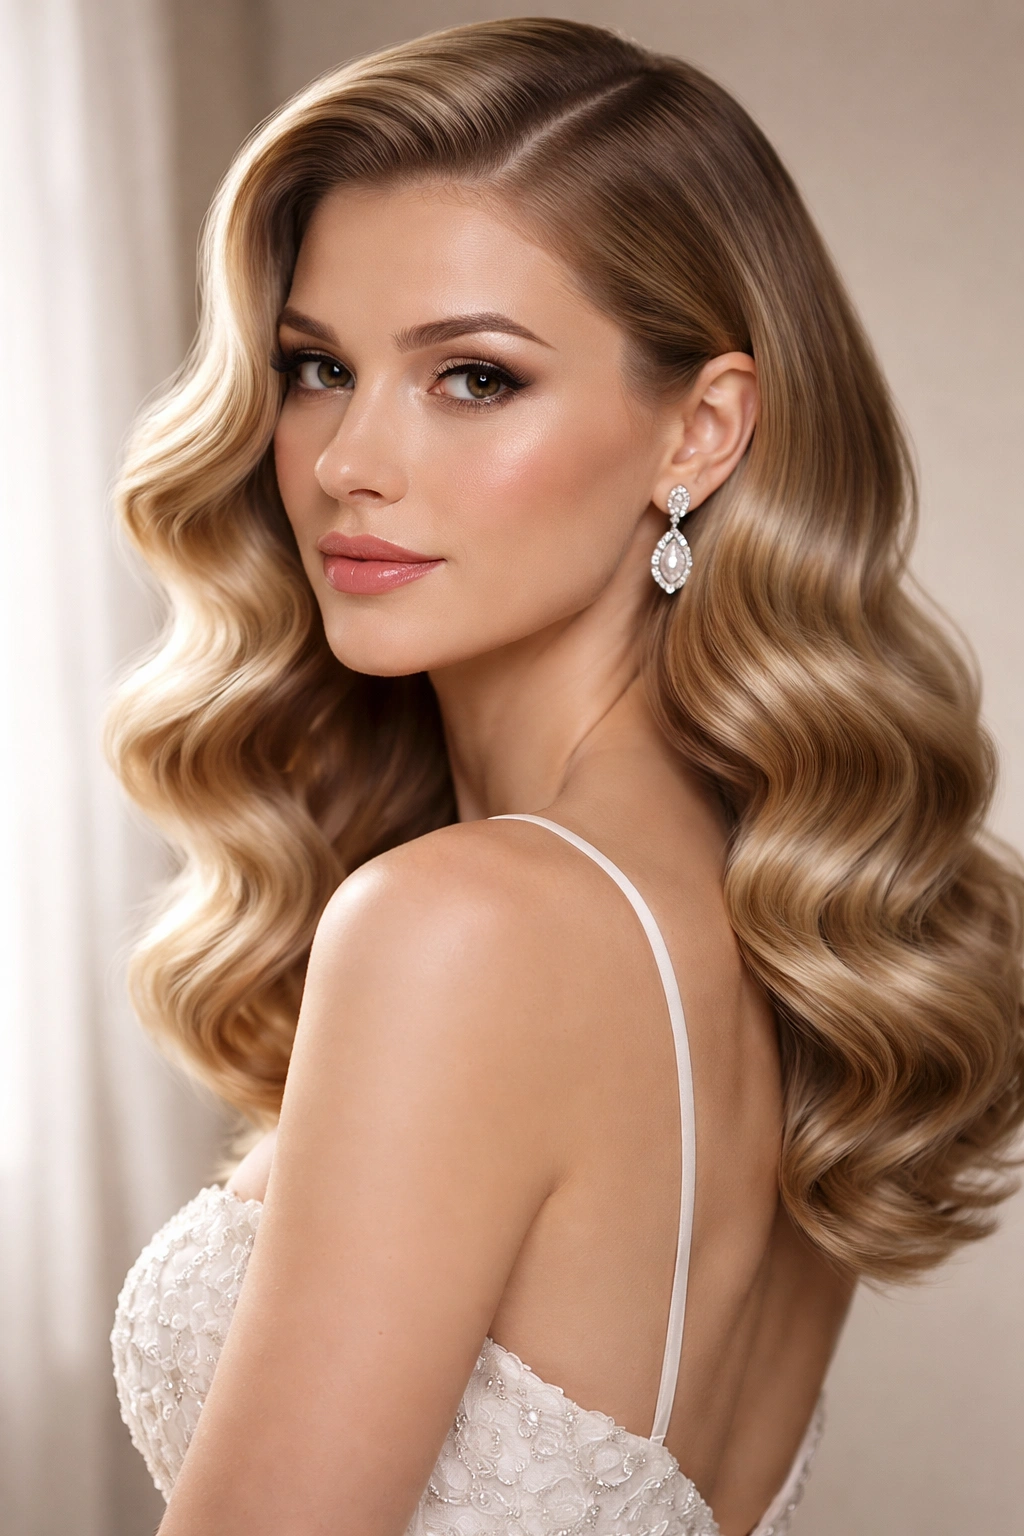
1. Classic Old Hollywood Waves
Old Hollywood waves are the heavyweight champion of formal wavy hairstyles—instantly recognizable, timelessly elegant, and guaranteed to photograph like a dream. These aren’t subtle waves; they’re carefully sculpted, glossy, and directional, with deep waves that start at the root and flow all the way down to the ends. Think Grace Kelly meets modern elegance. The style works because it’s undeniably glamorous without looking theatrical, and it pairs beautifully with any wedding dress from minimalist slip gowns to heavily beaded ball gowns.
Why This Works for Weddings
Old Hollywood waves read as intentional and formal in a way that feels appropriately special for such an important day. The shine and structure photograph beautifully in both natural light and flash photography, and the directional movement creates a flattering frame for your face from almost every angle. This is the style that makes you feel like a polished version of yourself—not like you’re wearing a costume, but like you’ve been elevated.
How to Achieve This Look
- Start with clean, blow-dried hair straightened or smoothed as a base (this gives you the sleekest foundation)
- Use a 1.25-inch curling iron or wand, wrapping sections away from the face and holding for 8-10 seconds per section
- Let curls cool completely before brushing through gently with a paddle brush to soften them into waves
- Apply a light hairspray or finishing serum to add shine and hold without crunchiness
- Style on one side (pin the opposite side back if desired) for the most authentic Old Hollywood moment
- Refresh between events with a flat iron on low heat, gliding down the waves to re-smooth and add shine
Pro tip: This style holds best on day-two or day-three hair that already has texture and natural oils. If you’re styling on freshly washed hair, a texturizing spray or dry shampoo applied before blow-drying makes the waves grip and last significantly longer.
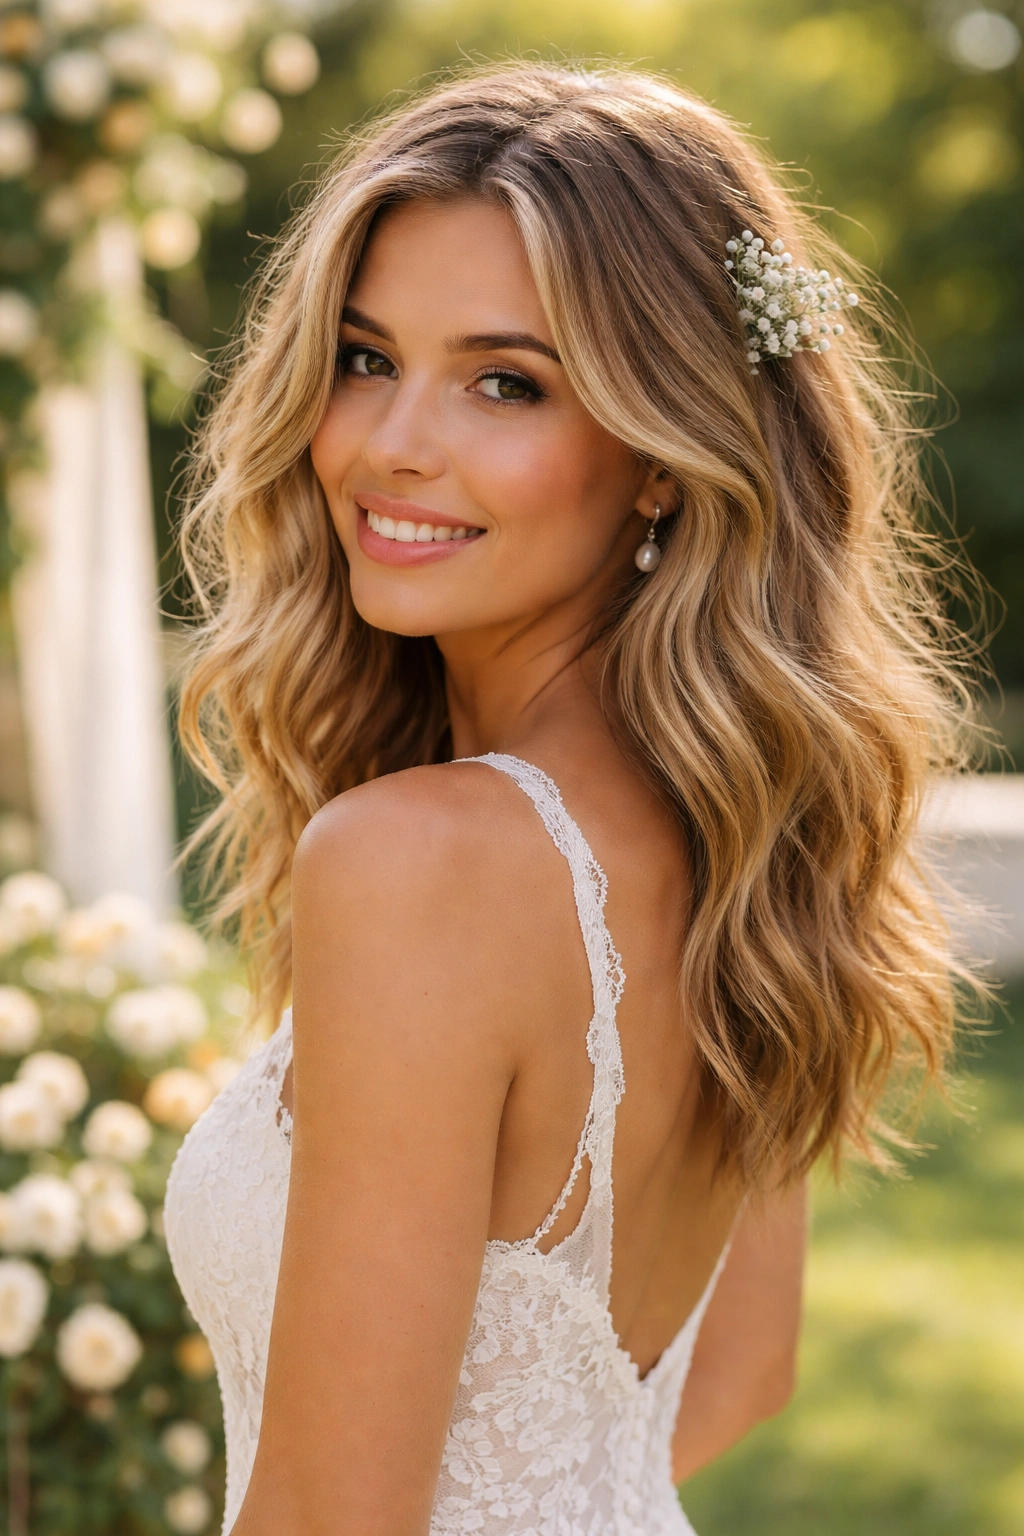
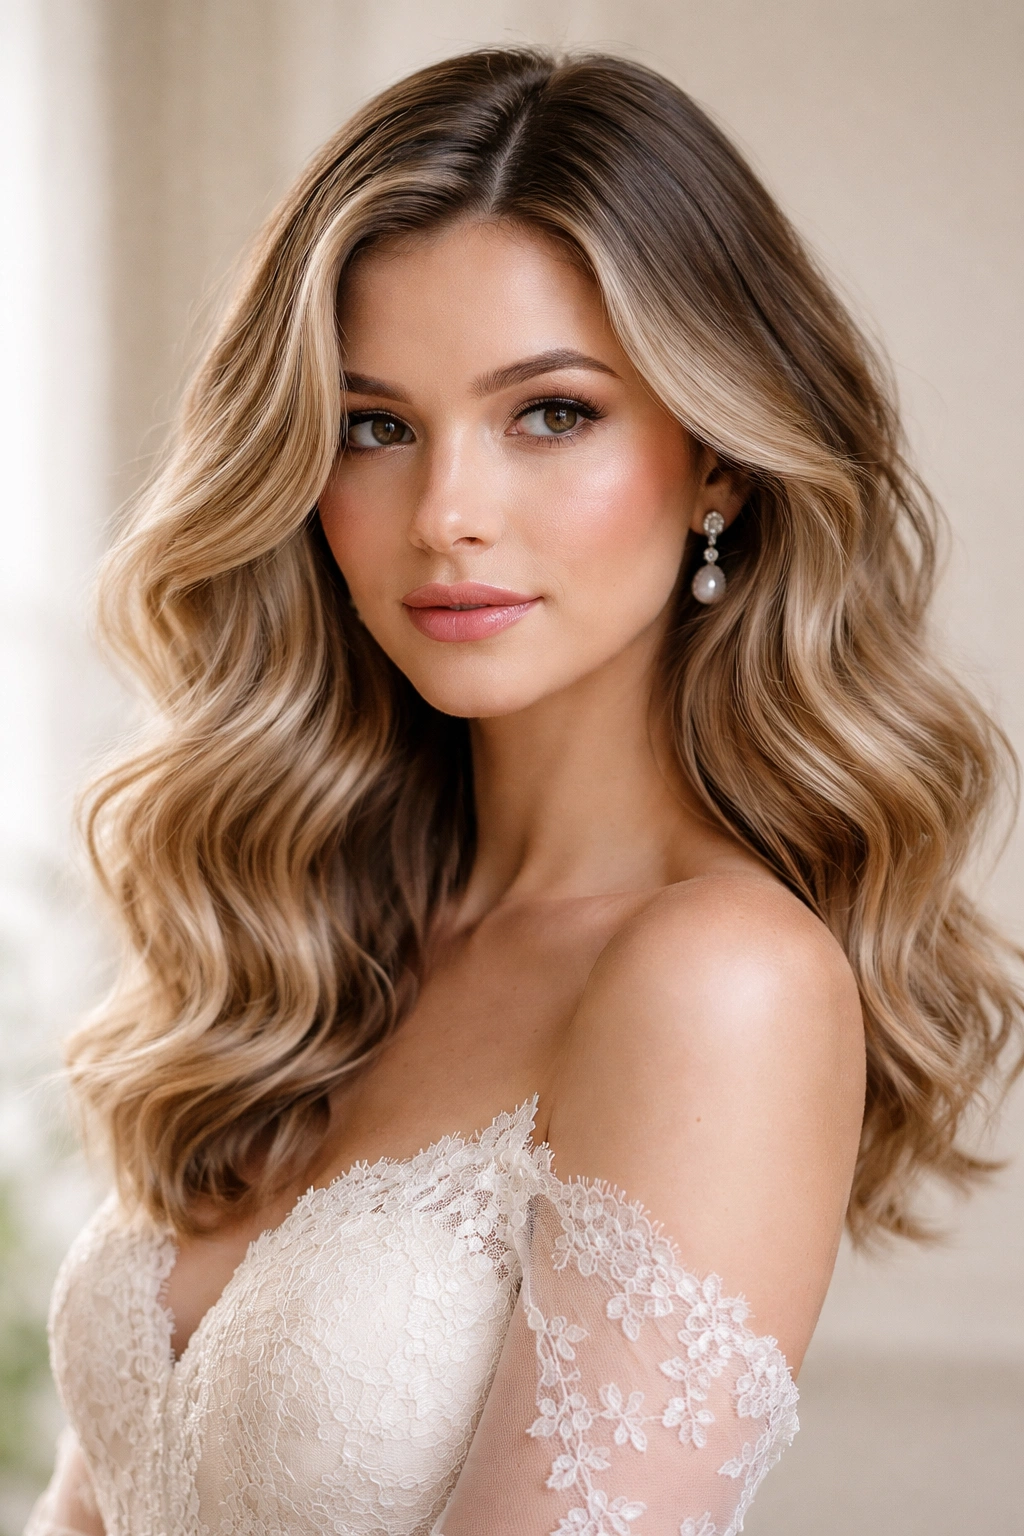
2. Soft Romantic Waves with Face-Framing Pieces
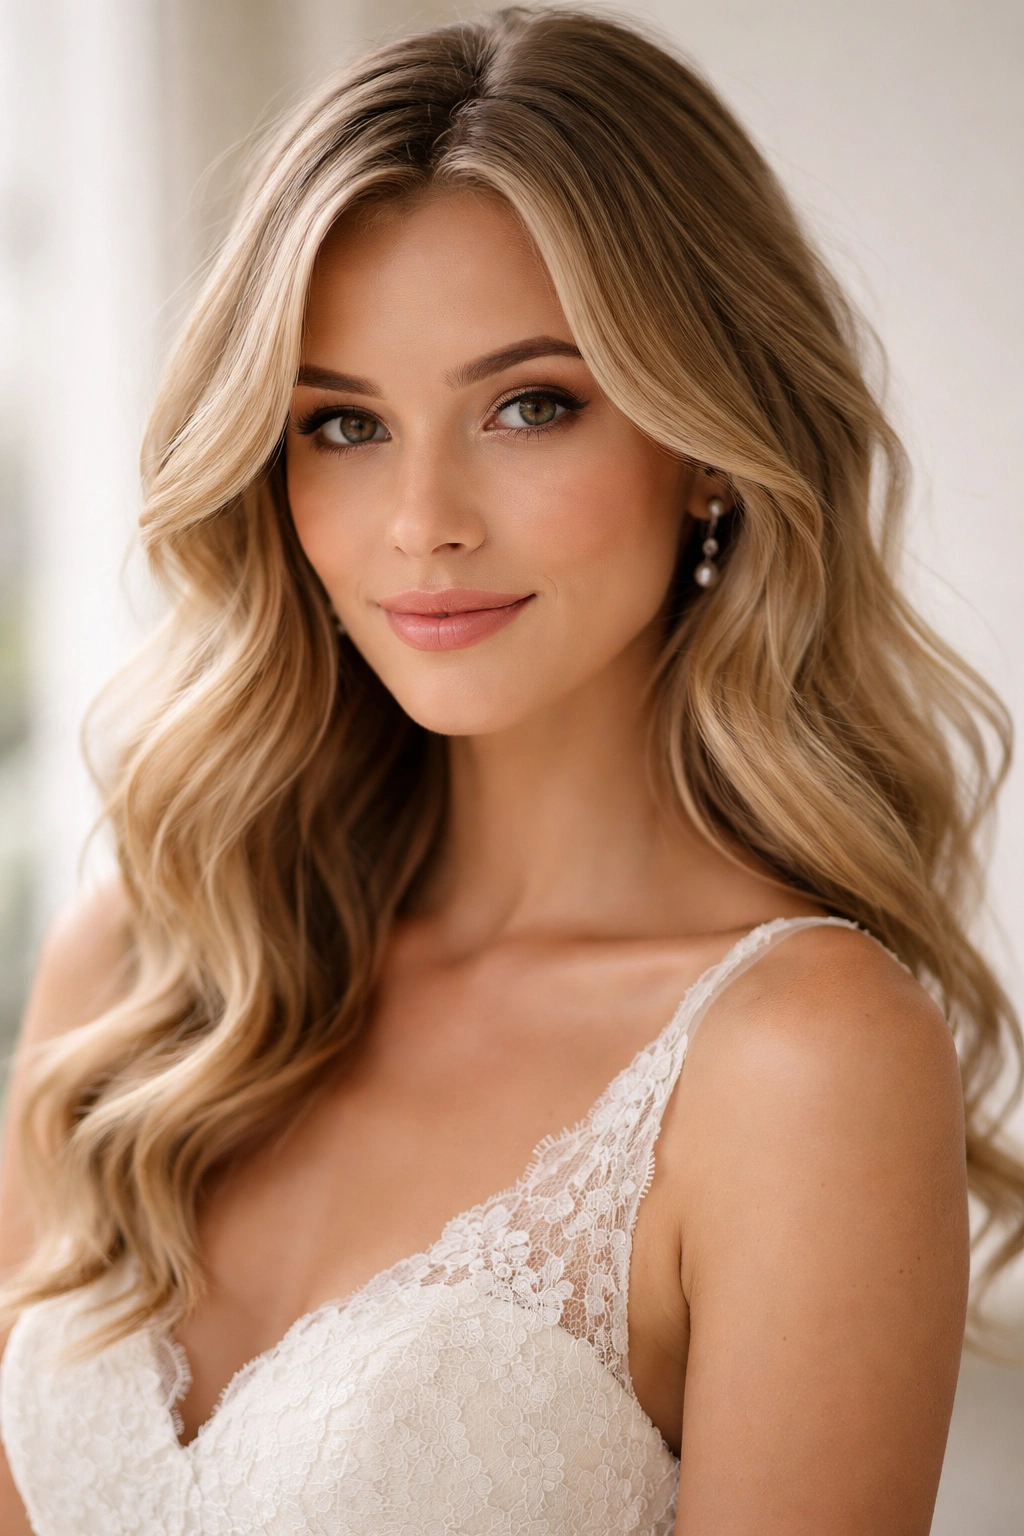
If Old Hollywood waves feel too structured for your vibe, soft romantic waves offer all the elegance with a more relaxed, effortless energy. These waves are looser, less directional, and allow flyaways and softer texture to show—creating an intentionally imperfect, touchable aesthetic that feels fresh and modern. The addition of face-framing pieces (shorter layers or sections left loose around the face) softens the overall look and creates a genuinely romantic quality that works beautifully for garden weddings, outdoor ceremonies, or any bride who wants to feel beautiful rather than “done up.”
Why It’s Perfect for a Wedding
This style walks the line between polished and approachable—it shows you’ve made an effort without appearing overly formal or distant. The face-framing elements draw attention to your eyes and cheekbones in a flattering way, and the looser texture looks soft in close-up photos while maintaining enough shape to photograph clearly. It’s especially stunning with flower crowns, delicate hairpieces, or minimal accessories.
Key Styling Elements
- Begin with texturizing spray or sea salt spray applied to damp roots for grip and natural texture
- Blow-dry with a medium round brush to add volume at the roots and a gentle wave pattern throughout
- Use a 1.5-inch curling iron on medium heat, curling sections loosely in alternating directions for an organic look
- Leave the face-framing sections slightly looser and less defined than the rest of the hair for intentional softness
- Gently brush through waves with your fingers (not a brush) to break them up and create movement
- Finish with a light-hold hairspray that won’t stiffen the texture
Worth knowing: This style looks better slightly undone than perfectly structured—if every wave is identical and tight, it loses the romantic quality that makes it special. Aim for variation and softness over perfection.
3. Side-Swept Waves with a Low Ponytail
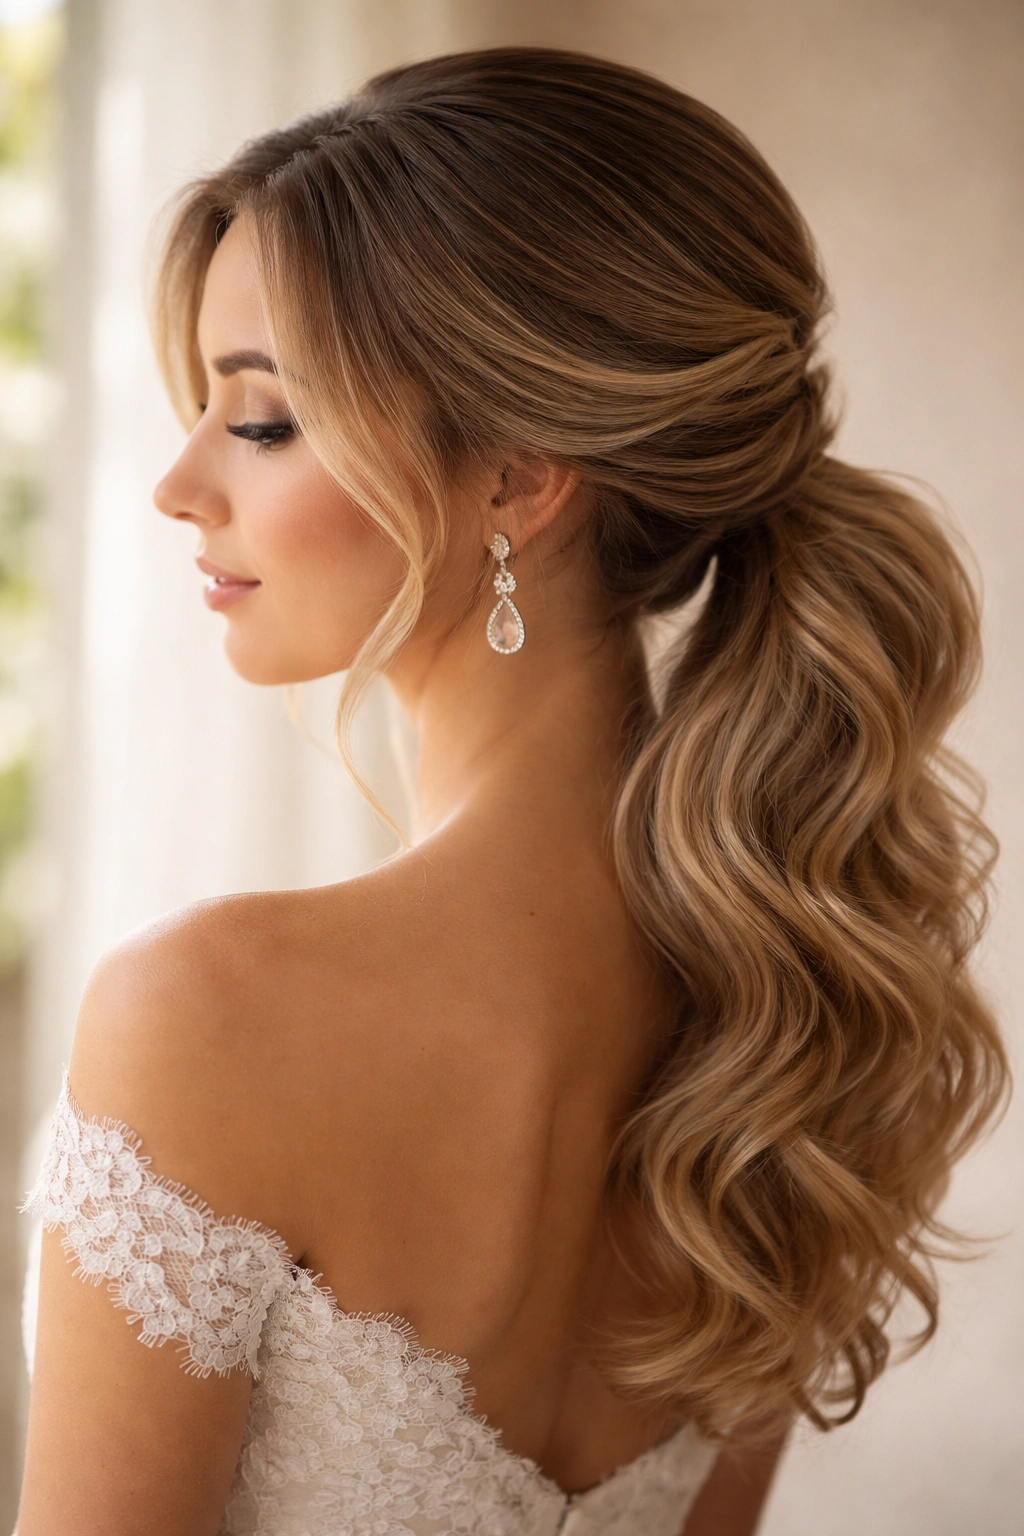
For brides or bridesmaids who want waves but also want the hair partially secured, a side-swept wave with a low ponytail offers the perfect hybrid: you get the elegance of waves, the security of a ponytail, and the beauty of a half-up, half-down look that works with any dress neckline. The waves drape beautifully across one shoulder, and the low ponytail at the base of the neck (often decorated with a pearl or ribbon) keeps everything in place while maintaining that romantic, flowing quality.
Why Brides Love This Style
It solves the practical problem of keeping hair off your face and neck during ceremony and reception activities, but it doesn’t sacrifice the beauty of loose waves. The asymmetry created by sweeping everything to one side is flattering and creates beautiful lines in photographs. Hair stays secure without feeling tight or uncomfortable, and you can still run your fingers through the waves without worrying about everything falling down.
How to Create This Look
- Begin with soft waves throughout the hair using a curling iron or wand (follow the soft wave technique above)
- Flip your head to the side you’re sweeping toward and gather the back section loosely at the nape of your neck
- Secure with a clear elastic, bobby pins, or a decorative hair comb depending on your wedding aesthetic
- Leave the front sections (especially the side-swept piece) loose to frame the face with waves
- Gently pull a few flyaway pieces from the ponytail to soften it and create an undone quality
- Pin the side-swept section loosely behind your ear with a bobby pin if needed to keep it from falling into your face
- Finish with a light hairspray applied to the secured section to prevent slipping
Insider note: Using a velvet or silk scrunchie instead of a standard elastic prevents the ponytail from snagging hair and creates a more elegant, refined look in photos.
4. Textured Waves with a Deep Side Part
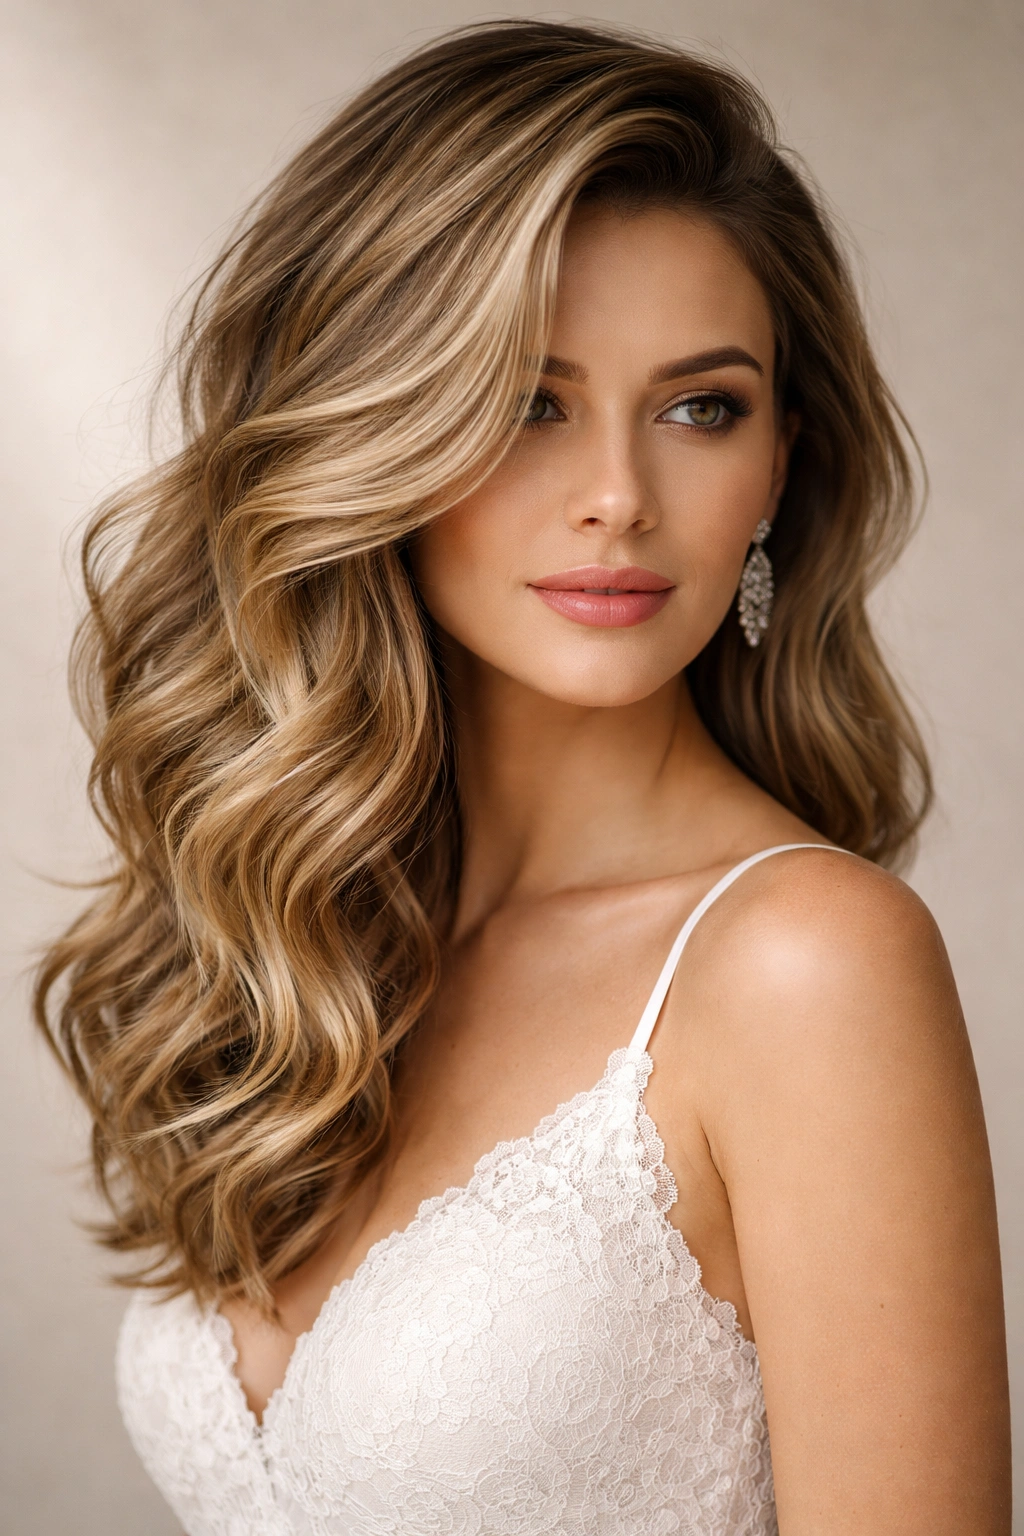
A deep side part transforms simple waves into something with visual drama and intentionality. By sweeping hair dramatically to one side and creating waves with varying texture (some tighter, some looser), you create a look with dimension and movement that photographs exceptionally well from the front and side angles. This style works across multiple wedding aesthetics: it’s structured enough for formal affairs, textured enough to feel modern, and romantic enough for any bride.
What Makes This Special for Weddings
The deep side part creates an elongated line that flatters most face shapes, and the asymmetry is visually interesting in photographs. Because the hair is swept to one side rather than centered, it shows off neck, shoulders, and collarbone—especially important if you’re wearing a dress with a beautiful neckline. The varied texture prevents the look from feeling flat or one-dimensional.
Styling Steps
- Apply texturizing spray to damp hair for grip and natural texture
- Blow-dry with your fingers or a round brush to create a tousled base with volume at the roots
- Create a deep side part (starting at least an inch away from your natural part line for drama)
- Using a 1.25-inch curling iron, curl medium-sized sections in alternating directions (away from face on one side, toward on the other)
- Let curls cool, then gently separate and tousle with your fingers to create varied, lived-in texture
- Use a smoothing serum on the ends to add shine and prevent frizz
- Lock everything with a flexible-hold hairspray that won’t make hair feel stiff
Real talk: This look requires some styling skill or a trusted stylist who understands texture and movement. If you’re doing this yourself, practice at least once before the wedding day.
5. Waves with a Braided Crown Detail
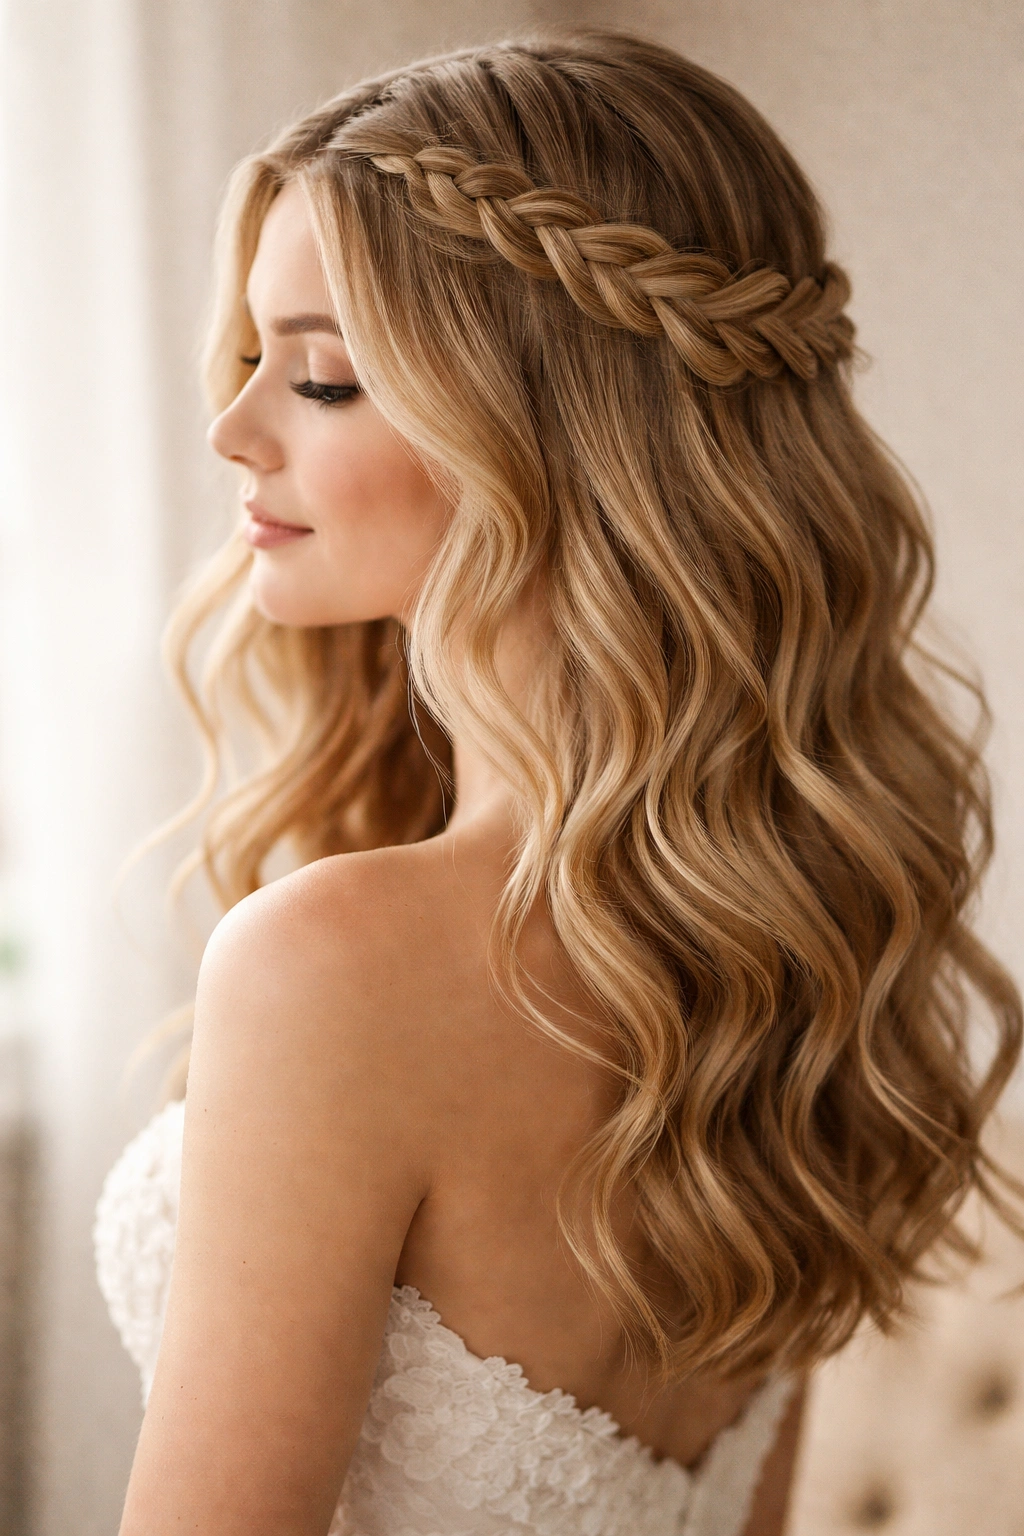
For a bride wanting waves with just a touch of intentional detail, a braided crown transforms medium wavy hair into something wedding-specific and romantic. The braid doesn’t have to be tight or complex—a loose, undone Dutch or French braid that wraps around the back of the head or one side, woven through the waves, adds texture and elegance while keeping the focus on the waves themselves. This style bridges the gap between “just waves” and “elaborate updo”—it feels bridal without being costume-like.
Why This Works
The braid adds a custom, made-for-the-occasion element that makes the style feel special without compromising the beauty of the waves. It also functions practically: if you need to secure some hair away from your face or neck during a ceremony, the braid does that beautifully. It photographs like a dream because it’s visually interesting from every angle—close-ups show the intricate braid detail, while full-length shots showcase the waves flowing beneath.
How to Execute This Style
- Start with soft waves created throughout the hair (using the method described in the soft romantic waves section)
- Once waves are set and cooled, start a loose braid at one temple, French braiding back toward the nape of your neck
- Gently pull the braid slightly looser as you go to create an undone, romantic quality
- Braid only about three-quarters of the way back, then secure the end loosely with a small elastic or bobby pin
- Leave the remaining wavy hair unbraided to flow and wave naturally down the back
- Tuck baby hairs and flyaways into the braid loosely for softness, not perfection
- Finish with light hairspray applied specifically to the braid area to prevent slipping without making waves stiff
Pro tip: This style is easier to execute on second-day hair or hair with dry shampoo applied—fresh, freshly washed hair is slippery and harder to braid.
6. Waves with a Pearl or Hair Comb Accent
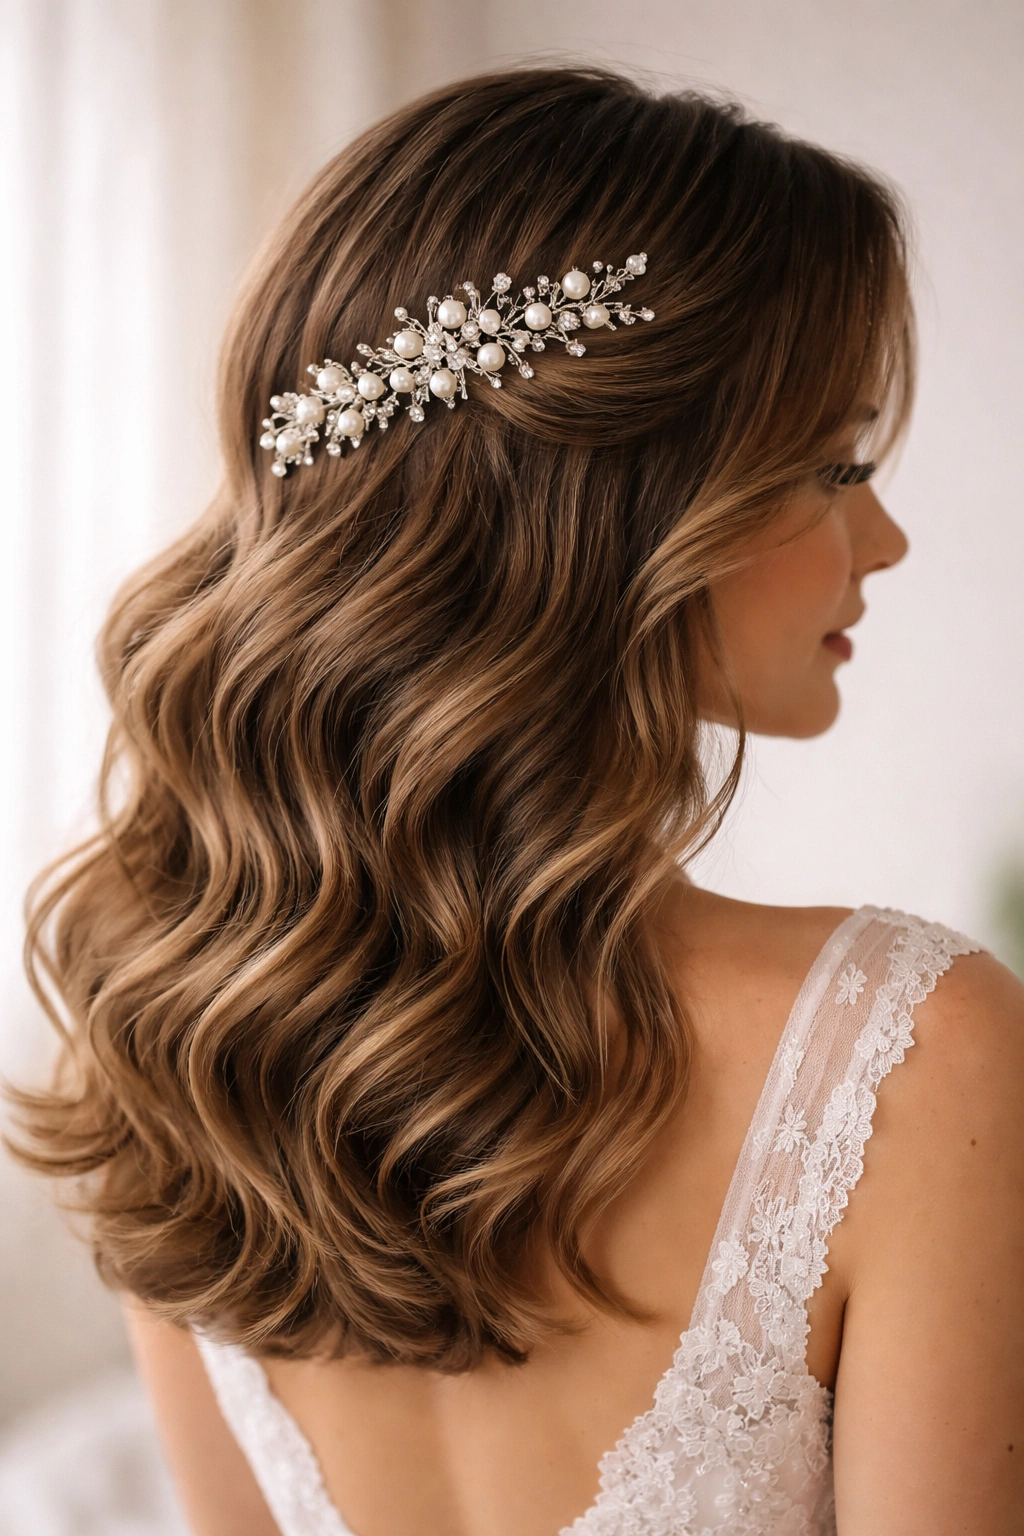
Sometimes the simplest accessory is the most elegant. Medium wavy hair looks absolutely stunning adorned with a pearl hair comb, a delicate vintage comb, or a modern geometric clip positioned at the side, back, or crown. The accessory adds a custom, bride-approved element without requiring complex styling—just perfect waves and the right accessory in the right place. This approach works for brides with limited styling time or skill, since the focus shifts to the accessory rather than the intricacy of the waves themselves.
Why Minimal Styling + Maximum Accessory Works
An intentional, beautiful accessory can elevate simple waves into something bride-worthy. The accessory draws the eye and creates a focal point that feels intentional, and it photographs beautifully in both detail and full-length shots. This is also the perfect approach if you’re not confident in your wave-styling abilities—a perfectly positioned accessory on beautiful (even simple) waves reads as intentional and polished.
Creating This Look
- Style medium-length waves using your preferred method (Old Hollywood, soft romantic, or textured—all work)
- Let waves cool and set completely before adding any accessories
- Choose an accessory that coordinates with your dress and overall wedding aesthetic (pearls for classic, modern metals for contemporary, vintage for romantic)
- Position the comb or clip slightly off-center (not dead center on the crown, which can look costume-like) or at the base of one side
- Pin it securely with bobby pins that match your hair color
- Ensure it’s tight enough to stay through ceremony and dancing, but not so tight that it’s uncomfortable
- Style one or two loose waves to drape over the accessory slightly for softness
Worth knowing: The placement and style of your accessory should complement your dress neckline and your overall wedding aesthetic. If your dress is heavily embellished, a simpler comb works better. If your dress is minimal, a statement comb or vintage piece shines.
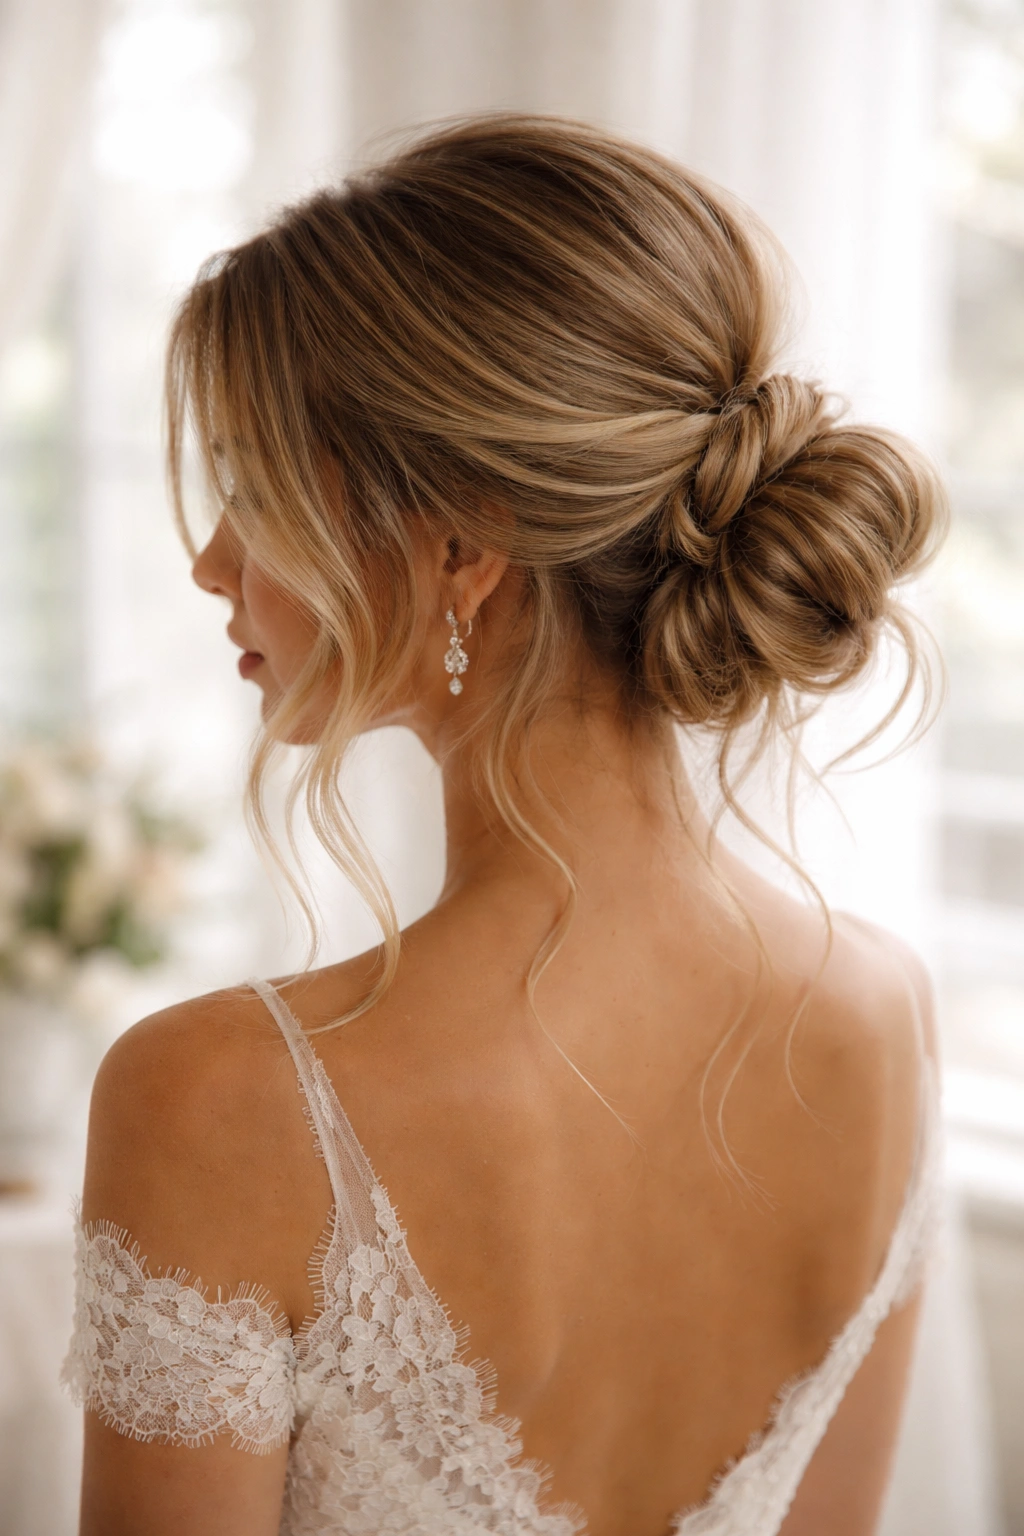
7. Waves with an Elegant Low Bun Base
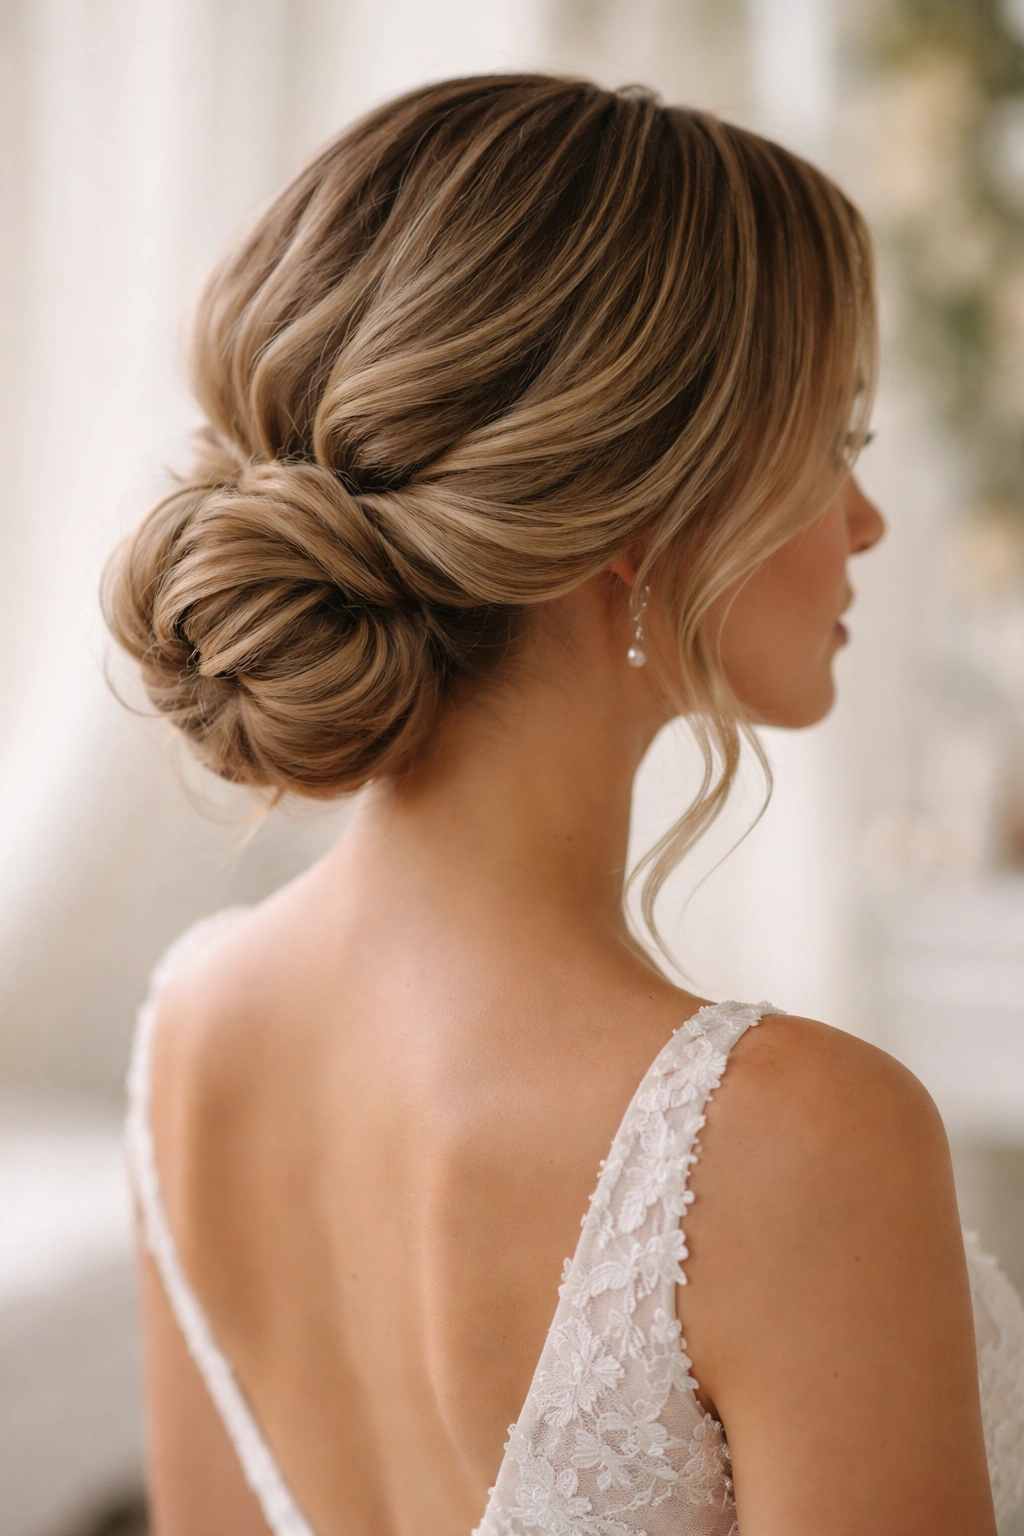
For a bride who wants the movement and beauty of waves but also wants the security and formality of a partially upswept style, a low bun base with waves falling loosely around it offers the perfect compromise. The bun sits low at the nape of the neck—almost a chignon—and waves are released from the bun and styled to fall around the sides and back. It’s polished, romantic, and entirely wedding-appropriate while keeping hair secure and off the neck.
Why This is Perfect for Formal Weddings
This style says “bride” without being overdone. It shows you’ve put thought and effort into your hair, it keeps everything off your face and neck for ceremony comfort, and the waves falling around the bun create a romantic, dimensional look that photographs beautifully. It’s especially stunning with ornamental pins, a delicate hairpiece, or fresh flowers woven through the bun.
Steps to Achieve This Style
- Create soft waves throughout your hair using a curling iron and texturizing spray (follow the soft waves method)
- Once waves are completely set and cooled, gather the hair into a low ponytail at the nape of your neck
- Twist or braid the ponytail loosely, then coil it into a low, loose bun shape and secure with bobby pins
- Release several sections of waves from the bun—don’t leave it perfectly enclosed, but let waves flow around and below it
- Adjust the waves to frame your face and fall elegantly around the bun
- Add a decorative element if desired: pins, a comb, flowers, or pearls threaded through the bun
- Secure everything with flexible-hold hairspray that allows the waves to move naturally
Insider note: The key to making this look romantic rather than severe is keeping the bun slightly loose and textured rather than sleek and tight, and making sure waves flow freely rather than being pinned down.
8. Beachy Waves for an Outdoor Wedding
For outdoor or destination weddings, beachy waves offer a relaxed, effortless elegance that feels perfect for a garden ceremony or seaside celebration. These waves are loose, textured, and intentionally undone—achieved with salt spray, minimal product, and a tousled styling approach. The style says “I woke up like this” even though you’ve actually spent time creating these waves, and it photographs beautifully in natural sunlight with a soft, glowing quality.
Why Beachy Waves Suit Destination Weddings
The looseness and texture of beachy waves don’t require constant maintenance and touch-ups—they actually improve as the day goes on. Unlike structured waves that need refreshing, beachy waves develop more personality and texture as you move around, dance, and the natural humidity and breeze add to the effect. They pair beautifully with simpler dress styles, bare shoulders or delicate straps, and minimal jewelry.
Creating Effortless Beachy Waves
- Apply a sea salt spray or texturizing spray generously to damp hair
- Use a medium round brush or your fingers to blow-dry, scrunching and tousling rather than smoothing
- Once mostly dry, use a 1.5-inch curling iron or wand to create loose waves, curling larger sections than you would for other styles
- Curl away from the face and don’t worry about consistency—varied texture is the point
- Let curls cool, then run your fingers through repeatedly to break up the waves and create a soft, tousled effect
- Add a light texturizing spray or sea salt spray once more for grip and texture
- Avoid heavy hairspray; instead use a light finishing mist that maintains the undone quality
Real talk: Beachy waves are easier to style on hair with natural texture or slight wave. If your hair is very straight, you’ll need to work a bit harder to create the effect, and it may not last as long throughout the day.
9. Waves with a Half-Up Twist Detail
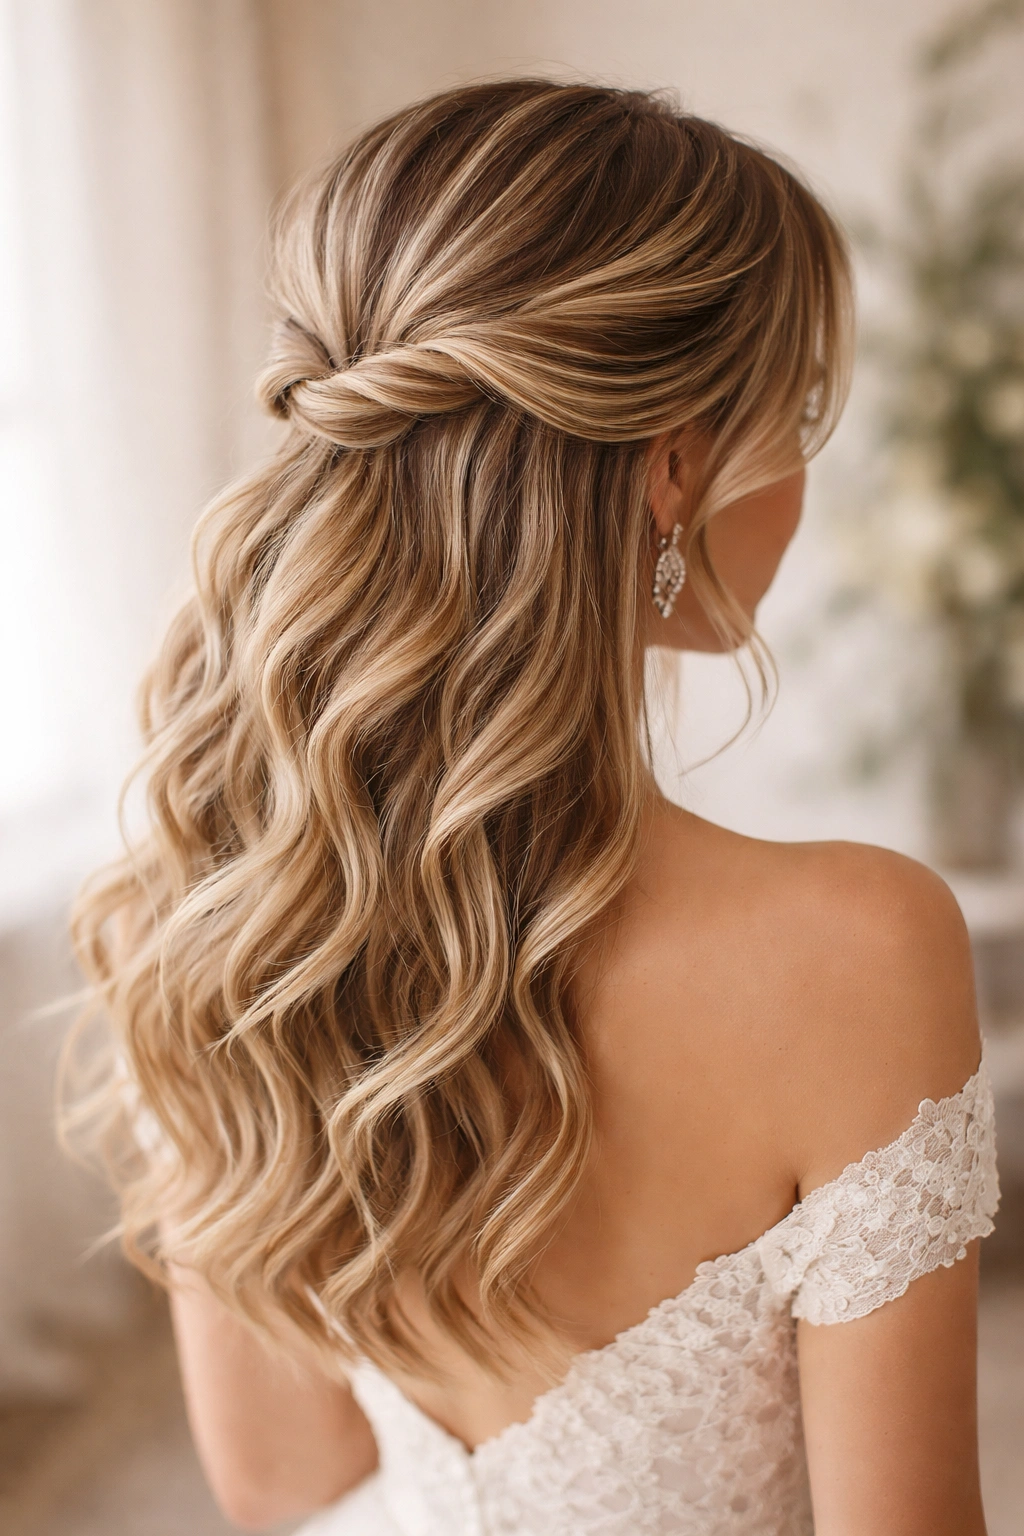
A half-up style with a twisted or wrapped detail (rather than a traditional half-up pinned section) creates visual interest without the formality of a full updo. This involves taking a section of hair from one side, twisting or wrapping it loosely, and pinning it at the back of the head, leaving the bottom half of the hair in waves. The twist adds an intentional detail that says “styled for the occasion” while the loose waves below maintain movement and romance.
Why This Hybrid Approach Works
It keeps hair partially secure without fully confining it, adds a custom detail that elevates simple waves, and creates a modern take on the traditional half-up style. The asymmetry created by wrapping one section is flattering and visually interesting in photographs. It’s also practical for ceremony (some hair secured) without sacrificing the beauty of waves (the majority of hair loose).
How to Style It
- Create soft, textured waves throughout using your preferred curling technique
- Once waves are set, take a 2-3 inch section from one temple area
- Twist this section loosely as you move toward the back of the head, incorporating small sections of surrounding hair as you go
- Bring the twisted section to the back-center of your head and secure with bobby pins, tucking the end around itself slightly
- Leave flyaways and shorter pieces loose around your face and neck for softness
- Gently pull the twisted section to make it slightly looser and less defined (tighter twists look less romantic)
- Use light hairspray to set the twist while keeping waves soft and moveable
Pro tip: This style works beautifully with a delicate hairpiece, comb, or fresh flowers positioned at the twist point for added elegance.
10. Waves with Shadowed Roots for Dimension
For medium-length hair, creating the illusion of deeper texture and dimension through shadowed roots (slightly darker roots with lighter lengths) combined with waves creates a look that’s incredibly dimensional and modern. This isn’t about actually dyeing your hair darker—it’s about using contouring with makeup or temporary hair shadow products to create the appearance of dimension. Paired with waves, this creates a sophisticated, editorial look that photographs beautifully and feels luxuriously styled.
What Makes This Modern and Wedding-Appropriate
The shadowed root technique has moved from fashion editorials into mainstream bridal styling because it works. It creates the illusion of depth and volume (important for thinner or finer hair), it photographs like a dream in all lighting conditions, and it adds a modern, intentional quality to waves. This is the look of someone who’s worked with a professional stylist and has their aesthetic dialed in.
Creating Shadowed Roots with Waves
- If using temporary hair shadow products, apply to roots and blend thoroughly before styling (follow product instructions)
- Create your preferred wave style—Old Hollywood, soft romantic, or textured all work beautifully
- The contrast between shadowed roots and wavier lengths amplifies the dimension, so don’t be afraid to really lean into the wave definition
- Once waves are set, the darker roots will create the illusion of thicker, fuller hair with more defined waves
- Style the waves with a light finishing spray that adds shine without flattening the root shadow effect
- Avoid heavy product on the roots that might muddy the shadow effect—keep it clean and defined
Worth knowing: This technique is best executed by a professional stylist, as blending the root shadow for a natural (rather than artificial-looking) effect takes skill. If you’re not experienced with this, it’s worth booking with a stylist who specializes in this technique.
11. Waves Styled Back with a Low, Loose Topknot
For a bride wanting waves with the security of an updo but without the formality of a traditional bun, a low, loose topknot styled from wavy hair offers the best of both worlds. All the hair is pulled up and secured in a relaxed knot at the lower crown, but the knot is textured and undone (not sleek), and small pieces and waves are pulled out and styled to frame the face and neck. It’s playful, romantic, and entirely wedding-appropriate.
Why This Works for Modern Brides
It feels fresh and modern rather than traditional, it’s practical (hair is fully secured), but it’s still romantic and beautiful. The loose, textured quality of the knot prevents it from looking severe or matronly—instead, it reads as intentionally relaxed and effortless. It pairs beautifully with modern minimalist dresses and also works with romantic ball gowns.
Steps to Create This Look
- Create soft, textured waves throughout your entire head using a curling iron and texturizing spray
- Once waves are completely cool and set, gather all the hair into a low ponytail at the base of your skull, slightly off-center
- Twist or braid the ponytail loosely, then coil it into a relaxed knot and secure with bobby pins
- Deliberately pull out several pieces around the knot to create an undone quality—these pieces should have visible waves
- Gently tease or backcomb the knot itself slightly so it looks textured rather than slick
- Pull out a few soft pieces at the sides and front to frame your face with gentle waves
- Use light hairspray rather than strong-hold to keep the relaxed, undone aesthetic
- Ensure the knot is secure enough to survive ceremony and reception activities
Insider note: The difference between a chic undone topknot and a messy topknot is intentionality—plan in advance which pieces you’ll pull out, and style them with purpose rather than randomly pulling hair out.
Final Thoughts
The right wavy hairstyle for your wedding isn’t about following trends or choosing what looks best on someone else—it’s about selecting a style that makes you feel genuinely beautiful and confident on your day, that complements your dress and venue, and that works practically with your hair type and skill level. Whether you choose the timeless glamour of Old Hollywood waves, the romantic softness of face-framing pieces, or the modern relaxation of beachy texture, the foundation is the same: healthy, well-moisturized hair, proper styling technique, and the right products for your hair type.
Book a trial run with your stylist well before the wedding if you’re having your hair professionally done—this allows time for adjustments and gives you confidence knowing exactly what to expect. If you’re styling yourself, practice your chosen style multiple times leading up to the wedding, and don’t hesitate to film yourself from different angles so you can see how it will look in photographs. The goal is to feel like an elevated, polished version of yourself, not like you’re wearing someone else’s idea of how a bride should look.
Medium-length waves offer remarkable versatility because they’re long enough to feel bridal and romantic, but short enough to photograph clearly and move beautifully throughout the day. You genuinely can’t go wrong—the key is selecting the version of waves that speaks to your personal style and makes you feel like yourself, just elevated and celebration-ready.