Straight hair has a reputation for being slippery and difficult to style—bobby pins slide out, updos slip down, and by midday you’re left with a wilted ponytail hanging at an awkward angle. But here’s the truth most stylists don’t say out loud: straight hair doesn’t require complicated updos or sticky products to hold. It actually responds beautifully to simple, well-executed styles that work with your hair’s texture rather than against it. The secret is understanding grip points, using the right technique, and choosing styles that leverage straight hair’s natural sleekness as a feature instead of treating it like a weakness.
The updos that hold best on straight hair share a few things in common. They rely on tension created during the styling process itself—the way you twist, fold, or braid the hair creates structure that keeps everything locked in place. They use strategic bobby pin placement rather than drowning your head in products. They work with your hair’s weight and movement, not against it. And many of them actually benefit from straight hair’s smooth texture, creating clean lines and polished finishes that wavy or curly hair can’t quite match.
Whether you’re getting ready for a long day at work, a formal event, or just want your hair off your face without the constant maintenance, these ten updos are designed specifically for straight hair that needs to stay put. Each one has been chosen because it solves the real challenges straight-haired people face: grip, longevity, and that frustrating tendency for pins and elastics to slide loose as the day goes on.
1. Low Twisted Ponytail
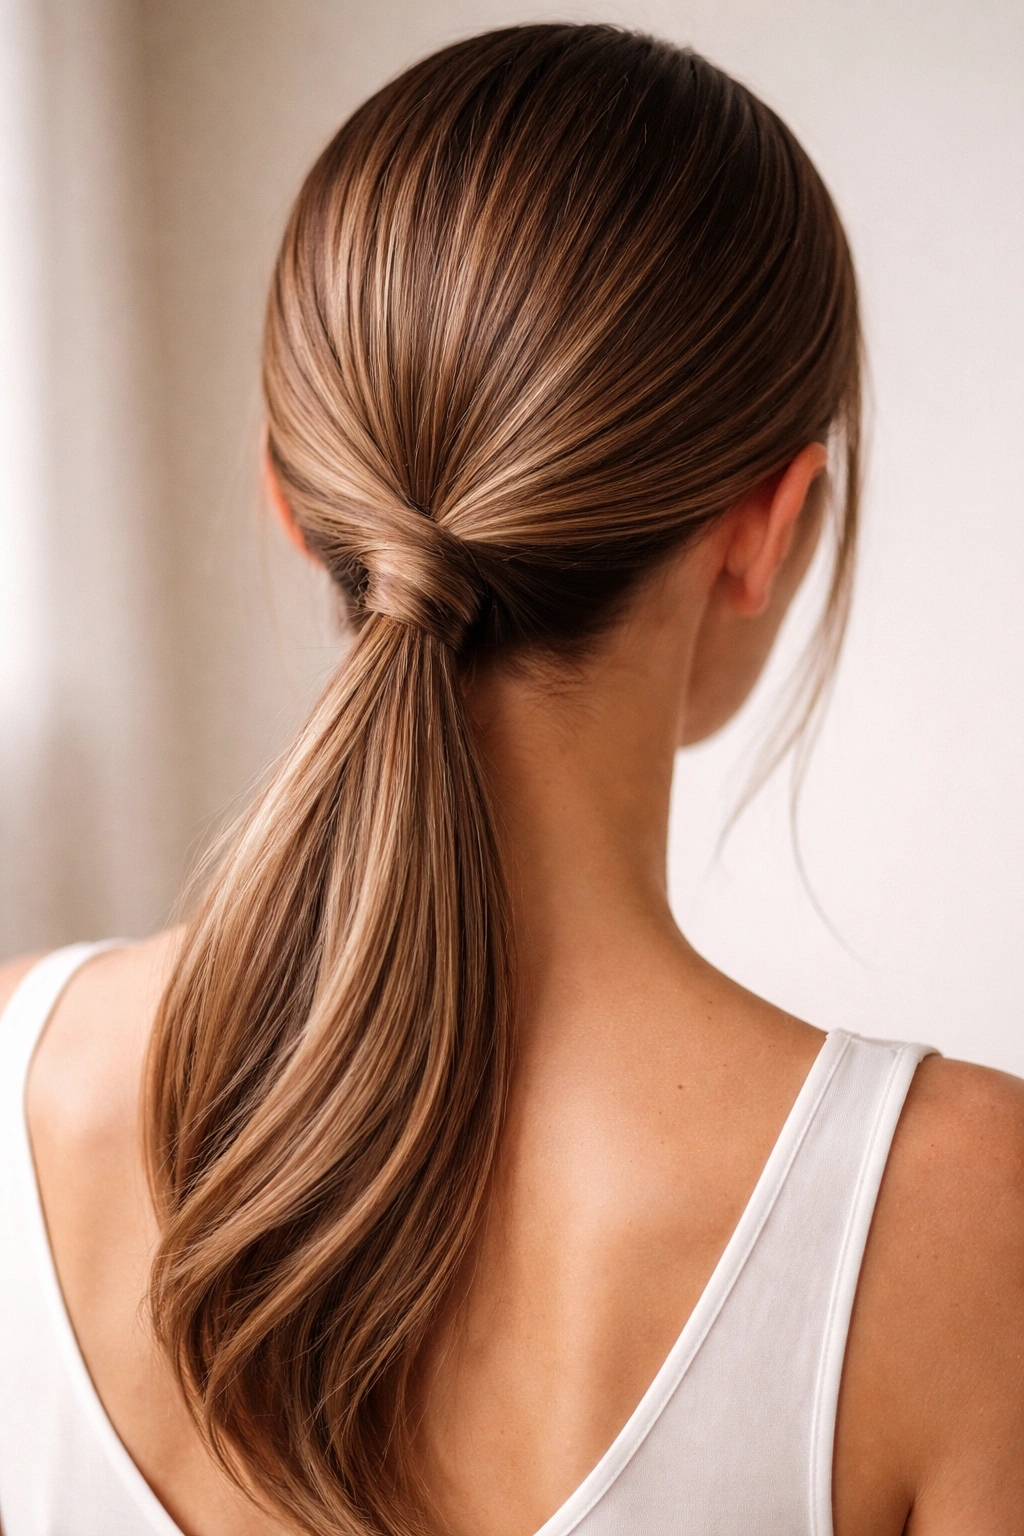
The low twisted ponytail feels almost deceptively simple, but it’s one of the most reliable updos for straight hair because it creates its own grip mechanism. Instead of a standard ponytail where hair can rotate and loosen, the twist creates friction between the strands—this friction is what keeps everything in place even as you move throughout the day.
Why It’s Perfect for Straight Hair
The low twisted ponytail works exceptionally well on straight hair because straight strands slide smoothly against each other when twisted, creating a tight, compact base that resists loosening. Unlike wavy or curly hair, which has texture that naturally grabs and holds, straight hair needs that mechanical tension the twist provides. The lower placement also distributes weight evenly, preventing that top-heavy feeling that makes updos slip on straight hair. Once secured with a good elastic, this style can easily last 8-10 hours without adjustment.
How to Execute It Perfectly
Start with clean, dry or slightly damp straight hair—dampness helps create better grip. Run your fingers through your hair to ensure there are no tangles, as tangles will actually make the twist tighter and less smooth. Flip your head forward and gather all your hair at the nape of your neck, creating a low ponytail about 2 inches below where your ears would be. Instead of smoothing this ponytail immediately, take the entire tail and twist it tightly—one full, deliberate twist going clockwise—then wrap that twisted section around itself to form a knot shape. Secure tightly with a matte elastic (shiny elastics slip more easily on straight hair). Anchor with a bobby pin inserted horizontally through the twisted base.
Pro tip: Use a matte elastic or one with a rubber grip rather than a slippery silk one—the extra friction makes all the difference.
2. Sleek High Bun
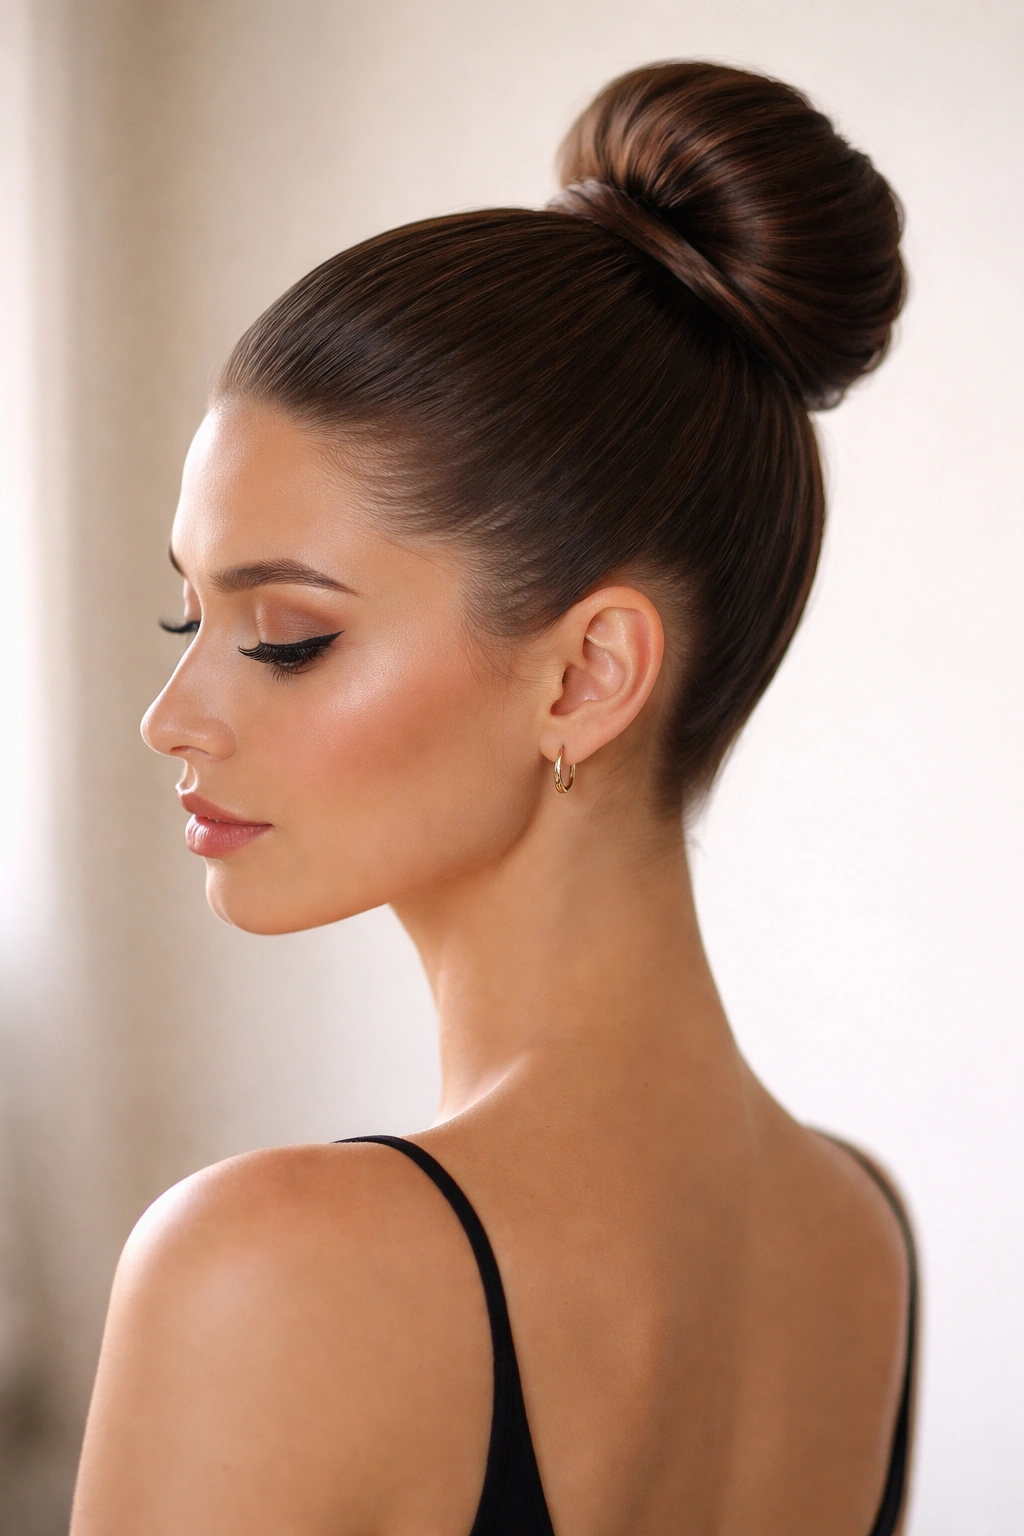
A sleek high bun is the polished, professional choice that works beautifully on straight hair precisely because you can achieve that glass-smooth finish that straight texture excels at. On straight hair, this style doesn’t require dry shampoo or texture spray to hide messiness—it’s supposed to be sleek and clean.
What Makes It Hold on Straight Hair
High buns can be tricky because they’re elevated and constantly fighting gravity, but straight hair’s weight distribution actually works in your favor here. The key is starting with enough tension at the crown to support the bun’s weight. Straight hair, when pulled tightly, creates a strong foundation because every strand is engaged in that pull—there’s no wave or curl creating weak points. The sleekness also means hair won’t separate into clumps that slide independently; it moves as one unit, which is far more stable.
Step-by-Step Technique
Begin by creating a high ponytail at the crown of your head—gather hair that starts about 2-3 inches from your hairline and pull straight up and back. This high placement is crucial: it keeps the weight centered over your head rather than pulling your whole updos backward. Secure the ponytail with a strong elastic. Now take the tail and create a simple knot—fold it in half, then loop the fold through the base to create a knot shape. Twist any remaining tail around the outside of this knot and pin. Use 3-4 bobby pins, inserting them at different angles (one at 12 o’clock, one at 3 o’clock, one at 9 o’clock) to distribute weight evenly. Smooth any flyaways with a fine-tooth comb and a light spray.
Worth knowing: Straight hair shows every flyaway, so a comb and lightweight hairspray are non-negotiable for this style.
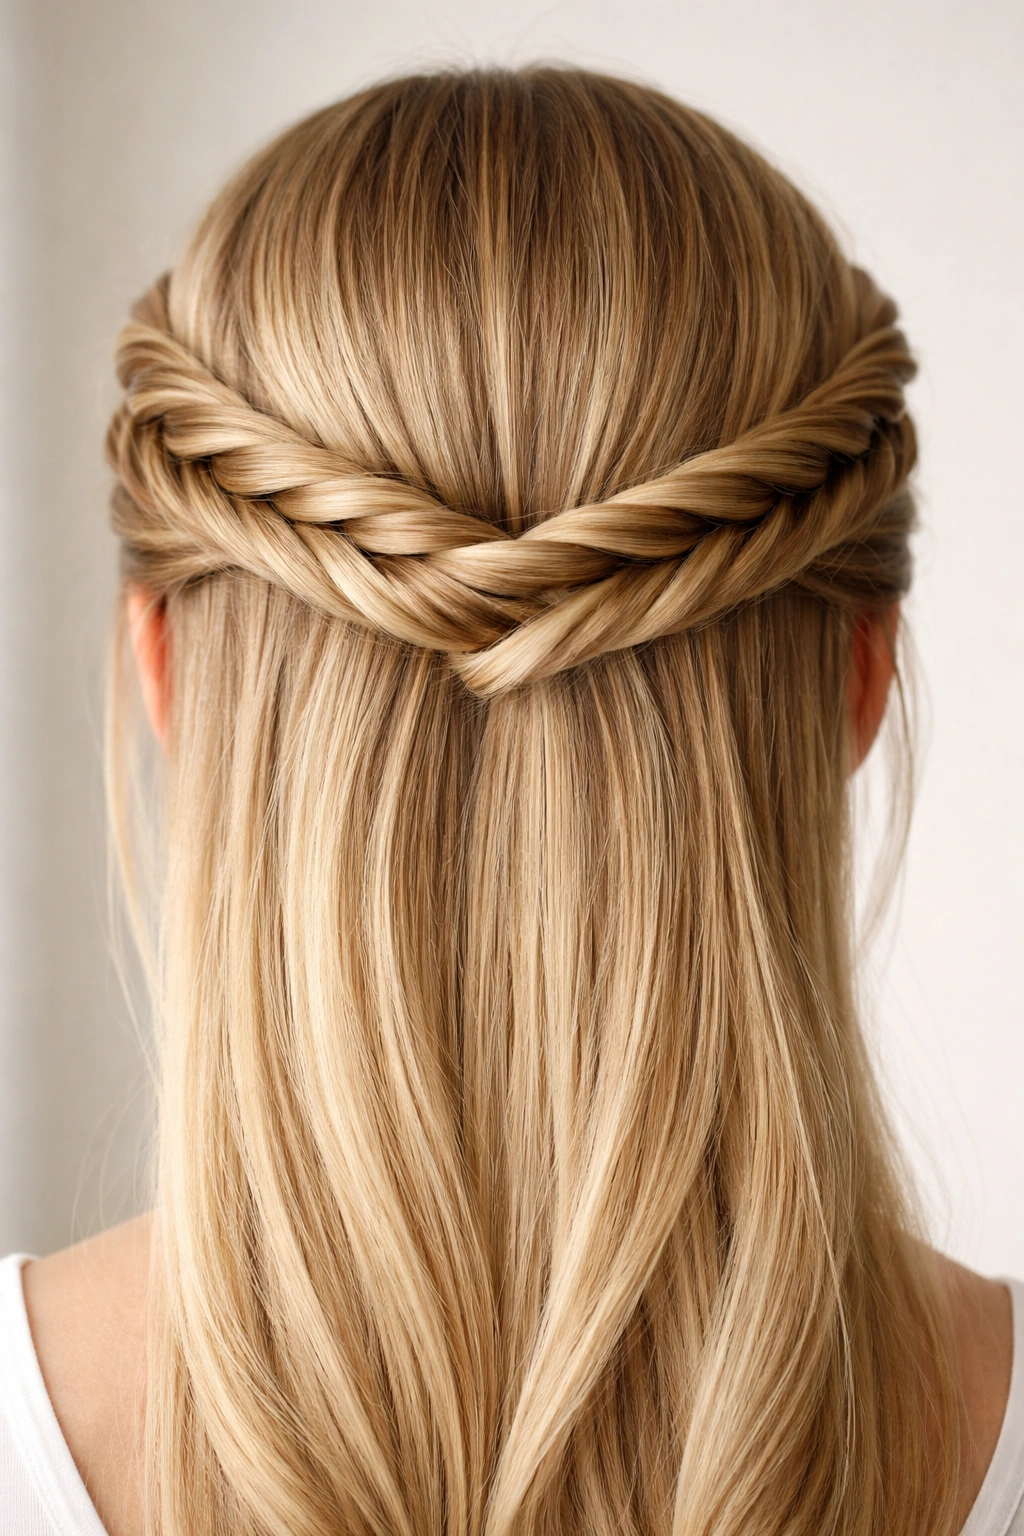
3. Half-Up Knot
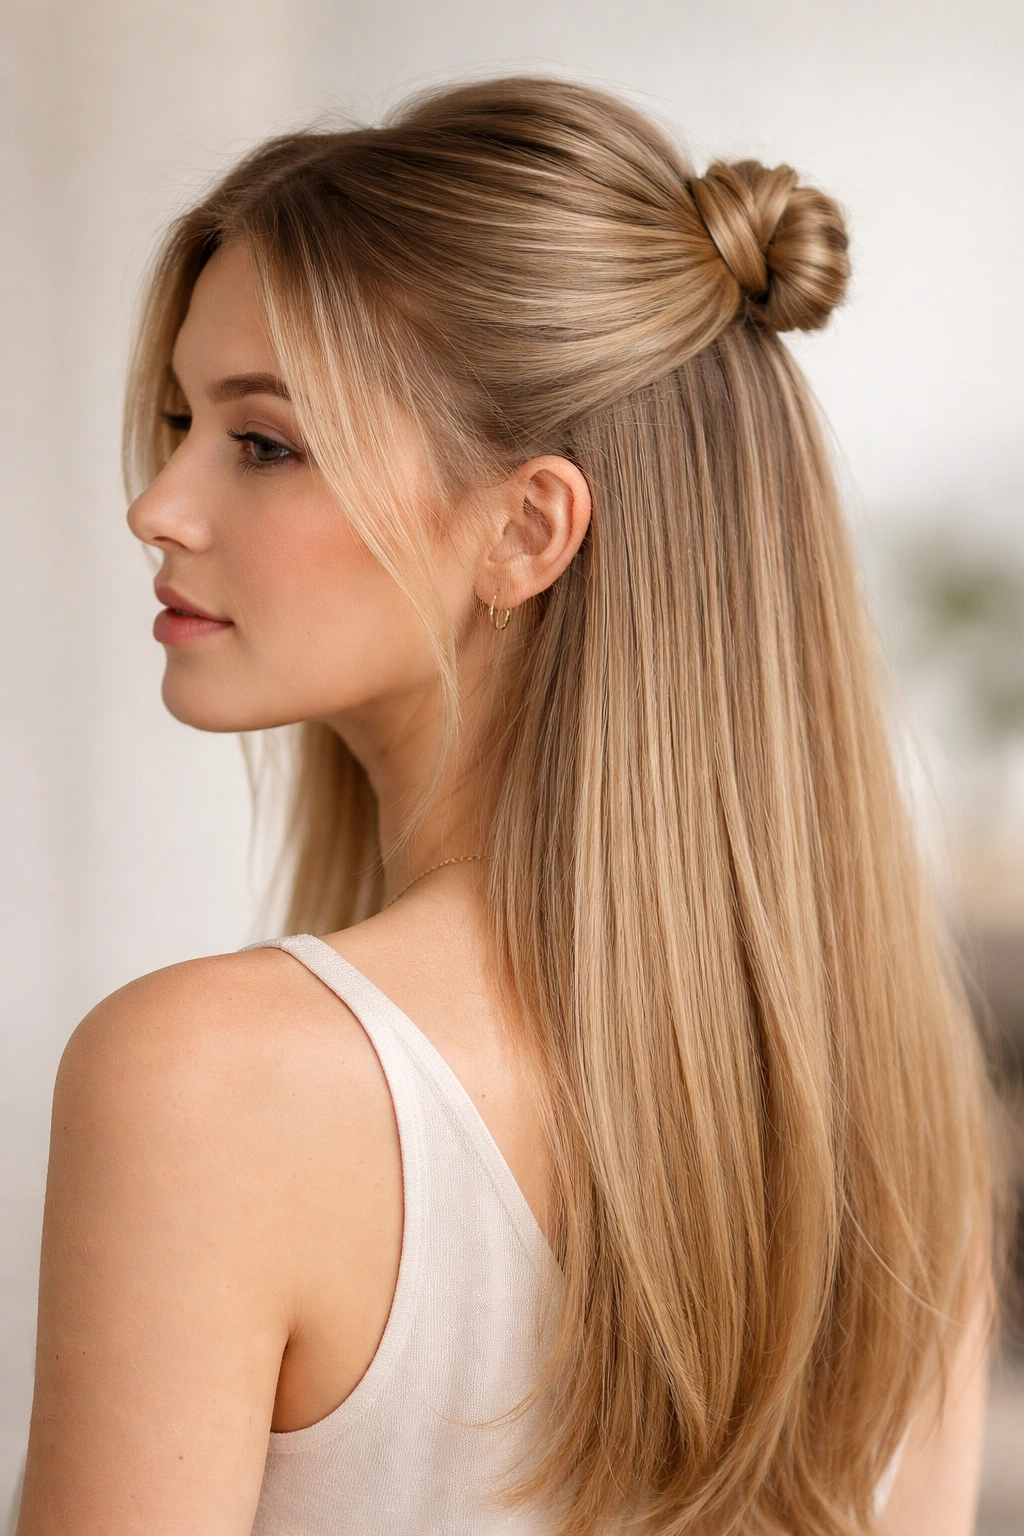
The half-up knot sits perfectly on the border between down and up, which makes it ideal for straight hair because it doesn’t create the tension issues that fully-up styles sometimes do. It’s secure enough to last all day yet casual enough for everyday wear.
Why Straight Hair Loves This Style
Because a half-up knot doesn’t gather all your hair, there’s less total weight pulling on your roots, so the style stays in place longer without causing discomfort or that “my hair is being pulled too tight” feeling. The knot itself creates a self-locking mechanism—when you twist the gathered section and loop it back through itself, the weight of the remaining down hair actually helps hold the knot tighter. On straight hair, this interlocking effect is particularly effective because straight strands grip each other more reliably than textured hair.
Creating the Perfect Half-Up Knot
Start with your hair down and smooth. Create a part at the crown where you’d naturally want the knot to sit—roughly at the top of your head, about 2 inches back from your hairline. Gather roughly the top third of your hair into a ponytail at that point, using a light elastic. Now take that ponytail and twist it slowly and deliberately—you want a tight, defined spiral. Once twisted, fold the twisted section back toward the crown and secure the loop at its base with bobby pins, allowing the ends of the twisted section to fan out naturally or tuck back through the loop. The remaining hair stays down, framing your face.
Insider note: The tension of the twist itself holds the knot, so the tighter your twist, the longer it lasts.
4. Woven Braid Crown
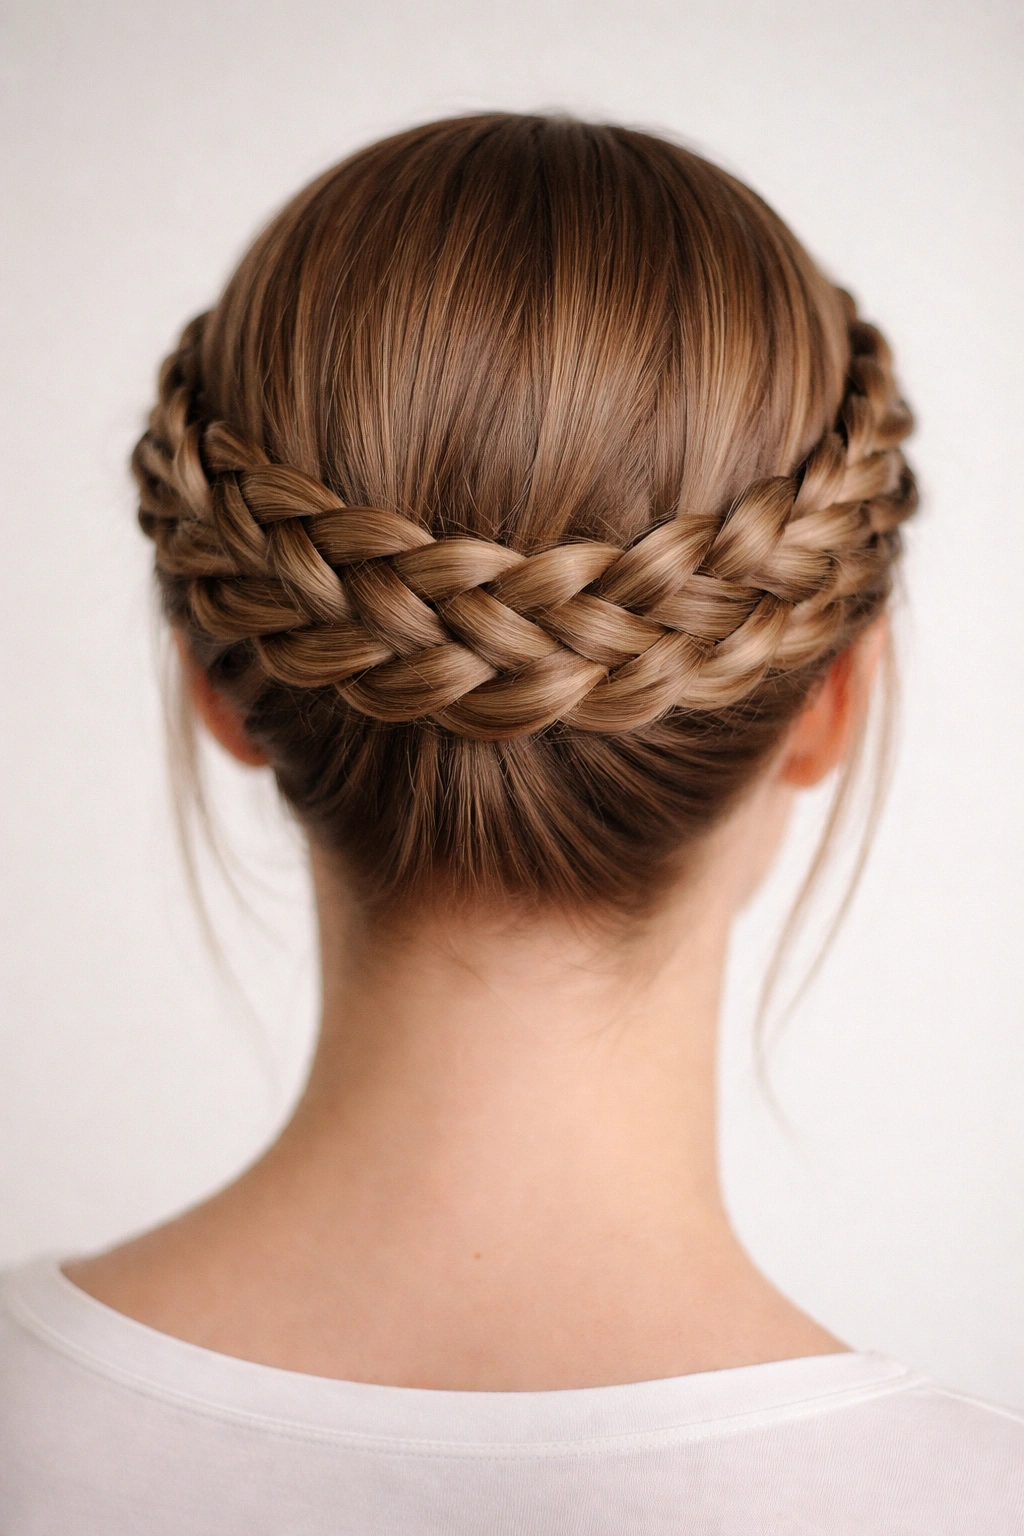
A woven braid crown is the show-stopping updo that looks intricate but actually holds beautifully on straight hair because braids create natural grip along the entire length. This style is ideal when you want something that looks special but won’t betray you halfway through the day.
The Structural Advantage for Straight Hair
Braids grip straight hair exceptionally well because each intersection point in the braid pattern creates a lock. Unlike curly hair, where natural texture might create loose, fluffy braids, straight hair braids are compact and defined, with each layer sitting precisely where you placed it. The braid acts like a web of tension across your head, distributing the weight of your hair evenly. A well-executed braid crown on straight hair can last 12 hours or more without any loosening.
Technique for a Crown Braid on Straight Hair
Start with smooth, detangled straight hair. Begin a three-strand braid at the nape of your neck, working upward and around your head as though you’re creating a halo. For straight hair, use a tight, compact braid—loose braids look softer on textured hair but tend to fall apart on smooth strands. Keep consistent tension throughout, pulling each new section firmly into the braid before adding the next strand. Once you’ve braided all the way around your head back to the starting point, secure the end with a small elastic. Coil the braided section back up toward the crown and pin it in place, creating a crown effect. Use bobby pins to secure the braid to your hair every 2-3 inches along the back.
Key detail: Straight hair braids unravel if the tension isn’t consistent, so practice with even, deliberate movements.
5. Slicked-Back Low Bun
The slicked-back low bun is the ultimate minimalist updo, and it’s particularly stunning on straight hair because you can achieve that ultra-polished, wet-look finish that shows off your hair’s natural smoothness. This style is nearly impossible to mess up once you’ve secured it.
Why It’s Virtually Failproof on Straight Hair
A slicked-back style uses gel or a similar product to create additional grip, which straight hair responds to beautifully. The gel fills the microscopic gaps between smooth strands, essentially gluing them together. The low placement means the bun sits exactly where gravity pulls, so there’s no tension working against you. The compactness of a tight, smooth bun means there’s minimal surface area exposed to friction or movement—it’s just one solid unit that doesn’t shift.
Creating a Slicked-Back Bun That Lasts
Apply a smoothing gel to damp or dry hair, working it through with your fingers, starting at the roots. Use enough product to create visible shine but not so much that your hair looks wet all day. Use a fine-tooth comb to smooth all hair straight back from your face, ensuring every strand is coated in the smoothing product. Gather this smoothed hair into a low ponytail at the nape of your neck—much lower than you might think, roughly 2 inches above your collar. Secure with a strong elastic. Create a simple bun by wrapping the ponytail around the elastic and pinning it flat against the back of your head with 3-4 bobby pins inserted horizontally. Use the comb one more time to smooth any loose hairs, and you’re done.
Pro tip: Gel-based products work better than creams for straight hair because they create actual adhesion, not just moisture.
6. Twisted Side Bun
A twisted side bun is the slightly more forgiving cousin of the center bun—by moving the bun to the side, you reduce some of the tension that can develop from having weight directly at your crown. It’s romantic without being fussy, and it holds exceptionally well on straight hair.
The Physics of Why This Works for Straight Hair
When a bun sits to the side, the weight distributes differently than a center bun would. Some of the weight pulls gently sideways rather than straight down, which actually reduces the total downward tension on your roots. Additionally, the side positioning means the bun itself sits against your shoulder and upper back, which provides natural support. On straight hair, where every strand is independently engaged with its neighbors due to the lack of natural texture, this support becomes particularly effective.
Step-by-Step Side Bun Construction
Start with straight hair and create a deep side part—part your hair so that roughly 80% is on one side and 20% is on the other. Gather all your hair toward the side where the majority of your hair is parted, at about ear level, creating a side ponytail. Secure with an elastic. Twist this ponytail tightly—this twist is your grip mechanism—and then wrap the twisted section around the elastic to form a bun shape. Pin this bun firmly in place using 3 bobby pins inserted at different angles. The remaining 20% of hair from the smaller side can fall forward across your shoulder, creating a face-framing element. This asymmetrical arrangement actually makes the bun feel more secure because the front hair anchors the opposite side.
Worth noting: The twist before the bun is what keeps this style from slipping on straight hair, so don’t skip it.
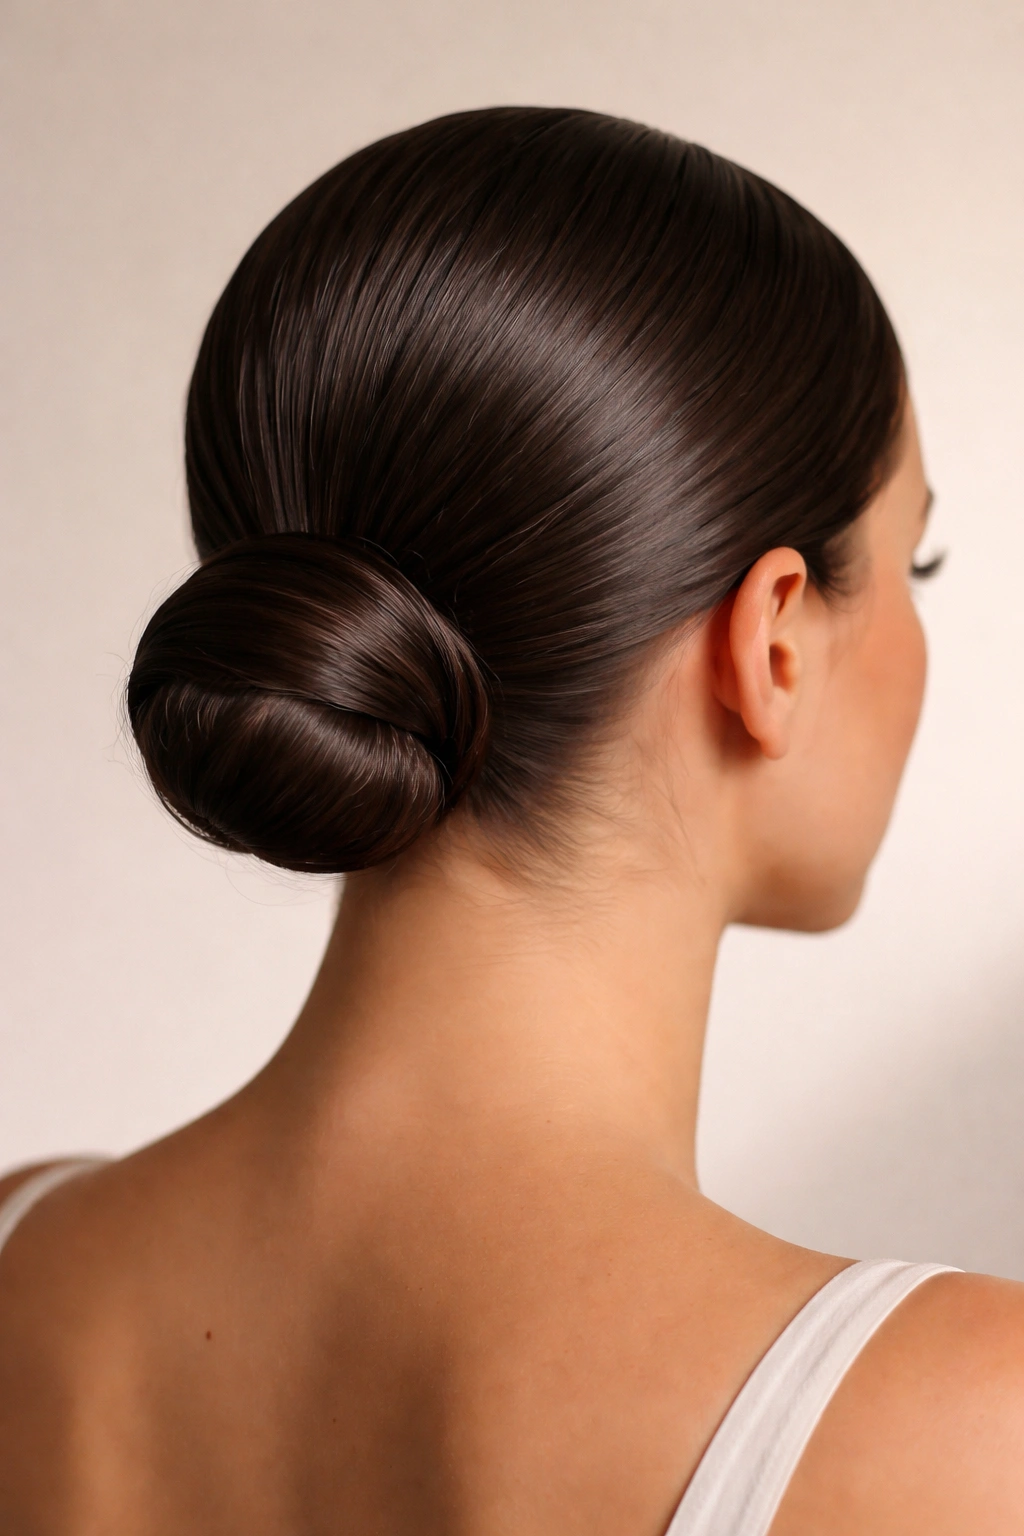
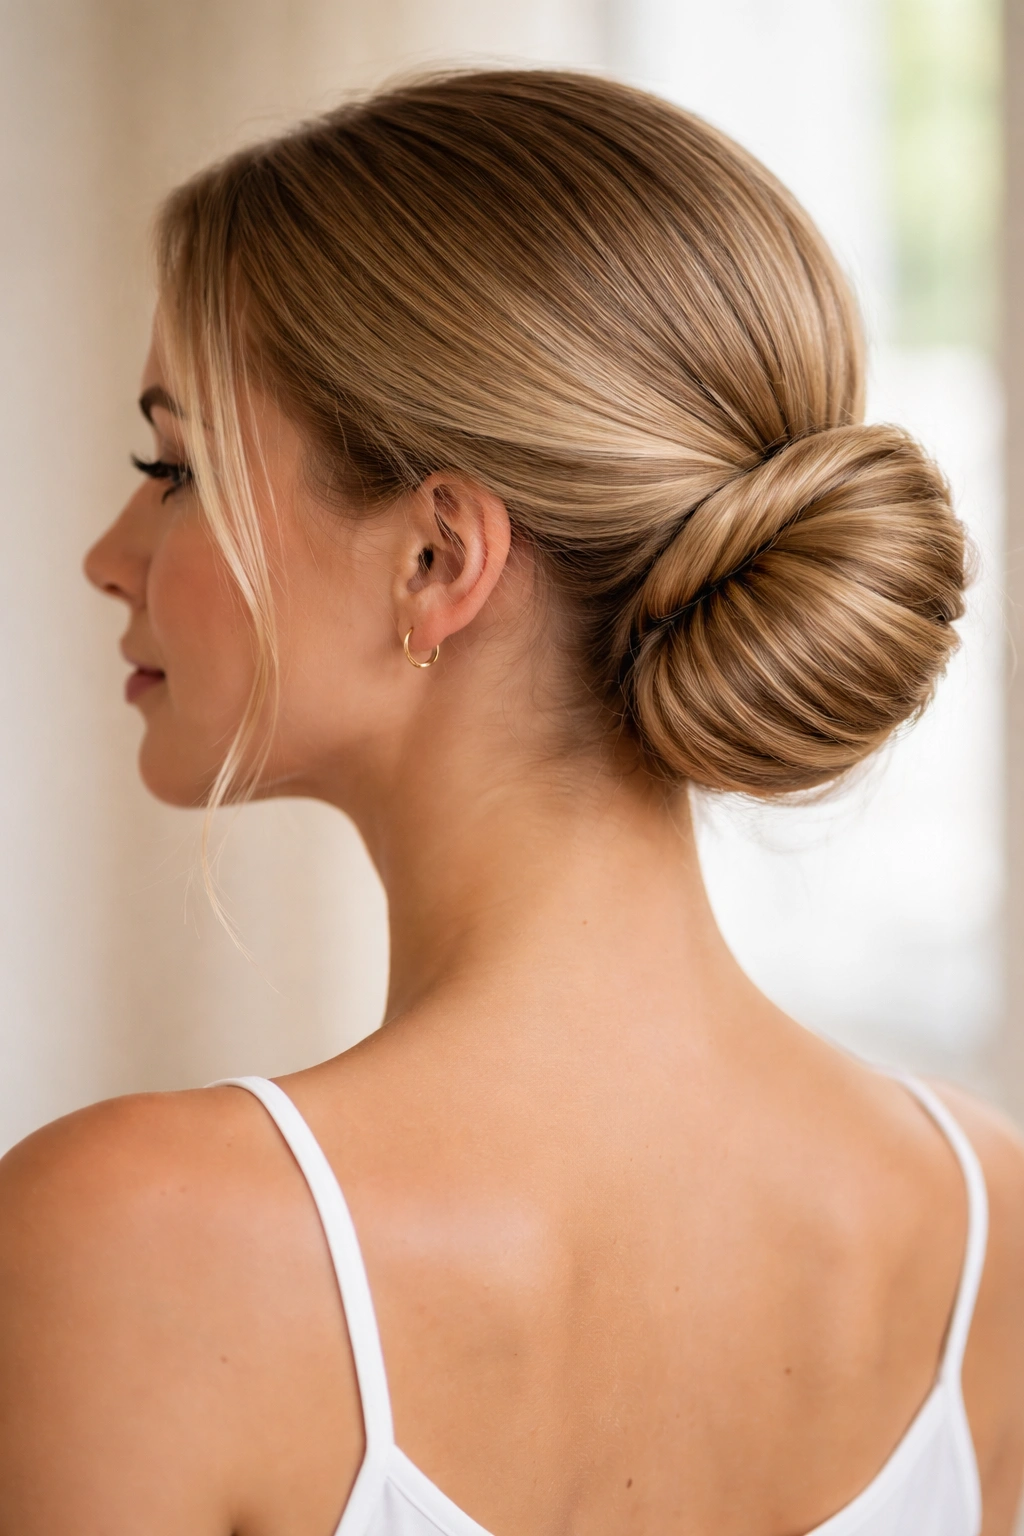
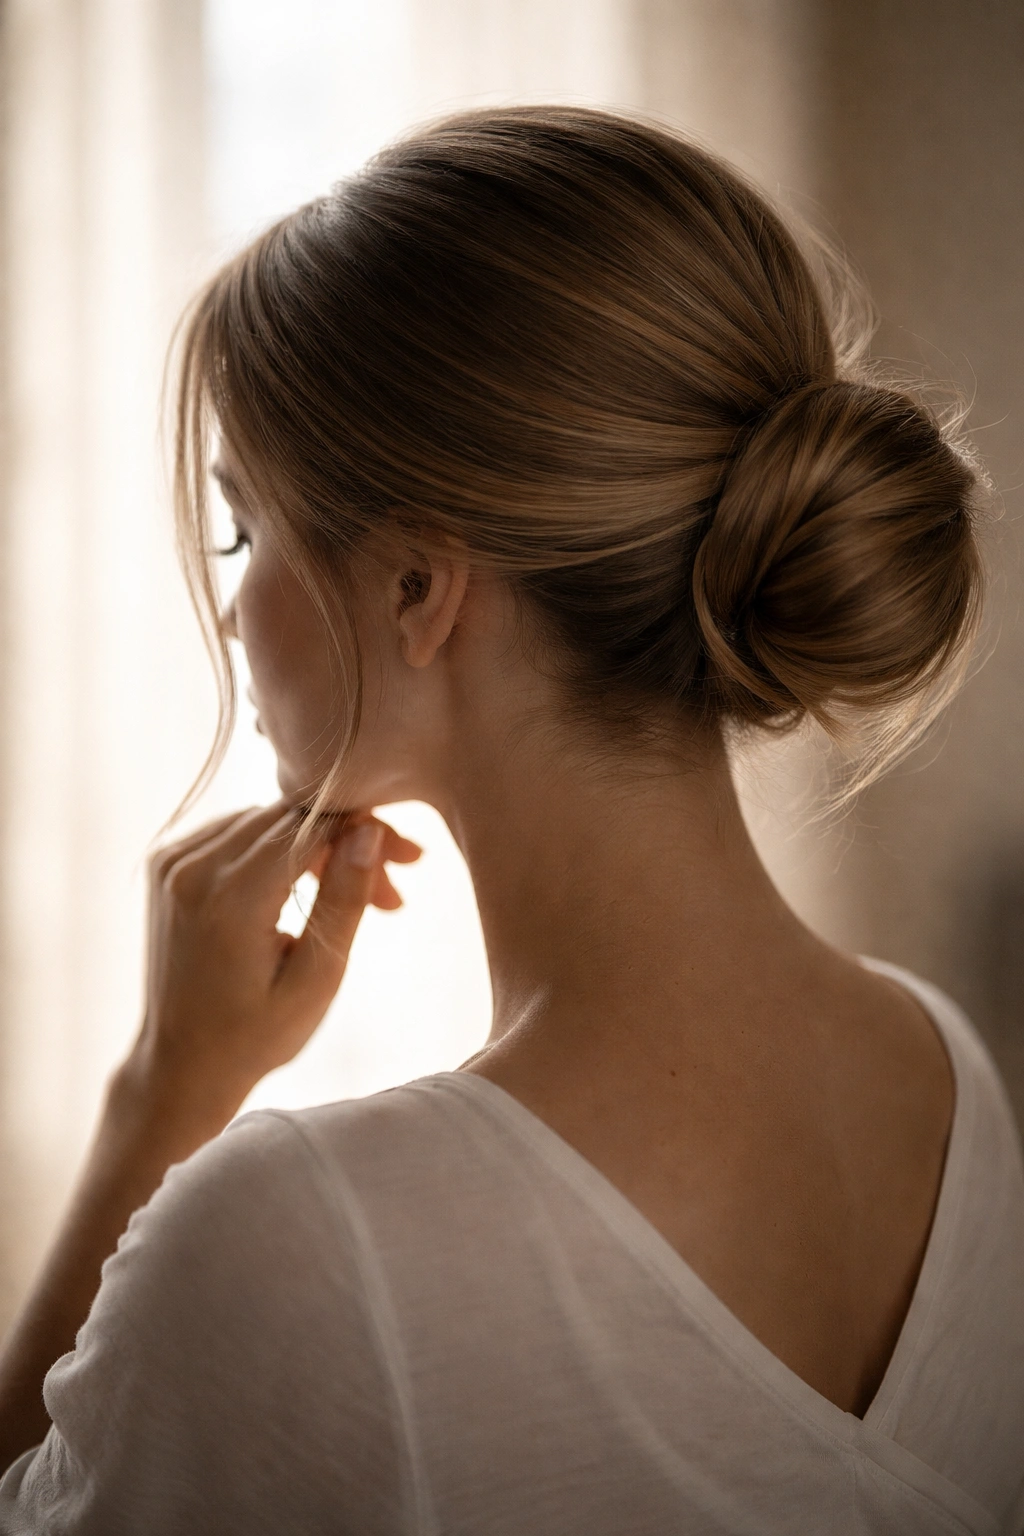
7. Braided Low Chignon
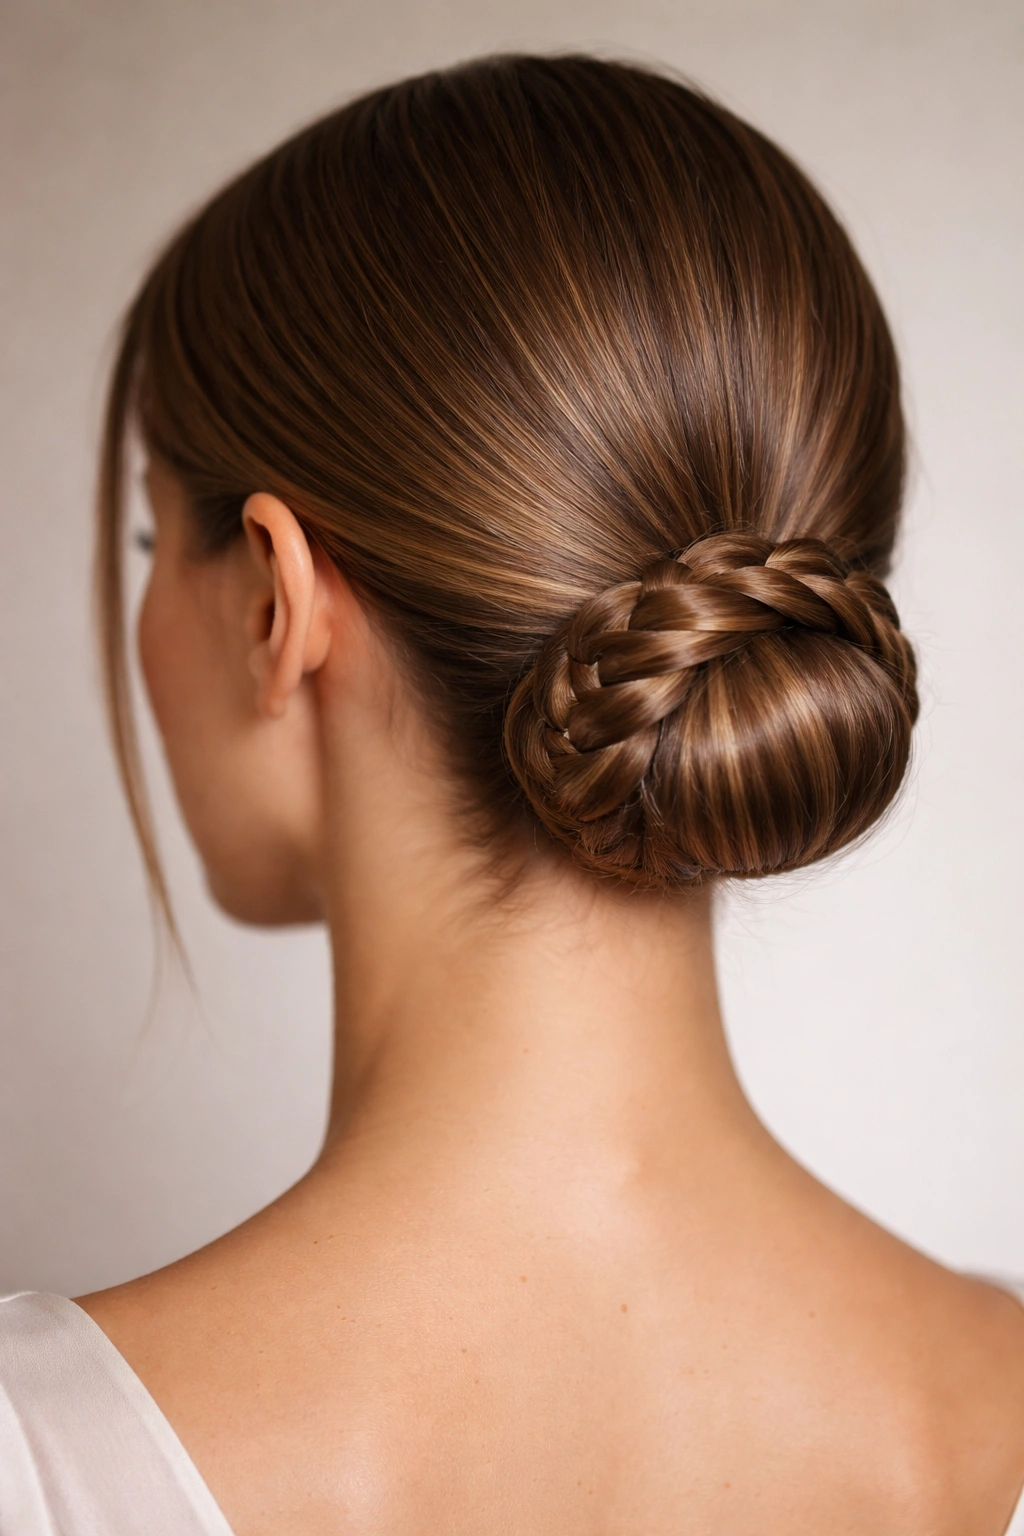
A braided low chignon is the elegant, vintage-inspired updo that feels special enough for events but practical enough for everyday wear. It holds beautifully on straight hair because the braid creates structural support for the entire updo.
Why This Style Is Particularly Effective on Straight Hair
A chignon is essentially a twisted or braided coil of hair, and braids grip straight hair better than almost any other technique because of the interlocking structure. Each section of the braid locks into the next, creating multiple grip points. Straight hair, lacking natural texture, depends on this mechanical grip—and braids deliver it in abundance. Additionally, the low placement means the bun sits low on the back of your head, where the natural curve of your skull provides structural support.
Building Your Braided Chignon
Create a low ponytail at the nape of your neck—lower than you might instinctively go, roughly 3 inches above your collar. Secure it with an elastic. Create a three-strand braid starting from the base of this ponytail, braiding the entire length of the ponytail. Keep the braid tight and compact—loose braids unwind on straight hair. Once you’ve braided to the ends, secure the end temporarily with a tiny elastic. Now take this braided ponytail and coil it up, creating a spiral disk of braid. Pin this coil in place using bobby pins inserted every inch or so around the spiral, making sure each pin goes through multiple layers of the braid for maximum hold.
Critical detail: The braid’s tightness determines whether this holds all day or unravels by afternoon—straight hair requires deliberately tight, compact braiding.
8. Tucked Ponytail with Pins
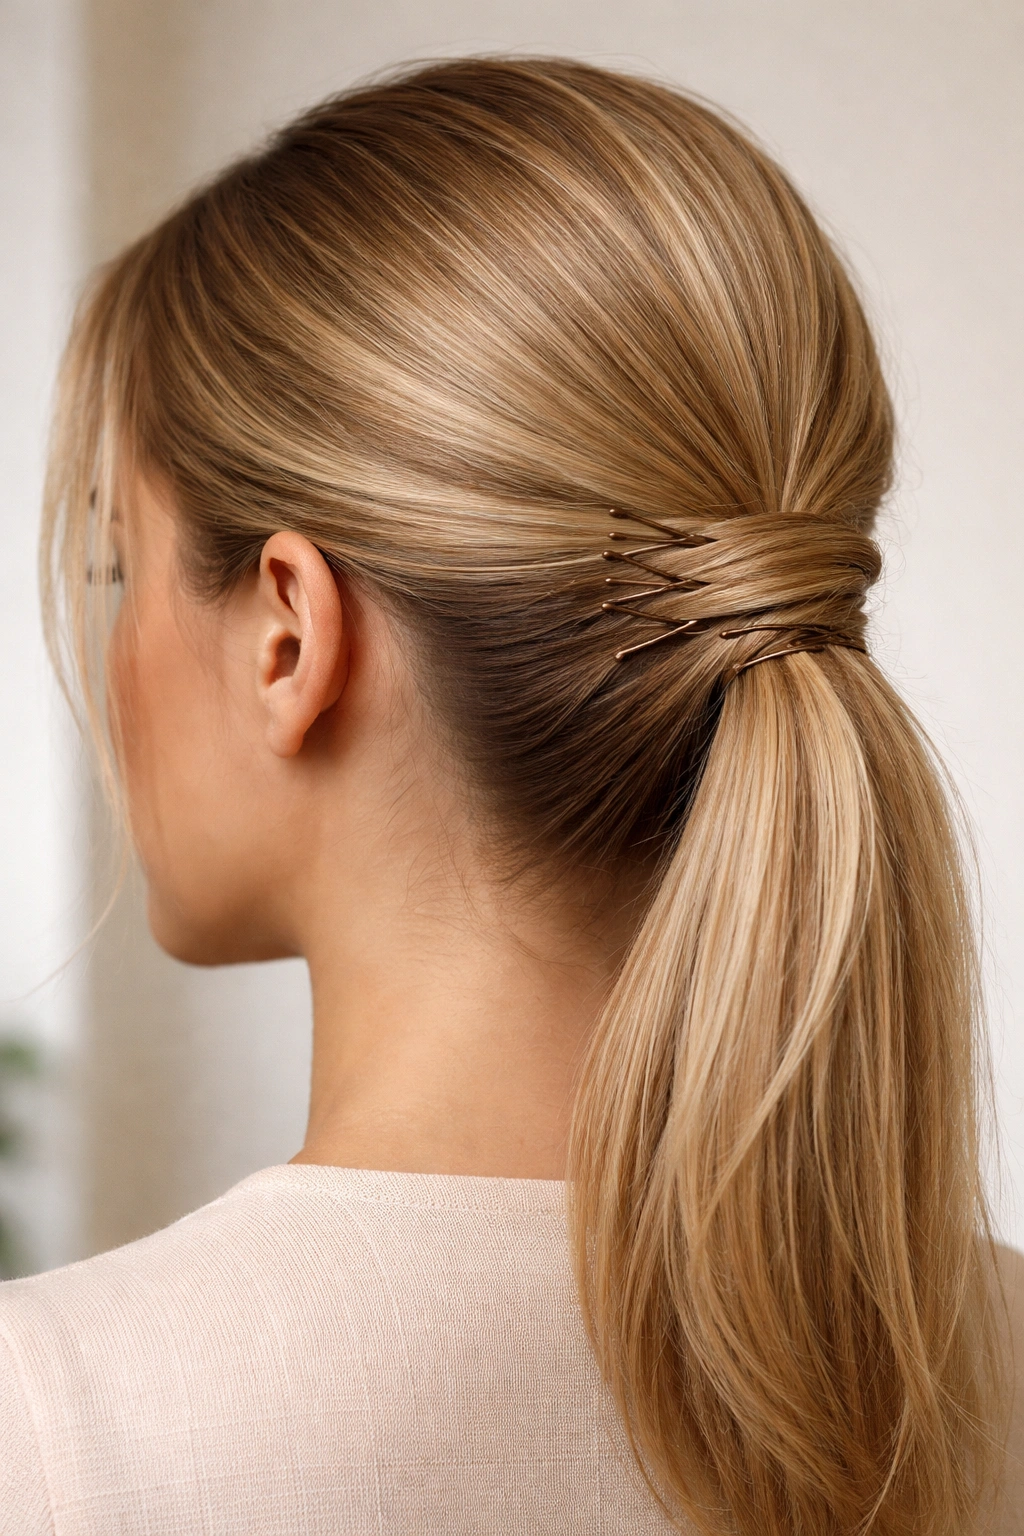
The tucked ponytail is a clever variation where you create a ponytail, then tuck the tail up into itself and secure it with bobby pins. This style is deceptively secure on straight hair because the tucking process creates compression that holds everything in place.
The Grip Mechanism That Makes It Work
A standard ponytail can rotate and loosen on straight hair because the elastic is the only thing holding it. But when you tuck the tail into the base of the ponytail and pin it, you create multiple anchor points. The hair itself is pinned in place at multiple locations, so even if one pin loosens slightly, three others are holding firm. Straight hair’s smooth surface actually makes the pinning more effective because pins catch cleanly on the hair without slipping through texture.
How to Execute a Tucked Ponytail
Create a standard ponytail at your desired height—either high or low, depending on your preference. Secure firmly with an elastic. Take the ponytail and tuck it upward, threading it up and under the elastic at the base, creating a looped shape. The end of the ponytail will now be pointing upward, creating a compact, enclosed style. Secure this tucked position with 3-4 bobby pins inserted horizontally through the base of the ponytail and into the surrounding hair. The pins should go through the loop and into the hair beneath the elastic, creating a secure anchor.
Pro tip: Use bobby pins that match your hair color—they’ll be less visible if any shift slightly during the day.
9. Double Twisted Crown
A double twisted crown uses two separate twists that wrap around your head in opposite directions, creating a braid-like effect without the complexity of actual braiding. This style is stunning and holds incredibly well on straight hair.
Why Straight Hair Creates Superior Crown Twists
Two twists create twice the grip points of a single twist, and on straight hair, this redundancy is incredibly effective. If one twist loosens slightly, the other is still holding strong. The interlocking pattern where the two twists cross each other creates additional locking points. Straight hair’s lack of texture actually means these twists are more compact and defined than they would be on textured hair, creating a cleaner, more polished look.
Creating a Double Twisted Crown
Part your hair down the middle, from your hairline to the back of your neck. Take one section from each side—start at your temple on the right side and begin twisting a section of hair toward the back of your head, moving along your hairline. This twist should wrap around the side and back of your head, creating a crown effect. Once you reach the back, secure this twist temporarily. Now create an identical twist on the left side, twisting in the same direction, so both twists spiral around your head in the same direction. When you reach the back, the two twisted sections will meet. Coil them together around each other and secure the entire arrangement with bobby pins, creating a braided-looking crown.
Key detail: The tighter your twists, the longer they’ll hold on straight hair, so twist deliberately and firmly.
10. Straight-Back High Ponytail with Grip
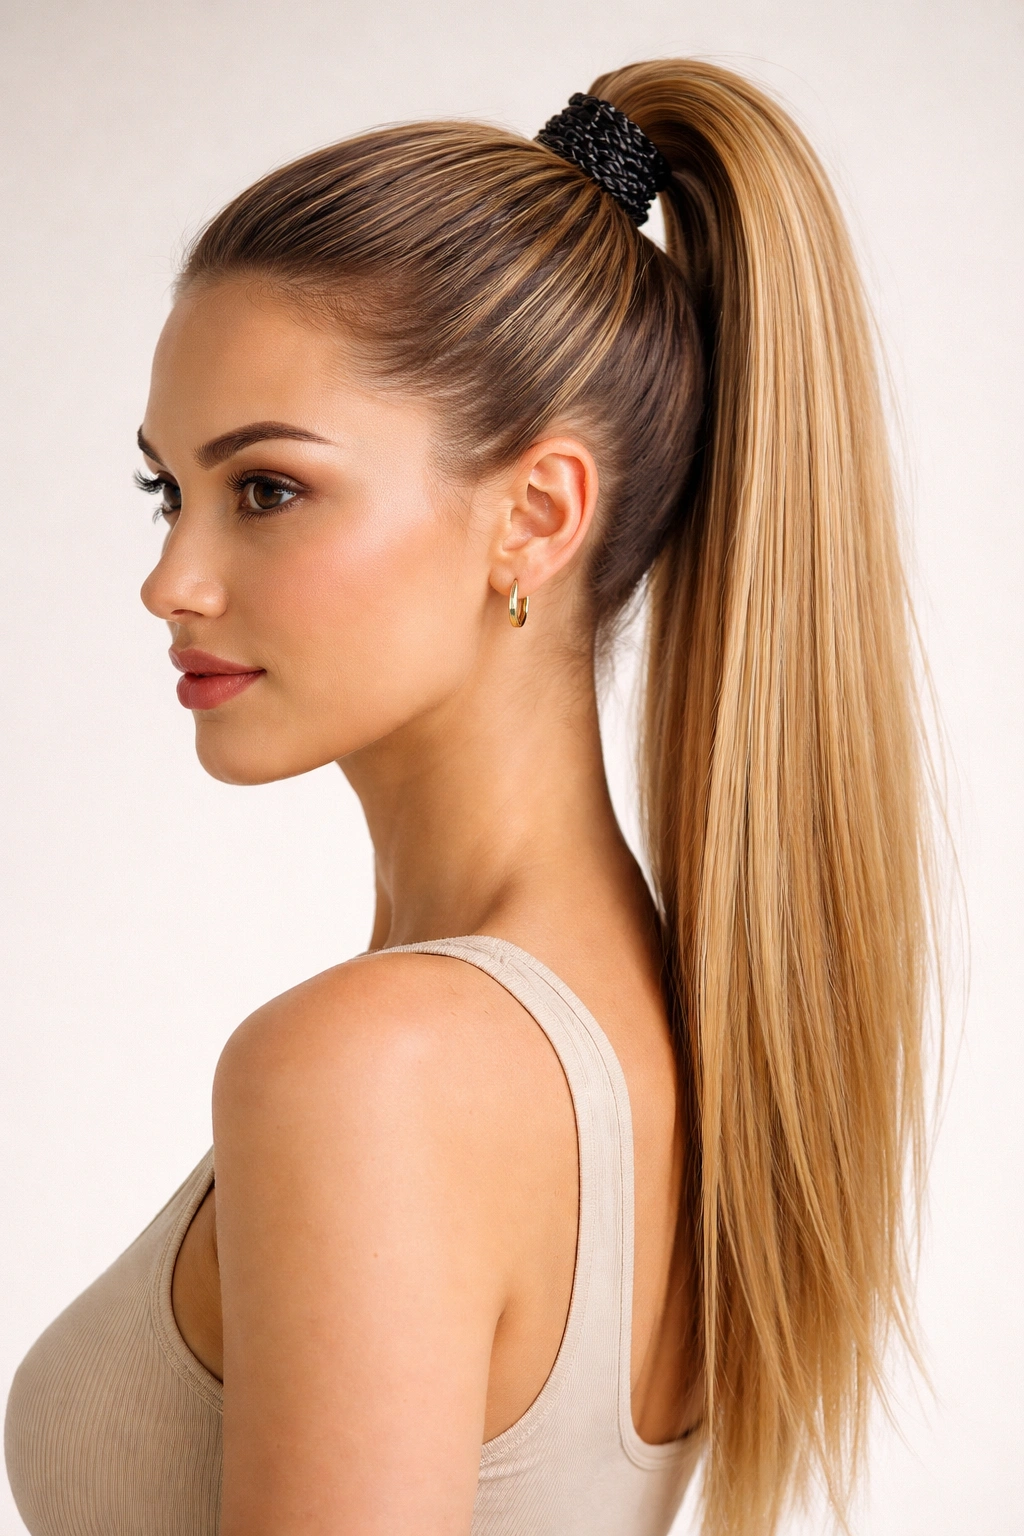
The straight-back high ponytail is the simplest style on this list, but its simplicity is exactly what makes it so effective on straight hair. When executed with proper technique and the right products, it’s virtually indestructible.
Why Simplicity Works Best for Straight Hair
Straight hair can sometimes be sabotaged by overly complicated styling—each extra loop, twist, or pin is another chance for something to slip. A straightforward high ponytail relies on clean technique and a good elastic to do the job, and on straight hair, these fundamentals are often more reliable than elaborate styling. The high placement means weight is centered directly over your head, creating minimal stress on any one area.
Technique for a Failproof High Ponytail
Brush your hair smooth and gather it at the crown of your head, pulling straight upward and back. Use a textured or grip-style elastic—the kind with rubber bumps or texture designed to prevent slipping. Pull the ponytail so tight that you can feel gentle tension at your roots; this tension is what prevents rotation. Wrap a small section of hair from the base of the ponytail around the elastic to conceal it, then secure this wrapped section with a bobby pin. For added security, spray the base with lightweight hairspray before wrapping and pinning.
Worth knowing: The tightness at creation is what prevents loosening later—a ponytail that feels slightly too tight when you first make it will feel perfectly snug by mid-day.
Final Thoughts
Straight hair’s reputation for being uncooperative with updos comes from working against its nature rather than working with it. These ten styles all leverage the specific qualities that straight hair offers: the ability to create tight, compact twists and braids, the smooth surface that makes bobby pins grip cleanly, and the clean lines that make simple styles look intentional rather than messy.
The common thread running through all of these styles is tension created through technique—twists, braids, and tight gathering all create the mechanical grip that keeps updos in place. Straight hair doesn’t need a cloud of products or complicated styling tricks. It needs proper technique, the right elastic or pins, and styles that create their own structural integrity.
Start with the styles that feel most natural to you. Once you’ve mastered one or two, branch out to the others. Pay attention to how tight you need to pull, how much product actually helps (often less than you’d think), and which bobby pin placement style works best with your hair’s texture and density. Within a few tries, you’ll develop the intuition to adjust these styles for your specific hair, making them your own reliable go-to updos that hold through whatever your day throws at you.