There’s something powerful about a well-executed ponytail—it’s polished, it’s versatile, and it says you’ve got your life together, even on mornings when you’re running late. But when it comes to styling textured curly hair, traditional ponytail advice often falls short. Generic tutorials don’t account for the unique characteristics of curly hair: the shrinkage, the way it behaves differently depending on moisture levels, how to keep your edges sleek without compromising your curl pattern, and the styling products that actually work instead of leaving buildup.
The beauty of curly ponytails for Black women is that they balance two seemingly opposing aesthetics—the polished, sharp lines of a sleek style with the gorgeous dimension and movement that natural curls bring. A sleek curly ponytail isn’t about choosing between looking professional and embracing your texture; it’s about having both. The key is understanding how to smooth your laid edges while letting your curls thrive, which products actually hold without flaking or crunchiness, and how to position your ponytail so it frames your face and complements your features.
This guide covers ten distinct approaches to the sleek curly ponytail—each one works with your natural texture rather than against it, each one moves beyond the basic high pony, and each one is absolutely doable at home with the right technique and products. Whether you’re looking for something sharp for a professional setting, romantic with curls framing your face, or sculptural with intentional texture, you’ll find your style here.
1. High Curved Ponytail with Defined Ringlets
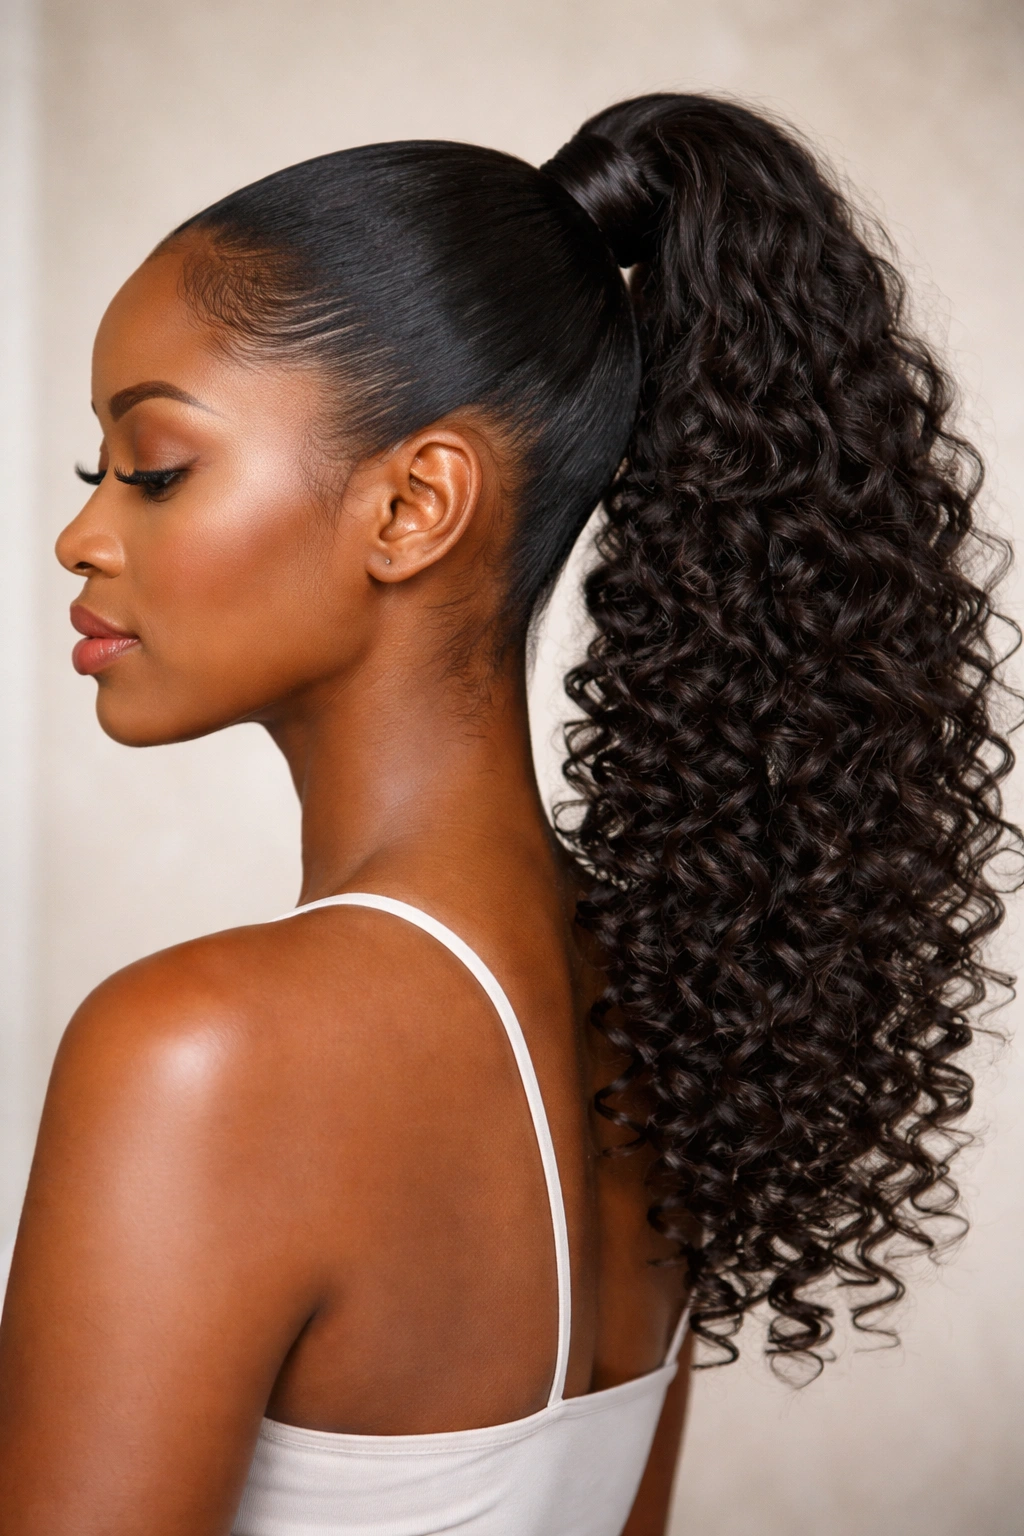
This style starts at the crown and curves slightly toward the back, creating a sophisticated silhouette that works beautifully for face shapes that benefit from height and definition. The magic is in gathering your hair higher than a traditional centered ponytail—aim for a point about two inches back from your hairline—which automatically creates an elegant curved line from your neck up to the base of the ponytail.
Why This Style Works for Textured Hair
The curved positioning naturally complements the volume of curly hair while the height creates an elongating effect. Your curls hang freely without being pulled too tightly, which means less stress on your hairline and better curl retention throughout the day. The slight curve prevents the harsh, flat look you sometimes get with a dead-center pony, and it actually photographs better from almost every angle.
How to Create the Look
Start with curls that are already defined—use a curl cream or leave-in conditioner on freshly washed, damp hair and either air dry or diffuse for defined ringlets. Once your curls are set, use a fine-tooth comb and a smoothing gel to create a sleek base, working from your parting back toward where you want your ponytail to sit. Smooth the sides by combing in the direction of the curve, then gather your hair slightly off-center (toward the back) and secure with a sturdy elastic. The secret is using enough gel to look sharp but not so much that your curls feel stiff—you want that balance between polish and movement.
Pro tip: Apply your smoothing gel in layers rather than all at once, working with a damp comb and letting each section dry slightly before moving to the next. This prevents product buildup that can make curls look dull.
2. Sleek Side Ponytail with Curled Spiral Ends
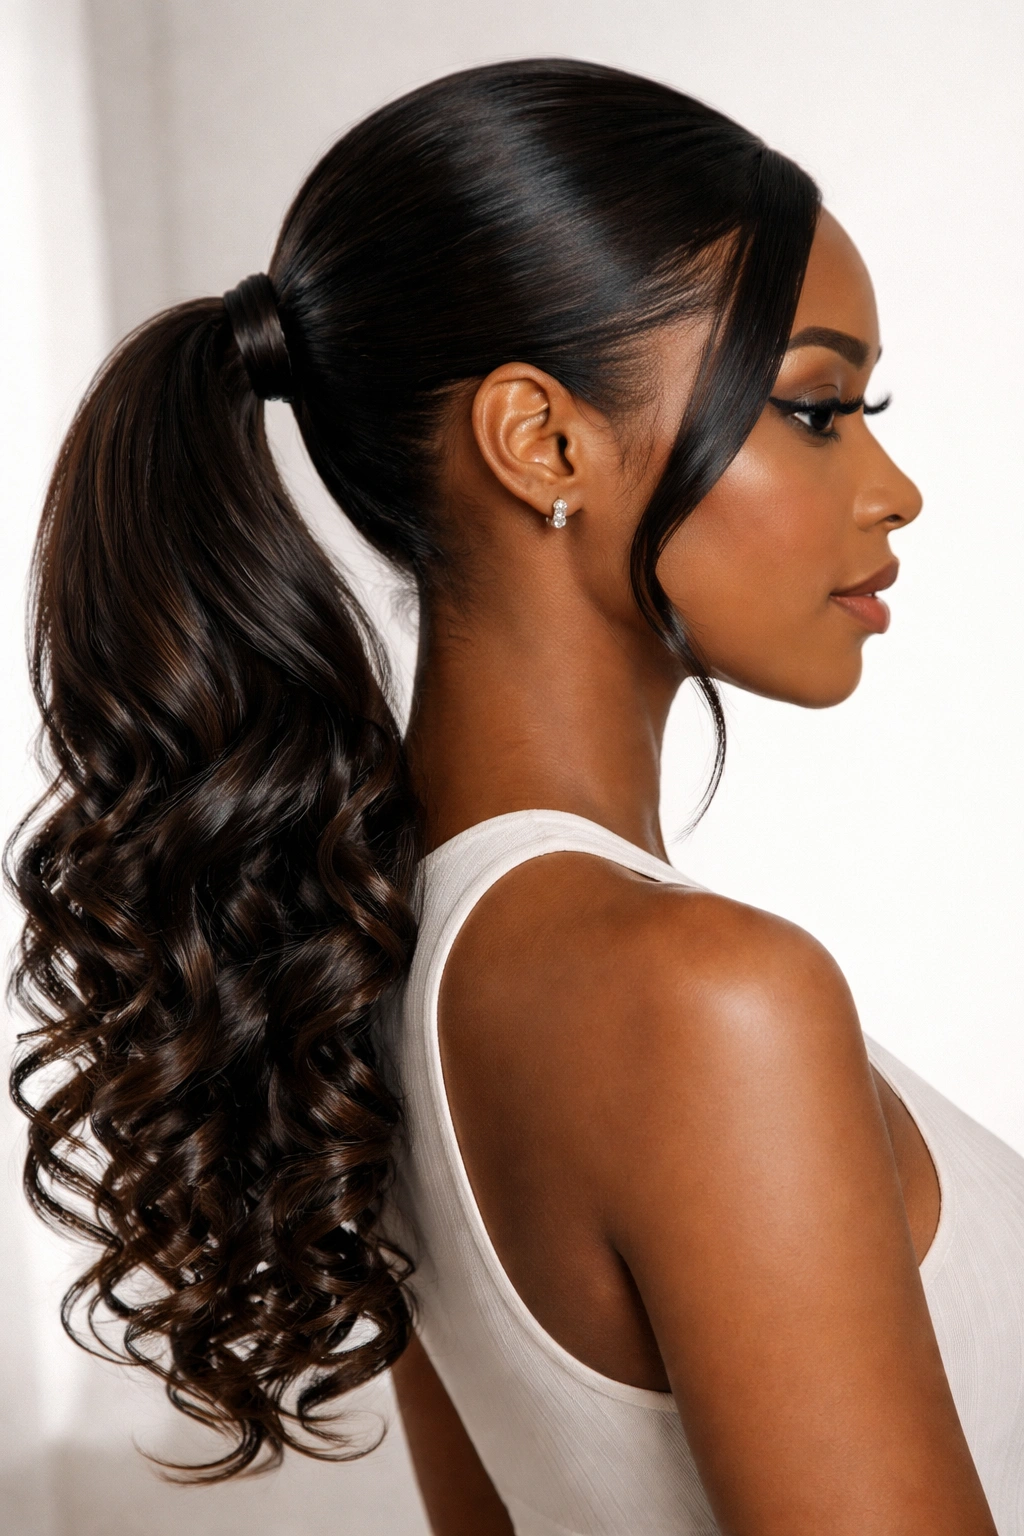
A side ponytail pulls focus toward your shoulders and neck, making it an excellent choice for elongating round or square face shapes. With curly ends, you get the elegance of the side placement plus the playful movement of spiral curls that catch light and add dimension.
Building the Sleek Base
The entire success of this style depends on how smooth you get the base. Work with damp hair and apply a lightweight smoothing serum or gel, starting from your part and combing all the way back to one side. You’re creating a sleek canvas on which to place spiraling curls. Unlike a ponytail at the center back, a side pony needs extra precision because the lines are more visible—any bumps or flyaways show immediately.
Creating Defined Spiral Curls
Once your hair is secured in the side ponytail, take sections from the ends and wrap them around a curling iron (barrel size between ½ and ¾ inch works best for spiral definition). Hold each section for 8-10 seconds, release slowly, and let it cool before touching. The cooling step is non-negotiable—it sets the spiral shape so your curls stay bouncy for hours instead of dropping within an hour.
Styling Considerations
For Black women with naturally curly hair, this style works especially well if your natural curl pattern is medium to tight coils. The side placement actually showcases the texture beautifully. Keep the base gel-smooth but avoid over-applying product to the actual curl sections—a light texturizing spray or curl-defining cream on the ends is enough.
Worth knowing: The lower you place the side ponytail, the more formal the look becomes. A side pony at shoulder height reads playful; at the nape of your neck it reads sophisticated and work-appropriate.
3. Bubble Ponytail with Curly Sections Between Bands
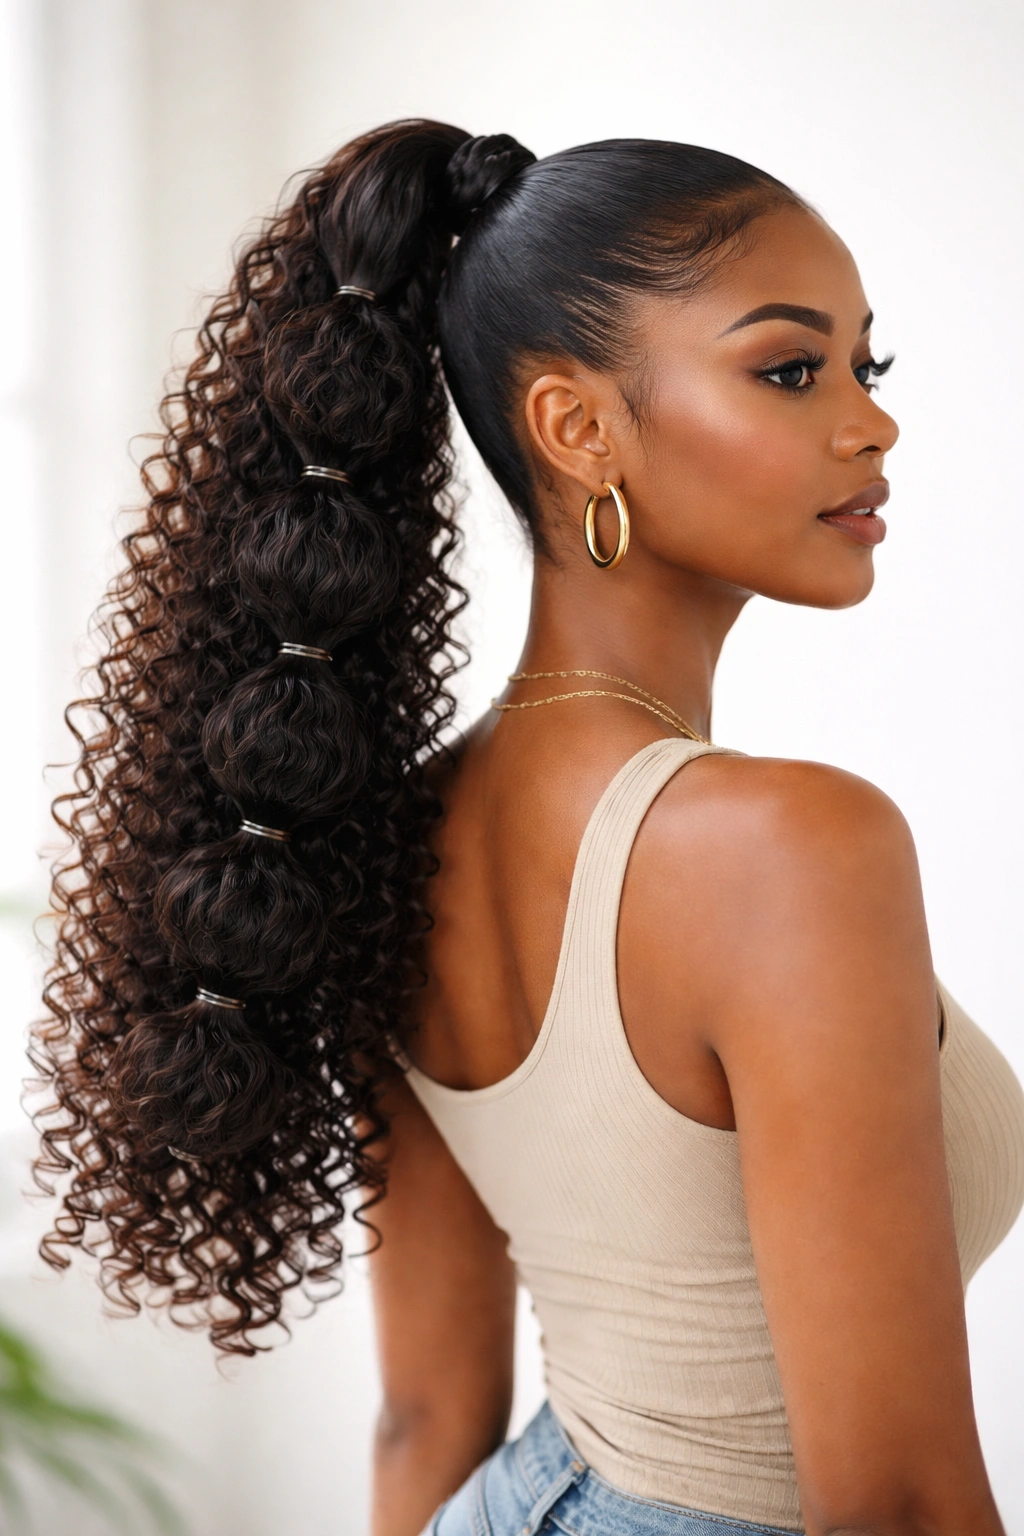
A bubble ponytail uses multiple elastic bands to create separated sections that puff outward, adding dimension and visual interest. The style becomes especially eye-catching when you alternate between sleek sections and curly sections, creating a pattern that draws the eye down the length of your ponytail.
Understanding the Bubble Technique
Gather hair into a high ponytail and secure it. Then, place a second elastic about two inches down from the first, creating the first “bubble.” Pull the hair section between the two elastics gently outward to puff it out. Continue down the length of your ponytail with elastics spaced 2-3 inches apart, pulling each section to create the bubble effect.
Incorporating Your Curls
Here’s where the curl element transforms the look from cute to intentional: between placing each elastic, take the curl section and gently scrunch it or separate the coils with your fingers to emphasize the natural texture. Some stylists twist or braid each bubble section before securing the next elastic for even more definition. The curly sections create an organic, lived-in quality that keeps the style from feeling too uniform.
Product and Maintenance
Use a flexible hold gel or styling cream on the smooth sections so they stay sleek, and apply a curly defining product to the bubble sections to keep them from frizzing. The beauty of a bubble ponytail is that it actually holds up well throughout the day because the multiple elastics distribute tension across your hair rather than concentrating it at one point.
Real-world advantage: This style is perfect when you want something that looks intentional and designed but isn’t as time-intensive as a fully braided ponytail. It gives you elaborate-looking results in about 20 minutes.
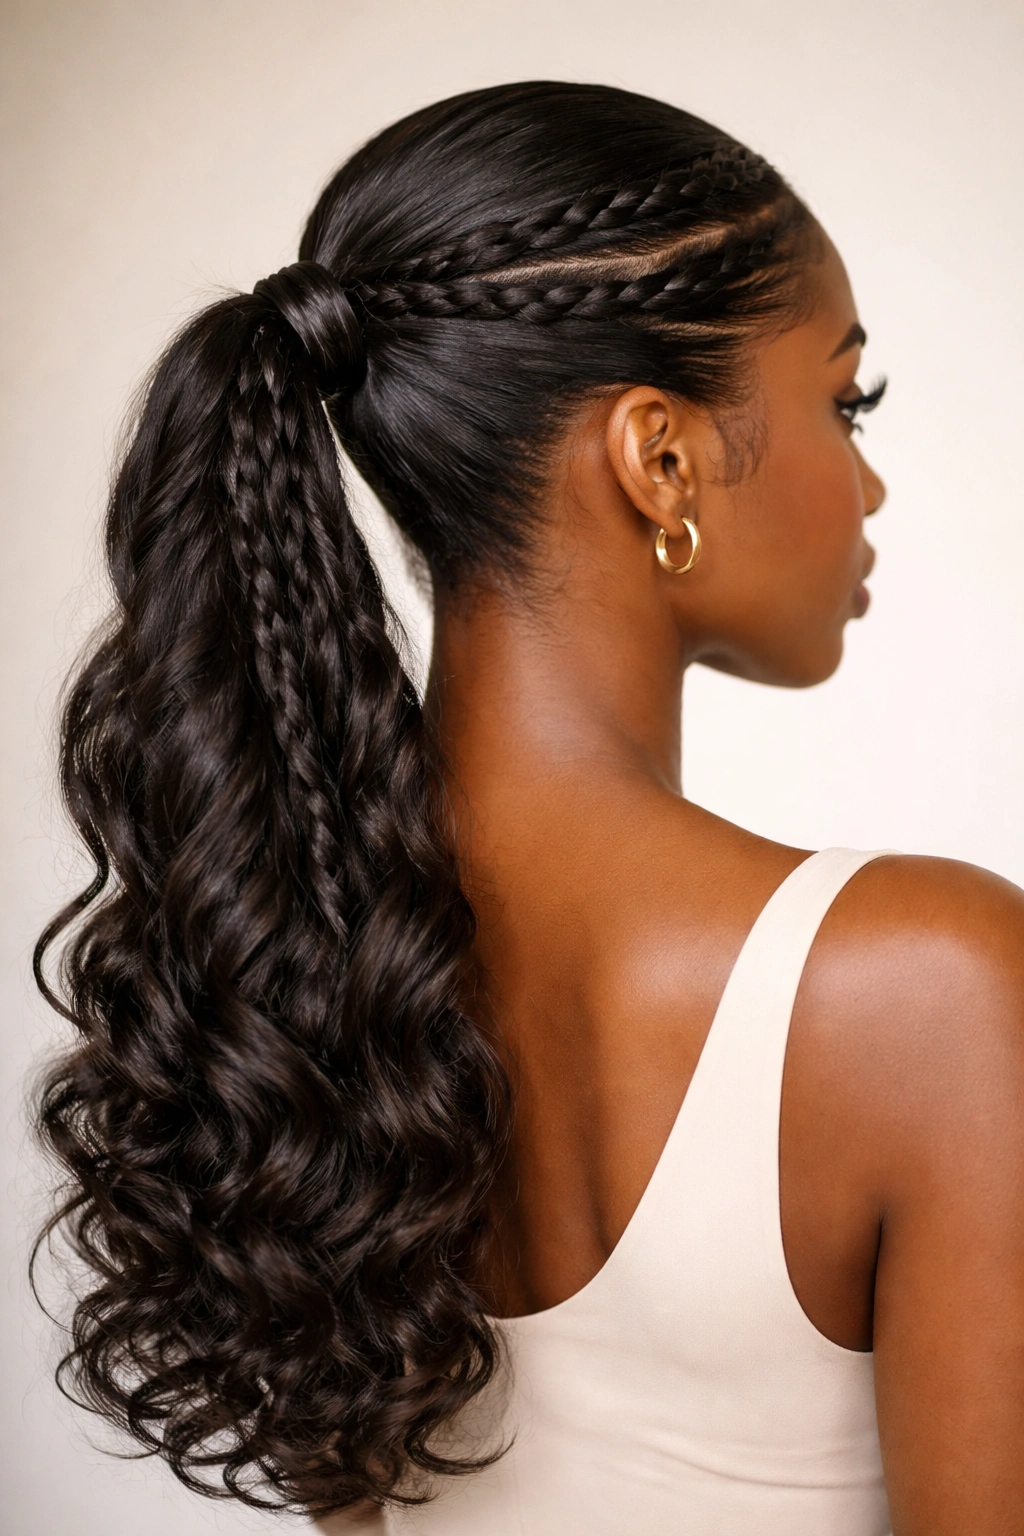
4. Braided Wrapped Ponytail with Curly Extensions
This style uses a braid wrapped around the base of your ponytail as both a design element and a practical way to hide elastics and blend in curl-enhancing extensions if desired. The wrapped braid adds sophistication and draws attention to where the style begins.
Creating the Foundation Ponytail
Start with a sleek, smooth ponytail positioned at your desired height. Use a lightweight smoothing gel and fine-tooth comb to ensure the base is flawless. The ponytail itself doesn’t need to be extremely thick—in fact, a moderately full ponytail gives you the best proportions for wrapping a braid around it.
Braiding the Wrap
Take a small section of hair from the ponytail and create a three-strand braid (or a two-strand twist if you want something less structured). Wrap this braid around the base of the ponytail, covering the elastic completely, and secure the end with a bobby pin hidden beneath the wrap. If you’re adding curly extensions, now is when you’d blend them into the main ponytail or weave a small amount through the braid itself for added dimension.
Styling the Curly Elements
The curls can be your natural texture, curly extensions, or a combination. The wrapped braid creates visual separation between your sleek edges and the curly section, making it easy for viewers to understand the intentionality of the style. Define your curls with a leave-in conditioner or curl cream, and if you’ve used extensions, use a lightweight finishing spray to blend them seamlessly with your natural curls.
Insider note: A metallic or decorative hair cuff worn over the braided wrap adds an instant premium feel and makes the style feel polished enough for events or special occasions.
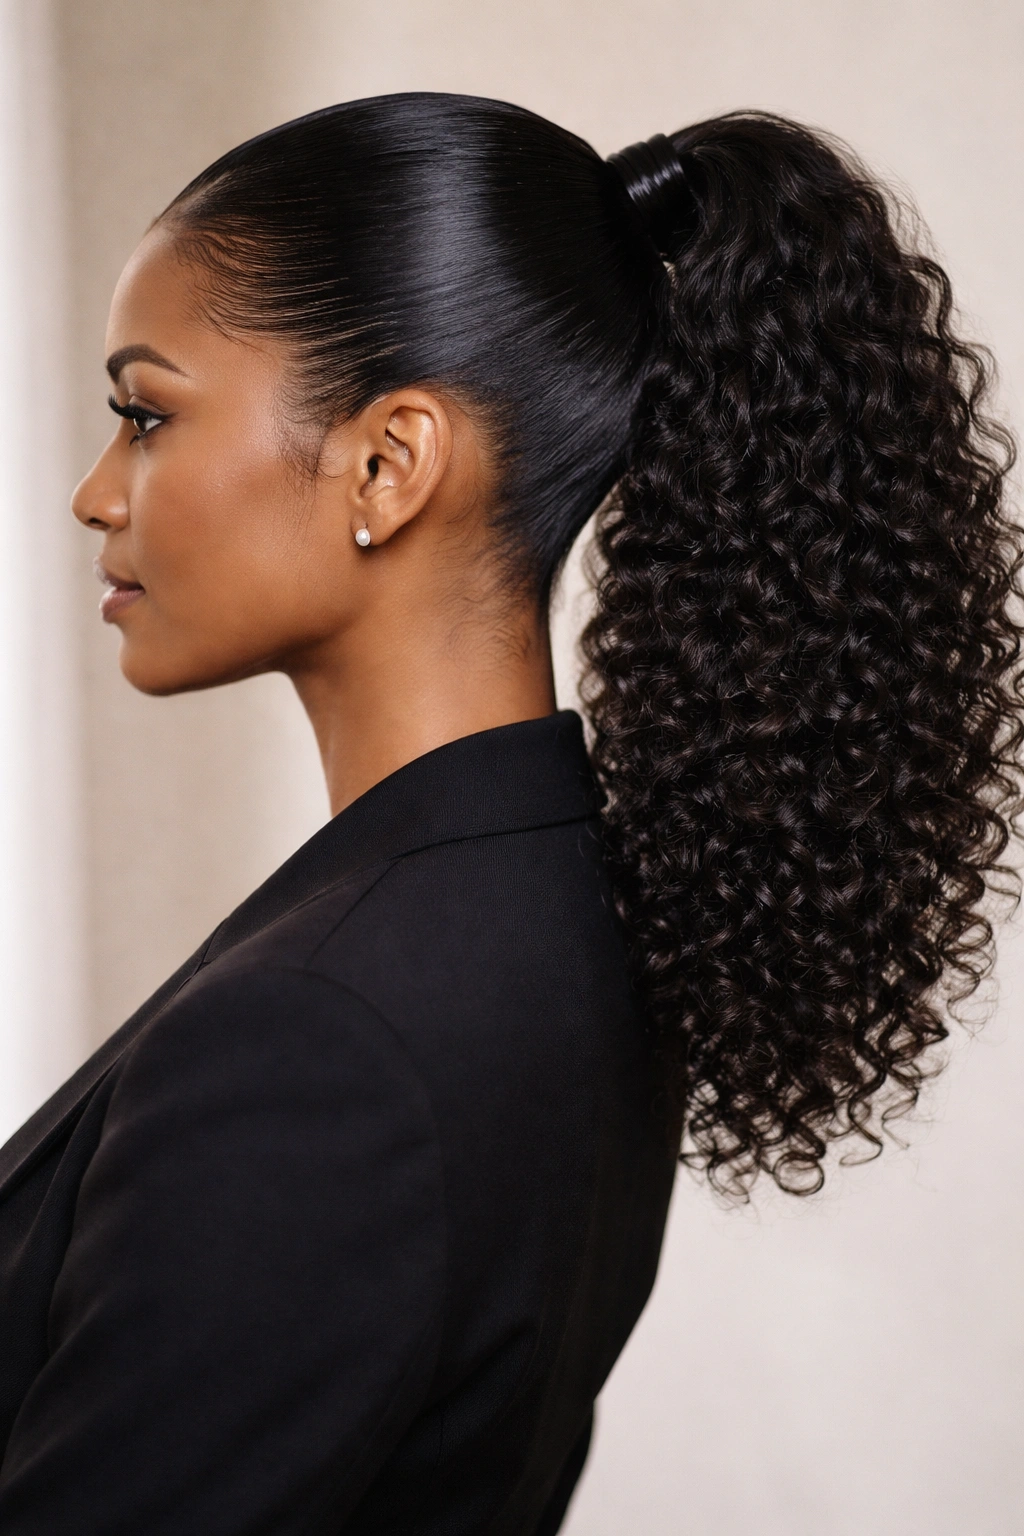
5. Low Sleek Ponytail with Face-Framing Curled Tendrils
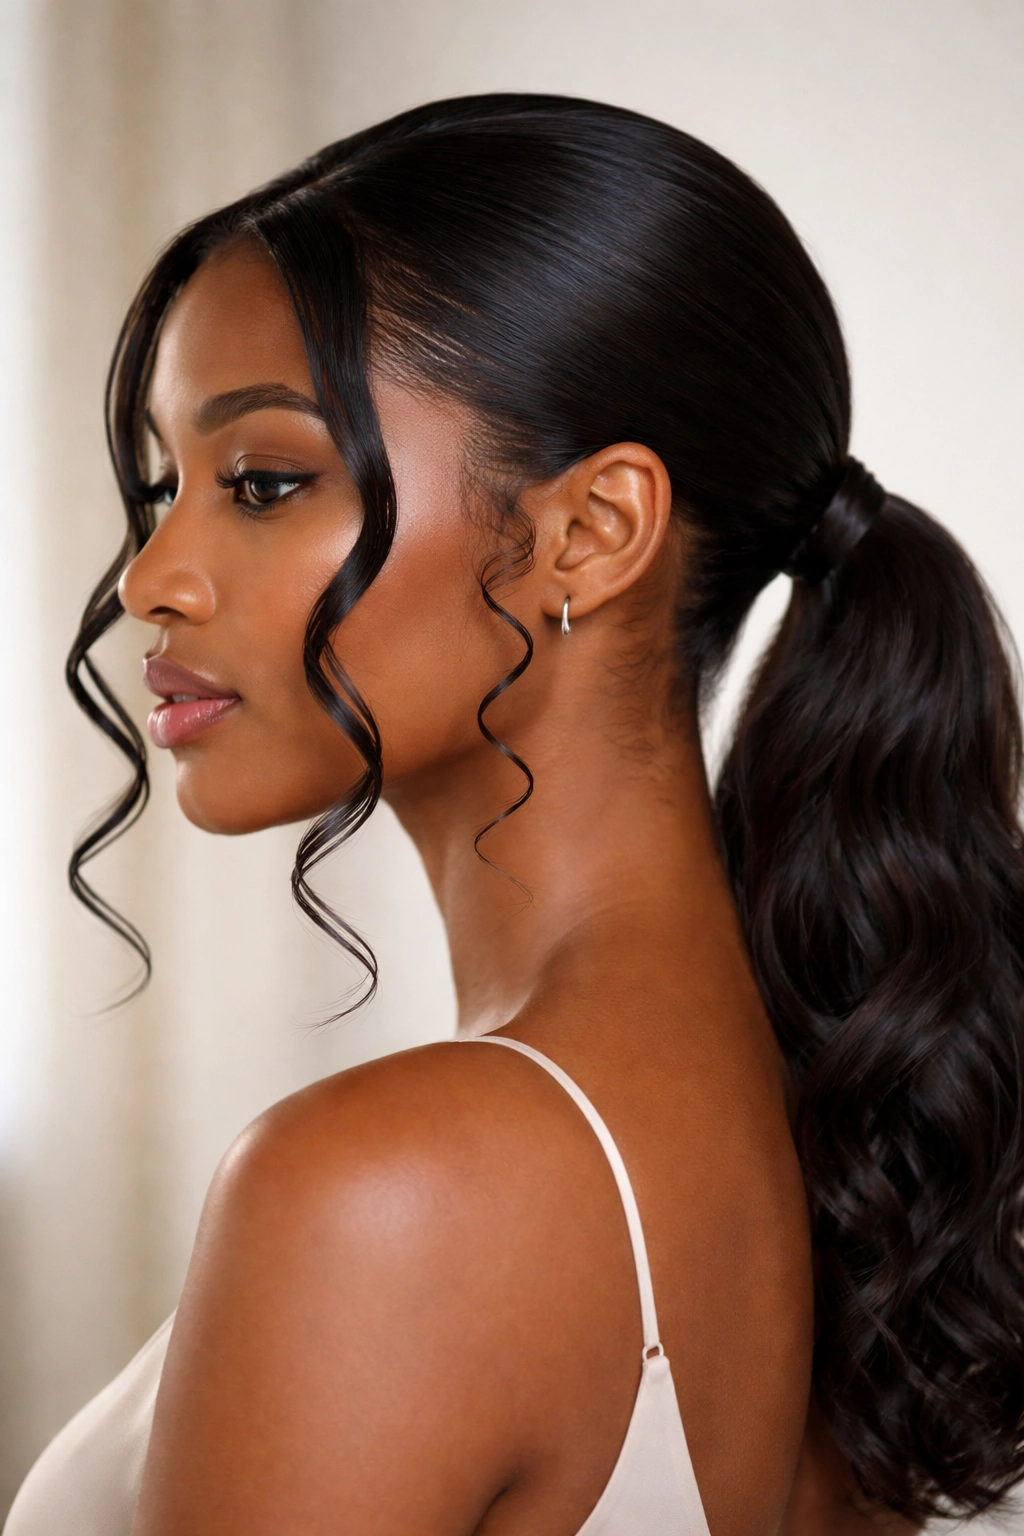
A low ponytail positioned at the nape of your neck reads instantly professional and sophisticated. By releasing a few face-framing tendrils and curling them, you soften the severity while maintaining that polished edge—it’s a style that works equally well in a corporate office or at a dinner date.
Positioning and Creating the Base
A low ponytail should sit roughly an inch or two above your nape. Use a fine-tooth comb and gel to smooth your hair back from your face, creating lines that are clean and precise. The base needs to be genuinely sleek because there’s nowhere for bumps to hide at this low position. Work in sections, smoothing from your front hairline back and then from the sides, ensuring symmetry.
Selecting and Curling Tendrils
Before securing your ponytail, set aside two small sections: one on each side of your face, starting near your temple. Curl these sections using a small-barrel curling iron (½ inch maximum), wrapping away from the face. These tendrils should feel gentle and romantic, not tight or forced. The goal is for them to look like they naturally fell out rather than like you intentionally created them—though of course, you did.
Product Strategy for All-Day Hold
Use a medium-hold smoothing gel on your base to keep everything sleek without making hair feel stiff or look shiny. For the curled tendrils, apply a lightweight curl cream before curling and finish with a flexible-hold hairspray that won’t make curls feel crunchy. The contrast between the smooth base and the soft curled tendrils should be noticeable but not jarring.
Pro tip: Refresh your curled tendrils midday by misting them lightly with a curl refresher spray and gently re-scrunching them with your hands. This brings back definition without requiring a full re-curl with the iron.
6. Half-Up Ponytail with Curly Crown Section
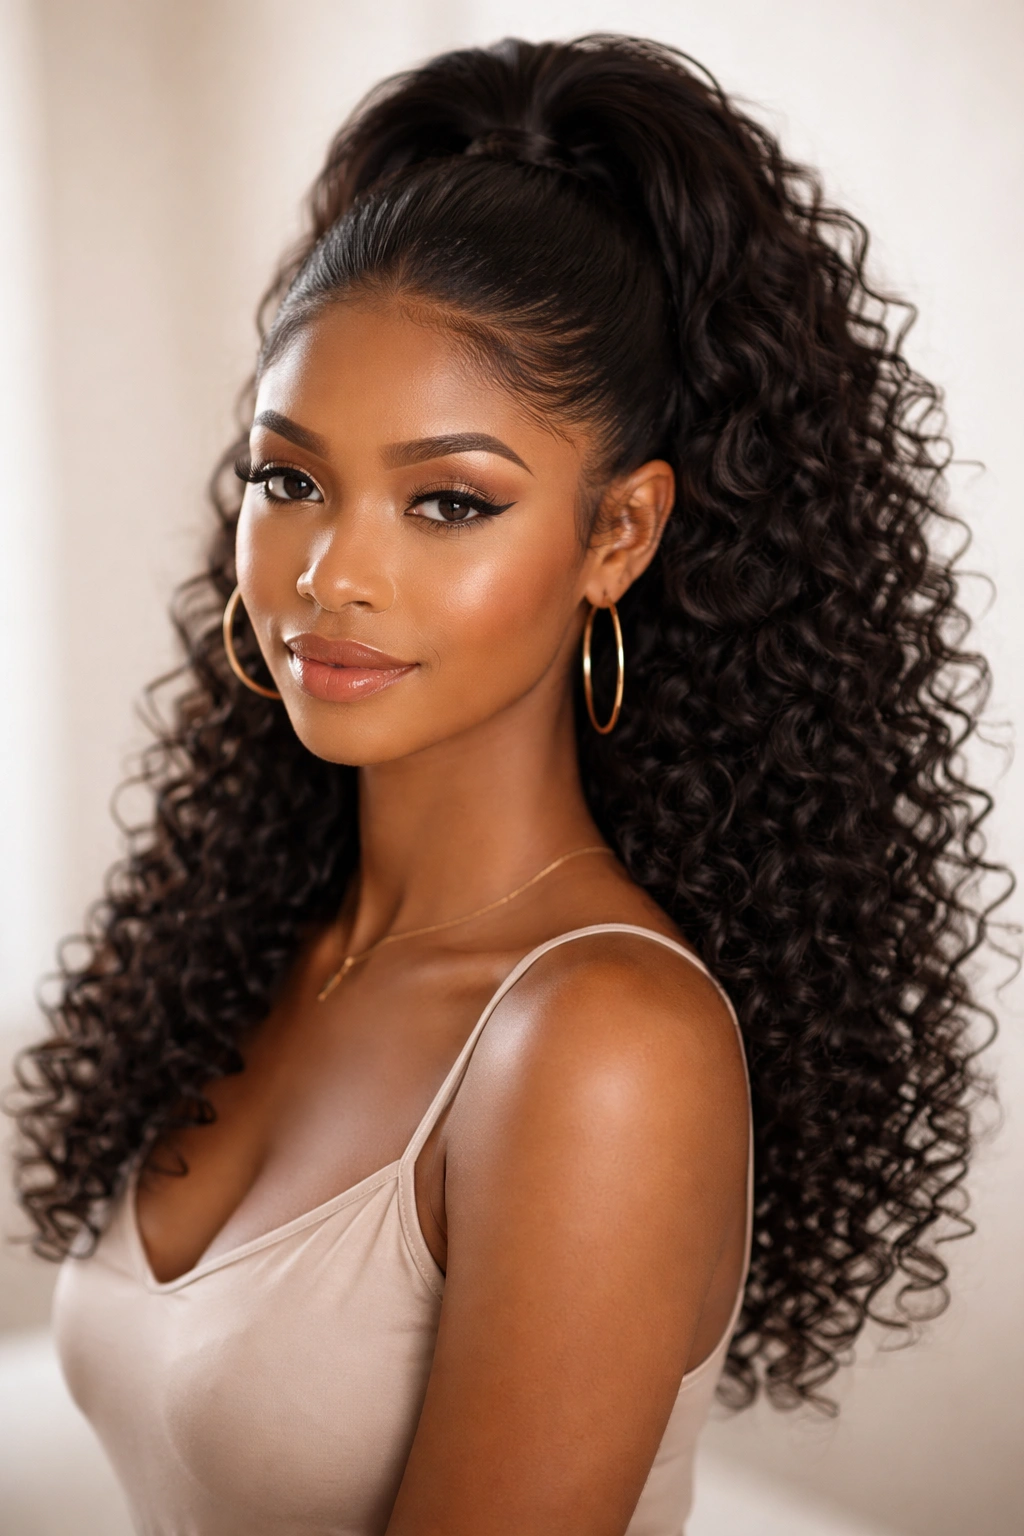
This style takes the best of both worlds—you get the polished look of a ponytail while leaving your curls completely down in the back, which means maximum curl visibility and zero tension on your hairline. The crown section is sleek while the lower section remains beautifully curly.
Constructing the Half-Up Base
The half-up ponytail gathers hair from about your temples back to the crown, leaving the lower two-thirds of your hair completely down. Use a fine-tooth comb and smoothing gel to create that sleek crown section, working from your front hairline back to roughly the crown of your head. The key is making clean, visible lines because the transition from smooth to curly is the visual centerpiece of this style.
Securing the Crown Ponytail
Secure your half-up section with a small elastic at the crown, then take a small strand of hair from the main ponytail and wrap it around the elastic to hide it completely. The wrapped strand should blend seamlessly, making the elastic invisible. This small detail prevents the style from looking incomplete.
Maintaining and Defining the Curls
Your down curls should be freshly defined, using either your natural curl pattern or styling methods that enhance definition. Apply a lightweight curl-defining cream or gel to your curls (not the smoothed crown section) and let them air dry or diffuse for the best results. The contrast between the smooth crown and the bouncy curls below is what makes this style striking.
What to watch for: If your curls tend to drop or lose definition throughout the day, apply a texturizing spray to the crown area and the top half of your curls, which will help everything grip and hold its shape better.
7. Twisted Sleek Ponytail with Texture Play
Instead of combing your hair straight back into a traditional ponytail, this style incorporates two-strand twists that spiral back toward your ponytail point. The twists create visual interest and a more complex appearance while still reading as sleek and intentional.
Creating Two-Strand Twists
Divide your hair into sections from your parting back toward where your ponytail will sit. Each section gets twisted (not braided—the two-strand twist is key here) in a spiral motion. You’re twisting small sections of hair around each other, creating a rope-like effect that’s less structured than a braid but more deliberate than a loose wave.
Directing the Twists
As you twist, direct each twist slightly inward toward your ponytail point. This means the twist on the right side of your head twists toward center-back, and the twist on the left does the same. When all your twists meet at the ponytail point, they create a visually cohesive style that looks far more complex than it actually is.
Finishing with Definition
Once you’ve twisted all your sections and secured them into a ponytail at the back, take the actual ponytail section (the gathered hair itself) and enhance its natural curl pattern or add curls using a curling iron. The twisted base is sleek and intentional, while the ponytail section is curly and free-flowing. This combination is sophisticated enough for professional settings while still celebrating natural texture.
Worth knowing: Two-strand twists actually hold up better than straight-back styles if you have very curly hair, because the twisting action naturally grips your texture rather than fighting against it.
8. Textured Sleek Ponytail with Sculpted Volume
This style embraces the idea that “sleek” doesn’t mean “flat.” You smooth your edges and create a clean ponytail base, but the actual gathered ponytail section is voluminous, textured, and sculpted for maximum dimension and movement.
Crafting the Smooth Foundation
Use your smoothing gel and fine-tooth comb to create a sleek, controlled base. The edges need to look sharp and intentional. This is the frame that makes the textured volume of the ponytail look like a deliberate choice rather than uncontrolled hair.
Building Ponytail Volume
Once your hair is gathered, gently tease the ponytail section using a fine-tooth comb or a teasing brush. The goal isn’t a 1980s ratted look—you’re adding subtle volume and texture. Work in small sections, teasing gently at the roots of each section. Then, use a comb to smooth the outer layer slightly so it looks polished while maintaining the volume underneath.
Adding Intentional Texture
Use your fingers or a pick to gently separate and define coils or waves throughout the ponytail. Apply a texture-enhancing cream or lightweight mousse to emphasize your curl pattern. The result is a ponytail that reads as both controlled (sleek edges) and free-spirited (textured volume).
Styling Products for Definition
Choose products that add hold without adding weight. A lightweight texturizing spray or a curl-defining cream works better than heavy gels or pomades. You want the texture to be visible and defined, not weighed down into limp curls.
Pro tip: Achieve better sculpted volume by blow-drying your ponytail section with a diffuser on low heat before teasing. This creates a naturally voluminous base that teasing enhances rather than creates from scratch.
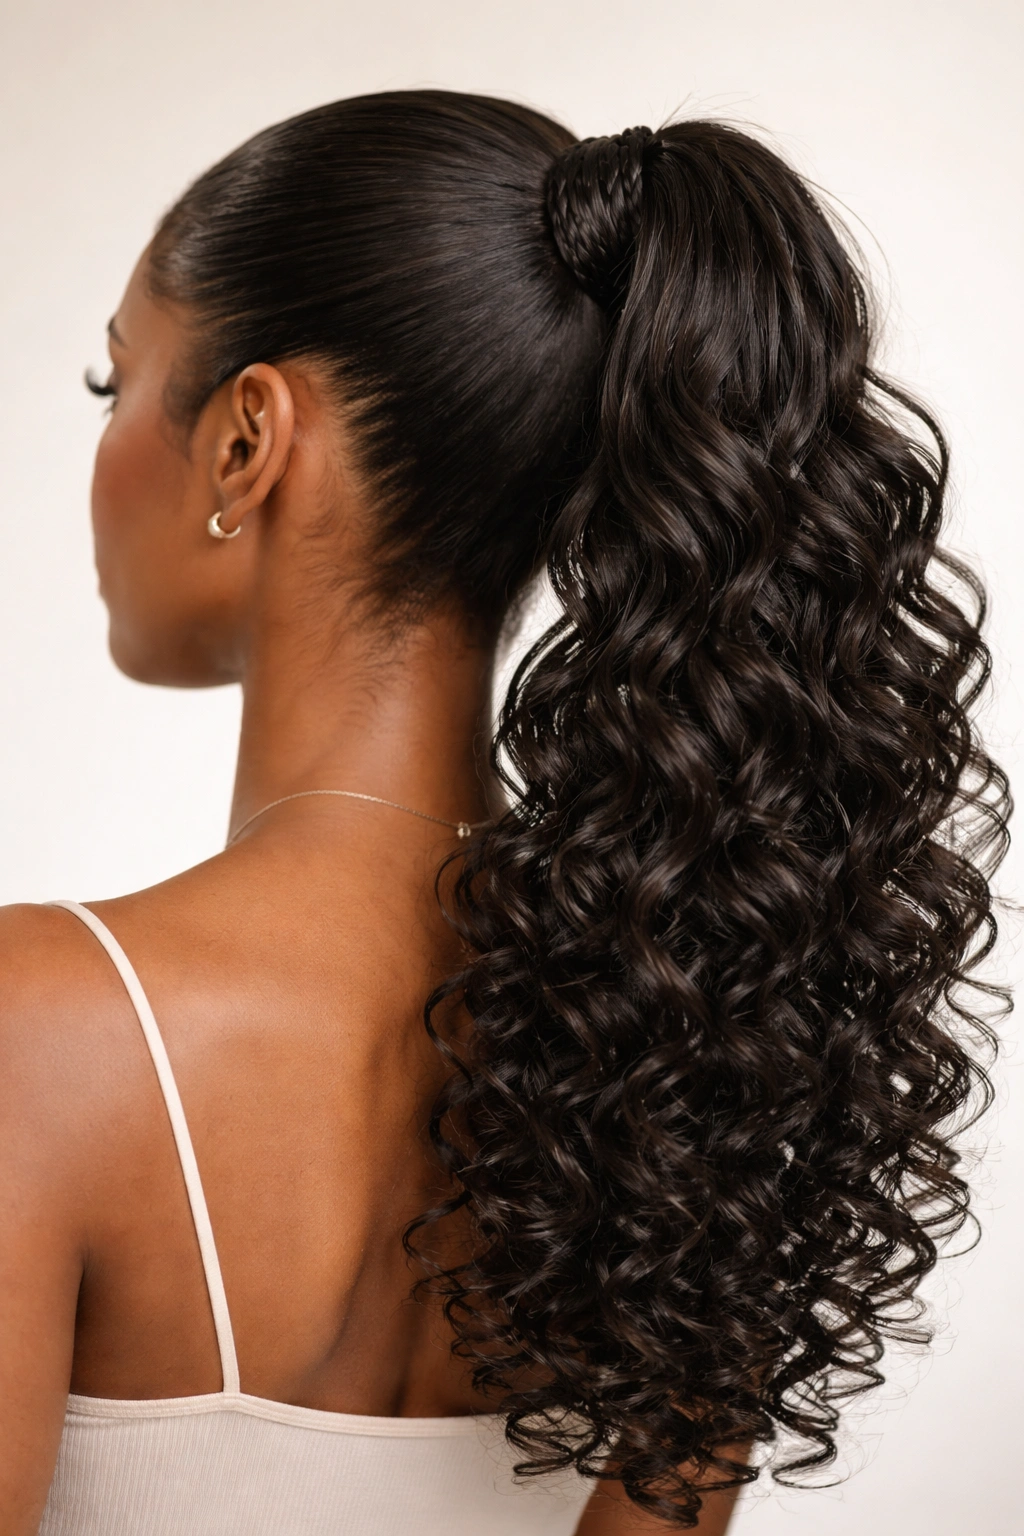
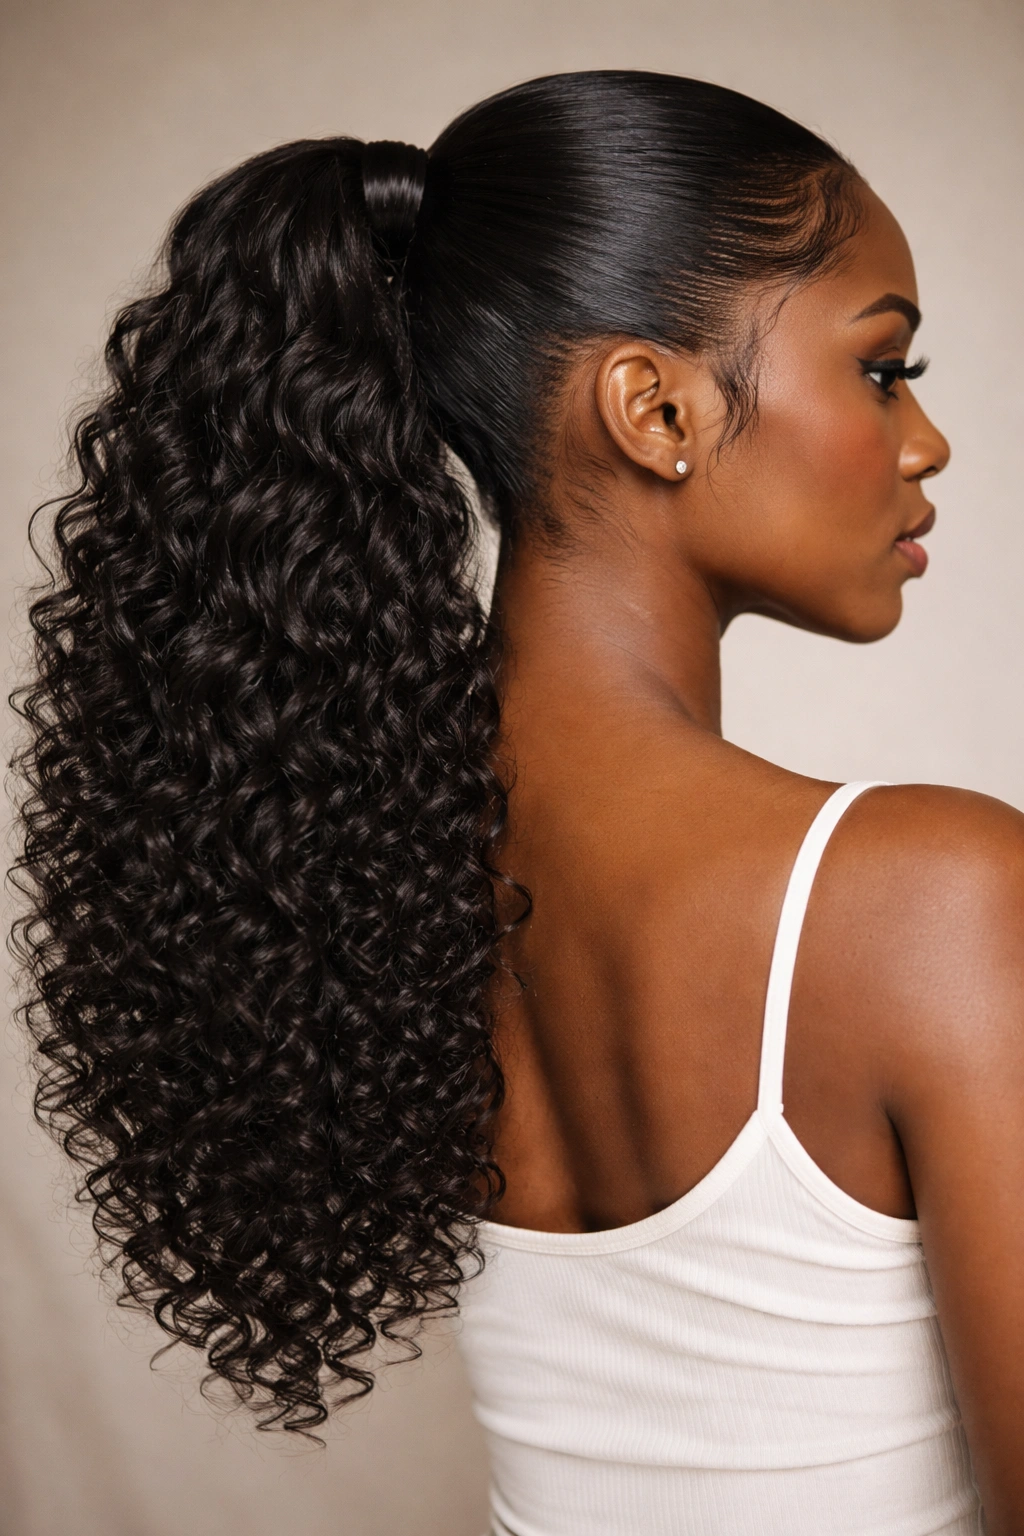
9. Slicked Back High Ponytail with Spiral Curls
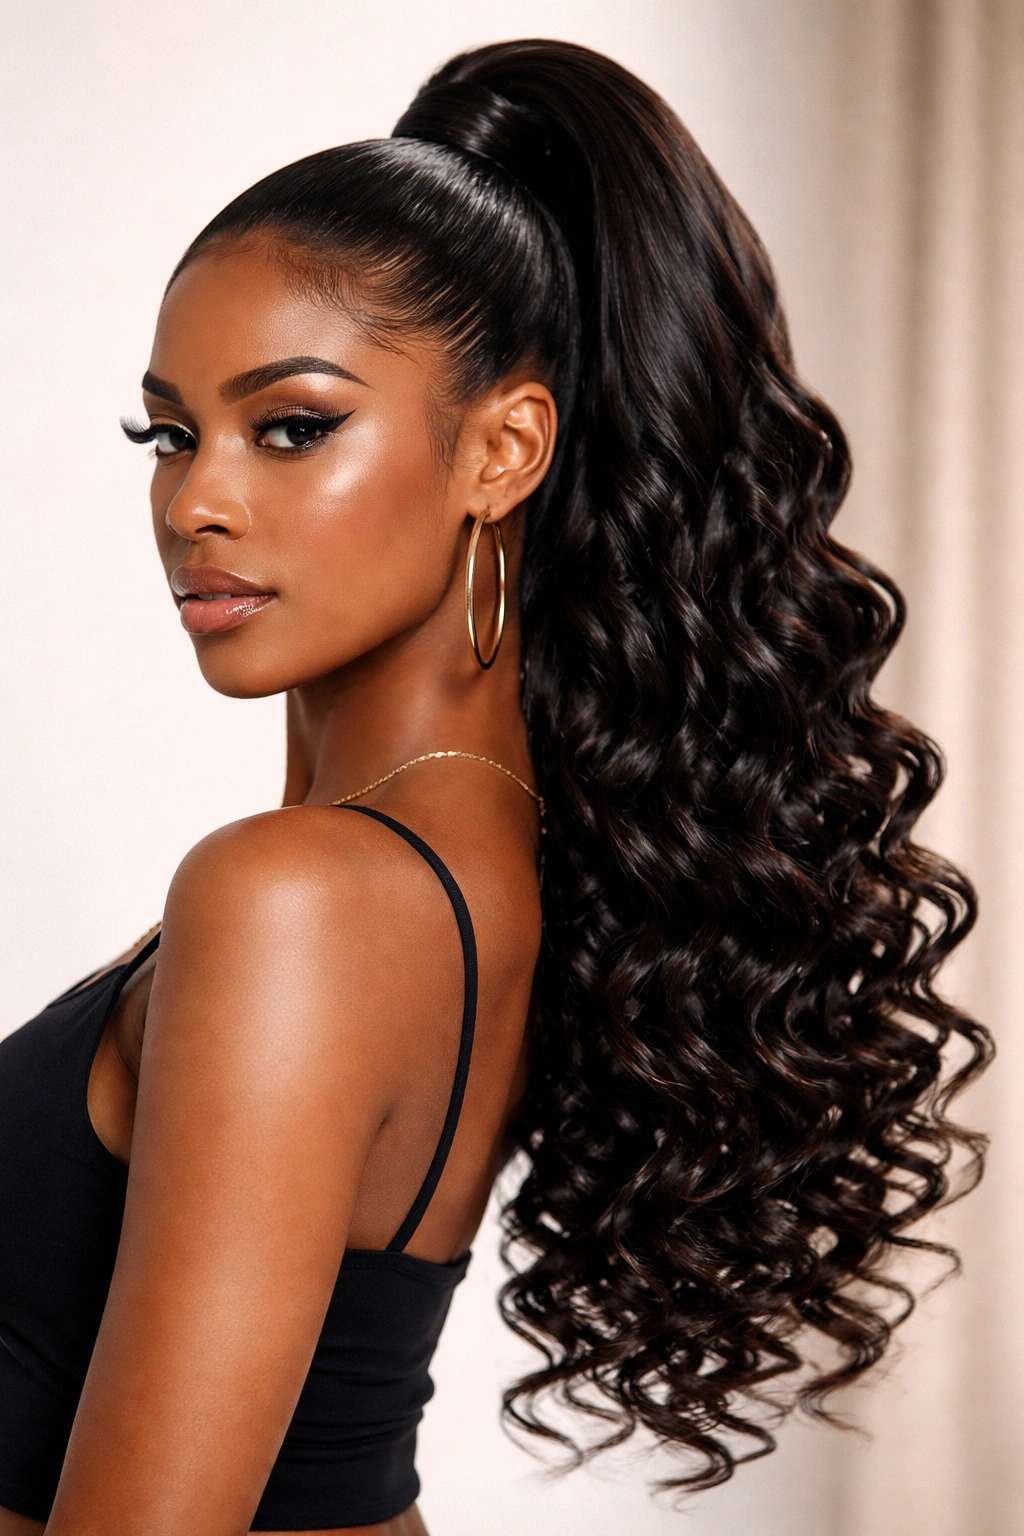
This is the statement-making style—hair pulled tight and sleek straight back to a high point on the crown, paired with sculptural spiral curls that hang long and dramatic. It’s bold, it’s unapologetic, and it requires precision to execute properly.
Creating the Sleek Slicked Base
The slicked-back look requires more product and technique than a simply smooth style. Use a smoothing gel with medium-to-strong hold, working in very small sections from your front hairline all the way back. Use a fine-tooth comb to smooth each section, pressing the comb firmly against your scalp to create that genuine slicked look. Don’t be timid with product—you need enough to keep every edge down and smooth.
Strategic Placement for Your Face Shape
A high slicked-back ponytail can be severe if it’s not placed thoughtfully. Position your ponytail to complement your face shape: slightly back from center if you want to widen your face, or directly centered if you want a balanced look. The placement matters more in a slicked style than any other because there’s no softness to frame your face.
Creating Spiral Curls with Impact
Once your ponytail is secured, take medium-sized sections (roughly an inch wide) and wrap them around a curling iron barrel (¾ inch is ideal for drama). Hold for 10 seconds, release, and allow the spiral to cool. Don’t touch the curl until it’s completely cooled—the cooling process sets the spiral shape. Pin cooled curls up against your head for a few minutes, then release them to hang freely for maximum impact.
Holding Everything in Place
Use a flexible-hold hairspray on your slicked base so it doesn’t feel stiff or look plastic, and use a medium-hold spray on your spiral curls to keep them bouncy but defined. The curls should move when you move, not hang like stiff ropes.
Real-world advantage: A slicked-back high ponytail actually minimizes facial features, making it perfect if you prefer a style that doesn’t emphasize cheekbones or jawline. It’s also excellent for athletic activities because the high placement keeps hair completely off your neck and face.
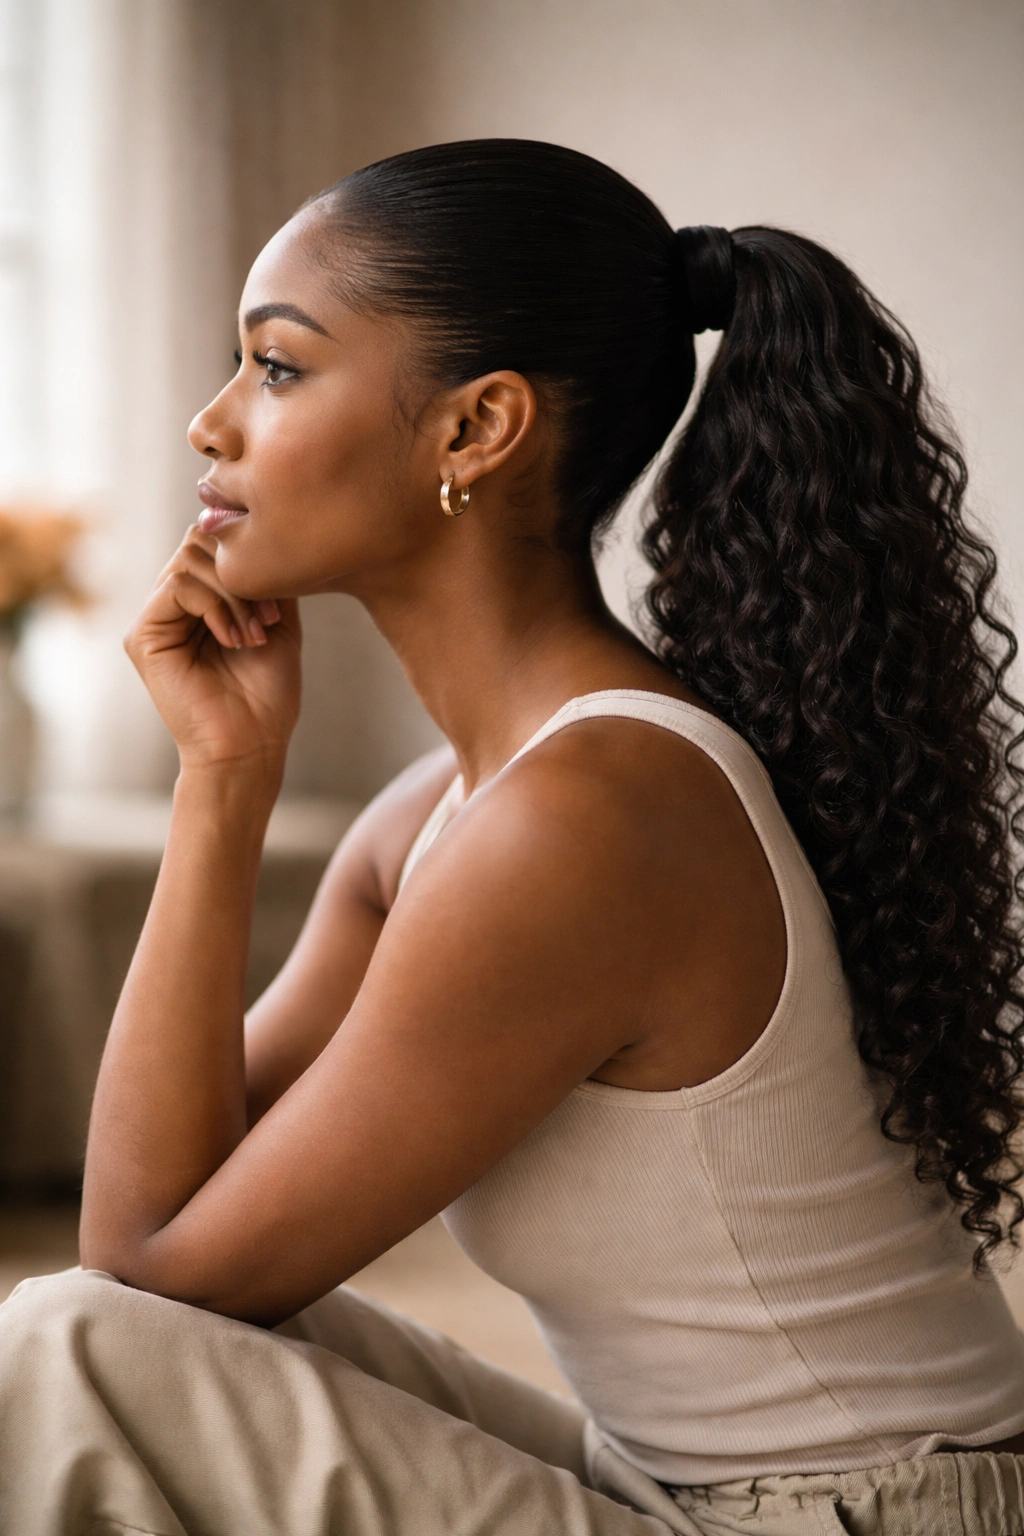
10. Gel-Smooth Ponytail with Bounce and Dimension
This style achieves the difficult balance of looking polished and controlled while maintaining visible curl bounce and dimension. It’s less severe than a fully slicked style but more intentional than a casual pony, making it perfect for professional settings where you want to look sharp without severe.
Building the Smooth Foundation
Use a lightweight smoothing gel (gel is key here, not cream or serum) and apply it to damp hair, combing through for even distribution. The goal is a smooth base, but not a shiny or wet-looking base. The gel should dry clear and not create a visible product layer. Work your hair back into your desired ponytail position and secure with an elastic.
Enhancing Curl Bounce
Don’t oversmoosh your curls into submission. Instead, apply a leave-in curl cream to your ponytail section and gently scrunch your curls upward to encourage bounce and dimension. Separate your coils slightly with your fingers to prevent them from looking one-dimensional or too compact.
Finessing with Texture Spray
A light texturizing spray applied to your curls adds grip and makes them hold their shape better throughout the day. Spray, then gently scrunch your curls one more time so the spray coats them fully. The result is curls that look bouncy and alive rather than weighed down or flat.
Refreshing Your Style Midday
This style actually improves with a midday refresh. Mist your curls with water or a curl refresher spray and re-scrunch them gently. They’ll spring back to life and look even more dimensional because they’ve naturally settled into a slightly more relaxed shape.
Worth knowing: The gel you choose makes a huge difference. Lighter gels designed for wavy or curly hair work better than heavy pomades or edge controls if you want the smooth-meets-bouncy effect. Test products on a small section first to see how they look once dry.
Final Thoughts
The best sleek curly ponytail for you is the one that makes you feel like yourself—polished but authentic, intentional but natural. Black women’s hair is beautifully complex, responding differently depending on moisture, product type, hair density, and curl pattern, which is exactly why a one-size-fits-all ponytail approach never works. These ten styles give you frameworks to work within, but your version will look different from anyone else’s, and that’s the whole point.
Real durability for any of these styles comes down to three non-negotiable factors: the right products for your specific hair type (lightweight gels, not heavy pomades, if you have tighter curls), a moisture-rich routine that keeps your curls healthy and defined, and techniques that work with your texture rather than fighting against it. A sleek ponytail that respects your curl pattern will last longer, look better, and feel more comfortable than one that tries to force your hair into an unnatural state.
Start with whichever style speaks to you, practice the technique a few times to develop your own rhythm, and don’t be afraid to modify based on what works for your hair specifically. The techniques here are guidelines, not rules—your texture, density, and personal aesthetic are always the authority.