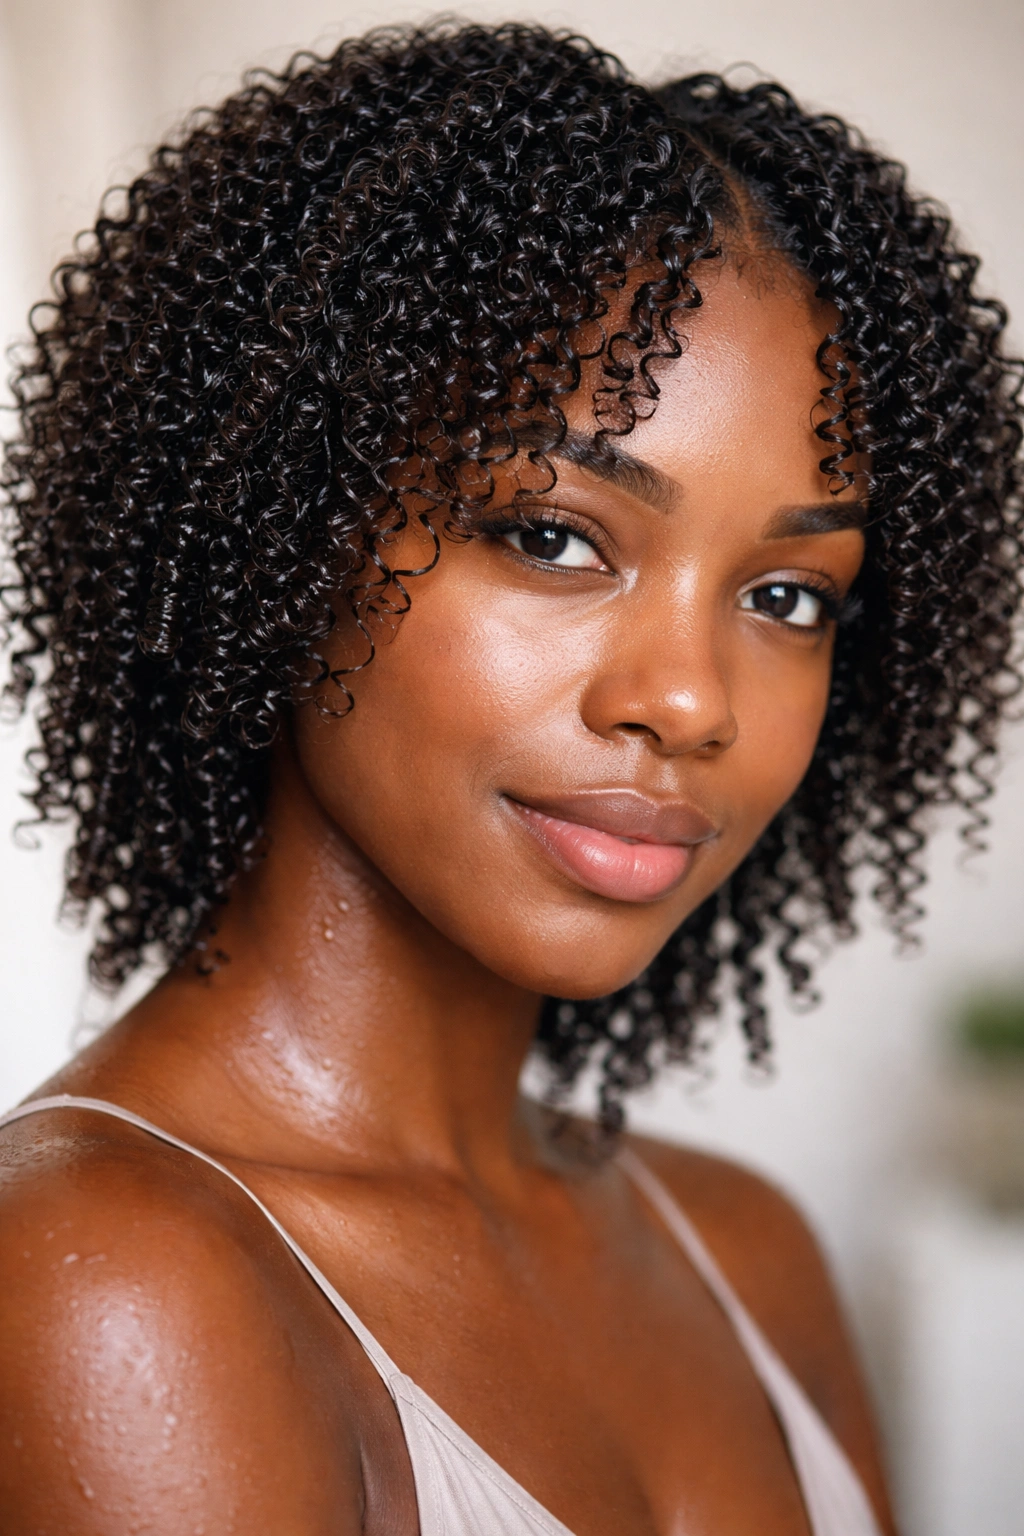
If your coily hair has been looking flat, undefined, or just… there lately, you’re not alone. Many people with coily textures struggle with making their curls actually pop — those tight, springy coils that catch the light and show off real dimension instead of just blending into a fuzzy cloud. The difference between coils that look alive and coils that look dull? Intentional definition. It’s about understanding exactly how to encourage your individual curl strands to clump together, how to use the right products in the right sequence, and how to style in a way that lets each coil shine rather than frizz out into its surroundings.
The frustration is real because coily hair doesn’t always play by the same rules as looser curl patterns. You can’t just shake it out and expect perfect ringlets. Coily hair responds to specific techniques — the way you apply products, the amount of moisture you use, how you manipulate the hair while it’s wet, and what you do after it dries all matter tremendously. But here’s the thing: once you know what works, you get to enjoy some genuinely spectacular hair days. Those tight, defined coils can look incredible if you treat them right.
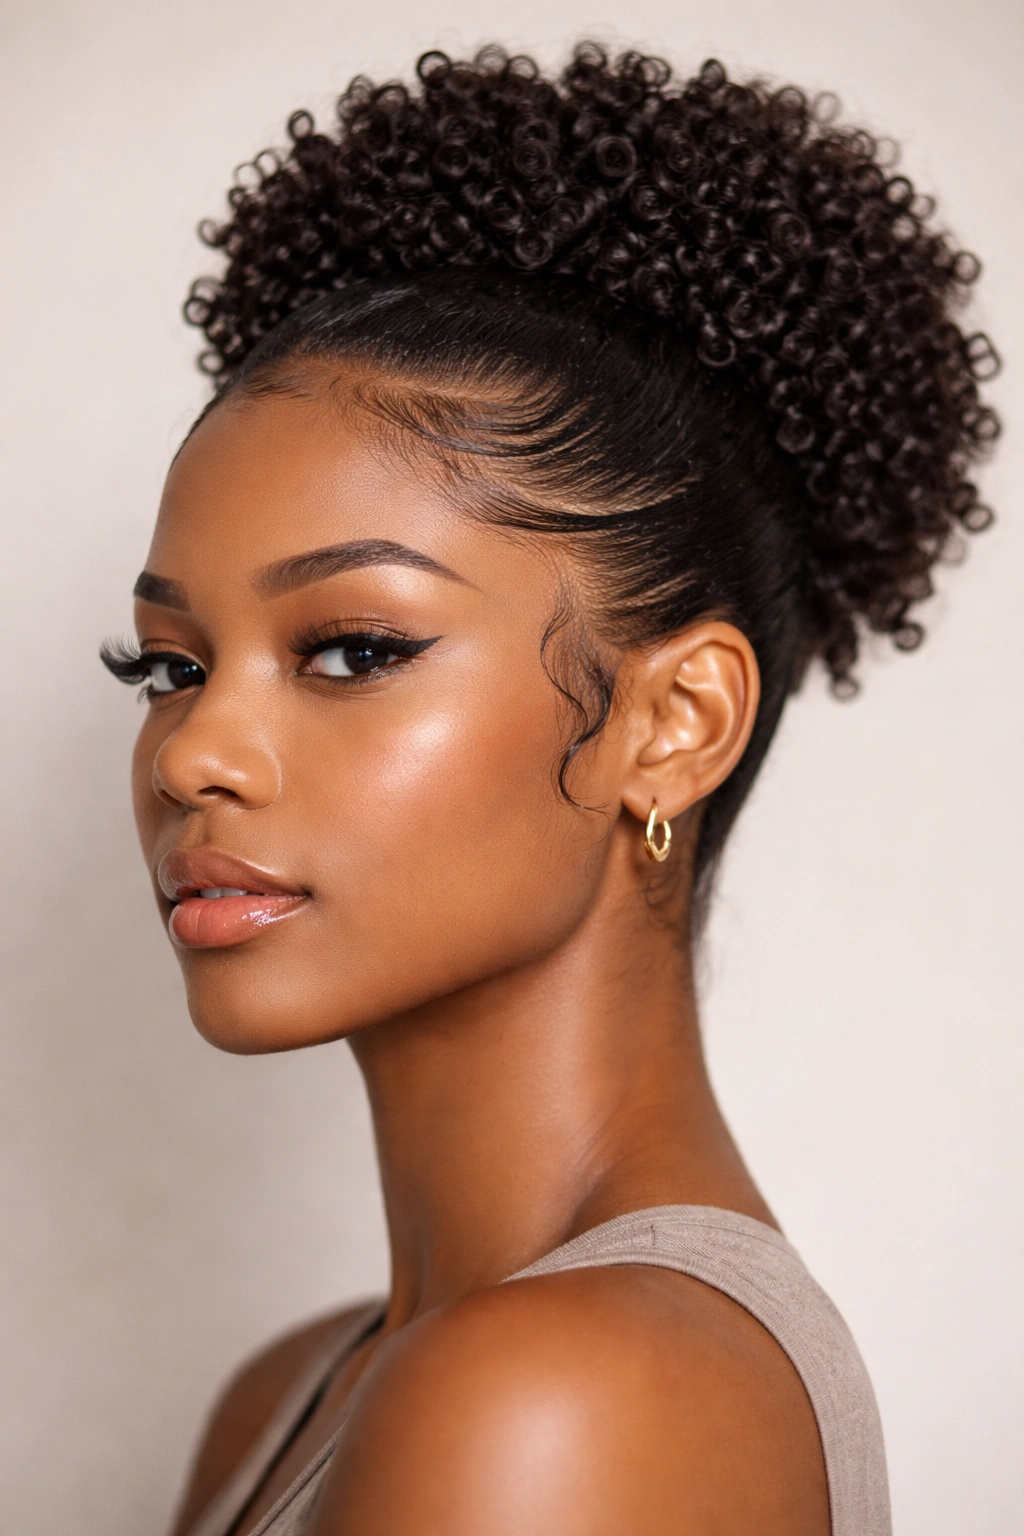
This guide covers 10 specific ways to style coily hair so your curls actually show definition instead of looking shapeless. Some of these are quick everyday looks you can do in 15 minutes. Others are weekend styles that take more time and planning but deliver stunning results that last for days. All of them prioritize one thing: making your individual coils visible, bouncy, and undeniably gorgeous. Let’s walk through each one so you can pick the styles that fit your routine, your hair type, and the look you’re going for.
1. Wash and Go With Type 4 Curls
A wash and go sounds simple, but it’s actually the most challenging look to nail if you want real definition. You’re working with absolutely no additional support — no twists, no braids, no elongation from styling tools. Everything depends on how you treat your hair during the washing and conditioning process, and then what you apply while it’s soaking wet.
Start with a sulfate-free cleanser that won’t strip your coils of their natural oils. Sulfates create that squeaky-clean feeling, but they leave coily hair prone to breakage and frizz because they’ve stripped away the protective layer. After cleansing, apply a rich, creamy conditioner (think leave-in consistency, not rinse-out) while your hair is still wet and dripping. Rake the conditioner through with your fingers in the direction your curls want to go — not fighting against them.
The Styling Sequence That Matters
- Apply a lightweight curl cream or gel to soaking wet hair, working in small sections from the roots down
- Use praying hands method: squeeze the product into each section rather than scrunching, which can disrupt curl clumping
- Cup each section gently in your hands and encourage the coils to nest against each other
- Avoid touching your hair as it air-dries — every touch introduces frizz opportunity
What Makes This Work
The secret here is product layering and patience. Don’t rush to touch wet hair or mist it with water. Let it dry completely undisturbed, and your coils will have time to fully form their natural shape. Most people who struggle with wash and go’s are touching, scrunching, or picking at their hair while it’s drying — that’s the enemy. You’re also likely using too much product. With coily hair, less is often more because product buildup weighs down tight coils faster than it does looser curls.
Pro tip: Seal your soaking wet hair into a bonnet or pineapple on your head while it air-dries overnight, and you’ll wake to coils that have dried in perfect clumps without any disturbance.
2. Defined Twists and Coils
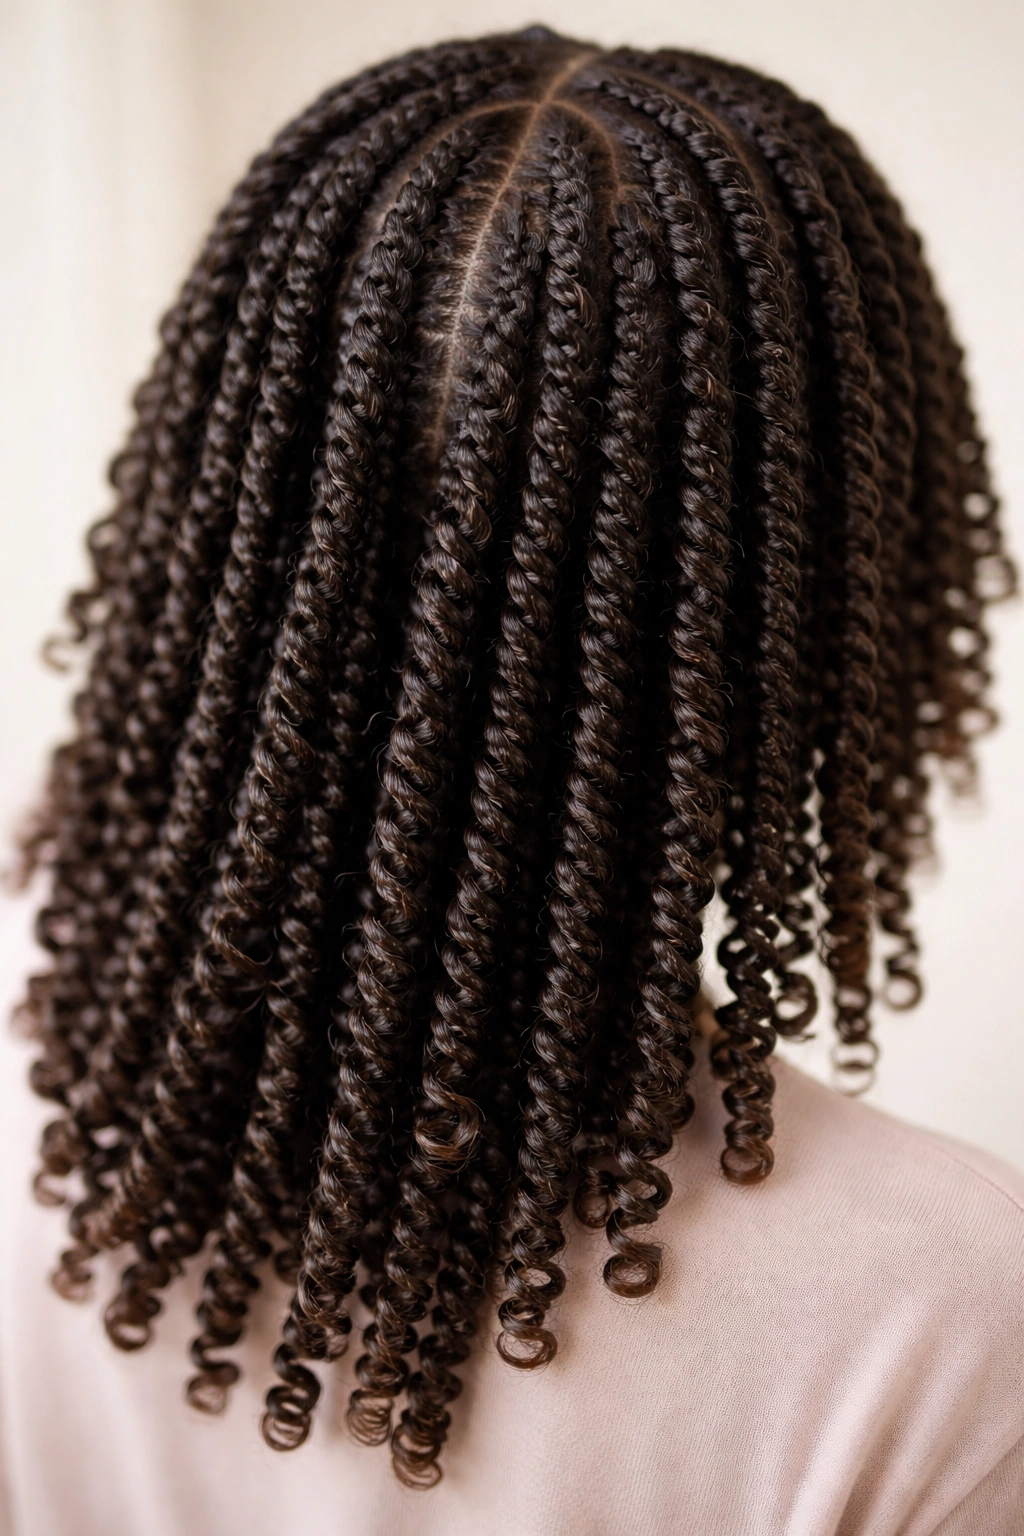
Two-strand twists aren’t just a protective style — they’re also a texture-defining powerhouse if you do them right. The technique involves taking two strands of hair and wrapping them around each other from root to tip, which naturally forces your coils into a defined, chunky formation.
The key is starting with very wet hair and lightweight product. Take a section of hair about the width of your index finger. Apply a light gel or twisting cream, then split it into two strands. Begin twisting from the roots, keeping tension so the two strands wrap smoothly around each other without buckling. Continue all the way to the ends. The tighter you twist and the more consistent your tension, the more defined those coils will be when you unravel the twist.
Installation and Longevity Tips
- Divide your entire head into 12 to 20 large twists depending on your desired size and head coverage
- Twist each section while the hair is saturated with product — let drying happen naturally after installation
- If you want the twist texture to last, sleep in a bonnet or on a silk pillowcase
- Unravel the twists after 3 to 7 days (depending on moisture and grip) to reveal beautifully clumped coils underneath
The Definition Payoff
When you unravel a twist that’s been in for several days, the coils come out with serious structure and bounce. They hold their shape without needing to redefine, and you get multiple days of wear from a single install. The coils are also visibly separated from each other instead of all running together into an undefined mass.
Worth knowing: The size of your twists affects the final result. Thin, pencil-sized twists create extra-tight coil definition but take forever to install and can cause tension on the scalp if too small. Thicker twists (index-finger width) are faster to do and still provide excellent definition while reducing scalp stress.
3. Chunky Braids for Texture
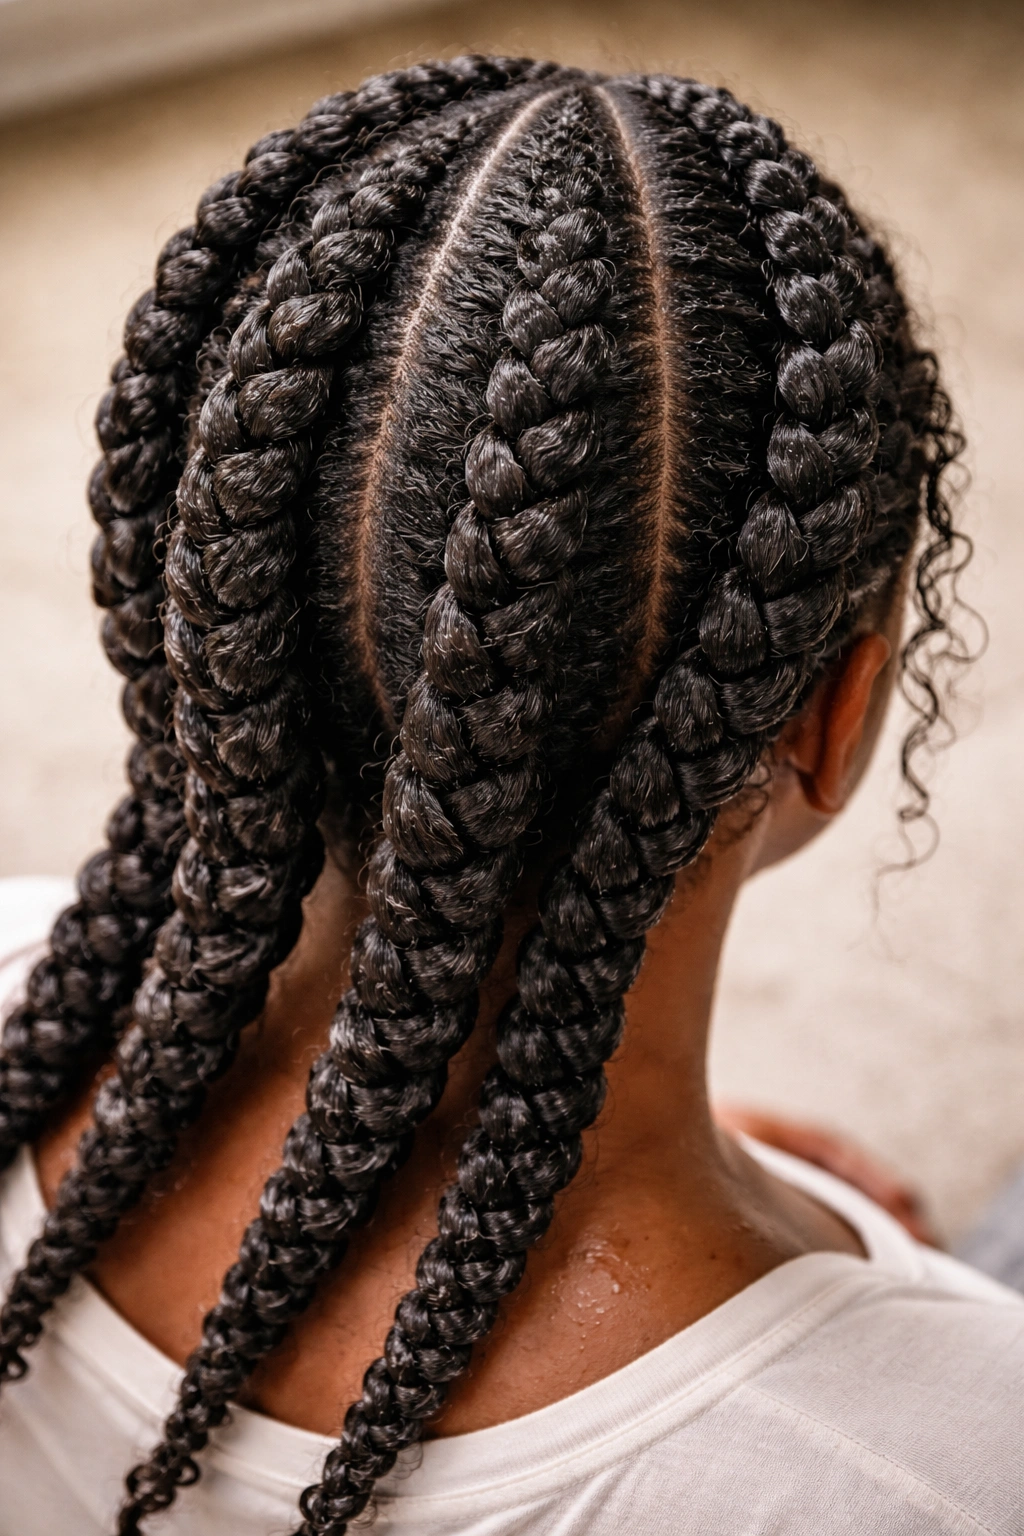
Braids have been a go-to for coily hair forever, and there’s a reason: they work. A thick, chunky braid forces coils into an organized pattern and holds that pattern even after you unravel the braid. The result is coils with structure and bounce that would take hours to achieve any other way.
Create 4 to 8 large braids (depending on your head and desired texture) using the classic three-strand technique. Braid while the hair is damp but not soaking wet — completely saturated hair is harder to control and the braids won’t grip as cleanly. Use a light cream or gel at the base of each braid to help the three strands stay organized as you work your way down.
Installation Best Practices
- Start braiding from the roots and keep tension even throughout the entire length
- Braid all the way to the ends so the coils are defined from scalp to tip
- Allow braids to air-dry completely (or use a blow dryer on low heat if you’re in a hurry)
- Leave braids in for at least 3 days to fully set the coil pattern
- Unravel gently by separating the three strands at the bottom and working your fingers upward
The Texture That Emerges
When you unbraid, the coils have been organized into a tight, clumped formation. They spring back with serious definition. The coils are visibly separated, which is exactly the look you’re aiming for. This style also gives you amazing volume — the braids hold space in your hair, so when you unravel and fluff, you get height and dimension.
Insider note: If you braid in a zig-zag pattern across your head instead of straight down, you get different wave and bounce directions, which looks more dynamic and textured when unbraided.
4. Perm Rods and Curl Clumping
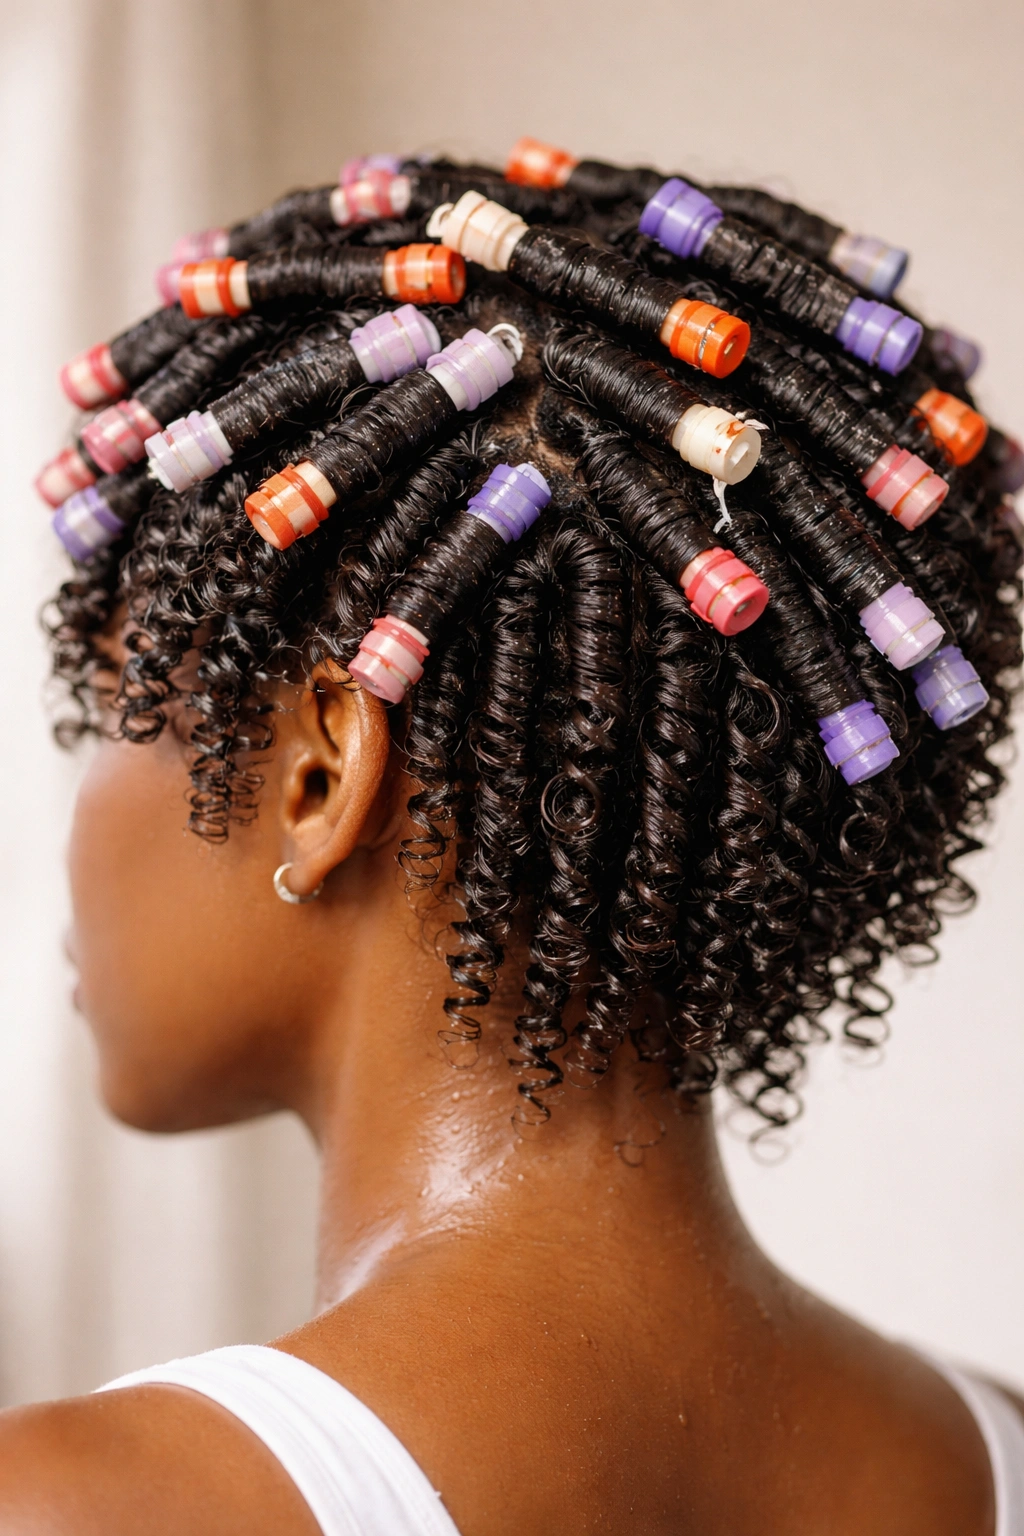
Perm rods are a technical styling tool that might seem intimidating if you’ve never used them, but they’re worth learning because they deliver extremely defined coils. A perm rod is a small plastic cylinder (available in various diameters) that you wrap damp hair around, creating a tight coil formation that locks in as the hair dries.
Divide your hair into small sections roughly the width of the perm rod. Take a section and apply a curl cream or mousse. Smooth the section straight, then place the perm rod at the end of that section. Roll the hair up and around the rod toward the scalp, keeping tension so the hair doesn’t slip. Fasten the rod with its attached clip. Continue this process across your entire head.
How to Use Perm Rods Effectively
- Use smaller rods (ranging from .5 inch to .75 inch diameter) for tighter, more defined coils
- Roll hair toward the scalp with even tension — loose rolling means loose curl definition
- Allow rods to air-dry completely or use a hooded dryer to speed the process
- Leave rods in for at least 4 hours (or overnight) before removing
- Release rods gently by unclipping and gently unwinding the rod while supporting the curl with your other hand
Why They Create Maximum Definition
Perm rods force your coils into a uniform cylinder shape while drying, which means every single coil has the same structure and springiness. The result is uniform definition — not some coils tighter than others, but a cohesive look across your entire head. The coils are also elongated slightly, so they’re more visible and have more volume.
Pro tip: Use perm rods on damp (not soaking) hair for the cleanest results. Soaking wet hair takes too long to dry, and overly damp rods can slip as the hair dries and contracts.
5. Bantu Knots and Spring Curls
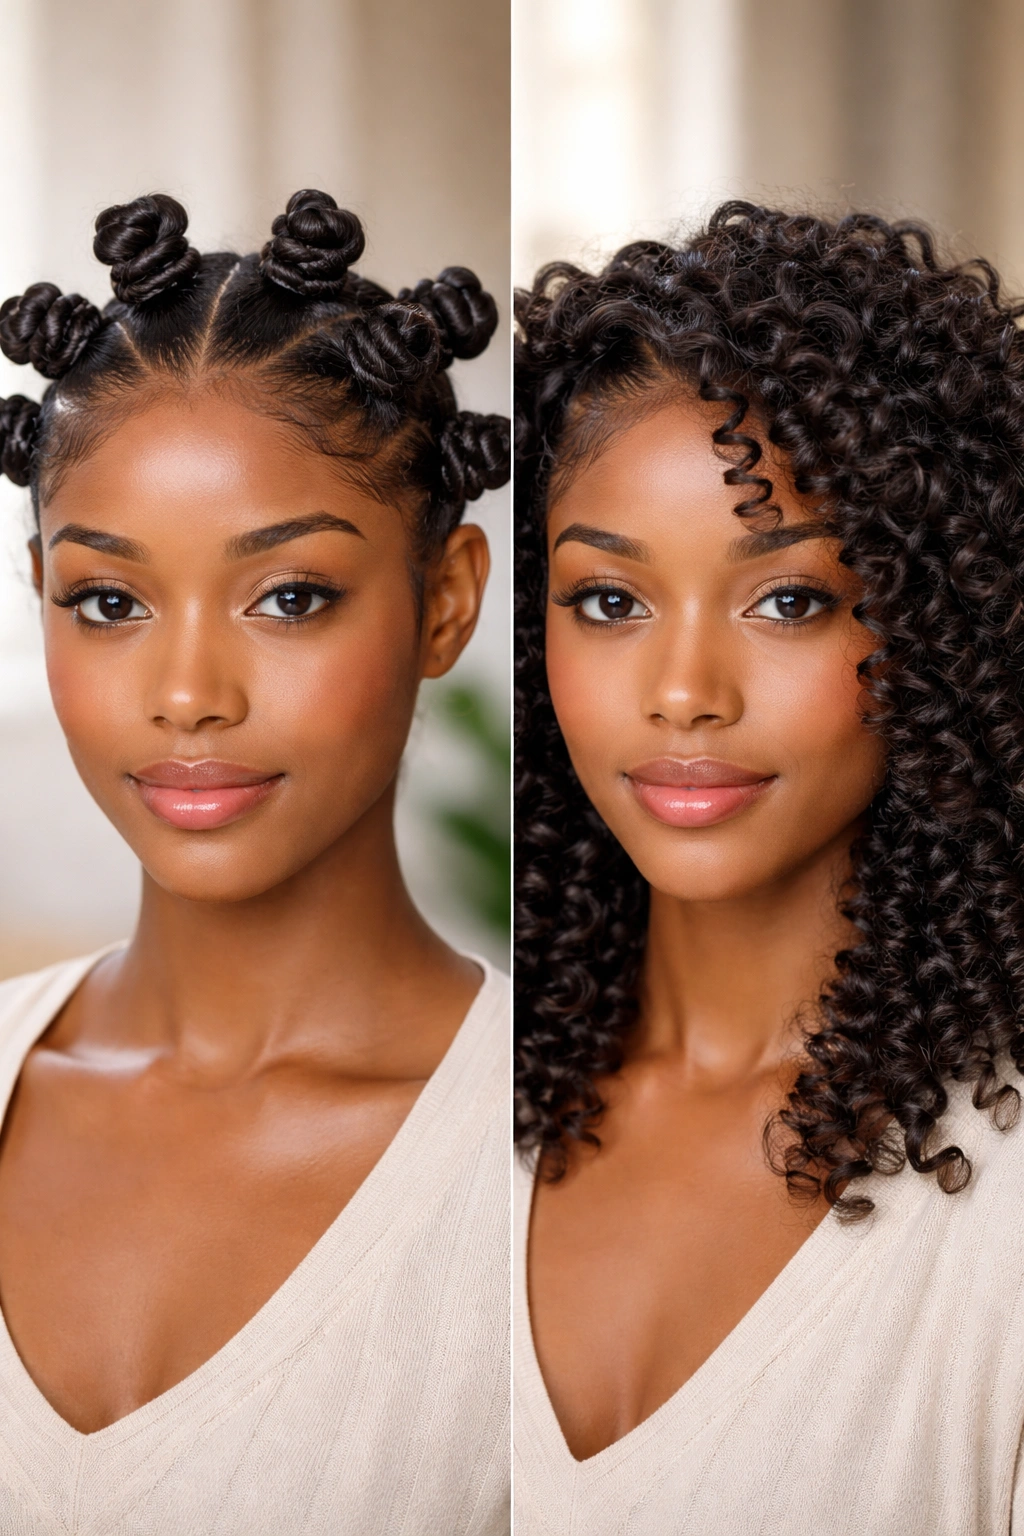
Bantu knots create one of the most visually striking textures possible with coily hair. A Bantu knot is created by twisting a section of hair into a rope, then coiling that rope into a flat spiral knot close to the scalp. When you unravel the knot, the section springs into a series of perfectly defined ringlet-like curls.
Section your hair into 8 to 12 square or rectangular sections, depending on the size you want. Apply a twisting cream or curl mousse to the first section. Twist that section of hair into a rope from root to tip, keeping even tension. Then, take the twisted rope and wrap it around itself in a spiral, pinning the knot flat against your scalp with bobby pins or kanekalon hair (if you want a firmer hold). Repeat across your entire head.
The Unraveling and Final Look
- Sleep in your Bantu knots for at least one full night (or leave them in for 2 to 3 days for extra-set curls)
- Remove bobby pins carefully and gently unravel each knot by unwinding the rope
- The section springs into a series of coils that are tight, bouncy, and individually defined
- Finger-comb between sections gently to separate the coils and add volume
- You get the incredible texture of separate, springy ringlets without having to finger-coil each one individually
Why This Works So Well
Bantu knots combine the coil-clumping benefits of twists with the spiral structure that creates extra bounce. The coils are forced into a specific shape and hold that shape because of the knot compression. The result is coils that look energized and three-dimensional.
Worth knowing: Bantu knots work best on hair that’s at least chin-length, ideally longer. Very short coily hair doesn’t have enough length to create visible ringlets when the knots are unraveled.
6. Two-Strand Twists With Gel
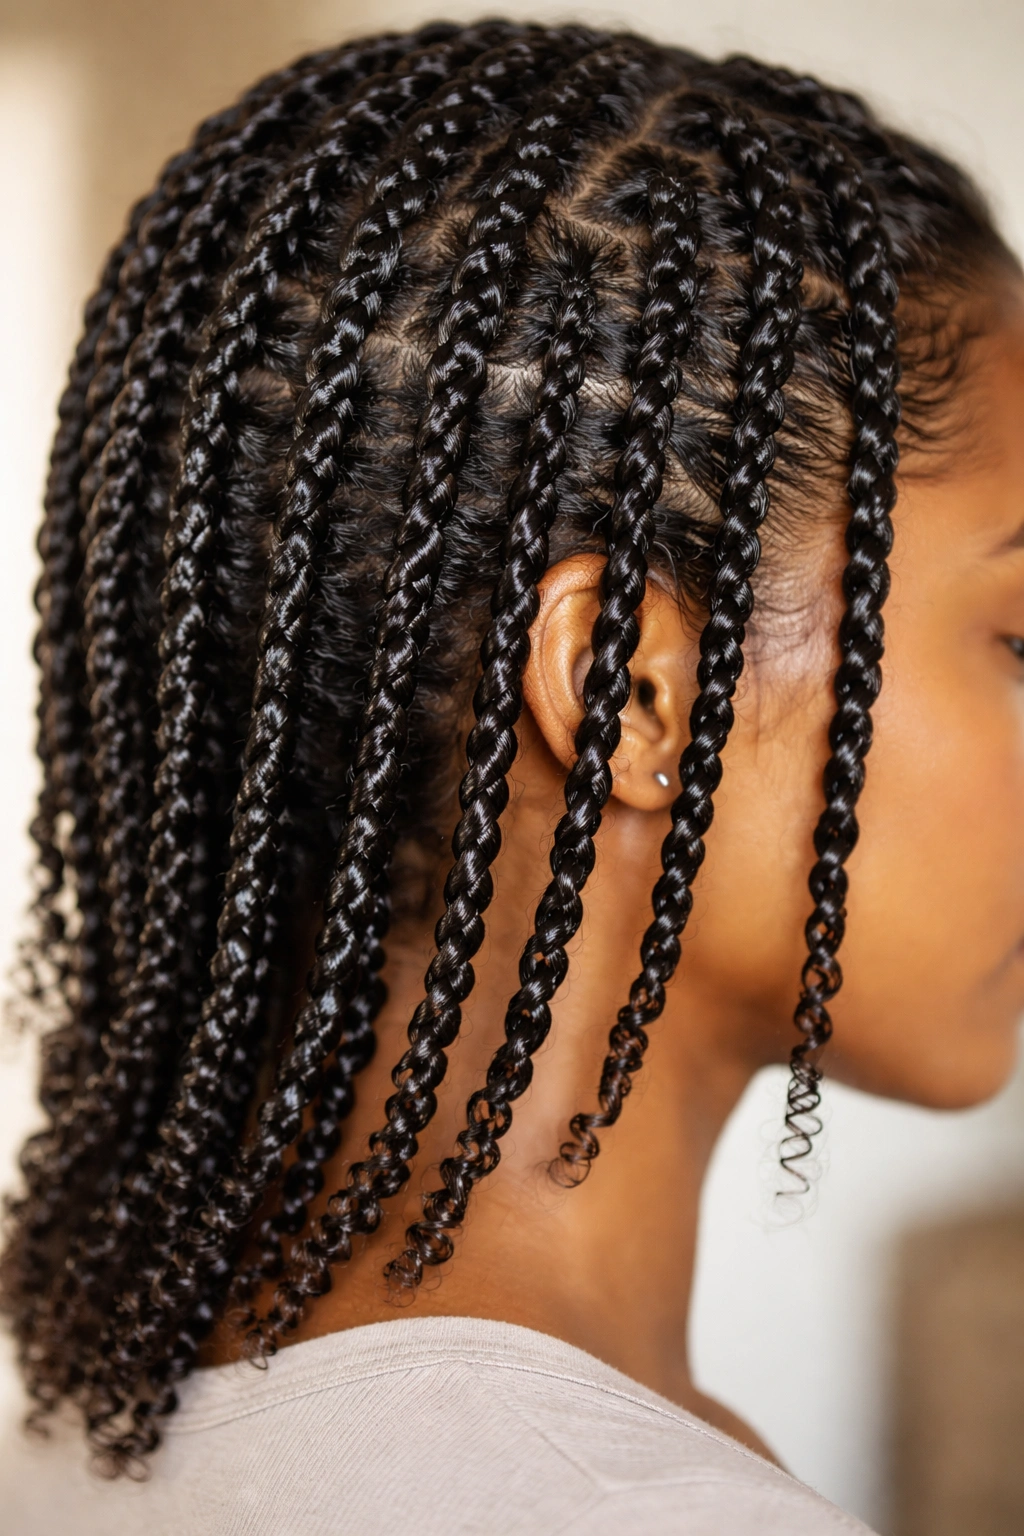
Two-strand twists are one of the most reliable ways to define coils, especially if you use a strong-hold gel. Unlike the softer approach earlier, this version emphasizes the gel component to lock each twist in place so the definition lasts through multiple days of wear.
Start with hair that’s damp to soaking wet. Apply a medium-to-heavy hold gel (think something with polymer resin, not just a cream) to a section. Split the section into two strands and begin twisting from the roots, keeping tension. The gel creates a firm grip between the two strands, which means the twist stays tight and well-defined even as your hair continues to hydrate and adjust throughout the day.
Making Twists Last Longer
- Use a heavy-hold gel or even a two-in-one twist mousse that’s specifically formulated to lock style
- Twists with gel are less fragile than twists with cream, so they can handle more manipulation
- You can finger-comb through twisted hair more freely without the twists coming undone
- Retwist the roots every 5 to 7 days to maintain a polished look
- Sleep on a silk pillowcase or in a bonnet to minimize frizz and maintain the gel hold
The Defined, Polished Result
Gel-twisted hair has a sleek, intentional appearance. Each twist is distinct and visibly separated from its neighbors. The coils are defined all the way down the length, and the style reads as intentional rather than just “I didn’t style my hair today.”
Pro tip: If you find regular gel too heavy or sticky for your preference, try a lightweight styling lotion with polymer resin — you get the hold without the stiffness or flakiness that heavy gels sometimes create.
7. Mohawk and Textured Crown

A coily mohawk (sometimes called a faux hawk when it’s less dramatic) is a statement style that showcases defined coils right down the center of your head. The idea is to create maximum volume and definition along the center section while keeping the sides flatter or braided back.
Divide your hair into three vertical sections: center, left side, and right side. The center section is where your coils will be most visible and defined, so this is where you apply your product and focus your styling effort. Braid the left and right sides close to the scalp (or use edge control to smooth them back), which keeps them out of the way and draws attention to the center coils.
Styling the Center Section
- Apply a strong-hold gel or mousse to the center section while it’s damp
- Use the praying hands method to smooth product through the coils without disrupting their natural clump pattern
- Encourage the coils to stand up and out from the scalp by gently lifting them as the section dries
- Finger-comb through the center section once it’s mostly dry to add volume and separate coils
- The braided sides frame the textured center, making the defined coils even more of a focal point
Why This Look Commands Attention
The mohawk style naturally emphasizes the center section, so all eyes go to your most beautifully defined coils. You’re not fighting to define your entire head of hair — you’re strategically showcasing the best part. The contrast between the sleek sides and the textured center creates visual interest and makes the coils look even more defined by comparison.
Worth knowing: This style requires a strong-hold product to maintain throughout the day. Regular styling cream won’t keep the center coils lifted and separated, so invest in a gel or mousse with serious staying power.
8. Finger Coils for Maximum Definition
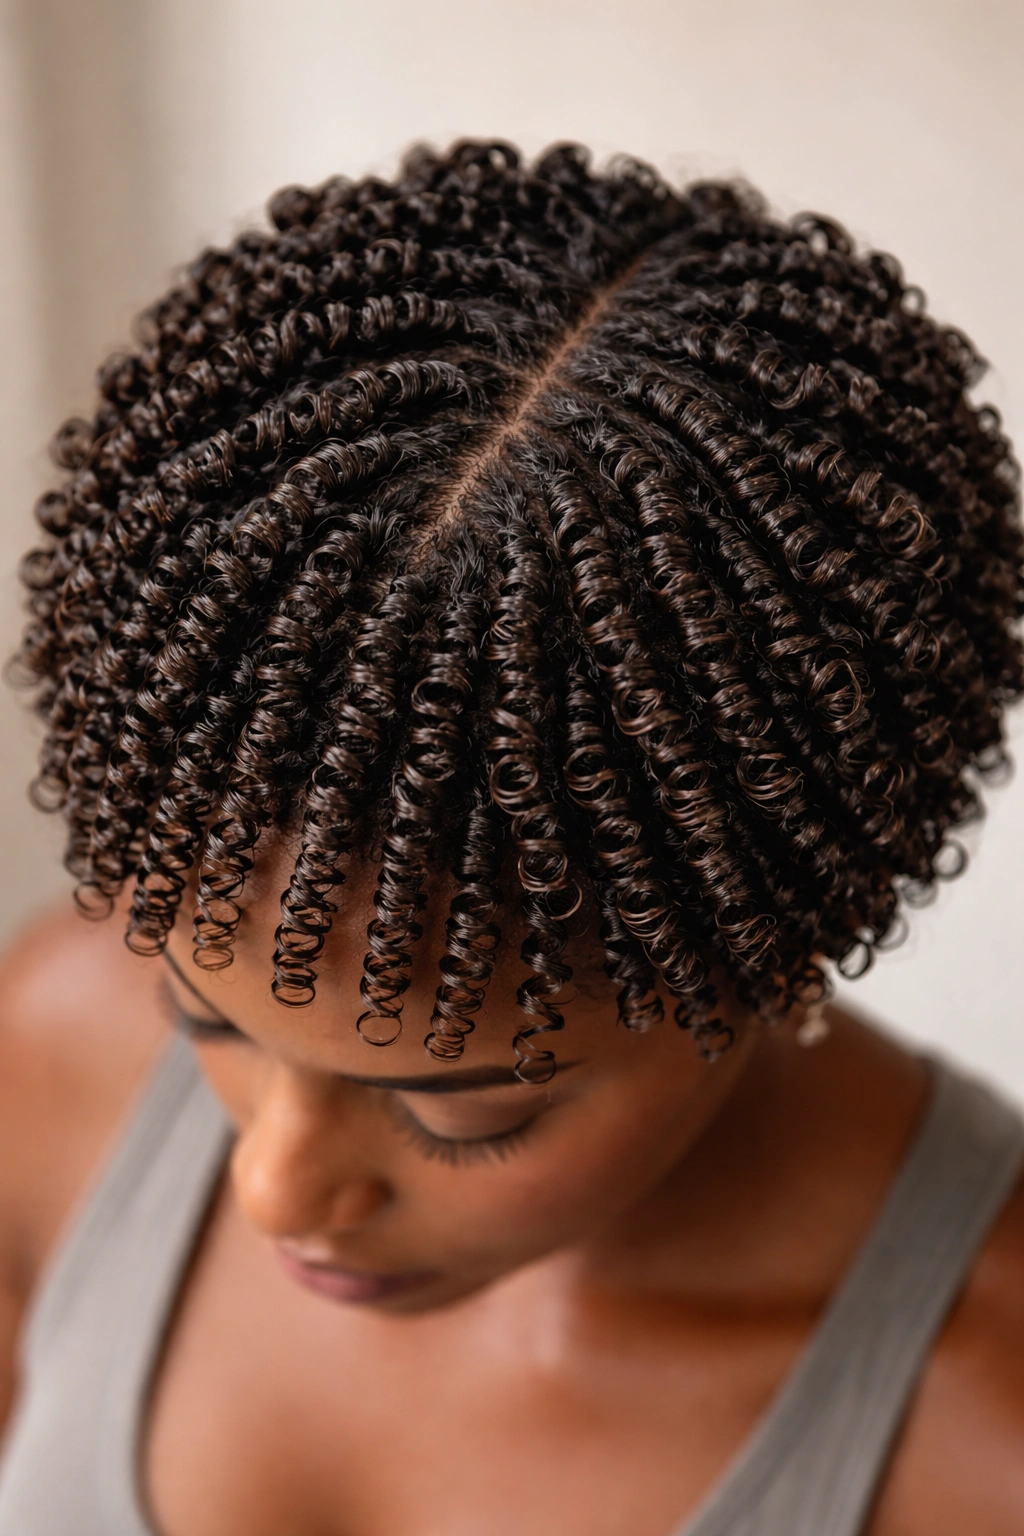
Finger coiling is the most labor-intensive way to define coils, but it’s also the most customizable. You’re literally creating individual coils by hand, which means every coil is exactly as tight and defined as you want it to be.
Start with soaking wet hair and a curl cream or mousse. Take a small section (roughly the width of your pinky finger). Wrap that section around your index finger in a tight spiral, starting at the root and working down to the tip. Squeeze the coil gently against your finger as you wrap to encourage the hair to hold the spiral shape. Release the coil and move on to the next section. Repeat across your entire head.
The Commitment and Payoff
- Finger coiling an entire head of hair takes 2 to 4 hours depending on hair length, density, and your speed
- Allow finger coils to air-dry completely (or use a hooded dryer)
- The result is unmatched definition — every single coil is distinct, springy, and visibly separated
- Finger coils last 4 to 7 days if you’re careful with sleeping and manipulation
- You can re-coil just the roots after a few days instead of redoing the entire head
When to Use This Style
Finger coiling is perfect for special occasions when you want the absolute most defined, polished coil look. It’s not something most people do regularly because of the time investment, but for a big event or when you want to feel your best, it’s 100% worth the effort. The coils are practically perfect — uniform, bouncy, and undeniably gorgeous.
Insider note: If full-head finger coiling sounds too time-consuming, try coiling just the front sections and one or two accent sections. You get the visual benefit of ultra-defined coils where people can actually see them without the hours of work.
9. Plopping Method and Defined Waves
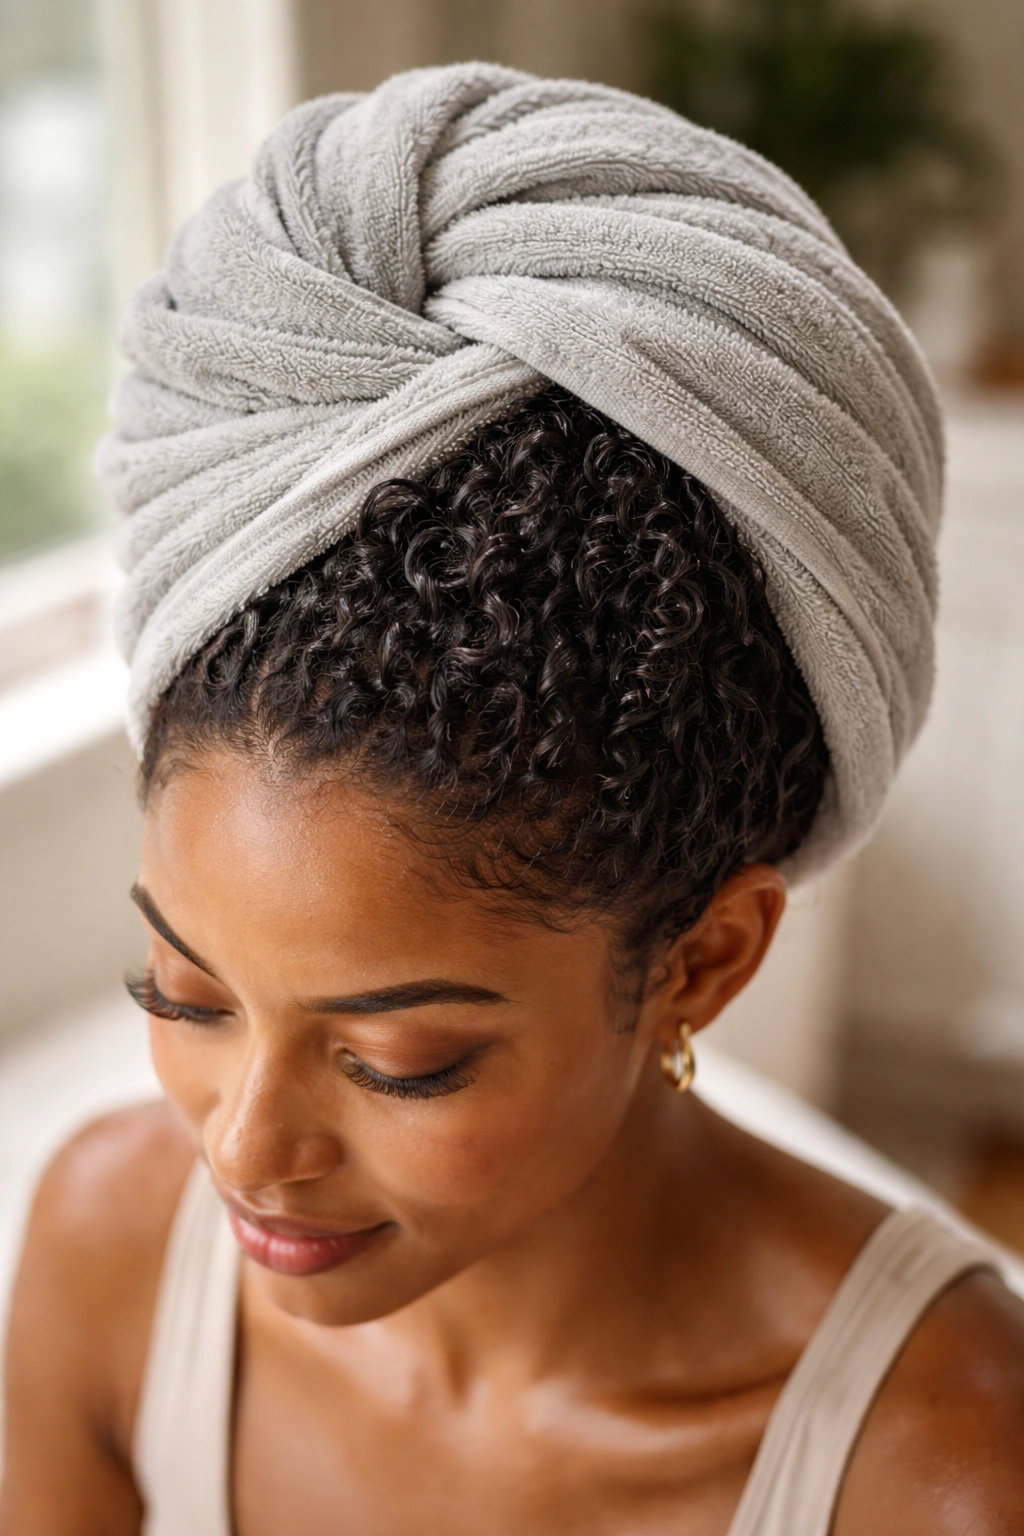
The plopping method isn’t technically a specific style, but it’s a technique that transforms how your coils dry, and that directly affects their definition. Plopping involves wrapping your wet hair in a microfiber towel or t-shirt in such a way that the hair clumps together tightly while it dries, encouraging coils to form in organized groups.
After applying your products, gather your soaking wet hair on top of your head and wrap it in a microfiber towel or dedicated plopping bonnet. The weight and compression of the fabric forces your coils to nest against each other. Leave your hair plopped for 20 to 45 minutes (or overnight if you’re patient). When you unwrap, your coils have dried in clumps with visible definition instead of in scattered individual strands.
How Plopping Affects Coil Definition
- The compression creates natural coil clumping without you having to do anything
- Coils that might frizz out during air-drying stay grouped together in organized formations
- The result is fewer single-strand frizz and more visible definition
- Coils are naturally elongated slightly by their weight being distributed evenly
- You get volume and bounce without any additional styling effort
Best Practices for Success
- Use microfiber towels or 100% cotton t-shirts — regular terry cloth towels create too much frizz against coily hair
- Ensure your products are fully applied before plopping so the entire section gets product coverage
- Don’t plop hair that’s so wet it’s dripping — damp-wet (post-conditioner squeeze) is ideal
- If you plop overnight, your coils will dry completely and be fully set
Pro tip: Layer your plopping — use a microfiber towel for the first 20 to 30 minutes, then switch to a silk or satin bonnet while the hair dries the rest of the way. This reduces frizz in the final stages of drying.
10. Edge Control and Sleek Sides With Coils
While your coils are the main event, the way you handle your edges and the sides of your head affects how defined and polished the overall style looks. Sleek, controlled edges create a frame for your coils, making them appear even more intentional and beautiful.
Use a lightweight edge control product (not a heavy pomade that will weigh down your coils) to smooth your edges, baby hairs, and hairline. Apply with a firm brush or an old toothbrush, working the product into a smooth, sleek line. You’re creating definition at the perimeter of your head, which draws the eye inward to your coils. Sleek edges say “I took time with this style” even if your coils are a simple wash-and-go.
Edge Styling Techniques That Elevate Your Coils
- Use a comb or firm brush to direct edge hairs in a consistent direction, creating clean lines
- Apply edge control smoothly but not so heavily that it looks greasy or stiff
- Create geometric shapes with your edge control: straight lines, waves, swoops, or geometric patterns
- Seal your edges by running a warm brush (not hot enough to damage hair) over the styled edges to meld them into place
- Re-apply edge control every 2 to 3 days as you wear your style to keep edges crisp
Why Edges Matter to Overall Definition
Your face and hairline are what people see first. If that area is messy, fuzzy, or undefined, it makes your entire style look less intentional. Sleek, controlled edges create a professional, polished frame that lets your beautiful defined coils be the focal point. It’s the finishing detail that elevates a casual look into something more considered.
Worth knowing: Edge control doesn’t have to be expensive. Many people use clear or translucent gels, lightweight pomades, or even diluted aloe vera gel on their edges. Experiment to find a product that gives you the hold and shine you want without weighing down the fine hairs at your hairline.
Final Thoughts

Defined coils aren’t about having perfect curls — they’re about making your curls look intentional, bouncy, and beautifully separated from each other. Whether you go for a quick wash and go, invest a few hours in finger coils, or choose something in between, the core principle is the same: moisture, product, and technique working together to encourage your coils to clump and show off their individual texture.
The styles that work best for you depend on your hair length, density, schedule, and personal preference. Someone with a tight schedule might lean toward wash and goes and braids. Someone with more flexibility might enjoy the payoff of Bantu knots or finger coils. The beautiful thing is that you have options — genuine, tested options that work specifically because they respect how coily hair actually behaves.
One more thing worth noting: defined coils require consistency. You can’t expect results if you’re switching between 15 different products and techniques every week. Pick a routine and stick with it for at least two to three weeks. Your hair will acclimate to your product line, your technique will improve with practice, and you’ll genuinely see better definition as you go. The effort is real, but the payoff — waking up to hair that looks alive, bouncy, and undeniably gorgeous — makes it completely worthwhile.