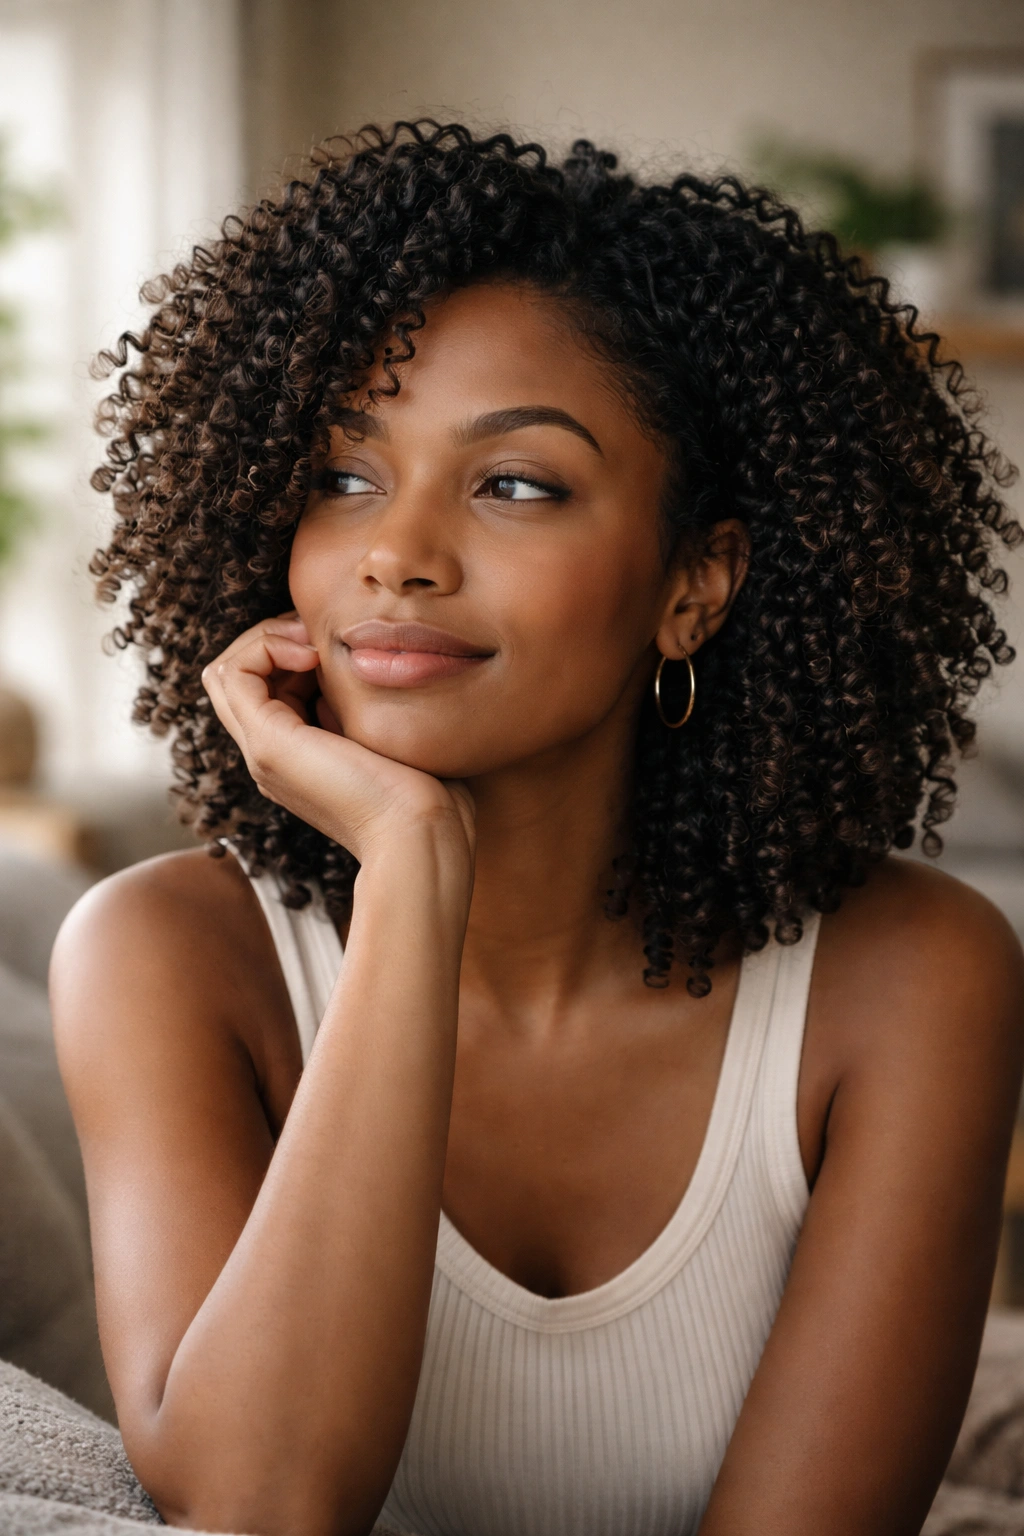
Medium-length coily hair sits in that sweet spot where you’ve got enough length to create volume and definition, but not so much that styling becomes a time-consuming ordeal. The challenge is finding styles that actually work with your natural texture instead of fighting against it, celebrating your curls rather than demanding they cooperate with someone else’s vision of what your hair should be.
The good news? Medium length opens up a ton of possibilities. You can rock protective styles that shield your ends from manipulation and environmental stress, play with textured layers that add movement and shape, or embrace your natural curl pattern with minimal effort. What makes medium-length coily styles so appealing is that they typically require less daily maintenance than shorter cuts, but offer more styling versatility than longer lengths. You’re looking at styles that can go from a wash-and-go situation to something polished and intentional, depending on your mood and schedule.
The key to making any of these styles work is understanding your specific curl pattern—whether you’re dealing with tight coils, loose spirals, or something in between—and choosing cuts and techniques that enhance rather than diminish your natural texture. Medium length is genuinely forgiving. It’s long enough that you can still create the graphic shapes and silhouettes that look stunning on coily hair, yet short enough that you won’t spend half your life working with it.
1. The Textured Shag

A textured shag capitalizes on medium length by layering your coils strategically throughout, creating that effortlessly undone look that actually takes intention to achieve. Rather than the choppy shags you might see on straight hair, a shag cut for coils focuses on longer layers that move through your curl pattern, removing bulk without compromising density. The result is a style that has serious personality—it’s undeniably modern and works beautifully for people who want their natural texture to be the star.
What Makes It Work for Coily Hair
The brilliance of a textured shag on coils is how the layering actually defines individual curl clusters rather than fraying them out. Where a shag might look wispy and broken up on straight hair, on coils it creates beautiful separation and dimension. Your stylist should be cutting into the curl pattern itself, not against it, so the layers follow the natural movement of your coils. This creates a style that looks intentional and sharp without requiring you to blow-dry or straighten anything.
How to Style and Maintain It
- Start with damp hair and apply your leave-in conditioner and styling cream to soaking-wet coils, working through from roots to ends
- Rake through your product with a wide-tooth comb or your fingers, then scrunch upward to encourage curl clumping
- Apply a gel or edge control to tighter coils at the perimeter to define them individually
- Let air dry or use a diffuser on low heat for 60-90% dryness, then go diffuser-free for the last bit
- On second or third day hair, refresh with a light mist of water and a tiny bit of product, then re-scrunch
- Get trims every 8-10 weeks to maintain the shape and prevent the shag from looking too grown-out
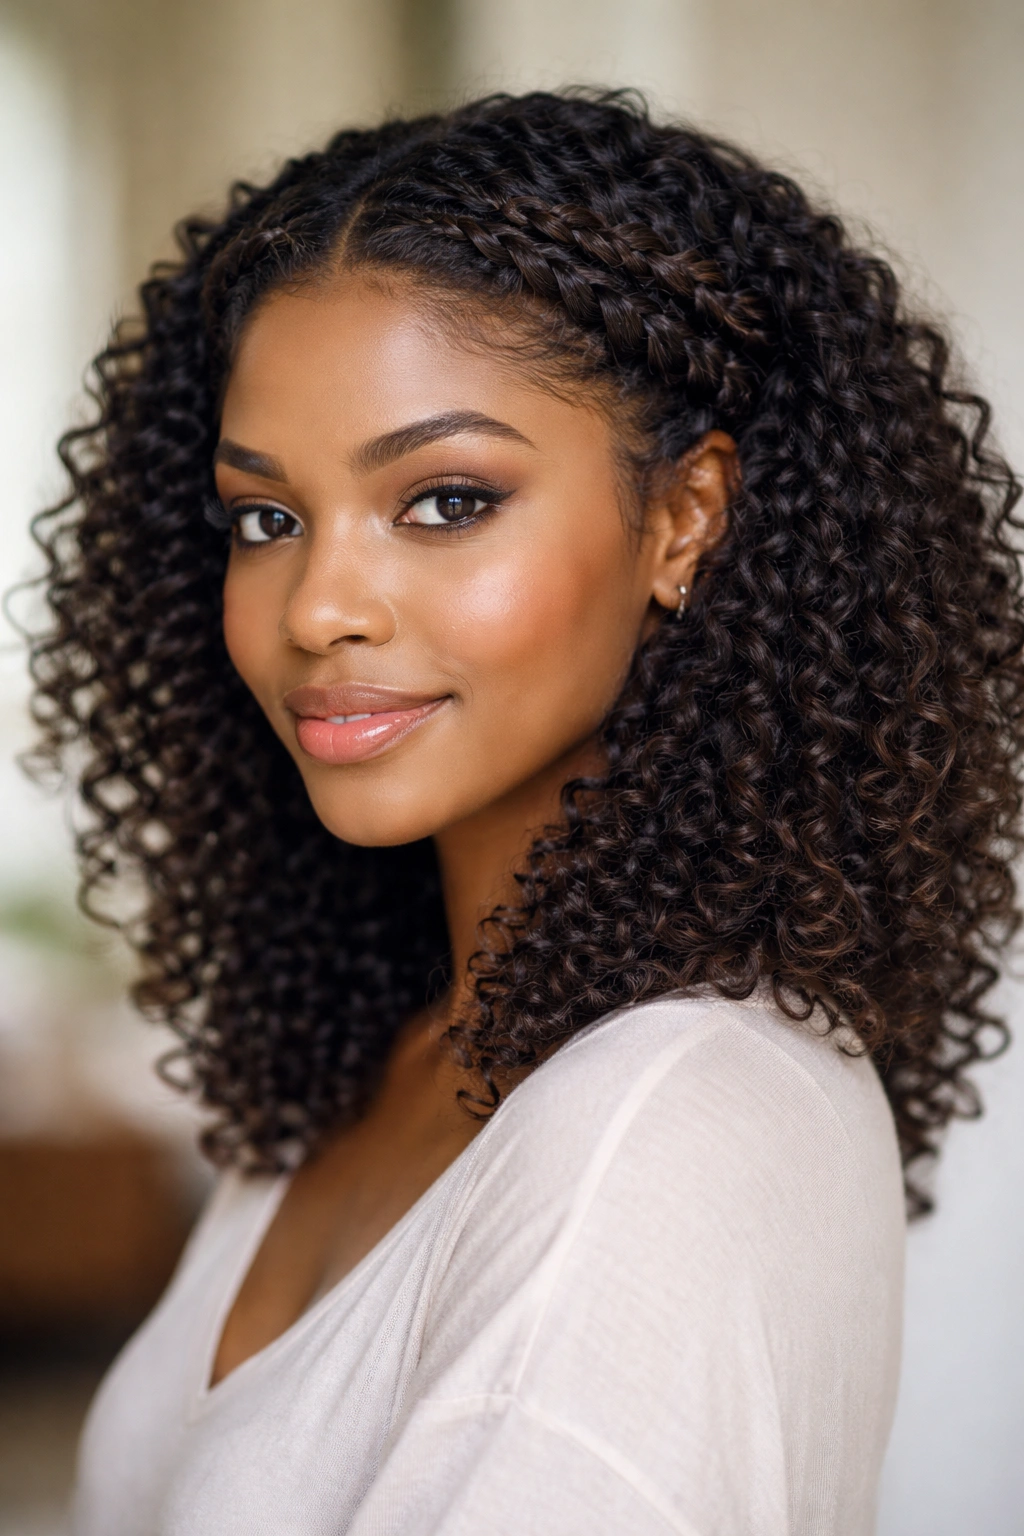
2. Defined Coil-Out with Colorful Accessories
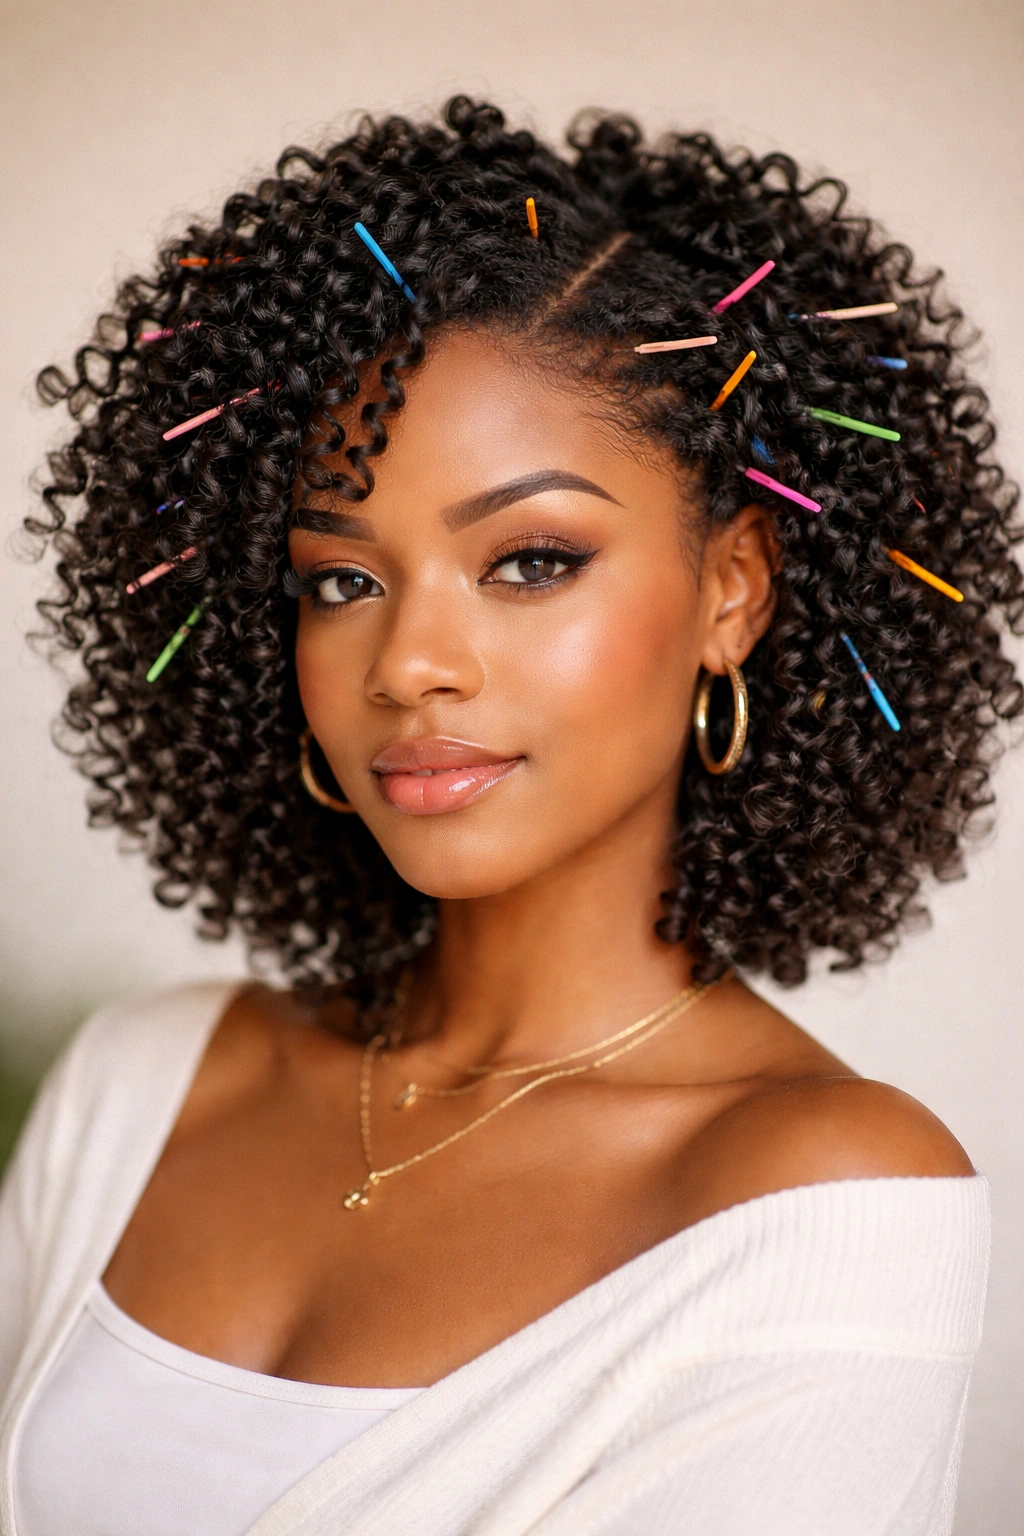
A defined coil-out takes your natural curl pattern and emphasizes each individual coil through styling technique and product choice, creating a style where every spiral is distinct and visible. Medium length is perfect for this because your coils have enough length to show real definition without the style becoming overwhelming or too casual-looking. This is the style for people who want their natural texture to be absolutely undeniable—it’s a statement.
Creating Maximum Definition
The secret to maximum coil definition is using the right products and technique in the right order. Start with a rich, moisturizing leave-in conditioner, then add a lightweight styling gel that won’t flake or feel crunchy when dry. Use the “praying hands” method: sandwich your coil between your palms while applying product, smoothing downward rather than raking through, which breaks up coil clumping. Some people find that applying products to soaking-wet hair creates better definition than damp hair, so experiment with your moisture level.
Adding Visual Interest
One of the best parts of a defined coil-out is using accessories to amplify the style. Colorful bobby pins tucked strategically throughout add personality—try gold, copper, or jewel tones that complement your skin tone. Decorative clips, metallic hair cuffs, or small silk scarves woven through sections create visual movement and interest. The coils themselves are already interesting, so accessories should enhance rather than compete.
Maintenance Tips
- Sleep on a silk or satin pillowcase or use a bonnet to preserve definition overnight
- Avoid touching your hair too much while it dries—hands-off drying creates cleaner coil definition than constant manipulation
- Use a microfiber towel or t-shirt to remove excess water before styling, not a terry cloth towel which disrupts coil formation
- Plan for full air-dry time (4-8 hours depending on density and climate) or use a diffuser
- You can keep a defined coil-out looking fresh for 5-7 days with proper maintenance
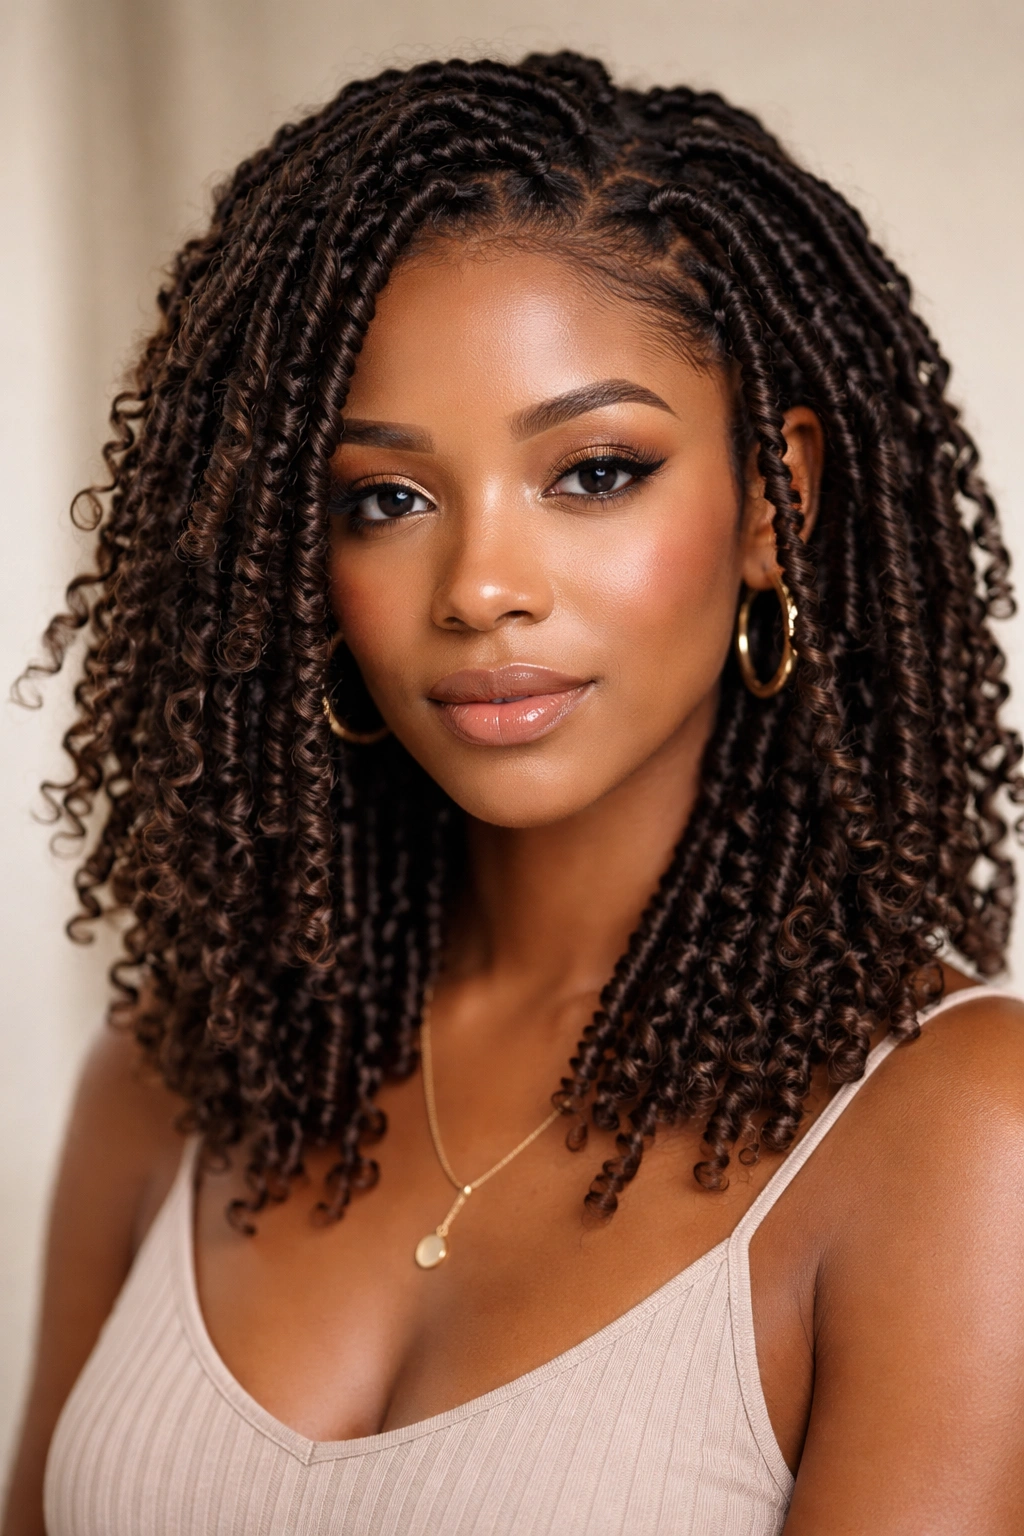
3. The Two-Strand Twist Out

Two-strand twists are a protective style that doubles as a styling technique—you twist damp hair into sections, let them dry completely, unravel them, and what you get is elongated, beautifully defined coils with volume and texture that’s totally different from your natural curl pattern. For medium-length hair, twist-outs create a really flattering silhouette that looks polished and intentional without looking overly done.
Why This Style Delivers
When you twist damp hair and allow the twists to set while dry, you’re essentially training your coils into a stretched but still-textured pattern. The result is coils that have more height and elongation than your natural curl pattern, giving you a completely different look while keeping your hair protected. Medium length means your twists will have enough substance to create real volume—short twists can look thin or wiry, and super long ones can look droopy, but medium-length twists are the Goldilocks zone.
The Twist-Out Process
- Start with freshly washed hair or damp hair that’s been spritzed with water until soaking
- Detangle thoroughly with a wide-tooth comb or your fingers while wet
- Apply leave-in conditioner and a styling cream or butter, working through section by section
- Divide hair into 8-12 sections depending on your density and desired twist thickness
- Create two-strand twists by taking two subsections of hair and wrapping them around each other from root to tip
- Let twists set for 48+ hours before unraveling—drying while in twists is crucial for definition to set properly
- Gently unravel each twist at the roots, running your fingers through the coil pattern to separate and fluff
- You can wear twist-outs for 5-10 days depending on how carefully you handle them
Real Talk About Timing
Twist-outs require patience. You need at least two full days for twists to dry, which isn’t realistic if you need your hair done in a few hours. Some people speed up the drying process with a diffuser on low heat, which works but isn’t ideal for every curl pattern. Planning ahead is essential—many people do their twists before bed on a Friday and wear them starting Sunday.
4. The Pineapple Updo
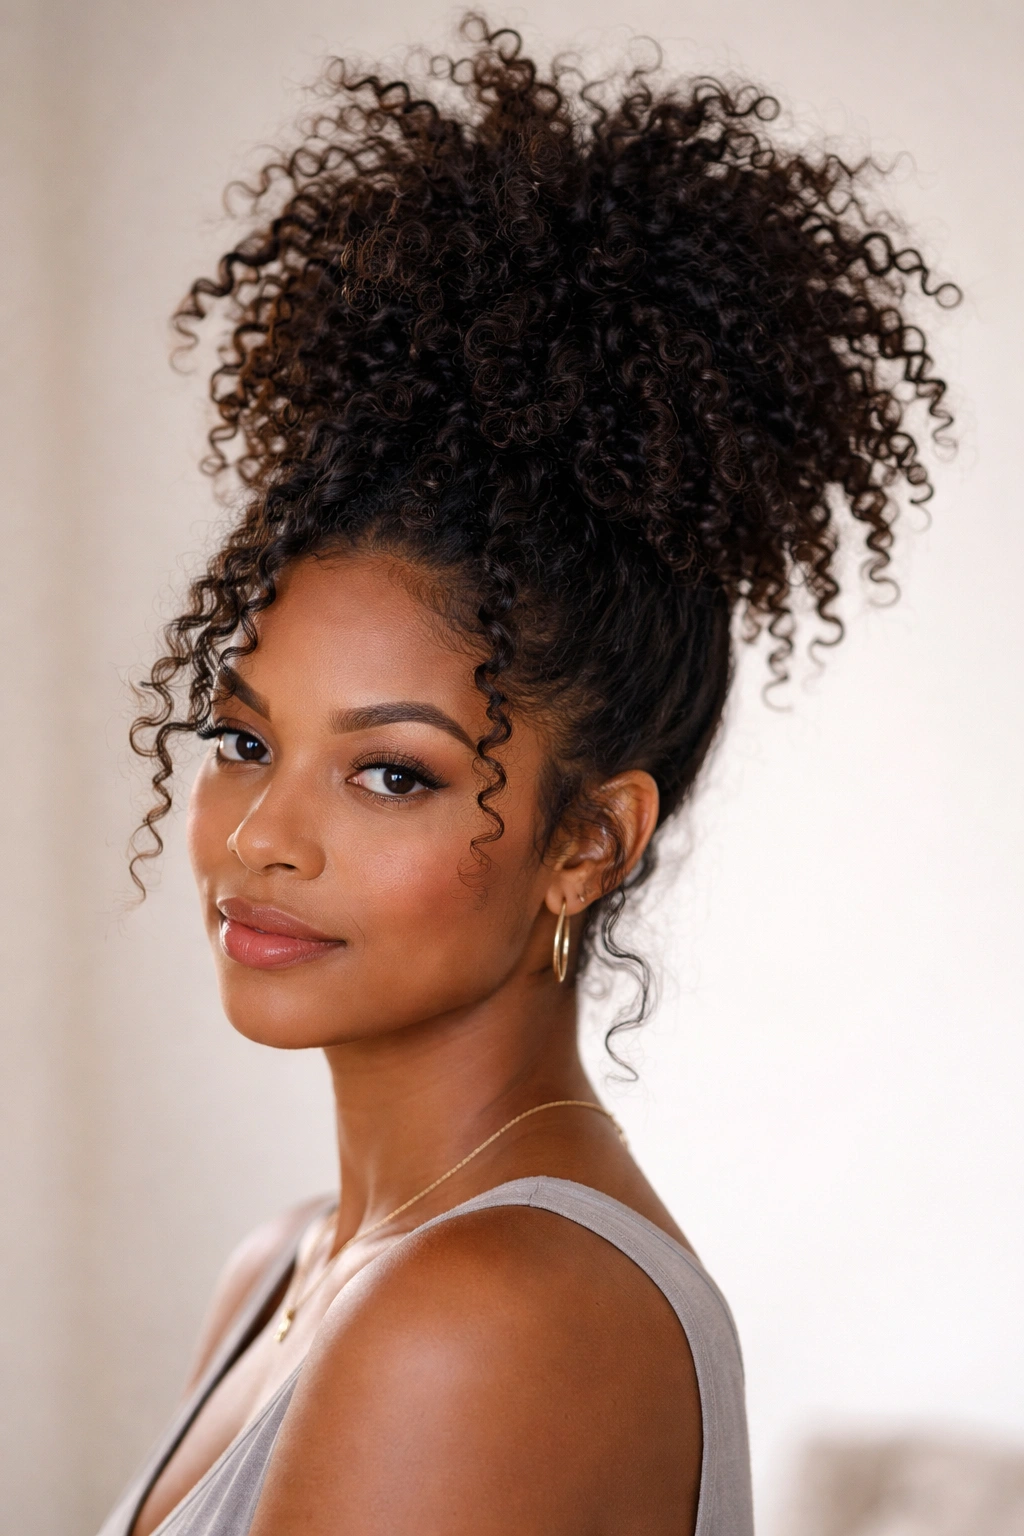
A pineapple updo is where you gather your hair at the crown into a high, loose ponytail without flattening the coils—the idea is that your hair sits on top of your head like a pineapple. This is a genius protective style for sleeping, going to the gym, or just wanting your hair out of your face while still showing off the texture. Medium-length hair creates a really balanced look with a pineapple updo because the proportions work beautifully.
Getting the Balance Right
The pineapple isn’t meant to be a tight, polished updo—it’s intentionally loose and voluminous. The whole point is to keep your coils from getting flattened and stretched out while sleeping or during physical activity. To do it right, use a silk or satin scrunchie rather than a regular elastic that might cause breakage, and gather your hair gently at the crown without pulling. You want to create height and volume, not a sleek, tight look. Medium-length hair naturally creates that perfect balance where you get height without the style looking too towering or difficult to manage.
Styling for the Daytime Pineapple
If you’re wearing a pineapple updo when awake, you can make it look more intentional by smoothing the front sections, tucking in any flyaways, and accessorizing with pins, clips, or a scarf. The pineapple is still ultimately a protective style rather than a finished look, so styling it up a bit makes it feel more purposeful when you’re not using it for sleeping. Some people wrap a silk scarf around the base of the pineapple to secure flyaways and add visual interest.
Nighttime Protection
This is where the pineapple truly shines—sleeping in a high pineapple keeps your coils elevated and separate, preventing the flattening and distortion you’d get from sleeping on them directly. Combine with a silk bonnet if you want extra protection and to prevent any movement during sleep. You can wake up and simply release the pineapple, shake out your hair, and go—or refresh with a light spritz of water and product if needed.
5. Butterfly Locs with Medium-Length Coils
Butterfly locs are a creative protective style where you wrap sections of your coily hair with thin thread or yarn while leaving some of your natural coils exposed throughout, creating a loc-adjacent look without the commitment of actual locs. On medium-length coily hair, butterfly locs create incredible texture, dimension, and interest. The exposed coils peek through the wrapped sections, creating a style that’s visually complex and fascinating.
The Appeal of Temporary Texture
Unlike traditional locs, butterfly locs are temporary—they typically last 4-8 weeks before you take them down and your hair returns to its natural state. This makes them perfect if you want to explore a loc-like aesthetic without committing long-term, or if you want the protective benefits of locs with the flexibility to change your style more frequently. Medium-length hair is actually ideal for butterfly locs because the style has enough dimension and movement without being overwhelming.
Installation and Maintenance
- Start with freshly washed and dried hair, preferably on a defined coil-out or twist-out
- Divide your hair into sections—usually 20-40 depending on desired thickness
- Wrap the middle section of your hair with thread or yarn, leaving the roots and ends unwrapped (that’s the “butterfly” part)
- Secure thread at the roots and ends by weaving it through or using small elastics
- Sleep on a silk pillowcase or in a bonnet to reduce frizz and maintain crispness
- Refresh your scalp and roots every 2-3 weeks if you’re keeping them longer than a month
- Take down carefully section by section, gently unraveling thread from your natural coils
Styling Butterfly Locs
Once installed, butterfly locs are pretty much a wash-and-go situation. You can refresh them with water and a light spritz of product, style them into ponytails or buns, or wear them down. They’re protective because your natural hair is secured and not being manipulated daily, though the wrapping itself does require care and attention during installation.
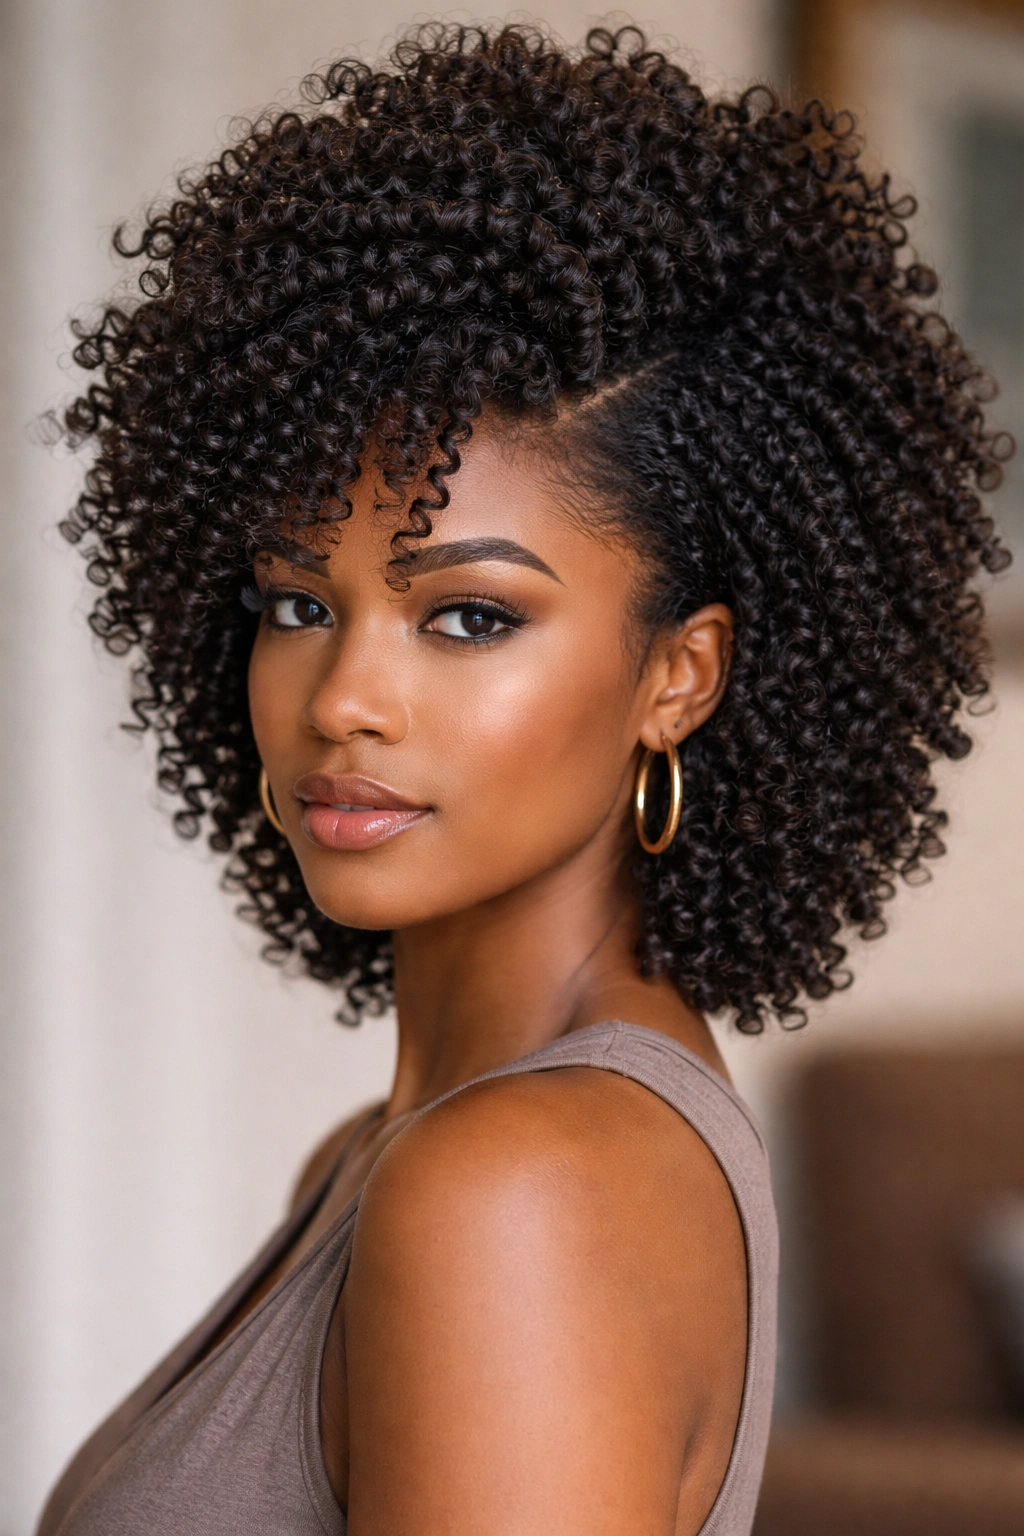
6. Chunky Coils with Side Part
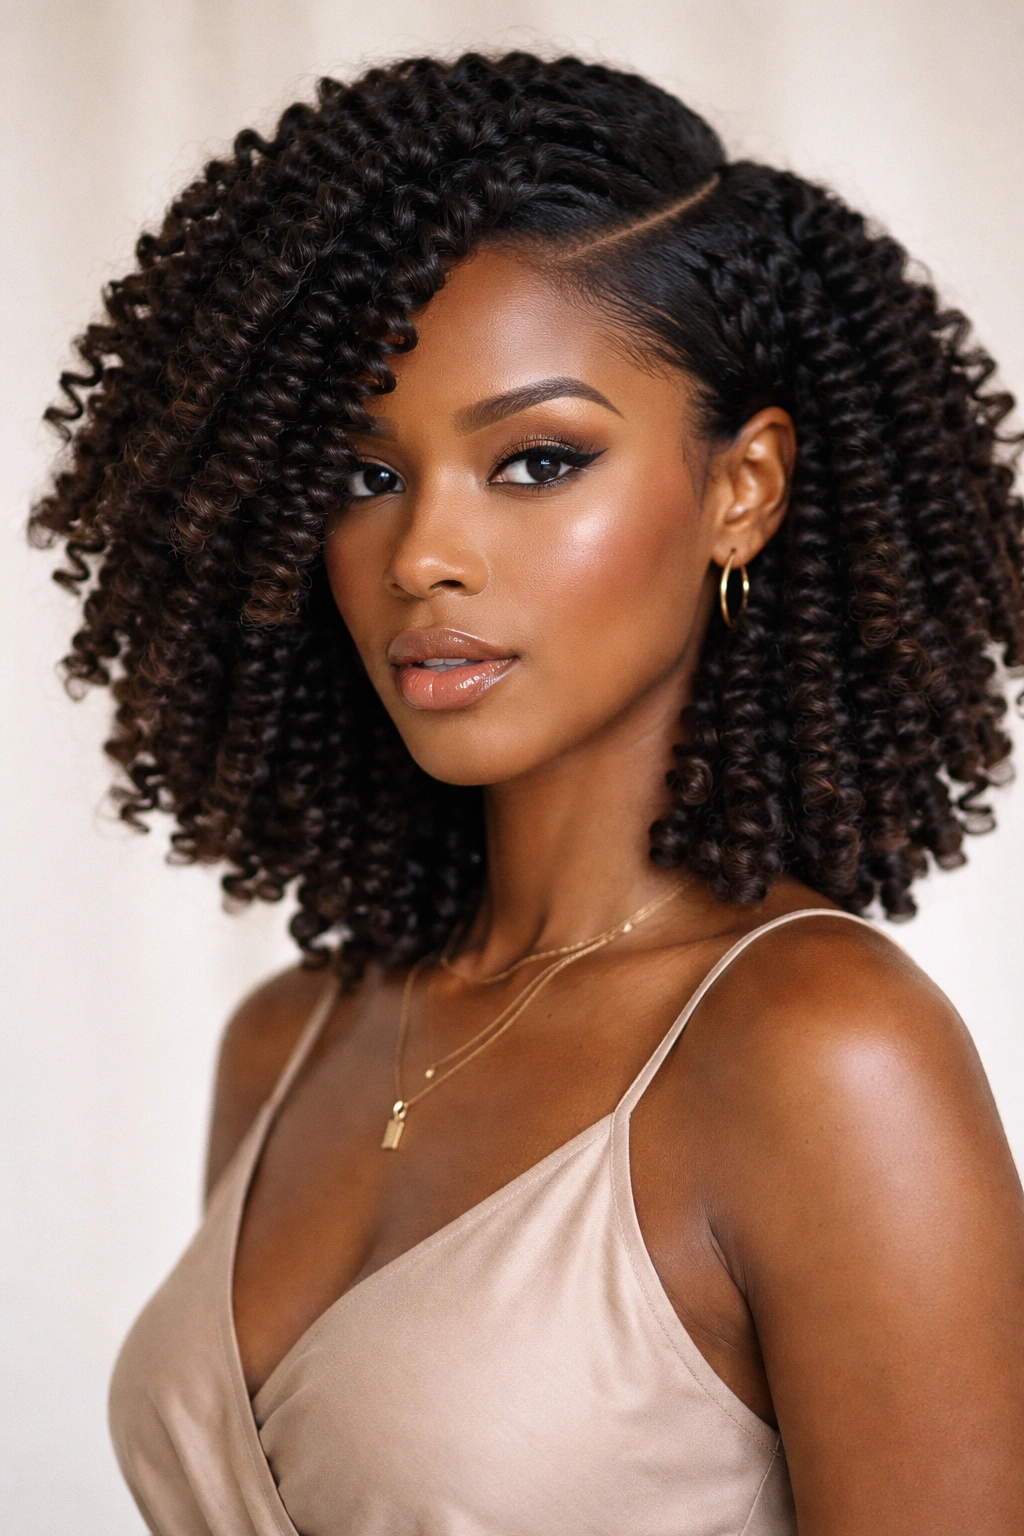
A chunky coil style emphasizes larger coil clusters by styling your hair with a deep side part that creates graphic movement and shows off the dimension of your coils. Rather than trying to maximize individual coil definition, this style celebrates the larger shapes your coils naturally form, creating a look that’s bold and beautifully architectural. Medium-length hair shows off this graphic quality beautifully—the side part adds sophistication and direction.
Working with Your Natural Coil Pattern
Start by understanding how your coils naturally cluster. Some people’s coils naturally form in groups of 3-5, creating naturally chunky sections. Rather than fighting this, emphasize it. Use a deep side part that creates contrast and shows off the volume on one side while keeping the other side sleek. Apply your styling products to enhance coil clumping rather than trying to separate every single coil—this is the opposite of the defined coil-out approach, and it creates a totally different aesthetic.
Creating the Side Part
- Use a rattail comb to create a deep, clean side part from your hairline back toward the crown
- Smooth the smaller side with gel or edge control, creating a neat line that emphasizes the contrast
- Encourage coil clustering on the larger side by scrunching upward with product-heavy hands
- Let this side dry fuller and less controlled, allowing chunky coil clusters to form naturally
- The contrast between the neat, sleek side and the voluminous coil side creates visual interest
Styling Possibilities
A chunky coil style with a side part works equally well as a wash-and-go or a more intentional styled look. You can accessorize the sleek side with pins or clips, add a colorful headband, or leave it minimal and let your coils do all the talking. The beauty of this approach is its versatility—it’s polished enough for professional settings but natural enough for everyday wear.
7. Coiled Crown Braid with Loose Coils
A coiled crown braid is where you braid a section of your coily hair while leaving the rest of your coils loose and voluminous, creating a hairstyle that’s both protective (braided section) and free-flowing (loose coils). On medium-length hair, a crown braid creates an elegant frame for your face while still showing off your natural texture in all its glory. This style works beautifully for situations where you want something polished but not overly styled.
How to Execute the Crown Braid
- Start with coils that have been defined and allowed to set—a fresh coil-out or twist-out works perfectly
- Section off a diagonal line from your temple toward the back of your head, dividing your hair into a small braiding section and a larger loose section
- Braid the sectioned portion using three-strand braids or a loose fishtail braid for added texture
- Secure the braid at the back with a small elastic or bobby pin hidden under the loose coils
- Leave the rest of your hair down and voluminous, allowing your coils to frame your face and flow down your back
- The loose coils provide beautiful contrast against the structured braid
Variations on the Theme
You can create different vibes by braiding different sections. A front-to-back crown braid works beautifully. A side braid that wraps around your head creates a more romantic look. Double braids on either side of your head create a youthful, playful aesthetic. Experiment with braid placement and style to find what feels right for your face shape and personal aesthetic.
Maintenance and Wear Time
Coiled crown braids typically last 5-7 days if you’re careful with them. Sleep on a silk pillowcase to prevent frizz in the loose coil sections. You can refresh the braid with a light spritz of water and product if needed, and the loose coils will naturally refresh and re-clump. This is one of those styles that actually looks better on day 3 or 4 than it does when freshly done—the coils relax slightly and create a softer, more undone vibe.
8. The Stacked, Sculpted Look
A stacked and sculpted coil style uses strategic cutting and styling to create height at the crown and shape throughout, with shorter layers creating volume in specific areas. This is a cut more than a style, but the way you style it completely changes the effect. Medium-length stacked cuts on coily hair create a modern, almost architectural silhouette that’s equal parts chic and textural.
Why Stacking Works for Coils
Layering and stacking remove bulk without removing length, which is perfect for coily hair that can sometimes feel heavy or overwhelming when all one length. By concentrating layers at the crown and gradually adding less layering toward the ends, you create a shape that’s naturally voluminous where you want it and tapered where you want more definition. This cut works beautifully for people with medium-density to high-density hair—finer hair can sometimes look too thin when heavily layered.
Styling the Sculpted Look
- Apply styling products to soaking-wet hair, working thoroughly through each layer
- Use a diffuser on high heat for the first 50% of drying to encourage volume at the crown
- Switch to low heat and diffuser for the next 40% to set your coils without frizzing them out
- Finish by air-drying the last 10% while scrunching to encourage coil clumping
- Flip your head to encourage height at the crown as you dry
- Once fully dry, gently separate coil clusters with your fingers to enhance the sculpted shape
Professional Input Matters
This is one of those styles where working with a stylist who understands coily hair is genuinely important. A regular stylist might cut your coils too short thinking they’ll shrink, or not understand how to layer coily hair so it looks intentional rather than just thin. Look for a stylist with experience specifically with coily textures and show them reference photos of the exact shape and volume you want.
9. Faux Hawk with Natural Coils
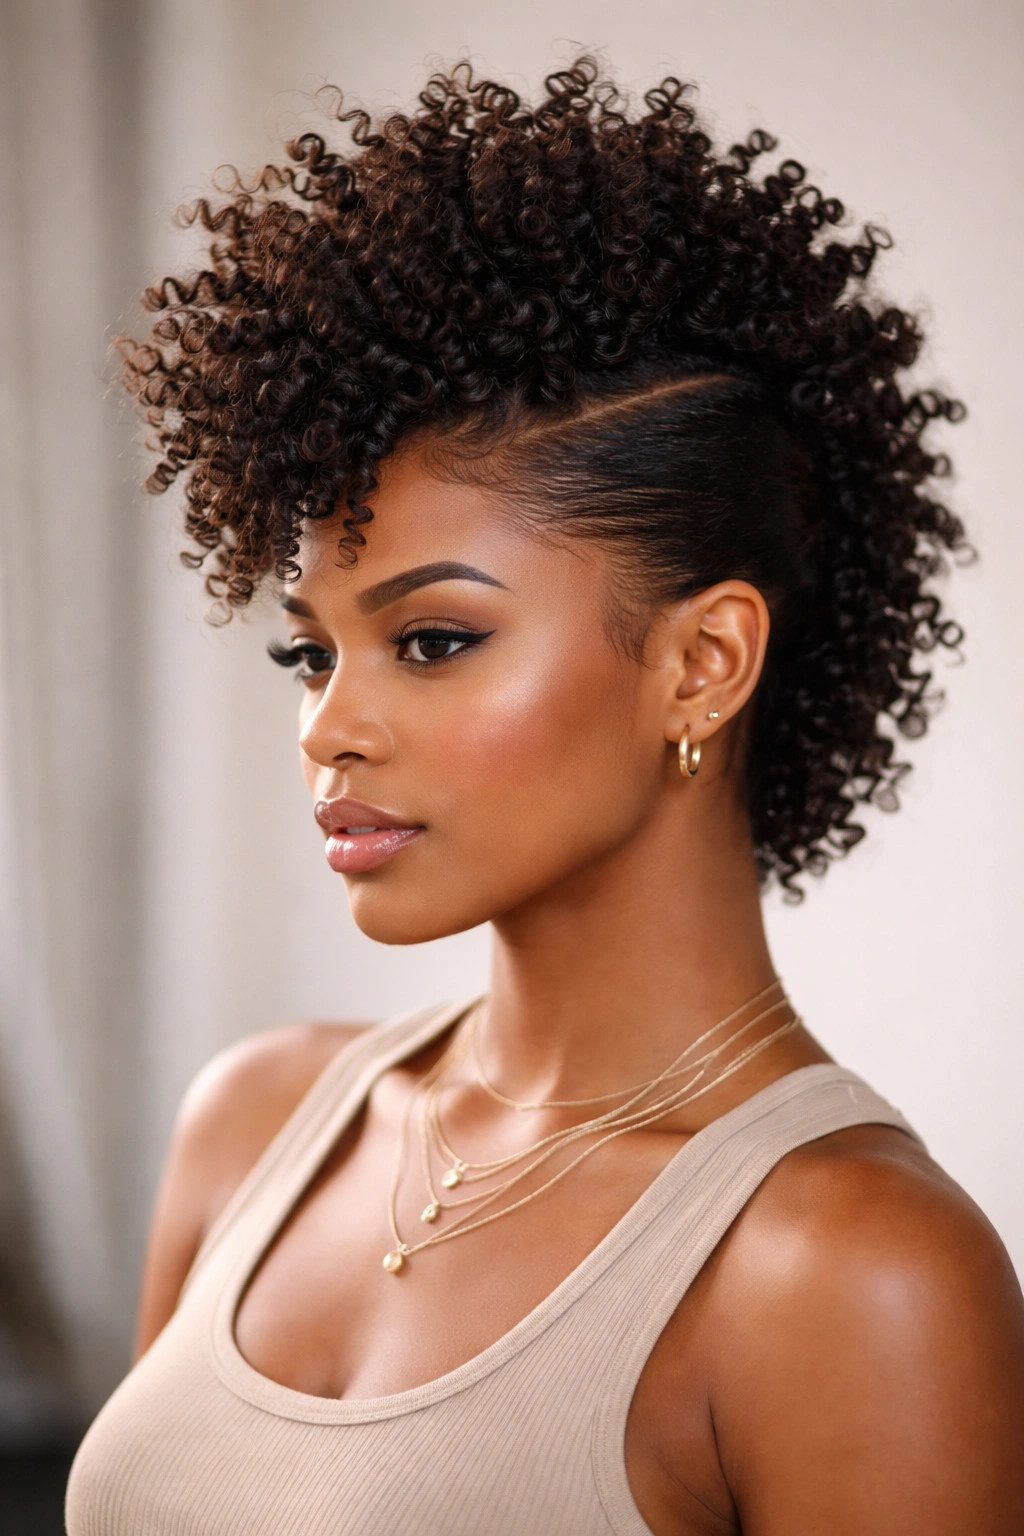
A faux hawk on coily hair is where you create the illusion of a mohawk by styling your coils to be voluminous down the center of your head while smoothing and controlling the sides. Unlike a traditional faux hawk on straighter hair, a faux hawk on coils celebrates texture—the center is deliberately full and textural, while the sides are neat but still clearly coily. On medium-length hair, this creates a bold, confident look that’s equal parts edgy and intentional.
Building the Faux Hawk
- Create a center section from your hairline back toward your neck, dividing your hair into three sections (center and two sides)
- Apply styling gel or edge control to the side sections, smoothing them back and securing them with bobby pins
- Let the center section be completely free and voluminous—apply leave-in conditioner and a lightweight styling product, then scrunch upward to encourage maximum coil clumping
- Blow dry or diffuse the center section to encourage height, keeping the sides smooth and flat
- You want obvious contrast—neat, controlled sides and a wild, textural center
Styling Variations
You can make the faux hawk more or less extreme depending on your mood. A subtle version has just slightly more volume in the center with moderately controlled sides—great for everyday wear. An extreme version has the sides pulled back very tight and secured with multiple bobby pins, with the center puffed out dramatically—perfect for nights out or when you want maximum impact. The beauty of a faux hawk on coils is how your natural texture does most of the work for you.
Maintenance Tips
- Sleep on a silk bonnet to prevent the styled sections from relaxing overnight
- The controlled side sections might get frizzy after a day or two—refresh with a light spritz of gel and smooth back again
- Keep a few bobby pins on you to re-secure the side sections if they start slipping
- A faux hawk typically lasts 3-5 days before needing a full refresh
10. Textured Bun with Tendrils
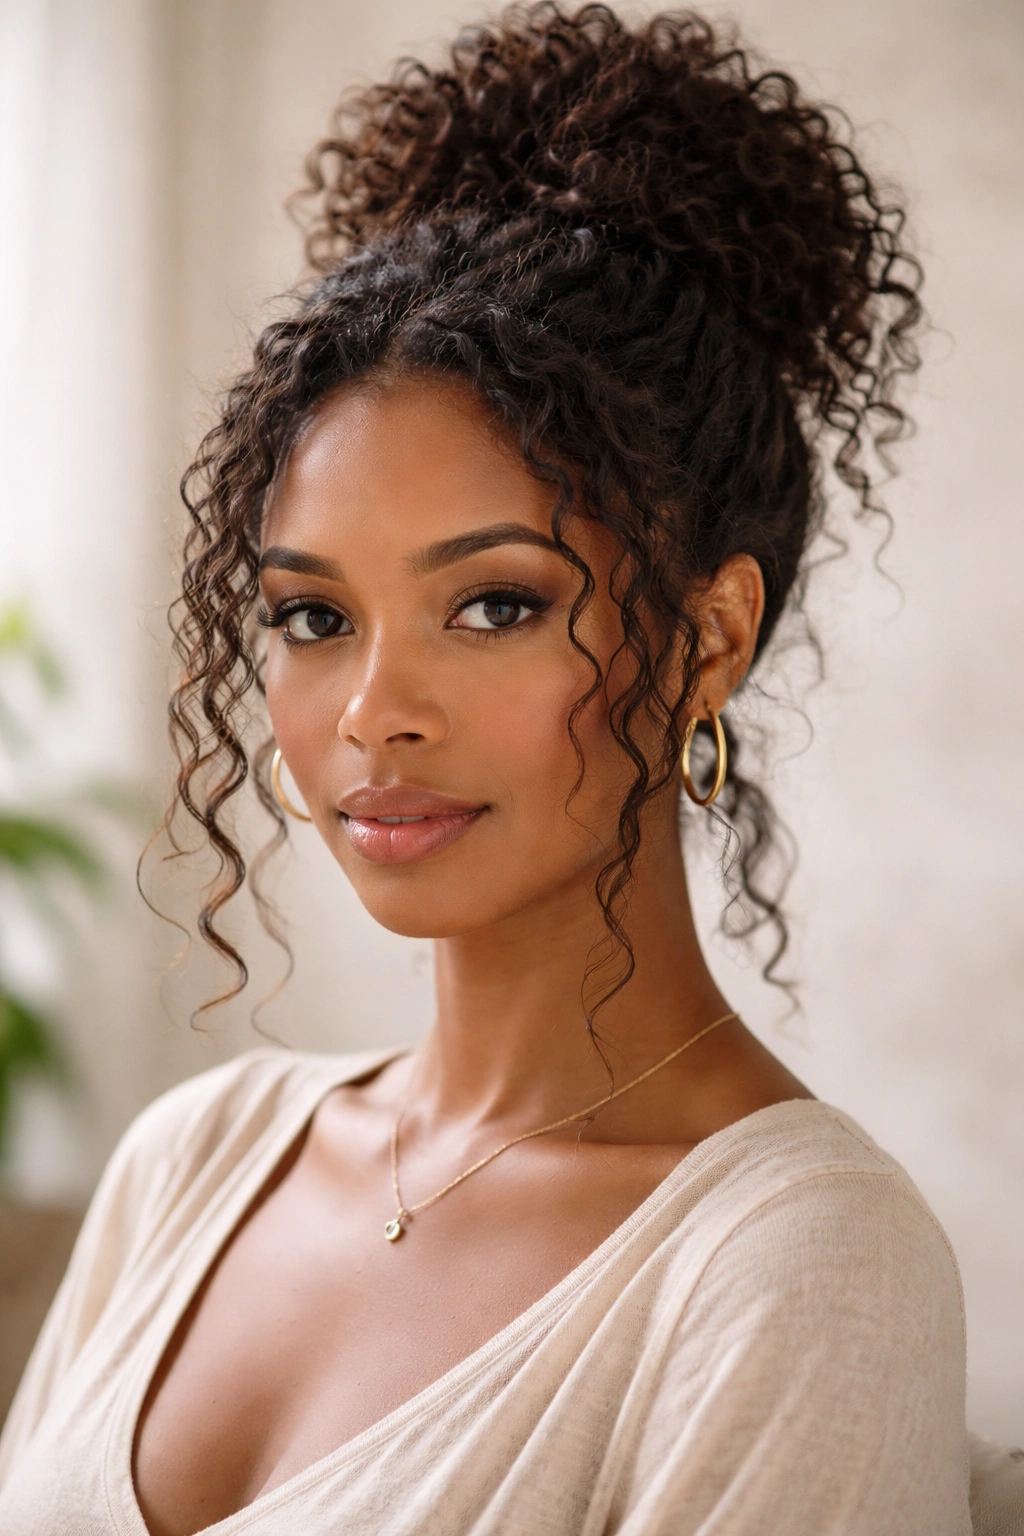
A textured bun where you pile your medium-length coils into a full, intentionally undone bun while leaving face-framing tendrils loose creates an elegant, romantic look that’s still absolutely you. This isn’t a sleek, polished bun—it’s a celebration of texture and volume, with strategically chosen loose sections that frame your face and add softness. It’s perfect for situations where you want your hair up and out of your way but still want to showcase your natural coil texture.
Creating the Perfect Textured Bun
- Start with defined or refresh coils—a coil-out, twist-out, or even day-old coils work beautifully
- Section off two or three strands from your temples and hairline that you’ll leave out as face-framing tendrils
- Gather the rest of your hair at the crown or the back of your head into a high or low ponytail
- Twist or braid the ponytail into a coil, then wrap it around the base to form a bun—don’t aim for tightness or neatness, leave it deliberately loose and textural
- Secure with bobby pins hidden throughout the bun
- Release your face-framing tendrils and let them spring free naturally
Styling the Tendrils
The face-framing sections make this style. Rather than pulling them back, let them soften your face and add movement. You can define them slightly with a light product or leave them completely natural—either approach works beautifully. If your tendrils are frizzing, a tiny bit of edge control smooths them without making them look slicked back and harsh.
When and Where to Wear It
A textured bun with tendrils works for almost any occasion. It’s casual enough for everyday wear with jeans and a t-shirt, but polished enough for professional settings or dressier events. The key is that the tendrils and the intentionally undone bun aesthetic keep it from feeling overly formal—it’s always got an air of effortlessness, even though you actually took time to create it.
Final Thoughts
Medium-length coily hair truly is the goldilocks of hair length. You’ve got enough hair to create real volume and shape, enough length to showcase your natural coil pattern, and enough manageability that styling doesn’t require hours of work or a professional’s hands. The styles above range from pure wash-and-go to intentionally styled looks, protective styles to statement-making cuts, which means you can rotate through different aesthetics depending on your mood, schedule, and what your hair needs on any given week.
The real magic is choosing styles that work with your specific curl pattern rather than against it. Pay attention to how your coils naturally cluster, where you have more density and where you have less, and what your hair naturally does when it’s wet versus dry. Some of these styles will feel like second nature immediately, while others might take a few tries to get right—and that’s completely normal. Your coils have been doing their thing for years; sometimes you’re just learning the language to work with them more intentionally.
Start with whichever style resonates with you most, give it a real try (at least twice, because first attempts are rarely perfect), and build from there. Medium-length coily hair is genuinely versatile, and the more styles you practice, the easier it becomes to see the possibilities in your own unique texture.