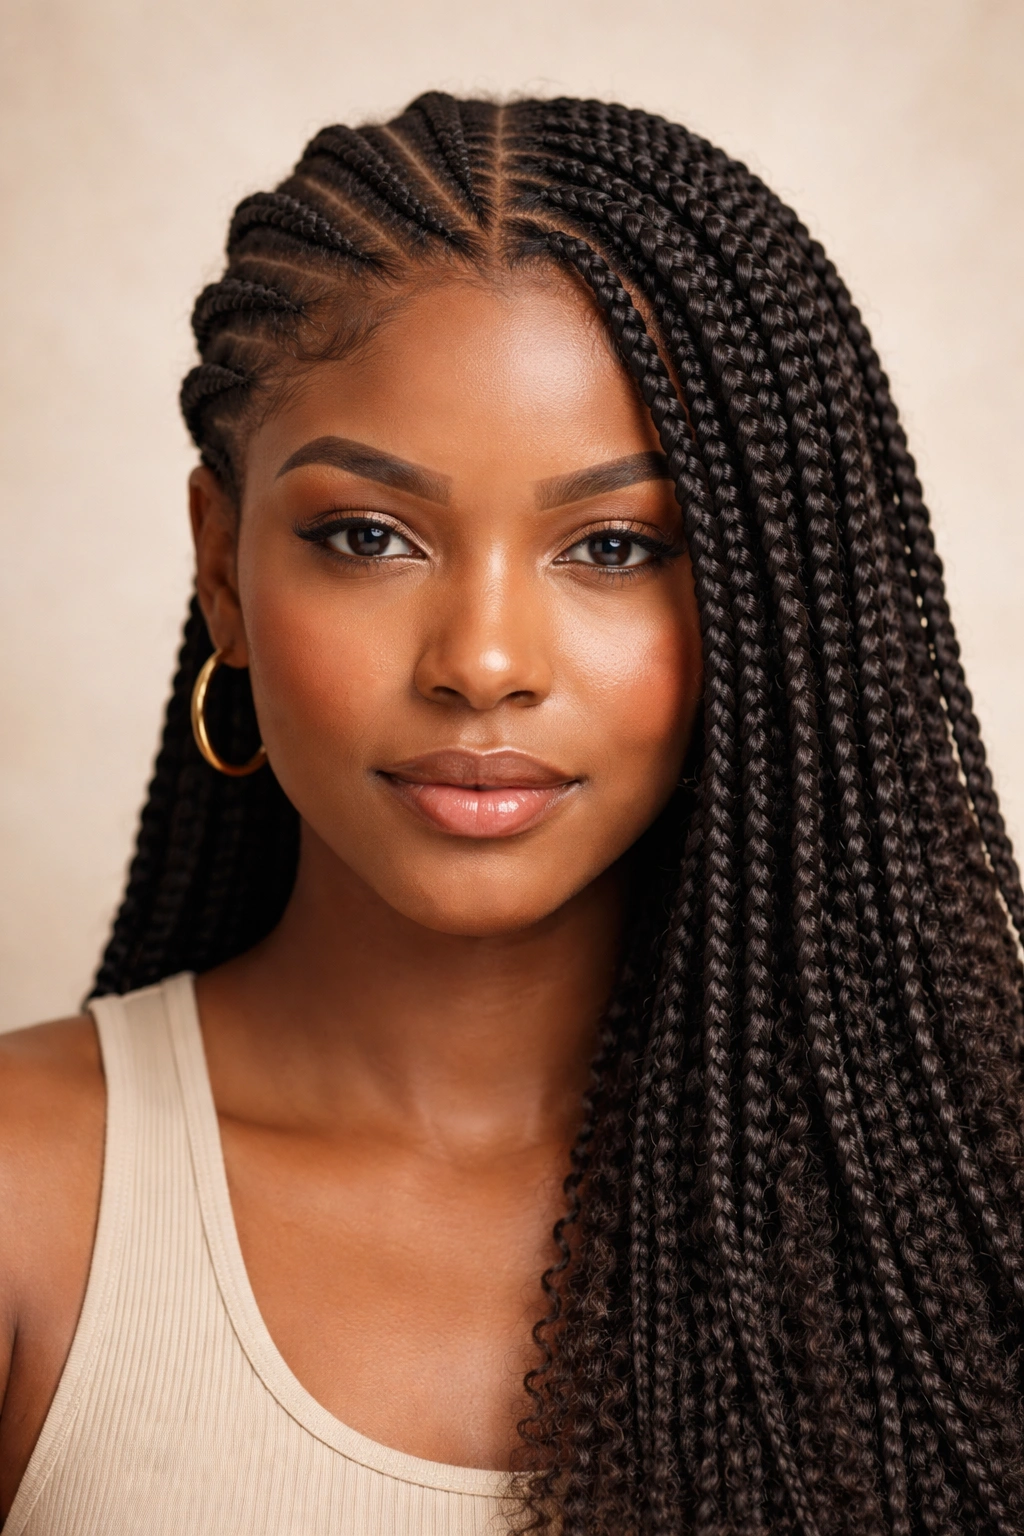
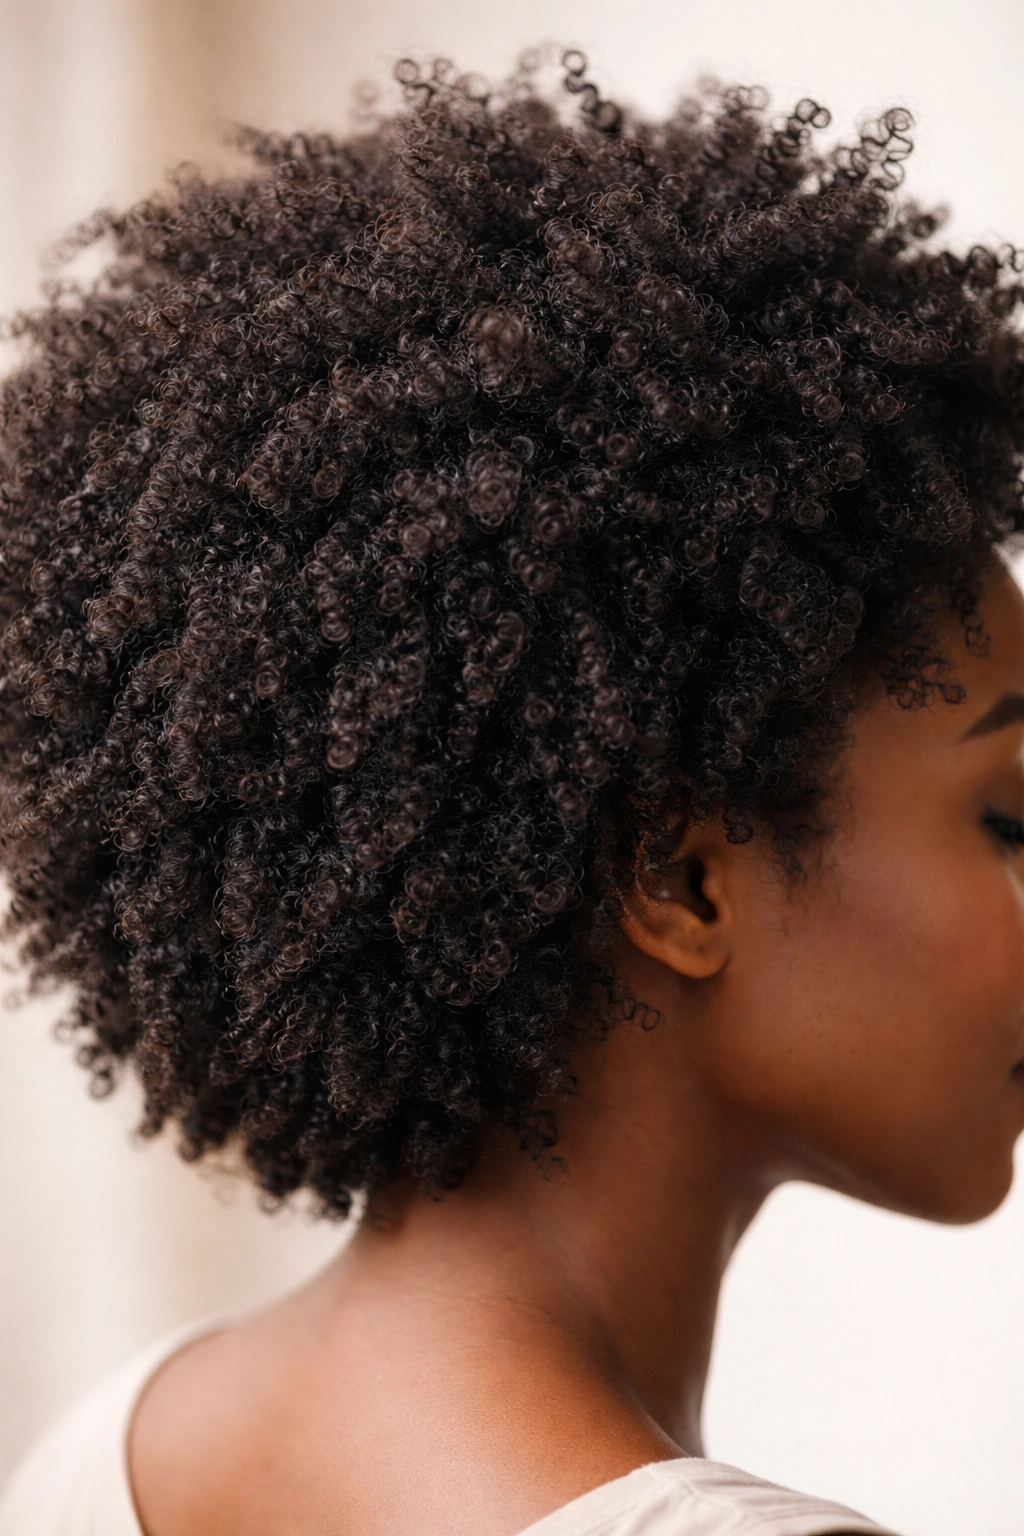
4C coily hair is a crown unto itself—tight, beautiful, and entirely unique—but styling it requires understanding what makes it tick. The texture sits at the smallest curl pattern on the hair spectrum, with coils so compact they sometimes appear almost kinky or zigzagged. This density means your hair isn’t just coily; it’s volumous, textured, and capable of holding shape in ways that longer, looser curls simply cannot. The challenge many people face isn’t that 4C hair is difficult to style—it’s that most mainstream hairstyling advice was built for straighter, looser textures and doesn’t account for the unique needs of coily hair: moisture retention, curl definition, protection from manipulation, and styling methods that actually enhance rather than fight the natural pattern.
The good news? 4C hair is incredibly versatile once you understand the right techniques and styles that work with your texture instead of against it. Whether you’re looking for protective styles that keep your hair healthy during the week, statement-making styles for special occasions, low-manipulation looks for minimal fuss, or styles that let your natural coils shine, there’s a world of options designed specifically for you. Many of these styles celebrate the full volume and texture of 4C hair rather than trying to stretch or elongate it—which is where the real beauty lies.
What follows are fifteen proven hairstyles that not only look stunning on 4C coily hair but actually support the health and integrity of your coils. Each style offers a different aesthetic, maintenance level, and longevity, so you can rotate them based on your lifestyle, mood, and how much time you want to spend styling.
Understanding Your 4C Hair Pattern
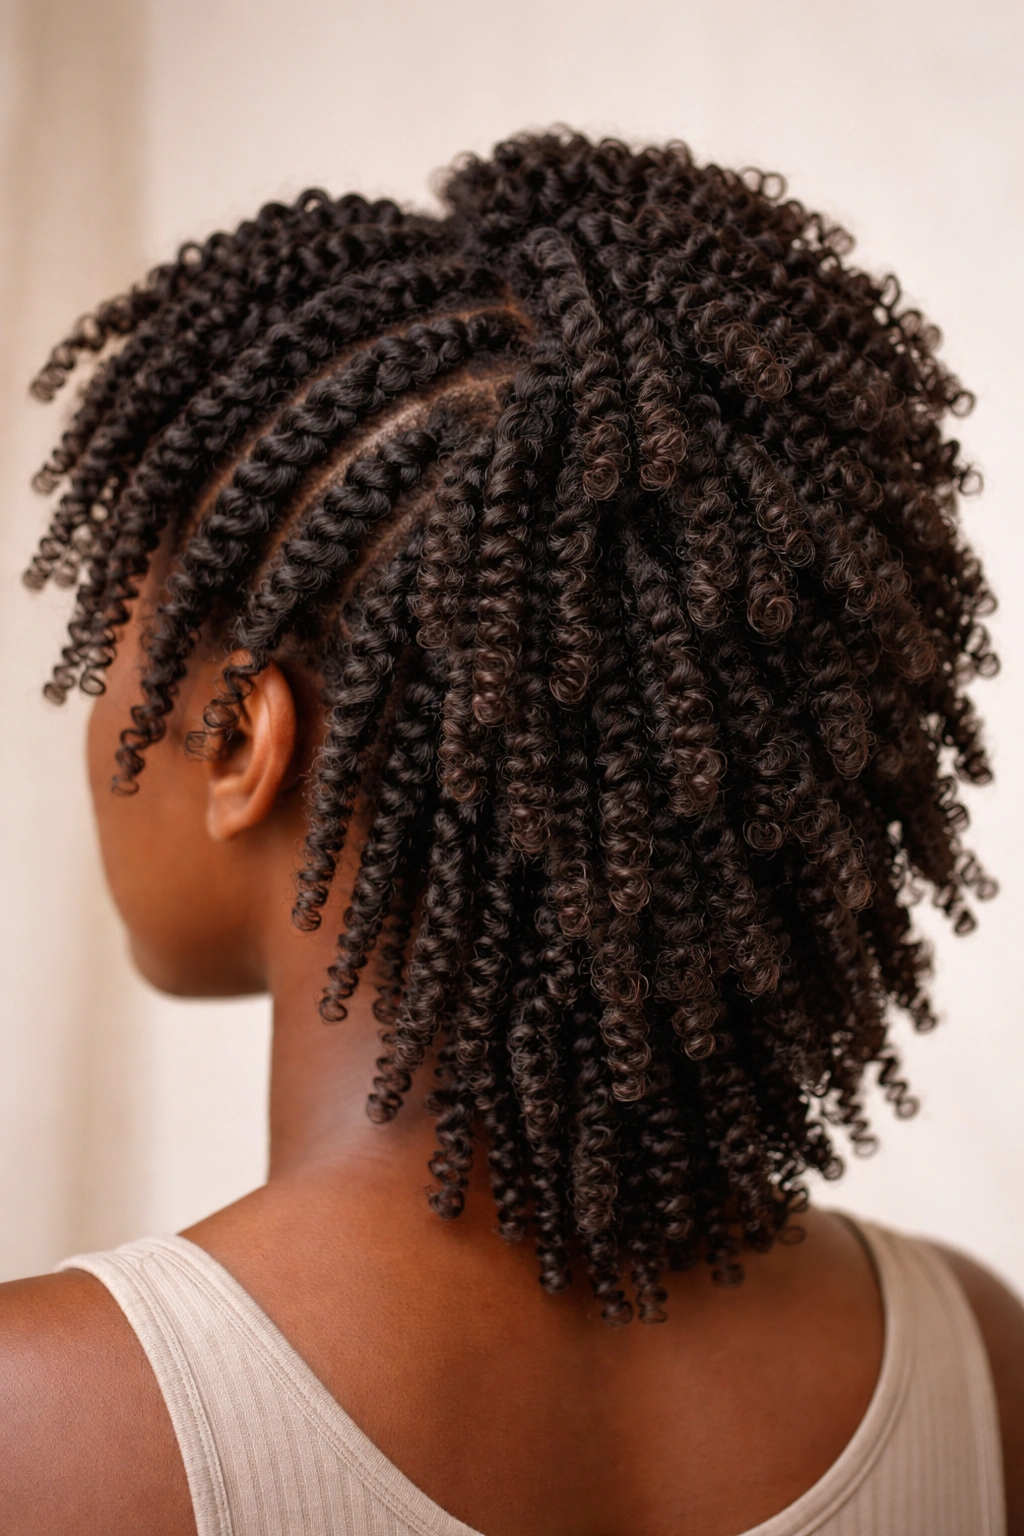
4C coily hair exists at the tightest end of the curl spectrum, with coils so densely packed that they often fold back on themselves multiple times along a single strand. This isn’t a flaw—it’s the source of the incredible volume and texture that makes 4C hair visually striking. The coil pattern means your hair naturally shrinks more than other curl types, sometimes appearing 50-75% shorter than its actual length when wet. This shrinkage is completely normal and, once you accept it, opens up styling possibilities that other hair types simply can’t achieve.
The density of 4C coils also means moisture moves differently through your hair. Sebum (the natural oil your scalp produces) has a harder time traveling down the coil shaft, which is why 4C hair tends to feel drier than looser curl types—even though it’s not actually producing less oil. This is critical to understand because it changes how you should approach moisture, product selection, and styling techniques. Your coils need consistent hydration and sealing to stay supple and soft, and choosing styles that allow for regular moisture applications makes all the difference in how healthy your hair stays long-term.
The Real Benefits of Protective Styling for 4C Hair
Protective styling isn’t just about looking good—it’s a genuine strategy for maintaining the length and health of 4C coily hair. When you style your hair in a protective style, you’re tucking the ends of your hair away and minimizing daily friction, manipulation, and breakage. For 4C hair, which is more fragile at the ends than some other curl types, protective styling becomes a tool for retaining length over time. A protective style doesn’t have to mean boring or restrictive; the styles listed below range from sleek and elegant to bold and textured, so you can protect your hair while expressing exactly how you want to look.
The other major benefit is reduced daily styling time and the ability to maintain moisture levels more consistently. When your hair is in a protective style, you’re not detangling it daily, applying heat, or exposing it to friction from pillows and clothing. You can focus your moisture applications on keeping the style fresh and your scalp healthy, rather than fighting breakage and dryness every day. Many people find that rotating protective styles allows them to grow out their hair significantly over the course of a year—not because the styles make hair grow faster, but because they retain more length by minimizing breakage.
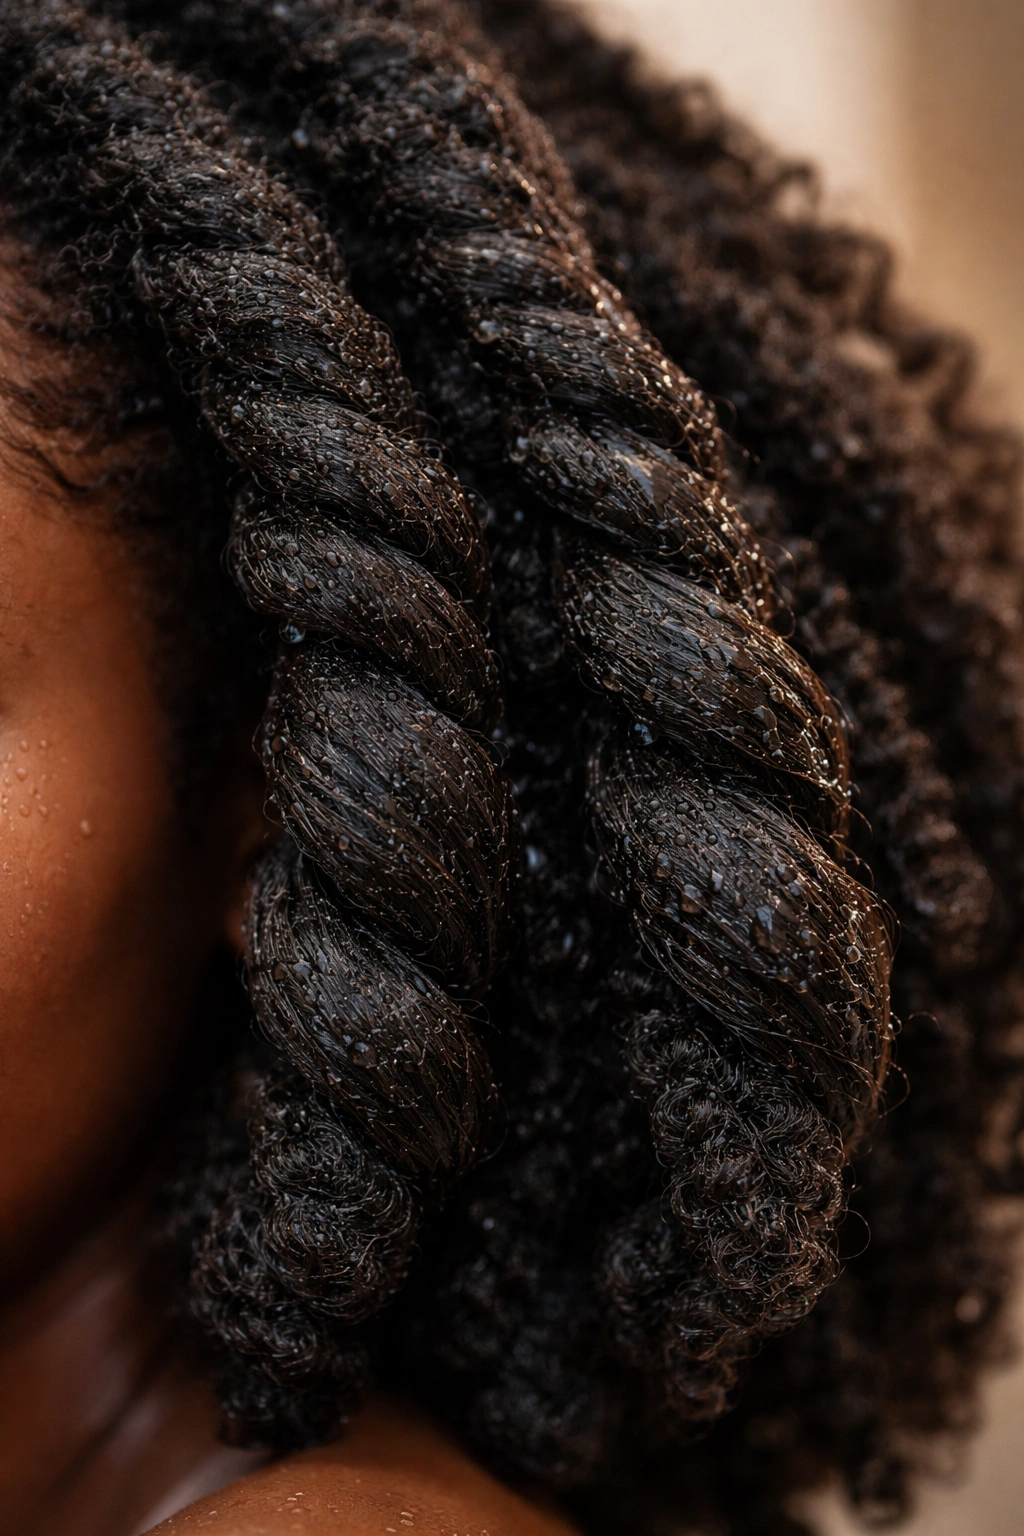
1. Two-Strand Twists
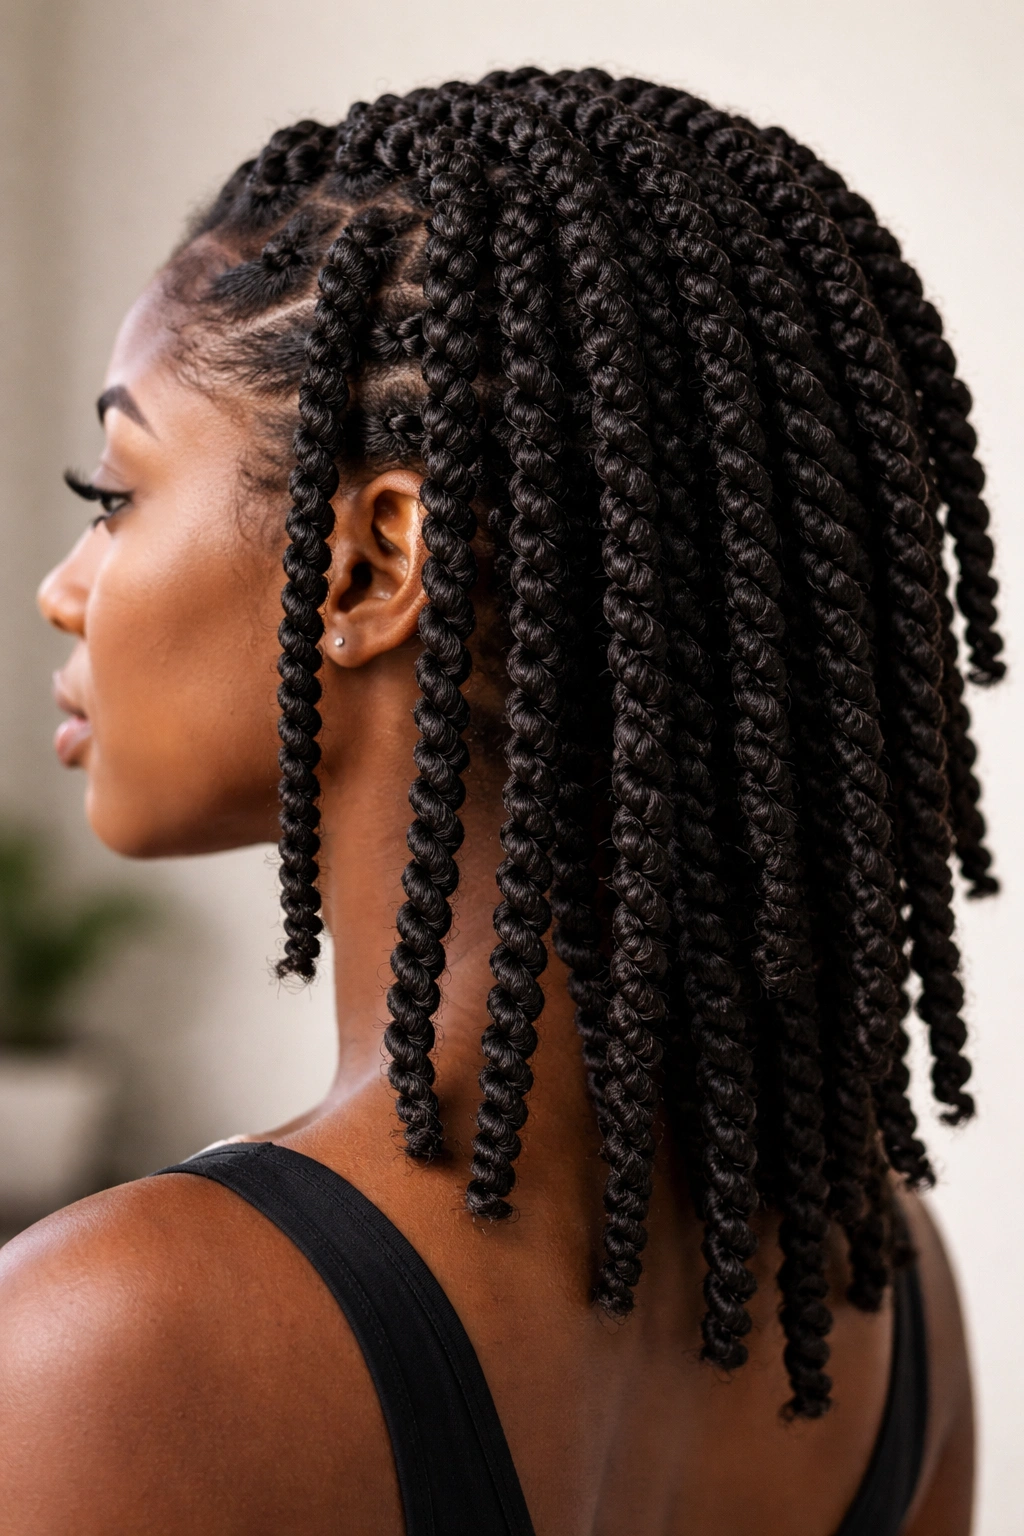
Two-strand twists are the foundational protective style for 4C hair—simple to create, endlessly customizable, and genuinely effective at protecting your ends while celebrating your natural texture. The style involves sectioning your hair into as many sections as you want (fewer sections mean thicker, chunkier twists; more sections mean finer, more delicate twists), then twisting two strands of hair around each other from root to tip. The beauty of two-strand twists on 4C hair is that the coils actually grip each other as you twist, creating a defined, long-lasting twist that holds for days without additional products or styling.
Why Two-Strand Twists Work So Well for 4C Hair
The coily structure of 4C hair makes two-strand twists naturally secure and defined. Unlike looser curl types where twists might unravel or look loose, your coils lock into place as you twist, creating a style that can last 2-3 weeks with proper maintenance. You can twist on dry hair for a tighter definition, or on damp hair with a light leave-in conditioner for a softer, more elongated look. The style is low-manipulation (you’re not constantly detangling or separating), and it tucks your ends away, protecting them from breakage and dryness.
Styling Options and Customization
- Chunky twists (larger sections, fewer total twists) for a bold, sculptural look that requires less styling time
- Micro twists (tiny sections, many twists) for a more delicate, defined aesthetic that takes longer but lasts even longer
- Colored twists by adding temporary dye, yarn, or beads to individual twists for visual interest and style variation
- Twisted bun by gathering the twists into a bun at the crown, back, or side for a polished, updo-style look
- Twisted out by unraveling the twists after 3-5 days to create a softer, more voluminous style from the definition the twists created
Pro tip: Keep your twists hydrated with a lightweight misting spray every 2-3 days and seal with a light oil or cream at the roots to prevent frizz and maintain softness. Twists that dry out completely tend to feel stiff and look less defined.
2. Box Braids
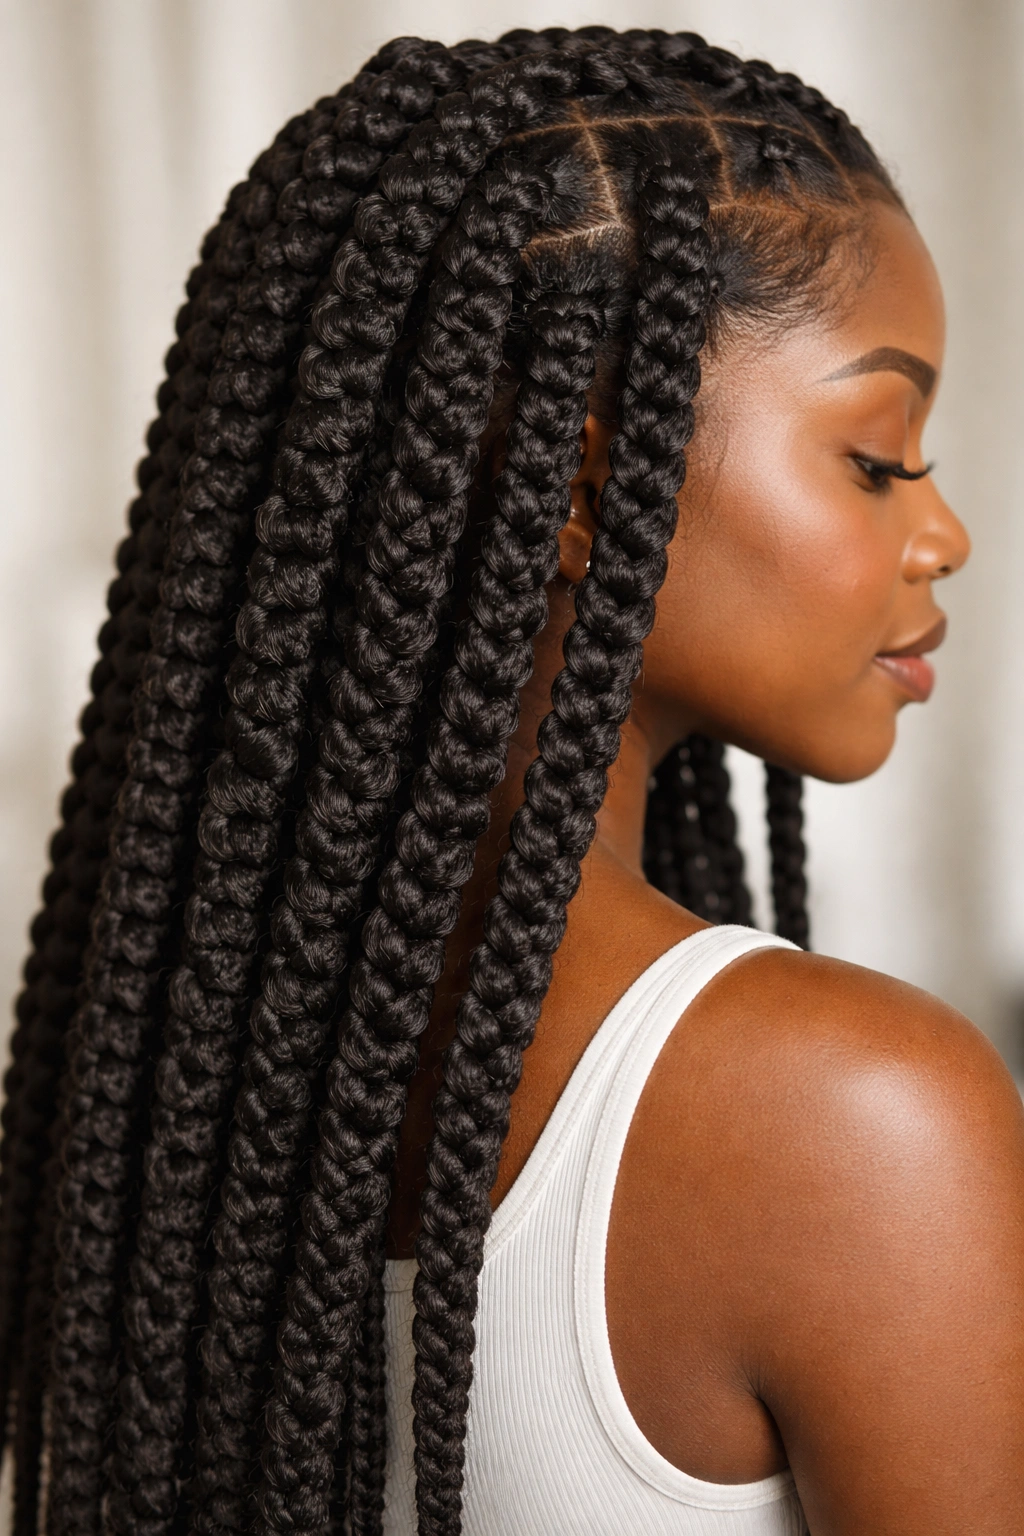
Box braids are chunky, defined braids that sit independently from each other, offering high impact and long-lasting style for 4C hair. Created by sectioning hair into square or rectangular boxes and braiding each section from root to tip, box braids can be styled in countless ways—down, wrapped in a high bun, pinned to the side, or styled into elaborate crown patterns. On 4C hair, box braids create maximum volume and definition because your natural coils add texture and thickness to each braid, making even thin braids look full and impressive.
Creating Box Braids That Honor Your Hair
Box braids work best when sized appropriately for your hair type and what you’re trying to achieve. Smaller braids (the width of a pencil or slightly thicker) offer more versatility in styling and feel lighter on the scalp, though they take longer to install. Larger braids (thicker than a pencil) go faster to install and feel lighter in terms of overall weight, but offer fewer styling variations. Aim for braids that are moisturized and smooth rather than overly tight—tight braids can cause tension alopecia (hair loss from constant pulling), which you want to avoid at all costs.
Popular Box Braid Variations
- Classic box braids worn down for maximum volume and impact, typically lasting 6-8 weeks
- Box braids in a high bun for a sleek, minimal look that’s perfect for work or workouts
- Jumbo box braids (very thick, fewer total braids) for dramatic volume and faster installation time
- Goddess braids which are box braids with a slight curve or crown effect styled down or pinned up
- Colored box braids using synthetic hair, yarn, or temporary color for visual interest and creative expression
Worth knowing: The tension on your scalp during box braids matters more than you might think. If your braids feel painful or tight, they’re too tight—ask your stylist to loosen them or take them down and restart. Protective styles should never cause pain.
3. Passion Twists
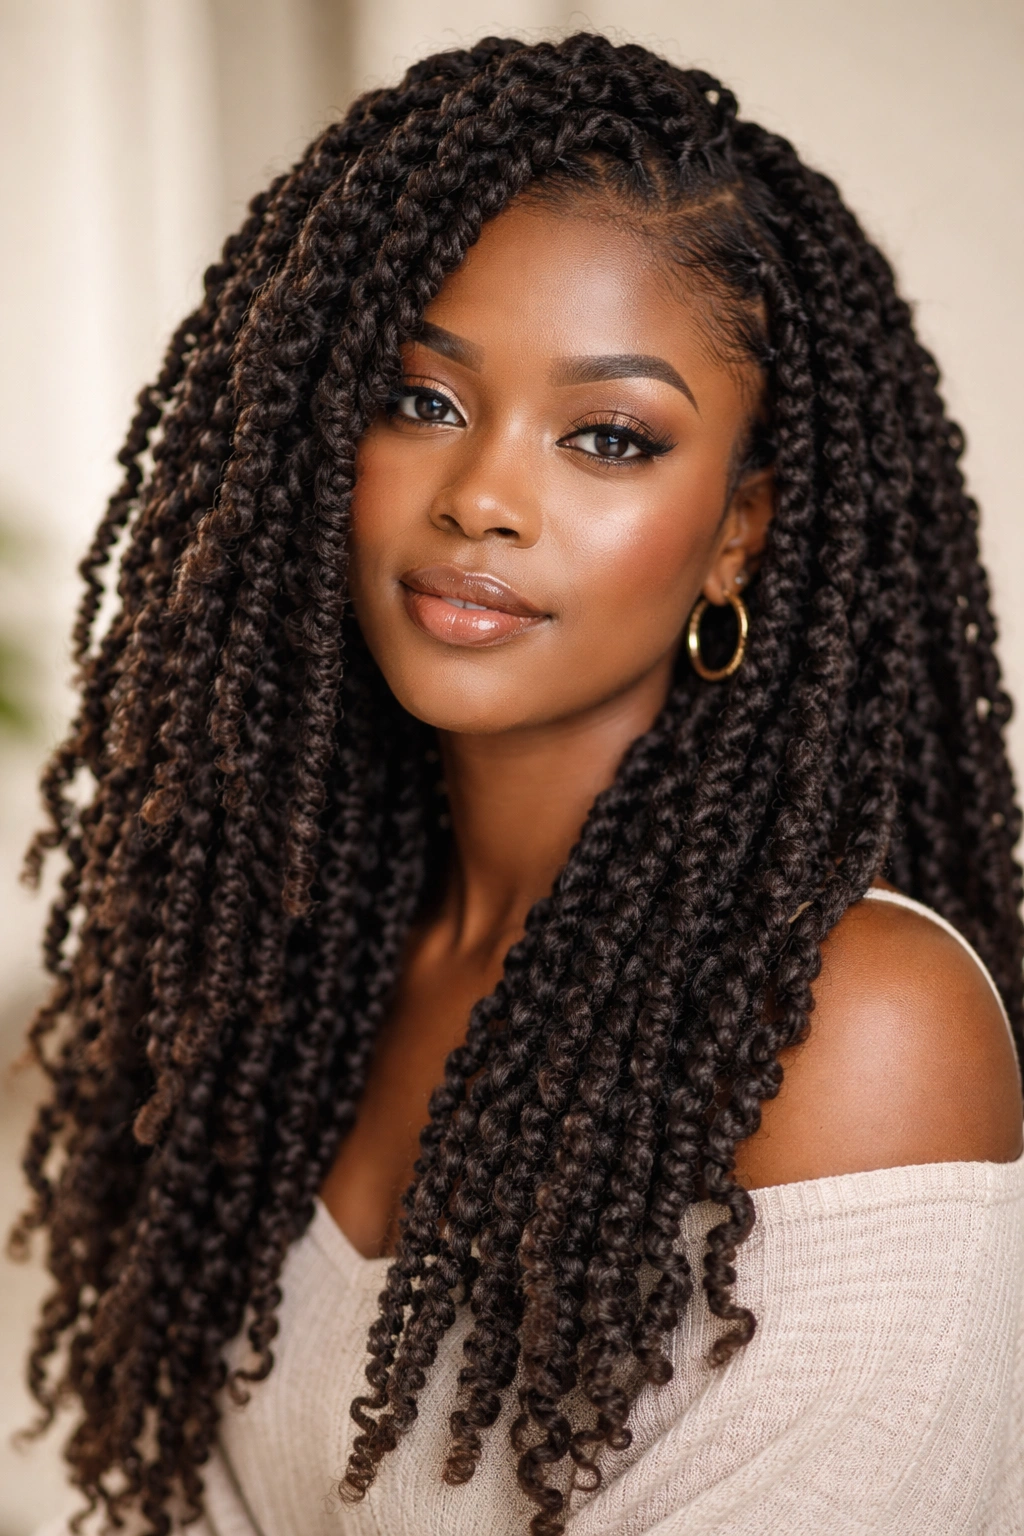
Passion twists are a softer, more elegant variation of two-strand twists that incorporate texture and softness into the style. Created by twisting your hair around pieces of curly yarn or textured hair extensions, passion twists combine the protective benefits of a protective style with the luxurious softness and definition that comes from the wrapping material. On 4C hair, passion twists add visual interest and create a style that feels textured and romantic rather than sleek and structured.
How Passion Twists Create That Signature Look
The key to passion twists is the yarn or textured material you wrap around your hair as you twist. Rather than a smooth, tight two-strand twist, passion twists have a loose, textured, almost braided appearance because of the wrapping material. This creates a softer silhouette and adds volume, making even finer hair appear fuller. The texture of the wrapping material also creates visual interest and allows for color play—you can choose yarn that matches your skin tone for a natural look, or pick contrasting colors for bold visual impact.
Styling and Wear Time
- Passion twists worn down for maximum volume and a soft, romantic look that photographs beautifully
- Passion twists in a high ponytail for a polished, gathered style with tons of texture visible
- Passion twists in an updo or crown bun for formal occasions or when you want a more elegant presentation
- Half-up passion twists with the top section secured and the bottom left down for balance and visual interest
- Passion twists with beads added to the ends for extra texture, movement, and personalization
Quick facts:
- Passion twists typically last 4-6 weeks with proper care and regular hydration
- Installation takes 3-5 hours depending on section size and the amount of hair
- The wrapping material makes them easier to style and restyle than regular two-strand twists
- They work beautifully on hair of any length, including very short hair
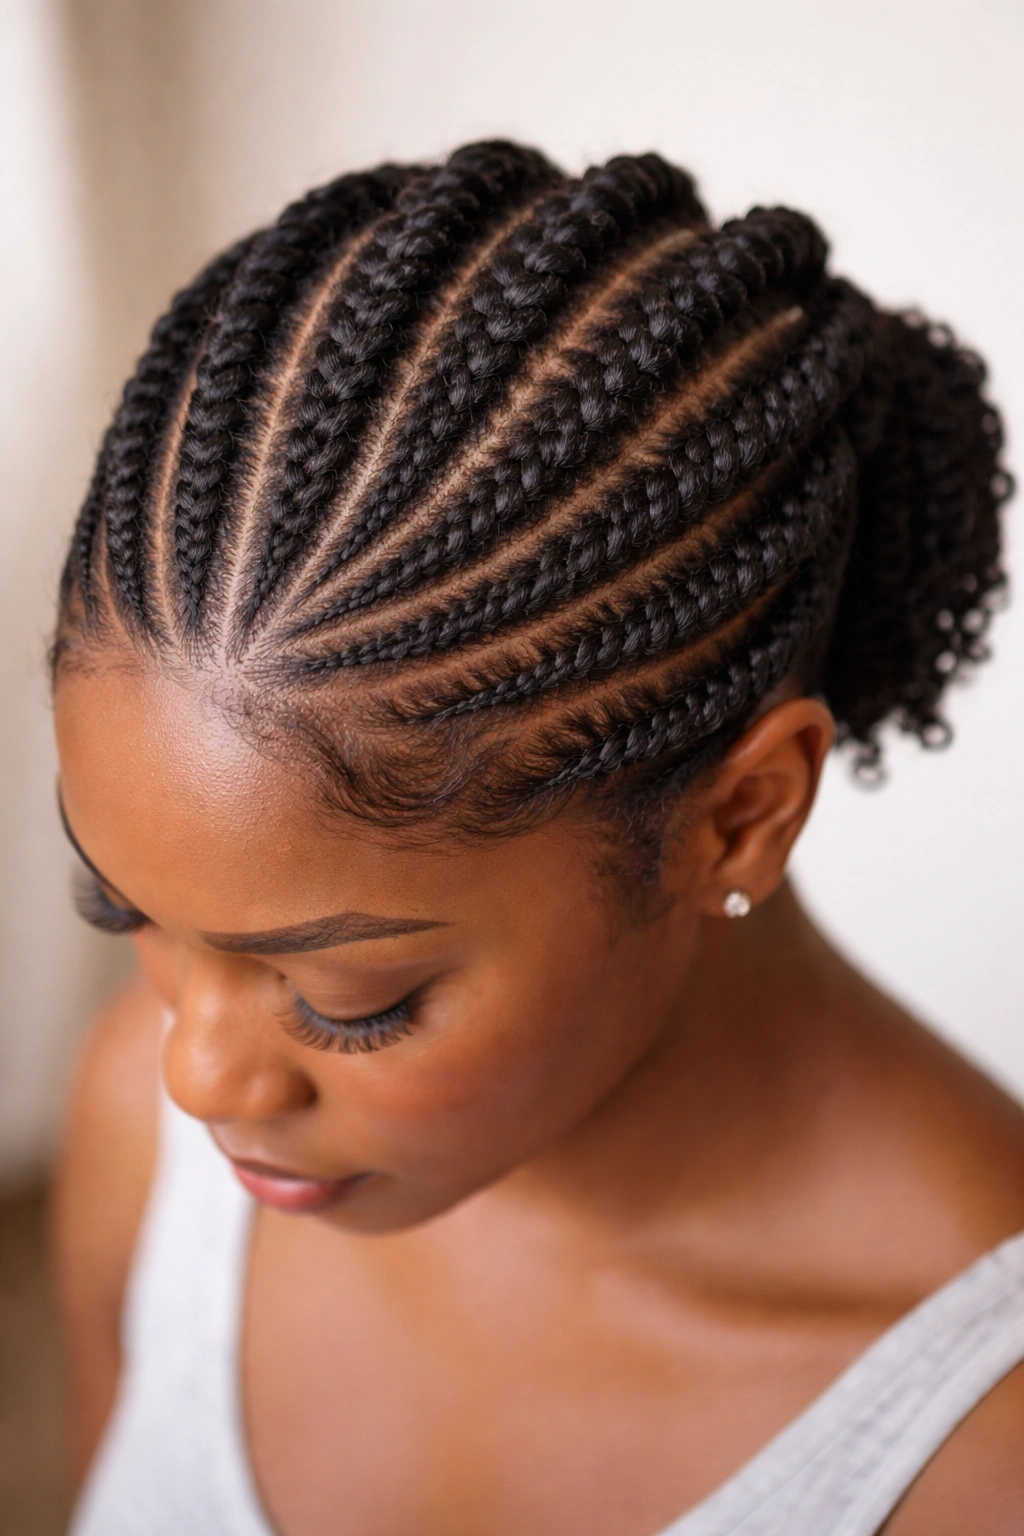
4. Cornrows
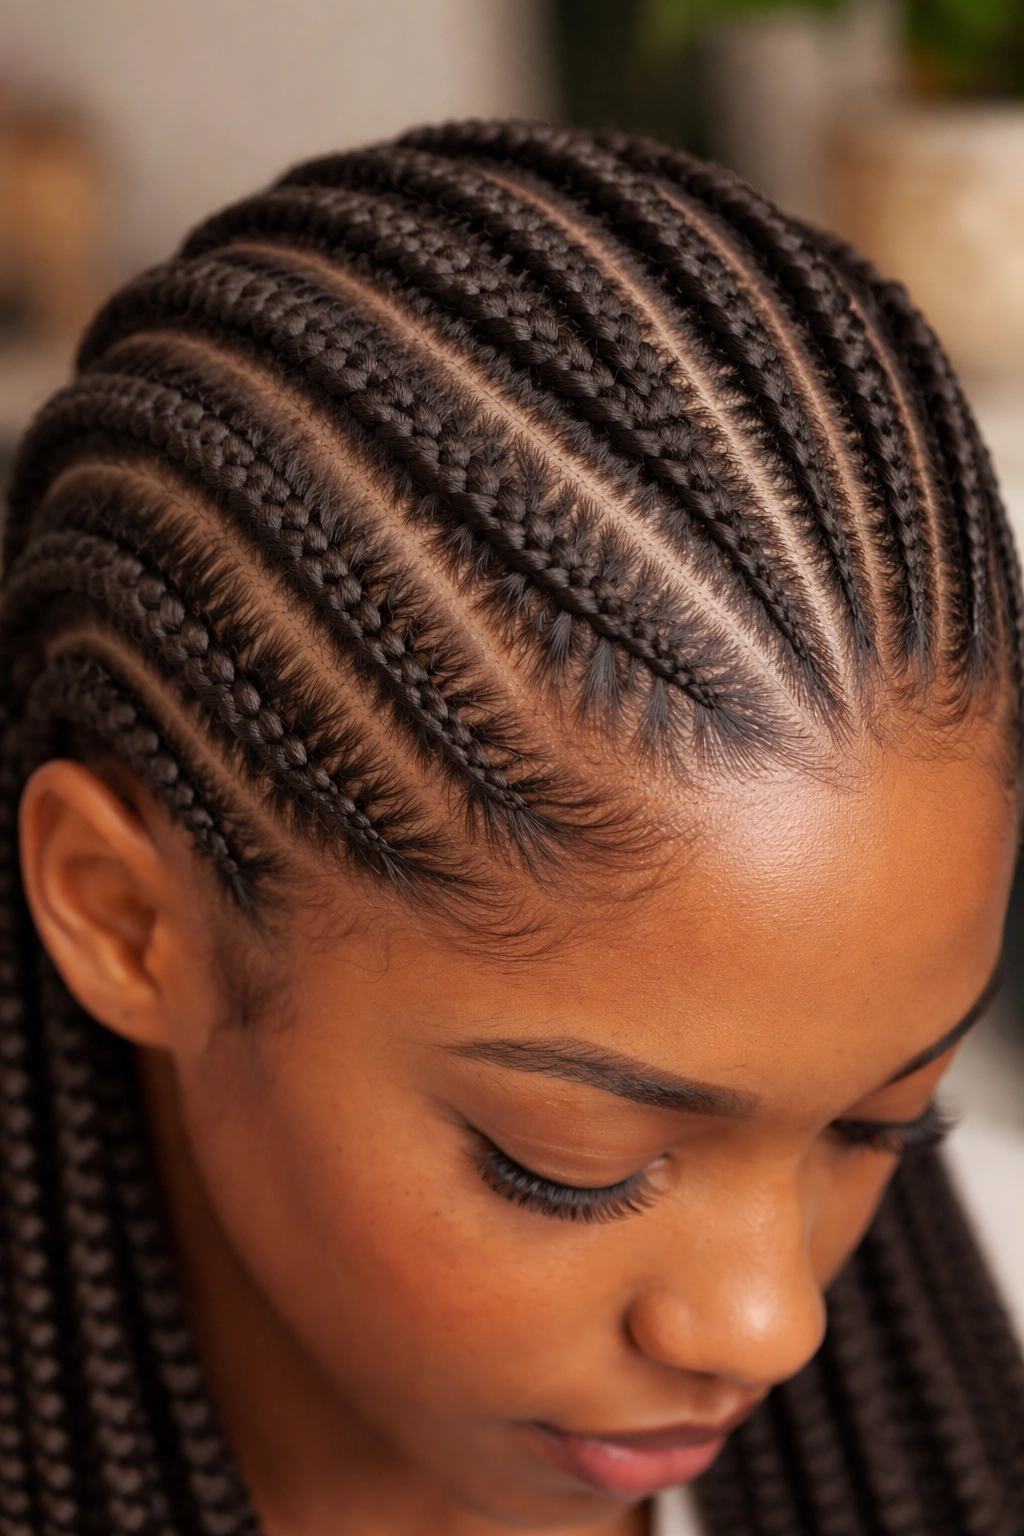
Cornrows are tight braids that sit flush to the scalp, created by braiding three strands of hair while adding hair from the surrounding sections as you move along the scalp. Cornrows are the quintessential protective style for 4C hair and have deep cultural roots in Black communities, where they’ve been worn for centuries as both a practical and artistic expression. On 4C hair, cornrows create stunning geometric patterns, sit securely throughout their wear time, and protect your ends completely by tucking them underneath each braid.
Creating Cornrows That Last and Look Defined
Cornrows on 4C hair hold beautifully because your coily texture naturally grips the braid structure, keeping everything in place without slipping or unraveling. The key is moisture and maintenance during wear—cornrows that start moisturized and are kept hydrated throughout their wear time will look sharp and defined. Dry cornrows tend to frizz and look less polished, so plan to refresh them with a light misting spray and a sealing product every few days. The installation tension matters too; cornrows should be snug but not painfully tight, as excessive tension can lead to hair loss along the hairline.
Cornrow Style Variations and Patterns
- Straight-back cornrows (rows running from front to back) for a classic, clean look that works in any setting
- Curved or spiral cornrows that wrap around the head in artistic patterns for more visual interest and movement
- Two-strand cornrows for a more textured, looser appearance than traditional three-strand cornrows
- Colored cornrows using yarn or textured hair for visual interest, or cornrows with beads or gold cuffs for added glamour
- Cornrow updo by twisting the cornrows at the base into a bun or knot at the crown for a polished, elegant look
Insider note: Cornrows look their absolute best in the first week of wear, so consider taking photos or attending events during days 1-7 if you want them looking their sharpest. They absolutely continue to look good after week one with maintenance, but there’s something special about freshly-installed cornrows.
5. Crochet Braids
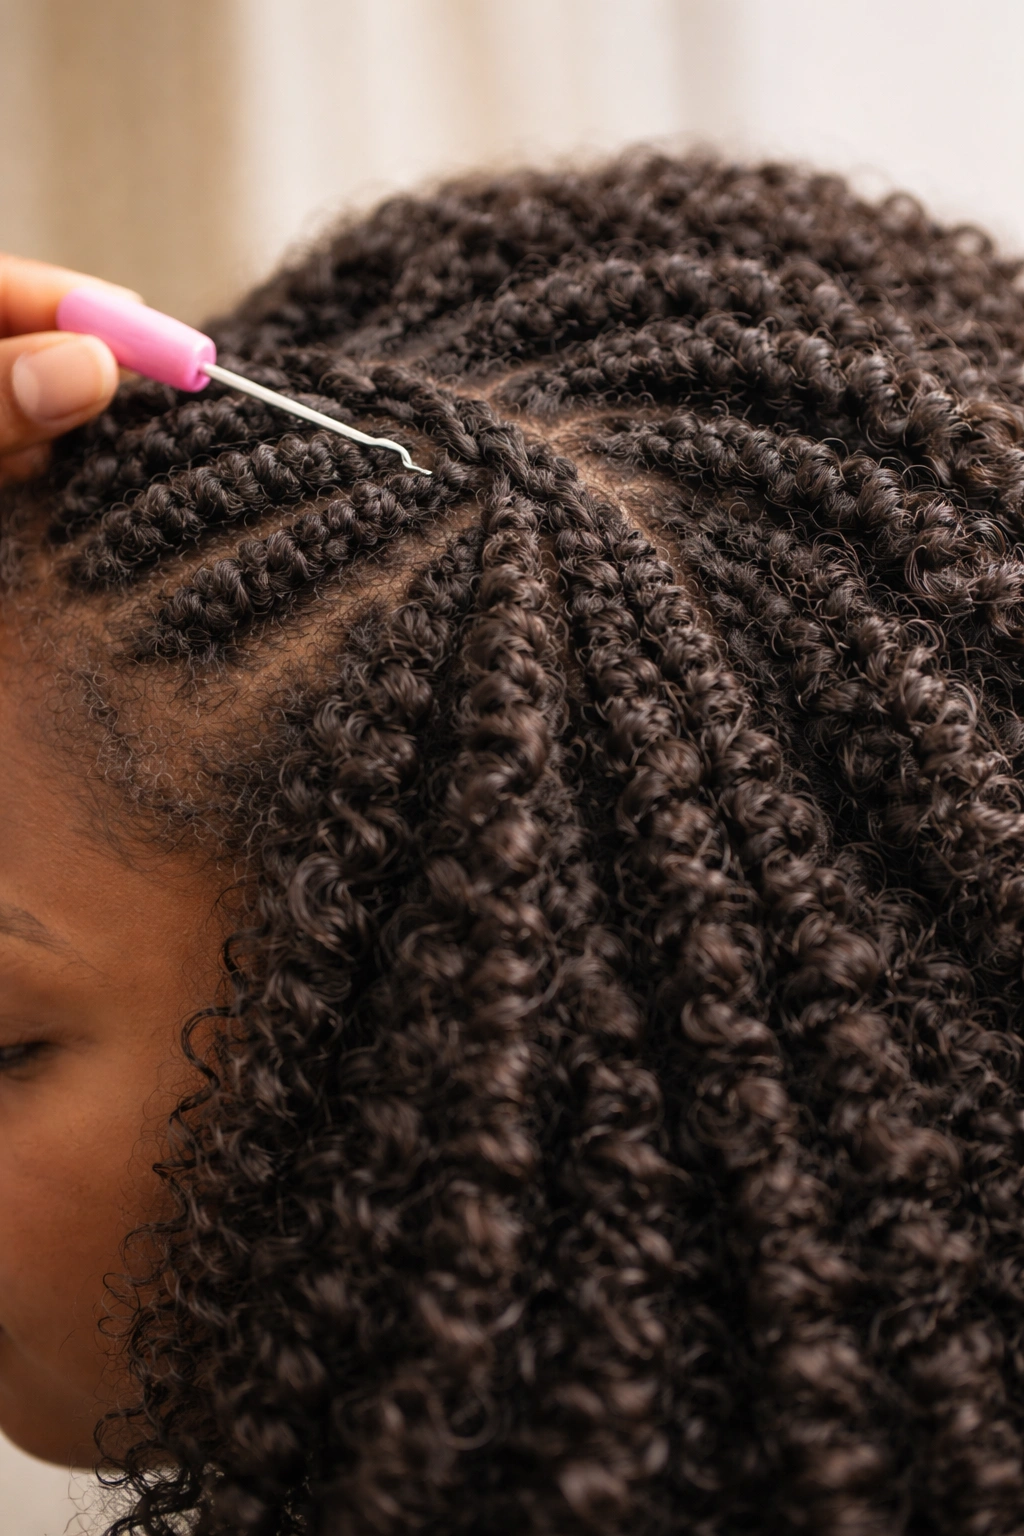
Crochet braids are a flexible protective style where extensions (usually pre-made braids, locs, or curly hair) are looped into your hair using a crochet hook, then styled in whatever way you choose. The beauty of crochet braids on 4C hair is the endless variety—you can install loose curly hair for a voluminous, textured style, pre-made braids for a sleeker look, or locs for a more structured aesthetic. The extensions sit on top of your hair, which means your actual hair is completely protected underneath, making crochet braids one of the most low-stress protective styles available.
The Mechanics of Crochet Braids on 4C Hair
Crochet braids work by creating small cornrows or twists in your hair (usually thinner than a pencil), then using a crochet hook to pull the extensions through the base braids. The extensions hang from these base braids, covering your actual hair completely. On 4C hair, this method works beautifully because your coily texture holds the base braids securely without them slipping. The extensions add volume and the appearance of length, while your actual hair sits underneath, undisturbed and protected for weeks at a time.
Extension Choices and Style Outcomes
- Curly crochet braids using textured or kinky-curly extensions for maximum volume and a natural-looking textured style
- Braided crochet using pre-made box braids or individual braids as extensions for a polished, braided look
- Loc crochet using synthetic locs or pre-made loc extensions for a structured, edgy aesthetic
- Ombré or colored crochet braids using extensions in multiple colors for visual interest and creative expression
- Half-up crochet style with some extensions clipped or pinned up and some left down for balance and versatility
Quick facts:
- Crochet braids typically last 4-8 weeks depending on the base braids’ integrity and how well they’re maintained
- Installation takes 2-4 hours depending on the amount of extensions and section size
- They’re gentler on the scalp than some other protective styles because the extensions do most of the styling work
- Your actual hair underneath receives minimal stress, making this an excellent choice for hair that’s recovering from damage
6. Bantu Knots
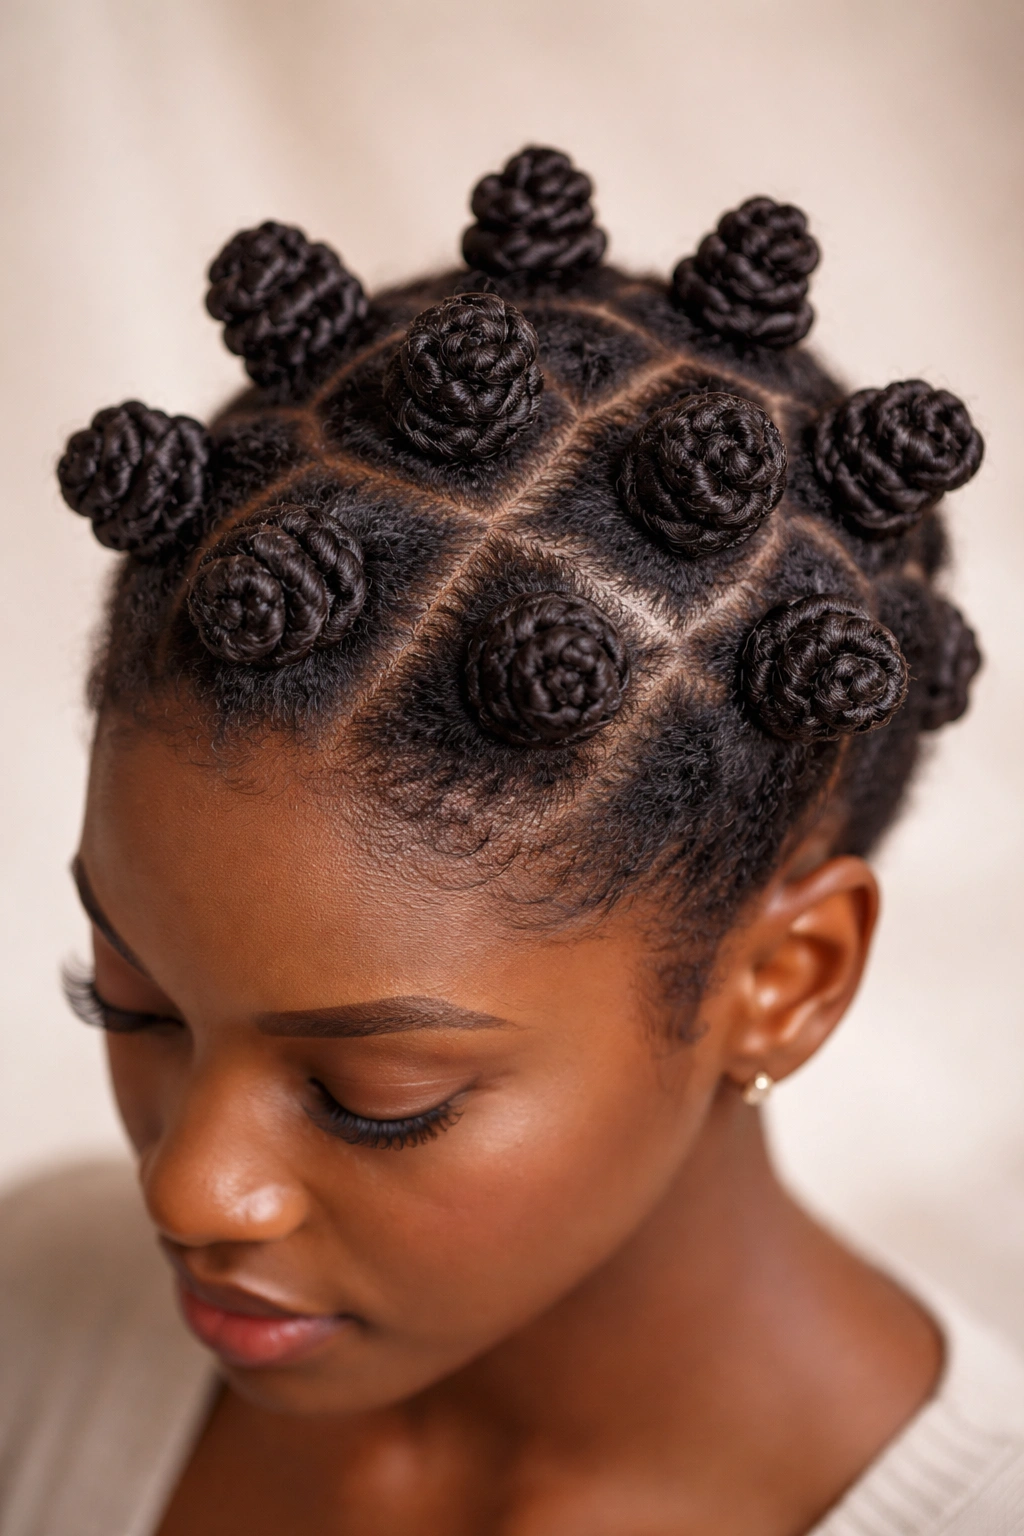
Bantu knots are coils of hair twisted around themselves and pinned to the scalp, creating a sculptural style that looks like knots sitting atop your head. Named after the Bantu people of southern Africa and with deep cultural significance in Black communities, Bantu knots are both a protective style on their own and the foundation for creating textured, voluminous bantu-knot-outs. On 4C hair, Bantu knots are absolutely stunning because your coily texture naturally complements the aesthetic, and when you unravel them, they create incredible definition and volume.
Creating Striking Bantu Knots
Bantu knots start with sectioning your hair into as many sections as you want knots. Each section is twisted or braided down from the root, then wound around itself and secured with a bobby pin, creating that signature knot shape. On 4C hair, the coils grip beautifully as you twist, making the knots secure and defined. You can create knots in any size—smaller knots create more detail and hold more definition, while larger knots go faster and create a bolder aesthetic. The knots can be as tight or as loose as you prefer; tighter knots create more defined texture when unraveled, while looser knots create a softer wave.
Styling Approaches
- Bantu knots worn as is for a bold, statement-making sculptural style that photographs beautifully
- Bantu-knot-out by unraveling the knots after 3-7 days of wear to create incredibly textured, voluminous hair
- Colored bantu knots using beads, yarn, or temporary color woven into the knots for personalization
- Bantu knots pinned down by flattening them slightly and securing them in a pattern for a more refined look
- Half bantu knots with only the top section of hair in knots and the bottom left down for a trendy, mixed aesthetic
Pro tip: For the best bantu-knot-out results, leave the knots in for at least 4-5 days and mist them with a hydrating spray every other day. The longer you leave them in, the more defined and textured your unraveled hair will be. Try not to disturb them during wear time, as that affects the texture outcome.
7. Faux Locs
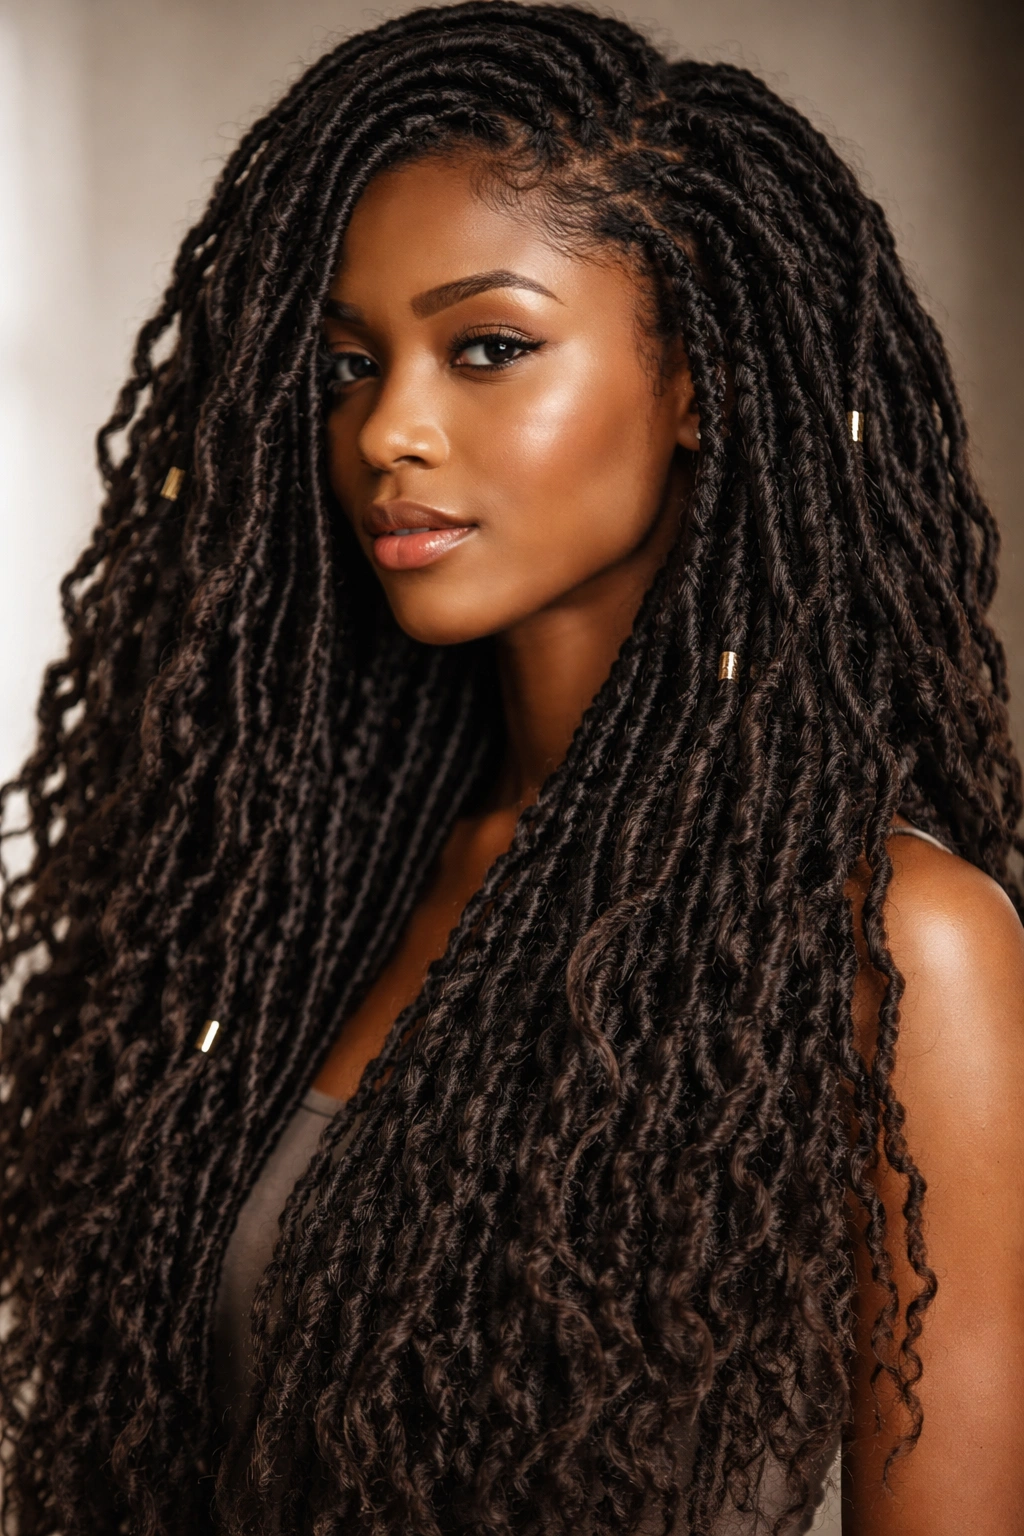
Faux locs are a temporary protective style that mimics the look of dreadlocks by wrapping your hair around crochet hair, yarn, or textured extensions. Unlike real locs, which are a permanent commitment, faux locs can be installed and removed in weeks, making them perfect for 4C hair when you want the dramatic, bohemian look of locs without the long-term commitment. On 4C hair, faux locs create stunning volume and texture, and they work particularly well because your natural coils add definition to the style.
Creating Faux Locs with Texture and Definition
Faux locs are created by sectioning hair into sections (anywhere from pencil-thin to thumb-thick, depending on your desired thickness), then wrapping the sections with crochet hair or yarn. As you wrap, your actual hair becomes incorporated into the wrapping material, creating a loc-like appearance. On 4C hair, this creates beautiful definition because the wrapping material and your natural coils work together to create texture and visual interest. Thinner faux locs look more delicate and allow for more versatile styling, while thicker faux locs have more presence and create a bolder statement.
Faux Loc Variations and Styling
- Traditional faux locs in a single color for a classic, bohemian look that works in any context
- Colored faux locs using multiple colors of yarn or crochet hair for visual interest and creative expression
- Thin faux locs for a more delicate aesthetic and greater styling versatility
- Thick or jumbo faux locs for maximum impact and fewer total sections to install
- Faux locs with beads added throughout for extra texture, visual interest, and personalization
- Faux locs styled in an updo gathered into a high bun or crown style for a more polished occasion
Worth knowing: Faux locs typically last 4-6 weeks depending on how well you maintain them and how quickly your roots grow. Keep them moisturized and sealed to prevent frizz and maintain that sharp, defined appearance. They can take 4-8 hours to install depending on thickness and the amount of hair, so plan accordingly.
8. Twists and Coils
Twists and coils is a protective style that combines both textures—some sections are twisted as traditional two-strand twists while other sections are coiled around themselves like mini bantu knots. This mixed style offers visual interest and versatility; you can wear some twists hanging down while others are pinned or styled upward. On 4C hair, the combination of twists and coils creates incredible texture and volume, and it’s an excellent way to explore different aesthetic options within a single protective style.
Mixing Twists and Coils for Visual Interest
The beauty of combining twists and coils is that you can customize the arrangement to match your preferences. You might create twists across the front and coils toward the back, or alternate them in a pattern. Some people create a specific number of coils as a focal point at the crown, then fill the rest with twists. This style works beautifully on 4C hair because both the twists and coils sit securely and create natural-looking definition. The mixed texture creates visual depth and makes the style feel less uniform than an entire head of twists alone.
Styling and Wear Options
- Twists and coils worn entirely down for maximum volume and texture visibility
- Twists and coils in a high puff with all sections gathered at the crown for a cute, casual look
- Twisted ponytail using only the twist sections while leaving coils loose creates an interesting mixed style
- Half-up twists and coils with the top section secured and the bottom left hanging
- Updo with twists and coils gathered into a sculptural bun or crown pattern for more formal occasions
Quick facts:
- Installation takes 2-4 hours depending on section size and how many sections you’re creating
- The style typically lasts 2-3 weeks before needing refreshing at the roots
- It’s less low-manipulation than a single-texture style, but still protects your ends and allows for regular moisture applications
9. Senegalese Twists
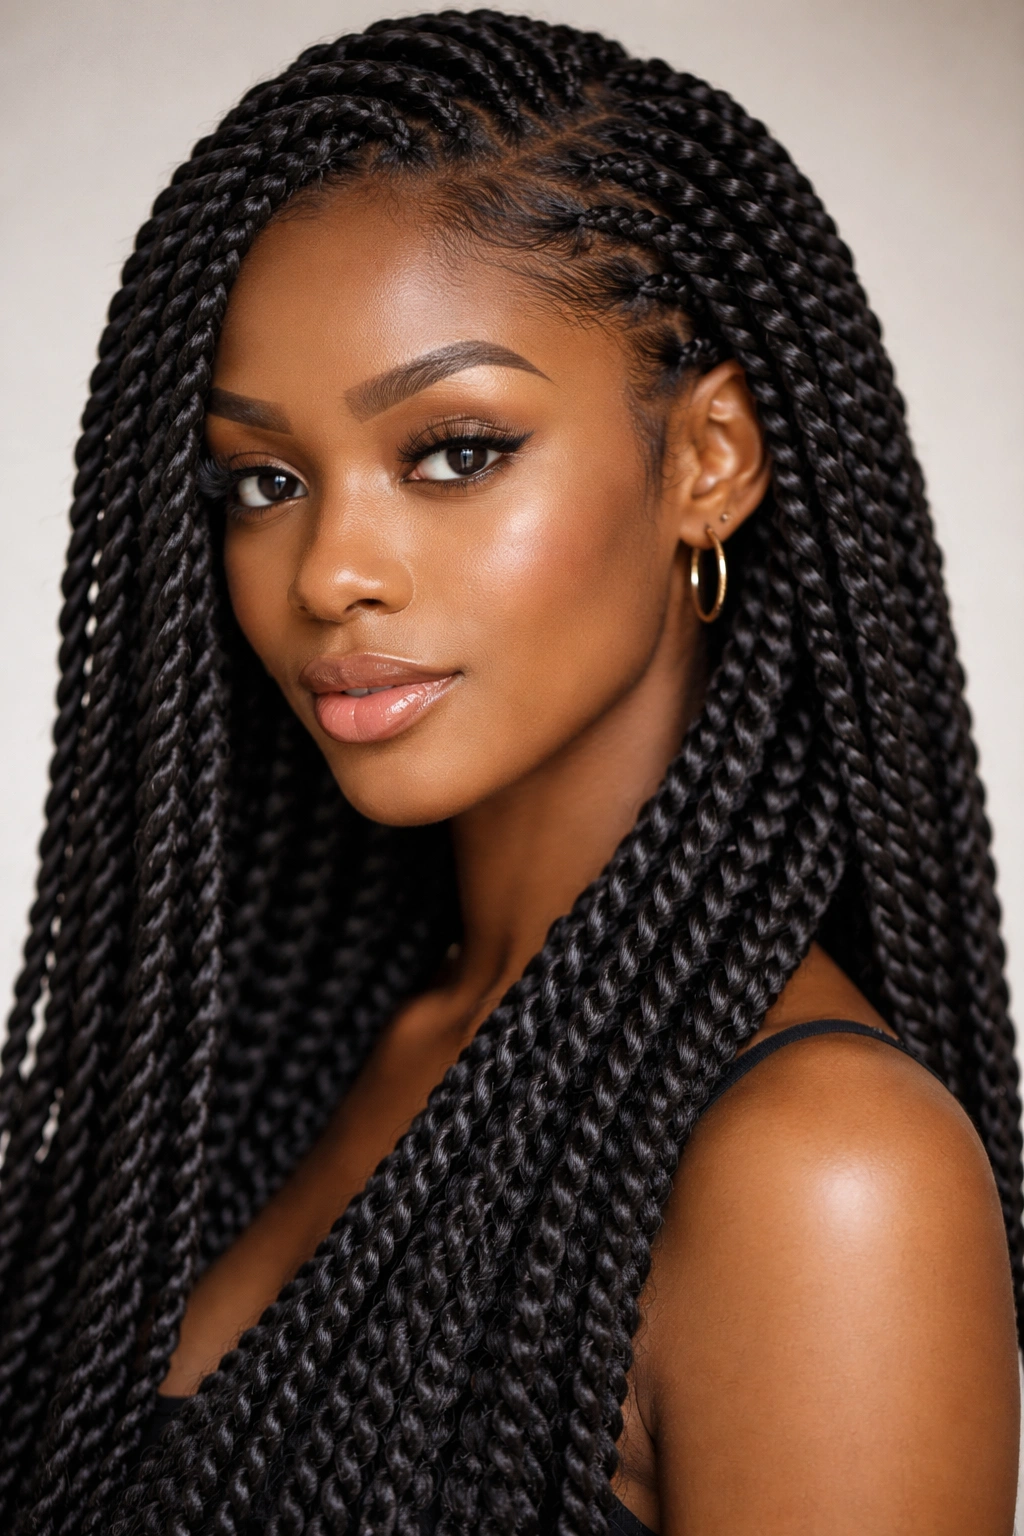
Senegalese twists are three-strand twists that incorporate wrapping hair or crochet hair into the twisting pattern, creating a tighter, more defined look than regular two-strand twists. Named after their roots in Senegal, Senegalese twists are a classic protective style that works beautifully on 4C hair. The wrapping material adds volume and creates a polished, refined aesthetic compared to the softer look of regular two-strand twists. Senegalese twists can be worn down, in an updo, or any combination, and they’re remarkably versatile.
Creating Senegalese Twists with Precision
Senegalese twists are created by taking a section of your hair and a piece of wrapping hair (usually crochet hair or yarn), then twisting all three elements together as one. As you twist, the wrapping material tightens and defines the twist, creating a smoother, more polished appearance than two-strand twists. On 4C hair, this creates a style that looks refined and intentional. The wrapping material does much of the work of creating volume and definition, so even if your natural hair is fine, Senegalese twists will look full and impressive.
Senegalese Twist Styling Variations
- Classic Senegalese twists worn down for a polished, refined protective style that photographs beautifully
- Colored Senegalese twists using contrasting yarn or crochet hair for visual interest and bold impact
- Senegalese twists in an updo gathered into a bun, crown, or high ponytail for special occasions
- Thin Senegalese twists for a more delicate aesthetic and versatile styling options
- Senegalese twists with beads added for extra personalization and visual interest
- Half-up Senegalese twists with some sections secured and others left down for a balanced, trendy look
Insider note: Senegalese twists typically last 6-8 weeks, making them longer-lasting than regular two-strand twists. The wrapping material keeps them defined and neat-looking even as they age, so they’re an excellent choice if you like a protective style you can wear for an extended period.
10. Spring Twists
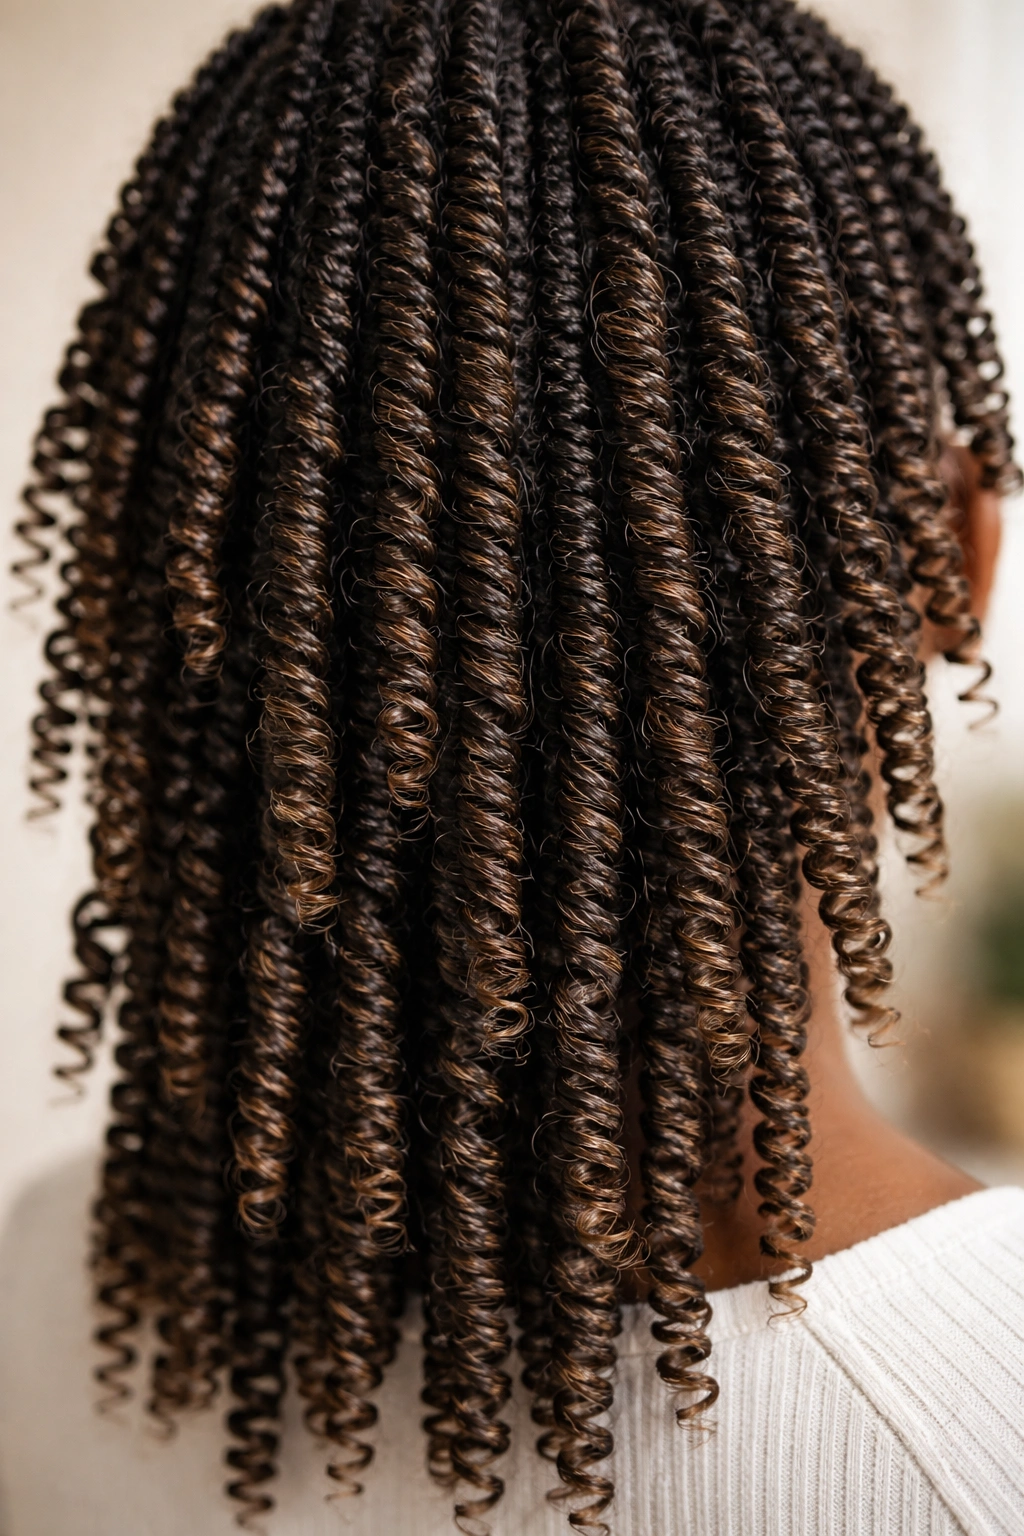
Spring twists are lightweight twists created by wrapping crochet hair or textured hair around your actual hair in a spiral pattern, creating the appearance of coiled springs. The spring texture adds visual interest and creates an appearance of length without actually requiring longer hair, making spring twists perfect for 4C hair at any length. This style is less heavy on the scalp than traditional protective styles because much of the visual impact comes from the wrapping material rather than your hair doing all the work.
Creating Spring Twists for Maximum Impact
Spring twists are created by sectioning your hair, then wrapping crochet hair or pre-curled hair around each section in a spiral pattern. As you wrap, the texture of the wrapping material creates that characteristic spring appearance. On 4C hair, this creates a beautiful, textured aesthetic because your natural coils add to the overall texture and definition. Spring twists are typically thinner than other protective styles, which makes them lighter on the scalp and perfect if you’re concerned about tension or want to wear them for extended periods.
Spring Twist Styling Options
- Loose spring twists worn down for a lightweight, textured style with tons of visual interest
- Spring twists in a high ponytail gathered together for a playful, voluminous look
- Colored spring twists using multiple colors of crochet hair for a custom, artistic appearance
- Spring twists in a bun or updo for more formal occasions while maintaining the textured aesthetic
- Half-up spring twists with the top section secured and bottom left down for a balanced, trendy style
Quick facts:
- Spring twists take 2-4 hours to install depending on thickness and the amount of hair
- They typically last 4-6 weeks with regular maintenance and hydration
- They’re significantly lighter on the scalp than heavier protective styles, making them comfortable for long-term wear
- The wrapping material does much of the visual work, so they look impressive even on shorter natural hair
11. Goddess Braids
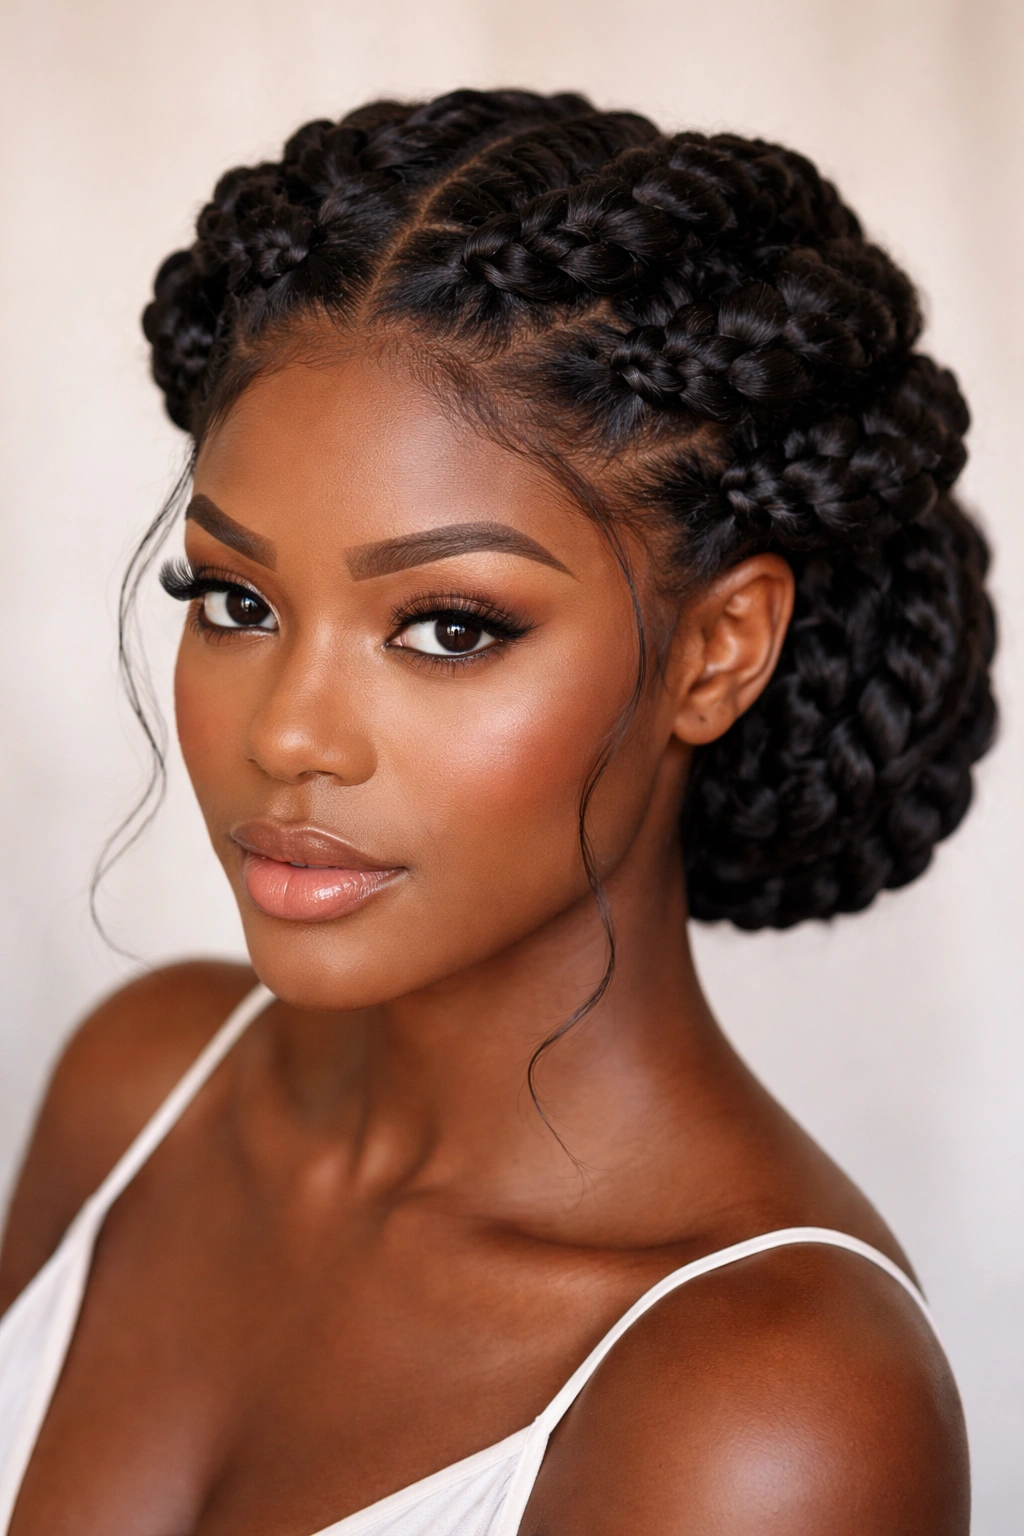
Goddess braids are four-strand braids (sometimes incorporating wrapping hair) that sit on or slightly off the scalp, typically styled in a crown pattern or swept to the side. This style combines the protective benefits of braids with the elegant, sculptural beauty of an updo, making goddess braids perfect for special occasions or everyday elegant wear. On 4C hair, goddess braids create stunning dimension and volume because your coily texture adds natural thickness to each braid.
Creating Goddess Braids That Wow
Goddess braids are typically thicker than cornrows and looser than standard braids, sitting slightly away from the scalp rather than flush against it. This creates an elevated, more elegant appearance than tighter braids. You can create goddess braids by sectioning hair, sometimes incorporating wrapping hair, and braiding each section using four strands instead of three. On 4C hair, this thickness creates a bold, statement-making style that looks impressive from every angle. The looser tension also means they’re more comfortable to wear and less stressful on your scalp.
Goddess Braid Styling Approaches
- Crown goddess braids swept around the head in a halo pattern for an elegant, romantic look perfect for special events
- Side-swept goddess braids beginning at one side of the head and wrapping to the other for a dramatic, asymmetrical aesthetic
- Down-the-back goddess braids running from the crown down the back of the head for a simpler, less complex arrangement
- Goddess braids with beads or cuffs added for extra personalization and visual interest
- Colored goddess braids using yarn or textured hair woven into the braids for creative expression
Worth knowing: Goddess braids work best when sized appropriately for your lifestyle. Thicker braids are faster to install and feel lighter, while thinner braids offer more versatility in styling but take longer. Most people find 4-6 goddess braids is the sweet spot between installation time and visual impact.
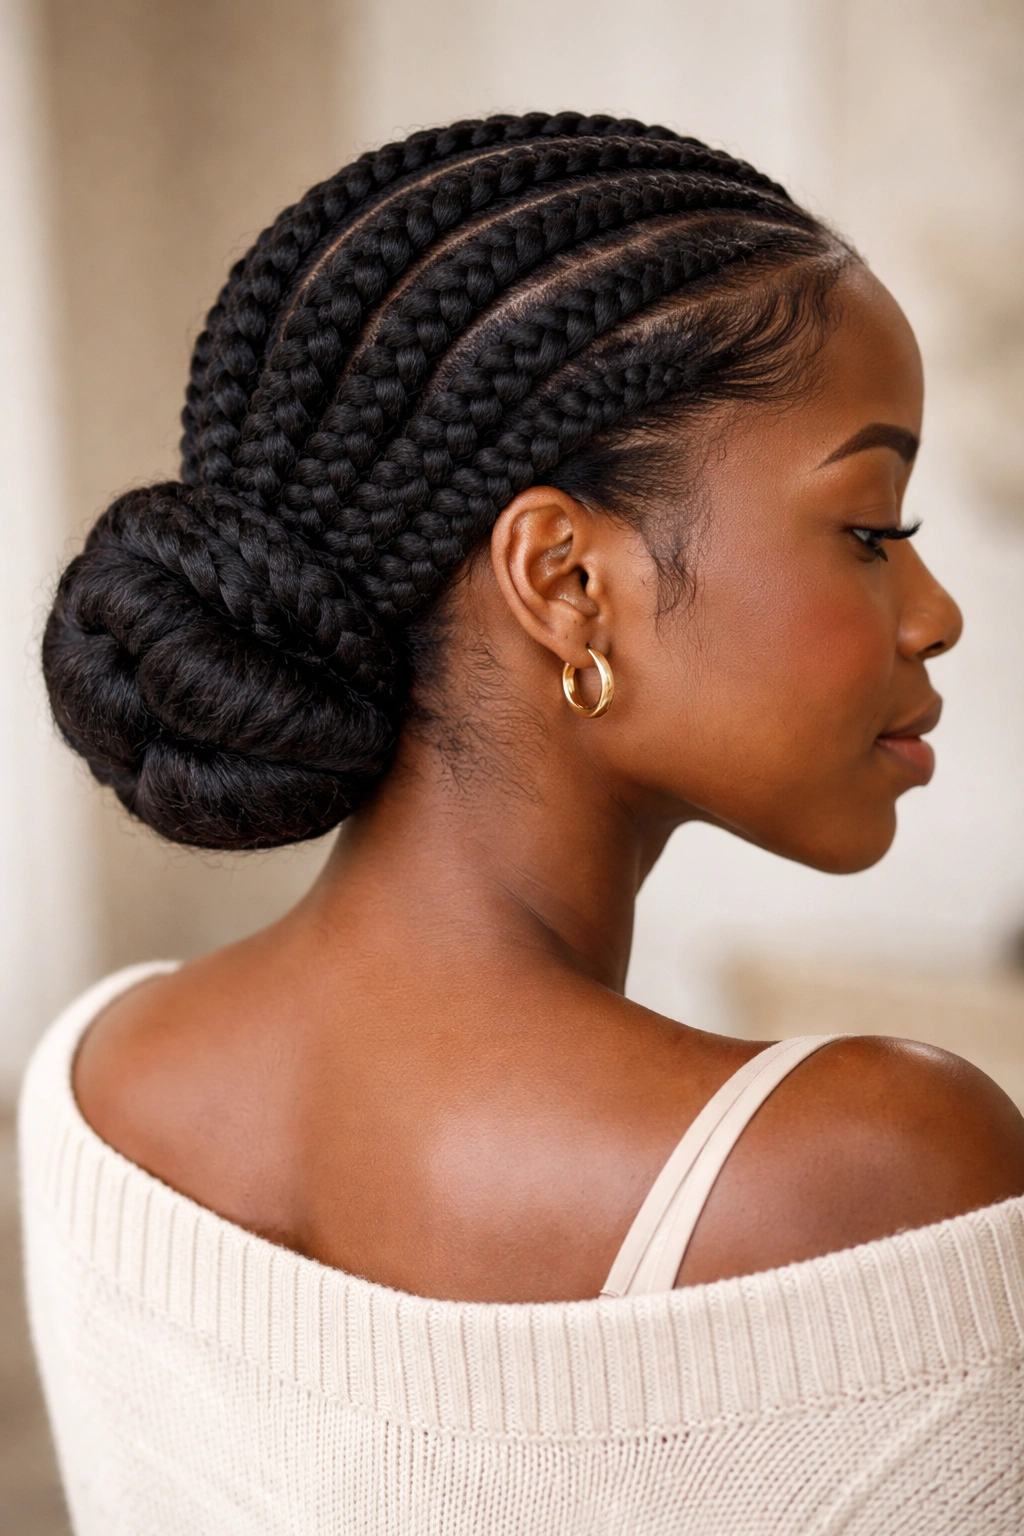
12. High-Bun Protective Style
A high-bun protective style is any arrangement where your 4C coils are gathered and secured at the crown in a bun shape, tucking all the ends away and creating a polished, minimal aesthetic. This can be created from twists, braids, coils, or even your natural hair if it’s long enough, making it one of the most versatile protective styles. A high bun works in any context—from professional environments to casual weekends—and it’s remarkably quick to style once your base is created.
Building a Protective High Bun
The key to a successful protective high bun is ensuring all your ends are tucked completely away. Whether you’re using twists, braids, or even your natural hair, the bun should fully enclose those ends so they’re not exposed to friction or dryness. On 4C hair, a high bun is particularly striking because the volume and texture of your coils create a full, impressive-looking bun even if you’re using thinner twists or braids as the base. You can create a smooth, sleek bun using gel, or you can embrace the texture and create a more textured, voluminous bun that celebrates your natural coils.
High-Bun Variations and Styling
- Sleek high bun with smooth gel for a polished, professional appearance
- Textured high bun showcasing the natural volume and texture of your coils or twists
- Bun with a wrap using a silk or satin scarf to create a smooth, elegant boundary around the bun
- Messy or undone high bun for a casual, effortless aesthetic
- High bun with accessories (hair sticks, cuffs, or decorative pins) for personality and style
Pro tip: Anchor your bun securely using bobby pins placed in a crisscross pattern, then secure again with a hair tie or elastic. This prevents the bun from slipping or unraveling throughout the day, keeping it looking fresh and intentional.
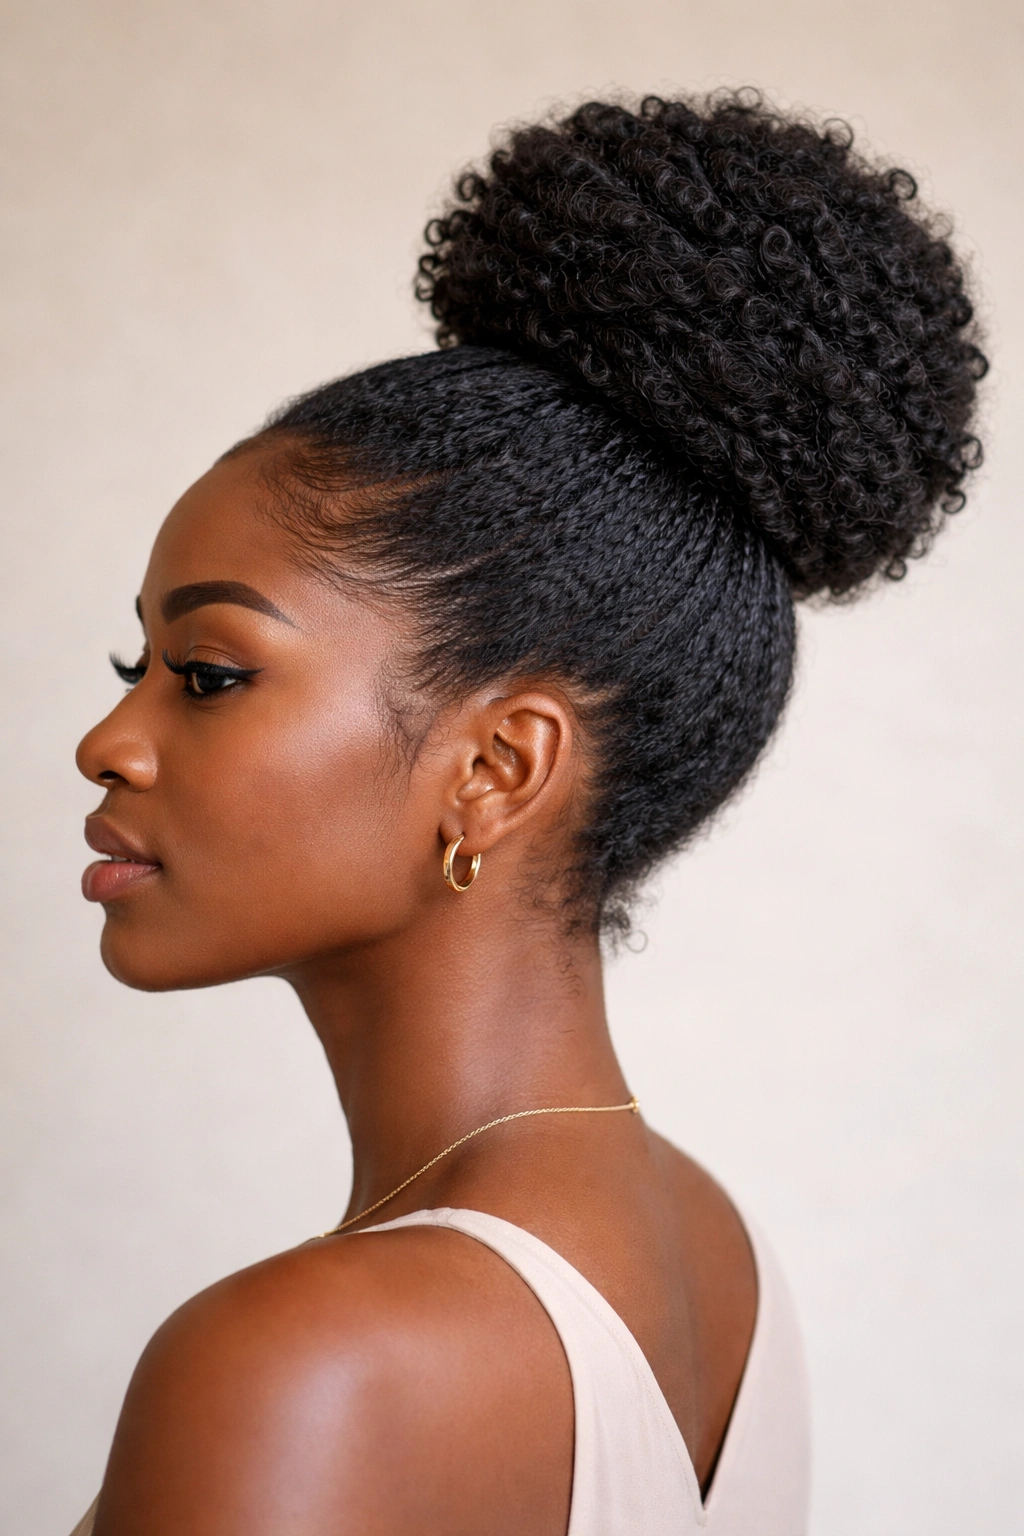
13. Puff
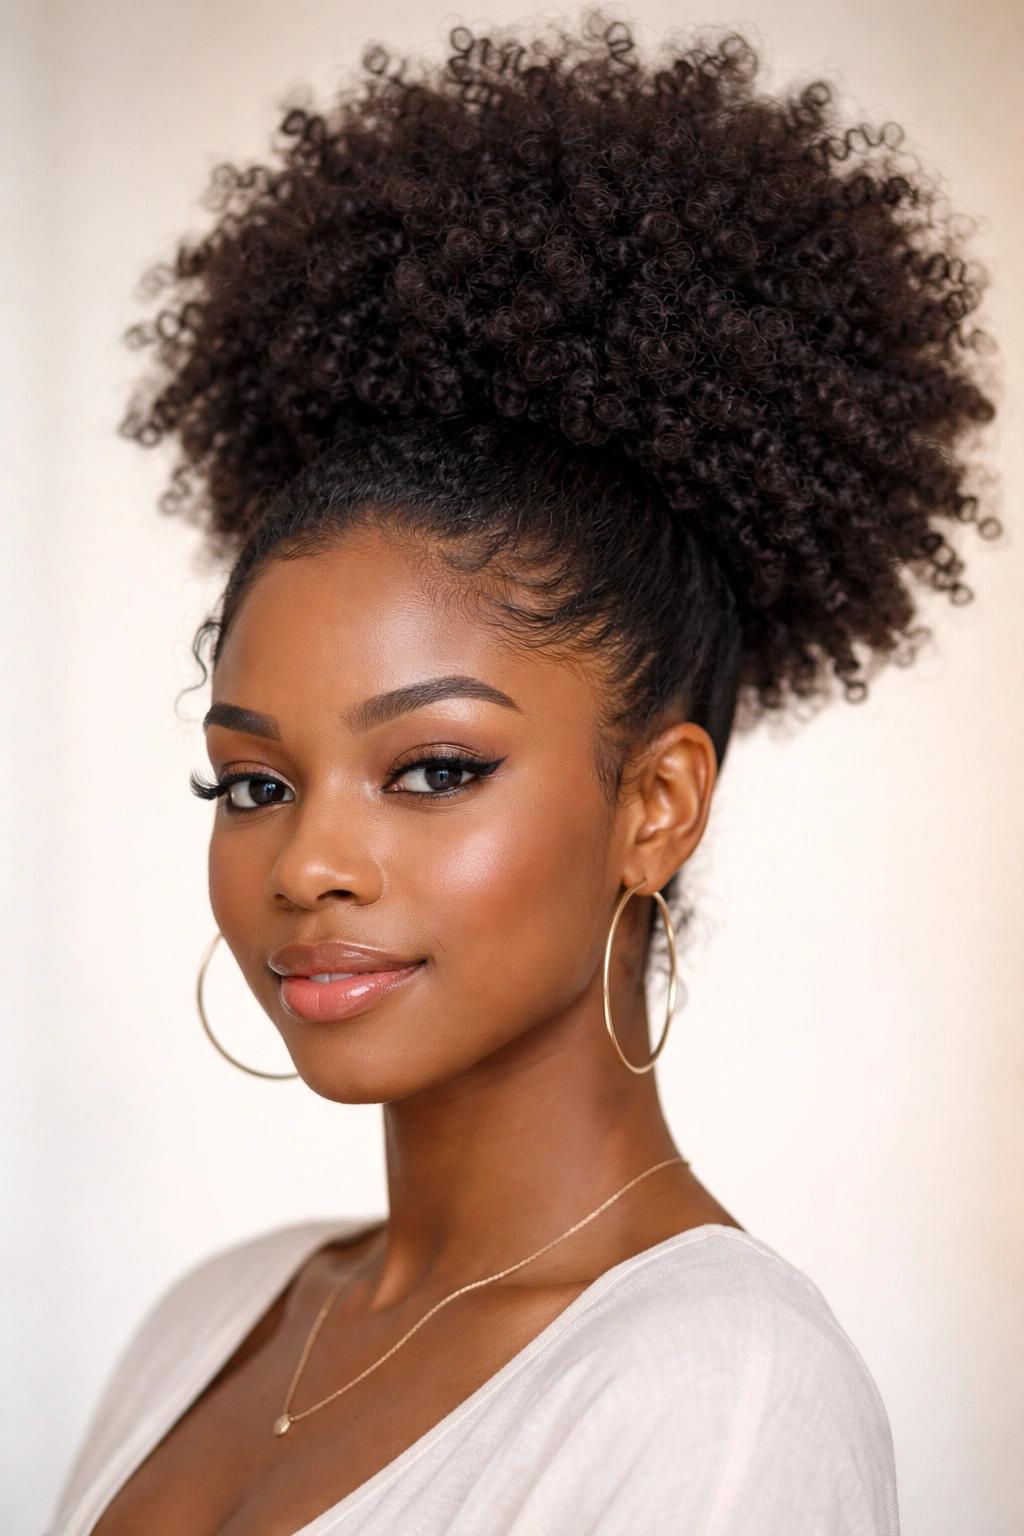
A puff is a gathered style where your hair is collected at one point on your head (typically the crown, but can also be the side or back) and secured in a ponytail or bun shape, leaving your natural coils somewhat loose and visible. A puff is one of the quickest protective styles to create and one of the most celebratory of your natural 4C texture—the entire point is to showcase the volume and beauty of your coils. On 4C hair, a puff is particularly stunning because your natural coils create incredible volume and visual impact with minimal styling effort.
Creating a Puff That Celebrates Your Coils
A puff requires only a few basic elements: a section of your hair gathered together, a hair tie or elastic to secure it, and optional bobby pins to smooth the edges if desired. The beauty of a puff is that it requires minimal manipulation and celebrates your natural texture exactly as it is. You can create a puff on second-day or third-day hair (unwashed hair that’s been styled previously) for maximum volume, or on freshly washed hair if you prefer. On 4C hair, the natural volume of your coils means even a puff created from freshly washed hair will look full and impressive.
Puff Styling Variations
- High puff gathered at the crown for a youthful, playful aesthetic
- Side puff gathered to one side of your head for an asymmetrical, trendy look
- Double puff with puffs gathered on both sides of your head for a bold, fun statement
- Low puff at the nape of your neck for a more subtle, sophisticated appearance
- Puff with accessories (hair sticks, cuffs, scarves) for added personality and style
Quick facts:
- A puff can be created in under 5 minutes on hair that’s already conditioned and moisturized
- It works as both a protective style and an everyday casual style, depending on your definition
- Multiple days of a puff count as extended wear, as long as you’re maintaining moisture and keeping your edges smooth
- It’s an excellent style choice when you want minimal manipulation but maximum texture visibility
14. Loc Extensions

Loc extensions (also called crochet locs or faux locs) are a long-term protective style where synthetic or human hair is crocheted into your natural hair to create the appearance of dreadlocks. Unlike faux locs, which are installed on top of your hair, loc extensions are looped through your actual hair, so they feel more integrated and secure. On 4C hair, loc extensions create a stunning, bohemian aesthetic and work beautifully because your natural coils add texture and dimension to the extensions.
Installing and Maintaining Loc Extensions
Loc extensions are installed using a crochet hook to loop extensions through your braided or twisted base, similar to crochet braids but creating a thicker, more substantial loc-like appearance. Once installed, they’re remarkably low-maintenance—you’re not detangling your actual hair, you’re not using heat, and you’re not manipulating your hair daily. Your actual hair sits underneath the extensions, protected and undisturbed. On 4C hair, this means your natural coils are completely protected while you enjoy the look and feel of locs.
Loc Extension Styling and Wear Duration
- Traditional loc extensions in a single color for a classic, bohemian aesthetic
- Colored loc extensions in multiple colors or with decorative wrapping for artistic expression
- Loc extensions styled in an updo gathered into buns or twisted patterns for special occasions
- Thin loc extensions for a more delicate aesthetic and lighter feel on the scalp
- Thick or jumbo loc extensions for maximum impact and a shorter installation time
Worth knowing: Loc extensions typically last 3-6 months depending on how well you maintain them and how fast your roots grow. They require regular hydration and careful washing, but the benefit is long-lasting style with minimal daily manipulation of your actual hair.
15. Flat Twists
Flat twists are two-strand twists that are twisted close to the scalp in the same manner as cornrows, but with a looser, more textured appearance than cornrows. Flat twists sit slightly away from the scalp rather than flush against it, creating an elevated, sculptural aesthetic. On 4C hair, flat twists are particularly striking because your natural coils add to the overall texture, and the style works beautifully in any arrangement—down the back, in a crown pattern, or in a more abstract design.
Creating Flat Twists with Texture and Definition
Flat twists are created by taking two strands of hair and twisting them together while simultaneously adding hair from the surrounding area, similar to cornrows but with a looser tension and a focus on creating texture rather than precision. On 4C hair, the coils naturally grip as you twist, creating definition without needing excessive tension. You can create flat twists using your natural hair alone, or incorporate wrapping hair or yarn for additional definition and volume. Flat twists work beautifully on hair of any length, including very short hair, because the texture of your coils creates visual interest and volume.
Flat Twist Styling and Arrangement Options
- Flat twists running down the back of the head for a classic, protective style that photographs beautifully
- Flat twists in a crown pattern wrapping around the head for an elegant, regal appearance
- Flat twists with beads or cuffs added throughout for personalization and visual interest
- Colored flat twists incorporating yarn or textured hair into the twists for artistic expression
- Flat twists pinned into an updo gathered at the base of the crown for a more polished, refined look
- Flat-twist-out by unraveling the twists after 3-5 days of wear to create a soft, textured, voluminous style
Insider note: Flat twists look their absolute best in the first week of wear. They absolutely continue to look good after that point with proper moisture and maintenance, but there’s something special about freshly installed flat twists—the definition is sharp, the texture is crisp, and the overall aesthetic is impeccable.
Keeping Your 4C Hair Healthy During Protective Styling
Protective styles are only truly protective if you’re maintaining moisture and minimizing tension during wear. 4C hair requires consistent hydration to stay supple and strong, and that doesn’t stop when your hair is in a protective style. Every 2-3 days, mist your hair and scalp with a hydrating spray (water mixed with a small amount of leave-in conditioner works perfectly), then seal with a light oil or cream. Pay special attention to your edges and ends, which are most vulnerable to dryness and breakage. If your protective style sits too tightly on your scalp, causing pain or creating redness, loosen it or take it down—no style is worth hair loss or scalp damage.
Sleep protection matters too, even with protective styles. Use a satin or silk pillowcase or wrap your hair in a satin bonnet or scarf to minimize friction and frizz overnight. This simple step dramatically extends the life and appearance of your style while also protecting your hair’s moisture levels. Your protective style is only as good as how you care for it during wear, so consistency with hydration and gentle handling is essential.
Transitioning Between Styles for Maximum Retention
Many people who successfully grow out their 4C hair do so by rotating protective styles consistently—not staying in one style for months, but moving between different styles every 3-8 weeks. This approach allows your scalp to rest between styles, minimizes the tension any single style places on your hair, and lets you explore different aesthetics. It also prevents style fatigue (the mental exhaustion of wearing the exact same style for months) while keeping your hair protected and healthy.
When transitioning between protective styles, take time to assess your hair’s condition. Unravel your old style gently, detangle if needed using a slippery conditioner and a wide-tooth comb or your fingers, then deep condition your hair before installing the next style. This maintenance-focused transition period takes an extra hour or two but ensures you’re starting your new style with moisturized, healthy hair rather than dry or damaged hair. Your hair will thank you with improved strength, shine, and overall health.
Final Thoughts
4C coily hair is meant to be celebrated, protected, and styled in ways that honor its unique beauty and needs. The fifteen styles outlined here represent just a fraction of the possibilities available to you—each one offers different levels of protection, different aesthetics, and different maintenance requirements. Some styles are perfect for traveling, others for special occasions, and still others for those weeks when you want minimal manipulation and maximum texture celebration.
The real power of protective styling comes when you understand why you’re styling your hair the way you are. You’re not doing it because your natural hair is difficult or wrong—you’re doing it because you’re strategic about your hair health, intentional about retaining length, and thoughtful about balancing aesthetics with hair care. When you approach protective styling from a place of intention and knowledge, rather than obligation or frustration, the entire experience shifts. Your hair gets healthier, styles look more impressive, and you feel more connected to your natural texture and heritage.
Choose the styles that resonate with you aesthetically and practically, rotate them to keep your hair and scalp healthy, and maintain consistent hydration throughout your wear time. Your 4C coils are stunning exactly as they are, and these protective styles are simply a way to keep them healthy while expressing yourself through hair.