By the time you’ve unpacked the shoes, found the sunscreen, and remembered where you shoved the charger, your curls have already made their opinion known. They’re either thriving, stretched, frizzing in a new and creative direction, or flattened on one side from the hotel pillow. Vacation hairstyles for curly hair have to survive all three.
That’s why I always think about vacation hair a little differently from everyday hair. You want styles that can handle heat, wind, salt, humidity, long walks, bad pillows, and the fact that you probably won’t want to spend 45 minutes in a bathroom mirror every morning. Good curly vacation hair isn’t about looking frozen in place. It’s about keeping shape, keeping moisture in, and letting your texture do the interesting part.
Vacation hairstyles for curly hair also need to respect the curl pattern you already have. Tight coils, loose spirals, and everything in between all get cranky in different ways. A style that’s too tight can leave dents and headaches. A style that’s too loose can unravel the second you step outside. The sweet spot is usually somewhere in the middle: enough hold to last, enough softness to still look like curls.
So here are the styles I keep coming back to when I want hair that can go from breakfast to the beach to dinner without turning into a project.
1. Vacation Hairstyles for Curly Hair: The Pineapple Puff
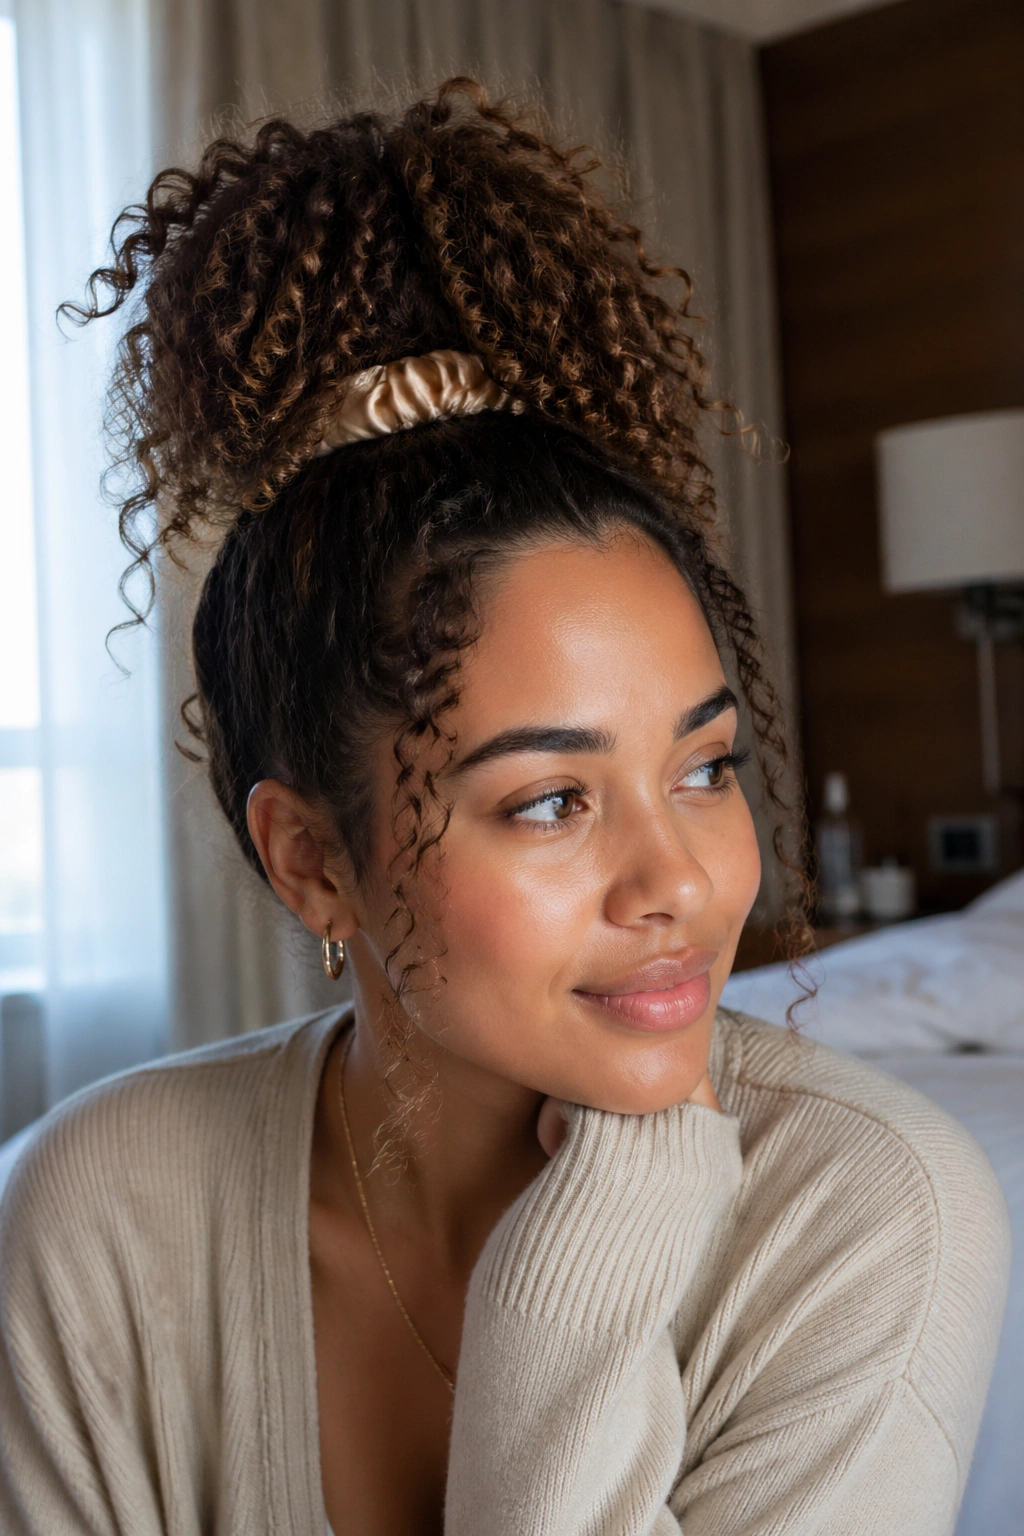
The pineapple puff is the first style I reach for when I want to protect curls and keep them out of my face. It’s high, loose, and forgiving, which is a rare and useful combination when you’re living out of a suitcase.
Picture this: you wake up, your curls are halfway decent, and you do not want to start over from scratch. A pineapple puff lets you gather the hair at the crown with a soft scrunchie, while the ends spill out like a fountain of curls. It looks casual on purpose. That’s the charm.
Why It Works So Well
The height keeps the shape from getting crushed against your neck or shoulders, which matters when you’re sitting in cars, planes, or beach chairs for hours. It also helps preserve curl clumping, especially on thicker textures that hate being pulled low and tight.
A pineapple puff is also easy to refresh. A little water, a leave-in spray, and a quick finger-fluff at the roots usually do enough. No elaborate styling ritual. No drama.
- Use a satin or silk scrunchie so the tie doesn’t snag.
- Place the puff at the crown, not the very top of the forehead.
- Keep the base loose enough that it does not leave a deep dent.
- Pull out a few face-framing curls if you want it softer.
Tiny tip: If your hair is shorter, pin the loose ends upward instead of letting them fall straight down. It gives the style the same lifted shape without fighting your length.
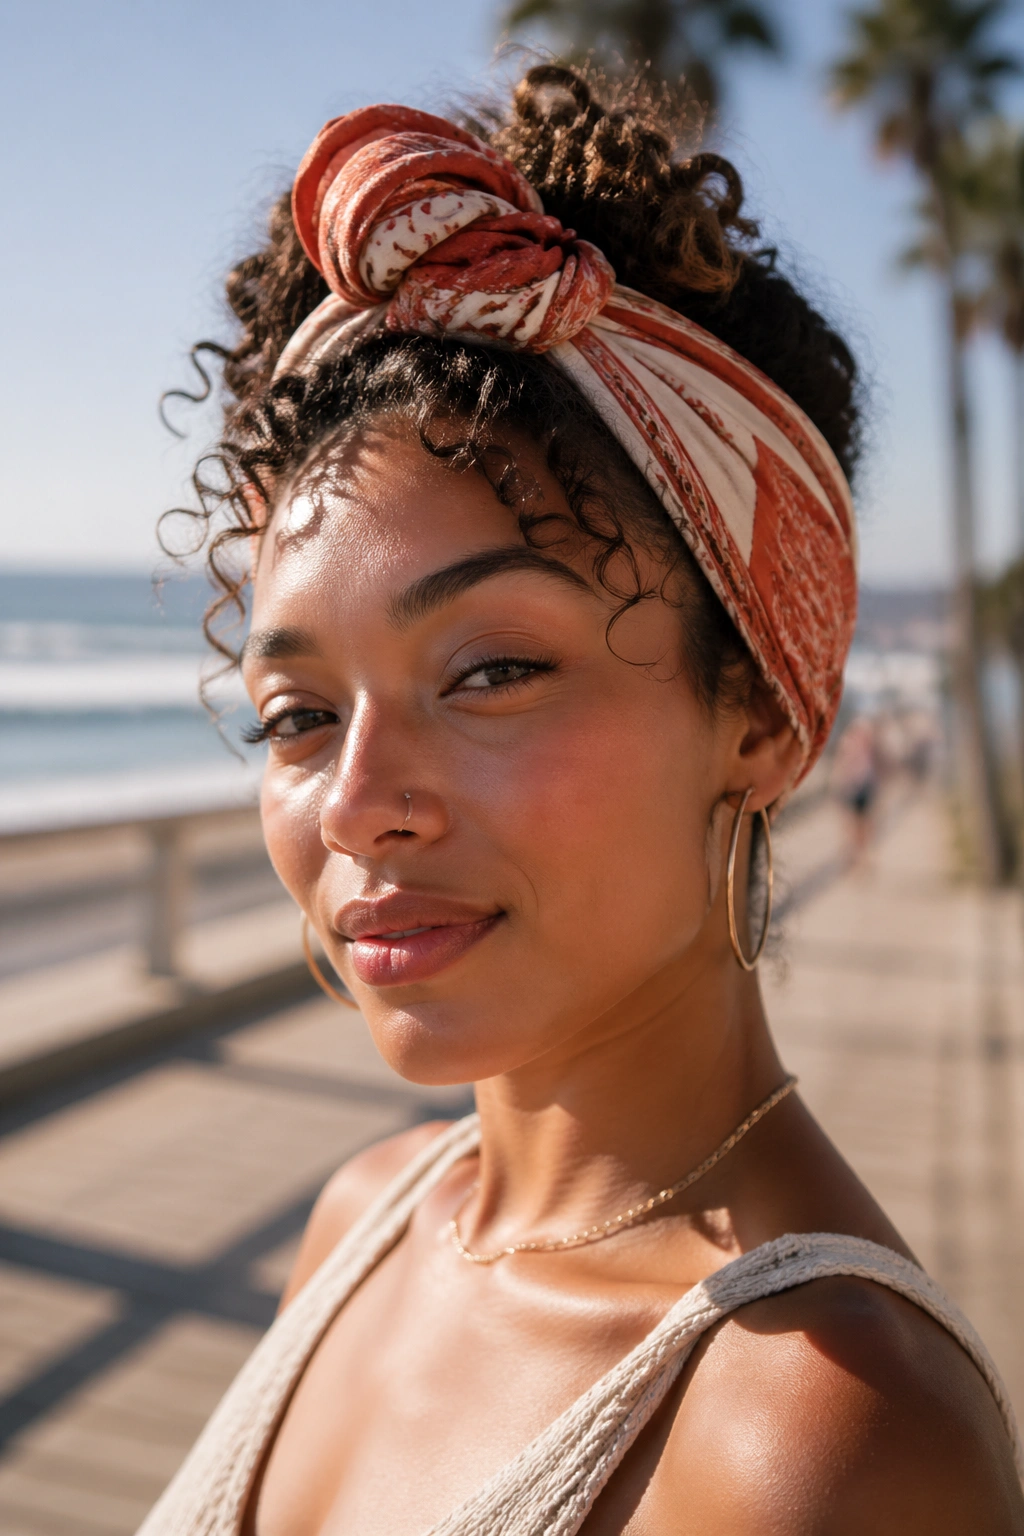
2. Silk Scarf Puff for Humid Beach Days
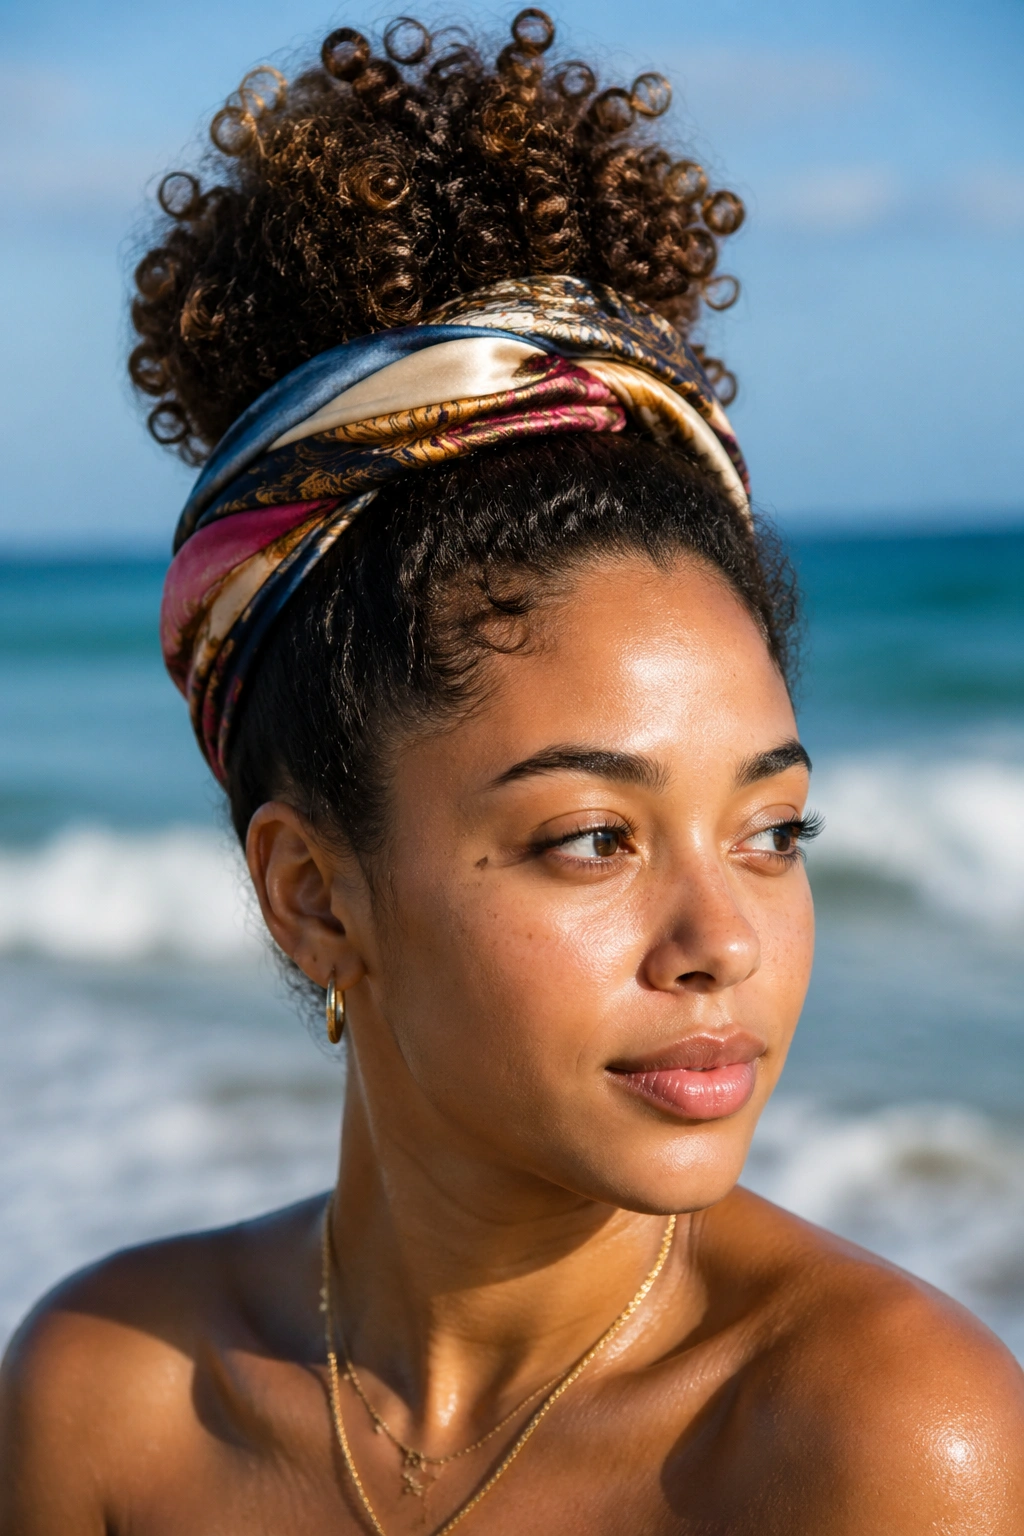
A silk scarf turns the pineapple puff into something a little more polished, and honestly, it’s one of those small things that makes vacation hair feel less chaotic. The scarf gives your curls a frame. It also helps keep the top section from puffing out in every direction the second the air gets damp.
The trick is not to overthink it. Gather the curls into a loose puff, smooth the front with your hands, and tie the scarf around the base or across the front hairline. Fold the scarf to about 2 to 3 inches wide if you want a clean band, or keep it fuller if you want more coverage and less fuss.
Why the Scarf Changes Everything
A scarf adds two useful things at once: grip and protection. It helps hold the hair in place, and it keeps sun, sweat, and sand from hitting the hairline quite as hard. That matters more than people admit, because the front pieces are usually the first to dry out and frizz.
If your hair gets fuzzy fast, this style is one of the easiest ways to buy yourself a little peace. It does not fight your texture. It works with it.
What to watch for: if the scarf is too slick, tie it over a small base of hair first, not directly on bare roots. That keeps it from sliding during the day.
3. Braided Crown That Stays Put in Wind

Why does a braided crown hold up so well when everything else starts to collapse? Because the braid follows the head shape instead of sitting on top of it like an afterthought. That makes it one of the smarter vacation hairstyles for curly hair when you know wind is part of the plan.
The style can be done as two braids wrapped around the head or as a single braid pinned into a crown shape. Either way, it keeps the front pieces controlled and leaves the rest of the texture tucked in a way that feels deliberate. It looks a little dressed up, which is useful if you’re going straight from sightseeing to dinner.
How to Wear It Without Fussing Constantly
Start with hair that has a little grip. Day-two curls often work better than freshly washed hair because they’re less slippery. If your curls are soft and very loose, a tiny bit of mousse or styling cream at the roots can help the braid stay neat.
A few bobby pins placed flat against the scalp make a bigger difference than people expect. No need for a pin explosion. Just anchor the places that want to lift.
If you want the style to feel less formal, leave a small curl or two near the ears. That tiny bit of looseness keeps it from looking stiff. And yes, the crown braid is one of those styles that survives a hot day better than it looks like it should.
4. Low Twisted Bun for Long Travel Days
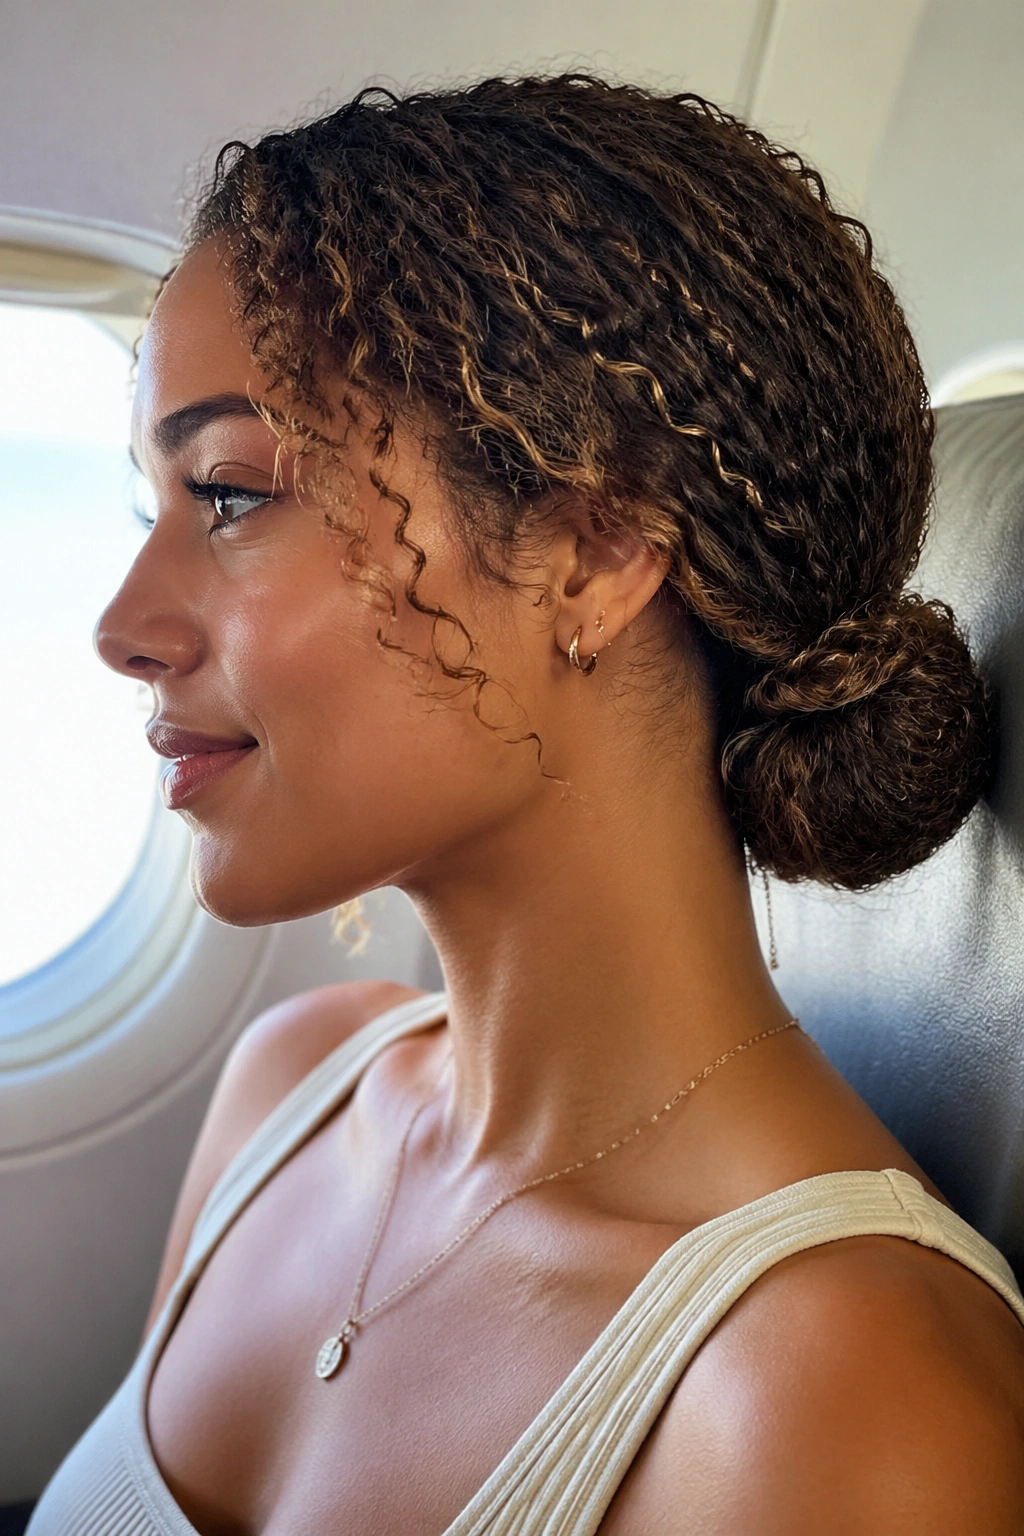
A low twisted bun is what I’d choose for the kind of day where your hair needs to be out of the way, but you still want to look like you made a choice. It sits low on the head, which makes it comfortable against a seatback, a sunhat, or a headrest. That alone makes it useful.
The style works especially well on curls that have some stretch. Twist two sections from the front or sides, bring them down to the nape, and coil them into a bun. You can tuck the ends in for a cleaner shape or leave a few curl tips loose if your hair is long enough to do it.
The nice part is how forgiving it is. If one twist is slightly thicker than the other, nobody cares. If the bun is a little messy, it looks intentional anyway.
- Use 2 to 4 bobby pins to anchor the bun.
- Place the bun at the nape, not high on the head.
- Smooth the front only as much as you need.
- Leave a few curls loose near the temples if the style feels too tight.
A low twisted bun also handles humidity better than a sleek bun on most curly textures, because the twist pattern hides a little frizz instead of exposing every flyaway. That’s useful when the air feels sticky and your hair has opinions about it.
5. Vacation Hairstyles for Curly Hair: The Half-Up Claw Clip
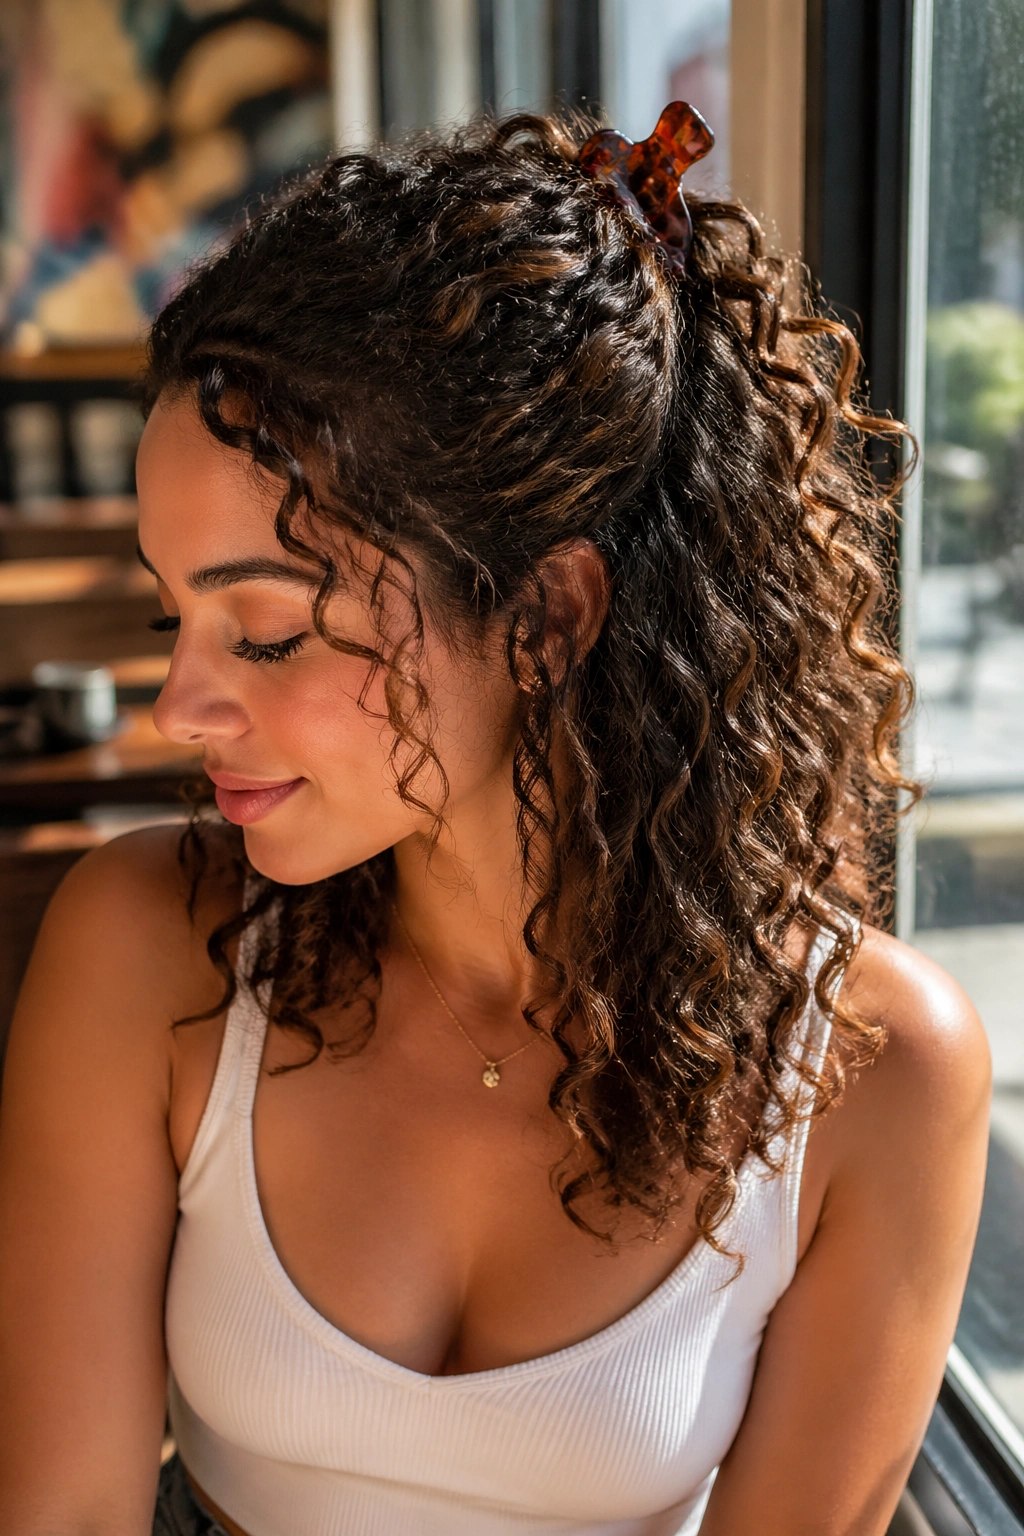
A half-up claw clip gives you more shape than a full bun and less tension than a ponytail. That’s the whole reason I like it. It keeps curls off the neck, lets the bottom section stay full, and doesn’t ask your scalp to do a lot of work.
The best version uses a medium or large clip, usually around 3 to 4 inches, depending on density. A tiny clip can hold fine curls, sure, but thick hair will eat it for lunch. Pull the top section back loosely, twist once or twice, and let the clip catch the twist at the center of the back of your head.
This style looks especially good when the bottom half still has movement. The contrast matters. You get structure up top and texture below, which is a nice combination when you’re moving through a day that involves both sun and indoor air conditioning.
It also gives you escape hatches. If the front frizzes a little, leave it. If the back gets flat, shake it out. You’re not locked into anything. That’s the point.
6. Bubble Ponytail for Full, Springy Curls
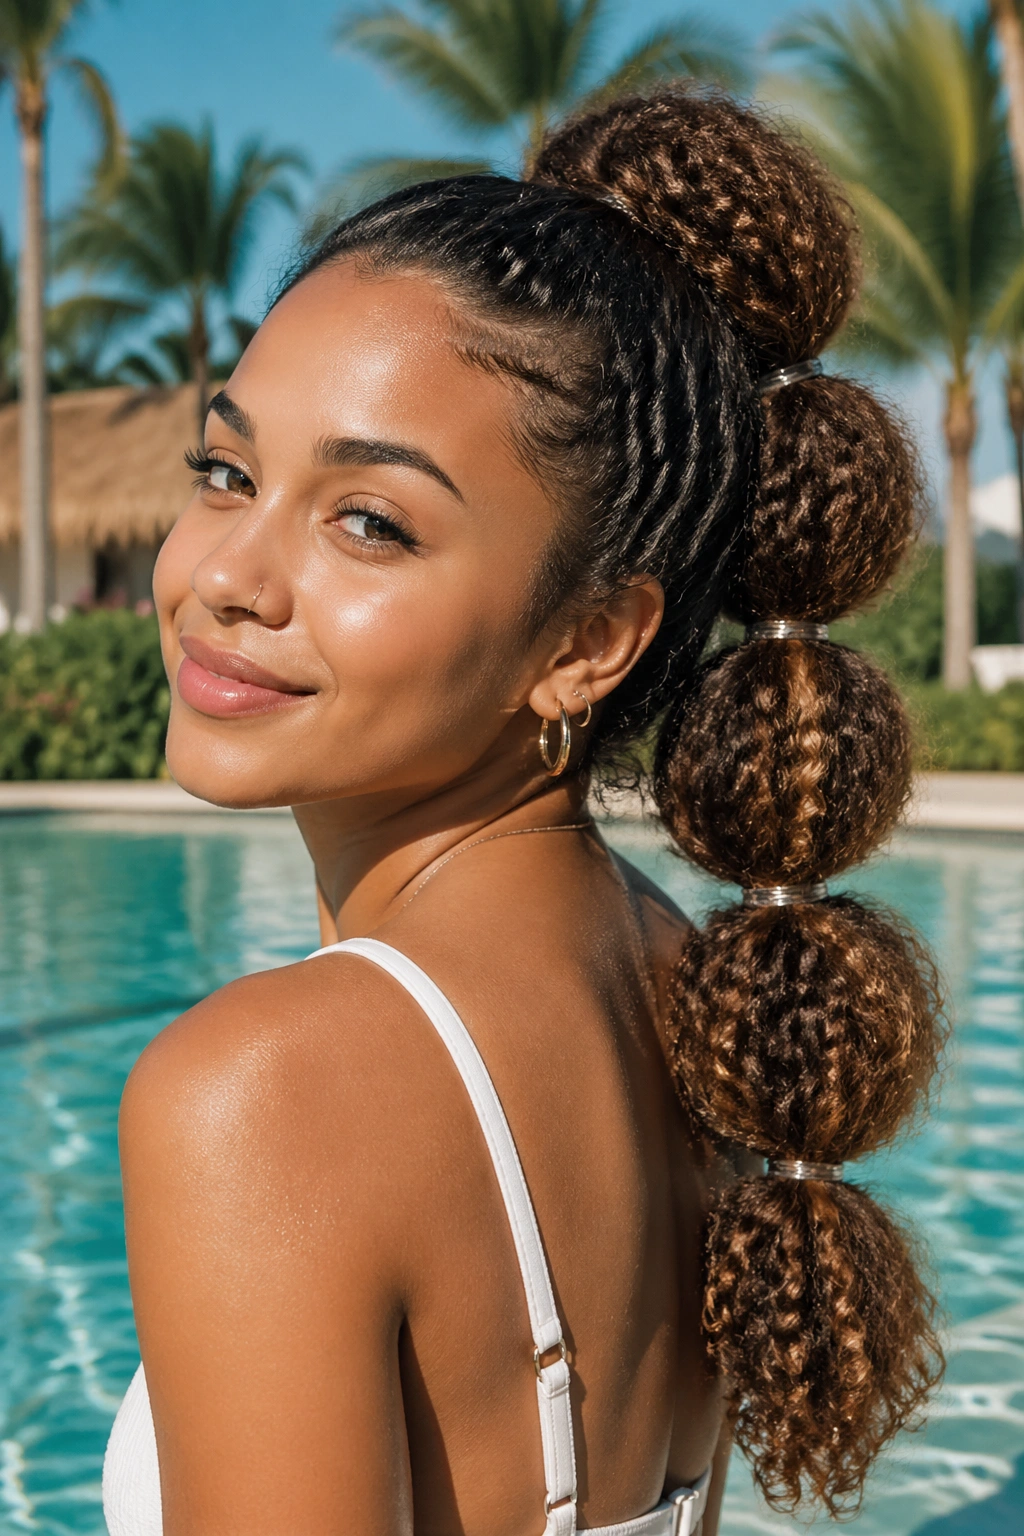
A bubble ponytail is one of the few styles that actually looks better when the hair has volume. That’s a rare thing for curly hair, and I never take it for granted. Instead of fighting the fullness, the style turns it into the whole point.
Pull your curls into a ponytail, then add clear elastics every 2 to 3 inches down the length. Gently puff each section outward with your fingers so it forms a rounded “bubble.” The result is playful, tidy enough for travel, and oddly good at making thick hair look intentional rather than bulky.
The spacing matters. Too close together, and the bubbles disappear. Too far apart, and the style droops. I’d keep the sections even, but not perfect. Tiny differences make it look less like a tutorial and more like hair a person actually wore.
How to Keep the Bubbles Balanced
Start with detangled curls or stretched hair. If the hair is too tangled, the bubbles lose shape fast. A light mist of water or leave-in conditioner on the ponytail length helps the sections puff without snapping.
This style is a good one for pool days, too, because the elastic placements keep the shape visible even when the hair dries unevenly. Not neat. Not fussy. Just practical and a little fun.
7. Mini Braids Into a Low Ponytail
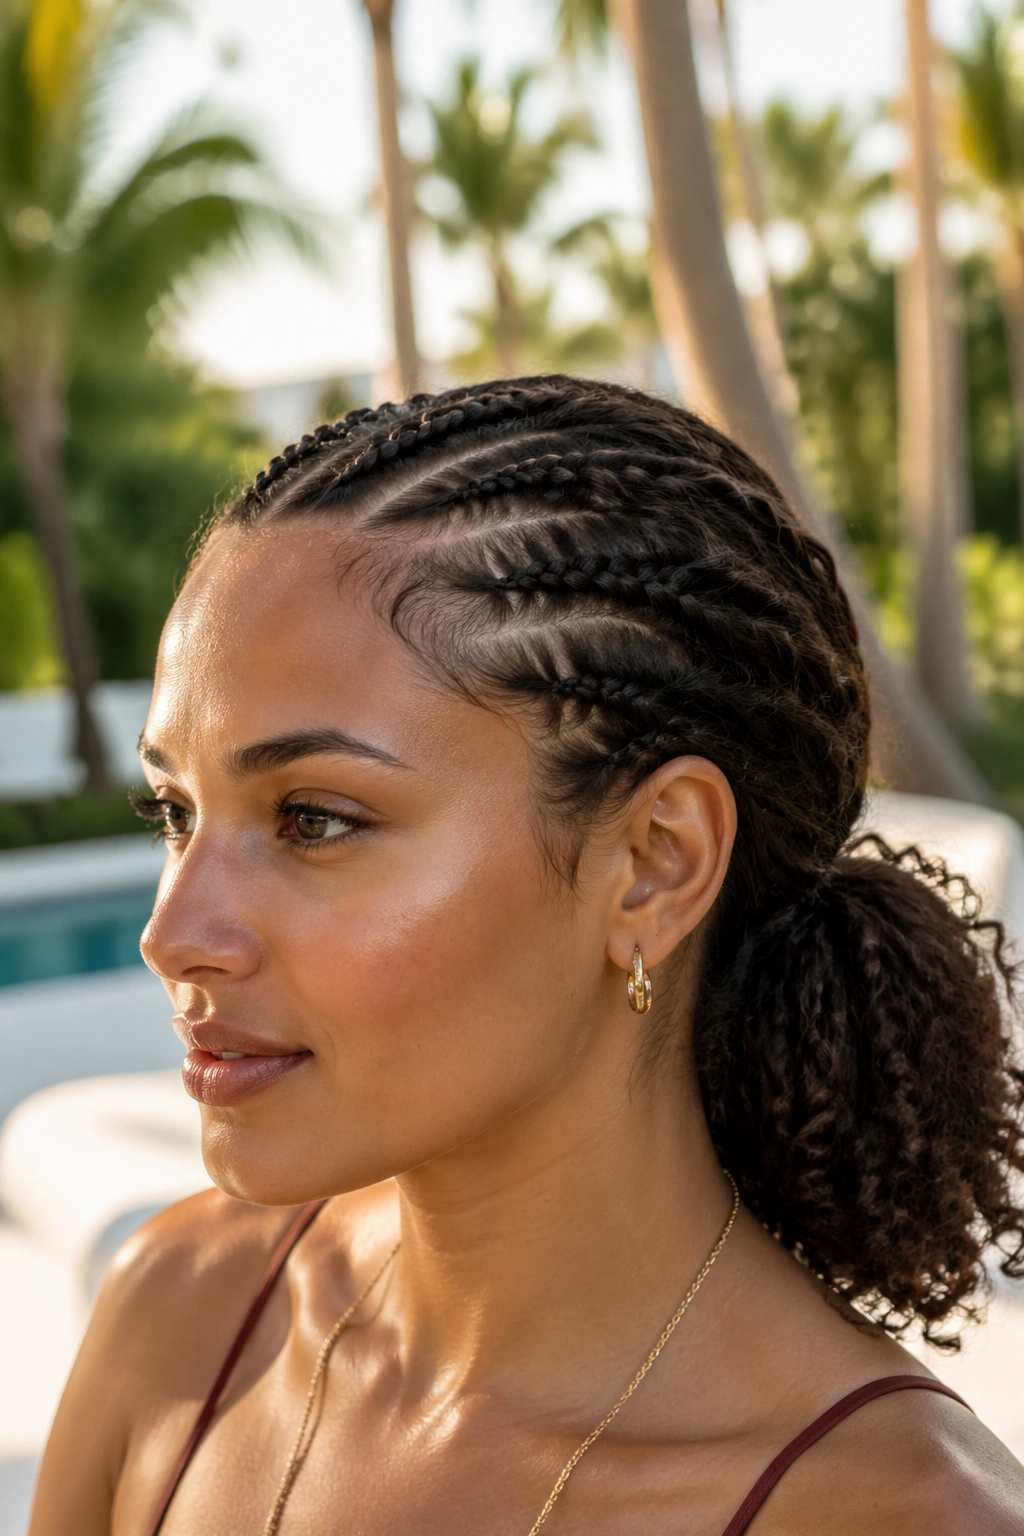
Mini braids are a clever way to keep curly hair controlled without hiding the texture completely. You braid a few small sections in the front or along the hairline, then gather everything into a low ponytail at the back. The braids act like little anchors, and the rest of the curls stay visible.
This works well if you want some detail near the face without committing to a full braided style. It also gives you a nice way to handle shorter layers that like to escape. Those pieces usually cause the most annoyance anyway.
What Makes It Different
Unlike a plain ponytail, the braided sections keep the top of the style from looking flat. And unlike a full head of braids, this version still gives you your curls. That balance is what makes it useful for a vacation setting where you want both ease and texture.
- Braid 3 to 5 small sections along the front hairline.
- Use small clear elastics if the ends are slippery.
- Gather the rest into a low ponytail with a soft tie.
- Pull gently at the braids to make them look fuller.
A little oil on the ends helps, but don’t drench the hair. You want the braids to stay crisp, not greasy. That’s a common mistake, and an annoying one.
8. Space Buns That Keep Curls Off Your Neck
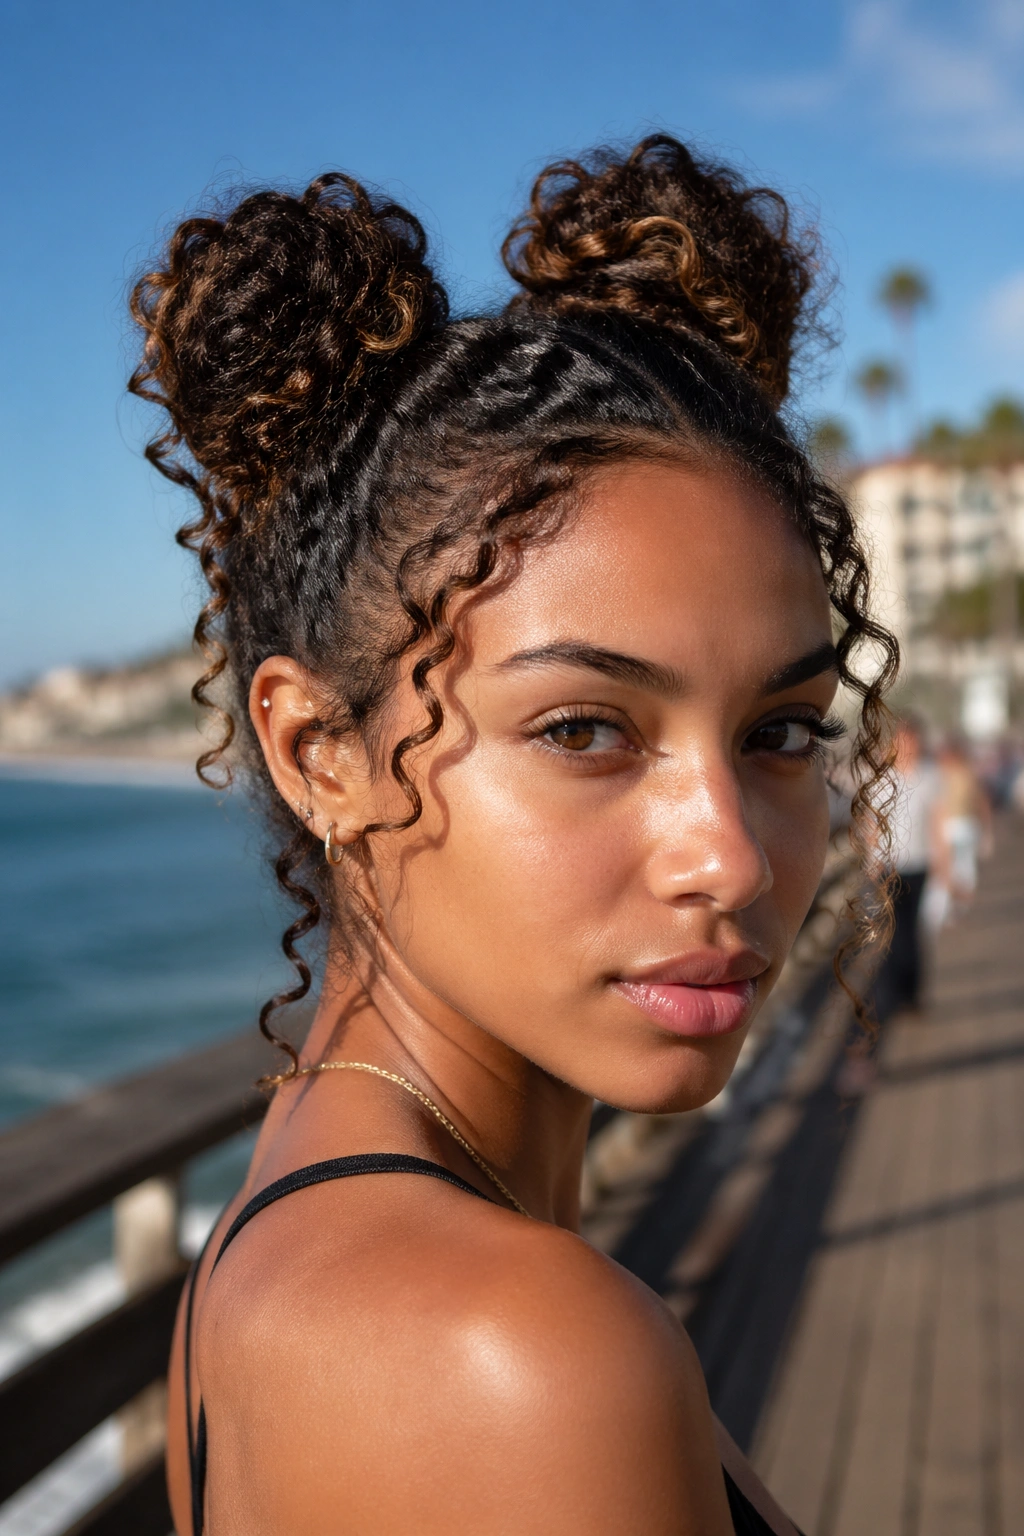
Space buns are one of those styles that looks more playful than it feels. The real benefit is simpler: they take the weight off your neck. On a warm day, that can be enough to make the style worth it.
You can make them tight and neat, or soft and puffy. I prefer the softer version for curly hair. Split the hair into two sections, gather each side high or mid-high, and twist each into a bun. Leave the ends a little loose so the curls still show through. If you pin every strand down, you lose the whole point.
A lot depends on placement. If the buns sit too high, they can look a little stiff. If they sit too low, they lose the fun shape. Half an inch can change the whole feel. That sounds fussy, but it really matters.
A Few Small Details That Help
- Use two matching scrunchies if you want the look to feel balanced.
- Keep the buns slightly off-center if your head is very round and you want more height.
- Leave the front pieces soft rather than slicked back.
- Pin any loose sections under the bun instead of wrapping them around and around.
The style works on second-day curls, third-day curls, and the kind of hair that’s somewhere between the two. It’s not precious. That’s why it travels well.
9. Side-Swept Flat Twists for a Polished Look
Flat twists are underrated on curly hair because they sit close to the scalp, which means they stay neat for hours without much help. Sweep them to one side and you get a style that looks polished, but not stiff. It’s a good choice for dinners, museum days, or any outing where you want your curls controlled without disappearing completely.
The side-swept version is my favorite because it uses the natural weight of the hair. Instead of fighting gravity, you let the twists fall toward one shoulder. That creates a line the eye can follow, and it feels more relaxed than a center-part style.
The other nice thing is that flat twists handle fuzz better than many styles. If a little texture lifts at the roots, it just looks part of the pattern. No one is waiting for every strand to behave.
What to Keep in Mind
Section cleanly at the front, then twist with enough tension to hold but not so much that the scalp feels pulled. If your curls are dense, make the twists slightly wider. Thin little twists on thick hair can disappear.
A few pins at the back can secure the side sweep. After that, leave it alone. Seriously. The more you keep touching flat twists, the more the neat surface starts to break apart.
10. Vacation Hairstyles for Curly Hair: The Sleek Low Puff
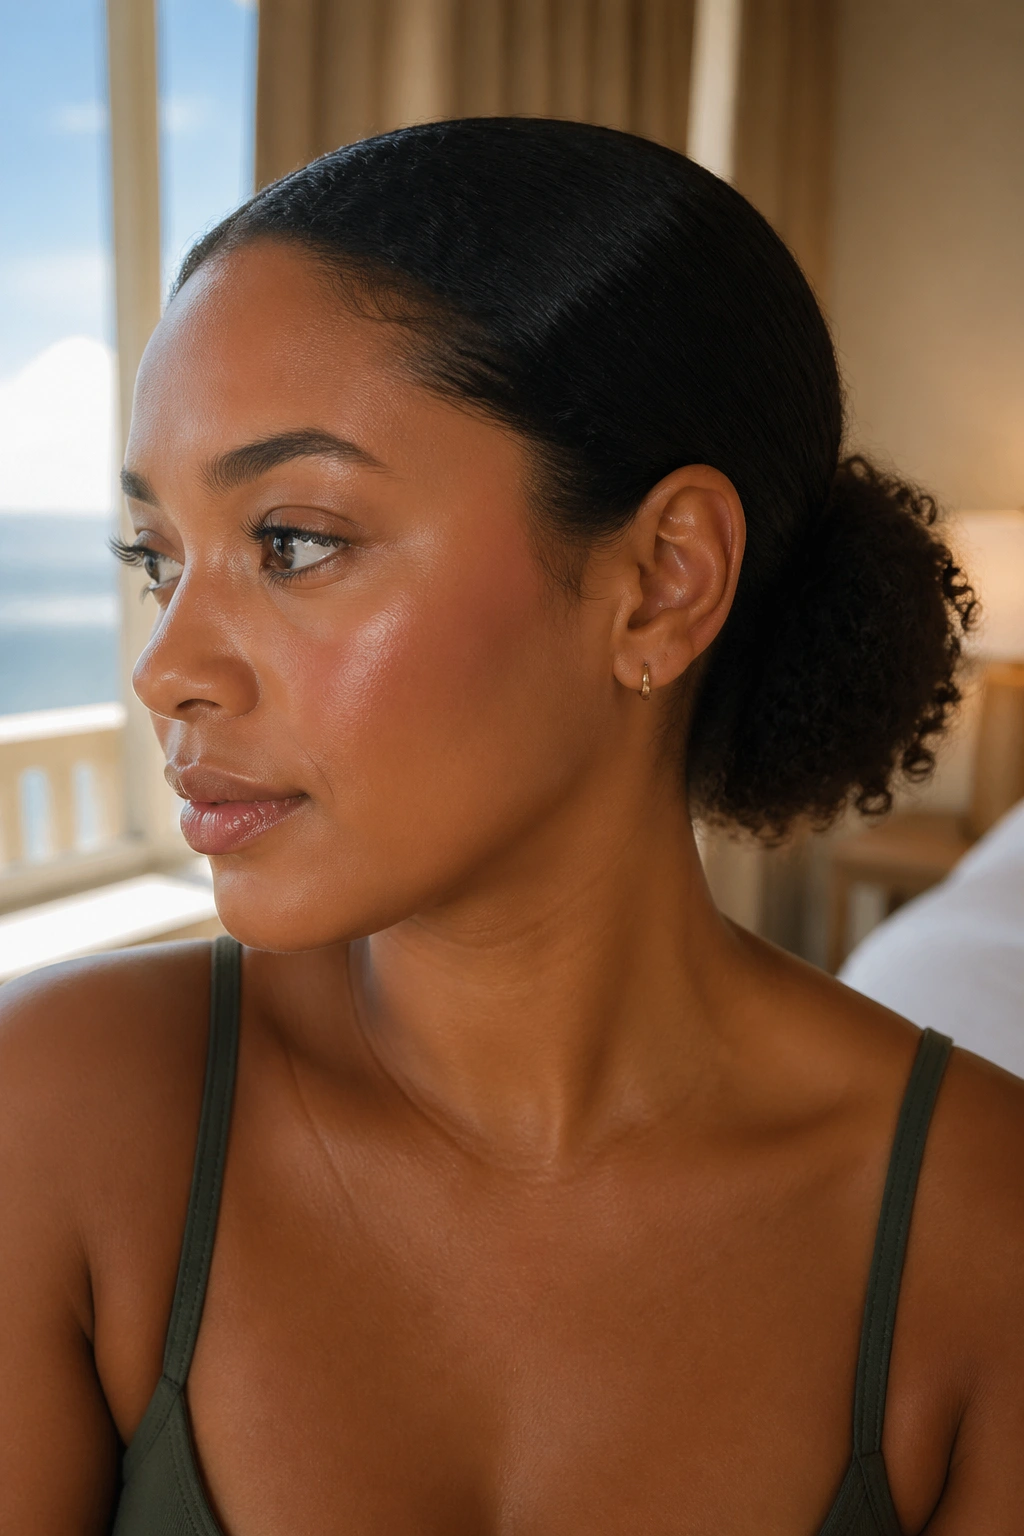
Can slicked-back styles work on curly hair without looking like you gave up on texture? Yes, if you leave the puff full and keep the crown smooth rather than crunchy. That distinction matters.
The style starts with gel or a strong-hold cream at the front and sides. Brush the hair back gently, then gather it low at the nape into a puff instead of a tight bun. The back stays curly and soft while the top reads clean. It’s one of the better vacation styles when you want your hair off your face but don’t want to flatten all of it.
The mistake most people make is over-brushing. That gives the front a shell-like finish and can make the whole style feel hard. I’d smooth with a soft brush, yes, but stop once the hair lies in place. You do not need to keep going until it looks like lacquer.
How to Make It Look Intentional
Use a small amount of gel at the hairline and a touch more at the temples if those pieces always spring loose. Then tie the puff with a soft band and fluff the curls in the ponytail section.
If you want a little lift, push the crown forward a touch before tightening the tie. That tiny move gives the style shape. It keeps the top from looking too flat, which is where many slicked-back curly styles go wrong.
11. Faux Hawk with Pinned Sides
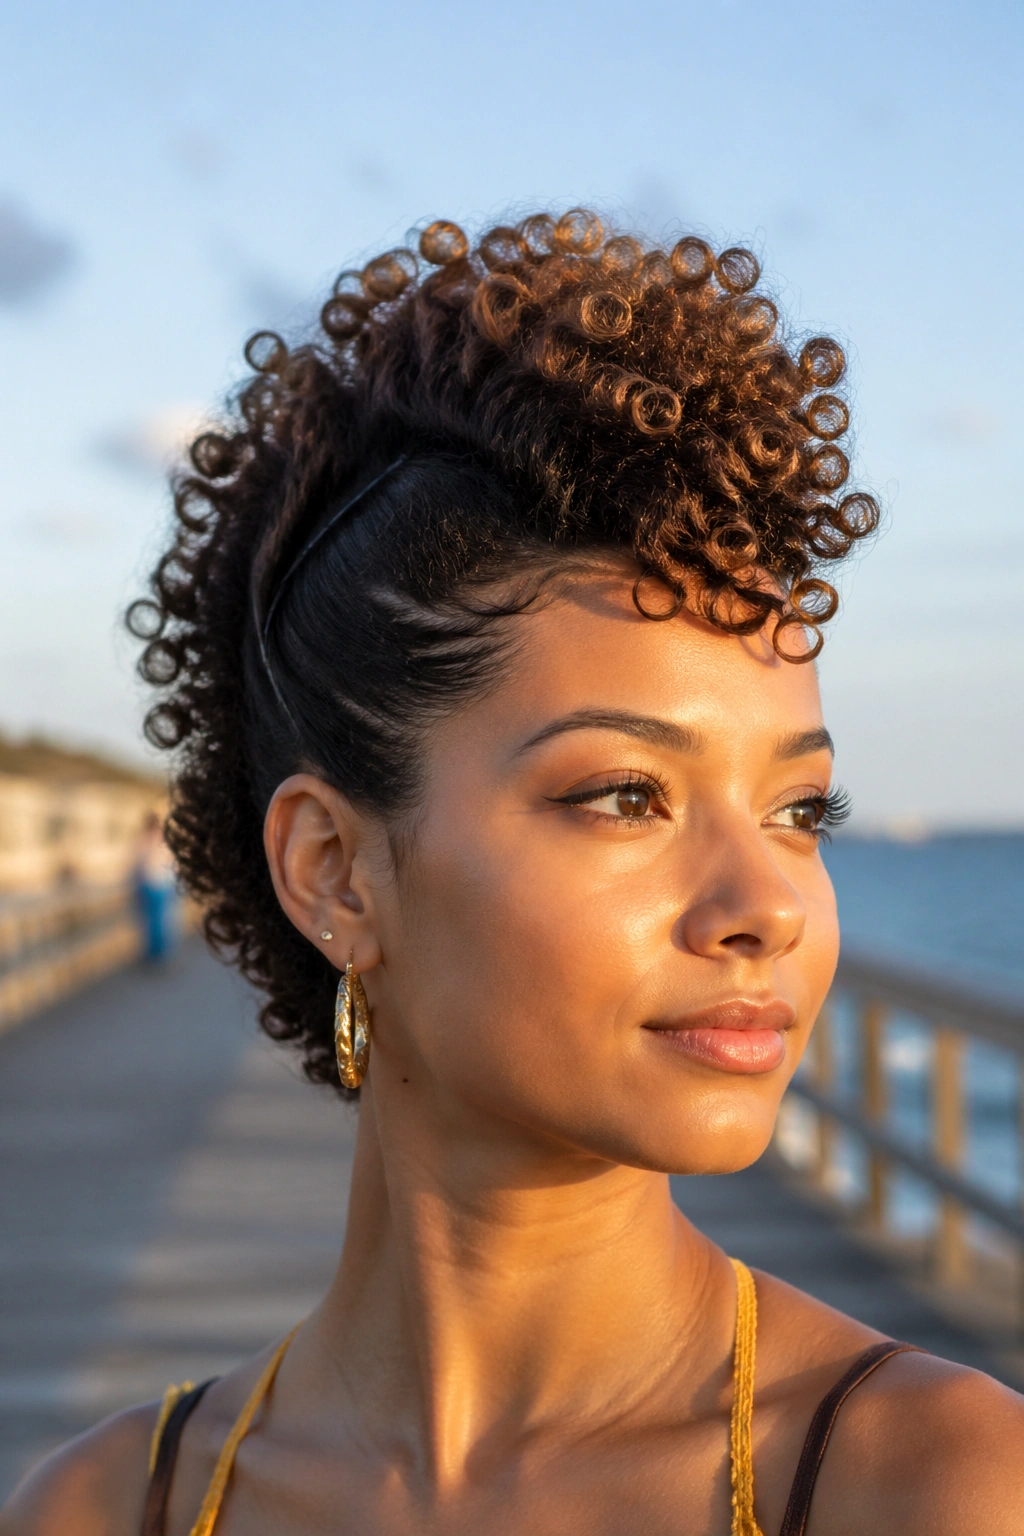
A faux hawk is the style I think about when I want something with a little edge but not much effort. The sides get pinned or braided back, and the curls stay concentrated through the center. It looks deliberate fast.
Imagine stepping out of a cab or a ferry with your curls a little windblown and still making the style look better because of it. That’s the energy here. You’re not trying to make every strand behave. You’re shaping the hair so the middle section becomes the main event.
How to Build It
Start by sectioning off the sides from temple to behind the ear. Pin those pieces back with bobby pins or small braids. Then fluff the center curls upward and backward so they stack instead of hanging flat.
If your hair is long, the center section can be gathered loosely at the back of the crown. If it’s shorter, let the curls stand up on their own and just secure the sides. Either way, the silhouette is the point.
This style also works well when your roots are a little flat but the ends still have life. The top gets height, the sides stay controlled, and the whole thing feels more polished than a regular half-up style.
12. Bandana Tuck and Roll
A bandana tuck and roll has a little retro charm, but the real reason it belongs on this list is simple: it protects the hairline and keeps curls from getting battered by wind. That makes it useful, not just cute.
The idea is to wrap a bandana or scarf around the head, then tuck the lower curls into the fold or let them fall out the back depending on your length. If your hair is thick, split it into two sections and tuck each side separately. That keeps the weight from pulling the scarf off-center.
The feel of this style is different from a full head wrap. You still get shape around the face, but the front stays controlled. On hot days, that matters. So does the fact that it’s easy to redo in a bathroom mirror without a pile of tools.
Small Notes That Save Time
Cotton bandanas grip better than slippery fabric, but silk feels gentler. If your hairline is delicate or your curls snag easily, use a softer fabric underneath and layer the bandana on top.
You can wear the knot at the top, side, or back. I like the side knot because it gives the whole style a little asymmetry, which keeps it from looking too tidy.
13. Side Braid with Curly Ends
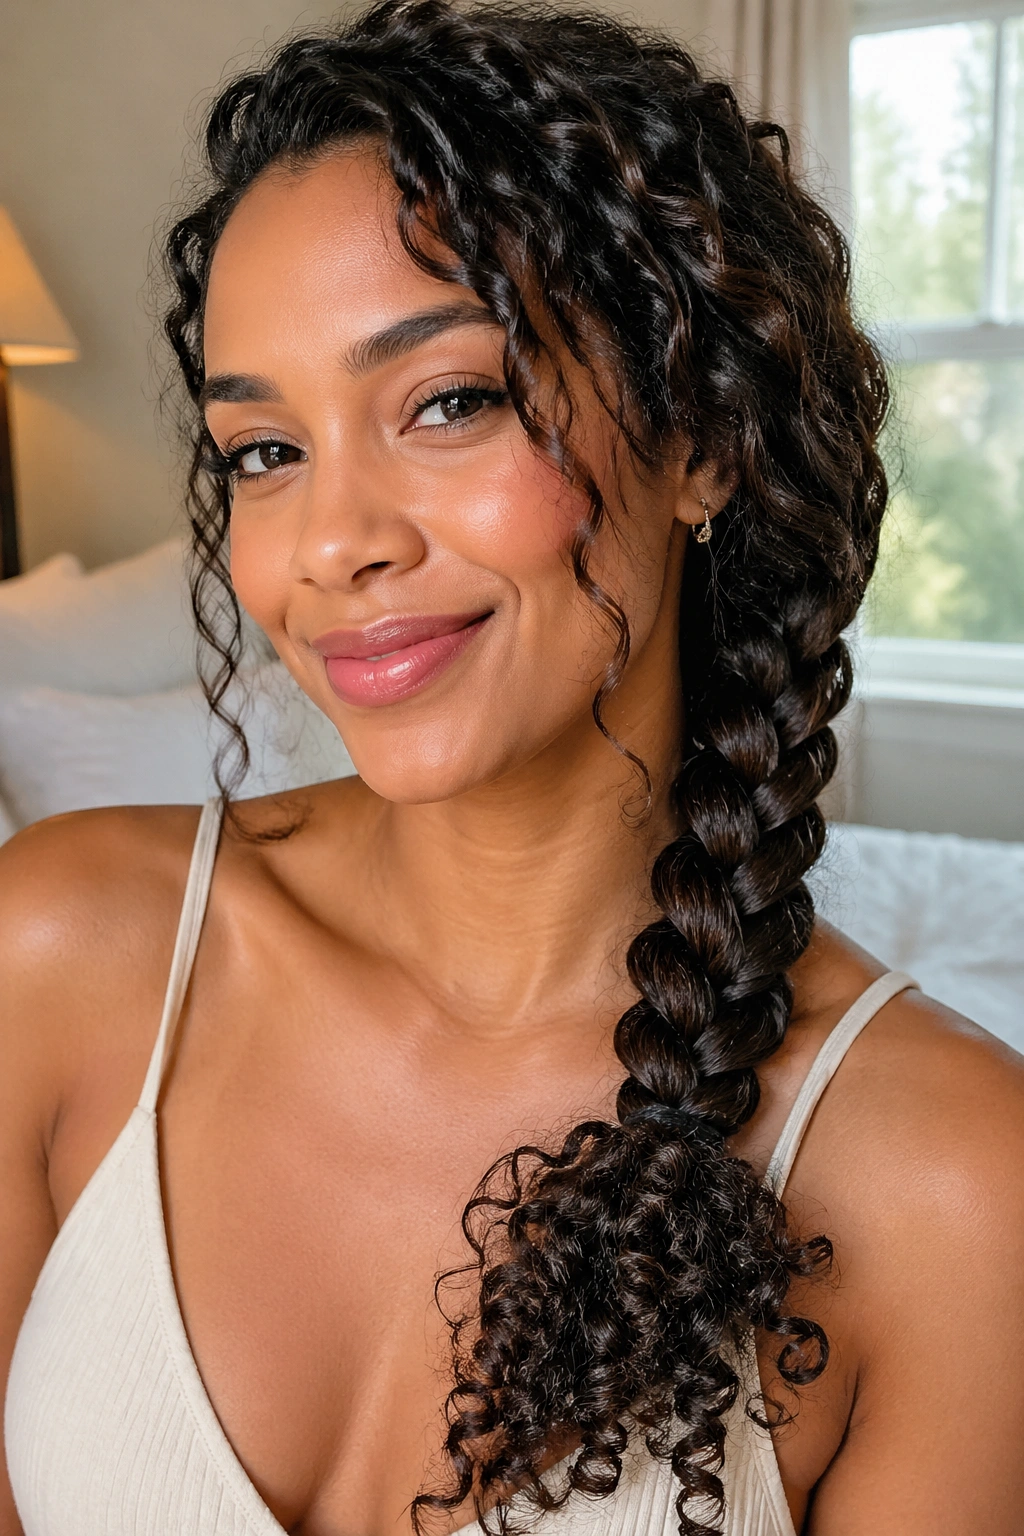
A side braid is the kind of style people sometimes dismiss as too simple, and I think that’s a mistake. On curly hair, it can look rich and full, especially if you braid only partway down and leave the ends loose. That last bit matters.
Unlike a tight braid all the way to the tips, this version keeps the curl pattern visible where it counts. The braid holds the hair back off one side of the face, while the ends spill out in springy texture. It’s practical and a little softer than a standard three-strand braid.
The braid itself does not need to be perfect. In fact, a slightly looser braid usually looks better on curls because it gives the hair room to puff a bit. That puffing is not a flaw. It’s the good part.
Where It Works Best
This is a strong option if your hair is long enough to braid comfortably past the shoulder. Start the braid below the cheekbone if you want to keep some volume at the crown. Starting too high can make the top look too flat.
A side braid also pairs well with a middle part that’s been worn for a while. The asymmetry helps break up any flattening on one side, which is handy after sleep or a long ride.
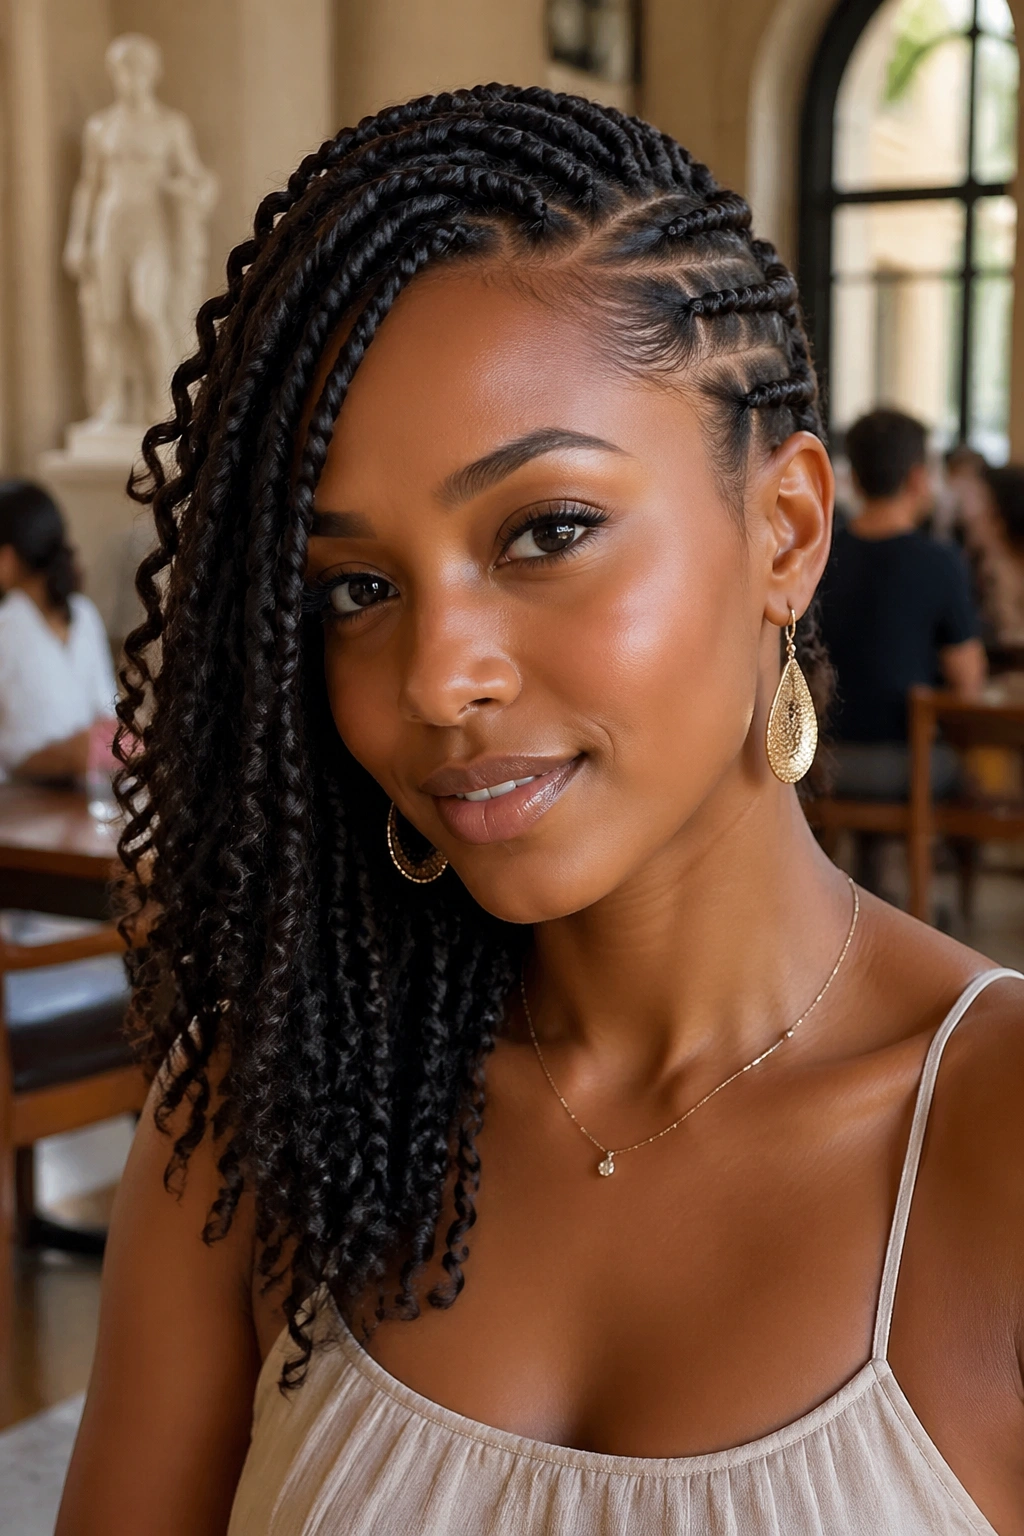
14. Mini Twists Gathered Up for Multi-Day Wear
Mini twists are the vacation hairstyle that does the most work with the least fuss. They can last through multiple days, still look neat after a nap, and go from down to half-up to fully pinned without much trouble. That’s a useful kind of low maintenance.
What I like about mini twists is how they hold shape without heat. You’re not stretching the curl pattern into submission. You’re giving it a cleaner line to live in. On a trip, that means fewer mornings spent trying to rebuild your hair from scratch.
You can wear them down if you want the texture to show, or gather them into a low bun or high puff later. The twist pattern is the whole point, so don’t bury it under too much product. A little leave-in conditioner at the start and a light oil on the ends are usually enough.
Where This Style Shines
- Good for long stretches between washes.
- Easy to pin up for dinner or leave loose for the day.
- Helpful if your curls tangle fast at the nape.
- Useful when you want a style that still looks neat after sleeping.
If you’re the kind of traveler who wants hair handled once and then left alone, this is a strong pick. It is not flashy. It is dependable, and sometimes that’s better.
15. Loose Top Knot with Face-Framing Curls
I keep a loose top knot in my back pocket for the days that get messy on purpose. A museum morning turns into beach drinks. Dinner turns into a walk. Plans change, and your hair needs to stop arguing.
The trick is to keep the knot high enough to get the hair off your neck, but loose enough that the curls still have shape. Gather the top section, twist once, loop it into a knot, and let a few face-framing pieces stay out. If the knot is too tight, it loses the easy feel that makes the style work in the first place.
The face-framing curls matter more than people think. They soften the style and keep it from looking like you tried to erase all texture. That little bit of looseness around the cheeks makes the top knot feel lived-in, not stiff.
This is the one I reach for when I want my curls to be out of the way but still visible. A clean knot alone can look a little severe on curly hair. Add a few loose tendrils, and the whole thing relaxes.
If you only build one vacation hair plan before you leave, make it a style that lets your curls stay recognizable. That’s the part people remember anyway.