Coily hair has a beauty that’s uniquely its own — texture, dimension, and natural volume that can turn heads. The challenge many people face isn’t whether their curls look good; it’s finding hairstyles that work with their actual lifestyle. You don’t want something that takes three hours to create on a Tuesday morning, and you definitely don’t want a style that falls apart by lunchtime. The good news is that natural coily hair is incredibly versatile and forgiving when styled the right way.
The styles in this guide are chosen specifically for everyday wearability. These aren’t special-occasion updos that require a salon appointment or weekend-long prep time. They’re hairstyles you can actually do at home, maintain throughout your week, and repeat as often as you want without damaging your curls or exhausting yourself in the process. Each style works for different occasions — from casual work-from-home days to professional office environments to weekend outings — so you can rotate them based on your mood and schedule.
What makes these styles genuinely practical is that they work with your coils rather than against them. They embrace the natural texture, require minimal manipulation once set, and actually improve with time as your curls settle in. You’re not fighting your hair into submission; you’re styling it in ways that let it shine while keeping it protected and manageable.
1. Wash and Go Coils

The wash and go is the minimalist’s dream — wash your hair, apply your styling products, and let your coils dry into their natural pattern. This isn’t laziness; it’s actually the gentlest way to wear your coils because there’s zero manipulation, zero heat, and zero stress on your strands. For this to work well, your curl pattern needs to be defined enough that it holds shape without extra styling, and your products need to provide the right balance of moisture and hold.
How to Nail the Wash and Go
Start with freshly washed hair. Use a sulfate-free cleanser that won’t strip your coils of their natural moisture, and follow with a moisturizing conditioner. Apply your leave-in conditioner to soaking wet hair, then add your styling gel or cream — the key is applying products to absolutely dripping-wet hair, not damp hair. This allows the products to distribute evenly through your coils and sets them properly as they dry. Smooth each coil gently between your fingers, encouraging them into their natural spiral pattern.
Why It Works for Everyday Wear
You can do a wash and go on a Sunday night and actually have a finished hairstyle ready to go on Monday morning. Once your coils are completely dry, they hold their shape all day without needing touch-ups or refreshes. This style also protects your coils from daily friction — you’re not combing, twisting, or braiding, so there’s minimal breakage. The coils stay defined and bouncy because you’re working with your natural texture, not against it. Pro tip: Let your coils air dry completely rather than diffusing them, which can create frizz at the edges.
2. The Pineapple High Puff
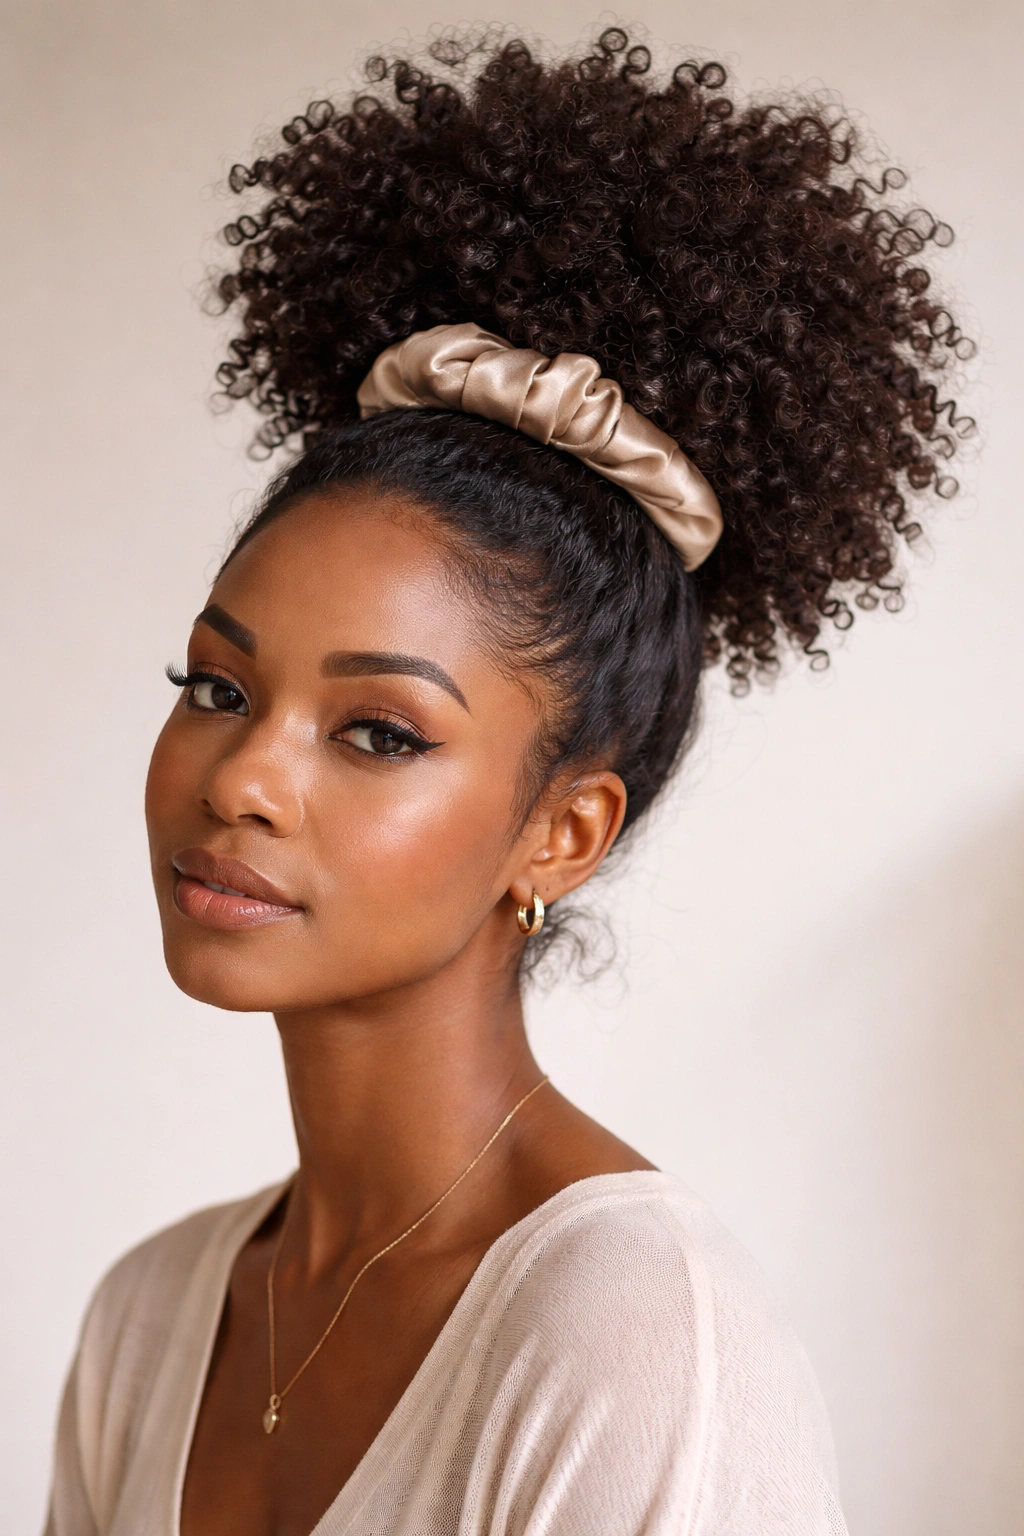
The pineapple is a protective styling genius that works on all coil types, whether your curls are tight spirals or looser waves. You gather your coils high on your head and secure them loosely with a silk scrunchie — the name comes from the shape the coils create when gathered at the crown. It’s cute, it’s quick, and it protects your coils while still looking intentional and polished enough for most settings.
Setting Your Pineapple Properly
Use a silk or satin scrunchie rather than a regular elastic, which can cause breakage. Flip your head upside down and gather all your coils at the crown, then flip back and secure the scrunchie loosely — the key word here is loosely. If it’s too tight, it can create tension on your hairline and cause breakage along the edges. Your coils should be gathered but not squeezed. You can adjust the height based on your mood — pull it higher on your head for more height and bounce, or position it slightly lower for a softer look.
Styling Variations and Longevity
Once you’ve got the pineapple set, you can refresh it for up to three days without rewashing by spritzing with a light misting of water and reapplying a tiny bit of curl cream. The coils on top stay defined while the coils underneath stay protected from friction. This style works beautifully with face-framing strands — leave a few coils loose in front if you prefer softer framing, or gather everything tightly if you want a sleek, polished look. The pineapple transitions seamlessly from casual to dressier depending on how you style your edges.
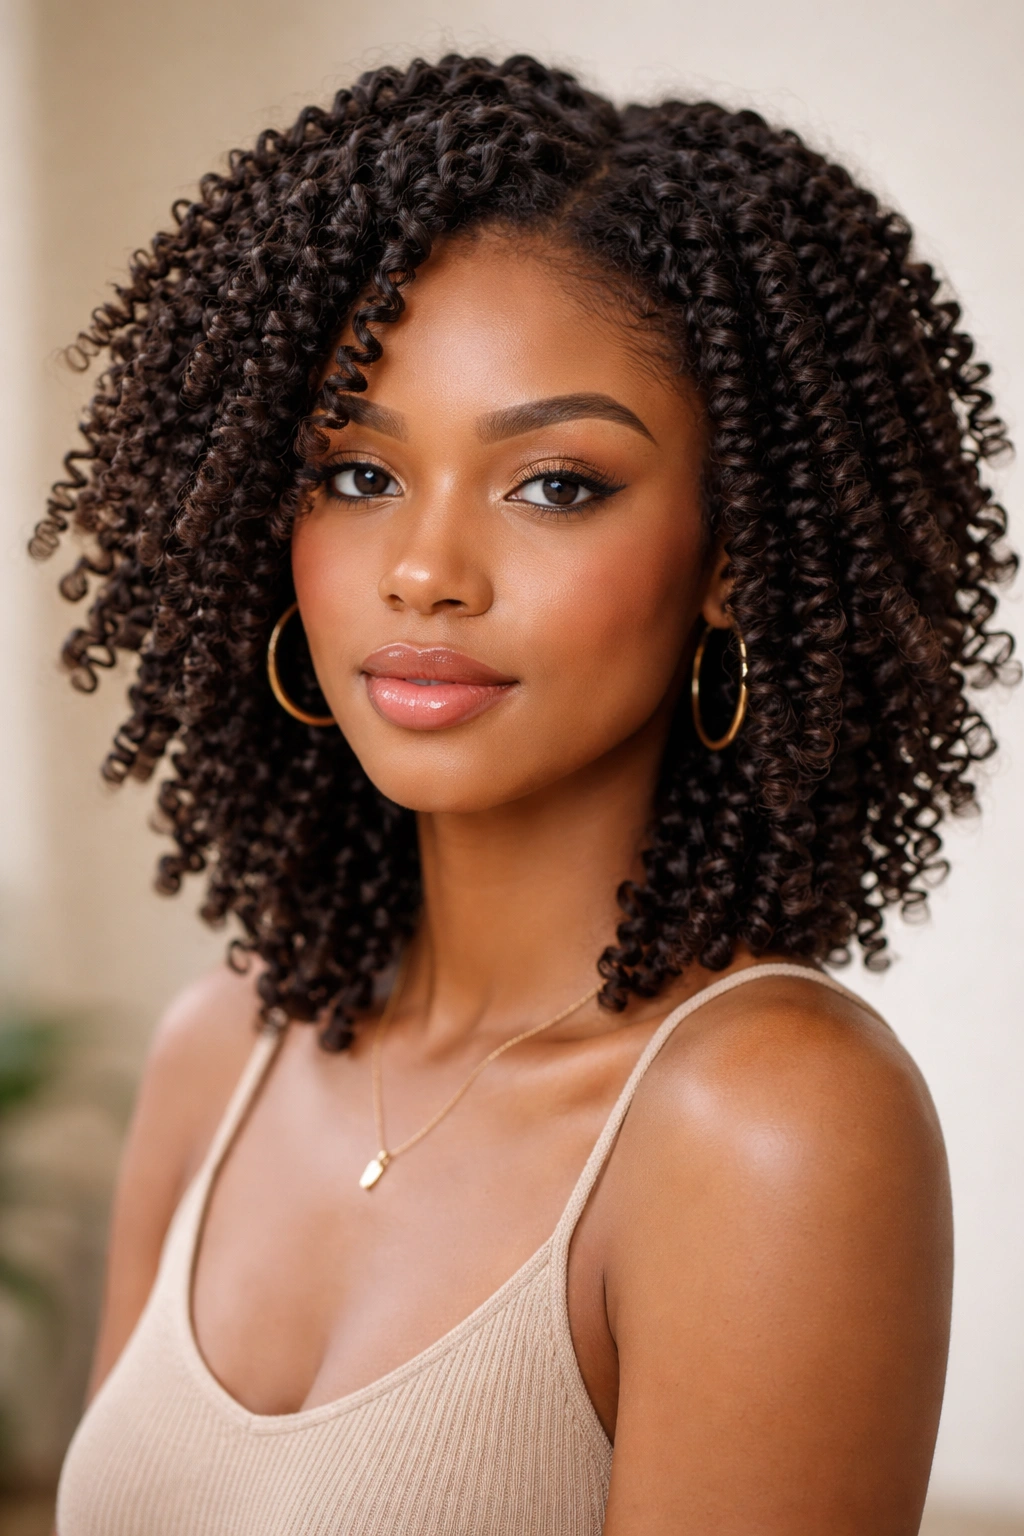
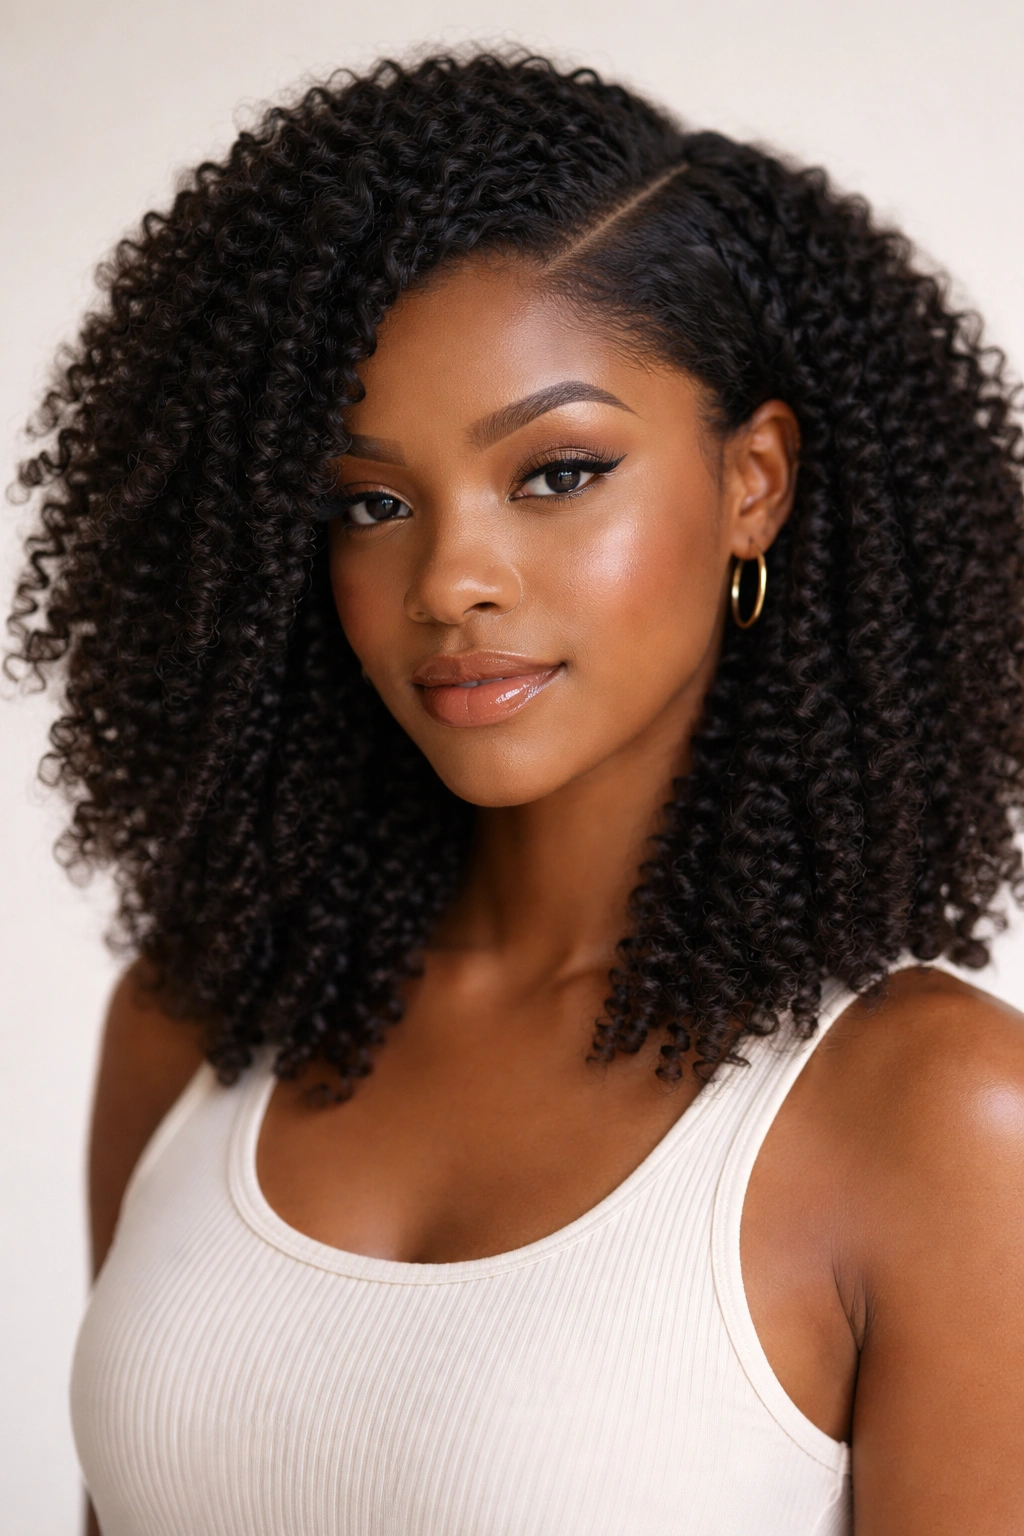
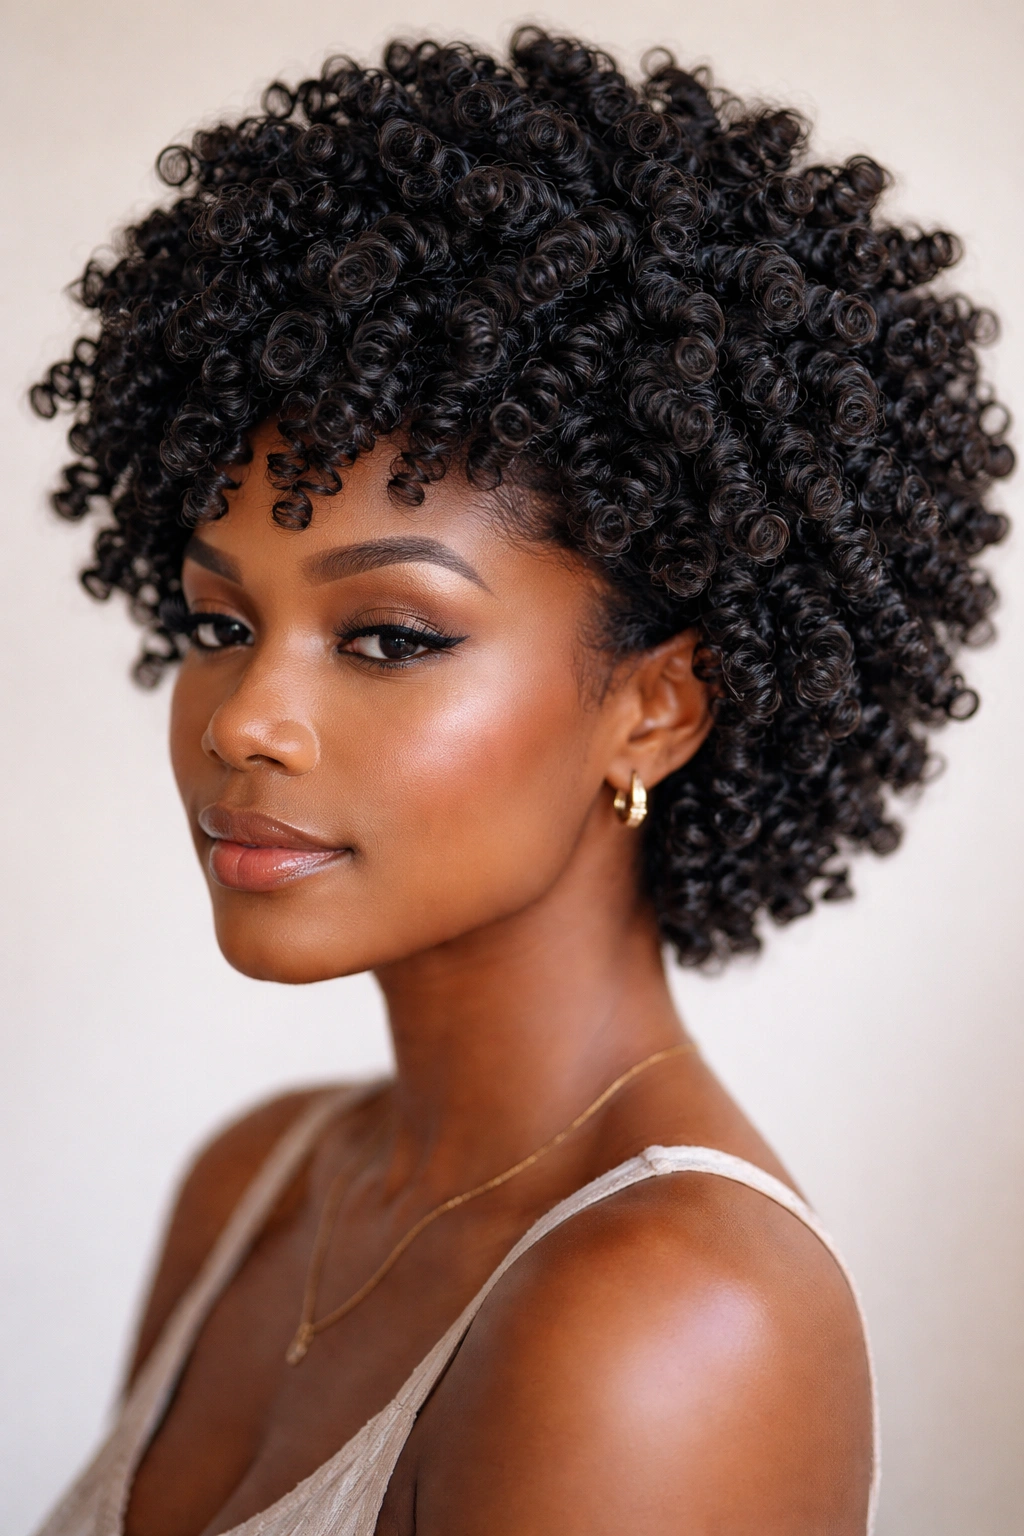
3. Defined Coil-by-Coil Styling
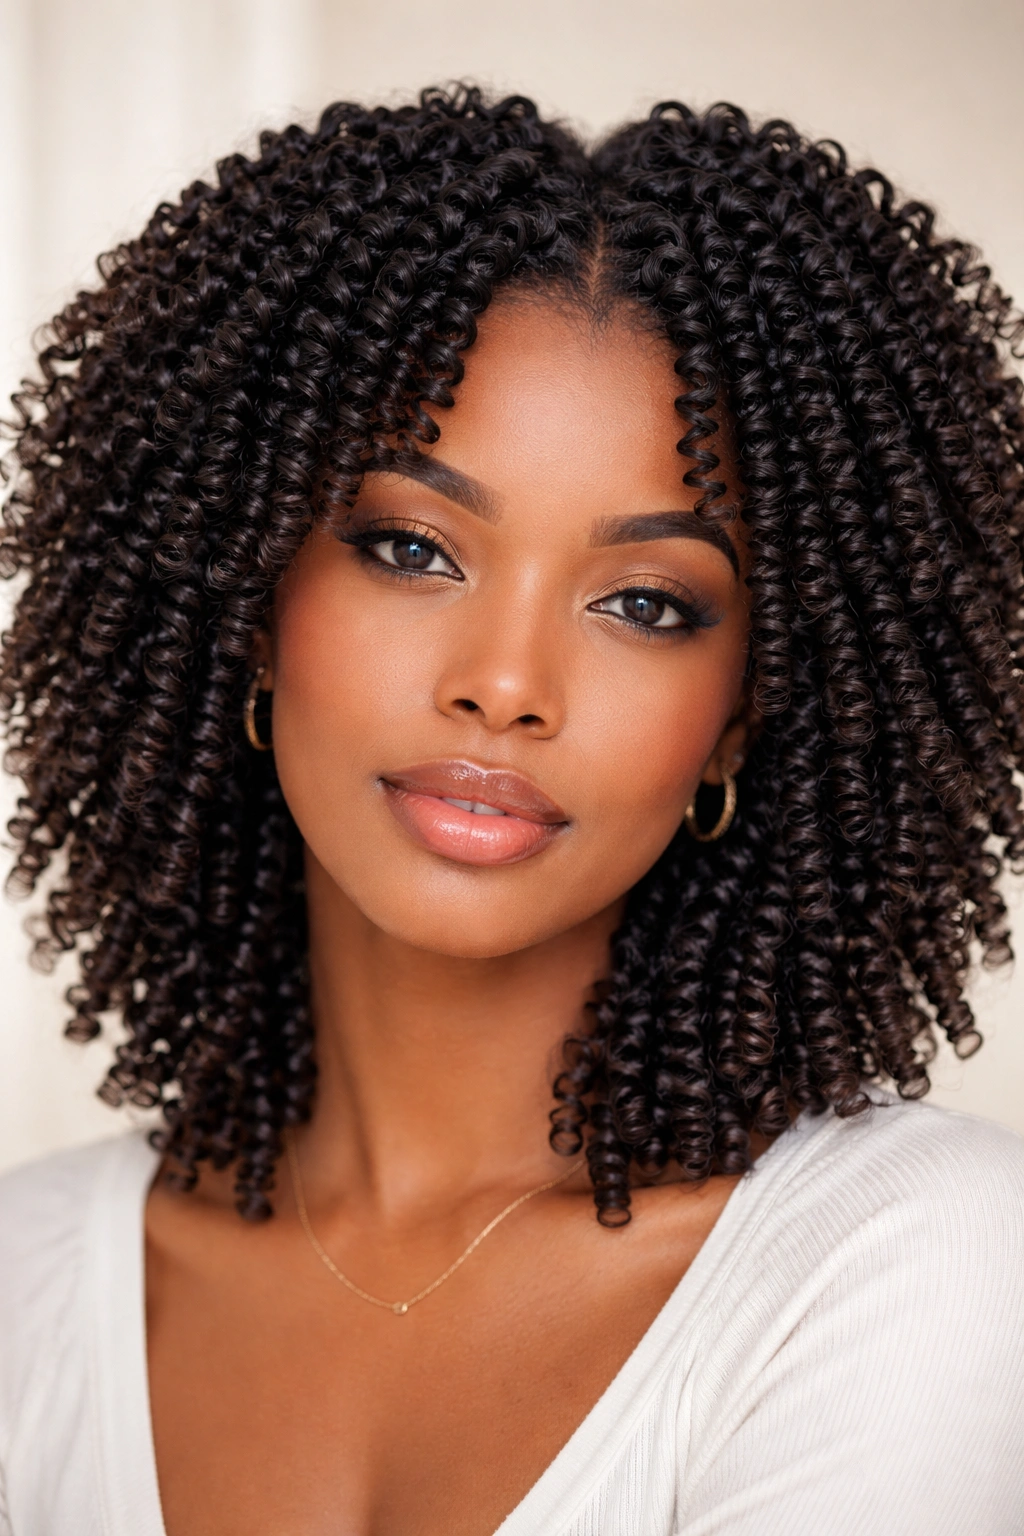
This is the approach where you apply styling products coil by individual coil, encouraging each one into its most defined shape. It takes longer than a casual wash and go, but the payoff is absolutely stunning definition that lasts for days. This technique works best if you have medium to thick coils and really want them to pop — the definition is noticeably sharper than with an overall product application.
The Product Application Technique
After washing, apply your leave-in conditioner, then take a small amount of gel or curl cream on your fingers. Working in small sections, take one individual coil and smooth the product through it from root to tip, encouraging it to stay in a tight spiral as it dries. This is more deliberate than a wash and go, but not as labor-intensive as a full twist-out or braid-out. Some people do this on damp hair and let it air dry; others use a diffuser to speed up the process.
Maintenance and Longevity
Once your coils are defined and dry, they stay that way for a full week with proper care. Sleep on a silk pillowcase or wrap your hair in a silk scarf to maintain the definition overnight. In the morning, you might get slight frizz at the surface, which you can smooth with a light spritz of water and a tiny amount of edge control cream. The definition actually improves days two and three as your coils settle in and the products fully cure. This style looks particularly sharp in professional settings because the definition reads as intentional and polished.
4. Braid-Out Definition
A braid-out creates beautiful wave-like definition in your coils by braiding damp hair and then unbraiding once it’s fully dry. The size of the waves depends on how thick or thin you braid — thicker braids create bigger waves, while thinner braids create tighter definition that mimics individual coil patterns. This style is especially popular because it adds dimension and can actually make thin hair appear fuller.
How to Create a Braid-Out
Start with freshly washed, conditioned hair that’s still damp. Apply your leave-in conditioner and styling cream throughout, then divide your hair into 4-6 sections depending on the thickness you want for your waves. Braid each section tightly from roots to ends, making sure the product is distributed evenly as you braid. Let your hair dry completely — you can air dry or use a diffuser. Once completely dry, unravel each braid carefully, starting from the bottom, and gently fluff the waves with your fingers. Don’t comb through; you’re encouraging the pattern to stay, not breaking it apart.
Styling and Refresh Options
The waves from a braid-out stay defined for 4-5 days with proper nighttime care. Sleep on a silk pillowcase and in the morning, gently separate the waves with your fingers to refresh the pattern. You can even re-braid the next night if you want to deepen the definition. On day three or four, the waves relax slightly into softer coils, which is a beautiful second look from the same style. Braid-outs also give you incredible volume at the roots because the braiding technique lifts your hair away from your scalp, and that lift remains even after you unbraided.
5. Twist-Out Coils
A twist-out is similar to a braid-out but uses two-strand twists instead of braids, which creates a slightly different texture pattern. Two-strand twists tend to create sharper definition than braids and work beautifully on all coil types, from tight spirals to loose waves. The twisted pattern itself is also a cute hairstyle — you can wear your hair in the twists for a few days before unraveling them if you want two looks from one styling session.
Creating Definition With Two-Strand Twists
Apply your leave-in conditioner and styling cream to damp hair, then divide into 4-8 sections. Starting with one section, take two strands and twist them together from root to end, wrapping one strand around the other in a consistent direction. Use enough tension that the twist holds its shape as it dries. Repeat with each section until your entire head is twisted. Let dry completely — this takes longer than braiding because the twists are smaller and contain more individual strands, so you might want to use a diffuser to speed things up.
Unraveling and Styling
Once completely dry, unravel each twist starting from the bottom, and gently separate the coils with your fingers to create fullness. The definition you get from twist-outs is incredibly sharp and dimensional — you can literally see the twist pattern running through your coils for the first few days. Wear your hair in the twists for up to three days if you like that look, then unravel when you want to switch things up. You can even re-twist as needed throughout the week for a completely different look.
6. High-Volume Coil Puff
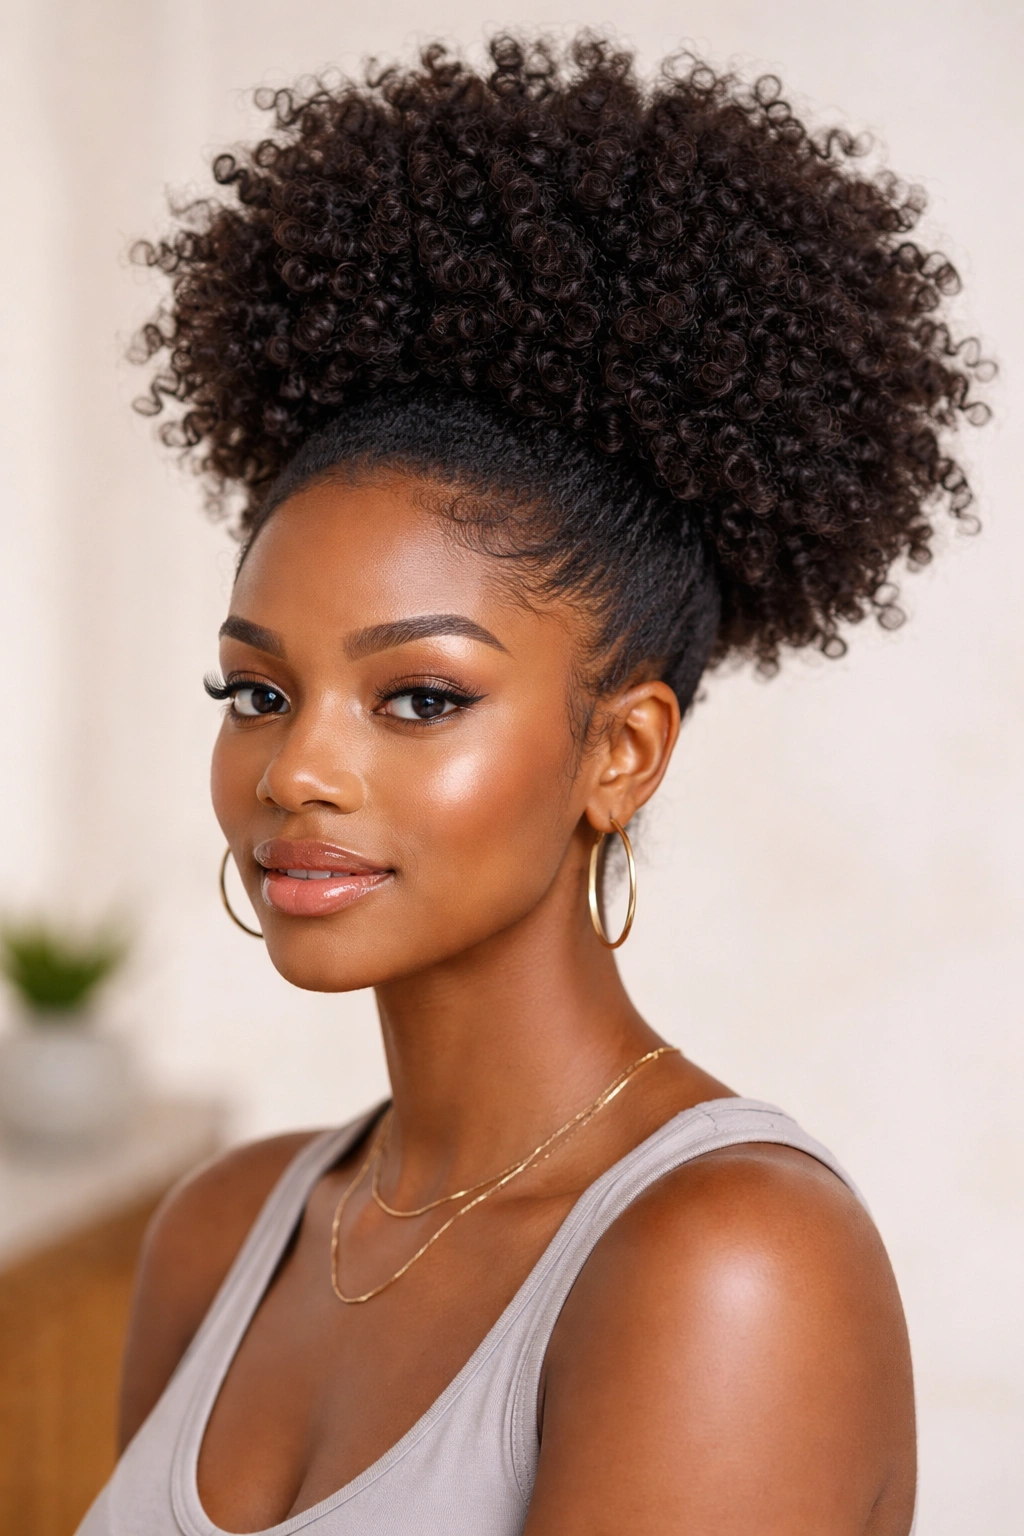
This is your elevated, more glamorous version of the pineapple — instead of a simple gathered puff, you’re actually fluffing your coils for maximum height and volume. This style creates serious impact and works for dates, nights out, or whenever you want your coils to look their absolute best. The fluffed-out structure makes your natural volume impossible to ignore.
Building and Fluffing the Puff
Gather your coils into a pineapple at the crown using a silk scrunchie, but this time, don’t stop there. Once gathered, gently pull and fluff each coil section, encouraging them to stand away from your head rather than lying flat. You’re creating a rounded dome shape, not a tight compressed puff. Gently rake your fingers through different areas to create lift and separation between your coils. A light misting of volumizing spray can help coils hold their fluffed-out shape throughout the day.
Accessorizing Your Puff
A high-volume puff is the perfect canvas for hair accessories. Add a decorative clip at the base, wrap a silk scarf around the elastic for a pop of color, or weave a string of pearls or beads through the puff for extra elegance. The height and volume of this style make it work beautifully with statement earrings — the coils frame your face and the accessories draw even more attention to your features. This is one of the most versatile styles because you can dress it up or keep it casual depending on your accessories and overall outfit.
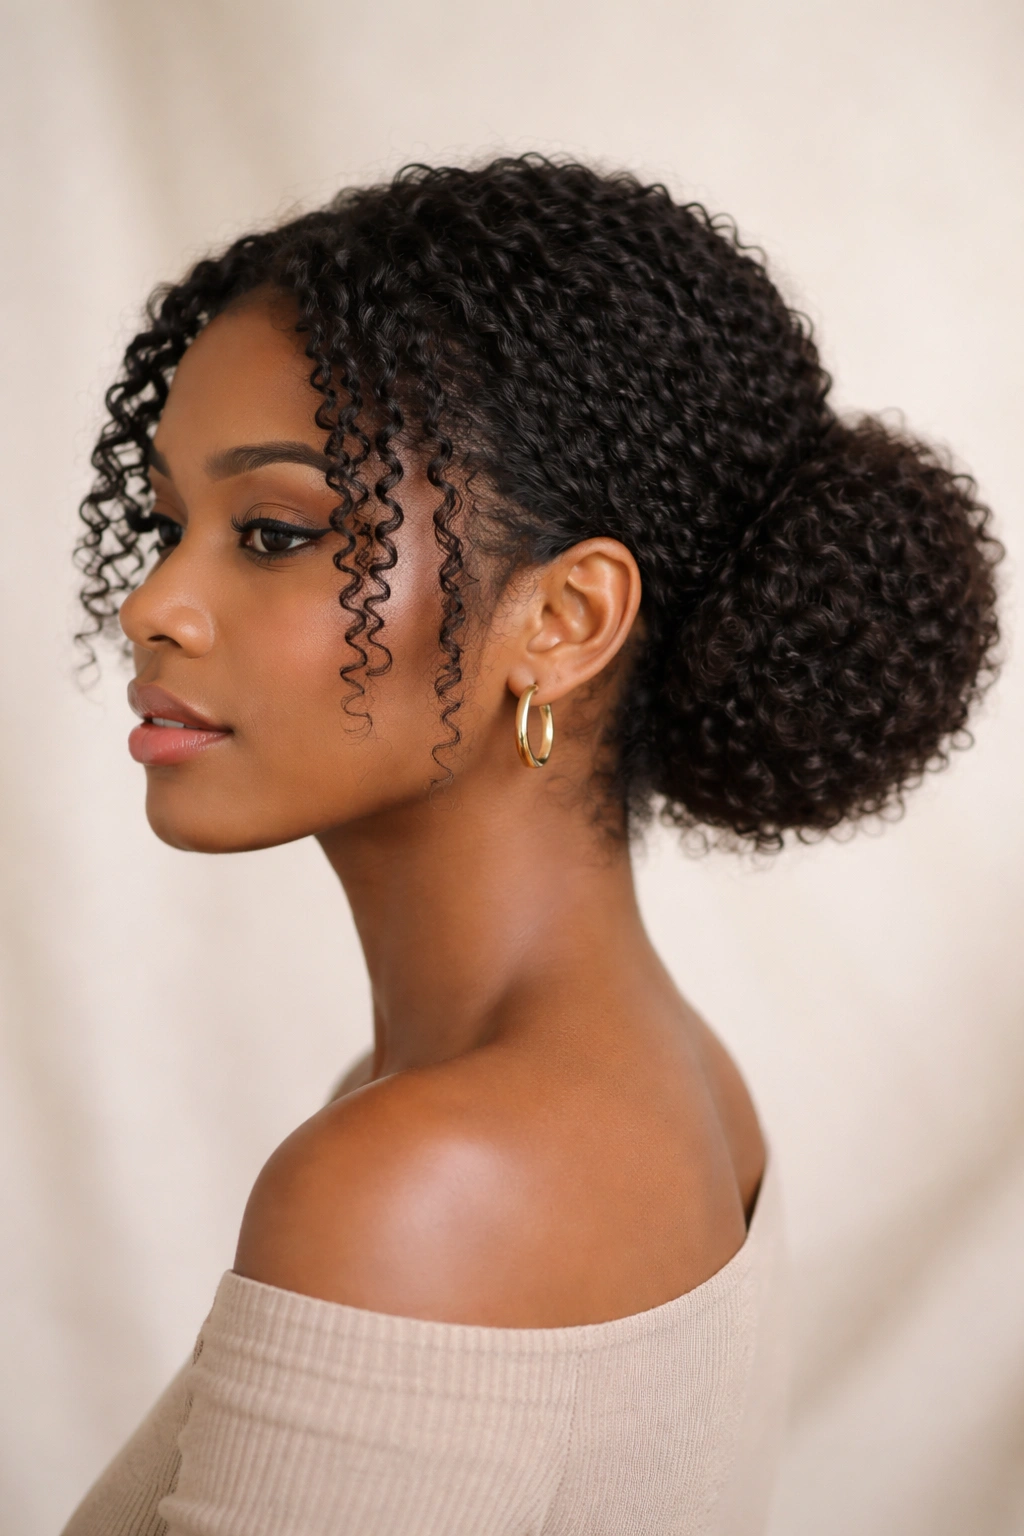
7. Protective Coil Bun
A low or mid-height bun is one of the best protective styles for your coils because everything is gathered away from your face and secured close to your head, minimizing friction and manipulation. You can wear it loose and romantic or sleek and polished depending on how you secure it and what accessories you use. This style is genuinely protective while still looking intentional and put-together.
Creating a Polished Bun
Gather your coils into a ponytail at whatever height you prefer — low for a sleek look, mid-height for something more casual. Twist the ponytail loosely, then wrap it around the base to create a bun shape. Secure with bobby pins and smooth your edges with a light edge control cream. The key to making a coil bun look intentional (rather than like you just threw your hair in a bun) is leaving some softness — don’t make it perfectly smooth and flat. Let some coils escape and frame your face; this adds texture and prevents the style from looking too severe.
Variations for Different Occasions
A sleek bun with smooth edges works beautifully in professional settings and actually passes most workplace dress codes that consider loose curls “unprofessional” (which is a whole separate conversation, but practically speaking, this style solves that issue). A looser, fluffier bun works better for casual settings and even creative workplaces. You can add a decorative hair stick or comb through the bun for visual interest, or leave it simple. Coil buns actually improve with time — the longer you wear them, the more textured and intentional they look, which is the opposite of some styles that flatten out as you wear them.
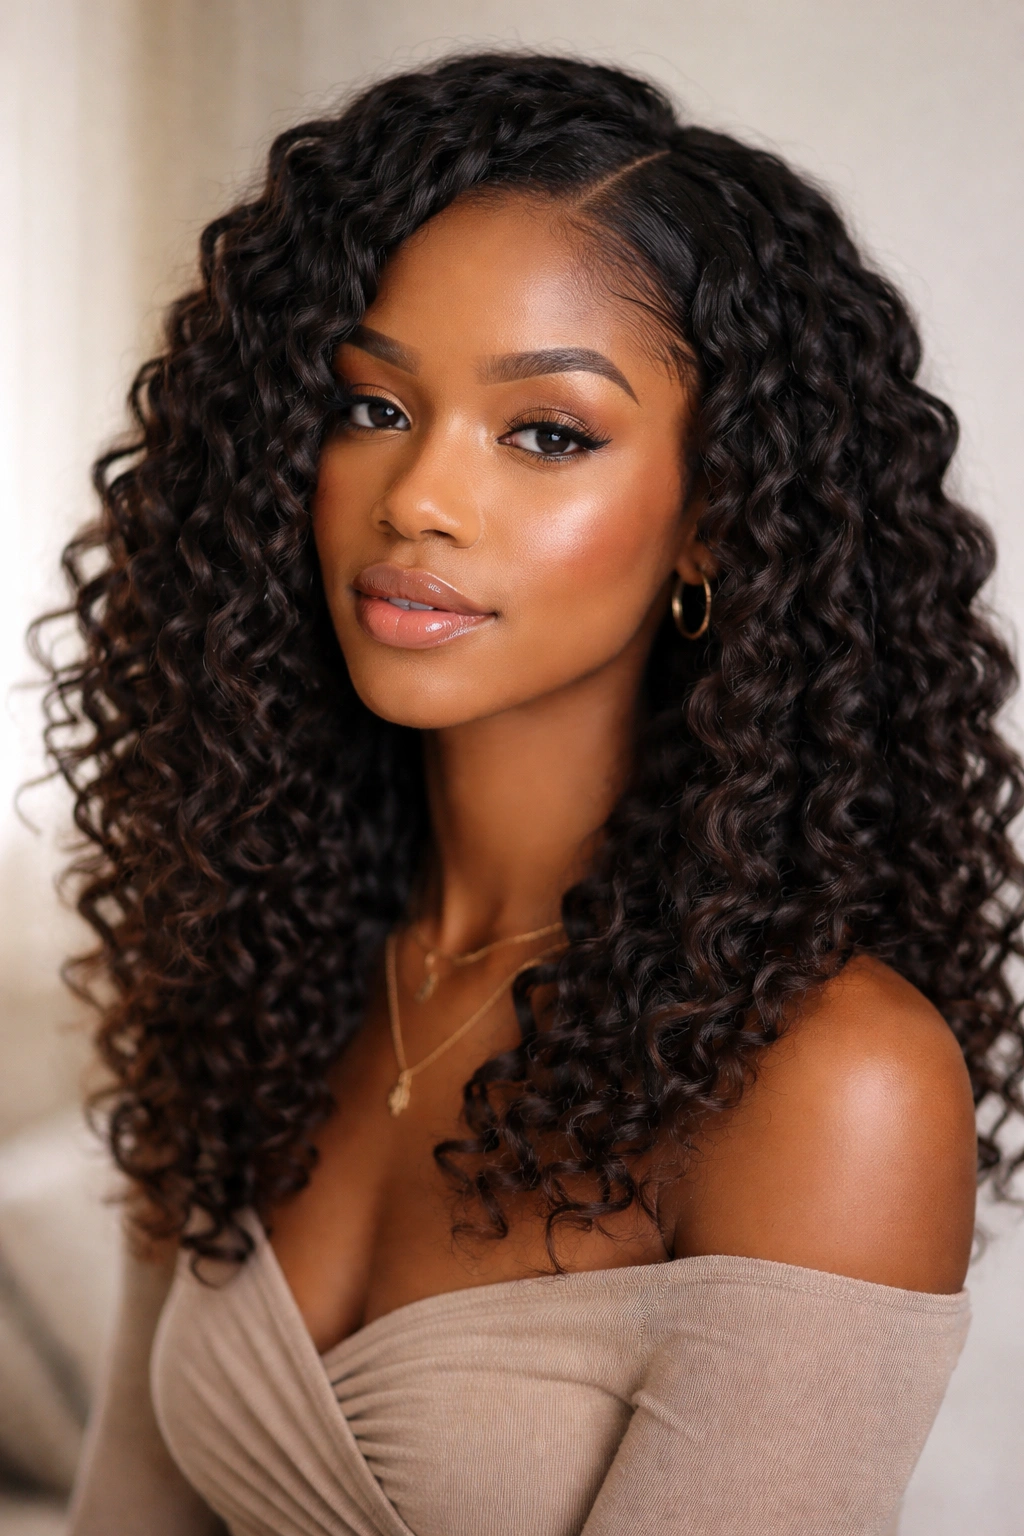
8. Side-Part Coil Drape
A side part is a subtle way to add dimension to your coils while keeping them completely down and loose. The asymmetry of a side part creates visual interest and can actually make your face appear more balanced. This works beautifully as an everyday style and photographs incredibly well, making it a favorite for content creation and special photos.
Creating a Clean Side Part
Wash and condition your hair, then use a rattail comb to create a sharp, clean part line from your temple down to behind your ear. Apply your leave-in conditioner and styling products, and dry your coils using a diffuser or air drying. The part acts as a natural guide for how your coils will fall — they’ll naturally follow the part line as they dry. Use a light gel on the parted line to keep it crisp and defined throughout the day.
Styling for Different Textures
If you have very tight coils, the side part might be more subtle because each coil will do its own thing regardless of where you part. If you have looser waves or a mix of curl patterns, the side part will be more dramatic and visually striking. You can play with how far to the side you part — a dramatic side part where you part almost at your ear creates more volume on the opposite side, while a more centered side part is softer and less dramatic. This style is incredibly versatile because it works equally well for casual days and dressier occasions.
9. Chunky Twist Protective Hairstyle
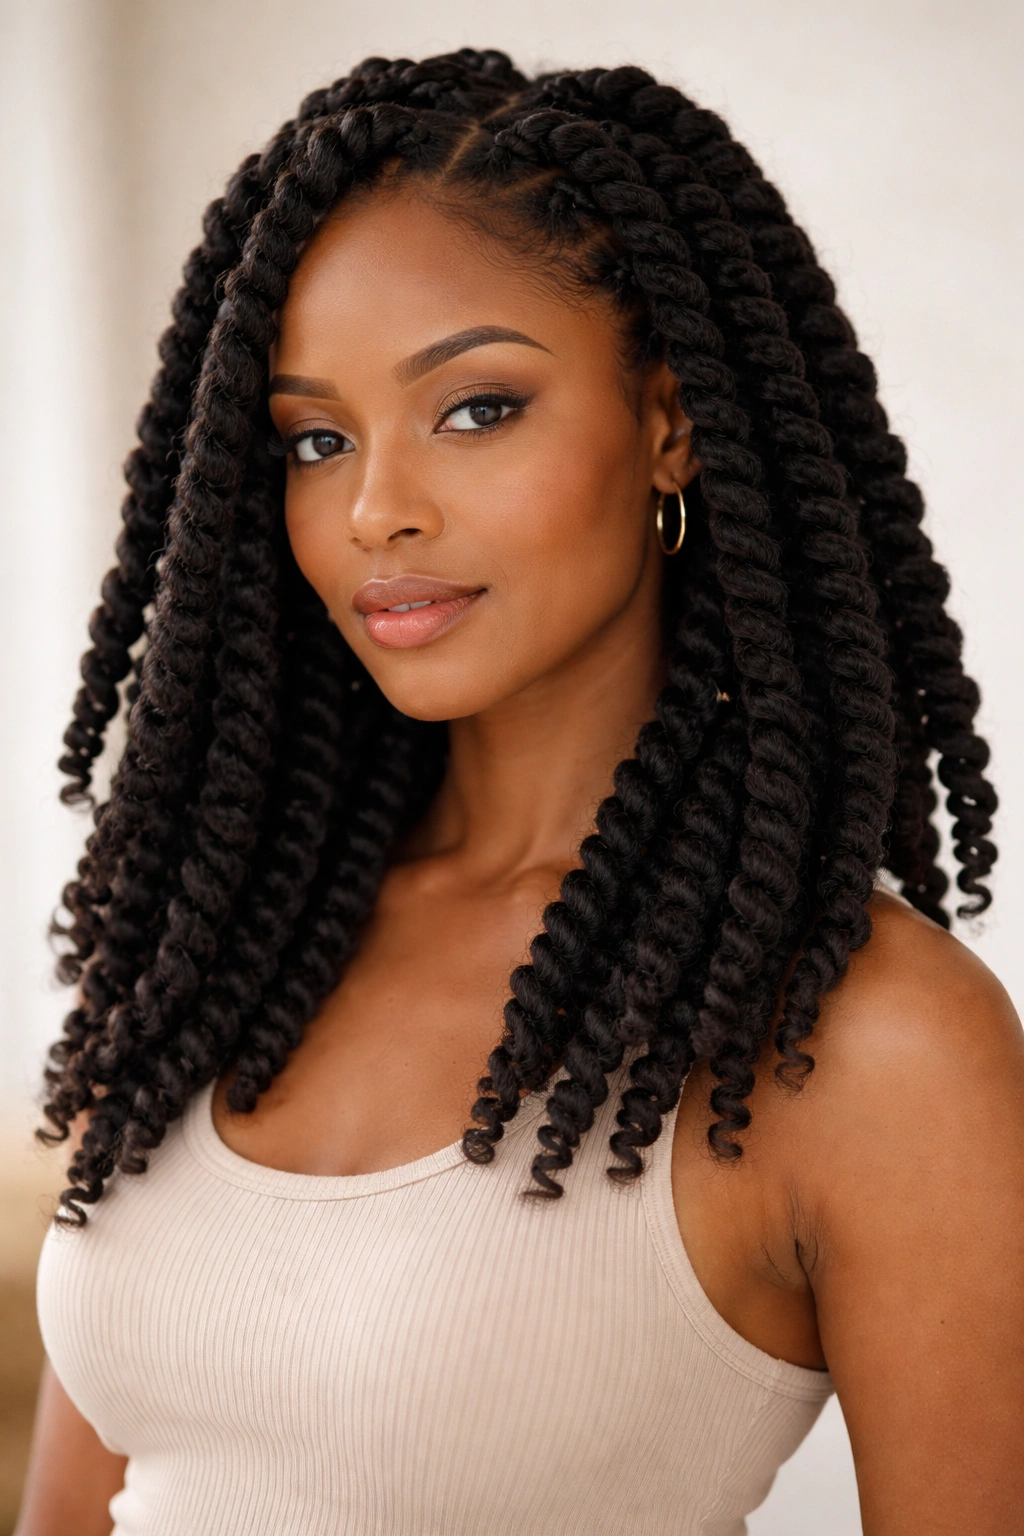
Instead of small two-strand twists, chunky twists are thicker, faster to create, and actually quite cute to wear as a finished style. You’re taking much larger sections of hair and twisting them, which creates a bold, sculptural look. This style is easier to maintain than traditional twists and offers great protection while still looking intentionally styled.
Dividing and Twisting for Chunky Results
Divide your damp, product-coated hair into 4-8 large sections depending on your desired thickness. Take two thick strands and twist them together, maintaining consistent tension as you work from root to end. Because you’re working with larger sections, the twists dry faster than traditional two-strand twists. The chunky twist pattern is inherently bold and beautiful — you don’t need to unravel them to have a finished look, though you absolutely can if you prefer loose coils.
Wearing and Maintaining Chunky Twists
You can wear chunky twists for 7-10 days with proper care, making them a genuinely low-maintenance style that protects your coils from daily wear and tear. At night, wrap them loosely in a silk scarf to prevent frizz and maintain definition. The twists themselves are protective because your natural hair is wrapped and tucked, minimizing exposure to friction and environmental stress. On day three or four, they actually relax slightly into a softer, more natural-looking pattern if you prefer that aesthetic, or you can keep them tight and defined the entire time.
10. Half-Up, Half-Down Coil Hybrid
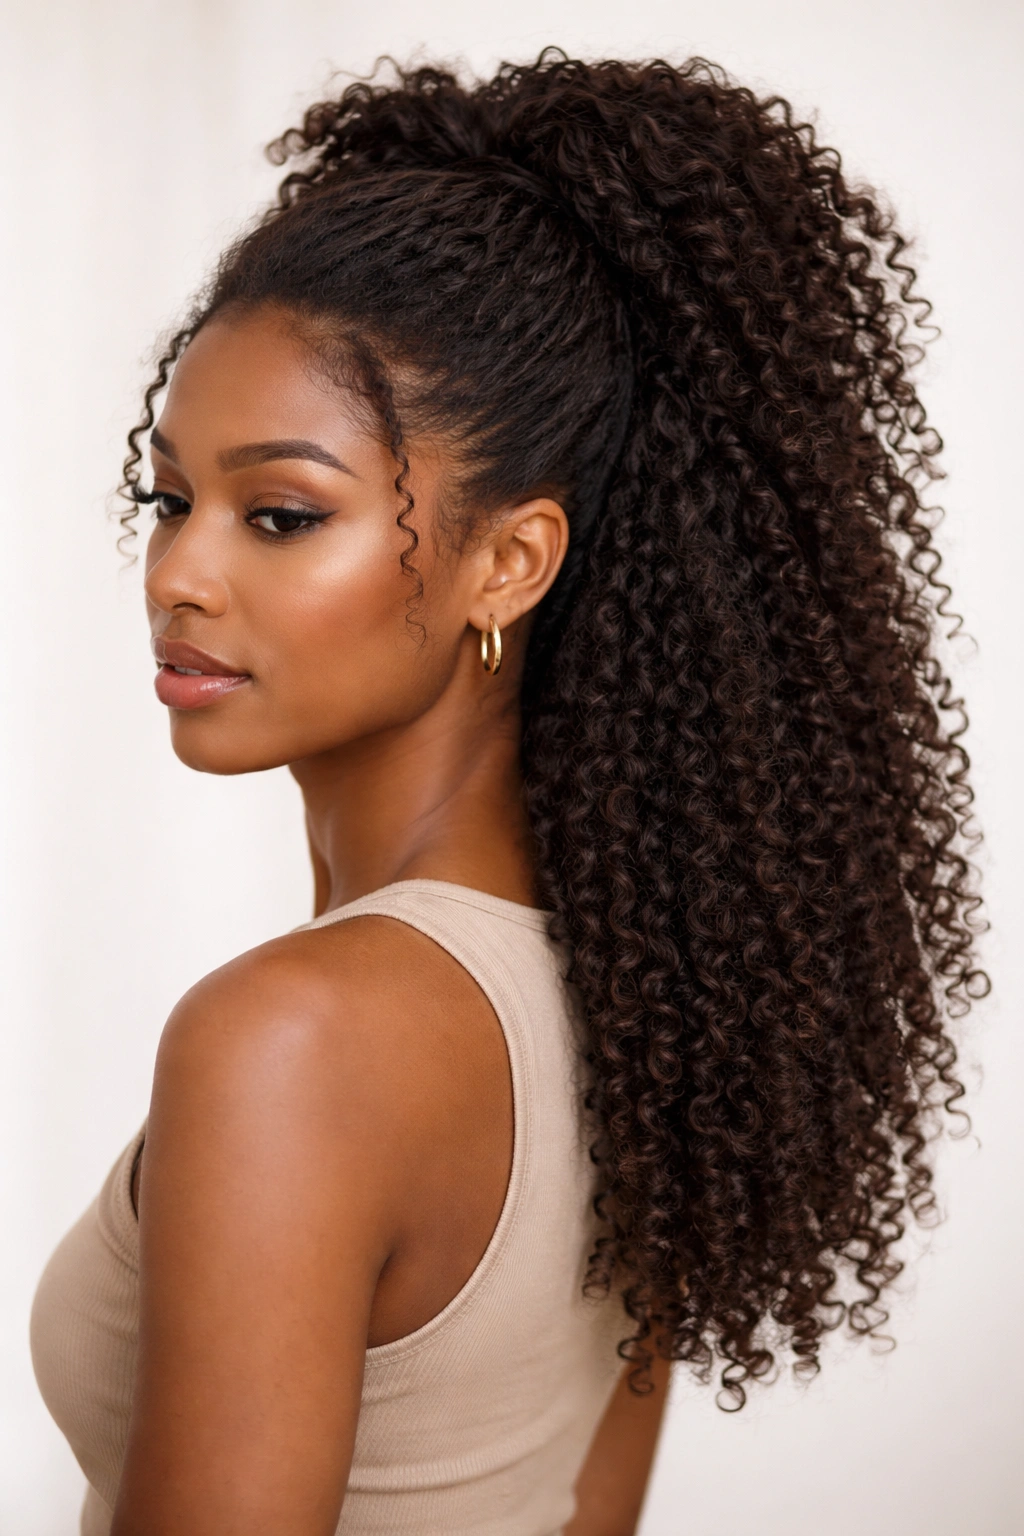
This style gives you the best of both worlds — half your coils are gathered up and secured (adding dimension and showing off your full coil pattern), while the other half hang loose and free. It’s flattering on all face shapes and offers a perfect middle ground between a completely loose style and a fully gathered updo. This works beautifully for work, casual wear, and social events.
Sectioning and Securing
After styling your coils, take the section from temple to temple across the crown and gather it into a ponytail or bun at the back of your head. Secure with a silk scrunchie or claw clip — the material matters because regular hair ties can damage your coils. Leave the bottom section of coils completely loose. The contrast between the gathered and loose sections creates visual interest and actually makes your coils look fuller and bouncier than if everything were loose.
Adding Dimension and Interest
You can add a decorative clip where the two sections meet for a polished look, or keep it simple with just the elastic. Try leaving some face-framing coils loose in front if you prefer that softening effect, even if you’re gathering the rest of the top section. The height of where you gather the top section changes the entire aesthetic — gather it lower for a more casual vibe, or higher on your head for something with more presence and drama.
11. Accessorized Coil Crown
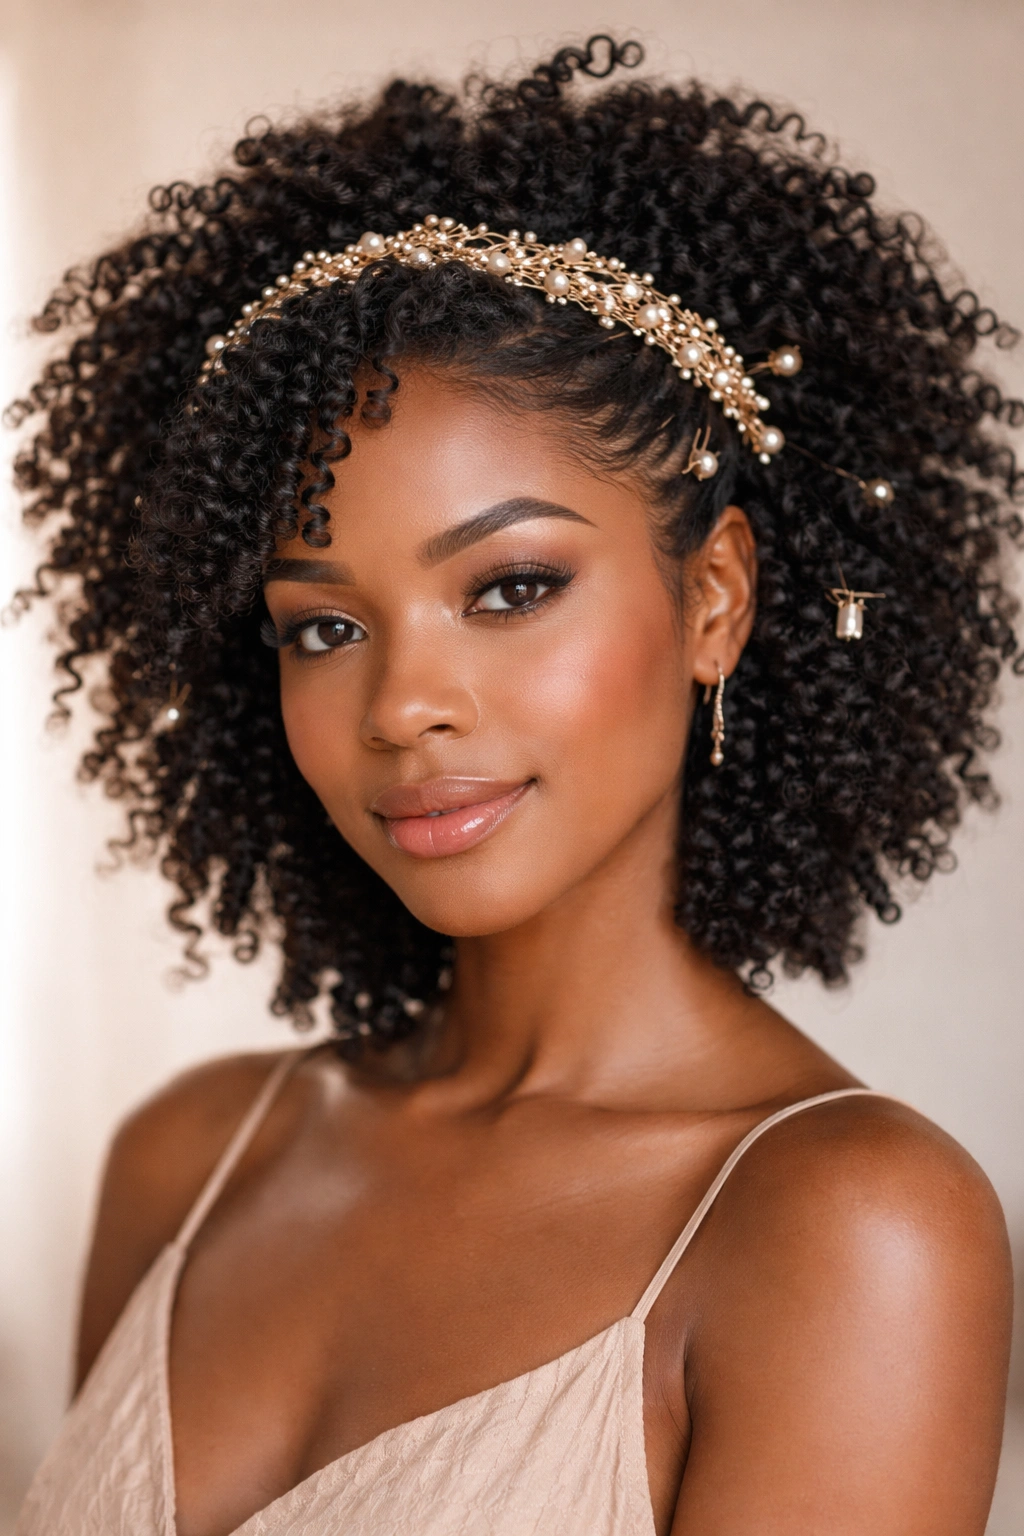
This style showcases your coils in all their glory while adding decorative elements that make it feel special and intentional. You’re wearing your coils loose and defined, then adding a headband, hair comb, decorative clips, or beaded hair strings that enhance and frame your natural texture. This approach transforms a simple loose coil style into something that feels elevated and styled.
Choosing the Right Accessories
Silk or satin headbands work beautifully across coily hair and actually protect your coils while adding visual interest. Metal combs, claw clips, and hair sticks designed specifically for thicker hair can all sit beautifully in coils without slipping or causing damage. Beaded hair strings or rings threaded through individual coils add visual depth and work especially well if you have longer coils. The key is choosing accessories that complement your coil texture rather than fighting against it.
Wearing Your Coils With Confidence
An accessorized coil style shows that you’ve intentionally styled your hair while still maintaining that beautiful natural aesthetic. This works equally well in professional and casual settings because you’re demonstrating care and intention through your accessory choices. The accessories draw attention to your coils in a way that celebrates them rather than obscuring them. This is also a great style for showing off your coil pattern to the maximum — nothing is pulled back or hidden, so your natural texture is completely visible.
12. Stacked and Sculpted Coil Curls
Stacking involves layering your coils strategically to create a rounded, voluminous shape that looks sculpted and intentional. You’re applying gel or cream to individual coils, stacking them on top of each other as you apply the product, and then letting them dry into that stacked formation. This creates serious visual impact and incredible texture and dimension.
The Stacking Technique
After washing, apply your leave-in conditioner and styling gel to soaking wet hair. Take small sections of coils and apply product directly to each one, then gently press and stack them on top of each other using your fingers or a curl sponge. As the coils dry in that stacked position, they hold that formation and create a rounded, almost sculpted appearance. Use a diffuser on low heat to encourage the coils to set in the stacked formation without disrupting the pattern.
Maintenance and Day-to-Day Wear
Stacked coils last beautifully for 5-7 days with proper care and actually look more interesting as they age — the stacking relaxes slightly into softer, more natural-looking coils by day three or four. Sleep on a silk pillowcase to maintain the pattern overnight. The sculpted, voluminous appearance works beautifully for people who want maximum visual impact and aren’t concerned with a perfectly neat appearance — this style celebrates texture and movement rather than sleekness.
13. Two-Strand Twist Crown Style
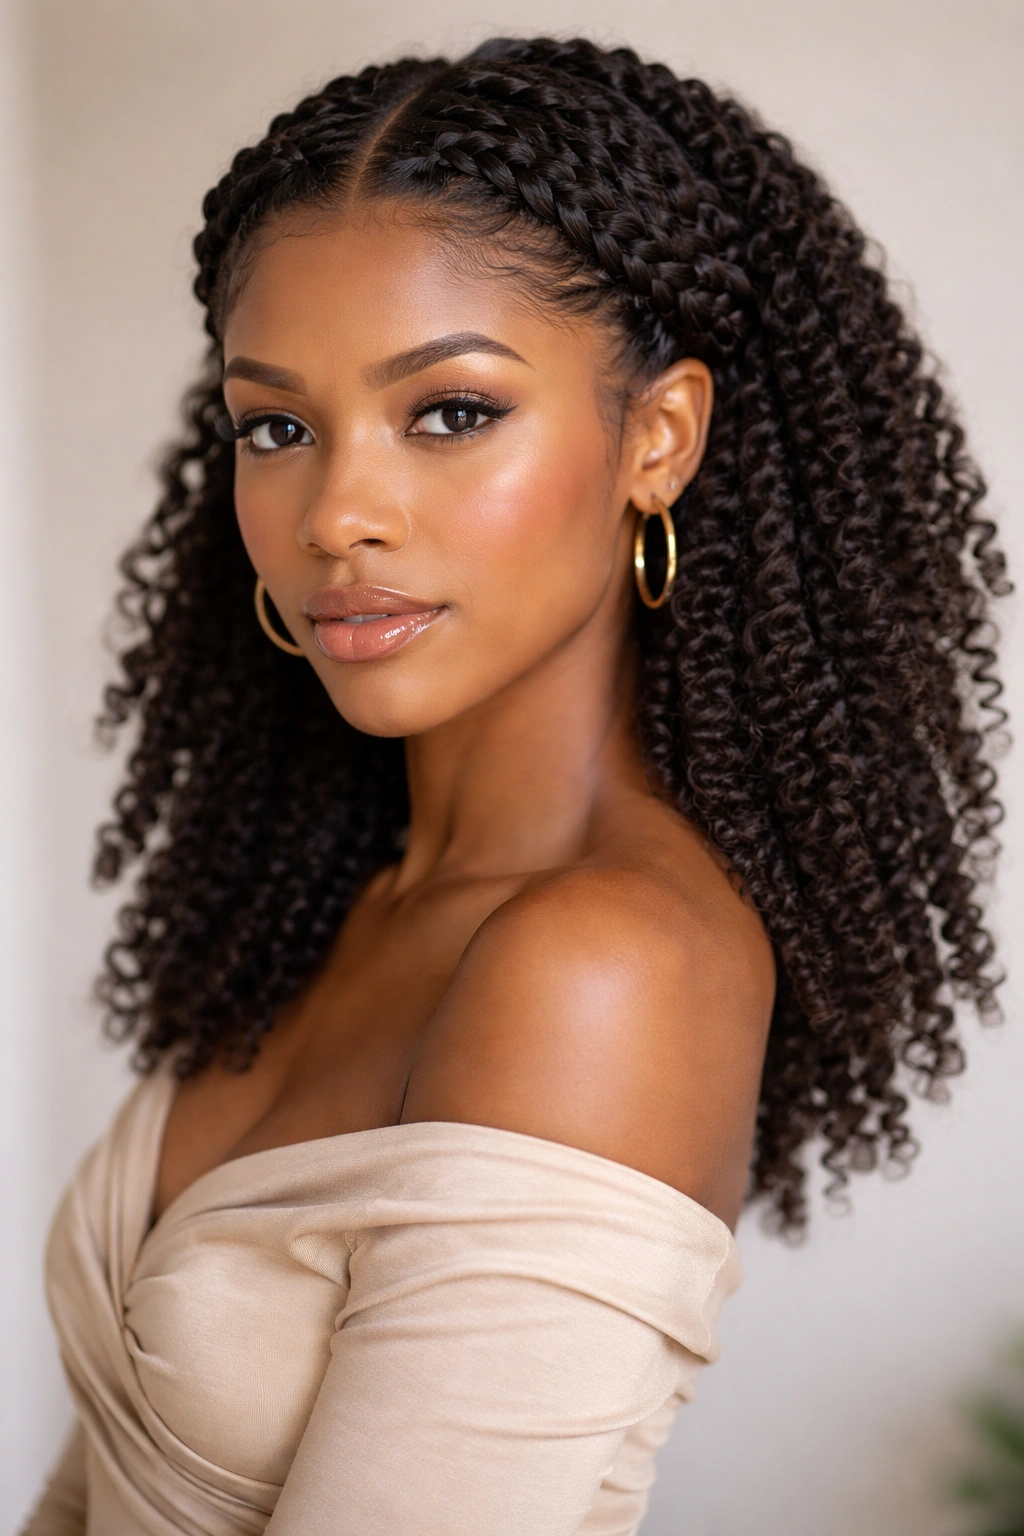
This is a more elegant variation of two-strand twists where you wear them as a crown or halo around your head rather than throughout. You’re creating twists only around your hairline and crown, leaving the back completely loose, which gives you a dressed-up, special-occasion look. This style is perfect when you want something that feels intentionally styled without committing to full twists throughout your entire head.
Creating the Crown Formation
Part your hair to separate the crown section from the back section. Create two-strand twists only in the crown area, working from one side of your head to the other in an arc or crown shape. Leave the back loose and define your coils using gel and a diffuser or air-drying method. The twists act as a frame for your face and create an elegant, intentional appearance while keeping your coils visible and the style achievable.
Occasions and Styling Variations
A twist crown works beautifully for dates, evening outings, professional events, and basically anywhere you want to look put-together without seeming overdone. The mix of texture (structured twists and loose defined coils) creates visual interest and sophistication. You can wear it as-is or add a decorative element like a hair comb or thin gold chain woven through the twists for extra elegance.
14. Puff With Braided Accents
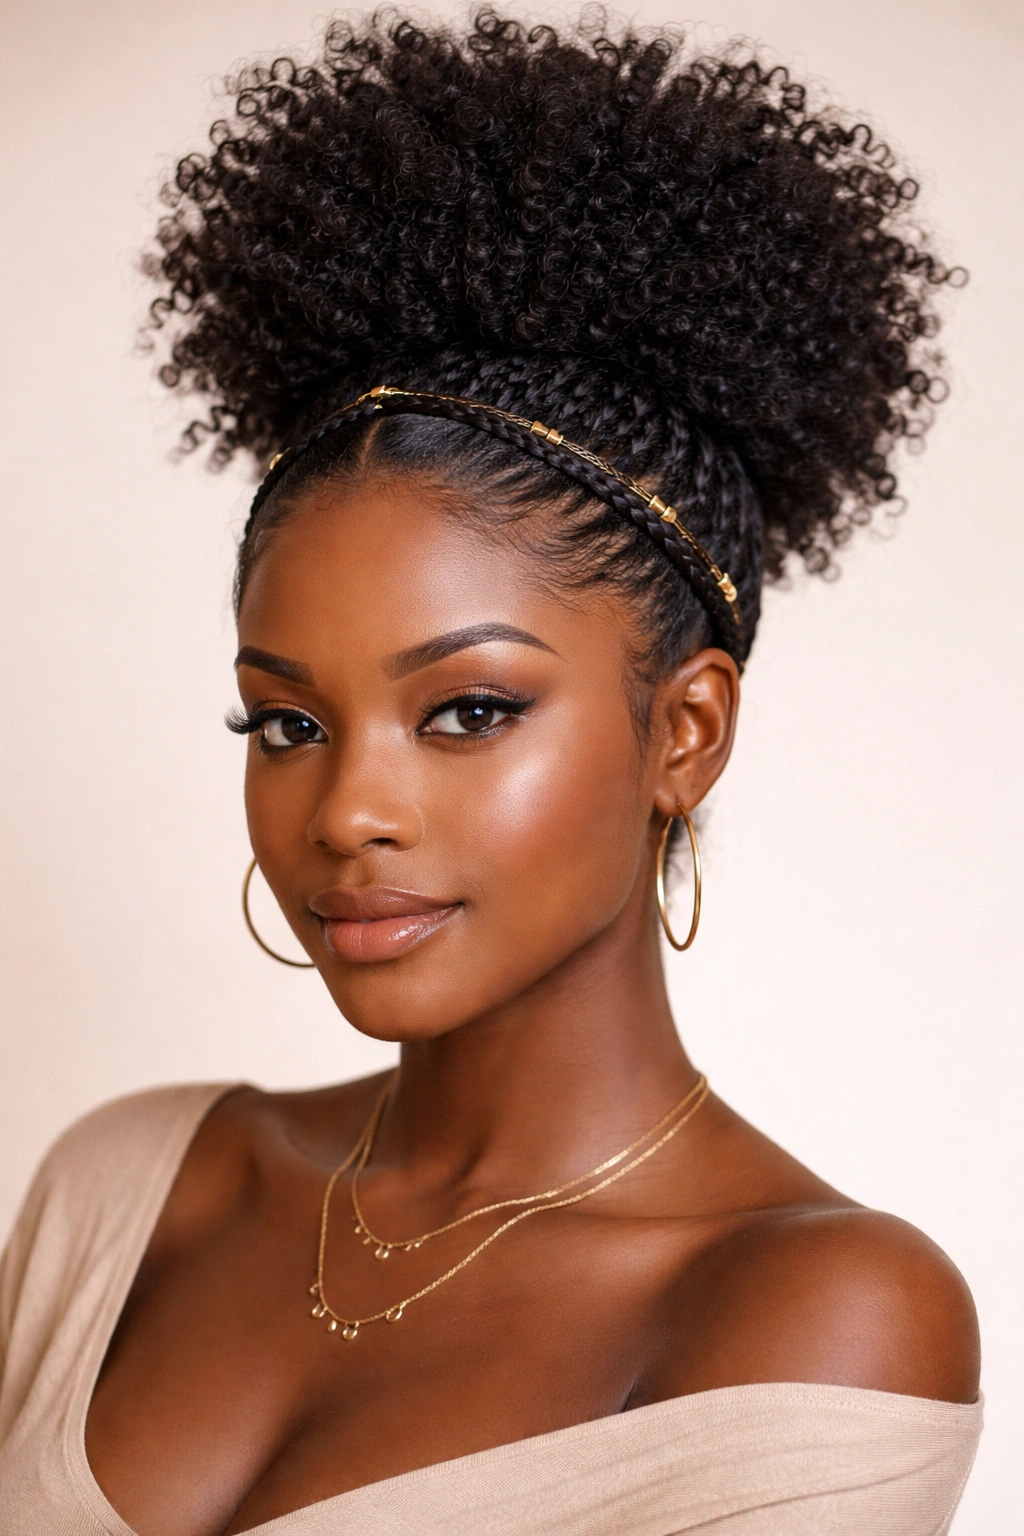
This style combines a high puff (all your coils gathered at the crown) with decorative braids incorporated into the design. You might create two side braids that wrap around the puff, or add a single braid across the back for visual interest. This approach gives you the protective benefits of a puff while adding an intentional, decorated element that makes it feel special.
Combining Puff and Braid Elements
Gather your coils into a pineapple puff at the crown using a silk scrunchie. Then, take a section from one side of your head and create a two-strand twist or braid that wraps around the base of the puff, pinning it in place as you go. You can do this on both sides for a symmetrical look, or add a single accent braid down the back. The braids should feel like decorative elements, not like they’re holding everything together — your puff is already secured with the scrunchie.
Creating Dimension and Visual Interest
This style works beautifully for anyone who likes a bit more visual complexity and enjoys playing with braiding techniques. The braids add an element of intentionality while the puff keeps everything protected and low-maintenance. It’s a perfect style when you want something that looks more involved than it actually is to create.
15. Curly Bangs With Loose Coils
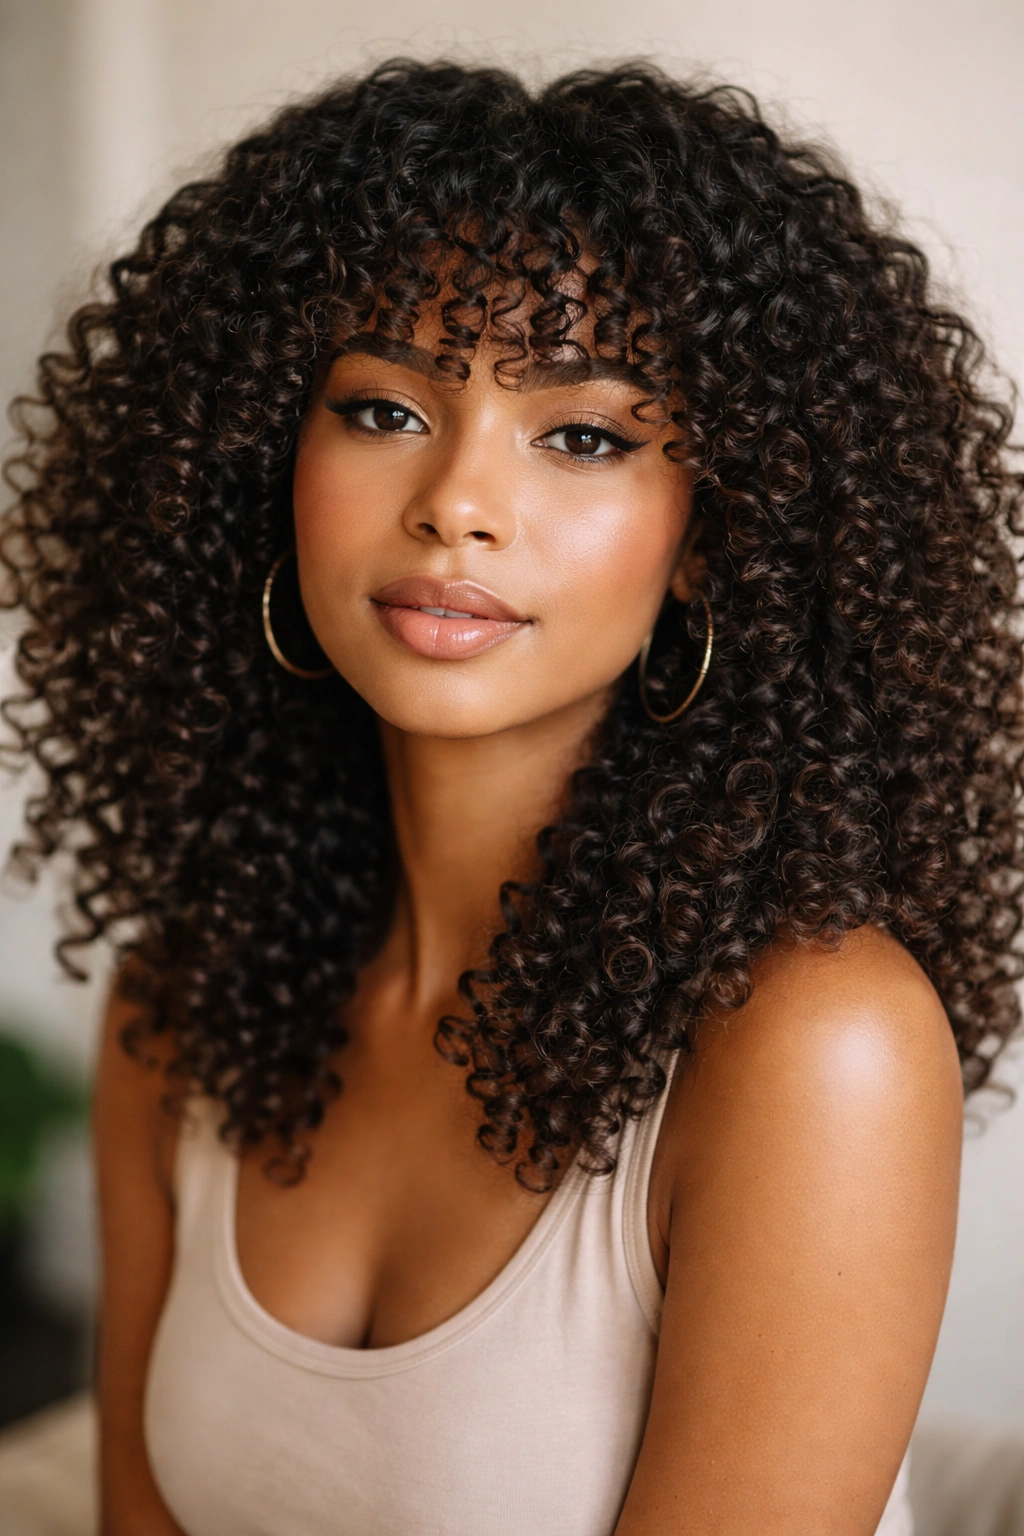
If you have or are considering getting curly bangs, styling them with loose, defined coils creates a youthful, trendy, and intentional look. Your bangs frame your face while your back and sides showcase your full coil pattern. This style works beautifully for all ages and face shapes, though it requires a bit of commitment to maintain the bang shape.
Styling Coily Bangs Effectively
Coily bangs need their own dedicated styling routine because they’re more vulnerable to frizz and require consistent definition. Apply your leave-in conditioner and styling gel directly to your bangs, encouraging them into their natural coil pattern. The rest of your hair gets the same treatment, but your focus is on making sure your bangs look intentional and defined. Use a light volumizing spray on your bangs to help them hold their shape throughout the day.
Face-Framing and Overall Aesthetic
Curly bangs with loose coils create a soft, face-framing effect that draws attention to your eyes and facial features. This style feels modern and intentional because the bangs show that you’ve actively styled your hair. The combination of structured bangs and free-flowing coils creates visual interest and makes even a simple loose coil style feel more elevated and put-together. This approach works for everything from casual daily wear to professional settings where you want to stand out.
Final Thoughts
The beauty of natural coily hair is that you can rotate between these styles based on your mood, schedule, and what your coils need on any given week. Some days you want the simplicity of a wash and go; other days you want the impact of a high-volume puff or the elegance of a twist crown. None of these styles require expensive products or salon appointments — they all work beautifully when you use quality moisturizing products, work with your coils’ natural pattern, and take time to set them properly.
The most important thing to remember is that your coils are strong, resilient, and genuinely beautiful in their natural state. The goal of these styles is to enhance and protect them, not to fight against your texture or force your hair into something it doesn’t naturally want to do. When you work with your coils instead of against them, styling becomes easier, your hair stays healthier, and you actually enjoy your hair routine instead of dreading it.
Pick a couple of these styles to master first, get comfortable with the technique, and then expand from there. Your coils will reward you with better definition, more elasticity, and that gorgeous bounce that makes natural coily hair so stunning to see and to wear.