Bantu knots have become the ultimate protective styling workhorse for anyone with coily, textured hair—and honestly, that’s not just because they look incredible. These knots are named after their origins in Bantu cultures of Central and Southern Africa, where they’ve been worn for centuries as both a style and a practical approach to keeping hair healthy and manageable. What makes them so valuable today is that they do triple duty: they protect your ends, they can create gorgeous wave or curl patterns overnight, and they offer endless styling versatility once you take them down.
If you’ve scrolled through natural hair communities or spent time in beauty spaces focused on coily hair, you’ve definitely seen bantu knots. But here’s what most people miss—there’s actually a whole spectrum of ways to do them, and each variation creates a completely different look and feel. The classic tight spiral knot your friend swears by might not be the best fit for your hair texture, your daily schedule, or the aesthetic you’re going for. Some versions work better for protection, some maximize styling impact, and some are specifically designed to showcase your coils without any wave-setting at all.
The beautiful thing about exploring different bantu knot styles is that you’re not just finding a new look—you’re discovering what works best with your unique hair type, whether you have fine, medium, or thick coils. You’re also learning how to adapt a protective style to different seasons, occasions, and styling goals. Let’s walk through eight distinct approaches to bantu knots that will expand your protective styling repertoire and give you the tools to customize this style to exactly what your hair and lifestyle need.
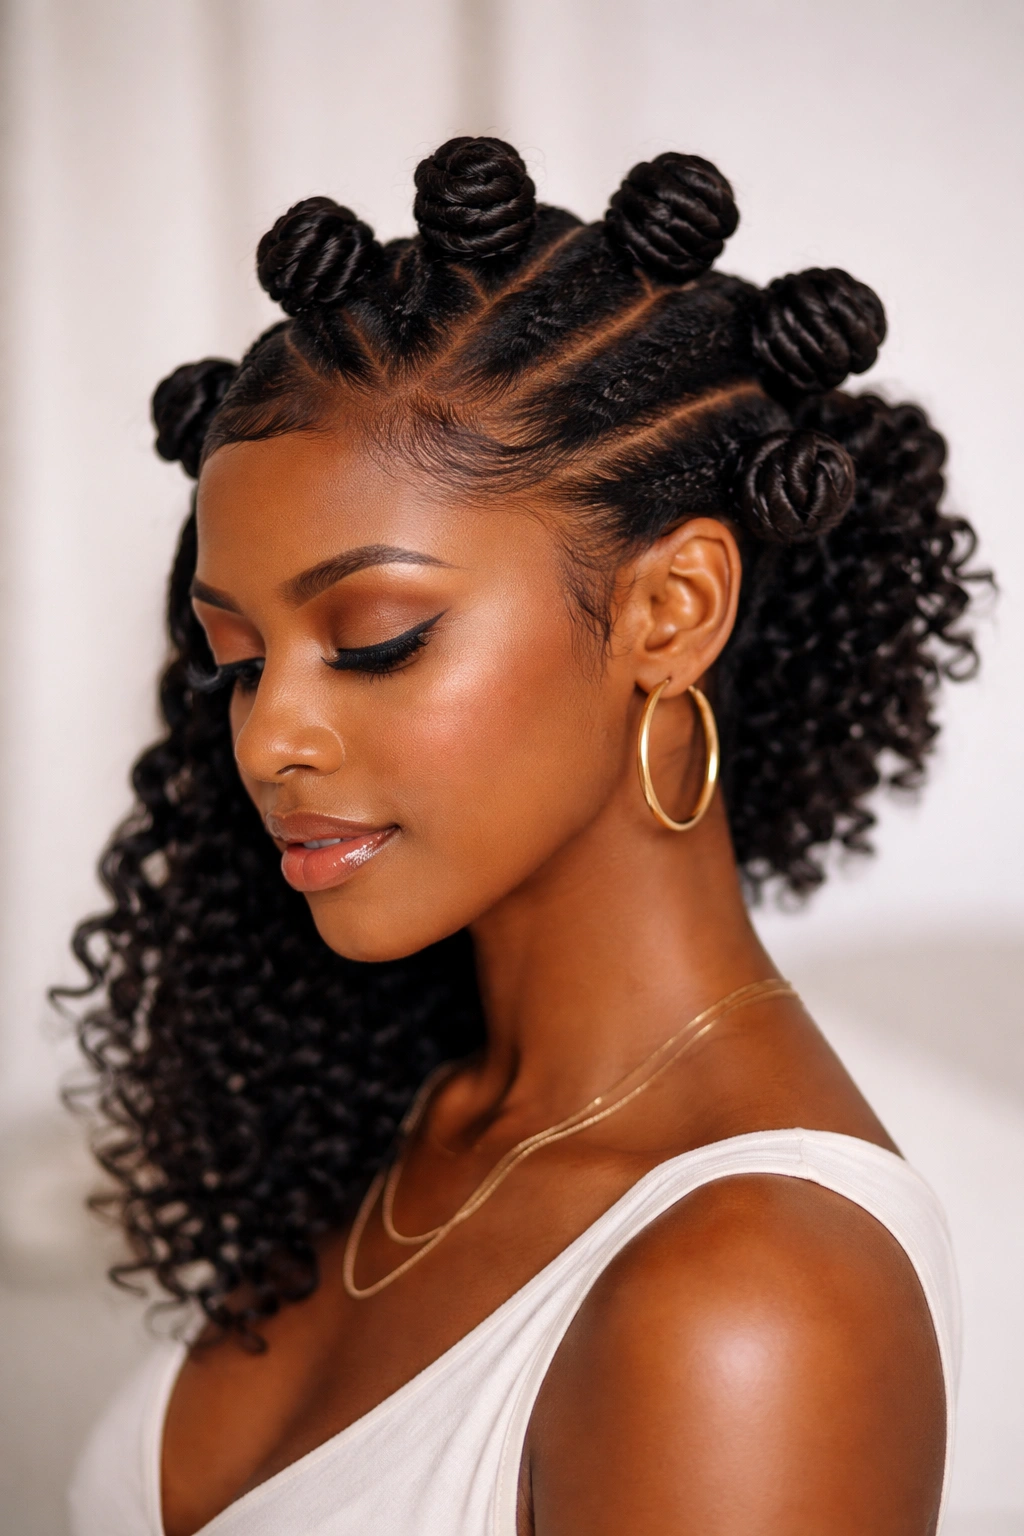
1. Classic Spiral Bantu Knots
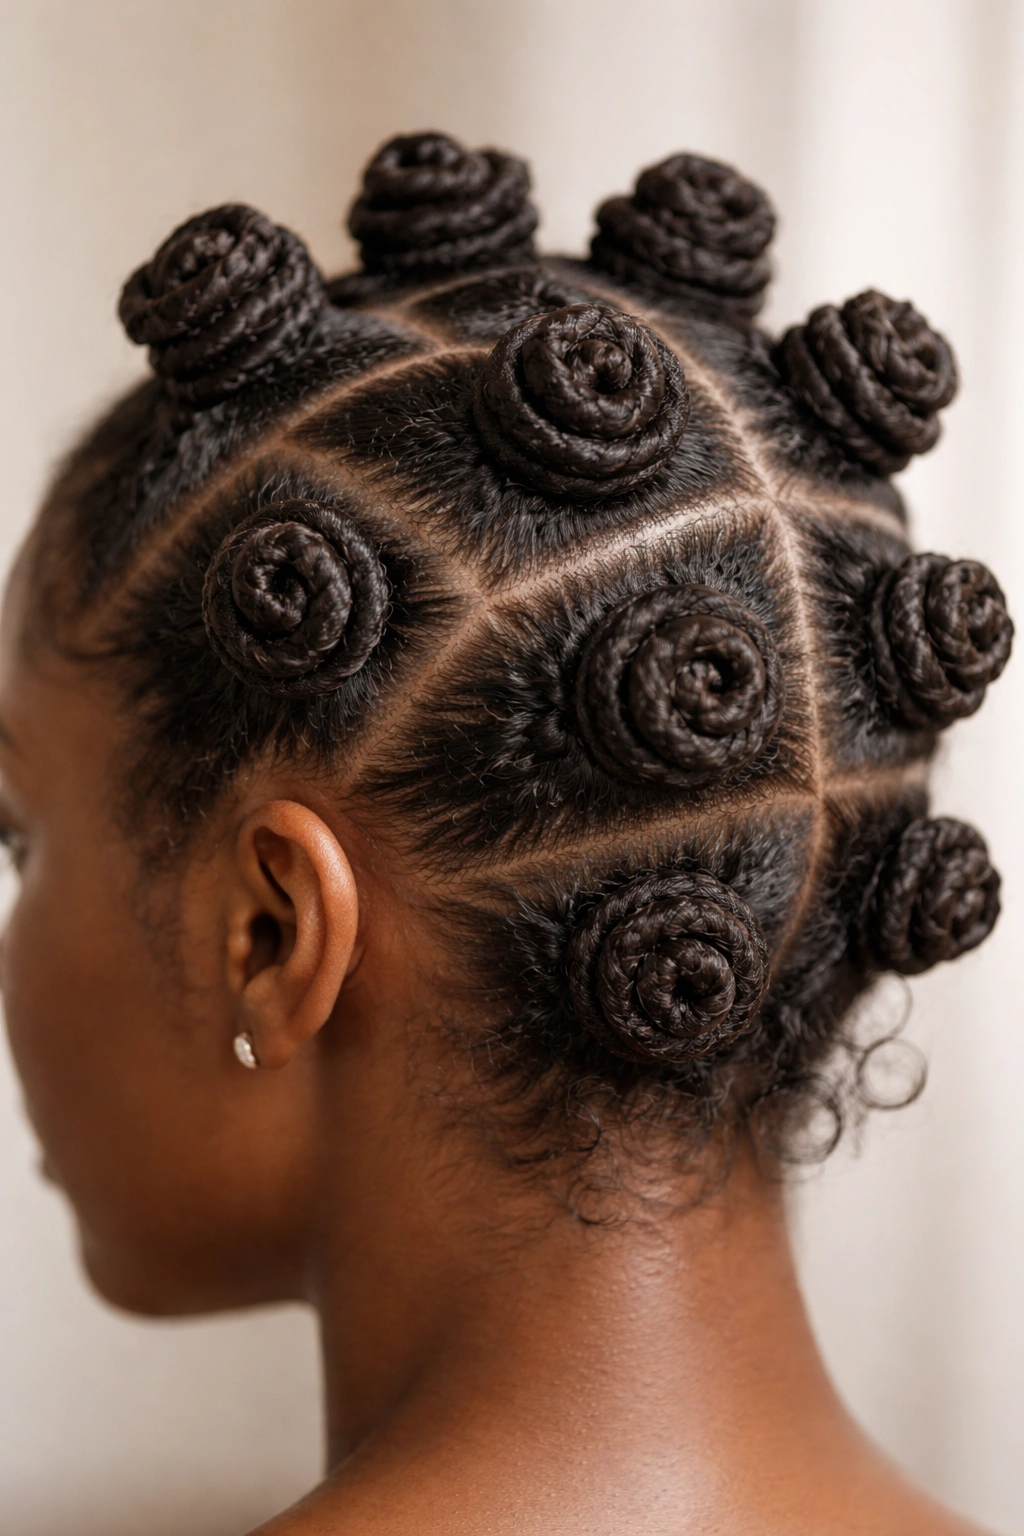
The classic spiral bantu knot is the foundation that all other variations build from, and it’s the version most likely to appear in protective styling guides and tutorials. This style starts with a section of hair that’s twisted or braided, then coiled tightly from the root all the way down until it forms a compact, rope-like knot that sits close to the scalp. The tight spiral is what gives it that polished, neat appearance—and it’s also what makes it such an effective protective style.
Why This Version Works for Most Hair Types
The classic spiral knot provides maximum hold and security, which means your style will last through multiple days of wear without loosening or unraveling. Because the twist is wound so tightly, it creates tension that prevents frizz and keeps individual coils defined. This version also works beautifully as a set—when you unravel these knots after two to three days, you’ll get gorgeous, bouncy spiral curls that can last for a week or more. It’s the version that most photographers and stylists reach for because the result is visually striking and consistent.
How to Create the Perfect Spiral
- Start with a section of damp hair about one to two inches square—smaller sections create tighter, more secure knots
- Apply a styling cream or gel to hold everything in place and reduce frizz as you work
- Divide the section into two strands and twist them together firmly all the way down the length
- As you reach the ends, continue twisting while wrapping the twisted strand around itself into a coil
- Pin or tuck the ends under to keep everything secure and prevent unraveling
- Repeat across your entire head, spacing knots evenly for a balanced appearance
Pro tip: For maximum hold, apply the knot while your hair is still slightly damp rather than completely soaking wet—this allows the product to set as the knot dries, locking everything into place.
2. Double-Twisted Bantu Knots
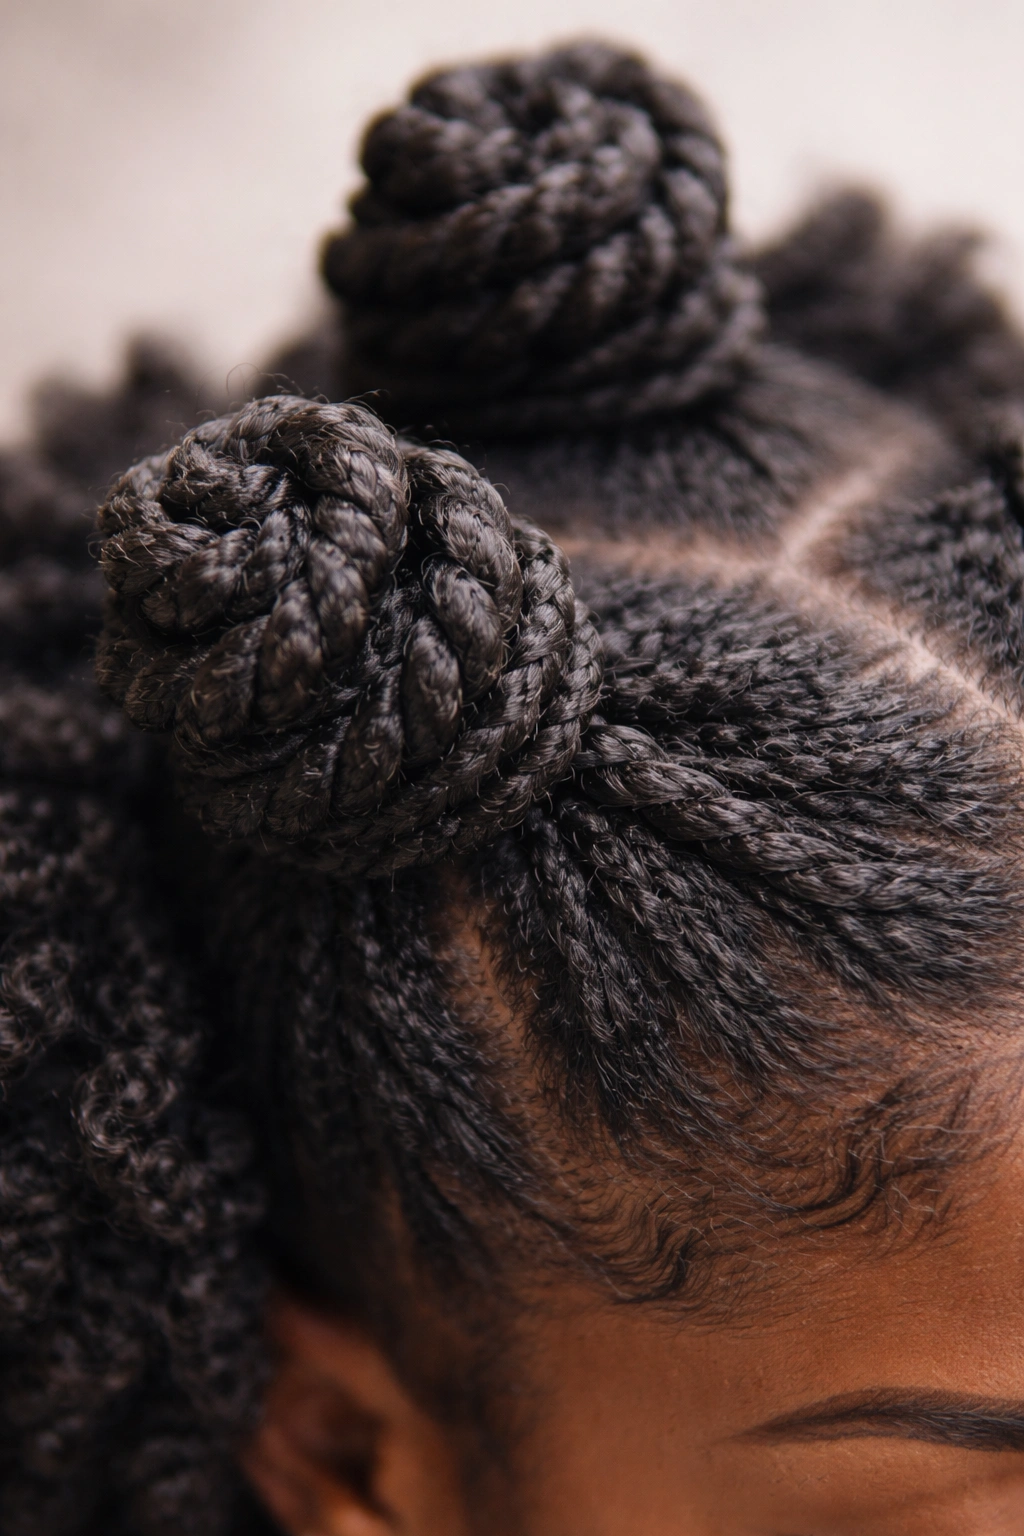
If you’ve ever looked at a bantu knot and thought it could use more texture and dimension, the double-twisted version is exactly what you’re looking for. Instead of a single twist, you create two separate braids or twists from the same section, then wrap both of them together as you form the knot. This doubles the visual interest and creates a richer, more intricate pattern when the knots unravel.
What Makes Double-Twisted Knots Stand Out
This variation creates noticeably more defined, almost rope-like spirals when you unravel the knots compared to a single twist. Because you’re working with two twists instead of one, the style takes a bit longer to install but creates a dramatically different aesthetic. Many people with finer hair types actually find that double-twisted knots hold better than single twists, since the doubled structure creates more grip and security. The final curl pattern also tends to be more uniform and springy, which means better longevity and less re-definition needed between wash days.
Installation Steps for Double-Twisted Bantu Knots
- Section your hair into one to one-and-a-half inch squares—double-twisted knots work best with slightly larger sections
- Divide each section in half and apply gel or cream to both halves
- Create two tight two-strand twists from the divided sections, twisting each one down to the ends separately
- Wrap both finished twists around each other, creating a double-helix effect as you coil them into a knot
- Secure the ends by tucking and pinning, making sure both twists are incorporated into the knot structure
- The finished knot should feel thick and sturdy, with visible texture from the two twists
Worth knowing: Double-twisted knots take longer to install than classic versions, so plan for an extra 30 to 45 minutes if you’re covering your entire head. Many people do them as a weekend project rather than a quick styling session.
3. Flat-Twisted Bantu Knots
Flat-twisted bantu knots simplify the installation process while still delivering gorgeous results—they’re a smart choice if you’re managing your time or if your hands tire easily during styling sessions. Instead of a rope twist, you create a flat three-strand braid from your section, which is inherently flatter and more structured than a regular twist. This braid then gets coiled into a compact knot that sits even closer to the scalp.
Why Flat Twists Create Better Scalp Coverage
The flat three-strand braid creates a wider base than a twisted knot, which means better coverage and protection for your scalp and the hair close to your roots. For people who’ve experienced scalp sensitivity or want extra protection in those vulnerable areas, flat-twisted knots are a go-to. The three-strand structure is also incredibly stable—it’s actually harder to accidentally unravel a flat twist than a two-strand twist, which is why this version is popular for extended wear (five to seven days without adjustment). The aesthetic is slightly different too—you get a more geometric, almost braided appearance rather than the smooth spiral of a regular bantu knot.
How to Braid and Knot
- Section your hair into one to two inch squares, making sure the edges are clean and well-defined
- Apply your styling product and start a three-strand braid from the root, keeping the braid as flat and close to the scalp as possible
- Continue braiding all the way down, maintaining even tension so the braid looks neat and structured
- Once you reach the ends, coil the finished braid around itself, tucking the ends under to create a flat knot
- Use bobby pins or hair clips to secure the knot in place—flat knots tend to hold well on their own but benefit from extra anchoring
- The finished knot should look like a flat medallion sitting against your head rather than a rounded spiral
Insider note: Flat-twisted knots are especially popular with people who sleep on their sides or switch positions frequently, since the flatter profile means less pressure on the knot while you sleep.
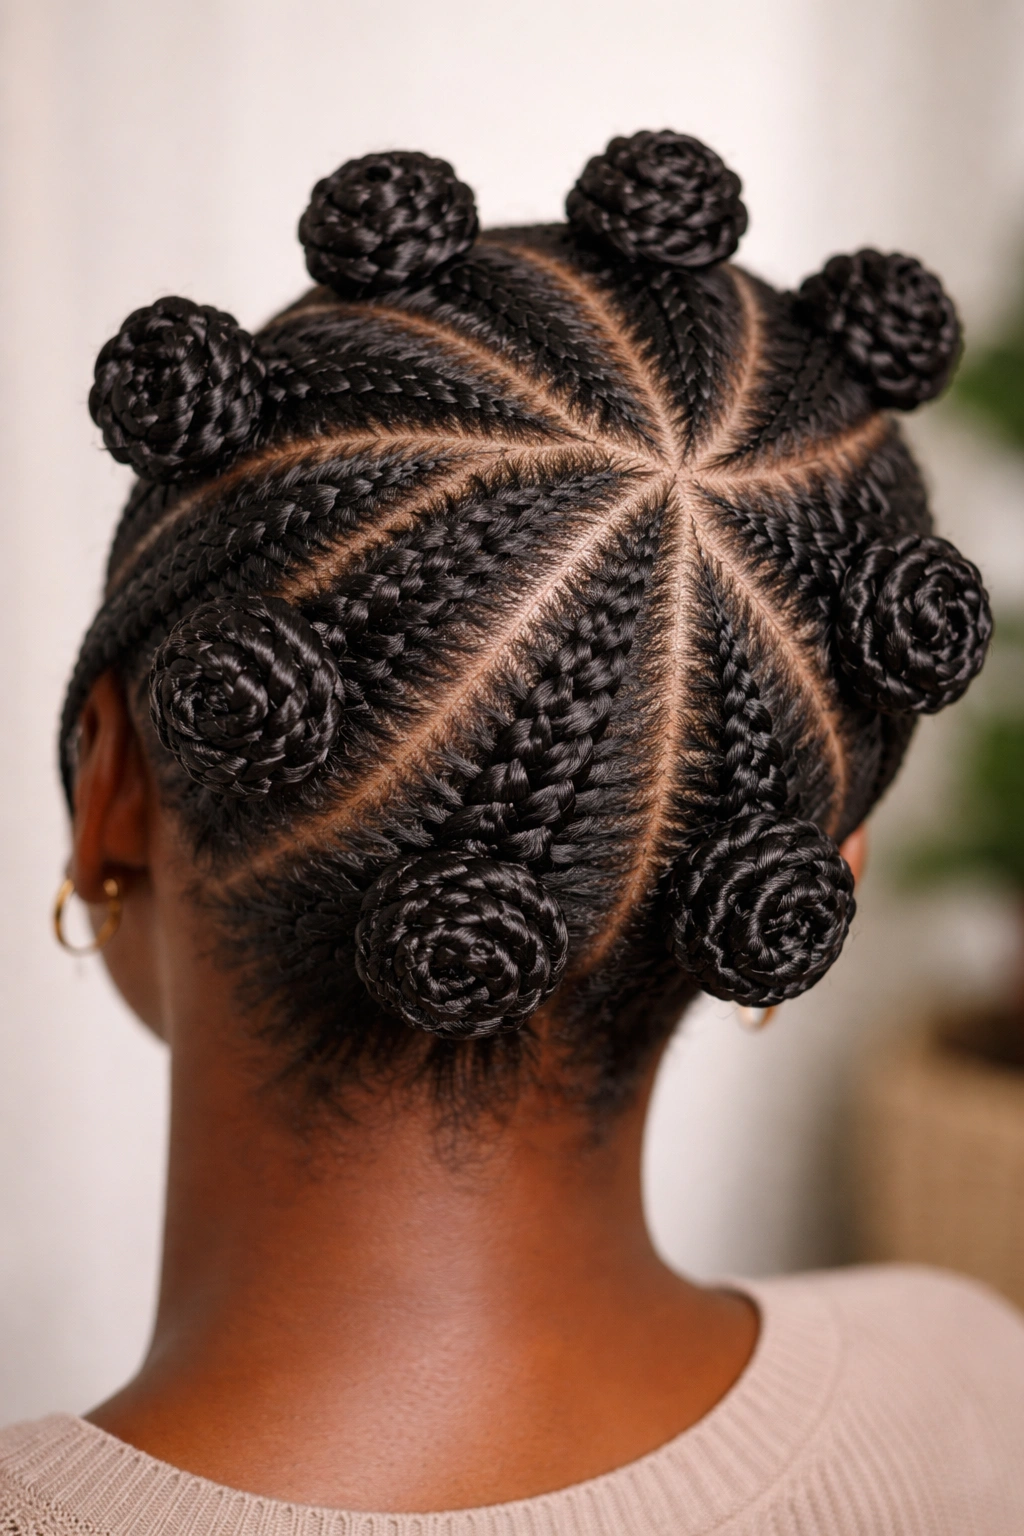
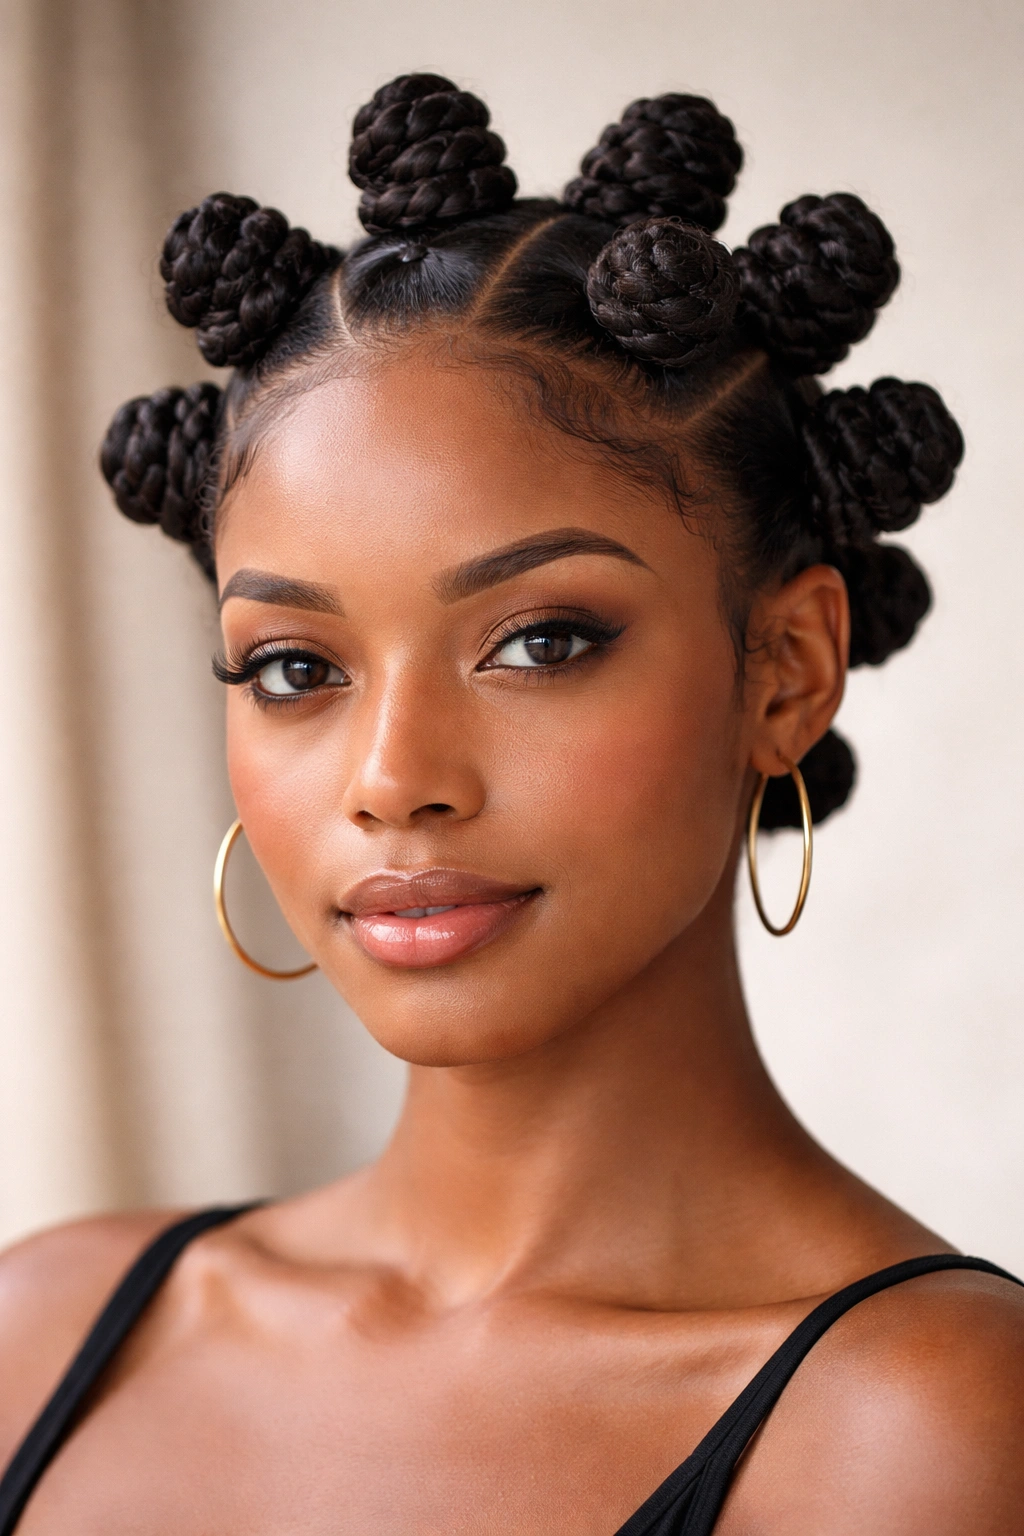
4. Stacked Bantu Knots

Stacked bantu knots take the classic version and expand it vertically, creating knots that are taller and more three-dimensional. Instead of one single coil, you create multiple progressively smaller coils stacked on top of each other, which builds height and visual drama. This version is specifically designed for people who want bantu knots that make a statement and create serious texture when unraveled.
The Visual Impact of Stacking
When you stack knots on top of each other, you’re essentially creating a knot that’s two or three times the height of a standard bantu knot. The result is a hairstyle that has real presence and architectural interest—it catches light differently and photographs beautifully. Stacked knots also unravel into longer, more defined coils because you’ve created more twist per section. Many people find that stacked knots hold their curl pattern longer than single knots, since the increased structure keeps everything locked in place. This version is particularly striking on people with medium to thick hair density, where the stacked effect creates visual harmony with the overall volume of the style.
Creating Stacked Knots Step by Step
- Divide your hair into one-and-a-half to two inch sections—you want enough hair to create multiple knots from each section
- Apply your styling product and create your first twist or braid, coiling it into a knot at the root as usual
- Before securing that knot completely, create a second twist from the remaining length of the section
- Coil that second twist on top of the first knot, creating a second tier
- If you have enough length, add a third small knot on top, graduating the sizes so each one is slightly smaller than the one below
- Secure all layers together with pins, making sure the entire stacked structure feels sturdy
Real talk: Stacked knots require more hair per section and more installation time, but they’re worth it if you love bold, sculptural styles. They’re also amazing for showing off length and texture, especially if you’re transitioning to natural hair and want to celebrate your coils.
5. Fulani-Inspired Bantu Knots
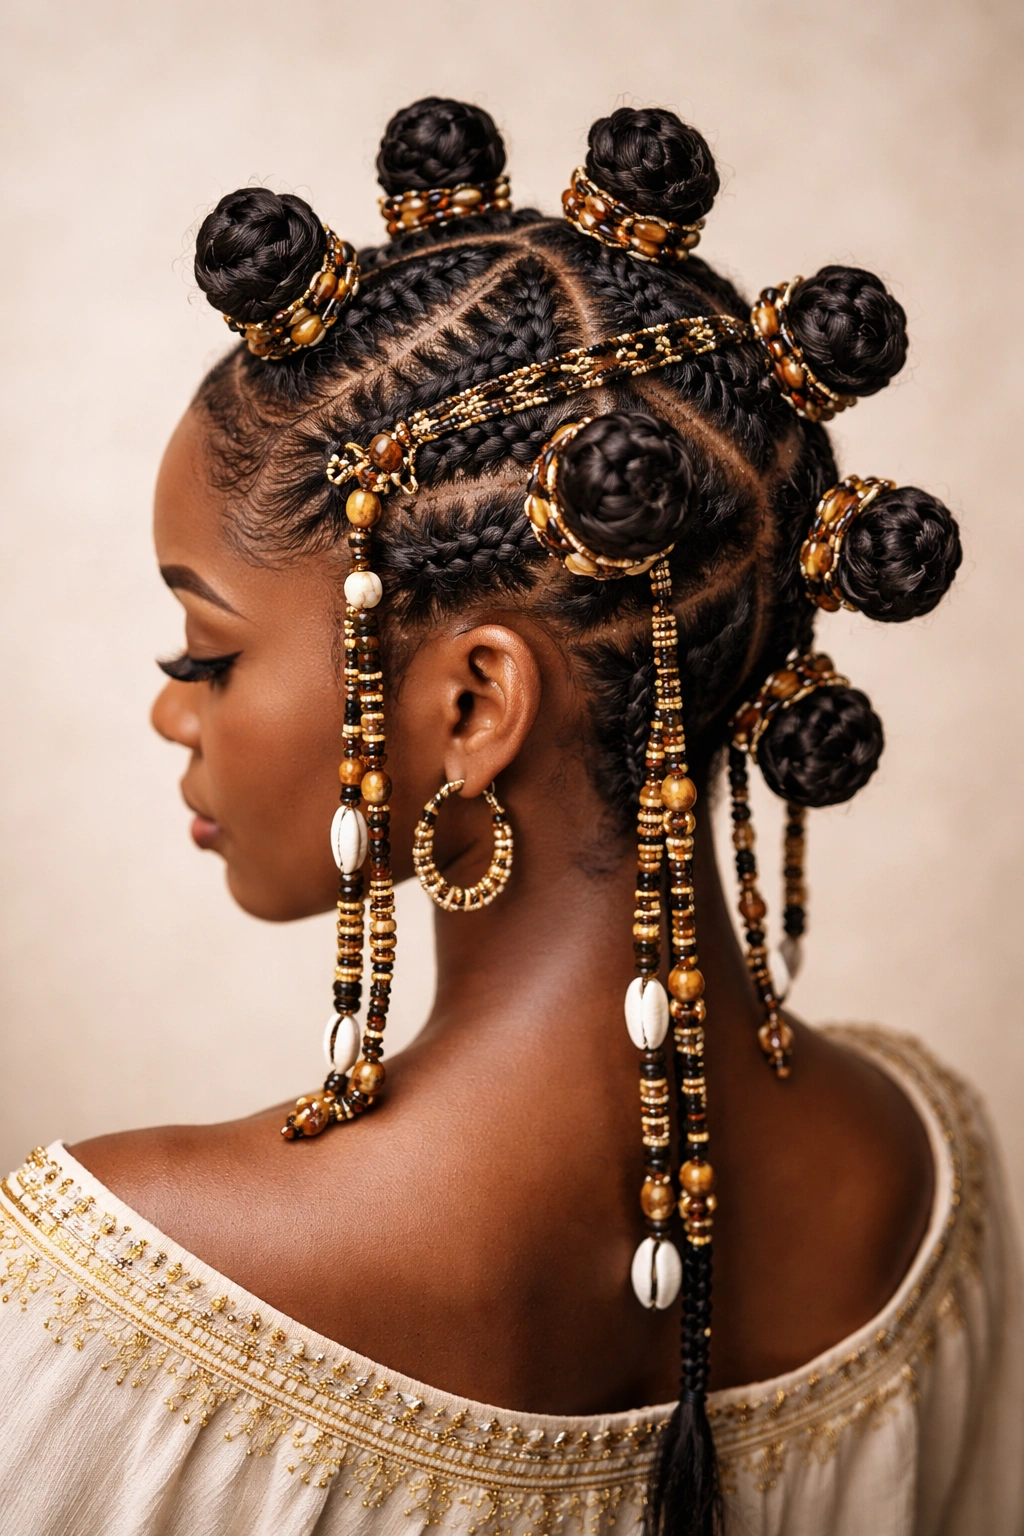
Fulani culture has a rich tradition of intricate braided and twisted hairstyles, and you can bring that aesthetic into your bantu knots by incorporating some specific design elements. Fulani-inspired bantu knots typically feature decorative beads, geometric sectioning, and sometimes a line of braids woven into the knot structure itself. This version honors the cultural origins of the style while creating something that feels fresh and personalized.
Cultural Elements That Define This Style
Fulani-inspired designs often include purposeful asymmetry, with knots positioned in a specific pattern across the head rather than uniform rows. You might also see beads incorporated into the twisted sections, thin braids creating geometric lines, or a combination of different knot heights and sizes. This version celebrates the artistry and intentionality of traditional protective styling—it’s not just about holding your hair, it’s about creating a design that reflects cultural heritage and personal style. The beauty of this approach is that you can adapt it to your own vision; there’s no single “Fulani bantu knot” style, but rather a philosophy of incorporating intentional design elements and cultural references into the knot structure.
Incorporating Beads and Design Elements
- Plan your knot placement before you start—sketch it out or use reference images to decide on your design
- Section your hair according to your design plan, rather than creating uniform sections
- As you create each twist or braid, incorporate gold beads, cowrie shells, or other decorative elements into the twisted sections
- You can thread beads onto the twist as you go, or wrap thread around the twist to hold beads in place
- Vary your knot heights and sizes to create visual interest and match your design plan
- Complete some knots with decorative elements and leave others plain, depending on your overall aesthetic
Worth noting: This version requires more planning and artistic vision than a standard bantu knot, which is exactly what makes it special. It’s a great choice if you want your protective style to feel like wearable art rather than just a practical hairstyle.
6. Side-Swept Bantu Knots
Side-swept bantu knots take a different approach to placement and direction, sweeping the knots diagonally across your head rather than placing them in traditional rows. This creates a dynamic, flowing aesthetic that’s less structured and more artistic than symmetrical knot placement. The side-swept version works beautifully for people who want their protective style to look like a styled, intentional choice rather than purely functional.
Why Asymmetry Creates Visual Interest
When you place bantu knots on a diagonal or sweep rather than in organized rows, it creates visual movement and draws the eye in a specific direction. This placement also looks incredibly flattering for most face shapes because the diagonal lines create balance and flow. Side-swept knots are also practical—they’re easier to position one-handed if you’re styling yourself, and they often feel less bulky on one side of your head, which can be more comfortable for sleeping or for people who wear their hair a specific way. The curl pattern you get when you unravel side-swept knots is also more flowing and less uniform, which many people prefer for a softer, less rigid look.
Placement and Installation Tips
- Instead of sectioning your head into a grid, imagine a diagonal line running from one side of your head to the other
- Create larger sections on the side you want to sweep toward, and smaller sections on the starting side
- Install knots following the diagonal flow, gradually moving larger knots toward the direction of the sweep
- Keep knots slightly closer together on one side and more spread out on the other to enhance the flowing effect
- Use smaller sections and tighter knots on the side with more knots, and larger sections with looser knots on the side with fewer
- The overall effect should feel like the knots are moving in one direction across your head
Pro tip: Side-swept knots photograph beautifully from one angle, so think about which side of your head you want to showcase when you choose your sweep direction.
7. Colorful Bantu Knots
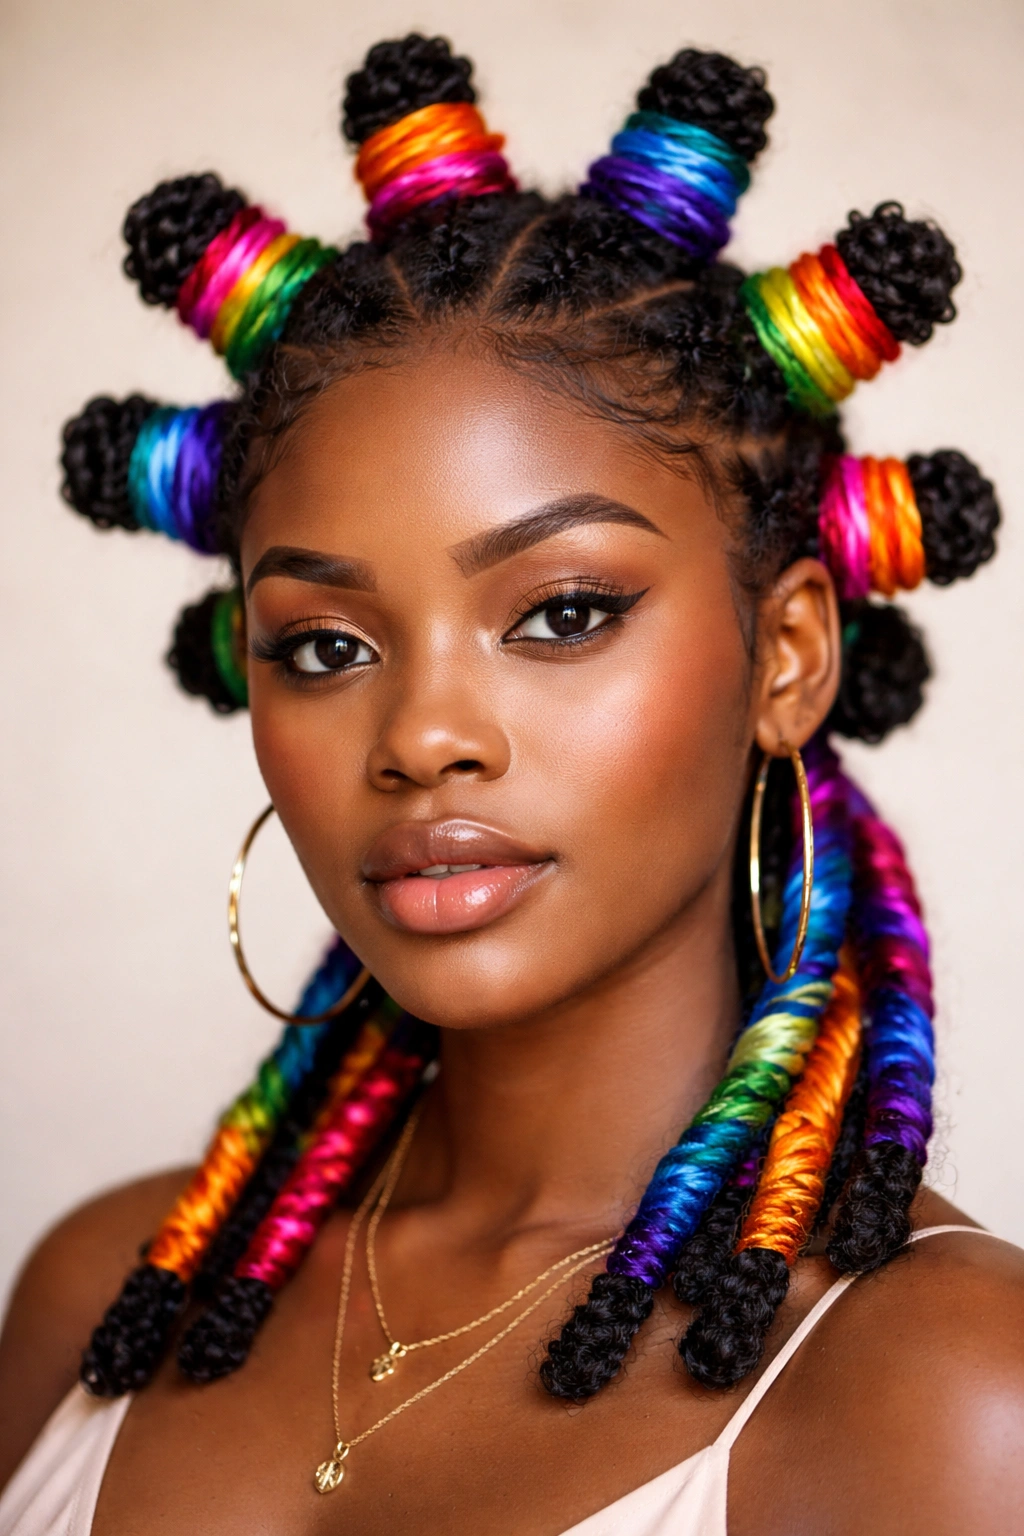
For people who love playing with color without committing to permanent dye or extensive braiding with colored hair, colorful bantu knots offer the perfect opportunity to experiment. You can incorporate color through thread wrapping, temporary hair color sprays, colored gel, or by braiding in small pieces of colored yarn or ribbon. This version transforms bantu knots from a protective style into a bold fashion statement.
Creating Color with Wrapping and Threading
The easiest way to add color to bantu knots is to wrap thread or thin yarn around your twists as you create them, or to wrap finished knots with color. You can create solid color wraps, ombre effects by transitioning between colors, or geometric patterns by wrapping different colors in specific sections. Another approach is to apply temporary color spray or colored gel to individual knots before you install them, which gives you the option to wash the color out without affecting the knots themselves. Some people use a combination of approaches—maybe wrapping with thread on half their head and using colored gel on the other half to see which method they prefer.
Different Color Integration Methods
- Thread wrapping: As you twist or braid each section, have a length of thread, yarn, or cord ready and wrap it around the twist as you work, moving in one direction or alternating between colors
- Gel application: Apply colored gel or mousse directly to your twist or braid, coating it evenly before you coil it into a knot
- Spray application: Use temporary hair color spray on finished knots, applying multiple thin coats for even color coverage
- Yarn integration: Braid small pieces of colored yarn directly into your sections before twisting, so the color is built into the structure
- Crochet thread method: Use embroidery floss or thin crochet thread in multiple colors, weaving them through the twist for intricate, detailed color work
Fun fact: The color will be most visible and vibrant when the knots are in place; once you unravel them and your natural curl pattern takes over, the color becomes more of an accent. This is actually a great feature if you want to enjoy bold color but keep it subtle in your daily wear.
8. High-Crowned Bantu Knots
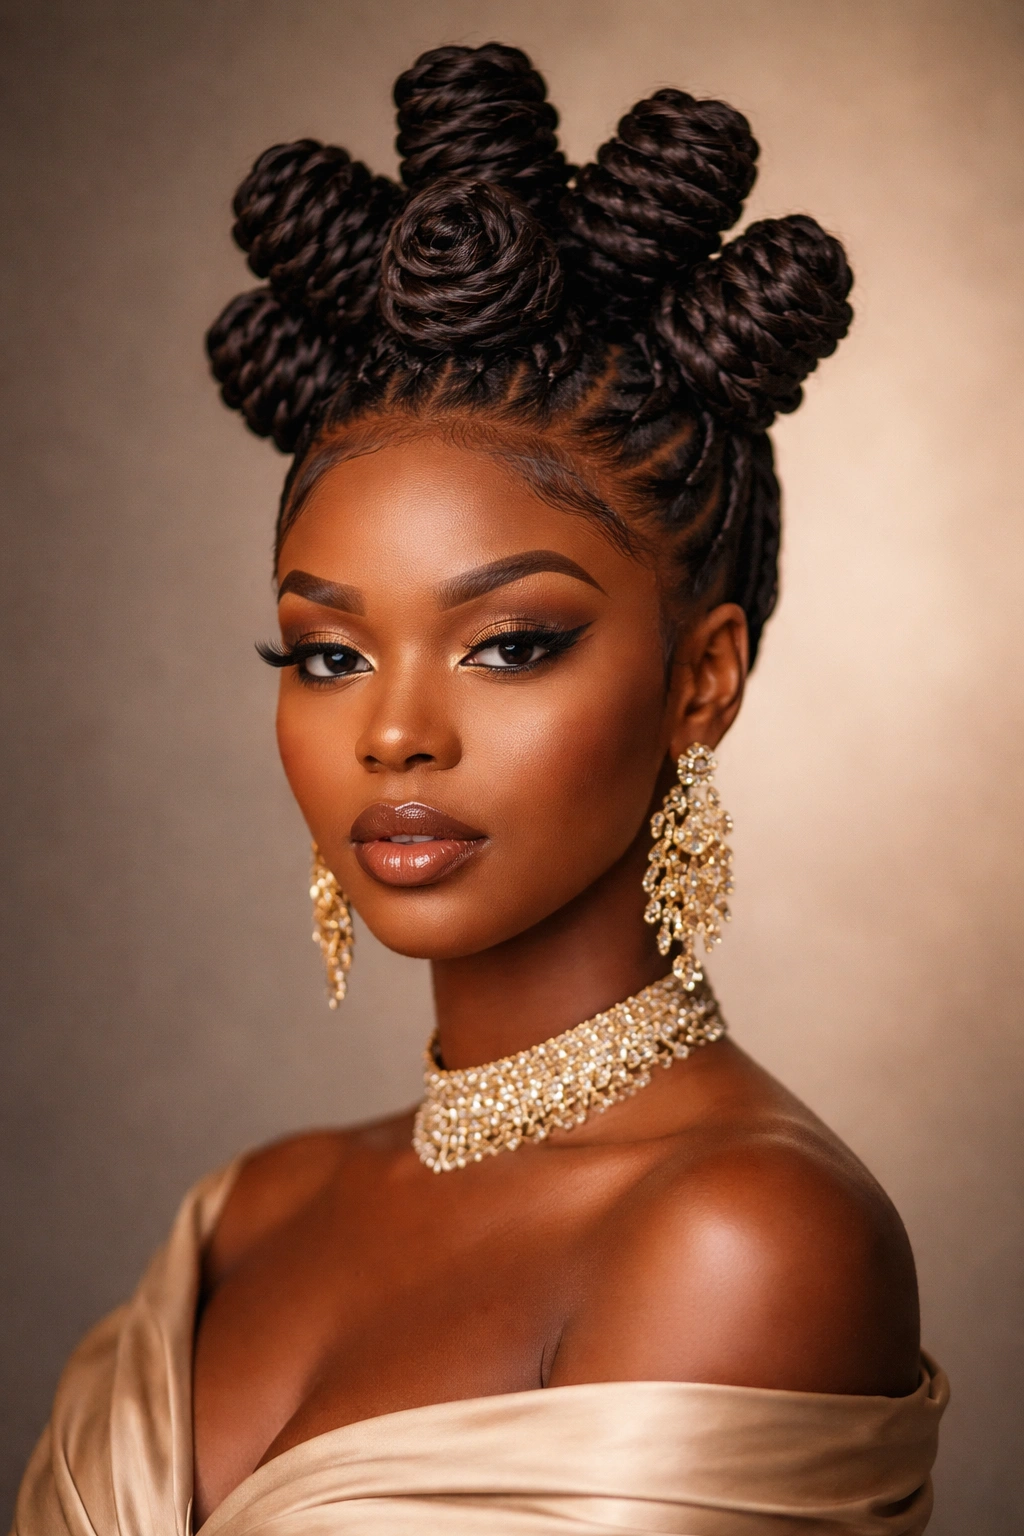
High-crowned bantu knots sit higher on your head, starting higher on the scalp and positioned to create maximum height from crown to ends. This version is designed for people who want their bantu knots to be front-and-center, visible from every angle, and creating serious vertical drama. It’s a confident, bold choice that works beautifully for special occasions, photoshoots, or any time you want your protective style to feel like the main event.
The Crown-Forward Design Philosophy
High-crowned knots follow the natural lines of your head but emphasize height and position everything toward the crown and top of your head rather than distributing knots evenly all over. This creates a style that’s immediately striking and architectural—there’s no question that this is an intentional, designed hairstyle rather than just a practical protective option. High crowns also tend to be incredibly comfortable for wearing with headwraps or crown accessories, since the knots are positioned where they work in harmony with those additions rather than creating bulk. The visual effect is regal and intentional, which is why this version is so popular for special occasions and statement-making styles.
Creating the High-Crown Effect
- Start your sections at the very crown of your head, positioning them to emphasize height and create upward movement
- Make your crown sections slightly larger than you would for a traditional bantu knot, since they’re the focal point
- Create your twists or braids with confidence, working upward and outward from the crown
- Position knots at varying heights, with the tallest knots clustered around the actual crown area
- Leave smaller sections lower on your head (at your ears and neck) with smaller knots, creating a graduated effect
- The overall silhouette should be widest and tallest at the crown, tapering slightly as you move down
Worth knowing: High-crowned knots are particularly striking on people with fuller hair density and longer length, where the extra volume creates real presence. If you have finer hair, you can still do high crowns by stacking them or using larger sections to create the illusion of height.
Final Thoughts
Bantu knots are so much more than just a protective style—they’re a way to honor a cultural tradition, to give your coils a break from daily manipulation, and to create beautiful texture that lasts for days or even weeks. The eight versions we’ve covered each bring something different to the table, whether you’re looking for maximum security with classic spirals, maximum drama with stacked knots, or maximum creativity with colorful or Fulani-inspired designs.
The best approach is to try different versions and pay attention to what actually works with your specific hair type, texture, thickness, and lifestyle. Maybe you discover that flat-twisted knots hold better for you than rope twists. Maybe your hair loves the aesthetic of side-swept placement but hates the installation time of stacked knots. Maybe you realize that the curl pattern you get from double-twisted versions is exactly what you’ve been searching for.
Remember that protective styling is personal—what works beautifully for someone else’s coils might not be ideal for yours, and that’s not a limitation, it’s just information. The more versions you try, the more you’ll understand exactly how to customize bantu knots to serve your hair’s needs and match your personal style. Every time you do them, you’re getting better at the installation process, learning what your hair responds to, and adding another tool to your styling repertoire. That’s the real power of exploring different approaches to this classic, culturally significant style.