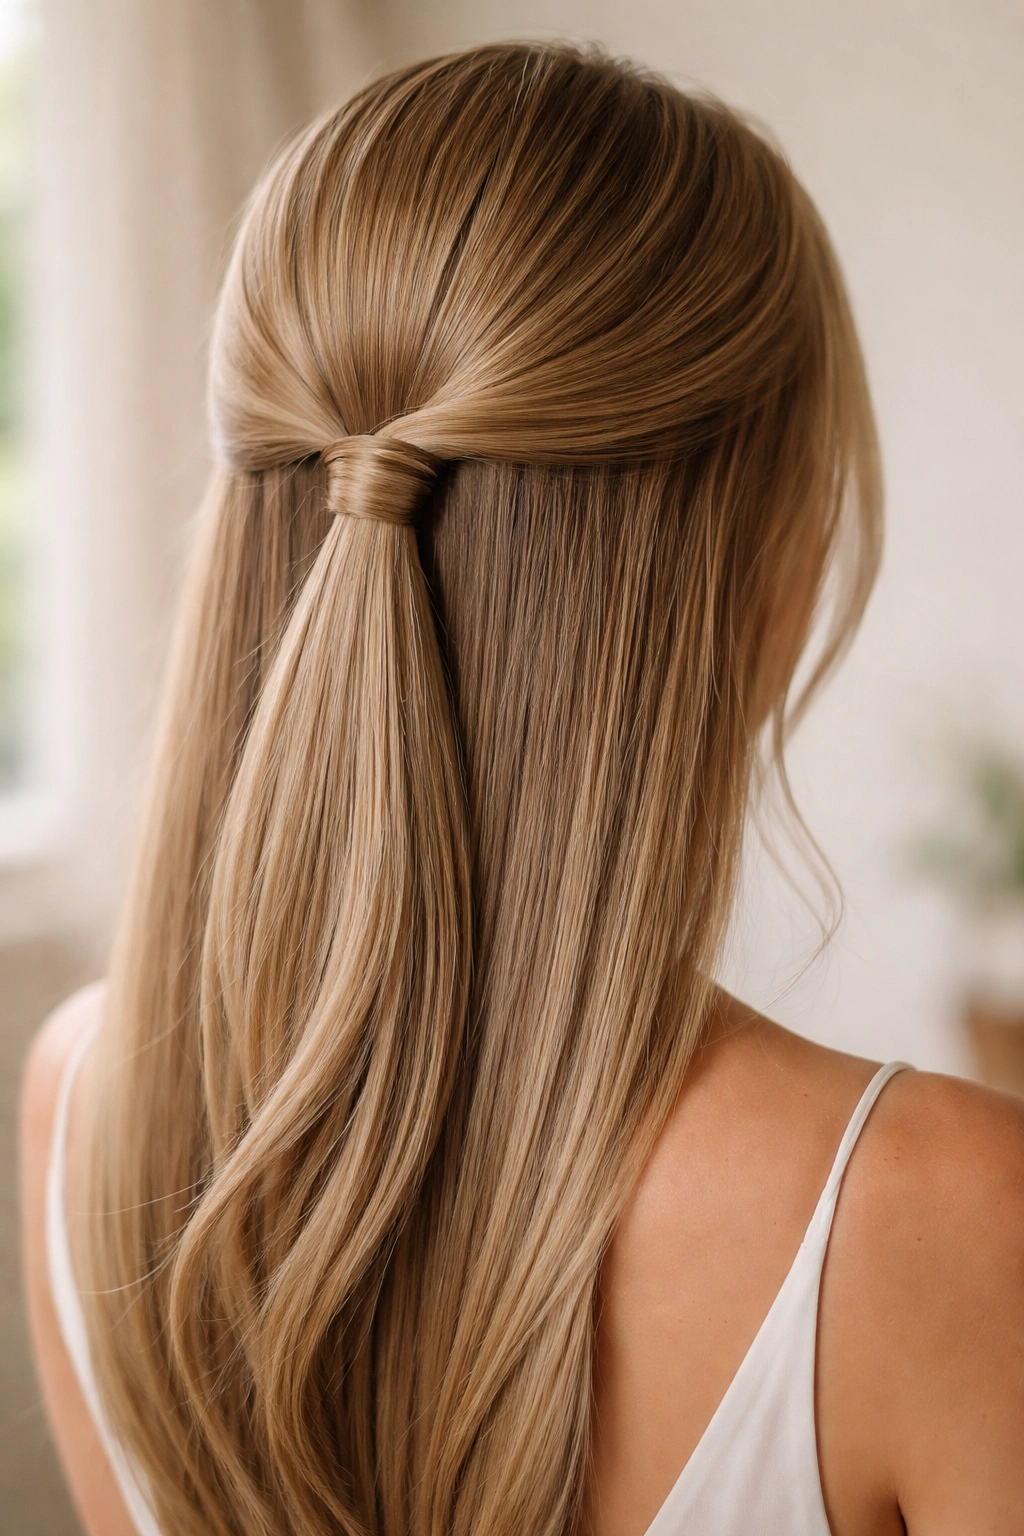
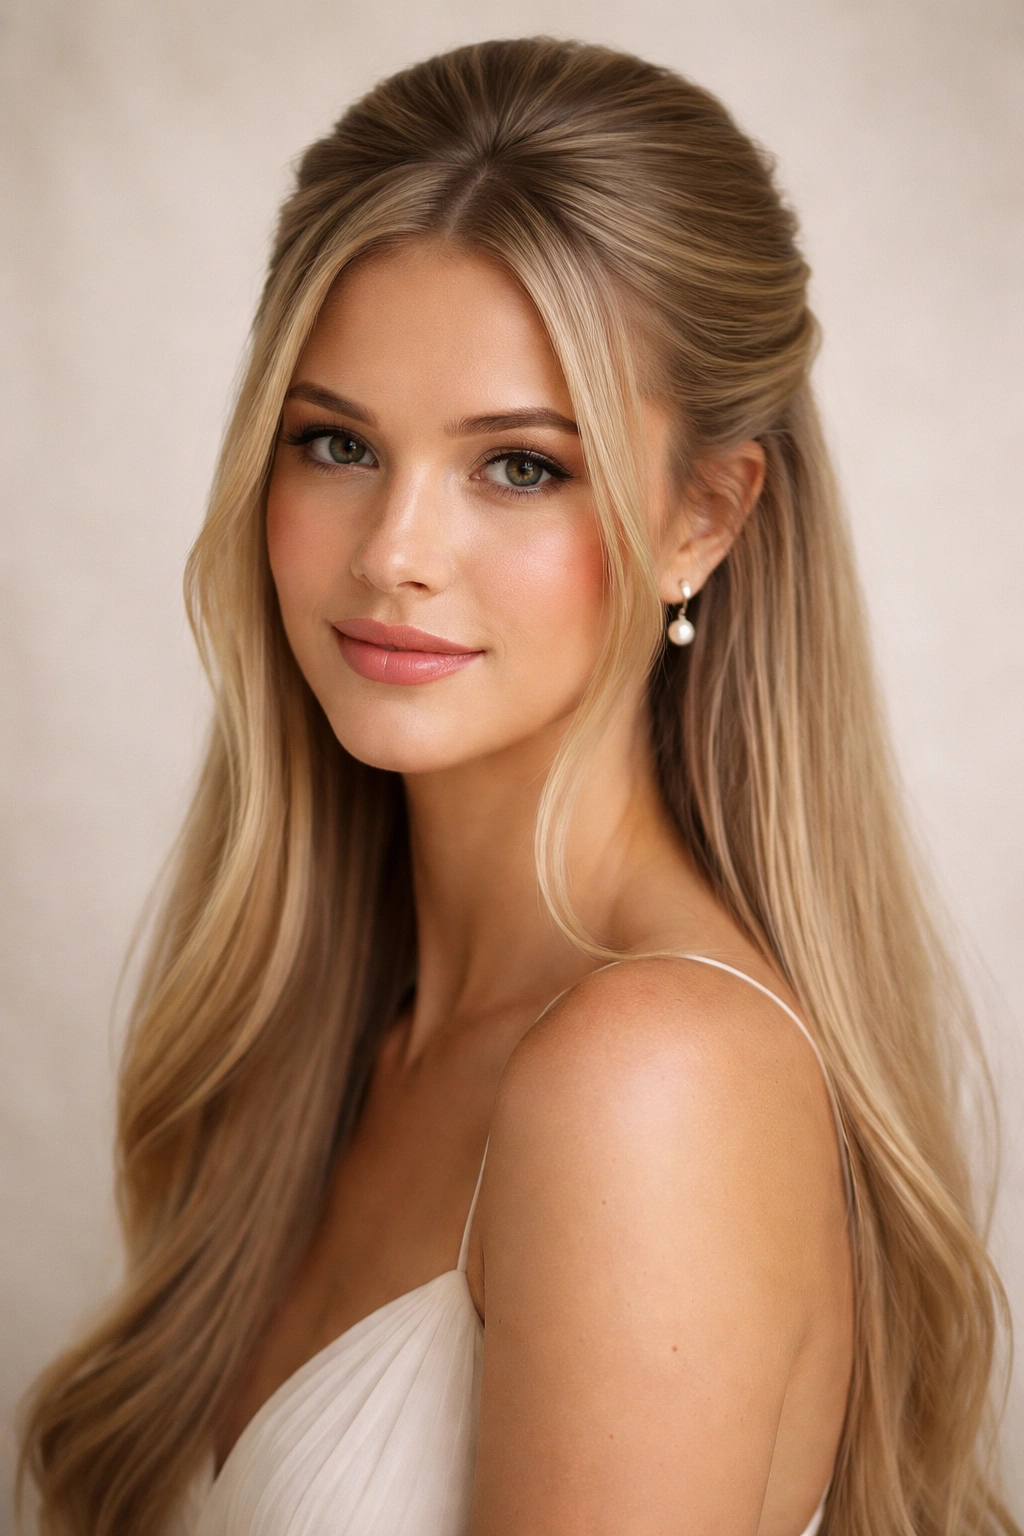
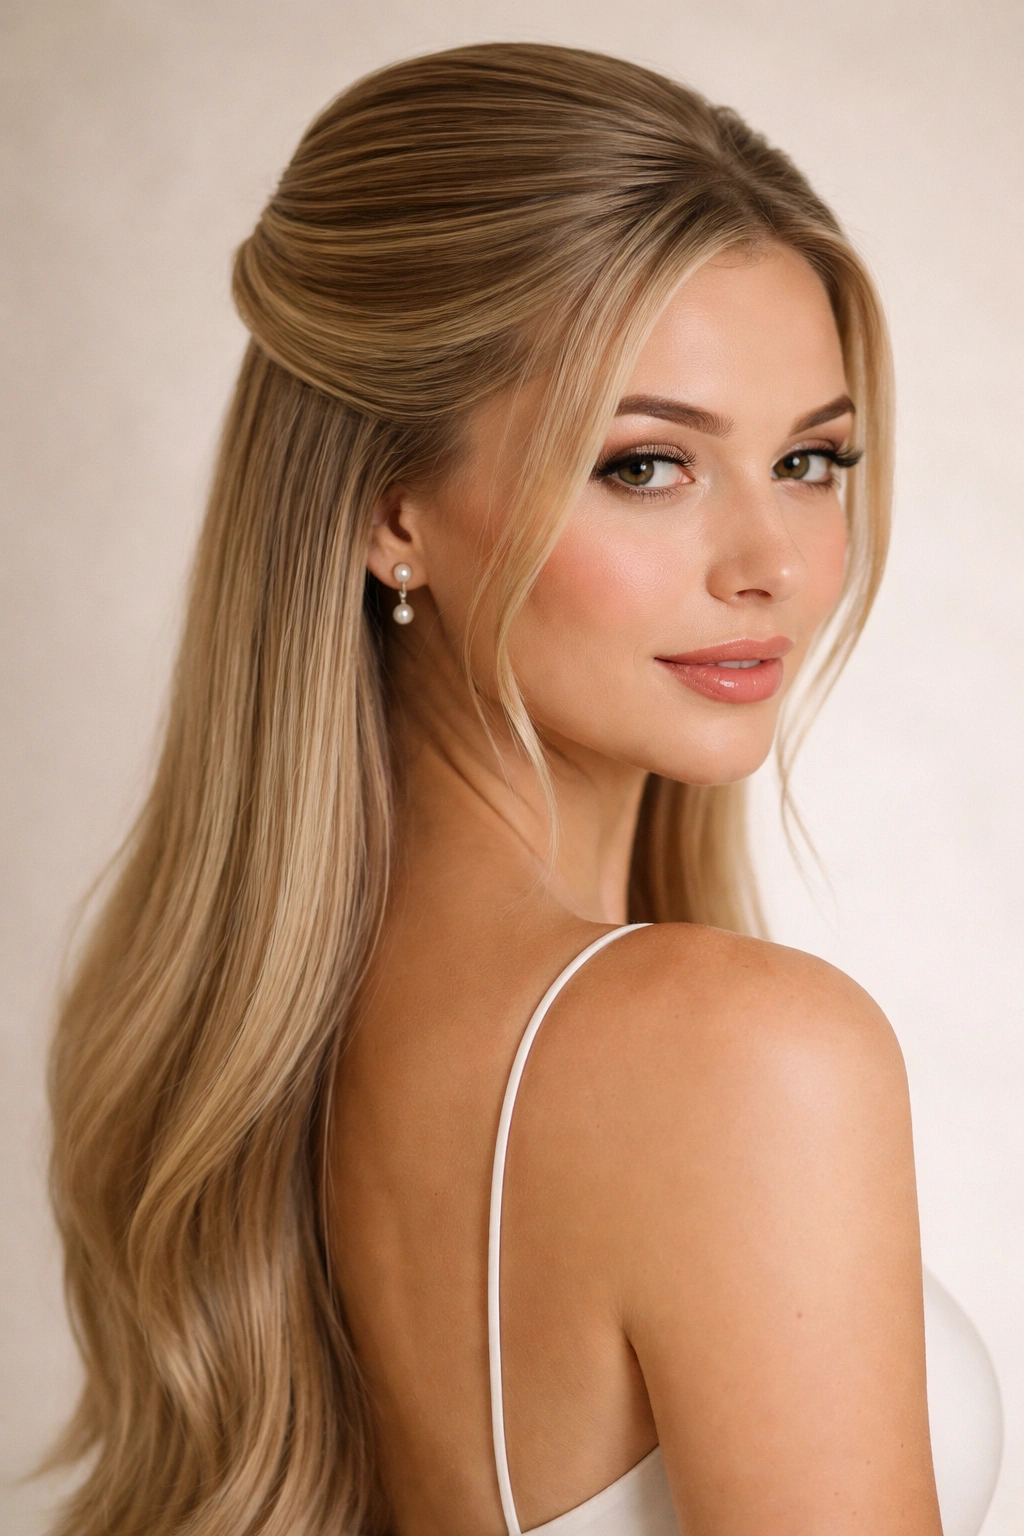
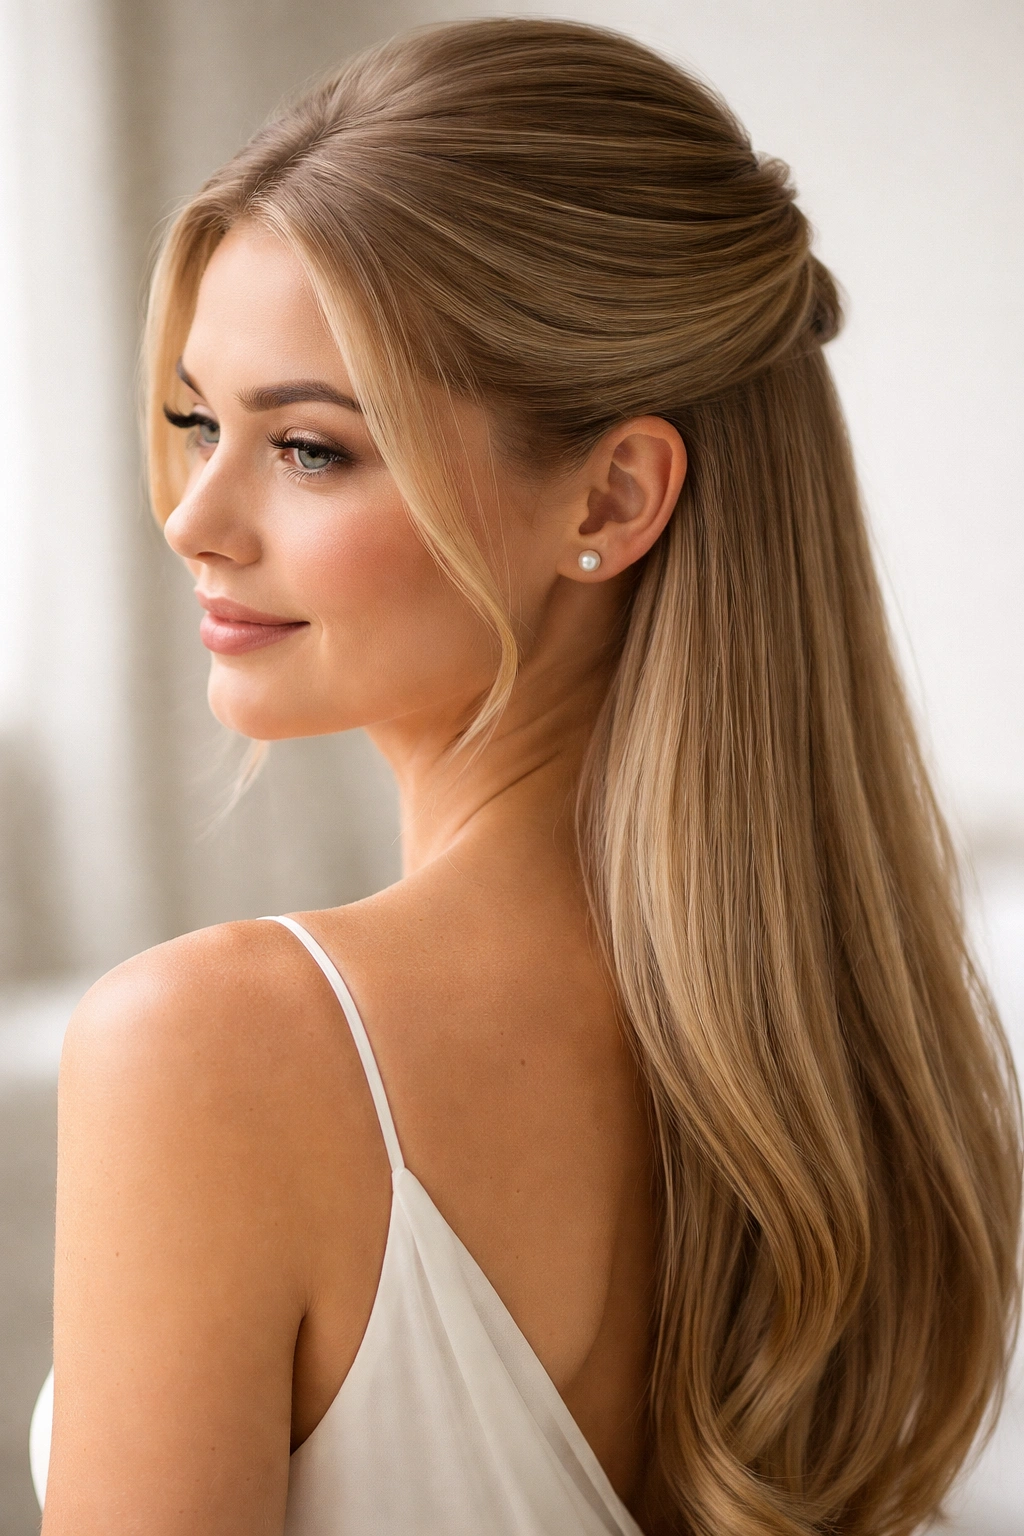
The half up half down style has become a bridesmaid staple for good reason—it’s elegant, romantic, and strikes the perfect balance between polished and wearable. If you have straight hair, you’re starting with a significant advantage: this texture holds definition beautifully without excessive frizz, and the clean lines of straight locks make half up half down styles look especially refined and intentional. Whether you’re looking for something softly romantic, dramatically dramatic, or effortlessly modern, straight hair gives you the canvas to create a bridesmaid look that feels both timeless and perfectly on-trend.
The versatility of half up half down styling is what makes it so universally flattering for weddings. You get the elegance of an updone style with the softness and movement of hair down—the best of both worlds. For straight-haired bridesmaids, this means you can embrace your hair’s natural sleekness in the lower section while creating stunning texture and dimension in the upper portion. The style works across different wedding aesthetics, from classic and formal to bohemian and relaxed, and it photographs beautifully from every angle.
What makes these styles particularly appealing for bridesmaids is their staying power. Wedding days are long, with photos, ceremonies, receptions, and dancing—your hair needs to hold up without looking tired or falling flat. The techniques and variations in this guide are designed to create looks that maintain their polish from the first “I do” through the last dance, all while complementing the bride without competing with her.
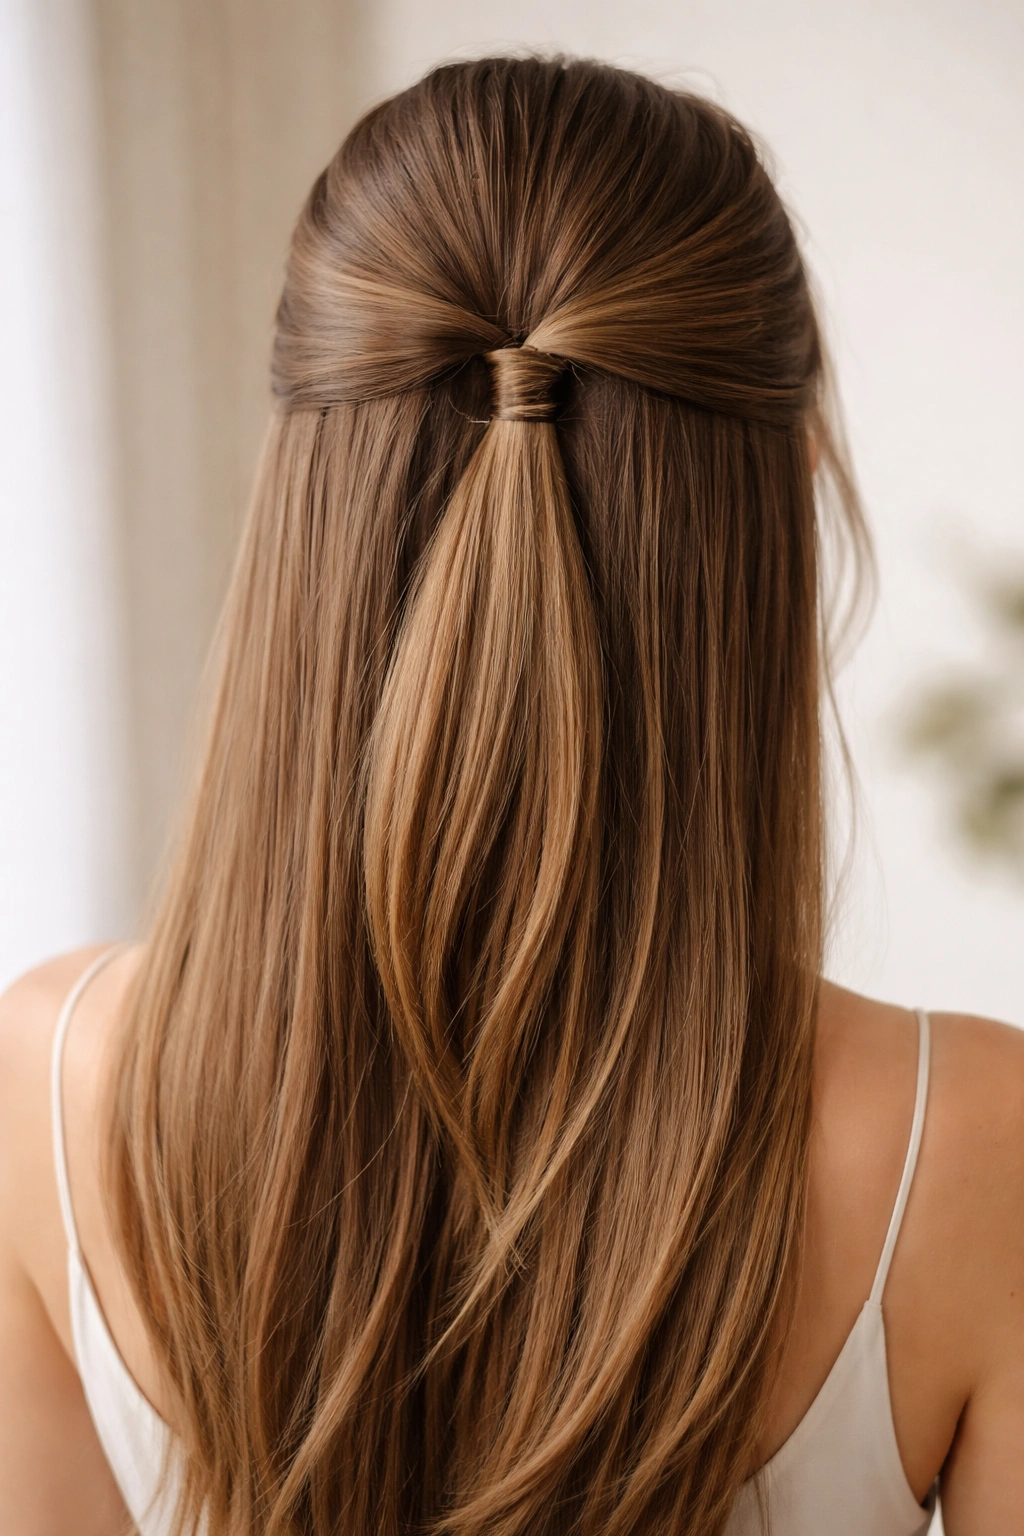
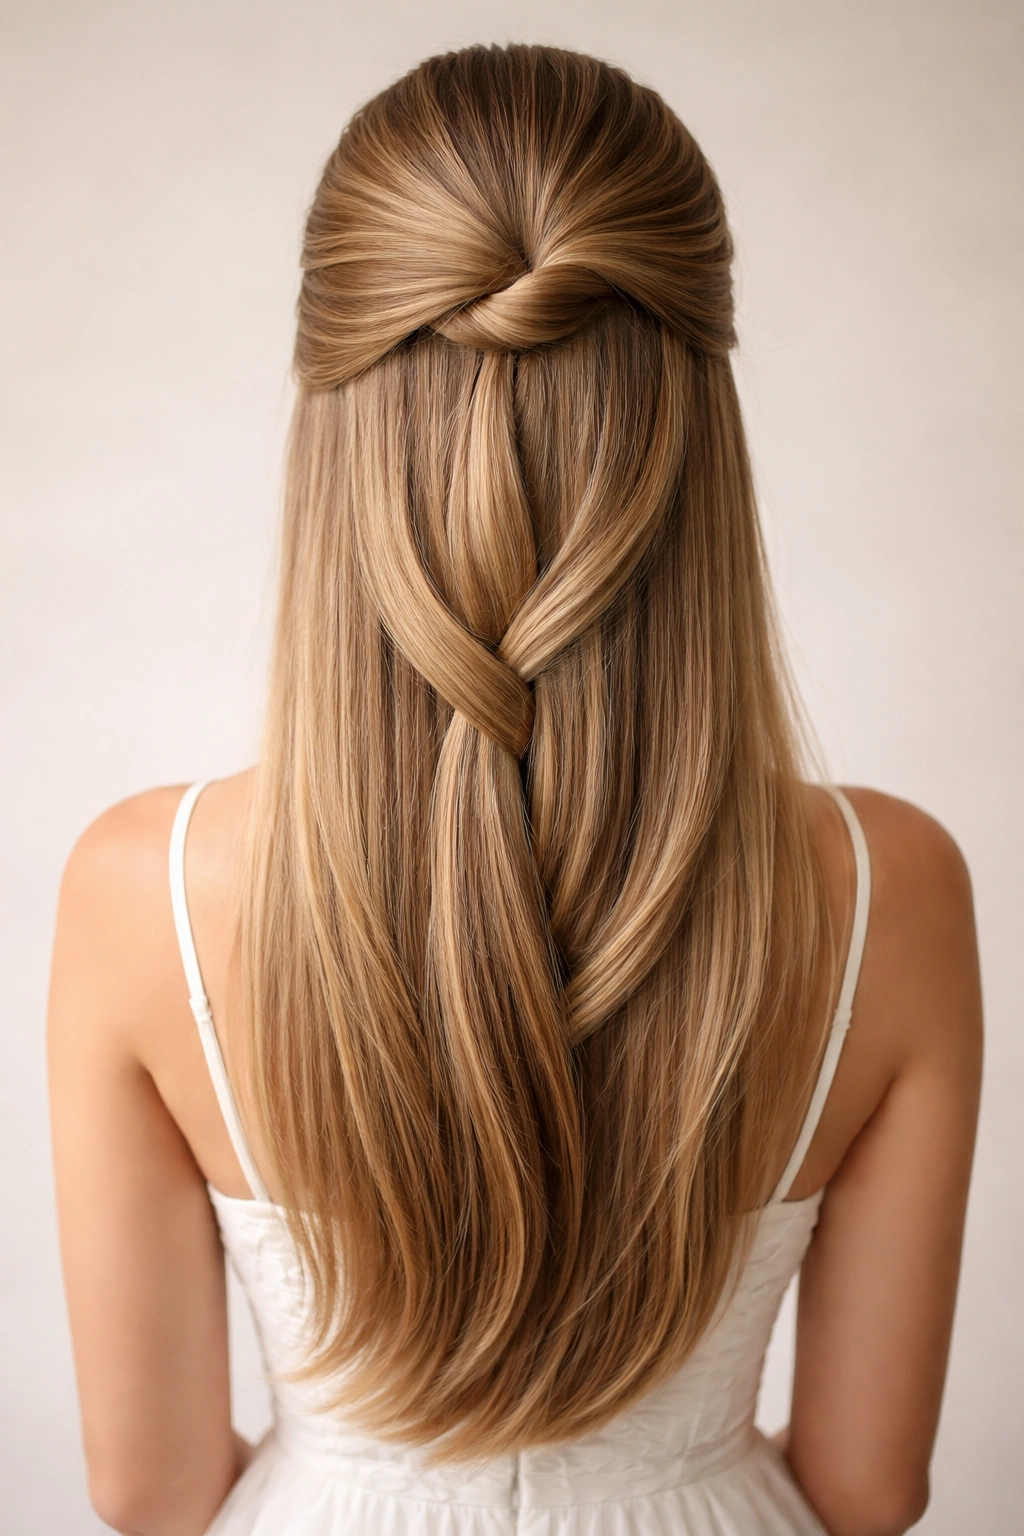
1. The Classic Twisted Crown
This timeless style pulls sections from both sides of the head and twists them back to meet at the crown, creating an elegant frame for the face. The twisted sections sit on top while the straight lengths flow freely, giving you a look that’s both refined and romantic. It’s the kind of hairstyle that photographs beautifully and works equally well with modern or traditional wedding aesthetics.
Why It Works for Straight Hair
Straight hair naturally shows off the smooth spiral of a twist, and the sleek texture makes each twisted section look intentional rather than accidental. The twists catch light beautifully and create definition without needing curls or waves, letting your hair’s natural shine become part of the design. This style relies on the hair’s natural smoothness to create visual interest through structure rather than texture, which plays to straight hair’s strengths.
How to Create the Look
Start by taking a 2-inch section from just above the right ear and twist it gently while moving toward the back of the head, securing it temporarily with a bobby pin. Repeat on the left side, twisting the same thickness of hair in the same direction. Bring both twisted sections to meet at the crown and secure them together with bobby pins and a small elastic hidden beneath the twists. Use a fine-tooth comb to smooth any flyaways and apply a light-hold hairspray to keep the twist structure visible throughout the day. The key is keeping your twists relatively tight so they hold their shape but not so tight that they look harsh or distort your natural hair texture.
- Secure with an elastic beneath the twists so the join isn’t visible from the front
- Use 1-1.5 inch bobby pins for better grip on straight hair, which can slip more easily than textured strands
- Finish with a light hairspray rather than heavy product—straight hair shows product buildup quickly
- Practice the twist direction beforehand so both sides mirror each other perfectly
2. The Romantic Braided Half-Up
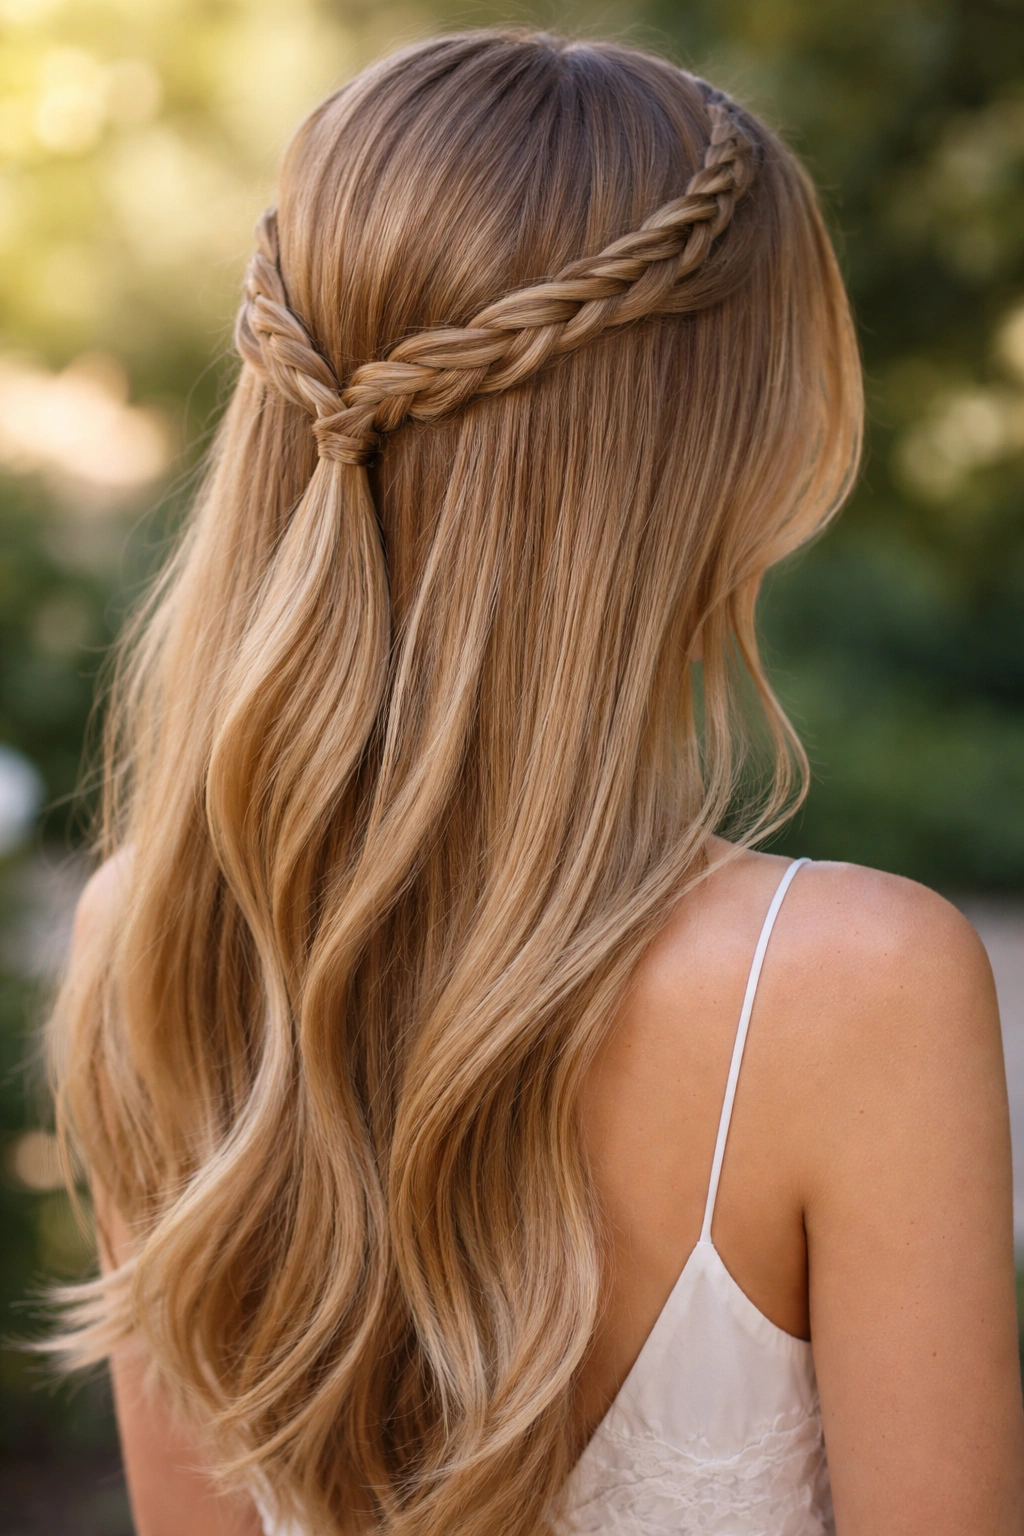
A single or double braid running from the front sections backward creates a focal point that feels both elegant and effortless. Straight hair shows off braid definition beautifully, with each strand clearly visible and contributing to the overall texture. This style works particularly well for outdoor or garden weddings where a slightly soft, romantic vibe feels appropriate.
Why It Works for Straight Hair
The crisp lines of a braid look especially clean on straight hair, where you can see each woven section distinctly. Without natural waves or curls that might blur the braid’s definition, your straight locks allow the braid structure to become a key design element rather than just a practical styling tool. The braid can hold its shape all day without additional texturizing or curling products.
How to Create the Look
Begin at the temple on one side and French braid toward the back of the head, incorporating hair as you move backward. Once you reach the crown, continue with a regular three-strand braid or stop and secure it at that point, letting the rest of your hair fall freely. For a softer appearance, gently pull on the outer edges of the braid to loosen it slightly—this technique, called “pancaking,” adds dimension without disturbing the braid’s integrity. Secure with bobby pins hidden beneath the braid and finish with hairspray. If you want more texture, try a loose Dutch braid (where you braid the sections underneath instead of over) for a slightly different visual effect.
- Pull gently on braid edges to create a softer, more romantic silhouette
- Use 0.5-inch bobby pins to secure the braid end completely—straight hair can slip from larger pins
- Keep the braid slightly loose rather than tight, which can look harsh against straight hair
- Consider a second braid on the opposite side for balance if your straight hair is very thick
3. The Sleek Ponytail at the Crown
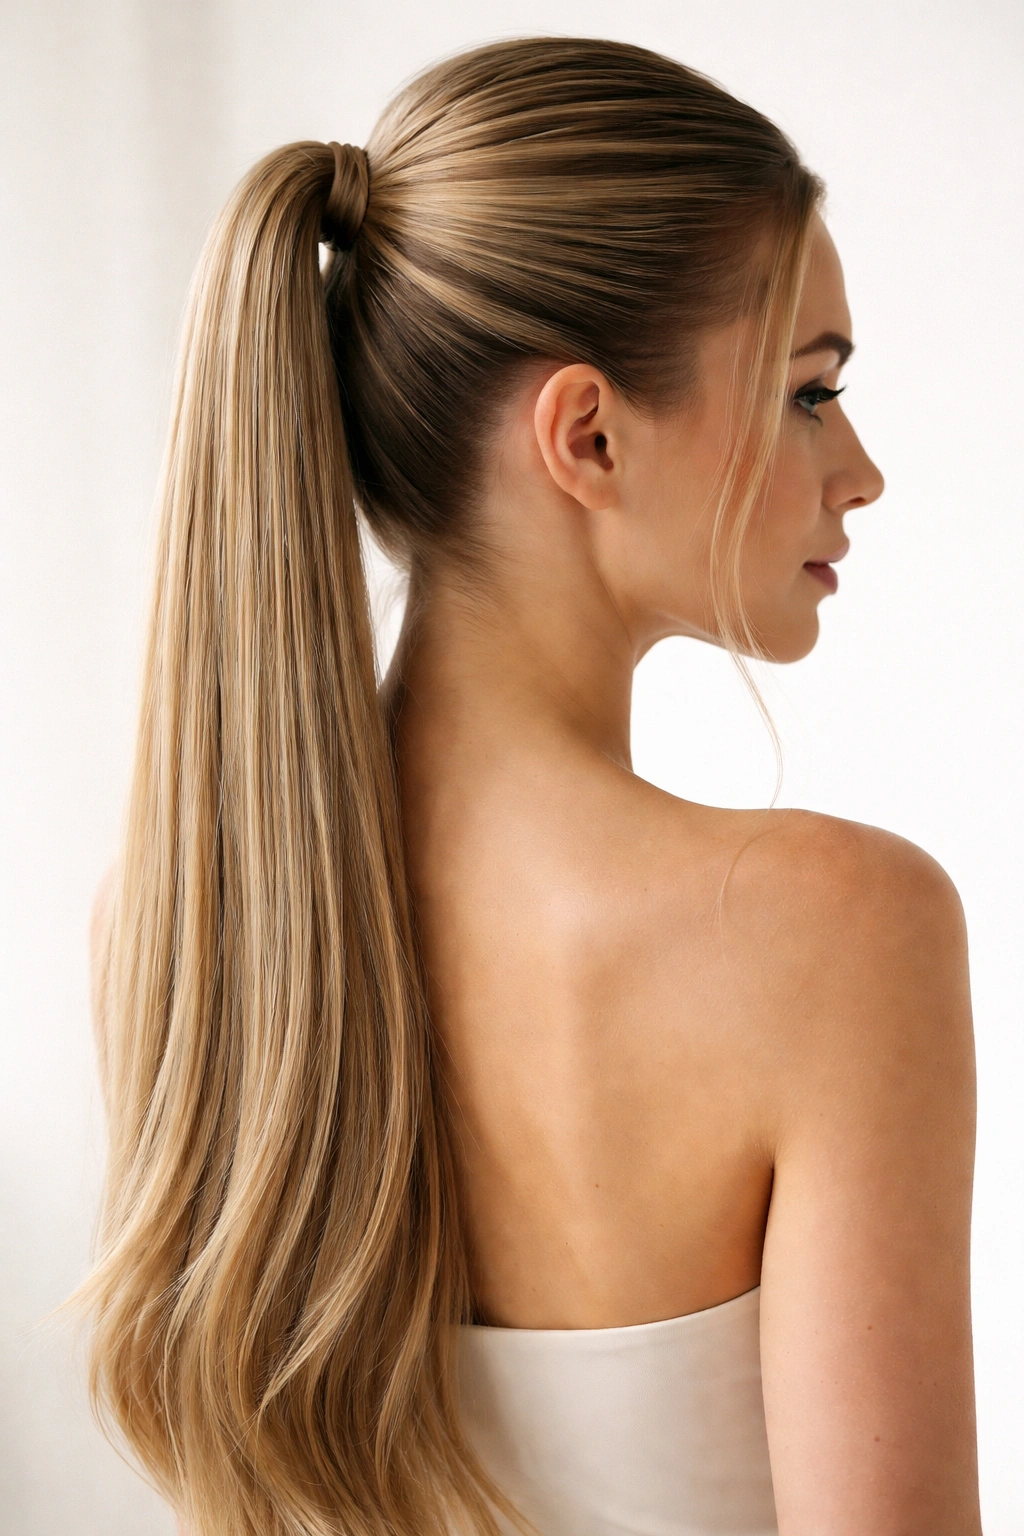
Gather the top half of your hair into a sleek, smooth ponytail positioned at the crown, then smooth down any bumps or texture with gel. The lower half flows freely while the upper section stays taut and polished. This modern-looking style works beautifully for contemporary weddings and looks particularly sharp on straight hair because of the clean, smooth finish you can achieve.
Why It Works for Straight Hair
Straight hair naturally lies smoothly against the scalp, making the slicked-back look achievable without hours of blow-drying or smoothing treatments. The contrast between the smooth, gathered section and the loose length below creates visual interest and dimension. This style emphasizes facial features while the straight lengths frame the shoulders elegantly.
How to Create the Look
Start with smooth hair—blow dry it straight if needed and apply a lightweight smoothing serum beforehand. Using a fine-tooth comb or a wet brush, gather the top section of hair at the crown, smoothing every hair down as you move the brush back. Secure with a small elastic, then use a tiny amount of gel on a comb to smooth any flyaways down and around the elastic. The key to this look is patience during the smoothing phase—small bumps and stray hairs show instantly on straight hair, so take time to get it flawlessly smooth. Once secured, you can make the ponytail slightly fuller by backcomb the base gently before smoothing over the top layer.
- Use a gel-type product rather than spray for controlling flyaways on the first section
- Blow-dry hair completely straight before beginning to make smoothing easier
- Create a “bump” at the base of the ponytail for dimension—backcomb under the top smoothed layer
- Tie the elastic around a small strand of hair wrapped around itself for an elegant, hidden elastic finish
4. The Wrapped and Pinned Style
This style pulls the top section back smoothly and wraps a delicate strand of hair around the base of the gathered section, creating a polished, finished look with no visible elastic. The wrapped detail adds an element of sophistication that feels especially appropriate for formal weddings. Straight hair shows off this wrapped detail beautifully because the strand remains smooth and shiny throughout the day.
Why It Works for Straight Hair
The smooth texture of straight hair means the wrapping strand lies perfectly against the base without bumps or texture interruptions. This creates a seamless, high-end appearance that looks intentional and polished. The detail is subtle but noticeable on straight hair, where light reflects off the smooth surface and highlights the elegant finishing touch.
How to Create the Look
Gather the top section of hair into a ponytail at the crown and secure with a small elastic. Take a very thin, 0.25-inch strand of hair from underneath the ponytail base and wrap it around the elastic multiple times, completely covering it. Secure the end of the wrapped strand with bobby pins hidden beneath the wrap, then smooth and spray. The wrapped strand should feel like a decorative detail rather than a functional element, so make it delicate and refined. For extra elegance, you can use a strand of coordinating ribbon or even a small hair accessory (like a decorative wire or thin chain) instead of hair, though a hair wrap looks most natural.
- Take the wrapping strand from underneath so it’s less visible when you’re gathering the top section
- Keep the wrapped strand smooth and tight around the base for a polished appearance
- Hide all bobby pins completely by securing them under the wrap and smoothing hair over them
- Use hairspray generously around the wrapped section to keep the thin strand in place
5. The Low Half-Up with Face-Framing Pieces
This softer version keeps most of your length loose while pulling back just a small section from the crown area, leaving delicate pieces loose around the face. It’s less structured than other half-up styles but still achieves the elegance of a partial updo. This style works beautifully for bridesmaids who want to keep their hair feeling soft and wearable throughout the wedding day.
Why It Works for Straight Hair
On straight hair, the face-framing pieces create an elegant contrast—the pulled-back section shows off your hair’s smooth texture while the loose pieces frame features softly. Straight hair holds this piece placement beautifully all day without the loose strands getting absorbed into waves or curls. The overall effect is effortlessly elegant rather than overly styled.
How to Create the Look
Take a section of hair from one temple and loosely twist it back toward the crown, securing it with a bobby pin. Repeat on the opposite side, then gently pull on these back sections to loosen them slightly. Leave 2-3 inch pieces of hair loose on each side of the face for framing. The key to this style is keeping it soft and relaxed—you’re not going for a tight, structured look but rather an intentionally placed arrangement of loose hair. Use a light hairspray so the style stays in place without looking stiff. The beauty of this on straight hair is that the pieces stay exactly where you place them rather than shifting or getting lost in curls.
- Leave face-framing pieces intentionally loose to soften the overall look
- Gently pull the secured sections to create a relaxed rather than tight appearance
- Secure with bobby pins that match your hair color for a more invisible finish
- Use minimal product so the style maintains its soft, natural feel
- Curl the face-framing pieces lightly with a small-barrel curling iron for added dimension if desired
6. The Double-Secured Half-Up with Hidden Elastics
This technique uses two elastics placed one above the other to create a thicker, more secure base for your half-up section. The second elastic is placed about an inch below the first, and bobby pins are used to hide the space between them. This creates a fuller, more dimensional look than a single elastic while maintaining the polished bridesmaid aesthetic.
Why It Works for Straight Hair
Straight hair can slip out of standard elastics because it doesn’t have the grip that natural texture provides. Using two elastics creates redundancy and security—if one shifts, the other holds the section in place. The method also allows you to create more fullness and dimension at the crown without adding bulky barrettes or clips. Visually, the slight thickness created by the double-elastic technique adds sophistication to straight hair’s naturally sleek appearance.
How to Create the Look
Gather your top section loosely and secure it with a small elastic at the crown. Immediately below this, secure the same gathered section with another elastic, positioning it about 1-1.5 inches lower. Use bobby pins to connect these two elastics, hiding the pins under the gathered section itself. The gathered area between the two elastics can be very gently pulled apart and smoothed to create a fuller, more finished look. This style particularly suits straight hair because the smooth texture shows off the polished construction without any frizz or texture disrupting the lines.
- Place the second elastic while the first is still loose to keep the tension even
- Use bobby pins vertically between the elastics to create seamless connection
- Tease gently between the elastics to create volume without disturbing the smooth texture
- Secure both elastics tightly to prevent slipping throughout the wedding day
- Use clear or hair-color-matched elastics so any visibility is minimal
7. The Sleek Side Sweep with Clips
Rather than centering your half-up section, sweep it to one side and secure it low with decorative clips or barrettes. This asymmetrical approach feels modern and sophisticated, perfect for contemporary wedding aesthetics. Straight hair’s smooth texture makes this side-swept arrangement look intentionally elegant rather than accidentally askew.
Why It Works for Straight Hair
The asymmetrical placement creates visual interest without relying on texture or waves for dimension. On straight hair, a side-swept style looks deliberate and polished because the sleek lines emphasize the intentional placement. The smooth hair flowing down the opposite side creates beautiful balance and frames the face from one side while showing the opposite side of the neck.
How to Create the Look
Gather the top section of hair and sweep it to one side—typically about two-thirds of the way across your head rather than directly over one ear. Secure it with decorative bobby pins or clip-style barrettes positioned at an angle to follow your hair’s natural fall. For a more dramatic sweep, use a larger decorative clip that can serve as both functional and ornamental. The loose section should drape naturally down the opposite side. Use a light hairspray to keep the swept section smooth and in place. The beauty of this style on straight hair is that the smooth length shows off the sweep’s elegant angle without any texture interrupting the line.
- Choose decorative clips with slight width to balance the hair’s visual weight
- Position the clip at an angle rather than perpendicular to follow the sweep naturally
- Keep the swept section smooth with a fine-tooth comb before securing
- Use 2-3 clips rather than one large barrette for better security and a more intentional look
- Leave the opposite side completely loose for maximum impact of the asymmetry
8. The Dutch Braided Crown
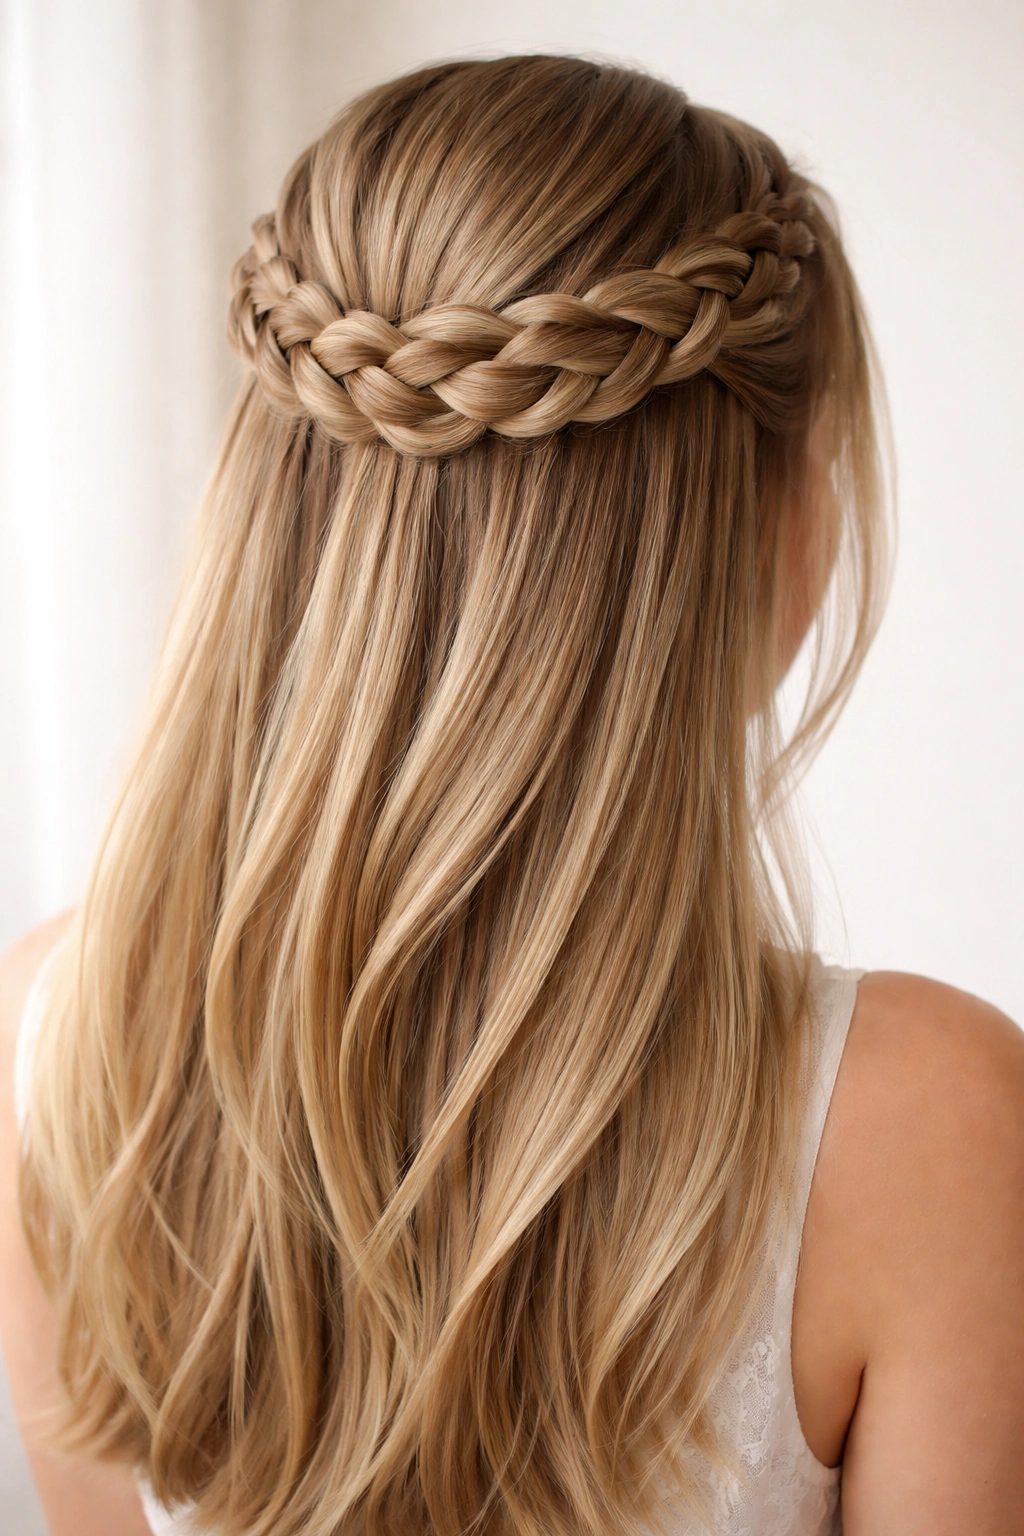
Create a Dutch braid (where you braid under rather than over) that runs around the back of the head like a crown, gathering the top section while leaving the lower length free. This style combines the elegance of a braid with the softness of a half-up look. Straight hair’s defined appearance makes each braid section crystal-clear and beautifully visible.
Why It Works for Straight Hair
The Dutch braid is automatically more textured and three-dimensional than a standard braid, which helps offset straight hair’s natural sleekness. On straight hair, the braid is ultra-defined—you can see every section distinctly, making it an excellent choice if you want texture to be part of your style without adding curls or waves. The inverted nature of the braid also creates subtle shadow and light play that’s especially visible on smooth, shiny hair.
How to Create the Look
Start at one temple and create a Dutch braid by crossing strands underneath each other rather than over. As you move toward the back of the head, incorporate loose hair into the braid from above. Once you reach the opposite temple, you can either continue the braid down that side or end it and secure with bobby pins. Gently pancake (pull on the edges of) the braid to loosen it and make it look more relaxed. The lower section of hair flows freely below where the braid ends. Use light hairspray to keep the braid structure visible without making it look stiff. This style requires more skill than simple twists but creates a genuinely impressive result.
- Practice the Dutch braid motion beforehand until it feels natural and even
- Keep the braid slightly loose during execution so it’s easier to pancake later
- Pancake deliberately by pulling on alternating sides to create even, romantic texture
- Incorporate hair gradually as you move backward to keep the braid thickness consistent
- Secure the braid end with small bobby pins hidden underneath the final twist
9. The Polished Low Bun with Free Lower Section
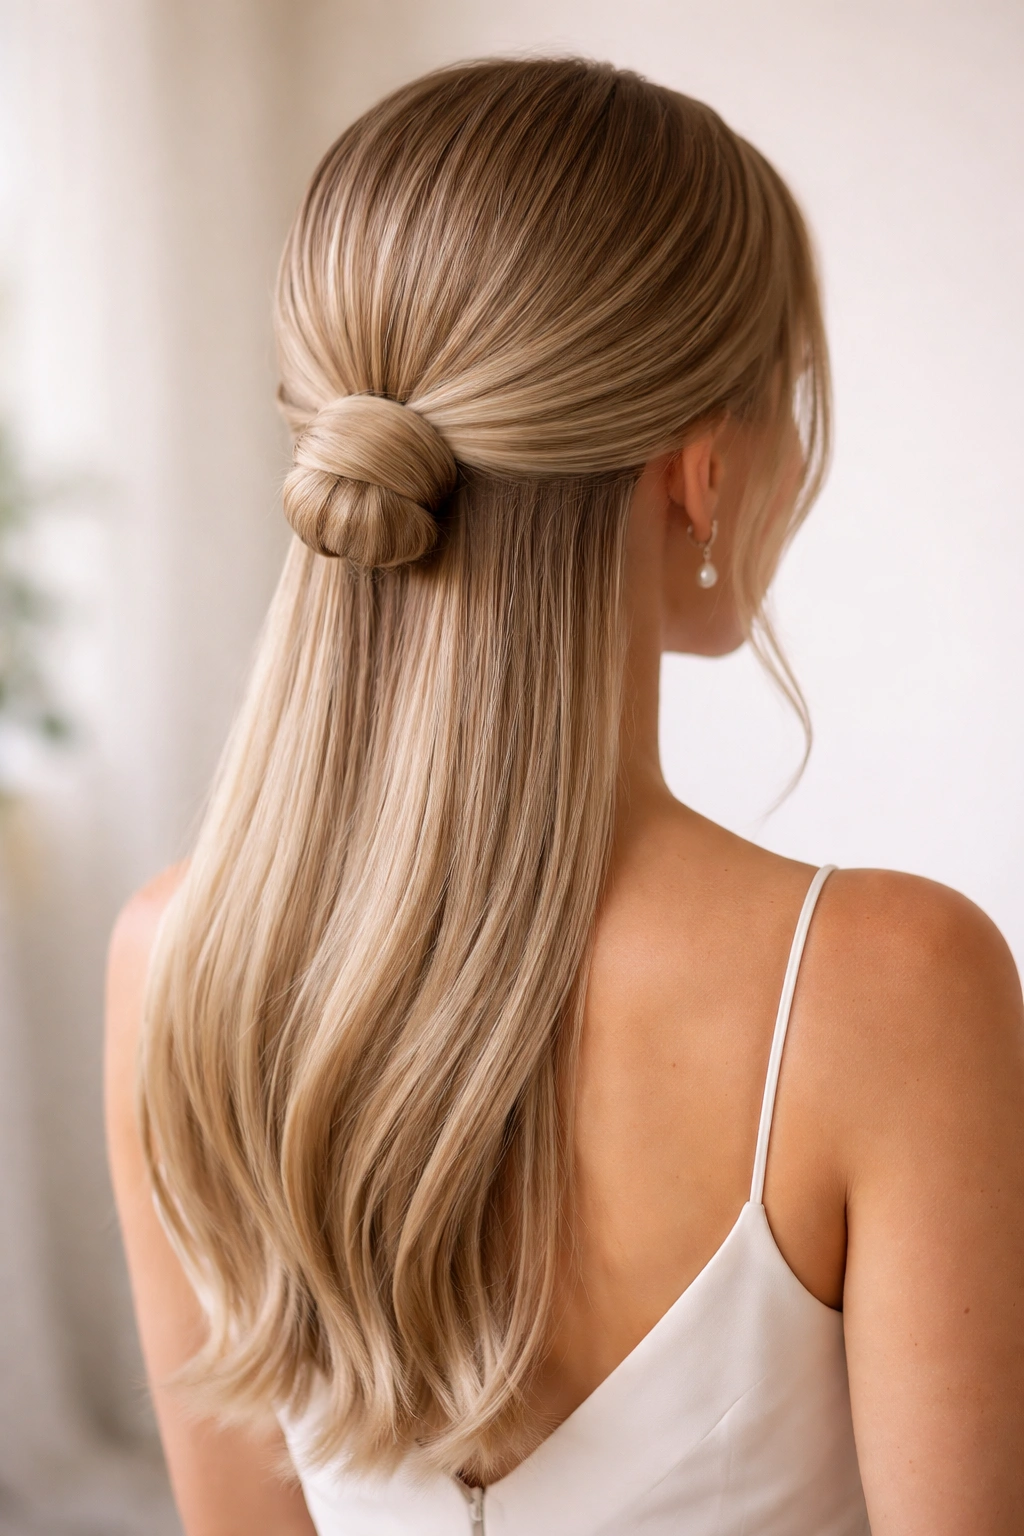
Create a small, tight bun at the nape of the neck using only the top section of your hair, then smooth down any bumps and finish with a light hairspray. The remaining length falls freely, creating a half-up effect that feels more formal than other variations. This style works beautifully for formal, traditional weddings where polished elegance is the goal.
Why It Works for Straight Hair
Straight hair creates an extremely sleek, refined bun with no frizz or stray texture interrupting the smooth lines. The contrast between the formal, structured bun and the loose, free-flowing lower section is especially striking on straight hair. The polished appearance of the bun paired with the movement of the loose length creates a sophisticated, high-end look.
How to Create the Look
Gather the top section of hair into a ponytail at the crown and twist it tightly, then wrap the twisted strand around itself to create a small, compact bun. Secure with bobby pins, then use a fine-tooth comb and smoothing serum to create a flawless, sleek finish with no flyaways visible. The bun should feel tight and polished, not soft or romantic. The lower section is left completely smooth and straight, creating strong visual separation between the formal upper section and the soft lower section. Use a light-hold hairspray to keep the bun in place without making it shiny or stiff-looking. The contrast between the tight bun and the flowing length is what makes this style so striking.
- Make the bun as small and tight as possible for maximum polish
- Smooth the bun surface completely with gel before hairspraying
- Use bobby pins in a starburst pattern from the center outward for maximum security
- Keep the lower section completely straight with a flat iron if needed
- Consider a decorative hair pin or comb for an elegant finishing touch
10. The Ribbon-Woven Half-Up
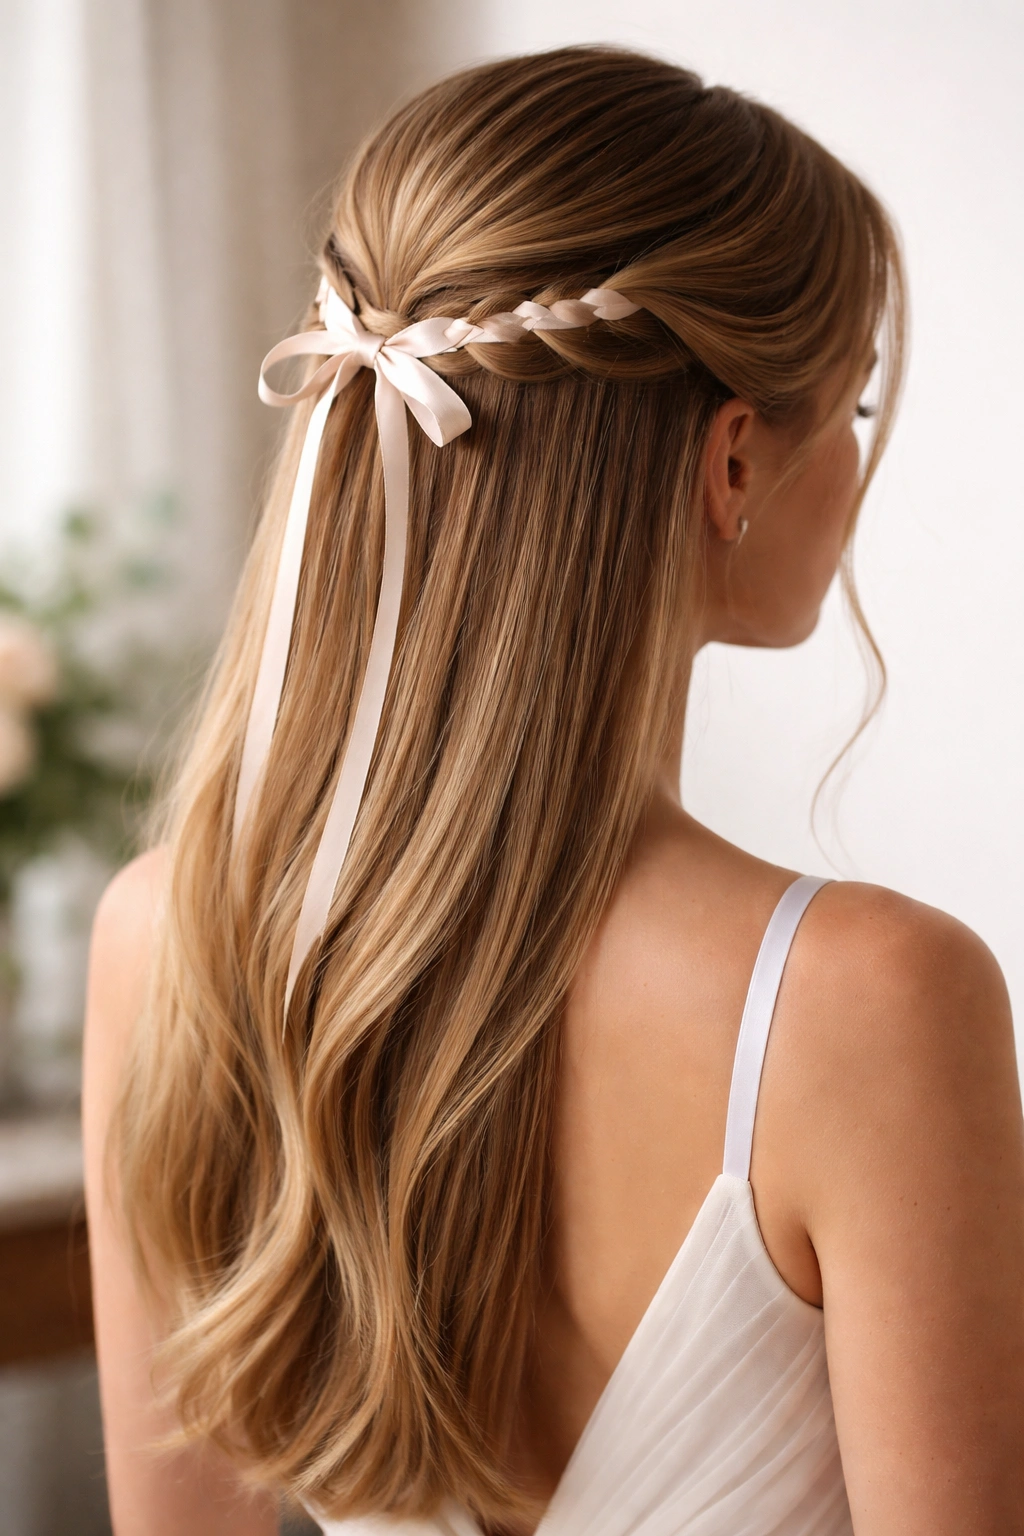
Thread a delicate ribbon through the top section of your hair, either by weaving it through a braid or securing it with bobby pins beneath a smooth gathered section. The ribbon adds color, texture, and visual interest while maintaining the elegance of a half-up style. This approach works beautifully on straight hair because the ribbon’s placement and drape are clearly visible and intentional.
Why It Works for Straight Hair
A ribbon creates dimension and visual interest on smooth hair without requiring you to add texture through curling or waving. The ribbon’s color and sheen provide a focal point that draws the eye, which is particularly effective on straight hair’s neutral canvas. You can choose ribbon colors to coordinate with your bridesmaid dress or the wedding’s color palette, adding a personalized touch that feels intentional and well-designed.
How to Create the Look
Gather the top section of your hair and secure it loosely with a small elastic. Thread a thin ribbon through the gathered section by weaving it in and out of your hair strands, or by looping it around bobby pins placed strategically throughout the gathered section. The ribbon can run straight through the middle, zigzag gently, or weave delicately throughout the section. Secure the ribbon ends with bobby pins and hairspray. The ribbon should be visible and intentional, not hidden or accidentally tucked away. The smooth texture of straight hair means the ribbon sits perfectly without snagging or getting lost in texture. Consider using 0.5 to 1-inch-wide ribbon for the most elegant effect.
- Choose ribbon that coordinates with your dress or the wedding’s color scheme
- Use ribbon with a slight sheen rather than matte, which shows up better against straight hair
- Weave the ribbon through bobby pins for secure placement without disrupting your hair structure
- Keep ribbon tails visible and intentional as part of the overall design
- Practice the ribbon placement beforehand to ensure even, balanced appearance
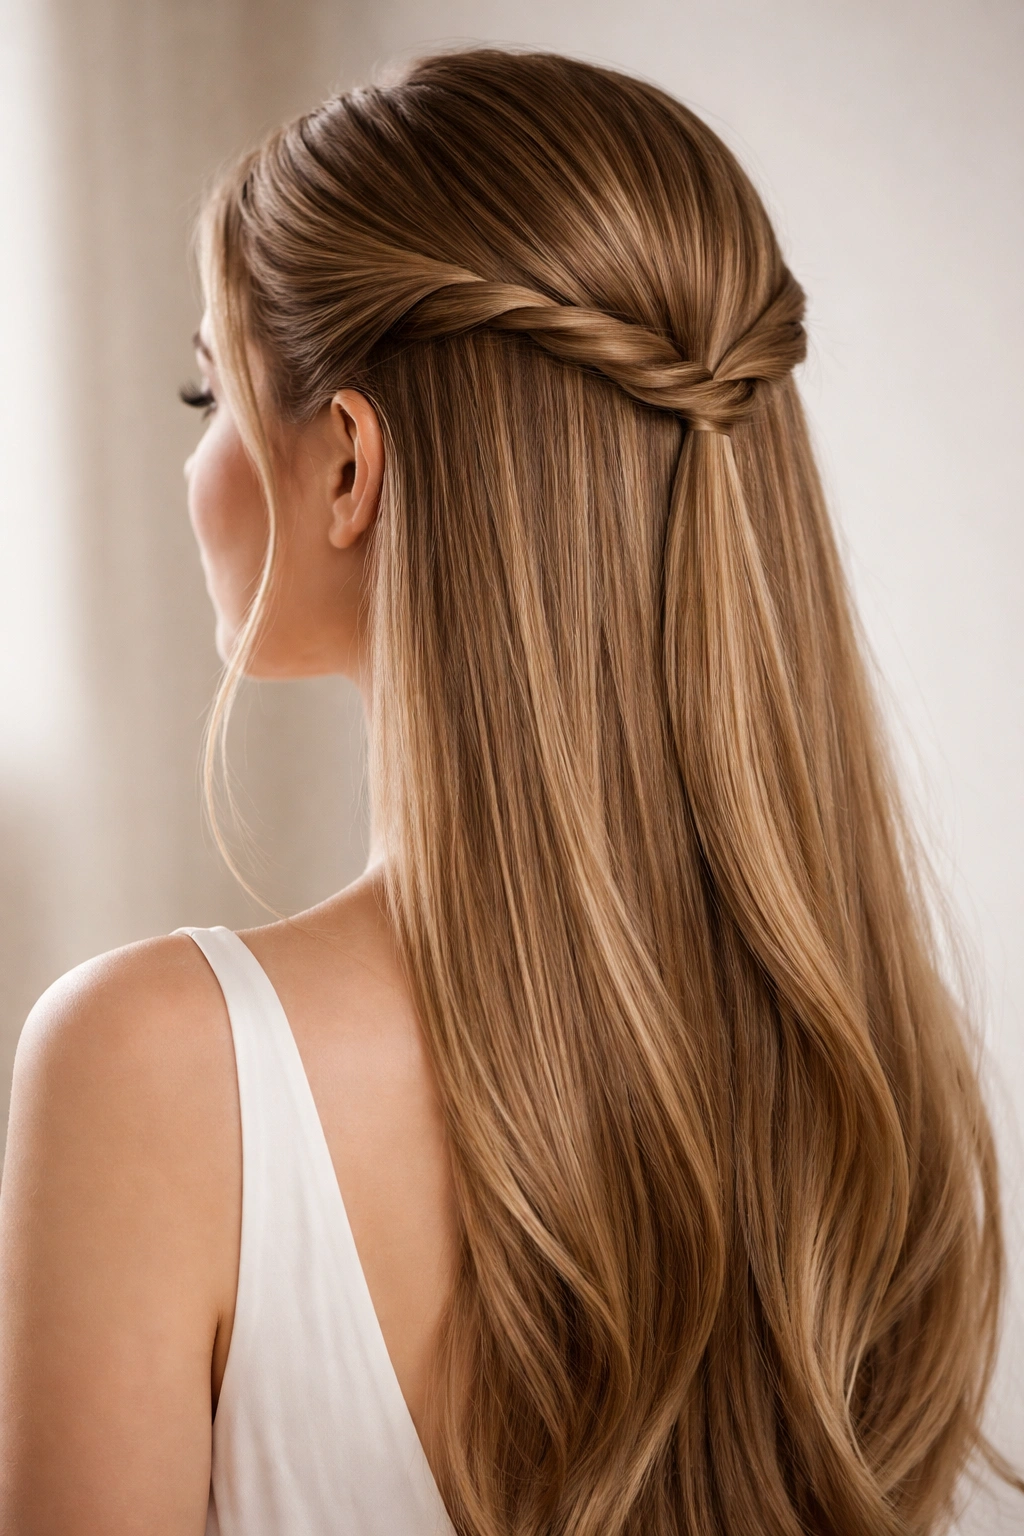
11. The Twisted Crown with Loose Texture
Create twisted sections from both sides of your head and meet them at the crown, then gently backcomb the crown area and smooth the top layer to create subtle texture at the crown point. The loose straight hair below remains smooth and shiny. This style bridges structured elegance with soft romance.
Why It Works for Straight Hair
The backcombing creates dimension at the crown without requiring you to curl your entire head of straight hair. The contrast between the dimensional crown area and the sleek straight length below creates a visually interesting effect. On straight hair, this subtle backcombing is less obvious than on textured hair but still creates the needed dimension and visual interest at the focal point of the style.
How to Create the Look
Starting from just above the right ear, take a section of hair and twist it gently toward the crown. Repeat on the left side, twisting in the same direction. Secure both twists at the crown with bobby pins. Once secured, gently backcomb just the crown area where the twists meet—use a fine-tooth comb to create texture without making it look messy. Smooth the top layer of this backcombed section with your comb to create a polished surface over the textured base. The result should look intentional and balanced, not like accidental texture. Finish with light hairspray to keep the twists and backcombed crown in place while maintaining the straight hair’s natural shine below.
- Keep the twists themselves smooth and sleek while adding texture only at the crown meeting point
- Backcomb gently to create dimension without making the crown look tangled or messy
- Use small bobby pins to secure the twists tightly so they don’t loosen throughout the day
- Smooth the top layer thoroughly over the backcombed base for a polished appearance
- Keep the lower length completely untouched for maximum contrast with the crown texture
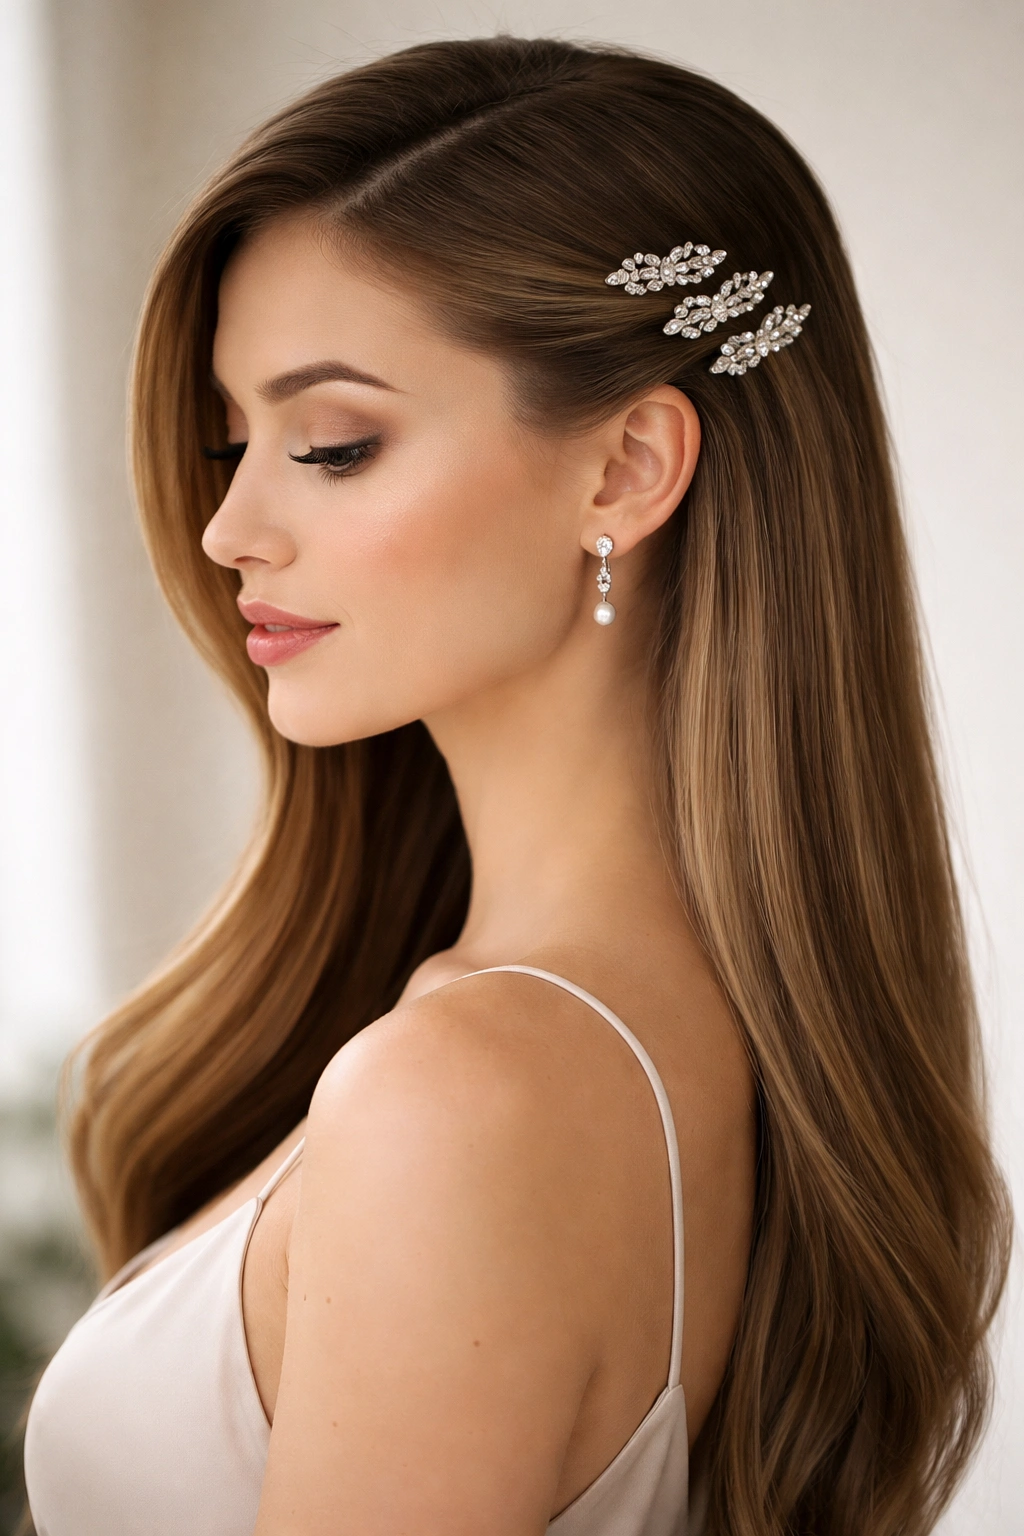
12. The Half-Up with Decorative Barrette Statement
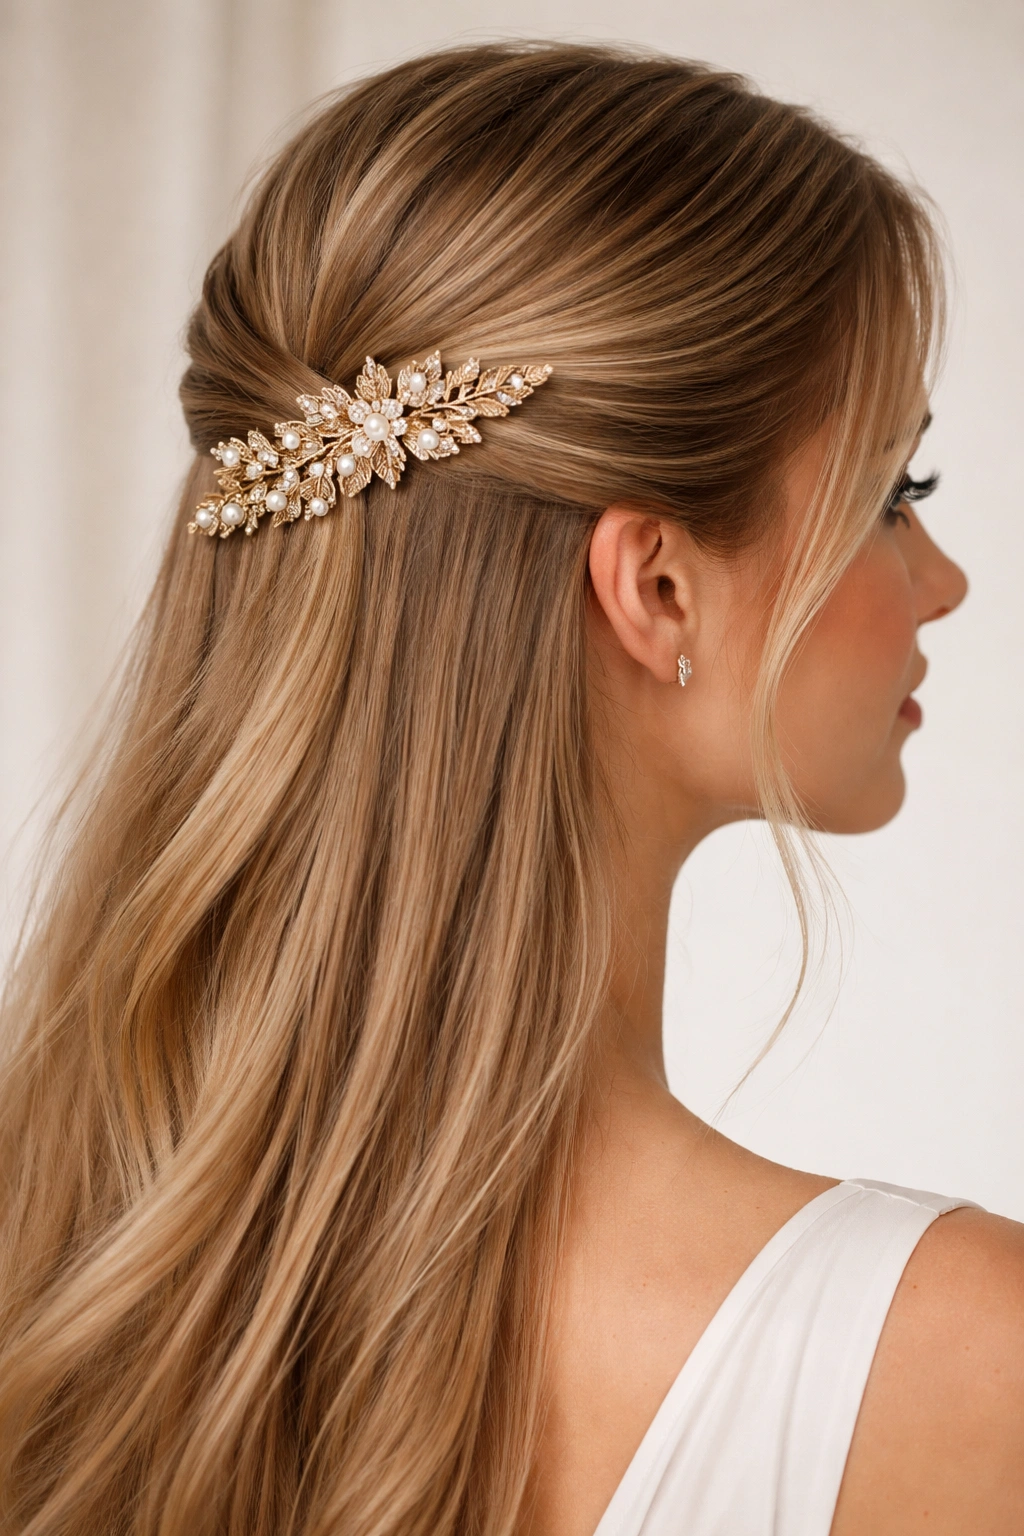
Gather the top section loosely and secure it with a larger, decorative barrette or clip that becomes part of the style’s design rather than just a functional element. Straight hair’s smooth texture shows off decorative clips beautifully because there’s no competing texture. This style works for bridesmaids who want their hairstyle to incorporate a meaningful or beautiful accessory.
Why It Works for Straight Hair
Straight hair provides the perfect backdrop for a statement barrette—the smooth surface of your hair makes whatever clip you choose look polished and intentional rather than compensatory. The clip sits perfectly without slipping or shifting on the smooth surface. You can choose ornate clips, delicate designs, or even vintage pieces that coordinate with your wedding aesthetic.
How to Create the Look
Gather the top section of your hair loosely at the crown and smooth it down with a fine-tooth comb. Position your chosen barrette or clip at a slight angle across the gathered section, ensuring it’s secure enough to hold all the hair throughout the day. The clip should sit visibly—this is intentional and part of the design. For extra security, use bobby pins beneath and around the clip to anchor it to your head rather than relying solely on the clip’s grip. The loose straight hair should cascade from below the barrette, creating a soft contrast with the polished upper section. Hairspray the gathered section lightly to keep it smooth and sleek.
- Choose a barrette with some weight and presence so it reads as intentional rather than purely functional
- Angle the clip slightly rather than placing it perfectly perpendicular for a more elegant look
- Secure with bobby pins underneath the clip for maximum hold on straight hair
- Keep the gathered section smooth so the barrette’s edge remains clearly visible
- Match your barrette to your jewelry or dress details for a cohesive, intentional appearance
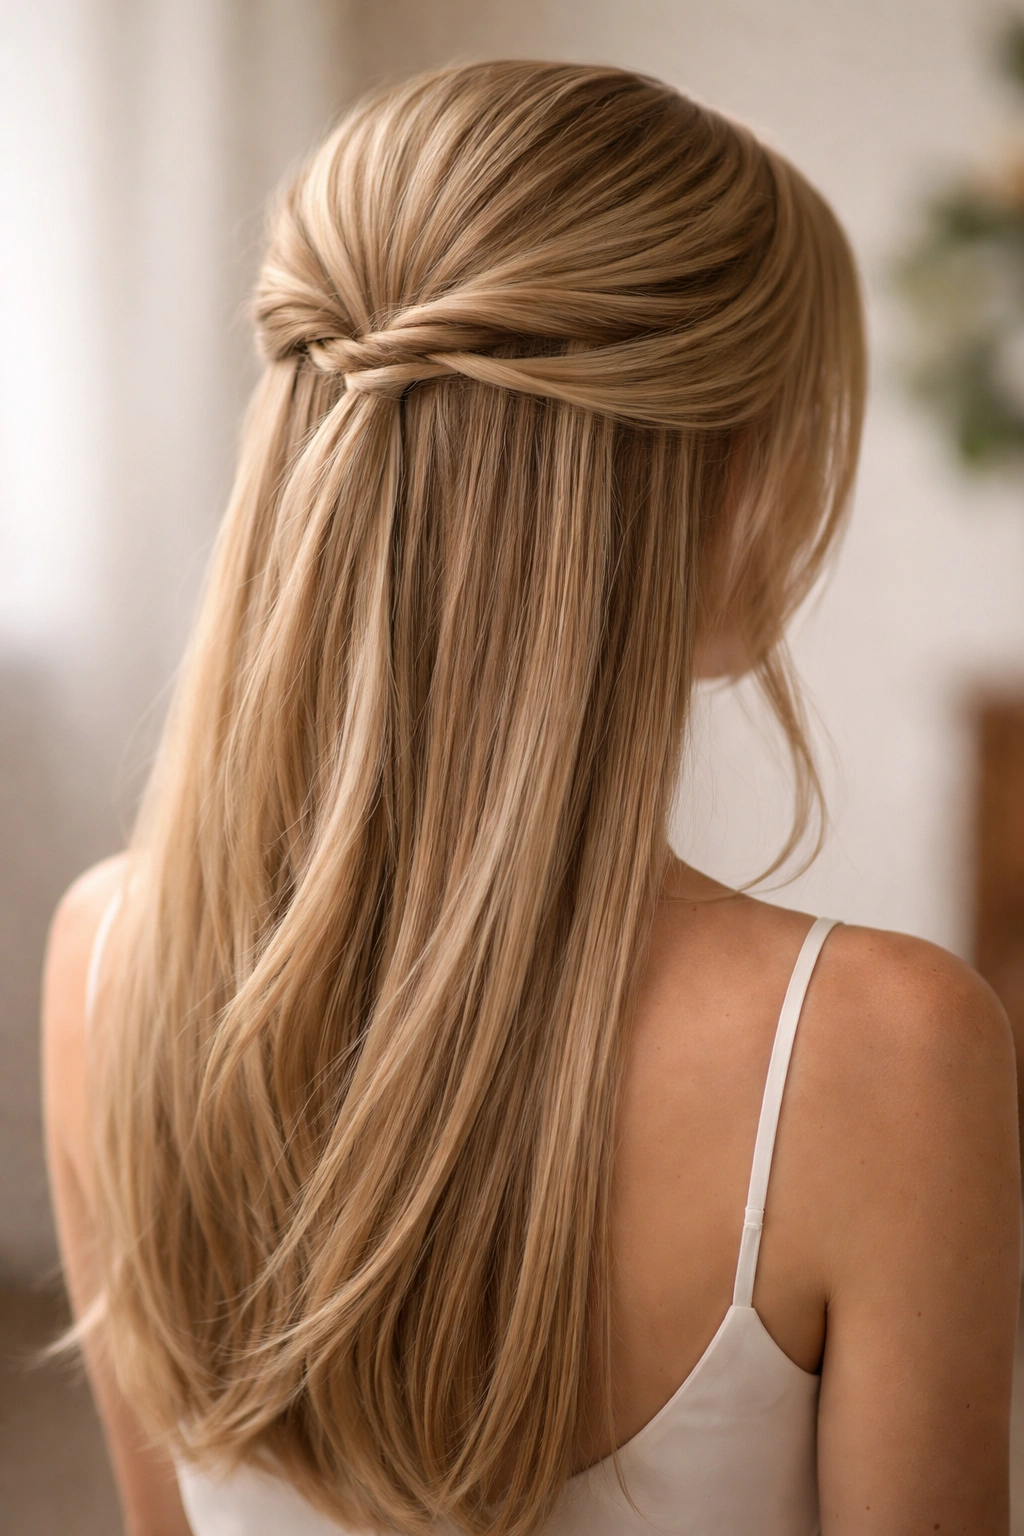
13. The Soft Front-Gathered Half-Up
Rather than pulling from the sides, gather a section just from the front-center of your head, pulling it back to the crown area. This creates a very subtle half-up effect that feels soft and romantic rather than structured. The sides remain loose and frame the face, creating a more relaxed bridesmaid look.
Why It Works for Straight Hair
This style is all about subtlety and softness—straight hair’s natural smoothness means even a loosely gathered front section looks intentional and polished. The gathered center section is visible but not overwhelming, creating a focal point without the bold structure of a traditional half-up style. The frame of loose straight hair on both sides of the face is particularly flattering because it softens facial features while the gathered center section prevents hair from looking completely unstructured.
How to Create the Look
Take a 2-3 inch section of hair from the very front-center of your head and gently pull it back toward the crown. Secure it loosely with a small elastic or a few bobby pins—you want the gathered section to feel gentle and soft, not tight. Leave the hair on both sides of your face completely loose to frame your features. The gathered section should be barely noticeable rather than a bold accent. Use light hairspray to maintain the soft placement without making anything stiff. This style looks most beautiful when the gathered front section is very subtle—if people struggle to notice that your hair is partially up, you’ve nailed the look.
- Keep the gathered section very loose and subtle for a soft, romantic feel
- Don’t pull too tightly or the style loses its gentle, unfussy quality
- Leave the face-framing pieces completely loose to maximize the softening effect
- Use a small elastic or just bobby pins to maintain the subtle appearance
- Pair with minimal makeup styling to keep the overall effect soft and romantic
14. The Sleek Half-Up with Curved Section
Gather the top section with smooth, curved lines rather than straight sections—this means taking hair from slightly further back on the sides rather than directly at the temples. The curved shape of the gathered section creates a more flattering frame for most face shapes. On straight hair, these curved lines are clearly visible and become part of the style’s design.
Why It Works for Straight Hair
The curved lines of the gathered section create visual interest and dimension on smooth hair. Curved shapes are inherently more flattering than straight lines, and on straight hair, these curves are visible and intentional. The curved gathering also creates a more natural-looking, high-end appearance than a stark straight line would create. This small difference in section placement completely changes the style’s overall effect.
How to Create the Look
Instead of taking hair from directly above your ears, take your gathering sections from slightly further back—roughly 1-1.5 inches behind your temples. Bring these curved sections back to meet at the crown, creating a subtle curved line from the front of your face backward. Secure firmly with bobby pins and a small elastic. The curved line should follow the natural shape of your head rather than fighting it. Smooth everything down carefully and finish with light hairspray. The curved gathering creates a more elegant frame for your face than a straight-across gathering would. This style requires slightly more precision during the gathering phase but creates a noticeably more sophisticated result.
- Visualize the curved line beforehand by parting your hair where you want to gather from
- Keep the curved sections smooth and sleek as you pull them back toward the crown
- Secure firmly since the curved placement puts slightly different tension on the gathered section
- Smooth the front of the gathered section to ensure the curved line is visible
- Consider your face shape when determining how dramatic the curve should be
15. The Multi-Layered Half-Up with Varying Heights
Create multiple small gathered sections at different heights across the back of the head, stacking them vertically to create a dimensional, layered effect. This intricate style works beautifully on straight hair because each layer is clearly visible and maintains its distinct shape. The result feels special and custom, perfect for a prominent bridesmaid or maid of honor.
Why It Works for Straight Hair
Straight hair allows you to create clear, distinct layers without texture blurring the individual sections together. The smooth surface of each gathered section is visible and intentional, creating a genuinely impressive, high-end appearance. This style showcases skill and effort—it’s the kind of look that makes observers wonder how long it took to create. On straight hair, the multiple sections don’t get lost in waves or curls but remain clearly visible as distinct design elements.
How to Create the Look
Start at the crown and create a small gathered section, securing it with a small elastic and bobby pins. Directly below this, create a second gathered section using hair from below the first section, securing it at a similar height (about 1-1.5 inches lower on the head). Create a third section if you want, following the same pattern. Each section should be small—about 1 inch thick—and tightly secured. The sections should stack vertically, creating a column of gathered sections down the back of the head. The effect is elaborate and dimensional without looking chaotic. This style requires patience and precision but creates a truly custom, impressive result. Use plenty of bobby pins to ensure each section stays in place throughout the wedding day.
- Make each gathered section very small and distinct to keep the style from looking cluttered
- Space the sections evenly as they descend down the back of the head
- Secure each section independently with its own elastic and bobby pins
- Use bobby pins in a starburst pattern for maximum security on each section
- Keep all sections smooth and sleek so each layer is clearly visible and intentional
- Finish with generous hairspray to hold all sections in place throughout the wedding day
Bridesmaid Half-Up Styling Tips for Lasting Results
The difference between a half-up style that falls apart by the reception and one that looks perfect all day comes down to proper preparation and product selection. Start with clean hair that’s been blow-dried straight—a smooth foundation makes every half-up style look more polished and holds better throughout the day. Consider using a lightweight volumizing powder at the roots before you begin styling; this gives bobby pins more grip on straight hair and helps prevent slipping.
Product choice matters tremendously for straight hair. Heavy pomades and thick gels can weigh down the smooth strands and make your hair look greasy by the reception. Instead, opt for lightweight hairsprays and flexible-hold products that keep your style in place without visible product buildup. A light texturizing spray can provide grip without the weight of heavier products. When securing sections, use small bobby pins that match your hair color—they disappear much more effectively than larger pins and work better with straight hair’s smooth surface.
The timing of your styling matters, too. Get your hair done 1-2 hours before the ceremony rather than much earlier, so your style stays fresh and holds better through the day. If you’re getting professionally styled, discuss the specific look with your stylist well in advance and bring photos of the styles you love. Consider requesting that bobby pins be placed in a starburst pattern for maximum hold, and ask your stylist to use hairspray generously in areas that will be under tension throughout the day.
For straight hair specifically, embrace the texture that styling creates rather than fighting to keep everything perfectly smooth. The subtle texture created by twists, braids, and gathered sections actually looks more interesting and dimensional on straight hair than completely sleek styling would. Allow your stylist to pancake braids and add gentle texture to crown areas—these techniques transform a flat straight-hair style into something genuinely beautiful.
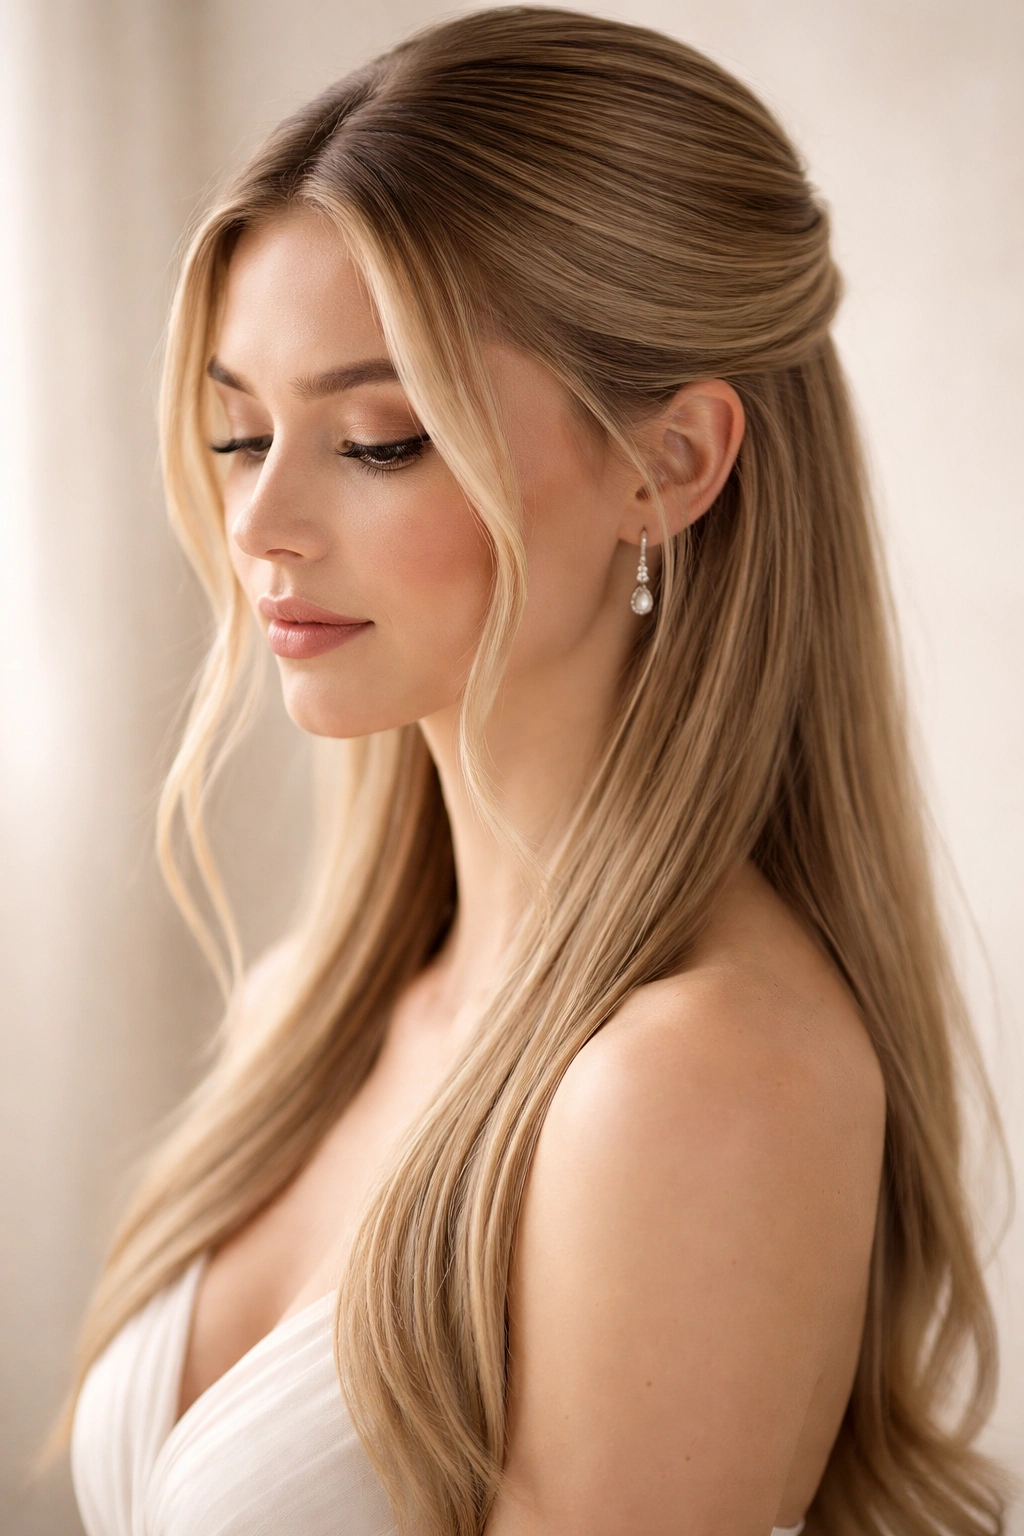
Final Thoughts
Whether you choose a classic twisted crown, an intricate Dutch braid, or a statement barrette style, the half-up half down approach gives you endless options for creating a bridesmaid look that feels both elegant and authentically you. Straight hair is genuinely an asset for these styles—the smooth texture, natural shine, and clean lines create a polished, refined appearance that photographs beautifully and feels comfortable to wear all day.
The key to finding your perfect style is considering your own comfort level, the wedding’s aesthetic, and what makes you feel confident. A style you love wearing is a style you’ll look beautiful in, and that confidence will shine through in every photo. With these fifteen options as your starting point, you can work with your stylist to customize a half-up half-down look that’s uniquely suited to you while supporting the bride’s vision for her wedding day. Your hair is one of the most important elements of your bridesmaid look—honor that importance by choosing a style you genuinely love.