Curly hair and the sixties make a better pair than most people expect. The decade loved height, side parts, rounded shapes, headscarves, and a little controlled drama, which is exactly why 1960s-inspired hairstyles for curly hair can look so natural instead of forced. Curls already bring lift; the trick is shaping them so the outline feels intentional.
The old mistake is flattening everything. Don’t. Give the crown some structure, let the ends keep their bounce, and the whole style starts to read right — polished at a glance, still alive when you move. That’s the sweet spot with vintage hair. Not costume. Not stiff. Just shape with personality.
Hair from that era had opinions. So should yours.
Curly hair usually does best when the style works with its own movement instead of trying to erase it. That means root lift, clean parts, smart use of pins, and accessories that do real work instead of just sitting there looking cute. A brushed-out set, a deep side part, a scarf wrap, a bouffant, a pin curl, a rounded bob — each one asks for a slightly different kind of control.
You do not need a drawer full of products to make these looks happen. You need a few good tools, a sense of proportion, and a willingness to stop touching your hair once it’s in place. That’s the part people skip. Then they wonder why the style falls apart by lunch.
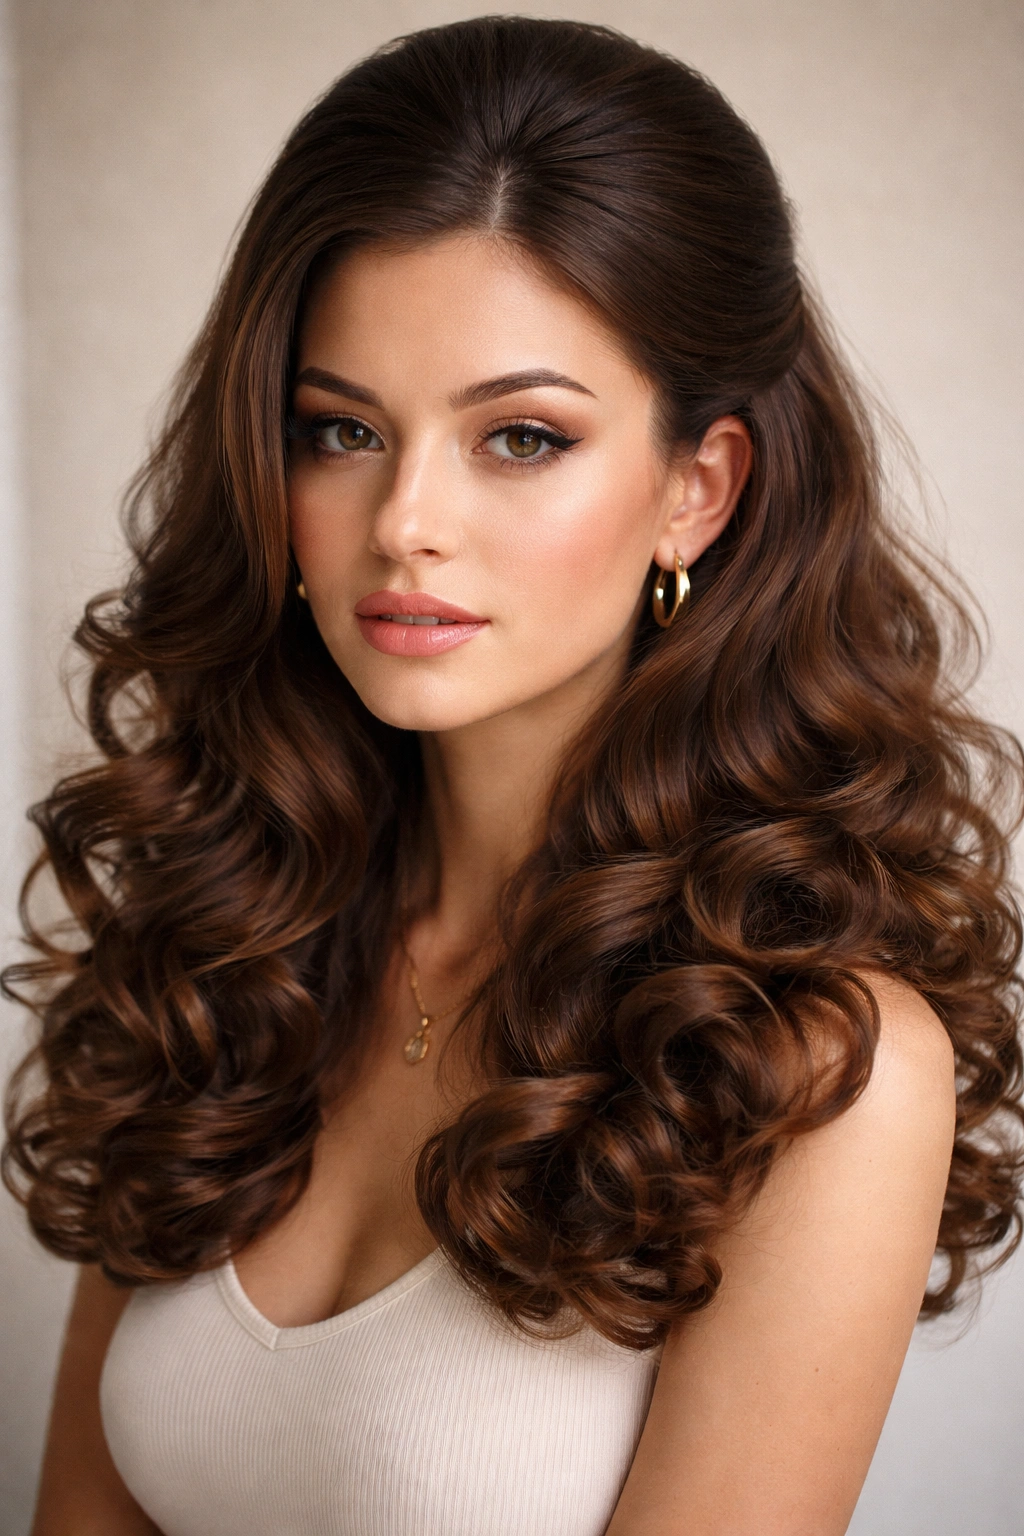
1. Brushed-Out Bombshell Curls
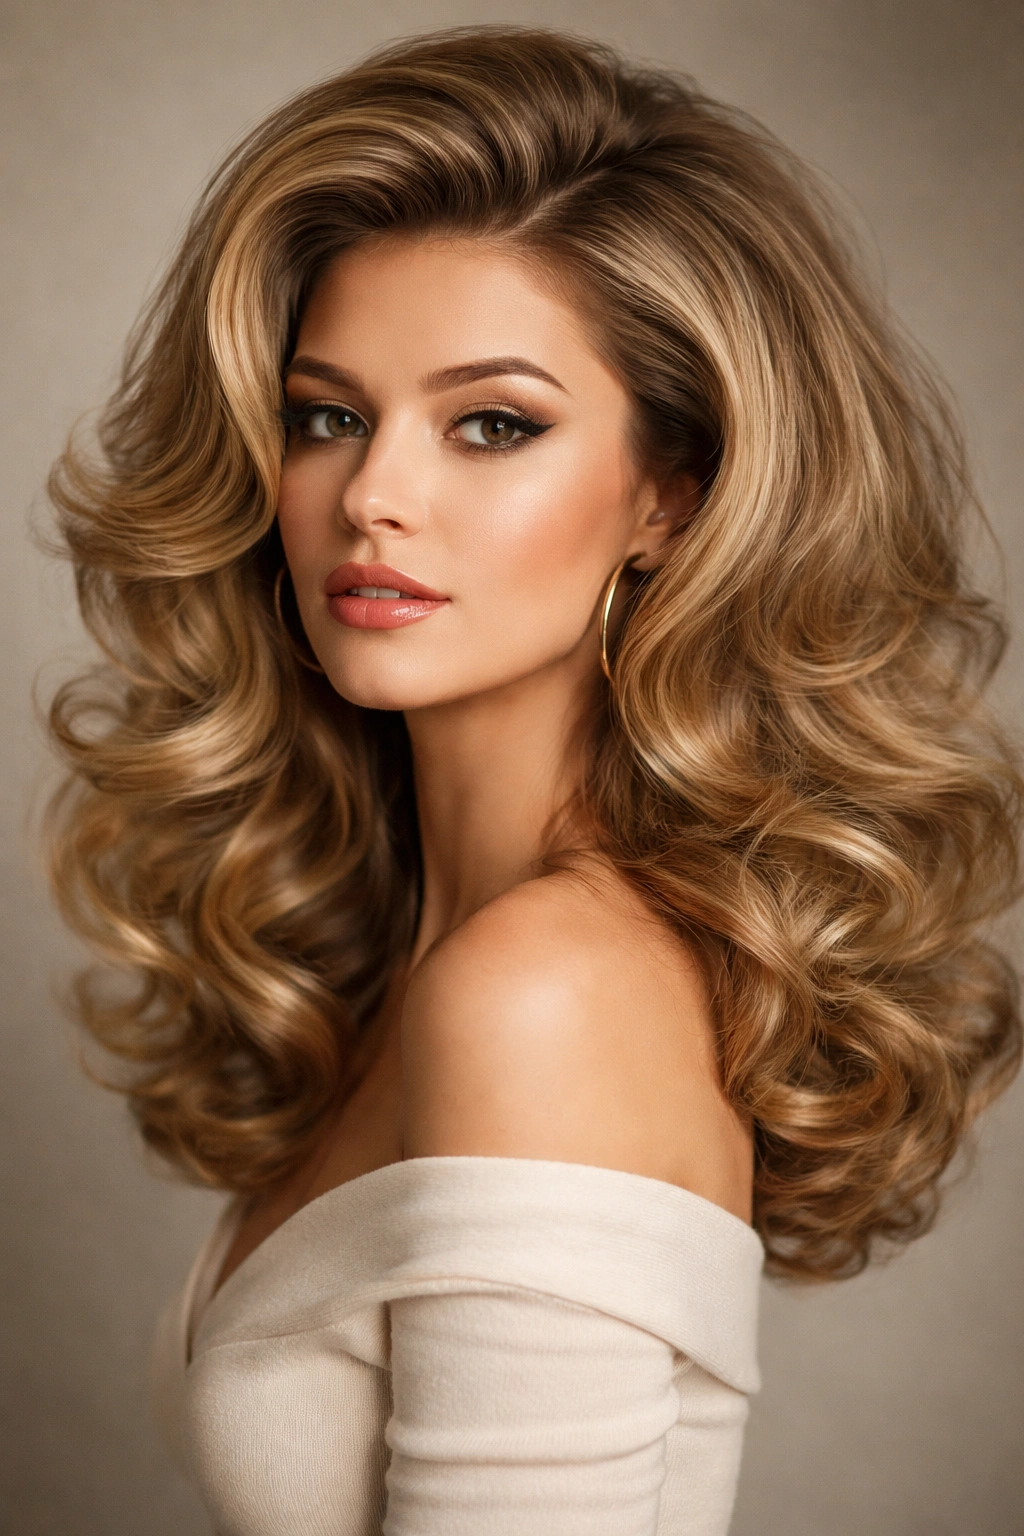
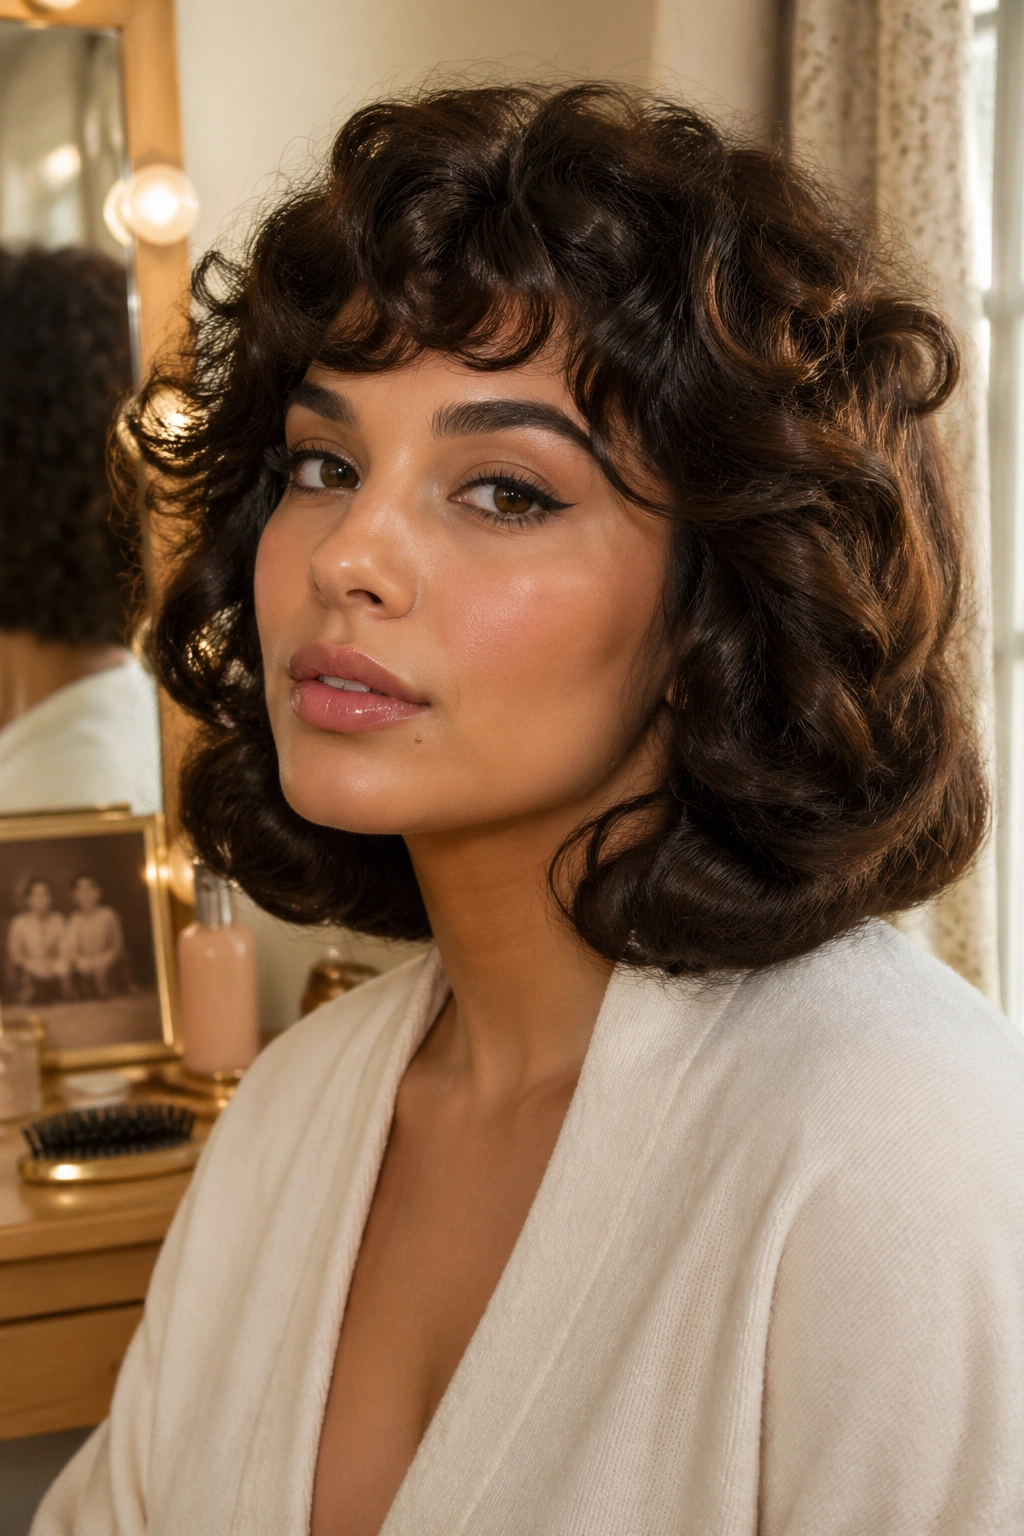
Brushed-out bombshell curls are the loudest, glossiest nod to the decade. They work because the shape is big without looking random: lift at the crown, soft width at the sides, and ends that still show a curl pattern under the surface. I reach for this when I want a 1960s silhouette that feels dressed up but not museum-piece stiff.
Start on fully cooled curls. If you brush while they’re warm, the whole shape collapses into fuzz, and nobody needs that drama. A boar-bristle brush or a soft paddle brush, plus a light mist of flexible hairspray, gives the curls that cloud-like finish the style needs.
How to keep the shape soft, not puffy
Set the hair in 1-inch sections with mousse or setting lotion, then diffuse until dry. Wait a good 10 minutes before brushing anything out. That cooling time matters more than people think.
- Brush from the ends upward, not the root downward.
- Use 2 or 3 passes at the crown if you want height.
- Pinch the top layers with a few bobby pins if the volume falls.
- Leave the ends slightly separate so the style still shows movement.
Brush less than you think. One or two passes is enough. Too much, and the curl pattern disappears.
2. Deep Side Part with a Swept Curl Fringe
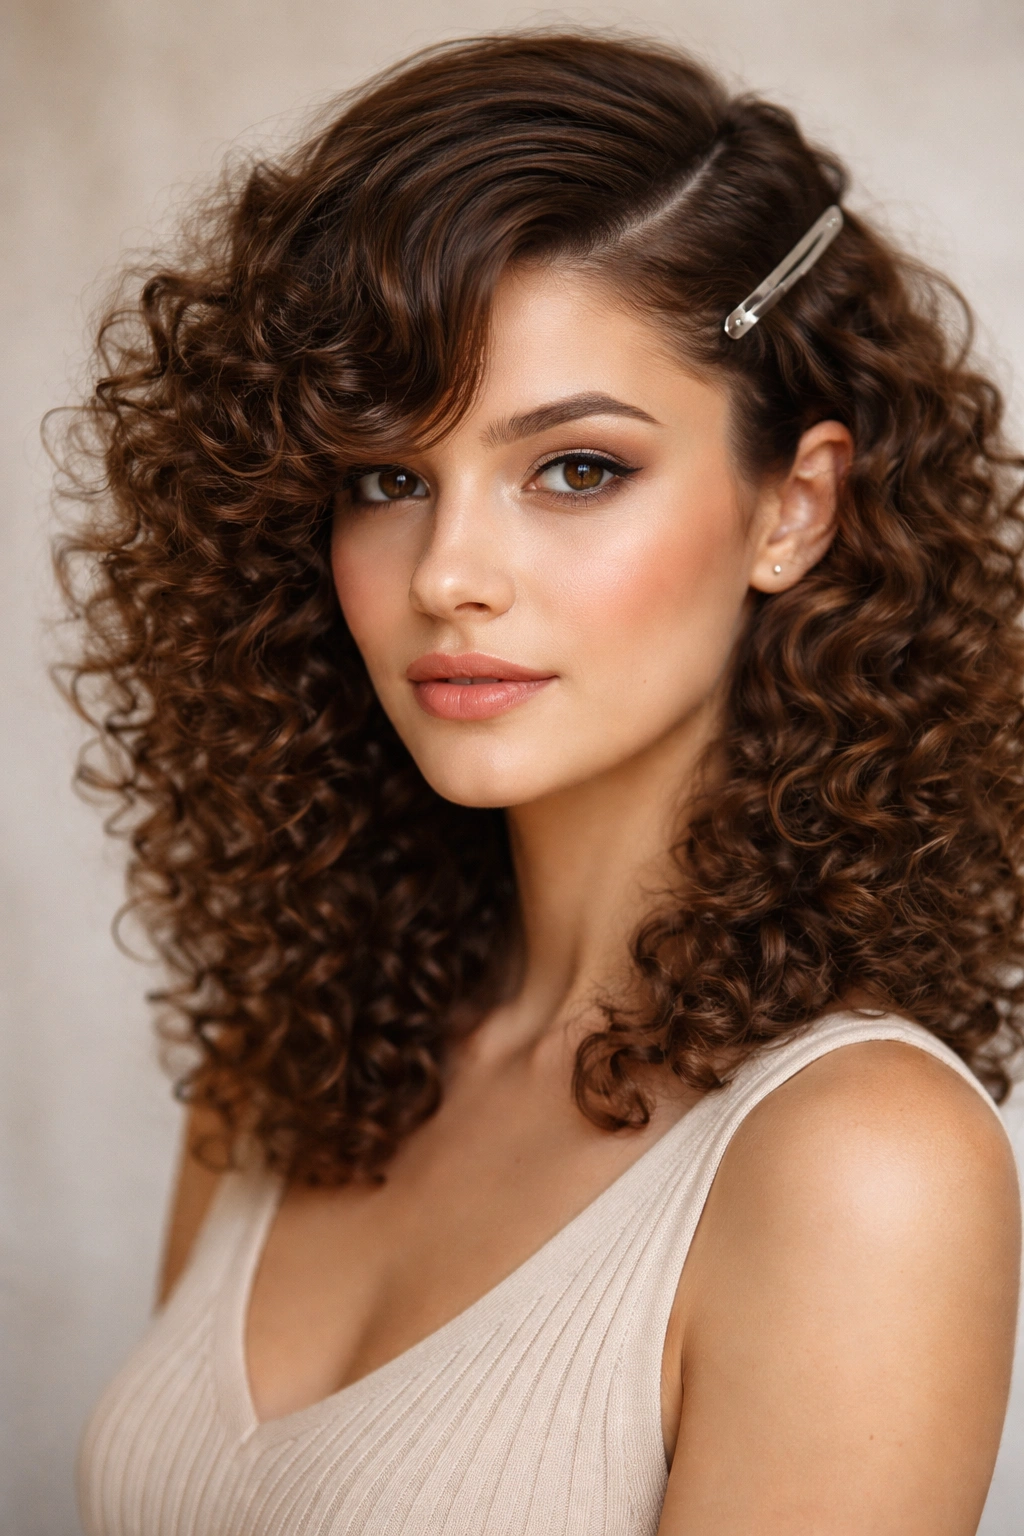
What makes a deep side part look so sixties? It’s the asymmetry. One side gets the drama, the other side gets the discipline, and curly hair gives you a built-in curve that straight hair has to fake with heat and patience.
This is a strong option if your curls are looser around the face or if you want a shape that works on second-day hair. Sweep the front section over one brow, clip it flat while it dries, and leave the rest free so the part has a clear line instead of a fuzzy suggestion.
How to keep the part clean
A rat-tail comb on damp hair is your best friend here. Draw the part where you want it, then clip the heavier side back for 15 minutes so the roots set in place.
- Smooth the part with a pea-sized amount of styling cream.
- Clip the front sweep away while the rest dries.
- Tuck one side behind the ear if the curl keeps springing loose.
- Use a tiny bit of pomade only at the top inch of the hairline.
A clean part is doing most of the work here. Everything else just supports it.
3. Half-Up Bouffant with Loose Ends
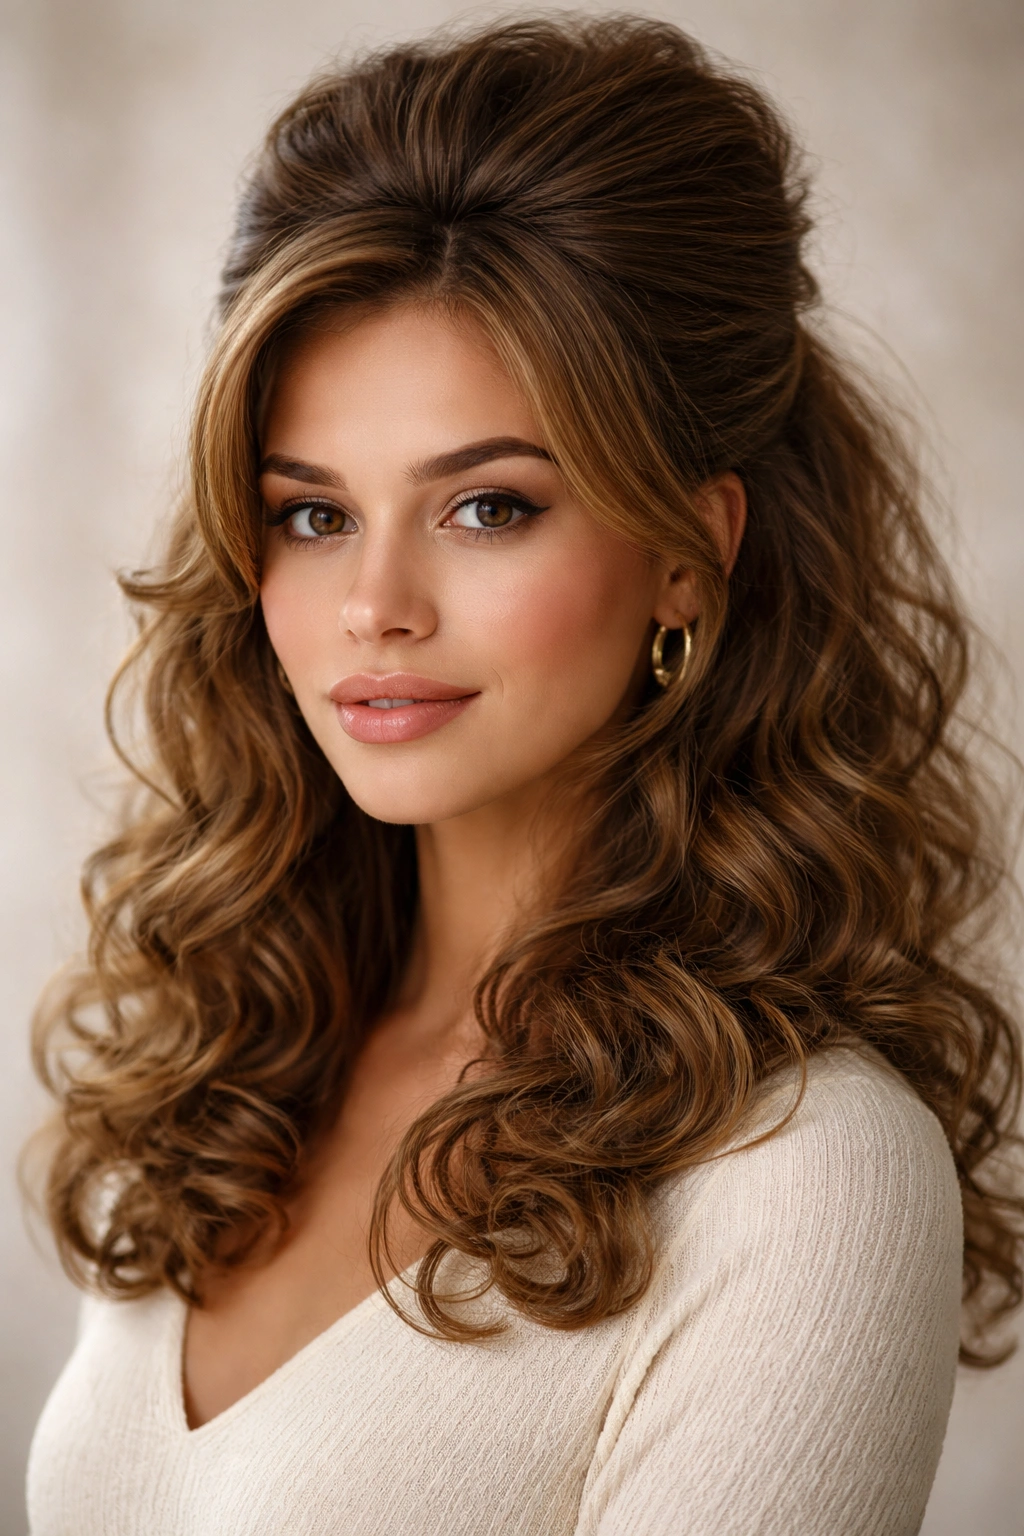
You know that look that says “I dressed up” without saying “I spent three hours on this”? Half-up bouffant with loose ends lives there. It gives you crown height and keeps the bottom curl pattern visible, which is a smart trade if you want the hair to still feel like hair.
The trick is not to tease the whole head. Only the crown needs lift. Smooth the top layer over the teased section, pin it at the back of the crown, and let the loose lengths fall around your shoulders. That mix of structure and softness is what makes the style land.
Teasing without turning it into a nest
Backcomb the crown in two or three short passes with a fine-tooth comb. Stop there. More teasing doesn’t usually mean more style; it usually means more tangles.
- Section the top from temple to temple.
- Backcomb only the roots, about 1 inch deep.
- Smooth the surface with the tail of a comb.
- Pin the lifted area where the head starts to curve.
Keep the bump about two fingers high. Bigger often looks less elegant, not more.
4. Scarf-Tied High Puff
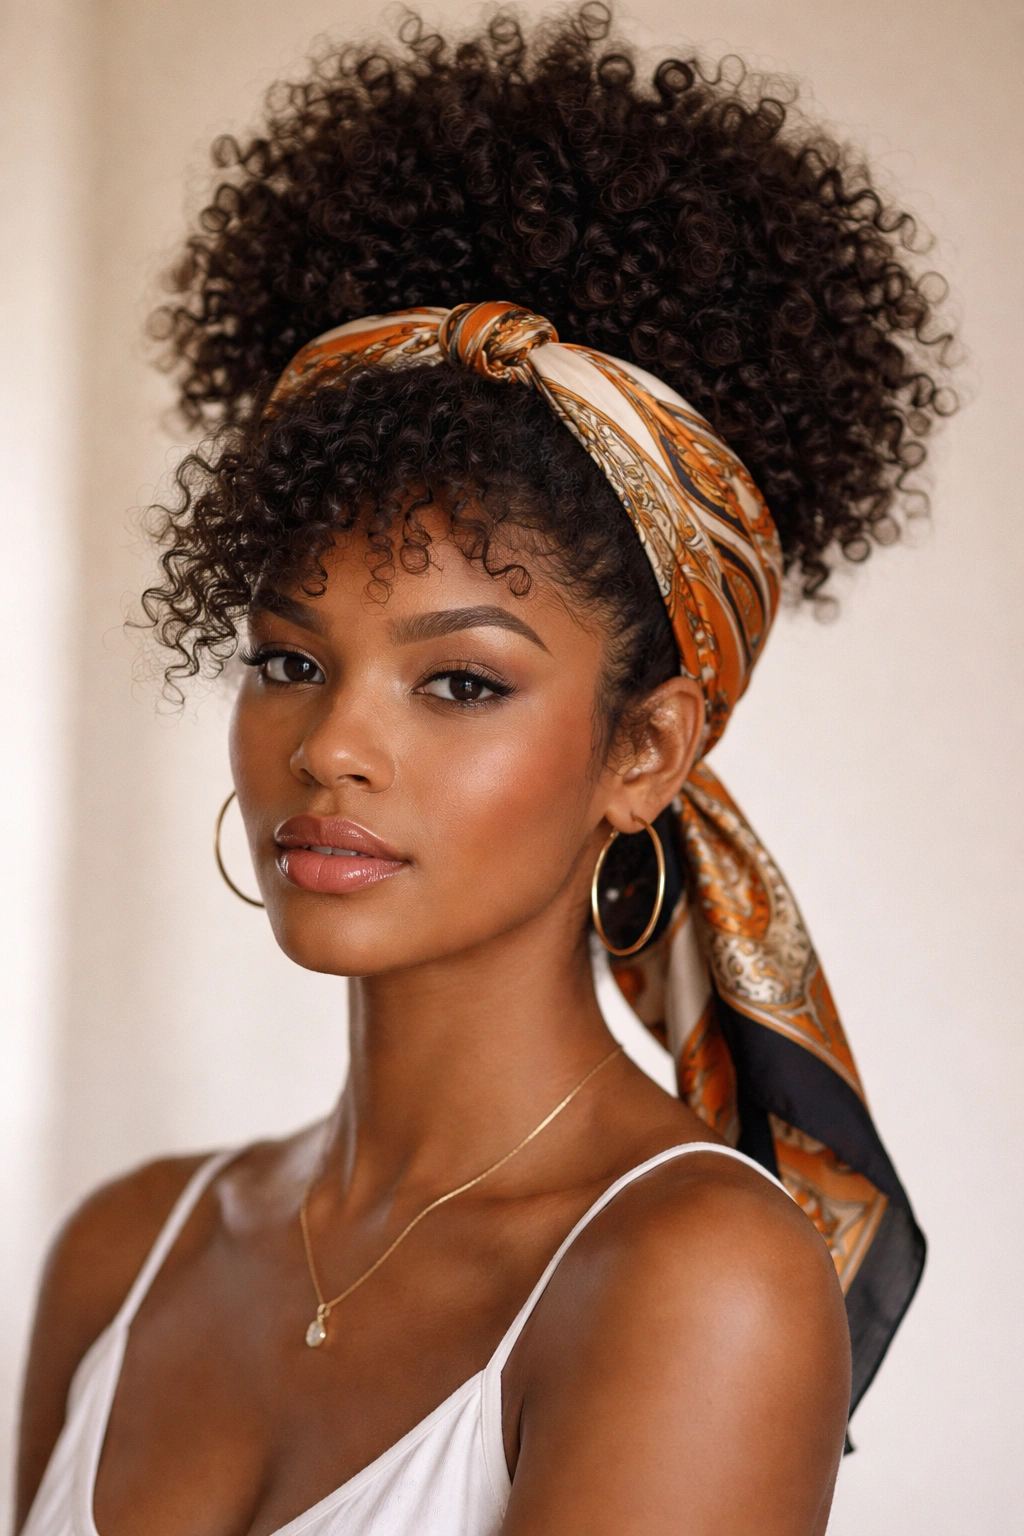
The scarf should feel like a frame, not a bandage. A high puff wrapped with a printed scarf gives curls an instant graphic line, and that line is what pushes the whole look into sixties territory. It’s playful, easy to wear, and it does not ask for precision everywhere.
I prefer a scarf with some grip — cotton or a cotton blend — because slippery silk tends to slide on fine hair unless you anchor it with pins. Wrap it wide across the front, leave a little height at the crown, and let the puff keep its roundness.
A good puff has shape, not crush. If the scarf is tied too tightly, the whole look turns flat at the temples and the crown loses its lift. Worse, it can pull the curls into a shape that feels more gym class than vintage.
Pick a scarf that’s about 2 to 3 inches wide when folded. Tie the knot slightly off-center if you want a softer, more casual read. Center knots can look strict fast.
5. Rounded Curly Bob with Flipped Ends
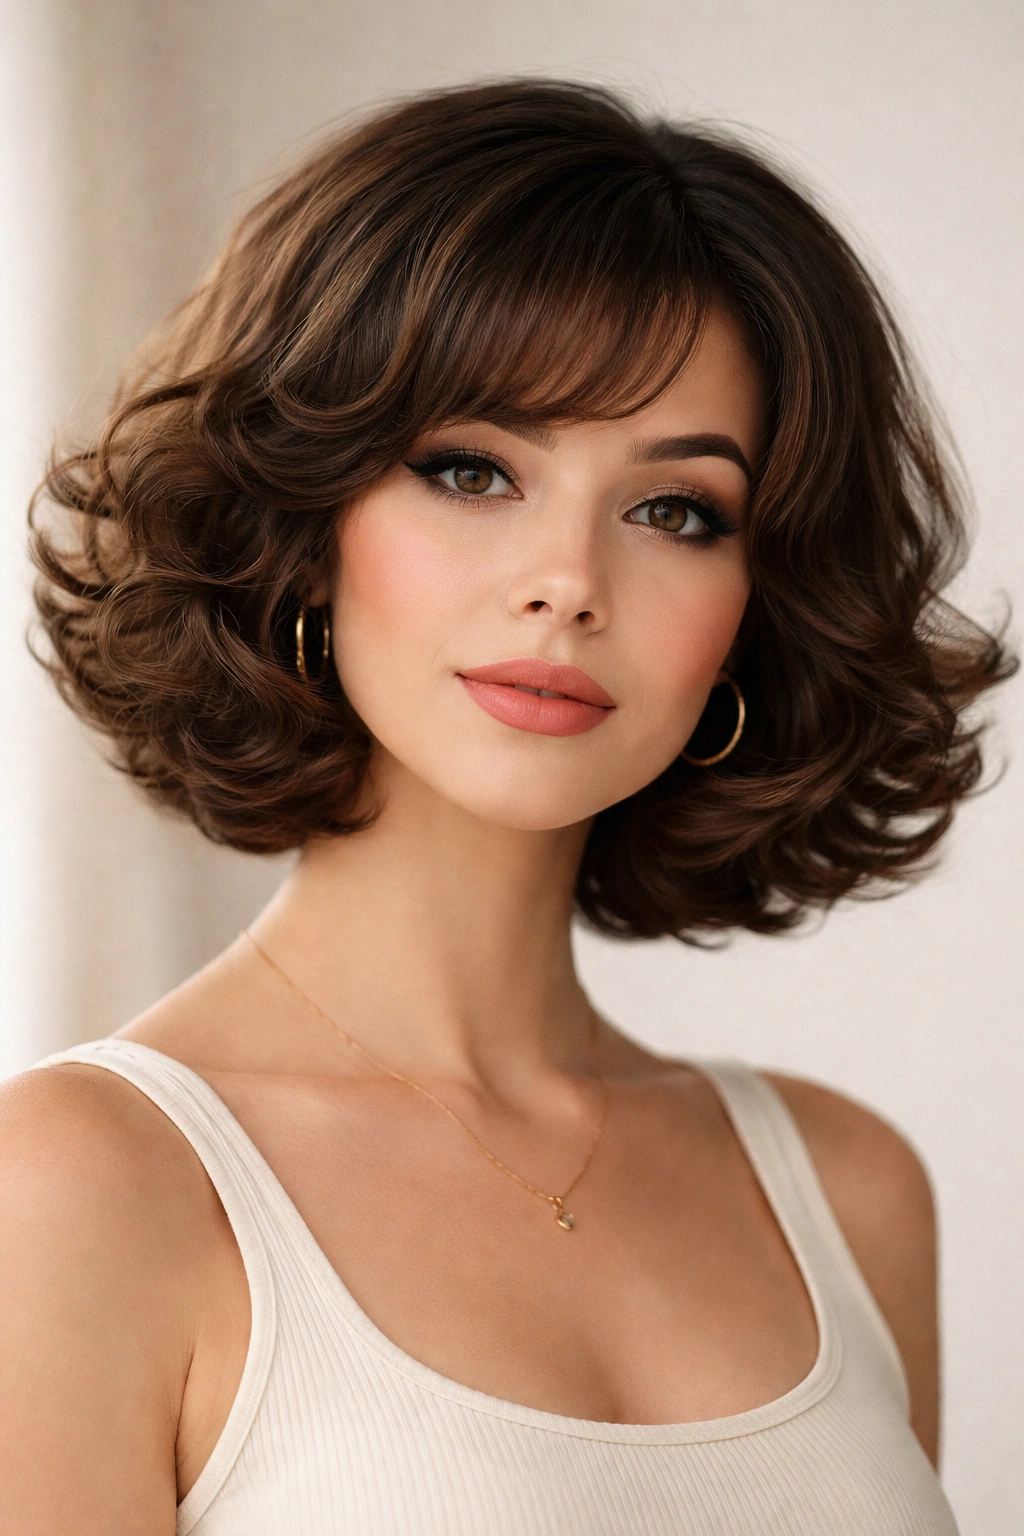
Unlike a blunt bob, the rounded curly bob asks the curl to do the shaping. That is why it feels so right for the decade. The silhouette sits around the jaw, bends inward in the middle, and flips out just enough at the ends to give the cut that tidy, sculpted outline.
If your hair lands at the chin or just below it, keep the top layers smooth and let the bottom curls kick out. A diffuser helps, sure, but a small round brush at the very front can give you a cleaner frame around the face. The back can stay a little freer.
A lot of people make this style too perfect. Don’t. The best versions have a tiny bit of uneven bounce. That makes the flip look like a shape, not a helmet.
Where the flip belongs
The bend should live from the ear line downward. If you flip too high, the bob starts to balloon in the wrong place.
- Use a 1.25-inch brush or a large roller at the ends.
- Direct the front pieces inward first.
- Flip the lower edge out with your fingers or a brush.
- Finish with a light mist of spray, not a wet coat.
6. Sleek Crown with Big Curly Ends
The top should feel smooth to the touch, almost cool, while the ends stay springy and full. That contrast is the whole point. A slick crown with big curly ends gives you a clean front and a lot of movement at the bottom, which is a very sixties kind of confidence.
Keep the crown controlled with cream or gel, then let the lower half stay fuller. A wide-tooth comb through the top and fingers through the ends creates a polished-at-the-top, loose-at-the-bottom shape that shows up often in vintage styling. It’s a smart style for layered cuts, because the layers help the ends look light instead of bulky.
I’d skip a heavy gel here. It can make the top feel hard and drag the whole style down. A soft hold cream does a better job because it smooths without freezing the texture.
One small twist helps a lot. Clip the top section while it dries, then release it only after the lower curls are fully set.
7. Curly Beehive Pony
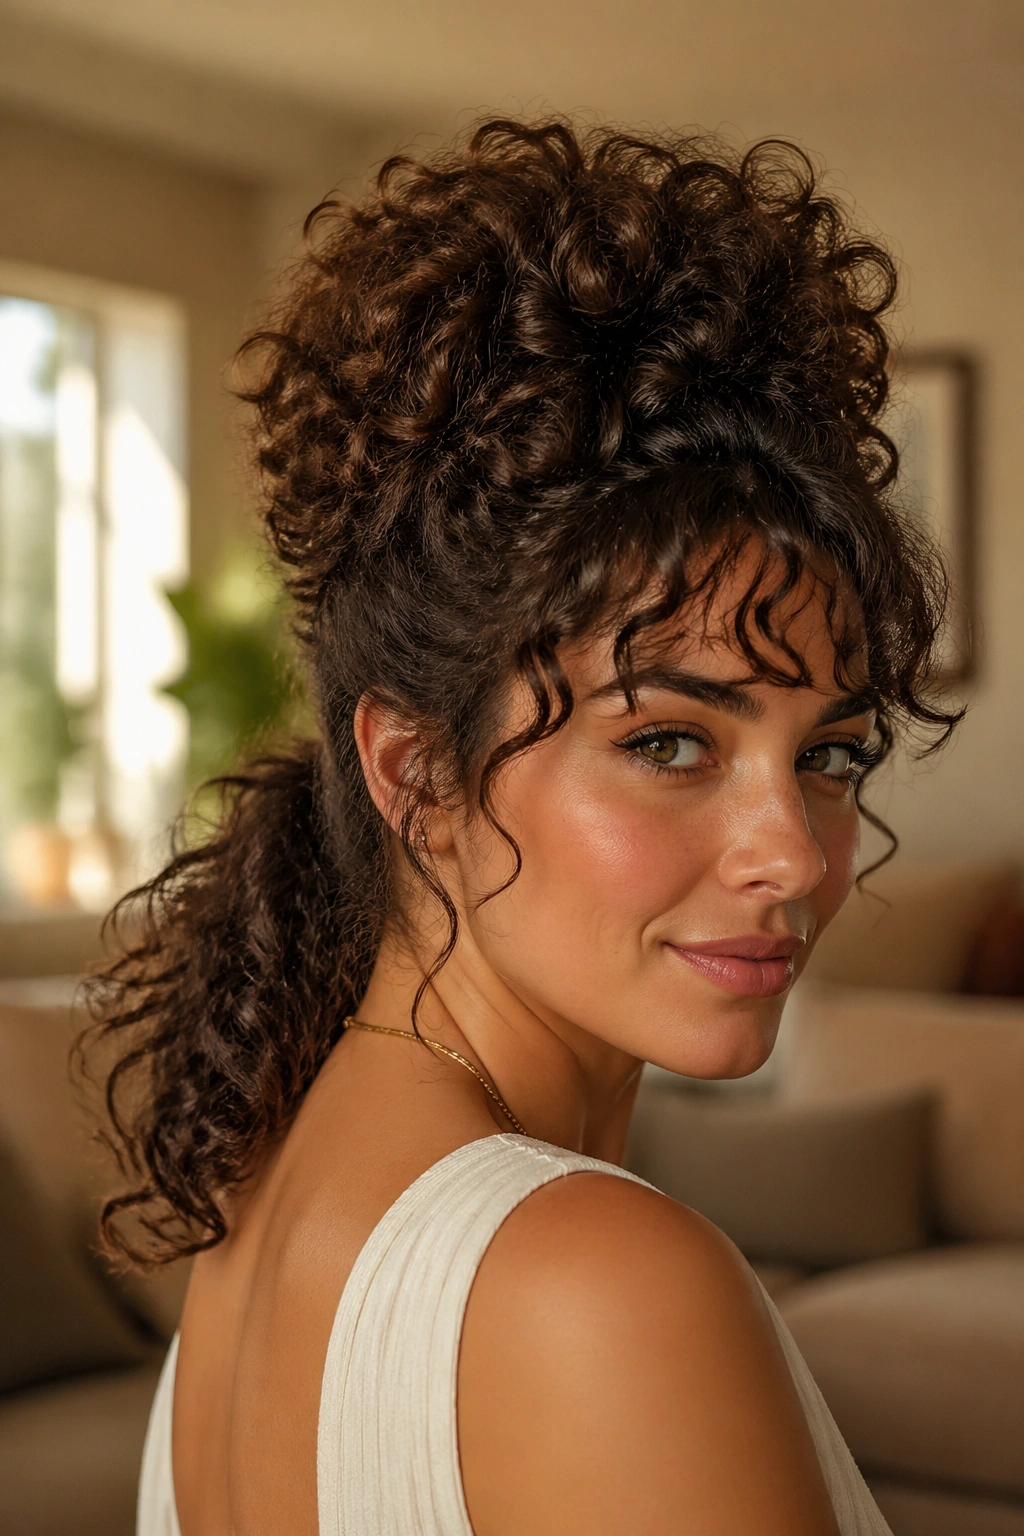
Can a beehive work on curls without looking fake? Absolutely, if you stop treating the whole head the same way. The lift belongs at the crown, not all the way back to the nape. Leave the ponytail soft. That’s what keeps this style from turning into a stiff block.
Section off the top triangle, backcomb only the roots, and pin the raised area into a soft mound before you let the rest of the curls drop. A curly ponytail at the bottom keeps the movement alive, which is the real trick. You want the crown to say “bouffant” and the ends to say “still me.”
Where to pin the lift
Use pins in crossed pairs if the crown wants to sag. One horizontal pin, one crossing over it, and the shape usually holds better than expected.
- Pin the lifted section 1 to 2 inches behind the hairline.
- Hide the pins under a curl instead of burying them deep.
- Keep the bump broad, not tall and narrow.
- Leave the ponytail loose enough that the curls can swing.
Keep the bump low and broad. That shape reads more vintage and less theatrical.
8. Wide Headband with Open Curls
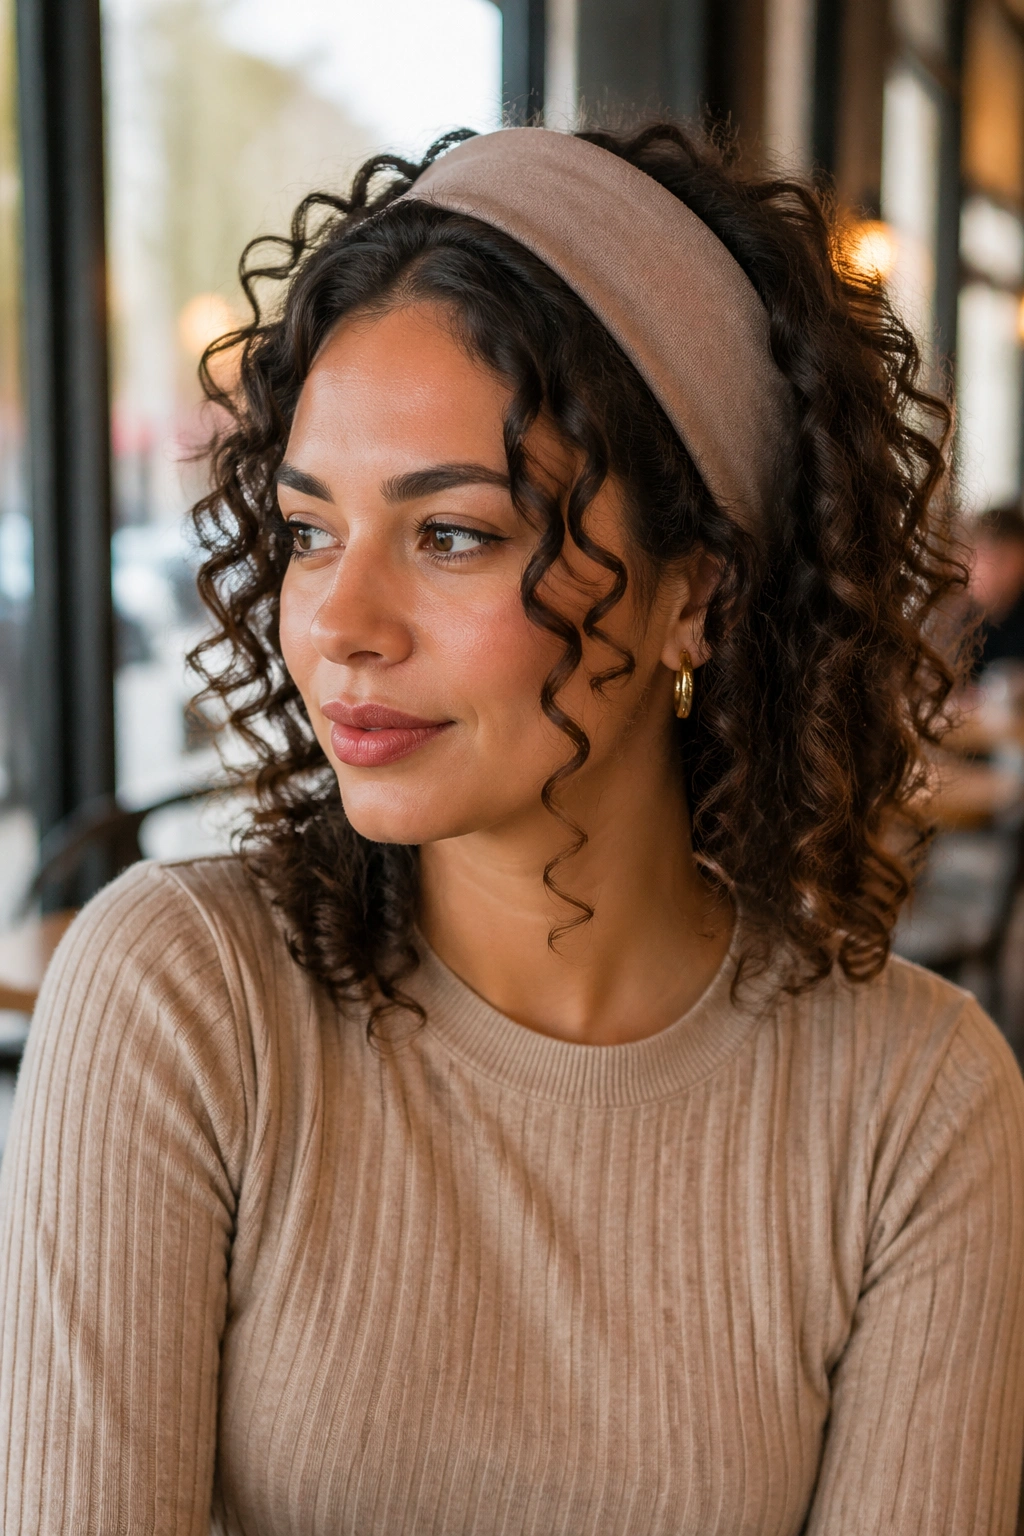
I keep seeing wide headbands save day-two curls that would otherwise live in a ponytail. A padded or fabric headband gives you that instant mod edge. It pushes the front section back, keeps frizz away from the face, and lets the rest of the curls fan out around it.
The look lands best when the band is at least 1 inch wide. Skinny bands can feel too delicate and tend to dig in. I also prefer matte fabric over shiny plastic because the texture feels more grounded, less costume-y, and it sits better against curly hair that has a little lift at the roots.
Let a few front curls fall around the band if the face needs softness. If you tuck everything away, the style can look hard. A couple of loose spirals around the temples changes the whole mood.
One thing to avoid: placing the band too far forward. It can shrink the forehead and flatten the crown. Slide it back just enough to show a bit of lift.
9. Pin-Curled Side Sweep
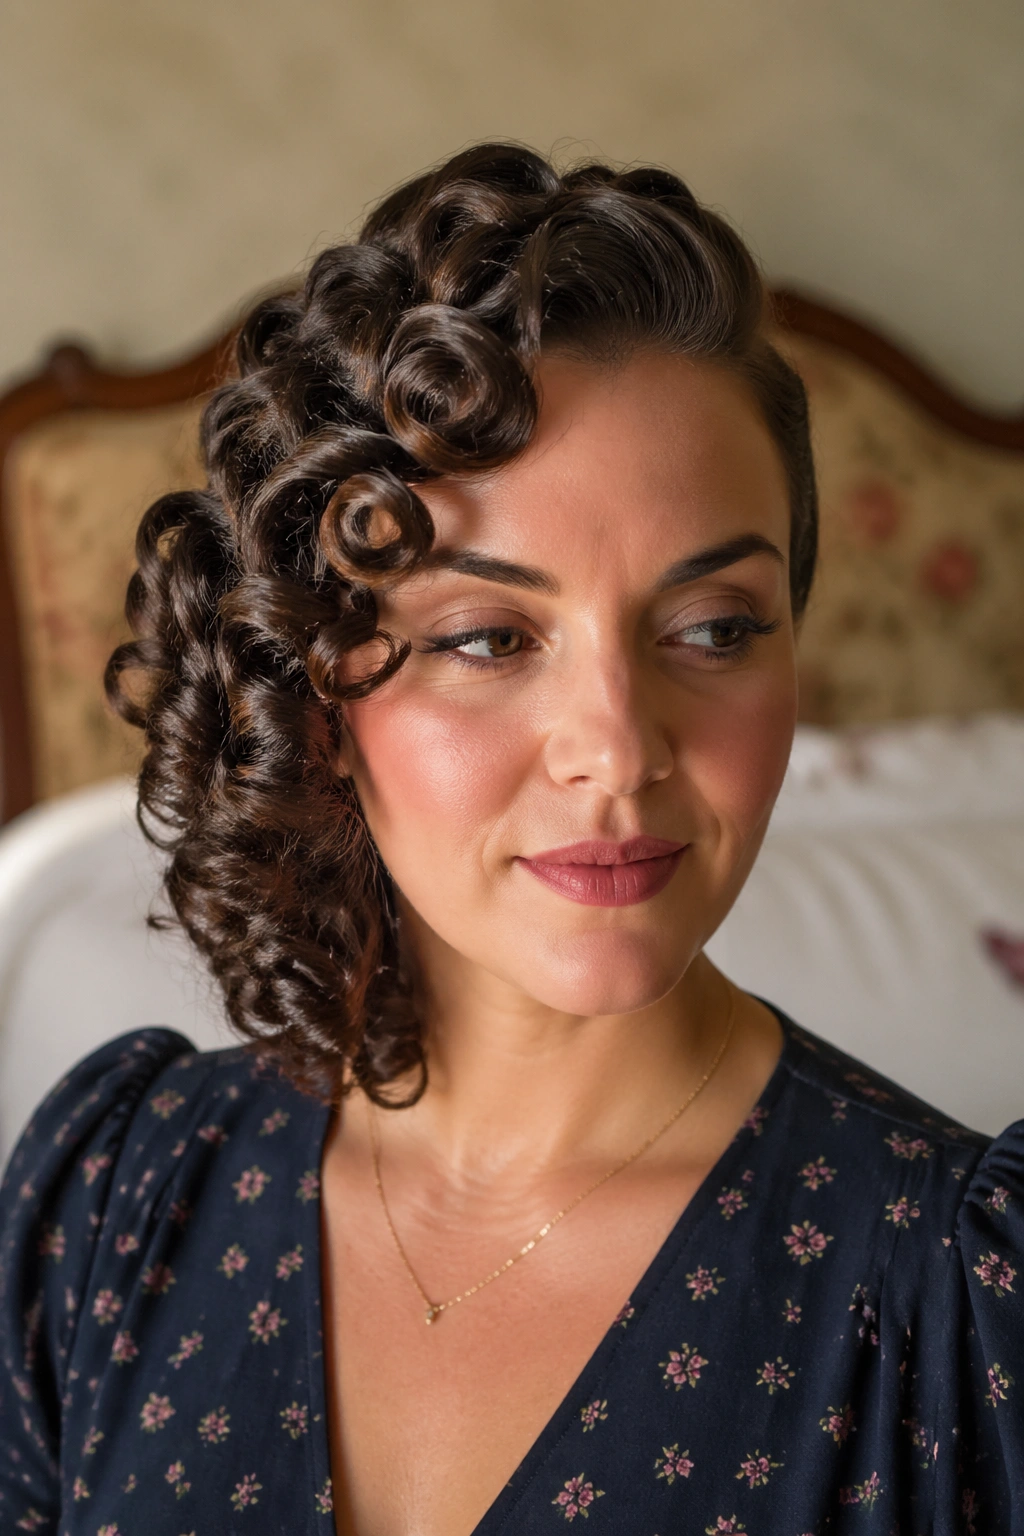
Pin curls are fussy. They also make some of the prettiest vintage curls you can wear. The shape is small, neat, and controlled, but when you release the set and brush it lightly to one side, the result has a softness that hot tools rarely match.
The best way to do this is with 1-inch sections. Roll each section, pin it flat against the scalp, and let it cool all the way before you take the pins out. If you stack curls on top of each other, the surface gets too bulky and the side sweep loses its smooth line.
Why the set lasts
Setting lotion or a light foam matters here because it helps the curl remember the shape once the pins come out. You do not need much — just enough to give the hair a little memory.
After the set cools, release the pins and finger-comb gently toward the side you want. Do not rake through it. That turns a clean curl set into a frizzy cloud fast.
A tiny barrette near the temple can help hold the sweep in place. Nothing heavy. Just enough to catch the eye.
10. Mod Pixie with Defined Coils
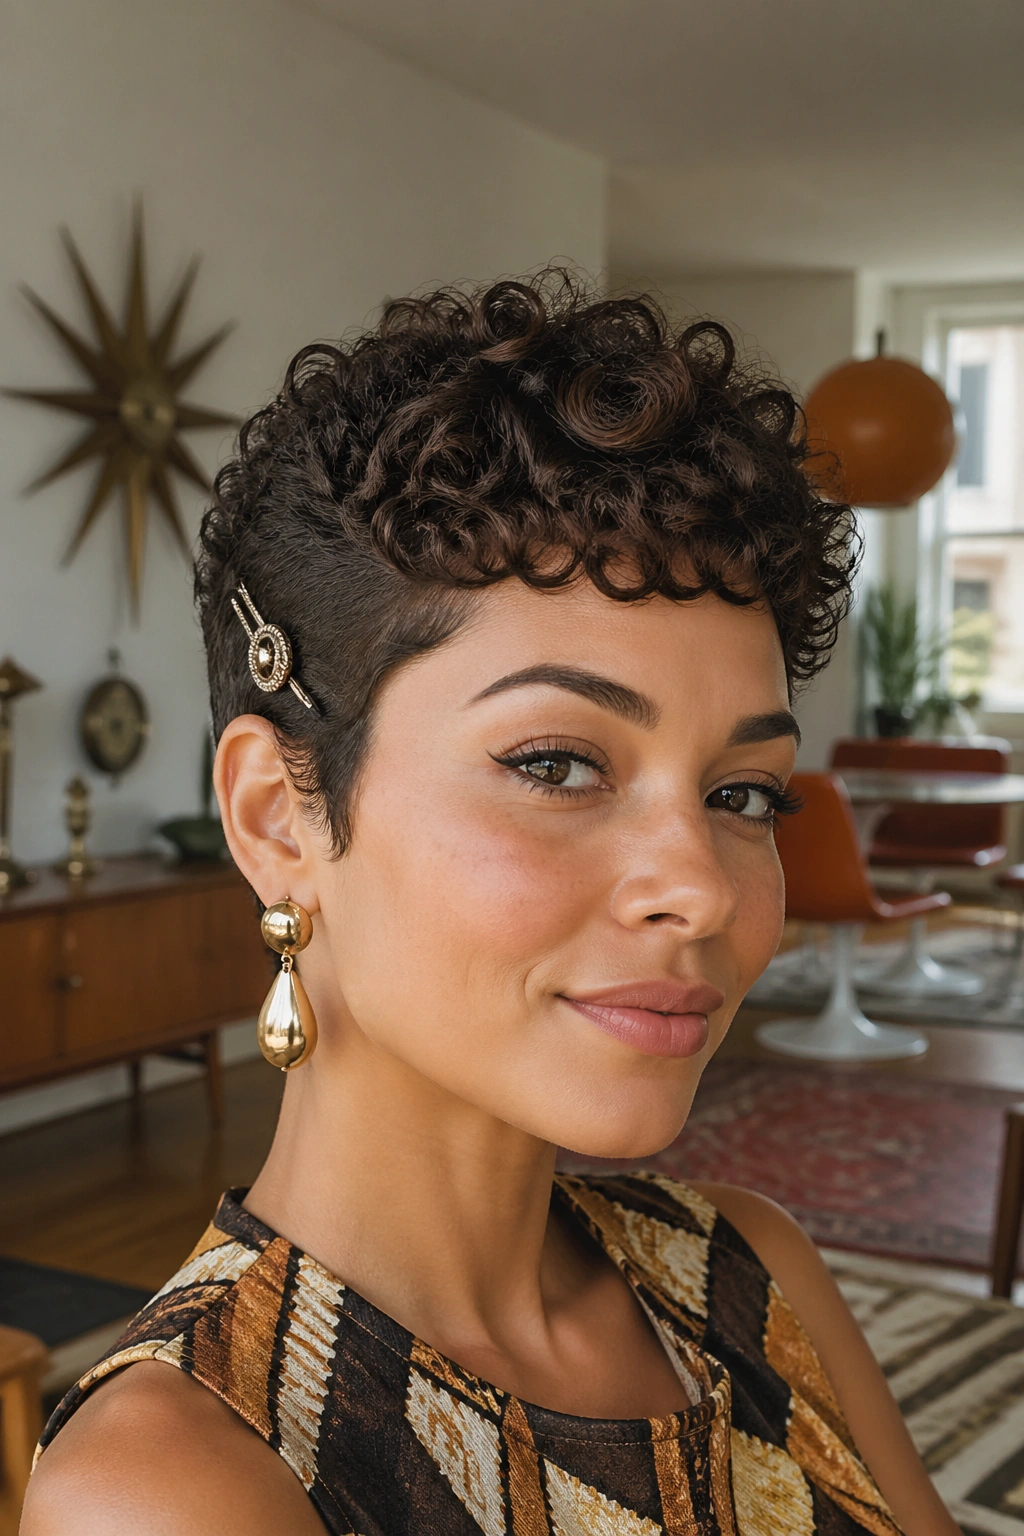
Short curly hair does not have to be soft and sweet. A mod pixie with defined coils can look sharper than any long style in the list, and that sharpness is part of the appeal. The cut feels clean, but the texture keeps it from looking severe.
Keep the sides neat, leave enough length on top for 1- to 2-inch coils, and define the front with a small dab of gel so the pattern stays crisp instead of fuzzy. A single barrette at the temple can tilt the whole thing back toward the decade without making it feel like a costume.
This is one of my favorite looks for tighter curl patterns. It celebrates the shape you already have, which is more useful than trying to stretch every curl into obedience. A little lift at the front and a tidy edge near the ears go a long way.
If your cut is very short, focus on the silhouette more than the curl pattern itself. The outline does the retro work.
11. Ribbon-Wrapped Ponytail
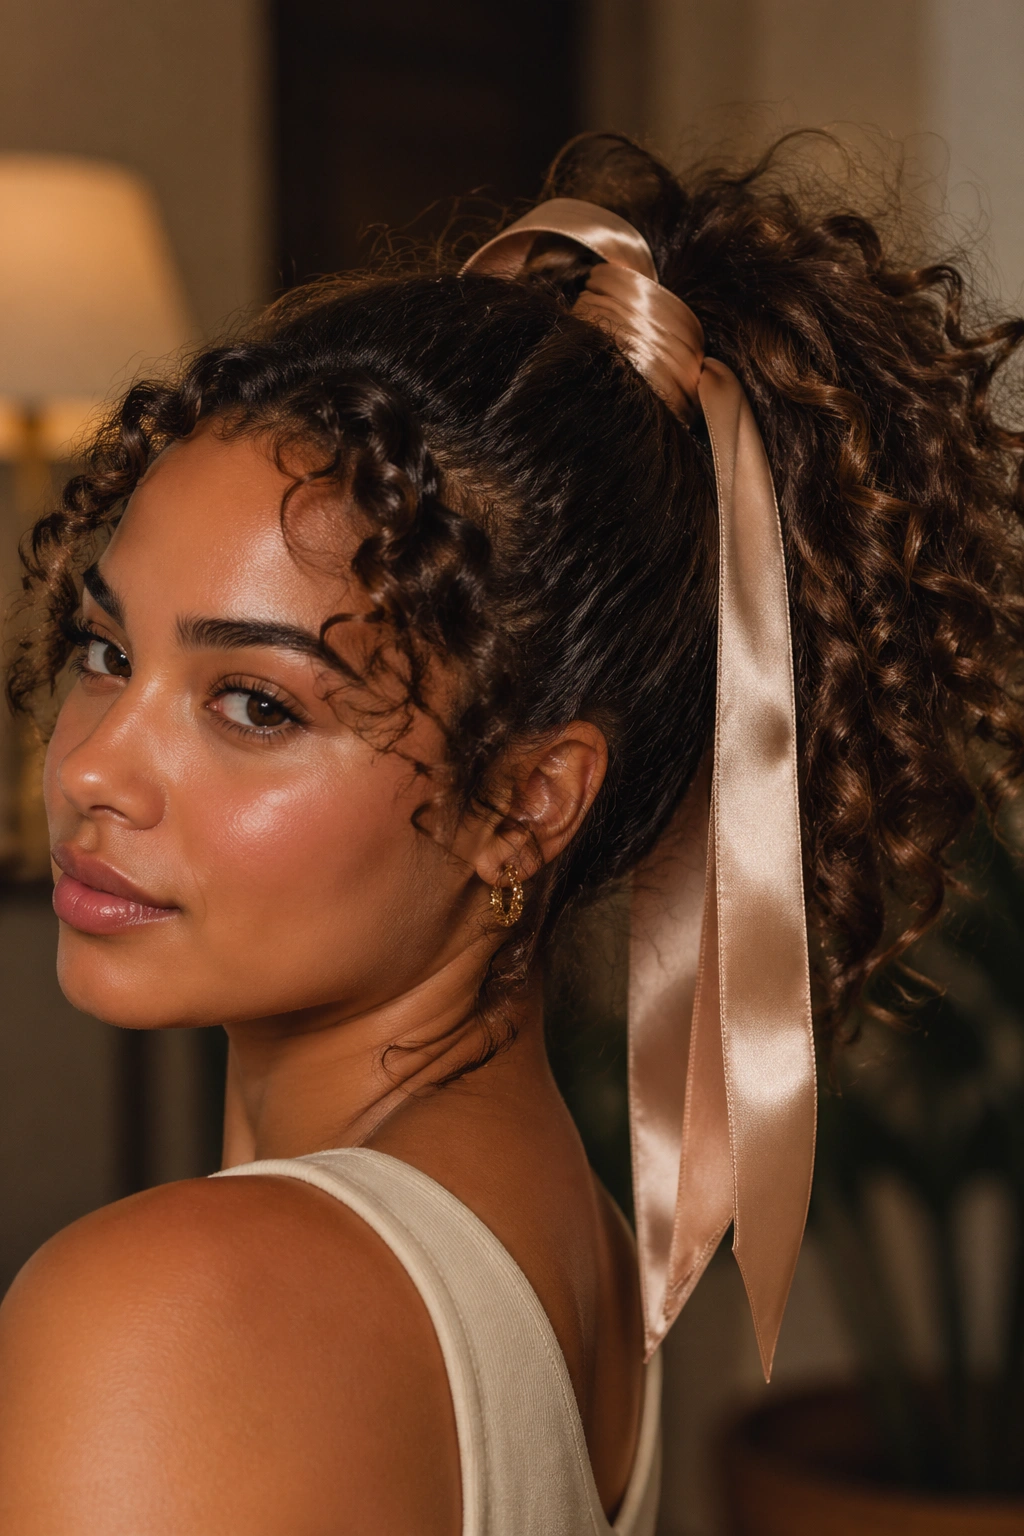
A satin ribbon wrapped around a curly ponytail changes the mood fast. The shape stays simple, but the ribbon gives it that polished 1960s edge. It’s a small detail, and it matters more than people think.
I like a ponytail set at mid-high height, with the crown lifted just enough to avoid a flat back. Wrap the ribbon around the elastic twice and let the tails hang long; short ribbon ends look accidental, while longer ones make the style feel finished. Grosgrain grips better than slippery satin if your hair is fine or silky.
Why the ribbon matters
A ribbon does more than decorate. It creates a line at the base of the ponytail, which makes the style read as deliberate. Without that line, a curly pony can look like a rushed workout look. With it, the whole thing shifts into vintage territory.
- Use ribbon about 1/2 inch to 1 inch wide.
- Tie it after the elastic, not in place of it.
- Let the ponytail sit slightly off-center if you want a softer look.
- Pull one small curl loose at the front if the face needs shape.
I’d keep the ribbon matte if the curls are glossy. Too much shine can get noisy.
12. Sculpted Afro with Soft Crown Lift
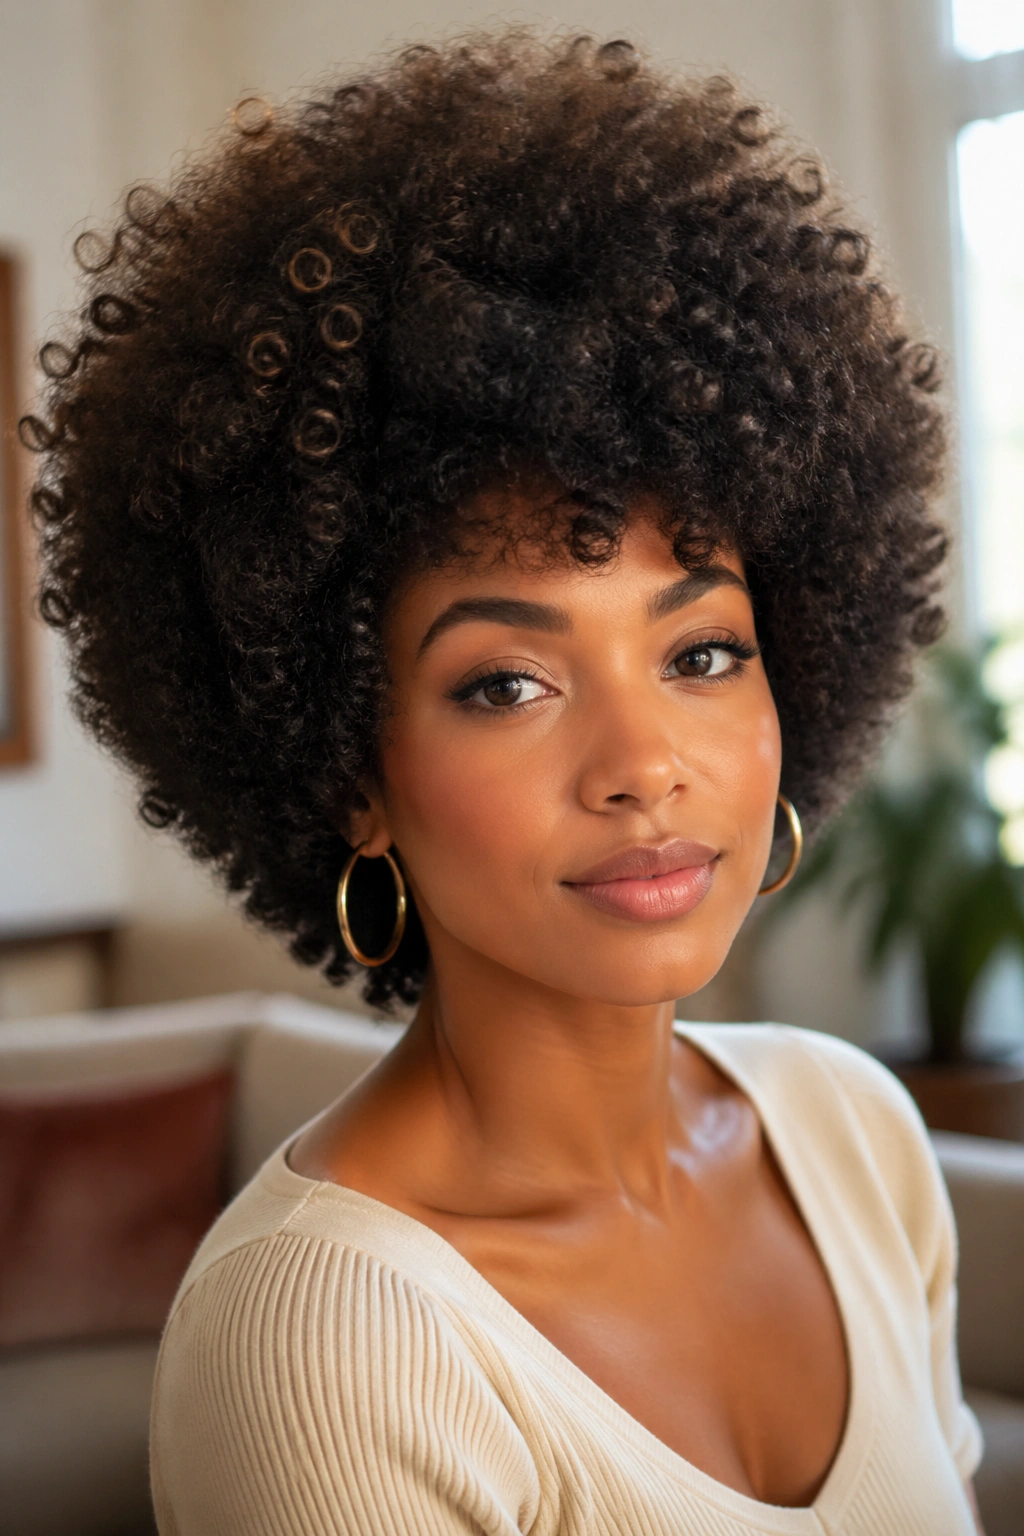
The rounded afro should feel airy, not boxed in. That’s the line that separates a shaped vintage look from a heavy outline that sits there without life. A soft crown lift gives the style the lifted, rounded profile that fits so many 1960s images, especially once the silhouette gets cleaned up around the edges.
This is one of the best 1960s-inspired hairstyles for curly hair because it honors texture instead of fighting it. Use a wide-tooth pick at the roots, lift in small sections, and shape the outline into a soft circle or oval. The crown needs height; the sides need space. If the sides are pressed flat, the whole style loses its shape.
- Pick the roots in 1-inch sections.
- Start near the crown and work outward.
- Use your hands to round the shape before you touch the pick again.
- Finish with a little oil on your palms, not a heavy coat on the hair.
- Skip tight clips that dent the outline.
Keep the texture fluffy but controlled. That’s the balance.
13. Tucked-Under Flip with Roller-Set Ends
The tucked-under flip looks neat from the front and a little cheeky from the side. That is its charm. Smooth the top layer, tuck the ends under with a round brush or large rollers, and leave the hairline soft so it does not turn into helmet hair.
On thick curls, keep the flip only at the bottom third. Trying to roll the whole length usually makes the style too bulky to sit right. Shoulder-length hair is the easiest place to start, because the curve has enough room to show without swallowing the head shape.
How much to roll under
A little goes a long way. The last 2 to 3 inches of hair usually need the most shaping. Anything more can look heavy.
This is one of those styles that benefits from patience during setting and almost no touching afterward. Let the rollers cool fully. If you release them too soon, the bend falls before it even gets a chance to settle.
A couple of pins hidden under the flip can hold the shape if your hair is slippery. Use pins that match your hair color if you can.
14. Low Curly Chignon with Side Barrette
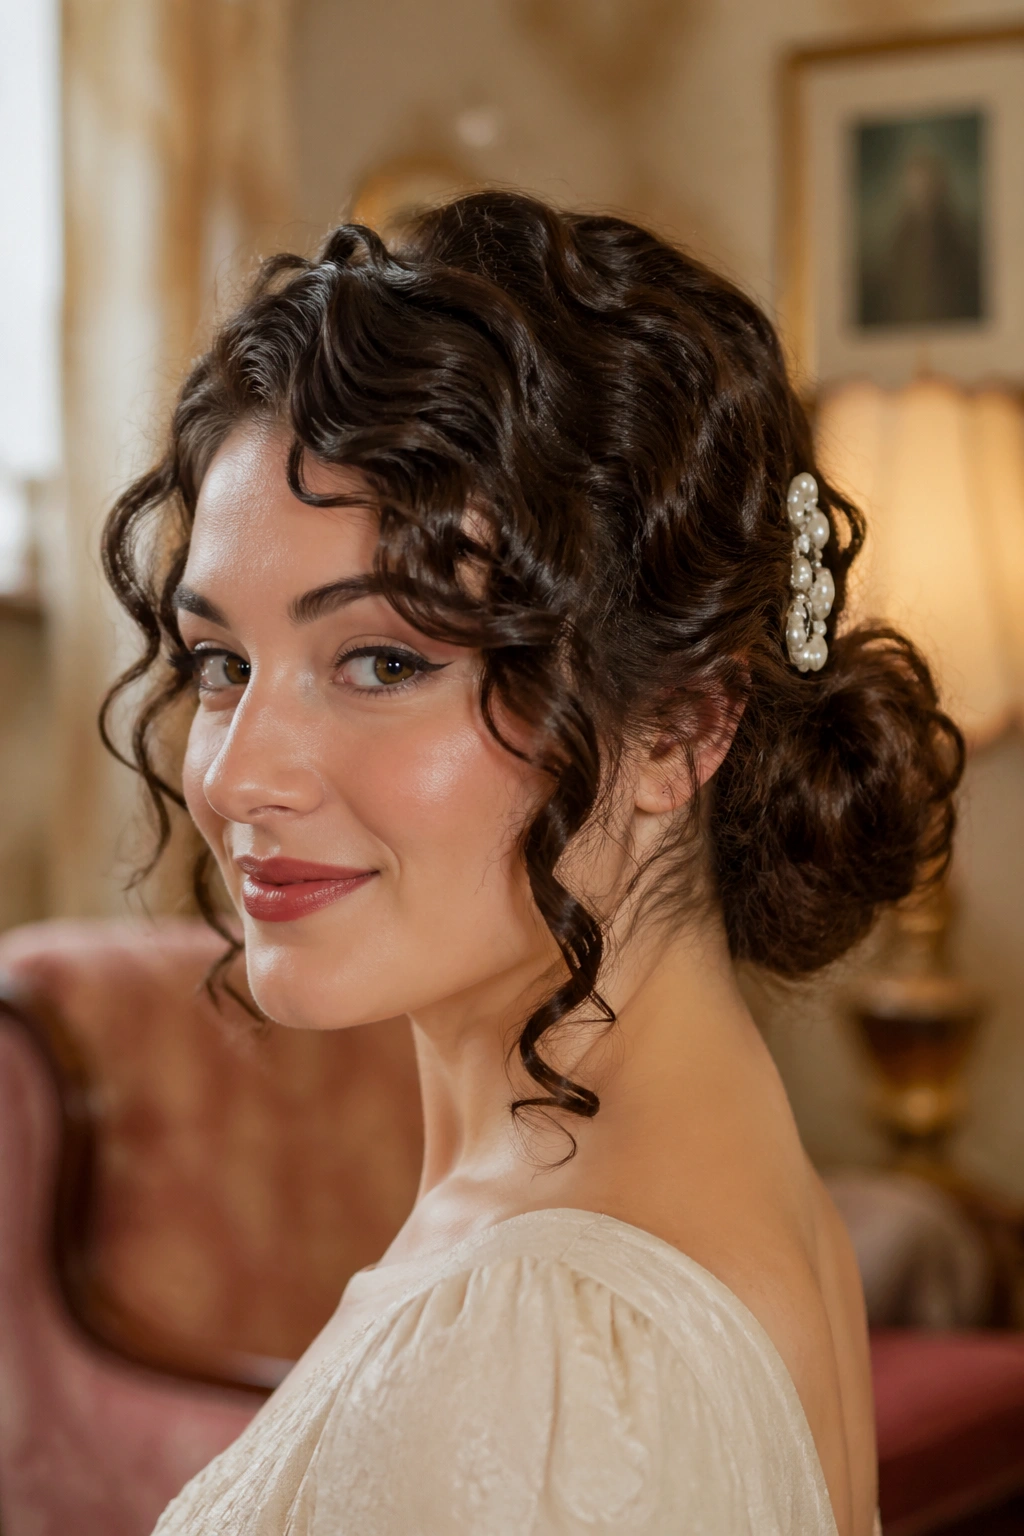
Not every low bun needs to look severe. A low curly chignon with a side barrette keeps the neck line neat while still letting a few curls escape at the temples and nape. That tiny bit of looseness matters. It keeps the style from feeling too polished to breathe.
Pin the bun low and slightly off-center, then tuck a decorative barrette where the side part meets the bun. Pearls, tortoiseshell, and brushed metal all work better than sparkly things that scream for attention. The barrette is doing the visual framing here, so let it be visible.
What makes it feel retro
The 1960s version of this shape rarely looked slick from every angle. It had softness at the edges and structure in the middle. That’s the part to copy.
- Leave 2 or 3 face-framing curls out on purpose.
- Keep the bun compact, not spread wide.
- Place the barrette above the ear line, not at the nape.
- Use pins in a crisscross pattern so the bun sits flat.
A low chignon is quieter than the bouffant looks, but it still has plenty of character.
15. Loose Center-Part Volume with a Soft Crown Lift
Soft center-part volume is the style I suggest when someone wants 1960s shape without the full costume. The part stays clean, the crown gets a little lift, and the curls fall in a round frame around the face. The height should be there, but not huge. That’s the difference between “inspired by the decade” and “wearing a wig from a party shop.”
Keep the part straight, tease the roots lightly at the crown, and smooth the top layer with a brush or your hands. Let the curls stay loose through the ends. If the silhouette opens up around the cheeks and narrows a touch at the forehead, the style starts to feel very right.
This is the one I’d hand to someone who wants a first try at retro curls. It’s forgiving. It works on medium lengths. It doesn’t ask for a ton of pins. And if the lift softens over the day, it still looks deliberate instead of fallen apart.
A little structure at the crown. A little freedom everywhere else. That’s the trick, and it keeps showing up because it works.
A good sixties-inspired curly style never smothers the curls. It shapes them. That’s the whole game. If you remember nothing else, remember that one thing, because it will save you from a lot of stiff, overdone hair that looks fine in a mirror and awkward in motion.