If you’ve been scrolling through hair inspiration and keep landing on those effortlessly textured, face-framing shag cuts, you’re definitely onto something. Shag haircuts have made a serious comeback, and honestly, they’re having a moment that feels like it’s here to stay. The beauty of a shag for wavy hair isn’t just about following a trend — it’s about working with your natural texture instead of fighting it. Wavy hair already has movement and dimension built in, so a well-designed shag amplifies that, creating depth, removing bulk in all the right places, and giving you a style that actually looks better the messier it gets.
The thing about shag cuts is that they’re surprisingly versatile. Whether you’re drawn to the rock-and-roll edge of a choppy, shorter shag or the romantic, beachy flow of a longer, layered version, there’s a shag variation that’ll make your waves feel intentional rather than accidental. The key is finding the right proportions for your face shape, your wave pattern, and honestly, how much styling effort you’re willing to put in. Some of these styles work beautifully with just a scrunch of product and air-drying; others benefit from a little texture spray and finger-styling to really shine.
What makes shags so magnetic on wavy hair is that the layers actually enhance your natural curl and wave pattern rather than disrupting it. Long layers meet your waves at different points, allowing them to fall with more freedom and personality. You get volume at the crown, movement through the mid-lengths, and that undone, sophisticated texture at the ends. The cuts I’m sharing here range from subtle, barely-there layers to dramatically choppy, statement-making shags — all of them designed to look their absolute best when you’ve got natural wave in your hair.
1. Classic Shoulder-Length Shag with Choppy Layers
This is the shag that started the whole modern revival, and it remains the most flattering option for a huge range of wave patterns. The cut lands right around shoulder length, with choppy, disconnected layers throughout that create texture without looking overly styled. What makes this version work so well for wavy hair is the balance — the layers are short enough to remove weight and create movement, but long enough that your waves don’t feel fragmented or choppy in a way that’s hard to manage.
Why This Cut Works for Wavy Hair
The choppy layers fall at natural breaking points in your wave pattern, so when you dry your hair, those layers naturally define each wave rather than fighting against it. The cut is forgiving with grow-out, too — as your hair gets longer, it just becomes a slightly longer shag, which is a pretty good look. The texture that this cut creates reads as intentional and edgy, not messy or unkempt, even when you’re literally just running your fingers through it.
How to Style It Best
- Work styling product into damp hair before blow-drying or air-drying
- Use a texturizing spray to separate layers and enhance definition
- Rough-dry your hair with a diffuser attachment to encourage wave formation
- Finish with a light hairspray to hold the separation without making it stiff
- Tousle with your fingers for that effortlessly undone vibe
Pro tip: This shag looks even better on day-two or day-three hair when the texture has had time to settle and your waves have developed more definition. Don’t feel like you need to recreate it perfectly every single day.
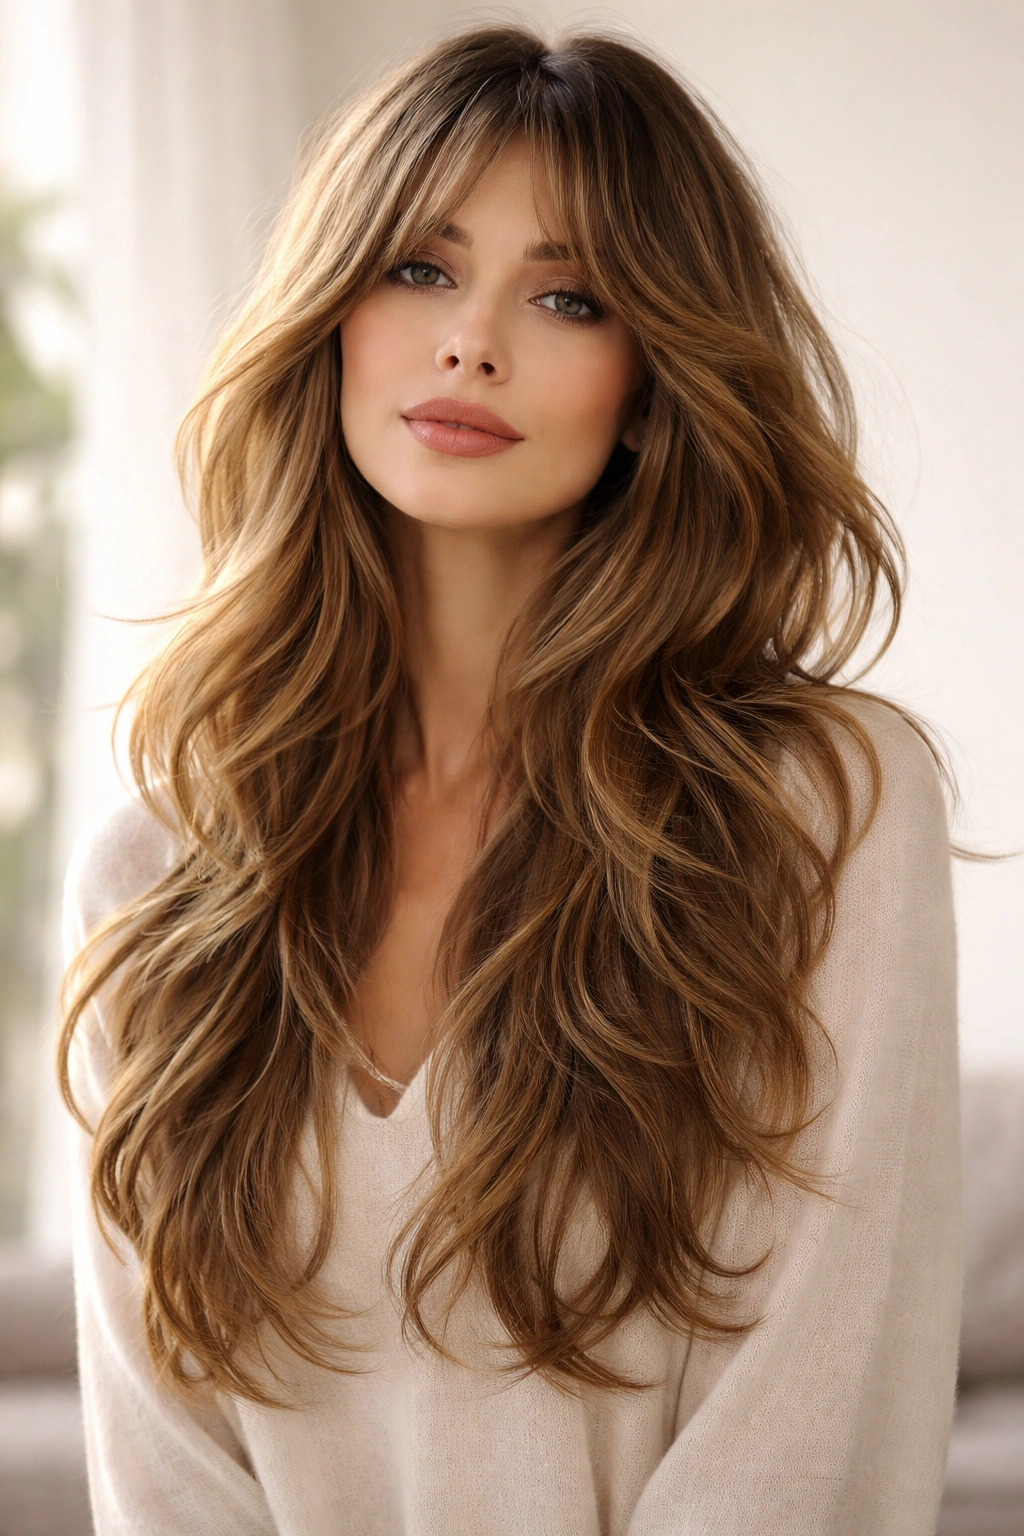
2. Long Shag with Subtle Layers
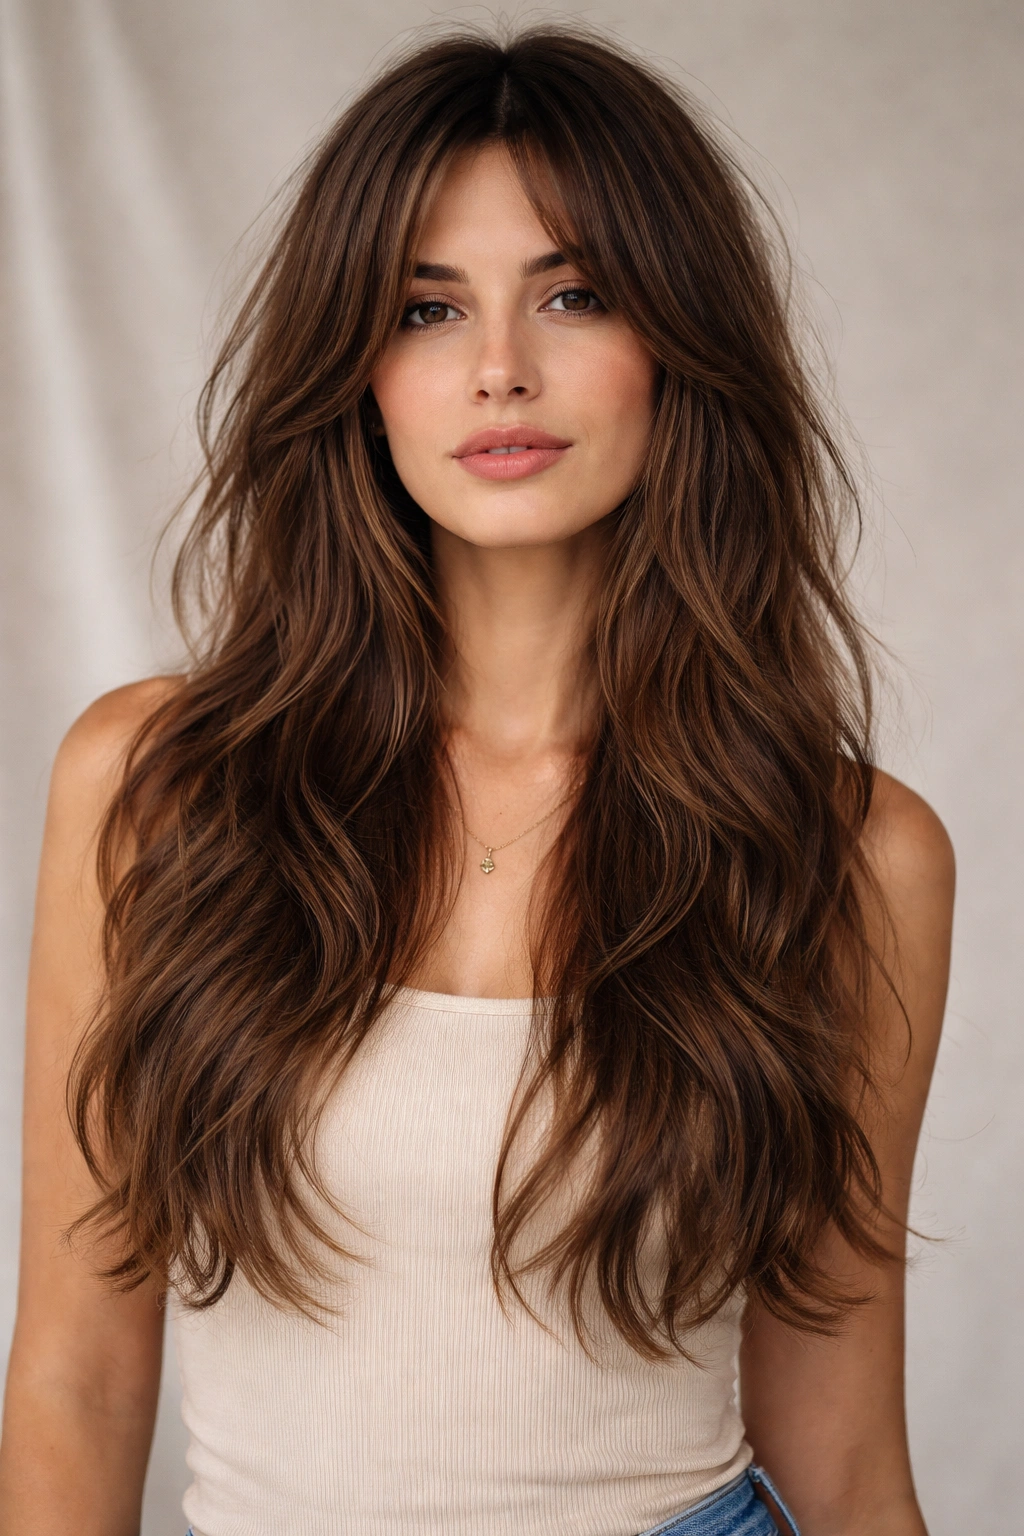
If you’re wavy but not super textured, and you’re drawn to longer hair, this subtle-layer approach gives you the shag benefits without the dramatic chop. The cut stays fairly long — hitting below the shoulders or even mid-back — with layers that are barely perceptible on fresh-from-the-salon smooth hair but absolutely transform your waves when you style them. This is the shag for people who want movement and texture without looking like they’ve had a major cut.
The Layering Strategy
The genius of this cut is that the layers are lighter and more spread out than a traditional shag, so they don’t read as “choppy” at all. Instead, they create internal movement that makes your waves look fuller and more defined without removing much length. The longest layers usually start around cheekbone level or lower, so there’s always enough length to pull back if you want a ponytail or bun.
Styling and Maintenance Tips
- Blow-dry in sections with a round brush to activate your waves
- Use a sea salt spray for texture and definition without crunchiness
- Expect to trim every 4-6 weeks to keep the layers looking fresh
- Consider a dry-cut touch-up between full cuts to maintain the layer shape
- Wavy hair tends to grow at different rates with a cut like this, so regular trims help
Worth knowing: This cut requires slightly more styling intention than a traditional shag because the layers are more delicate. But the payoff is a sophisticated, modern look that doesn’t scream “shag” if that matters to you.
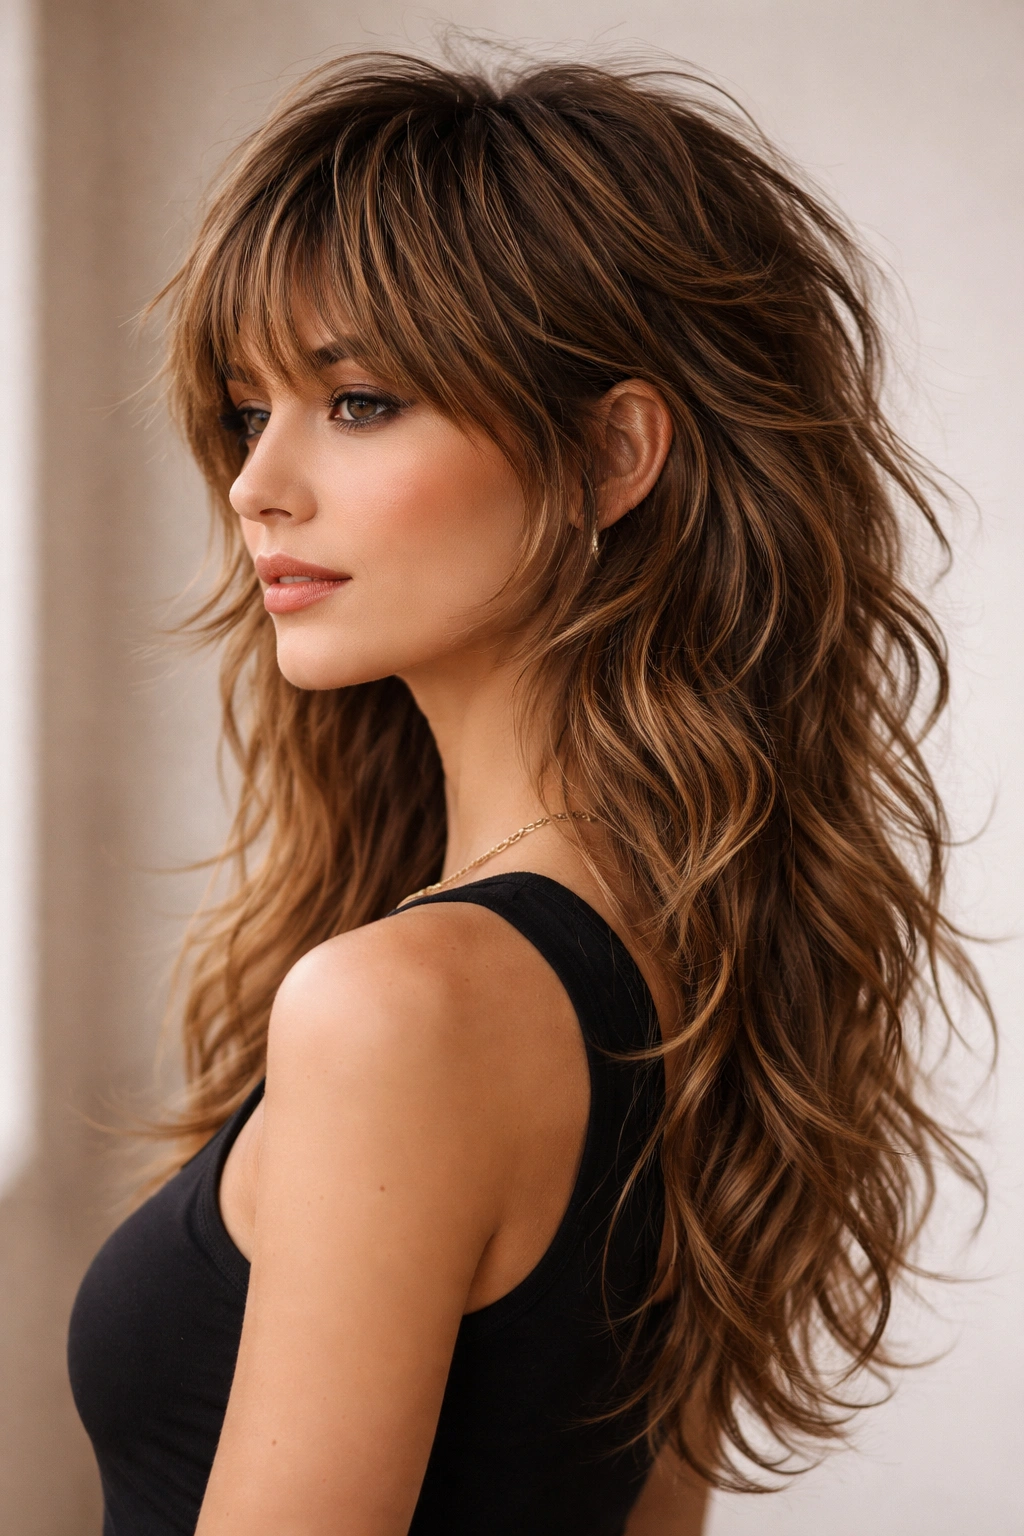
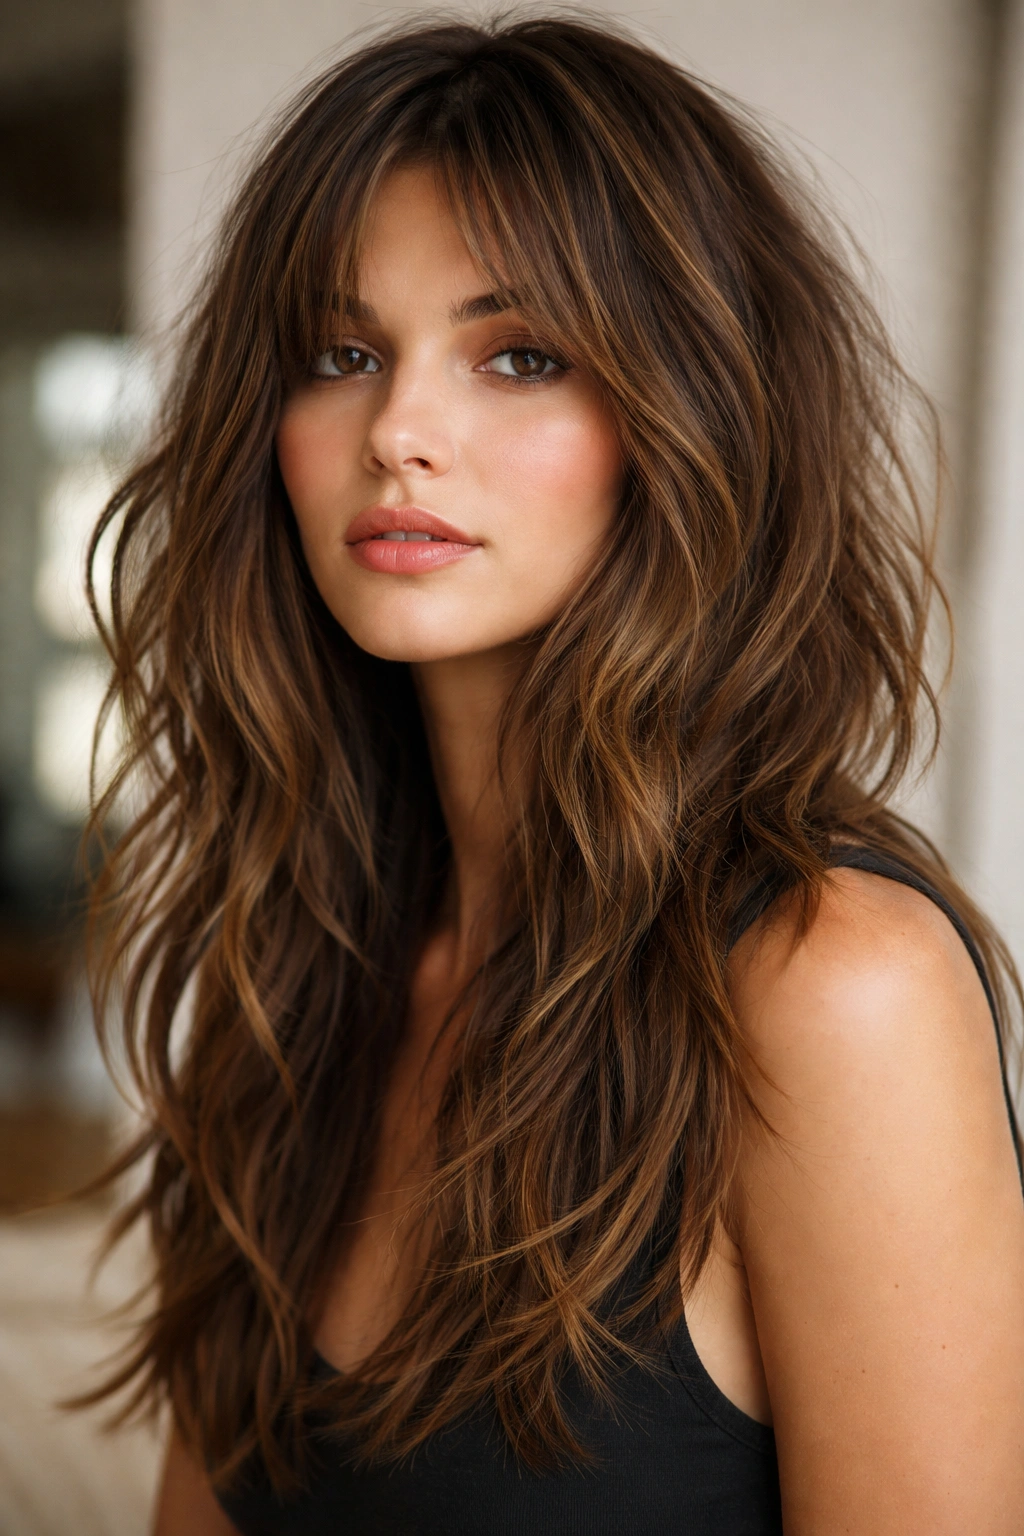
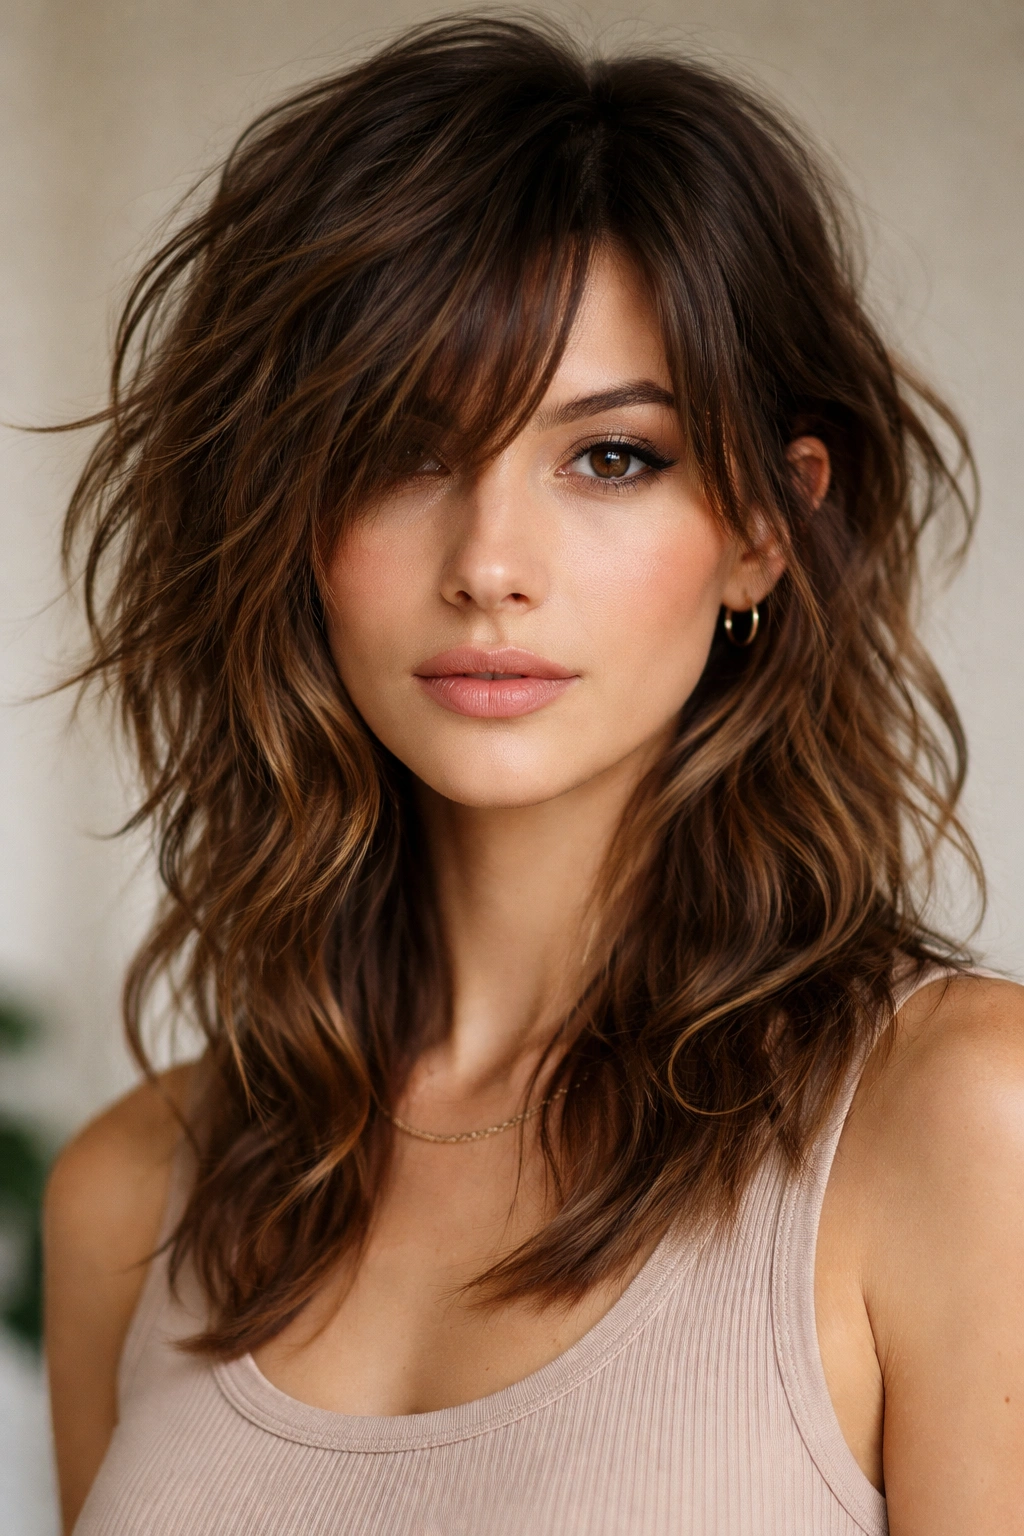
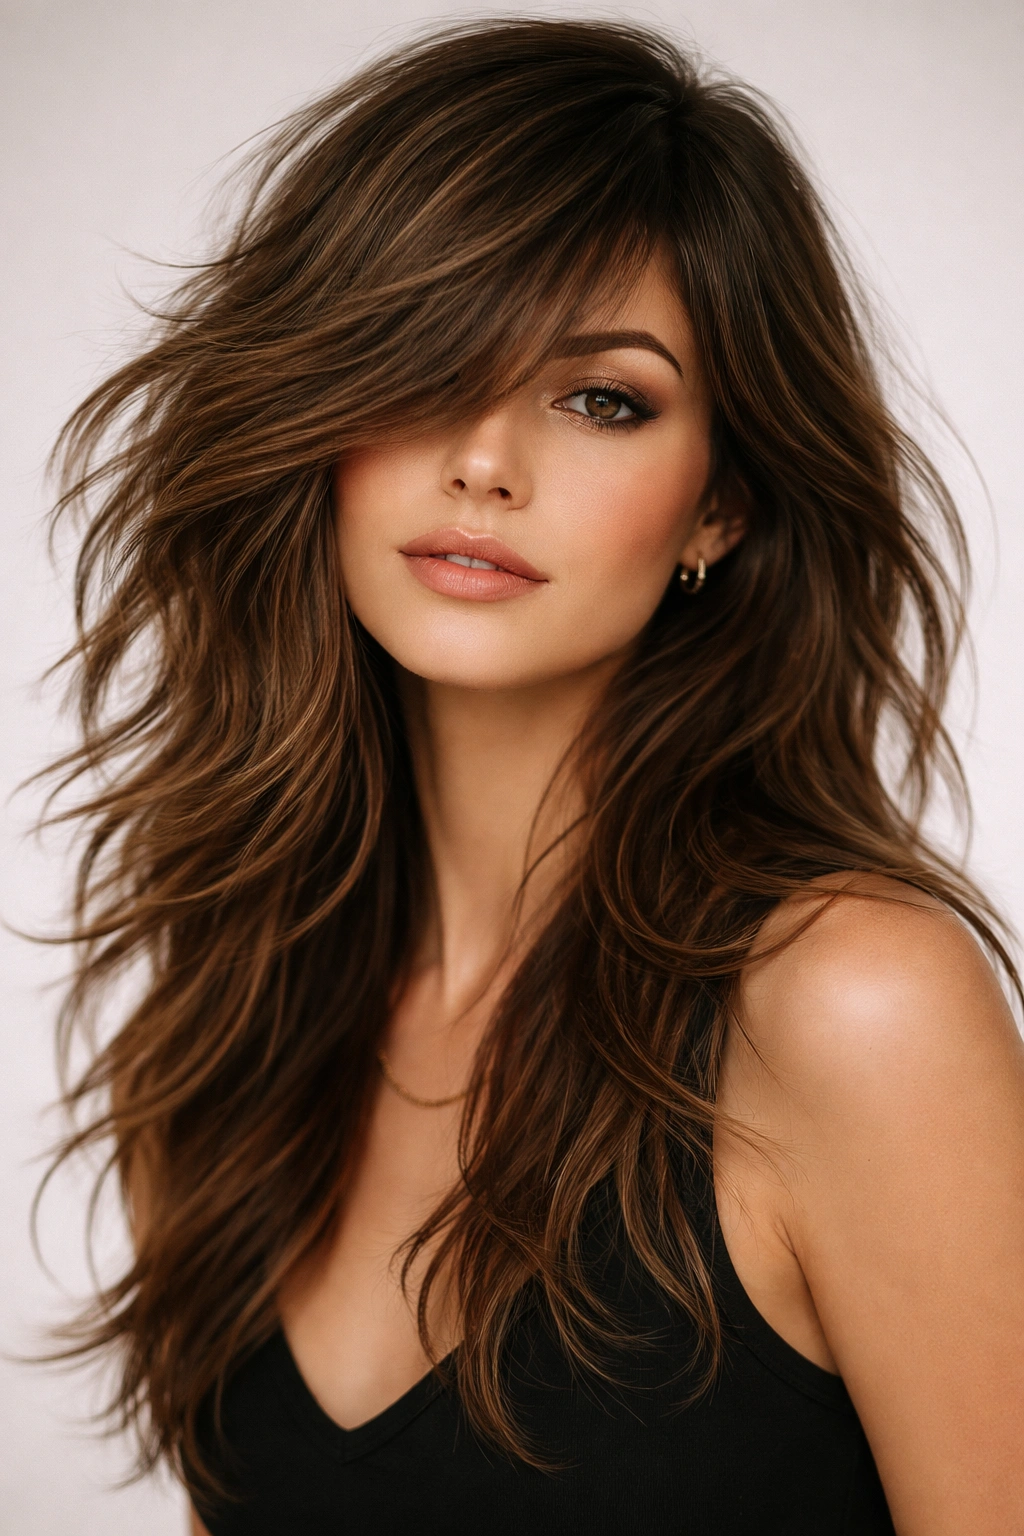
3. Textured Shag with Face-Framing Layers
This version puts the focus on dramatic face-framing pieces combined with choppy texture throughout. The shortest layers surround your face at cheekbone or chin length, creating that flattering, youthful framing effect, while the rest of the hair is built with texture in a more traditional shag pattern. The face-framing layers are what make this cut feel current and a bit editorial rather than purely ’70s.
Face-Framing That Flatters Every Face Shape
The key is that the face-framing pieces aren’t just shorter — they’re choppy, which means they fall differently than the rest of your hair and create movement that draws attention to your eyes and cheekbones. For wavy hair, those short choppy pieces do something magical: they curl and bend in ways that create softness and movement around your face without looking manicured.
Styling for Maximum Impact
- Focus styling effort on the face-framing layers first
- Use a small-barrel curling iron or a 1.25-inch waver to define the frames pieces
- Style the rest of your hair more loosely — let the choppy layers do the work
- A texture spray or light dry shampoo adds grip and definition to face-framing pieces
- Experiment with slightly undone styling that emphasizes the choppy edges
Insider note: If your face-framing layers start looking too blunt as they grow out, a quick texturizing razor-trim can keep them looking intentionally choppy and fresh between major cuts.
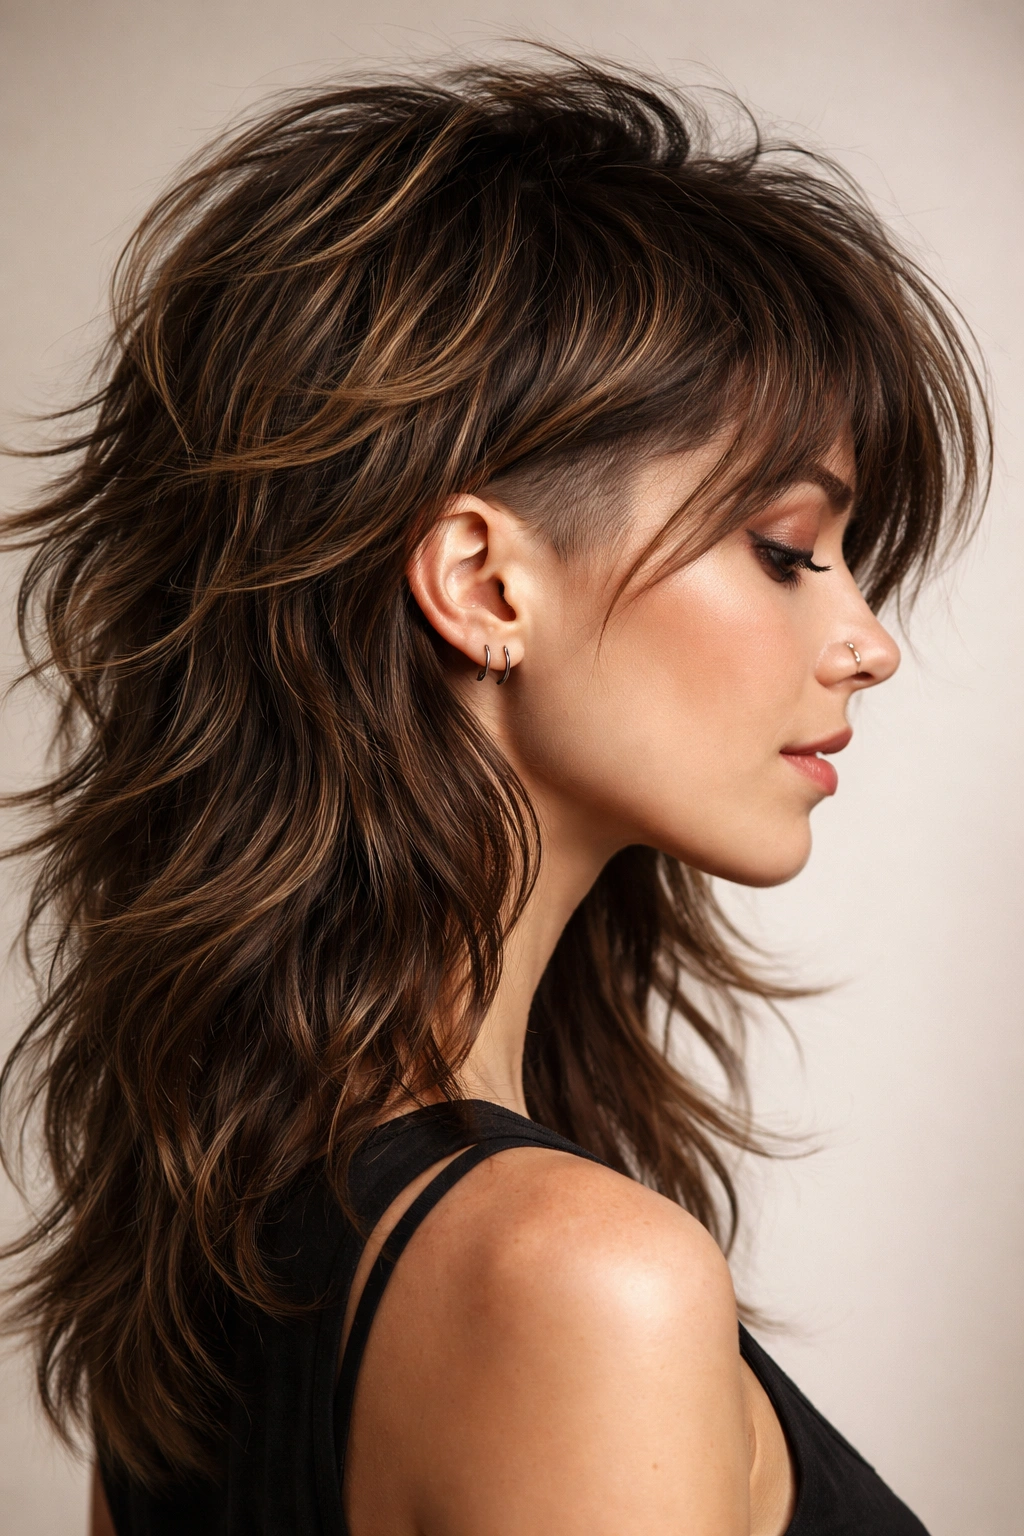
4. Mullet-Influenced Shag
The modern mullet has evolved into something way more wearable than its ’80s ancestor, and when you apply it to wavy hair with a shag sensibility, you get something genuinely cool. This version is shorter and choppier at the crown and through the top, then transitions into longer length at the back — but it’s done with layers and texture, not a harsh disconnection. The result feels edgy and fashion-forward without being costume-y.
The Shag-Mullet Balance
What separates a good shag-mullet from an awkward “business in the front, party in the back” situation is the gradual layering. The shorter pieces at the top aren’t blunt — they’re choppy and textured, and they gradually lengthen as you move back. Your waves play a huge role here because they soften what could otherwise read as sharp or severe.
Styling Requirements
- This cut works best when your top is textured and slightly tousled
- The back can be sleeker or more textured depending on your vibe
- Consider how your waves sit at the crown when consulting with your stylist
- Blow-dry the top for volume and let the back fall more naturally
- Product matters here — use texturizing spray throughout to enhance the shape
Pro tip: This cut photographs beautifully from the side, so if you’re considering it, look at side-profile pictures in inspiration galleries to see if you like the proportions.
5. Long Choppy Shag with Minimal Weight at the Ends
This is the full-drama shag for people with seriously thick, wavy hair who want to remove weight without losing length. The layers are abundant and choppy throughout, but they’re especially pronounced at the ends, creating that feathered, disconnected texture that defines the classic shag. The cut starts around shoulder length and falls longer, with the layers creating tons of movement rather than a blunt hem.
Managing Thick Wavy Hair with Layers
When you’ve got genuinely thick waves, a cut like this is transformative. The choppy layers break up the density without making your hair look stringy or thin. Instead, you get this gorgeous, textured, almost shredded effect at the ends that photographs amazingly and feels light when you touch it. The key is that every layer removes weight rather than just adding length.
Drying and Styling Strategy
- Rough-dry with a diffuser to encourage your natural waves to form
- Use a texturizing spray while your hair is still damp for best hold
- Avoid over-brushing, which can blur the choppy definition
- A light hairspray keeps the texture separated without making it crunchy
- Embrace the undone aesthetic — this cut looks better slightly messy than perfectly polished
Worth knowing: This cut can feel high-maintenance if you’re used to just towel-drying and going. But the texture lasts longer than you’d expect, and by day two or three, it often looks even better than day one.
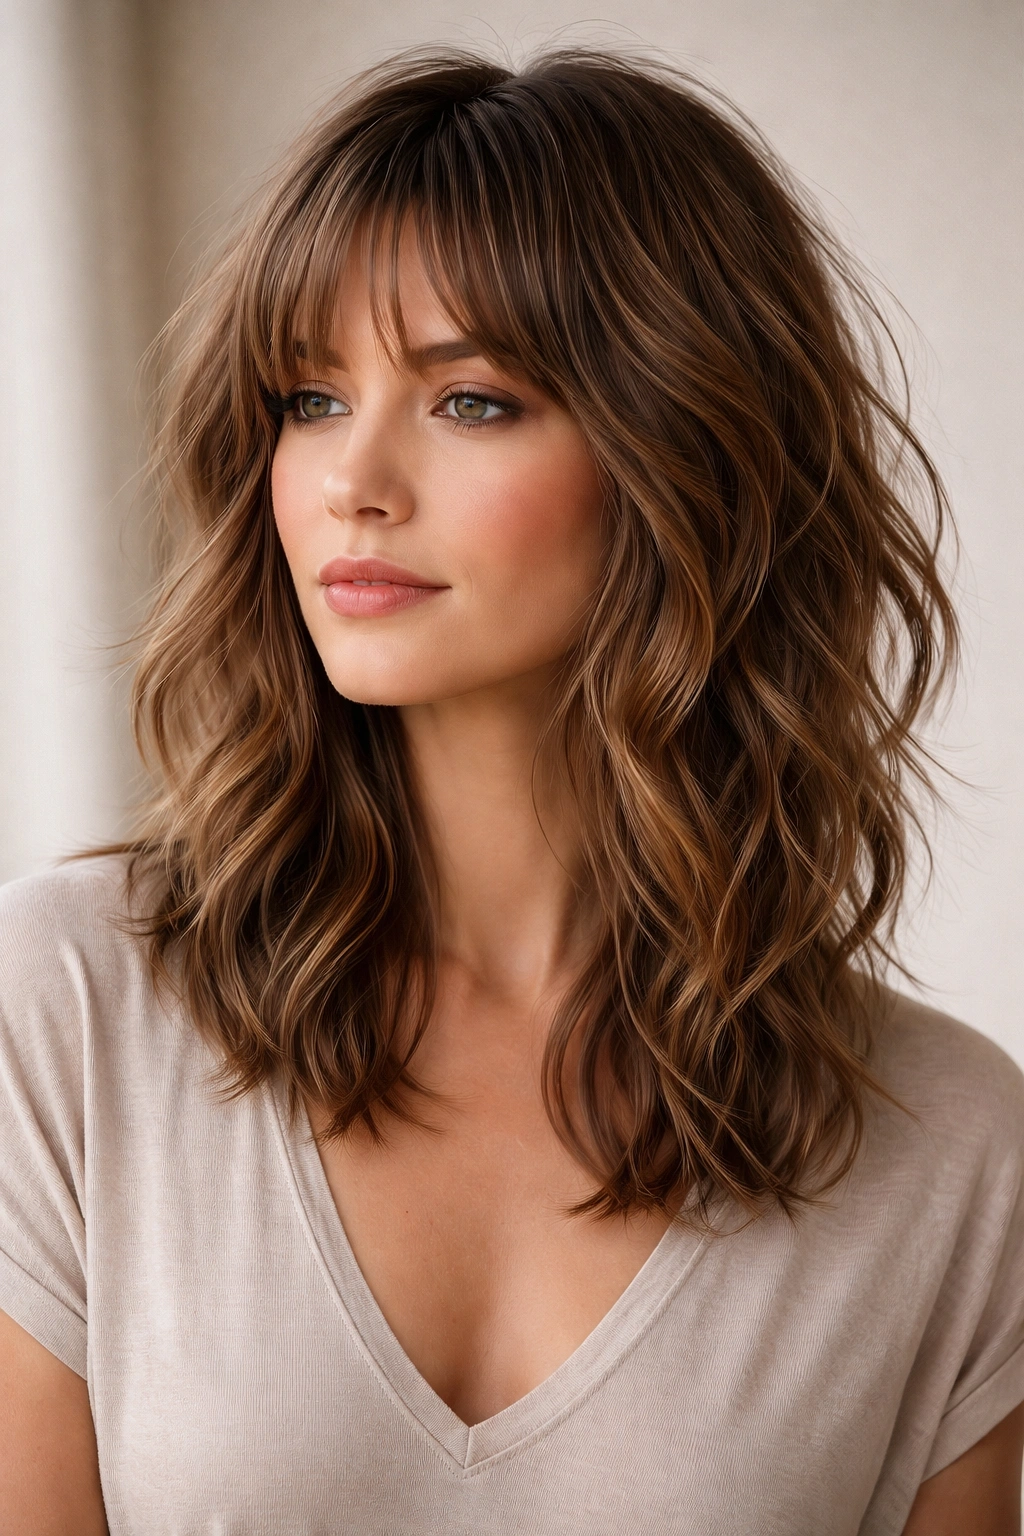
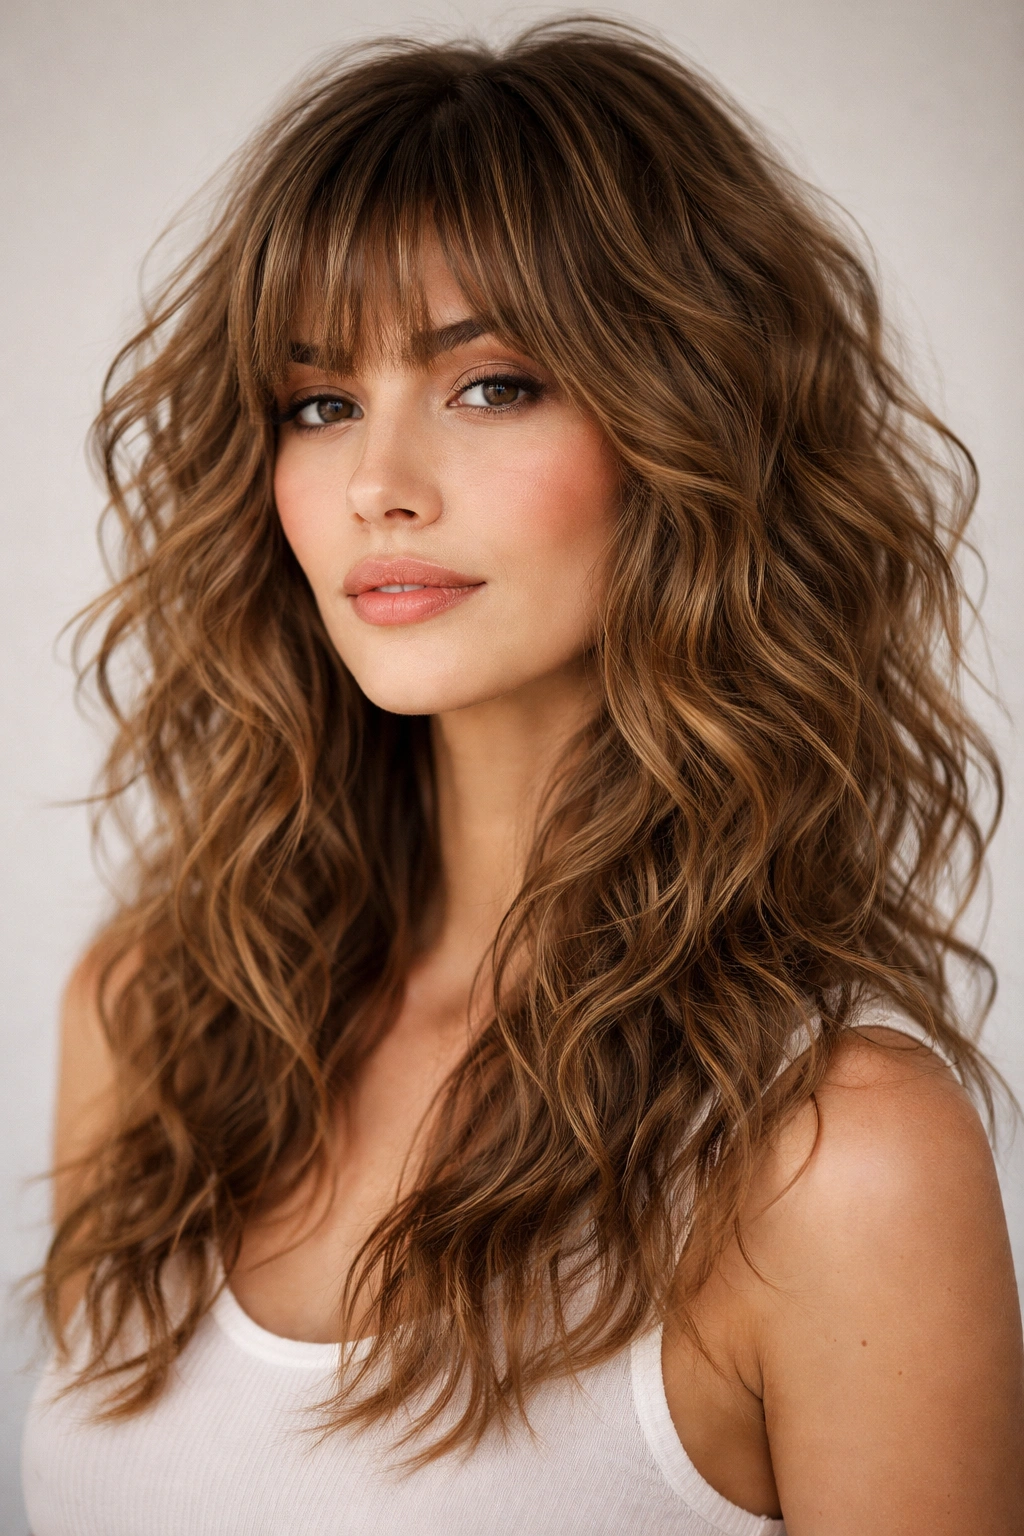
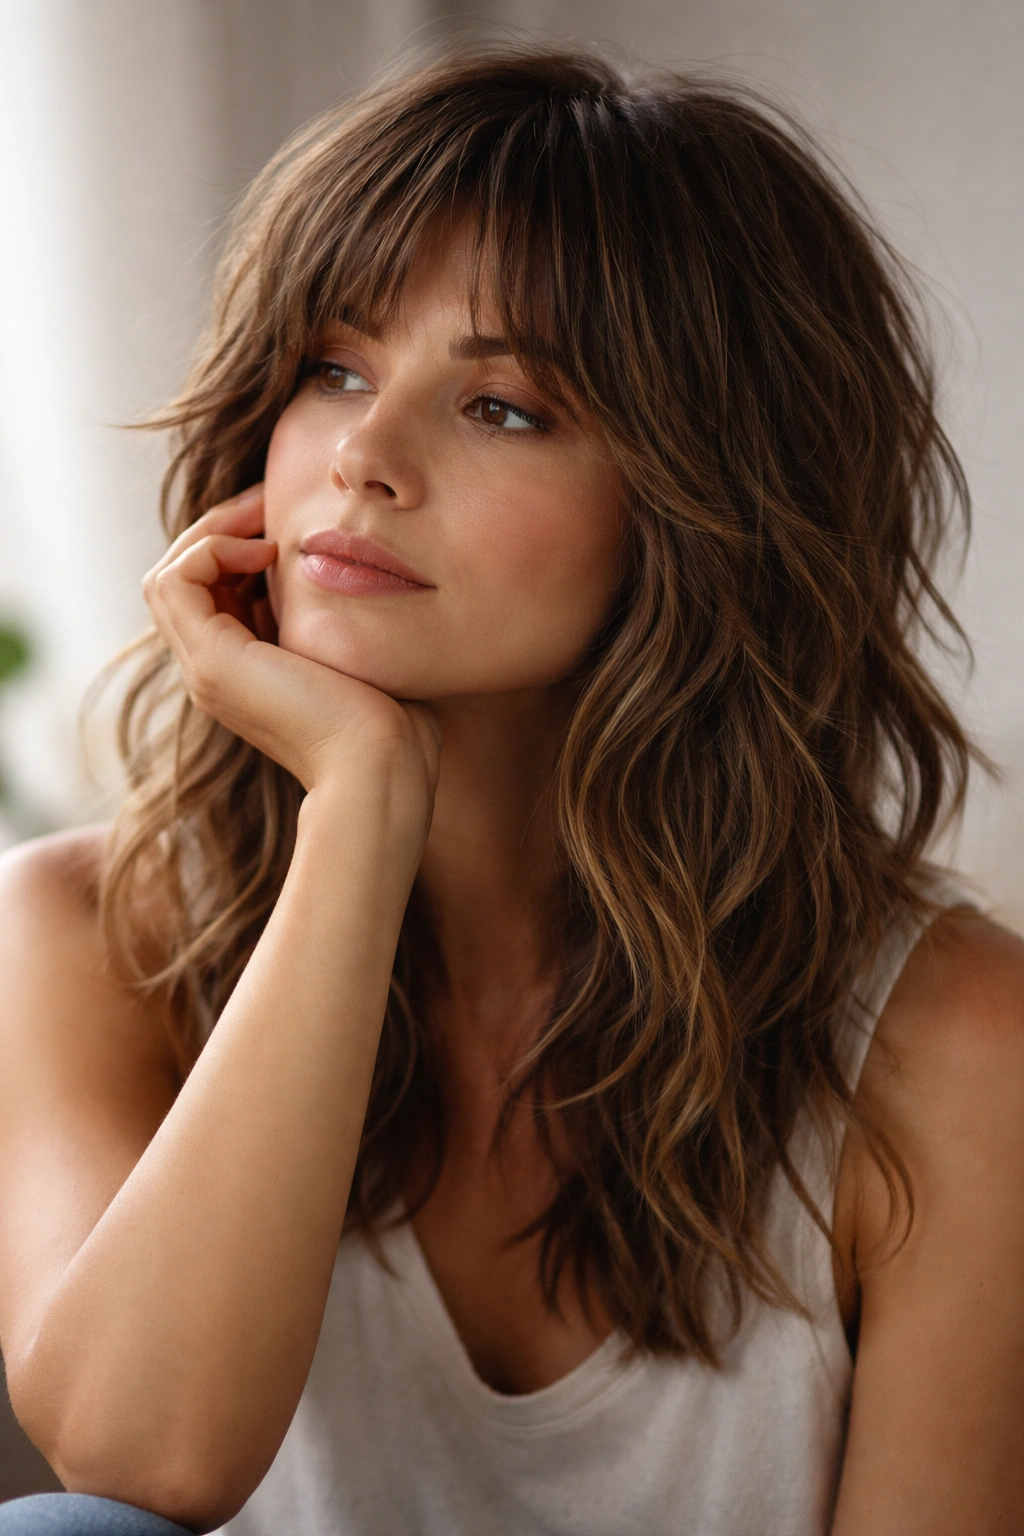
6. Shag with Blunt Bangs
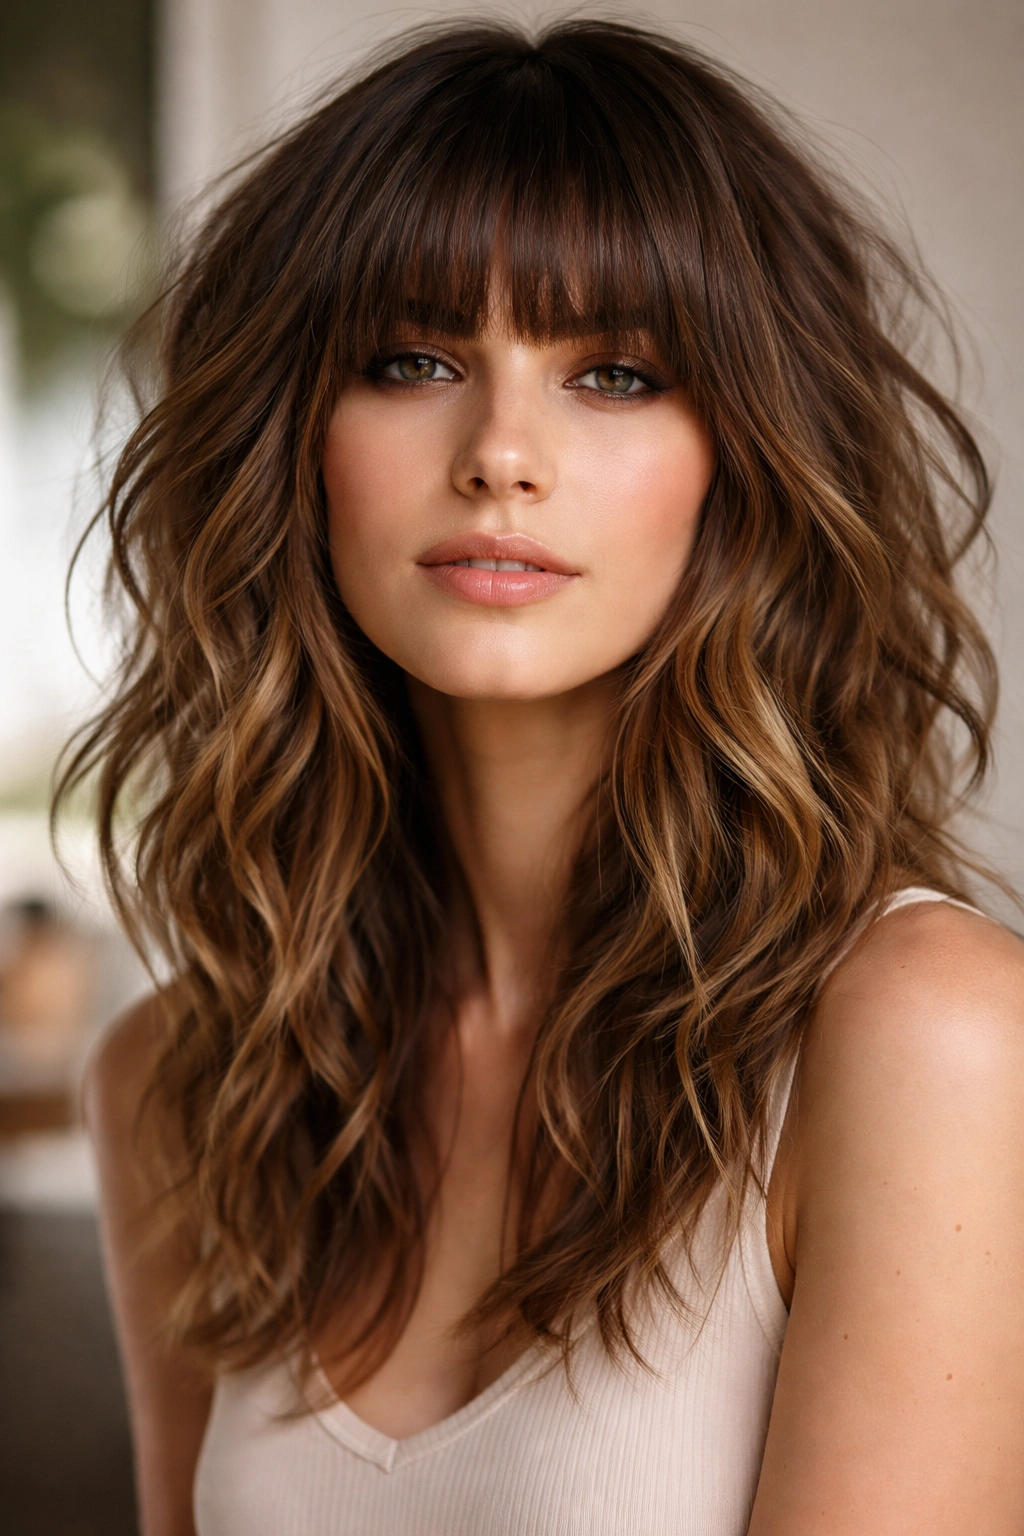
Bangs completely change the energy of a shag, and when you combine choppy, layered hair with blunt or heavily textured bangs, you get something with real personality. The shag itself follows all the usual rules — shoulders-length, choppy, textured — but the bangs are the statement maker. They can be full-coverage blunt, side-swept and textured, or choppy and piecey, depending on your styling preferences.
Bangs and Wave Pattern Compatibility
Here’s the thing: bangs and wavy hair require more styling intention than bangs with straight hair. You need to either embrace that your bangs will have movement and texture to them (which can look amazing and undone), or you need to be willing to style them more deliberately. The good news is that choppy, textured bangs actually look better with a bit of wave in them than perfectly straight.
Daily Styling for Bangs
- Your bangs might need blow-drying every day to look their best, even if you air-dry the rest
- Use a small round brush to direct the bangs while blow-drying
- A straightening iron can tame textured bangs if you want a sleeker look on certain days
- Texturizing spray can enhance choppy bangs or add separation
- Be prepared for bangs to feel shorter than you expected when they’re wet and longer when dry
Fair warning: If your waves are particularly pronounced, blunt bangs might not be the move unless you’re committed to styling them. Choppy, textured bangs work better with strong wave patterns because the texture disguises the movement.
7. Asymmetrical Shag
An asymmetrical shag takes the already interesting proportions of a shag and plays with them unevenly — one side is shorter or choppier, and the other is longer or slightly smoother. It’s an avant-garde choice that works beautifully on people with wavy hair because the asymmetry adds visual intrigue without needing to be blown out or heavily styled.
Creating Visual Balance with Asymmetry
The asymmetry shouldn’t be so extreme that it looks like you’re still growing out an uneven cut. Instead, it’s intentional — maybe one side is genuinely shorter and choppier while the other is longer and slightly less textured, or one side is swept back while the other falls forward. Your waves help soften the asymmetry so it reads as edgy and thoughtful rather than accidental.
Styling an Asymmetrical Shag
- Embrace which side naturally falls forward on your head
- Use that to your advantage — style the shorter side back if it’s choppy, let the longer side fall forward
- This cut looks particularly good when you’re not trying too hard with styling
- Air-drying often actually looks better than blow-drying for asymmetrical cuts
- Part your hair to showcase the asymmetry rather than trying to hide it
Insider note: Asymmetrical cuts can sometimes look better from certain angles. Show your stylist which side of your face you prefer to show the camera, and build the cut accordingly.
8. Shag with Permed or Enhanced Waves
If your waves are subtle or you want more defined curl in your shag, you can layer a perm or wave-enhancement treatment into your cut. A perm adds permanent texture throughout, which makes a shag look fuller and more textured without any styling effort. This is a commitment, but for people who want the shag look without daily styling, it’s genuinely transformative.
Perm and Wave Enhancement Options
You don’t necessarily need a full perm anymore — modern options include partial perms that add curl to just certain sections, or gentler wave-enhancement treatments that create more defined waves without the intensity of a traditional perm. Applied to a shag cut, these treatments give you dimension and movement that lasts between styling sessions.
Caring for Permed Shag Hair
- Permed hair requires sulfate-free shampoo and conditioner to preserve the curl
- Deep conditioning treatments keep permed hair from drying out
- Avoid heat styling initially after the perm sets (usually a few days)
- Once it’s set, you can style with heat if you want, but you don’t need to
- Regular trims (every 4-6 weeks) keep the shag shape looking intentional
Pro tip: If you’re considering a perm, do it after your stylist cuts the shag, not before. That way they can cut with the enhanced curl pattern already in place.
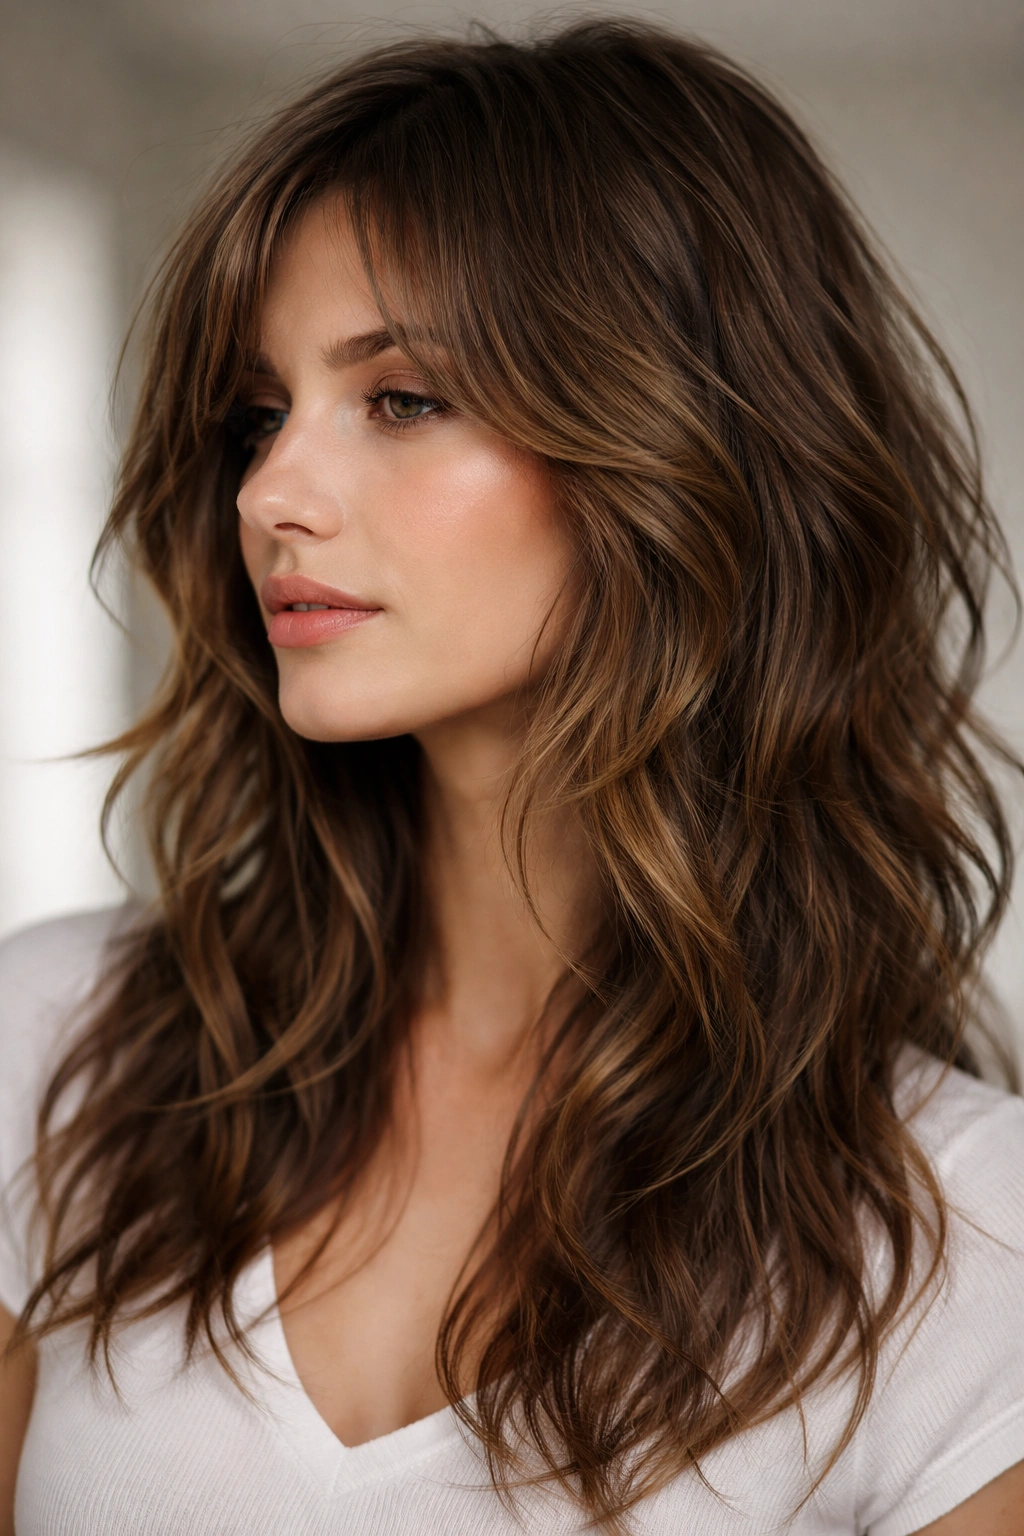
9. Long Shag with Feathered Layers
This is the romantic, bohemian take on the shag — long length, flowing layers, and a feathered rather than choppy approach. The layers are smooth and curved, created with point-cutting or feathering techniques rather than chopping, so they flow into each other. With wavy hair, this creates a gorgeous waterfall effect where your waves move smoothly from one layer to the next.
Feathering vs. Chopping Techniques
Feathered layers are cut at angles so they taper gradually, creating soft, flowing movement. Choppy layers are more blunt and disconnected, creating texture and separation. For a feathered shag, your stylist is working with your wave pattern to enhance how the waves naturally fall. This is more subtle than a choppy shag but often looks more polished.
Styling a Feathered Shag
- Blow-dry with a round brush to encourage your waves to flow smoothly
- Use a lightweight styling cream or mousse rather than heavy texture products
- A light hairspray keeps the shape without making it feel stiff
- This cut looks beautiful when it’s slightly more “done” than a choppy shag
- Finish with a smoothing serum if you want a slightly shinier, more polished look
Worth knowing: This cut requires slightly more regular styling than a choppy shag, but the payoff is a more elegant, less-obviously-textured look that still has all the movement and dimension.
10. Shag with Undercut Elements
An undercut layer — where shorter, undercut sections sit beneath longer layers on top — adds an edgy, modern element to a shag. You’re not doing a full undercut fade, but rather incorporating some undercut-inspired shorter sections that peek through when you move or style. It’s a way to add an unexpected element of edge to an otherwise traditional shag.
Modern Undercut Integration
The undercut pieces are usually at the sides or underneath back sections, and they’re deliberately hidden most of the time. When you move or tousle your hair, they peek through and create visual intrigue. With wavy hair, these undercut sections add depth and movement without being in-your-face about it.
Styling and Showing Off the Undercut
- Tuck longer layers over the undercut pieces for a more subtle look
- Sweep your hair back or to the side to show off the undercut sections
- Use texture spray or a light pomade to make the undercut pieces stand out if you want
- The undercut can look sleek or textured depending on how you style it
- This is a high-style cut that requires intentional styling to look its best
Fair warning: Undercut sections need regular trims (every 3-4 weeks) to maintain the style as they grow out. Make sure you’re ready for that commitment before you go for this cut.
11. Shag with Lots of Layers Starting High

This version puts the emphasis on volume at the crown and through the mid-lengths, with layers beginning quite high on the head. Instead of the shortest layers being at the very top, they start around the ears or cheekbones, creating a voluminous crown with longer ends that still have movement. This is the shag for people who want height and fullness without a super-choppy texture throughout.
Creating Crown Volume with Layering
By starting the shortest layers a bit lower, you preserve length and density at the crown while still getting the movement and texture benefit of a shag. Your waves get more room to form and breathe without being chopped into small pieces. The result is a fuller-looking shag with more traditional length.
Blow-Drying for Maximum Volume
- Blow-dry your roots against their natural growth pattern for lift
- Use a volumizing mousse or spray at the roots before blow-drying
- Rough-dry with your head flipped upside down to create natural volume
- Finish with layers falling in their natural direction
- A light hairspray at the crown keeps the volume without weighing it down
Pro tip: This is the shag to go for if you have finer or thinner hair but still want that textured, layered look. The volume at the crown makes your hair look fuller overall.
12. Shag with Side-Swept Styling
A side-swept shag puts all the emphasis on how the layers fall to one side, creating an almost windblown effect. The cut itself is a traditional shag, but the styling is where the magic happens — all those choppy layers are styled and directed to fall predominantly on one side of the head. This is a more dramatic, editorial take that requires daily styling intention.
Styling for the Side-Swept Effect
Your waves are actually perfect for this because they naturally tend to fall in certain directions. You’re just amplifying that tendency. Use a round brush while blow-drying to direct everything toward your styled side, and finish with texture spray to keep everything in place. The side-swept styling makes a shag look incredibly dimensional and interesting.
Product Strategy for Side-Swept Styling
- Use a lightweight mousse or volumizing spray at the roots while blow-drying
- Texturizing spray applied during blow-drying helps layers fall in the right direction
- A light hairspray finishes the look without weighing down the delicate layers
- You might need to restyle if you shower or get caught in moisture
- This cut looks best when it’s styled, so commit to daily styling time
Insider note: Side-swept styling is extremely photogenic and flattering to most face shapes because it creates an elongated, slimming line.
13. Shag with Curly Texture Enhancement
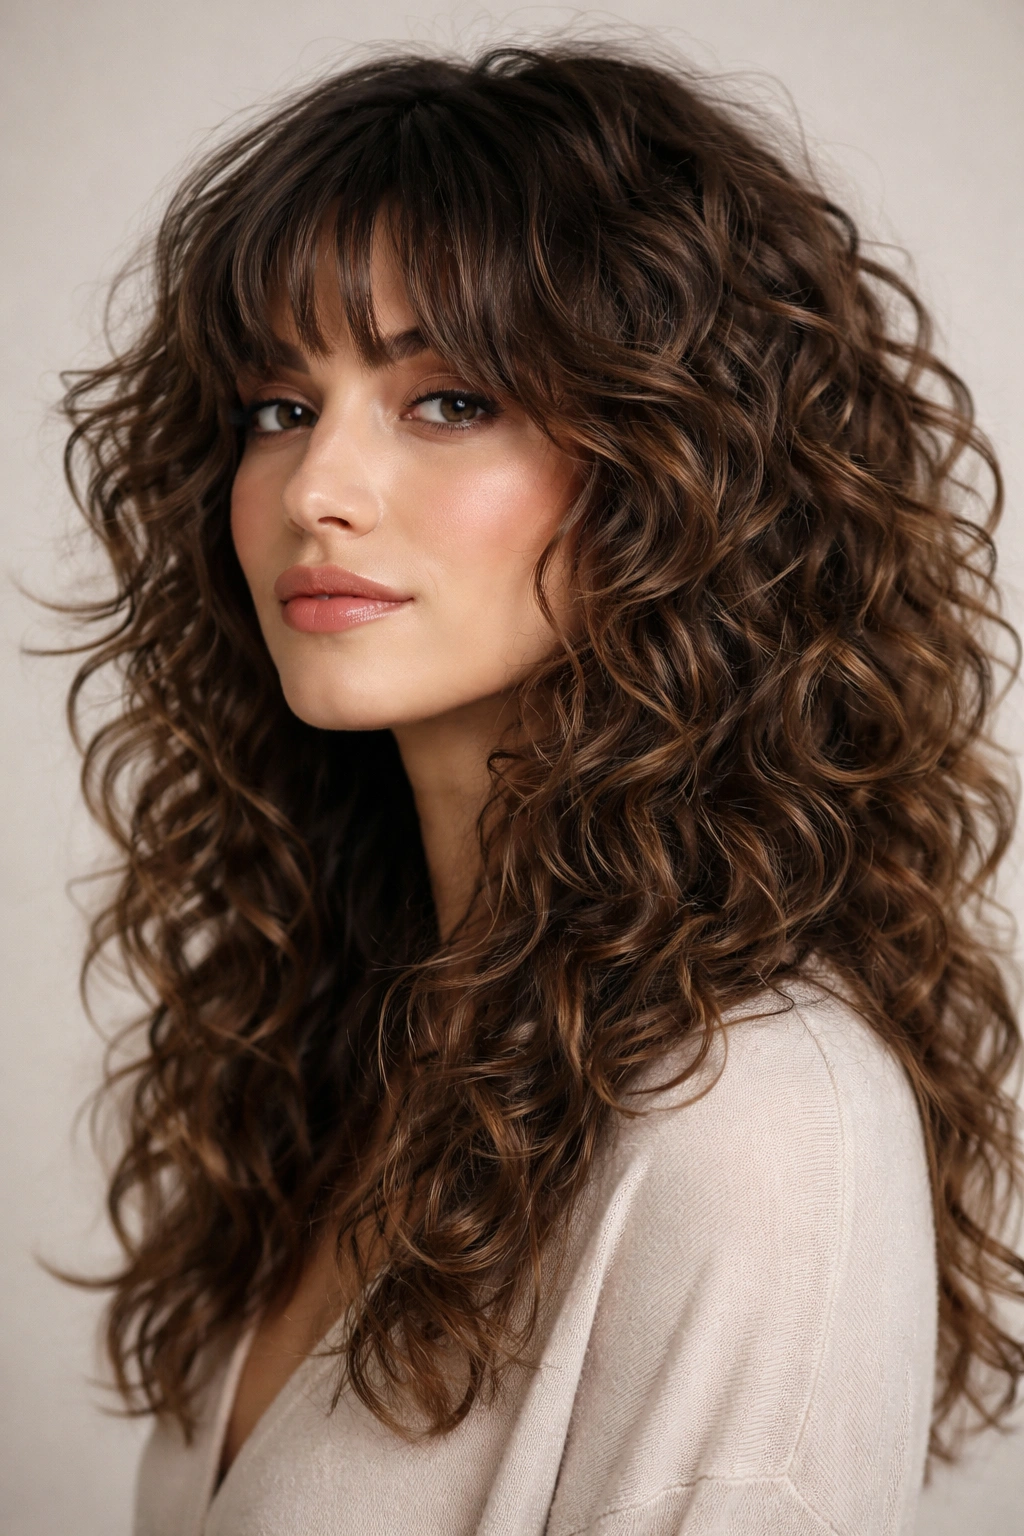
For the waviest wavy-haired people, a shag cut combined with styling methods that enhance your natural curl pattern creates maximum texture and dimension. This involves layering the cut to work with your curl pattern, then styling with techniques like scrunching, plopping, or using a diffuser that bring out every bit of your natural texture. The result is a shag that looks intentionally curly rather than just wavy.
Working With Your Unique Curl Pattern
Every curl pattern is different, and the best curly shags are cut to work with your specific pattern. Some people have loose waves that need choppy layers to look textured; others have tighter curls that just need smart layering to define each curl. Your stylist should understand curl patterns and cut accordingly.
Styling for Curl Enhancement
- Apply styling products to soaking-wet hair before any drying
- Use a diffuser attachment on low heat, or air-dry with plopping
- Scrunch upward as you dry to encourage curls to form
- A curl-defining cream or gel helps shape and hold your texture
- Avoid touching your hair while it’s drying if possible — let the curls form naturally
Pro tip: Curly girls and guys should look for stylists trained in the Curly Girl Method or similar curl-specific cutting techniques. These stylists understand how to cut curly and wavy hair so it looks its best when you’re working with your natural texture.
Final Thoughts
A shag for wavy hair isn’t just a throwback trend — it’s actually the perfect marriage of cut and texture. Your natural waves do half the work for you, creating movement and dimension that a shag cut then amplifies into something that looks deliberately styled even when you’re working with minimal effort. The key is finding the right proportion of chop versus length, the right amount of layers for your specific wave pattern, and honestly, understanding that there’s a shag out there for every vibe you’re going for.
Whether you want something dramatic and choppy that reads editorial and fashion-forward, or something more subtle and feathered that feels romantic and bohemian, the shag variations are genuinely endless. The best move is to find a stylist who actually understands wavy and curly hair, bring reference photos of cuts you love, and be specific about your lifestyle and styling habits. A shag that requires blow-drying and texturizing products is a very different commitment than one you can air-dry with minimal styling. There’s nothing wrong with either — you just want to pick the version that matches how you actually want to live with your hair.
The reality is that wavy hair has been somewhat overlooked in favor of straight or perfectly curly hair for too long. A good shag finally gives that middle-ground texture the respect it deserves, turning something that might have felt like neither-here-nor-there hair into a genuinely desirable style. Your waves aren’t a problem to solve — they’re the whole point.