Messy ponytails have a reputation for being effortlessly chic, but for those of us with curly hair, they’re so much more than just a quick fix. They’re a celebration of everything your natural texture brings to the table — volume, definition, movement, and personality. The truth is, curly hair creates messy ponytails that look intentional and beautiful in ways straight hair simply can’t match. Instead of fighting your curls into submission, these styles work with your natural pattern to create something that feels polished yet playful.
The challenge with curly ponytails isn’t the messiness itself — it’s creating a style that feels deliberately undone rather than like you just rolled out of bed without brushing. A genuinely good curly ponytail needs just enough structure to hold your curls in place while allowing them to shine, enough texture to feel intentional, and enough personality to feel like you. Whether your curls are tight coils, loose waves, or something in between, there’s a messy ponytail approach that works specifically for your hair type.
What makes these styles different from straight-hair versions is the way they handle curl definition, frizz management, and volume distribution. You’re working with density, bounce, and natural texture that creates dimension on its own — you just need to style it strategically. The goal isn’t to tame your curls into a sleek, perfect line. The goal is to gather them in a way that looks intentional, feels secure enough to last all day, and honestly, makes your natural curls the star of the show.
1. The Textured Low Bun Ponytail
This is the everyday messy ponytail that works whether you’re heading to work, running errands, or have nowhere important to be. It sits at the nape of your neck and keeps curls off your face while still letting them do what they do best — look full and naturally beautiful. The low placement means less tension on your hairline, which is especially important if you have fragile curls around your temples or are concerned about breakage.
Why This Works for Curly Hair
- Creates a soft, romantic vibe without requiring your curls to be perfectly defined or recently washed
- The low position prevents pulling curls tightly, which can distort your natural pattern and create frizz
- Curls automatically form sections and movement as they fall into the ponytail, creating visual texture without extra styling
- Works beautifully at any stage of your wash cycle — day-one curls, day-two texture, or even refresh days
How to Make It Happen:
- Flip your head upside down and gather curls loosely at the nape of your neck using your fingers rather than a comb, which can disrupt your curl pattern
- Use a hair tie that matches your curl pattern color (dark brown for darker curls, so it blends seamlessly) and keep the ponytail loose — tension is the enemy
- Twist or loosely coil the ponytail around its base and secure with bobby pins placed close to your scalp for a secure hold
- Pull a few face-framing pieces down gently and separate them to break up the line and create intentional messiness
- Mist the finished style with a lightweight curl-refreshing spray to encourage bounce and definition without adding weight
Pro tip: This ponytail actually improves over the next 24-48 hours as your curls fully relax and settle into their pattern, so don’t judge it on day one.
2. The Half-Up Messy Curl Knot
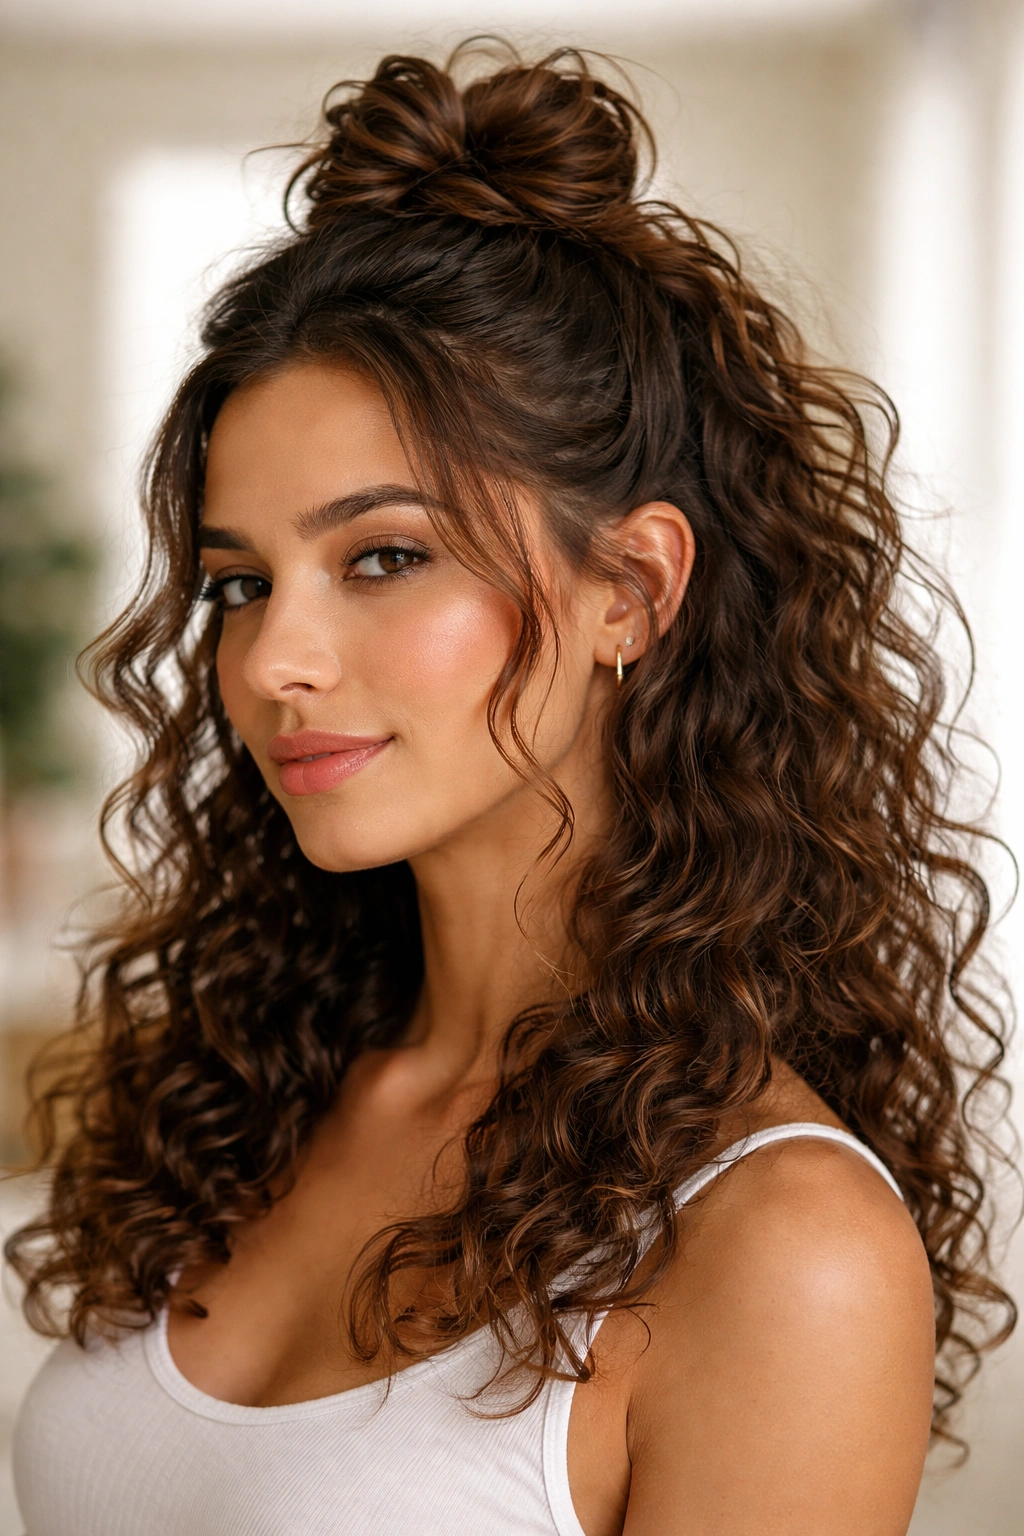
If you’re not ready to fully commit your curls to a ponytail but want them off your face, this half-up option gives you the best of both worlds. You’re securing the top section of hair while letting the bottom half fall free, creating maximum visual impact with your longest curls still loose and visible. This style reads as instantly more polished than a full ponytail while feeling equally effortless to create.
What Makes This Different
- Draws attention to face shape and cheekbones without the severity of a fully pulled-back style
- Curls that frame your face can be intentionally separated for a romantic, tousled look
- Works with almost every curl pattern because you’re not constraining the bulk of your hair
- Takes about 90 seconds to create but looks like you spent 15 minutes styling
How to Build It:
- Section hair from your crown back to mid-head, pulling only the top half toward the back
- Backcomb the section at your crown using a fine-tooth comb to create volume and grip for the knot
- Tie the section loosely and create a knot by twisting the ponytail section and looping it back on itself, pinning where it meets your hair
- Leave the front-most pieces down intentionally — these are your frame
- Use your fingers to gently tease and separate the curls in the knot for dimension, pulling a few loose strands down the back of your neck
Worth knowing: This style holds better if your curls have a little texture to them, so it’s ideal for day-two or day-three hair when oils have settled in and enhanced your curl definition.
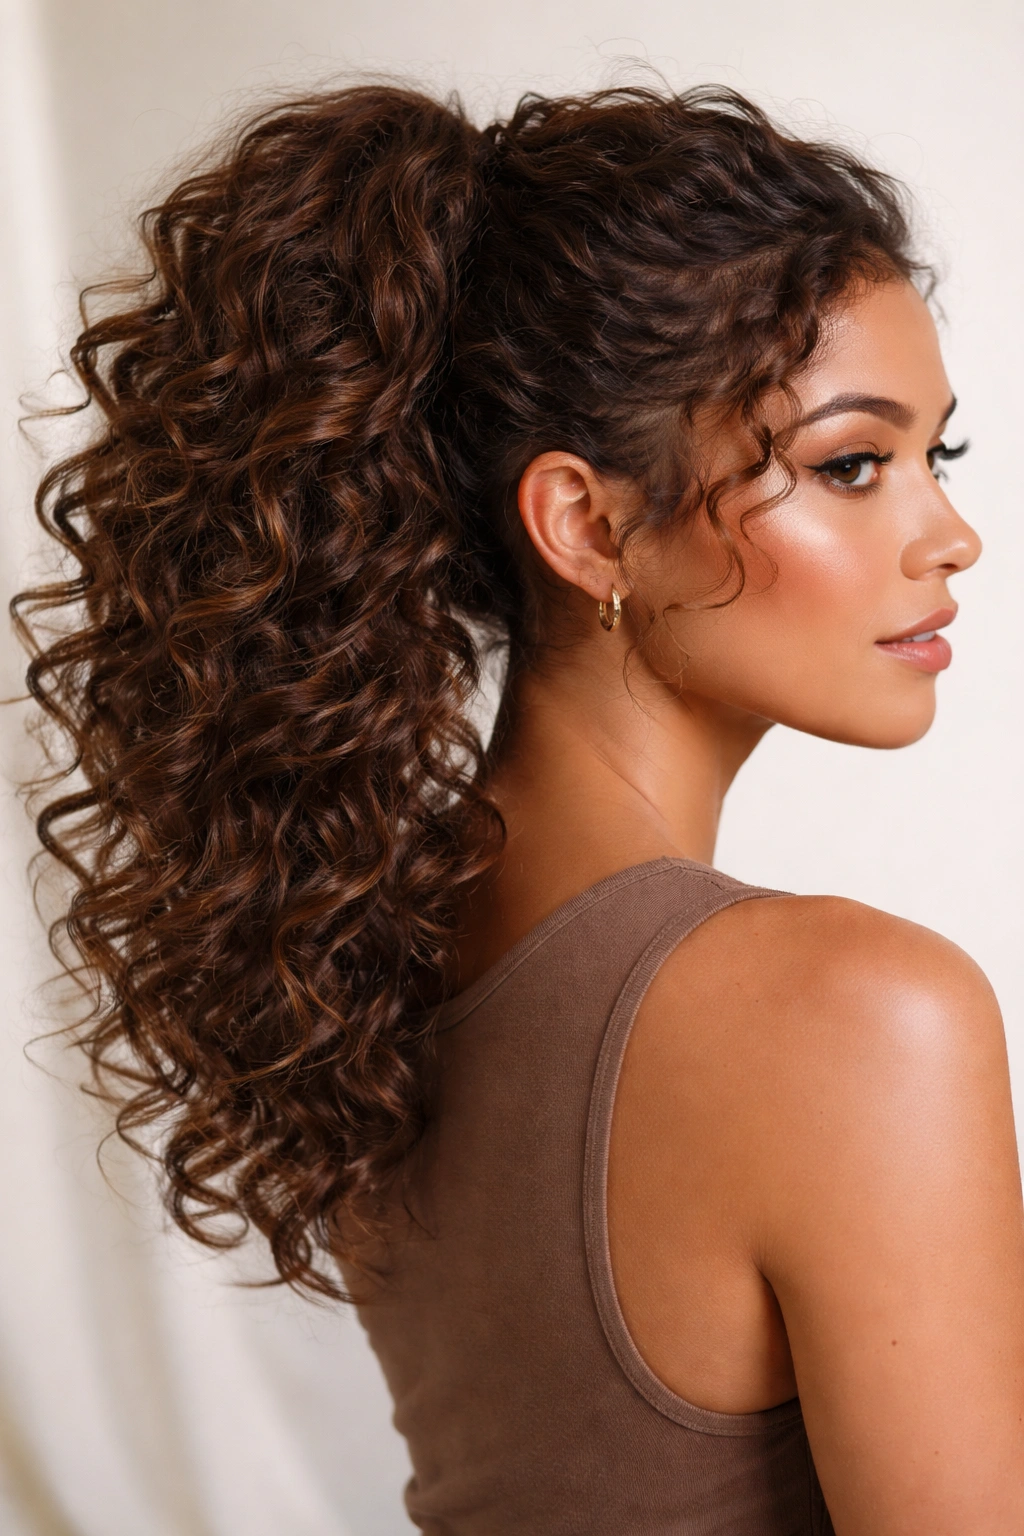
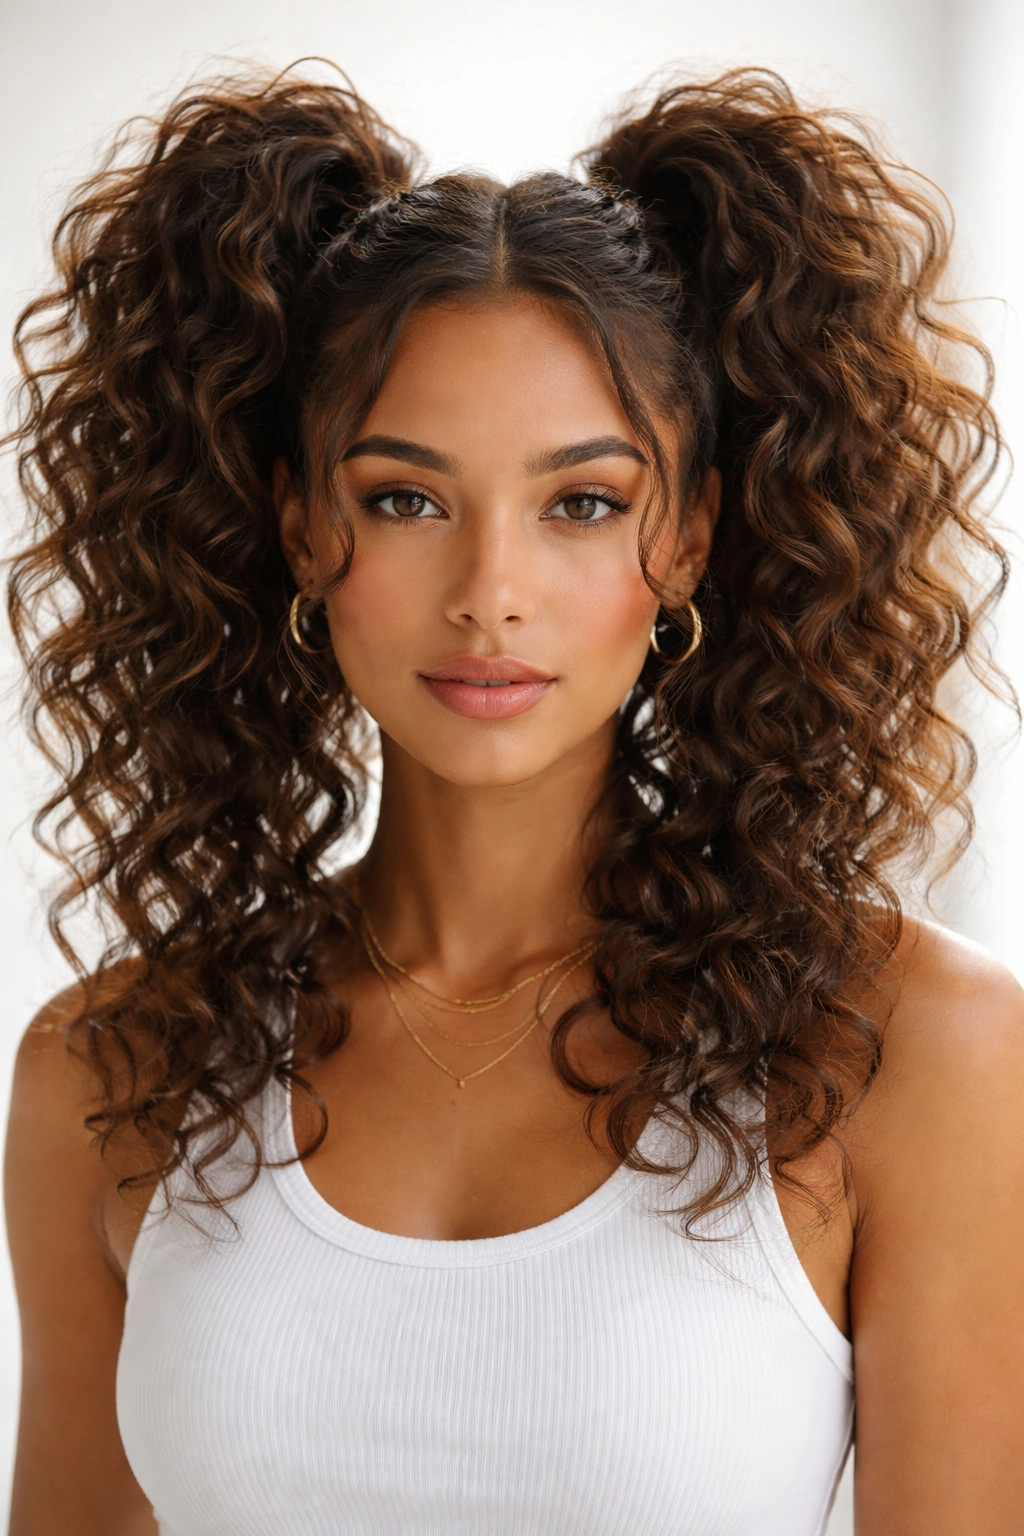
3. The Sleek Pineapple High Ponytail
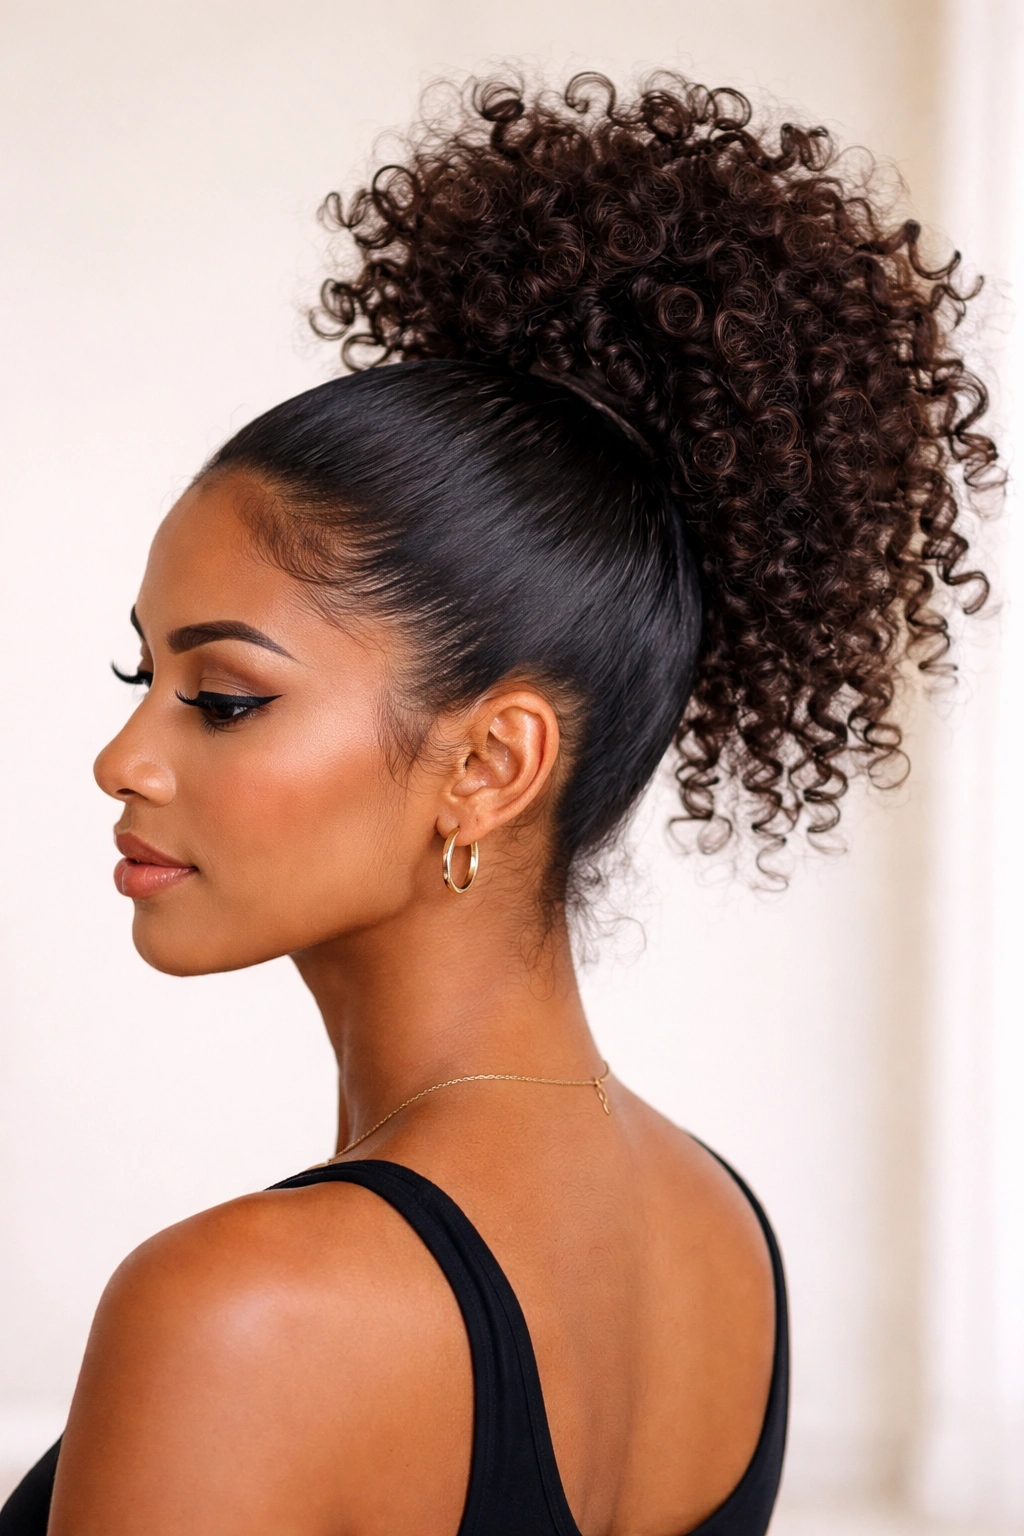
The pineapple technique — where you gather curls on top of your head for sleeping — translates beautifully into a waking hairstyle. This high ponytail uses the same principle but with intention: you’re creating a gathered cluster of curls at your crown that maintains definition and bounce while keeping hair completely off your shoulders. It’s casual yet commanding, works for both relaxed and dressed-up occasions, and honestly photographs beautifully from every angle.
Why It Stands Out
- Creates the illusion of voluminous, thick hair even if your curl density is medium
- The high placement makes your face look fresher and draws attention upward
- Curls arrange themselves vertically rather than falling flat, which showcases your natural texture
- You can adjust how “high” the ponytail sits to flatter your face shape and head structure
Steps to Create It:
- Start with curls that have some moisture — either freshly washed and styled or refreshed with water and product
- Flip your head upside down and gather hair at your crown using fingers rather than a comb, creating a loose pile at the very top
- Use a wide hair tie (which causes less breakage than thin ones) and keep the gathering loose — you want curl sections to be visible
- Once tied, gently pull and tease strands around your face to separate your curls and prevent a matted appearance
- Take 3-4 individual curl sections and gently pull them down slightly to frame your face with dimension
Insider note: If your curls are prone to losing definition by day three, this high ponytail actually looks better slightly imperfect, with curls starting to relax and create more intentional texture.
4. The Spiral Twisted Curly Ponytail
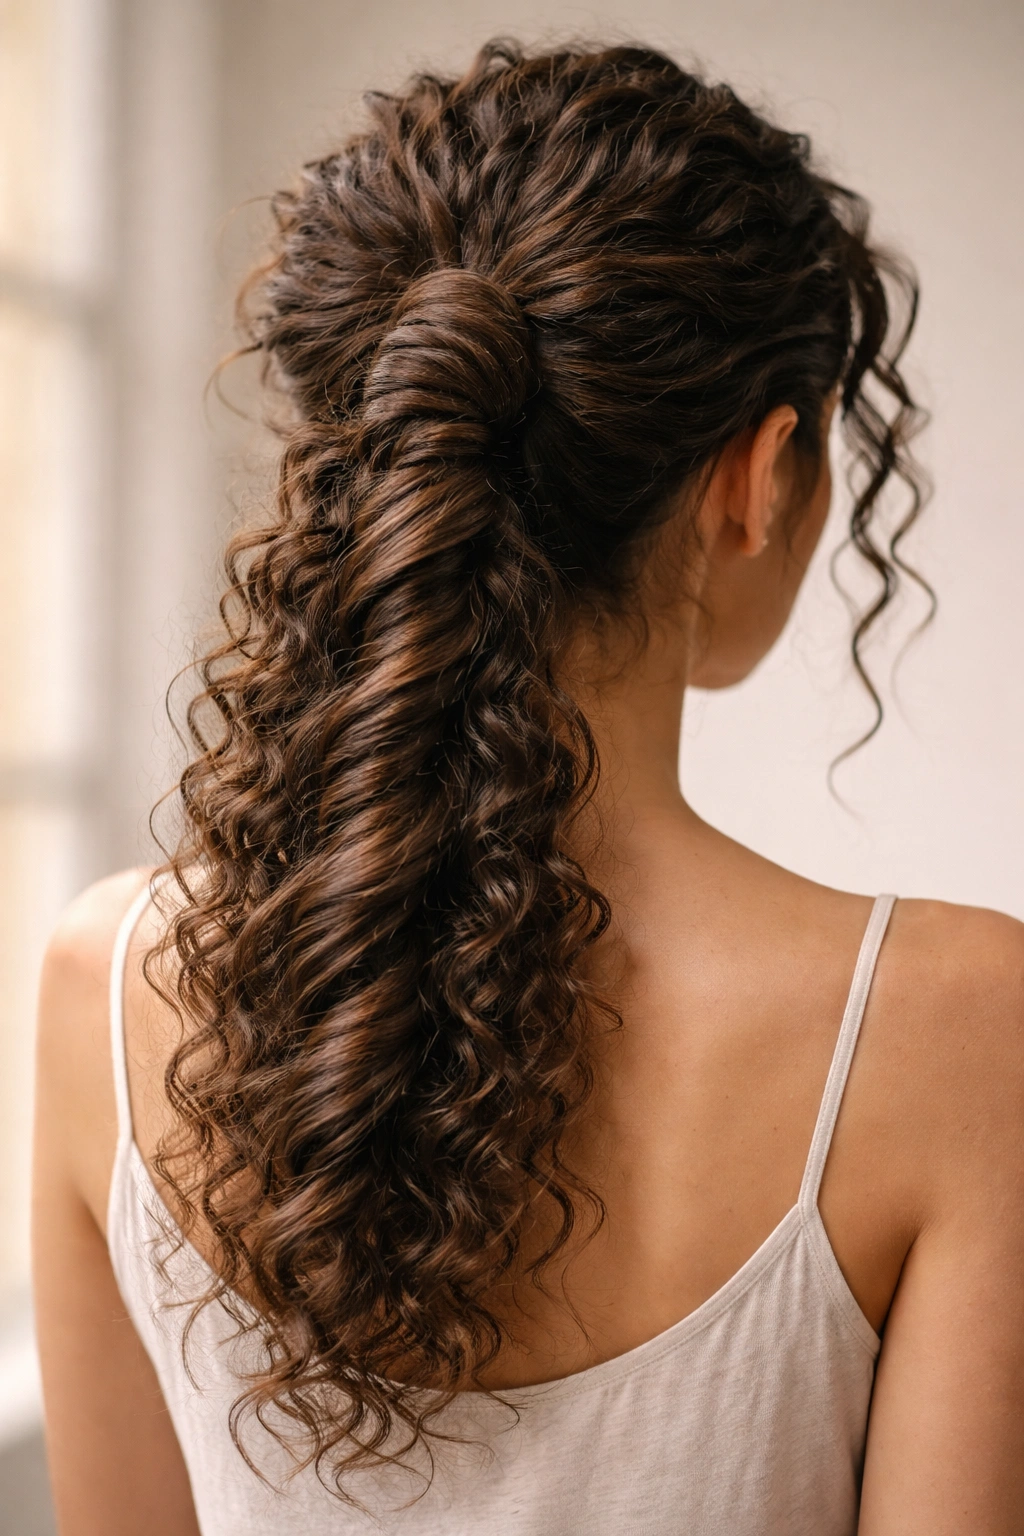
This version uses a twisted-wrap technique to create visual interest and texture within the ponytail itself. Instead of a simple gathering, you’re twisting the ponytail section around itself before securing it, which creates a sculptural look that feels more intentional than a basic ponytail. The spiral element catches light and emphasizes your curl pattern, making even loose waves look defined and deliberately styled.
How It Compares to Basic Ponytails
- Adds a design element without requiring you to do anything to your curls except gather them
- The spiral creates natural sections that showcase individual curl definition throughout the ponytail
- Takes just one extra minute but looks significantly more styled and curated
- Works beautifully at any head height — high, middle, or low — and feels appropriate for casual or professional settings
Building Your Spiral:
- Gather your ponytail loosely at whatever height you prefer, holding it in one hand
- Take the ponytail section and twist it away from your head in one continuous spiral, moving from the base down to the ends
- Once twisted completely, wrap the spiraled section around its own base like you’re creating a coil at the nape of your neck (for low ponytails) or crown (for high ones)
- Secure with bobby pins that match your hair color, tucking them close to your scalp so they disappear
- Use your fingers to gently separate curls within the spiral, pulling individual sections out to emphasize texture
Real talk: If your curls are super-defined, this spiral actually becomes a design feature — the twisting enhances your curl pattern visually and creates a sophisticated, intentional look.
5. The Braided Curly Crown Ponytail

Combining a braid element with a curly ponytail elevates the whole style. A single braid (or multiple thin braids) can be woven around your head or incorporated into the base of your ponytail, adding a romantic, texture-rich element that works beautifully with curls. Braids and curls go together like they were made for each other — the braid adds structure while your loose curls add softness and dimension.
What Makes It Different
- Introduces a secondary texture that complements your curls rather than competing with them
- The braid acts as a frame for your face while the curly ponytail remains the focal point
- Creates a more polished version of the messy ponytail without requiring you to refine your curls
- Works for curly and wavy hair textures equally well because the braid provides the “intentional” element
How to Build This:
- Create a small Dutch or French braid starting at one temple and braiding toward the back of your head
- The braid doesn’t need to be tight — let it follow the natural contours of your head loosely
- Gather your curls into a ponytail at the base where the braid ends, incorporating the braid into the base
- The braid essentially becomes the anchor point that keeps your ponytail looking intentional and structured
- Leave face-framing pieces loose and separate them gently to soften any severity
Quick facts:
- Braids appear more defined in curly hair than in straight hair, so they stand out as a design element
- A side braid that feeds into a low ponytail is especially flattering for round or oval face shapes
- This style holds beautifully through movement and physical activity — the braid keeps curls secured while the ponytail tail moves naturally
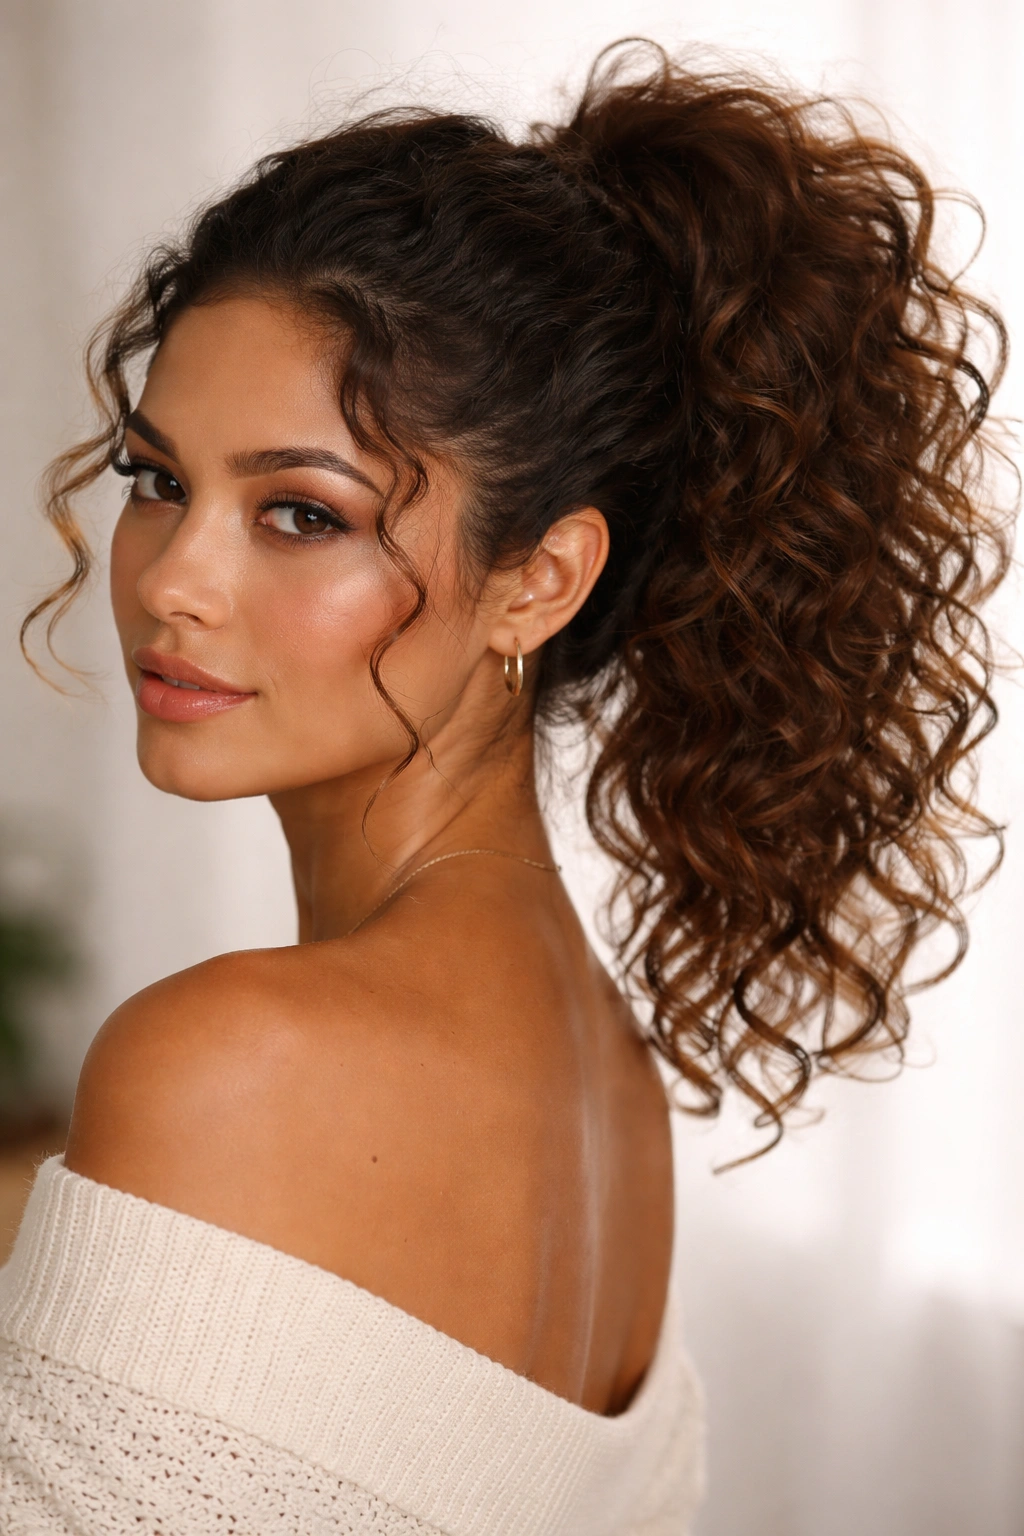
6. The Tousled Side Ponytail with Curls
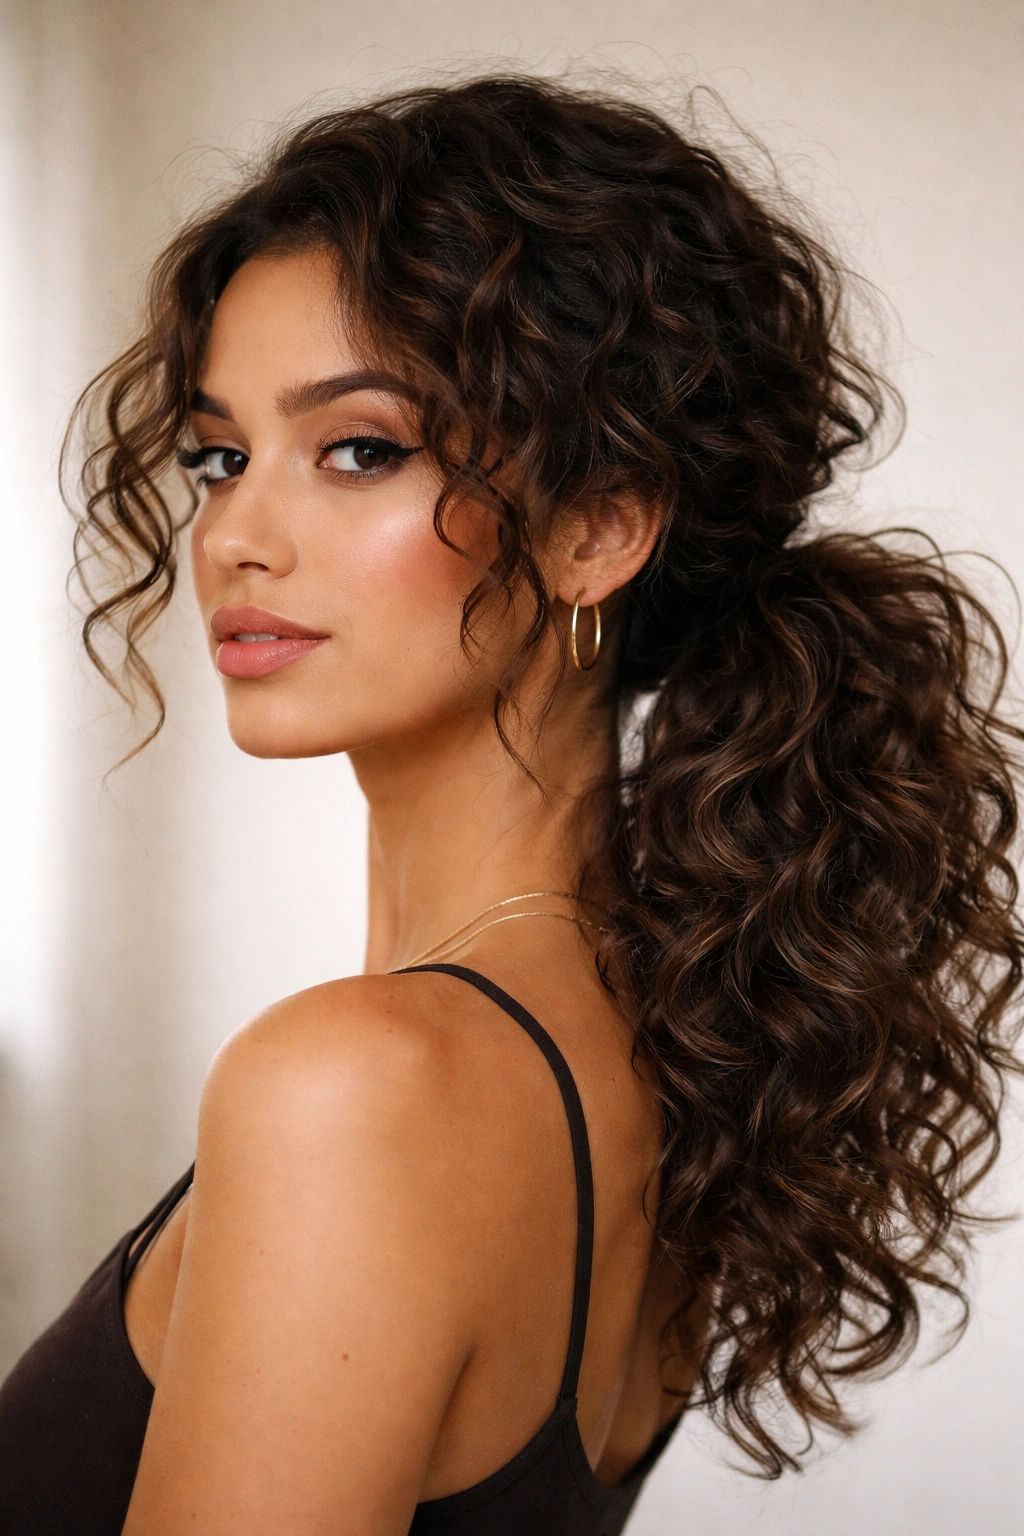
The side ponytail is inherently romantic, but when you pair it with curls that cascade down one shoulder, it becomes absolutely stunning. Everything is gathered to one side of your head, creating an asymmetrical silhouette that feels editorial and intentional. This works especially well if you’re dressing up slightly or want a ponytail that reads as more formal than your typical everyday style, yet still feels natural and curly-girl-authentic.
Why It’s Worth Trying
- Immediately flatters most face shapes because of the asymmetrical placement and face-framing
- One shoulder gets completely exposed, which changes your silhouette in a way that’s visually interesting
- Your curls have room to cascade and move without bunching, so they look bigger and more defined
- Shifts which side of your face is emphasized, letting you choose how you’re framed depending on your mood
Creating the Look:
- Gather all your hair toward one side of your head, placing the ponytail at ear level or slightly lower depending on the effect you want
- Use your fingers (not a comb) to sweep hair to the side, maintaining your curl pattern as you gather
- Secure loosely with a hair tie that matches your hair color
- Pull several face-framing pieces gently around your face on both sides — the opposite side gets longer pieces to balance the gathered side
- Twist or coil the ponytail section around its base and pin, leaving the bulk of the ponytail free to cascade
Pro tip: Apply a lightweight curl-defining spray to the loose curls in the side ponytail section about 30 minutes before wearing it. This sets your curl pattern and prevents frizz while still allowing movement.
7. The Voluminous Top Knot Ponytail
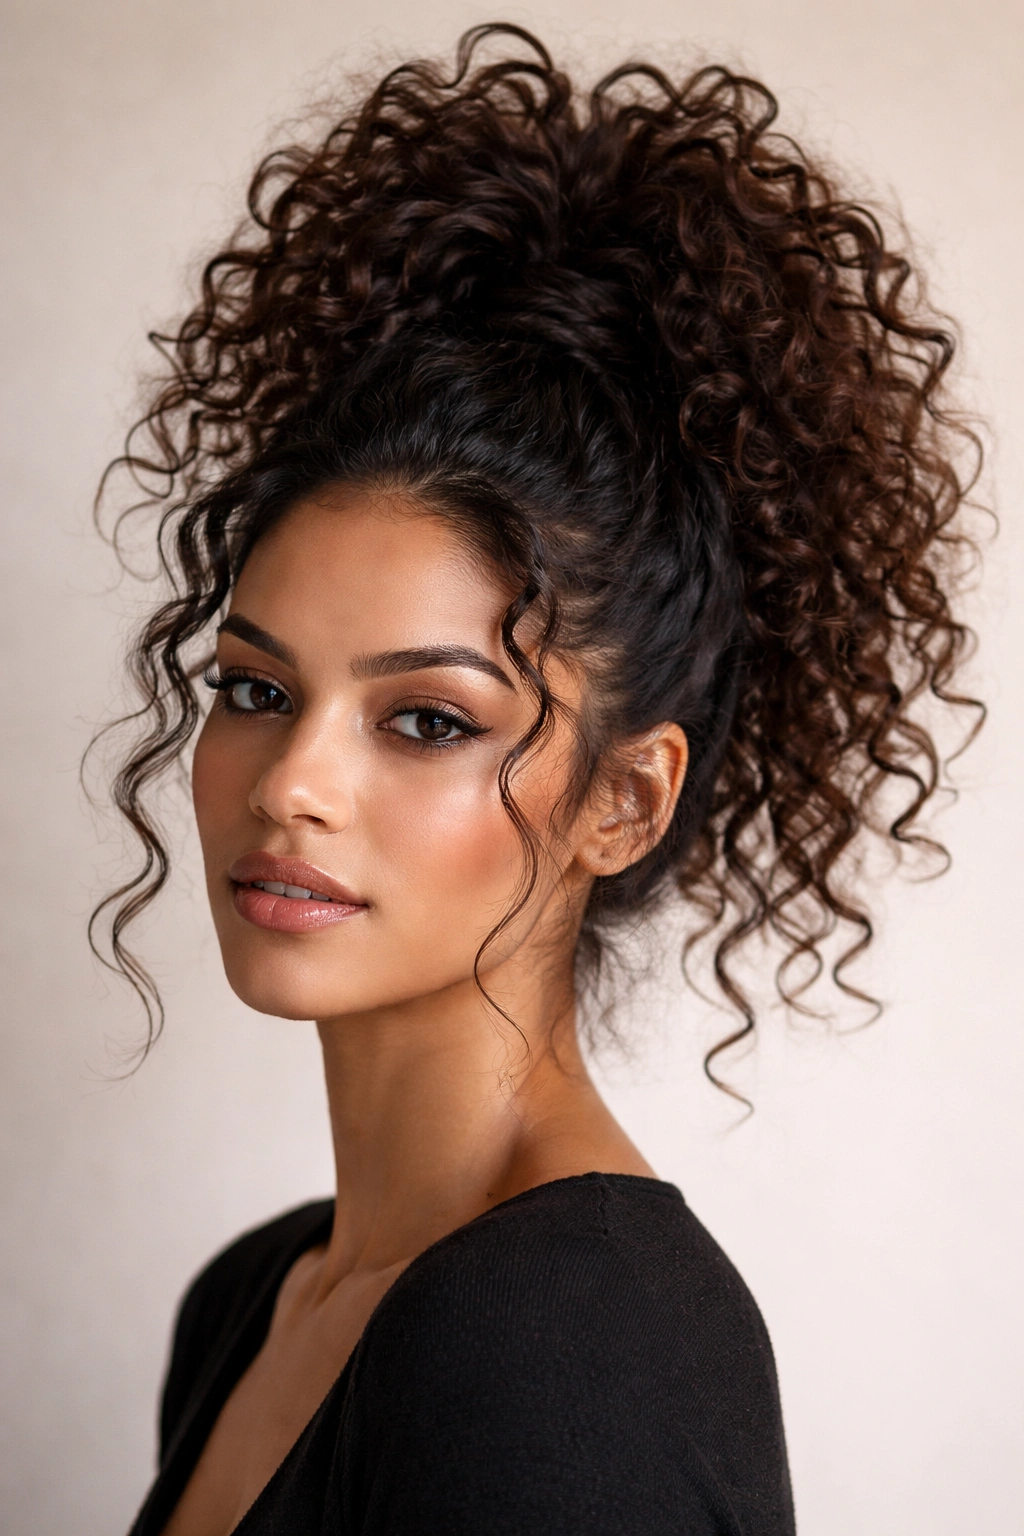
This is the ultimate statement ponytail — all your curls gathered at the crown and coiled into a knot that sits right at the top of your head. The effect is dramatic, undeniably confident, and showcases your curl volume in the most flattering way possible. Hair looks thicker, the style reads as intentional rather than sloppy, and you get complete visibility of your face and neck. It’s the kind of ponytail that photographs beautifully and makes you feel powerful.
The Real-World Advantage
- Instantly makes your hair look fuller and thicker because curls are gathered vertically at the highest point
- Completely off-face styling means curls can’t fall forward or obscure your features
- The height creates a flattering elongation of your face and neck
- Stays secure through movement and activity because gathered height means less tension on individual curls
Step-by-Step:
- Flip your head upside down and gather all your hair at the very crown of your head using your fingers
- Create the highest-placed ponytail possible without causing pain or pulling too tightly
- Backcomb or tease the gathered section at the base to create grip and texture that holds bobby pins securely
- Twist or coil the ponytail around its base multiple times to form a knot that sits like a crown at your head’s apex
- Secure thoroughly with bobby pins inserted in multiple directions so the knot stays locked in place
- Gently pull individual curl sections out of the knot to create dimension and prevent it looking too compact
Worth knowing: This style actually feels lighter and more comfortable than you’d expect because the weight is concentrated at your crown rather than pulling down on your hairline. It’s genuinely wearable for 8+ hours.
8. The Layered Curl Section Ponytail
Instead of gathering all your curls at once, this technique creates visual interest by pulling curls in sections at slightly different heights, creating a layered effect within the ponytail itself. The result is a multi-dimensional look that emphasizes your natural curl pattern and creates movement that a single-gathered ponytail can’t achieve. Each curl section maintains its own definition while still being secured as one ponytail unit.
What Makes It Different
- Creates visual complexity and depth without requiring additional styling beyond what your curls naturally provide
- Each curl section can be slightly teased or separated to emphasize texture, making the ponytail look intentionally textured rather than smooth
- Works beautifully at any length because you’re playing with sections rather than the overall shape
- The layered approach accommodates curls of different lengths and densities perfectly
How to Create It:
- Take your top section and secure it loosely at your desired ponytail height with a hair tie
- Take your middle section and secure it below the first, ensuring both are gathered loosely enough that you can’t see the ties
- Take your lower section and secure it at the bottom, creating three distinct layers
- Once all layers are secured, gently push each layer down slightly so the tiers become visible and distinct
- Use your fingers to tease and separate the curls in each layer, pulling strands outward to emphasize the texture
Quick facts:
- This technique works best on hair that’s at least shoulder-length because you need enough length for the layers to be visible
- You can use 2, 3, or even 4 layers depending on your hair length and how much dimension you want
- Lightweight bobby pins in matching colors can hide the individual hair ties if you want to make the layering effect more subtle
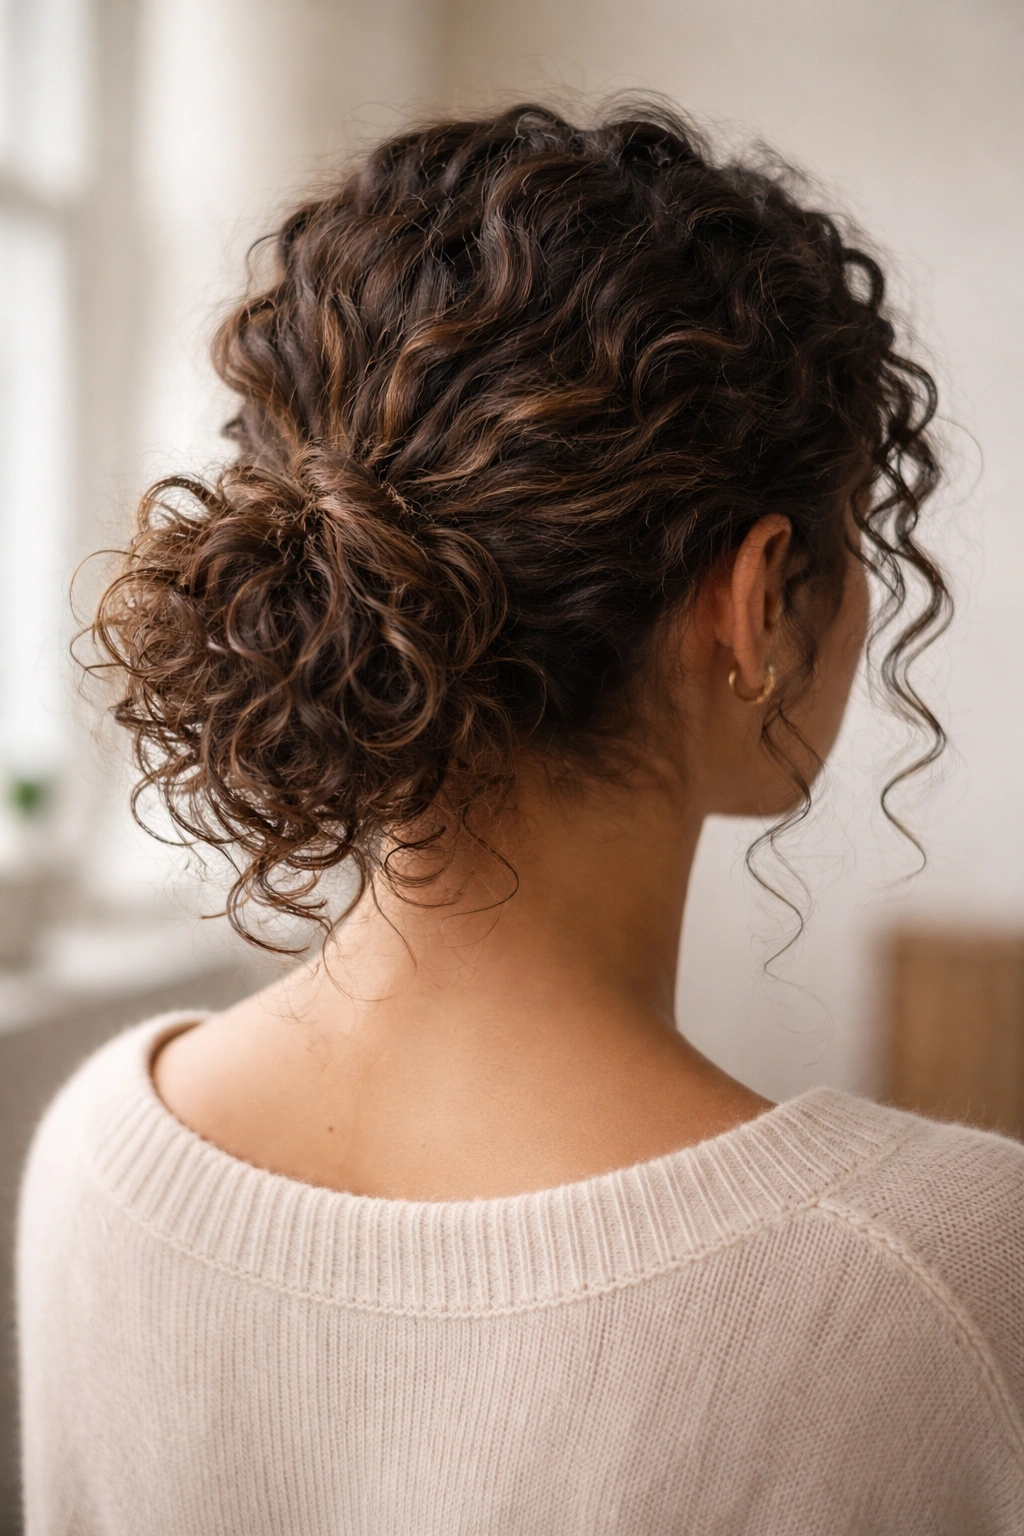
9. The Soft Romantic Curly Updo
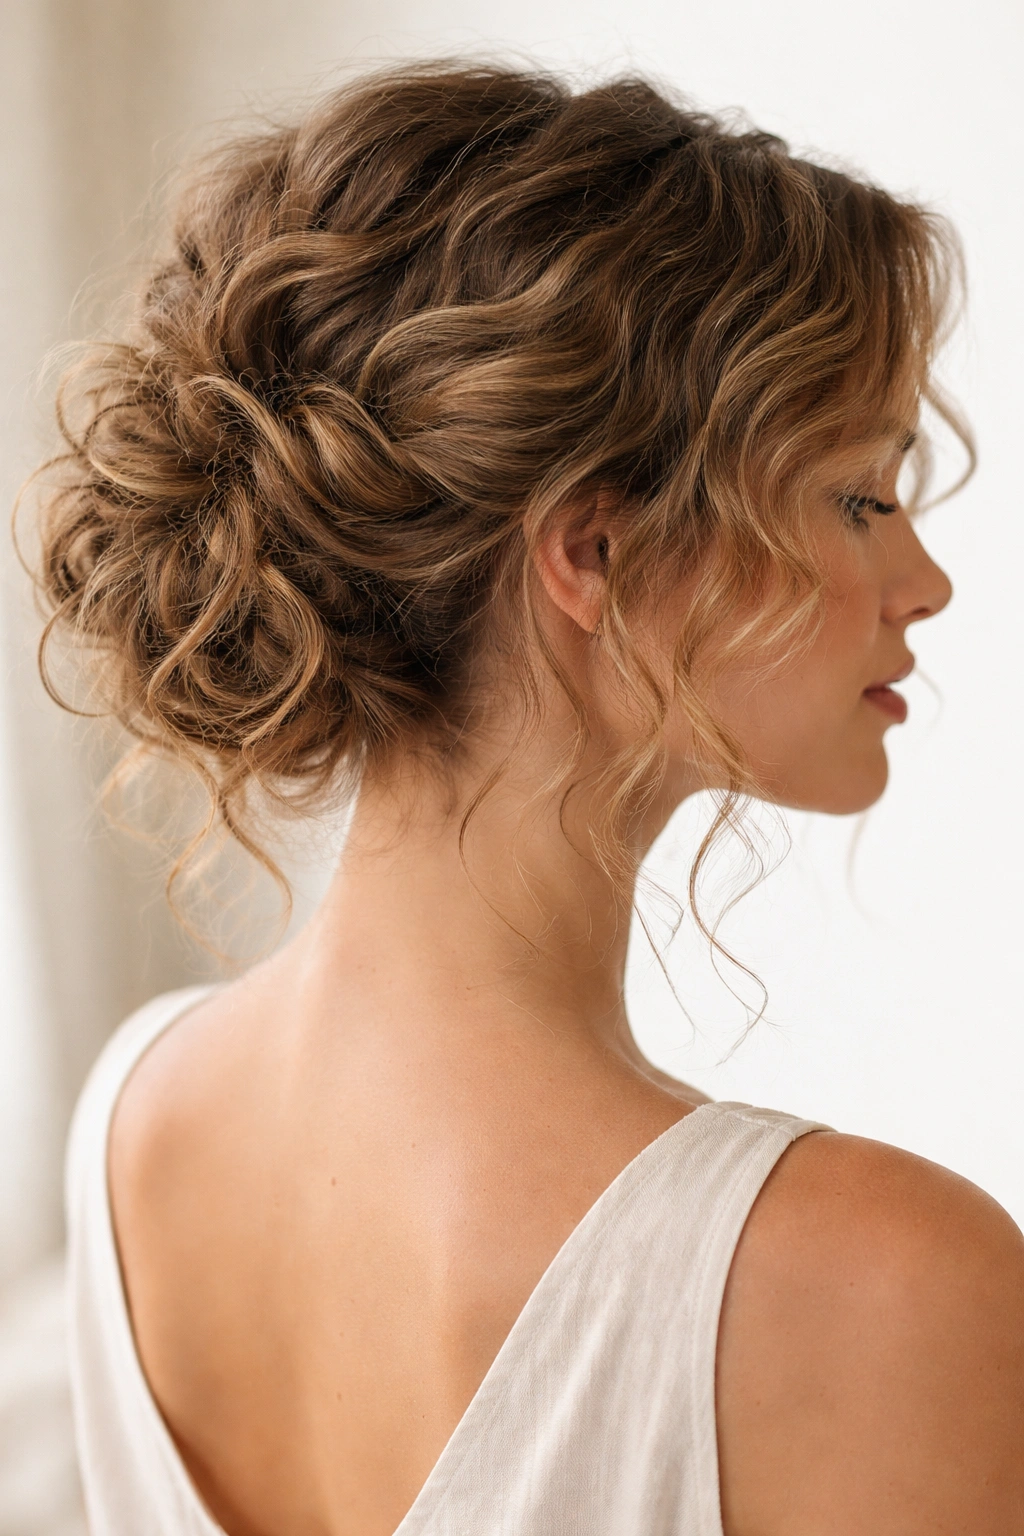
This is the most formal of the messy ponytail options — a gathered, curled updo that still maintains that intentionally undone, textured aesthetic. You’re not going for a perfectly smooth ballet bun here. Instead, you’re creating something that feels elegant and put-together while celebrating the natural softness and dimension your curls provide. It’s perfect for events where you want to look polished but still authentically yourself.
Why It Stands Out
- Elevates curly hair to “occasion-appropriate” without requiring you to blow-dry straight or use heat tools
- The softness of curls prevents the style from feeling too formal or severe — it maintains personality
- Shorter, face-framing pieces work beautifully in this style because curls create softness naturally
- You can incorporate accessories like bobby pins with pearls, thin clips, or delicate hair combs for extra elegance
Building Your Romantic Updo:
- Gather your curls into a low or mid-height ponytail, keeping everything loose and avoiding tension
- Create a twisted or braided texture within the ponytail by working with sections rather than the whole ponytail at once
- Wrap the ponytail around its base to form a soft bun, securing with bobby pins but leaving curls somewhat loose within the structure
- Tease gently around the edges and pull small curl sections out to frame your face and create softness
- Leave 2-3 longer curls intentionally loose on each side of your face — these are your romantic element
Insider note: Use a light-hold mousse or curl cream on your curls before styling this look. It provides enough hold to keep the updo secure while remaining flexible enough that curls can move and shift slightly throughout the event.
10. The Undone Wrapped Curl Ponytail
This version uses the wrap technique to make your ponytail look finished without feeling overly polished. A section of hair wrapped around the base covers your hair tie, and the wrap can be as simple or as intricate as you want. The result looks more intentional and styled than a basic ponytail while maintaining that effortless, curly-girl aesthetic that makes the style feel authentic.
How It Compares to Basic Ponytails
- Instantly elevates a casual ponytail to something that looks purposefully styled
- The wrap hides your hair tie, which makes the whole style read as more curated
- You can create different wrap textures by using straight sections, twisted sections, or braided sections
- Takes literally two extra minutes but makes a noticeable difference in how intentional the style appears
Creating Your Wrap:
- Gather your curls into a loose ponytail at your preferred height and secure with a hair tie
- Take a thin section of curls from the ponytail itself (about 1-2 inches thick) and wrap it around the base of the ponytail, covering the hair tie
- You can wrap it once or multiple times depending on your hair thickness and how much coverage you want
- Pin the wrapped section securely in place using bobby pins hidden beneath the wrap
- Tease the remaining ponytail curls to create texture and dimension
Real talk: If your wrap section isn’t quite long enough to go all the way around, use a bobby pin to grip the end securely and pin it to the side of the ponytail base — it’ll disappear into the curls.
11. The Double Curl Section Ponytail
This technique uses two distinct ponytails positioned close together to create a thicker, more voluminous appearance. You’re essentially creating two sleek sections that sit side-by-side, but the effect is more interesting than a single ponytail and gives you more visual texture because you have curls tumbling from two points rather than one. It’s surprisingly simple but looks like you invested real effort into your styling.
Why It Works for Curly Hair
- The two-ponytail approach accommodates varied curl densities perfectly — you’re dividing the work
- Creates twice as many curl cascades, which is stunning visually and makes hair look fuller
- Each section can be individually teased and separated, creating more complexity than a single ponytail
- Proportionally more attractive on longer hair or hair with significant volume and density
How to Build It:
- Section your hair down the middle from crown to nape, creating two distinct halves
- Gather the first half into a ponytail at your desired height (high, mid, or low) and secure loosely
- Gather the second half into a ponytail right next to the first, positioned so both are adjacent and nearly touching
- Pull both ponytails slightly forward so they sit next to each other visibly
- Tease and separate the curls in both sections to create dimension and prevent either one from looking too compact
Worth knowing: This style works best if you have hair with decent thickness and density. If your hair is finer, it might read as two thin ponytails rather than one voluminous one.
12. The Fuzzy Textured Bubble Ponytail
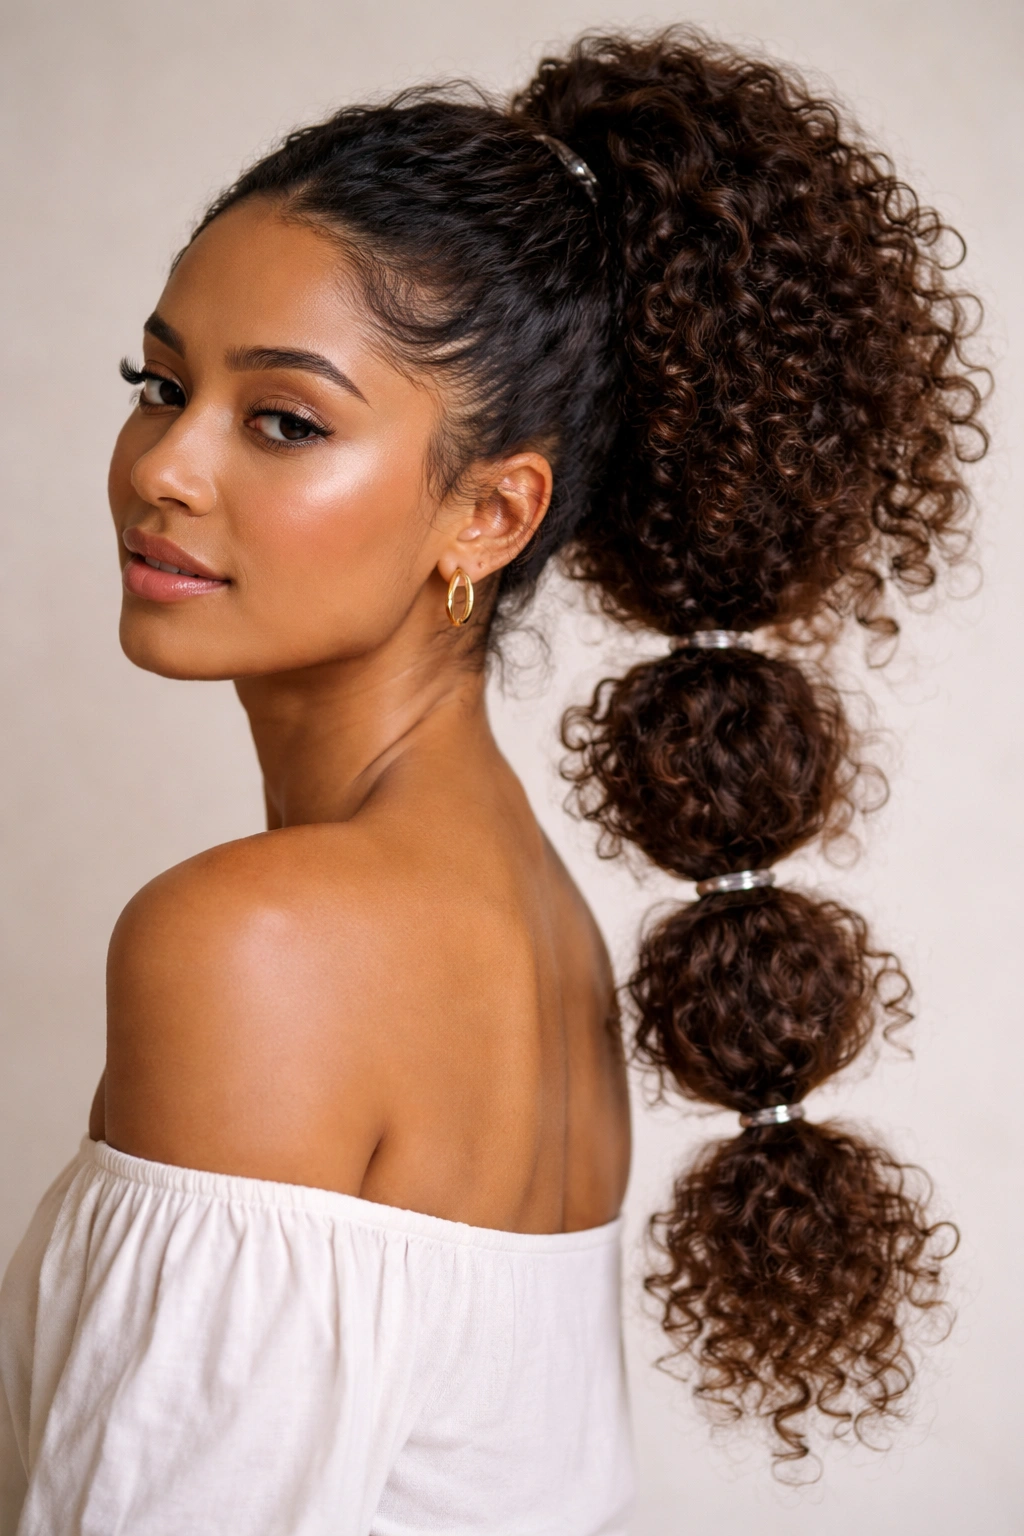
A bubble ponytail uses multiple hair ties spaced down the length of the ponytail, creating distinct sections that puff outward between each tie. With curly hair, the effect is absolutely gorgeous because your curls create natural fuzziness and texture within each bubble. It’s playful, undeniably intentional, and works beautifully at any head height from high and fun to low and sophisticated.
What Makes It Different
- Each “bubble” created between the ties showcases your curl pattern and texture individually
- The style creates visual movement that a single smooth ponytail can’t achieve
- Works as a statement on a casual day or as a playful option for more dressed-up occasions
- The multiple hair ties mean the style stays secure through movement and activity
Creating Your Bubble Ponytail:
- Gather your curls into a loose ponytail at your preferred height and secure with a hair tie
- Place a second hair tie approximately 2-3 inches down the ponytail from the first
- Place a third tie another 2-3 inches down, continuing the pattern until you reach the end of your ponytail (typically 3-4 sections total)
- Gently push each bubble outward and upward slightly to create puffing between the ties
- Use your fingers to tease and separate the curls within each bubble, pulling strands outward to maximize texture and dimension
Pro tip: Use hair ties that match your curl color exactly. If the ties show against your curls, you can camouflage them by wrapping a thin strand of hair around each tie to hide it.
Final Thoughts
The beauty of messy ponytails for curly hair is that they stop asking your curls to be something they’re not — they celebrate exactly what makes your hair unique. Whether you prefer the softness of a low textured bun, the drama of a high volume knot, or the romance of side-swept waves, these styles work with your natural pattern rather than against it. Your curls provide dimension, texture, and movement that become the actual design of the hairstyle.
The secret to making these styles work is looseness. Every single version of these ponytails depends on gathering and securing your curls without tension or tight pulling. Tension is what distorts your curl pattern, encourages frizz, and makes ponytails feel less intentional. By gathering loosely, securing gently, and letting your curls move naturally, you create styles that actually improve over the next 24-48 hours as your pattern fully settles and defines itself.
Start with whichever style calls to you, but honestly, the real magic happens when you try them all. Different ponytails suit different curl days, different face shapes, different occasions, and different versions of your confidence. The more you experiment with these techniques, the better you’ll understand what works specifically for your curl pattern, hair density, and personal style. Your curls are already beautiful — these styles just give them a chance to shine.