Space buns have made a major comeback, and unlike their ’90s reputation, they’re actually incredibly versatile when you approach them with intention. Medium-length hair is honestly the perfect canvas for this style because you’ve got enough length to create dimension and movement without the weight that can collapse longer buns. The half-up-half-down variation is what makes space buns wearable for adults — it looks intentional, a little edgy, but still polished enough for most settings. Whether you’re going for whimsical and fun or graphic and deliberate, the way you size, position, and finish your space buns completely changes the vibe.
What makes this hairstyle so genius is its flexibility. You can take it from playful weekend mode straight into something that works for casual office days, creative industry events, or literally anywhere you want a statement that says “I put thought into this.” The key with medium hair is understanding how placement and texture work together — a high centered pair looks completely different from an asymmetrical low pair, and both are equally valid. You’re not locked into one specific look the moment you decide to do space buns.
The best part? Every single version of this style is surprisingly achievable once you know the mechanics. You don’t need professional skills or hours of styling time. Most of these styles take 10 to 15 minutes once you’ve practiced the technique once or twice. Let’s walk through twelve distinct approaches to half-up half-down space buns that are specifically designed to work with medium-length hair.
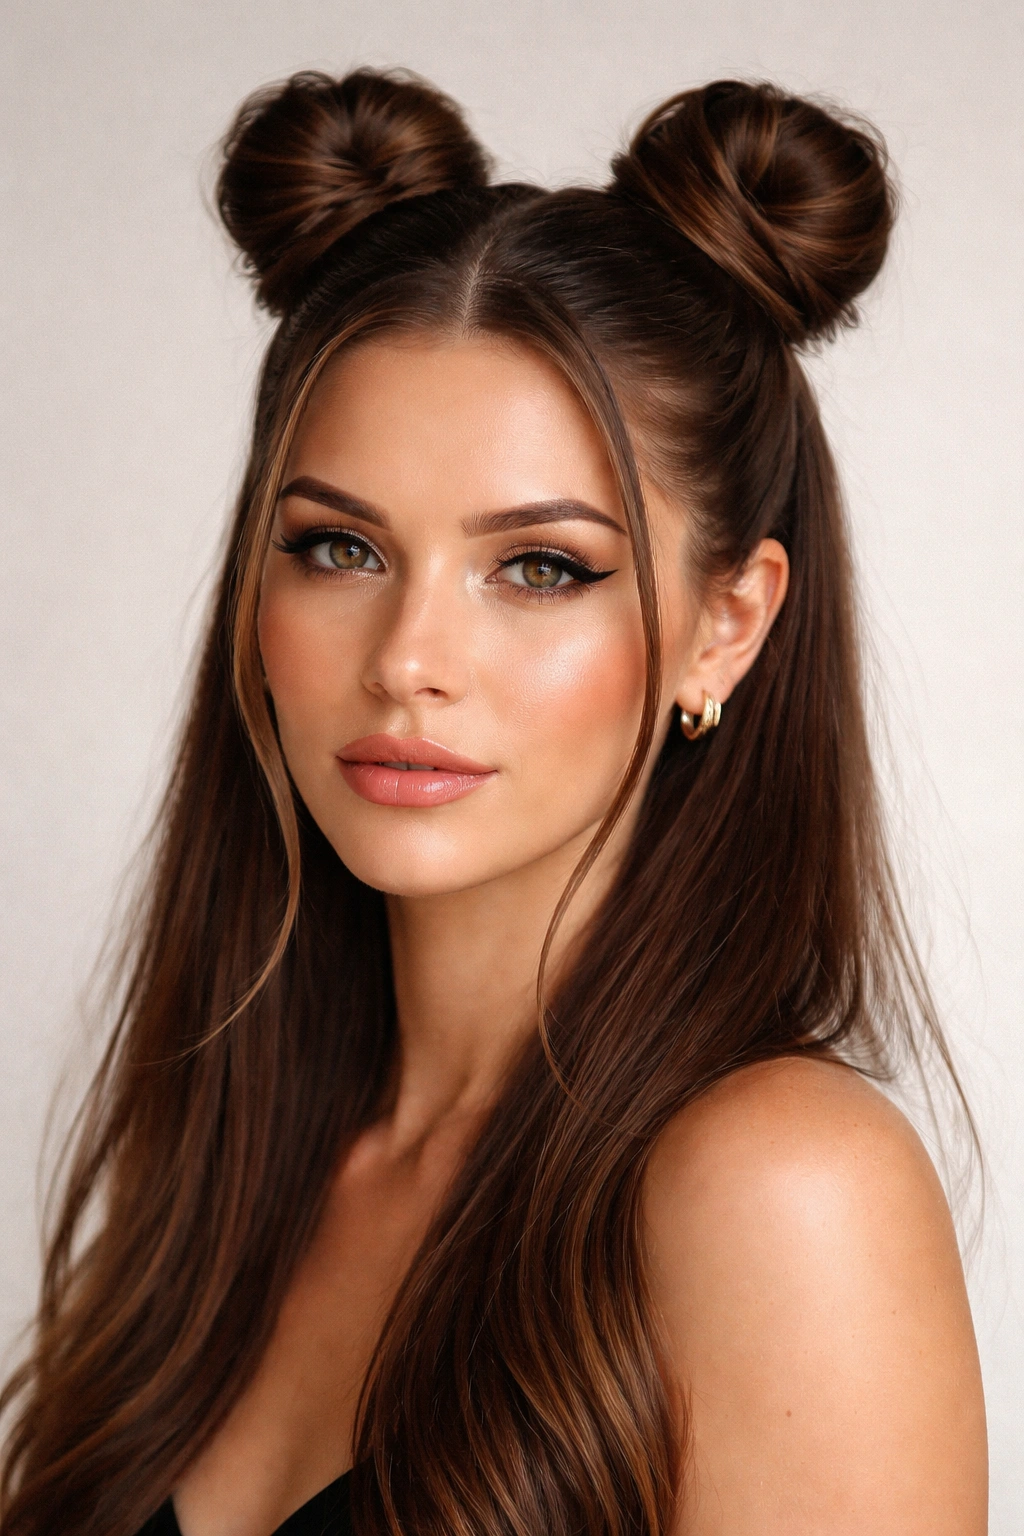
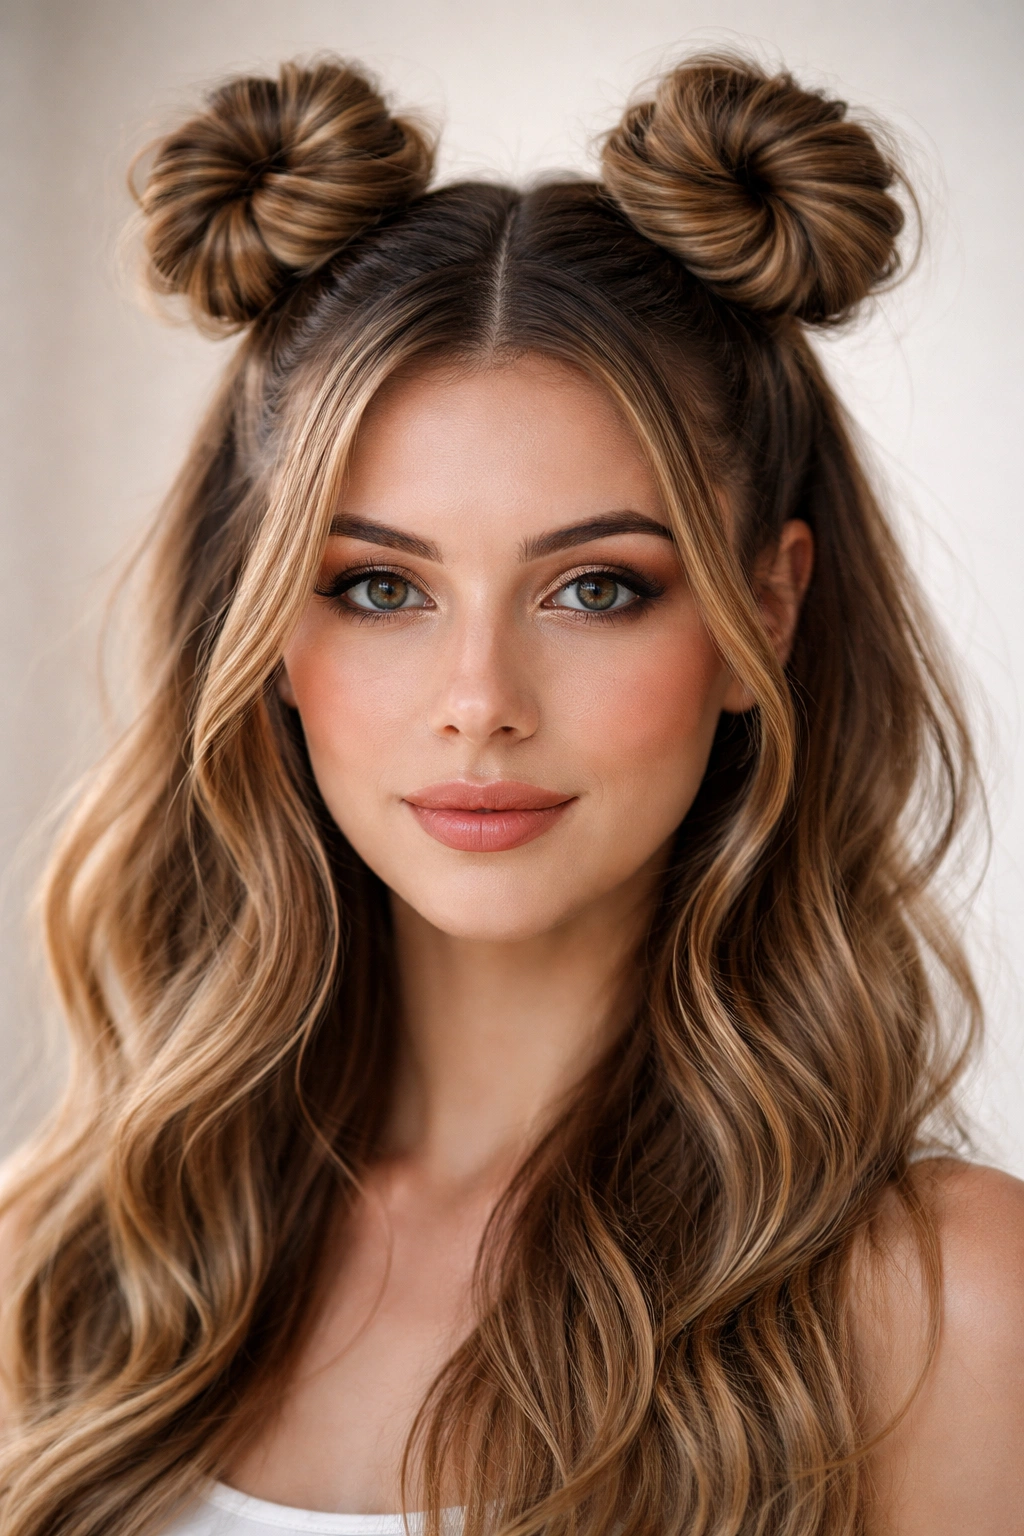
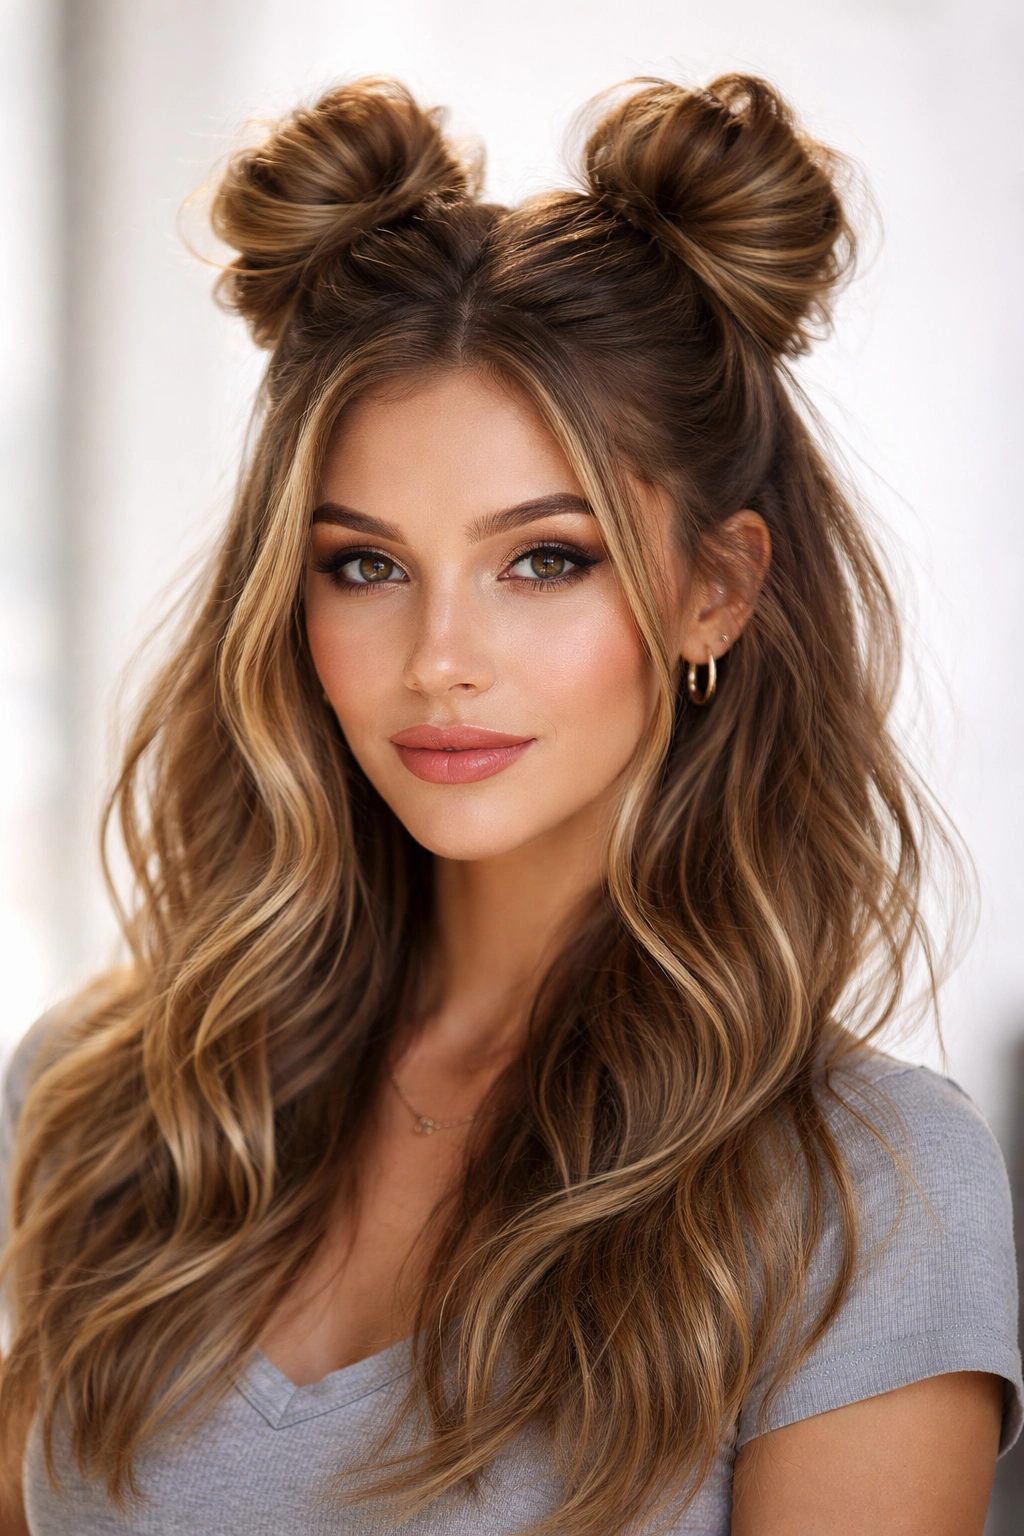
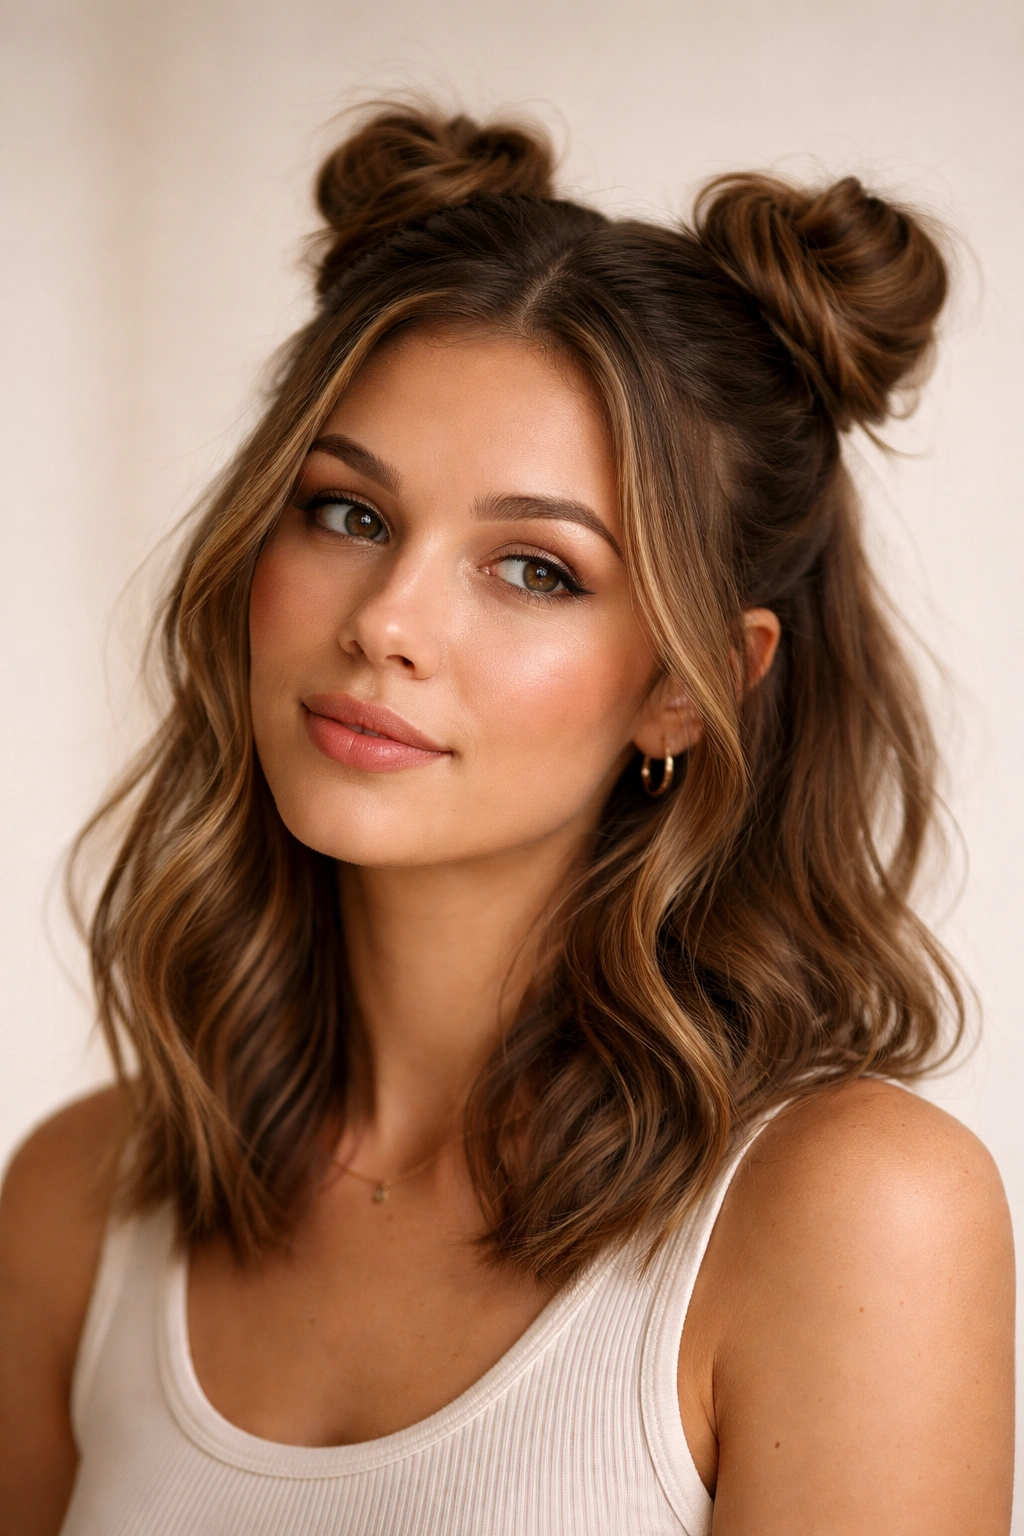
1. Classic Centered Space Buns
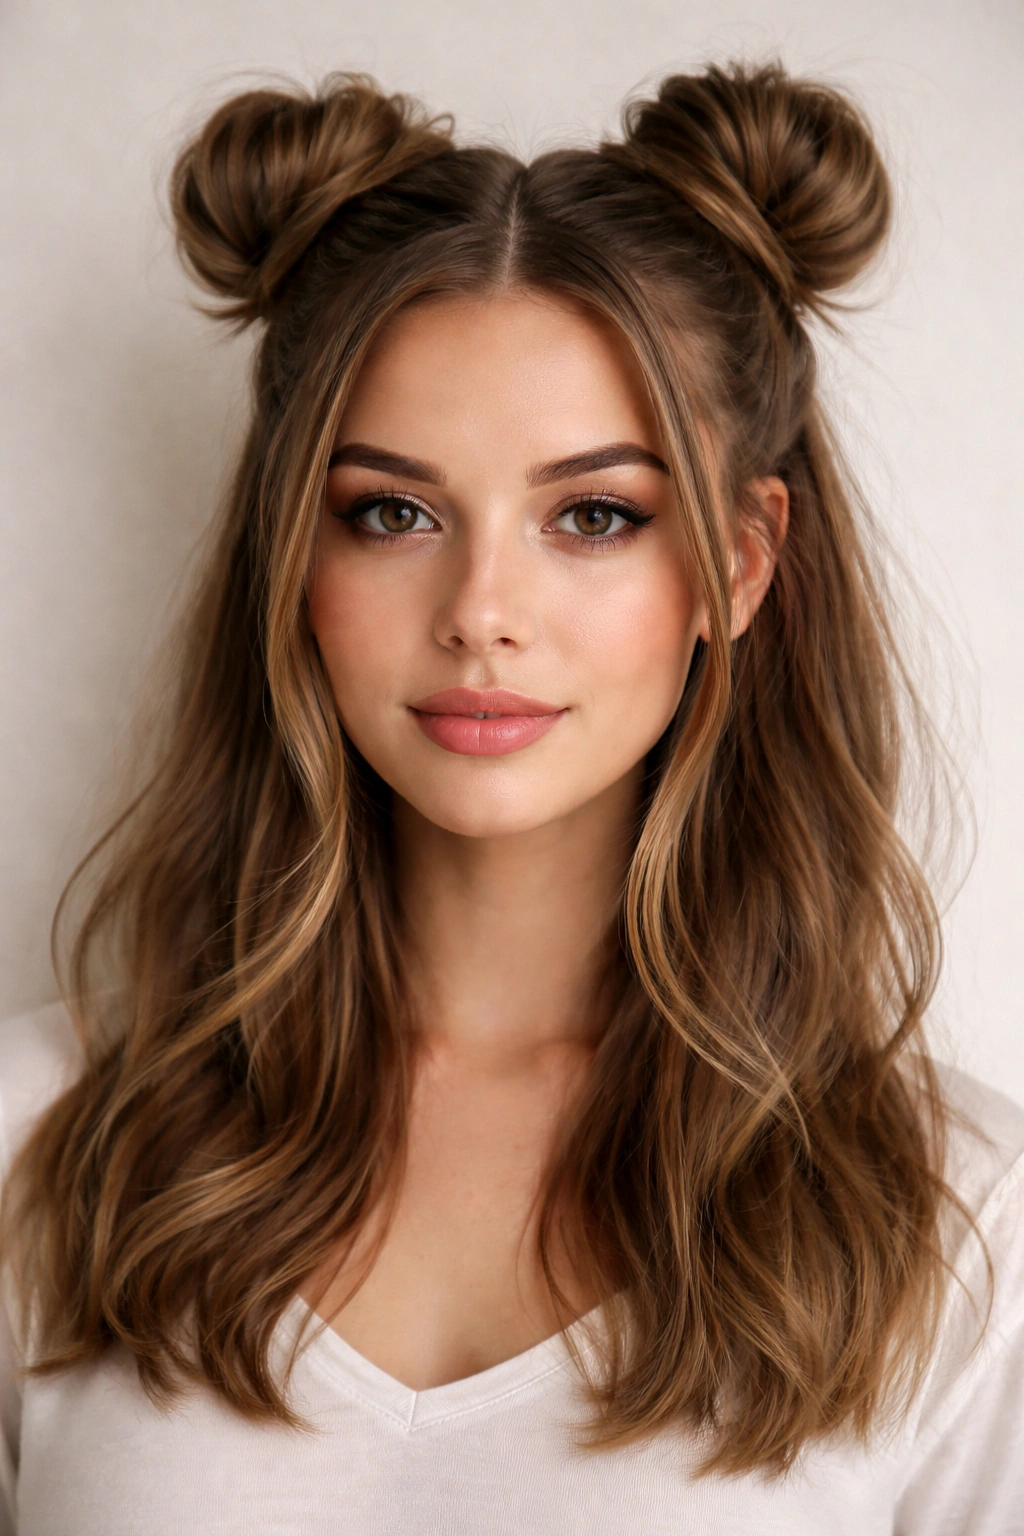
This is the foundation style that all other space buns build from, and for good reason — it works beautifully on medium hair because the proportion of bunned hair to flowing bottom half stays perfectly balanced. Divide your upper half straight down the middle from your forehead to the crown, then separate that top section into two equal halves. Gather each side into a high ponytail right at the temple line, then twist or wrap each ponytail around its base to form a compact bun. The loose bottom half creates a perfect contrast that keeps the look from feeling costume-y.
The Construction Method That Stays Put
The secret to centered space buns lasting all day is where you position the base. For medium hair, aim to gather your ponytails right at ear level when you look at your profile — any lower and you lose the “half-up” definition, any higher and the ponytail pulls at your roots uncomfortably. Secure each ponytail with a small elastic, then wrap a small section from the ponytail around the base before coiling the rest into a bun. This wrapping technique is what prevents slippage throughout the day.
What Works Best
- Blow-dry your hair completely straight or with a slight wave before starting — texture gives the buns grip
- Use matte-finish elastics that grip hair better than shiny ones
- Bobby pins placed horizontally through the bun base hold infinitely better than vertical placement
- Start with damp hair if you have very fine or slippery hair texture
- Tease gently at the base of each ponytail for micro-grip before forming the bun
Pro tip: If your buns start loosening by afternoon, carry a small atomizer of light hairspray and lightly mist each bun — this recrisps them without the flaking of dry shampoo.
2. Asymmetrical Low Space Buns
Instead of placing both buns at the same height and equidistant from center, position one bun lower and slightly toward the back while the other sits higher and forward. This off-balance arrangement feels modern and intentional rather than symmetrical, which can sometimes read as overly cutesy on adults. The lower bun on medium hair creates a gorgeous visual line that draws the eye along your profile, while the higher bun adds unexpected visual interest.
Creating Intentional Imbalance
Start by taking a section from one side that’s larger than the other — maybe 60% of your upper half goes into the lower bun, 40% into the higher one. This size difference reinforces the asymmetrical feel. Place the lower bun toward the back of your head (almost at the nape line), which lengthens your neck visually and feels less choppy than two buns at the same height. The flowing hair in front stays longer and frames your face, especially if you have shorter layers.
Real-World Styling Tips
- This works particularly well if you have any face-framing layers — they fall naturally in front of the asymmetrical arrangement
- Brush all the flowing bottom section forward and down before bun-forming, so it pools toward your face rather than your neck
- The size difference between buns is what makes this feel intentional — same-sized buns just look uneven rather than designed
- A slight tease at one bun’s base (but not the other) adds to the deliberately-different vibe
- Spray the lower bun with light hairspray before coiling — gravity pulls harder on the back placement
Worth knowing: This style photographs beautifully in profile because the height variation creates depth and movement that center-space buns lack.
3. Twisted Wrap Space Buns
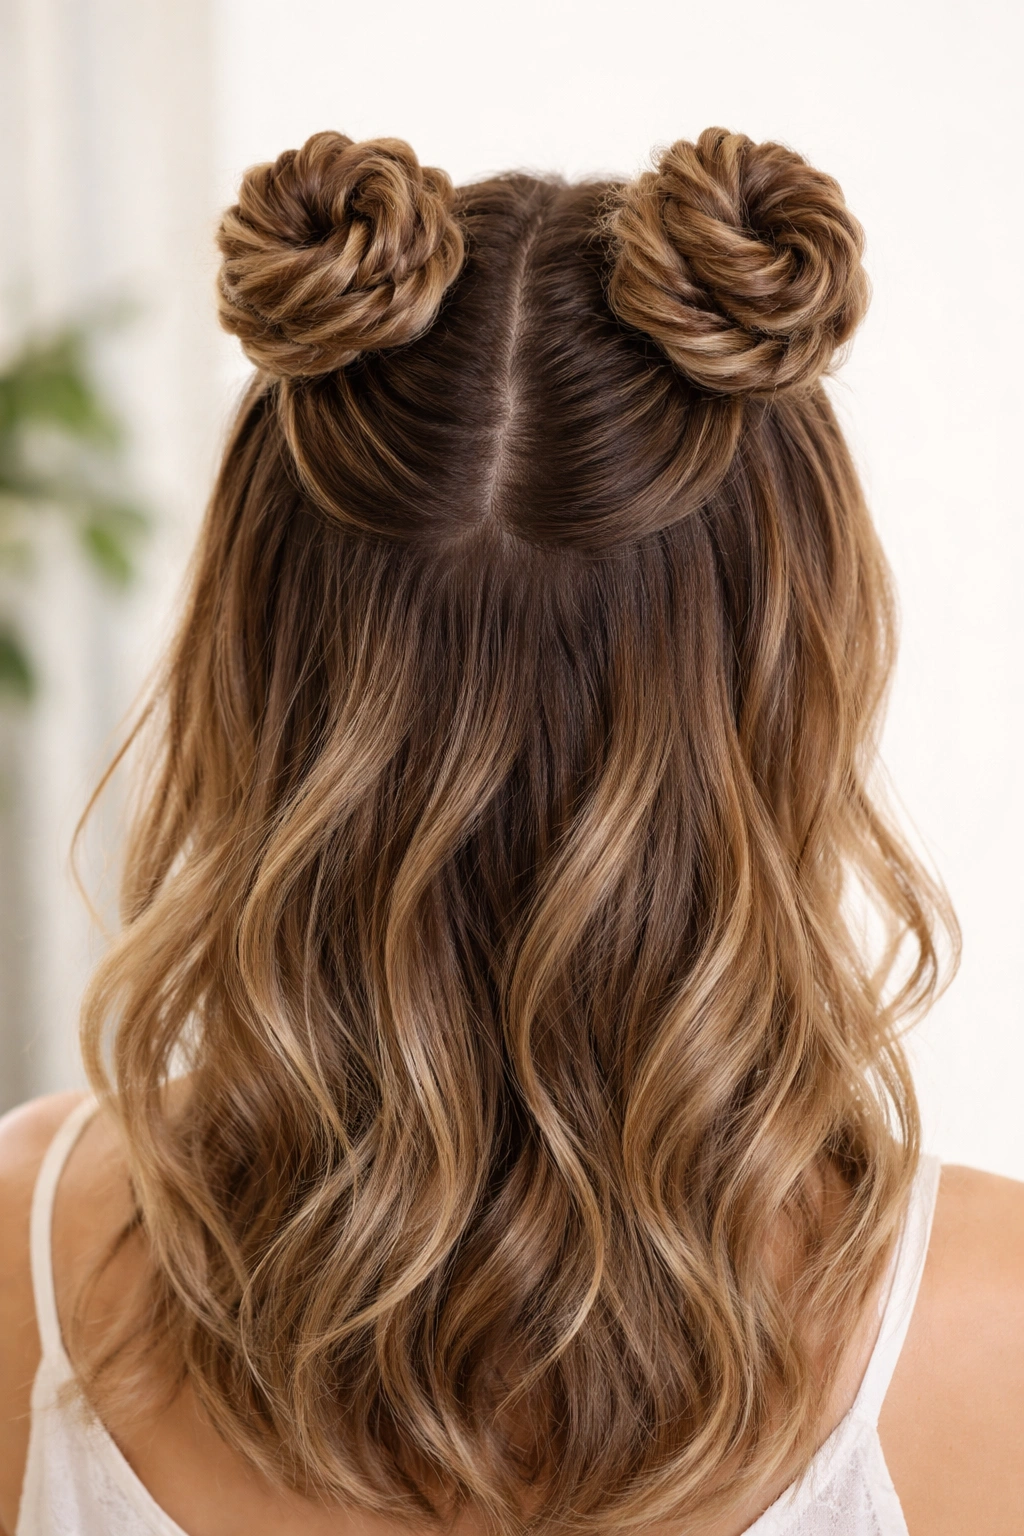
Instead of simply coiling your ponytail into a bun, twist the entire length of each ponytail tightly, then wrap that twisted rope around the base in a spiral. This creates a completely different texture and visual than a standard bun — it looks more constructed, more intentional, and honestly more sophisticated. The twist gives the bun definition and makes it read as something you deliberately created rather than just piled-up hair.
Mastering the Wrap Technique
The twist matters more than you’d think. A loose, casual twist looks lazy and will unravel, but an intentional twist that’s firm enough to hold shape creates a bun that stays solid all day. Divide the ponytail into two strands and twist them around each other rather than twisting the entire thickness at once — this creates a tighter, more reliable twist. As you spiral that twisted rope around the base, overlap each wrap slightly and tuck the end underneath the spiral, then pin it securely. The overlapping creates a rose-like texture that’s genuinely beautiful.
Making It Last
- Do not twist loosely — firm tension is what makes this technique reliable
- A two-strand twist (dividing the ponytail and twisting the two pieces around each other) holds better than twisting the entire ponytail as one unit
- Use at least 3 to 4 bobby pins placed through the spiral to anchor it, since twists can want to spring loose
- This style is especially good for fine hair because the twist creates the illusion of more volume than a simple coil
- Hairspray the twist lightly before wrapping to set the twist shape
Insider note: If your ponytail is thick and long, you might have leftover length after spiraling — instead of tucking it under, wrap it once more around the spiral for extra dimension.
4. Braided Half-Up Space Buns

Create a Dutch braid down each side of your head starting from your temple, then gather the end of each braid into a bun. This is where braids and space buns combine into something genuinely unique. The braid creates a visual line from your face toward the back of your head, and then the bun acts as an endpoint for that line. It’s more complex than a simple space bun but absolutely worth the effort if you want something that looks high-effort and sophisticated.
Braid Placement for Medium Hair
For medium-length hair, you want to start your braid right at the temple — not the very top of your head like a typical Dutch braid. This positioning means the braid moves down and back naturally with the shape of your head rather than creating tension at the roots. Braid loosely (tight braids look strained and can pull hair out over time), and as you braid, slightly loosen the plait every inch or so to build texture. Once you reach the nape, gather what remains into a small ponytail and coil it into a bun. The loose braid texture contrasts beautifully with the tighter bun.
Execution Steps That Matter
- Dutch braiding (braiding by adding sections from underneath the working sections) creates more texture and visual interest than regular braiding
- Loosely pre-curl your hair with a waving iron or braiding technique before starting — this helps the loose braid drape nicely rather than looking stringy
- Pull the braid slightly looser after you’re finished braiding by gently tugging each section outward — this adds dimension without unraveling it
- Braid only until you reach approximately ear level, then gather the remaining length into a ponytail and bun
- Start braiding from your actual temple, not the top-center of your head, so the braid sits naturally
Real talk: This style is a workout the first time, but once you’ve practiced the braid twice, it becomes your go-to because it genuinely looks like you invested serious effort.
5. Messy Textured Space Buns
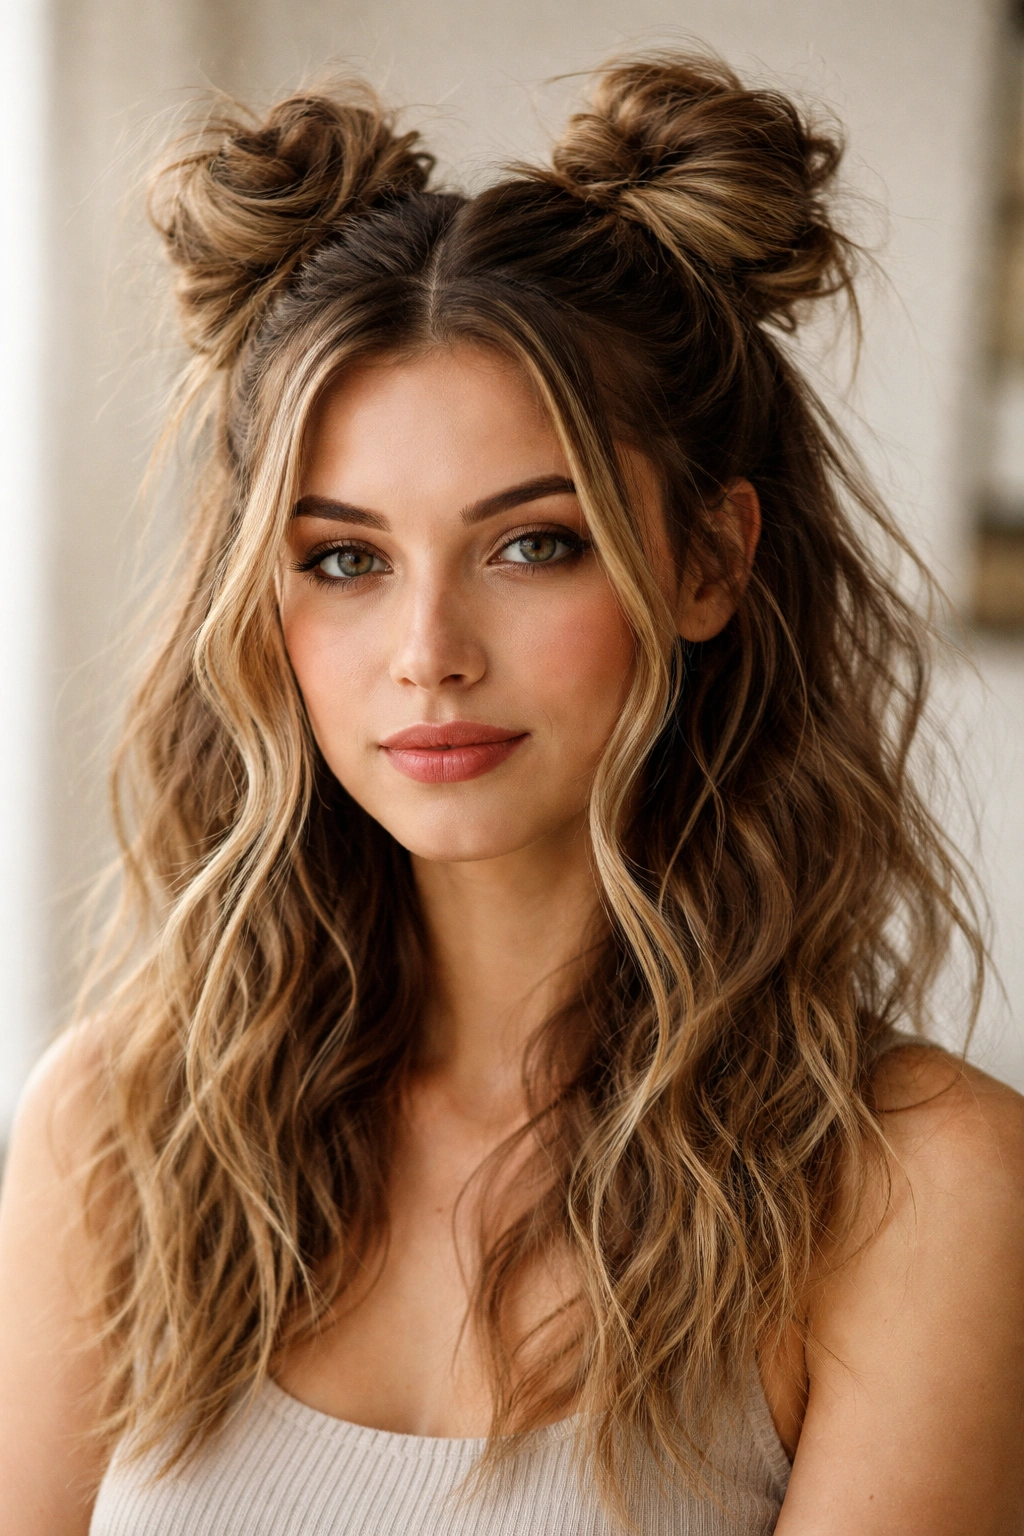
Sometimes the most intentional-looking style is one that appears intentionally imperfect. Create your space buns from hair that’s been intentionally texturized rather than smooth — use a crimper, a braiding method, or a salt spray to create texture throughout. When you form the buns, don’t try to make them neat. Instead, deliberately leave some wispy pieces loose, let the bun sit slightly imperfect, and embrace the “undone” aesthetic. This is the version that works for people who feel weird about the precision of perfect space buns.
Building Intentional Texture
The day before you plan to wear this style, braid your hair loosely (all one braid or two braids) and leave it in overnight — this creates a gorgeous wave pattern that holds for days. The next day, lightly separate the waves with your fingers, then form your space buns without trying to make them smooth. This texture is what you want. Alternatively, use a crimping iron on random sections throughout your hair before creating the buns — the crimped sections catch light differently and create visual texture even when the buns themselves are neat.
The Undone Look That Works
- Don’t blow-dry smooth; instead, air-dry with texture or use a crimper beforehand
- Pull some small face-framing pieces loose and curl them away from your face after the buns are complete
- Slightly mess up each bun after you’ve formed it — pull gently at the edges to make it look less “done”
- Use a lightweight texture spray (not heavy dry shampoo) for grip and separation
- Leave baby hairs around your hairline loose and slightly curled rather than pulling everything back
Pro tip: Tease very lightly at the base of your buns, then relax the tease slightly with your comb — this creates buns that look full without looking ratty.
6. High Sleek Space Buns
Position both buns as high as possible while keeping them in the “half-up” territory — near the crown but not at the absolute top of your head. Use a fine-tooth comb to smooth every piece into sleek, shiny perfection. This version is the most graphic and modern-looking. The height creates a literal visual lift that’s flattering, and the sleekness reads as intentional and editorial rather than playful. It’s the version for when you want space buns to feel like a statement rather than a cute accessory.
Achieving Actual Sleekness
Sleekness is harder to achieve than it looks, especially on medium hair. Start with damp hair that you’ve blow-dried fully straight with a paddle brush. Use a fine-tooth comb rather than a brush to gather your sections — combs pull out less flyaways. A lightweight smoothing serum brushed through your hair before blow-drying helps reduce frizz. When you form the bun, use a comb to smooth every piece into place, then set with a very light mist of hairspray (too much and it gets crunchy). Small clear elastics are better than colored ones here because they disappear into the sleek style.
The Technique for Maximum Sleek
- Blow-dry with a paddle brush first, then use a flattening iron over your sections before gathering them
- A lightweight smoothing serum matters more than hairspray for sleekness — apply it to damp roots before blow-drying
- Always use a fine-tooth comb for gathering, not a brush
- Small, clear elastics look cleaner than larger colored ones in this context
- A tiny dab of smoothing cream on your comb helps control any flyaways while you’re forming the buns
- Matte bobby pins look cleaner than shiny ones in this graphic style
Worth knowing: This is the only space bun version that actually improves the more you blow-dry and smooth — don’t skip the sleekness step.
7. Hybrid Half-Up Half-Down with Clip
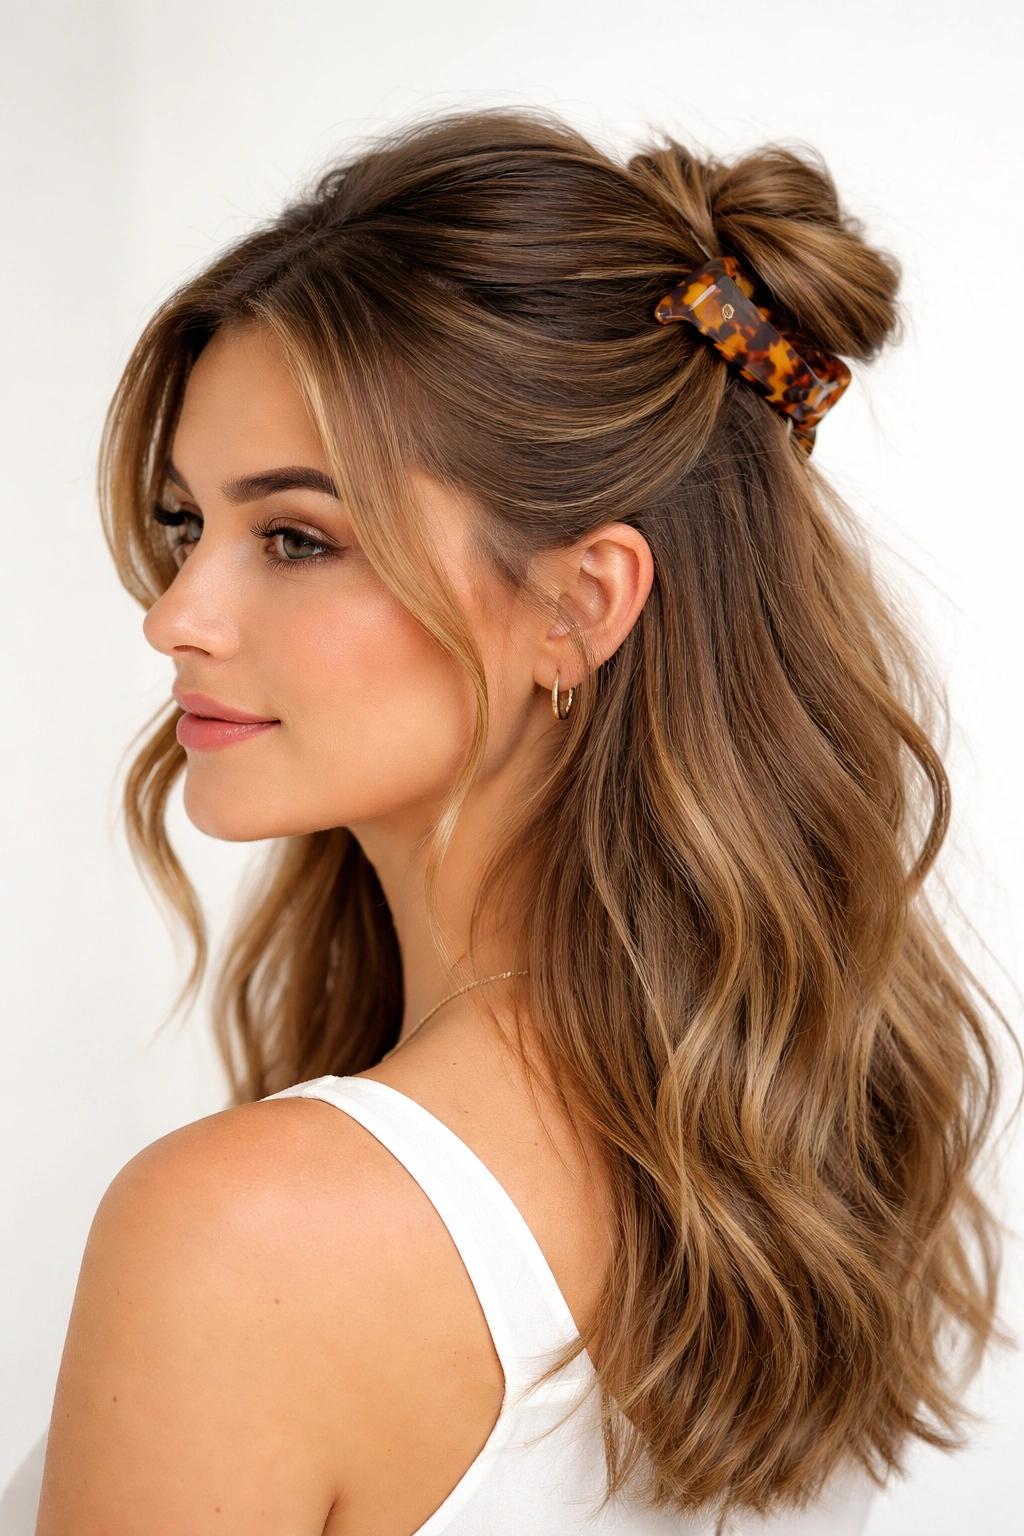
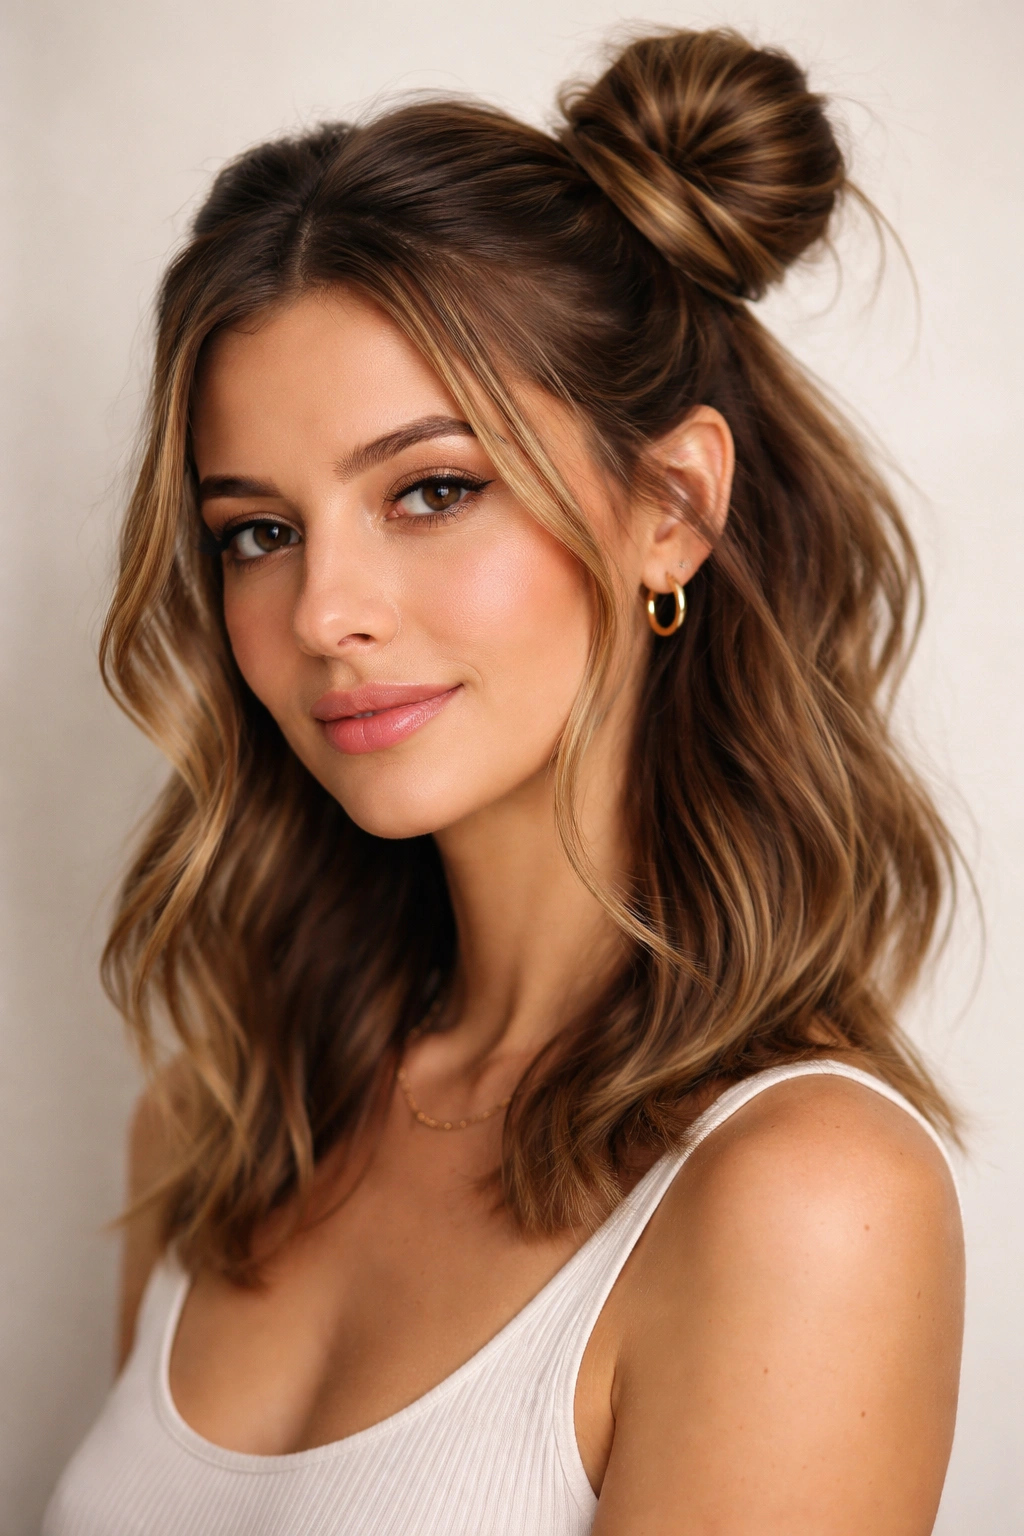
Instead of creating traditional buns, gather a half-up section and secure it with an elegant clip — a hair claw, a decorative barrette, or a tortoiseshell piece. This gives you the half-up half-down aesthetic with the bun vibe (compact, graphic, bunned-looking) but without the actual fussiness of forming two separate buns. It’s faster, it lasts longer, and honestly, it’s a lifesaver on days when your hair is slightly damp or stubborn. The “space bun” look comes from how you position the clip — off-center or asymmetrically creates that same vibe as two separate buns.
Clip Selection and Placement
The clip you choose completely changes the energy. A claw clip in tortoiseshell or pearl reads sophisticated and intentional, while a decorated barrette in a bright color reads fun. Gather your half-up section from your temples upward toward the crown (skip the very top center) and clip it slightly off-center or even low on the back of your head. This off-center placement creates the same visual as asymmetrical space buns. For medium hair, you want a clip that’s roughly 2 inches wide — large enough to secure the section comfortably but not so massive that it overwhelms your proportions.
Making This Look Intentional
- Off-center or low placement looks intentional; centered placement just looks like a half-up hairstyle
- A larger clip works better than a small one for creating the “bun-like” silhouette even though nothing is actually bunned
- Tease very slightly at the base of your half-up section before clipping — this creates a little dome shape that reads as “bun-like”
- A claw clip that’s slightly wider than your gathered section actually holds better than one that fits perfectly
- Tortoiseshell, pearl, metal, or fabric clips all work; choose based on the occasion and your personal style
- Curl the lower half loosely with a waving iron for contrast against the clipped structure
Insider note: This works especially well if you have thicker hair or a rounder face shape — the off-center clip is incredibly flattering for its simplicity.
8. Pinwheel Space Buns
Create pinwheel texture within each bun by spiraling your ponytail in a specific direction. Start at the base and spiral outward rather than wrapping around in concentric circles. This creates a pinwheel or spiral pattern that’s visually distinct from a standard bun. The difference is subtle but significant — it looks more intentional and artistic. For medium hair, the pinwheel creates just enough texture and movement that the bun doesn’t look flat or boring.
The Pinwheel Spiral Method
Secure your ponytail, then imagine your bun as a flat spiral that radiates outward from the center point. Rather than wrapping the ponytail around the base in overlapping circles, create one continuous spiral from the inside outward. This means your first wrap is tight at the base, and each wrap gets progressively larger, creating that pinwheel effect. It’s a bit more involved than a standard bun, but the visual payoff is worth it. The pinwheel catches light differently, and it photographs beautifully.
Making the Pinwheel Precise
- Imagine your bun as a flat disc that you’re spiraling outward from the center point
- Start the spiral at the elastic base and work outward, each wrap getting slightly larger
- Use bobby pins to anchor the spiral at 3 to 4 points around the circle
- Lightly tease before creating the pinwheel if your hair is fine or slippery — it helps hold the spiral shape
- A light hairspray set after you’ve formed the pinwheel prevents it from coming loose
- The pinwheel works best when you have enough hair for volume — fine or thin hair might make it look sparse
Real talk: Your first pinwheel won’t look perfect, but by the third or fourth time you do it, you’ll develop the muscle memory and it becomes your signature move.
9. Side-Swept Space Buns
Position both buns off to one side rather than centering them. Gather your upper half and distribute it toward one side, creating two buns that sit on your right side (or left, depending on your preference). This asymmetrical approach creates a completely different silhouette and feels modern and editorial. The flowing bottom half sweeps to the opposite side, creating movement and balance even though everything is technically on one side of your head.
The Geometry of Side-Swept
Imagine a vertical line down your head from your forehead through your skull. Both buns sit to one side of that line, usually about 2 inches on either side of center. The buns should be stacked vertically (one slightly higher than the other) rather than side-by-side. This vertical stacking on a diagonal side creates a visual line that’s incredibly flattering. The bottom half of your hair flows to the opposite side, which balances the heaviness of the buns. This works especially well for medium hair because you have enough length for the flowing section to feel substantial.
Positioning for Maximum Impact
- Both buns sit on the same side, stacked vertically rather than side-by-side
- One bun sits higher (toward your crown) and one sits lower (toward your ear) on your chosen side
- Brush all the flowing bottom section to the opposite side so it creates a diagonal line
- Tease slightly at the base of each ponytail to create a dome shape that extends the profile line
- Curved bobby pin placement (following the bun’s curve) looks cleaner than straight pins
- Soft waves or loose curls in the flowing section enhance the movement of this style
Pro tip: This style is incredibly flattering for face shapes that benefit from asymmetry — if you’re not sure about your face shape, try this and see if you feel more balanced with the weight on one side.
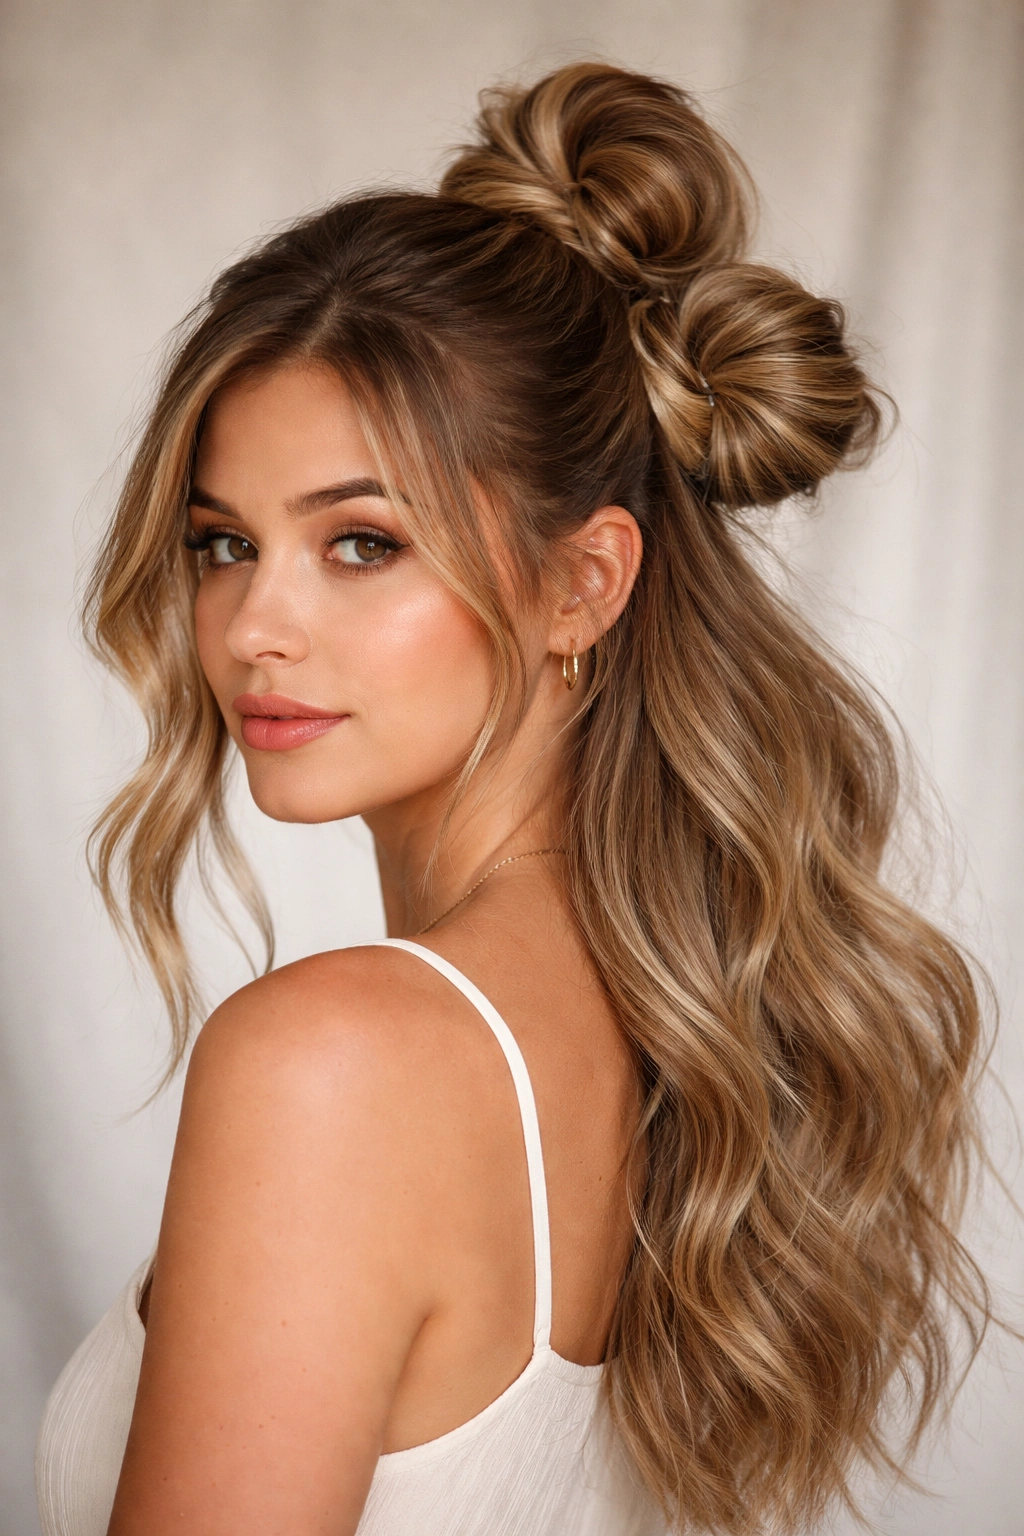
10. Bubble Bun Space Bun Hybrid

Create a half-up section and divide it into 3 to 4 smaller ponytails stacked vertically down the back of your head, each gathered with its own elastic. Then coil each small ponytail into a tiny bun, creating a “bubbled” stack. The top tiny bun sits in the half-up space bun position, while the next ones are slightly lower, creating dimension and a sculptural quality. This is the version that looks complex but is actually surprisingly straightforward once you understand the stacking concept.
Building the Bubble Structure
Divide your half-up section into roughly equal portions and gather each with its own elastic, spacing them about an inch apart. Each ponytail should be relatively small — if your half-up section includes about 30% of your hair, each mini-ponytail might be only about 7 to 8% of your total hair. Coil each tiny ponytail into its own small bun, pinning each one securely before moving to the next. The result is a column of small buns that create unexpected visual interest. For medium hair, 3 to 4 bubbles work perfectly — any more and they get too small to see; any fewer and you lose the effect.
Execution Tips
- Make sure your elastics for the mini-ponytails are truly small — thick elastics will overwhelm tiny ponytails
- Each mini-bun should be roughly the same size and shape for a polished look
- Space them with about 1 inch between each, creating a clear visual separation
- A small tease at the base of each mini-ponytail before gathering creates better bun definition
- This style works best on second-day hair or hair with some texture — freshly washed straight hair can look too thin and stringy
- Light hairspray after each mini-bun helps them hold their shape throughout the day
Insider note: The bubble bun hybrid is the perfect in-between style if you find full space buns too youthful but a simple half-up too basic.
11. Accessory-Adorned Space Buns
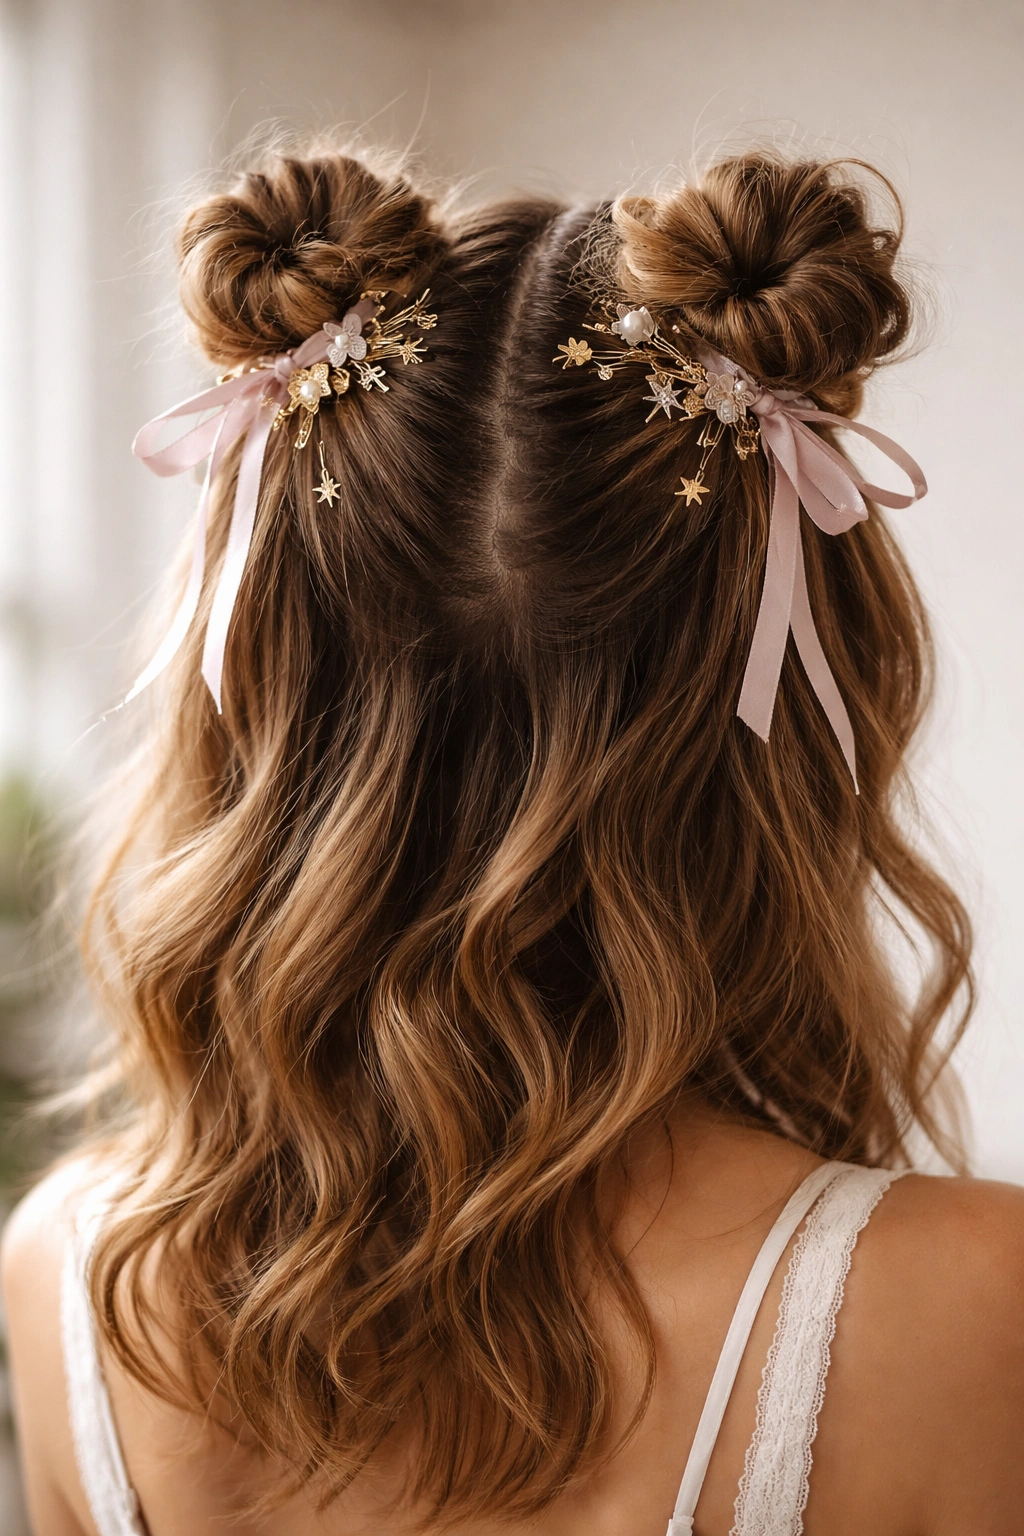
Create your space buns as normal, then immediately after securing them, add accessories. Small claw clips clipped around the base of each bun, hair ribbons woven through the bun structure, delicate gold pins placed radiating from the bun center, or even temporary hair chalk in contrasting colors — the accessories are what transform a simple space bun into something completely personalized. This is the version for people who want to express personality and style through their hairstyle rather than just the shape of the bun itself.
Accessory Integration That Works
The key is choosing accessories that match the style of your bun placement. A high, sleek space bun pairs well with minimal metallic pins or a single luxury clip. A textured, messy space bun works beautifully with colorful ribbons or multiple small clips. Asymmetrical space buns call for asymmetrical accessory placement. Don’t just randomly clip things on — think about the visual balance and whether the accessories reinforce the style you’ve created. For medium hair, you usually have enough bun surface area to support 2 to 3 accessories per bun without looking cluttered.
Accessory Placement Ideas
- Small claw clips placed around the perimeter of each bun create a framing effect
- A single metallic or pearl hair pin placed radiating from the center looks editorial and intentional
- Silk ribbons woven through the bun structure add color and texture without bulk
- Temporary hair chalk applied to the bun surface adds color without commitment
- Delicate chain hair accessories placed looped through the bun add jewelry-like elegance
- Multiple small clips work if you stagger their placement — not all at the front or all at the back, but distributed around
- Hair scarves tied around the base of each bun create a completely different vibe than clips
Worth knowing: Accessories often read more fun and less “costume-y” than space buns alone — if you’ve been hesitant about space buns, adding something metallic or elevated often makes it feel more age-appropriate and intentional.
12. Volumized Crown Space Buns
Create your space buns using the half-up section, but deliberately tease and build volume throughout the process. This version prioritizes fullness and movement rather than sleekness or precision. The buns should be visibly full and dimensional, and the crown area should have noticeable height. This works beautifully for medium hair because you have enough length to create real volume without looking disproportionate. It’s the version for people who want their space buns to have presence and impact.
Building Serious Volume
Start by blow-drying your half-up section with a round brush, creating volume at the roots. Then tease that section with a fine-tooth tease brush — not aggressively, but enough to build a base of texture. Lightly brush the outside layer to smooth it slightly while keeping the teased base intact. This teasing step is what creates real, lasting volume rather than just fluff that falls flat. When you gather your ponytail and form the bun, the teased base supports the bun structure so it sits away from your head rather than lying flat against your scalp.
Volume-Building Technique
- Blow-dry your half-up section with a round brush to build root lift before teasing
- Tease with a fine-tooth brush at the roots and crown area — this is where you need the structure
- Smooth the outside layer with your comb to disguise the tease while keeping the volume
- The teased section acts as a structural base for your bun
- A light hairspray set at the roots before gathering helps the volume stay put
- When you form the bun, don’t pull it too tight — let it sit slightly away from your scalp
- Curled or wavy bottom hair creates a cohesive look with volumized buns
- If you have fine hair, this is the version that actually works best for you — the structure is what matters
Pro tip: This style is the easiest one to refresh throughout the day with a light hairspray mist because the volume structure is already built in.
Final Thoughts
Space buns for medium hair are genuinely more wearable and flexible than they’ve ever been because you’ve got the length for movement, the volume for impact, and the proportions to carry several different interpretations. Whether you go sleek and editorial, textured and intentional, or accessory-forward and personalized, the half-up half-down approach keeps the style looking intentional rather than costume-like. The best space bun style is honestly the one that makes you feel confident wearing it, which means experimenting with positioning, texture, and accessorizing until you find your version.
The mechanical skills involved — basic ponytails, simple twists, fundamental braiding — are honestly easier than they seem once you’ve done them twice. Your first attempt at any of these styles might take 20 minutes and look a little rough. By your third time, you’re down to 10 minutes and it looks polished. That’s not because you’re somehow getting more talented; it’s because your muscle memory is learning what the right tension feels like, where the elastics should sit, and how tightly to twist before wrapping. Embrace the practice rounds as part of the learning process.
Medium hair is actually the sweet spot for space bun styling because you have exactly enough length for the flowing bottom section to feel substantial while the bun section has enough density for impact. If you’ve written off space buns as “not your thing,” try one of the less cutesy versions — the braided hybrid, the twisted wrap, or the high sleek version. That slight shift in positioning or texture sometimes makes the difference between a style that feels off and a style that becomes your signature.