Bubble ponytails have become a go-to protective styling choice for Black women, offering a chic, versatile look that works for everyday wear, special occasions, or when you want to give your hair a break from manipulation. The beauty of the bubble ponytail lies in its simplicity—sectioned portions of hair secured with elastic bands create rounded, dimensional segments that catch light and add instant visual interest. Whether you’re working with natural hair, extensions, or a blend of both, there’s a bubble ponytail style that fits your texture, lifestyle, and personal aesthetic.
What makes bubble ponytails so appealing goes beyond looks. They’re relatively quick to create, protective when done correctly, and they maintain their shape for days, making them incredibly practical for busy schedules. The style sits somewhere between casual and polished, so you can wear it to the gym, the office, a night out, or anywhere in between. The key is understanding the variations and knowing which one complements your face shape, hair type, and the occasion.
The different bubble ponytail styles each bring their own flavor to the basic concept. Some emphasize sleekness and control, while others prioritize volume and texture. Some work beautifully with your natural hair alone, while others truly shine when paired with extensions. Understanding the distinctions between these styles helps you choose the right one for what you’re trying to achieve—whether that’s a polished professional look, an Instagram-worthy statement, or simply a protective style that feels good and looks great.
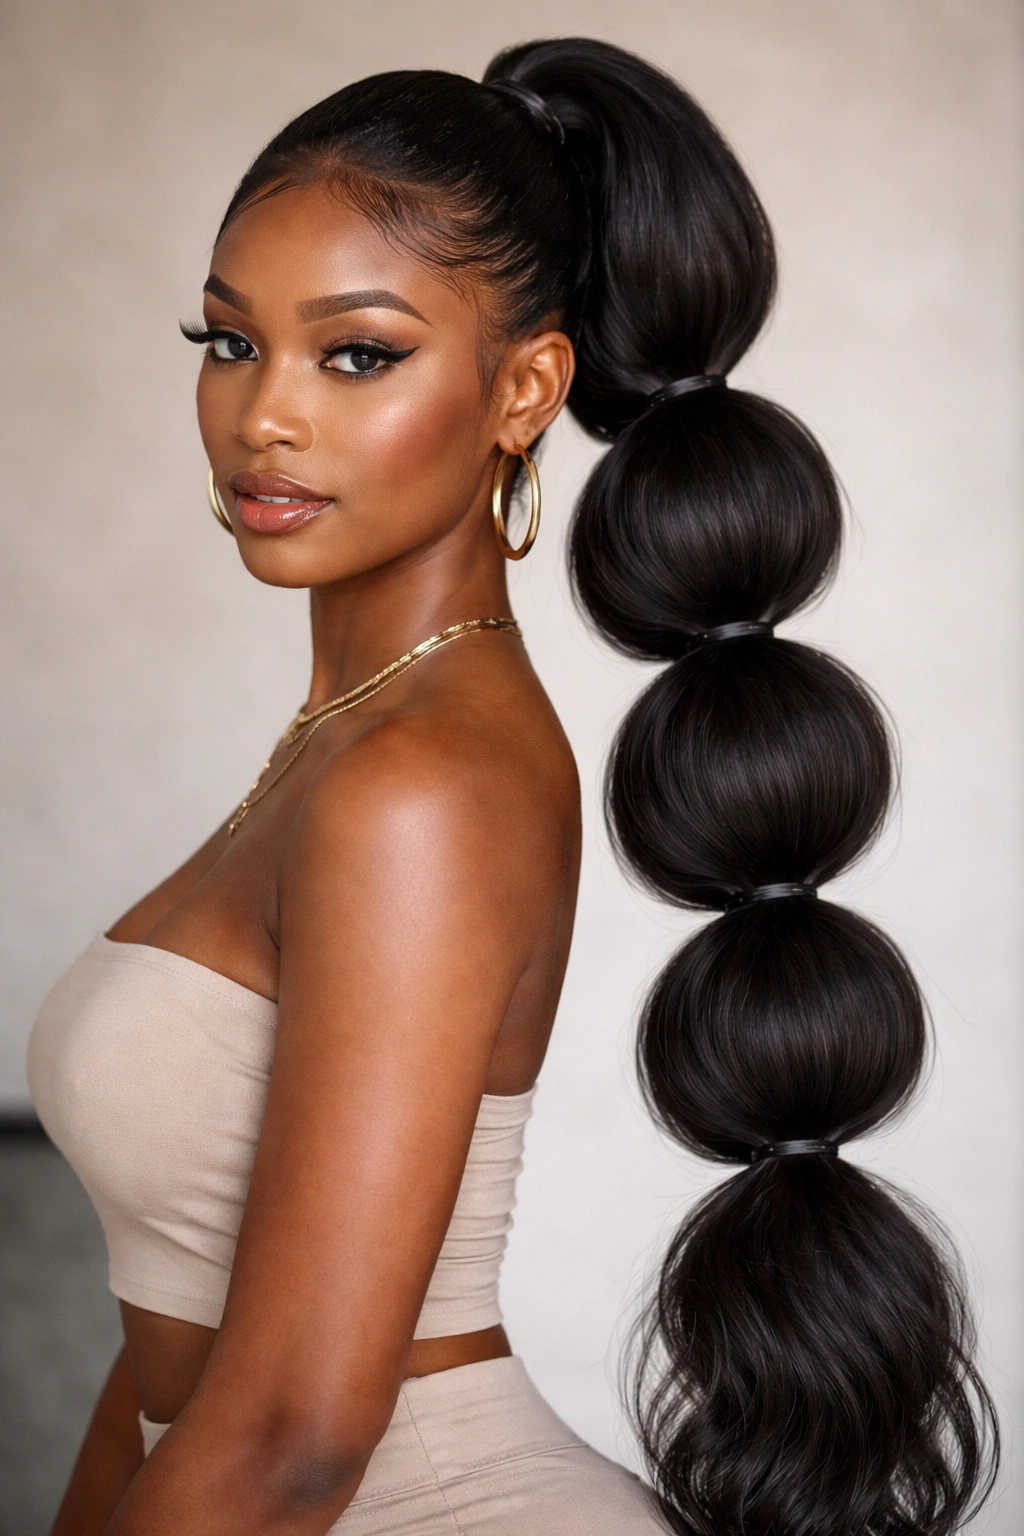
1. Classic Sleek Bubble Ponytail
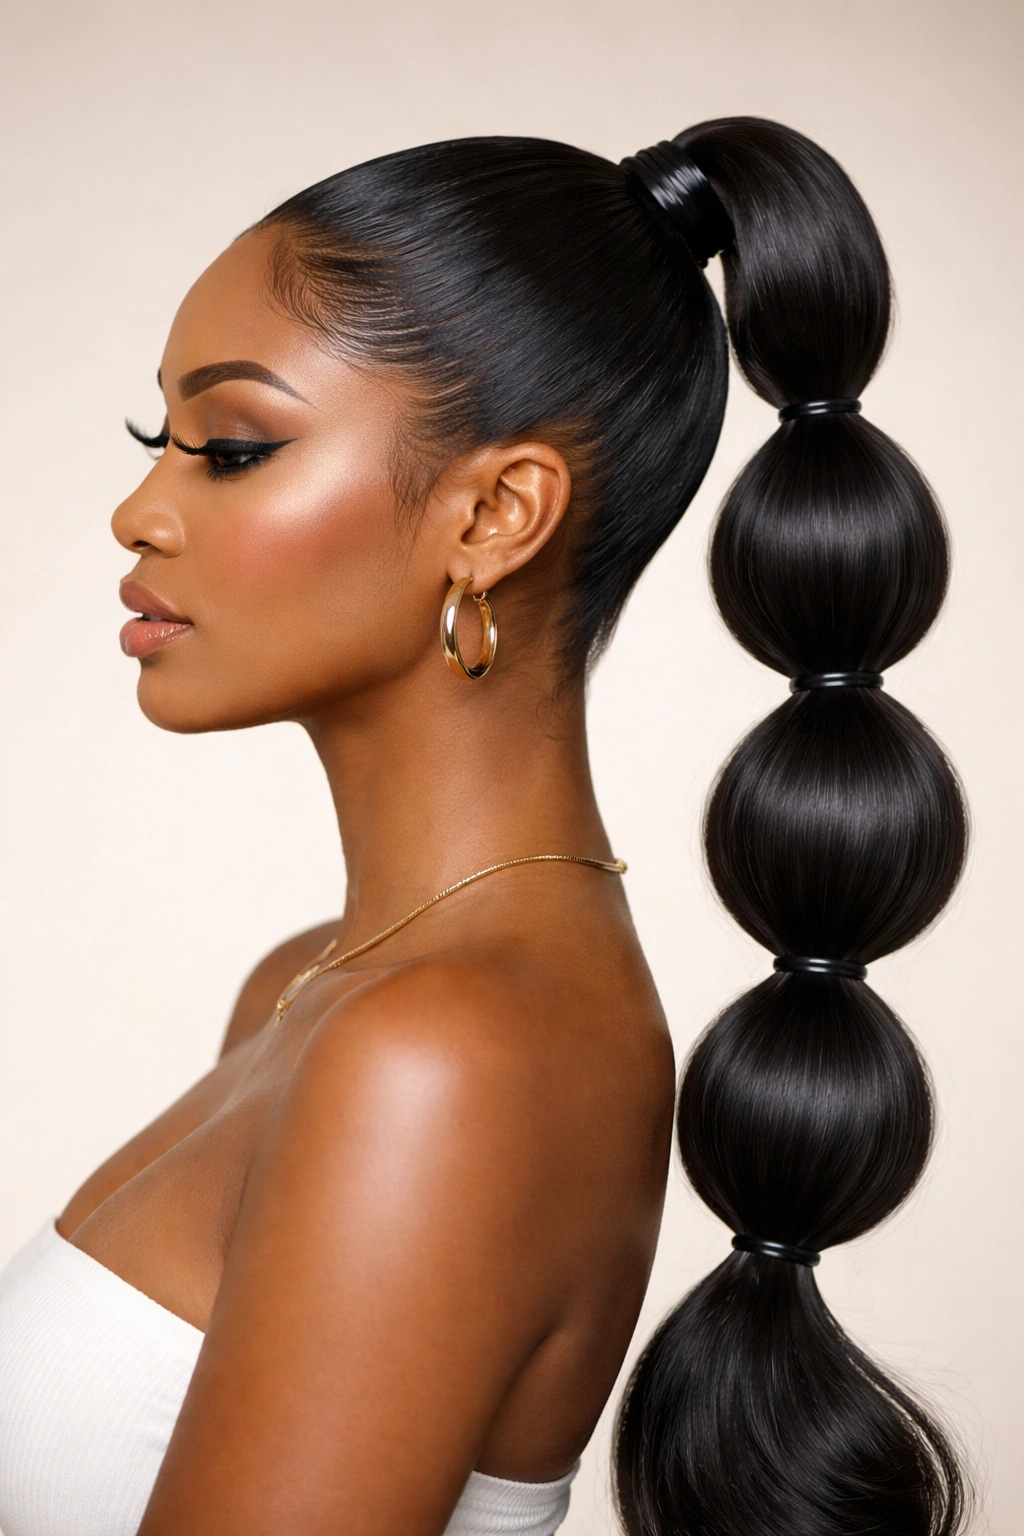
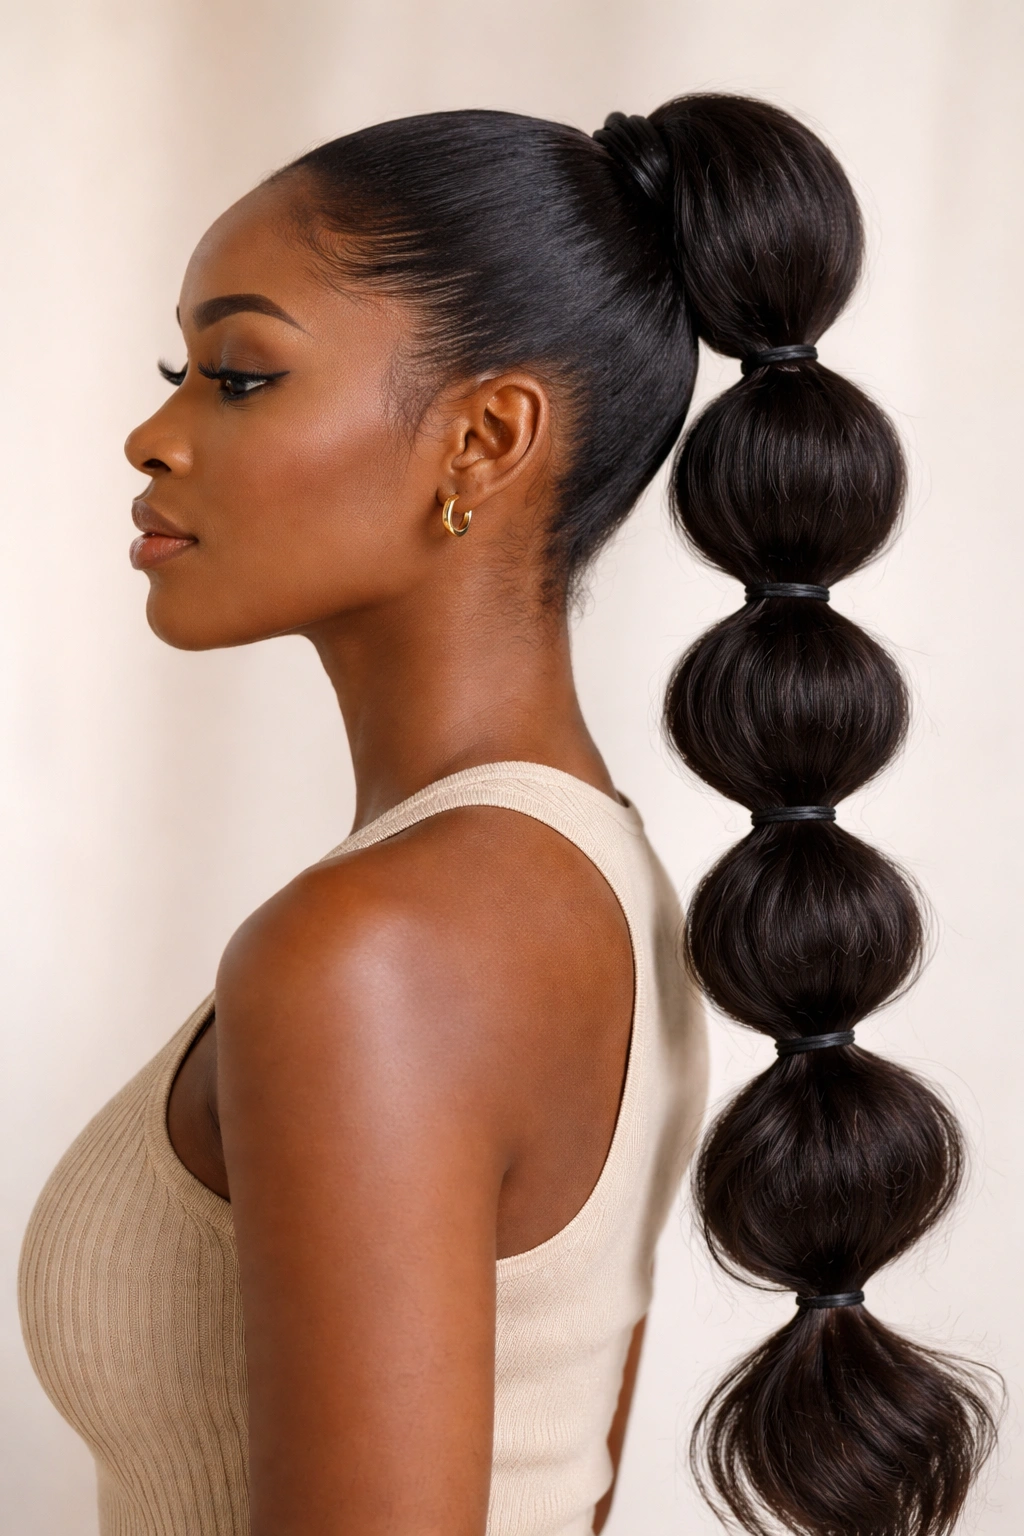
The classic sleek bubble ponytail is the foundation style that all others build from. This version emphasizes smooth, controlled sections with a glossy finish throughout. Each bubble sits perfectly rounded and distinct, with no flyaways or texture breaking up the clean lines. It’s the kind of style that photographs beautifully and works equally well whether you’re heading to work or out with friends.
How to Create This Polished Look
Start with hair that’s been detangled and moisturized—moisture is essential for achieving that sleek finish without breakage. Apply a smoothing cream or gel to your edges and throughout your hair to tame any frizz. Gather your hair into a high ponytail at the crown of your head, securing it firmly with an elastic band. The tighter you pull initially, the sleeker the result. Once you have your base ponytail, divide it into 4 to 6 sections, depending on how many bubbles you want. Secure each section with its own elastic band, pulling gently downward to create tension and definition between each bubble. Smooth each bubble as you go, using a fine-tooth comb or your fingers to work out any bumps or ridges.
Styling Tips and Maintenance
The key to keeping this style sleek throughout the day or week is controlling your edges and preventing frizz. Use a small toothbrush and edge control to lay your baby hairs smoothly against your scalp. Retouch your edges every morning if needed—it takes just a minute but makes a huge difference in the overall polish of the style. At night, wrap your ponytail loosely with a silk scarf to prevent friction and frizz. When you’re ready to remove the style, take your time unraveling each bubble gently. Rushing the removal process can cause unnecessary breakage, especially if you have fine or delicate strands.
Pro tip: For extra shine and smoothness, apply a light hair oil or serum to each bubble once you’ve secured them—just use a tiny amount so it doesn’t look greasy.
2. Bubble Ponytail with Curled Ends
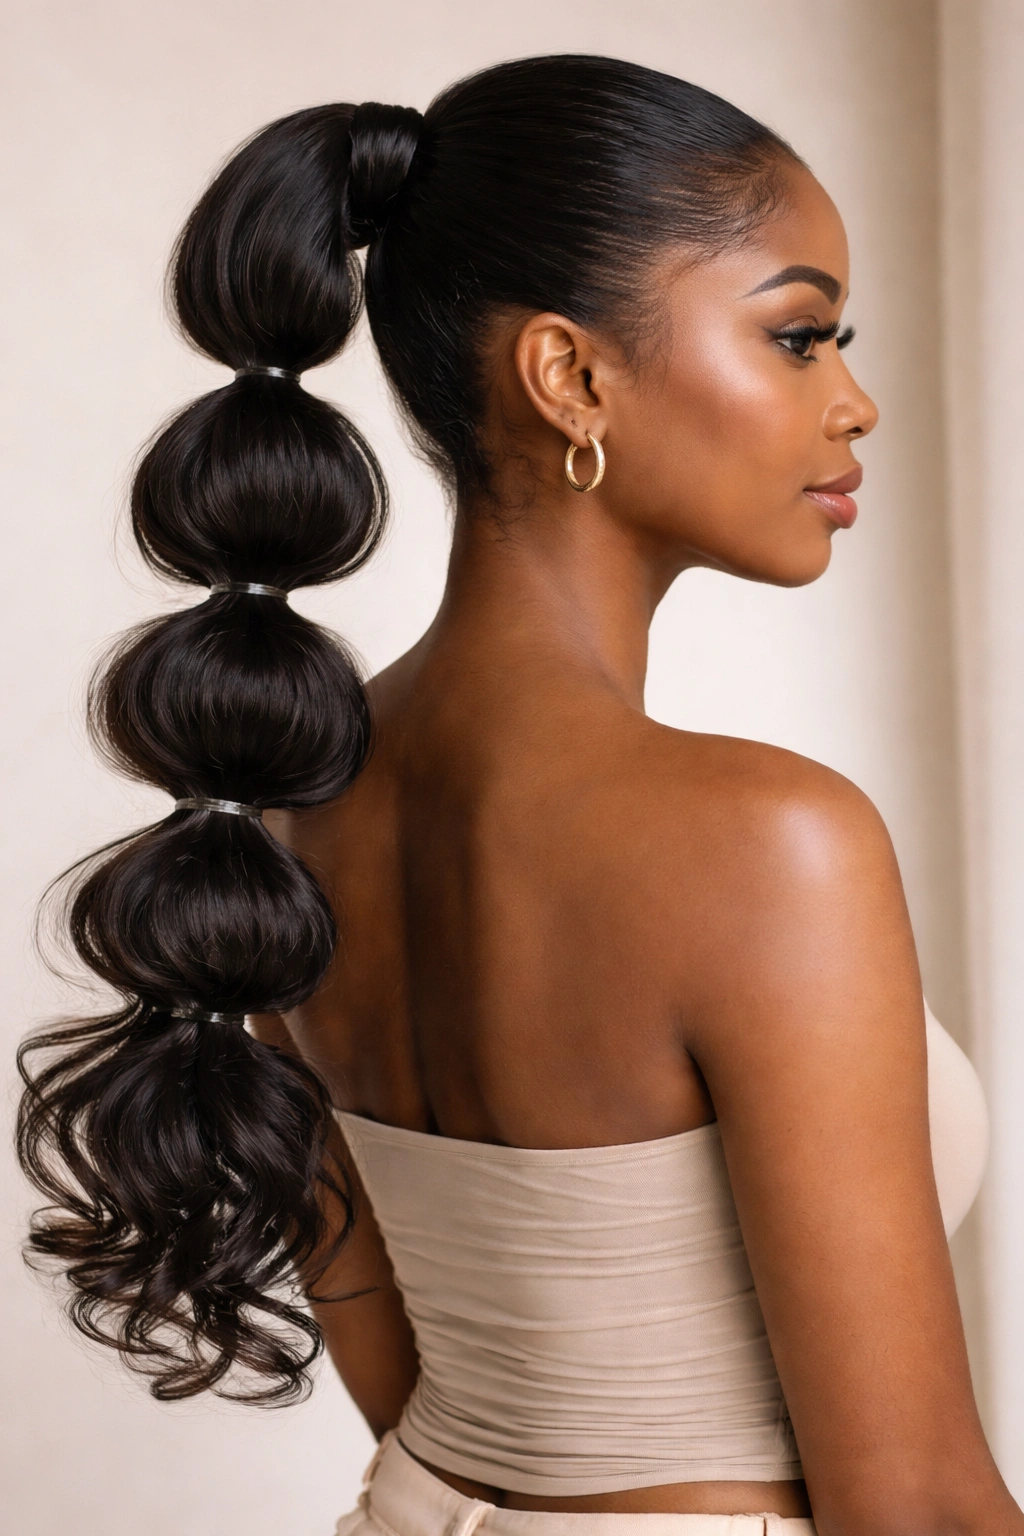
This variation takes the classic bubble ponytail and adds texture and movement to the ends of each bubble segment. Instead of leaving the ends of your hair straight, you curl each section, creating a playful, feminine look with more visual dimension. The curled ends catch light beautifully and add a sophisticated touch that reads as intentional and polished.
Creating Texture at the Ends
After you’ve created your bubbles with elastic bands, work with one bubble section at a time. Divide each bubble into 2 to 4 smaller subsections and curl each one with a curling iron, wand, or flexi-rods, depending on your preferred curl pattern and the size of curl you want. Medium to large barrel curling tools work best for bubble ponytails, as they create loose, bouncy waves rather than tight ringlets. You can also use a curling cream or mousse before curling to enhance curl definition and longevity. Let each curl cool completely before moving to the next section—this helps set the curl and prevents it from dropping prematurely.
Texture Variations and Hold
Depending on your hair texture and curl goals, you have flexibility in how tight or loose your curls can be. If you want more dramatic, defined curls, use a smaller barrel. If you prefer loose waves, go with a larger barrel or use a waving technique rather than a full curl. Setting lotion or light hairspray applied before curling helps hold the texture longer—apply it sparingly so your curls don’t feel stiff or crunchy. This style typically lasts 3 to 5 days before the curls begin to relax, depending on how well you protect it at night.
Worth knowing: Curled bubble ponytails photograph beautifully from the back, making them ideal if you’re planning any photo sessions or events where your hair will be on display.
3. Layered Bubble Ponytail
A layered bubble ponytail creates depth and dimension by using bubbles of different sizes or heights throughout the style. Rather than making each bubble identical, you intentionally create variation—some bubbles might be larger and puffier, others smaller and tighter. This approach requires a bit more styling skill, but the result is a uniquely textured, eye-catching style that stands out from a standard bubble ponytail.
Building Dimension Through Variation
The magic of a layered bubble ponytail is in the intentional size differences. You might make your first bubble slightly smaller and tighter, then your second bubble larger and fuller, alternating throughout. You can also adjust how much hair you release into each bubble—using less hair creates a tighter, more compact bubble, while using more creates a fuller, puffier one. Another approach is to create bubbles of varying heights by adjusting where you place each elastic band—some could sit at the midpoint of the hair segment, others at a point slightly higher or lower.
Customizing for Your Hair Type and Vision
With textured or coily hair, you can play with how much you fluff each bubble to create different visual weights. Some bubbles can be left relatively tight and defined, while others can be gently pulled and fluffed outward to create a softer, airier look. This variation works beautifully with or without extensions, though extensions do give you more hair to work with, making it easier to create truly voluminous bubbles. The layered approach also provides practical benefits—the varying bubble sizes can help distribute tension more evenly across your scalp, reducing stress on any one area.
Insider note: Start with just two sizes of bubbles (small and medium) when you’re first experimenting with this technique, then get more adventurous once you’re comfortable with the concept.
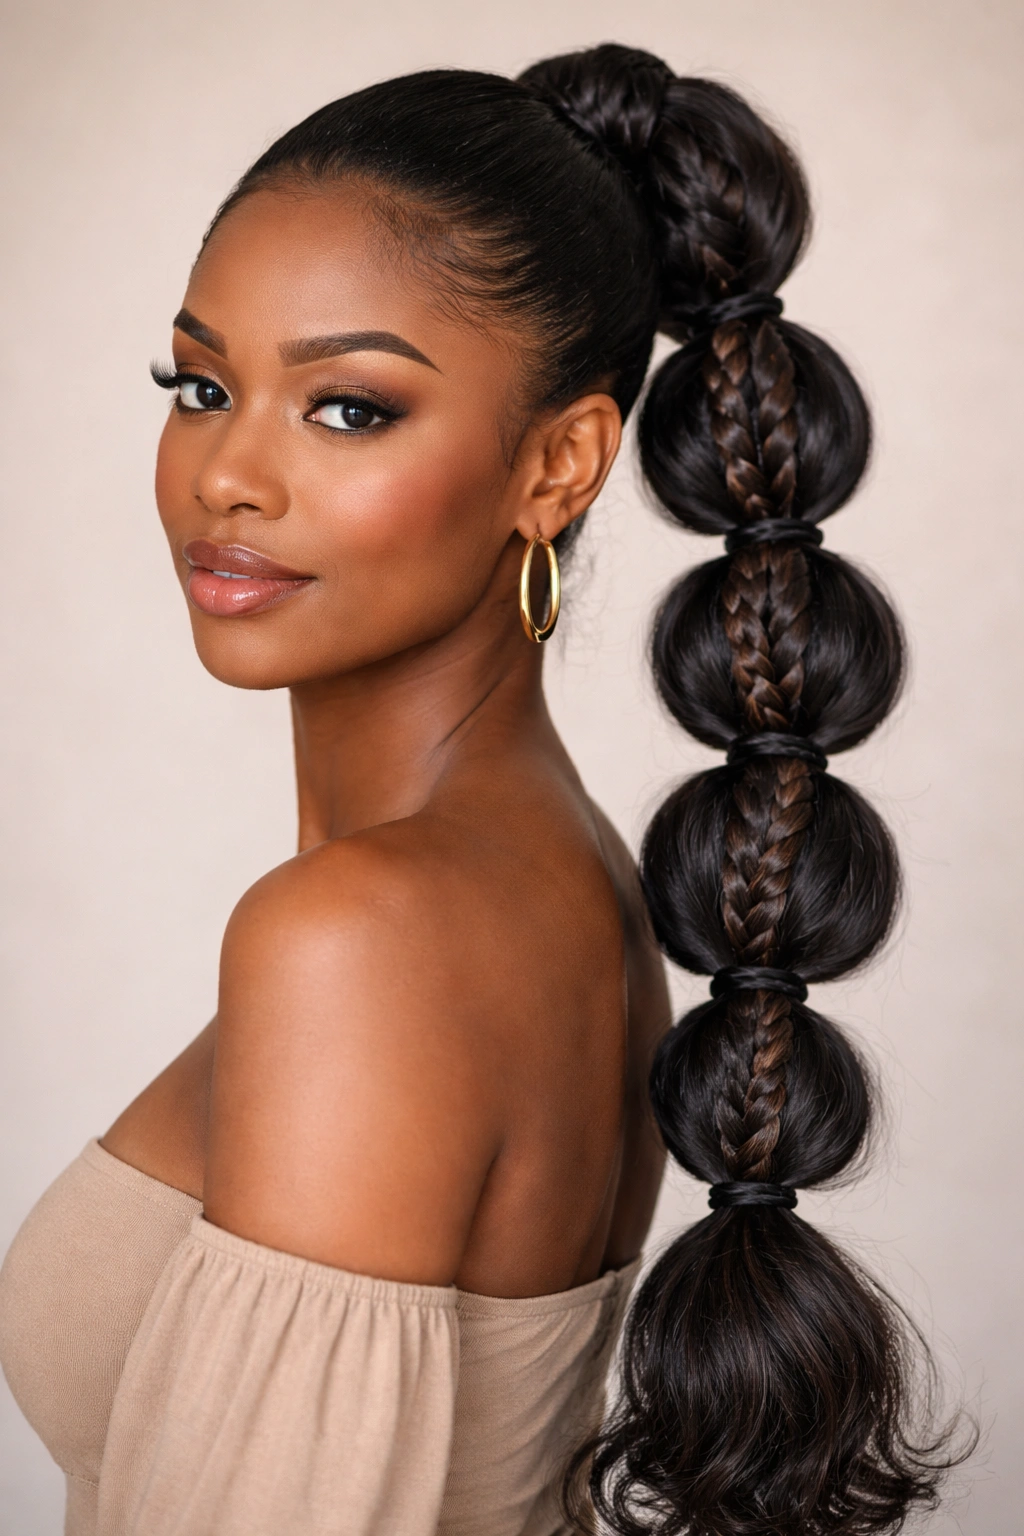
4. Bubble Ponytail with Braided Sections
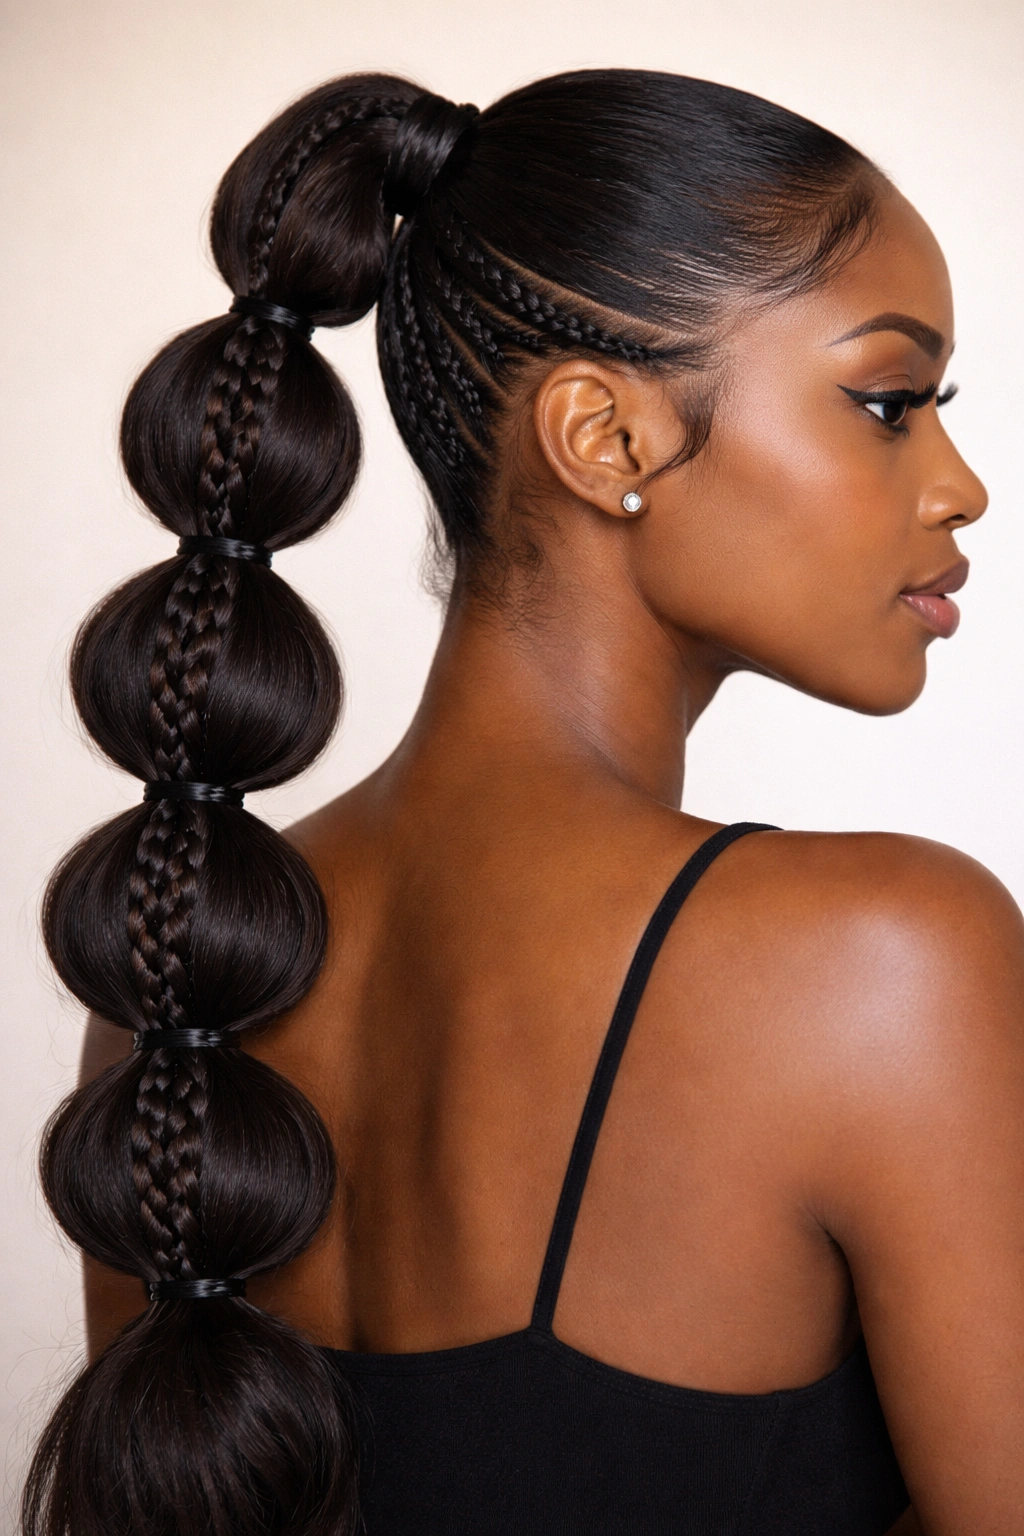
This style incorporates small braids into the bubble ponytail structure, adding textural contrast and visual interest. You might braid the entire hair before creating bubbles, create single braids that run through the center of some bubbles, or weave small braids in and out of the bubble sections. The braids add dimension and make the style feel more intricate and intentional.
Integration Techniques for Braids
One popular approach is to create your ponytail base, then divide each bubble into 2 or 3 sections and braid each section before securing it with a tiny elastic. This creates a braided bubble effect that looks complex but is actually quite manageable. Another method is to create thin cornrows or box braids before establishing your bubbles, then secure the braided sections into bubble formation. You could also create a few free-hanging braids alongside your bubbles, allowing them to weave through the base ponytail for a mixed-texture look.
Texture Combinations and Timeline
The beauty of adding braids to bubbles is that you can create completely different effects depending on braid style and placement. Three-strand braids create a neat, classic look. Thin, intricate braids create a more detailed, artistic appearance. Thicker braids create bold statements. All of these play well with the rounded bubble structure. This style holds up exceptionally well over time—the braids help the bubbles maintain their shape, and the style can easily last 5 to 7 days or longer with proper care and nightly protection.
Pro tip: Add a bit of gel or braiding cream to your hands before braiding to help the braids stay neat and defined throughout the week.
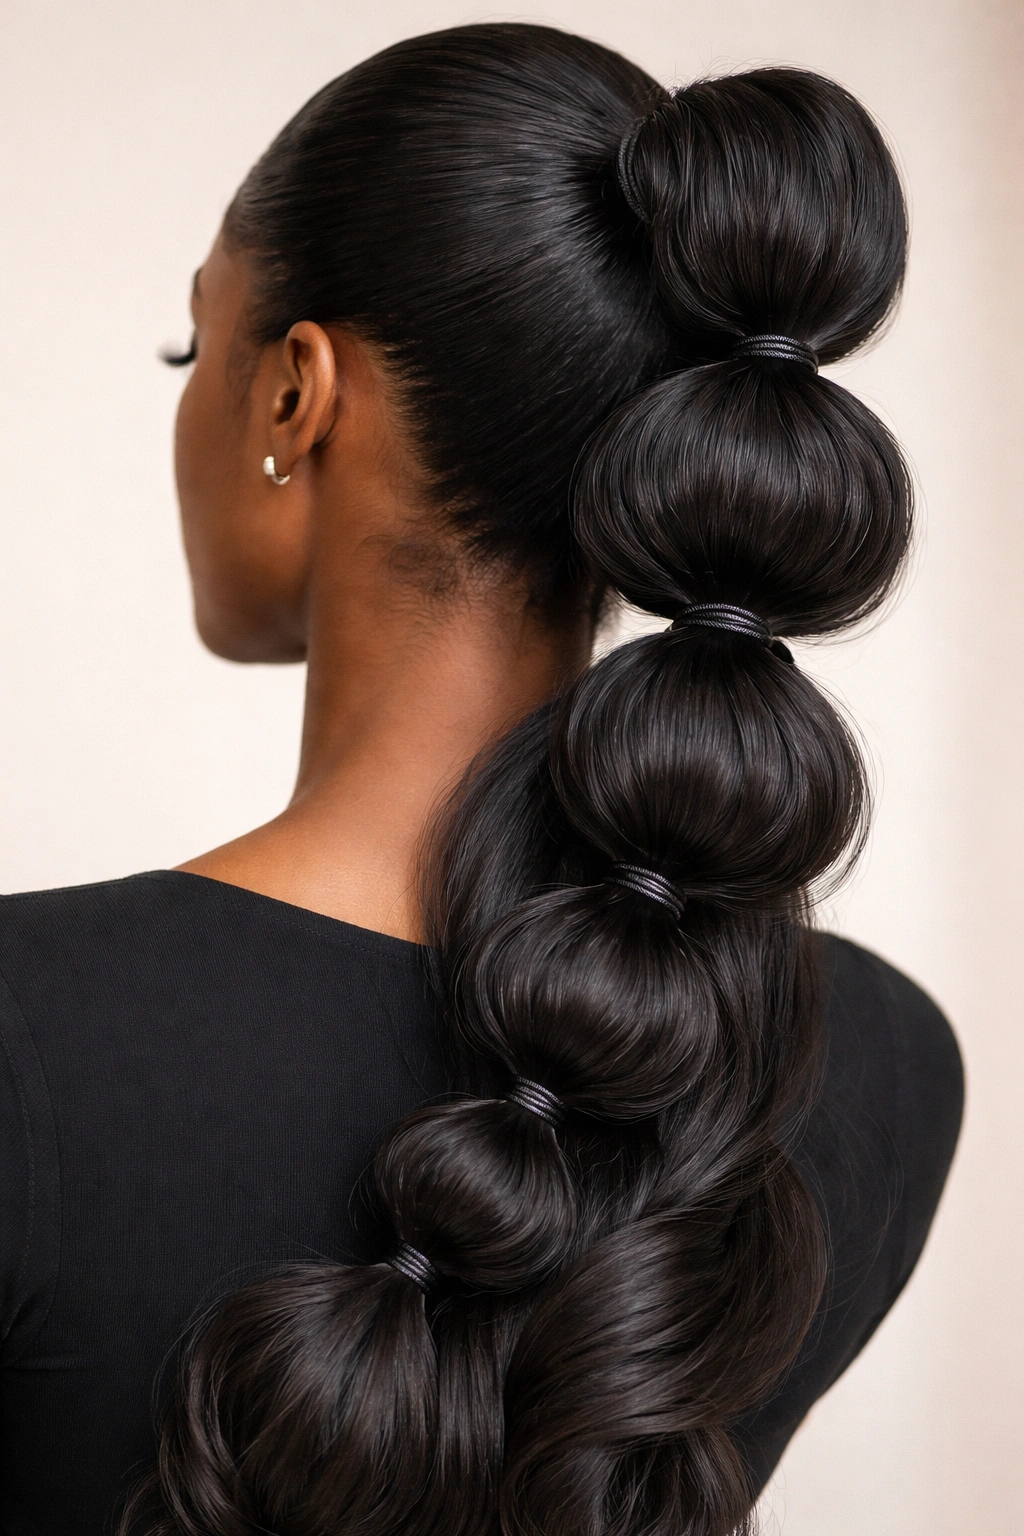
5. High Bubble Ponytail with Volume
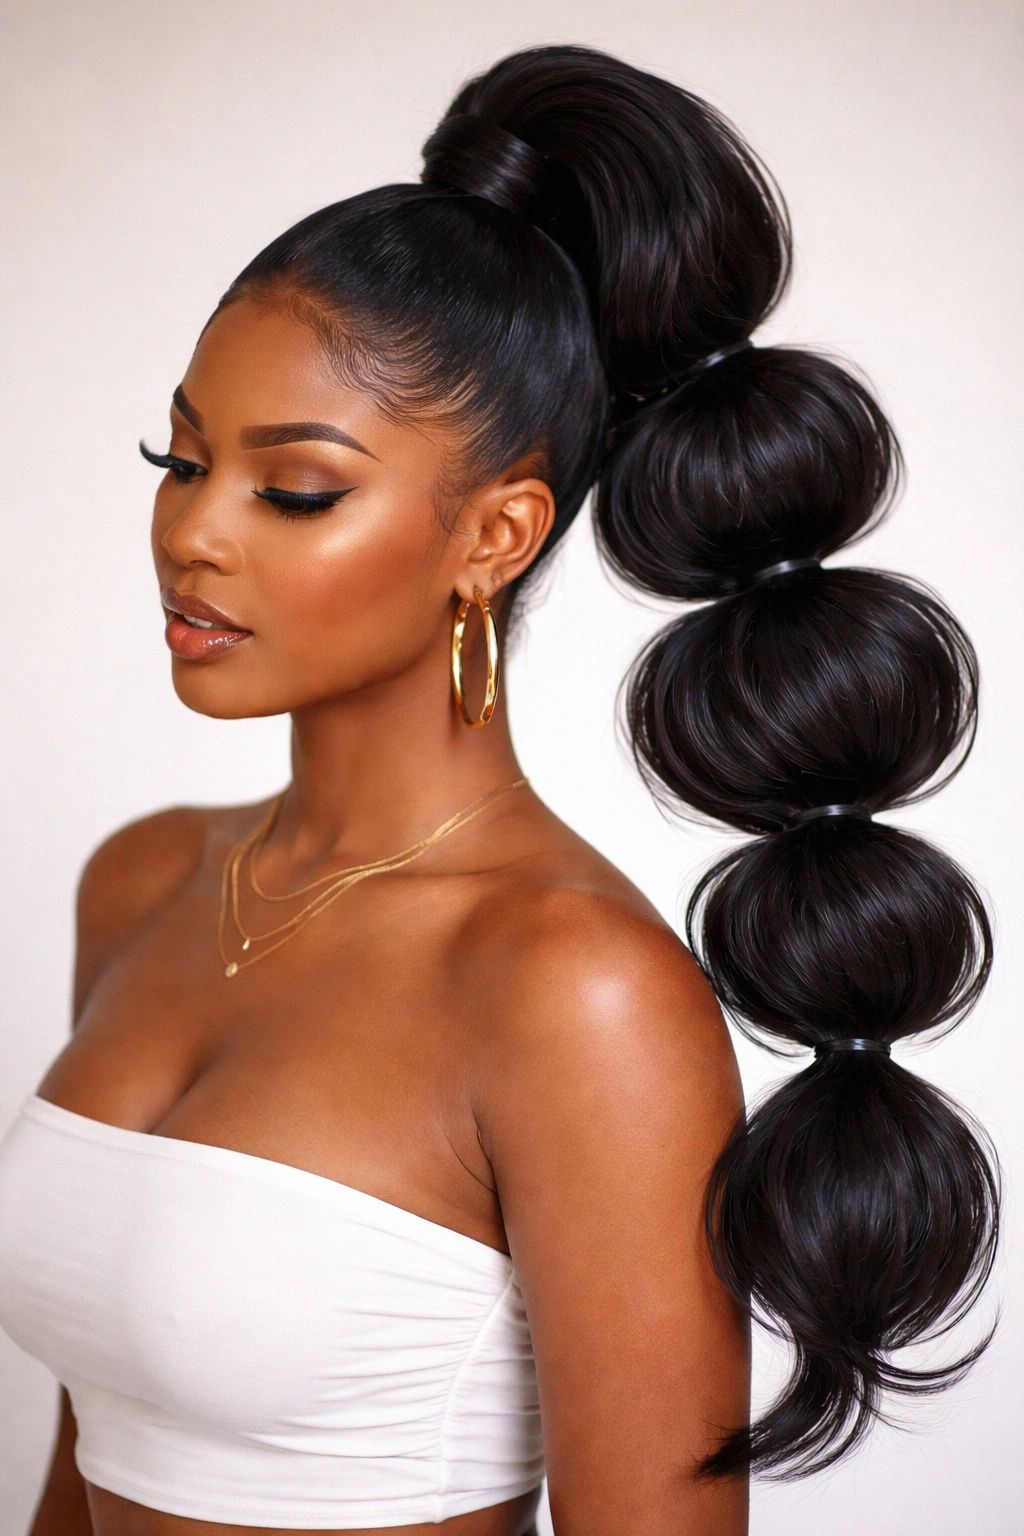
A high bubble ponytail creates maximum impact and suits most face shapes beautifully. By positioning the base ponytail at the crown of your head and creating generous, voluminous bubbles, you draw attention upward and create a statement style. This version prioritizes fullness and presence, making it perfect for situations where you want your hair to be a focal point.
Creating Impressive Volume
Volume comes from several factors. First, ensure your base ponytail is secured very high and very tightly—a loose base will produce droopy, lifeless bubbles. Second, use plenty of hair in your ponytail; you might even add extensions if you want extra fullness. Third, be intentional about fluffing each bubble. After you secure each section with an elastic, gently but firmly pull the bubble outward and upward, encouraging it to expand and round out. You can use a fine-tooth comb to backcomb or tease slightly within each bubble before securing it—this builds in texture and helps the bubble hold its shape better.
Styling and Scalp Considerations
While high bubble ponytails look stunning, they do create tension on the scalp. It’s important to balance aesthetics with hair health. If you wear this style frequently, alternate it with lower styles or looser styles to give your hairline a break. Make sure your elastics aren’t so tight that they cause discomfort or pulling. You want significant hold and definition, but not so much tension that you experience headaches or scalp tenderness. Secure your base ponytail tightly, but don’t over-tighten—you can achieve definition through volume and careful bubble fluffing rather than extreme tension.
Important note: If you have a sensitive scalp or traction alopecia concerns, be especially mindful not to create excessive tension with this style variation.
6. Bubble Ponytail with Accessories
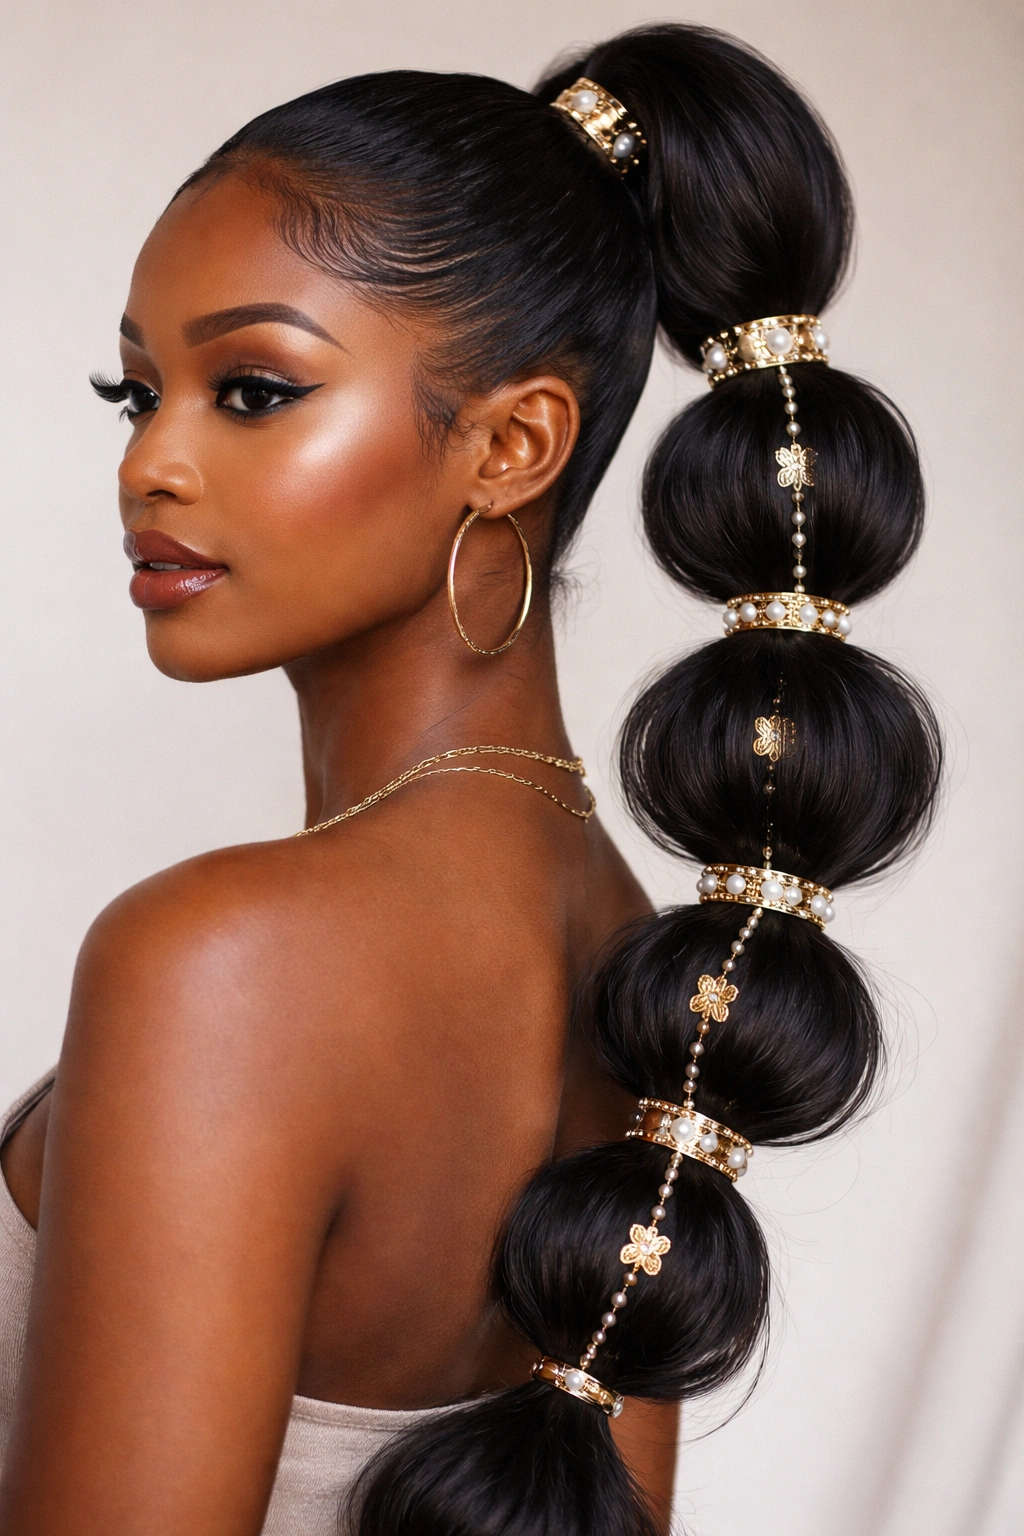
Decorative accessories transform a bubble ponytail into something more intentional and personalized. Hair clips, beads, pearls, ribbons, cuffs, rings, or charms positioned at the base of each bubble or integrated throughout create visual richness and allow you to customize the style to match your mood or outfit.
Accessory Placement Strategies
You can place small accessories at the elastic band securing each bubble—tiny clips, rings, or cuffs clustered together look modern and intentional. You can thread beads or pearls onto your hair before securing each bubble, embedding them within the section. You can wrap ribbons or silk threads around the elastics for a softer look. You can even use hair cuffs in metallic finishes positioned at intervals throughout the ponytail. The key is choosing accessories that either complement your skin tone or create an intentional color contrast—gold tones typically suit warmer undertones, while silver suits cooler undertones.
Creating Cohesion and Avoiding Overwhelm
The difference between looking polished and looking chaotic is restraint. Choose one or two types of accessories and apply them consistently throughout the style, rather than mixing too many different elements. For example, small gold cuffs at every other bubble creates visual rhythm and feels intentional. Mixing gold cuffs, silver rings, and pearl beads in different spots feels random and busy. Keep the color palette simple—if you use gold, stick with gold. If you use clear or pearl, build around those neutrals. This style works beautifully for events, date nights, or anytime you want to elevate your everyday look.
Pro tip: Lightweight accessories are key, especially if you’re planning to wear the style for hours—heavy beads or clips can create pulling and discomfort.
7. Bubble Ponytail with Bangs
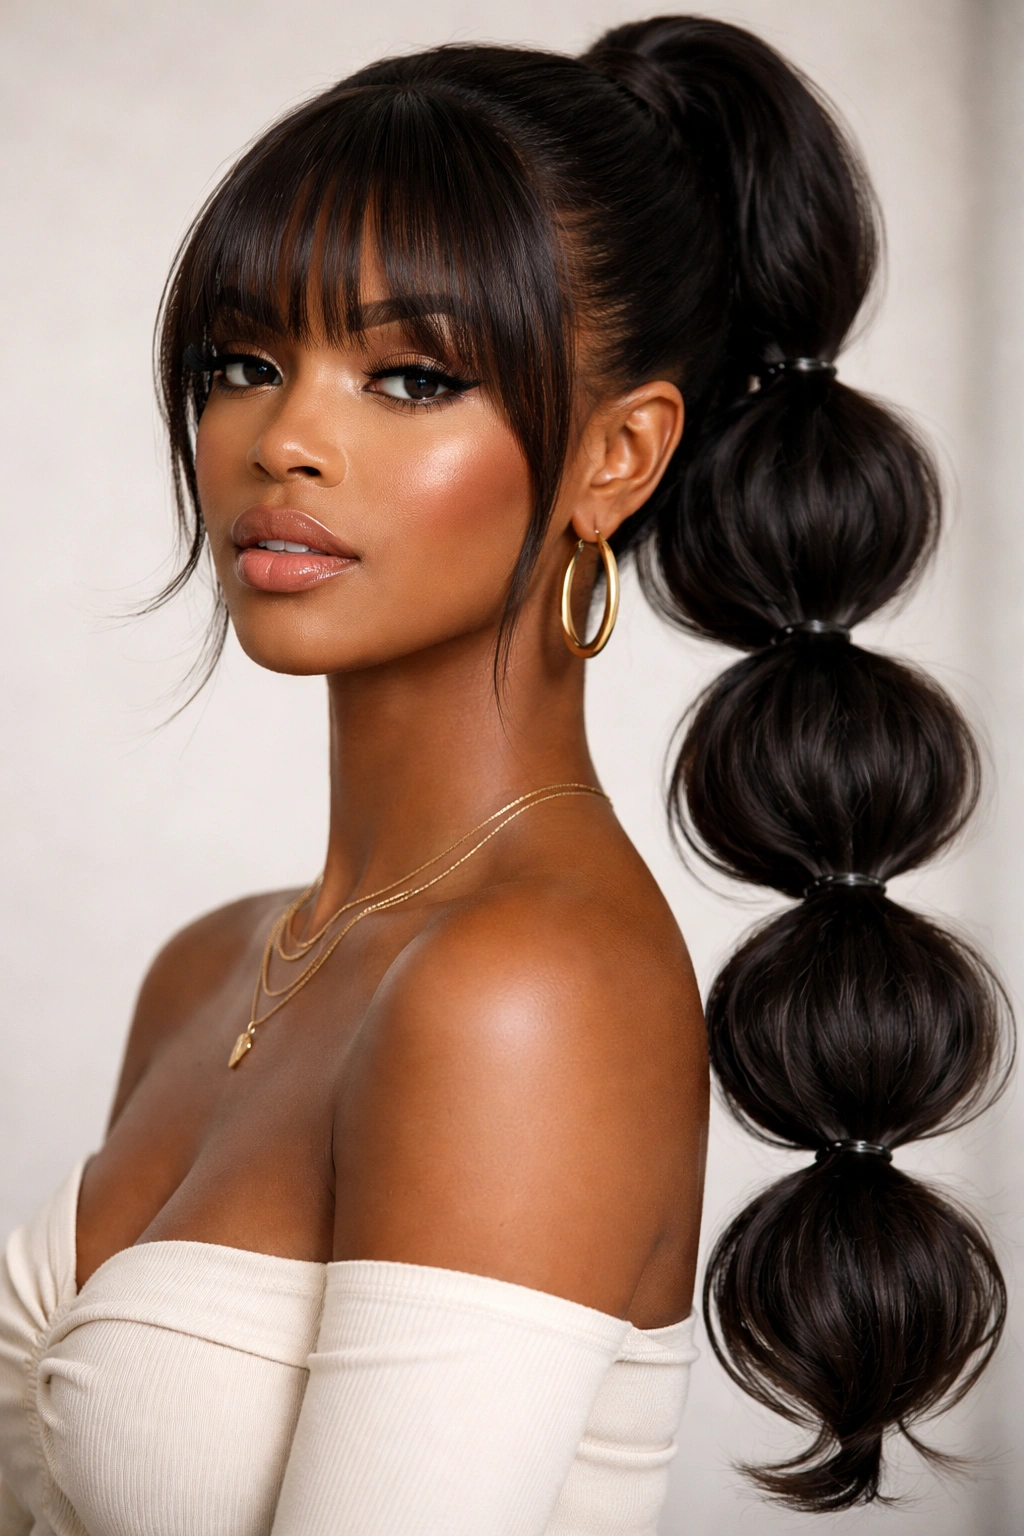
Adding bangs to a bubble ponytail changes the entire aesthetic of the style, framing your face and creating a more fashion-forward appearance. Whether you’re working with actual bangs you cut, or creating temporary bang effect with a small section of hair, this variation takes a protective style into more intentional territory.
Creating the Bang Effect
If you have actual bangs, they fall naturally in front of your face and frame the bubble ponytail nicely. If you don’t have bangs but want the effect, you can leave a small section of hair out at your hairline when creating your ponytail, then style that section separately. You could wear it straight and smooth across your forehead, curl it under slightly, or even braid a tiny section. Another approach is to create a small front ponytail with just the hair around your face, then add that small ponytail to your main bubble ponytail base, creating a full look with framed edges.
Face-Framing Variations
The bangs or bang effect can be deep and dramatic, covering most of your forehead, or subtle and barely-there, just skimming your eyebrows. Deep bangs create a bolder, more fashion-focused statement. Subtle bangs create softness and draw attention to your eyes without making a huge style statement. Straight bangs create a sleek, modern look, while parted bangs create a softer, more romantic vibe. Thick bangs feel bold and graphic, while thin, wispy bangs feel delicate and ethereal. The style of bangs should complement both your face shape and the vibe of your bubble ponytail overall.
Worth knowing: If you don’t actually have bangs cut, you can create this look without any permanent commitment—just style a small section differently for the day, and you can wear your hair without the bang effect tomorrow.
8. Low Bubble Ponytail for Work
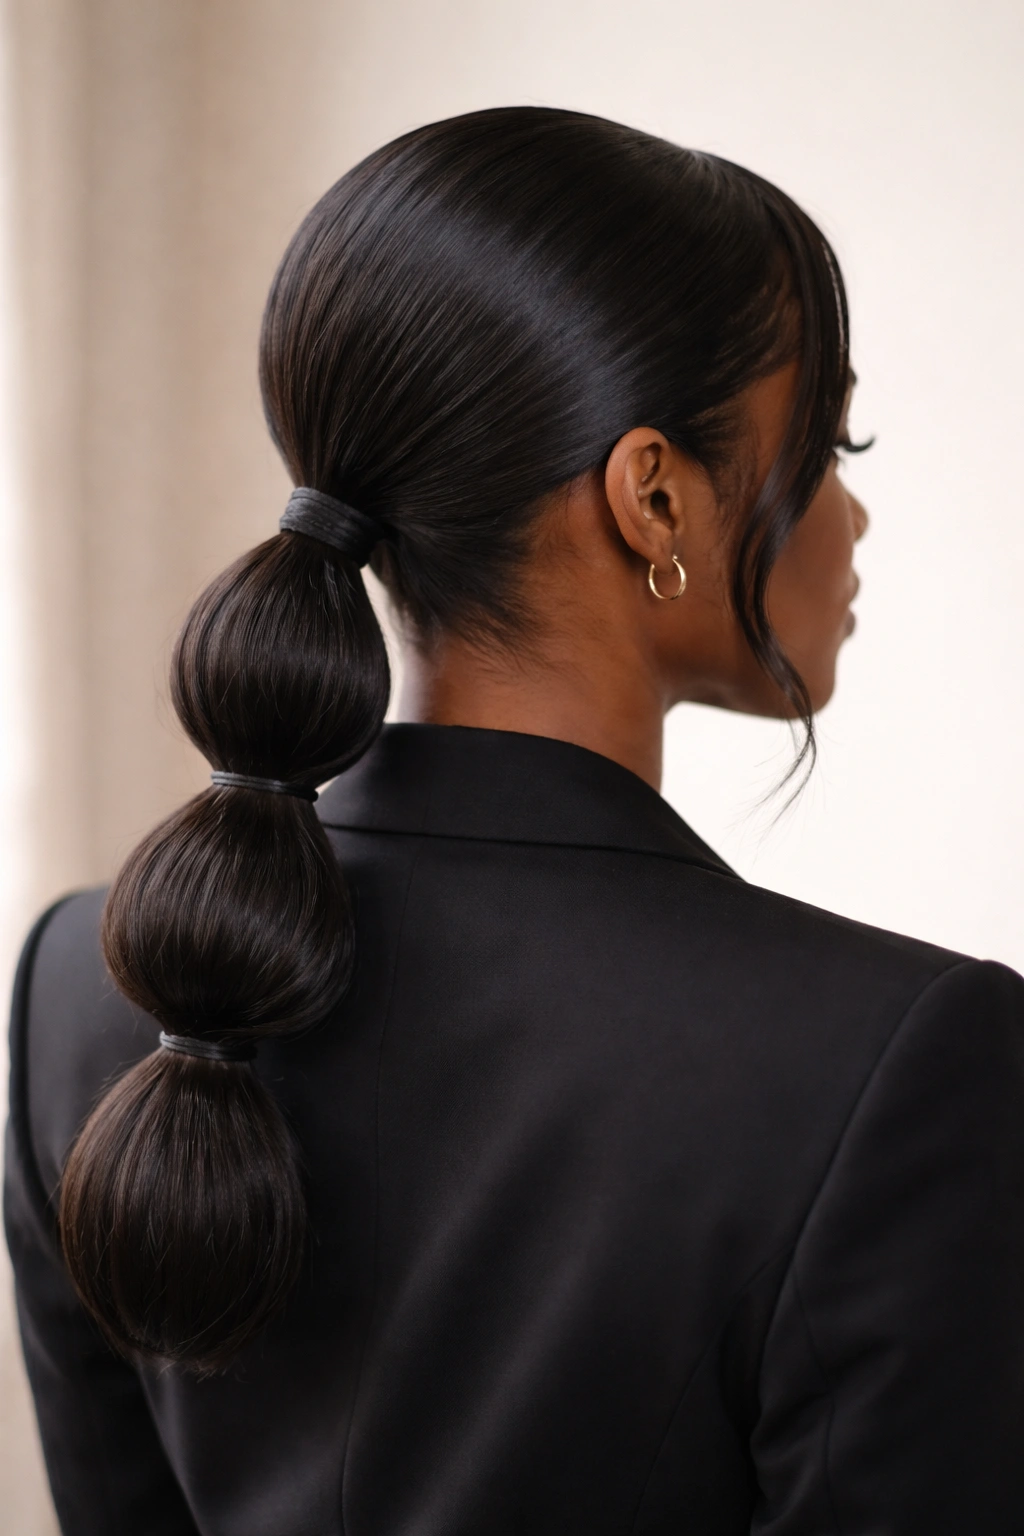
For professional settings, a low bubble ponytail creates a sophisticated, pulled-together appearance without looking overly casual or playful. By positioning the base ponytail at the nape of your neck rather than the crown, and keeping bubbles sleek and refined, you create a style that reads as professional and intentional.
Professional Styling Guidelines
Start with smooth, moisturized hair and apply a smoothing product throughout to ensure a polished finish. Your base ponytail should sit low but not at the very bottom of your hairline—aim for about 2 to 3 inches up from your neck. This positioning is flattering on most face shapes and looks more refined than an extremely low tail. Keep your bubbles moderate in size and neat in appearance—avoid overly voluminous, fluffy bubbles, which can read as too casual for a professional environment. Smooth each bubble carefully and keep your edges neat and controlled. A low bubble ponytail should look intentional and well-executed, not messy or undone.
Longevity in Professional Settings
This style holds beautifully through a full workday and can easily last several days with proper care. The lower positioning actually creates less tension on your scalp than a high ponytail, making it more comfortable to wear all day. You can easily add a structured hair clip or cuff in a neutral tone (silver, gold, tortoiseshell) to elevate the look further. This is an excellent style choice if you want protective styling without sacrificing professional appearance.
Professional note: A low, neat bubble ponytail is one of the most universally accepted protective styles across different workplace environments and industries.
9. Bubble Ponytail with Extensions
Whether you’re using clip-in extensions, sew-in extensions, or braiding hair, adding extensions to a bubble ponytail allows you to create more volume, length, and fullness than you might achieve with your hair alone. Extensions also give you more styling flexibility and can protect your natural hair by reducing the load it needs to support.
Integration Methods for Extensions
You can attach clip-in extensions to your natural hair before creating your bubble ponytail, ensuring the extension hair is distributed throughout the tail. Sew-in or braiding extensions can be woven through your ponytail base for added volume and fullness. You might attach extensions to create just the bubbles themselves, leaving your natural hair to form the sleek base, or use extensions throughout for maximum volume. The type of extension you use determines your options—synthetic extensions work well for specific, defined styles, while human hair extensions offer more versatility in terms of heat styling and texture.
Volume and Length Considerations
Extensions dramatically increase the visual fullness of your bubbles, allowing you to create truly voluminous, statement-making sections. They also add length, which creates different proportions and visual weight. Extensions also extend the longevity of your style—you can wear an extension-based bubble ponytail for 2 to 3 weeks or longer without needing to redo it, assuming you’re maintaining proper care. The trade-off is that extensions add weight, which means you need to be mindful of tension and scalp health. Never pull extensions so tightly that you experience discomfort or scalp tenderness.
Practical consideration: Extensions require more careful nightly care—wrap or braid loosely to prevent tangling, and avoid rough handling that could damage the extension hair or stress your natural hair attachment points.
10. Half-Up Bubble Ponytail
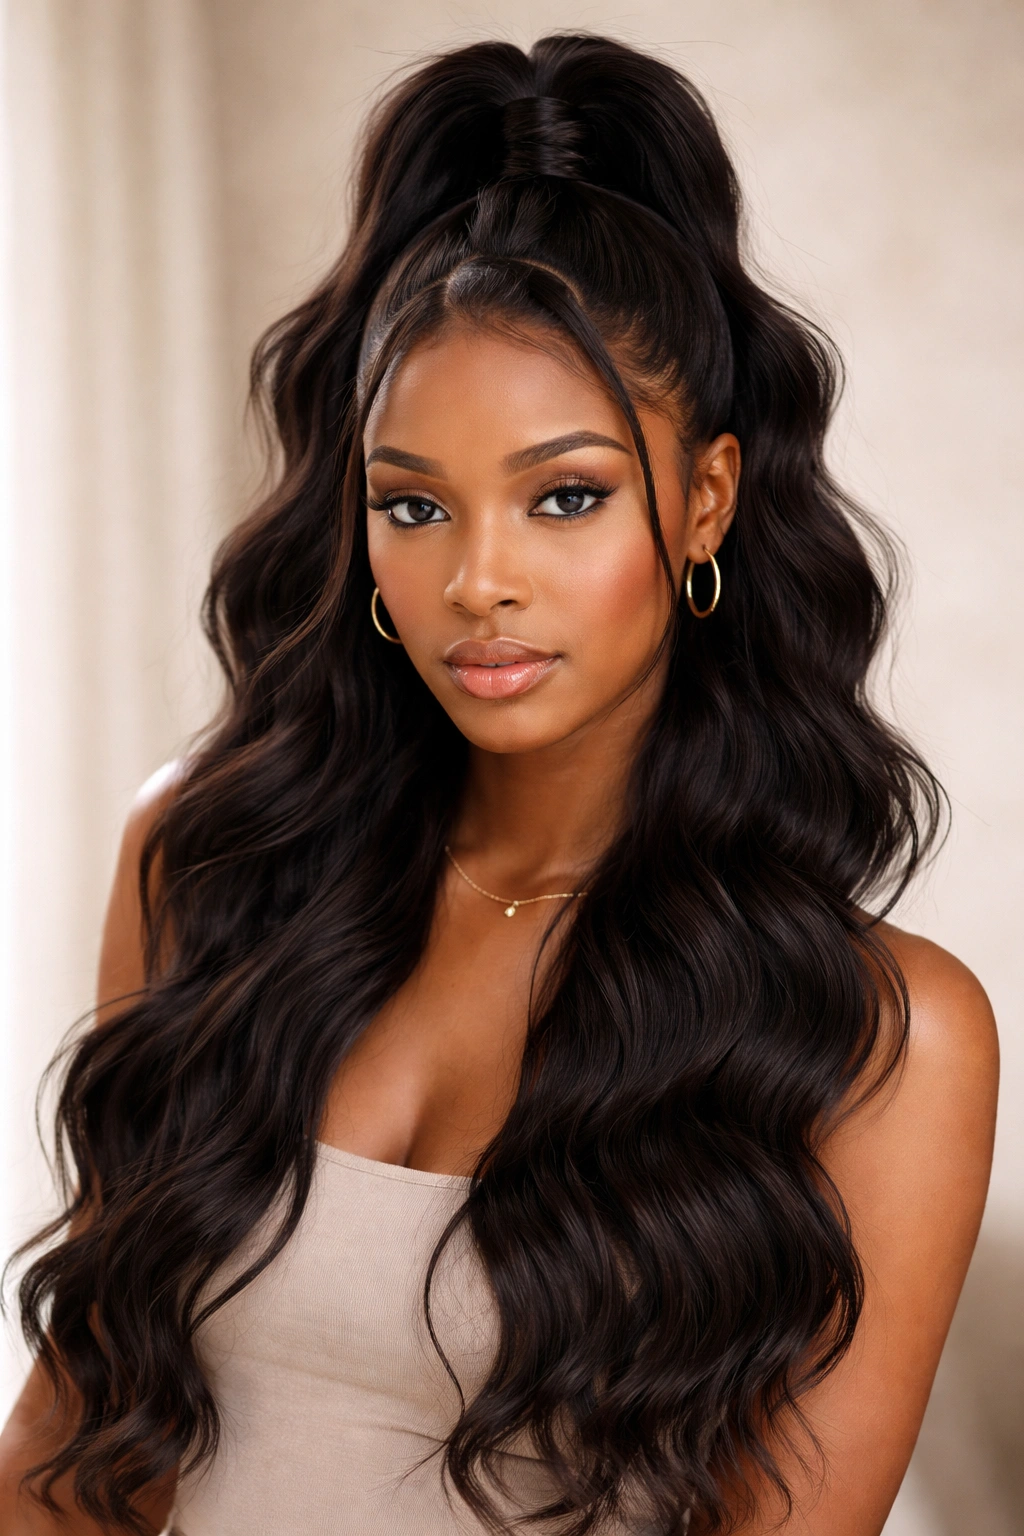
A half-up bubble ponytail creates a different silhouette than a full ponytail, showcasing more of your length and allowing you to display your natural texture or curl pattern below the bubbles. This variation offers the protective benefits of a bubble ponytail while maintaining more freedom and movement in the lower portion of your hair.
Creating the Half-Up Structure
Begin by dividing your hair mentally into two sections—the upper half and the lower half. You’ll only be using the upper half for your bubble ponytail base. Gather the hair from your temples and crown back to the crown of your head, securing it into a ponytail that sits at the top of your head. Your lower hair remains free and down. Create your bubbles using only the hair in that upper ponytail section. The result is a style with defined, rounded bubbles across your crown and back, with hair flowing freely below.
Styling the Free Hair Below
The hair below your half-up bubbles can be styled numerous ways depending on your preference and texture. You might leave it down and loose, letting your natural curl pattern show. You might create soft waves by braiding it and then unbraiding once the waves set. You might create a low bun or second ponytail at the nape of your neck for a more contained look. You could even braid sections of the lower hair for a mixed-texture appearance. The half-up bubble ponytail works beautifully with locs, coils, waves, or straight hair, making it a versatile choice.
Pro tip: A half-up bubble ponytail is ideal for situations where you want your hair pulled back and manageable but want to showcase length or texture—perfect for both everyday wear and special occasions.
11. Bubble Ponytail with Defined Curls
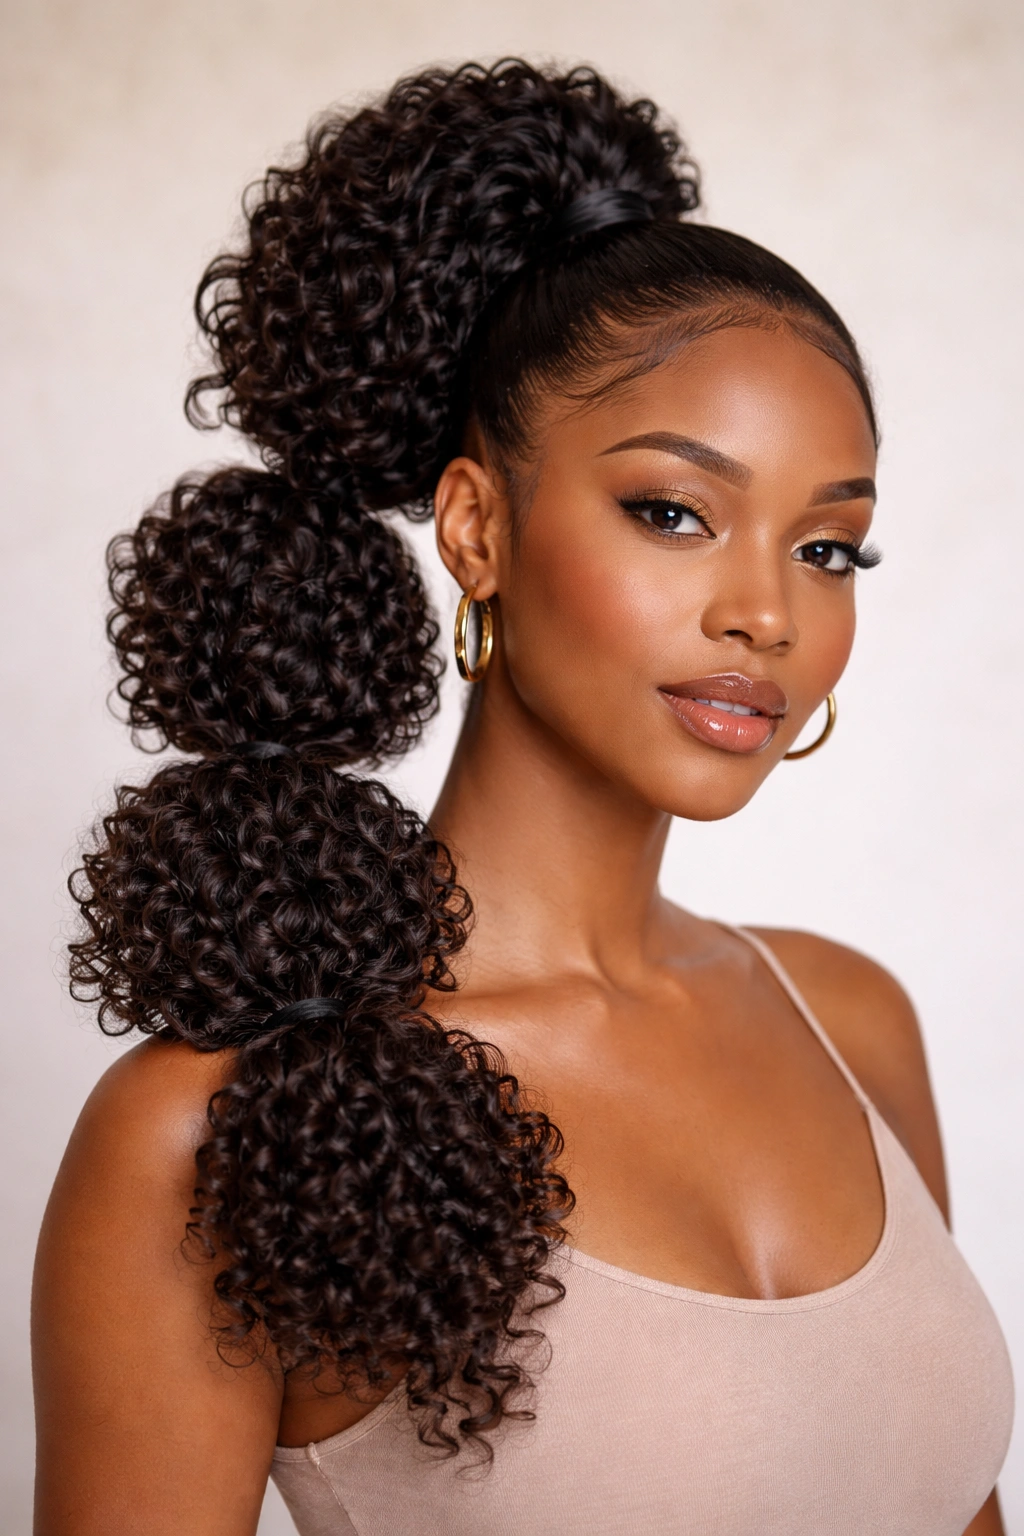
This variation emphasizes texture and curl definition throughout the entire style. Rather than sleek bubbles, you’re creating curly, defined, textured bubbles that showcase your natural curl pattern or intentionally set curls. This approach celebrates textured hair and creates a bold, beautiful aesthetic.
Enhancing and Defining Curls
Begin with curling cream, mousse, or gel applied to damp hair. You can create your bubbles first and then define the curls within each bubble, or define curls before creating bubble sections—both approaches work depending on your preference and hair type. Once your bubbles are secured, use a curl-defining product and possibly a diffuser attachment on a blow dryer to enhance curl definition. You can also use flexi-rods or curlformers to set and define curls within each bubble section, letting them air-dry or dry under a hood dryer. This approach gives you intentional, beautiful curl definition throughout the style.
Texture Variation and Curl Pattern Showcase
Defined curl bubble ponytails work beautifully with coily, curly, or wavy hair. The defined curls can be tight and springy, loose and wavy, or anything in between. You can vary curl patterns within different bubbles—tighter curls in some sections, looser waves in others—creating visual dimension and interest. This style celebrates natural texture rather than fighting it, making it an excellent choice if you’re embracing and styling your natural curl pattern. Defined curl bubbles also photograph beautifully and create a statement look that feels intentional and confident.
Worth knowing: This style requires more product and more styling time than sleek bubbles, but the result is a textured, eye-catching look that lasts beautifully.
12. Bubble Ponytail with Twisted Sections
A twisted bubble ponytail incorporates rope twists or two-strand twists into the bubble structure, adding linear texture and visual interest. Rather than leaving each bubble as a simple rounded section, you twist subsections before securing them, creating a more intricate appearance.
Building Twisted Elements
After securing your base ponytail, divide it into your desired number of bubble sections. Then, within each bubble section, divide the hair into 2 to 4 subsections and create a two-strand twist with each. Secure each twist with a small elastic, then combine all the twists within that bubble and secure them together with a larger elastic to create your final bubble. The result is a bubble with defined twisted elements visible throughout. You can also create a rope twist (twisting a single section of hair around itself) instead of two-strand twists for a different textural look.
Texture Contrast and Visual Appeal
Twisted bubbles create more movement and dimension than smooth bubbles, and the linear quality of twists contrasts beautifully with the rounded shape of the bubbles themselves. This style works with all hair types and textures, and it holds beautifully over multiple days. The twists help keep each bubble defined and prevent them from becoming flat or losing their shape. You can also combine twisted bubbles with smooth bubbles in the same ponytail for a mixed-texture approach that feels modern and intentional.
Insider tip: If you’re new to twisting hair, start with just two subsections per bubble and create two-strand twists—they’re simpler to manage than rope twists when you’re first learning the technique.
Final Thoughts
Bubble ponytails offer something for every situation, mood, and hair texture. Whether you’re looking for sleek professionalism, playful volume, textured definition, or anything in between, there’s a bubble ponytail variation that fits your needs. The beauty of this style lies in its versatility—you can create a completely different look simply by adjusting the size of your bubbles, changing where you position the base ponytail, adding extensions or accessories, or incorporating different textures.
The most important thing when wearing any bubble ponytail is maintaining the health of your hair and scalp. Protective styling is only truly protective if you’re not causing tension, breakage, or damage. Take your time when creating the style, use gentle elastics that hold without crushing, and protect your hair at night with a silk scarf or bonnet. When you remove the style, be patient and gentle, working through tangles carefully rather than ripping elastics out.
Experiment with different variations and find the ones that make you feel confident and beautiful. Your bubble ponytail doesn’t have to match anyone else’s version—it should reflect your personal style, suit your lifestyle, and make you happy every time you look in the mirror.