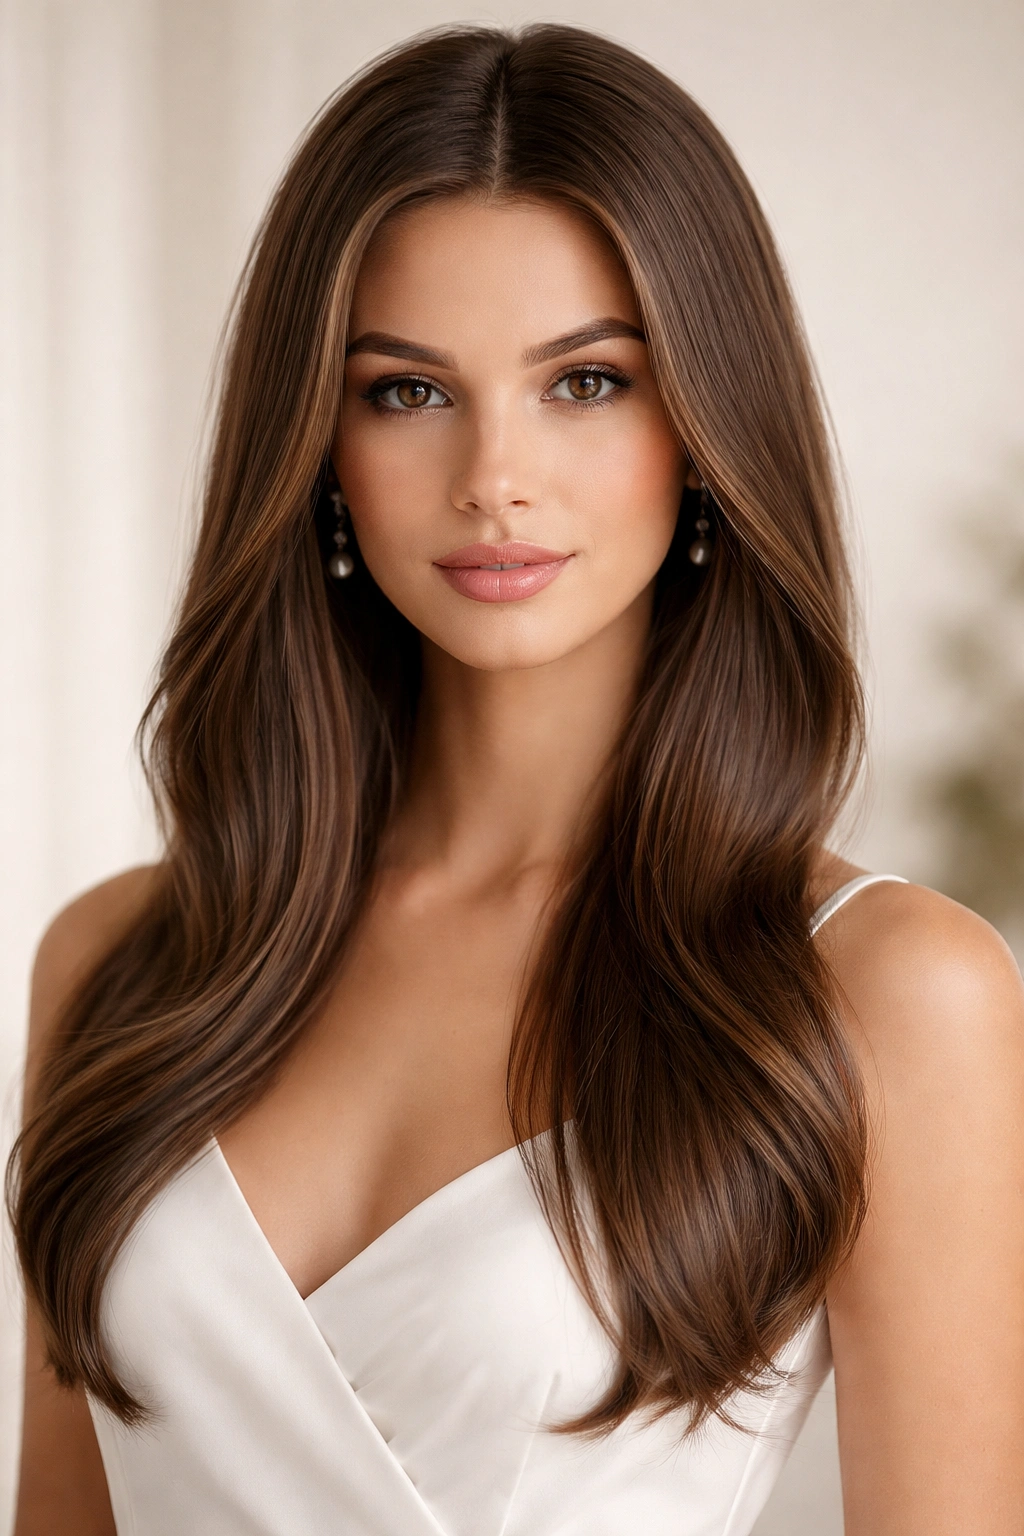
Straight hair at a wedding can feel like a double-edged sword. You’ve got a gorgeous natural canvas that can look polished without hours of styling, but you might worry about looking too casual or basic next to guests with bouncy waves or elaborate updos. The truth? Straight hair actually has massive advantages for wedding guest looks — it’s the ultimate blank slate for creating styles that range from effortlessly chic to truly show-stopping, and it tends to hold styling clean and sharp all night long without getting frizzy or losing definition.
The key is understanding that straight hair doesn’t need to fight its nature. Instead of trying to force volume or texture that won’t stick, you can lean into the sleekness, play with the precision of clean lines, and use texture strategically where it matters most. Whether you’re attending a formal evening wedding or a casual garden ceremony, there’s a straight-hair style that fits the vibe while letting you feel confident and polished.
What makes straight hair particularly special for wedding events is how it photographs. The shine reflects light beautifully in photos, clean lines look intentional and refined, and styling tends to stay put through dancing and the emotional moments of the day. We’re going to walk through ten elegant, modern styles that work specifically with straight hair’s natural strengths — no fighting texture, no complicated techniques that require a professional blow-dry every other day to maintain.
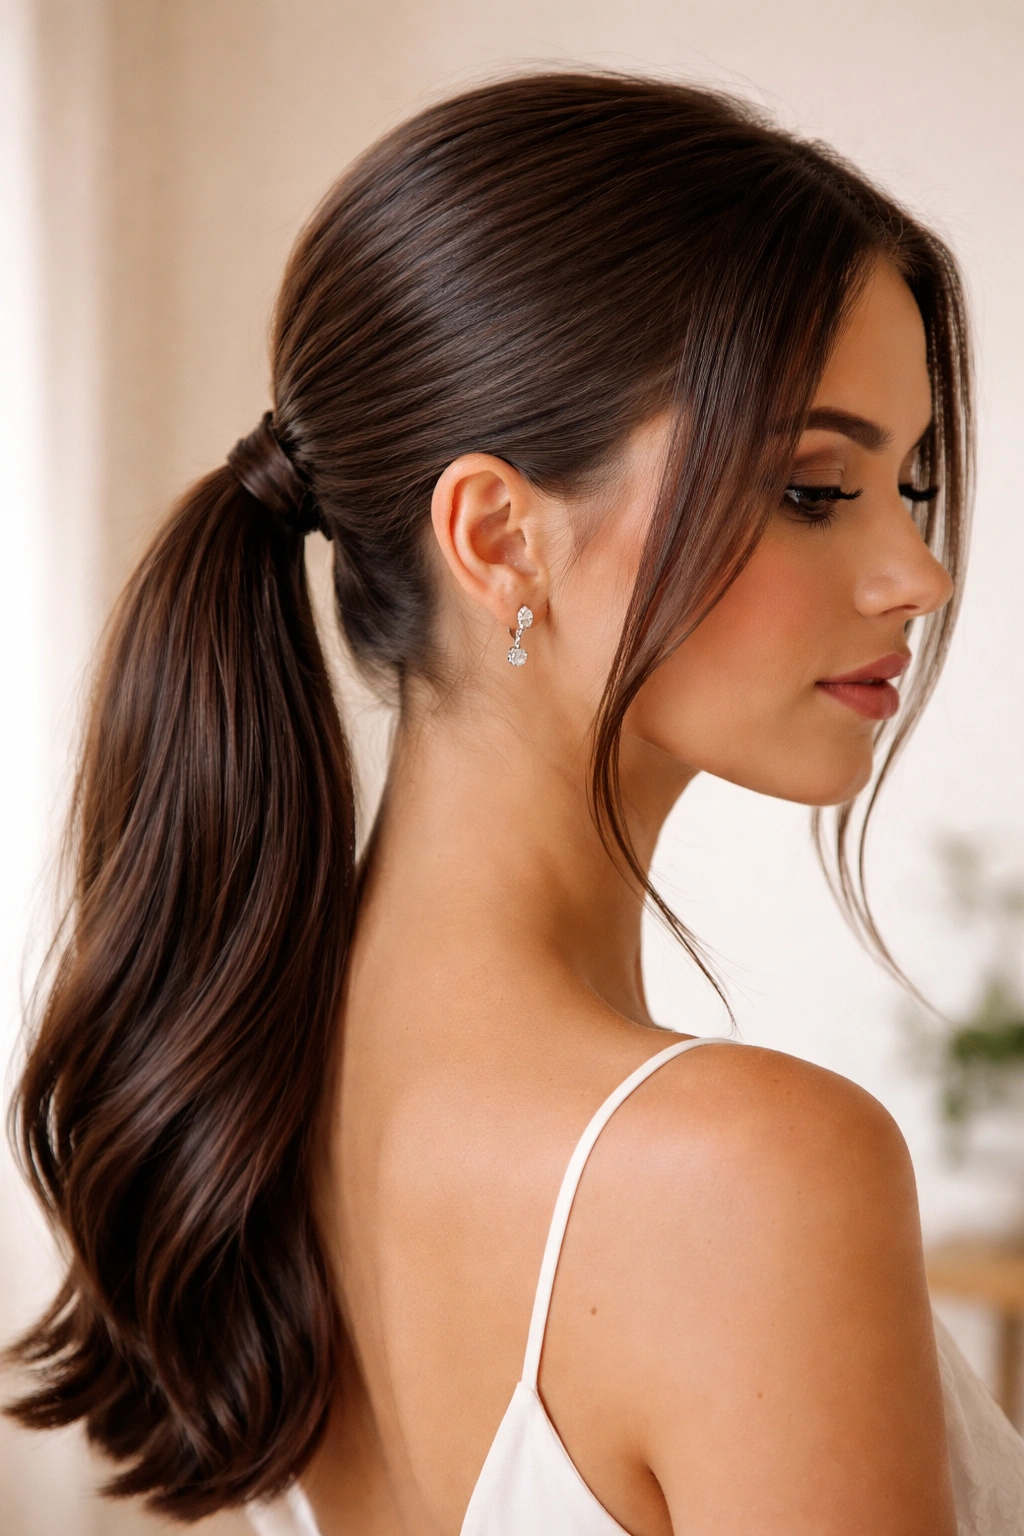
1. Sleek Low Ponytail with Face-Framing Layers
A low ponytail is the Swiss Army knife of wedding hairstyles — appropriate for every formality level, flattering on nearly everyone, and surprisingly versatile. What makes this version wedding-worthy instead of just “everyday ponytail” is the precision of placement and the strategic face-framing layers you leave out.
Why This Works for Straight Hair
Straight hair makes a low ponytail look intentional and refined rather than lazy. The shine naturally draws light, and because your strands don’t have built-in texture, the ponytail maintains a polished, controlled appearance throughout the entire event without random frizz or flyaways disrupting the look.
How to Create This Style
Start with smooth, hydrated hair — use a lightweight smoothing serum on damp hair before blow-drying with a flat paddle brush to eliminate any bend or crease. Brush your hair back firmly and secure a low, centered ponytail at the nape of your neck with a small elastic. Here’s the key detail: before securing the ponytail fully, leave a 1-inch section of hair on each side of your face unsecured. These face-framing pieces should fall naturally in front of your ears and can be left perfectly straight or given a subtle curl with a thin curling iron for softness.
- Placement: Position the base of the ponytail at the nape of your neck, roughly aligned with your earlobes — not too high, not so low it looks like you’re trying to hide something
- Texture touch: For added visual interest, wrap a thin strand of hair from the ponytail around the elastic to conceal it completely
- Face-framing length: Leave pieces that hit around your cheekbones for maximum face-flattering effect
- Security method: Use a strong hold elastic or bobby pins combined with light hairspray to keep everything locked in place
Pro tip: If you want to elevate this beyond just smooth and sleek, add a delicate hair comb or small pearl clip where the face-framing pieces meet the secured ponytail — it catches the light beautifully in photos and signals “I put thought into this.”
2. Polished Half-Up Half-Down with Pearl Clips
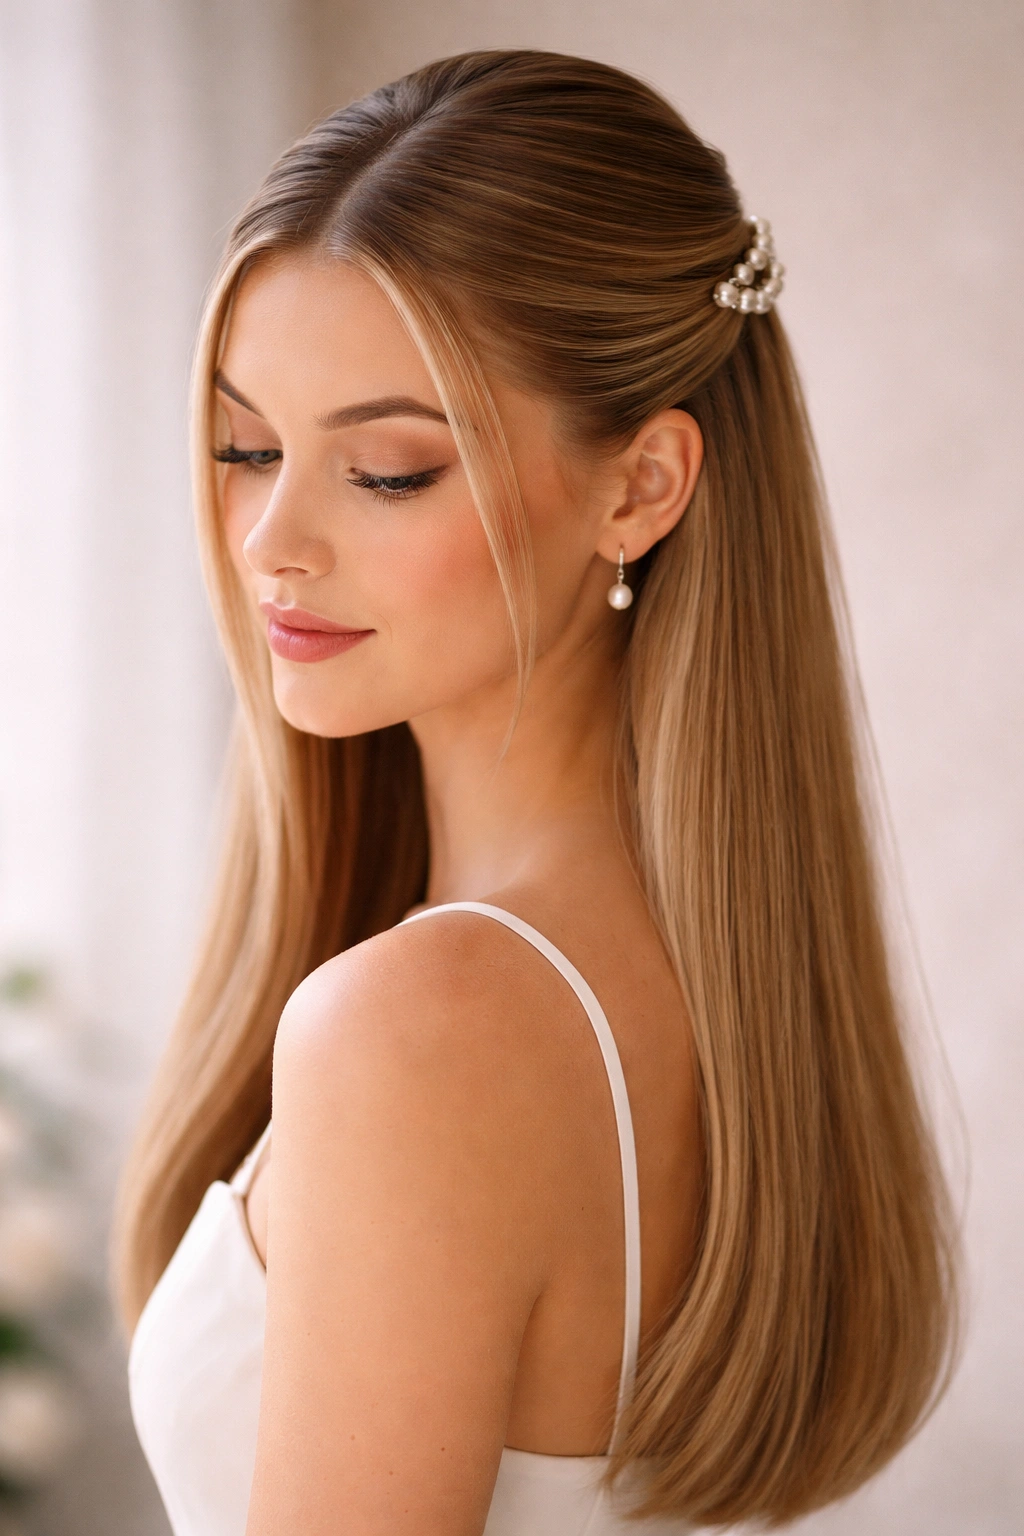
Half-up half-down is the romantic middle ground — it’s feminine without being overly done, it shows off the length of your hair, and it keeps hair off your face when you’re eating and celebrating. With straight hair, you can make this look significantly more refined than the version we all had in middle school.
The Sophistication Factor
The magic here is in the execution. A messy half-up reads as undone; a precisely crafted half-up with intentional styling reads as intentional elegance. Straight hair makes this distinction crystal clear because your strands are so responsive to clean sectioning and precise placement.
Building the Look Step by Step
Blow-dry your entire head until it’s completely straight and smooth, then use a fine-tooth comb to create a precise center part from your hairline all the way to the back of your crown. Take a section of hair from each side, roughly from your temple back, and secure these two sections together at the crown with a clip. The key is not pulling too tightly — you want the secured section to look deliberately placed, not aggressively gathered.
- Section size: Take a section that’s roughly 2 to 3 inches wide from each side; too small looks scrawny, too large looks shapeless
- Height and placement: Clip the section at the very crown of your head, roughly an inch above where you’d place a headband
- Down-hair styling: Leave the bottom half completely smooth and straight, or use a large-barrel curling iron to add subtle waves to just the bottom third of your hair
- Clip choice: Pearl clips, geometric metal clips, or ornate vintage-inspired clips all work; choose something that coordinates with your outfit
- Securing detail: Use bobby pins underneath the clip to anchor everything in place — clips alone won’t hold through dancing
Worth knowing: This style works beautifully with a center part, but you can also do a deep side part and take the half-up section from the fuller side of your part. It creates an asymmetrical look that feels more intentionally styled.
3. Deep Side Part with Soft Waves
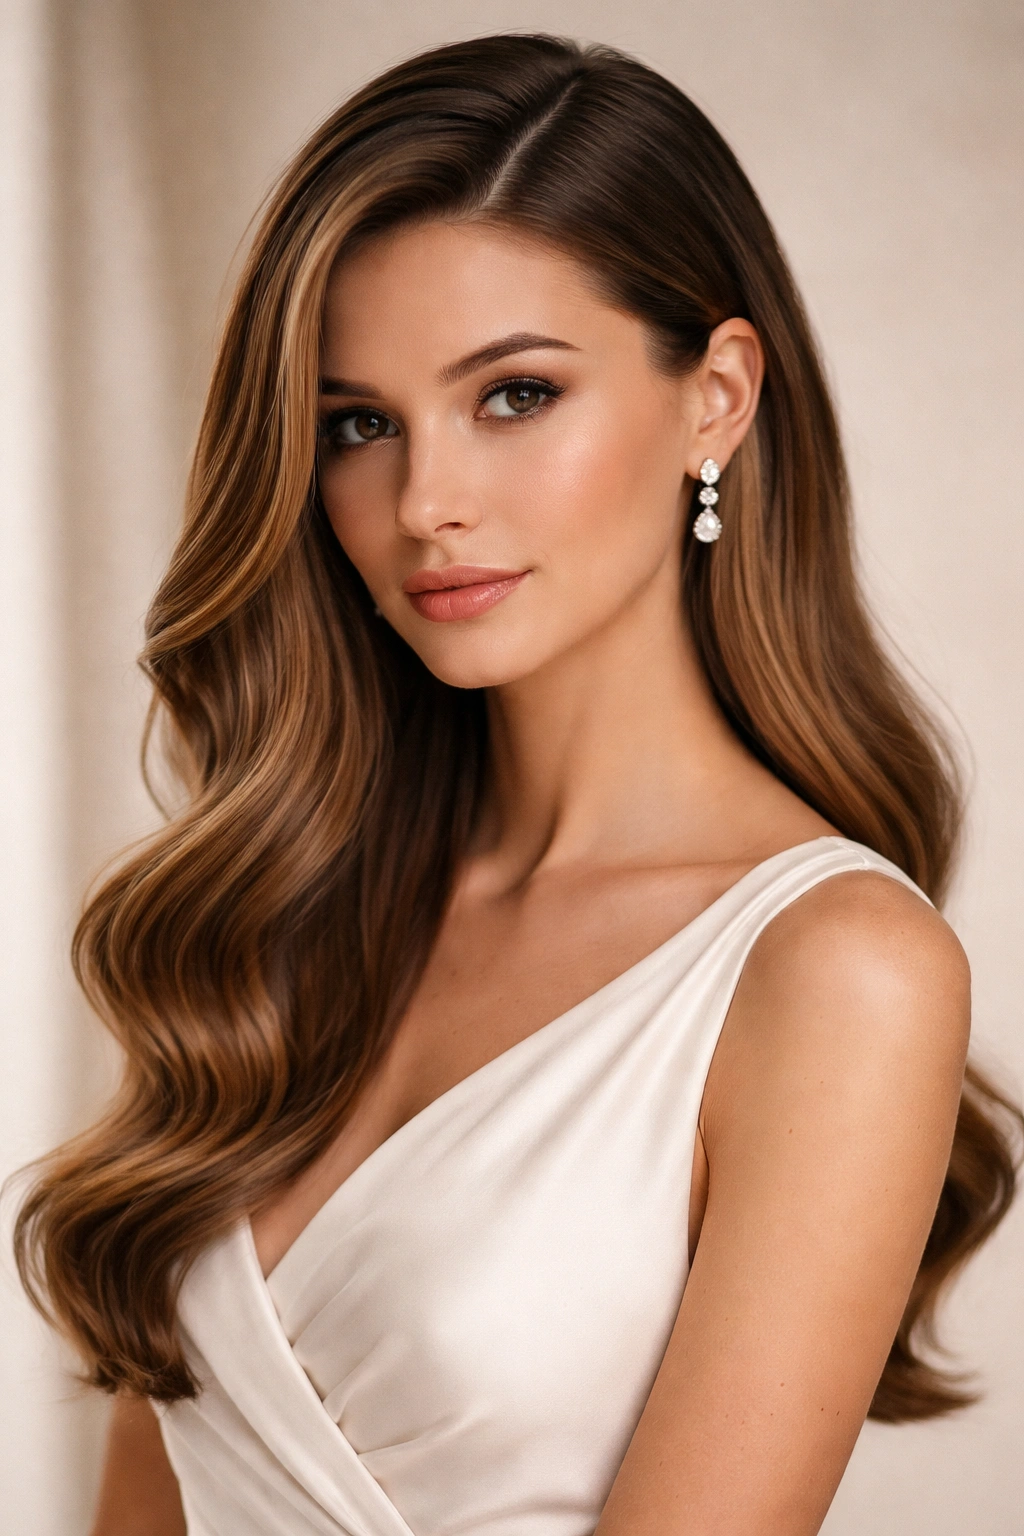
Sometimes the most elegant wedding look is the simplest one. A deep side part with subtle waves is less obviously “styled” than an updo, which means you can wear it to any type of wedding without worrying whether you’re overdressed or underdressed. It reads as polished without screaming “formal event.”
Why Straight Hair Shines Here
Straight hair gives you a sharp, precise part line that looks intentional. The waves, when added to straight hair, read as deliberate styling choices rather than natural texture, which creates a refined, controlled appearance. There’s an elegance to the contrast between the geometric precision of the part and the soft curve of the waves.
Creating Clean Waves on Straight Hair
The technique matters here. Blow-dry your hair completely straight first, then use a 1.5-inch curling iron to create loose waves, curling away from your face on one side and toward your face on the other side for balance. The curls will look much more intentional and controlled on straight hair than on naturally wavy or curly hair. After you’ve curled all your hair, run your fingers gently through the waves to soften and break them up so they look effortless rather than coily.
- Part depth: Create your side part by drawing a line from the inner arch of your eyebrow back toward your crown; this creates a genuinely “deep” part rather than a barely-there one
- Wave pattern: Alternate which way you curl each 2-inch section — away from face, toward face, away from face — for balanced, natural-looking waves
- Hold strategy: Use a light to medium hold hairspray as you work; heavy hold will make the waves feel stiff
- Wave-breaking technique: After all curls cool, massage your scalp gently and run your fingers through your hair to break up the curl pattern into softer waves
- Styling duration: This style typically holds its wave pattern for 6-8 hours with medium-hold spray, perfect for an afternoon or evening event
Insider note: If you have a wedding where you’ll be outside and it might be humid, this style is more forgiving than a sleek style because the waves already have texture — a little humidity adds movement rather than frizz.
4. Minimalist Center Part with Curved Ends
This is the modern, art-gallery version of straight hair — intentionally simple with a single curved detail that transforms it from basic to sophisticated. It’s what you’d see on fashion editorials and red carpet appearances, and it proves that sometimes the most striking styles are the ones with minimal fuss.
The Power of Strategic Details
A dead-straight center part with completely straight hair all the way down can read as a bit severe. The solution is adding a subtle curve or bend to just the last 2-3 inches of your hair at the ends. This single detail changes the entire visual from “I didn’t style my hair” to “I styled my hair with perfect intention.”
How to Achieve the Curved-End Effect
Blow-dry your hair absolutely straight with a flat paddle brush, creating a precise center part from your forehead back through the crown. Once your hair is completely dry and smooth, use a straightening iron set to medium-high heat to get your hair completely poker-straight through the length. Then, in the last 2 inches before the ends, angle the straightening iron slightly outward and curve it gently away from your face, rotating it as you slide it down the last section of each strand. This creates a subtle bend that catches light differently than the rest of your hair.
- Part precision: Use a tail comb or teasing brush to create a razor-sharp center part; this geometric precision is what elevates the look
- Straightening iron technique: Move slowly through your hair and don’t clamp the iron too tightly; you want to guide the shape, not fight your hair
- Curve angle: The curve should be subtle — think a gentle outward sweep, not a dramatic flip; about a 15-20 degree angle outward from your head
- Product layering: Use a smoothing serum before heat styling and a light shine spray after for reflectivity
- Face framing: Let your hair fall naturally; if you want a softer face frame, you can leave 1-inch sections out near your face completely straight
Pro tip: This style photographs beautifully because the subtle curve catches light in a way that completely straight hair doesn’t, but it’s understated enough that it looks effortless. The curve is visible in person and in photos, but not so dramatic that it reads as obviously curled.
5. Twisted Crown with Cascading Length
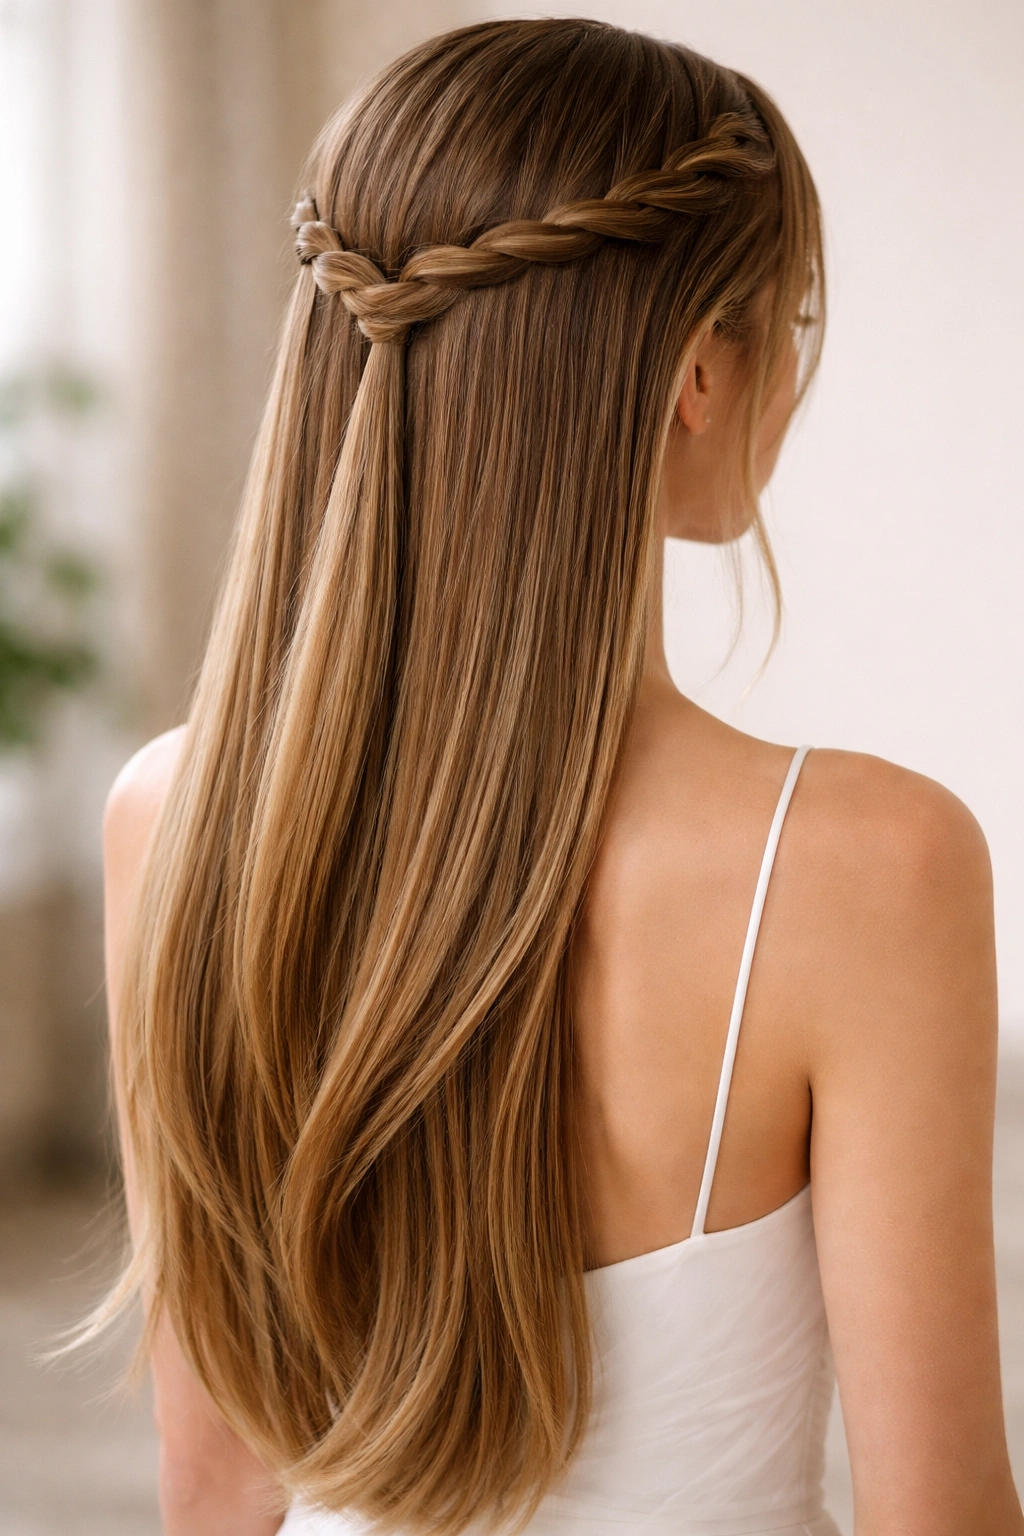
A twisted crown — also called a twisted halo or twisted crown braid — is an elevated updo that actually keeps most of your hair down. It’s formal enough for an evening wedding, romantic enough for a garden ceremony, and surprisingly easy to execute once you understand the technique.
Why This Style Flatters Straight Hair
The twisted sections read as deliberately stylized on straight hair, creating a texture contrast that’s visually interesting. Because you’re not relying on waves or curls to add volume, the style depends on the precision of the twist and the clean fall of the remaining hair — both areas where straight hair excels.
Building the Twisted Crown
Start with blow-dried, completely straight hair. Take a 2-inch section of hair from one side of your head at temple level. Divide this section in half and twist the two subsections around each other tightly, walking backward and diagonally across the back of your head. As you travel across the back of your head (roughly following your hairline), pick up additional hair every inch or so and incorporate it into the twist. When you reach the opposite temple, secure the twisted section with bobby pins and allow the rest of your hair to cascade down in a ponytail or completely loose.
- Starting point: Begin the twist at one temple, roughly at ear height; too high reads less refined
- Twist tightness: Keep the twist fairly snug; loose twists look unfinished on straight hair because there’s no natural texture to help it hold visually
- Hair pickup: Every inch or so, take a small strand of hair from your hairline and incorporate it into the twist; this is what creates the halo effect
- Endpoint: Bring the twisted section to the opposite temple and pin it securely; you can tuck the end underneath to hide it
- Cascading section: Allow the hair below the twisted crown to fall completely straight or add subtle waves with a large-barrel curling iron
Worth knowing: You can do a single twisted crown (one twist wrapping around one side of your head) or a double twisted crown (one twist on each side of your head meeting in the back). The double version is more dramatic and works beautifully for evening weddings.
6. Sleek High Ponytail with Graphic Clip
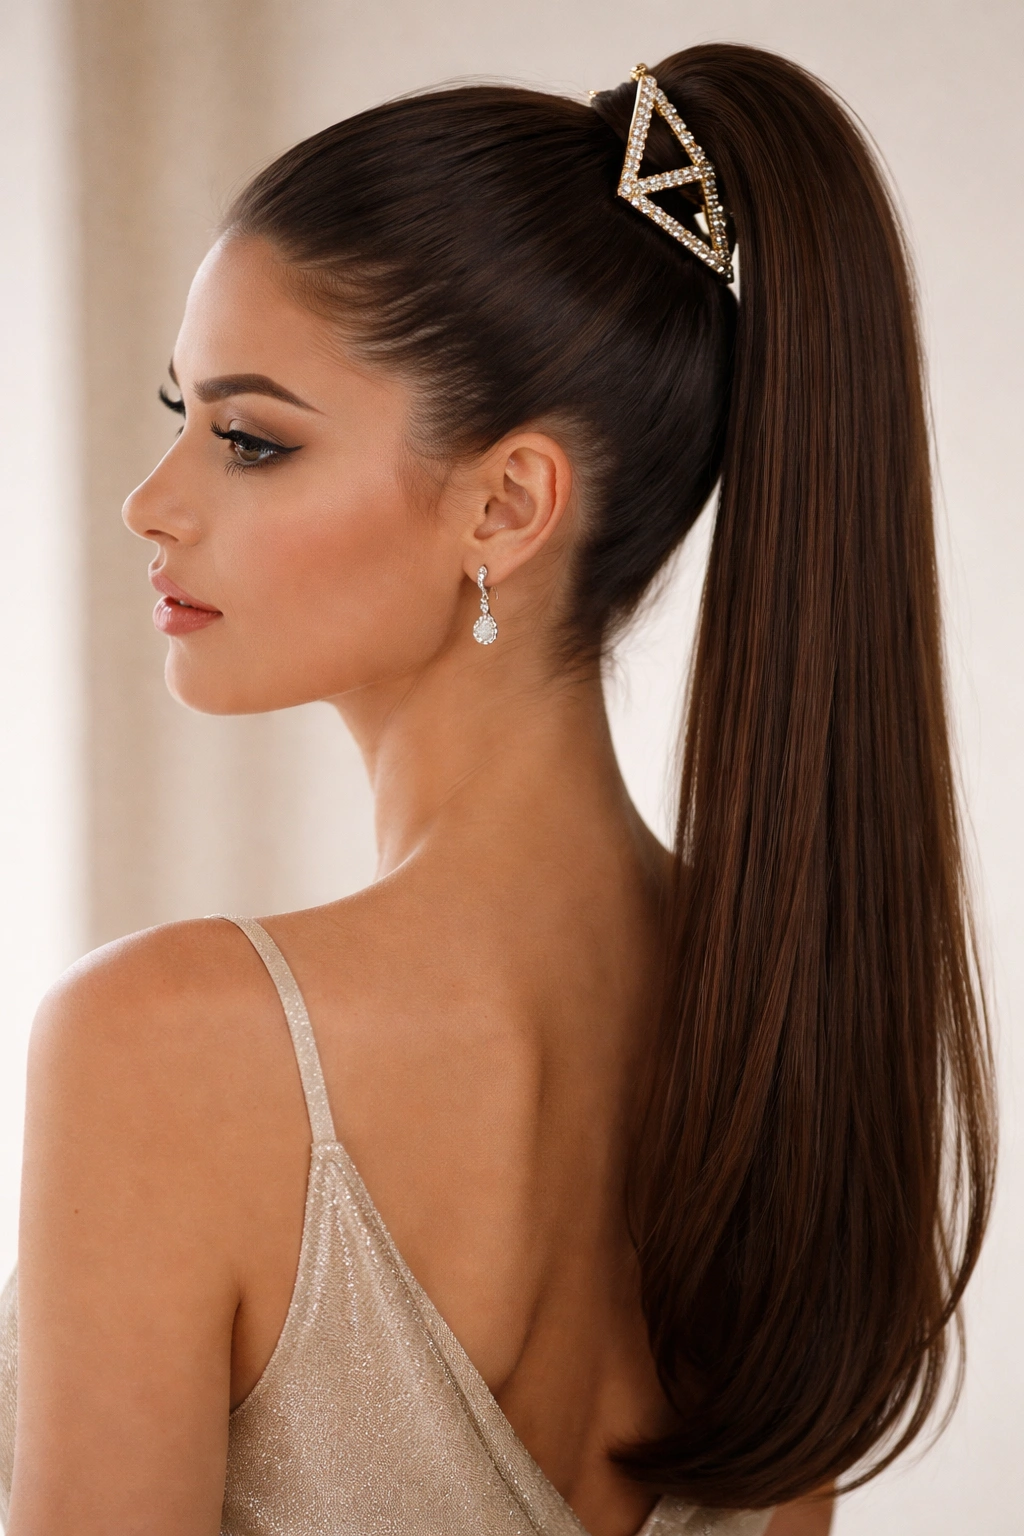
A high ponytail is youthful, energetic, and can be surprisingly formal when executed with precision and the right accessory. The trick is making it look intentional and polished rather than like you threw your hair up because you were running late.
Making Height Work
High ponytails can read as severe or unbalanced on some face shapes, but the antidote is strategically placed face-framing and a striking clip that draws attention to the beautiful accessory rather than to your hairline. Straight hair holds a high ponytail with clean precision, which allows the style to read as intentionally placed rather than carelessly gathered.
Creating a Refined High Ponytail
Blow-dry your hair with a volumizing mousse for subtle lift at the roots. Brush your hair straight back from your forehead and secure a high ponytail at the crown of your head — roughly where a crown or tiara would sit. Before tightening the elastic fully, release two 1-inch sections of hair on either side of your face to frame your features. Use a boar-bristle brush to smooth the ponytail and eliminate any bumps or creases at the base.
- Placement precision: The base of the ponytail should sit directly above the crown of your head, roughly in line with the tops of your ears when you tilt your head slightly forward
- Hair smoothness: Use a smoothing serum on damp hair before blow-drying to eliminate frizz; comb through the finished ponytail with a fine-tooth comb to catch any stragglers
- Face-framing sections: The two pieces you leave out should be released before you fully secure the ponytail and should fall naturally on either side of your face
- Elastic coverage: Wrap a thin strand of hair from the ponytail around the elastic to conceal it — this single detail elevates the whole look
- Clip placement: Position a graphic clip, metal cuff, or pearl-studded clip at the base of the ponytail, covering the elastic wrap
Insider note: If your hair is very fine or thin, a high ponytail can look skimpy. Solution: tease the hair at your crown gently before securing the ponytail to create a small cushion of volume, then smooth the top layer. This creates the illusion of density without any visible bumps.
7. Straight Blowout with Textured Ends
Sometimes the wedding look is just beautifully executed straight hair — no braids, no twists, no complicated structure. A professional blowout with textured ends is a timeless style that works for virtually every wedding aesthetic and puts the focus entirely on shine, movement, and polish.
The Art of the Perfect Blowout
A good blowout isn’t just “blow-dry your hair.” It’s a technique involving the right tools, product layering, and directional styling that creates movement, shine, and a slight bend or curve that prevents the hair from looking completely flat or one-dimensional.
Achieving a Salon-Quality Blowout at Home
Start with damp hair and apply a volumizing mousse to your roots and a smoothing serum to your mid-lengths and ends. Blow-dry your hair using a paddle brush, directing the brush downward as you work to smooth the hair cuticle and create shine. Once your hair is 80% dry, switch to a round brush and focus on your crown, rolling the brush under and away from your face to create subtle lift. For texture, use a large-barrel curling iron (2 inches or wider) on the bottom third of your hair, curling away from your face. Finish with a light shine spray.
- Product order: Mousse first (creates lift at roots), then serum (smooths the lengths), then a heat protectant spray (non-negotiable before any hot tool)
- Blow-dry direction: Always brush and blow-dry downward to smooth the cuticle and maximize shine
- Crown volume technique: Once your hair is mostly dry, use a round brush at the crown, rolling it under and holding for a few seconds as you blow-dry to create subtle lift that lasts
- Curl placement: Add waves or curls only to the bottom third of your hair; top-to-bottom curls can look dated or overly done
- Finish products: Light shine spray or hair oil on the ends prevents that striped texture and keeps everything looking cohesive
Pro tip: The difference between a blowout that lasts 4 hours and one that lasts 10 hours is finishing spray. Use a medium-hold spray all over your hair and a light hairspray as your final step. This keeps everything in place without making your hair feel crunchy or stiff.
8. Braided Side Sweep
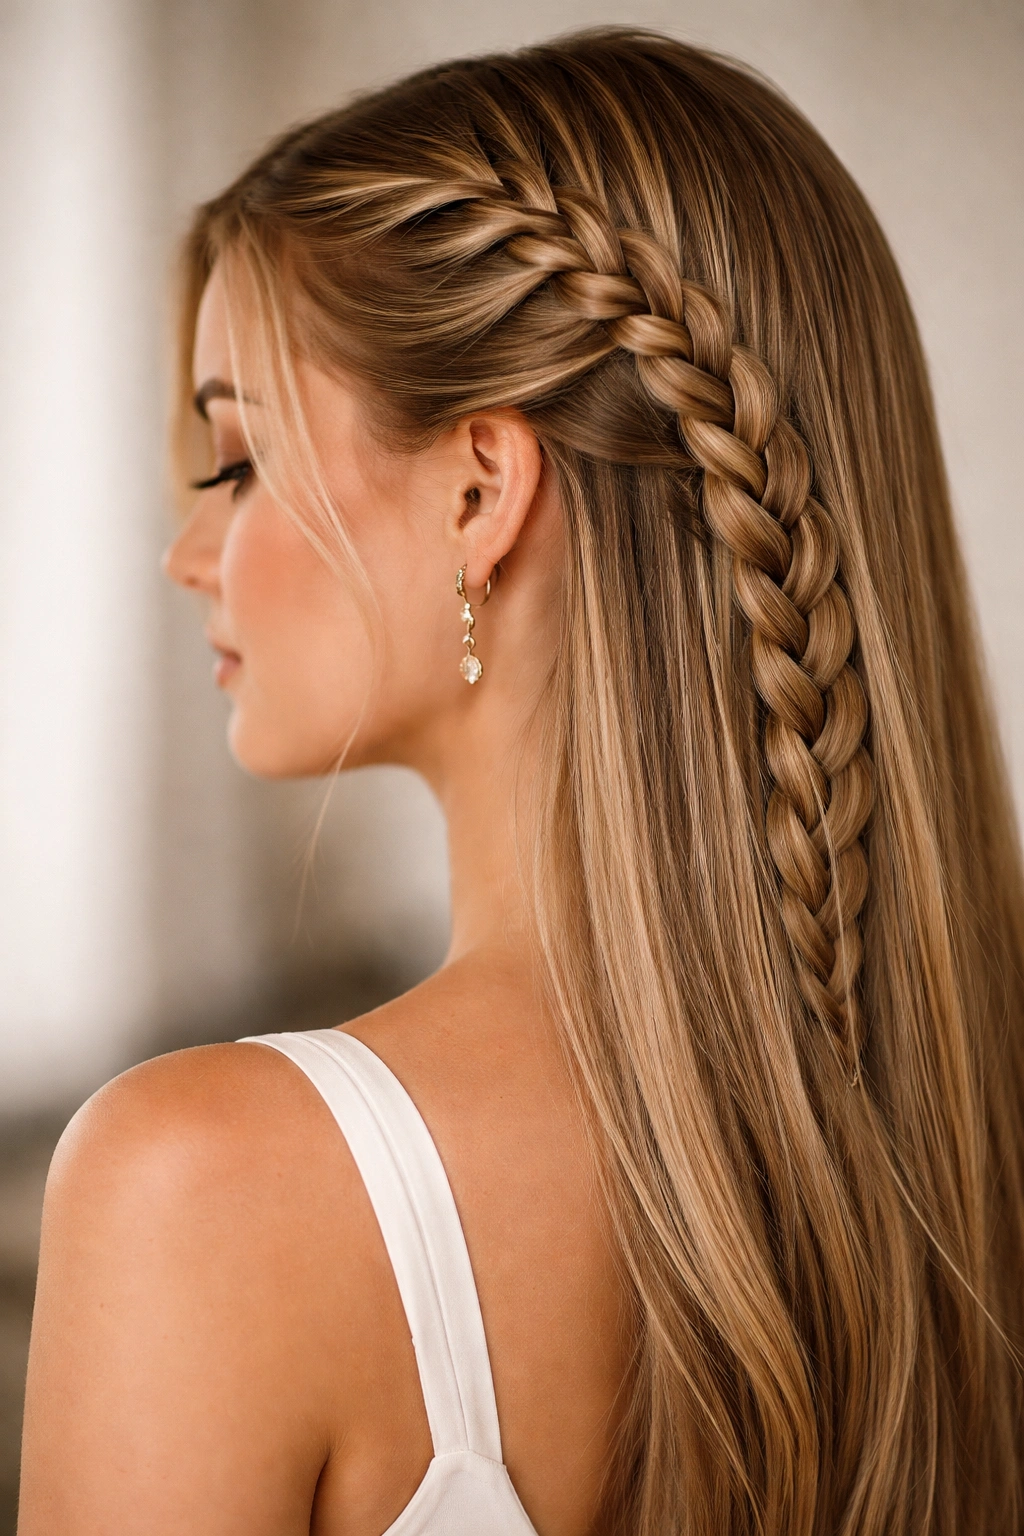
A side braid is a more interesting alternative to a ponytail while still keeping hair off your face and neck. For straight hair, a single braid down the side of your head creates a texture contrast that reads as intentionally styled and romantic.
Why Braids Work on Straight Hair
Braids read as more formal and intentional on straight hair than on naturally curly or wavy hair. The clean edges of a braid created from straight hair have a sculptural quality that’s quite striking, especially when photographed. A braid also has the advantage of looking fresh and polished even after a few hours of activity.
Creating a Polished Side Braid
Start with smooth, blow-dried straight hair. Create a deep side part on one side of your head — the side where you’ll be braiding should have more hair. Take a section of hair from your crown on the fuller side and start a three-strand braid, working your way down and around to the opposite side of your head (this is called a Dutch braid, and it’s more structured than a standard braid). Continue braiding until you reach the nape of your neck, then secure with a small elastic.
- Starting point: Begin your braid at the crown of the fuller side of your part; starting too high or too low affects the balance of the style
- Braid tension: Keep the braid firm enough that it holds its shape throughout the day, but not so tight that it pulls painfully on your scalp
- Braid path: The braid should travel from your crown down and around toward the nape of your neck, creating a diagonal line that’s visually flattering
- Braid finish: Secure with a small elastic that matches your hair color; wrap a thin strand of hair around the elastic to conceal it
- Face-framing option: Leave a couple of small sections of hair unbraided at your hairline to frame your face softly
- Braid loosening: After you’ve secured the braid, gently pull at the outer edges of each braid loop to loosen and widen it slightly; this makes the braid look more intentional and romantic
Worth knowing: A side braid works beautifully with a low updo — you can braid partway down your head, then gather all your hair into a low bun at the nape. This creates a sophisticated two-part style.
9. Slicked-Back Bun with Wispy Face-Framing
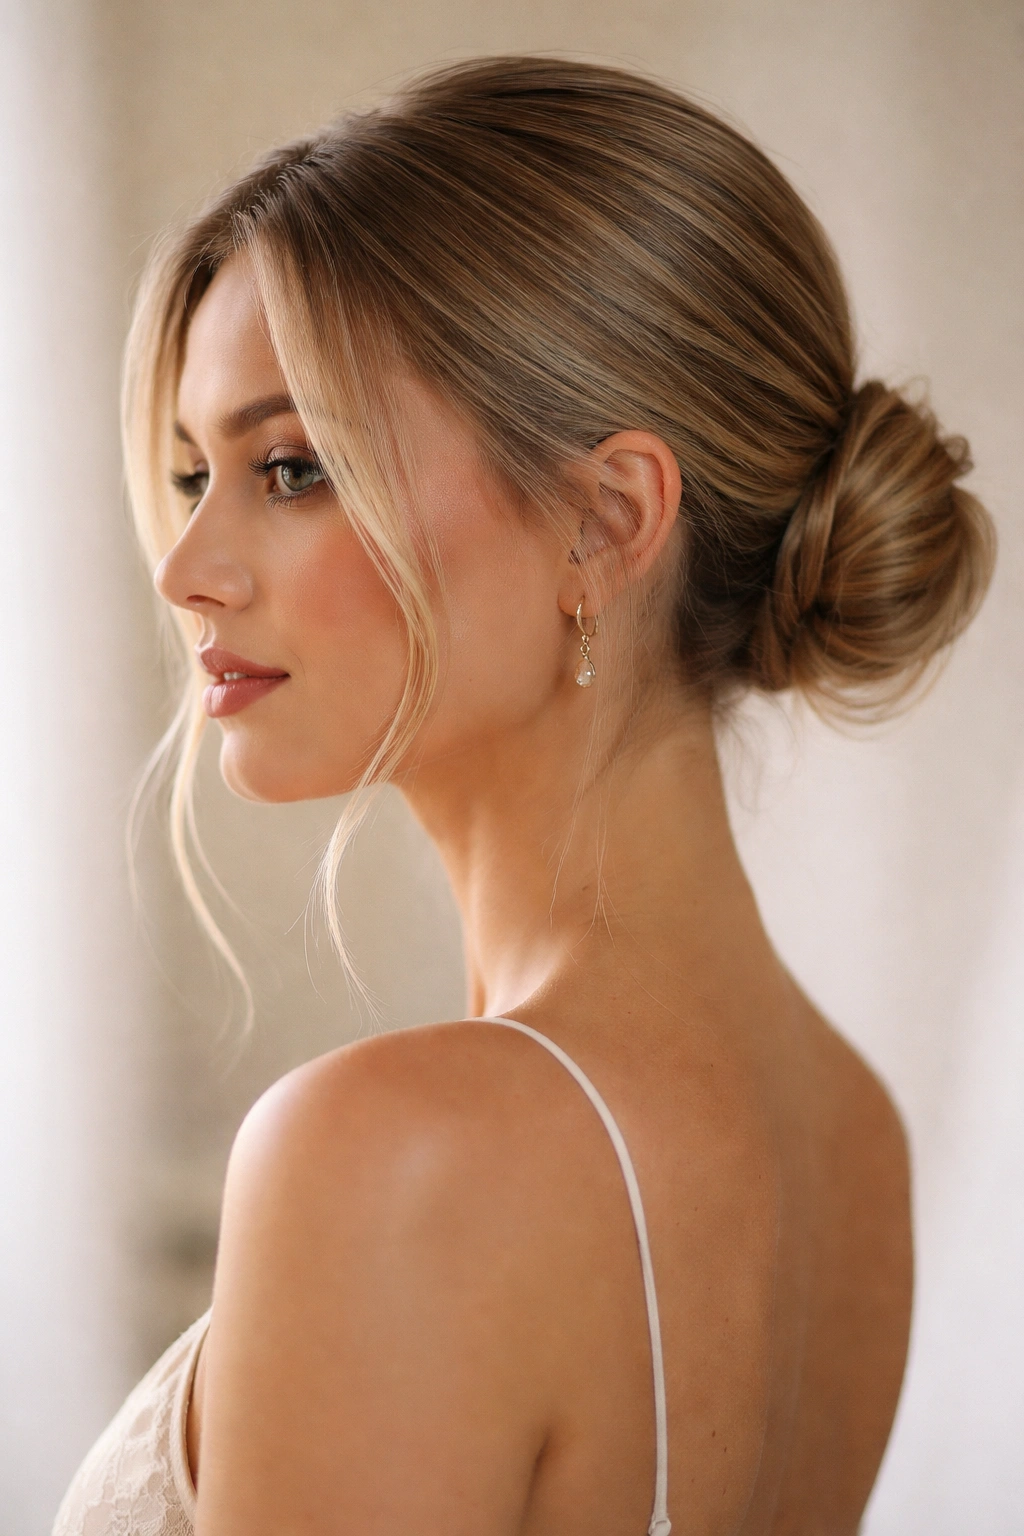
A bun is the ultimate formal updo, and when done with intention on straight hair, it reads as polished and deliberate. The key is the slicked-back styling and the wispy pieces that frame your face — together, these elements keep the style from looking too severe or matronly.
The Modern Slicked-Back Approach
What separates a contemporary slicked-back bun from a dated one is the texture of the bun itself and the strategic placement of face-framing pieces. Instead of a perfectly smooth, pulled-tight bun, you want a bun that’s slightly textured and positioned at the very base of your neck for a modern, elongated appearance.
Building the Slicked-Back Bun
Blow-dry your hair completely smooth, then use a slicking gel or mousse to smooth your hair straight back from your forehead toward the nape of your neck. Release two small sections at your temples before securing the rest into a low bun at the base of your neck. The bun itself should be created by twisting your ponytail around itself loosely and securing with bobby pins; don’t aim for a super-tight, smooth bun — a slightly textured, voluminous bun reads as more modern.
- Slicking product: Use a gel or mousse designed specifically for slicked-back styles; regular hairspray won’t give you enough control
- Slicking technique: Apply the slicking product to damp hair before blow-drying, then blow-dry your hair straight back and down; this sets the style much better than trying to gel dry hair
- Face-framing pieces: Release 1-inch sections at your temples, roughly at cheekbone height; these pieces can be left completely straight or very gently curved
- Bun placement: Secure your low ponytail at the absolute nape of your neck, the lowest point of the back of your head; this elongates your neck and looks more elegant than a higher bun
- Bun texture: Twist your ponytail and wrap it around the elastic, securing with bobby pins, but don’t pull it completely tight; a slightly full, textured bun looks more refined than a sleek, tight bun
- Bun loosening: Gently pull a few strands from the bun to create a slightly undone appearance; this prevents the style from looking too severe
Pro tip: If your hair is fine or thin, add a hair thickener or volumizing spray to your ponytail before creating the bun. This makes the bun look fuller and more substantial without any visible padding or additional hair pieces.
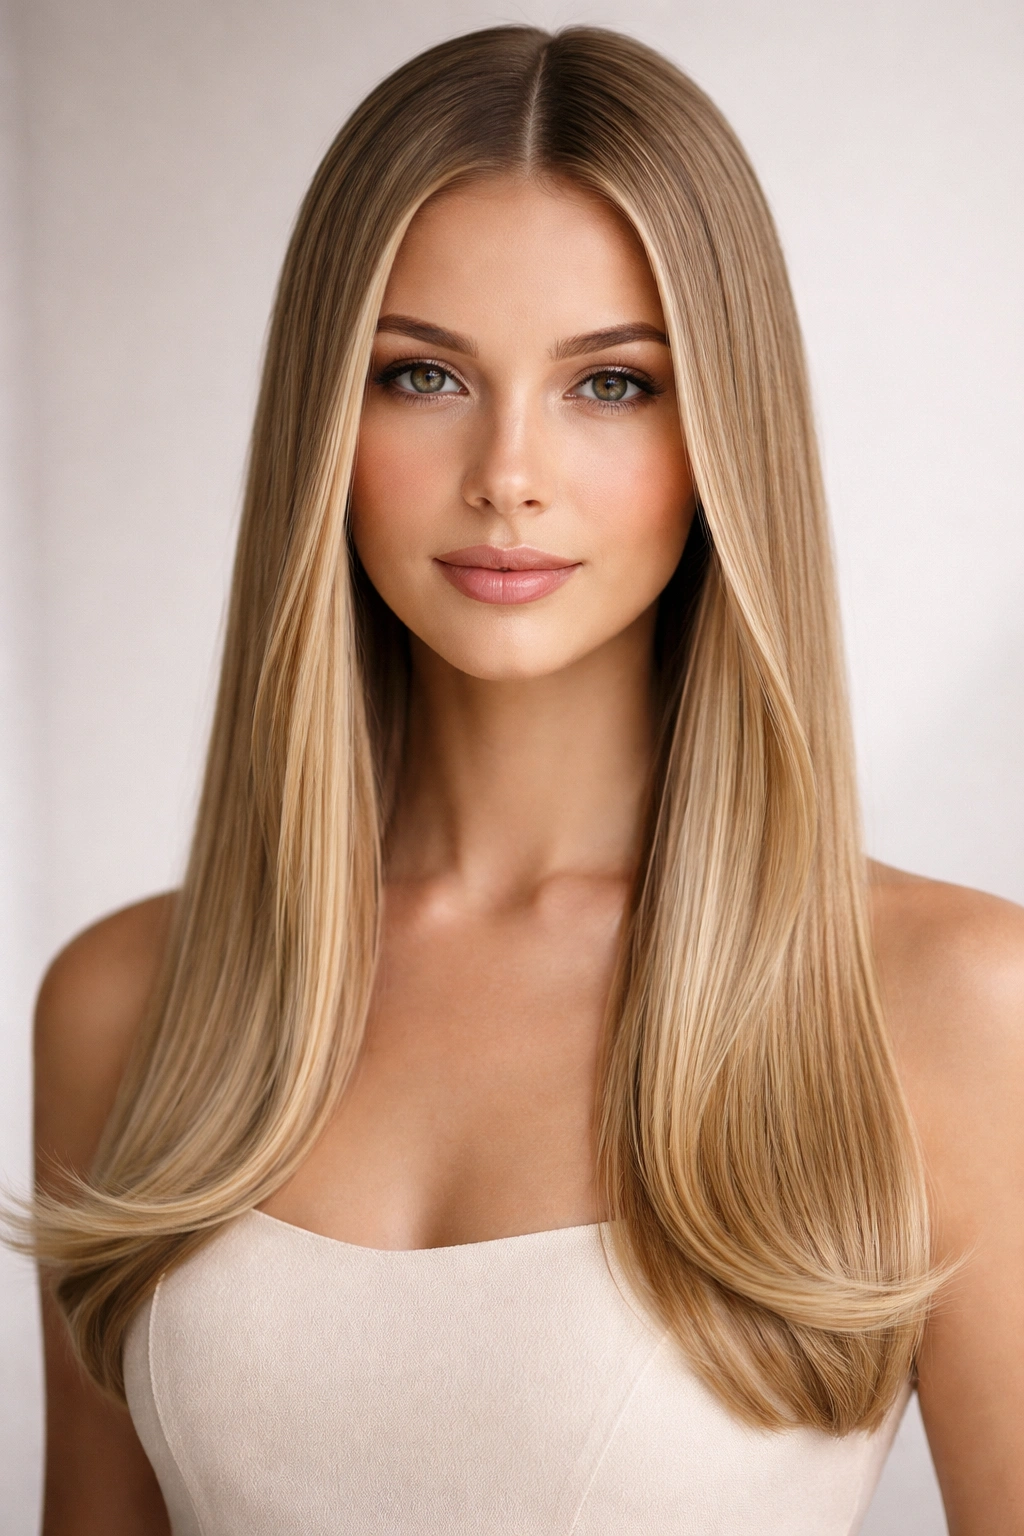
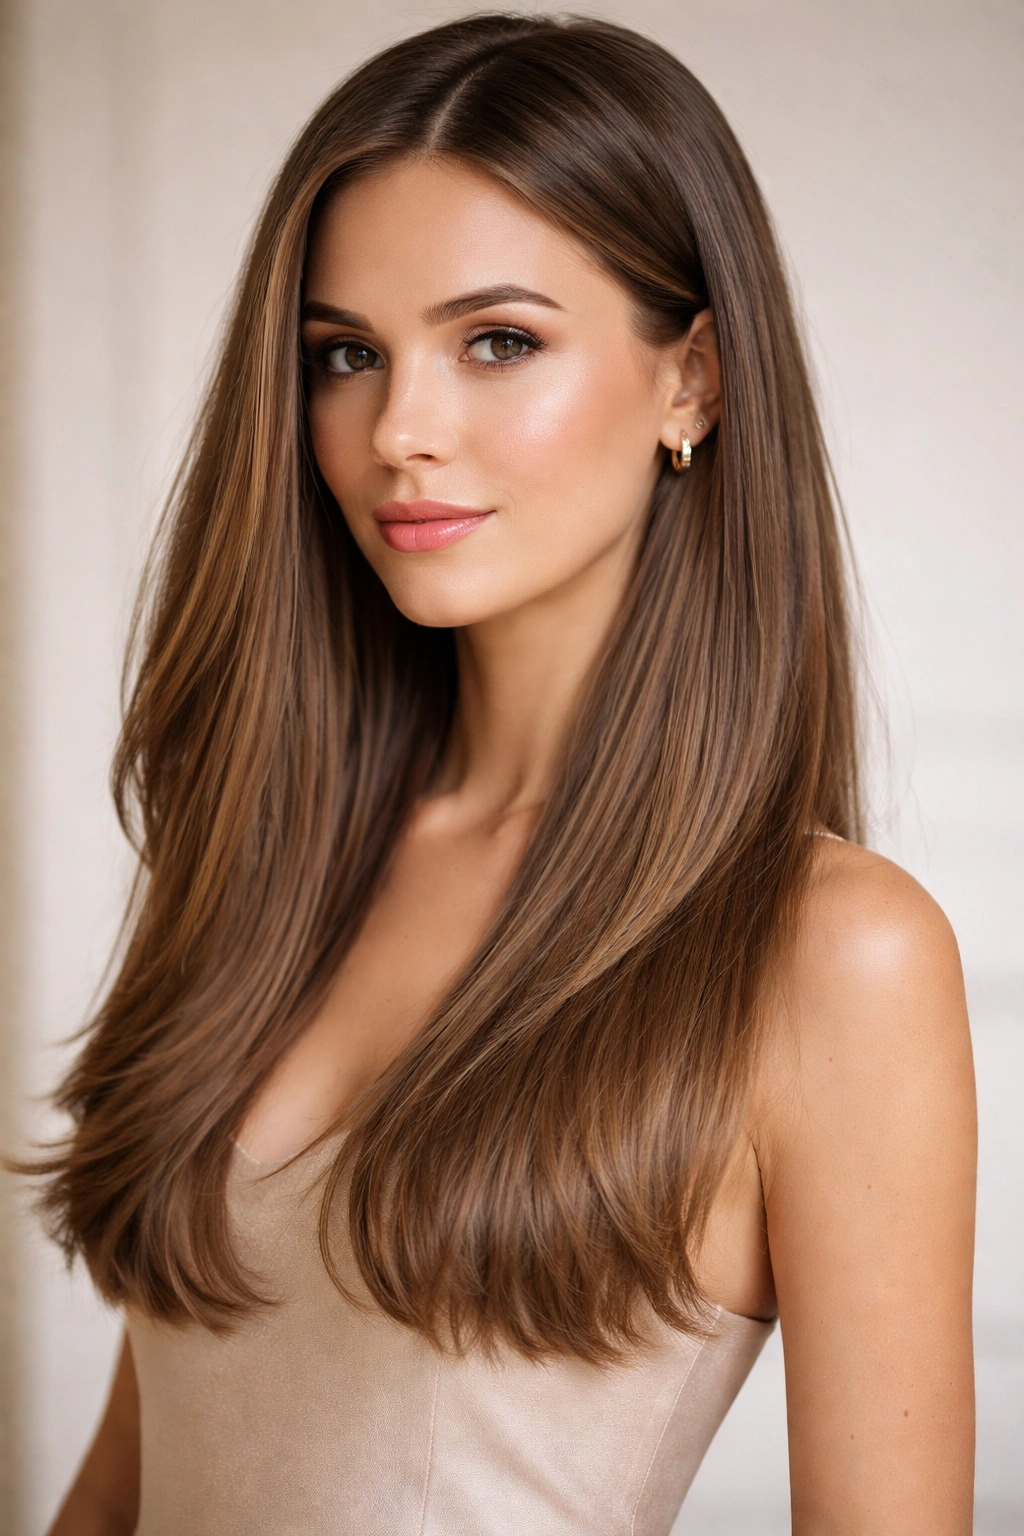
10. Middle Part with Volume and Movement
This is the modern, fashion-forward wedding look — an upgraded version of just straight hair that incorporates subtle volume at the crown and gentle movement through the lengths. It’s less obviously “styled” than other options, which means it works for any wedding vibe and lets your face and outfit shine.
Building Volume Into Straight Hair
The challenge with straight hair is that without built-in texture, it can read as flat or lack dimension. The solution is creating strategic volume at the crown and adding subtle movement that creates light and shadow in your hair.
Creating Voluminous, Movable Straight Hair
Apply a volumizing mousse to damp hair at the roots only, then blow-dry your hair with a paddle brush moving downward for smoothness. Once your hair is 80% dry, switch to a round brush at your crown and roll the brush under and away from your face, blow-drying as you go. This creates subtle lift that lasts all day. For movement, use a large-barrel curling iron on the bottom two-thirds of your hair, alternating which direction you curl each section — away from face, toward face, away from face — to create waves rather than ringlets.
- Volume placement: Concentrate the volumizing mousse at your roots from the crown back; applying it throughout your hair can make straight hair look greasy
- Round brush technique: At the crown, place your round brush under a 2-inch section of hair and roll it upward and away from your face while blow-drying; hold for 2-3 seconds before releasing
- Wave creation: Use a 1.5 to 2-inch curling iron and curl each section away from or toward your face alternatively; this prevents ringlets and creates movement instead
- Wave breaking: After all curls cool completely, run your fingers gently through your hair to break the curls into soft waves
- Middle part precision: Create your middle part with a tail comb, running from your forehead straight back through your crown; the precision of the part balances the softness of the waves
Insider note: This style is particularly forgiving if you have any humidity at your wedding. The waves already have movement and texture, so humidity adds softness rather than frizz — making this an excellent choice for outdoor or garden weddings.
Final Thoughts
The beauty of styling straight hair for a wedding is that you’ve got a completely cooperative canvas that responds well to styling products, holds shapes beautifully, and photographs with stunning shine. Whether you choose a structured style like a twisted crown or braid, a classic option like a low ponytail or bun, or an effortless-looking style like waves and volume, the key is executing your chosen style with precision and adding one intentional detail that signals “I put thought into how I look today.”
None of these styles require hours of styling time or extensive product knowledge — each one comes down to understanding the specific techniques that work with straight hair’s natural properties. The sleekness that sometimes feels boring becomes an advantage when you’re creating clean lines in a braid or ponytail. The shine that some people try to matte down with texture becomes your secret weapon in a polished blowout or slicked-back style. The fact that straight hair holds its shape without constant frizz control means your style stays wedding-ready from ceremony through dancing.
Pick the style that matches the formality of the event and how you want to feel. Then commit to the technique — straight hair rewards precision and intention. Show up confident knowing that straight hair’s natural advantages mean you’ll look polished, put-together, and photograph beautifully all night long.