Your prom night deserves a hairstyle that celebrates your coils, not fights them. For too long, coily-haired folks have had to choose between straightening their hair or settling for flat, undefined styles that don’t photograph well or hold up through hours of dancing. But here’s what’s changed: there are now incredible coily prom hairstyles that work with your natural texture, showcase your curls at their most beautiful, and stay put all night long.
The key difference between a mediocre coily updo and a show-stopping one is understanding how to work with your curl pattern, not against it. It’s about strategic placement—knowing which curls to define and which to soften, how to add height without frizz, and which styling products keep coils locked in place through sweat and movement. The best coily prom hairstyles combine protective techniques (so your hair stays healthy after the big night) with confidence-building impact (so you feel absolutely stunning).
What makes these styles different from Instagram tutorials for straight hair is the real-world mechanics of coily texture: how to gather curls without breaking them, how to braid coily sections without creating frizz at the edges, and how long everything actually takes when you’re not working with a single uniform curl pattern. These ten styles have been road-tested on actual coily hair—not CGM-perfected curls under studio lighting, but real, varied curl patterns that range from loose waves to tight coils.
Whether your goal is elegance, drama, romance, or bold self-expression, you’ll find a style here that makes you feel like the best version of yourself on prom night. Each style includes the exact techniques, product recommendations, and timing details you’ll need to recreate it at home or show to a stylist who truly understands coily hair.
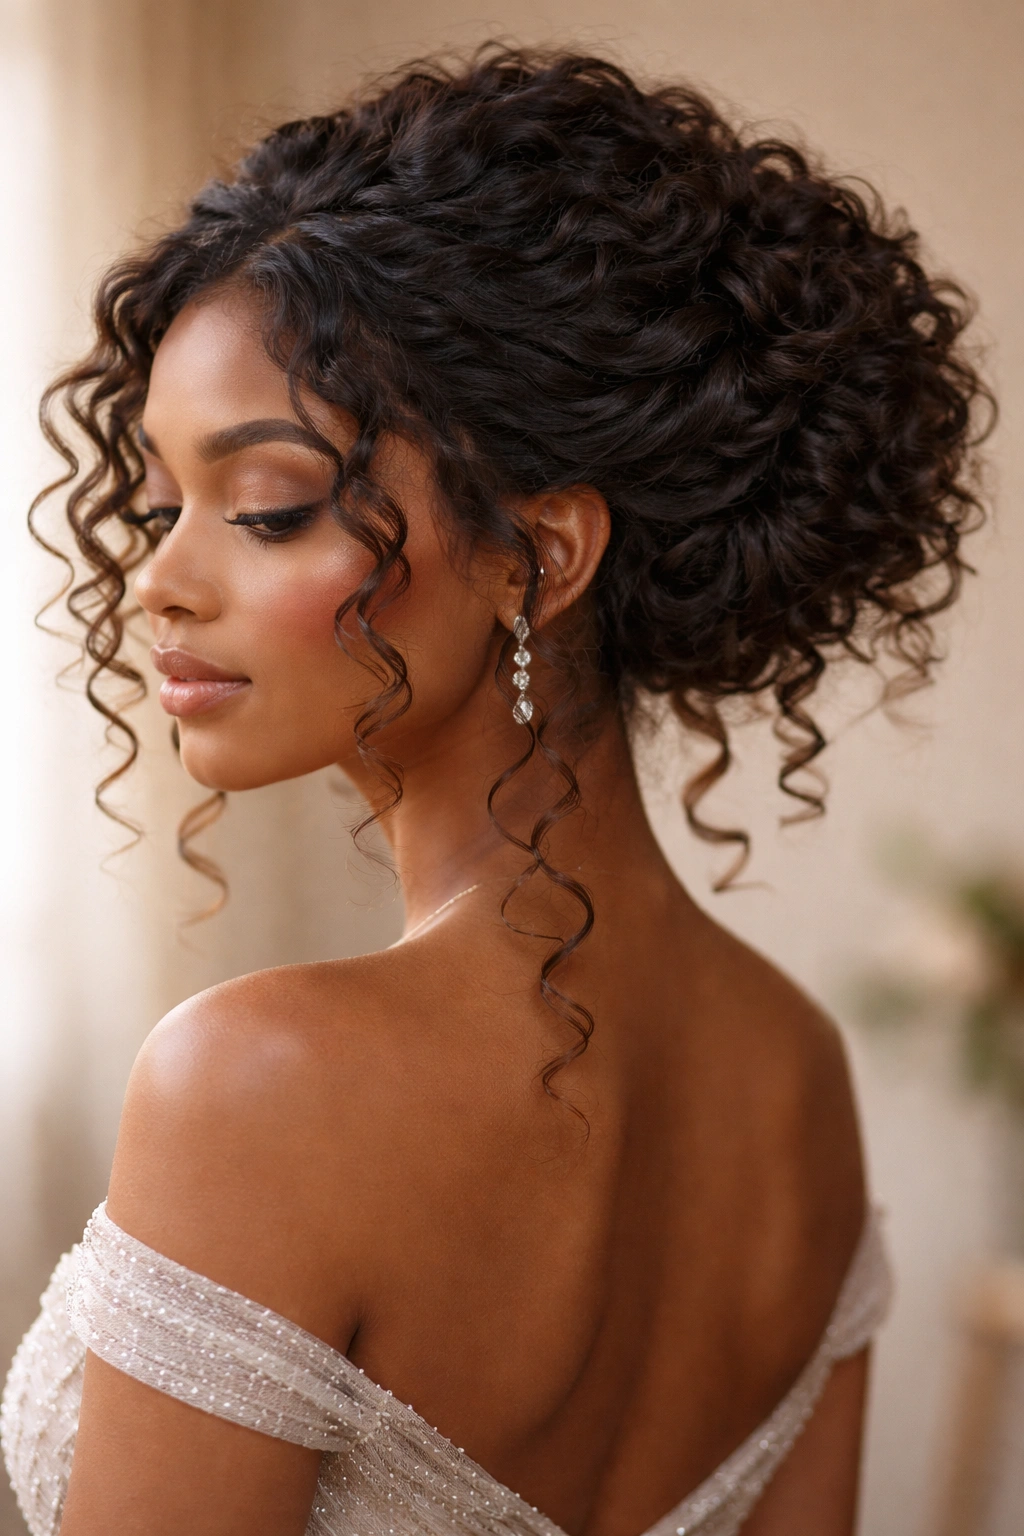
1. High Coiled Bun with Tendrils
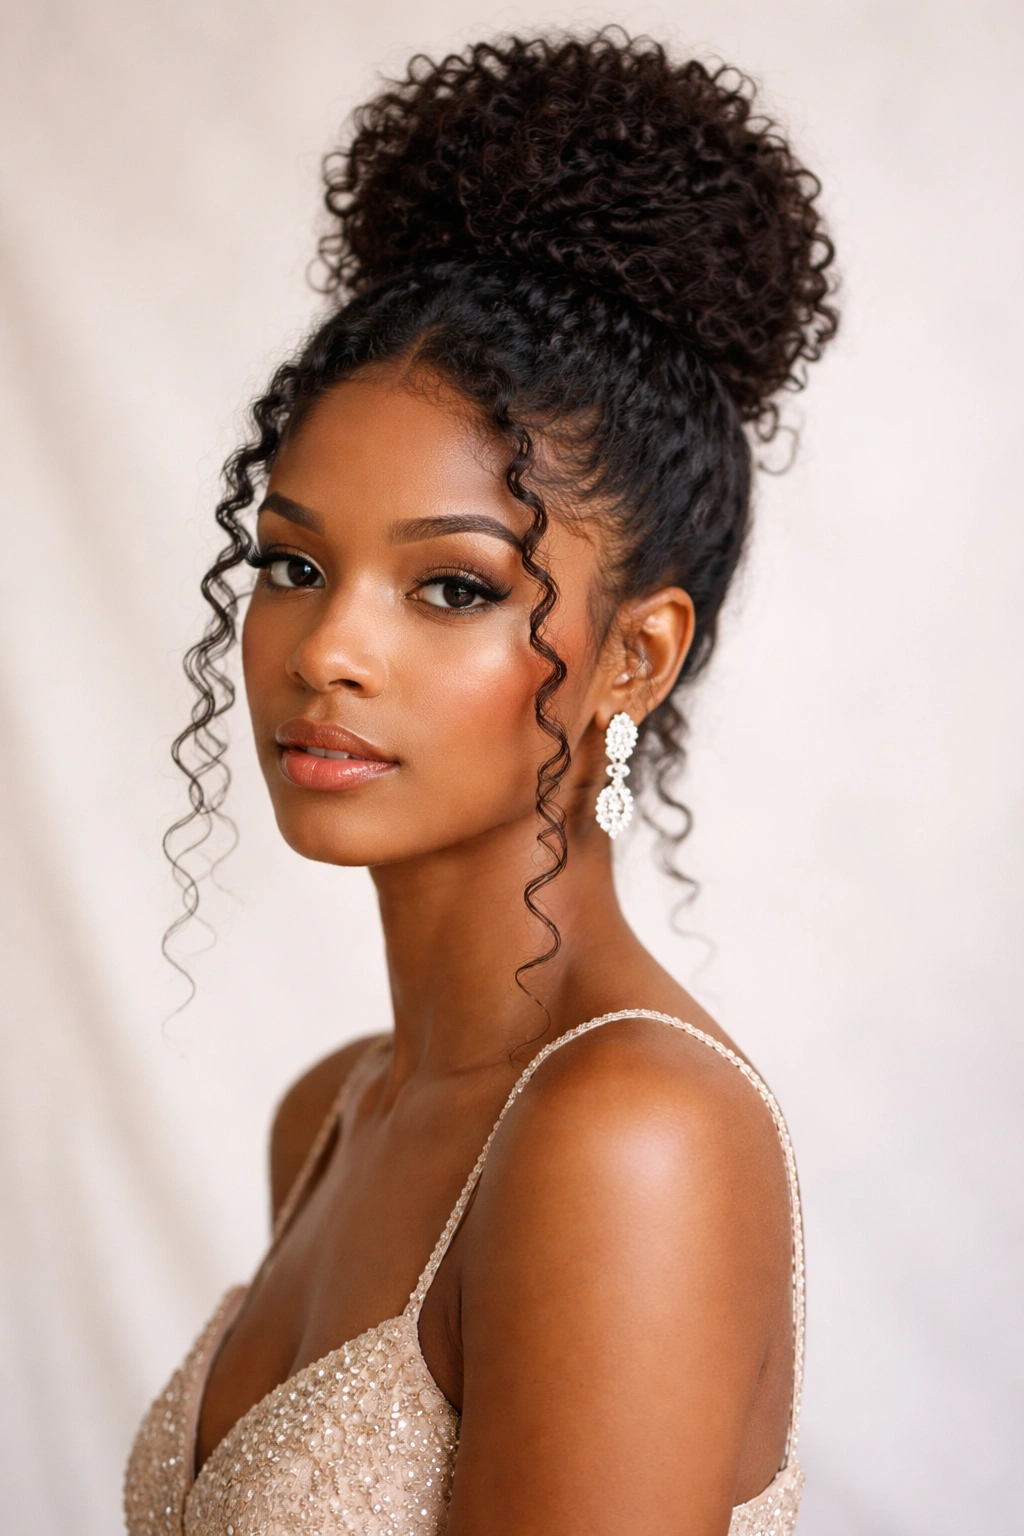
This is the style that screams “I’m confident and elegant.” You’re gathering your coils up high—creating lift and drama—while strategically leaving a few face-framing tendrils down to soften the look. The bun sits at the crown or slightly higher, and because you’re working with actual coils rather than smoothed strands, the texture reads as intentional luxury rather than casual.
Why This Style Absolutely Works for Coily Hair
Coily hair naturally has volume and dimension built in, which means a high bun doesn’t need to be artificially puffed or teased to look full. Your curls do the work for you. The key is gathering your coils gently—using your fingers or a wide-tooth comb rather than a brush—to preserve the curl structure while creating that upswept silhouette. When you do this right, the bun looks textured and sophisticated, not flat or “done too tight.”
How to Create This Look
- Start with second or third-day coily hair, or lightly spritz dry hair with a curl-refreshing spray before styling
- Section off face-framing pieces on both sides before doing anything else—these become your tendrils
- Gather the remaining hair into a high ponytail at the crown, using a silk or satin hair tie (never elastic that grips roughly)
- Gently twist or coil the ponytail around itself, pinning as you go with bobby pins that match your hair color
- Use a lightweight holding spray or curl cream to smooth any flyaways without creating crunch
- Pull down one or two face-framing curls on each side and define them with a small amount of curl cream if needed
Pro tip: Do a practice run at least a week before prom. Coily hair can shift and change based on humidity and how much product is in your hair, so knowing exactly how long this takes and how it holds is invaluable. On prom day, you’ll do it faster because you’ve already worked out the mechanics.
2. Twisted Crown with Side Sweep
Imagine a crown of twisted sections spiraling around your head while the bulk of your curls cascade down one side in a romantic, asymmetrical statement. This style is equal parts regal and effortless—it photographs beautifully from every angle, and the twists add visual interest and texture while keeping hair off one side of your face.
Why Twists Are Your Secret Weapon with Coily Hair
Twists are easier on coily hair than braids because they don’t separate individual strands as much, which means less frizz and less disruption to your curl pattern. Two-strand twists in particular look intentional and polished on coily textures—they read as a deliberate styling choice, not a hairstyle you settled for. The twisted crown pairs coils with technique, combining natural texture with visible craftsmanship.
Building the Twisted Crown Effect
- Divide the top and back sections of your hair into 4-6 sections (depending on your hair density and desired twist thickness)
- Take one section at a time and create a two-strand twist by dividing it into two strands and twisting them around each other from root to tip
- Coil the finished twist around your head in a crown shape, pinning it flat against your scalp as you go
- Continue until you’ve twisted all sections into a crown
- Leave the front and sides free to fall in loose curls
- Sweep the majority of your loose hair to one side and secure gently with bobby pins hidden beneath the curls
- Finish with a flexible-hold styling cream or light spray that defines curls without hardening them
Worth knowing: This style works beautifully whether your coils are tight or loose. The twists create uniformity while the loose cascade of curls shows off your natural texture. It’s the perfect balance of “styled” without looking over-processed.
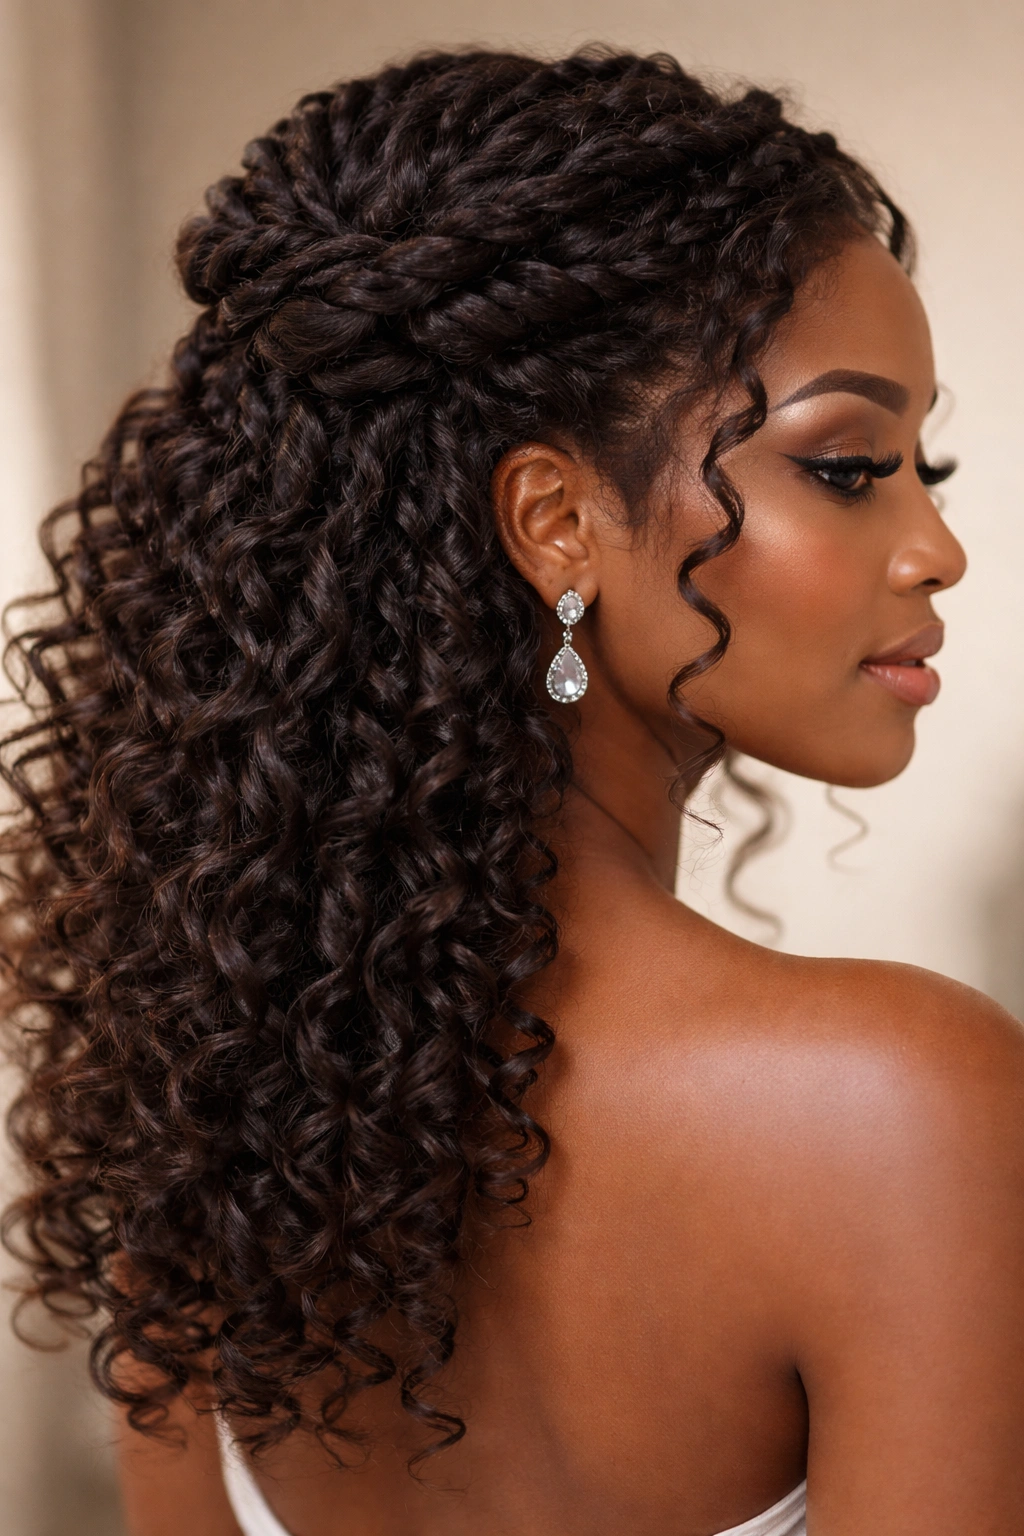
3. Half-Up Cascading Curls
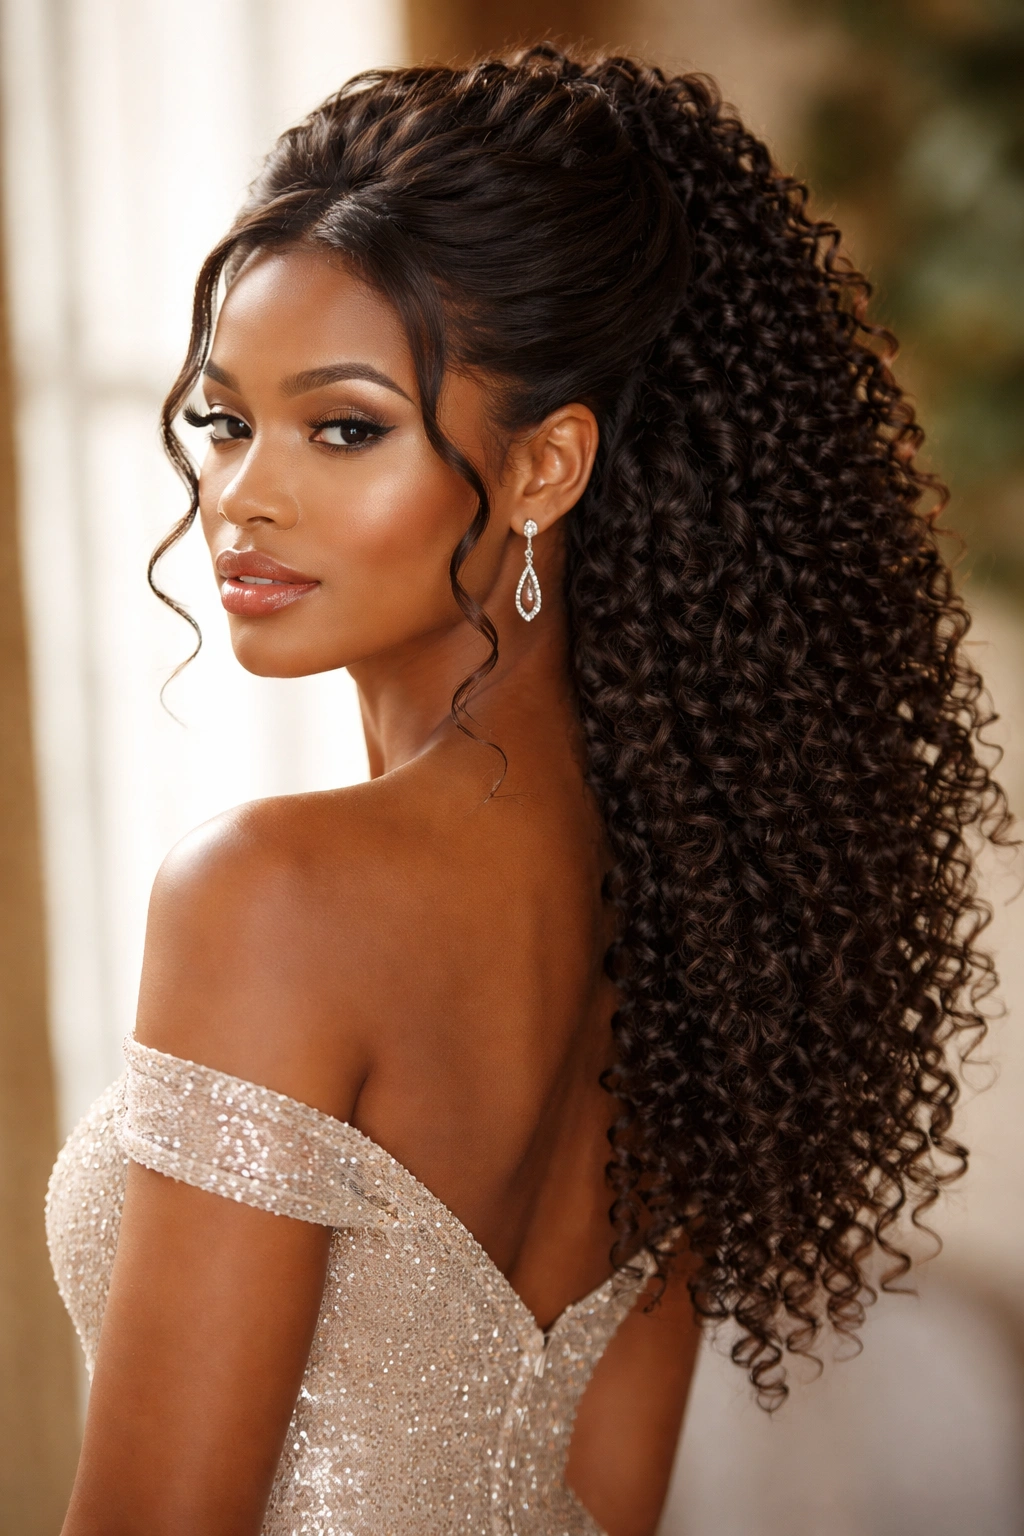
You get the best of both worlds here: the polished, put-together feeling of an updo combined with the freedom and movement of wearing your curls down. The half-up section is twisted, braided, or smoothly gathered, and everything else flows down your back in defined, bouncy coils. This is the style for someone who wants to show off their curl pattern but still look formally styled.
The Psychology Behind Half-Up Hairstyles on Coily Hair
Half-up styles work brilliantly for coily hair because they solve a real problem: sometimes a completely down style can feel shapeless, and a completely up style doesn’t showcase your texture. Half-up splits the difference. You’re creating a focal point (the gathered upper section) that grounds the style while letting your coils cascade freely from your shoulders down. It reads as intentional, not like you didn’t finish styling.
Step-by-Step Half-Up Technique for Coils
- Flip your head upside down and apply a lightweight mousse or curl cream to damp hair, scrunching upward to activate curl pattern
- Allow hair to dry completely or use a diffuser if you’re short on time
- Flip back upright and identify the section you want to gather (from ear to ear across the back of the crown is a good starting point)
- Use your fingers or a wide-tooth comb to gently gather this section without disrupting curls
- Twist this gathered section loosely (not tightly, or you’ll break curl strands) and secure with bobby pins at the base
- Leave the bottom half completely loose and use a curl cream or oil to define individual coil clusters if desired
- For extra polish, add a delicate hair clip, comb, or small piece of jewelry to the twisted section
Insider note: If you have very thick coily hair, you might need to use a claw clip or decorative clip rather than bobby pins to secure the half-up section—bobby pins alone often won’t grip enough thick hair to keep it in place all night.
4. Sleek Low Bun with Braided Detail
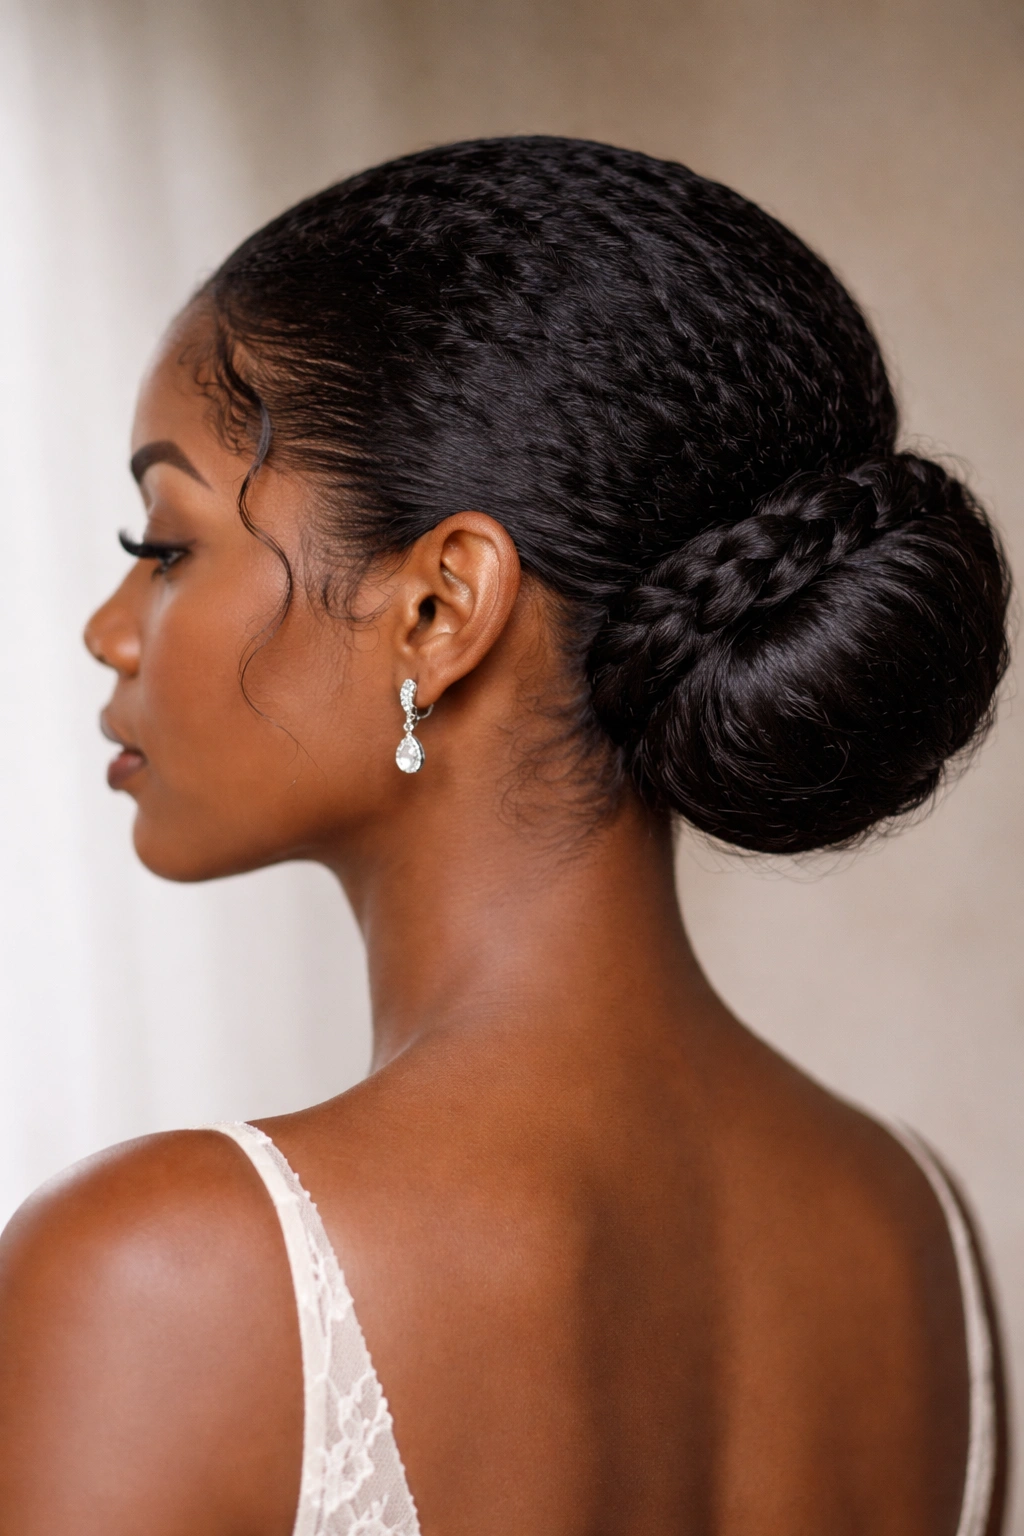
This style walks the line between modern and classic. Your coils are gathered into a low bun at the nape of your neck, but rather than leaving it plain, you’ve woven a braid or twisted section into the bun itself or along the base. The “sleek” element comes from a gel or mousse that defines your curl pattern while keeping flyaways minimal, creating a polished frame for the textured bun.
Why Low Buns Suit Coily Hair Better Than High Ones
A low bun positioned at the nape of your neck works with your natural curl weight rather than fighting it. Gravity pulls coily hair down and outward, so a low placement feels more secure and looks more intentional than a high bun that might shift or loosen as the night goes on. The braided detail adds visual sophistication—it says “I took time with this” while the low placement says “but I’m still comfortable and confident.”
Creating the Braided Bun
- Brush through dry or damp coily hair gently with a wide-tooth comb or your fingers to minimize breakage
- Apply a lightweight gel or curl-defining cream throughout, scrunching to activate your curl pattern
- Section off a small three-strand or two-strand braid from one side of your head, starting near the temple
- Braid loosely downward and secure the end with a small elastic
- Gather all hair into a low ponytail at the nape of your neck (incorporating the braid end into the ponytail)
- Twist the ponytail around itself and coil it into a bun, securing with bobby pins
- Use a fine-tooth comb or toothbrush and a tiny bit of gel to smooth any flyaways around your hairline and neck
- The braided section should be visible wrapping around or through the bun, creating visual texture and dimension
Worth knowing: The key to a “sleek” look on coily hair is using the right product—you need something that defines curl without flaking or looking crunchy under prom lighting. Test your gel or cream beforehand in different lighting conditions, including the actual prom venue if possible.
5. Side-Swept Curls with Decorative Pins
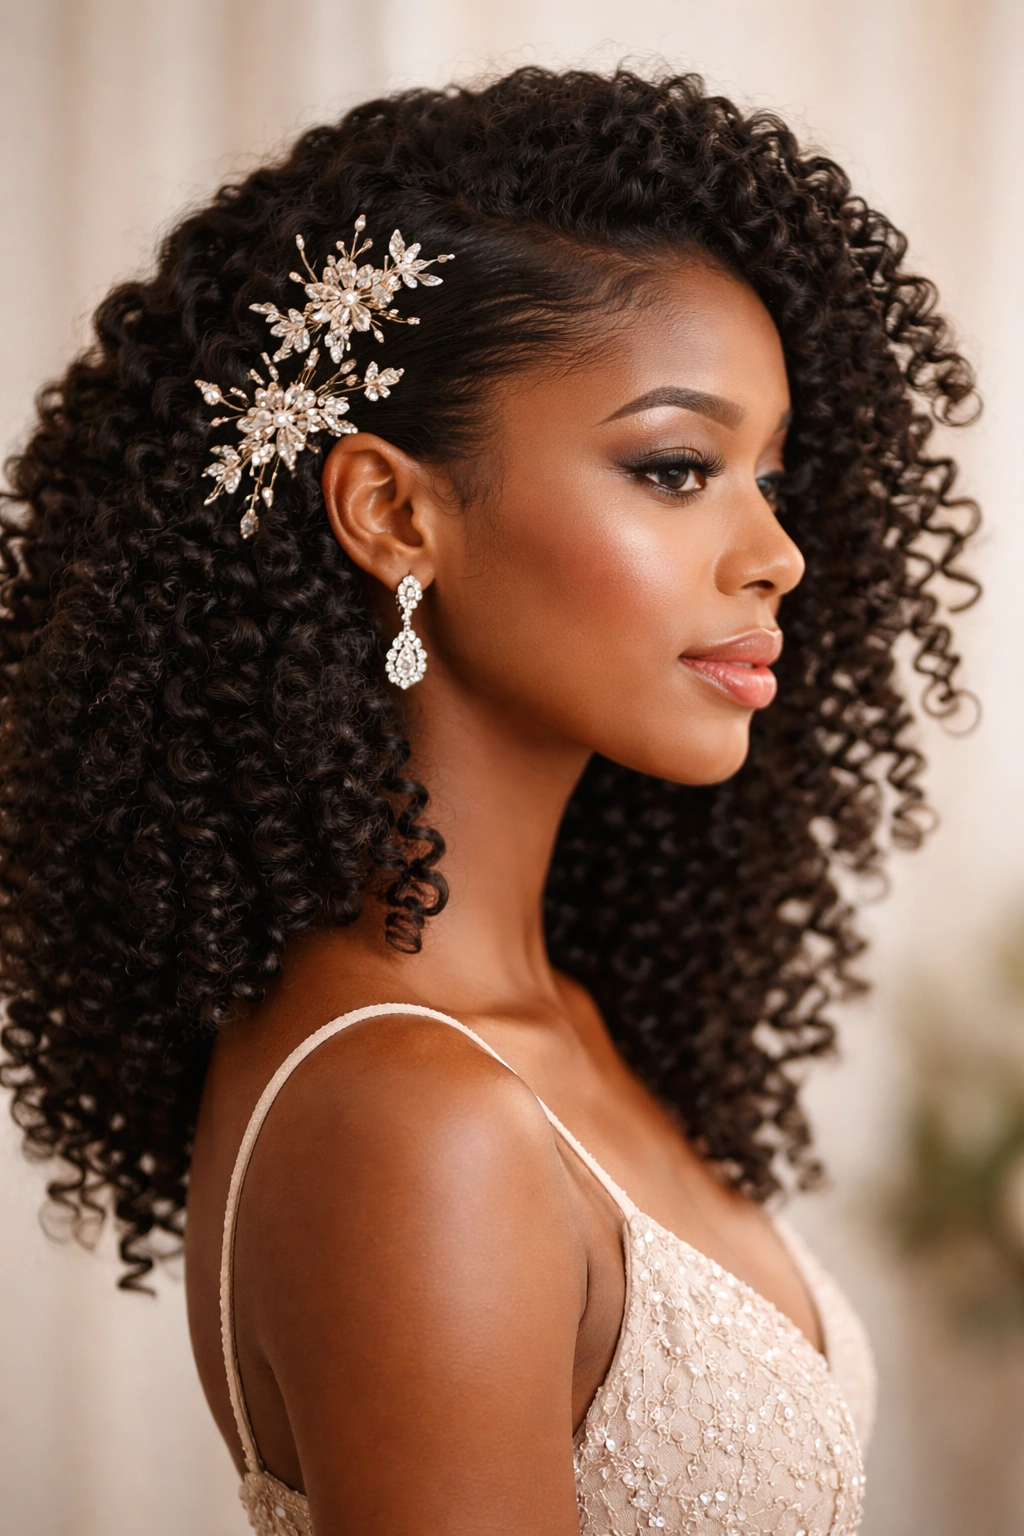
This is pure romance. Your coils fall to one side, creating an asymmetrical silhouette that’s flattering and feminine. The “decorative pins” element is crucial—you’re using bobby pins, hair sticks, vintage clips, or jeweled pieces not just functionally but visually, as part of the design. They hold your curls in place while catching light and adding sophistication.
The Power of Asymmetry with Coily Textures
Coily hair is already dynamic and full of movement. An asymmetrical style plays into that naturally. By sweeping everything to one side, you’re creating a clear, strong line that photographs beautifully and photographs differently depending on which side of your face the camera captures. The style works whether you’re posing for formal photos or dancing with friends—the swept element ensures your hair creates visual interest from every angle.
Building the Side-Swept Look
- Style your coils normally with your preferred curl cream or mousse, allowing them to dry fully
- Create a deep side part, using your fingers or a rattail comb to define it clearly
- Gently brush all hair toward one side using a soft paddle brush or your fingers
- Use bobby pins in a color matching your hair to secure the swept hair at the base of your skull on the opposite side
- Hide pins beneath coil clusters so they’re not visible
- Take decorative pins or clips and place them strategically along the sweep—at the side part, along the temple, or clustered where the hair is pinned back
- Use jewelry-style hair clips, vintage combs, or even small pearl or crystal pieces for extra glamour
- Finish with a flexible-hold spray that keeps shape without looking stiff
Pro tip: Practice the pin placement beforehand. You want them to look intentional and balanced, not randomly scattered. Photograph yourself in different angles to see how they read on camera.
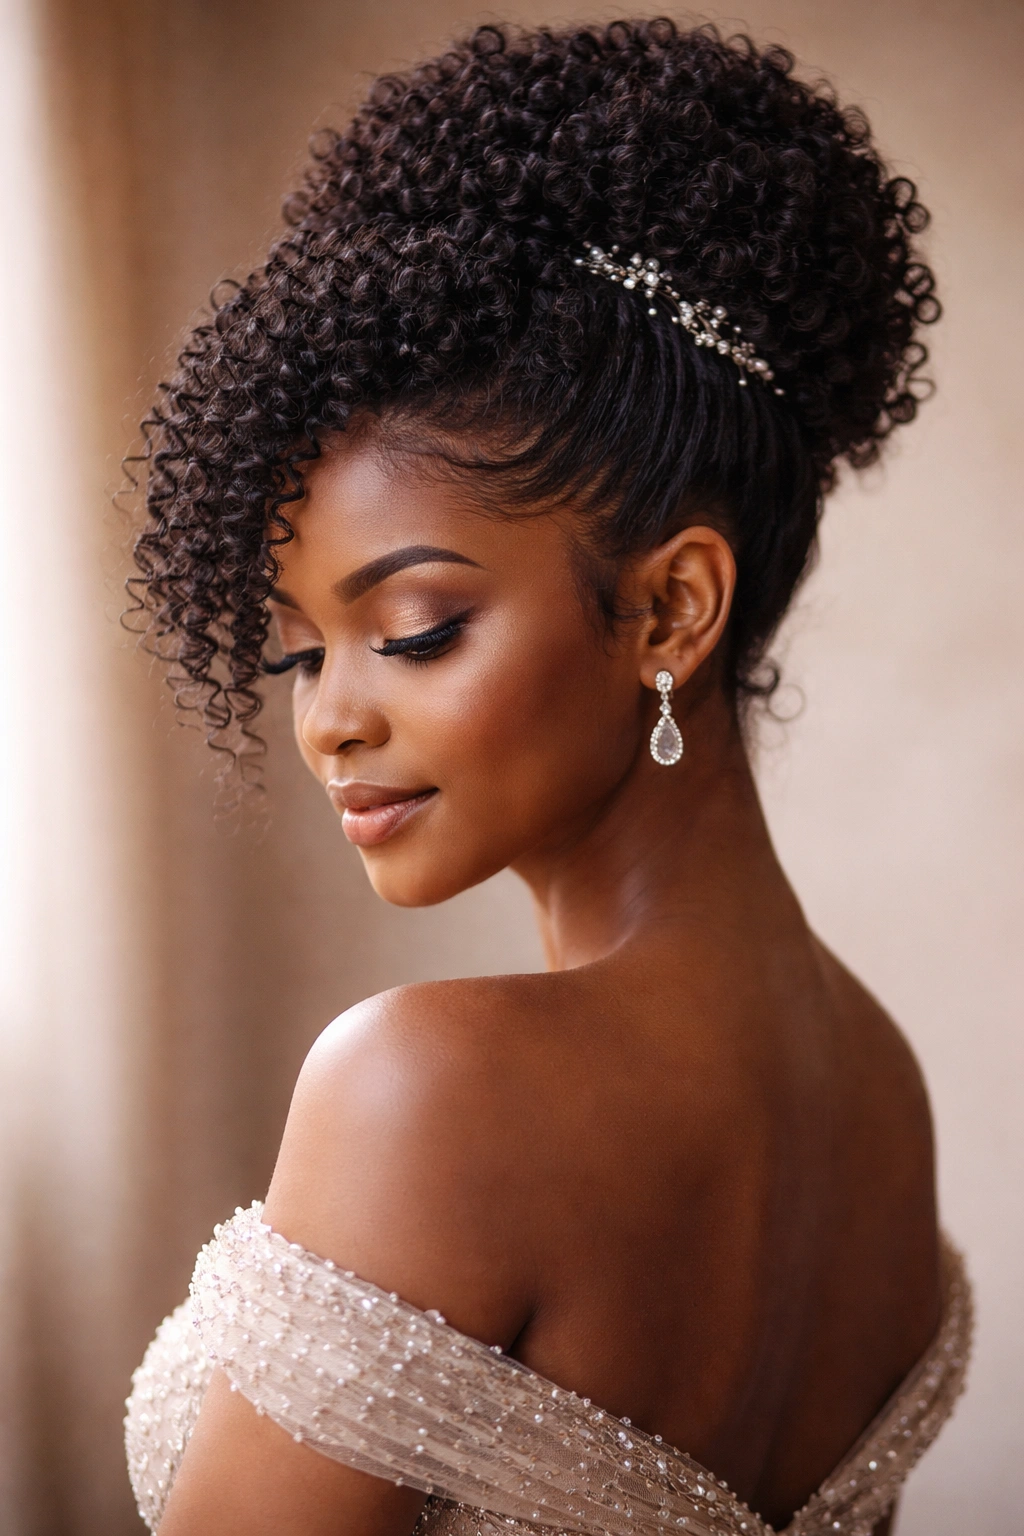
6. Gathered Updo with Curl Definition

This style is all about embracing your coils while organizing them into a formal updo. Rather than trying to smooth or straighten your curls into submission, you’re gathering them, pinning them strategically, and then using product to define and separate individual coil clusters. The result looks textured, intentional, and absolutely stunning—it’s an updo that celebrates coily hair rather than hiding it.
Why Traditional Updos Fail on Coily Hair
Most updo tutorials assume you’re working with a single, uniform curl pattern or straight hair. With coily hair, you have varying curl sizes and directions all over your head. A traditional smooth updo doesn’t work because you can’t force coils into that shape without damaging them. A gathered updo with curl definition works because it accepts the inherent texture and uses it as a design element instead of a problem to solve.
Step-by-Step Gathered Updo with Definition
- Start with dry, styled coily hair with clear curl pattern definition
- Apply a lightweight curl cream or mousse to reactivate curls if they’ve begun to flatten
- Gather hair into a high or mid-level ponytail, being gentle to avoid breaking coils
- Secure with a silk hair tie
- Divide the ponytail into 6-8 sections
- Take each section and coil it loosely, pinning the coil flat against the base of the ponytail to create a swirl pattern
- Once all sections are coiled and pinned, use a curling cream or lightweight gel and your fingers to gently separate and define individual coil clusters throughout the updo
- Use bobby pins to secure any pieces that shift
- Finish with a flexible-hold spray that doesn’t flatten texture
Worth knowing: This style takes longer than a traditional updo because you’re actively defining curls rather than just pinning them. Budget 45-60 minutes, depending on your hair density and curl tightness.
7. Twisted Knot with Loose Ringlets
Imagine a sculptural knot of twists sitting at the back of your head while loose, defined ringlets cascade down your back and frame your face. The twists create the “knot”—a visible focal point that shows technique and intention—while the loose ringlets provide softness and movement. This style is bold, artistic, and absolutely photograph-worthy.
Why Twists Create Better Definition Than Other Techniques
Twists work beautifully on coily hair because they enhance the natural spiral pattern of your curls without disrupting it. When you two-strand twist a coily section, each twist becomes almost a “super coil”—more defined and structured than the individual curls, but still honoring the natural texture. This is why twisted styles photograph so well and hold their shape all night without needing heavy products.
Creating the Twisted Knot
- Divide your hair into 8-12 sections depending on desired thickness of twists
- Create two-strand twists in each section, starting from the roots and continuing to the ends
- Gather the twisted sections toward the back of your head, positioning them at your preferred height (mid-crown or lower)
- Coil and wrap the twists around each other to form a knot shape, pinning as you secure
- Leave the front hairline and lower sections completely free as loose ringlets
- Apply a lightweight curl cream or oil to the loose ringlets and use your fingers to separate and define individual coil clusters
- Make sure face-framing curls fall naturally on both sides—these soften the look and are crucial for balance
Insider note: If you have very long coily hair, this style is especially striking because the contrast between the organized twists and the flowing ringlets is dramatic. Shorter coily hair can do this too, but the effect is more subtle.
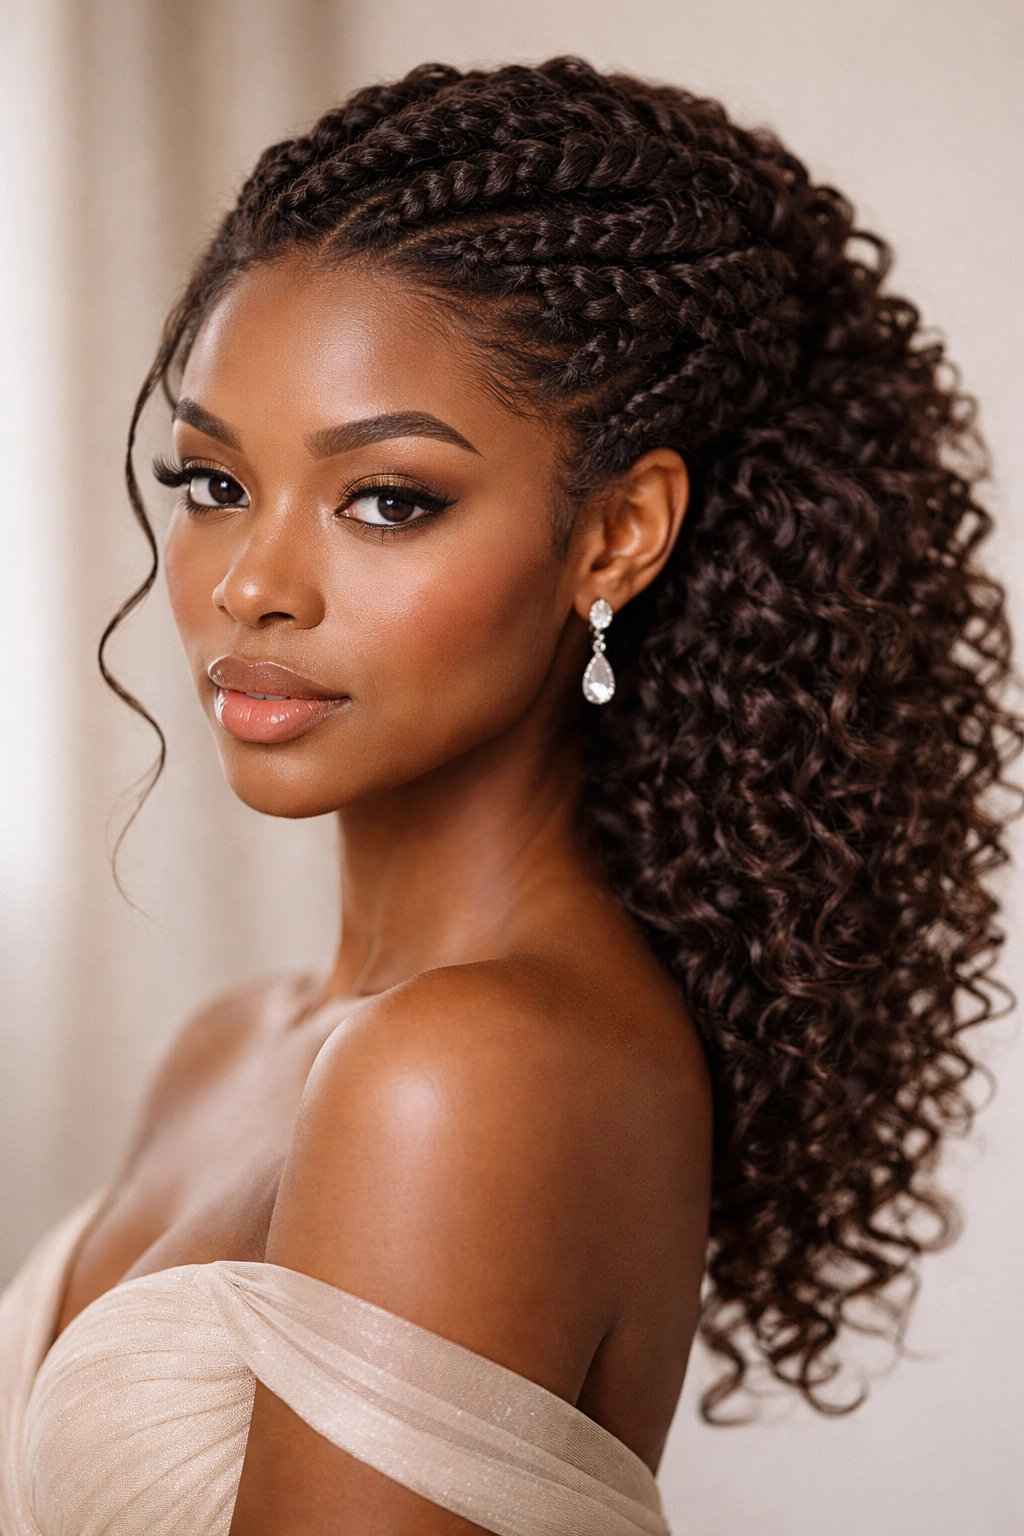
8. Braided Halo with Free-Flowing Curls
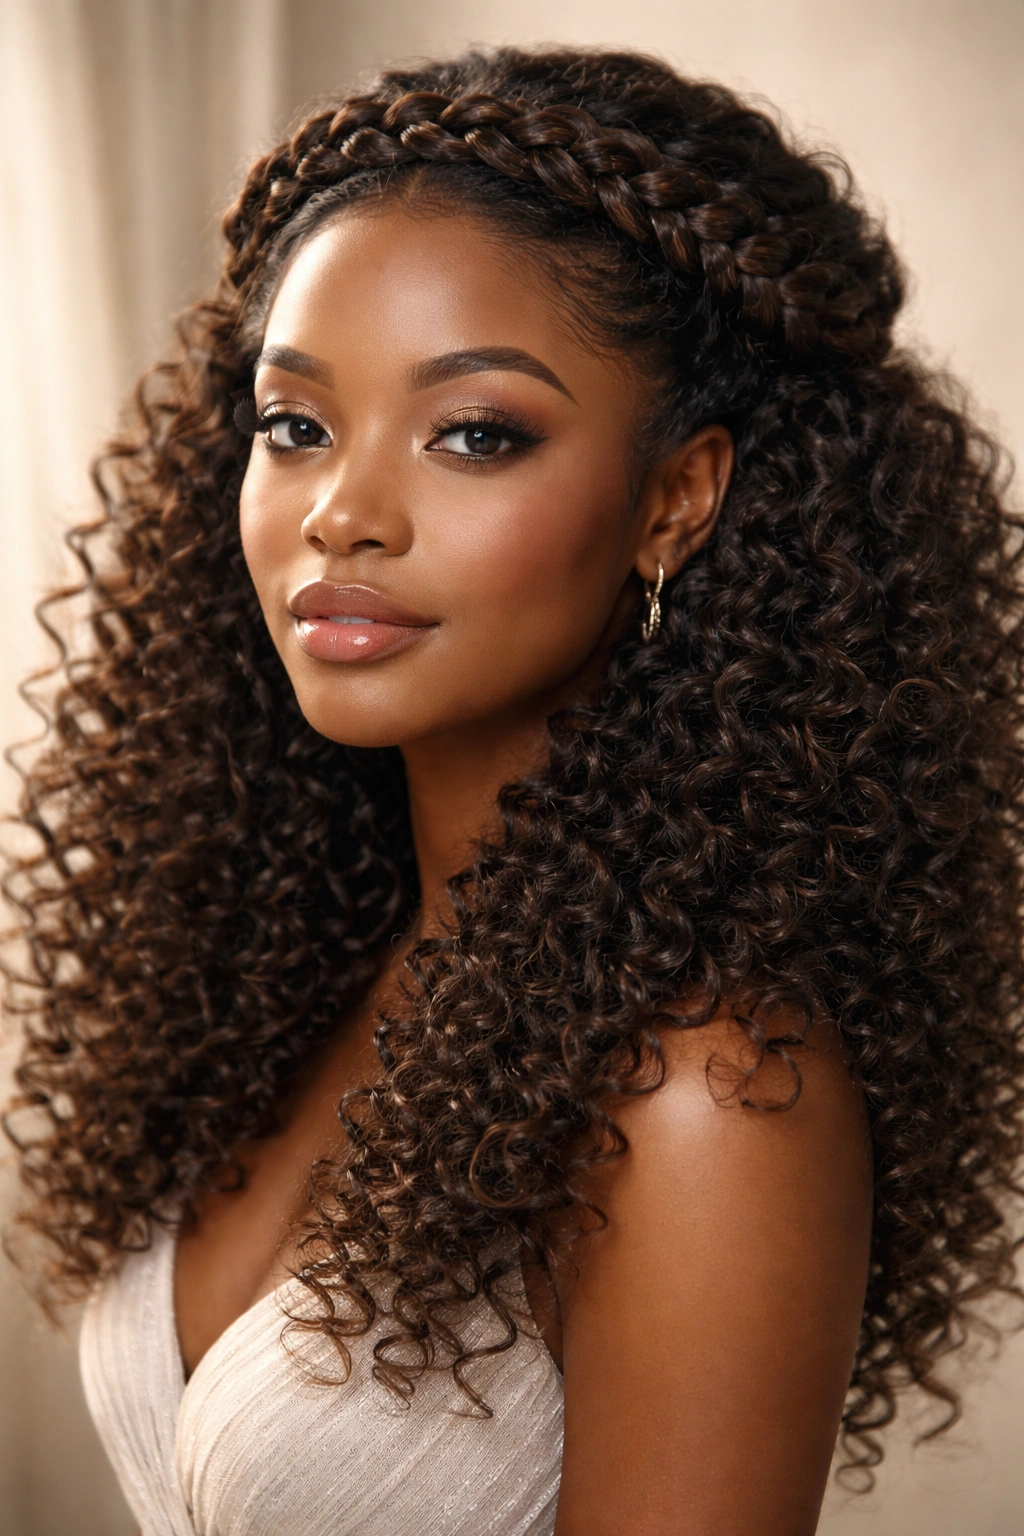
Picture a crown of braids framing your face and head while your coils flow freely below. The braided halo creates an ethereal, romantic vibe—it’s the kind of hairstyle that makes you feel like a goddess, especially when combined with the right prom dress and makeup. The braids keep hair off your face while showcasing both texture and technique.
The Romantic Power of Halo Braids
Halo braids work on every hair type, but on coily hair they’re particularly magical because the braids add a contrasting texture element. Your tightly woven braids create visual rhythm against your loose, bouncy coils. The style reads as effortlessly elegant—like you woke up this beautiful, even though halo braids actually require some technical skill to execute well.
Building Your Braided Halo
- Section off a thick piece of hair from behind one ear, combing it gently
- Create a three-strand braid starting from behind that ear, angling the braid upward and across the back of your head toward the other ear
- As you braid, gradually add small sections of hair from underneath and above the braid, incorporating your entire crown into the braid as you travel across
- Finish the braid at the other ear and secure the end with a small elastic
- Take down the elastic and gently gently tug on the braid sections to create a looser, more textured appearance
- Leave all remaining hair down and loose—use curl cream or oil to define your coil pattern
- The loose curls should flow freely below and beside the halo, creating a frame around your face and shoulders
Pro tip: Practice this braid several times before prom night. The technique of adding hair gradually while maintaining braid tension takes practice, especially on coily hair where the texture can make it harder to see the braid structure as you’re working.
9. Sculpted High Topknot
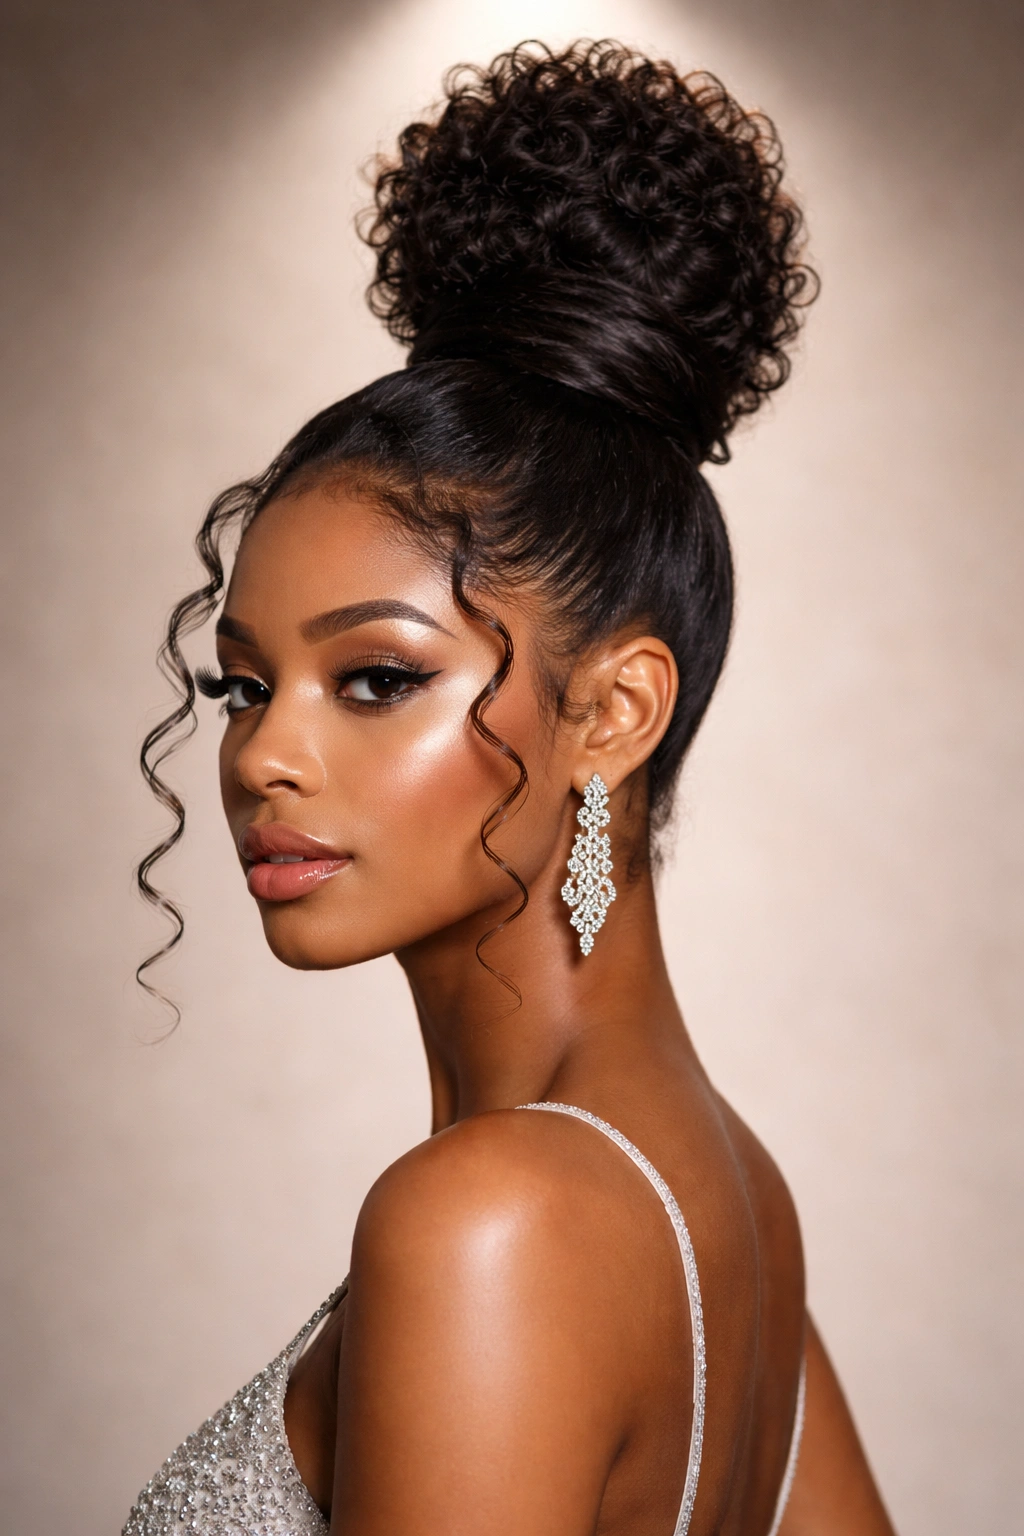
This is the statement style. A high knot positioned at the very top of your head, sculpted so tightly it looks almost architectural, while face-framing curls fall softly on both sides. The topknot is sleek and intentional, created with precision and hold, while the face-framing curls provide softness and femininity. It’s high-fashion, bold, and works especially well on longer coily hair.
Why High Topknots Require Special Technique on Coily Hair
A high topknot needs to look intentional and structured, but on coily hair it can’t look overly tight or strained. The solution is using the right tools and products: a smooth, sturdy hair tie (never a rough elastic that grabs), strategic use of bobby pins for support, and a medium-hold product that keeps everything in place without feeling crunchy. You’re aiming for “sculptural” not “painful.”
Creating the Sculpted Topknot
- Apply a medium-hold mousse or gel throughout dry coily hair and allow to dry completely
- Create a high ponytail at the crown of your head using a smooth hair tie
- Twist the ponytail loosely and wrap it around the base to form a knot
- Use bobby pins to secure the knot from multiple angles—clip pins horizontally, vertically, and diagonally so the knot feels stable
- Use a fine-tooth comb and a tiny amount of styling cream to smooth the surface of the knot and minimize flyaways
- Pull out one or two soft face-framing curls on each side of your face
- Define these curls with curl cream if needed, but leave them loose and bouncy
- Finish with a medium-hold spray that provides staying power without looking stiff or shiny
Worth knowing: This style works best on second or third-day hair when your coils already have some texture and grip. Fresh-washed and super-soft coily hair might not hold a tight topknot as well.
10. Romantic Twisted Updo with Face-Framing Curls
This is elegance and romance combined. Multiple twisted sections are gathered and coiled into a loose, textured updo that sits at the back of your head, while a handful of delicate coils frame your face and shoulders. The twists provide structure and show technique, but the overall feel is soft, romantic, and effortlessly beautiful. It’s the style that makes you look like you walked out of a luxury magazine.
Why Twisted Updos Feel More Romantic Than Braided Ones
Twists have a different visual quality than braids. They’re slightly less structured, slightly more flowing, and they seem to settle into a softer shape as you move. On coily hair specifically, twists allow individual curls to peek through the twisted structure, creating a layered, dimensional look that feels alive and organic rather than rigidly controlled. This is why twisted updos tend to photograph more romantically than braided ones.
Building the Romantic Twisted Updo
- Apply curl cream or mousse to damp coily hair and allow to dry completely so curls are defined and bouncy
- Select 8-10 face-framing curls around your face and secure them to the side with bobby pins—you’ll release these last for the final romantic touch
- Gather the remaining hair into a mid-level ponytail at the back of your head
- Divide the ponytail into 4-6 sections
- Create a loose two-strand twist in each section—twist loosely so the texture is visible
- Coil each twist around the base of the ponytail, pinning each coil as you go
- The result should look organic and gently textured, not tight or sculptural
- Release the face-framing curls you pinned earlier and arrange them around your face
- Use curl cream to define the face-framing curls and separate them into distinct coil clusters
- Finish with a flexible-hold spray that maintains shape but allows movement and bounce
Pro tip: This style is particularly stunning with delicate jewelry, a sparkly hair comb, or small fresh flowers woven through the twists. The romantic vibe pairs beautifully with understated glamour elements.
Final Thoughts
The most beautiful coily prom hairstyle isn’t the one that matches some standard of elegance—it’s the one that makes you feel stunning. All ten of these styles are designed specifically for coily hair, which means they work with your texture instead of against it. They’re structured enough for a formal occasion, flexible enough to move when you dance, and designed to make you feel confident and beautiful all night long.
Before you choose your style, think about what makes you feel most like yourself. Do you love the drama of height and volume? Go for the high topknot or high bun. Do you prefer softness and romance? The halo braid or twisted updo will speak to you. Are you bold and artistic? The gathered updo with curl definition or twisted knot will showcase your personality.
The other crucial element is getting comfortable with the style before prom night. Do at least two practice runs, ideally one week before and once a few days before. This tells you exactly how long it takes, whether you need additional products, and how the style actually holds on your specific hair on a regular day. On prom night, you’ll do it faster and with way more confidence because you’ve already solved all the little problems and figured out exactly how you like it.
Your coily hair is an asset on prom night, not something to hide or fight. These styles prove that coils, twists, and defined curls can be just as formal, just as elegant, and infinitely more stunning than any straight-haired style. Own it, celebrate it, and enjoy feeling absolutely beautiful in a hairstyle that’s authentically, unapologetically you.