If you’re learning to style your natural coils for the first time, the pressure to get it “right” can feel overwhelming. There are endless products to choose from, conflicting advice about technique, and Instagram-worthy styles that seem to require professional-level skills. But here’s the truth: some of the most stunning coily hairstyles are deceptively simple, and they don’t require hours of practice or expensive tools to master.
The beauty of coily hair is that your texture does half the work for you. Your natural curl pattern has built-in volume, dimension, and visual interest that straighter hair types have to create artificially. Once you understand a few foundational styling methods—how to define your coils, lock in moisture, and protect your pattern—you can build an entire rotation of looks that range from polished and intentional to effortlessly textured.
What separates a beginner-friendly style from a complicated one isn’t usually the technique itself. It’s whether the method forgives slight imperfections, whether it works with your natural curl pattern rather than against it, and whether you can actually replicate it more than once. The styles below are all genuinely achievable on your second or third try, even if the first attempt feels awkward. They also double as protective styles, meaning they minimize daily manipulation and help your coils retain moisture—essential for keeping your hair healthy while you’re experimenting and learning.
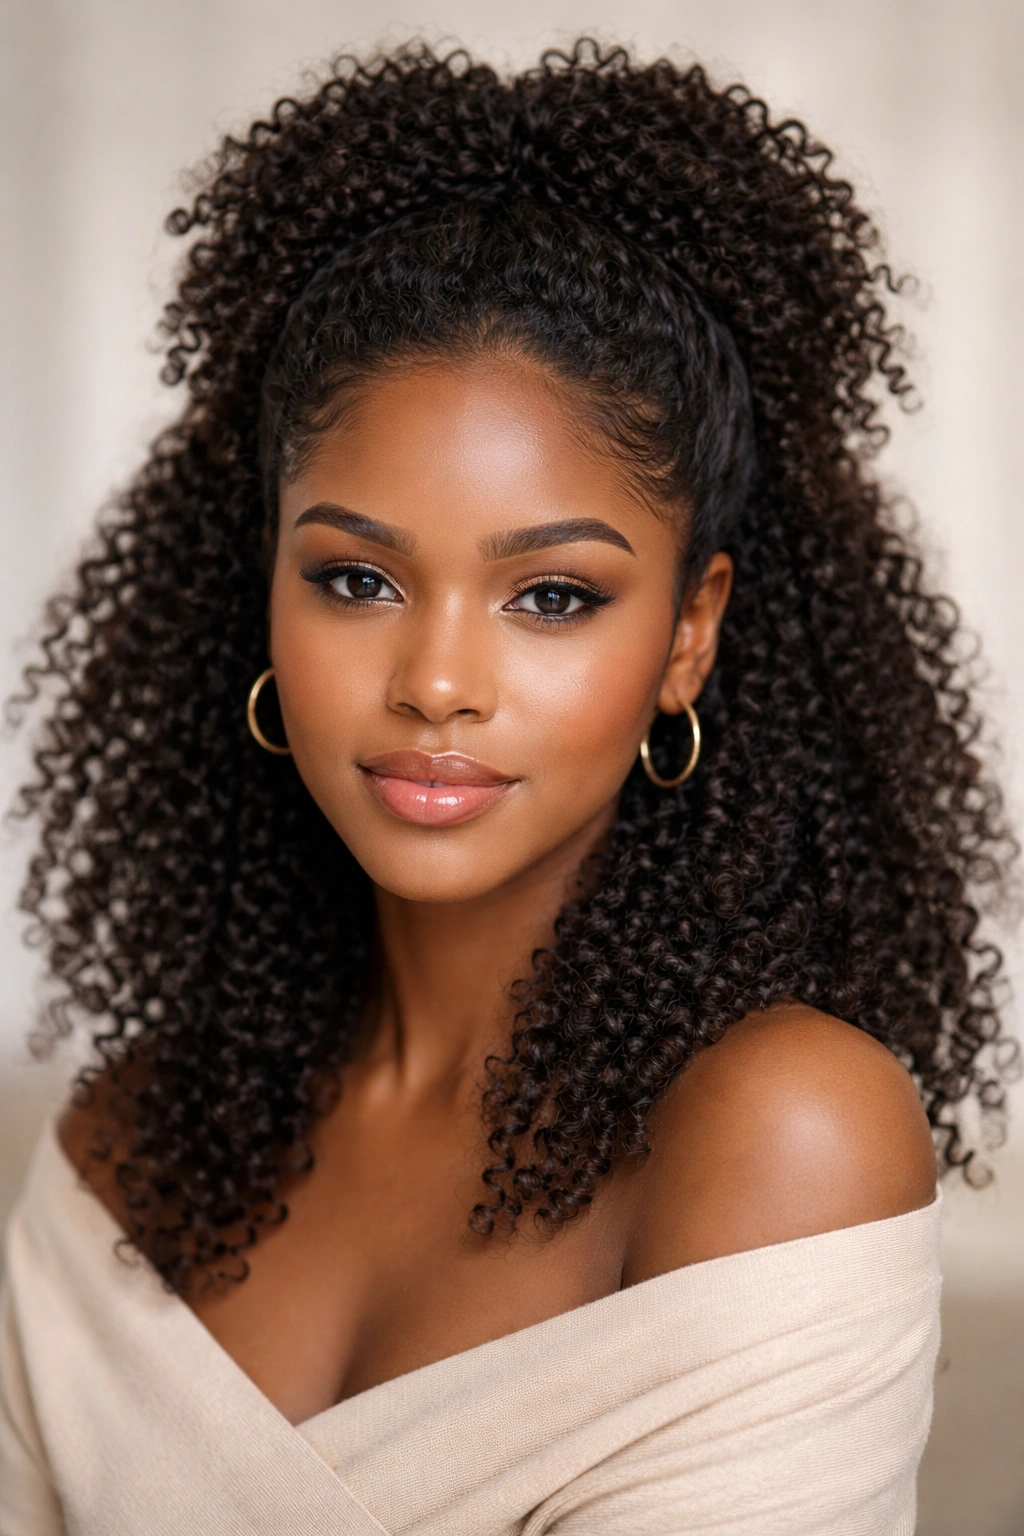
1. High Coily Puff
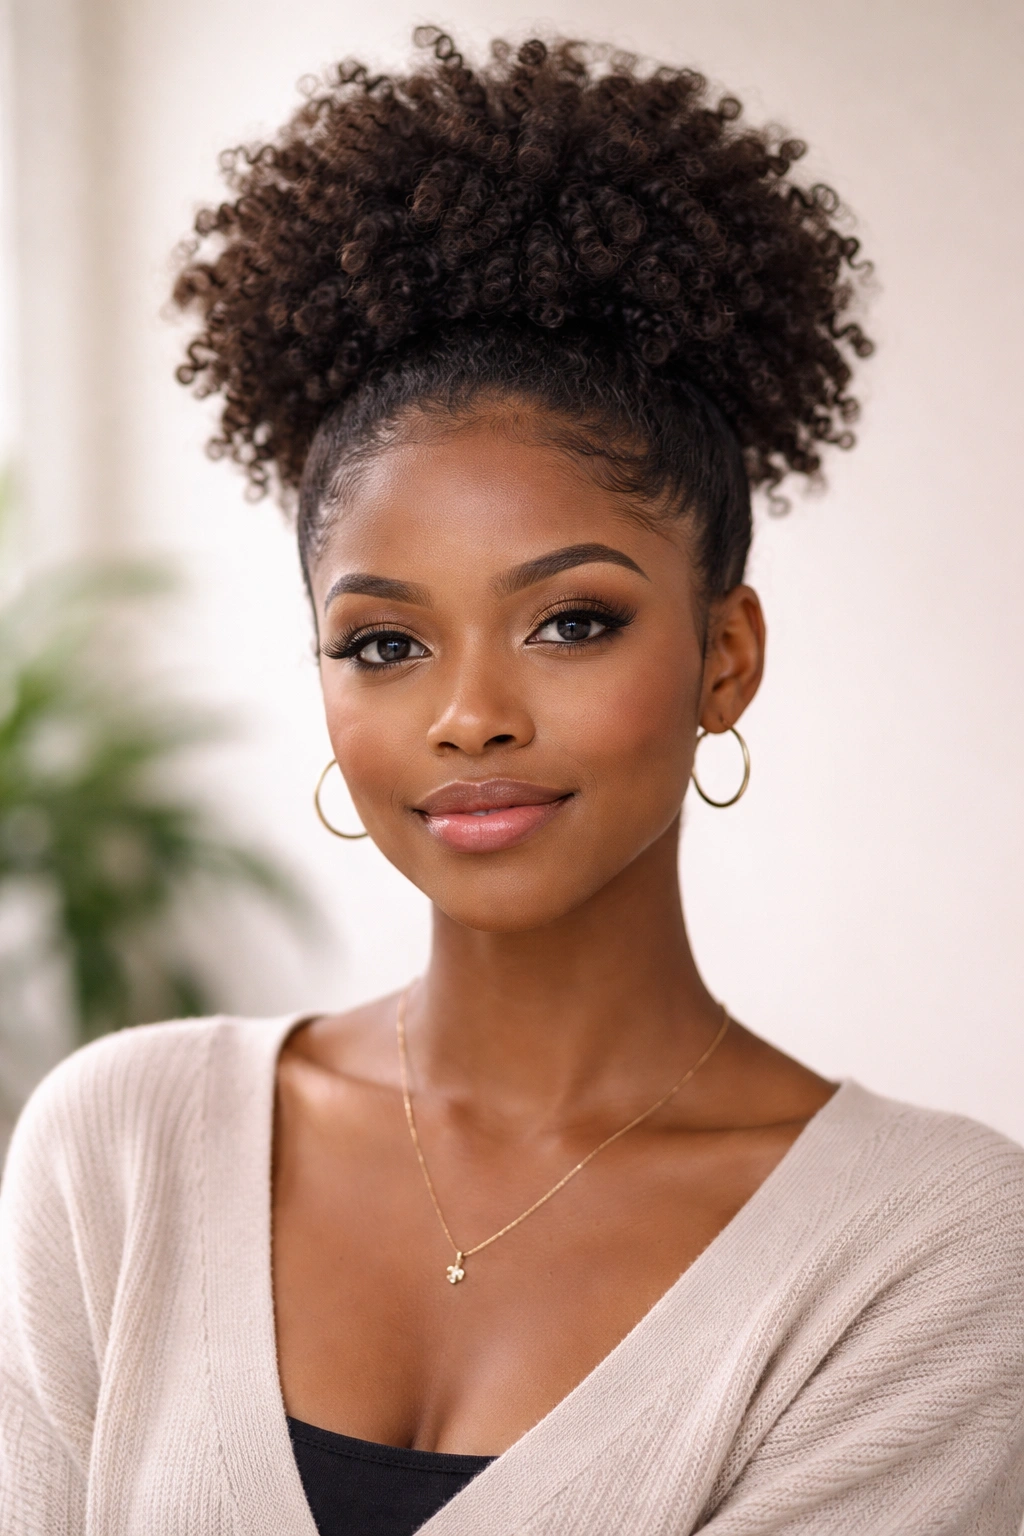
A high puff is the coily-haired version of a high ponytail, except instead of pulling your hair straight, you’re gathering your coils at the crown and letting them sit naturally textured on top of your head. This style works on coils at virtually any stage—freshly washed and defined, refreshed with a light mist of water, or even a few days into your style when your coils have relaxed slightly.
Why This Works for Beginners
You don’t need to create perfect smoothness or tension to pull off a puff. In fact, a slightly loose, textured gathering at the base actually looks intentional and prevents the sleek, polished look that requires serious technique to nail. The coils do the visual heavy lifting for you; your job is simply to gather them high enough that they sit away from your face and shoulders, then secure them without causing breakage.
How to Create the Perfect High Puff
- Flip your head upside down or bend forward slightly, then gather your hair at the crown with your fingers or a wide-tooth comb. You’re aiming for a section roughly the size of your fist.
- Use a smooth, stretchy hair tie or coil-friendly elastic—avoid thin, tight rubber bands that dig into your hair and create creases. Silk or satin elastics are ideal because they create less friction than cotton alternatives.
- Secure the tie at the base without twisting it multiple times. One or two wraps is enough; extra wraps create unnecessary tension that can lead to breakage over time.
- Flip your head back up and gently fluff the coils in your puff so they fan outward and create volume. This is where the magic happens—don’t skip this step.
Pro tip: If you want the puff to look fuller and more intentional, separate a small section of coils from the sides of your puff and lightly backcomb them with a fine-tooth comb before resecuring. This creates subtle dimension without looking messy.
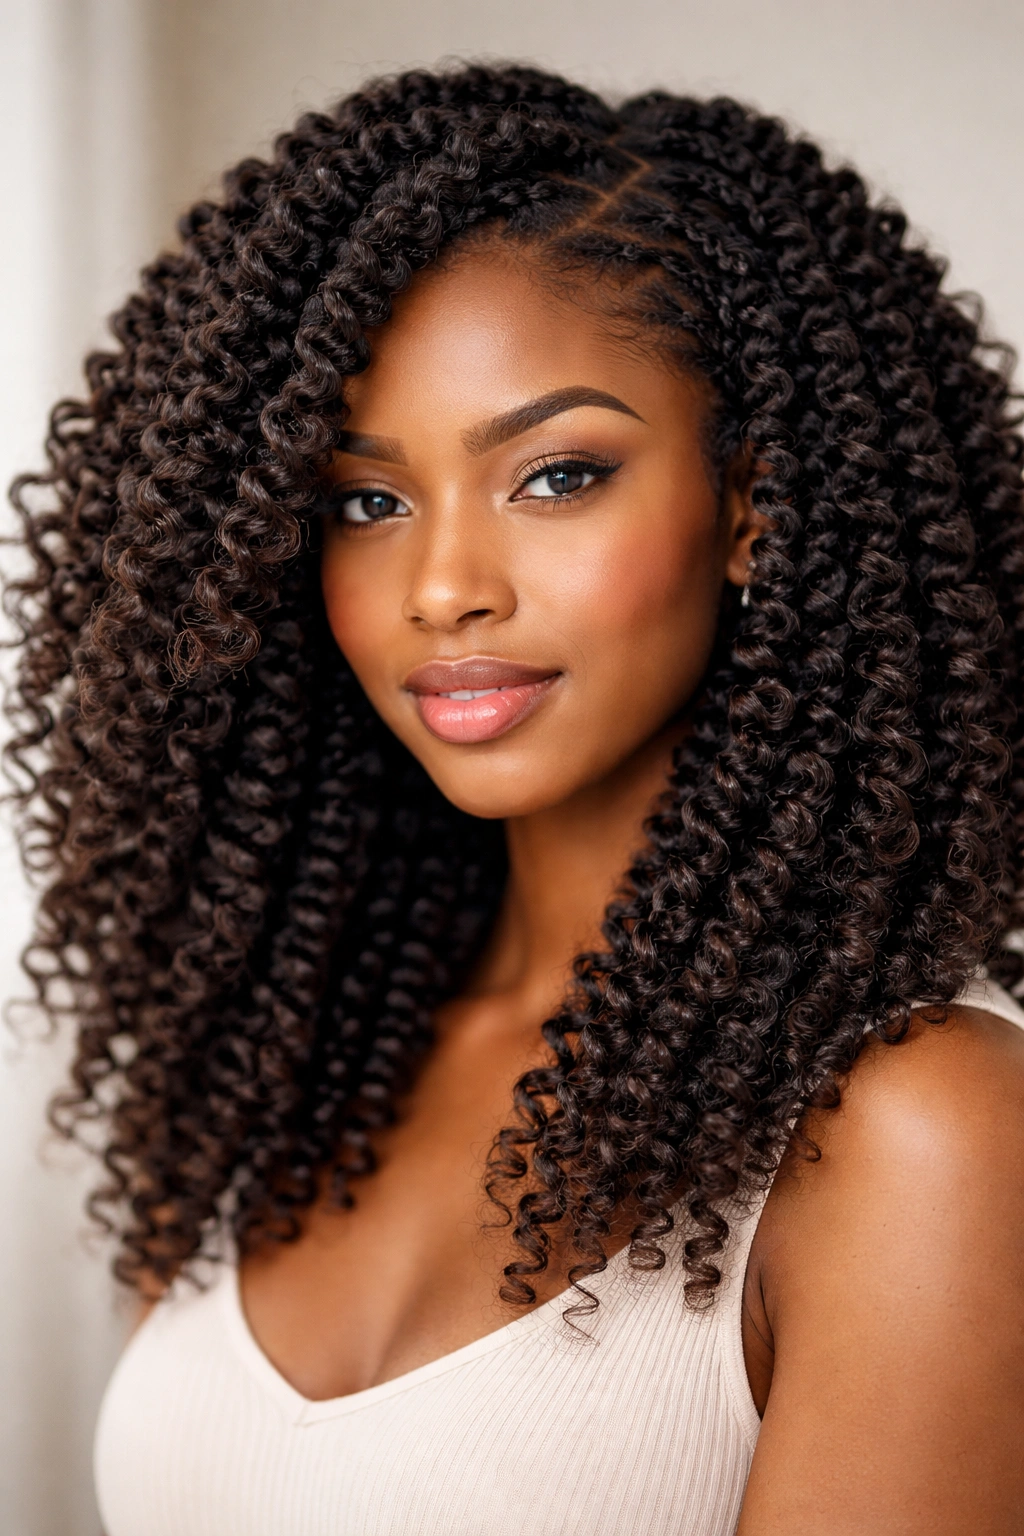
2. Defined Two-Strand Twists
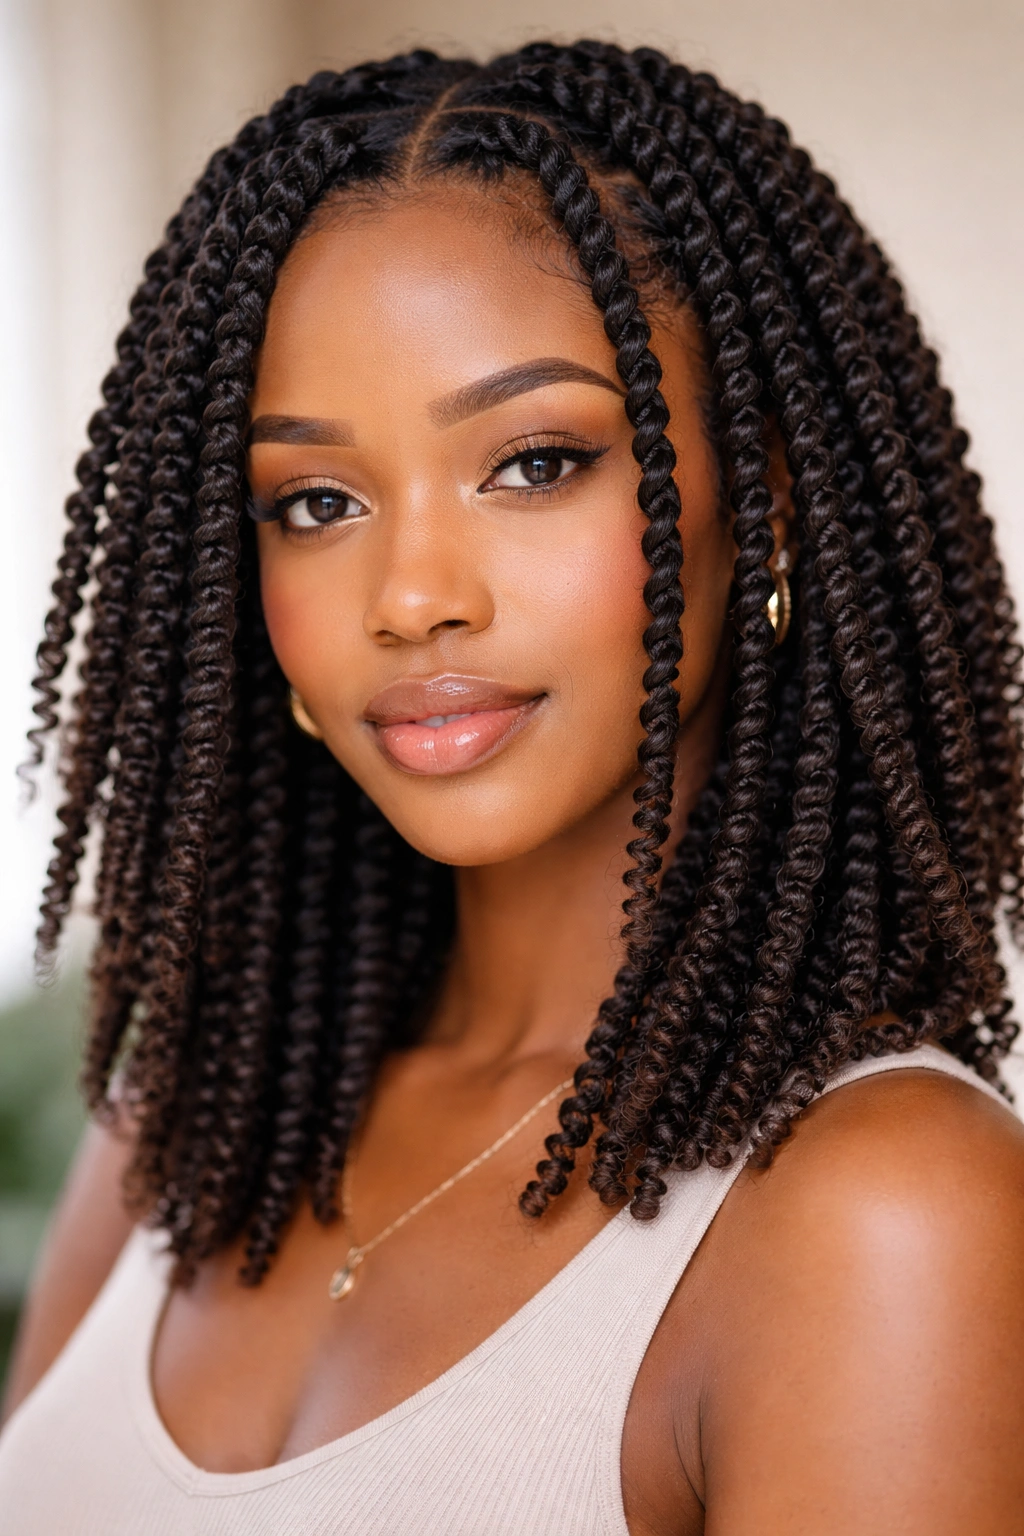
Two-strand twists are a foundational coily-hair skill that opens the door to multiple hairstyles. The method is straightforward: you divide a section of coily hair into two strands and twist them around each other until they spiral all the way down to the ends. What makes twists perfect for beginners is that you can start with larger sections (which twist faster) and work your way down to smaller, more intricate twists as you gain confidence.
Why Two-Strand Twists Are Worth Learning
Twists serve multiple purposes in a coily-hair routine. Fresh twists provide defined, twisted texture that lasts a week or longer. They’re also protective because they keep your ends tucked and reduce friction between your coils and your pillowcase, clothes, or shoulders during sleep. Beyond that, twists can be unraveled into a twist-out style, worn as a sleek low bun, or pinned into geometric patterns. They’re one of the most versatile tools in your styling toolkit.
Step-by-Step Twist Technique
- Start with damp hair and apply a light styler to your first section. A cream-based styler works better for twists than oils, because it provides grip without making your hair too slippery to control.
- Divide the section into two equal strands using your fingers or a rattail comb.
- Cross the right strand over the left, then cross the left over the right, continuing this pattern all the way down. Keep your hands close together as you twist; loose, spread-out hands make it harder to maintain even tension.
- Twist all the way to the ends, then gently roll the ends between your fingers to seal them and create a finished look.
- Repeat for each section on your head.
Common beginner mistake: Twisting too tightly. This creates tension at the roots and can cause traction alopecia (hair loss) over time. Your twists should feel secure but not painful at the scalp. If you’re feeling your roots being pulled, you’re going too tight.
3. Bantu Knots for Definition and Texture
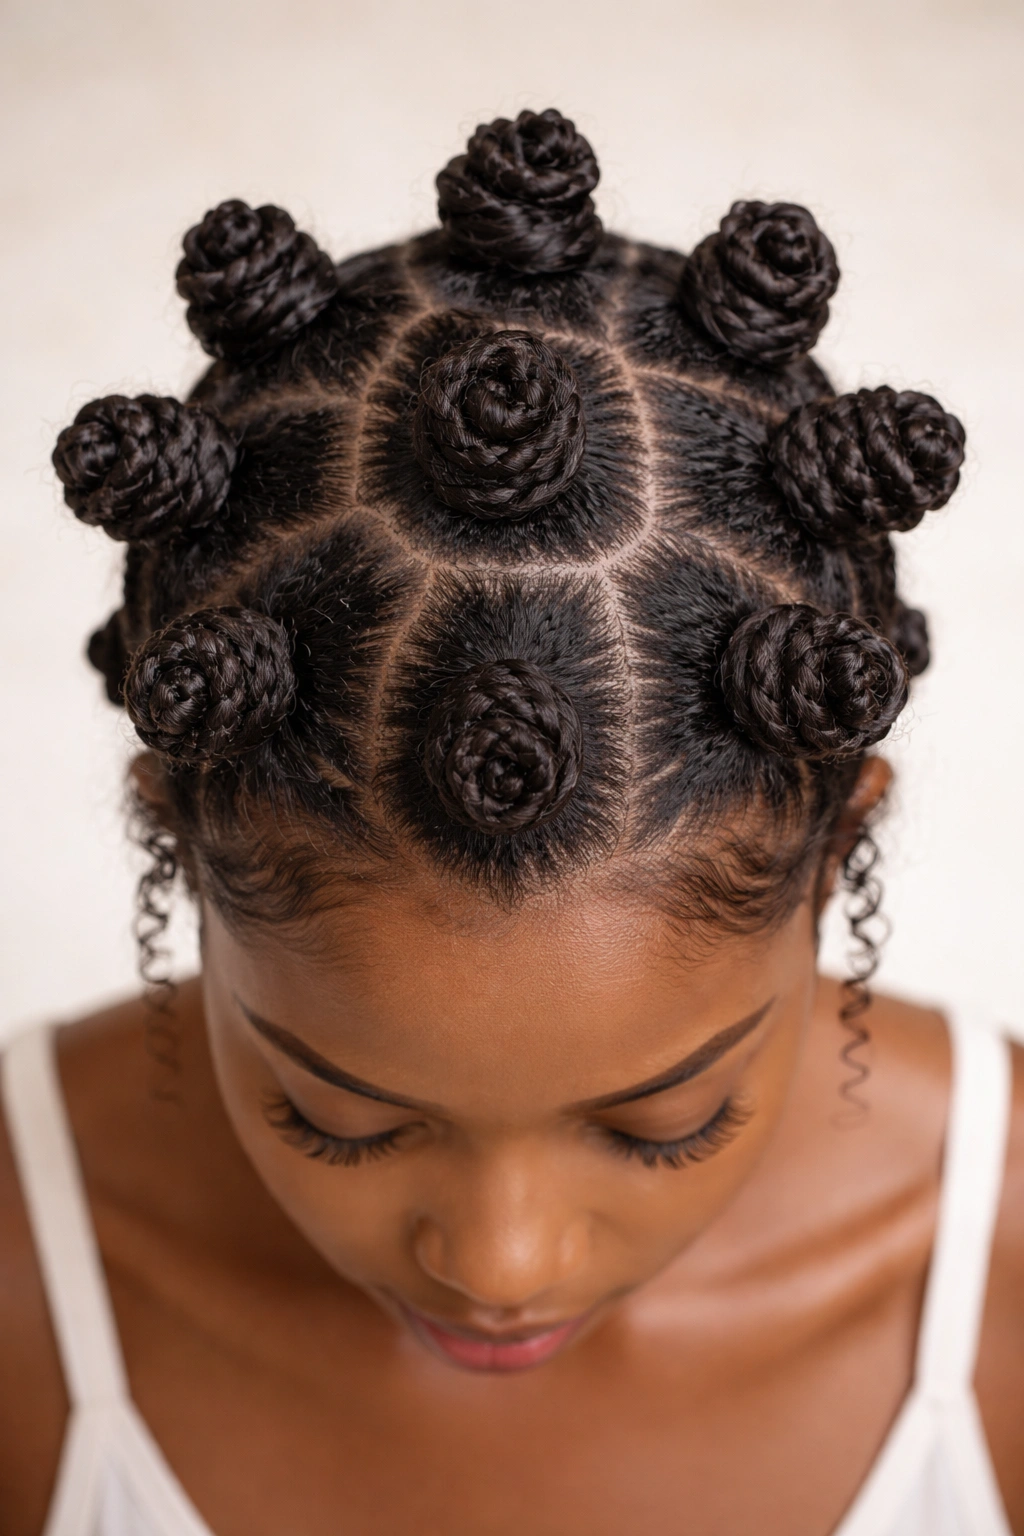
Bantu knots are coils wrapped around themselves at the base and coiled downward, creating a distinctive spiral pattern. They’re striking as a protective style on their own, but they’re also the foundation for a bantu-knot-out look—where you unwind the knots and fluff out the resulting coiled texture. For beginners, what’s appealing about bantu knots is that they’re forgiving; slightly loose knots still look intentional, and the technique requires minimal precision to look polished.
Why Bantu Knots Belong in Your Rotation
Beyond the visual appeal, bantu knots serve the same protective function as twists: they keep your ends tucked away and minimize daily manipulation. They also create gorgeous, consistent coil definition that lasts longer than a wash-and-go because the knots hold your coils in a set pattern. Unraveling them creates a style that looks like you spent hours on precise coil-by-coil definition, when in reality you just twisted sections around themselves.
Creating Bantu Knots Step by Step
- Apply a moisturizing styler to a small section of damp or refreshed hair—roughly the size of a grape.
- Twist the section around itself at the base, spiraling downward in one direction as tightly or loosely as you prefer.
- Once you reach the ends, tuck them under and secure the knot with a bobby pin if necessary (or skip the pin if the knot holds on its own—many do).
- Repeat across your entire head, spacing the knots evenly so you have room to work.
- Leave the knots in place for at least 24 hours—ideally 3 to 5 days—before unraveling them for maximum definition.
Styling note: Bantu knots are especially effective on coils that are medium to thick in diameter. If your coils are very fine and delicate, use slightly larger sections so the knots don’t feel overly tight or uncomfortable at night.
4. The Pineapple Method for Overnight Protection
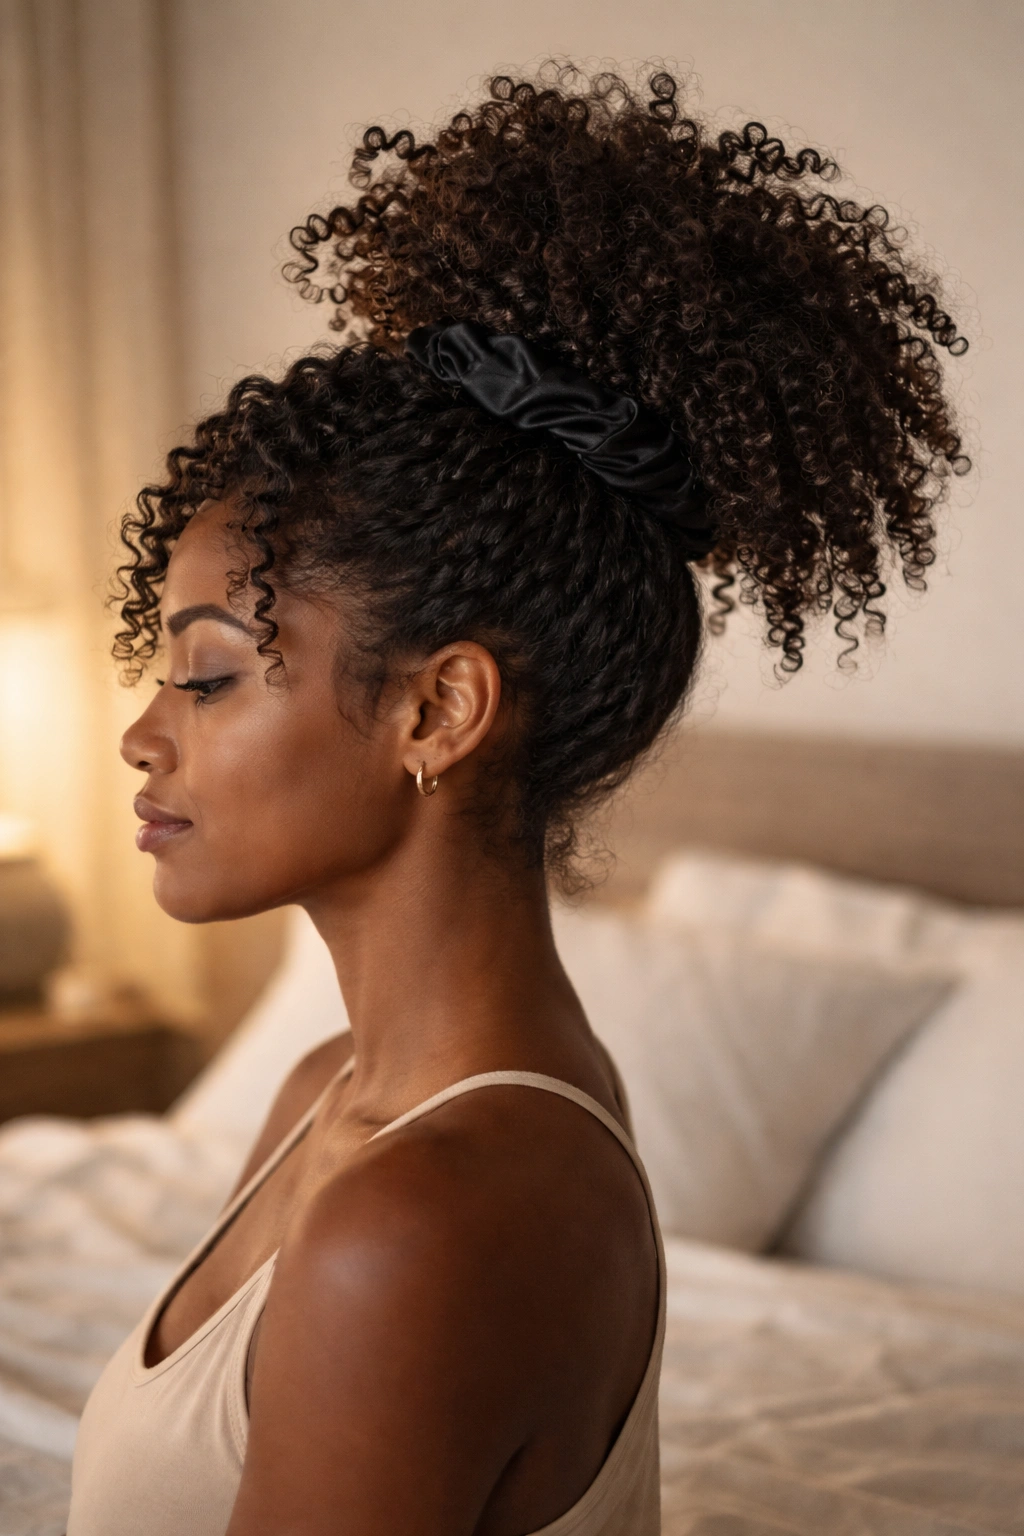
The pineapple method isn’t a hairstyle for daytime wear; it’s a protection method you use while sleeping to preserve your coil definition and prevent frizz overnight. The technique involves gathering your coils loosely at the very top of your head—high enough that the coils sit away from your pillow—and securing them there while you sleep. When you wake up, you release the coils and they fall back into place with minimal disruption to your style.
Why Pineapple Prevents Frizz and Breaks
When you sleep without protecting your coils, the friction between your hair and your cotton pillowcase roughens the cuticle of each coil, creating frizz and disrupting the definition you created with your styling method. The pineapple keeps your coils elevated and away from that friction. It’s the difference between waking up to a defined style you can refresh with a light mist and some fluffing, versus a fuzzy, collapsed texture that requires re-wet and re-style.
How to Pineapple Correctly
- Flip your head upside down or bend forward and gather your hair loosely at the very crown—not as tightly as a high puff, but with enough tension that the coils sit above your head when you flip back upright.
- Use a silk or satin scrunchie (never a tight rubber band) and secure it once or twice around the base.
- Make sure your coils are sitting at least a few inches away from your pillow when you lie down on your side. If any coils are touching the pillowcase, they’ll still experience friction and frizz.
- Sleep on a silk or satin pillowcase or bonnet to minimize friction even further. A cotton pillowcase works against everything the pineapple is trying to accomplish.
Beginner insight: The pineapple works best on coils that are at least a few days into a style—when they’ve partially relaxed and settled. Pineappling freshly styled, super-defined coils can sometimes disrupt the definition too much, especially if your coils are delicate or fine.
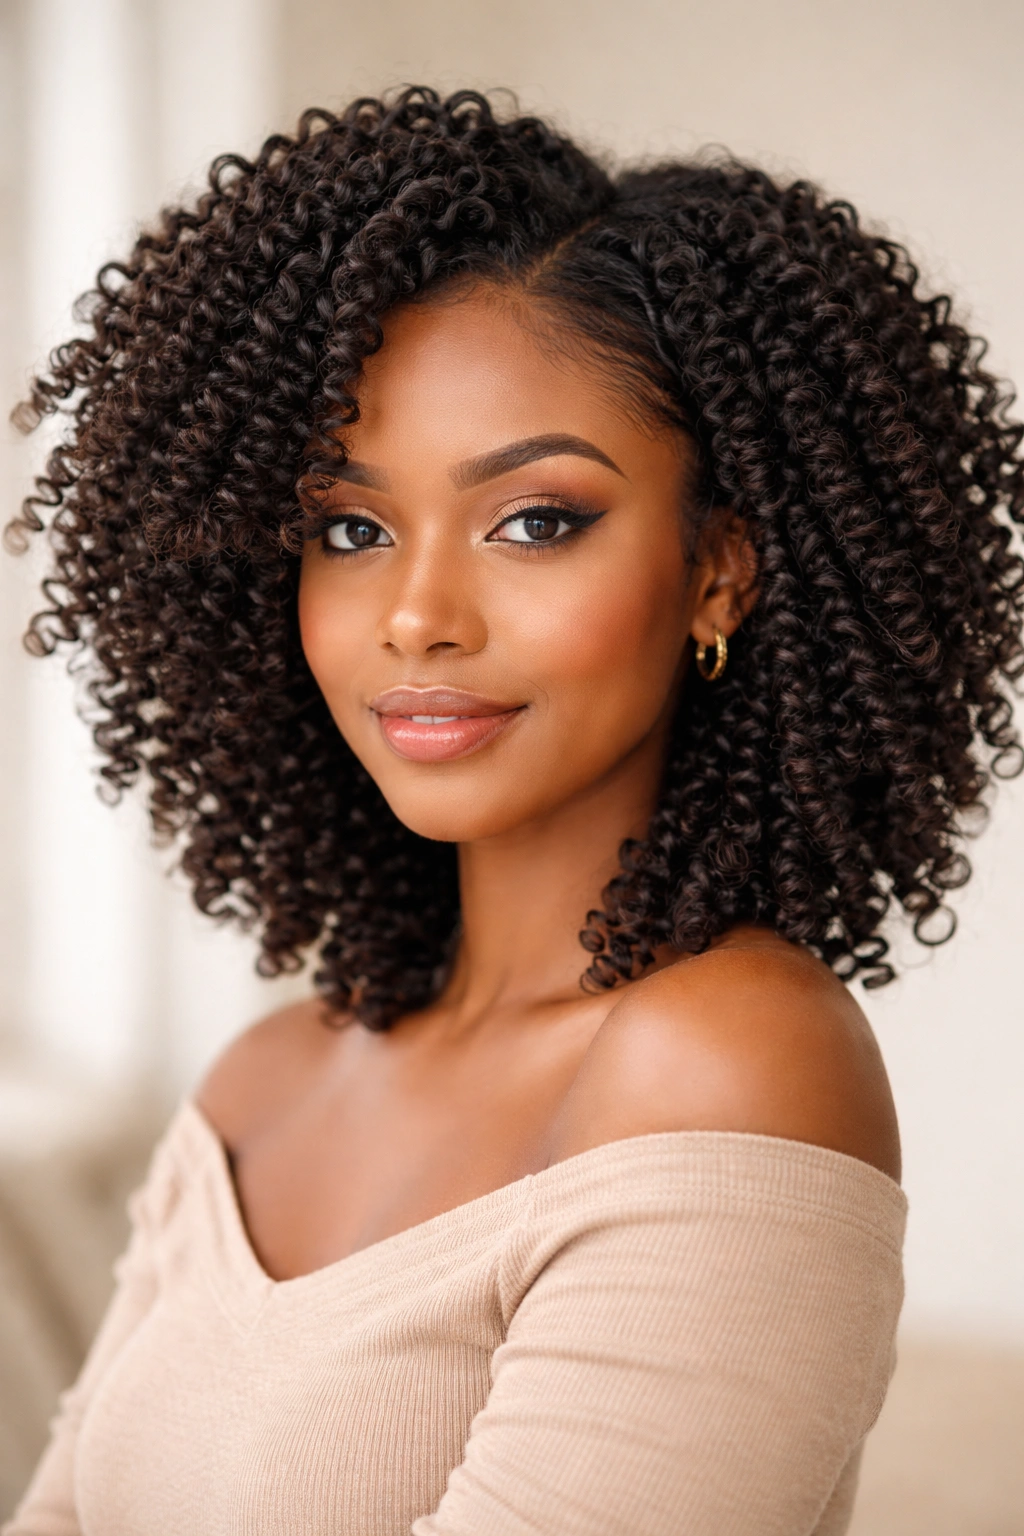
5. Half-Up Coily Crown
A half-up style gathers a portion of your coils at the back of your head while leaving the rest down, framing your face and shoulders. For coily hair, a half-up style is especially flattering because your natural texture provides visual fullness and dimension automatically. You’re not fighting your curl pattern; you’re working with it to create a style that looks intentional and polished without requiring technical precision.
Why Half-Up Works for Nearly Every Coil Type
A half-up style is endlessly adaptable. You can use a simple elastic, or you can braid or twist the section you’re pulling back. You can create a clean, gathered look or a loose, textured gather. You can wear it high, at the true crown, or slightly lower for a different vibe. The core method stays the same, but the variations are infinite.
Creating a Half-Up Coily Crown
- Use a spray bottle to refresh the coils on the top half of your head if you’re styling a few days into a style, or work with freshly washed coils if you’re styling wash day.
- Mentally divide your head in half horizontally—imagine a line from ear to ear across the back. You’re going to gather everything from this line upward.
- Using a wide-tooth comb or your fingers, gently gather the coils in this upper section and secure them at the back of your head with a smooth elastic or hair clip.
- Fluff the gathered coils gently so they look full and intentional, not slicked down.
- Leave the lower half of your coils down, framing your face and shoulders.
Styling variation: For a more polished look, twist or braid the upper section before gathering, then wrap it into a loose bun or coil at the back. For a more casual, textured vibe, just gather loosely and let the coils bunch naturally.
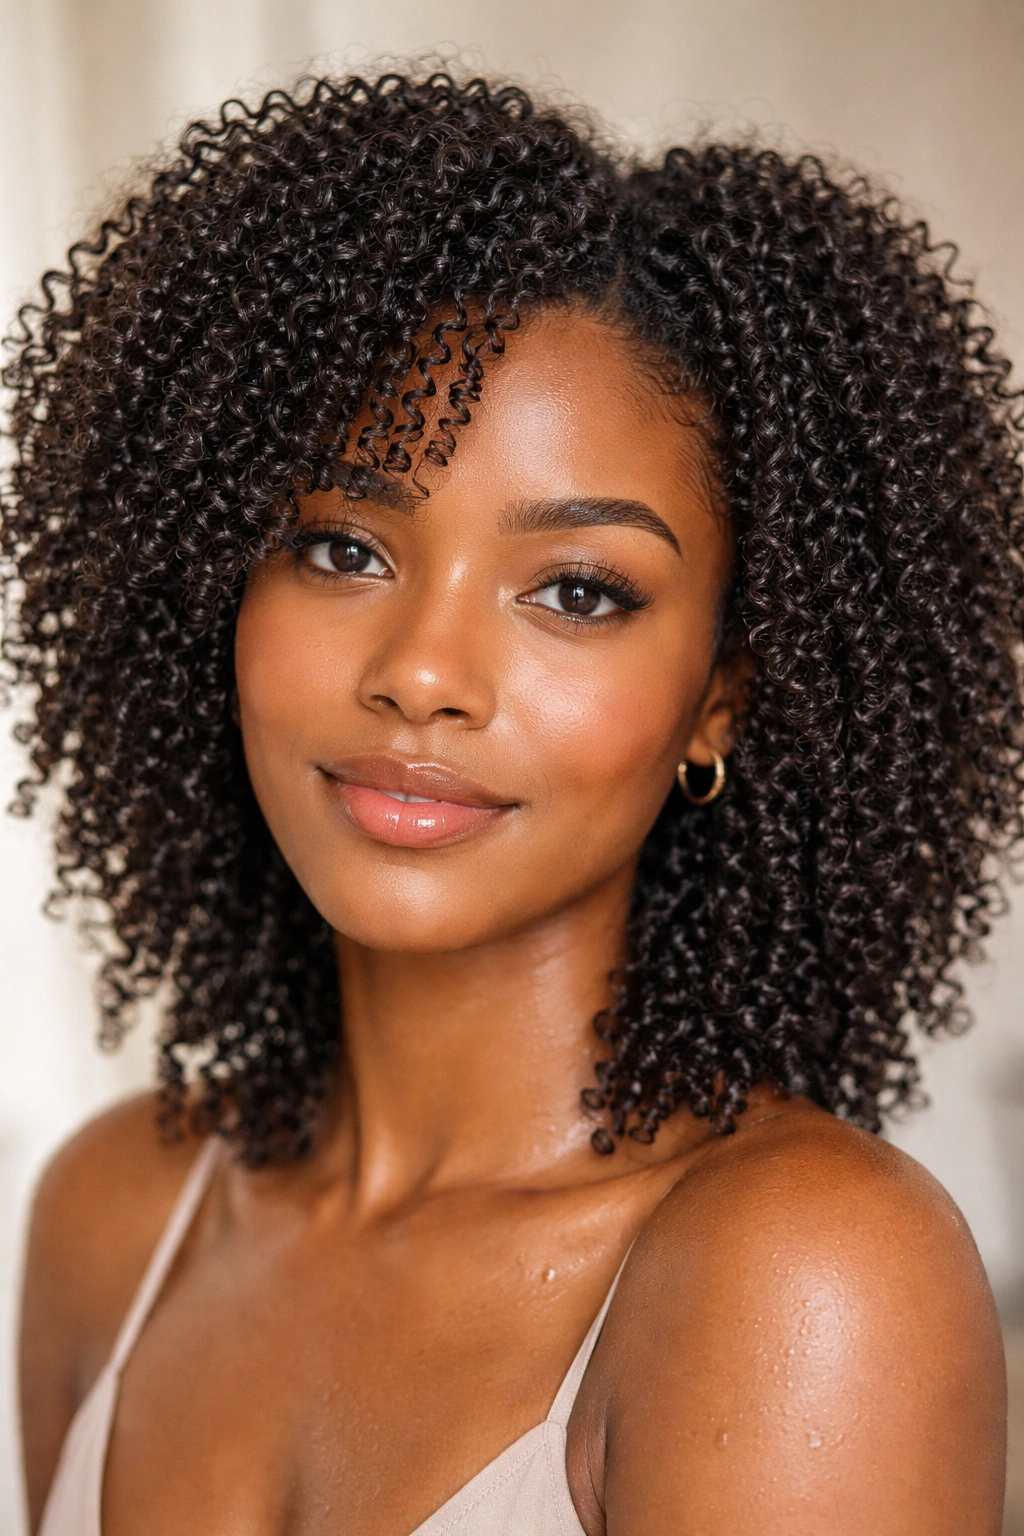
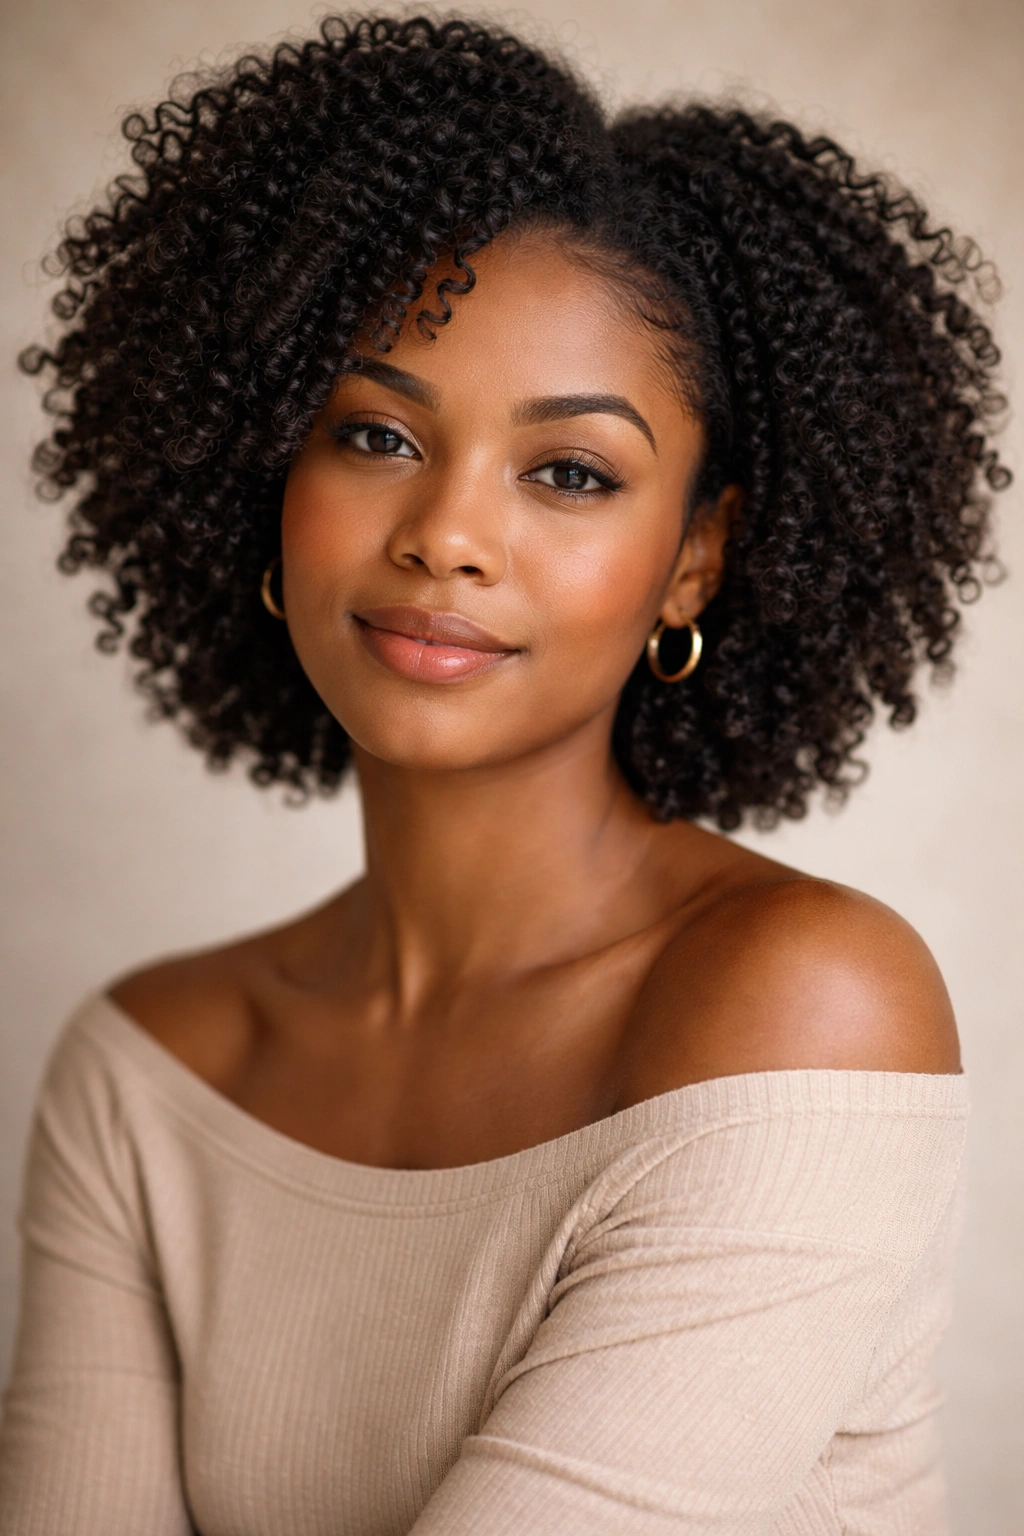
6. Twist-Out Texture and Definition
A twist-out style is created by twisting coils together, leaving those twists in place overnight (or for 2-3 days), then unraveling them. The result is beautifully defined, twisted texture that lasts longer than a fresh twist style and requires minimal styling effort to achieve. Twist-outs are absolutely beginner-friendly because the twists do the heavy lifting—you’re essentially creating the texture while you sleep, then just releasing it.
What Makes Twist-Outs Special
A twist-out gives you defined coil texture without requiring you to manipulate each coil individually. When you unravel a well-set twist, the coil within the twist springs back with definition, and the twist itself creates larger, more dramatic texture than a fresh coil pattern. It’s one of the lowest-effort, highest-impact styles available, which is why so many people—from beginners to experienced—rely on twist-outs as a regular part of their routine.
The Twist-Out Process from Start to Finish
- Create two-strand twists or bantu knots on damp, moisturized hair using your favorite styler.
- Leave them in place for at least 24 hours, but ideally 2-3 days. The longer they set, the more defined your final texture will be.
- Unravel each twist gently, starting at the bottom and working upward. If a twist feels stuck, spritz it lightly with water to loosen it slightly before continuing.
- Gently separate the twisted coils with your fingers to fluff them out and create dimension. Don’t comb through or manipulate too much at this stage—overworking a fresh twist-out can destroy the definition.
- Apply a light finishing spray or oil to reduce frizz if desired, then let the style settle for an hour before checking how it looks.
Setting technique: If you want extra hold and definition from your twist-out, apply your styler when your hair is about 60-70% dry rather than soaking wet. Damp (not wet) hair sets faster and creates longer-lasting texture.
7. Braid-Out for Crisp, Detailed Texture
A braid-out is created the same way a twist-out is, except you’re using braids instead of twists. You braid sections of coily hair, leave the braids in place overnight or for several days, then unravel them to reveal beautifully defined, three-strand texture. The main difference between a braid-out and a twist-out is purely aesthetic: braids create a more dramatic, crisp, segmented texture, while twists create a smoother, more continuous spiral.
Why Braids Create Different Texture Than Twists
When you braid three strands together and then unravel, each strand springs back toward its natural coil pattern, but it’s been constrained by the braid structure. This creates a distinctive braided texture that’s highly defined and eye-catching. Braids also hold their shape slightly better than twists overnight, so a braid-out can last slightly longer before it starts to relax.
Braiding Coily Hair Step by Step
- Start with coils that are damp and well-moisturized. Apply a light styling cream or gel to provide slip and hold.
- Divide the coil into three equal sections. With coily hair, these sections won’t be perfectly smooth—that’s okay. The coils within each section will create natural texture.
- Cross the right section over the middle, then the left over the middle, continuing this pattern down the length of the coil. Use gentle, consistent tension to keep the braid neat but not overly tight.
- Secure the end of the braid with a small elastic or bobby pin.
- Repeat for each section on your head.
- Leave the braids in place for at least 24 hours, longer if you want maximum definition.
- Unravel carefully, starting from the ends and working upward.
Beginner note: Braiding coily hair can feel awkward at first if you’re used to braiding straighter textures. The coils may not feel as controlled in your hands. This is normal. Embrace it—the coils will create beautiful, natural texture regardless.
8. The Coily Wash-and-Go
A wash-and-go means styling your hair immediately after washing (or refreshing) it with water, product, and your hands, then letting it dry in its natural coil pattern without any additional heat or manipulation. It sounds simple in theory, but executing a successful, definition-rich wash-and-go requires understanding your coil pattern, choosing products that provide hold and definition without crunch, and using the right application technique.
The Appeal of a True Wash-and-Go
If you can dial in a wash-and-go that works for your coils, you’ve unlocked a style that requires no overnight setting time, no unraveling, and no complicated technique. You wash, apply product, let your coils dry, and you’re done. It’s the path to a longer-lasting healthy routine because it minimizes manipulation and allows your natural coil pattern to shine.
How to Build a Definition-Rich Wash-and-Go
- Wash your hair thoroughly and apply a leave-in conditioner or moisturizing styler while your hair is still soaking wet.
- Add a gel or cream-gel that provides hold. Apply it with the praying hands method (hands together, coils sandwiched between your palms) or the raking method (fingers spread wide, pulling product through from roots to ends).
- Use the scrunching method to encourage coil definition: cup sections of wet hair in your hands and gently squeeze upward. This physical action helps coils cluster and define rather than frizz.
- Apply a light oil or butter to the ends if they feel dry, but don’t apply it throughout—product buildup at the roots kills definition.
- Allow your hair to air dry completely, or use a blow dryer on low speed with a diffuser attachment to speed up the process without disrupting your coils.
Crucial variable: A wash-and-go succeeds or fails based on your product combo and technique, not on luck. If your first attempt doesn’t look the way you want, adjust one variable at a time: try a different hold product, apply less product overall, use a different technique, or experiment with scrunching frequency during drying.
9. Coil Jelly Pin Curls for Sleek Definition
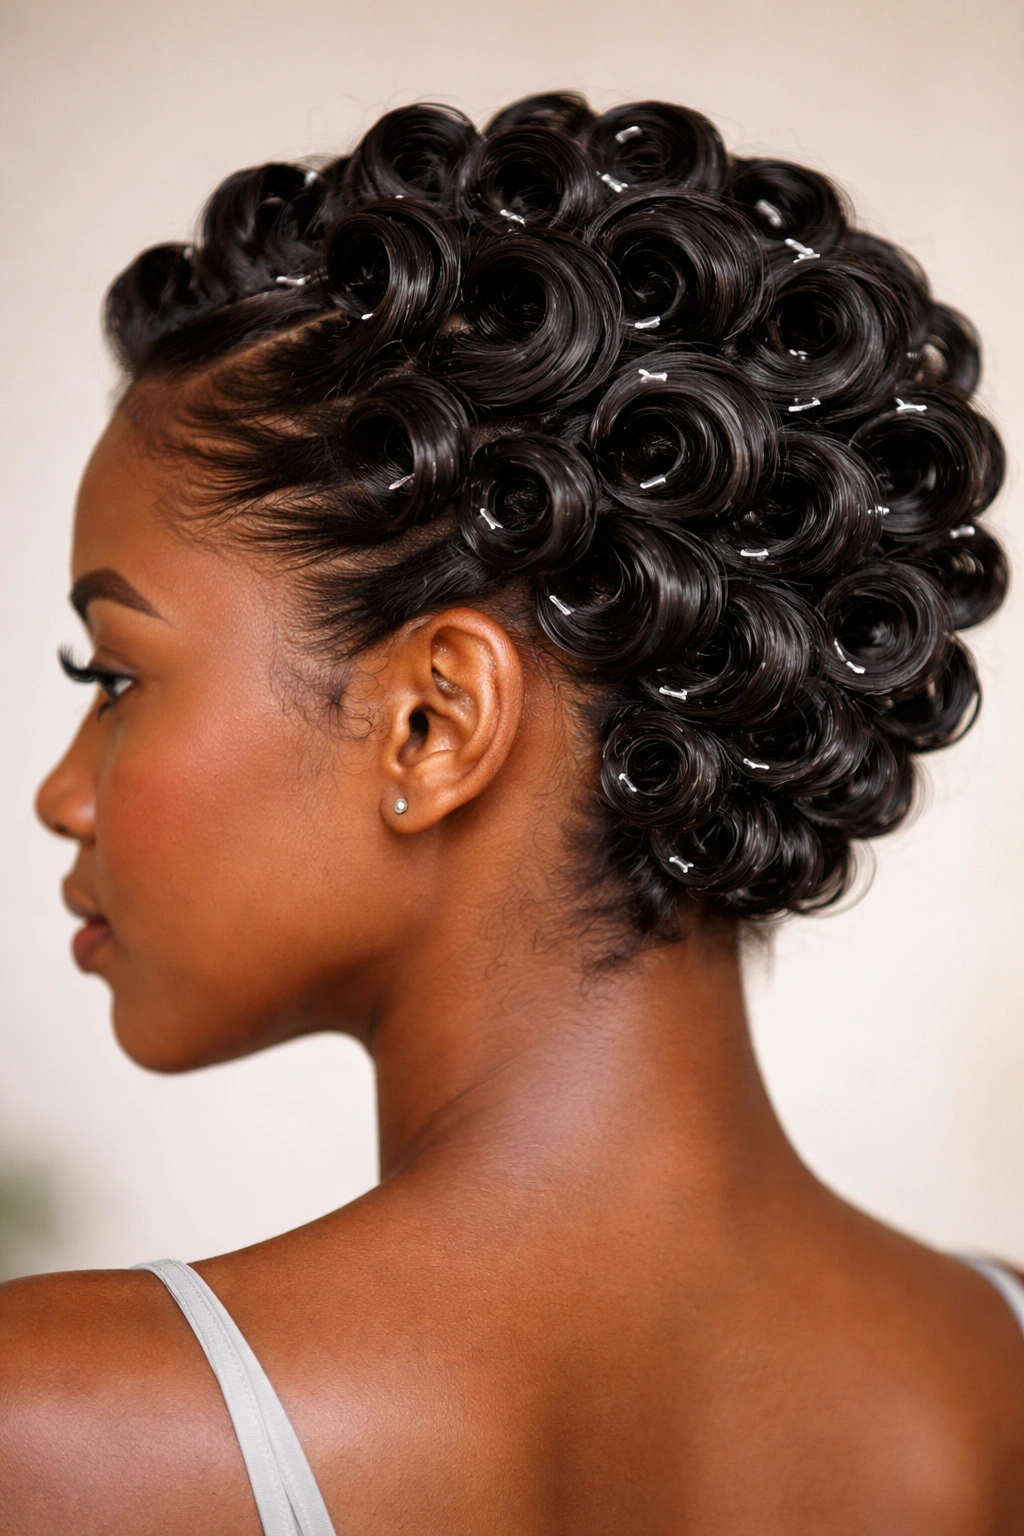
Pin curls are a vintage technique that works beautifully on coily hair. You use a gel or “coil jelly” to smooth and define a section of coils, then wrap them loosely around your finger and pin them down. As they dry, they set into a soft, defined curl. This style creates smooth-looking, intentional coil definition without the tightness of a twist or braid—and you can wear the pins in place as a style, or remove them once they’ve set for a lightweight, bouncy look.
What Makes Pin Curls Beginner-Friendly
Pin curls require no complex wrapping technique and forgive imperfection. A slightly loose curl still looks intentional. They’re also quick—you can pin curl your entire head in 15-20 minutes if you’re working with already-defined coils. Plus, they work on coils at multiple stages: freshly washed, refreshed, or even a few days into a twist-out.
Creating Pin Curls in Your Coils
- Apply a light to medium hold gel or “coil jelly” to a small section of damp coils. You want enough product for smoothness and hold, but not so much that it looks wet or heavy.
- Use a fine-tooth comb or your fingers to smooth the section gently.
- Wrap the section loosely around your index or middle finger, creating a spiral. Release your finger gently so the curl sits against your scalp.
- Pin the curl in place with a bobby pin or small clip, making sure the pin goes through the curl loop to hold it.
- Repeat for each section, spacing the curls evenly around your head.
- Leave them in place until your hair is completely dry, then gently remove the pins.
Styling option: You can wear pin curls as a finished style—with the pins in place for a polished, intentional look—or remove them after they’ve set and wear the defined coils loose. Both are equally valid.
10. Faux Locs for a Protective, Statement Look
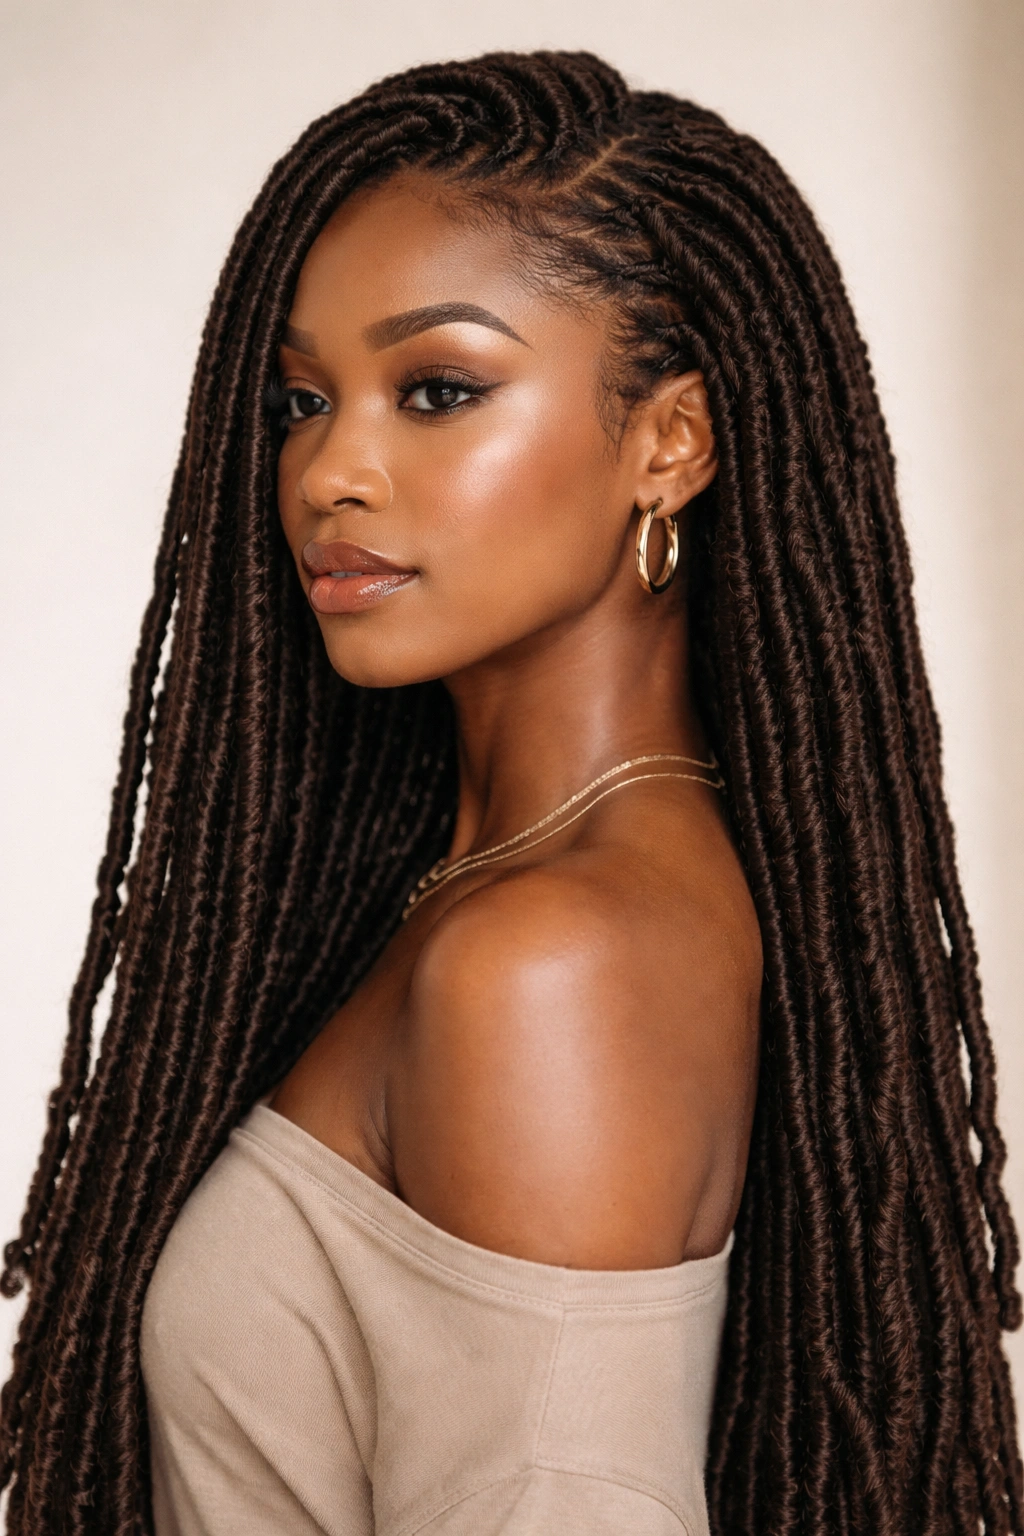
Faux locs are a protective style where you wrap sections of coily hair with yarn, thread, or braiding hair to create the appearance of locs without the commitment of actual locs. They’re simultaneously protective (they minimize daily manipulation and tuck your ends away) and a bold statement style. For beginners, faux locs might seem intimidating, but they’re actually surprisingly straightforward once you understand the wrapping technique.
Why Faux Locs Are Worth the Effort
A faux loc style can last 4-8 weeks, which means you’re looking at weeks of a protective style that requires minimal daily maintenance. You don’t have to restyle your coils frequently, which gives your hair a true break from manipulation. Beyond the practical benefits, faux locs look striking and intentional—they read as a statement style, even though the technique is simpler than it appears.
Creating Faux Locs Step by Step
- Start with coils that are freshly twisted or braided. The twisted or braided base gives you something stable to wrap around.
- Cut a length of yarn or thread (preferably in a color that matches your hair) roughly 2-3 times the length of the section you’re wrapping.
- Fold the yarn in half and begin wrapping it around the twisted section, starting near the base and spiraling downward. The yarn should be snug but not painfully tight.
- As you wrap, overlap each spiral slightly so the yarn holds securely without gaps.
- Once you’ve wrapped all the way to the ends, tuck the yarn ends under and secure them by wrapping them around the final coils a few times.
- Repeat for each section on your head.
- After a day or two, gently pull and manipulate each faux loc to shape it and blend the yarn with your coils.
Beginner tip: Start with thicker sections (larger twists or braids) if you’re new to wrapping. Thicker sections are faster to wrap and forgive slightly loose technique more easily than thin sections.
Final Thoughts
The difference between a hairstyle that feels effortless and one that feels like a chore comes down to choosing methods that match your skill level and your daily life. All of these styles work with your natural coil pattern instead of fighting it, which is the secret to looking polished without spending hours in front of a mirror.
Your best next step is to pick one style that genuinely appeals to you—not the one that looks most impressive on Instagram, but the one you’re actually excited to try. Make it once, then make it again. By your third attempt, you’ll have internalized the technique enough that it becomes automatic. From there, you can branch out to other styles with confidence, knowing you’ve already proven you can nail at least one.
Coily hair is forgiving in ways that many people don’t realize. A slightly imperfect twist still looks intentional. A frizzy wash-and-go still has dimension and beauty. The goal isn’t perfection—it’s understanding your coils well enough to style them in ways that make you feel confident and comfortable. Every style in this list gets you closer to that goal.