


When you have coily hair, updos for special occasions feel like a different challenge altogether. Regular updo tutorials often assume straighter textures, which means you’re left scrolling through endless pin-straight tutorials wondering how they’ll translate to your beautiful, springy curls. The truth is, coily updos aren’t just a modification of straight-hair styles—they’re an entirely different art form that celebrates texture, dimension, and the natural structure your curls already have.
The magic of coily updos lies in how they work with your curl pattern instead of fighting against it. Your coils hold their shape, create natural volume, and add visual richness that flat, smooth styles simply can’t match. Whether you’re heading to a wedding, an elegant dinner, a family celebration, or any event where you want to feel polished and stunning, coily updos offer endless possibilities. The key is understanding how to manipulate, position, and highlight your coils to create sophistication that feels completely authentic to who you are.
The updos in this guide are designed for coily hair textures specifically—from loose waves and springs to tighter coil patterns. Each style works beautifully on its own, but they’re also incredibly flexible. You’ll discover how to adapt them based on your curl type, hair length, and the specific vibe of your event. Some are elegant and romantic, others are modern and architectural, and a few sit right in that sweet spot of polished-yet-playful that works for almost any occasion.
1. Crown Braid with Coily Extensions
This updo combines the sophistication of a braided crown with the volume and texture of your natural coils cascading around it. The braid sits high and secure while your coils flow freely from the back and sides, creating a style that’s both formal and undeniably striking. It’s the kind of look that draws compliments throughout the evening because it’s so visually dynamic.
Why This Works for Special Occasions
A crown braid reads as intentional and polished—the kind of style that says you took time to prepare but didn’t try too hard. The combination of the structured braid framing your face with loose coils underneath creates a balance that works for everything from garden parties to formal dinners. The braid sits snugly enough that it won’t slip throughout the evening, while your coils maintain their movement and natural beauty. It’s particularly stunning if your coils have dimension or color variation, as the cascading texture really showcases that richness.
How to Create This Look
- Start with damp or refreshed coils. If your coils need a boost, lightly mist them with water and fluff gently with your fingers.
- Take a section of hair from one temple and begin a Dutch braid (braiding underneath rather than over, which creates a raised effect) that curves around the back of your head toward the opposite ear.
- As you braid, keep your sections relatively loose—tight braiding can disturb the coil pattern along the braid line. Work gently and deliberately.
- Secure the braid at the end with a small elastic, then gently pull at the braid sections to add width and dimension.
- Leave the coils around your crown and back loose, sweeping them slightly to one side or letting them fall naturally.
- Finish with a lightweight hairspray that holds without crunchiness, or a shine-enhancing spray that catches the light.
Pro tip: If your coils are prone to flattening where the braid section sits, refresh that area with a light spritz and pick gently with a wide-tooth comb just before the event to restore volume.
2. High Puff with Decorative Accessories
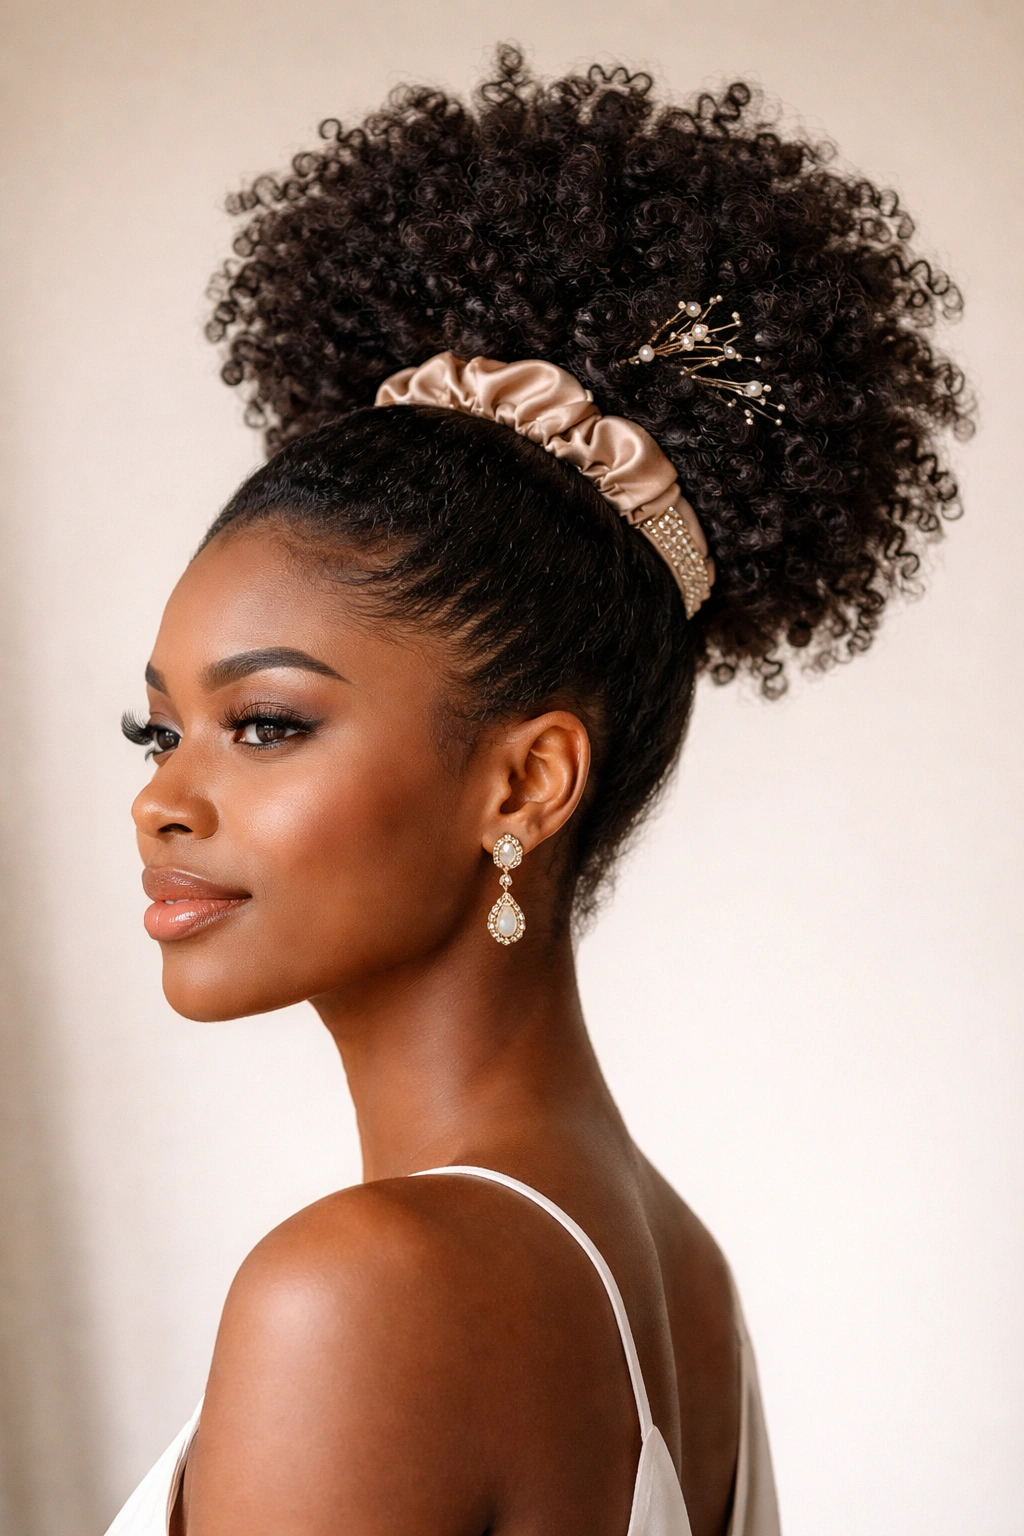
A high puff is an immediately polished updo that celebrates the full beauty of your coil texture. When you gather your coils into a high puff and add the right accessories—a silk scrunchie, a decorative cuff, or even strategically placed hair jewelry—it transforms into something that feels elevated and special. This is simplicity with serious visual impact.
Why It’s Perfect for Events
A high puff is versatile enough for casual celebrations but sophisticated enough for formal events when you style it intentionally. The height creates drama and draws the eye upward, which flatters most face shapes. Because it’s positioned away from your neck and shoulders, it keeps you cooler throughout an event, which matters if you’re dancing or spending time in a warm venue. It also showcases your curl pattern beautifully, letting the natural texture be the star.
How to Build This Style
- Brush or comb through your coils gently to create smoothness if desired, or leave them separated and textured for a more natural look.
- Use a paddle brush or wide-tooth comb to smooth the hair toward the crown, gathering it into a high pony at the very top of your head.
- Secure with a covered elastic or a silk scrunchie that matches or complements your outfit. Silk is crucial here—it prevents breakage and looks more elegant than standard elastics.
- Gently massage the coils around and above the base of the puff to add volume and ensure no hair is pulled too tightly.
- Wrap a small section of hair around the base of the puff to conceal the elastic, securing it with a bobby pin.
- Add your chosen accessory: a decorative cuff, metallic hair jewelry, fresh flowers, or a beaded ornament pinned through the puff for visual interest.
Worth knowing: The higher and fuller you can make the puff, the more impact it has. Take time to fluff and separate your coils as you shape it—a puff that’s tightly compressed looks less intentional than one with visible texture and movement.
3. Twisted Spiral Bun
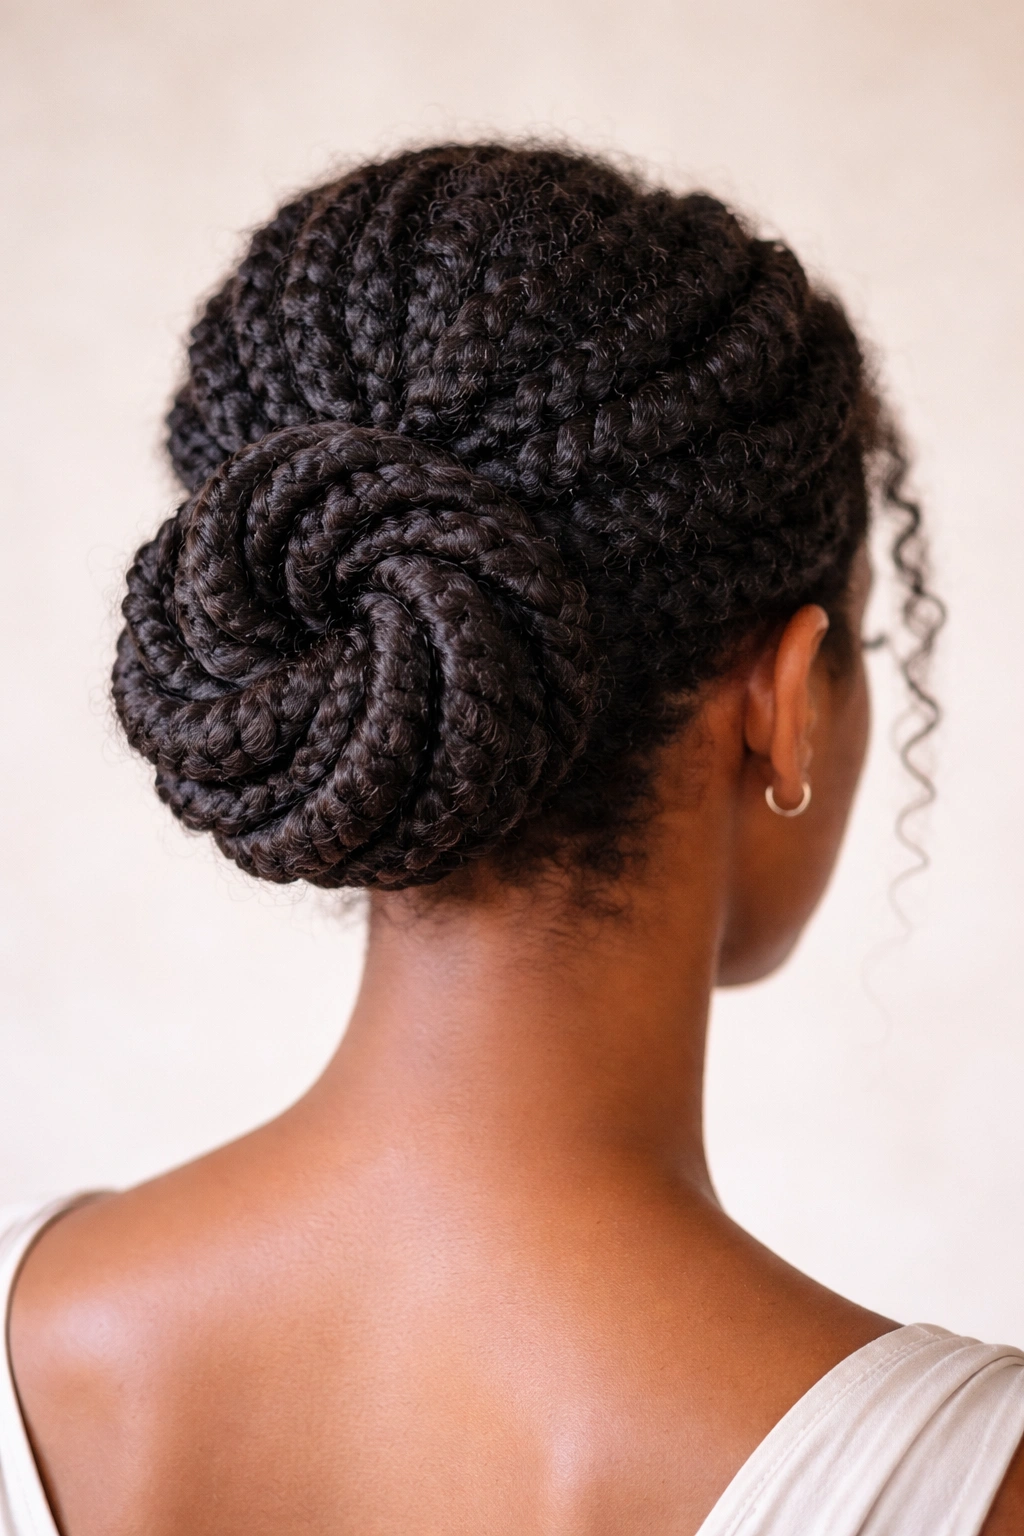
This updo takes the structure of a classic bun but replaces it with sculptural spirals of your coils twisted around each other, creating a geometric, architectural look that’s completely modern. It sits low or mid-height at the back of your head, and the intertwined spiral pattern creates depth and dimension that’s visually fascinating from every angle.
Why This Style Is Elegant
Twisted spirals are inherently sophisticated because they show intentionality—this isn’t a casual bun, it’s a styled composition. The technique works beautifully with coily hair because your curl pattern already has natural spiraling, so you’re amplifying what your hair naturally wants to do. The result feels sculptural and fashion-forward while remaining completely wearable for a formal event. It also stays put incredibly well since the twists lock your hair into position without needing heavy product.
How to Execute It
- Gather your coils into a low or mid-height ponytail, securing with a silk elastic.
- Divide the ponytail into three equal sections. This is where patience pays off—the more precise your sections, the more polished the final result.
- Twist each section tightly from the base of the ponytail upward, creating a firm spiral.
- Begin wrapping the first twisted section around the base of the ponytail, spiraling it around and pinning as you go with bobby pins that match your hair color.
- Wrap the second section in the opposite direction, then the third, creating an alternating spiral pattern.
- As you wrap, tuck and nestle the spirals against each other so they’re snug and support one another.
- Pin thoroughly—use at least 4-6 bobby pins per spiral to ensure nothing shifts during the event.
- Lock everything with a flexible-hold hairspray that maintains the sculptural shape without stiffness.
Insider note: This style shows impeccably on video and in photos, and the spiral detail catches light beautifully, creating extra dimension that reads stunning in any lighting.
4. Swooped Coil Updo
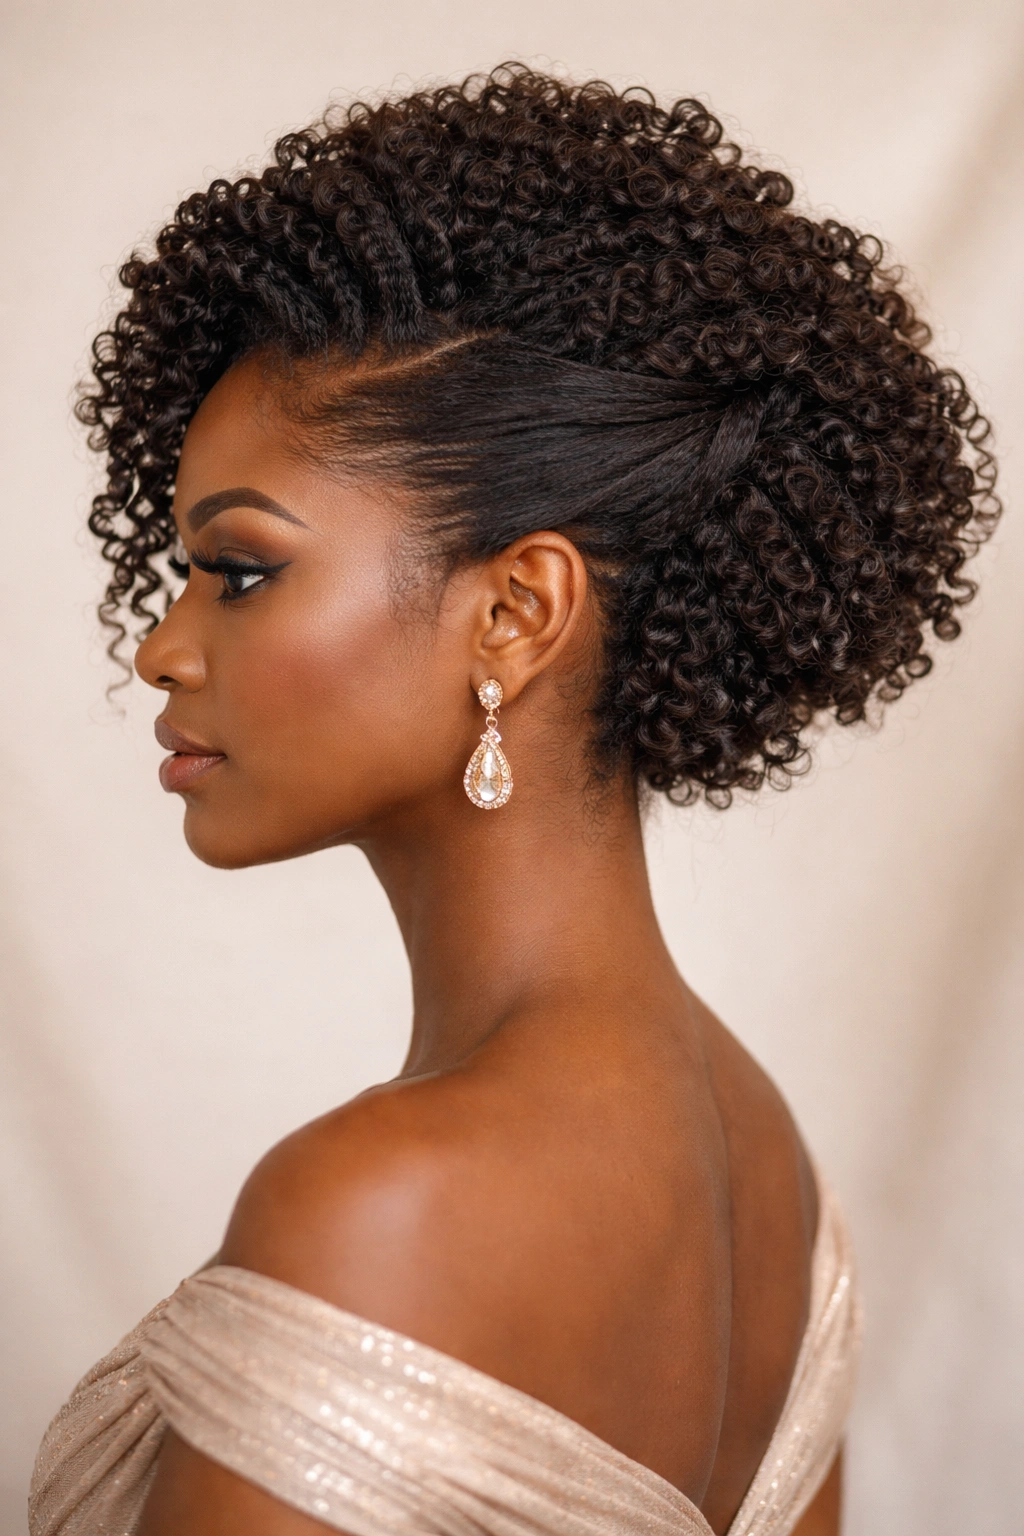
This is the coily-hair version of a swooped, romantic updo—but instead of smooth swept sections, you’re creating a beautiful asymmetrical arrangement where coils sweep dramatically from one side to the other. One side is gathered and pinned high while coils on the other side cascade lower, creating movement and a touch of glamour that feels effortless.
Why It’s Ideal for Romantic Settings
A swooped updo has inherent elegance because of the asymmetry and movement it creates. With coily hair, the texture of the sweep is what makes it special—those coils catching the light as they flow create a dynamic, living quality to the style. It works beautifully for weddings, anniversaries, date nights, or any event where you want to feel especially polished. The asymmetry also means this style flatters various face shapes, and it can be dressed up or down depending on your accessories.
How to Create the Swoop
- Start with refreshed, moisturized coils. You want them bouncy and responsive.
- Create a side part roughly at your temple on one side—this is where the swoop will originate.
- Gather the smaller section of hair (from the side part to behind one ear) and twist it gently, creating a rope-like twisted section.
- Pin this twisted section toward the back crown area on the opposite side, securing it with bobby pins.
- Leave the larger section of coils loose and sweep them gently toward the pinned section, arranging them so they flow gracefully over one side.
- Tuck and pin loose coils as needed to create a cohesive shape, but allow enough to cascade freely for movement.
- Use a light hairspray to set the sweep without locking it into rigidity—you want the coils to still move and breathe.
Quick fact: This style works on all hair lengths from mid-shoulder up. The longer your coils, the more dramatically you can sweep them.
5. Half-Up Crown with Loose Coils
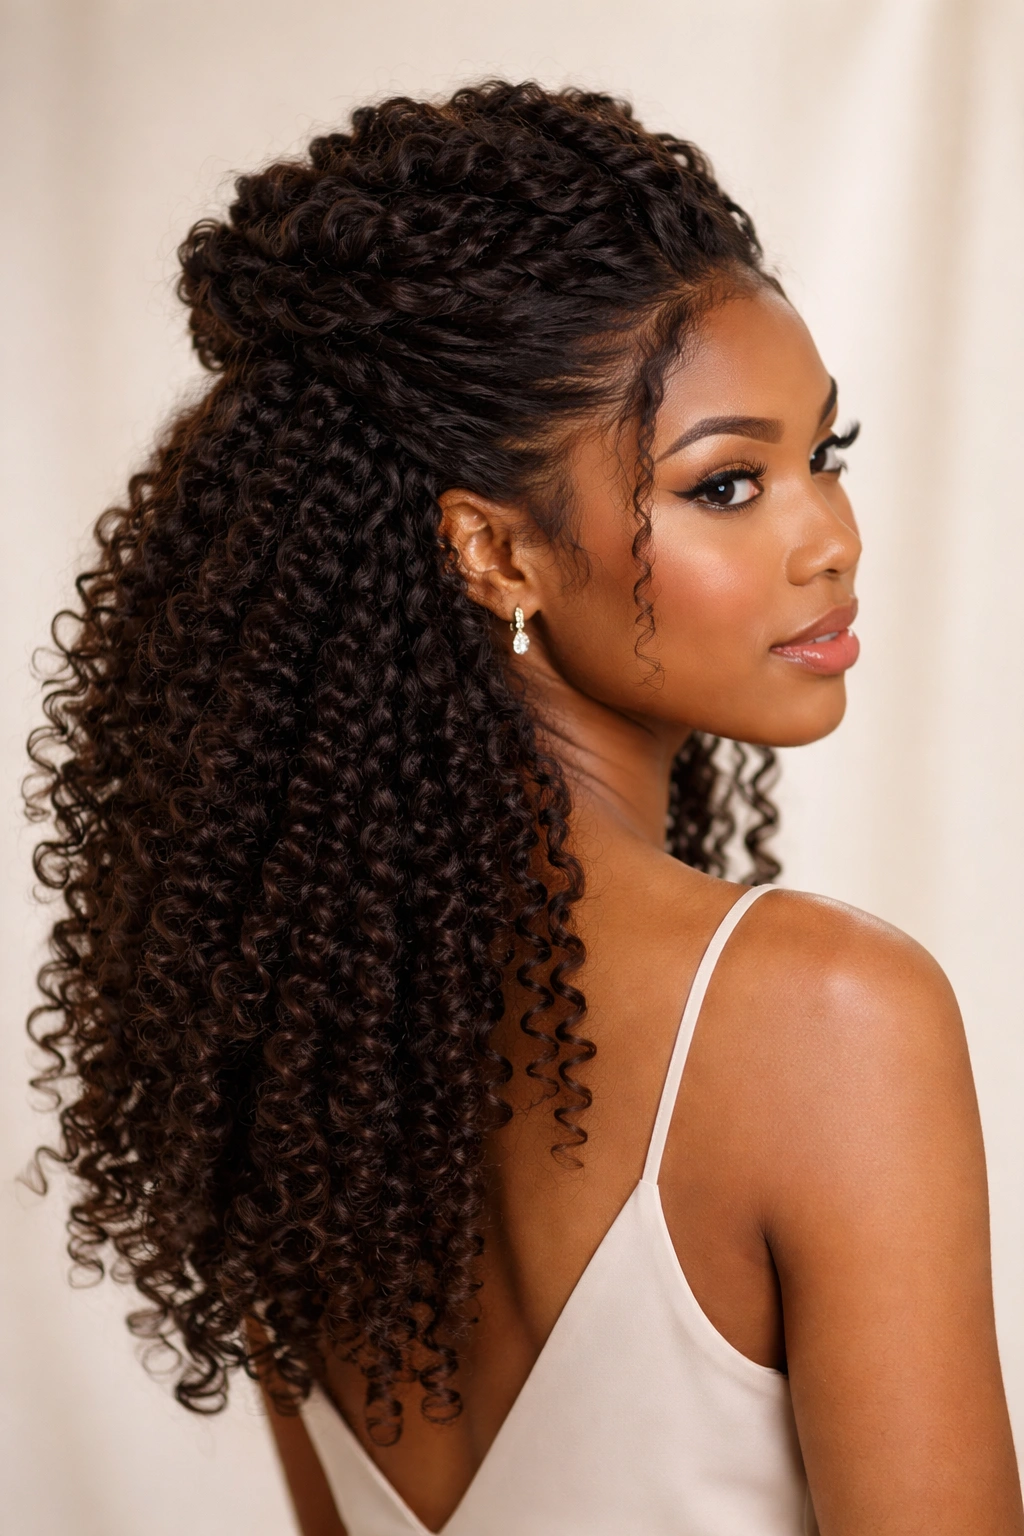
Part updo, part down—this hybrid style is incredibly popular for good reason. You’re gathering enough hair to look intentional and polished, but leaving enough loose to showcase your full curl pattern and texture. The half-up crown creates a focal point at the top of your head while your coils flow freely below, giving you elegance without the formal feeling of a full updo.
Why This Works Across Events
A half-up crown is the Goldilocks of coily updos: formal enough for weddings and celebrations, but relaxed enough for garden parties, brunches, or even date nights. It reads as styled without looking overly done, which makes it endlessly versatile. You have the security of an updo at the crown—it stays in place all night—but the visual interest and freedom of having your coils flowing. It also keeps hair off your face and neck while still showing off the full dimension of your coil texture.
How to Achieve This Look
- Determine where you want the “crown” section to sit—roughly from temple to temple across the top of your head.
- Starting at one temple, gather a section of coils and begin twisting gently as you move toward the opposite temple, following the curve of your crown.
- Continue twisting, picking up small sections of coils as you go, until you reach the opposite temple.
- Secure the twisted section with bobby pins, hiding them within the twisted texture.
- Take two small face-framing sections of coils from near your temples and gently arrange them to flow forward, adding softness around your face.
- Fluff and separate all loose coils below the crown to maximize volume and texture.
- Optional: wrap a thin decorative ribbon or silk thread around the base of the crown twist for added elegance.
Pro tip: The key to making this style look special rather than ordinary is in the fluffing. Spend time gently separating and lifting your loose coils after pinning—this is what creates the luxe, intentional appearance.
6. Twisted Low Knot
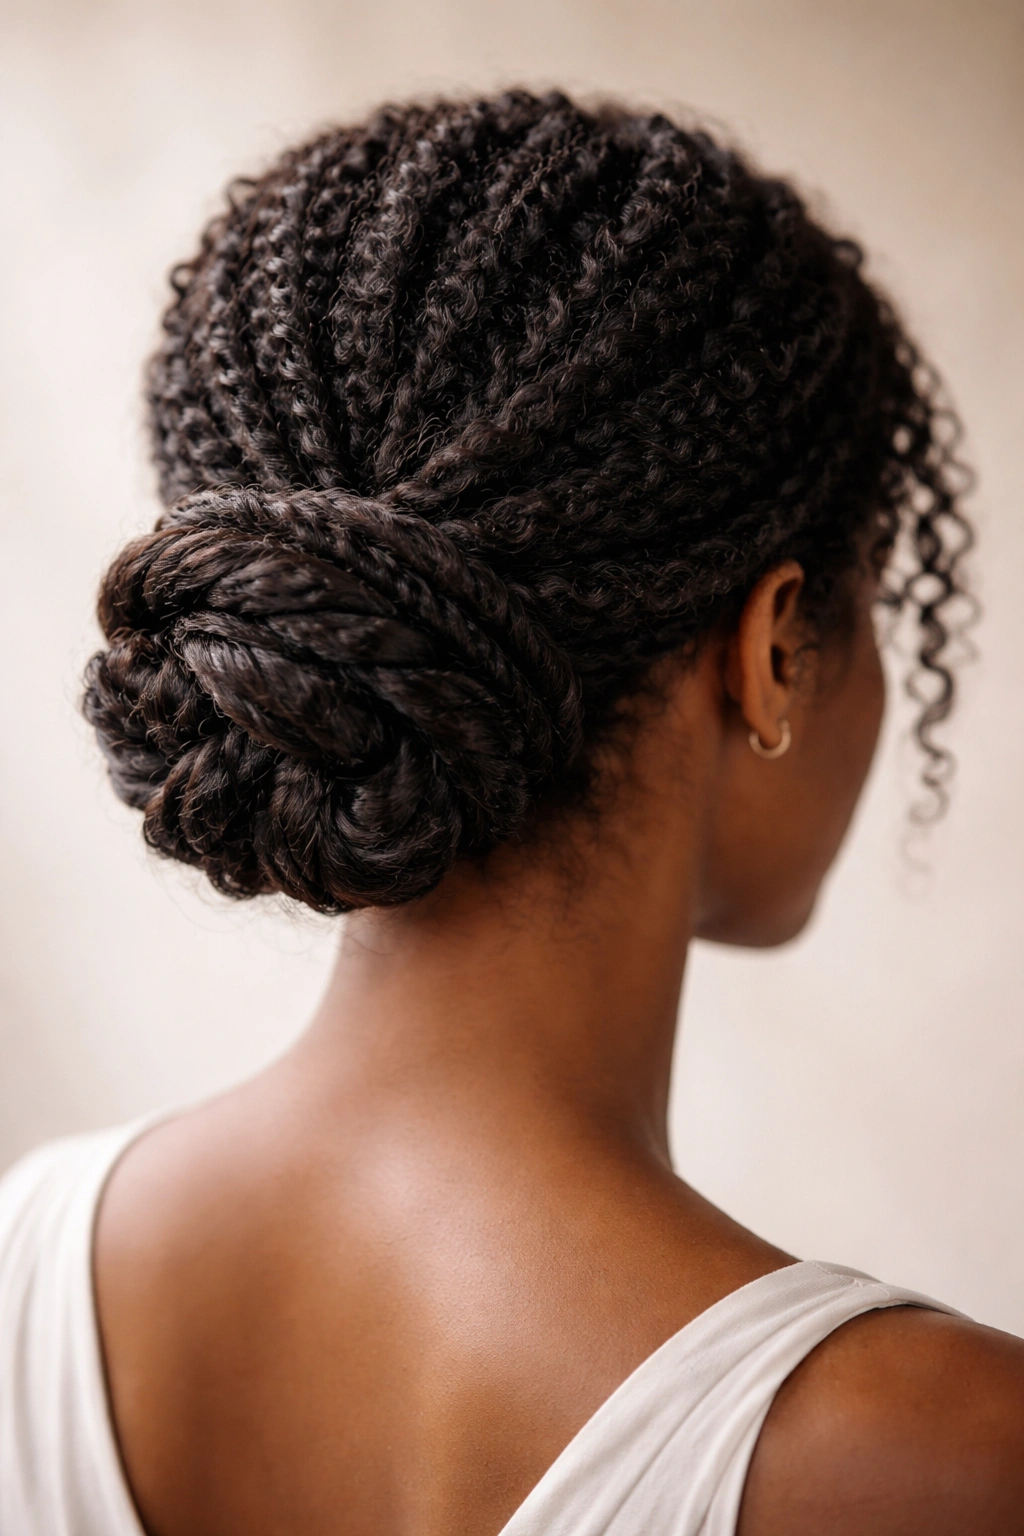
A low knot is understated sophistication, and when you create it by twisting sections of coils rather than braiding or smoothing them, you add texture and visual interest that elevates it beyond a standard bun. The twisted sections create a knot that’s visually intricate without being fussy, sitting low at the nape of your neck with a graceful, elongated silhouette.
Why This Style Reads Refined
Low knots inherently feel mature and sophisticated—they’re the choice of someone confident in simplicity. With coily hair, a twisted knot becomes architectural rather than plain. You see the individual spirals and the way the texture locks together, which makes it visually compelling without relying on accessories or embellishment. It’s perfect for formal events where you want understated elegance, and it works beautifully with any outfit from classic to modern.
How to Construct It
- Brush or comb your coils until smooth, then gather them into a low ponytail at the nape of your neck, securing with a silk elastic.
- Divide the ponytail into two equal sections.
- Twist the first section tightly from base to end, creating a firm spiral.
- Twist the second section in the same direction (consistency matters here—both twisting the same way creates visual harmony).
- Wrap the first twisted section around the base of the ponytail, pinning as you go.
- Wrap the second twisted section around in the opposite direction, creating an interlocking pattern.
- Secure thoroughly with bobby pins and set with a firm-hold hairspray that won’t flake.
What to know: This style photographs beautifully from behind, which makes it ideal if you’re attending a formal event where you’ll be photographed. The twisted texture really shows on camera.
7. Sculpted High Bun
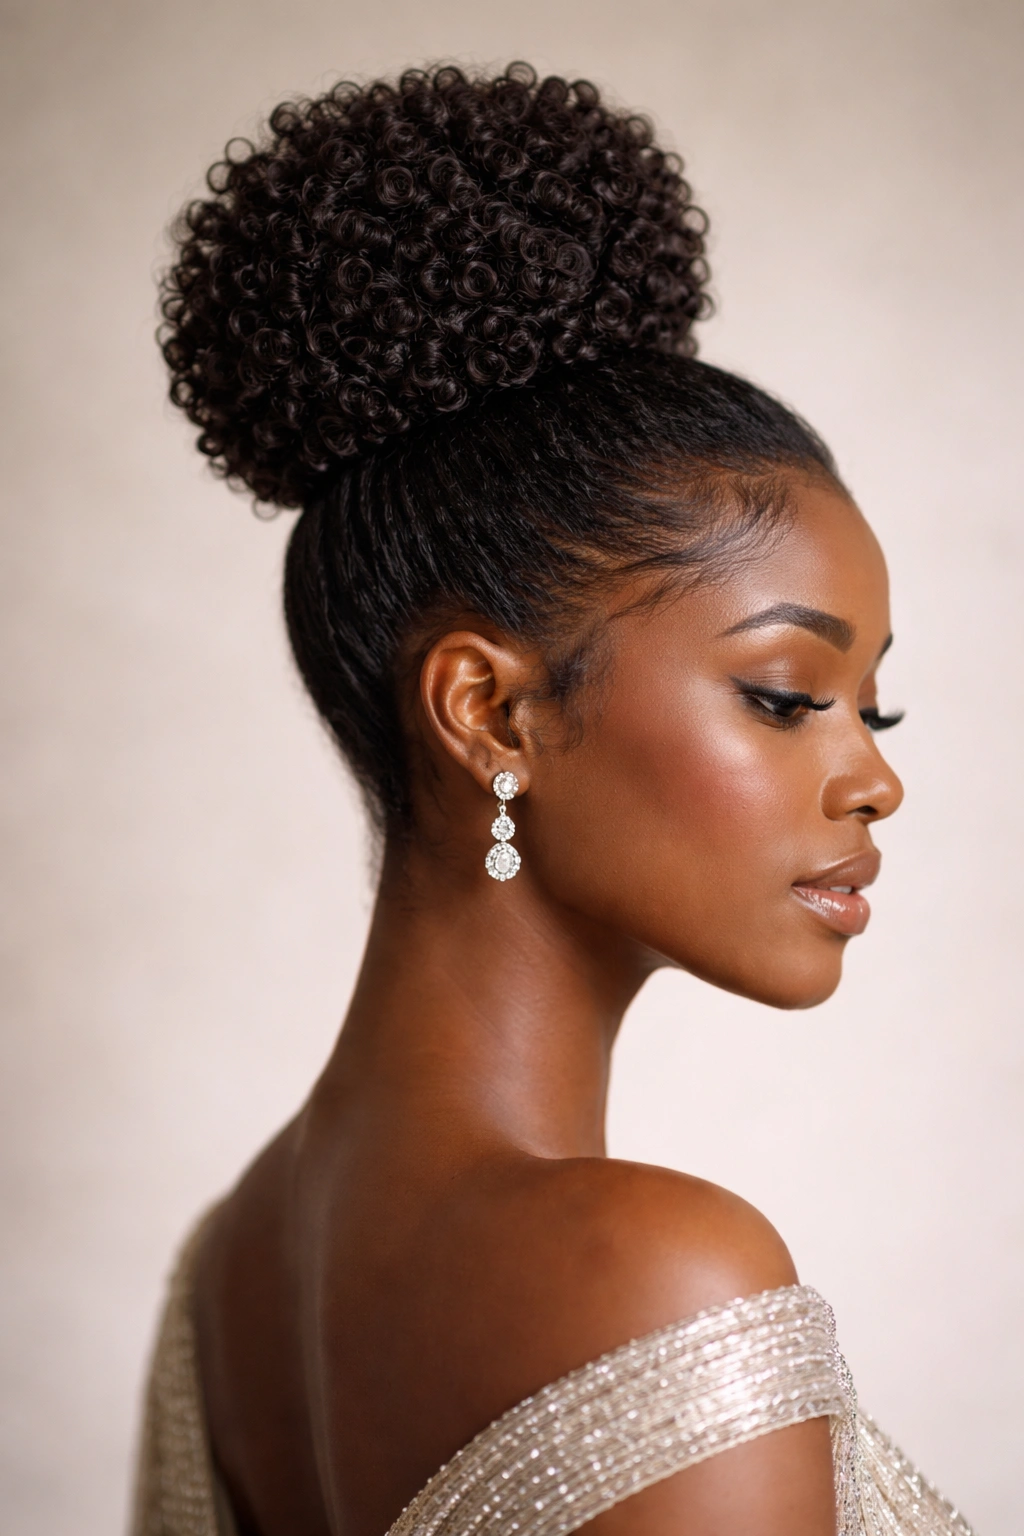
A high bun positioned right at the crown is the ultimate statement updo. When you sculpt it with coily texture rather than sleek smoothness, you create something that’s modern, bold, and architecturally interesting. This is the updo that commands attention—the kind of style people notice and ask about.
Why It’s Perfect for Making an Entrance
A high bun is confidence in hair form. It’s bold, it’s polished, and it puts your face, neck, and shoulders on full display. With coily hair, a high bun celebrates your natural texture rather than trying to minimize it, which makes it feel authentic and intentional. This style works beautifully for galas, formal dinners, milestone celebrations, or any event where you want to feel powerful and put-together. It also keeps all your hair secured away from your face and neck, which is practical if you’ll be moving around or dancing.
How to Build the Bun
- Create a high ponytail at the very crown of your head, using a silk elastic that won’t tug or crease your coils.
- Lightly brush or comb the ponytail to create smoothness, or leave it textured depending on your preference.
- Twist or braid the ponytail section—twisting creates a rounder, fuller bun; braiding creates more definition.
- Coil the twisted or braided section around the base of the ponytail, pinning very thoroughly to ensure security. Use a minimum of 6-8 bobby pins.
- Gently massage the bun with your fingers to add dimension and ensure no flat spots.
- Use bobby pins to tuck any loose coils or flyaways into the bun structure itself.
- Lock everything with a strong-hold hairspray.
Worth noting: The fuller and rounder you can make the bun, the more polished it appears. Don’t compress it—let it breathe and show texture.
8. Coily Wrap Updo
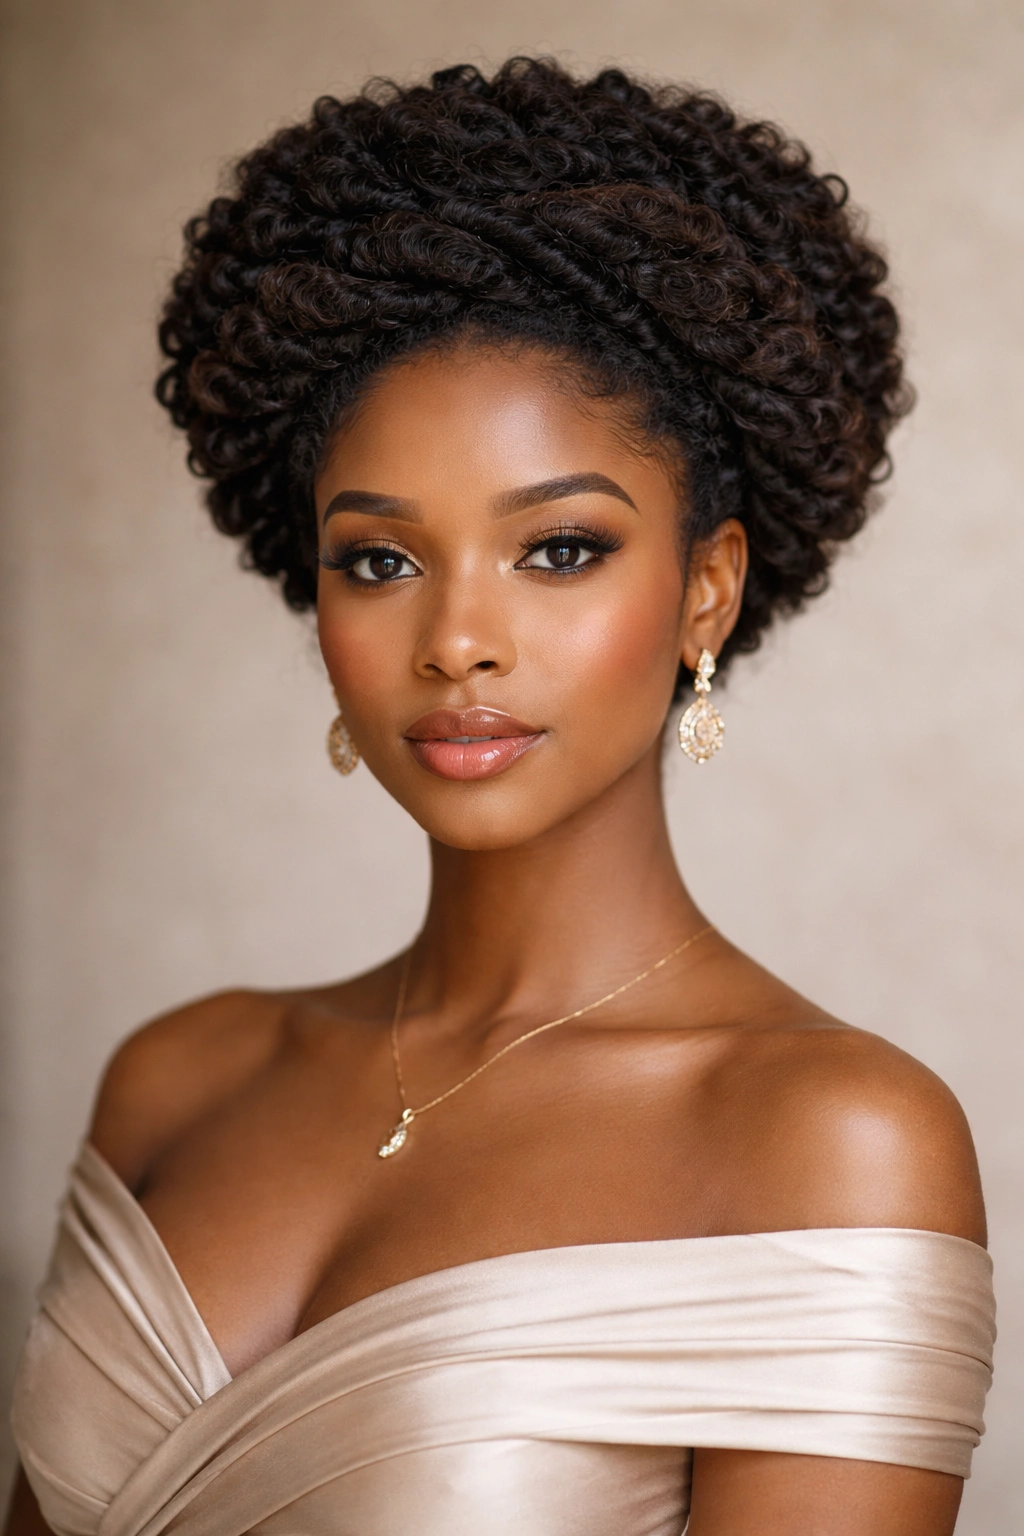
This style wraps sections of your coils around your head in a crown-like pattern, creating an updo that’s both protective and show-stopping. It’s similar to a wrap-around braided crown but uses your coils in their natural spiral form rather than braiding them, resulting in a look that’s uniquely textured and undeniably gorgeous.
Why This Creates Visual Drama
A coil wrap creates a halo effect around your head, drawing attention upward and framing your face beautifully. Because you’re working with your natural coils rather than taming them into braids, the texture is maximized, and the visual impact is substantial. This style has strong cultural and aesthetic significance in Black beauty traditions—it’s a celebration of natural texture elevated to high-fashion status. It works wonderfully for celebrations, formal events, or any occasion where you want to make a powerful style statement.
How to Execute the Wrap
- Start with well-defined, moisturized coils. You want them to hold their shape and have good spring.
- Take a thick section of coils from one side of your head and begin twisting or coiling it, creating a rope-like section.
- Wrap this section around the back of your head, moving from one side toward the other, pinning as you go with bobby pins.
- Take a second section and repeat the process, wrapping in a similar direction and pinning it against the first wrapped section.
- Continue with a third section if you have enough hair density, creating layers of wrapped coils that sit close together.
- Tuck all loose coils into the wrap itself or let them cascade from the center or lower back, depending on your preferred look.
- Pin generously and use a flexible-hold hairspray to set everything while maintaining the texture.
Pro tip: This style holds better on days three to five of your coil refresh, when your coils have slightly more grip and hold their form more naturally.
9. Layered Coil Roll
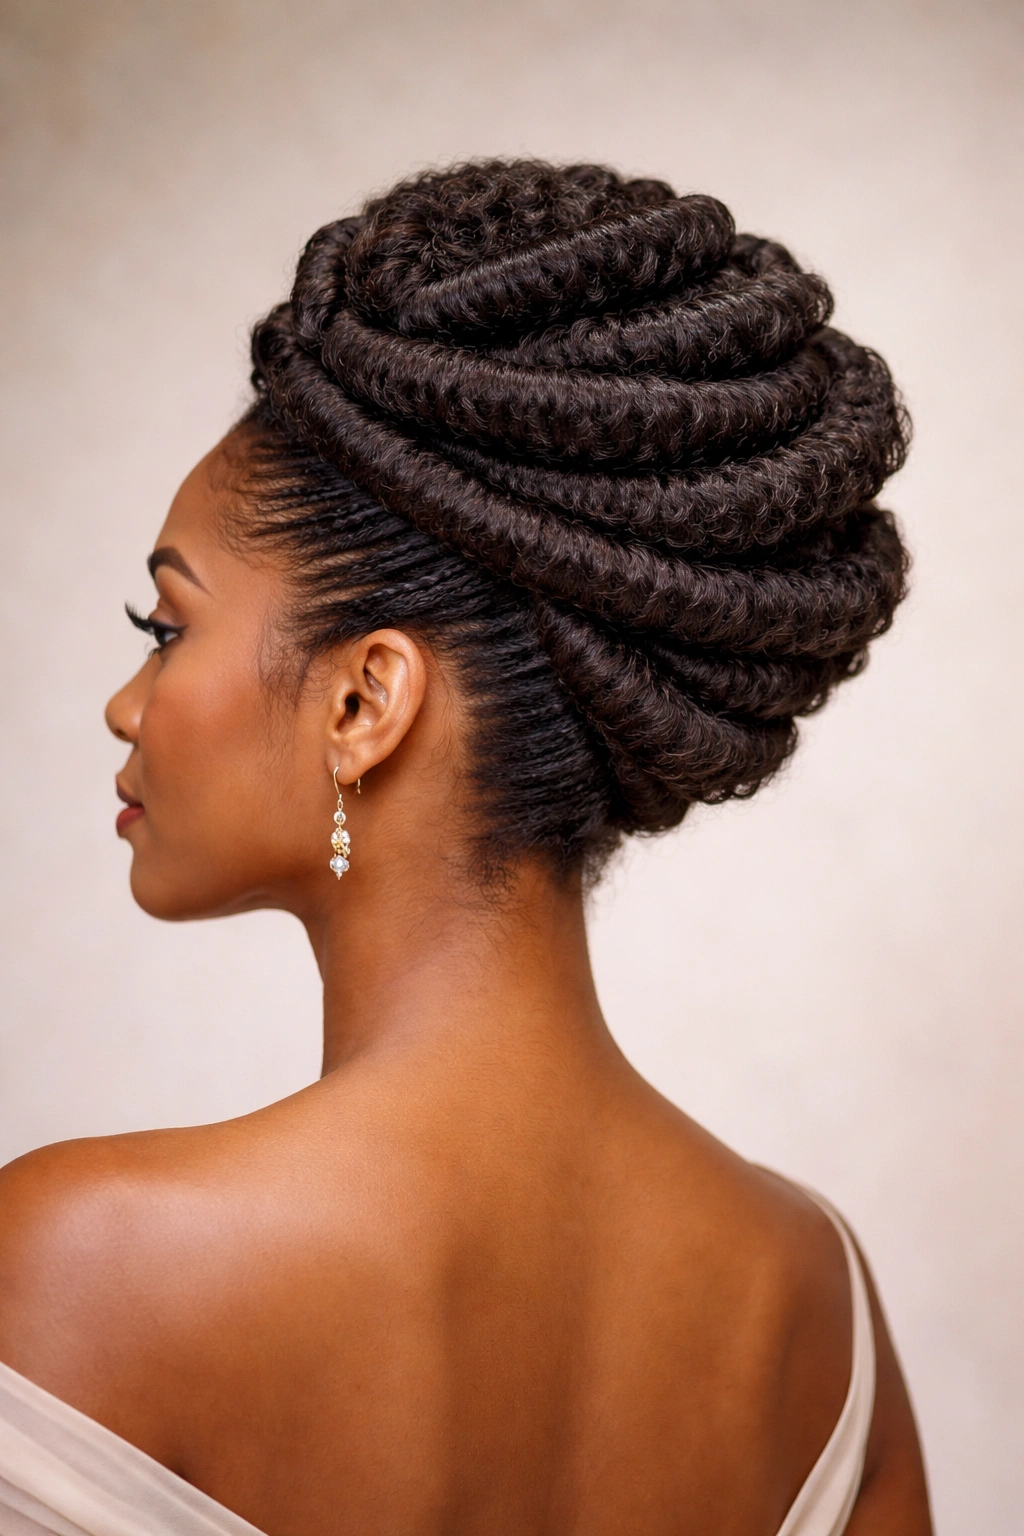
A layered coil roll creates multiple horizontal sections of your coils rolled upward and stacked, building a sculptural updo that’s visually complex and undeniably stunning. It’s more labor-intensive than some updos, but the payoff is an updo that looks like wearable art—the kind of style that makes people stop and stare.
Why It’s Worth the Effort
A layered roll takes time to execute, which signals that you put care into this look. For a special event where you really want to feel extraordinary, this is the updo that delivers. The multiple layers create incredible dimension and visual interest, and because each layer is its own distinct rolled section, the style feels modern and fashion-forward. It’s a statement look that says you understand your hair, you’re proud of your texture, and you know how to make it shine.
How to Construct It
- Section your hair horizontally from the nape of your neck upward, creating 3-4 distinct horizontal sections depending on hair length.
- Starting with the lowest section, gather the coils and roll them upward toward the crown, securing with bobby pins as you go.
- Roll the second section upward in the same direction, positioning it just above the first rolled section and pinning it to sit close.
- Continue with remaining sections, always rolling in the same direction, creating a stacked, layered appearance.
- The coils within each roll should be visible and textured—don’t compress them. You want to see the individual coil pattern.
- Pin each roll independently and then reinforce with additional pins where the rolls meet each other.
- Set with a light to medium hairspray that won’t weigh down your coils.
Insider note: This style looks absolutely stunning on deeper skin tones where the texture and shadow within the rolls create incredible depth, but it’s gorgeous on all complexions.
10. Textured Sleek Updo with Face-Framing Coils
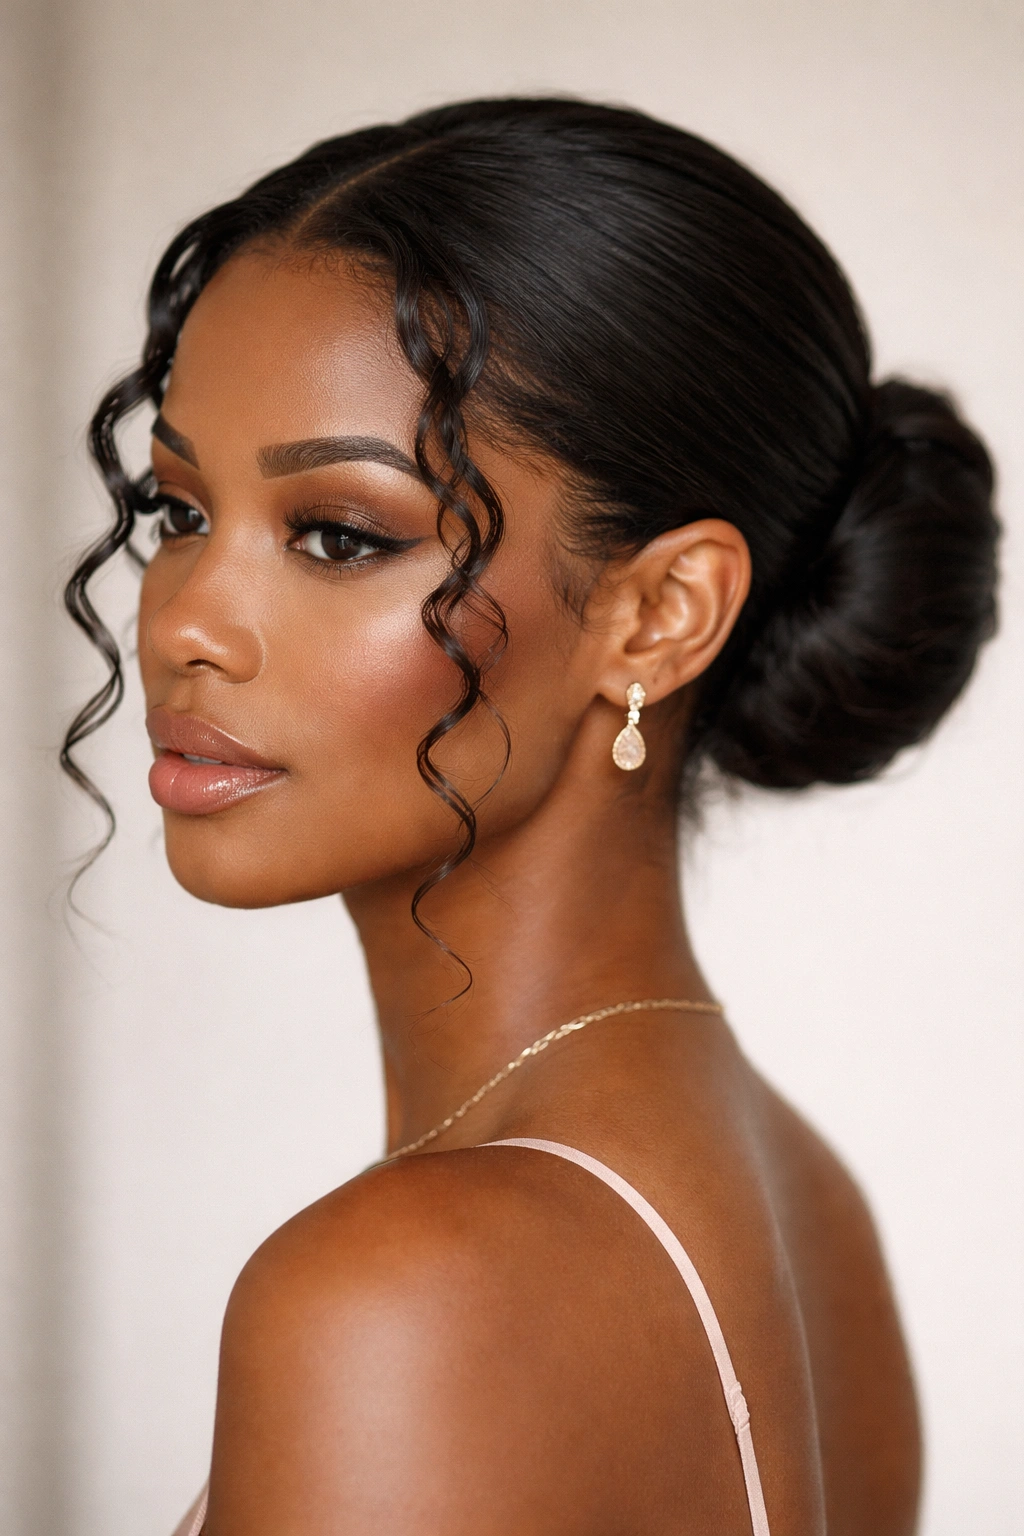
This updo takes a minimalist approach with a sleek, smooth base gathered into a low bun at the nape of your neck, but leaves strategically placed coils loose around your face. The contrast between the smooth, polished gathered section and the freely textured face-framing coils creates elegance with an edge—it’s polished but not austere, intentional but not severe.
Why This Balances Polish and Personality
A textured sleek updo is sophisticated without being cold. The smooth gathered base says polish and formality, while the loose face-framing coils say you haven’t abandoned your natural texture—you’re just styling it strategically. This works beautifully for professional events that still want personality, formal dinners where you don’t want to look overdone, or celebrations where you want elegance with warmth. The face-framing coils soften the overall appearance and add movement.
How to Create It
- Apply a light smoothing cream or styling butter to the hair you’ll be gathering—this helps create a sleek base without making your coils crunchy.
- Take two small sections of coils from near your temples and set them aside (these will be your face-framing pieces).
- Gather the remaining coils into a low ponytail at the nape of your neck, using a silk elastic.
- Smooth the ponytail gently with a brush or your fingers, creating an even, polished appearance.
- Twist or braid the ponytail section and wrap it around the base to form a bun, pinning thoroughly.
- Release the two face-framing sections and arrange them gently around your face, allowing them to flow naturally.
- Use a light hairspray on the gathered section and a different product (like a styling gel or coil cream) on the face-framing coils to maintain their texture.
Quick fact: This style works beautifully on all hair lengths and densities because the gathered section can be adjusted to your hair volume, and the face-framing coils can be as minimal or as abundant as you prefer.
Final Thoughts
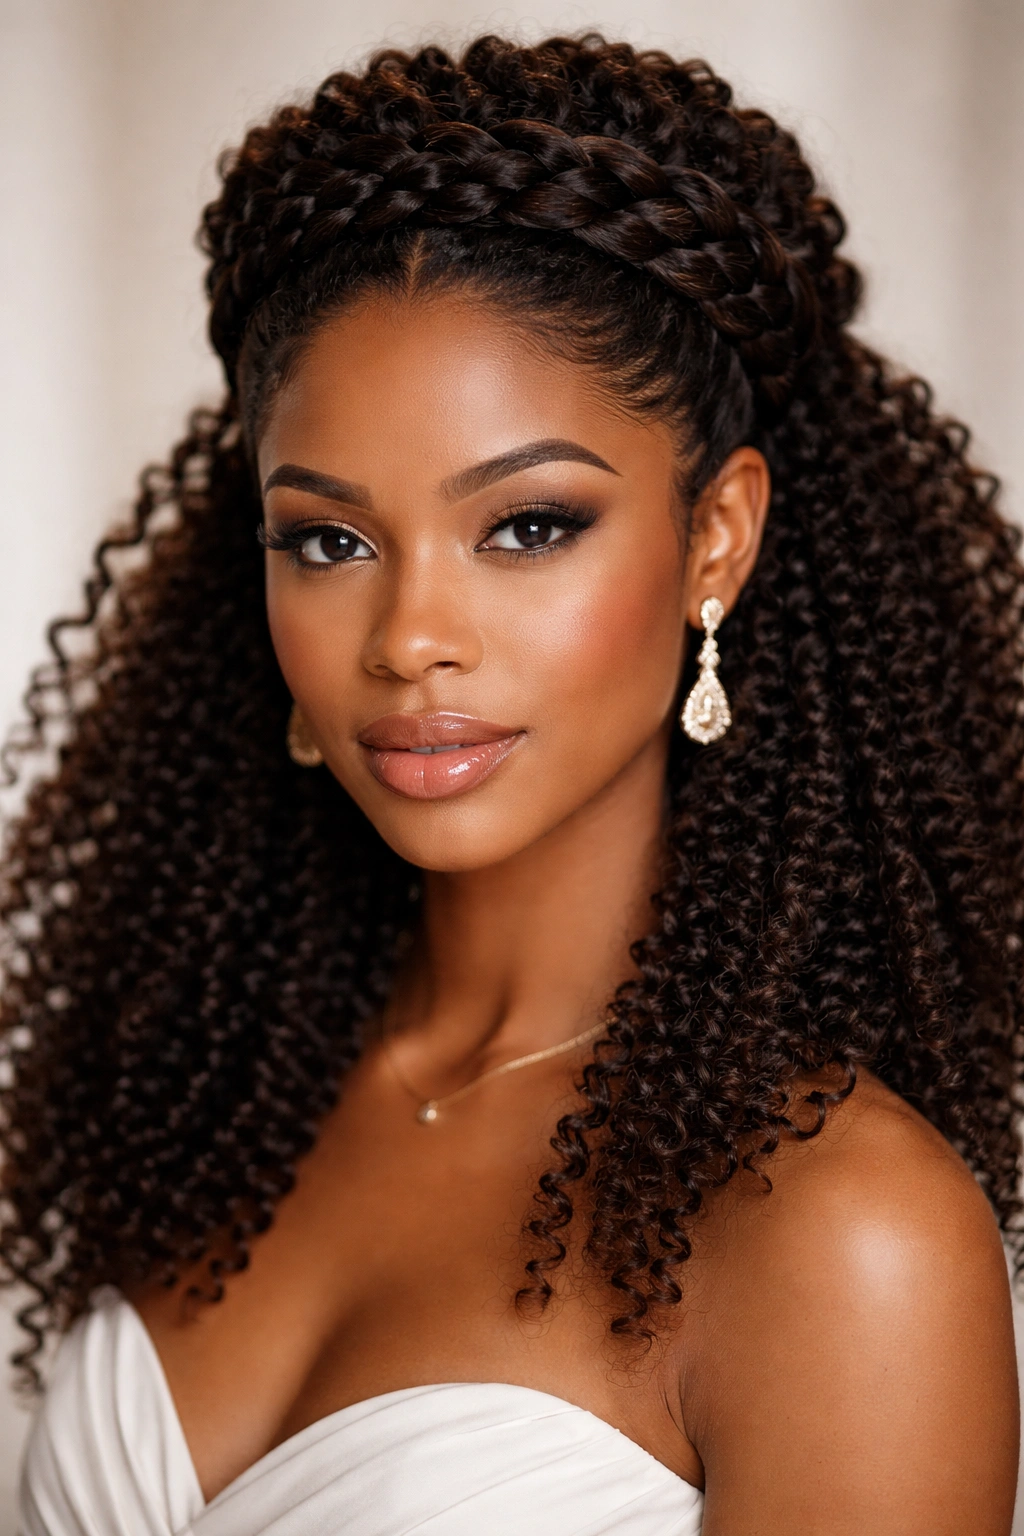
Coily updos are a celebration of your hair’s natural architecture, texture, and beauty. Each of these ten styles approaches the updo differently—some emphasize smoothness and structure, others lean into texture and sculptural interest, and many find that elegant balance between polish and personality. The style you choose depends partly on the event, partly on your mood, and partly on what makes you feel most confident and beautiful.
The secret to pulling off any coily updo is understanding your specific curl pattern and working with it rather than against it. Coils that are left textured and loose create drama and volume; coils that are twisted or braided create definition and structure. Neither approach is better—they’re just different, and they communicate different aesthetics. Pay attention to what your hair is telling you on any given day. Sometimes your coils are thirsty and need extra moisture before styling; sometimes they’re perfectly cooperative and hold shape beautifully. Adjust your product use and technique based on what you observe.
Don’t be afraid to practice these styles before your special event. The beauty of coily updos is that they’re incredibly forgiving—a slightly imperfect twist or an extra fluff of your coils often looks intentional and artistic rather than messy. Try each style a few times if you can, photographing yourself from different angles so you can see how the style translates in real life and on camera. This preparation also takes the stress out of styling on the day of your event, since you’ll already know exactly how to execute it and what products work best.
Finally, remember that the best updo is the one that makes you feel powerful, beautiful, and authentically yourself. Whether you choose a simple high puff with elegant accessories, an intricate layered roll, or anything in between, you’re already honoring your natural texture by styling it intentionally for an event that matters to you. Coily updos are never an afterthought or a compromise—they’re a genuine, beautiful choice that celebrates who you are.