Wavy hair is a playground for braiding. Unlike perfectly straight hair that can look stiff, or tight curls that demand specific techniques, waves have an inherent texture that makes braids look fuller, more romantic, and effortlessly undone in the best possible way. The thing is, most braid tutorials are filmed on poker-straight hair or coily textures—leaving people with waves wondering if the style will even work for them. (It absolutely will, once you know the tricks.)
The real magic of braiding wavy hair is that the texture does half the work for you. Your waves naturally fill in the gaps between sections, add volume at the roots, and create that coveted “I woke up like this” vibe that took someone else an hour with a straightener to fake. But there’s a technique shift required. Wavy hair braids differently than straight hair—you need to account for the texture, work with your natural movement rather than against it, and know which braid styles will look effortlessly beautiful versus trying too hard.
I’ve spent years experimenting with braids on wavy hair, and I’ve noticed which styles genuinely enhance waves and which ones fight the texture. Some braids look thinner and more fragile on wavy hair, while others gain remarkable dimension and movement. The styles that follow work specifically with your wave pattern, not despite it. Whether you want something polished for an important event or a casual braid you can throw together before heading out, the right braid can transform wavy hair into something truly striking.
1. Classic Three-Strand Braid
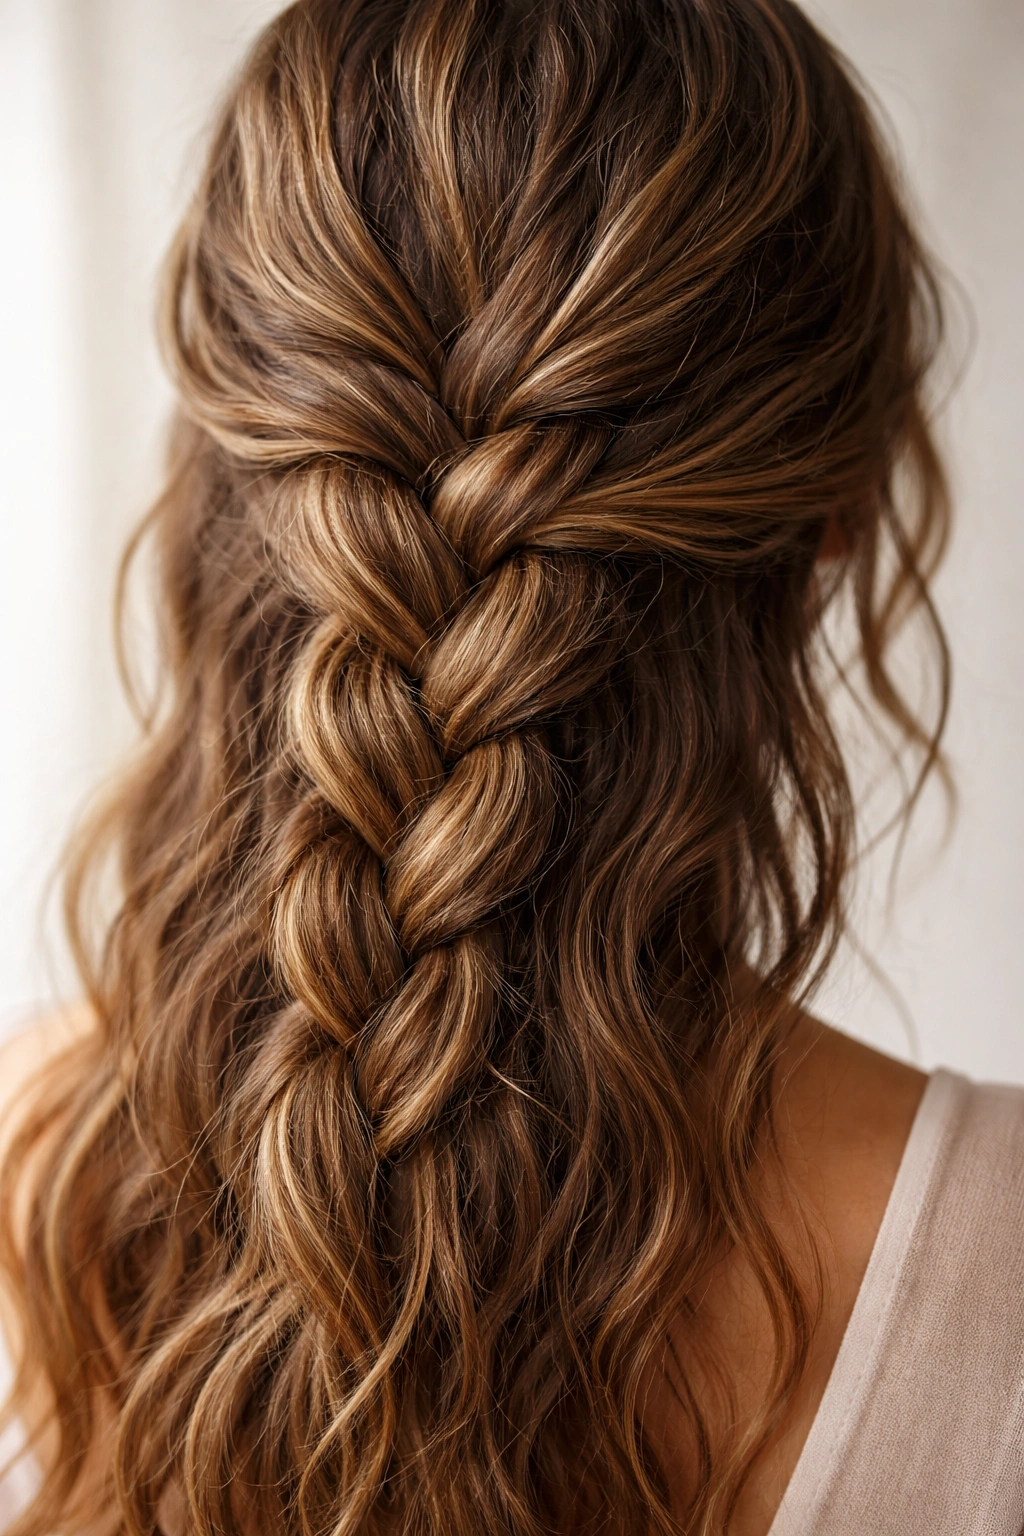
The three-strand braid is the foundation—and on wavy hair, it becomes something unexpectedly beautiful. Most people dismiss it as too basic, but when you braid wavy texture, the waves peek through every section and create a naturally thick, dimensional braid that looks anything but simple.
Start with damp or lightly damp hair. Dry wavy hair can be frizzy and difficult to control, but hair that’s still slightly damp from a shower holds the braid shape better while letting your natural waves remain visible. Divide a section of hair into three equal parts and begin braiding, but here’s the key: don’t pull the sections tight. Loose braiding is what shows off your waves. Tighten just enough to hold the braid together, leaving room for the texture to breathe and create that full, undone look.
Why It Works on Wavy Hair
Wavy hair adds instant fullness to a basic three-strand braid that straight hair simply can’t match. The texture naturally fills the gaps between sections, making even a simple braid look professionally done and intentional.
How to Perfect Your Three-Strand Braid
- Braid from underneath rather than over the top (this creates more visual interest and shows off texture)
- Don’t comb through the braid when you’re finished—gently separate the sections by hand to encourage your waves to show through
- Use a light texturizing spray before braiding to enhance the waves and grip the strands slightly
- Finish at the end of your hair and secure with a clear elastic that won’t disturb the braid’s texture
Pro tip: Do this braid the night before you need it, then gently shake it out the next morning. Overnight, the braid sets your waves in a gorgeous rippled pattern that stays put all day.
2. Dutch Braid for Maximum Texture

A Dutch braid (the reverse of a traditional French braid, where you cross strands under instead of over) becomes dramatically fuller and more textured on wavy hair. Because you’re working opposite to the traditional braid, it sits on top of your head with more presence, and the waves make it look substantially thicker than it actually is.
The Dutch braid technique is identical to a French braid, just inverted—instead of crossing the left section over the middle, you cross it under the middle. Start at the top of your head and work your way down, adding small sections as you go. On wavy hair, this braid develops serious personality. The underbraid structure creates shadows and depth that make the braid appear fuller and more intricate.
What Makes Dutch Braids Perfect for Waves
The reverse-braid structure naturally showcases textured hair. Wavy sections create visual contrast and dimension that a Dutch braid on straight hair simply can’t achieve. Plus, waves add volume that makes even a loose Dutch braid look intentional and polished.
Technique for Best Results
- Start your Dutch braid slightly to one side rather than dead-center—this creates an asymmetrical, more modern look that flatters textured hair
- Pull slightly on the outer edges of the braid as you go to create texture and volume (this technique is called “pancaking” and it’s essential for maximum dimension)
- Don’t finish all the way to the bottom—stop at the nape of your neck and secure with a small elastic, leaving the ends loose and wavy
- Use a lightweight texturizing spray beforehand so strands grip each other without feeling stiff
Worth knowing: Dutch braids look best on hair that’s been styled with some movement first. If you blow-dry your waves or use a sea salt spray before braiding, you’ll get the most pronounced, beautiful results.
3. French Braid Romance
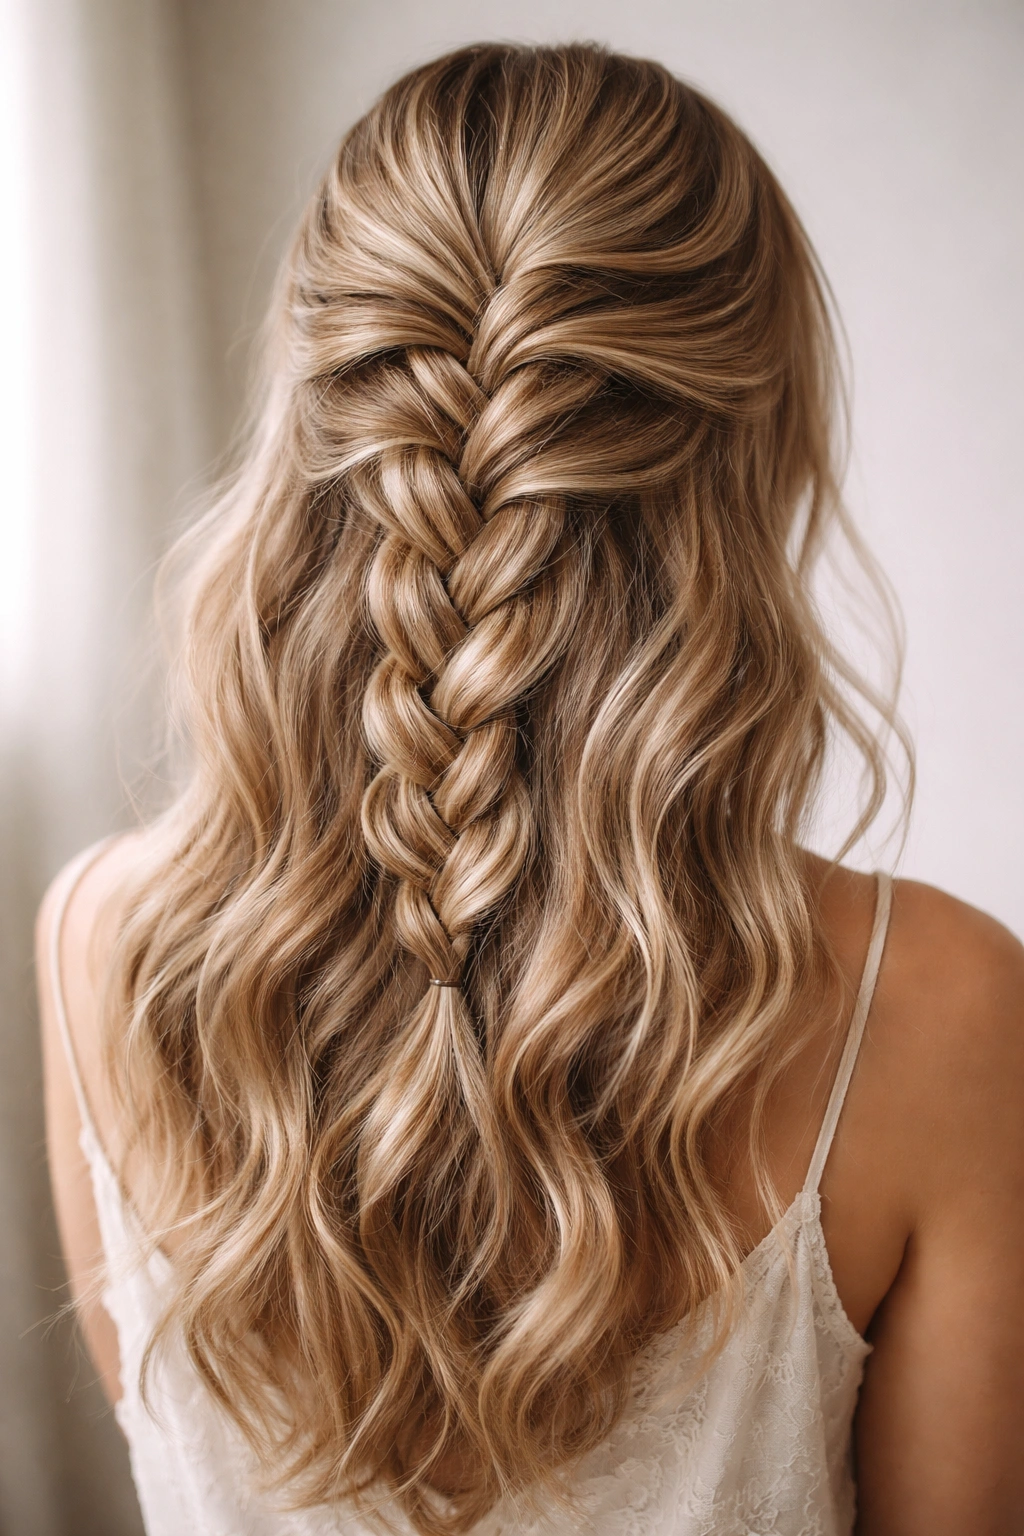
The French braid is elegant and timeless, and on wavy hair it takes on a romantic, slightly undone quality that feels intentionally styled rather than formal. Unlike straight hair, where a French braid can look very structured and defined, a French braid on waves has a softer, more relaxed aesthetic while still being polished enough for a date or special occasion.
Begin at the crown of your head with three small sections. Cross the right section over the middle, then the left over the middle, just like a traditional braid. As you progress down the head, add small sections of hair to the outer strands before crossing them into the middle. The difference on wavy hair is subtle but significant: your waves create tiny peaks and valleys within the braid that catch light and add dimension.
Why Waves Transform a French Braid
A French braid on straight hair can sometimes read as extremely controlled and neat. But wavy hair breaks up the perfect uniformity of the braid pattern, creating a texture-forward style that reads as “effortlessly beautiful” rather than “perfectly done.” This is exactly what makes it romantic.
Steps for Maximum Impact
- Work with damp hair so the braid holds its shape while still showcasing waves
- Braid loosely enough that you can see the wave pattern in each section—tight, flat braids flatten wavy texture
- Once finished, gently pancake the braid by pulling out the outer edges to increase volume and reveal more texture
- Secure with bobby pins at the base rather than a tight elastic, which helps the braid fade into loose waves at the bottom
Insider note: Do this braid on the second day of hair (not freshly washed, which can be too slippery). Day-two hair has better grip and texture, making the braid hold longer and look fuller.
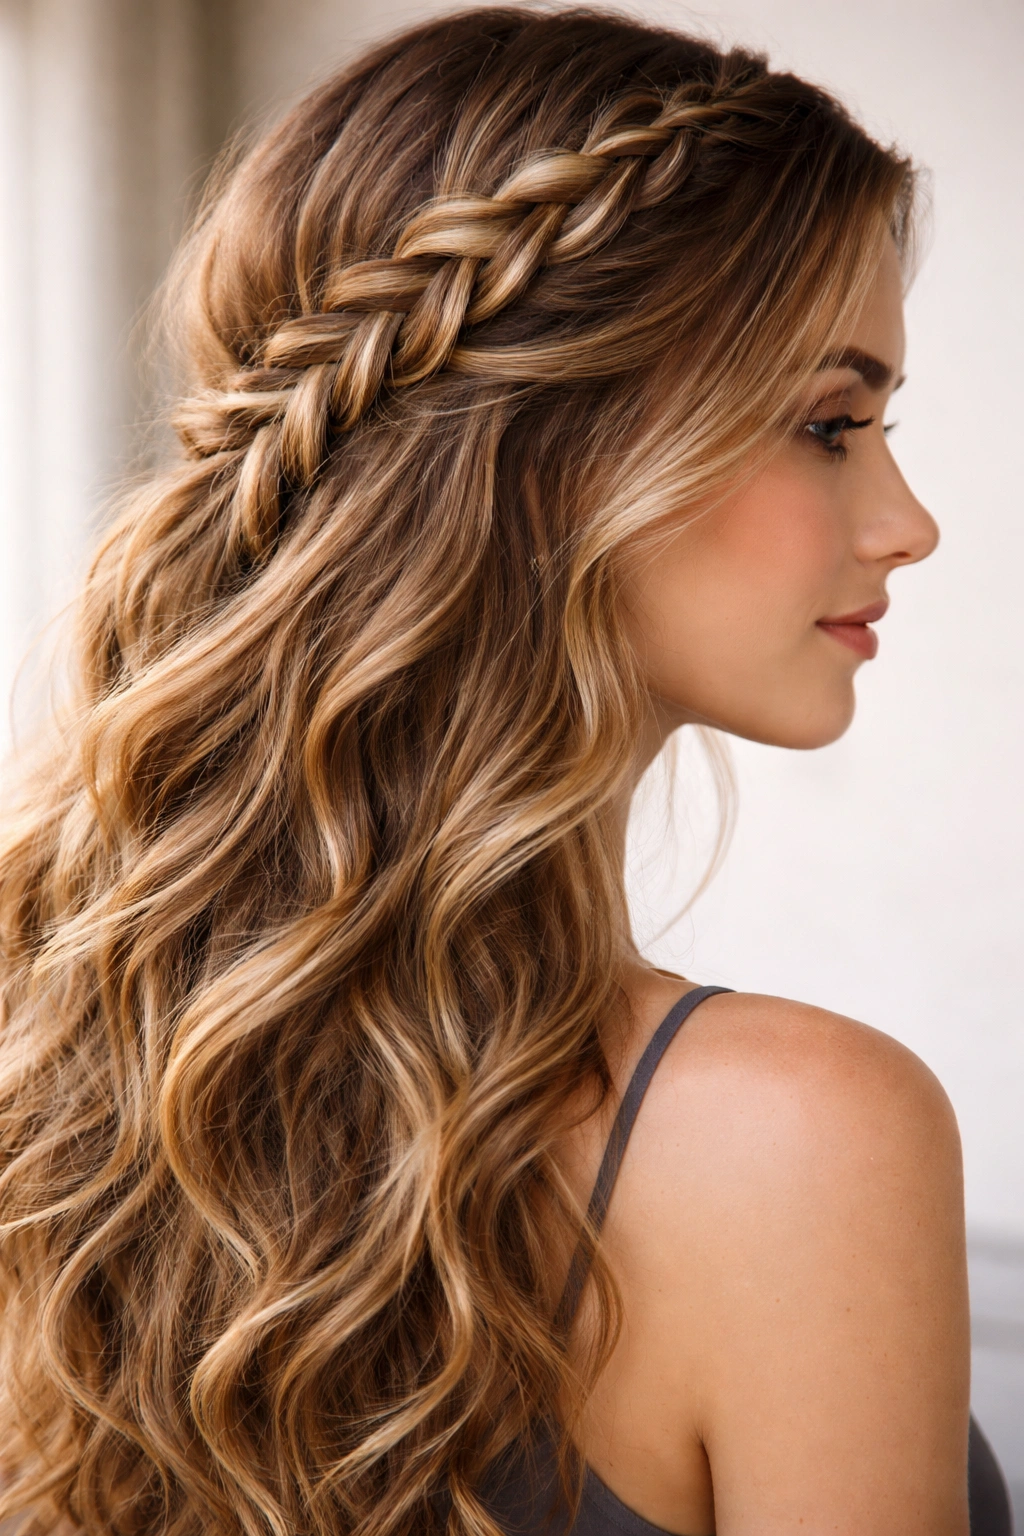
4. Crown Braid for Elegance
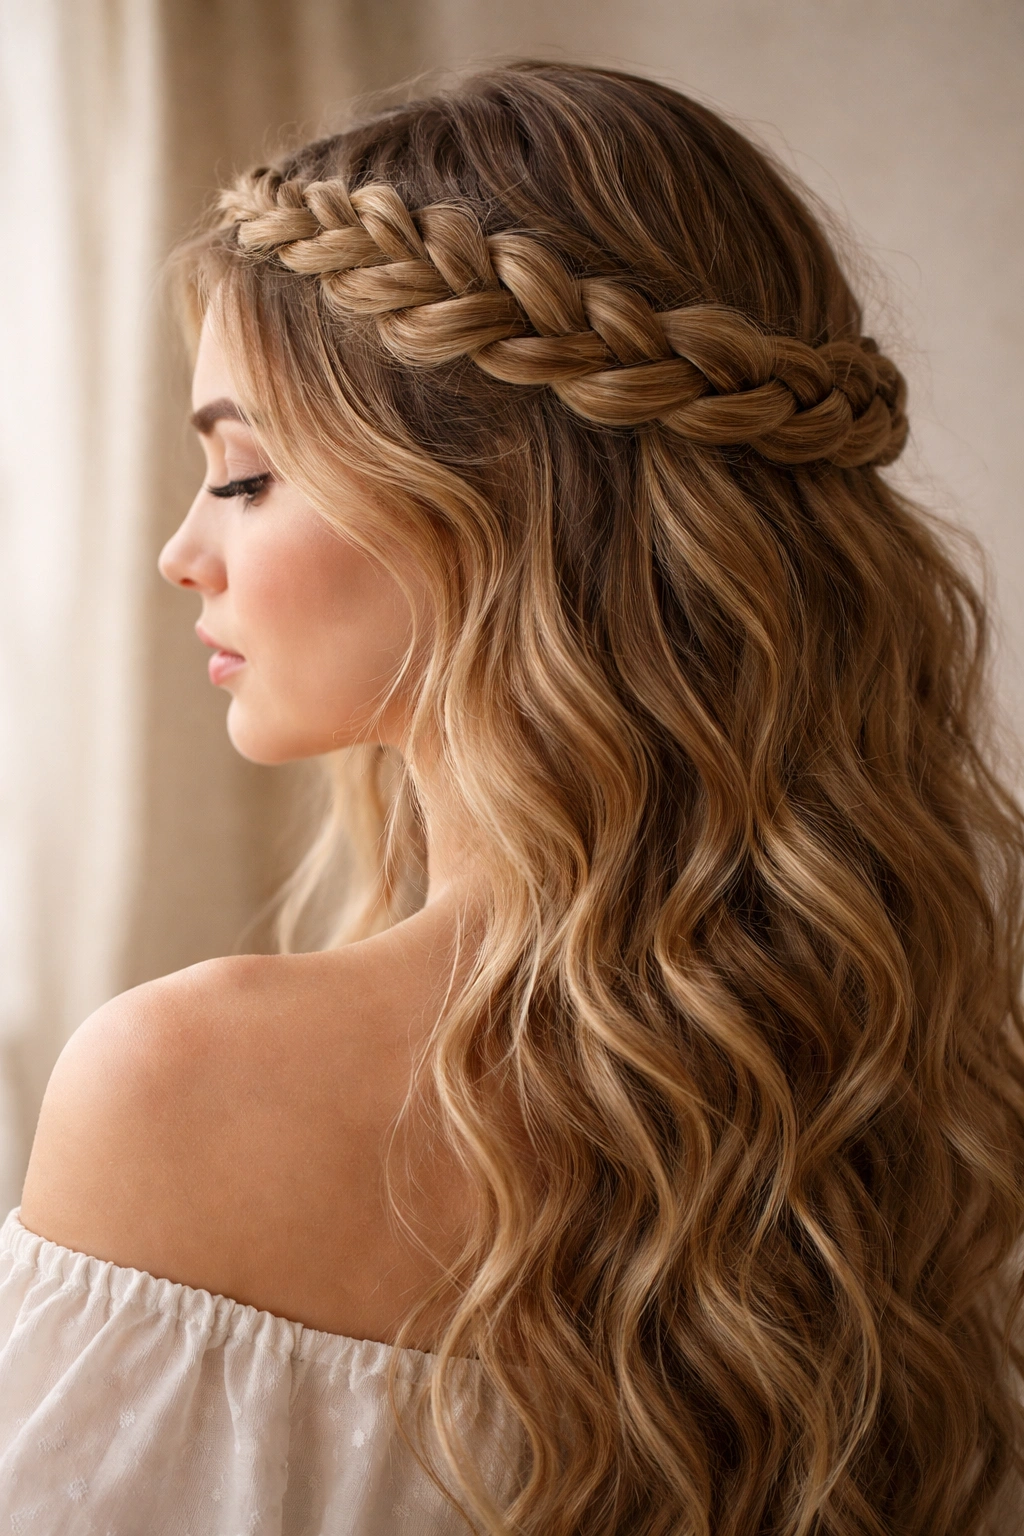
A crown braid is a French braid that wraps around your head like a halo, creating a princess-worthy look that works beautifully for wavy hair. Because the braid sits atop your waves rather than nestled against your head, the texture of your waves becomes the visual backdrop—making the braid feel more interesting and less severe than it would on straight hair.
Start a French braid on one side of your head and work it toward the back, creating a braid that travels horizontally across the back of your head. Finish the braid on the opposite side and pin it into place. Secure with bobby pins that match your hair color, and pull out the remaining hair so it falls in waves around the crown. The effect is ethereal.
Building the Perfect Crown Braid
The crown braid is fundamentally a French braid that travels a different path, so the technique is the same—but the path is everything. You want the braid to travel horizontally, not vertically, so it creates an actual visual crown around your head.
Pro Tips for Crown Braid Success
- Start the braid lower than you think (toward your temple rather than your hairline) so the braid sits higher and more noticeably on your head
- Use bobby pins or decorative clips to secure the end of the braid—a ponytail holder will just disappear into your waves
- Pancake the braid as you go, pulling out sections to maximize volume and showcase your waves
- Let the back of your hair fall completely loose—don’t try to braid all the way around in a continuous circle; instead, stop at the opposite temple
Pro tip: Add small flowers, delicate clips, or ribbon woven through the braid to elevate this style for special occasions. Wavy hair holds decorative elements beautifully.
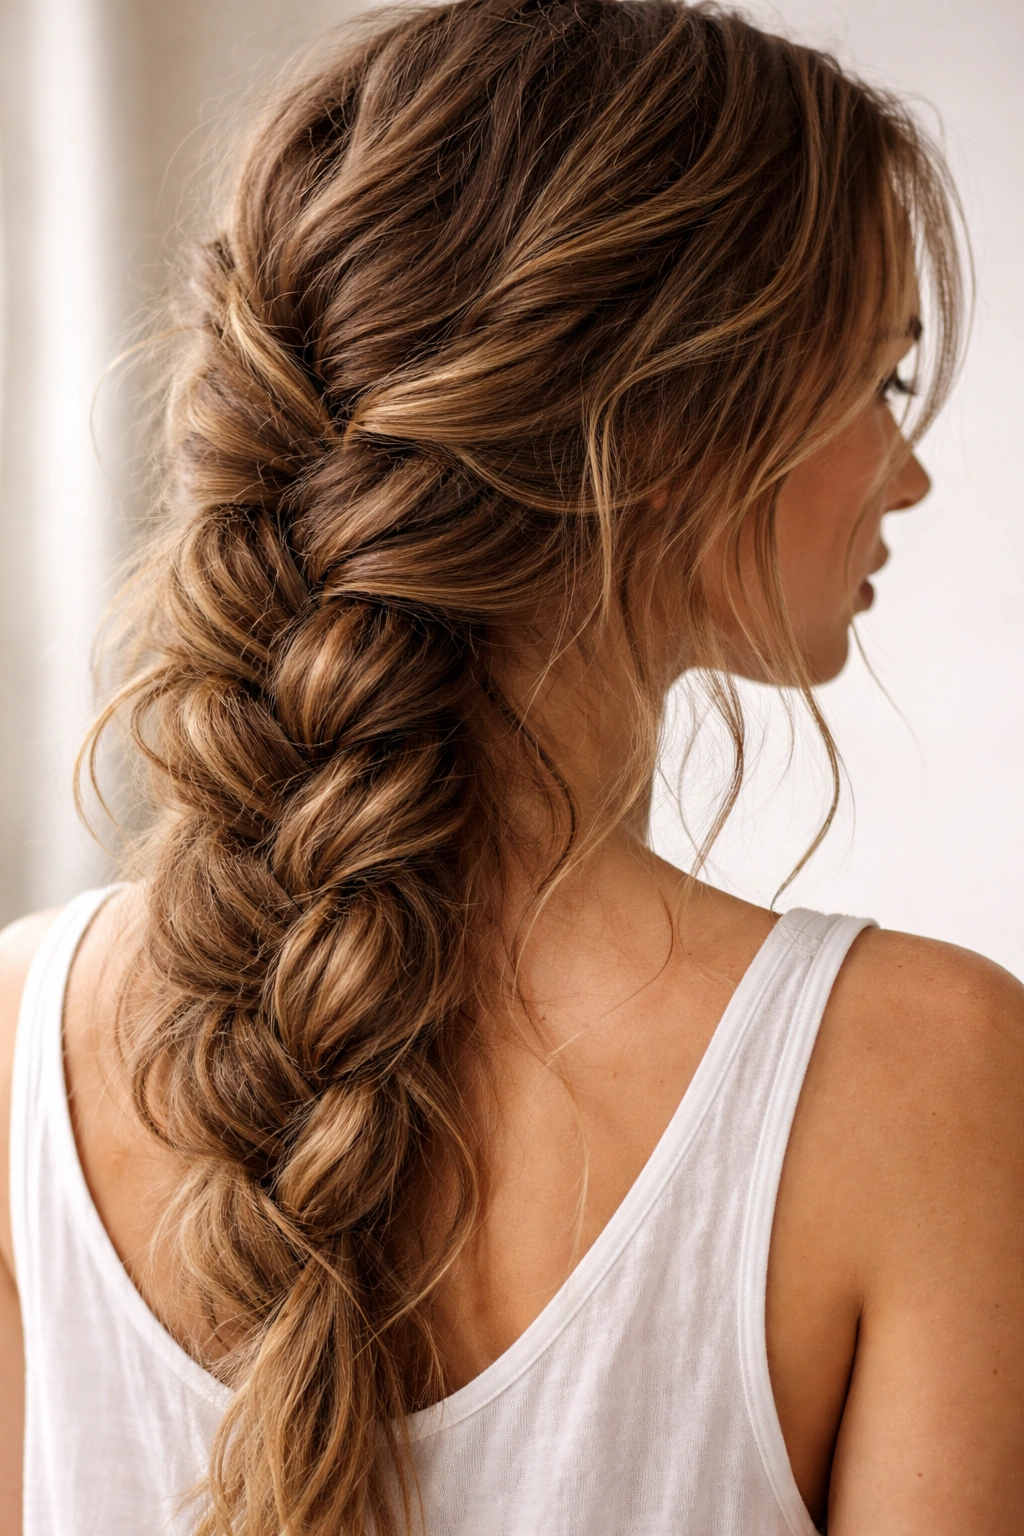
5. Fishtail Braid for Dimension
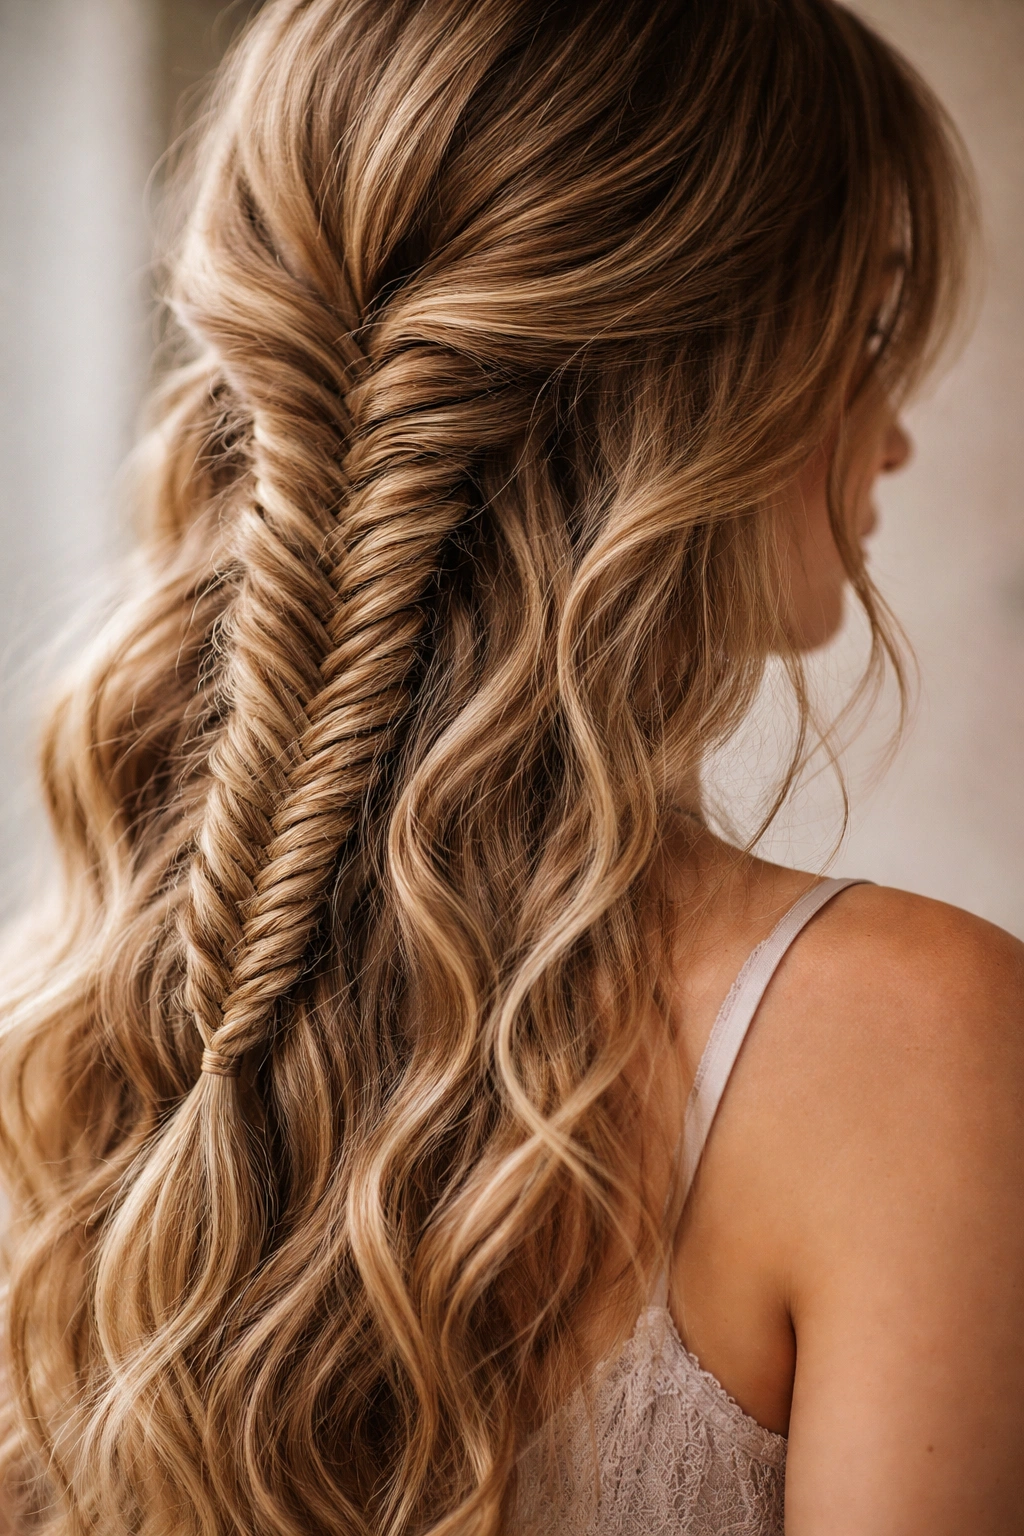
A fishtail braid uses only two sections instead of three, creating a braid that’s intricate and textured by nature. On wavy hair, a fishtail braid becomes almost three-dimensional—the two-strand structure creates tiny peaks and valleys that catch the light differently than a traditional three-strand braid, and your waves amplify that effect.
Divide your hair into two sections. Take a small piece from the outside of the right section and cross it over to the left section. Then take a small piece from the outside of the left section and cross it to the right. Continue this pattern, using smaller sections than you would for a three-strand braid. The result is a braid that looks complex and intricate, even though the technique is simpler than it appears.
Why Fishtail Braids Shine on Wavy Hair
Fishtail braids have an inherently textured appearance because the two-strand structure naturally creates more surface area and visual interest than a three-strand braid. When you layer that on top of existing waves, you get a braid that reads as intentionally undone and effortlessly complex.
Technique for Perfect Fishtail Results
- Use thinner sections than you’d use for a three-strand braid (about half the thickness) so the fishtail pattern remains visible
- Start looser than feels comfortable—you’ll tighten it as you go by pulling each small section slightly
- Pancake the finished braid generously; fishtail braids are designed to be slightly undone and textured, so pull out the edges and expand the braid width
- Work with slightly damp hair so small sections stay together but your waves remain defined
Worth knowing: Fishtail braids look particularly stunning when done loosely and pancaked aggressively. This is the braid style where “messy” is actually the goal.
6. Waterfall Braid Style
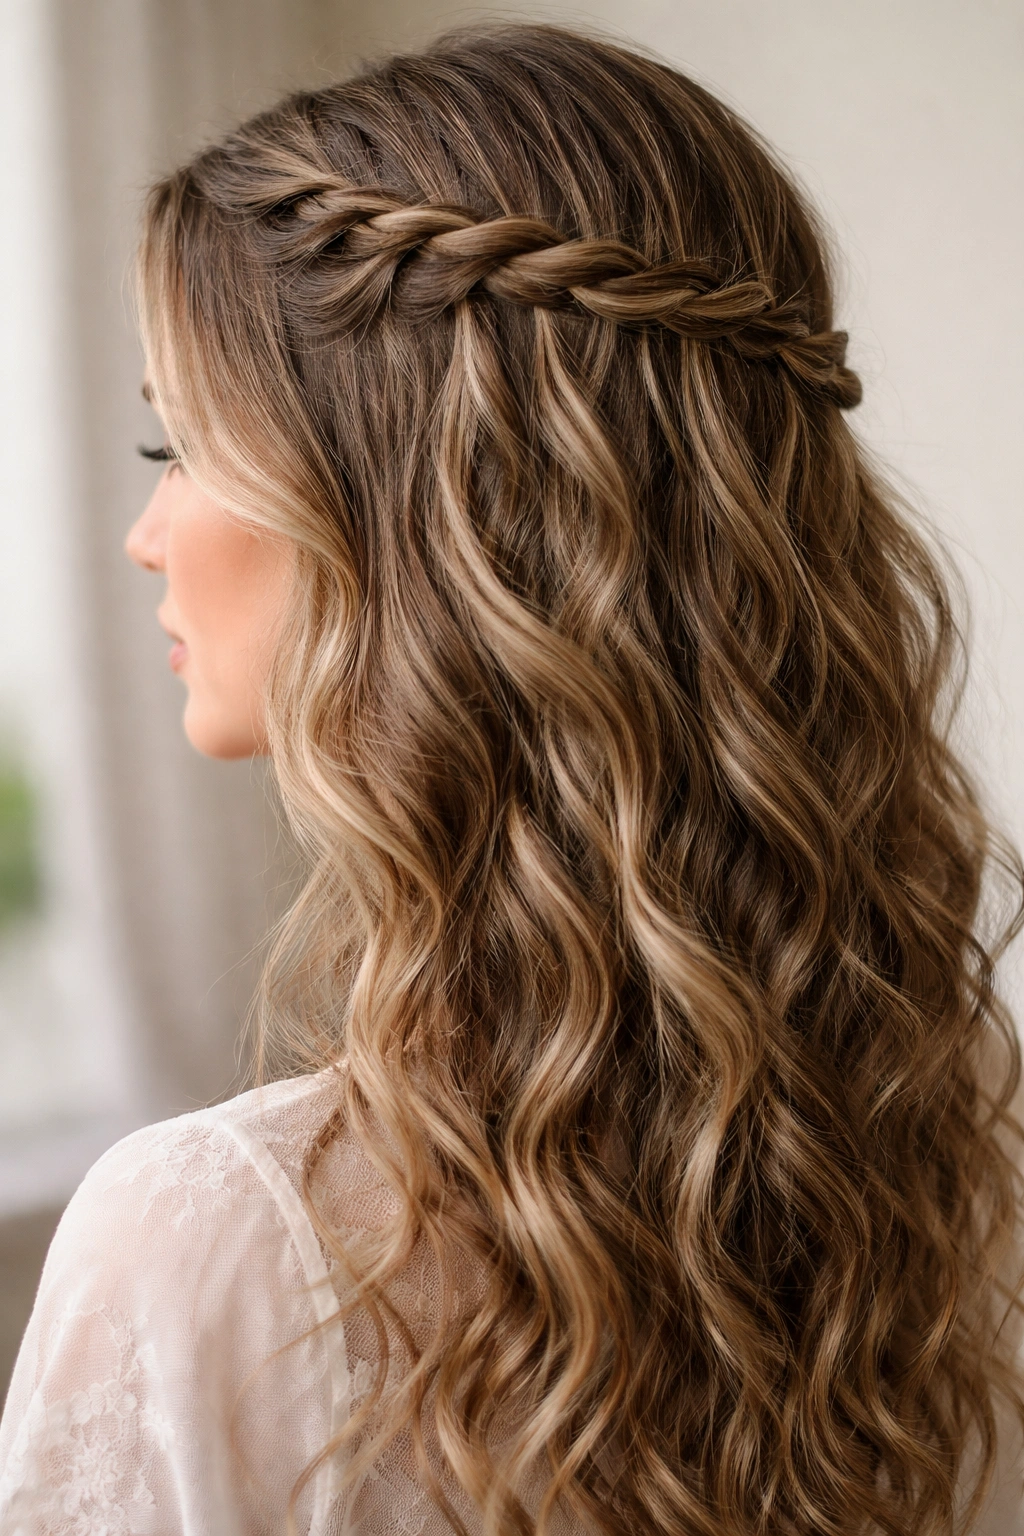
A waterfall braid is a French braid with a twist—instead of adding every strand into the braid, you let one strand fall freely as you progress, creating the effect of water cascading down. On wavy hair, this style becomes particularly beautiful because the “waterfall” strands flow with your natural wave pattern, creating a romantic, flowing aesthetic.
Start a French braid at one side of your head. As you create each cross, let the front strand fall completely loose instead of incorporating it back into the braid. This creates a pattern of loose strands that cascade down your head in a waterfall effect. The technique requires more concentration than a standard French braid, but the result is worth it.
What Makes Waterfall Braids Perfect for Waves
Because the loose strands in a waterfall braid follow the natural wave pattern of your hair, they frame your face beautifully and flow with your existing texture rather than against it. On straight hair, waterfall strands hang flat and rigid. On wavy hair, they curve and move, creating that romantic cascade effect the style is designed for.
Steps for Flawless Execution
- Start your braid slightly behind your temple, not at your hairline, so the waterfall effect is more visible
- Work toward the back of your head, allowing each “water” strand to fall down the side of your face
- Once you reach the back of your head, either finish the braid at the nape or convert to a loose three-strand braid with the remaining hair
- Use bobby pins to secure the braid out of sight, letting the waterfall strands fall freely
- The loose strands will naturally follow your wave pattern—don’t fight it by trying to make them perfectly smooth
Insider note: This style looks more intentional if you curl or wave the “waterfall” strands slightly with a curling iron before braiding. This ensures they work with your existing waves rather than looking like they’re trying to be straight.
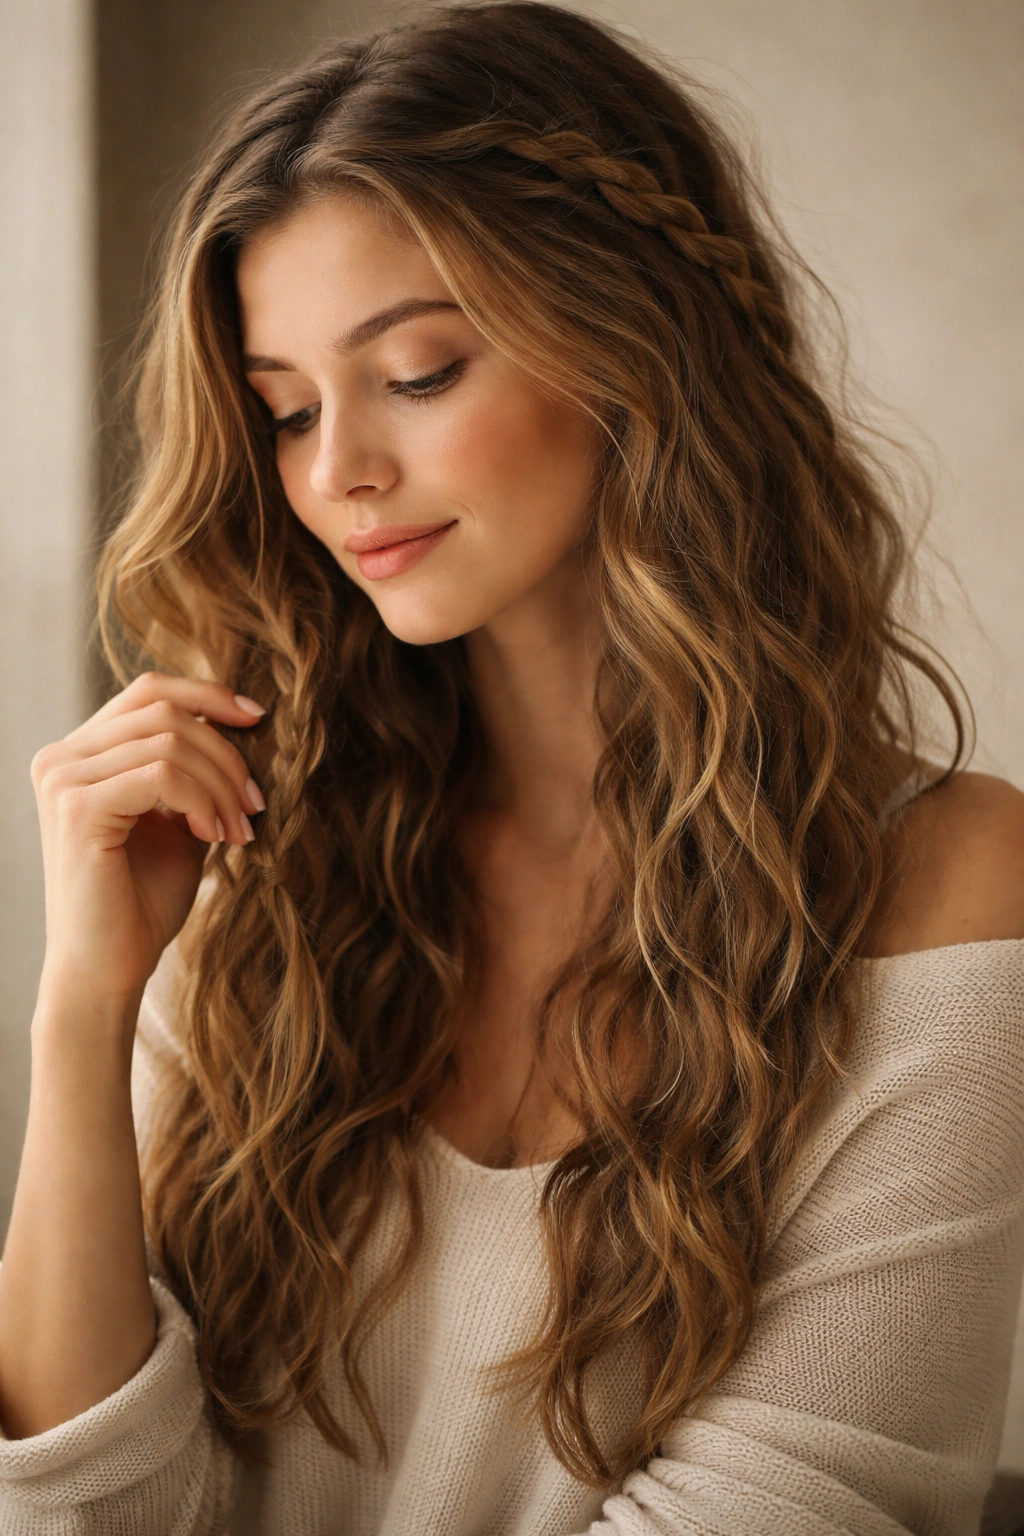
7. Messy Loose Braid
Sometimes the most beautiful braid is the one that looks like you didn’t try very hard. A messy loose braid works exceptionally well on wavy hair because waves are the texture that naturally makes braids look full and undone. This isn’t a sloppy braid—it’s a carefully undone braid that celebrates the texture you already have.
Divide your hair into three sections and begin braiding, but make it intentionally loose from the start. Don’t worry about making it perfect or symmetrical. Once finished, gently pull on every outer edge of the braid to create volume and separation. The goal is a braid that looks like it barely holds together, where you can see all the individual waves and texture within the braid structure.
Why Messy Loose Braids Look Best on Wavy Hair
Loose braids on straight hair often look unfinished or like you gave up. But on wavy hair, a loose braid is genuinely beautiful because the waves give the braid shape and structure that straight hair lacks. Your waves are doing the heavy lifting, making the braid look intentional and designed rather than sloppy.
How to Achieve the Perfect “Undone” Look
- Start with textured hair (second-day hair or hair that’s been styled with waves already, not freshly washed)
- Braid extremely loosely—imagine you’re braiding with wet spaghetti noodles rather than solid strands
- Pancake the braid as aggressively as you’re comfortable doing; pull out every outer edge to increase width and texture
- Use a small clear or textured elastic at the end, something that doesn’t draw attention to the tie
- Finish with a light texture spray that adds grip and helps the braid stay together without looking stiff
Pro tip: If your braid starts to fall apart during the day, that’s actually the goal. The more lived-in it looks by evening, the more intentionally undone it appears.
8. Double Braid Look
Double braids (one braid on each side of your head) are playful and youthful, but they read completely differently on wavy hair than on straight hair. Instead of looking like a hairstyle for a younger person, double braids on wavy hair read as intentionally stylish and textured. The two braids frame your face while letting your waves cascade down the back, creating volume and movement that feels genuinely sophisticated.
Divide your hair down the center into two sections. Create a French braid or three-strand braid on one side of your head, starting at the temple and working toward the back. Repeat on the opposite side. Secure both braids at the nape and let the remaining hair fall in loose waves down your back. The result is a style that’s polished enough for work but has enough texture and movement to feel modern.
Why Double Braids Work for Adult Wavy Hair
The textured waves surrounding and flowing from the double braids add sophistication that straight hair can’t match. On straight hair, double braids read distinctly young. On wavy hair, the texture and volume create a chic, dimensional look that works for any age.
Creating Double Braids That Feel Sophisticated
- Start each braid slightly behind your temple rather than at your hairline—this creates a more modern, less juvenile placement
- Make the braids loose enough that you can see wave texture within them (tight braids look younger and less textured)
- Don’t braid all the way to the ends; stop at ear length and secure with a small elastic, letting the rest of your hair flow loose and wavy
- Pancake both braids to add volume and showcase the textured pattern within each braid
- Consider braiding only the front section of hair on each side, leaving the back completely loose; this creates dimension and movement
Worth knowing: Double braids look particularly stunning when you add color to them—a temporary color spray, ribbon woven through, or even small clips add visual interest to an otherwise simple style.
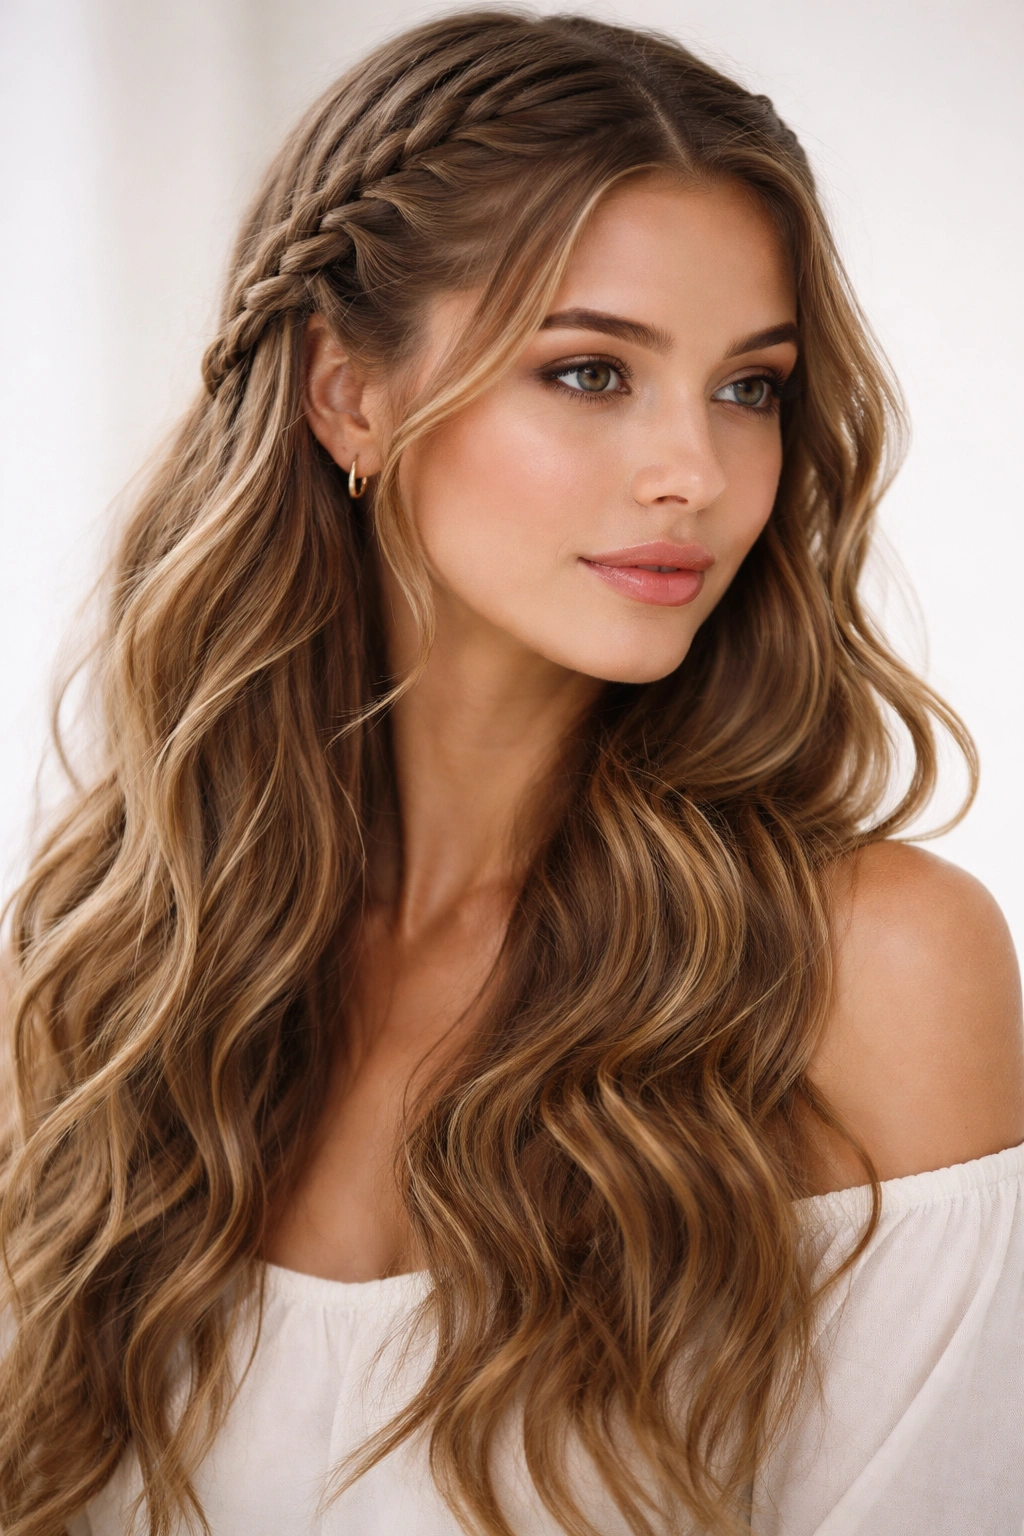
9. Side-Swept Braid
A side-swept braid is a French or three-strand braid that starts on one side of your head and travels across toward the opposite side, creating an asymmetrical look that’s both romantic and practical (it keeps your hair off your face while still keeping it down). On wavy hair, this style gains tremendous visual interest because the braid sits against a backdrop of flowing waves, creating dimension and contrast.
Create your braid starting at one temple, working it diagonally across the back of your head toward the opposite shoulder. Secure at the end with a small elastic or bobby pins. Let the remaining hair fall freely in waves around the braid. The effect is lopsided and interesting—far more visually compelling than a centered braid would be.
What Makes Side Braids Particularly Flattering
A braid that travels diagonally across your head draws the eye in an intentional direction, framing your face from an angle. On wavy hair, this creates a style that’s flattering to most face shapes and adds visual interest without requiring perfectly styled waves.
Tips for the Most Flattering Side Braid
- Start your braid at the temple on the side you want it to begin, then gradually bring it toward the center back of your head
- Let the braid fade into loose waves as it reaches the opposite shoulder; don’t force it to be perfectly tight or uniform all the way through
- Use bobby pins to secure the end rather than an elastic, so the braid transitions seamlessly into loose hair
- Pancake the braid on the side facing your face so it has more volume and presence
- Don’t try to make it symmetrical; asymmetry is the entire point and what makes it interesting
Pro tip: This braid works beautifully when you secure it with a delicate clip or small flower rather than an invisible bobby pin. Small decorative elements draw attention to your styling without being overdone.
10. Braided Bun Updo
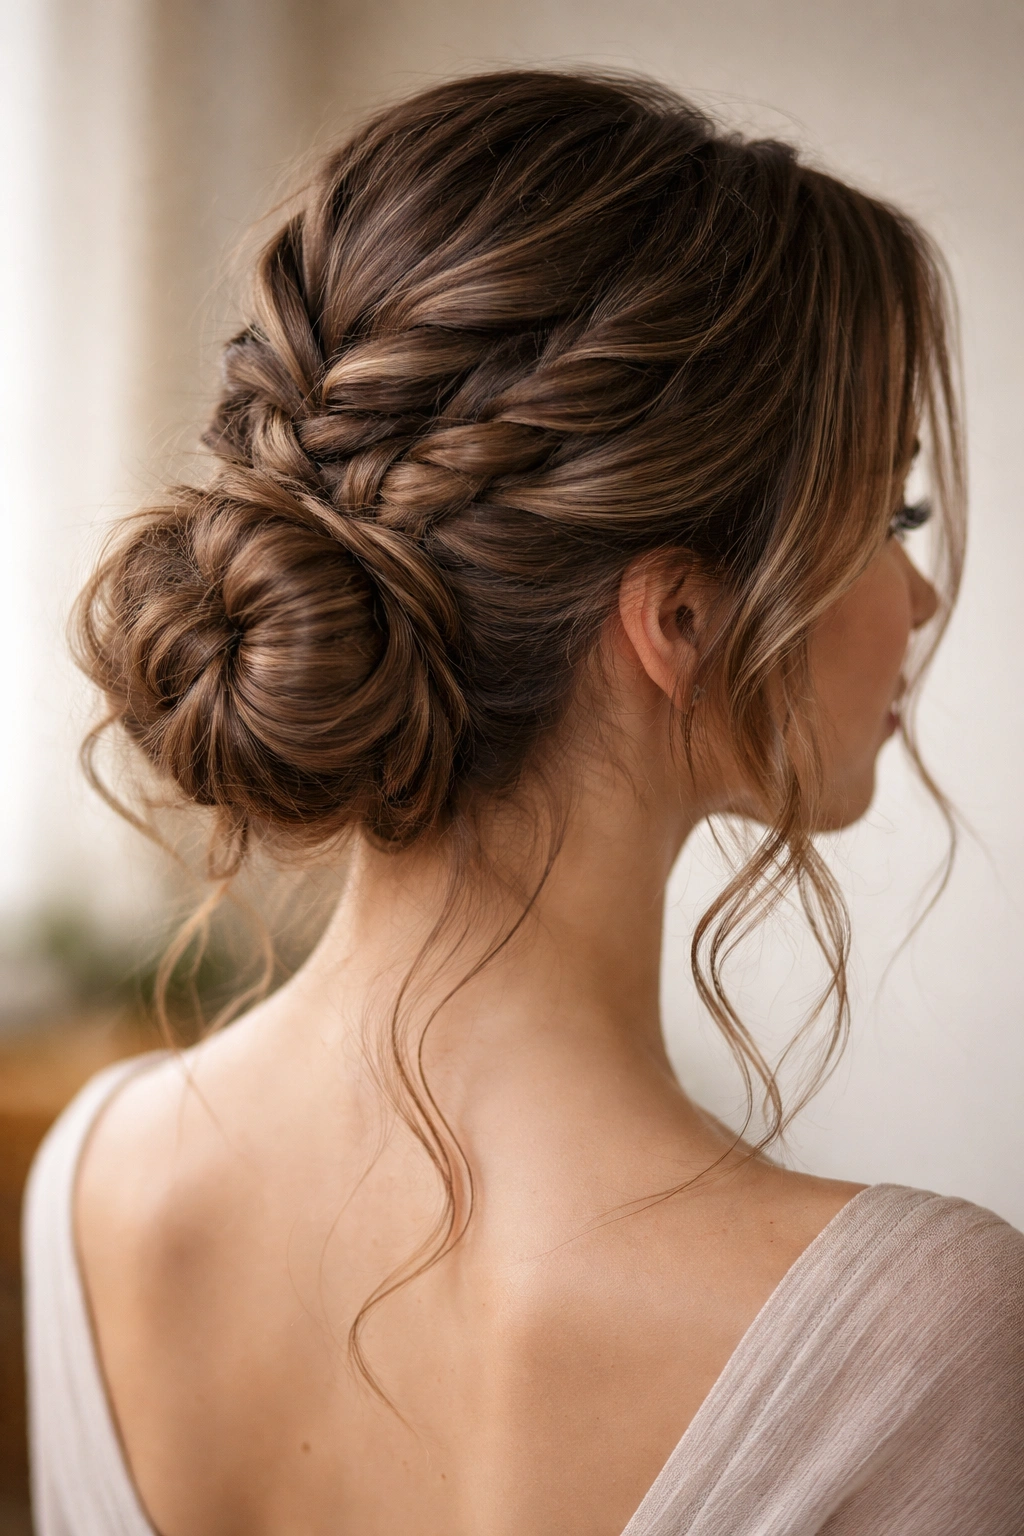
A braided bun combines the texture and interest of a braid with the practicality of an updo. On wavy hair, a braided bun becomes a style that’s elegant enough for events but has enough texture and movement to feel modern and romantic rather than stiff and formal.
Create a French or Dutch braid starting at the crown of your head and working down toward the nape. Once you reach the bottom, wrap the braid around itself at the base of your neck, securing it with bobby pins to form a bun. Leave a few small sections of wavy hair loose around your face and neck for softness. The braid becomes the structure of the bun, while your waves create texture and dimension around it.
Why Braided Buns Elevate Your Wave Texture
A regular bun on wavy hair can sometimes look thick and bulbous. But a braided bun takes that texture and organizes it into a style that feels intentional. The braid structure keeps everything in place while the waves add visual interest and softness.
Creating a Braided Bun That Looks Polished
- Braid loosely so the structure remains visible and textured in the finished bun
- Pancake the braid before wrapping it into a bun to maximize volume and show off the braid pattern
- Secure the bun with multiple bobby pins in different directions so it holds firmly but doesn’t flatten the texture
- Leave 2-3 small sections of hair loose around the face and nape for a romantic, slightly undone quality
- Use a light hairspray to keep flyaways in place without making the style look stiff
Worth knowing: A braided bun worn for several hours will actually tighten and hold better as the day goes on. This is a style that improves throughout the day rather than falling apart, making it perfect for all-day wear.
Final Thoughts
Braiding wavy hair is genuinely easier than braiding straight hair once you understand that your texture is an asset, not a challenge to work around. Each of these braid styles works with your natural waves rather than requiring you to fight them into submission. The waves add volume, dimension, and that effortlessly romantic quality that people pay hairstylists hundreds of dollars to fake.
The real secret to beautiful braids on wavy hair is loose braiding and aggressive pancaking. Let your texture show. Stop trying to make your braids look perfectly uniform and structured—that’s not what wavy hair does, and honestly, the undone textured version is far more beautiful. Your waves are doing half the work; let them.
Start with whichever style speaks to you, and give yourself grace as you practice. Braiding is a skill that improves dramatically with repetition. By your third or fourth attempt at any of these styles, your hands will remember the motions and your eye will understand what “loose enough” actually looks like on your specific hair. That’s when the magic happens—when the technique becomes automatic and you’re free to focus on making it look intentionally undone rather than struggling through the mechanics.