Straight hair doesn’t always make styling easier—it can actually be trickier to work with than you’d think. While texture naturally grabs and holds, straight strands are slippery, tend to slip out of traditional hair ties, and reveal every bend and crease a clip leaves behind. Claw clips, though, are almost made for straight hair. Their wider surface area, curved teeth, and gripping design work beautifully with smooth strands, holding styles all day without the flattening that regular clips create. The beauty is that claw clips aren’t just practical—they’re genuinely stylish right now, capable of everything from casual everyday looks to polished, put-together styles that actually photograph well.
The thing about straight hair and claw clips is that you have incredible versatility. Because your strands don’t have natural texture to hide a clip’s edges, the style itself becomes part of the aesthetic. That means your claw clip choices matter visually, not just functionally. Whether you’re going for effortlessly cool, professionally polished, or romantically soft, the right claw clip style can completely shift the vibe of your look. The clips come in different sizes, colors, and finishes—tortoiseshell, metallics, pastels, minimalist black—so there’s genuinely something for every mood and occasion.
Let’s walk through the claw clip styles that look absolutely stunning on straight hair, plus exactly how to achieve each one with that salon-quality finish.
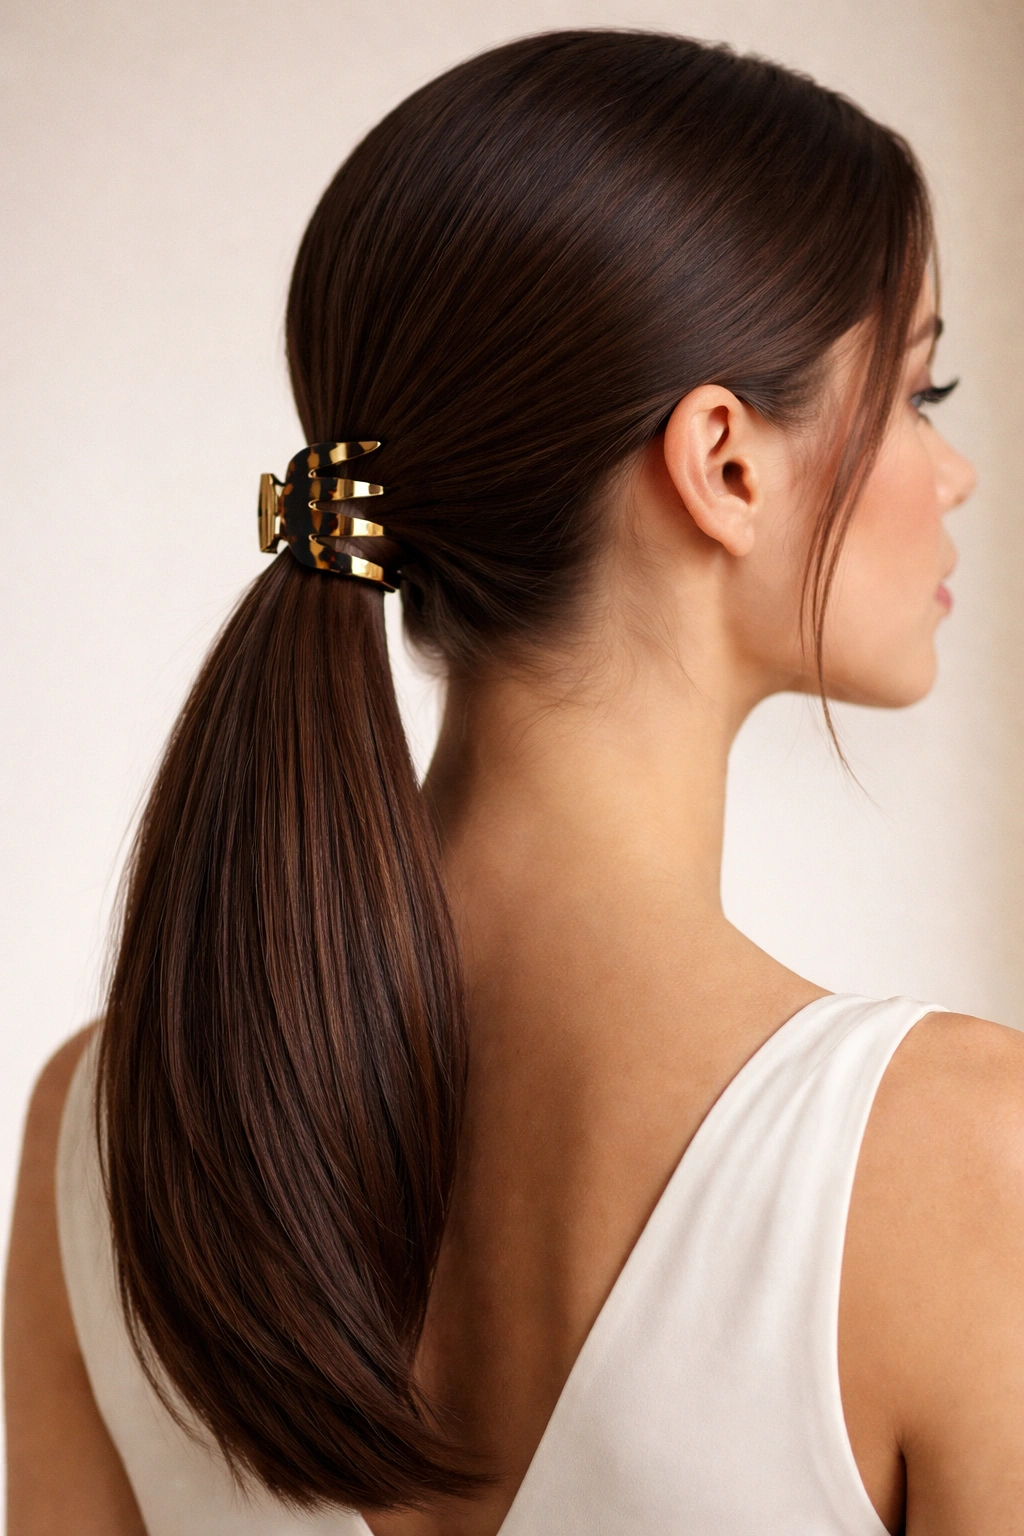
1. The Sleek Low Ponytail
A low ponytail with a claw clip is the definition of effortlessly polished. For straight hair, this style skips the drama of a high pony and leans into understated elegance—the clip becomes a subtle accessory rather than a statement piece. The low placement elongates your neck and works whether you’re dressing up or keeping things casual.
How to Create the Perfect Base
Start with completely dry hair (or hair that’s just been blow-dried straight). Comb or brush your hair back smoothly, sweeping it into a low position at the nape of your neck—roughly where a collar would sit. The key with straight hair is to keep tension smooth and even; any bumps or unevenness will show immediately. Use a fine-tooth comb or a boar-bristle brush to smooth everything, creating a polished surface that’ll make the clip look intentional.
Securing It Right
Position your open claw clip horizontally at the base of your ponytail, angling it slightly downward. Gather all your hair into the clip’s teeth, making sure the base of the ponytail sits deep into the clip—not perched at the edge where it might slip. For straight hair, you don’t need a traditional hair tie underneath; the clip alone will hold securely. If you prefer extra security (especially if your hair is very fine or slippery), a small elastic band underneath the clip works beautifully and stays completely hidden.
Pro tip: Pull out one or two thin face-framing strands before clipping to soften the look and add dimension. These delicate wisps make the style feel intentionally soft rather than severely pulled back.
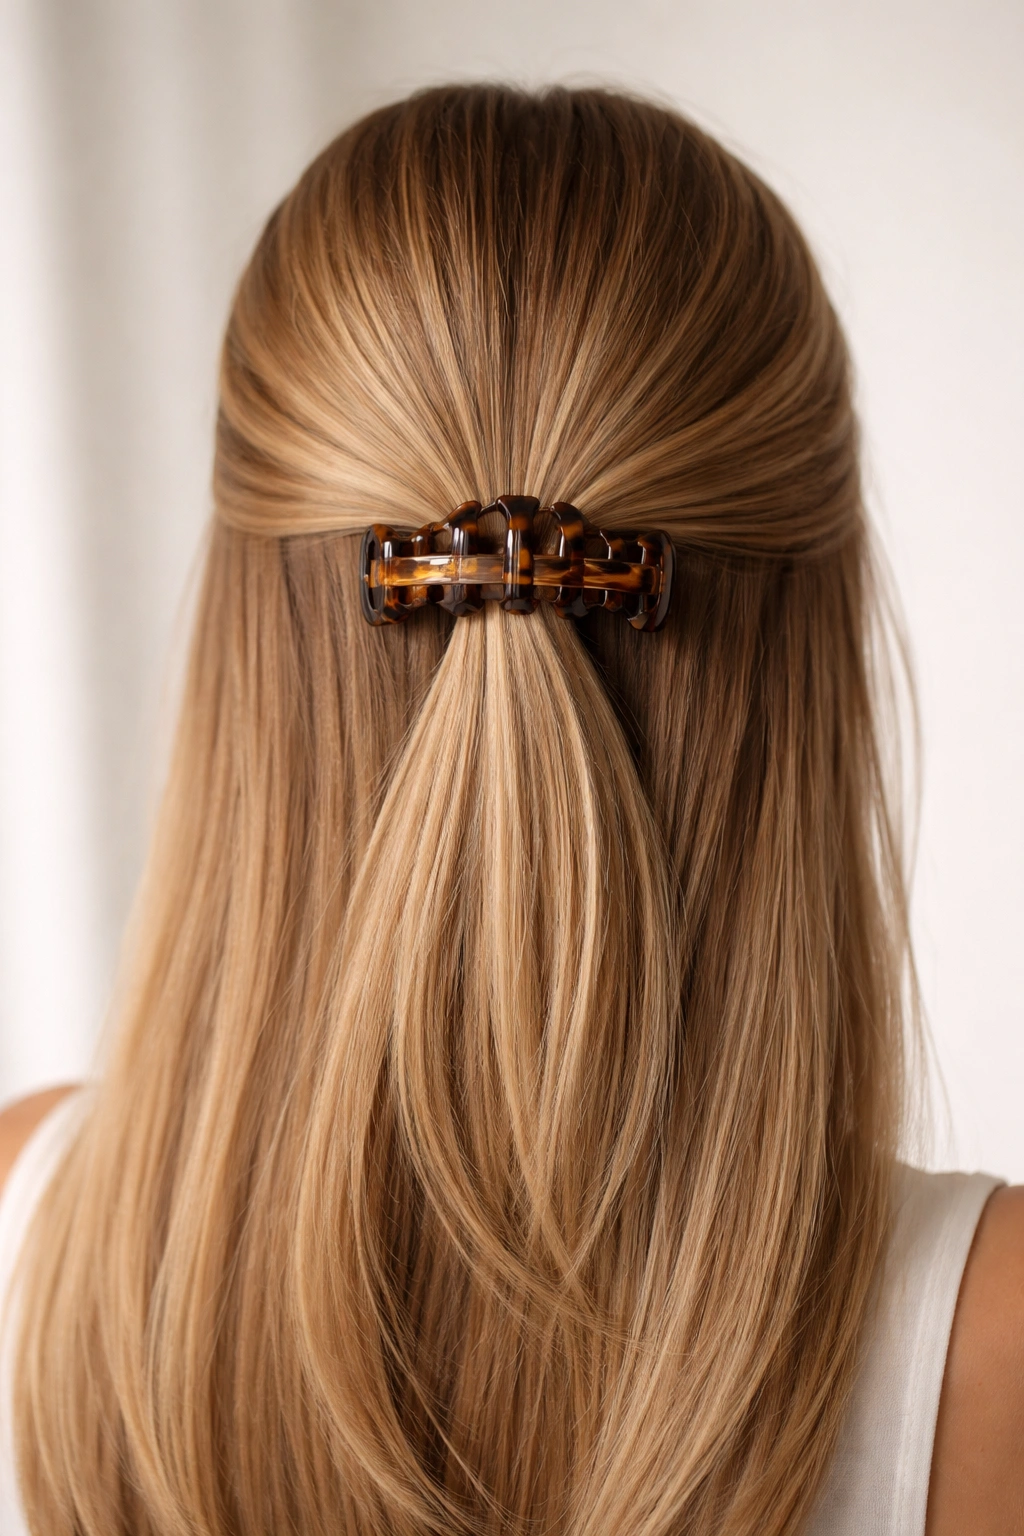
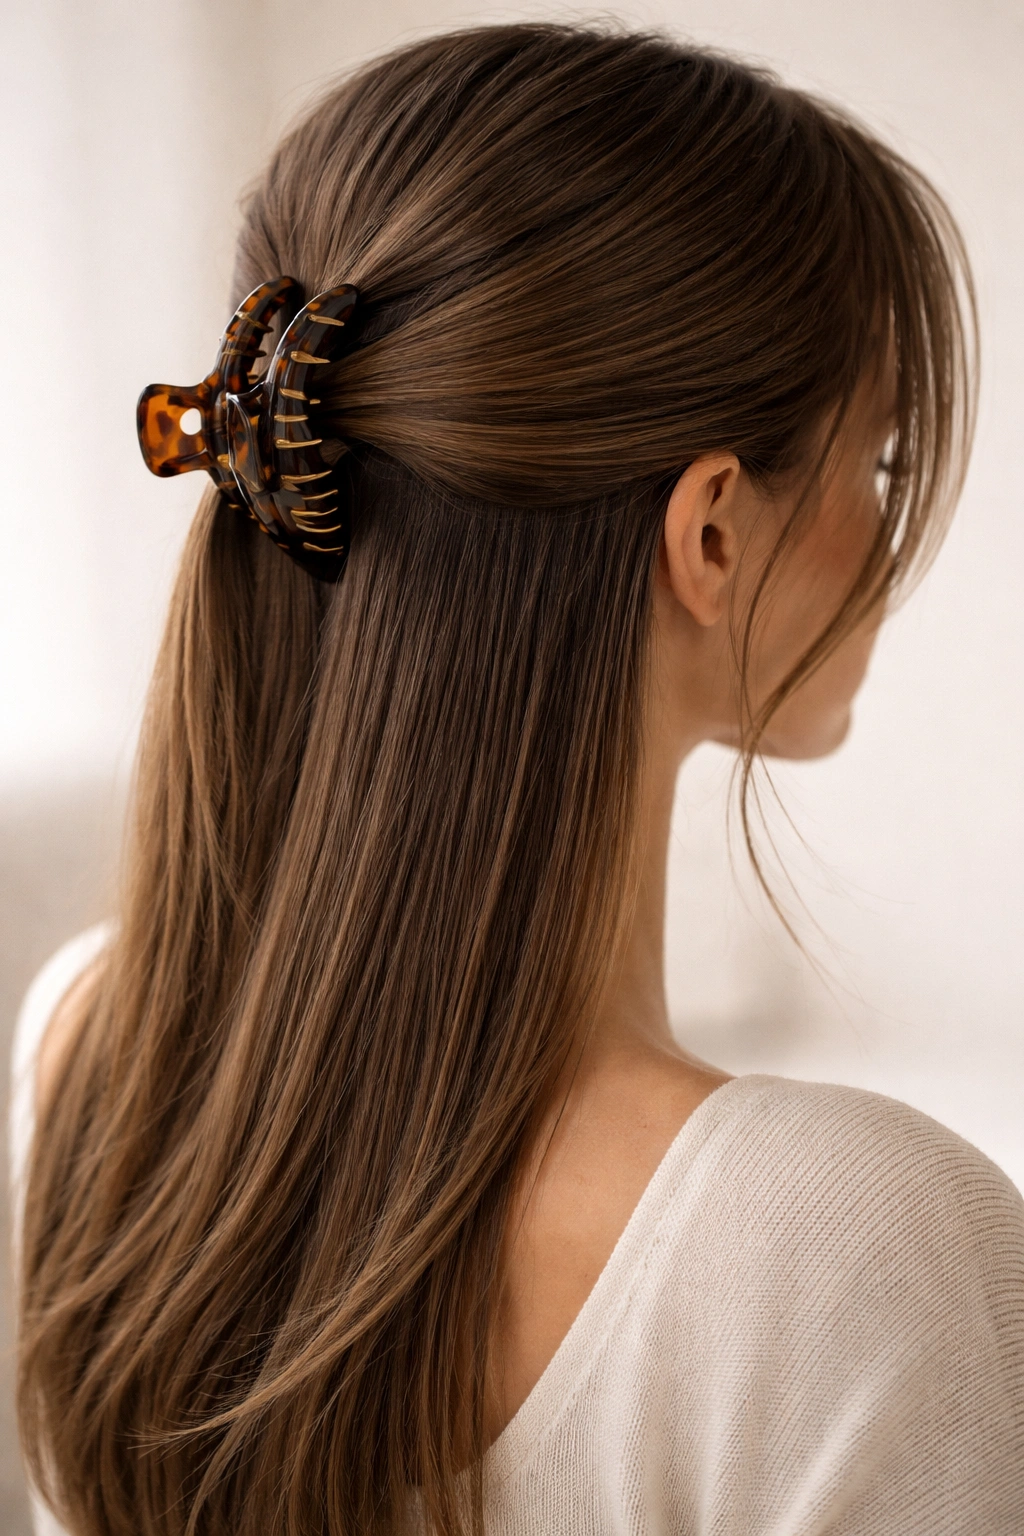
2. The Half-Up Half-Down Look
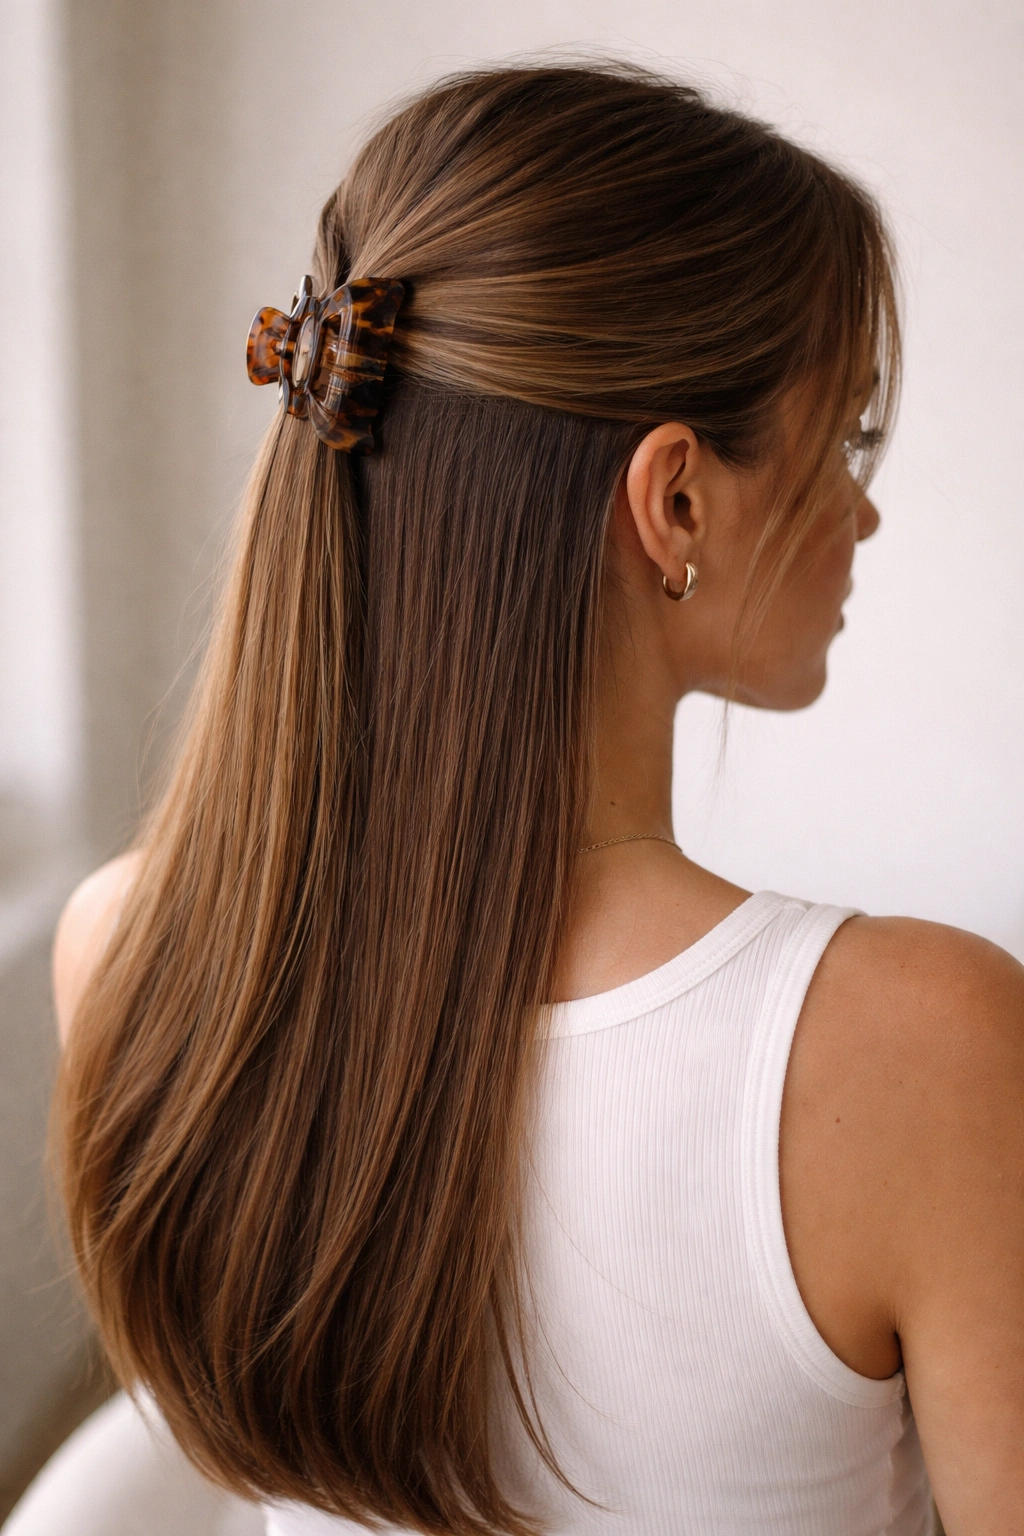
This is the gateway claw clip style—casual enough for running errands, polished enough for work, and genuinely flattering on straight hair. The half-up style hits that sweet spot between “I just threw my hair up” and “I’m put together,” which is probably why it’s beloved by nearly everyone.
Creating the Upper Section
The upper section is where precision matters. Part your hair where you’d naturally part it (usually toward the side or center), then mentally divide the crown area in half—you’re going to take hair from the crown backward. Section this hair out by clipping the rest away temporarily with another clip. Smooth the upper section with a brush, creating a polished base. For straight hair, avoid back-combing or teasing in this section; instead, work with the natural smoothness and let the sleekness contrast with the fuller bottom half.
The Clip Placement and Integration
Gather the upper section loosely at the back of the crown (not at the very top, but a few inches back), and clip horizontally with a medium-sized claw clip. The gathering should feel intentional but not overly tight—straight hair looks better with some gentle, natural-looking texture. For a more modern take, you can also position the clip vertically (flat against your head) rather than horizontally. Leave the lower half of your hair completely down, allowing it to flow freely and create visual contrast with the clipped upper section.
Worth knowing: The thicker and more substantial your hair, the easier this style holds. If you have fine straight hair, position the clip at the very back of the crown section for maximum grip on those slippery strands.
3. The Twisted Crown
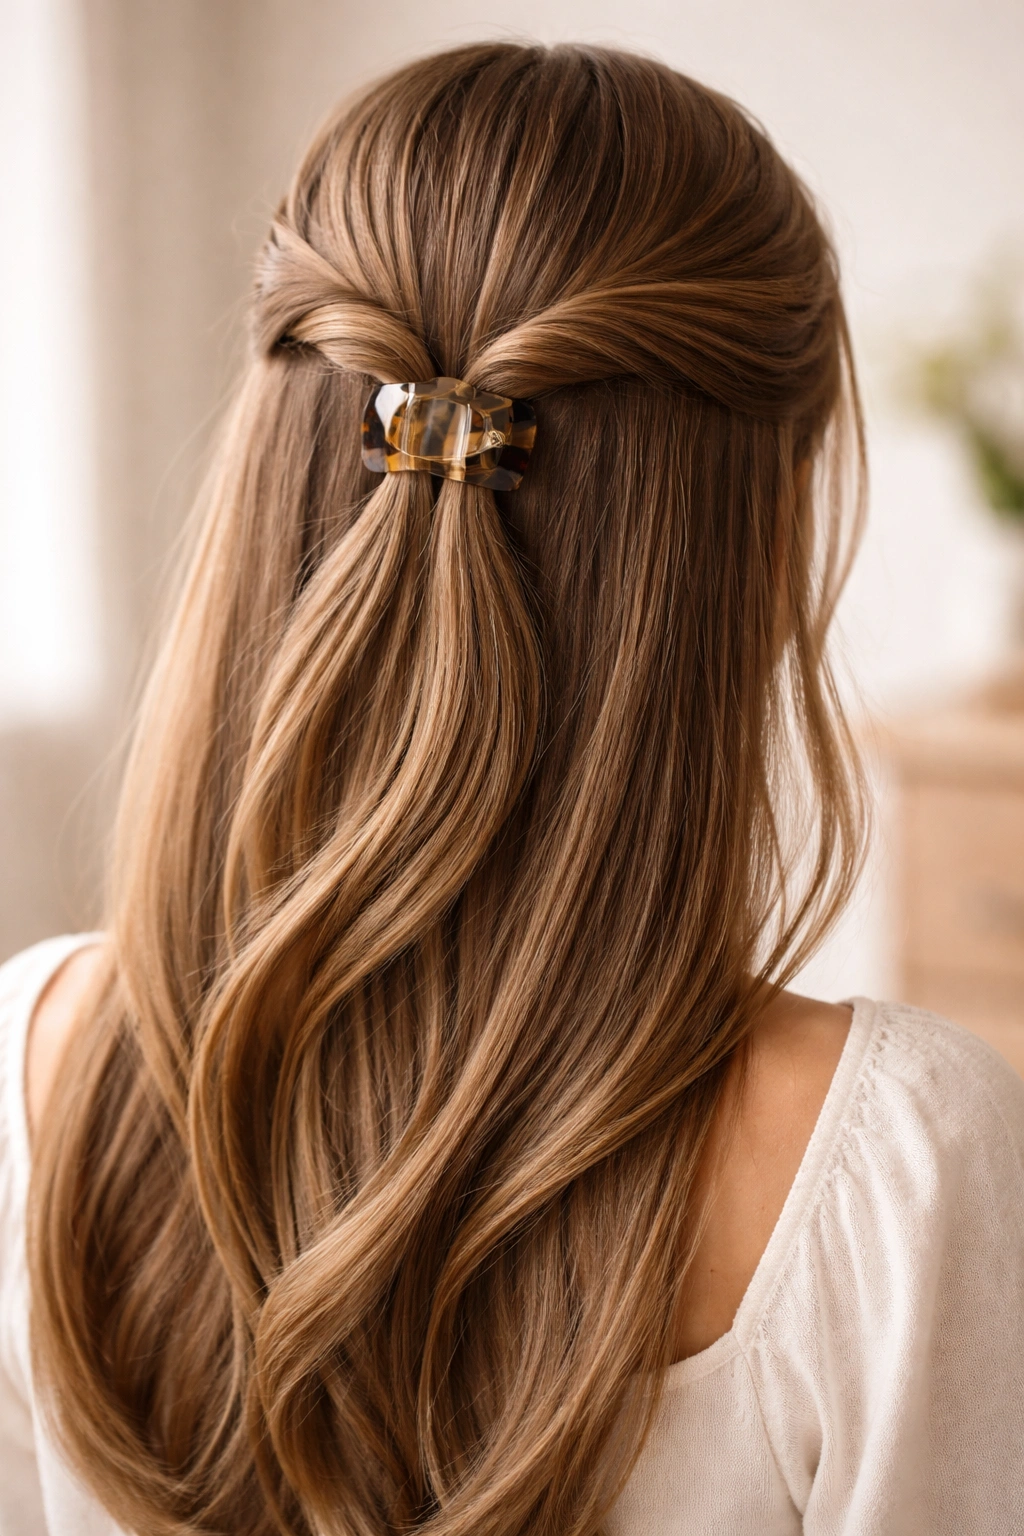
This style takes the half-up concept and adds a romantic twist—literally. It’s elevated enough for date nights or special occasions but still works beautifully as an everyday style that looks way more complicated than it actually is. The twist catches light beautifully on straight hair and creates movement that clips can’t achieve alone.
Building the Twist
Start by sectioning off the upper portion of your hair again, similar to the half-up style. Take a one-inch section from one side of your head (near your temple or ear) and begin twisting it gently back and away from your face. Keep the twist loose and slightly loose-surfaced rather than tight—this creates visual texture and keeps the style looking romantic rather than severe. As you twist backward, gradually incorporate more hair from the side and crown sections, feeding strands into the twist as you go. This creates a fuller, more substantial twist that has real visual presence on straight hair.
Securing the Twist
Bring the completed twist to the back of your head (around the crown or slightly lower, depending on your preference) and clip it with a claw clip positioned vertically or at a slight angle. The clip should catch all the twisted hair without squishing it. For straight hair specifically, you want the clip to define the twist rather than flatten it, so avoid clamping down too hard—let the teeth grip the hair gently. If any baby hairs or wisps escape, that’s actually lovely; they add softness.
Pro tip: After clipping, gently loosen and fluff the twist slightly with your fingers. This gives straight hair more dimension and prevents the twist from looking too tight or compressed.
4. The Double-Clip Statement
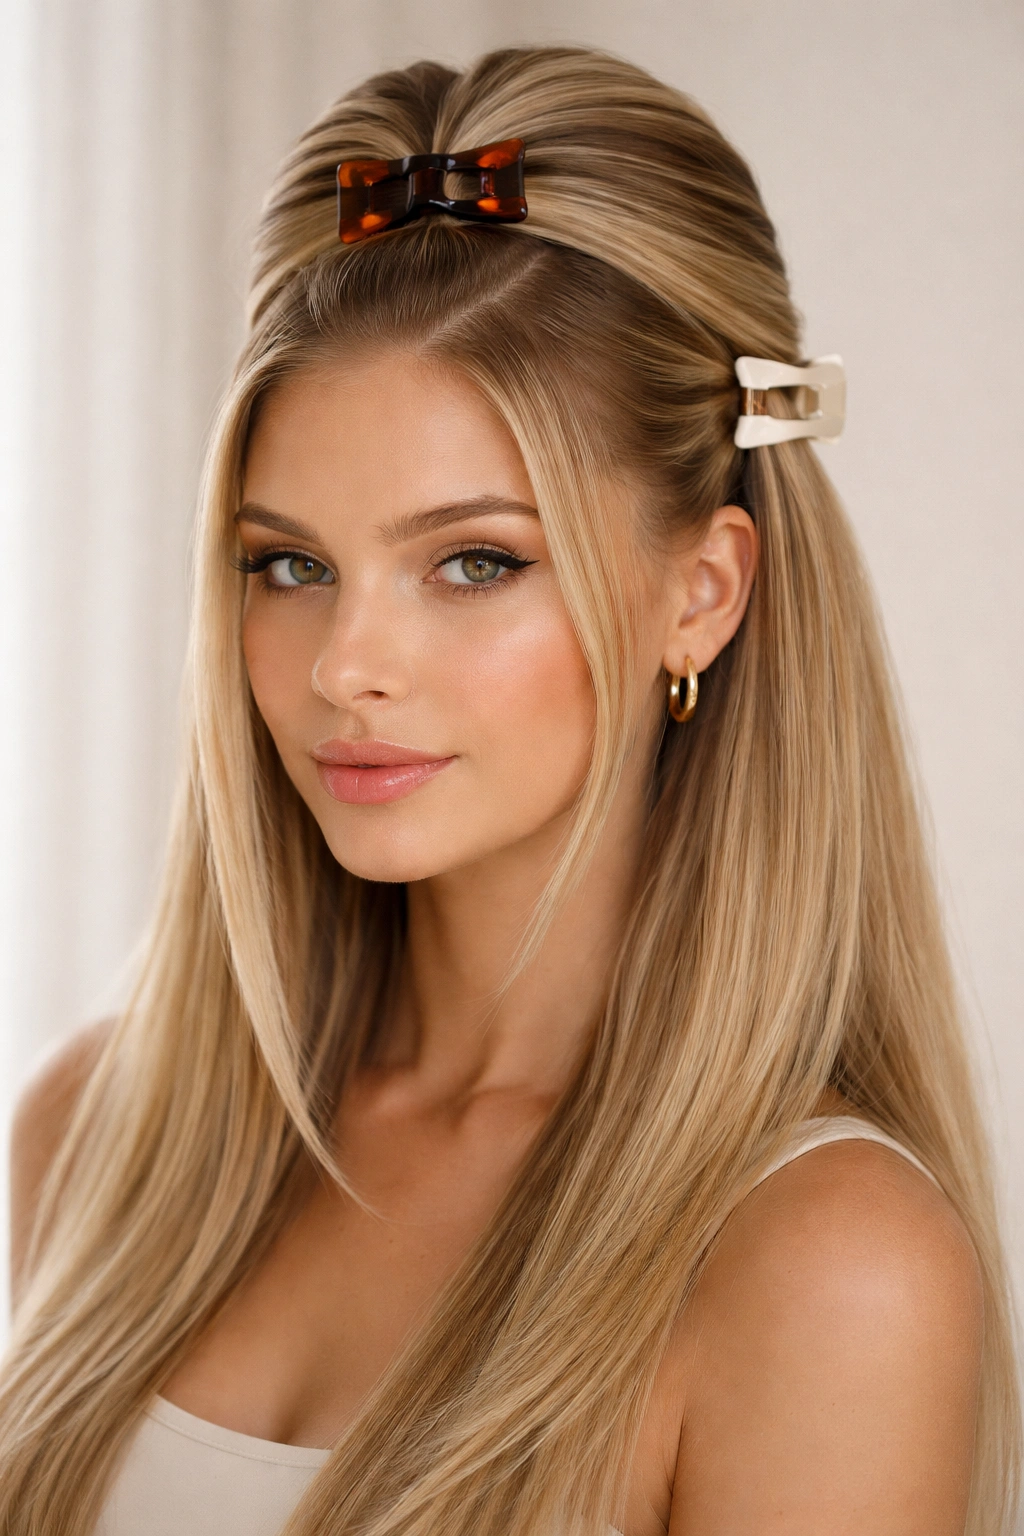
Double claw clips are having a major moment, and for good reason. On straight hair, two clips spaced apart create a modern, intentional-looking style that reads as fashion-forward without being difficult to execute. It’s graphic, it’s chic, and it photographs beautifully.
The Two-Section Approach
Divide your hair into two sections: one upper section (roughly from ear to ear across the crown) and one lower section (underneath). Alternatively, you can create side sections—left side and right side. Clip the first section from one side of your head with a claw clip positioned diagonally; then take the second section and clip it with another clip positioned at the opposite angle, creating a crisscross or parallel line effect. The key is intentionality—place the clips where they’re visually noticeable, not hidden.
Making It Work on Straight Hair
Because straight hair is smooth, you want to create some visual texture to keep the style from looking too slick. After clipping both sections, gently ruffle and loosen each clipped section slightly, pulling out some strands and creating softer, feathered edges around each clip. This prevents the style from looking too geometric or harsh. You can also twist each section slightly before clipping, or gently backcomb the roots of each section for soft lift.
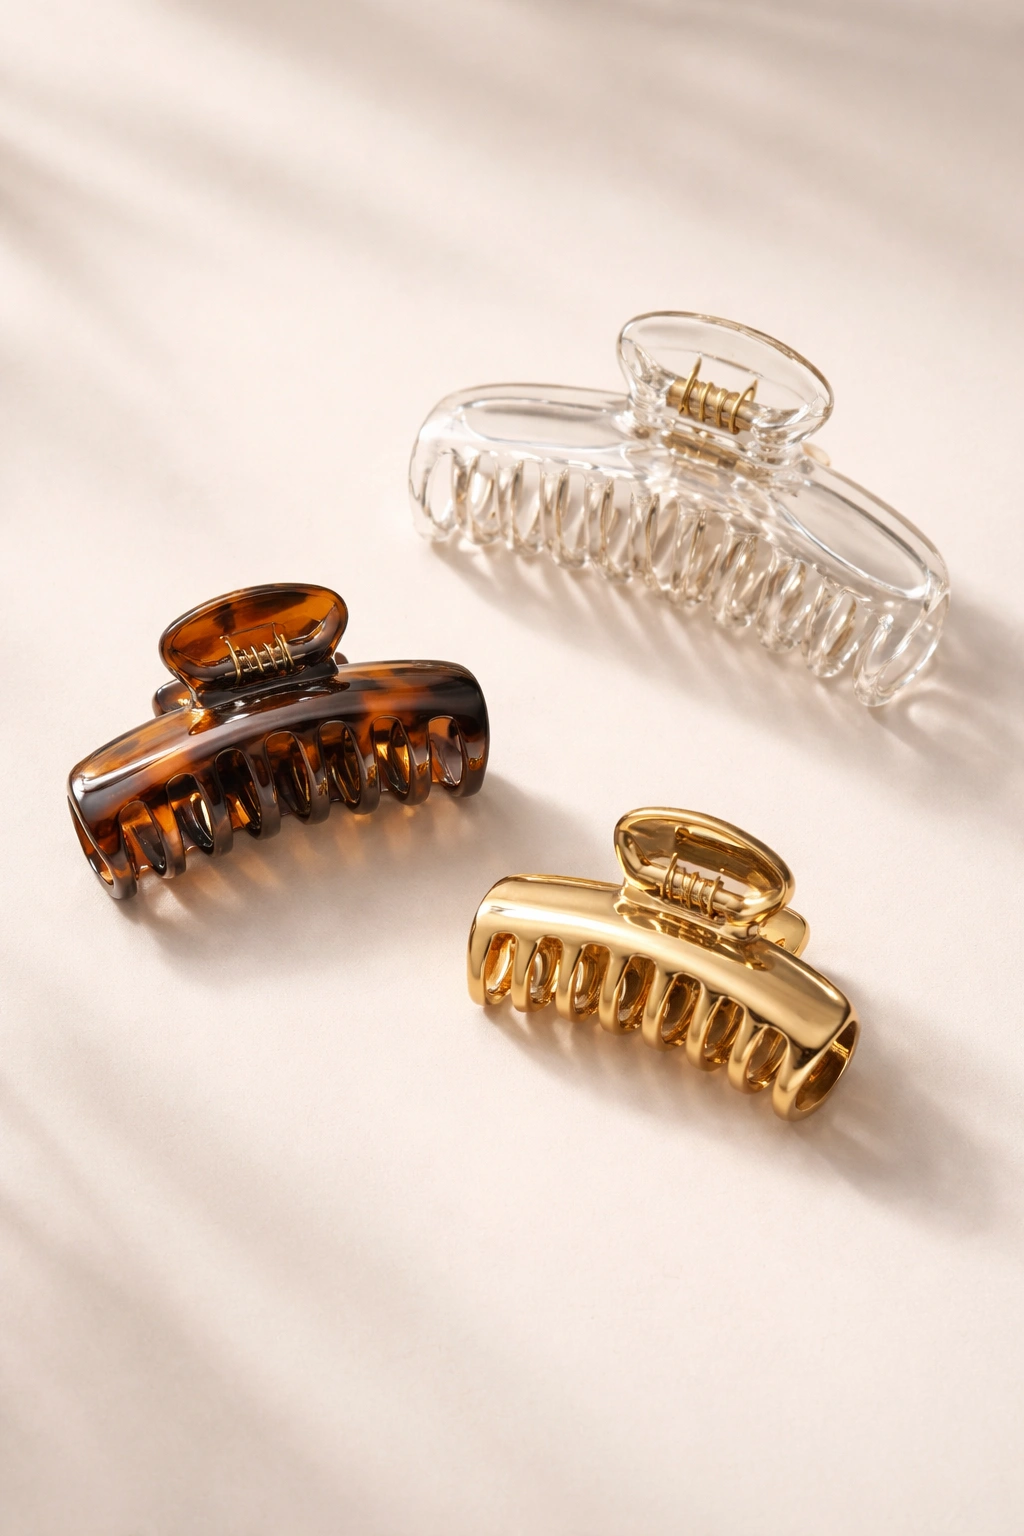
Worth knowing: Try using clips in contrasting colors or finishes for extra impact. A tortoiseshell clip paired with a gold metallic one creates visual interest that plays beautifully against straight hair’s sleekness.
5. The Side-Swept Elegance
This style is pure romance and works especially beautifully on long or wavy-adjacent straight hair. The sweep creates an asymmetrical, slightly dramatic line that’s flattering and deeply stylish. It’s formal enough for weddings or galas but works equally well for elevated everyday looks.
Creating the Sweep
Take all your hair and brush it to one side—not directly behind your ear, but over toward that ear and slightly beyond. The sweep should feel natural, like your hair just happened to fall that way, not severely pulled. For straight hair, you want the swept section to have some gentle movement, so avoid creating a totally flat, compressed sweep. Instead, use a soft brush and let the hair fall with some natural texture and flow.
Clipping It in Place
Position your claw clip at the base of where the sweep meets the back of your head, clipping horizontally and making sure the clip sits deep in your hair for security. The clipped section should be hidden beneath the top layer of swept hair, making the clip virtually invisible from the front. For extra polish, pull out a few delicate face-framing strands from the swept section and leave them loose, creating a softened frame around your face.
Pro tip: This style looks stunning with a curved or slightly open-tooth claw clip rather than one with tightly packed teeth. The clip becomes less noticeable when it’s not gripping every single strand.
6. The Center-Back Classic
Sometimes the simplest style is the most effective. The center-back clip is timeless, works for any hair length, and on straight hair it looks immediately polished and intentional. It’s the style you’ll return to again and again because it truly works for everything.
Finding Your Center
Use your hands to locate your natural center—many people find it slightly lower than the very crown, roughly at the point where your head’s curve begins. Part a section of hair directly down the center of your scalp from your part to this point, then gather this center section and smooth it back with a brush or fine-tooth comb. With straight hair, this creates a clean, visible center line that becomes part of the style’s appeal.
The Placement
Clip the gathered center section at the back of your head with a single, well-sized claw clip positioned horizontally. The clip should sit at a depth that feels balanced—not too high (which can look pinned-back and severe) and not too low (which loses the style’s visual impact). On straight hair, a center-back clip looks best when the rest of your hair flows freely and naturally, so don’t gather or constrain the sides and lower sections.
Worth knowing: A medium-sized clip usually works best for this style, as it needs to be noticeable enough to define the center section without looking oversized. Choose a color that contrasts slightly with your hair for intentional visual interest.
7. The Textured Bun Topper
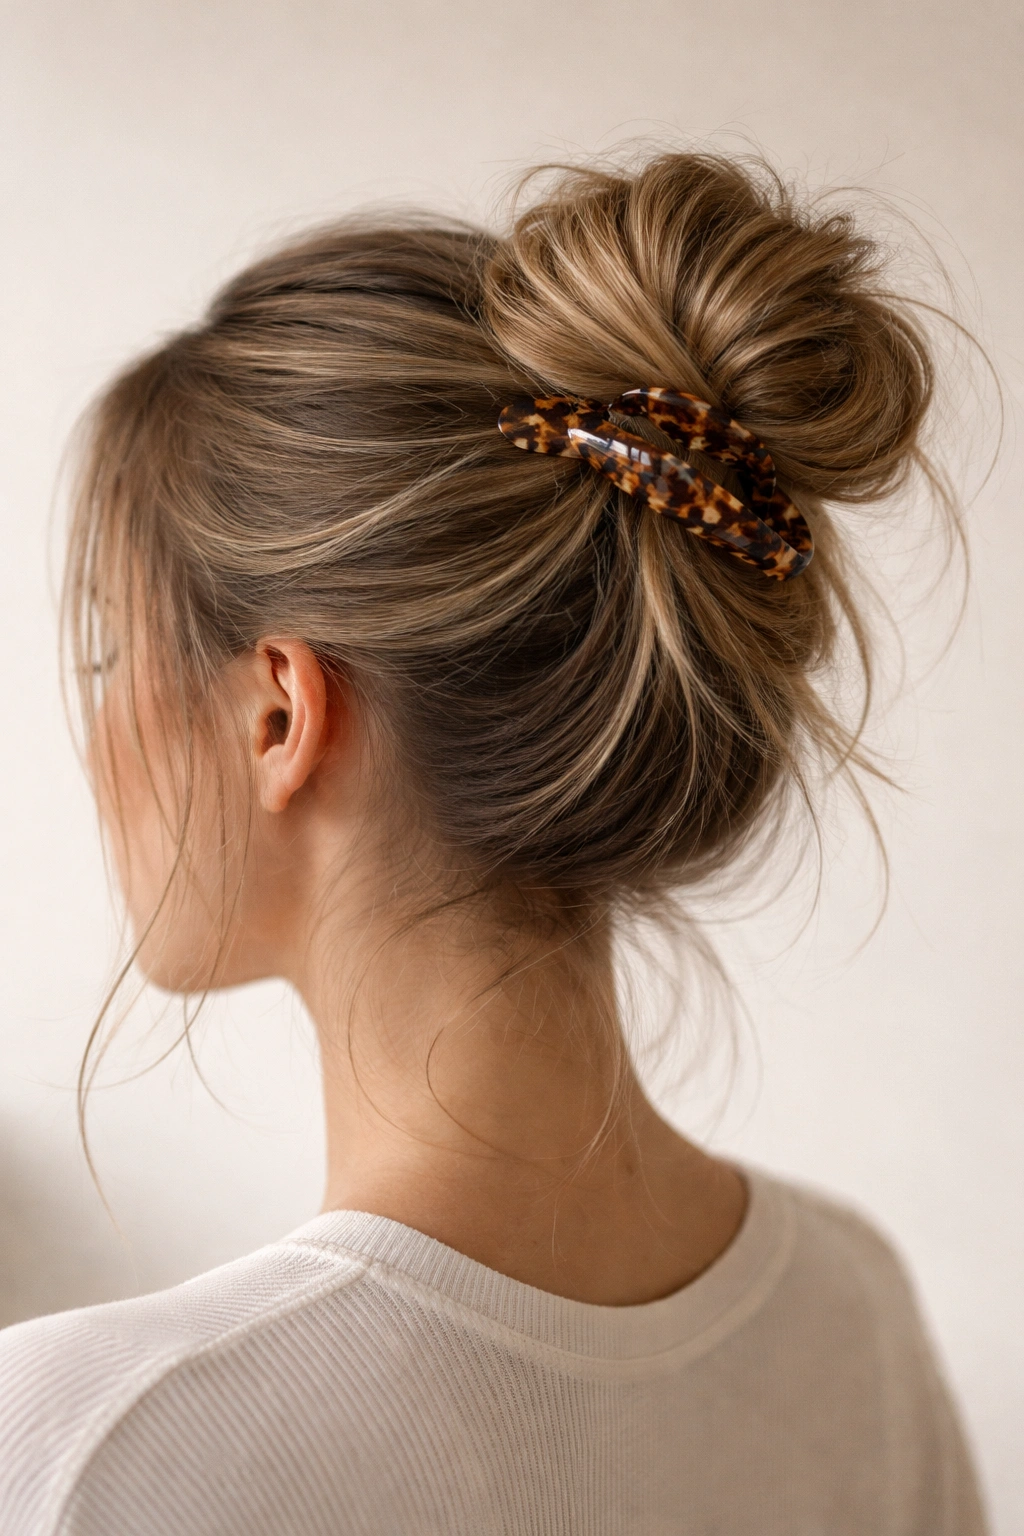
This style bridges the gap between a full updo and a casual clip. Instead of pulling all your hair into a tight bun (which can look severe on straight hair), you create loose texture and volume, then secure everything with a claw clip positioned at the top. It’s chic, effortless-looking, and works beautifully for both casual and dressier occasions.
Building the Base
Gather all your hair into a low ponytail at the nape of your neck—not a tight tie, but a loose grouping held by a small elastic. Gently backcomb or tease the ponytail section to create soft volume and texture. On straight hair, this step is crucial because it prevents the bun from looking sleek and plastic-y. The backcomb creates a surface that actually catches light and looks dimensional. Once you’ve created texture, use your fingers (not a brush) to gently shape the ponytail into a soft, loose bun shape—think undone rather than perfect.
The Clip’s Role
Position a large claw clip horizontally at the top of the bun, clipping down through the center to anchor everything together. The clip shouldn’t fully enclose the bun; instead, it holds the main mass while allowing wispy pieces and texture to escape. This creates a deliberately imperfect, modern bun that looks intentional rather than accidental. Pull out a few face-framing strands and a few wisps from the bun itself for extra softness.
Pro tip: Spray the bun lightly with texturizing spray or light hairspray before clipping to give the straight hair more grip and hold throughout the day.
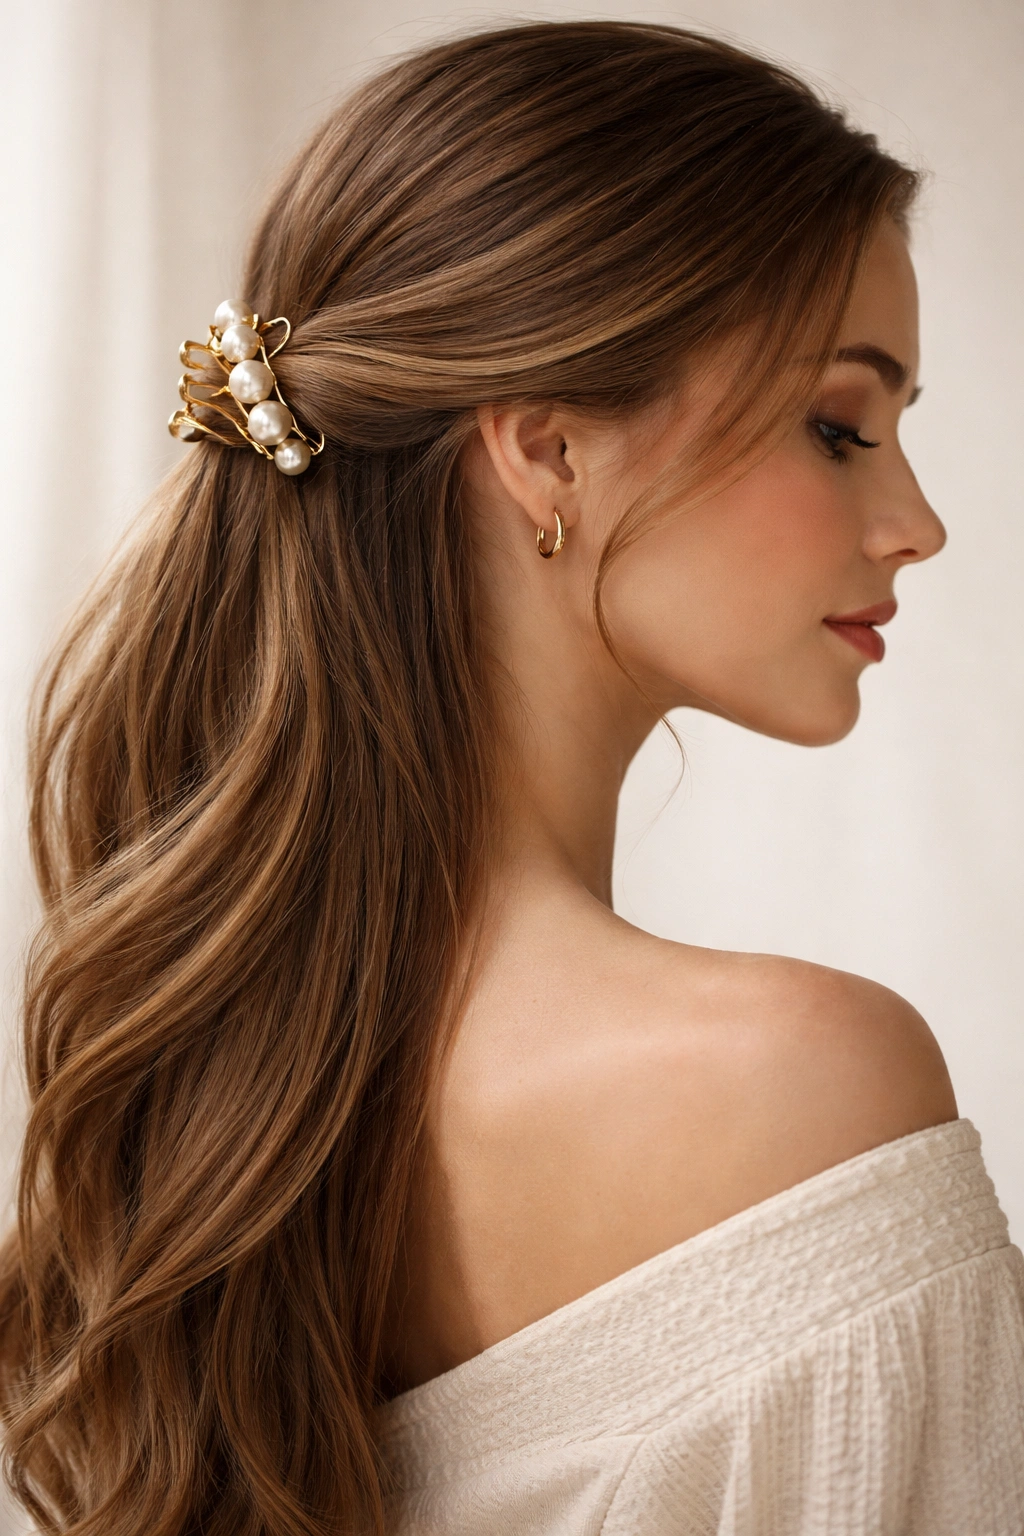
8. The Vintage Side Clip
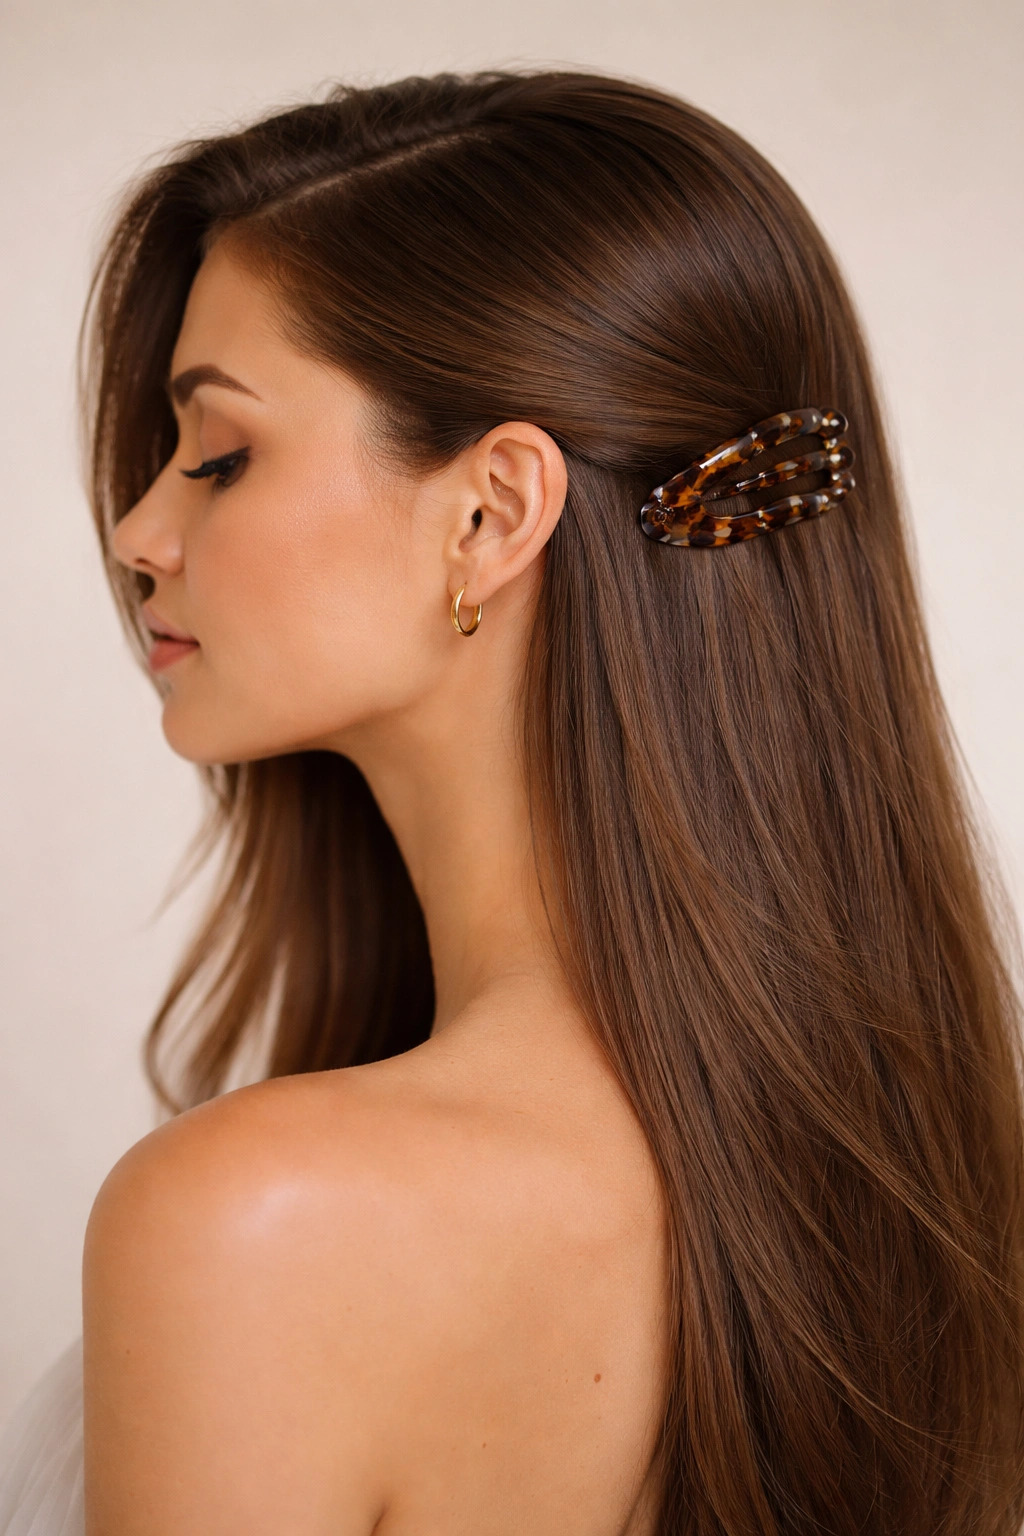
This style channels old-Hollywood glamour and absolutely sings on straight hair. The vintage side clip is positioned at the ear level, securing a section of hair that sweeps back dramatically. It’s elegant, it’s timeless, and with the right clip—think tortoiseshell, pearl, or a jeweled design—it becomes a genuine statement piece.
Creating the Vintage Section
Brush your hair to one side, angling it back and slightly upward from the opposite side of your head. Don’t sweep it all the way back; instead, gather a generous section that includes hair from your crown and the upper side, leaving the rest to fall freely. This creates an asymmetrical, dramatic line. For straight hair, you want this section to have some gentle volume, so lightly backcomb or tease the root area where the clip will sit, creating a soft cushion that the clip will grip beautifully.
Positioning for Impact
Place your claw clip at ear level, slightly back from your ear, positioning it diagonally or horizontally depending on your preference. The clip should feel like a deliberate accessory, not a hidden necessity—let it show. This is where clip color and finish matter; a vintage-style tortoiseshell or an ornamental clip becomes part of the overall aesthetic. Make sure some hair falls freely below the clip, creating that dramatic sweep effect.
Worth knowing: This style photograph beautifully and works wonderfully for photographs, special events, or any time you want to feel extra elegant. The side positioning automatically creates a graceful line that’s flattering on most face shapes.
9. The Feathered Back Layers
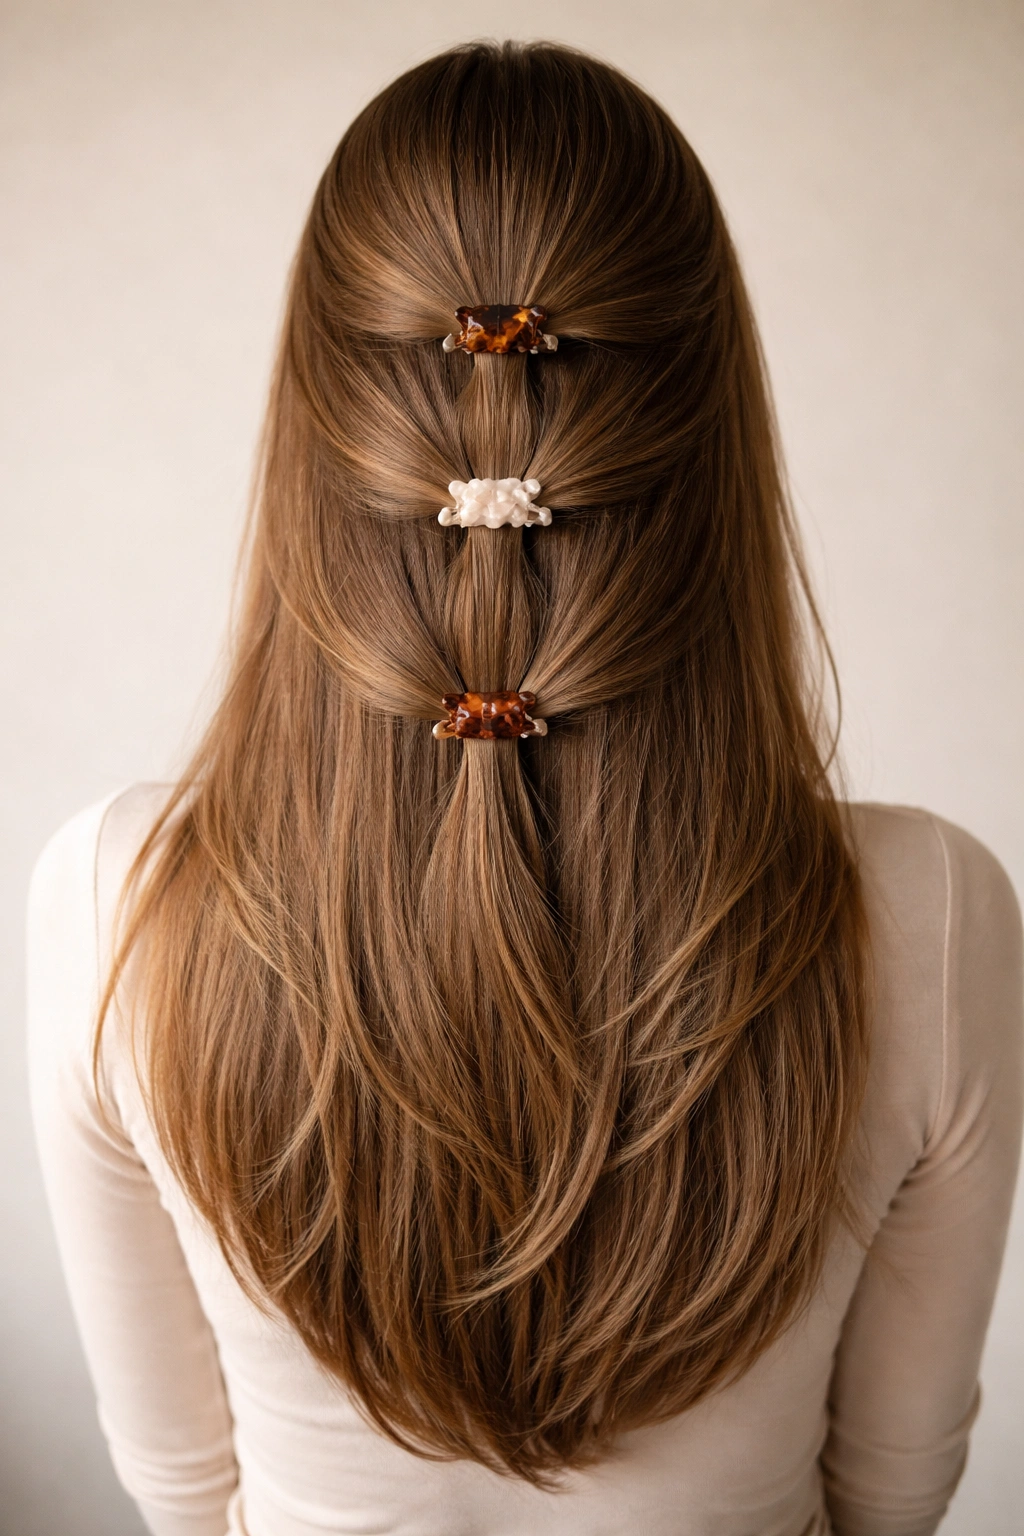
This style works best on longer straight hair and creates beautiful movement and dimension. Instead of securing all your hair in one section, you clip multiple horizontal sections throughout the back of your head, creating a layered effect that makes straight hair look like it has natural texture and depth.
Creating Horizontal Sections
Starting at the nape of your neck, section off a small portion of hair (about one to two inches thick) and clip it with a small claw clip. Move up a few inches and create a second horizontal section, clipping it independently. Continue this pattern up toward your crown, creating 3-4 horizontal clipped sections. Each clip should be positioned at a slightly different angle or height, creating visual interest and a feathered, layered appearance.
The Textured Effect
This style works because it visually breaks up the smoothness of straight hair, creating a sense of movement and dimension that longer straight hair sometimes lacks. The multiple clips become design elements rather than functional necessities. You can use clips in different colors or sizes for extra visual interest, or keep them all matching for a more subtle effect.
Pro tip: This style requires some patience but looks absolutely stunning once complete. The multiple clips can shift throughout the day, but that actually adds to the intentional, artfully undone vibe. Just gently resecure any clips that slip.
10. The Minimalist Single Clip
Sometimes less is more. The minimalist single clip is placed with intention—not functionally securing a whole section of hair, but rather acting as a sculptural accent. This style works beautifully on straight hair because the sleekness of your strands becomes a backdrop for the clip itself.
The Subtle Placement
Instead of gathering all your hair, take just a small section from one side of your head near your temple—maybe an inch or two of hair—and clip it back with a small, delicate claw clip. Position it slightly off-center and leave the rest of your hair completely down and flowing. The clip should feel like an afterthought, a small intentional detail that adds polish without looking like you’re “doing your hair.” This works beautifully with minimalist clip designs—think sleek black, warm gold, or simple acetate finishes.
Why Straight Hair Shines Here
The beauty of straight hair is that you don’t need to do much to look polished. A single minimalist clip reads as intentional styling even though it requires almost no effort. It’s the grown-up version of pulling your hair half-up; it says “I’m put together” without looking overdone.
Worth knowing: This style pairs perfectly with clean, simple makeup and clothing. It’s the definition of less-is-more and works especially well for professional settings, minimalist aesthetics, or minimalist personal styles.
Claw Clip Care and Longevity
Your claw clips are styling tools and accessories, so taking care of them extends their life and keeps them looking beautiful. Every few days, gently remove any stray hairs caught in the clip using a fine-tooth comb or even an old toothbrush. For clips with a tortoiseshell finish or delicate design, wipe them down with a soft, barely damp cloth—never use harsh cleaners. Store your clips in a cool, dry place away from direct heat or sunlight, which can warp acetate finishes or fade colors. If you have clips with metal components, a tiny dab of clear nail polish on any rough edges prevents snagging on your hair.
Styling Straight Hair with Claw Clips: Key Principles
Straight hair requires a slightly different approach than textured hair when using claw clips. First, always start with completely dry hair or freshly blow-dried hair. Wet straight hair is too slippery to grip securely; the clip will slip even if it feels secure initially. Second, create some gentle texture or volume at the point where the clip will sit. This might be light backcomb, a texturizing spray, or just finger-ruffling to rough up the surface. Straight hair’s smoothness is beautiful, but it also means clips grip better on a slightly textured surface.
Third, clip deep into your hair, not just at the surface. The clip’s teeth need to catch enough hair throughout the entire clip to hold securely. Surface-level clipping almost always results in slippage by midday. Finally, let some softness escape. Don’t pull your hair back so tightly that it’s stretched and strained. Straight hair looks its best when there’s some gentle movement and some face-framing wisps; this softness is what makes claw clip styles feel intentional and flattering rather than severe.
Choosing the Right Clip Size and Style
The vast range of claw clip options available means you can match your clip to your hair length and thickness. Fine or thin straight hair needs a smaller clip with tightly spaced teeth that can grip delicate strands. Medium-thickness hair works with standard medium-sized clips. Thick or very long straight hair requires a large clip with strong, widely spaced teeth that can handle volume without pinching. Consider having a range of sizes in your collection—a small clip for delicate face-framing sections, a medium for everyday styles, and a large for fuller holds.
Finish and color matter too. Tortoiseshell and warm metals work universally and add warmth to all hair tones. Minimalist black or clear acetate works beautifully on straight hair because the simplicity doesn’t compete with your hair’s natural shine. Bright colors or patterned clips create instant visual interest and work well if you’re going for a more playful or fashion-forward vibe. Consider your personal style and how often you’ll reach for each clip when building your collection.
Final Thoughts
Claw clips are genuinely one of the best styling tools for straight hair. They hold securely without the flattening of traditional hair ties, they look intentional and stylish rather than purely functional, and the sheer variety means you can create completely different aesthetics with the same tool. Whether you’re reaching for the sleek simplicity of a center-back clip for a workday or channeling old-Hollywood glamour with a vintage side clip for a night out, your straight hair has the perfect canvas for these styles to shine.
The key is understanding what works with your specific hair—the right clip size, how much texture to create, and how deep to clip for security. Once you’ve figured out those details for your own hair, these ten styles will become your go-to arsenal. Start with whichever style resonates most with you, practice it a few times until you find the exact placement and tightness that feels right, and then branch out to the others. Within a few days, you’ll have multiple polished, intentional-looking styles that take literally minutes to create and look like you spent far more effort than you actually did.