Curly hair on kids is absolutely gorgeous, but let’s be honest — keeping it styled, off the face, and looking intentional can feel like an ongoing challenge. Half up half down styles hit that perfect sweet spot: they keep hair from falling into your child’s eyes during school or playtime, let the beautiful curls flow free, and look far more polished than a simple ponytail or letting everything loose. Plus, most kids actually like these styles because they get the best of both worlds — texture and movement without hair hitting their face constantly.
The thing about styling curly hair is that you can’t just use the same techniques that work on straight hair and expect the same results. Curls have their own logic, their own texture, and their own personality. A style that looks sleek on straight hair might look completely different on curls — and honestly, that’s usually a good thing. Curls add volume, dimension, and visual interest that can make even simple styles look special. The key is working with the curl pattern rather than fighting against it, choosing the right tools and products so your child’s curls stay defined and bouncy all day, and picking styles that actually hold up to the reality of an active kid’s day.
Half up half down styles give you incredible flexibility too. You can keep them simple and elegant for school, dress them up with ribbons and clips for special occasions, add braids for extra texture and hold, or keep them loose and casual for playing outside. Your kid’s curls are doing most of the visual work anyway — you’re just organizing them strategically. Whether your child’s curls are loose waves, springy spirals, tight coils, or anything in between, there’s a half up half down style that’ll work beautifully for their specific curl type and lifestyle.
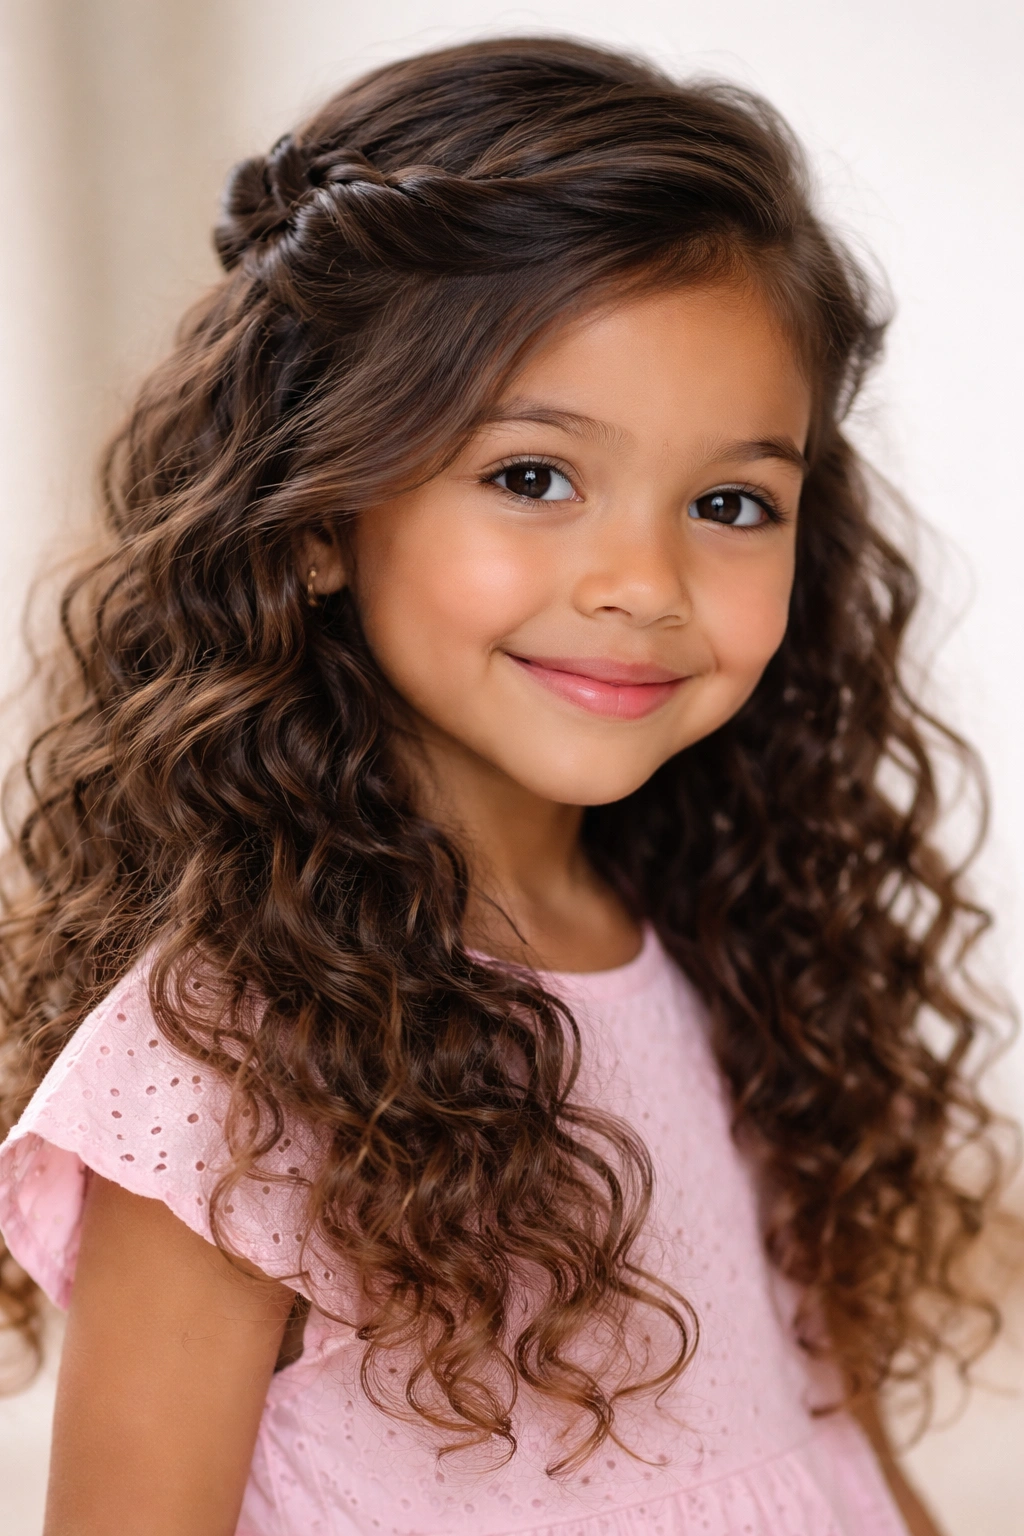
1. The Classic Twisted Half-Up with Center Part
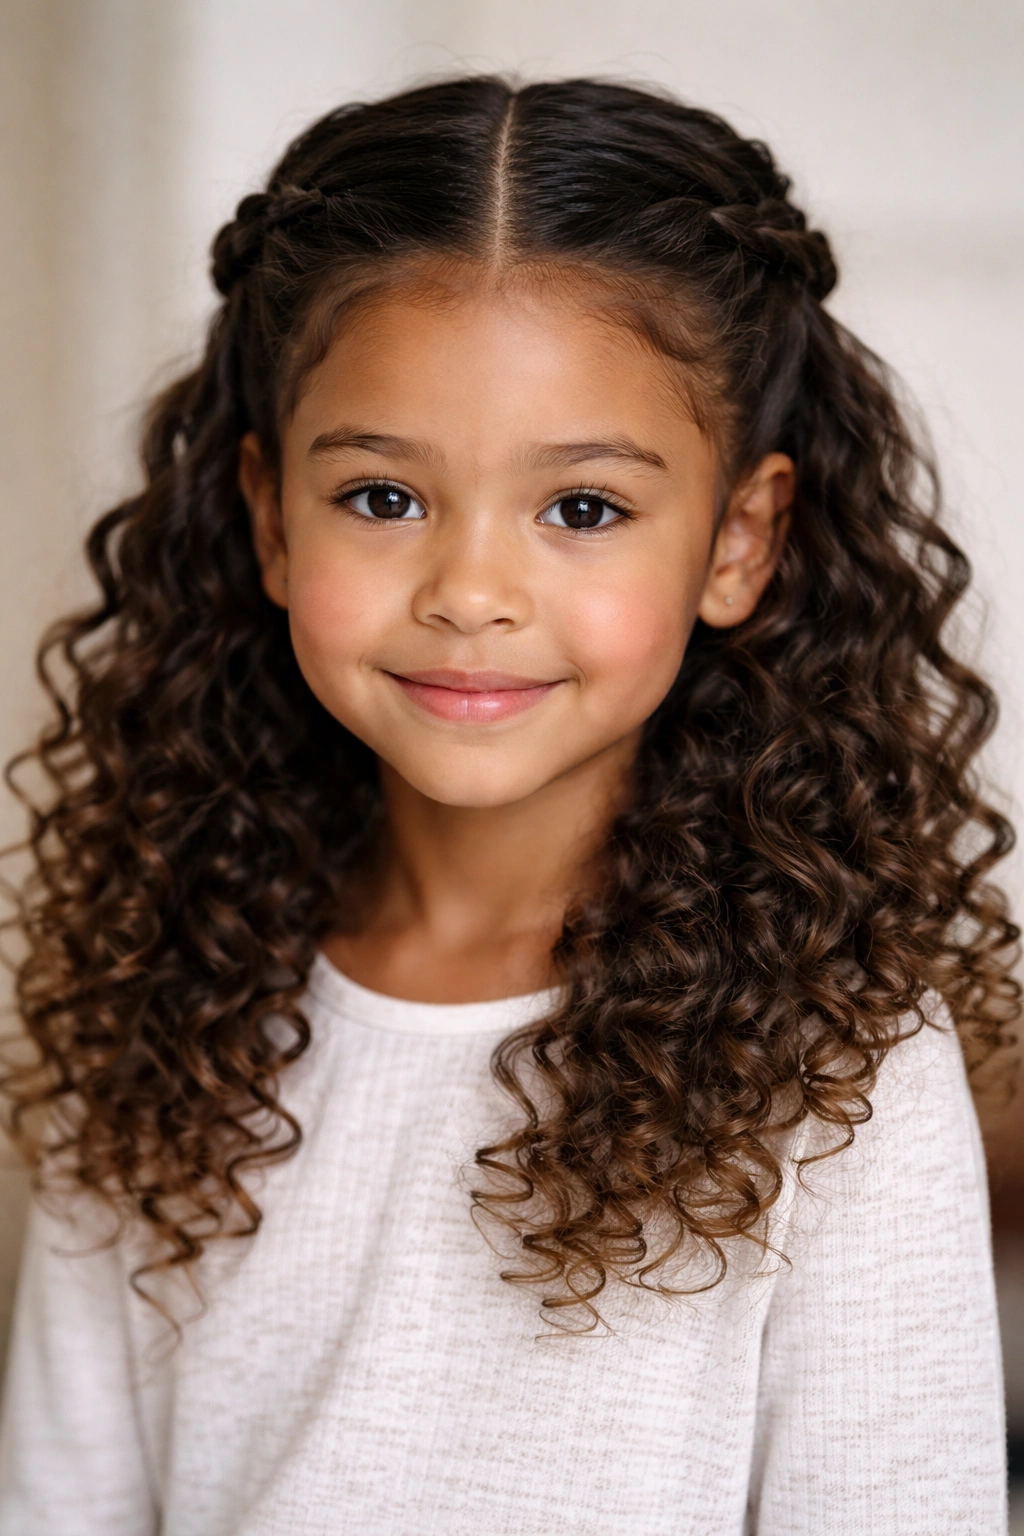
This foundational style works beautifully on curly hair because the twist naturally creates definition while keeping the curls intact and bouncy. Start with hair that’s been brushed out or finger-combed to separate the curls gently, then section off the top portion from temple to temple at roughly ear level. Twist each section — one from the left side and one from the right — moving back toward the crown, then secure both twists together at the base with a elastic band or decorative clip at the back of the head.
Why It Works for Curly Hair
Twisting is gentler on curls than tight braiding, which means your child’s curl pattern stays defined and won’t get crimped by a braid’s structure. The twist naturally sits on top of the curls below rather than pulling them tight, so the lower section maintains its full volume and springiness. This style also works across every curl type — from loose waves to tight coils — because the twist is flexible enough to accommodate different textures.
Key Details to Master
- Use a light hand when creating the twist — you’re guiding the hair, not pulling it tight. The more relaxed the twist, the more natural it looks against curly hair.
- If your child’s hair is prone to frizz, apply a light curl cream or gel to the sections you’ll be twisting before you start. This creates definition and reduces flyaways.
- Secure the twists with a claw clip or wooden clip rather than a tiny elastic if you want to minimize creasing in the curl pattern.
- The style holds better throughout the day if you twist the sections fairly snugly (not painfully tight, just snug enough that they won’t slip). Test the hold before sending your child to school.
Pro tip: This twist-and-clip combination actually works as a quick refresher for day-two curls — you can twist the hair without adding water or product, and the twists help reset the curl pattern while keeping hair off the face.
2. Double Twisted Half-Up with Side-Swept Sections
This more elaborate variation uses two twists on each side of the head, creating a romantic, layered look that’s especially flattering on kids with longer curls. Instead of a center part, create a deep side part, then take two horizontal sections on the fuller side of the part. Twist each section separately from front to back, then clip or secure both twists together at the back where they meet. The result is elegant enough for special occasions but casual enough for everyday wear.
What Sets This Apart
The double-twist approach creates more visual interest and texture than a single twist, and the side-swept asymmetry is incredibly flattering for round or square face shapes. This style also distributes the hold across two points rather than one, which means it stays secure even during active play without requiring a tight elastic that could leave creases in the curls.
How to Execute It Cleanly
- Start with damp, product-enhanced curls — a curl cream or gel gives you the hold you need without that crunchy feel of too much styling product.
- Twist from the area closest to the temple first, moving back and slightly upward toward the crown. This angled twist is more flattering than a straight-back approach.
- Make the twists at slightly different heights — the front one a bit lower, the back one a bit higher — so they don’t look too matchy-matchy when clipped together.
- Use a metallic or tortoiseshell clip rather than a standard clear elastic for a polished, intentional appearance.
Styling note: If one side of your child’s hair is thinner or has less curl definition, create the twists on that side with slightly more tension to give the appearance of fuller volume, while keeping the other side more relaxed.
3. Half-Up with Silk or Satin Ribbon Woven Through
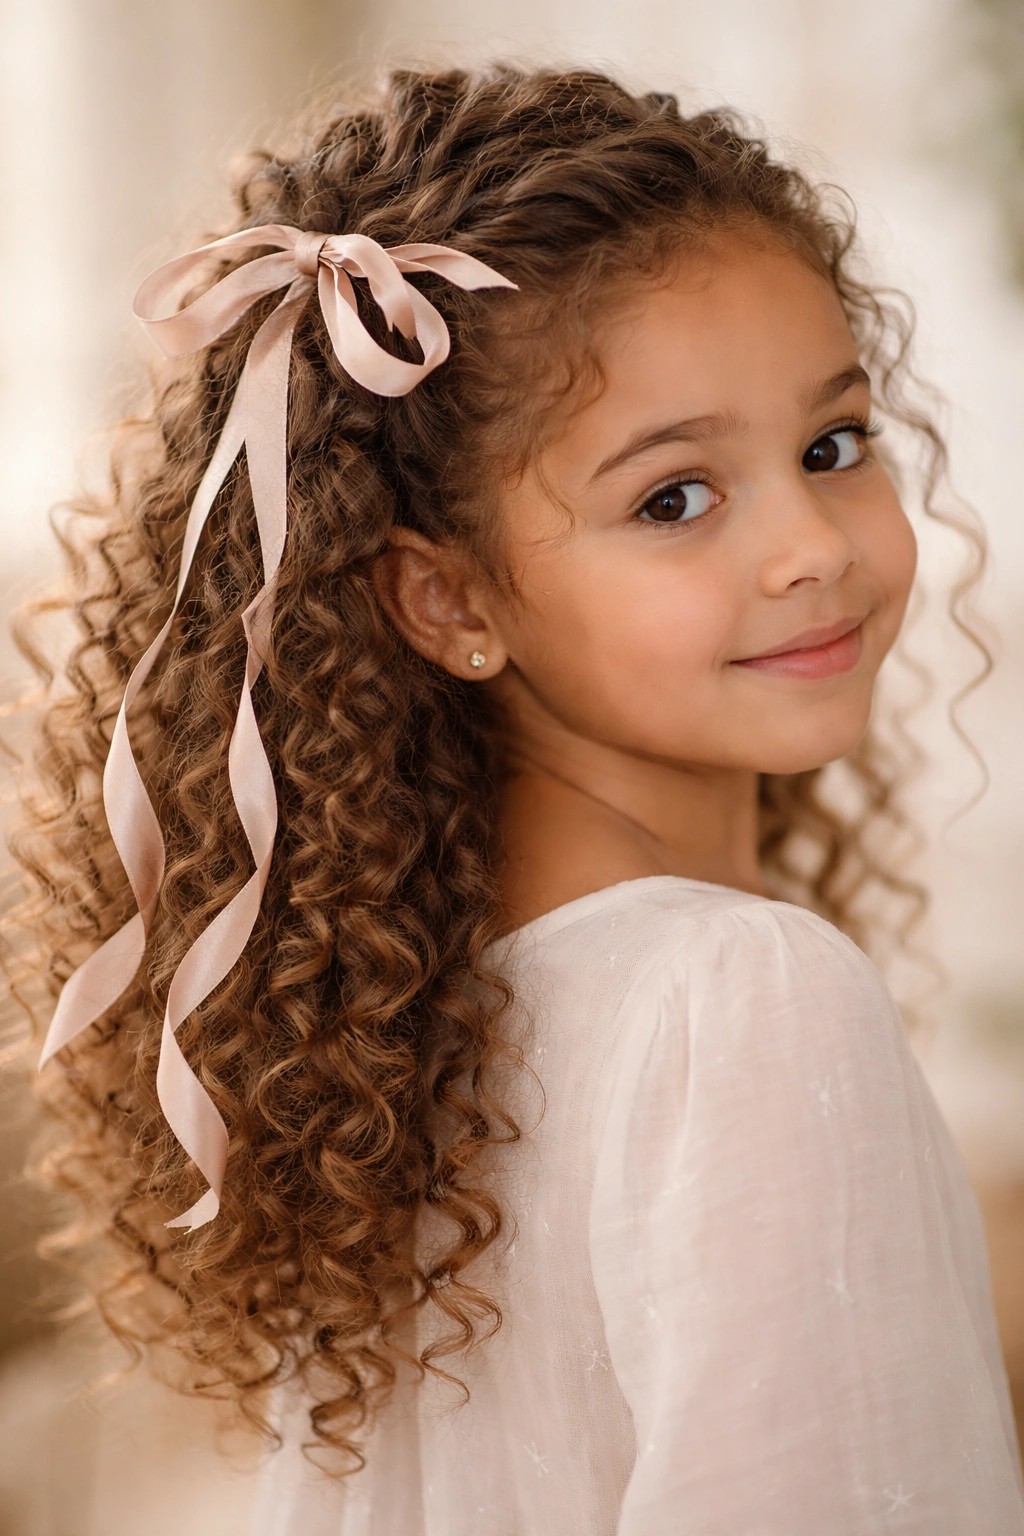
This romantic style incorporates a length of ribbon that gets woven through the gathered half-up section, creating softness and visual interest without needing braids. Take the top half of the hair as you would for a standard half-up, gather it loosely, then weave a silk or satin ribbon through the gathered section before securing it all with a clip or elastic. The ribbon adds elegance, helps distribute the hold across the gathered hair so you can keep the elastic looser, and silk or satin won’t create friction that leads to frizz the way cotton or elastic-only styles can.
Why Ribbon Makes a Difference
Satin and silk ribbons are genuinely better for curly hair than cotton or plastic elastics because they create less friction. Less friction means fewer flyaways, less frizz activation, and curls that stay smoother throughout the day. The ribbon also adds visual richness and a finished, intentional look that makes even a simple half-up style feel special — perfect for holiday photos or days when you want to feel a little bit extra.
Application Tips
- Choose a ribbon width that feels proportional to your child’s hair thickness — thicker, curlier hair looks better with a 1- to 1.5-inch ribbon, while finer curls work well with a narrower half-inch ribbon.
- Weave the ribbon under and over sections of the gathered hair rather than just laying it on top. This integration makes the style hold better and look more cohesive.
- Secure the ribbon with a small knot or bow at the back of the head, or tuck the ends underneath the gathered section so they don’t dangle.
- Ribbon is less secure than an elastic band alone, so if your child is very active, you might want to use a small clear elastic and the ribbon for maximum hold.
Pro tip: Satin ribbons are also excellent for tying around the ponytail at the base — they look more elegant than a standard elastic band and provide that friction-free benefit for the entire length of the gathered hair.
4. Braided Crown Half-Up on Top of Natural Curls
This style creates a crown of braids while keeping the curls below entirely loose and full, giving you the best of both worlds — organized and polished on top, bouncy and wild below. Create two Dutch or regular braids that start at one temple and travel across the top of the head to the opposite side (almost like a crown or halo), then secure both braids at the back of the head with a clip. The loose curls cascade below, creating height and drama without any pulling or tightness on the face.
Why Braids Across the Top Works Well
This placement puts the braid structure where it won’t crimp or damage the curl pattern of the lower section. The braids naturally sit on top of the curls rather than through them, so there’s zero disruption to the curl formation. This is especially valuable if your child has tight coils or delicate curls that you want to protect from manipulation. The style also works across different curl patterns because the braids create structure at the crown while the curls do their own thing below.
Execution Notes
- Dutch braids (braided underneath rather than over) sit more flatly against the head, which is usually more flattering and keeps hair off the face more effectively than regular braids.
- Start the braids slightly higher than the temples — at a point between the temple and the hairline — so they frame the face nicely without causing discomfort or tension in that sensitive area.
- Braid fairly loosely, especially if you’re using Dutch braids. Tight braids can leave creases and actually damage curly hair over time.
- For a softer, more romantic look, gently pull small pieces of hair out from the braids after they’re secured. This adds volume and makes the braids feel more organic and less structured.
Styling secret: If your child’s braids don’t want to stay braided (because curly hair has texture that wants to expand), try braiding damp hair with a light gel applied to the section you’re braiding. The gel helps the braid hold shape while the hair dries.
5. Curly Bun Half-Up Style with Intentional Volume
Instead of a sleek, tight bun, create a half-up style where the top section is gathered into a soft, intentionally messy bun that sits loosely at the crown. This works gorgeously on curly hair because curls naturally create that textured, voluminous look that makes buns interesting and pretty rather than simple or plain. Gather the top section, twist or lightly braid it, then wrap it loosely around the base and secure with bobby pins, letting pieces fall out naturally around the face and crown.
What Makes This Different From a Regular Bun Half-Up
A standard bun half-up on curly hair can look flat or uninspiring if you pull it too tight. But a textured bun that celebrates the curl and isn’t overly controlled is absolutely stunning. The curls in and around the bun create natural dimension and that “I woke up like this” softness that’s so flattering on kids. This approach also distributes the hold across multiple bobby pins instead of relying on one tight elastic, which means you can keep the overall style looser and less pulling.
How to Build This Bun
- Gather the top half of the hair loosely at the crown, using your fingers or a wide-tooth comb to keep the curl pattern intact as much as possible.
- Twist the gathered section loosely (don’t braid it tightly — a loose twist is what you want here).
- Wrap the twisted section around the base at the crown, allowing some of the curl texture to show rather than smoothing everything into submission.
- Secure with 3-4 bobby pins pushed into the bun so they’re hidden by the curls themselves.
- Let several face-framing pieces fall loose, and consider pulling a few small sections out of the bun after it’s complete to increase the intentional-messiness factor.
Insider note: This style actually looks better if it’s not perfect. A slightly imperfect bun with visible curl texture and loose pieces is far more flattering and interesting than a tight, controlled bun.
6. Side-Swept Half-Up with Curved Clips

Create asymmetry and movement by gathering only the back-upper section of hair (not centering it at the crown) and sweeping it dramatically to one side before clipping it down. This gives the curls a directional flow and makes the overall style feel more intentional and less symmetrical. Use a decorative curved clip or several smaller clips to secure the side-swept section, and let the curls below flow in the opposite direction for maximum movement and visual interest.
Why Side-Swept Works on Curls
Curly hair naturally wants to expand and create volume. A side-swept style lets that volume happen while still keeping hair organized and off the face. The asymmetry is also visually interesting and flattering — it breaks up the roundness that curls create and adds sophistication without needing braids or twists. This style works especially well for kids with very thick, very curly hair that needs to go somewhere, and side-sweeping gives it an intentional direction.
Technique Details
- Start by sectioning off the top-back portion of hair (roughly from ear to ear across the crown), then gently pull that section toward one side of the head.
- Don’t use an elastic band that pulls the hair into a tight gathered point. Instead, use clips that hold the hair in place while allowing it to maintain its curl shape.
- Curved clips are your friend here — they hold more hair and distribute the hold more evenly than straight clips, which means less creasing in the curl pattern.
- Leave at least a few inches of the gathered section loose and unclipped at the sides so that the lower half of the hair flows freely below.
Pro tip: This style is especially effective if you do a light refresh with curl cream or a light spray on the side-swept section before clipping — it adds shine and definition to the section you’re highlighting.
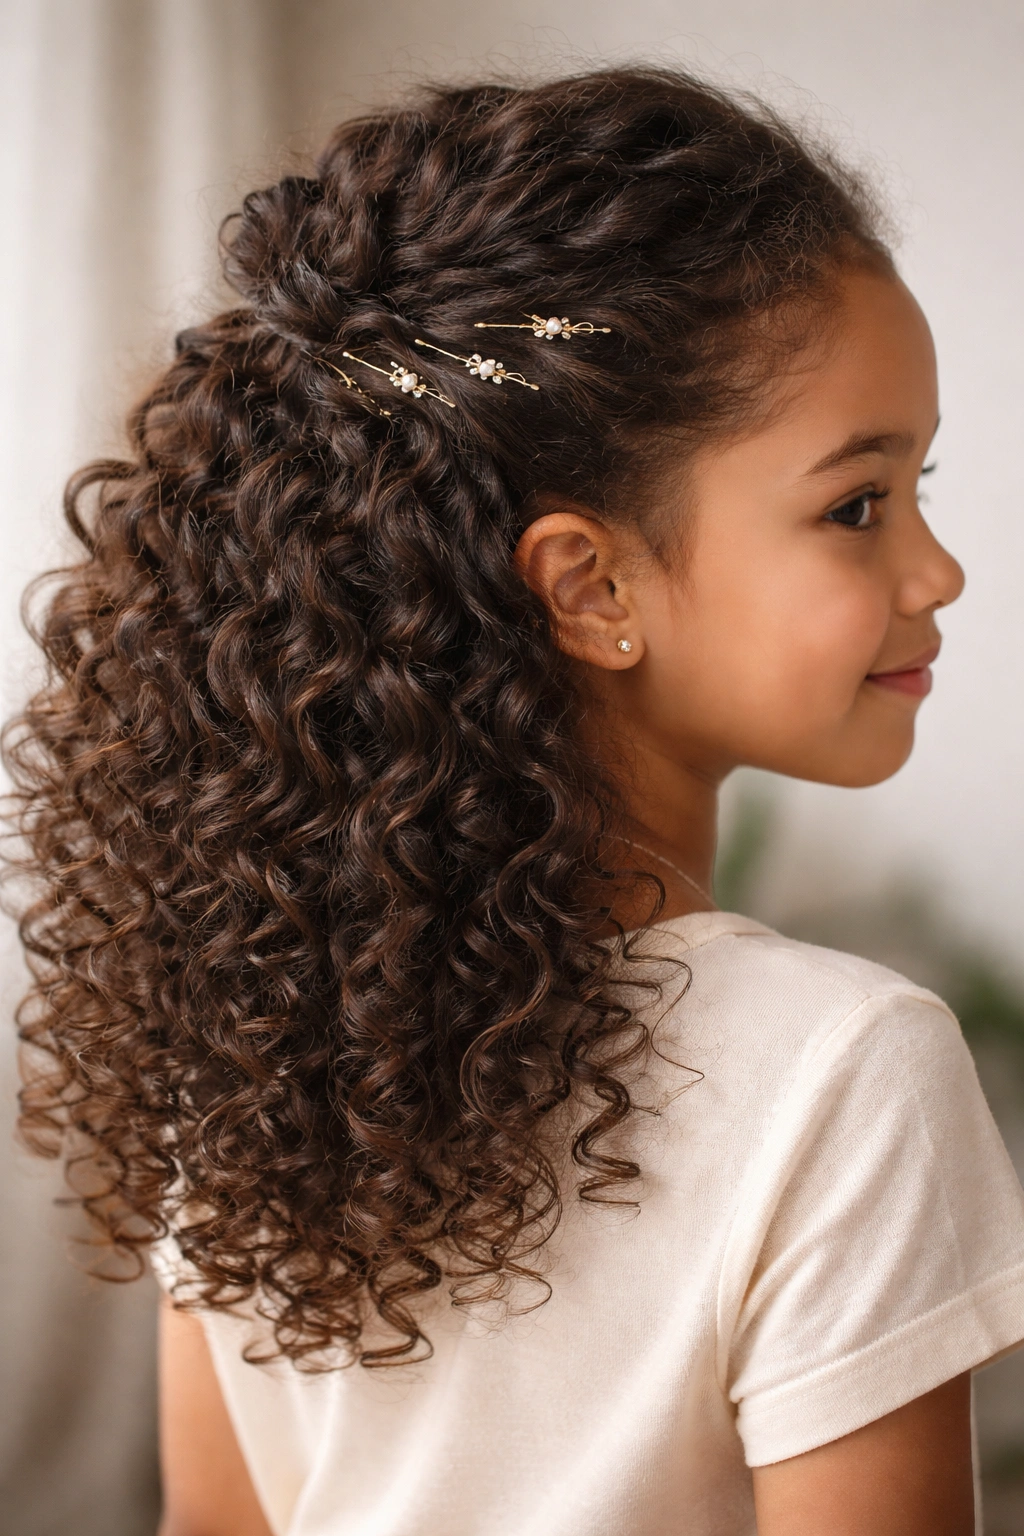
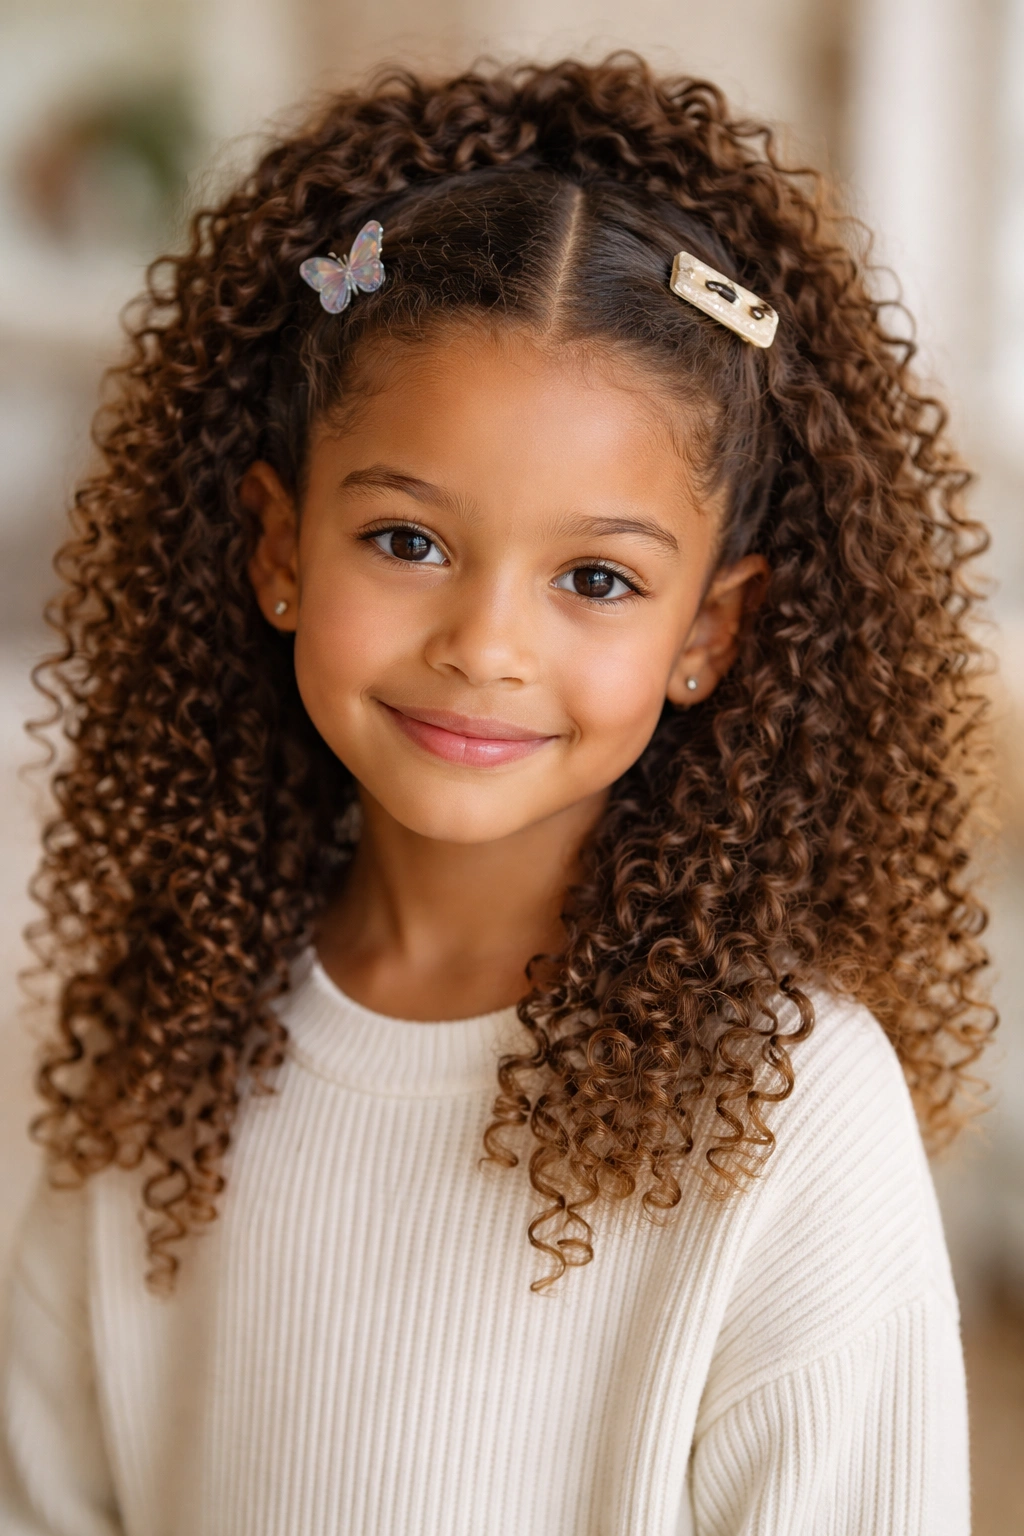
7. Accessorized Half-Up with Decorative Clips and Pins
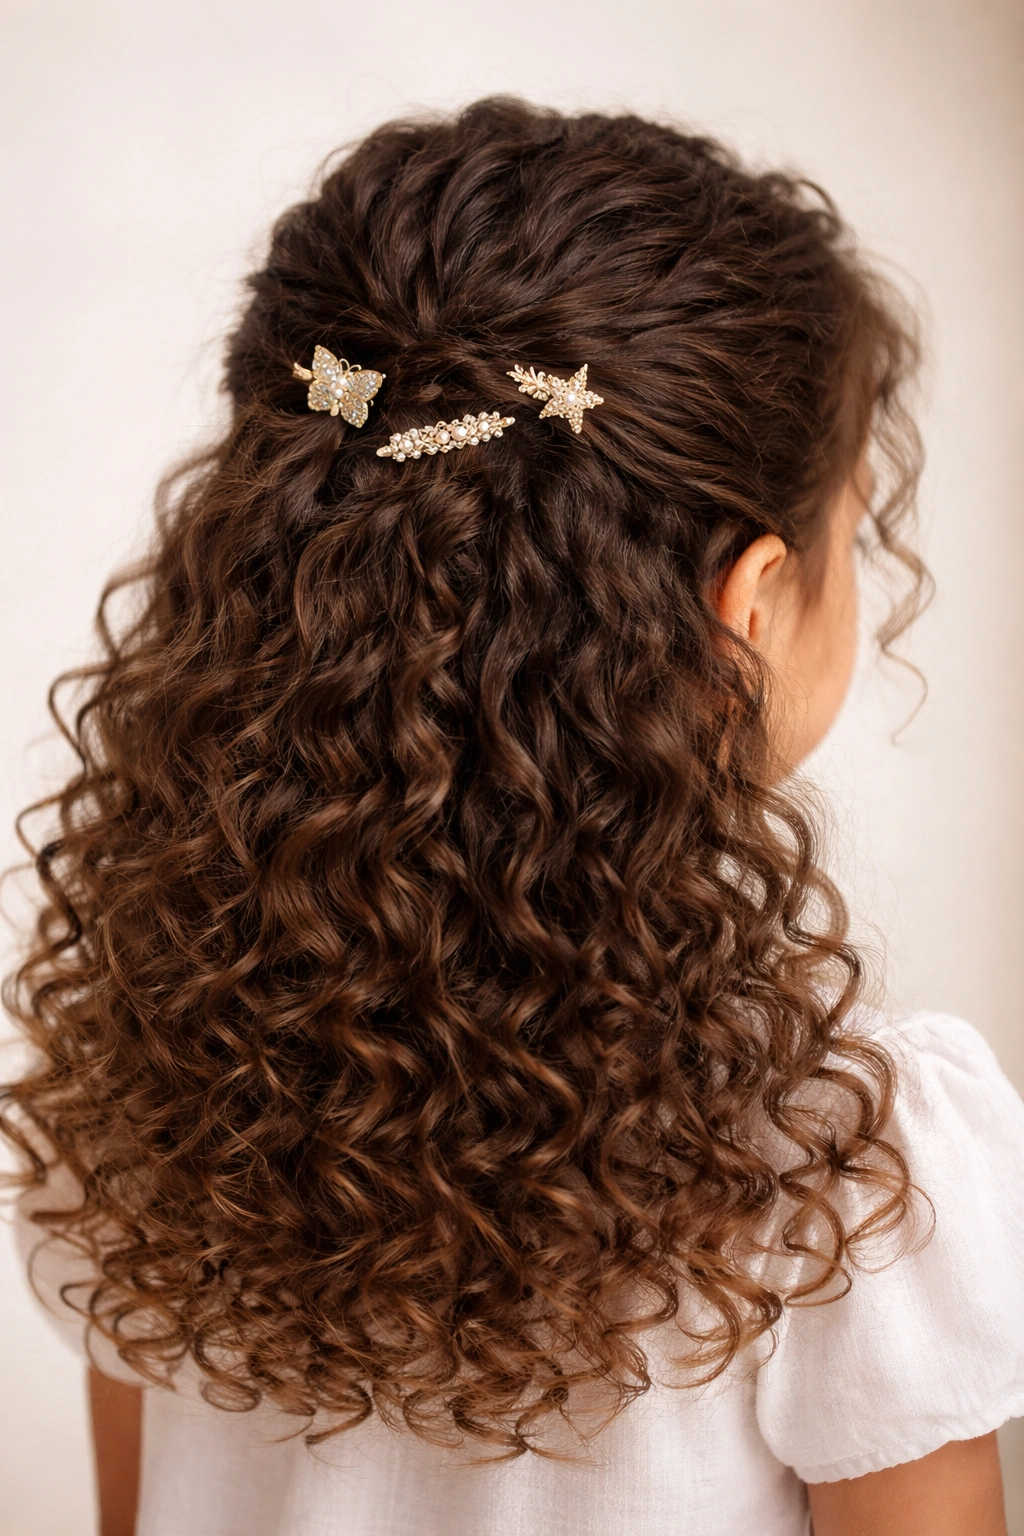
Take a simple half-up style and elevate it by using interesting clips, pins, and small accessories instead of a single elastic band. Gather the top section loosely, then secure it with 2-3 small decorative clips placed at slightly different angles, or use bobby pins with beaded or metallic ends tucked into the gathered section. This approach distributes the hold so you can keep the overall tension looser, it looks intentional and polished, and it’s surprisingly flexible — you can adjust clips throughout the day if needed without creating new creases.
Why Multiples Work Better Than One
A single tight elastic band can create a noticeable crease or even a line in curly hair that takes hours to bounce back out. Multiple loose clips distribute the hold across several points, which means each clip can be looser, and the overall style stays more textured and voluminous. This is also the most adjustable approach — if your kid finds a clip uncomfortable during the day, you can shift one without taking down the entire style.
Styling Approach
- Gather the top half of the hair loosely, using your fingers rather than a comb to minimize disruption to the curls.
- Place the first clip at the very center back of the gathered section, then add a second clip slightly to one side, and a third slightly to the other side. This triangular clip placement distributes hold evenly.
- Let some of the gathered hair escape from the clips intentionally — a few face-framing pieces and some texture around the back clip creates a softer, more organic look.
- Choose clips in colors or finishes that complement your child’s skin tone or coordinate with what they’re wearing.
Styling note: Claw clips in tortoiseshell, pearl, or metal finishes look way more sophisticated than basic plastic clips, and they’re also gentler on curly hair because they have a smoother surface and don’t create the sharp creases that some clips can.
8. Waterfall-Inspired Half-Up Adapted for Curls
The waterfall style traditionally uses a braid where you weave new sections into the braid as you go down, creating the effect of hair cascading. You can adapt this for curly hair by using a looser, less rigid approach: create a twisted or loosely braided section along one side of the head (from temple back), letting sections of hair fall out intentionally as you go, then secure the remaining braid back at the crown or side with a clip. The result is romantic and complex-looking without needing perfectly precise braiding.
How to Adapt a Waterfall for Texture
Traditional waterfall braids rely on precise technique. But with curly hair, you can be looser and more forgiving. Start with a simple twist or loose braid on one side, let curls fall naturally, and secure the remaining length at the back. The curls that fall create that cascading effect, and the intentional messiness is actually more flattering on curly hair than a super-polished waterfall would be.
Step-by-Step Execution
- Start at the temple on one side of the head and create a loose twist or loose three-strand braid moving back toward the crown or ear.
- Every inch or so, let a small section of hair escape from the twist/braid naturally. Don’t overthink this — the curls want to expand anyway, so just let them.
- Continue the twist/braid back to where you want to secure it (usually at the back of the crown or behind the ear on that same side).
- Clip or tie off the remaining length, leaving the rest of the hair loose below.
- Gently pull sections of the twist/braid slightly outward to increase volume and texture.
Insider tip: This style actually works better if some pieces are a bit messy or imperfect — it’s the loose, romantic quality that makes it special on curly hair.
9. Half-Up with Simple Elastic Band and Texture Emphasis
Sometimes the simplest approach is the best. Create a half-up style using just a single elastic band, but emphasize the curly texture by gently pulling at the gathered section after you’ve secured it, working in sections from the outside in to increase volume and fluff. Use a silk or satin-covered elastic rather than a standard rubber band to minimize friction, and let the gathered curls puff out naturally.
Why Simple Can Be Stunning
Curly hair is the star — you don’t always need braids, twists, or complicated techniques to make it look great. A simple gathered half-up with emphasis on the curl texture is clean, polished, and lets your child’s hair do the talking. This style also requires minimal styling time, which is huge when you’re getting a kid ready for school.
Maximizing Texture on a Simple Half-Up
- Use a wide-tooth comb or your fingers (not a fine-tooth comb) to gather the top section. This preserves more of the individual curl shape.
- Position the elastic at the very back of the crown rather than higher up — this creates a more flattering proportion and allows more volume to show.
- After securing the elastic, take your time gently pulling sections of the gathered hair outward. Start at the bottom of the gathered section and work up, creating an intentional puffiness.
- Don’t pull so hard that you’re breaking hairs or causing breakage — gentle, respectful pulling is the way to go.
Pro tip: If you spray the gathered section lightly with a hold spray before doing the pull-and-fluff technique, the texture holds better throughout the day.
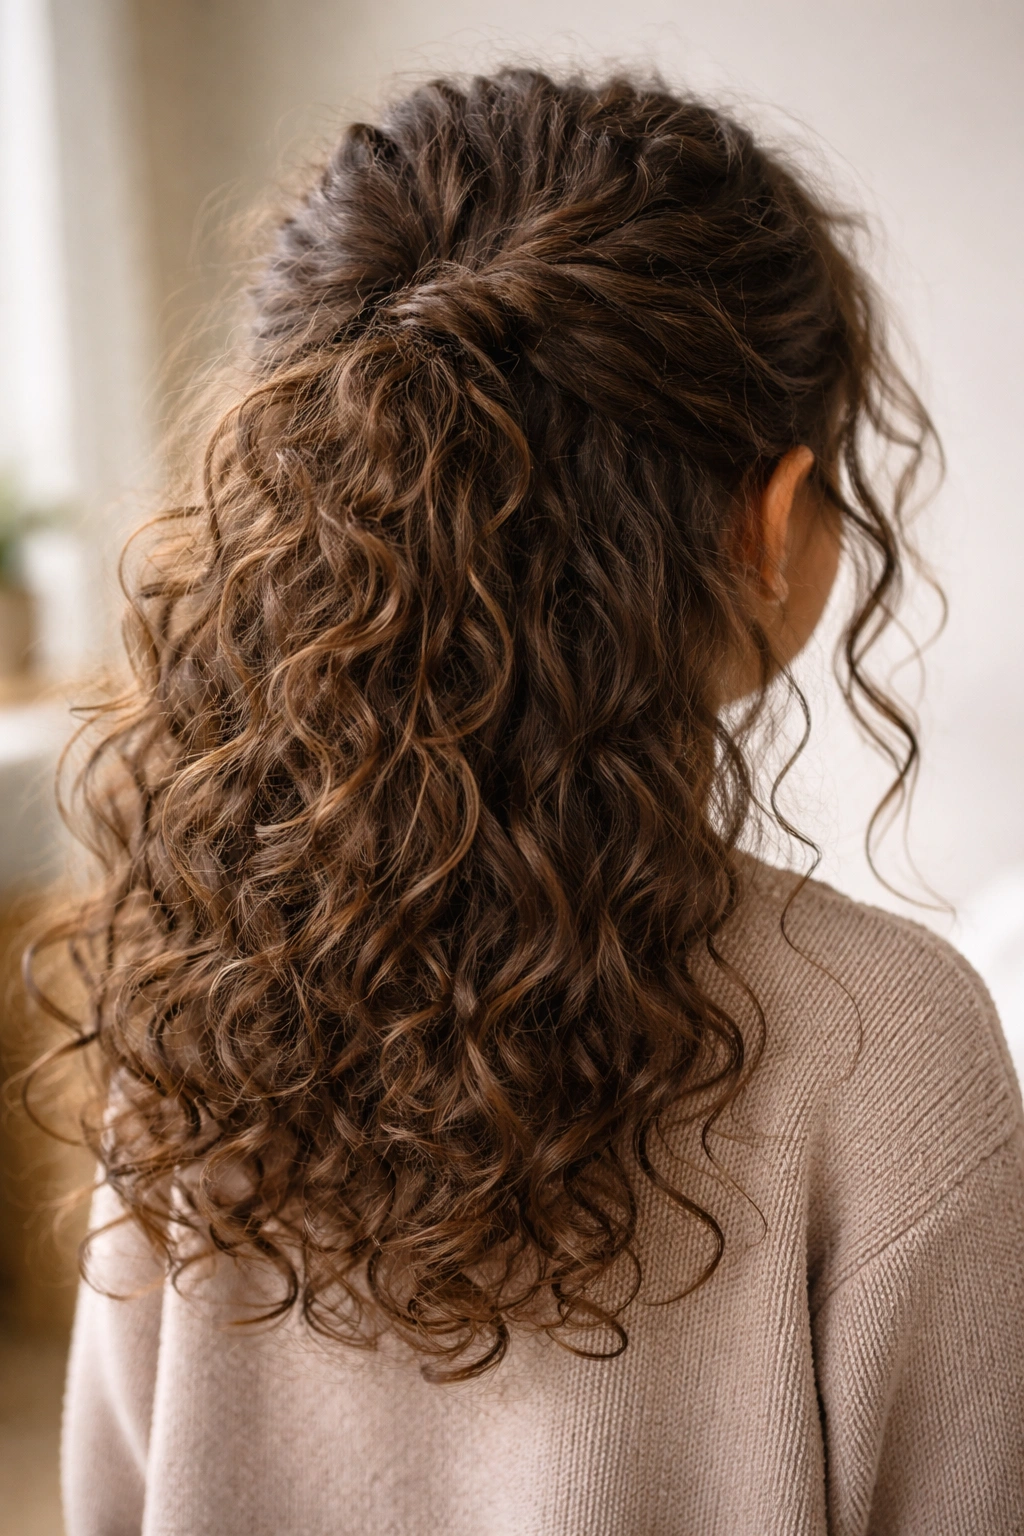
10. Boho Half-Up with Wispy Face-Framing Pieces
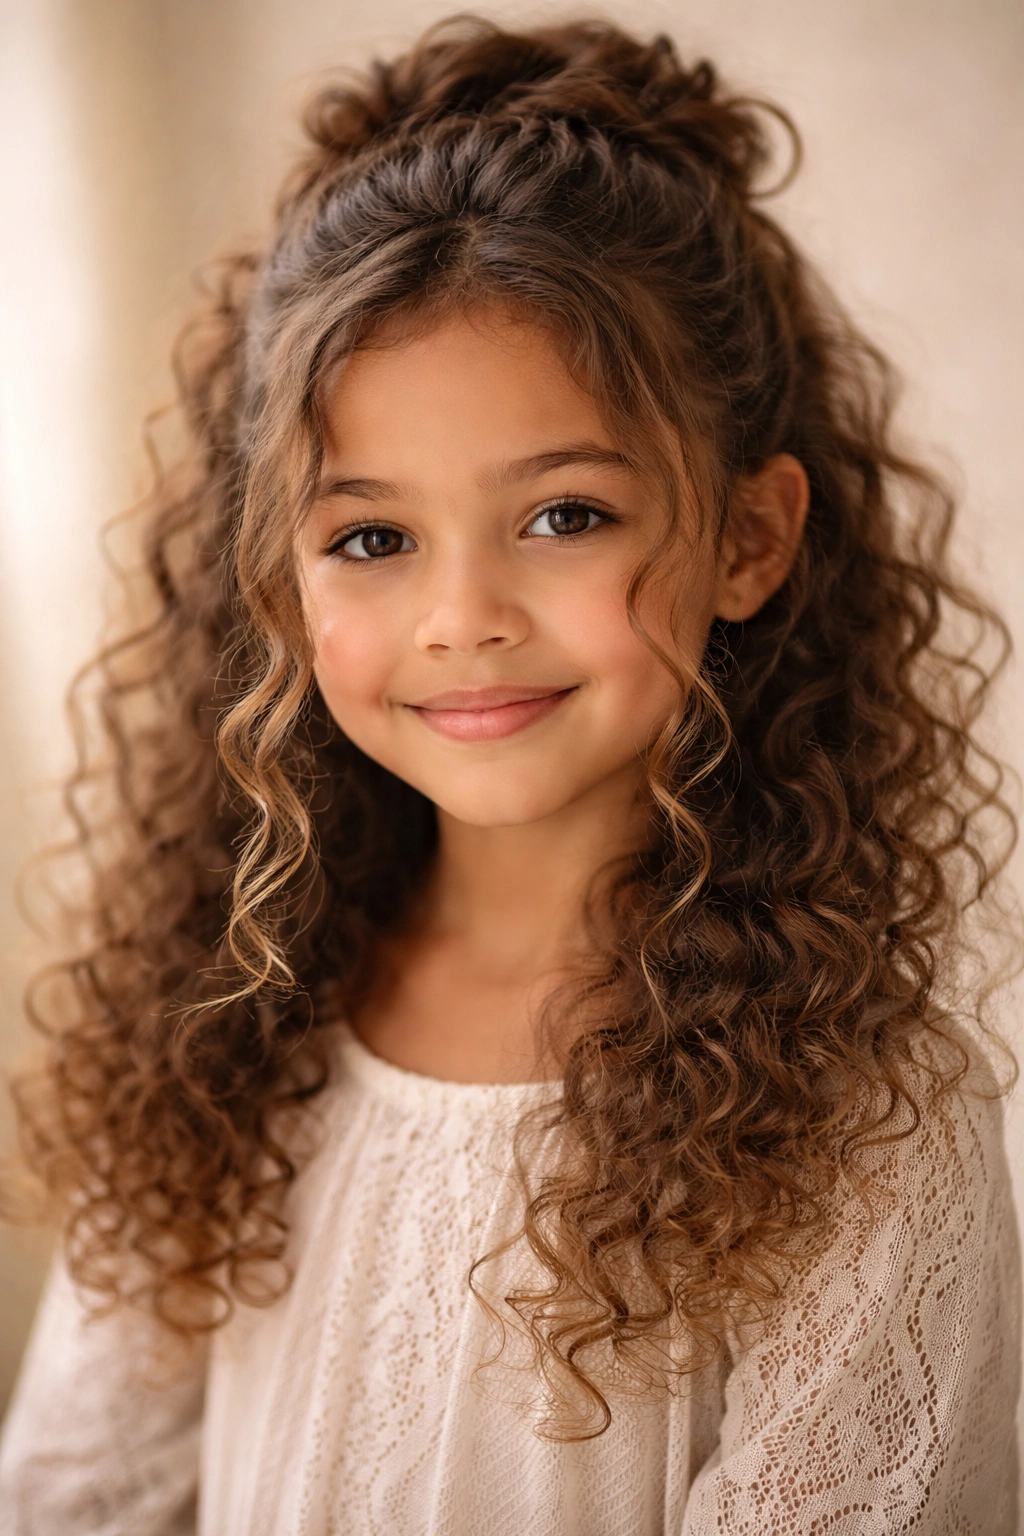
This romantic style emphasizes soft, intentionally loose pieces that frame the face while the bulk of the top half is gathered. Create a half-up by gathering the back-upper section, but intentionally leave the front-side sections loose and unclipped, allowing wispy curls to fall around the face in an effortlessly romantic way. This works beautifully on kids with longer curls and gives that “I’m a free spirit but I also look intentional” vibe.
The Boho Aesthetic on Curly Hair
Boho style is literally curly hair’s best friend — it’s all about texture, movement, and a slightly undone look. That means you don’t have to achieve perfect control or symmetry. The curls are the point. You’re just organizing enough of the hair to create intention and keep it reasonably off the face while letting the beautiful curl pattern shine.
How to Create the Wispy Effect
- Part the hair slightly off-center or create a side part rather than a center part — this asymmetry is very boho.
- Gather only the back-upper portion of hair (from roughly ear to ear across the crown), leaving the front-temple area completely free.
- Secure the gathered section with a clip, elastic, or ribbon — something that looks intentional and a bit romantic rather than strictly practical.
- Let the gathered curls puff out and show texture. This is not a sleek look; it’s a textured, organic look.
- The front pieces should be long enough to fall past the cheekbone, creating a soft frame around the face.
Styling secret: A boho half-up actually looks better if you add a delicate flower crown, headband, or hair vine across the gathered section at the back. This adds to the romantic, intentional aesthetic.
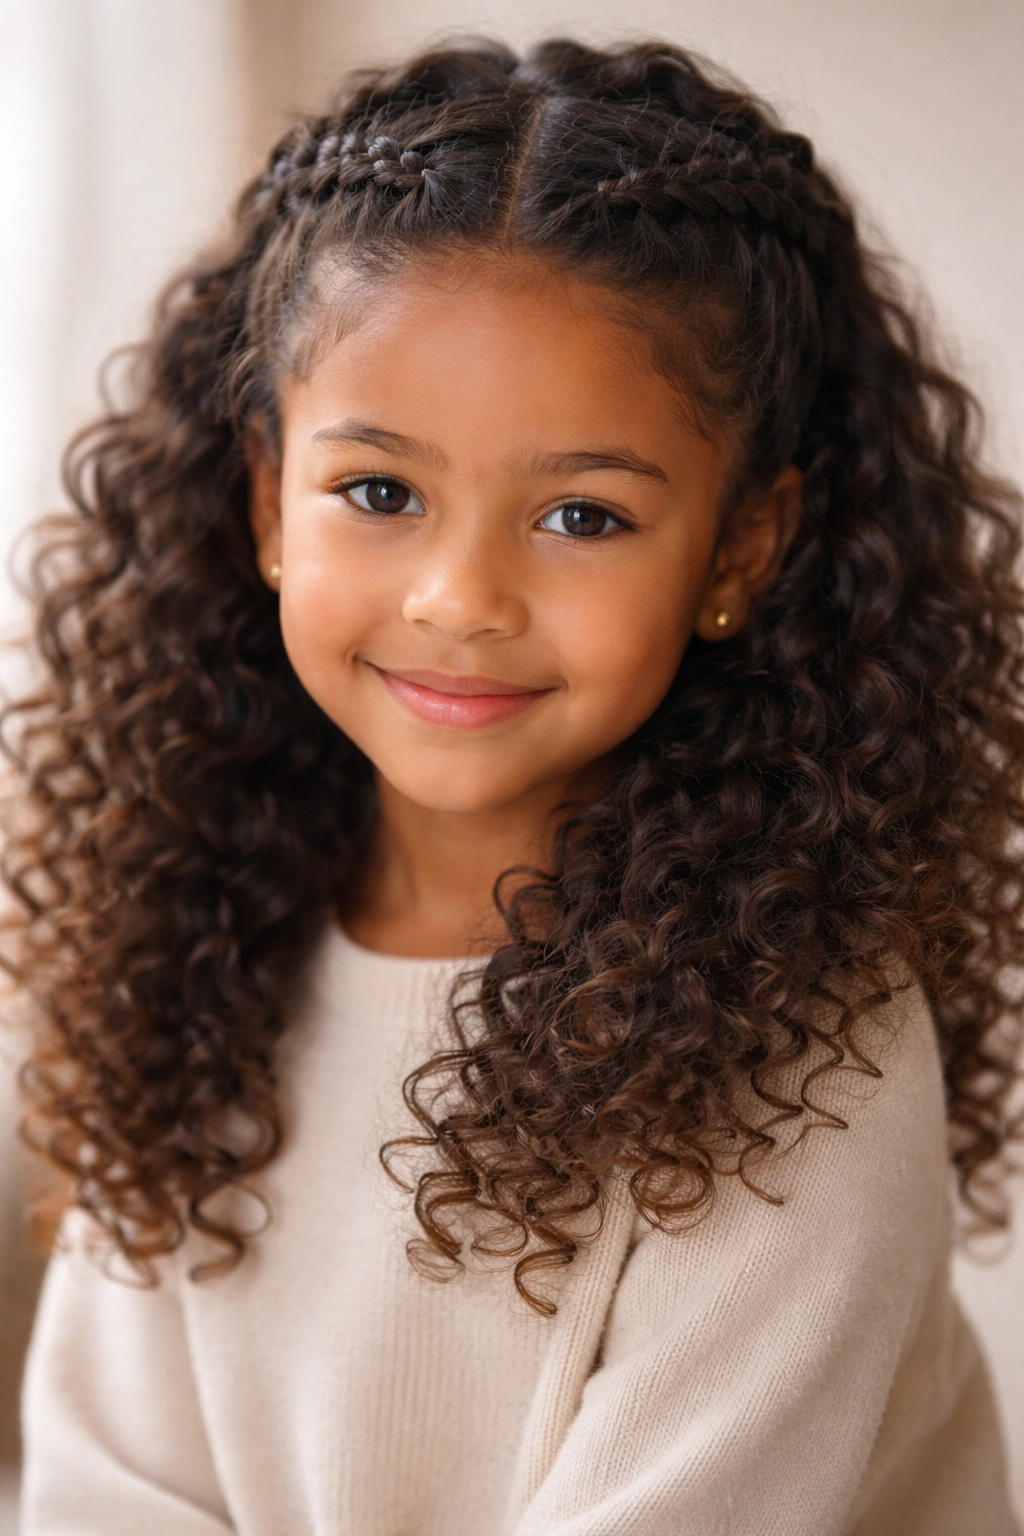
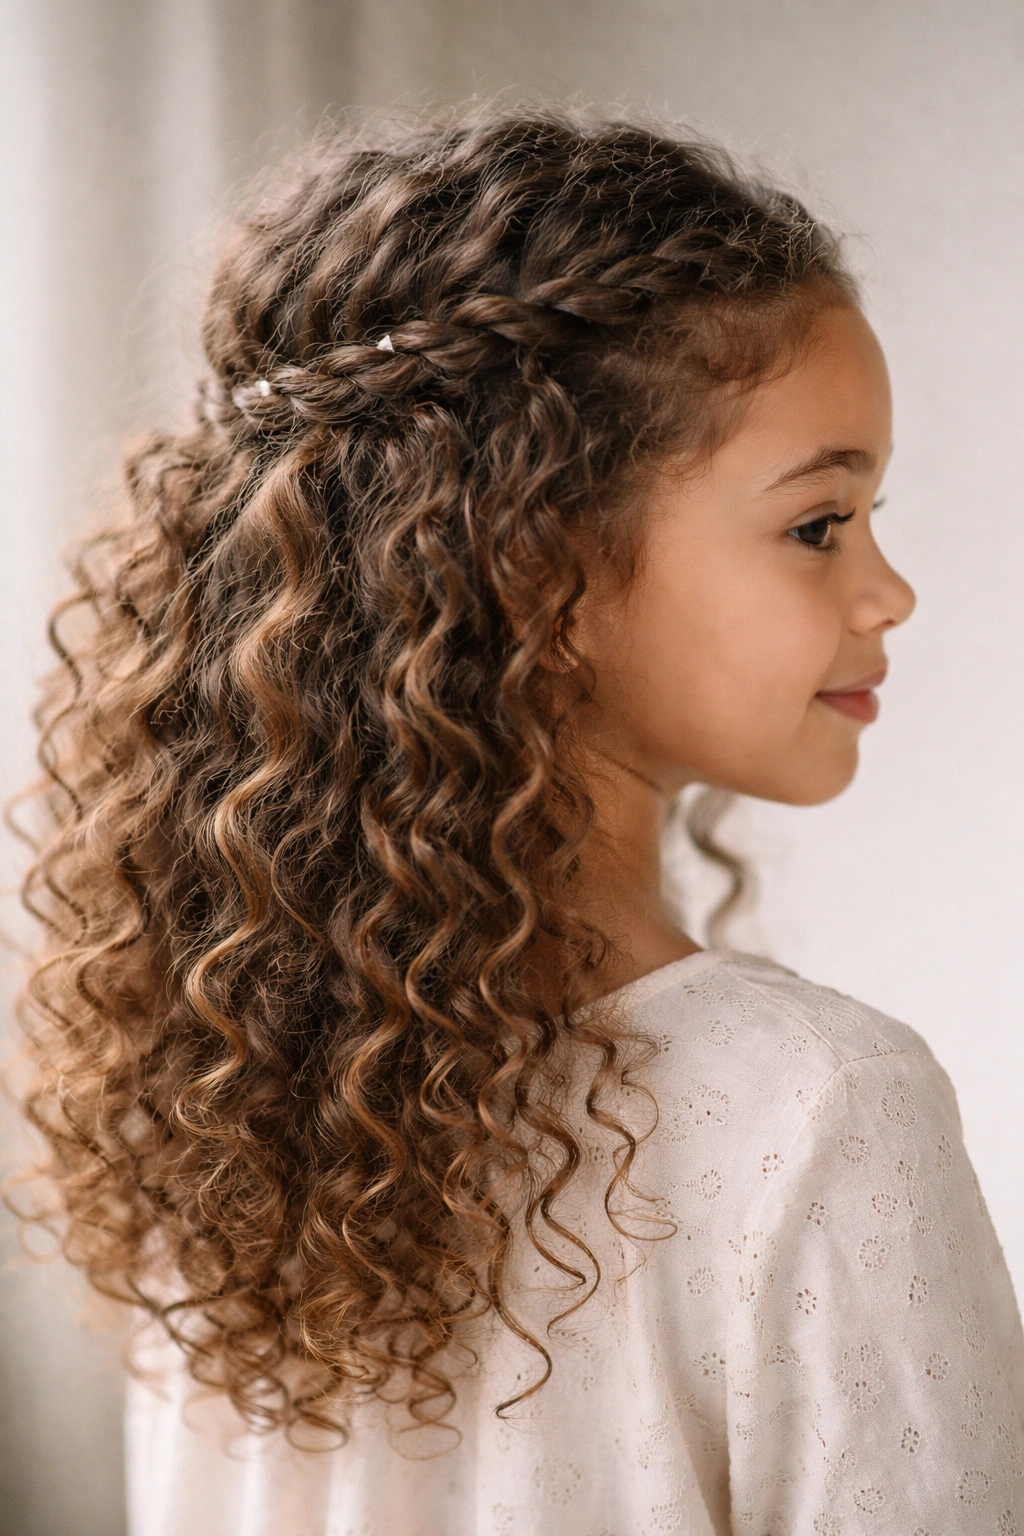
11. Half-Up with Two Small Braids Flanking the Center

Instead of one central braid or twist, create two smaller braids — one on each side of the head — that meet at the back and are secured together with a clip or elastic. This approach is less pulling than one thick braid, allows for more volume in the gathered section, and creates a really interesting visual effect with the two braids meeting at a center point at the back. The curls below remain completely loose and full.
Why Two Small Braids Distribute Tension Better
A single thick braid pulls on a concentrated area of the scalp, which can be uncomfortable and creates visible tension marks in curly hair. Two smaller braids distribute that pull across a wider area, making the style more comfortable and less likely to leave marks in the curl pattern. Two braids also look more interesting and complex than one, and the symmetry is flattering.
Braiding Process
- Create a deep side part, then start a loose three-strand braid at the temple on each side of the head.
- Braid loosely, moving back toward the crown and back of the head. Try to braid at roughly the same pace on both sides so the two braids meet at the same point.
- Secure both braids at the back with a single clip or elastic, letting them cross slightly if that happens naturally — the asymmetry adds interest.
- Gently pull the braids slightly outward to add volume and soften them.
- Let face-framing pieces fall loose in front of each braid.
Pro tip: If you start your braids a bit higher (at the hairline rather than the temple), they frame the face more flattering and are less likely to feel tight in the temple area.
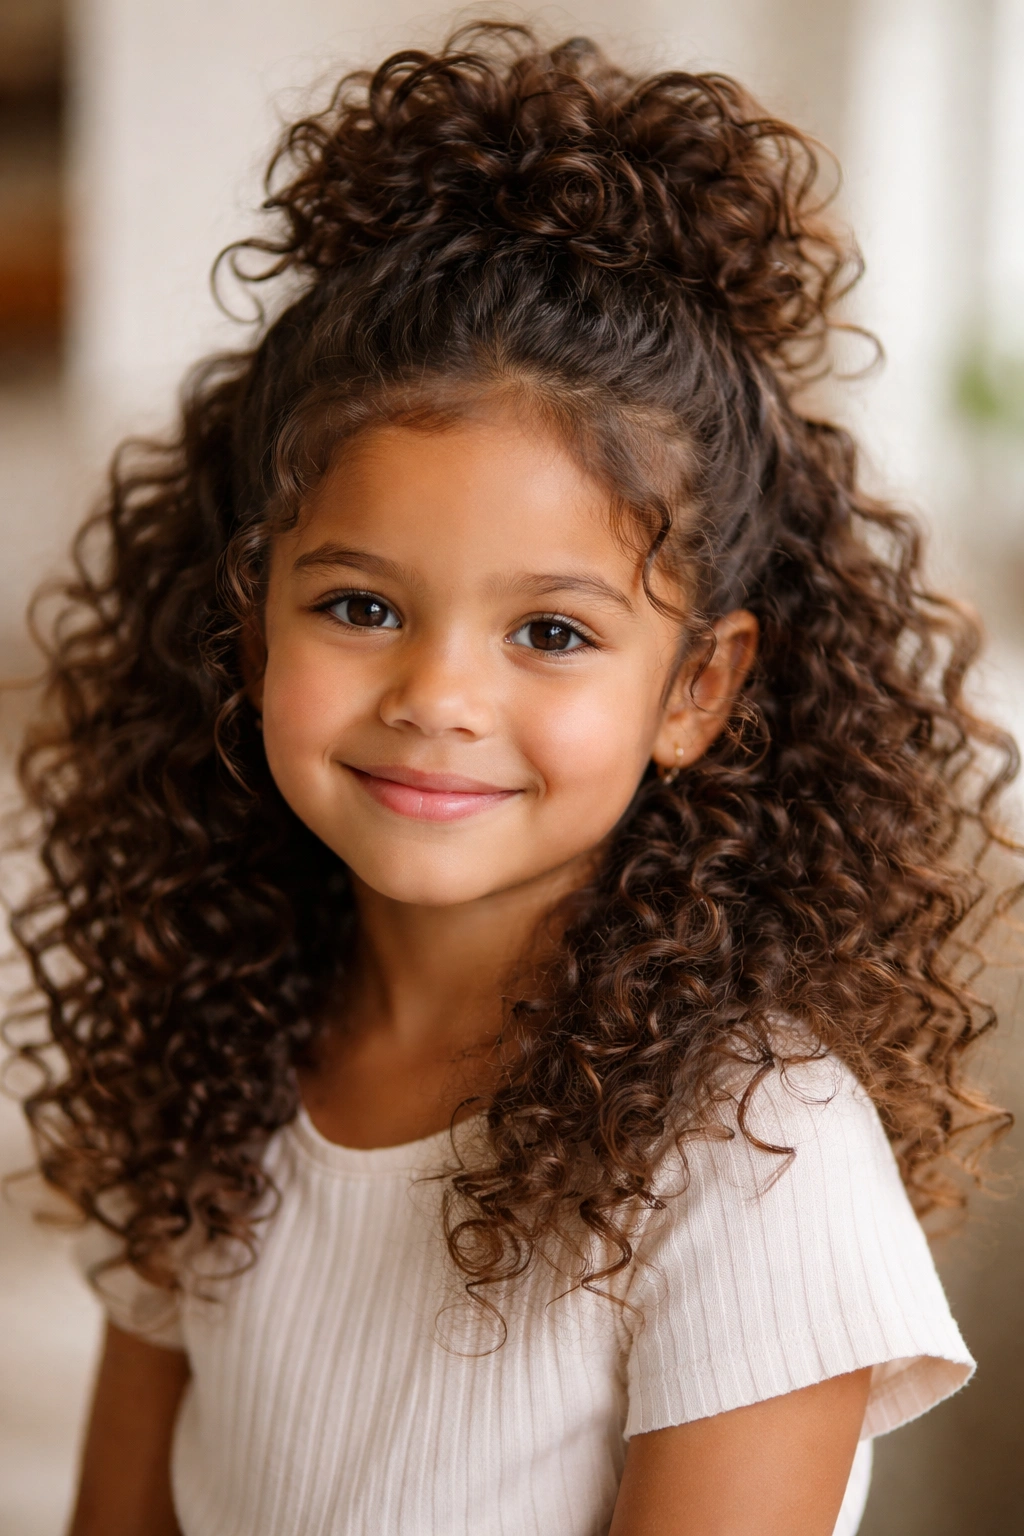
12. Claw Clip Half-Up with Curls Puffing Out
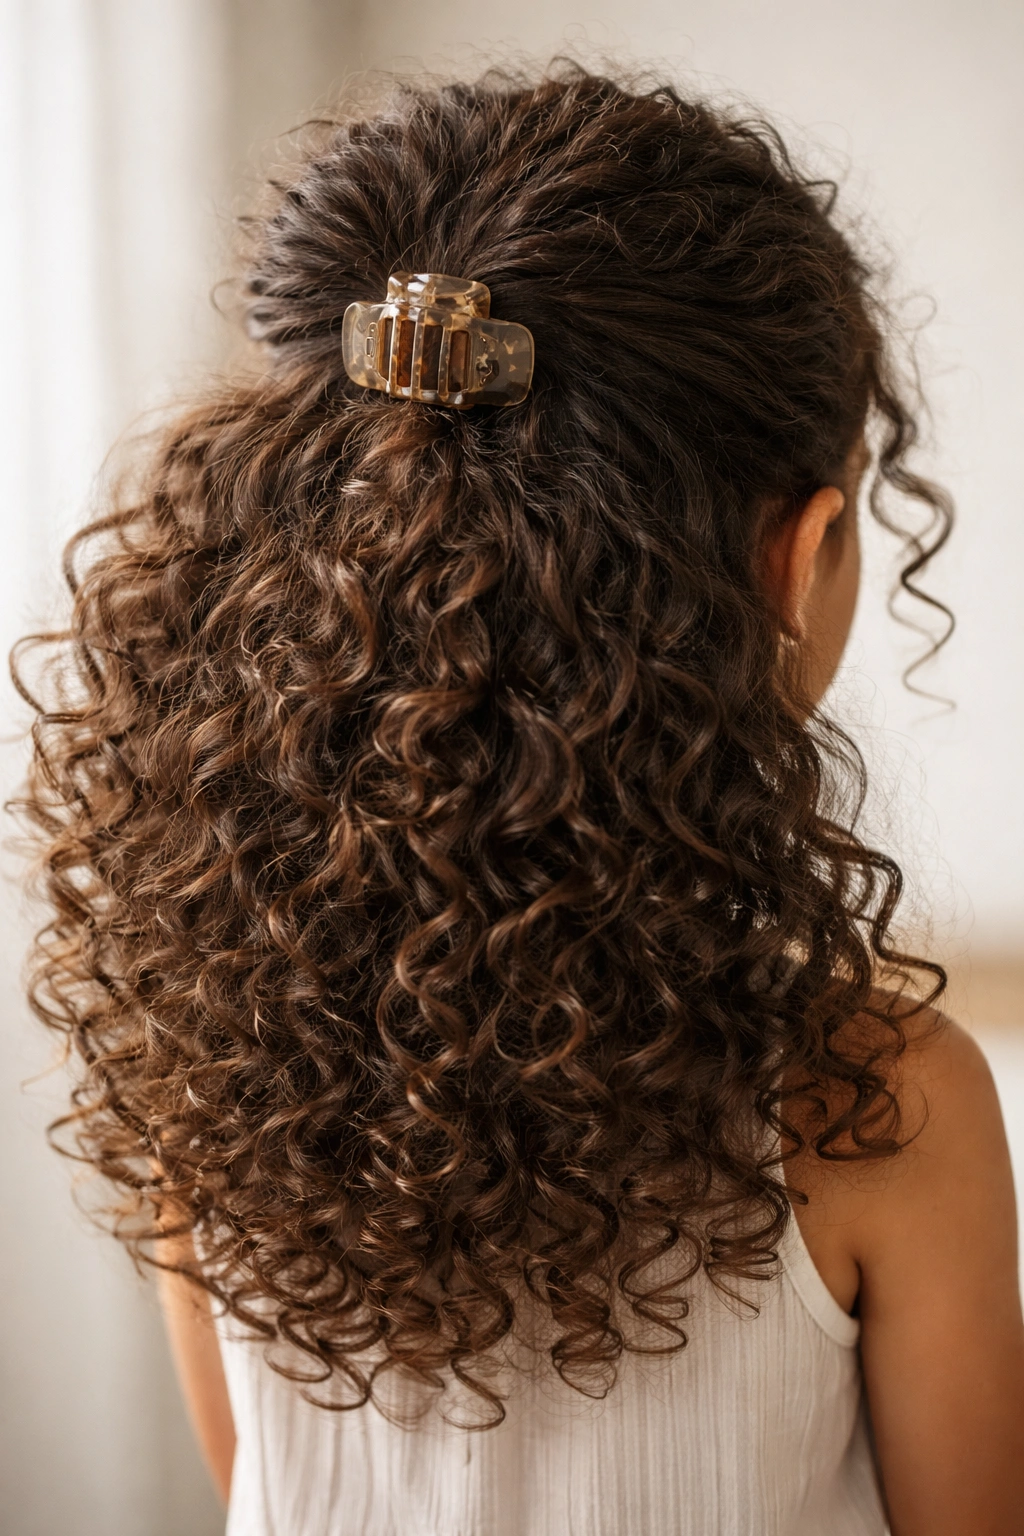
A claw clip is actually the ultimate tool for half-up styles on curly hair because it holds hair in place without the creasing or tension of a small elastic band. Gather the top half of the hair loosely and secure it with a single claw clip positioned at the center back of the crown, then gently pull sections of the gathered hair outward from the clip to increase volume. The result is textured, effortlessly polished, and genuinely comfortable.
Why Claw Clips Are Game-Changing for Curls
Claw clips are larger than typical elastics, which means they distribute hold across a bigger surface area — less tension, less creasing, more comfort. They’re also easier to adjust if your child finds the positioning uncomfortable, and they look intentional and polished rather than purely functional. A good claw clip holds all day without slipping, even in thick or heavy curly hair.
Claw Clip Technique
- Gather the top half of the hair loosely, letting your fingers do most of the work rather than a comb (which can disrupt curls).
- Position the claw clip at the very center back of the crown, making sure it’s sitting on the gathered hair (not pulling on loose hair or the scalp).
- Once clipped, gently pull sections of the gathered hair outward — start from the bottom and work up, creating volume all the way around the clip.
- Don’t worry about this looking perfect — the textured, slightly puffed-out look is exactly what you want.
Styling note: Tortoiseshell, pearl, or metallic claw clips look much more sophisticated than plain plastic, and they’re often more comfortable because the smoother surface doesn’t catch on curls.
13. Half-Up with Decorative Bobby Pins and Hidden Texture
This approach uses bobby pins (rather than a clip or elastic) to secure a half-up style, with the pins deliberately placed into the curl texture so they’re hidden and the gathered section looks like it’s just… floating. This creates an almost gravity-defying visual effect that’s really striking, and because the hold is distributed across multiple pins rather than concentrated in one spot, it’s more comfortable and less damaging.
The Hidden-Pin Aesthetic
When bobby pins are properly inserted into curly hair, they disappear entirely into the texture — you can’t see them, but the hair stays secured. This creates a magical effect where the gathered curls seem to be held in place by nothing but their own curl structure. It’s actually a very sophisticated styling approach, and it’s especially effective on curly hair because the texture naturally conceals the pins.
Technique for Invisible Pins
- Gather the top section of hair loosely, creating a shape rather than a tight ponytail.
- Insert bobby pins horizontally into the gathered section, pushing them into the curl structure so they’re surrounded and hidden by hair. You’ll need 3-4 pins minimum, spaced around the gathered section.
- Each pin should be inserted in a slightly different spot so the hold is distributed across the entire gathered area.
- Gently puff out the gathered curls to make them look full and intentional.
- The beauty of this approach is that there’s no visible elastic or clip — just gorgeous, textured curls.
Pro tip: Stick bobby pins in the fridge for a minute before using them — the cold metal grips hair slightly better and is more comfortable against the scalp.
14. Stacked Half-Up with Two Sections at Different Heights
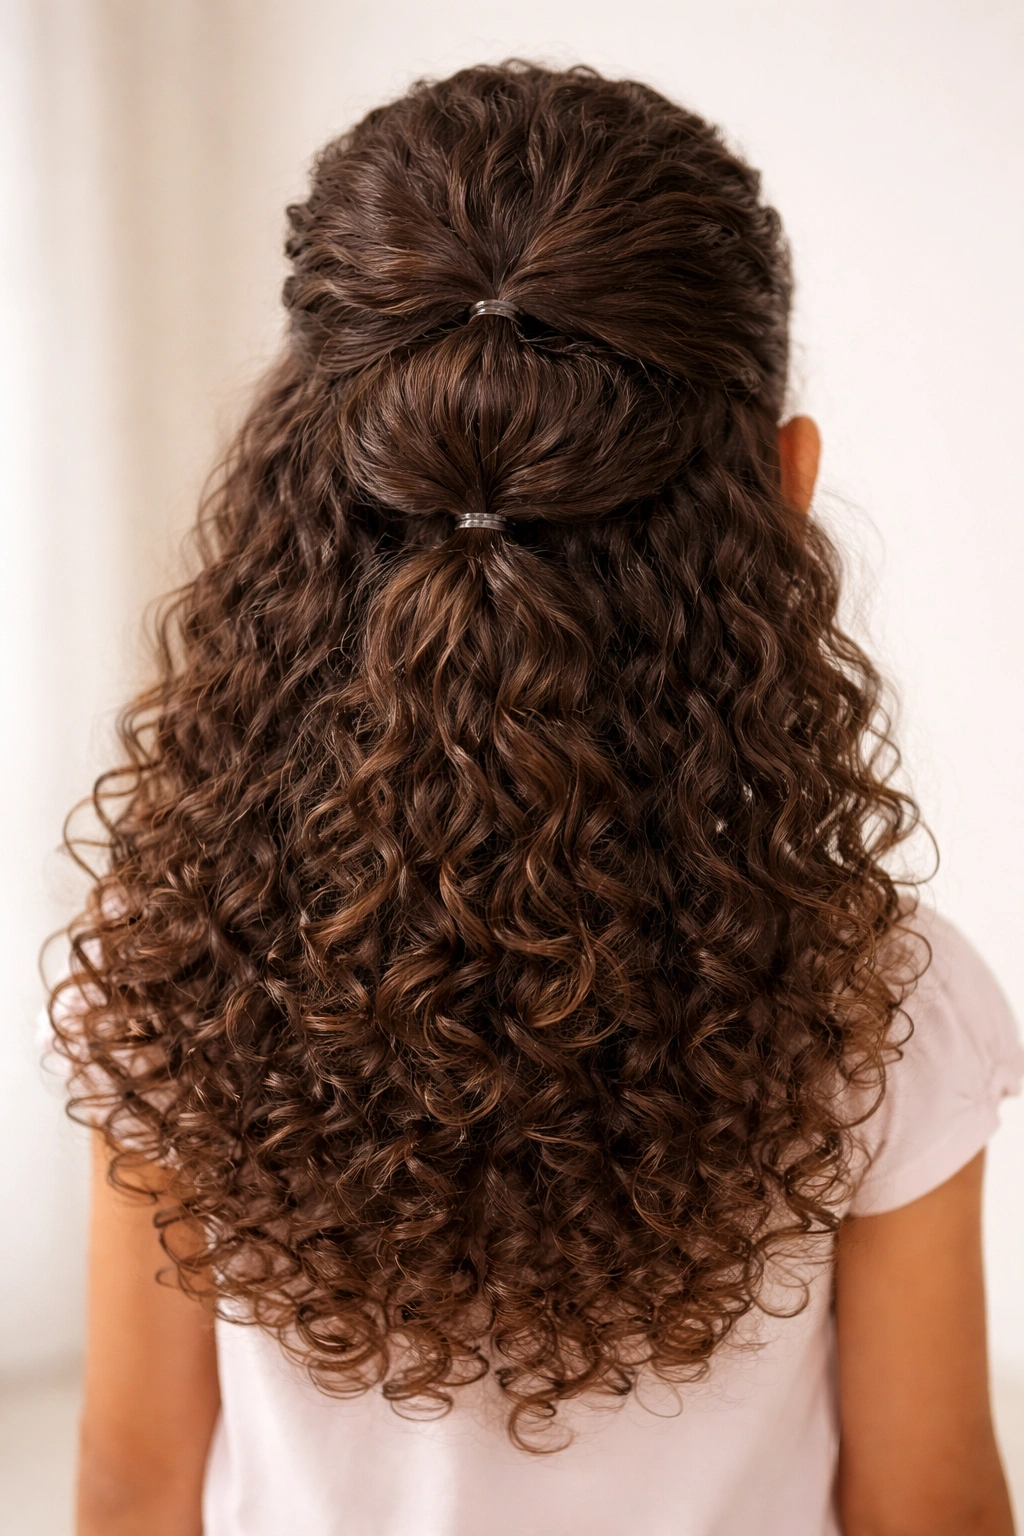
Create a more complex, layered look by gathering two separate sections at different heights: a smaller section higher up near the crown, and a larger section lower down at the nape area. Secure each section separately with clips or elastics, creating a stacked effect that adds visual interest and keeps more hair organized without the look being overly formal. This style works beautifully on longer curly hair and gives lots of height and dimension.
Why Stacking Creates Dimension
A single gathered section is clean and simple, but two sections at different heights create visual complexity and depth. Stacking also allows you to control different sections of hair in different ways — maybe the top section is smaller and tighter, while the lower section is looser and more textured. This flexibility helps accommodate different hair densities or thicknesses throughout the head.
How to Stack Successfully
- Identify where you want each section: the upper section should be roughly at the crown (from temple to temple), and the lower section roughly 2-3 inches below that.
- Gather the upper section first, secure it loosely with a clip or elastic, then gather the lower section and secure it separately.
- These two gathered sections can be secured independently, or you can gather the hair below the upper section and clip it to incorporate both sections into a visual “stack.”
- The key is making sure neither section is pulled too tightly — each should be textured and puffed out.
- Let some hair escape from both sections to create a soft, intentional look rather than a structured, controlled one.
Styling note: This style works especially well if you use different colored clips or finish off each section differently — maybe the upper one with a metal clip and the lower one with a ribbon-wrapped elastic.
15. Half-Up with Curled Sections Added for Extra Texture

If your child’s natural curls are loose waves or don’t hold as much texture as you’d like, consider adding extra curl to the gathered section by lightly curling it with a curling iron or wand before securing it. This creates a unified, enhanced texture that looks intentional and adds visual richness to the style. The contrast between the gathered, curled section and the looser natural curls below creates interesting dimension.
When and Why to Add Curl
Not all kids with curly hair need to add curl — if the natural curl is tight or springy, more curl isn’t necessary. But if the curls are looser waves or if the natural texture is a bit flat, adding curl to the gathered section makes the style look more put-together and increases visual interest. Adding curl also helps the gathered section hold its shape better throughout the day.
How to Add Curl Safely
- Use a low to medium heat setting on your curling iron or wand — high heat isn’t necessary and can damage curls over time.
- Curl only the gathered section after you’ve secured it, or curl before gathering and then secure while the curls are still warm (warm curls are more malleable and stay in place better).
- Use a styling cream or light gel on the section you’re curling before applying heat — this protects the hair and helps the curl hold.
- Keep the curling iron on each section for only 5-10 seconds — you want to create curl, not fry the hair.
- Allow curls to cool before moving the style around — this sets the curl and makes it last longer.
Pro tip: If your child has delicate or fine curls, skip the heat entirely and instead create texture by lightly twisting or braiding the gathered section while the hair is damp, then allowing it to dry in that twisted state.
16. Messier Textured Half-Up with Deliberately Loose Pieces
This intentionally imperfect style celebrates chaos and texture by gathering only the very back section loosely and letting tons of pieces fall around the face and sides. The gathered section should be puffed out maximally, and the face-framing pieces should be visibly loose and wispy. This is less about control and more about celebrating the volume and texture that curly hair naturally creates.
Embracing Imperfection
Curly hair sometimes looks best when you stop trying to control it and just let it be gorgeously chaotic. This style embraces that philosophy. It’s not careless — it’s intentionally textured and organized in the back, but visibly loose and organic everywhere else. Kids often love this approach because it feels more authentic to how their hair actually behaves.
How to Create Intentional Messiness
- Gather only the very back-center section of hair at the nape, using your fingers rather than a comb.
- Secure this small gathered section with a small clip or elastic — it’s really just a gentle gathering, not a tight hold.
- Leave at least 50% of the top-half hair completely loose, falling around the face and sides.
- These loose pieces should be visible and should frame the face — this is the point of the style.
- Gently puff out the gathered back section so it’s visibly full and textured.
- The overall effect should be “I have gorgeous, curly hair and I’m letting it be itself” rather than “I tried to control this and gave up.”
Styling secret: This style is even more effective if you hit the entire head lightly with a curl-refreshing spray or light mist of water before creating the style. Fresh, activated curls naturally look more intentional and beautiful.
17. Half-Up with Headband or Hair Vine Across the Crown
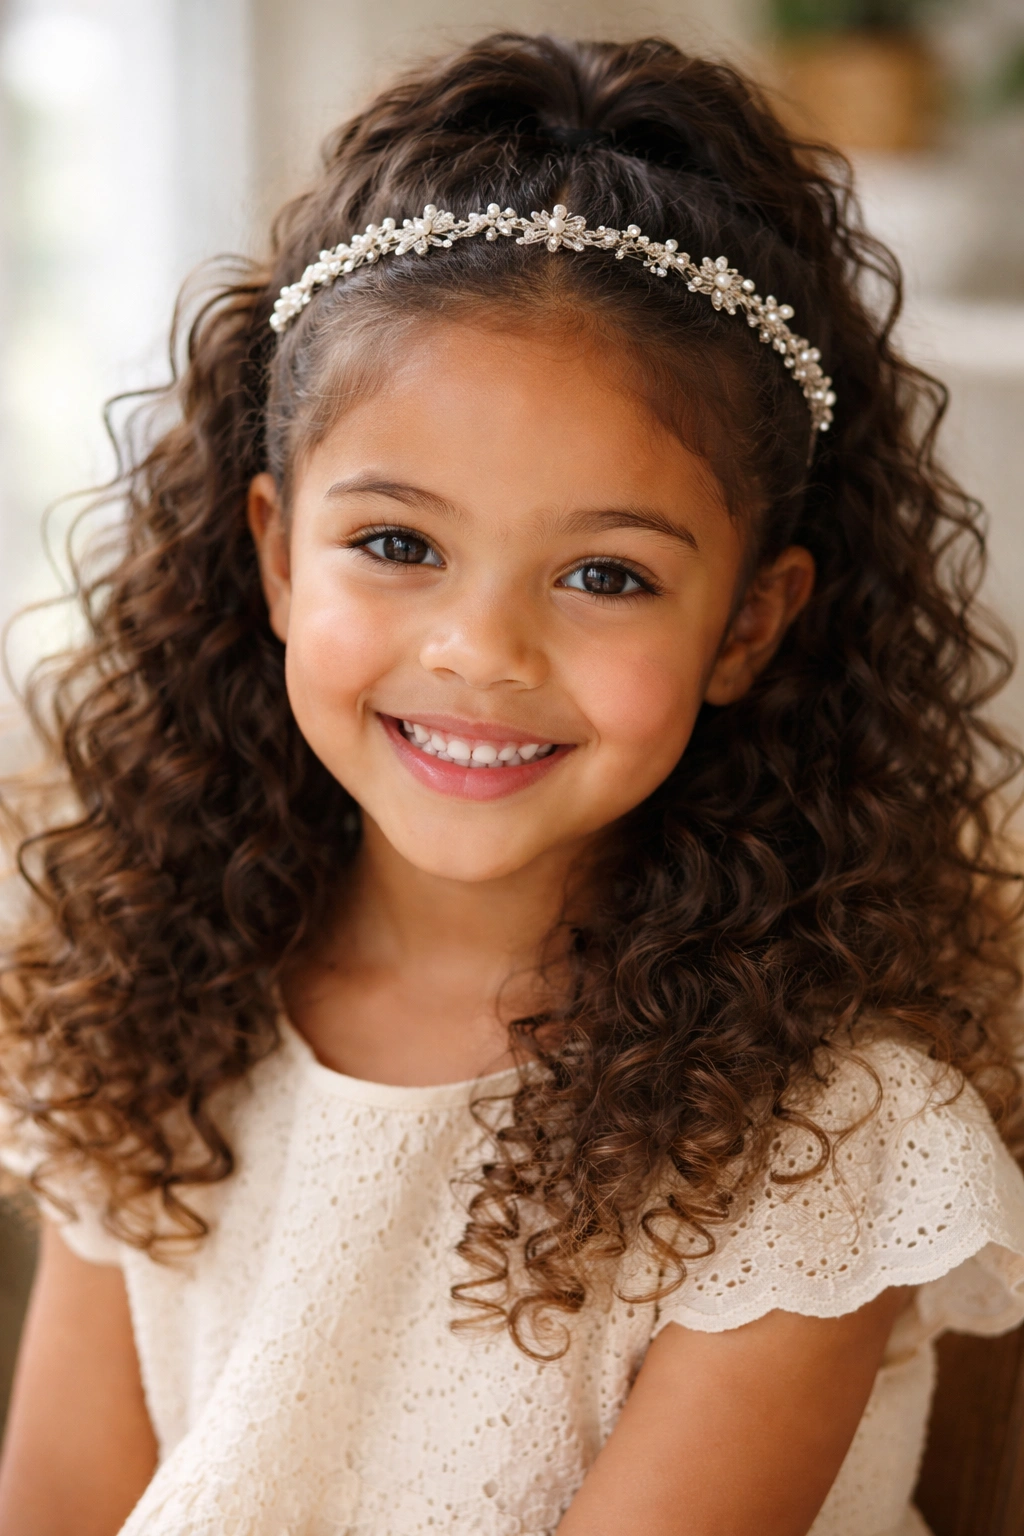
Use a decorative headband, hair vine, or tiara positioned across the crown to create a half-up effect, with the gathered section held in place by the headband itself rather than a traditional clip or elastic. This approach is especially striking and gives a royal or special-occasion feel while being surprisingly secure and comfortable. The headband becomes a focal point of the style rather than just functional.
Why Headbands Work as Holding Tools
A headband positioned correctly across the crown can hold a gathered section of hair in place just as effectively as an elastic band, but with the added benefit of looking intentional and decorative. This approach distributes the hold across the entire width of the headband rather than a small elastic, which is actually more comfortable and less damaging to the hair.
Headband Placement and Style
- Position the headband across the crown, roughly where you’d place a traditional gathered elastic for a half-up style.
- Gather the top section of hair loosely and tuck it slightly behind or under the headband to hold it in place.
- Choose a headband that coordinates with your child’s outfit, skin tone, or hair color — this is a visible, decorative element.
- Let the gathered curls puff out above and around the headband for texture and fullness.
- Face-framing pieces should fall loose in front of the headband.
- Hair vines with small flowers or beads are especially beautiful for special occasions, while simple metallic or velvet headbands work for everyday wear.
Pro tip: A slightly padded headband is more comfortable for extended wear than a thin, hard plastic one, especially if your child is wearing it all day at school.
18. Double Clip Half-Up with Asymmetrical Placement
Instead of one centered clip, use two clips positioned at different angles and slightly different heights, each holding a portion of the gathered half-up section. This creates an asymmetrical, fashion-forward look that’s visually interesting and keeps the overall tension lower because the hold is distributed across two clips rather than concentrated in one spot. This approach works especially well if your child’s hair is thick or heavy.
Why Asymmetry Works on Curly Hair
Curly hair naturally expands and creates visual fullness. Asymmetrical styling capitalizes on that fullness by playing with placement and balance rather than centering everything. An asymmetrical double-clip half-up looks intentional, modern, and way more interesting than a centered single clip.
Asymmetrical Clip Technique
- Gather the top section of hair loosely, creating a shape rather than a tight point.
- Position the first clip at the center-back, angled slightly to one side.
- Position the second clip slightly below and to the opposite side, creating a diagonal or offset pattern.
- The two clips should each be holding a section of the gathered hair, but the overall effect is asymmetrical rather than balanced.
- Puff out the gathered curls so they’re visible and textured.
- Let the clips themselves be visible — choose interesting colors or finishes that become part of the style’s visual appeal.
Styling note: This works best if the two clips are different colors or finishes — maybe one tortoiseshell and one metallic — so the asymmetry is intentional and obvious rather than accidental-looking.
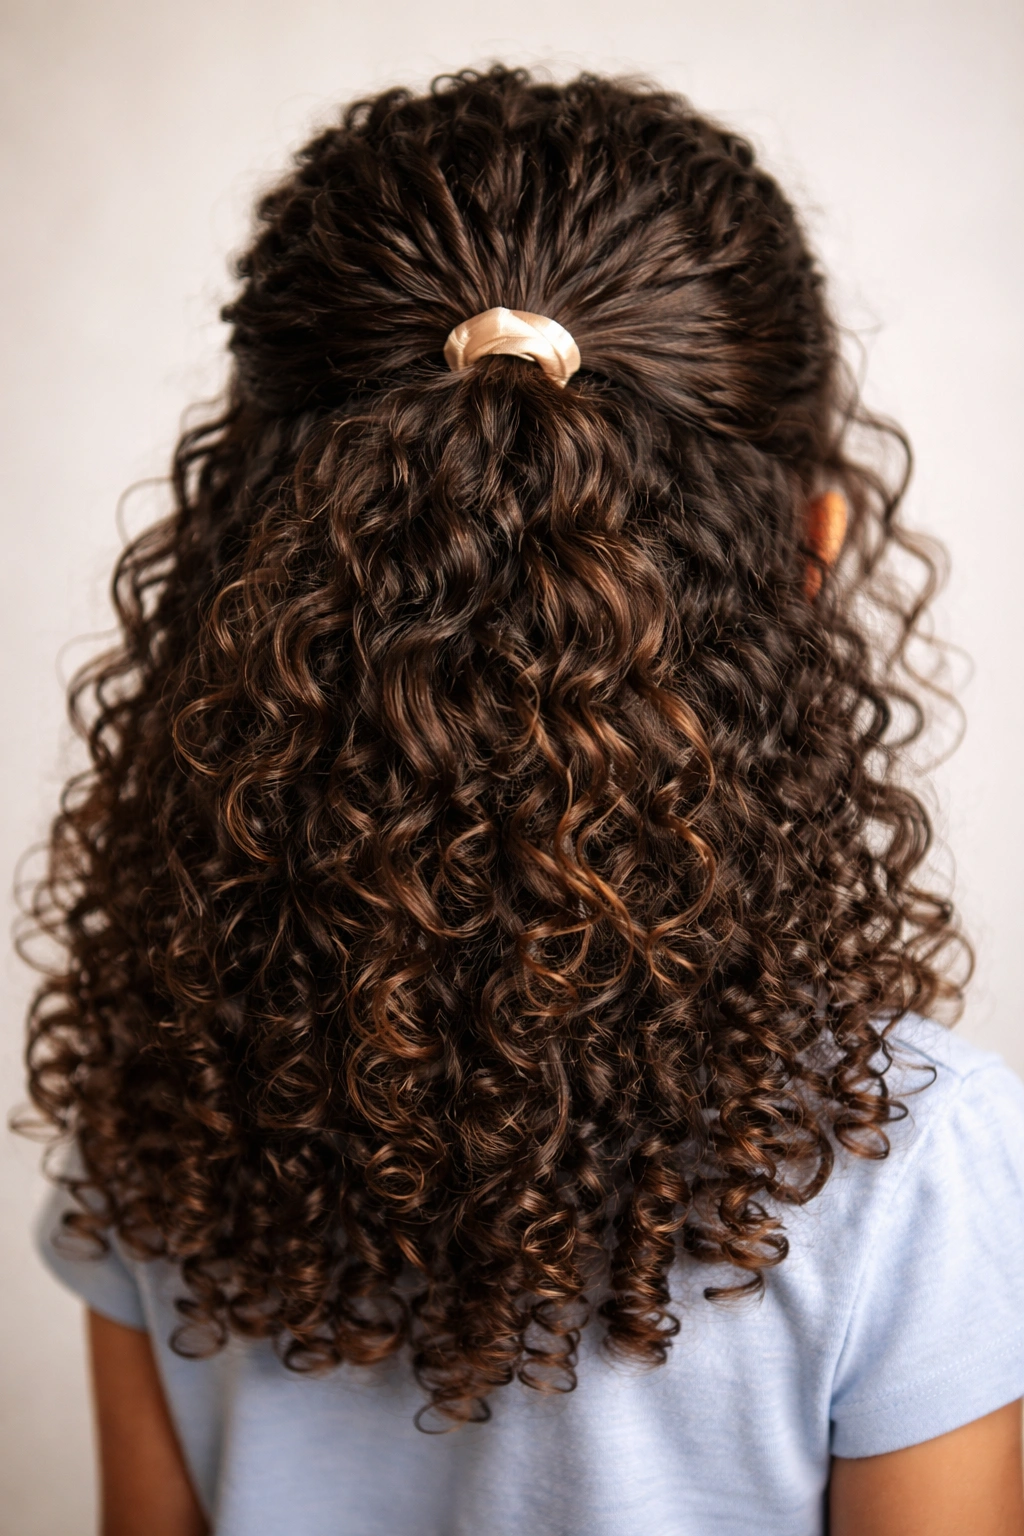
19. Half-Up Half-Down Ponytail Hybrid (The Best of Both Worlds)
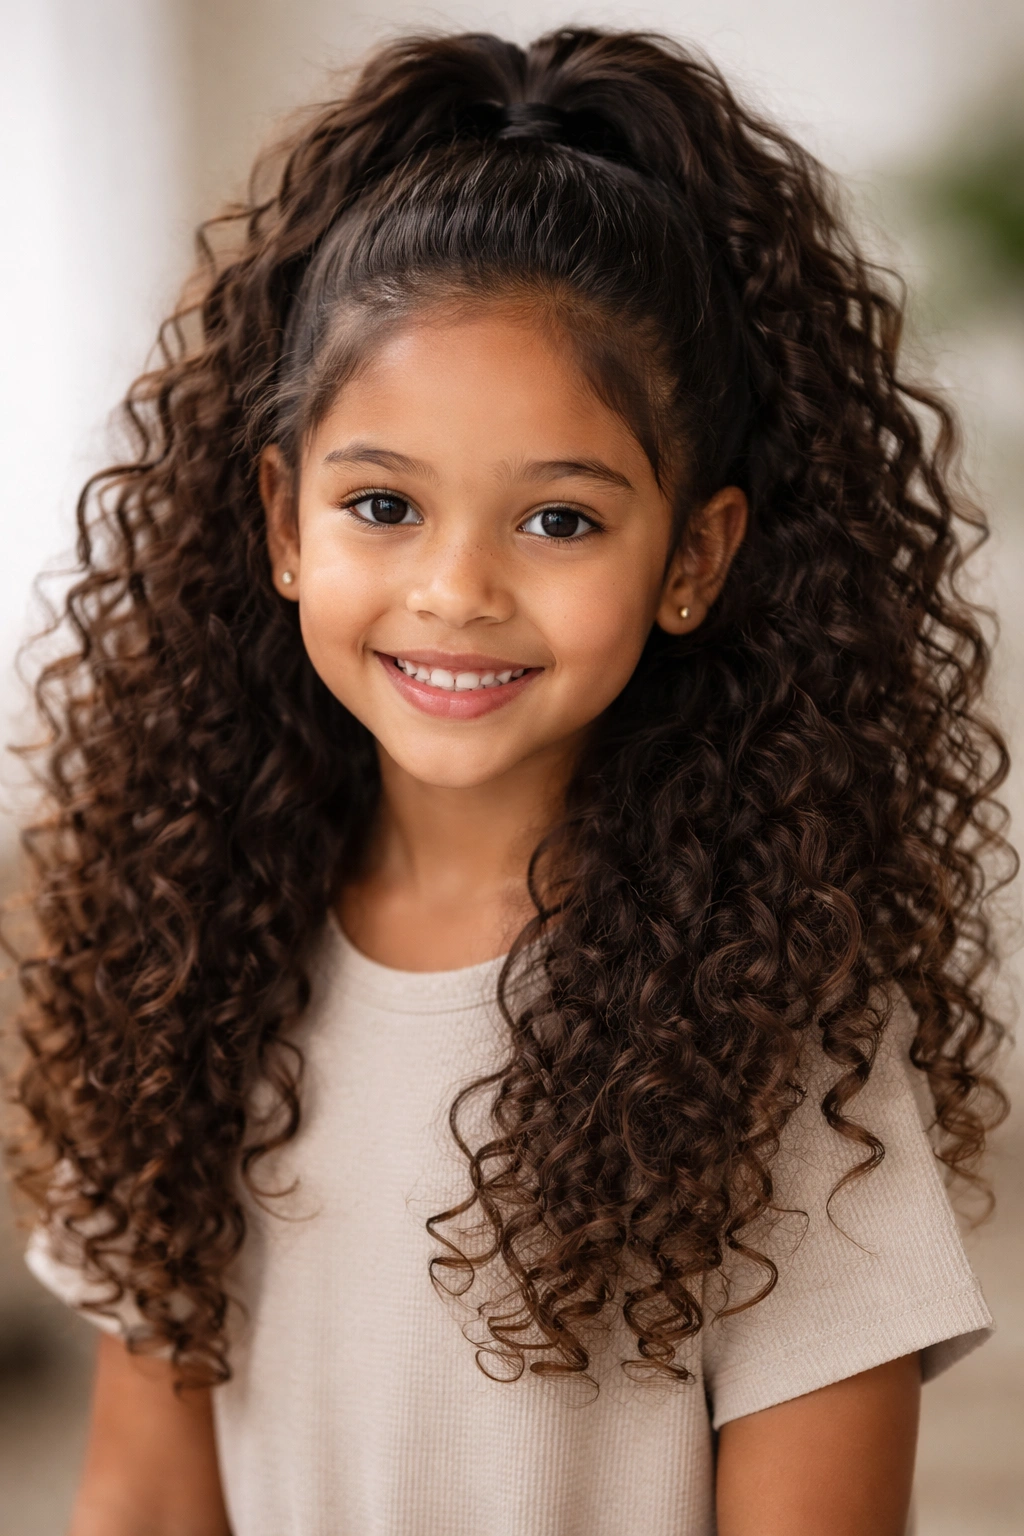
This style combines elements of a half-up with a full ponytail by gathering the top half of the hair into a ponytail (rather than clipping or securing it loosely), while intentionally leaving face-framing pieces out and allowing the lower half of the hair to flow freely below the gathered ponytail. The result is a style that keeps more hair off the face than a traditional half-up while maintaining the movement and fullness of a half-down style.
How the Hybrid Differs From Straight Half-Up
A traditional half-up gathers the top section and leaves the bottom completely loose and blending. This hybrid keeps the gathered section as a defined ponytail while the hair below remains loose, creating more definition between the two sections and a more polished overall look. It’s especially effective for kids with very thick or very long curly hair that benefits from more organization.
Creating the Hybrid
- Gather the top half of the hair into a ponytail using an elastic band, positioning it at the crown or slightly lower depending on how much hair you want gathered.
- Before fully tightening the elastic, pull out several face-framing pieces — leave these loose so they fall around the face.
- Tighten the ponytail so it feels secure and comfortable, but not painfully tight.
- The hair below the elastic (the lower half) should be left completely alone — let it cascade loose and full.
- Gently pull sections of the ponytail slightly outward to add volume and texture to the gathered section.
- You can style the loose lower section however your child prefers — curled, straight, or left as-is.
Pro tip: This style is especially effective if you use a decorative elastic or wrap the base of the ponytail with a ribbon, which makes the gathered section feel more like an intentional design element than just functional hair management.
20. Half-Up with Added Accessories and Beads Woven Through
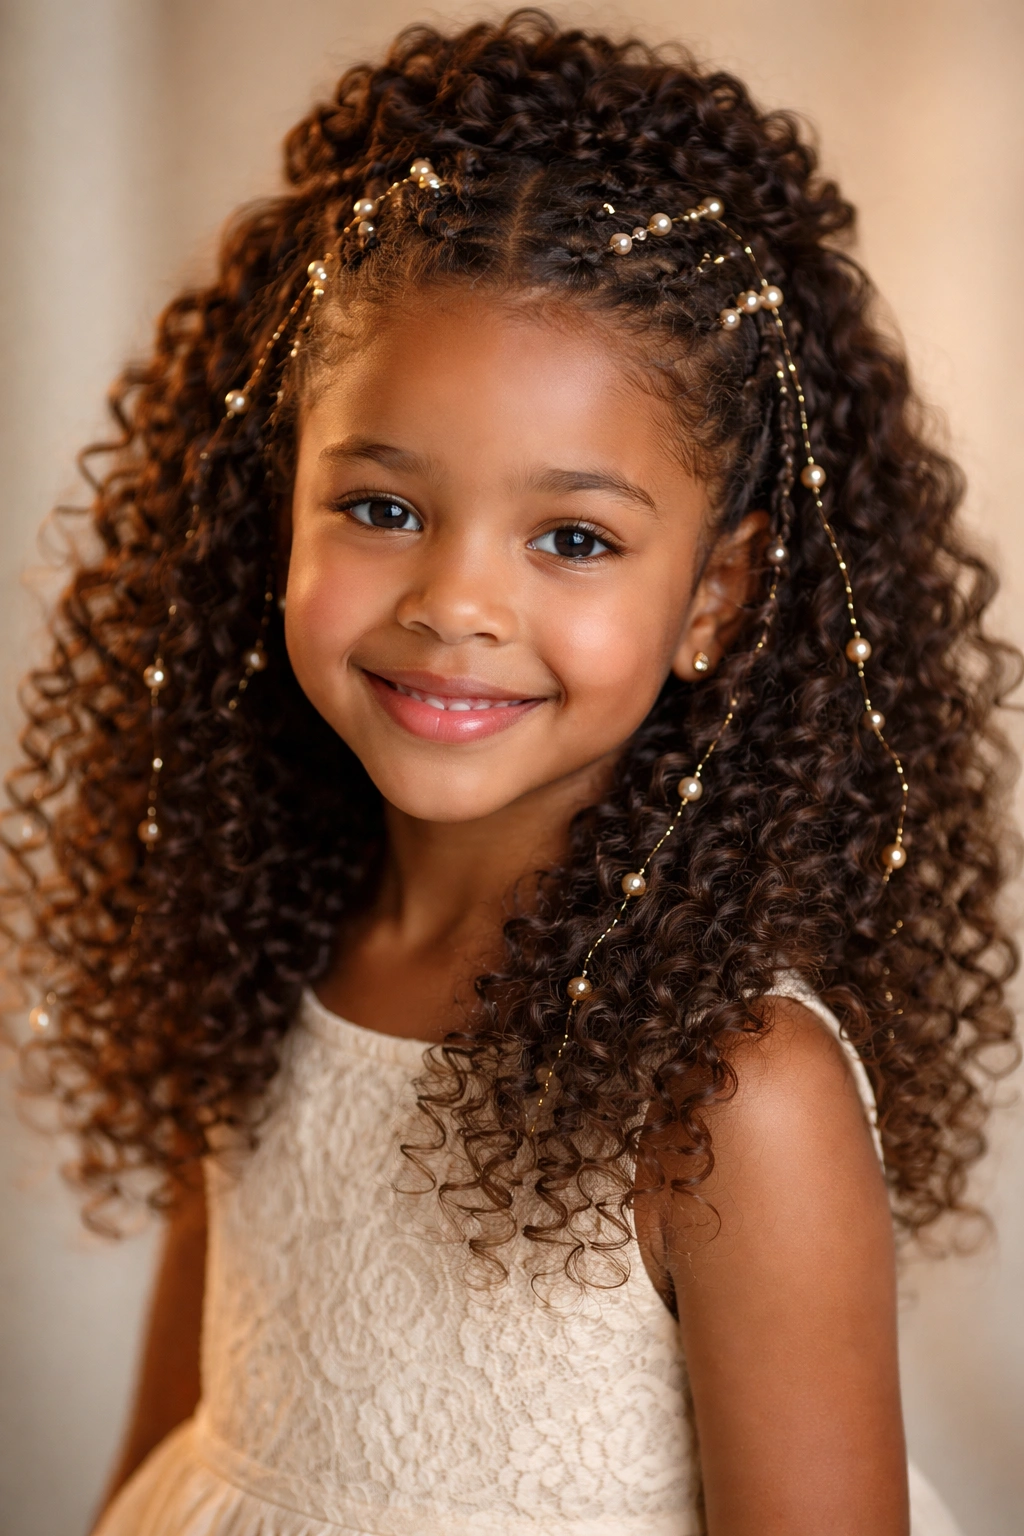
For special occasions or just adding extra flair, gather a half-up style and then weave small beads, pearls, or decorative elements directly into the gathered curls. This transforms a simple style into something festival-ready or celebration-appropriate without needing complicated techniques. The accessories become part of the curl structure, creating shimmer and interest throughout the gathered section.
When and Why to Add Embellishments
Adding beads or accessories works especially well for special occasions — school dances, holidays, family photos, or just days when your child wants to feel extra. Beads catch light and add visual richness that makes even a simple gathered section look special. Curly hair is perfect for this because the texture naturally holds beads in place without them sliding around.
How to Add Beads and Accessories
- Gather the top section of hair into a half-up using your fingers or a wide-tooth comb, being gentle to preserve curl shape.
- Thread small beads or pearls onto the strands of the gathered section by sliding them onto individual pieces of hair.
- You can scatter beads throughout, create patterns, or cluster them together — whatever looks good to you.
- Secure the gathered section with a clip, elastic, or decorative comb that coordinates with your chosen accessories.
- For extra security, you can weave beads onto strands before gathering, or add them after securing — whichever is easier.
- Make sure beads have smooth edges so they don’t catch on or damage the hair cuticle.
Important note: Before adding beads, make sure your child is comfortable wearing them and won’t find them distracting during school or activities. Test the style for a short period first to ensure it’s comfortable and practical.
Final Thoughts
Half up half down styles give you an incredible range of options for managing and celebrating curly hair on kids without requiring complicated techniques or products. Whether you choose a simple gathered style, add braids and twists for extra texture, incorporate ribbons and accessories, or lean into intentional messiness, the key is working with your child’s curl pattern rather than against it. Curly hair is generous — it creates volume, dimension, and visual interest that makes even simple styles look special.
The styles that work best are the ones that keep hair off the face comfortably, celebrate the natural curl texture rather than fighting it, and don’t rely on painful tightness to stay secure throughout the day. Your child should be able to forget they’re wearing a style — they should feel comfortable, confident, and like their curls are just being their beautiful selves with a bit of intentional organization. Experiment with different approaches, find the ones your kid actually likes wearing, and remember that the “imperfect” textured versions often look far better than overly controlled alternatives. Curly hair is meant to be full, bouncy, and a little bit wild — half up half down styles are the perfect way to celebrate exactly that.