Prom hair is the ultimate chance to feel like the best version of yourself, and wavy hairstyles strike the perfect balance between effortless elegance and high-impact glamour. Whether you’re aiming for romantic softness or modern sophistication, medium-length wavy hair gives you endless possibilities—it has just enough length to create movement and texture while being manageable enough to keep looking polished all night long. The beauty of wavy styles is that they work for virtually any dress, venue, or personality; they look equally stunning pulled back from the face or left down and loose, adorned with subtle accessories or kept completely minimal.
The real magic happens when you choose a style that actually fits your face shape, hair texture, and the overall vibe you’re going for. A style that looks incredible on your best friend might not hit the same note for you, and that’s okay. What matters is finding a wavy look that makes you feel confident enough to forget about your hair and focus on having an amazing night. Medium-length hair is genuinely ideal for prom because it’s long enough to create serious movement and drama but short enough that you’re not fighting with tangles or spending three hours on styling.
Throughout this guide, you’ll find detailed wavy styles that work with everything from classic ballgowns to sleek modern dresses. Some pull your hair back to show off your face and dress neckline, while others leave your waves down for maximum impact. Each style includes exactly what makes it special, how to achieve it, and what makes it particularly stunning for prom. Pick the one that makes you smile, or mix and match ideas from a few different styles to create something entirely your own.
1. Side-Swept Hollywood Waves
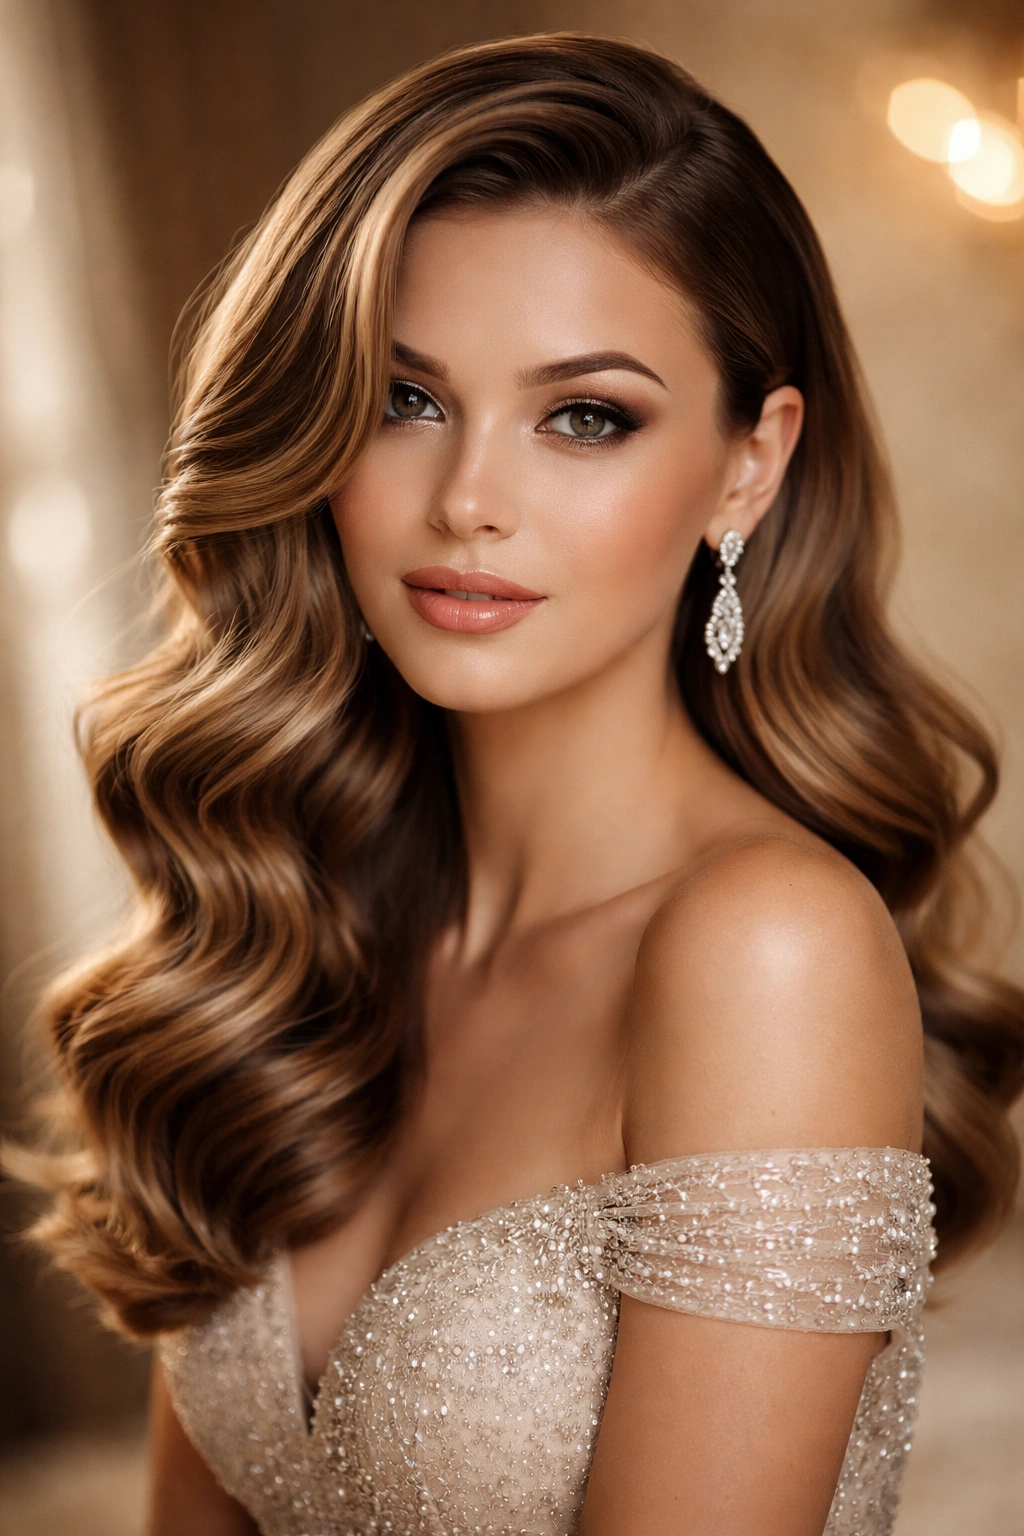
This is the quintessential prom style that works for literally everyone—a cascade of deep, shiny waves swept dramatically to one side with serious old-school glamour. The magic is in how the waves frame one side of your face while being subtly tucked behind the opposite ear, which creates an undeniably flattering silhouette. Your face gets maximum visibility while your hair has serious movement and texture. This style feels especially stunning with updos or if you want to show off statement earrings on the side that’s mostly clear.
How to Achieve Hollywood Side Waves
The foundation is creating structured waves using a curling iron or wand, working in sections and leaving each wave to cool before moving to the next section. You want waves that are intentional and bouncy, not limp or undefined. Once all your hair is curled, brush gently through the waves using a paddle brush to soften them slightly and blend the curl direction. The sweeping part of this look comes next—decide which side you want the waves to fall toward, create a deep side part (basically at the very edge of your hairline), and pin or clip the smaller section loosely behind your ear using bobby pins that match your hair color.
Styling Essentials for This Look
- Use a strong-hold hairspray at the roots before you even start curling to give the swept side staying power throughout the night
- Curl away from your face on both sides so the waves naturally fall toward your preferred side rather than fighting against the curl pattern
- Leave the waves slightly less processed on the swept side so they have more movement and don’t look too stiff or helmet-like
- Add subtle highlighter or luminizing powder to the cheekbones on the side facing forward—the waves naturally draw eyes there, so enhance it
- If your hair is fine or slippery, use a texturizing spray before curling to give each wave something to grip
Pro tip: This style actually looks better a few hours after you style it, once the waves have relaxed slightly. Aim to finish styling this about 45 minutes before photos or the event starts.
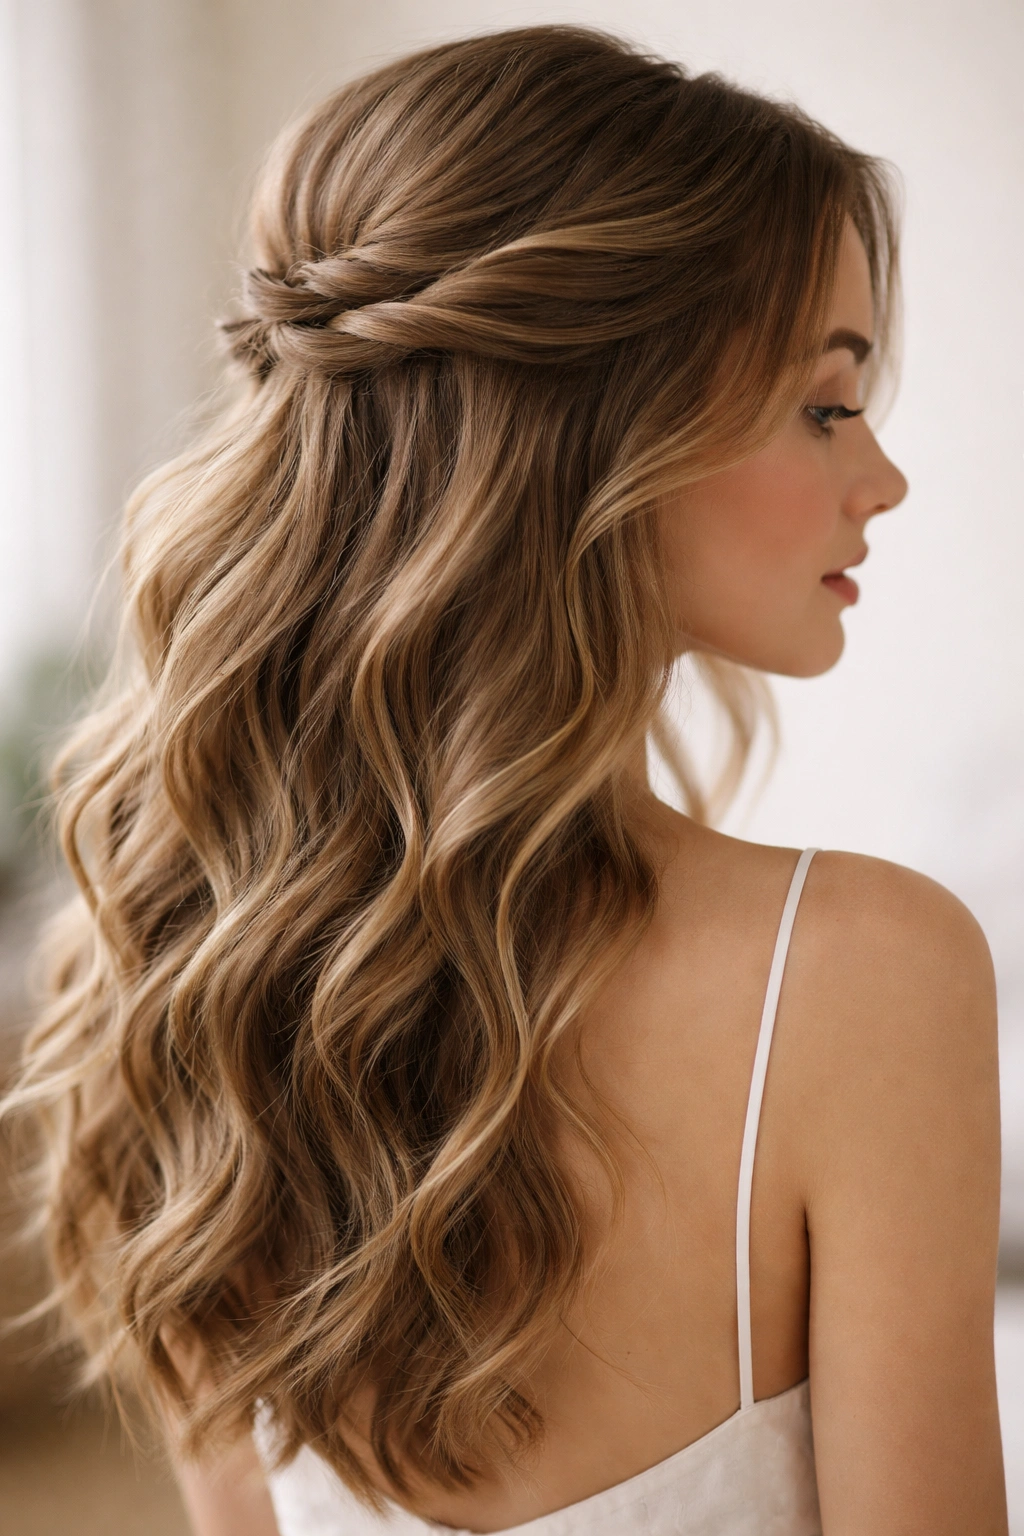
2. Textured Half-Up Half-Down
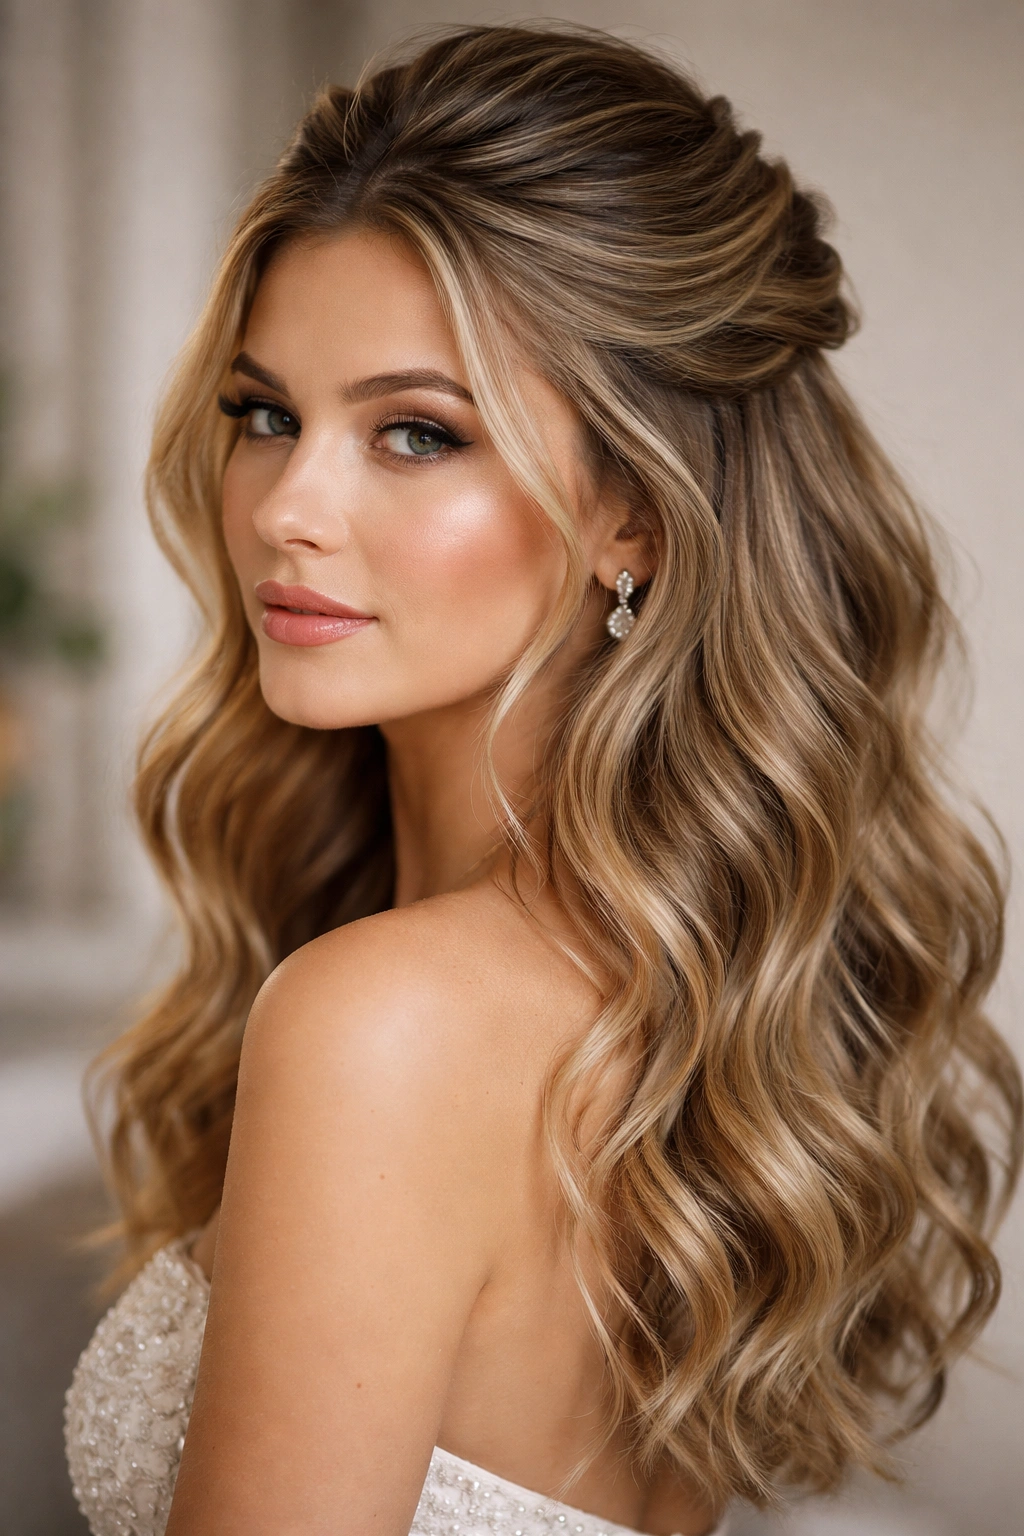
This is the perfect middle ground for anyone torn between pulling their hair back and leaving it down. The top half is gently twisted back and secured with a cluster of bobby pins or a decorative clip, while the bottom half flows free with tousled waves that catch the light when you move. It’s practical enough that you’re not constantly brushing hair out of your face, but romantic enough that you keep the beautiful length and movement of medium hair. The key is making the top section look intentionally textured rather than smoothly pulled back, which gives it a much more modern, effortless feel.
Building Texture Into the Crown Section
Start by using a texturizing spray or dry shampoo on damp hair before blow-drying to create grip and volume at the roots. Once your hair is dry, create loose waves throughout using a curling iron—these don’t need to be perfect; slightly undone waves actually look better for this style. Section off the top portion from your temples back, and rather than a sleek pull-back, gently twist or backcomb the section at the crown to create subtle volume and texture. Use several bobby pins positioned horizontally along the back to secure this section, and leave a few face-framing pieces loose even from the pulled-back portion.
Securing the Style So It Stays All Night
- Apply hairspray before pinning to lock everything in place, then pin, then apply light hairspray again over the pins so the texture holds
- Use three to five bobby pins positioned in an X or triangle pattern for maximum security—one pin rarely holds well enough for all-night wear
- Hide your pins by positioning them slightly under the upper waves so they’re not visible even in direct photos
- If you have thicker hair, try using one bobby pin horizontally through the twisted section, which distributes the hold weight more effectively than vertical pins
- Check the hold every hour and add one or two additional pins if you feel any loosening—it’s easier to prevent falling hair than to fix it mid-event
Worth knowing: This style works beautifully with a decorative hair comb or clip placed right at the secured section instead of (or in addition to) bobby pins. This is where delicate floral clips, vintage combs, or sparkly barrettes can really make a statement.
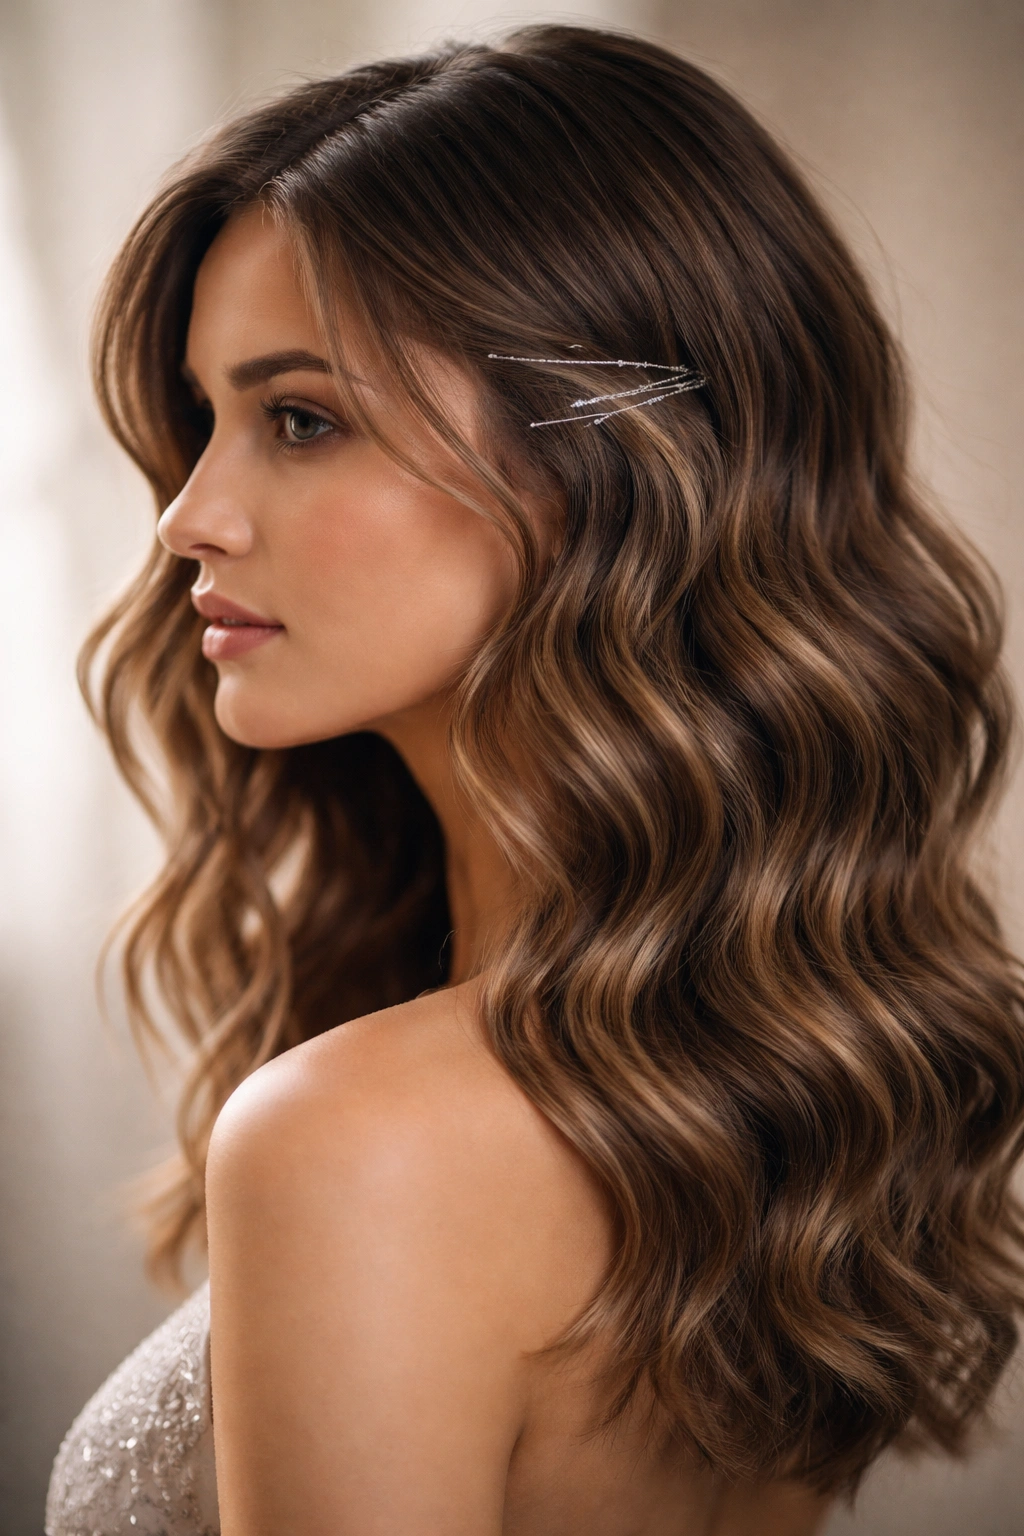
3. Romantic Face-Framing Waves
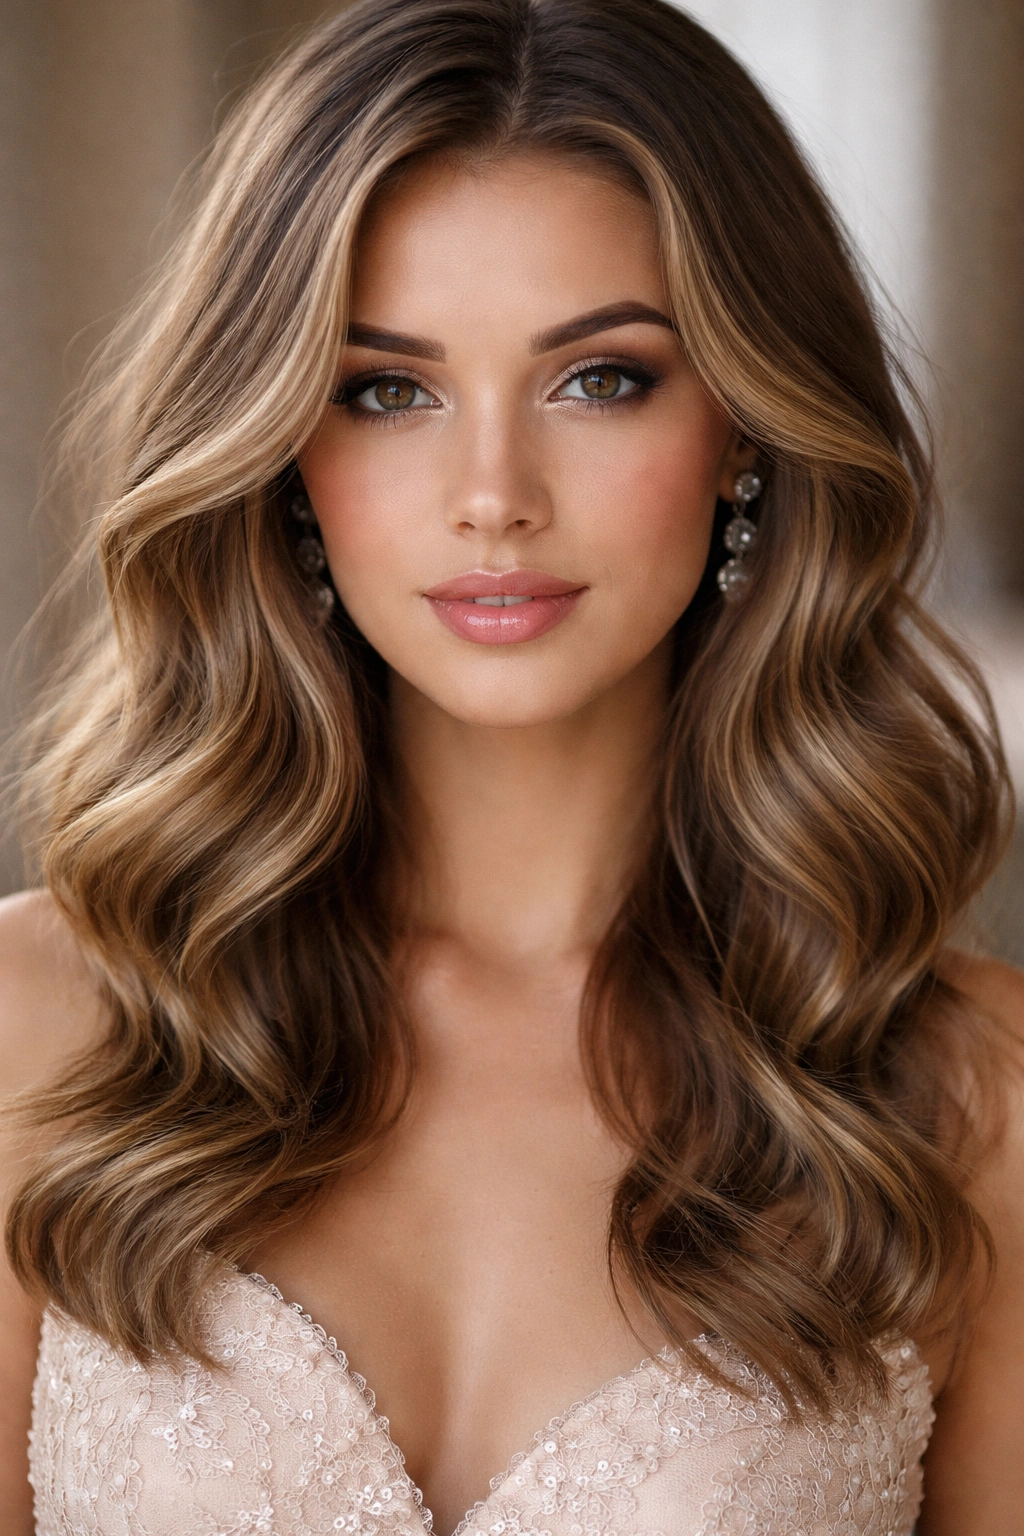
Sometimes the most beautiful option is simply emphasizing the waves you already have while sculpting them to flatter your face perfectly. This style starts with body waves throughout your entire head of hair, but the real artistry happens with the face-framing pieces—subtle waves that start just below your cheekbones and curve inward slightly toward your face, creating a soft, lifted frame that flatters every face shape. The key difference between this and just “wavy hair” is the intentionality and the specific direction of the face-framing pieces; they’re strategically positioned to draw attention to your eyes and cheekbones rather than being random waves throughout.
Curling Strategy for Flattering Face Frames
Using a 1.25-inch or 1.5-inch curling iron, take the sections of hair that naturally fall around your face and curl them deliberately. For the pieces on your right side, curl away from your face (counterclockwise if looking from your perspective), and for the left side, curl toward your face (clockwise). This creates a subtle shape that frames your face rather than hiding it. The rest of your hair can have waves going in any direction since they’re less visible. Allow each curl to cool completely before releasing—this sets the curl shape so it lasts all night rather than falling out after a few hours of dancing.
Creating Dimension With Texture and Movement
- Use a blow dryer with a diffuser attachment to dry your hair for softer, more natural-looking waves instead of using a flat iron or paddle brush for slick waves
- Apply mousse to damp hair before blow-drying to give waves more substance and longevity—this makes them last through dancing, photos, and activity
- Lightly brush through waves with a wide-tooth comb once they’re completely cool to soften the curl slightly without losing all the definition
- Apply dry shampoo or texturizing spray at the midlengths and ends to prevent the waves from looking too shiny or slick, which can read as flat
- Finish with a flexible-hold hairspray that doesn’t feel crunchy—you want waves that move when you move, not rigid waves
Insider note: The face-framing effect is even more dramatic if you leave slightly shorter, wispy pieces at your temples that curl outward slightly, catching light and adding dimension to your whole face.
4. Twisted Halo Braid With Waves
This is the style that makes everyone assume you spent three hours at a salon, but you can absolutely do it yourself if you can two-strand twist. A soft halo braid (technically two twisted sections meeting at the back) wraps around your head from temple to temple, while the rest of your hair flows down in loose waves. It’s romantic and intricate-looking but not overly formal or rigid. The twisted halo serves the practical purpose of keeping hair off your face and shoulders while looking like an intentional design choice rather than just a practical fix. This works especially well with strapless or off-the-shoulder dresses because it shows off your collarbone and neck completely.
Creating a Two-Strand Twisted Halo
Begin with wavy hair (you’ll add the waves after twisting, or you can wave your hair first and work with the texture). Section off a piece of hair from your right temple, roughly one inch wide, and divide it into two strands. Begin a two-strand twist (crossing one strand over the other repeatedly rather than weaving like a traditional braid) moving toward the back of your head, adding small sections of hair as you twist, just like you would in a traditional braid. Continue this twisted section all the way to the back center of your head. Repeat on the left side, twisting toward the back until both twisted sections meet.
Completing and Anchoring the Halo Effect
- Secure both twisted sections together at the back using bobby pins, and hide the pins beneath any loose hair
- Once the halo is secured, use a curling iron to add waves to the hair below the halo, working in vertical sections for dimension
- Apply strong-hold hairspray to the twisted sections before pinning them to prevent any loosening from dancing or movement
- If your hair is thin, backcomb slightly at the roots before twisting to create more volume and make the braid appear fuller and more defined
- Leave a couple of small face-framing pieces slightly loose from the halo on each side for a softer, less structured appearance
Pro tip: Don’t make the halo too tight, or it’ll look severe and uncomfortable. Let it sit naturally on your head with a tiny bit of slack—it’ll look more romantic and you’ll be more comfortable wearing it all night.
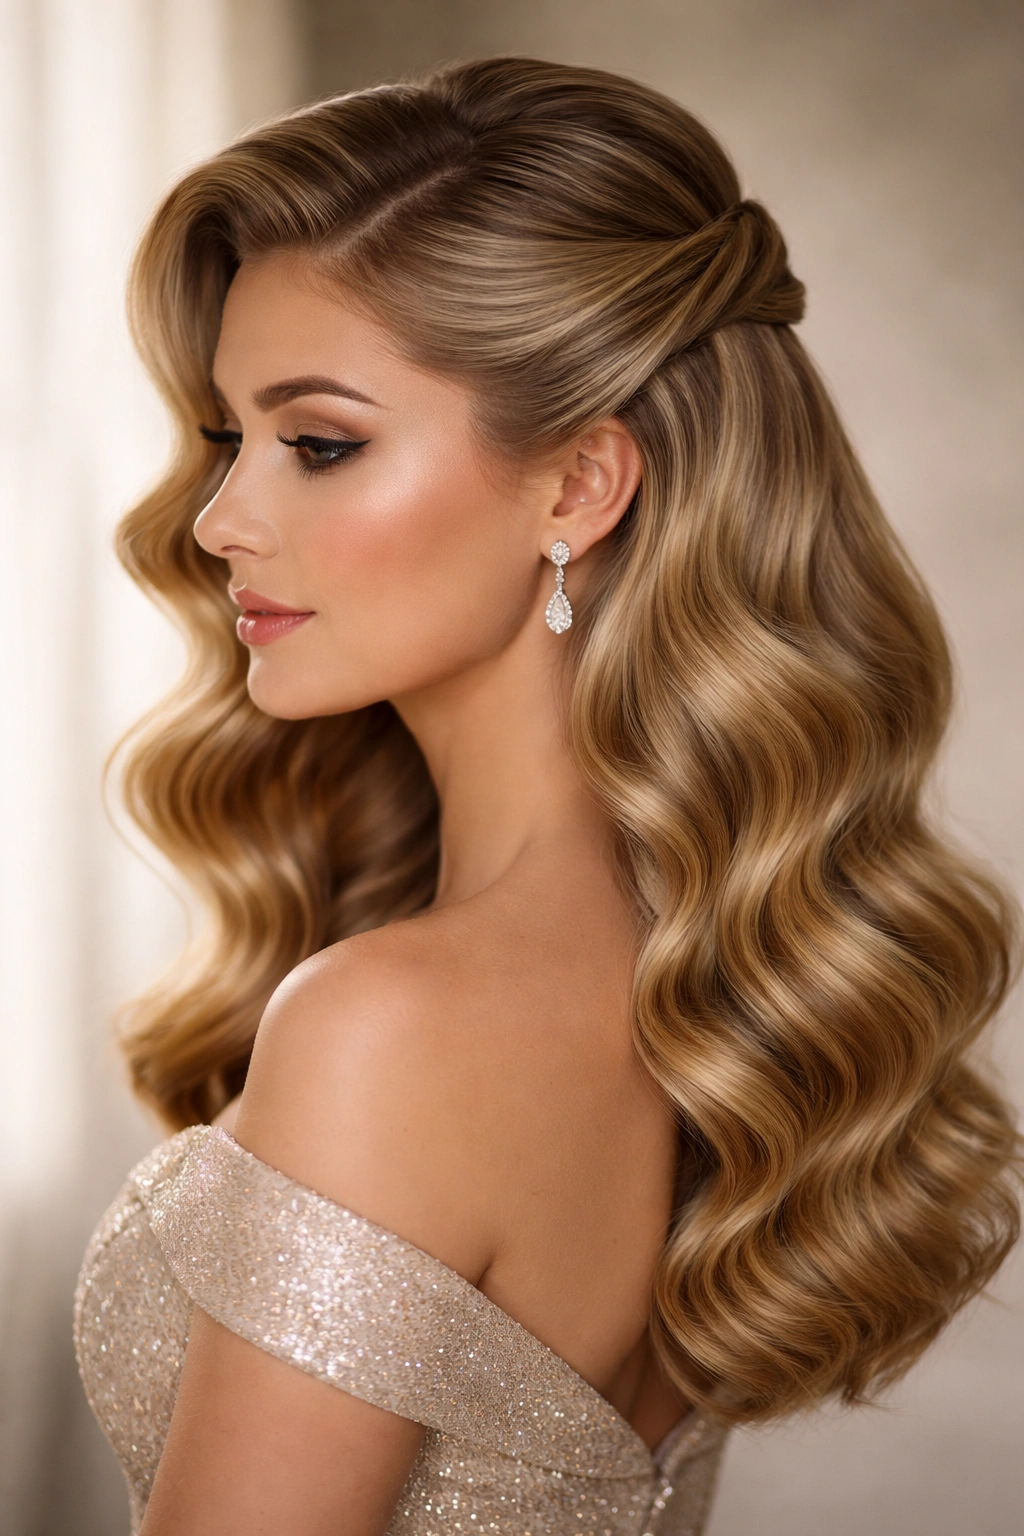
5. Sleek Low Bun With Wavy Tendrils
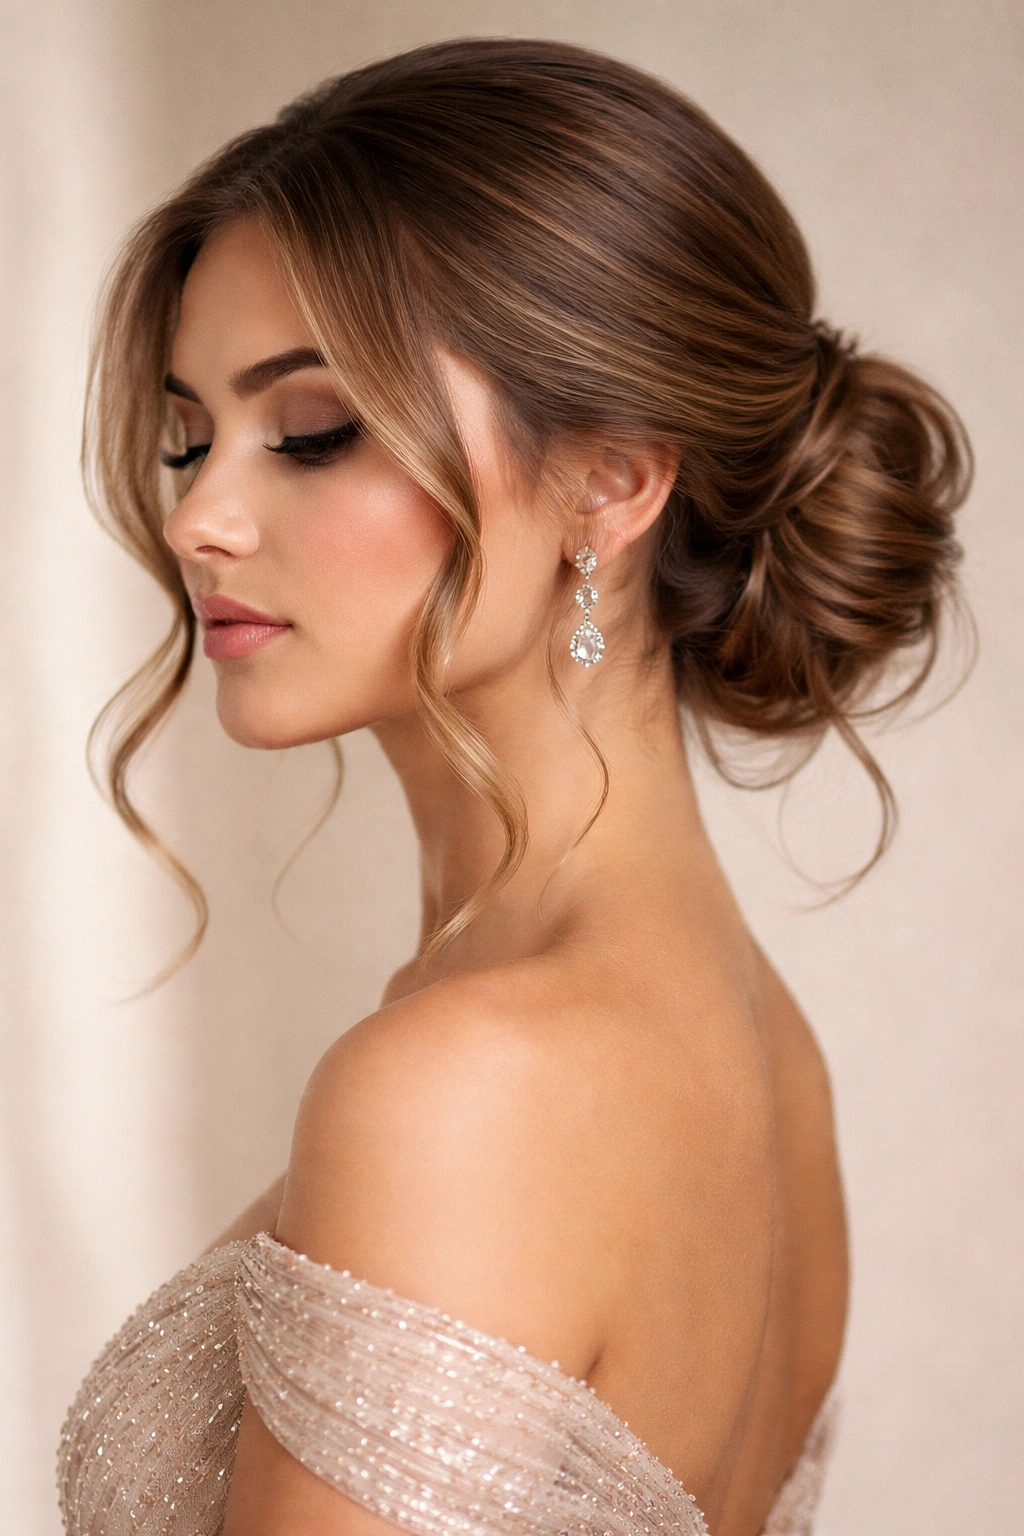
For prom, a bun doesn’t have to be overdone or complicated to be absolutely stunning. A low, slightly textured bun (not perfectly smooth and severe) positioned at the nape of your neck combines practicality with elegance, especially when you leave soft, curled tendrils framing your face and neck. This style shows off your face, your dress neckline, and your shoulders completely while keeping hair securely out of the way. It’s particularly gorgeous with updress styles that have detailed backs or interesting necklines, since the low placement doesn’t cover anything.
Building a Textured-Not-Sleek Bun
Brush your hair into a low ponytail at the nape of your neck, but don’t make it so tight that you get a headache or it pulls your hairline. Secure with a small elastic that matches your hair color. Before creating the bun itself, use a texturizing spray or dry shampoo throughout the ponytail length to give it grip and prevent it from looking like a slick donut. Gently backcomb or tease the ponytail slightly to create subtle volume, then twist the entire ponytail and wrap it around the base to form a loose, textured bun shape. Pin it using bobby pins positioned all around the base, and leave some wispy pieces slightly loose around the pin area for a softer effect.
Adding Framing Waves and Face-Opening Details
- Use a 1.25-inch curling iron to curl several pieces from your face-framing section, creating gentle waves that fall around your cheeks and neck
- These curled pieces should start from approximately ear-level and be left completely separate from the bun for contrast
- Allow curls to cool completely before applying any product so they hold their shape throughout the night
- Apply flexible-hold hairspray to the face-framing waves and the bun separately—this gives you better control over each section’s hold strength
- Add a delicate hair comb, vintage pin, or small cluster of bobby pins decorated with pearls or rhinestones directly into the bun for an elevated touch
Worth knowing: This style photographs incredibly well because your face is completely visible and unframed by hair, which means every expression reads clearly in photos. It’s also genuinely comfortable for all-night wear since the weight of your hair is concentrated in one secured spot rather than hanging loose.
6. Deep Side Part With Layered Waves
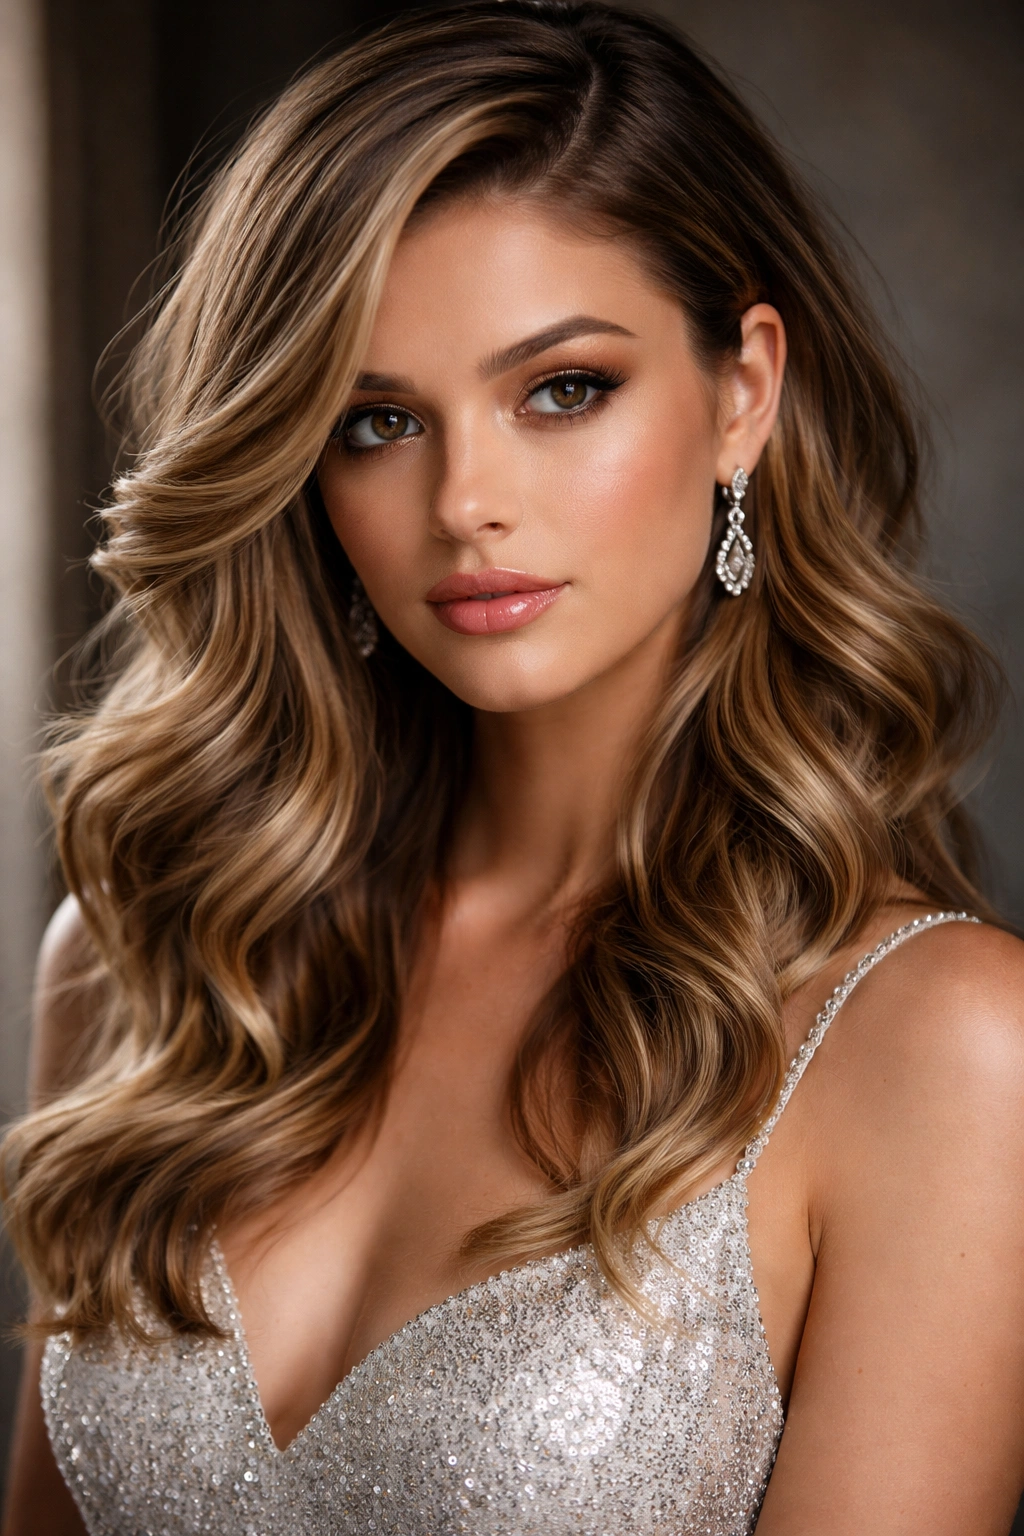
Sometimes the most sophisticated prom look is simply getting your wave pattern absolutely perfect and letting the hair itself do the talking. A deep side part (your part line starts almost at the temple rather than down the center) creates asymmetrical balance that feels modern and intentional. Combined with carefully layered waves—meaning the waves closer to your face are smaller and tighter, while waves toward the ends are larger and more relaxed—you get a style that looks effortlessly elegant. This approach works especially well if your hair has good natural texture or wave pattern to begin with.
Creating Layered Waves With Intention
You’ll use a curling iron in two sizes: a 1-inch barrel for tighter waves near the crown and face, and a 1.5-inch or 2-inch barrel for larger, looser waves on the lower half of your hair. Start at the roots with the smaller barrel, curling away from your face on both sides. Gradually transition to the larger barrel halfway down the hair length, which creates a cascade effect of increasingly larger waves. This makes your hair look fuller at the crown and gives the waves dimensional, professional-looking movement rather than uniform curl throughout.
Maximizing the Side-Part Impact
- Create your deep side part by brushing hair from one side completely toward the other, with your part line starting at your temple
- Apply a smooth finishing serum to the side with less hair (the smaller volume side) to make it look intentionally sleek and glossy rather than thin
- Use the flexible-hold hairspray on the side with more hair to maintain volume, and spray-in volumizer product there before you begin curling for extra lift
- Blow dry using a round brush on the smaller-volume side, directing hair smoothly across, and use a diffuser on the larger side to enhance wave texture
- For extra dimension, use subtle highlight or shimmer powder on the cheekbone on the side with the deep part, since that’s the side that faces forward
Pro tip: The deep side part actually makes your face look longer and more defined than a center part, which is why celebrities and photographers favor this approach for formal events. If you ever feel unsure about what’s most flattering, deep side part plus loose waves is virtually fail-proof.
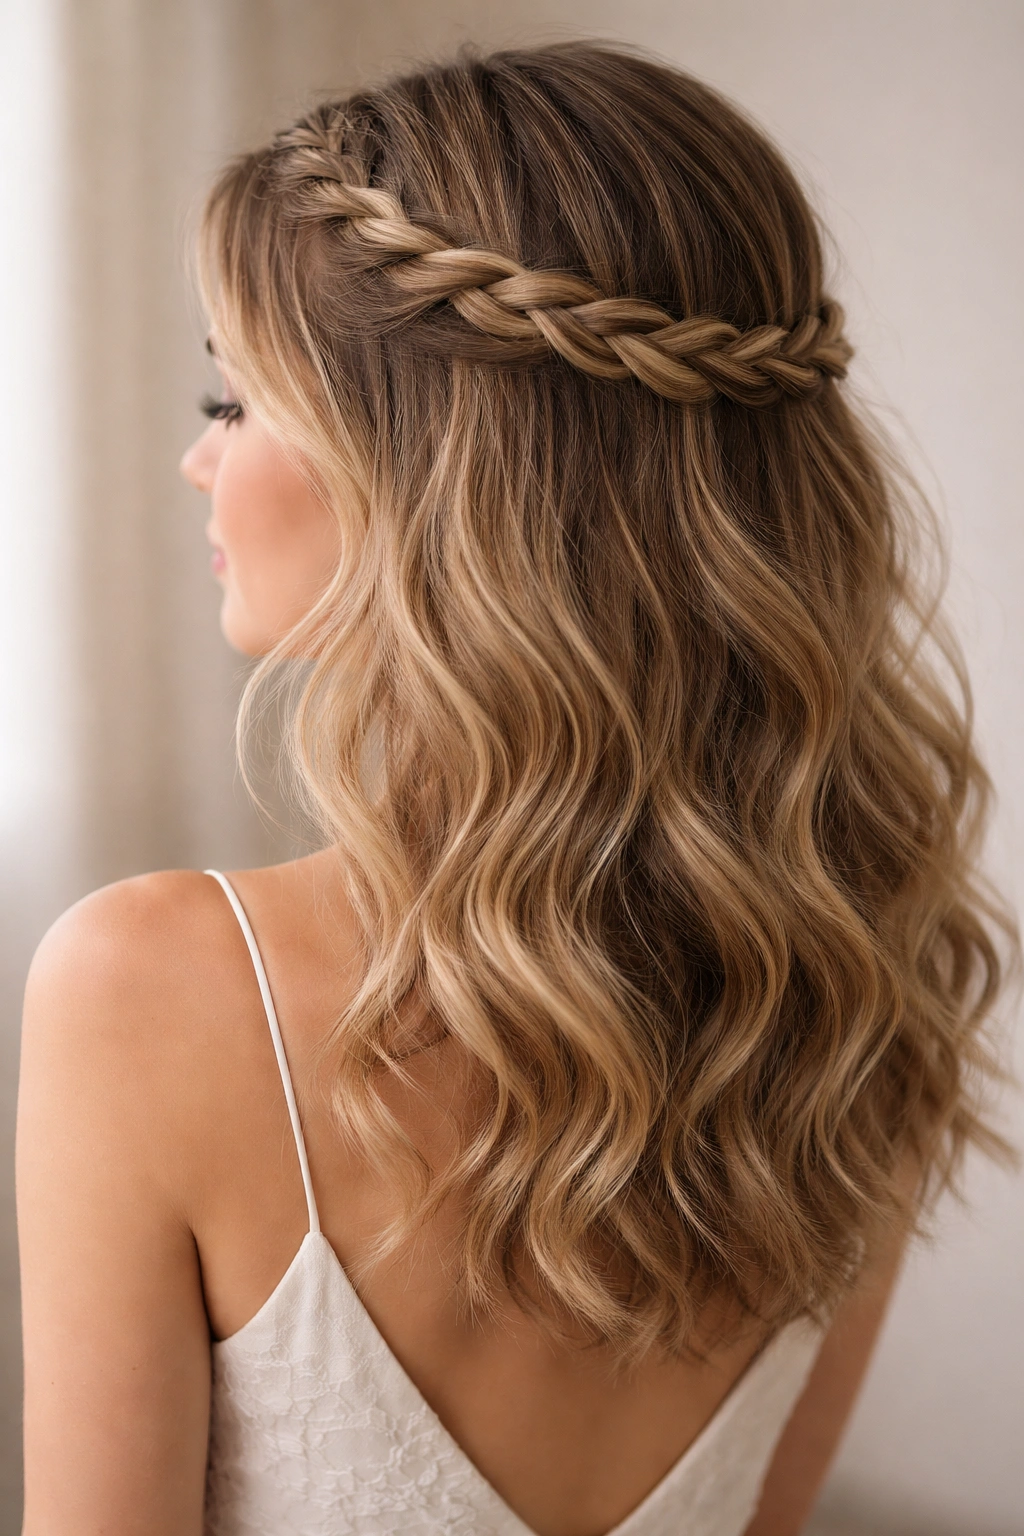
7. Crown Braid With Cascading Waves
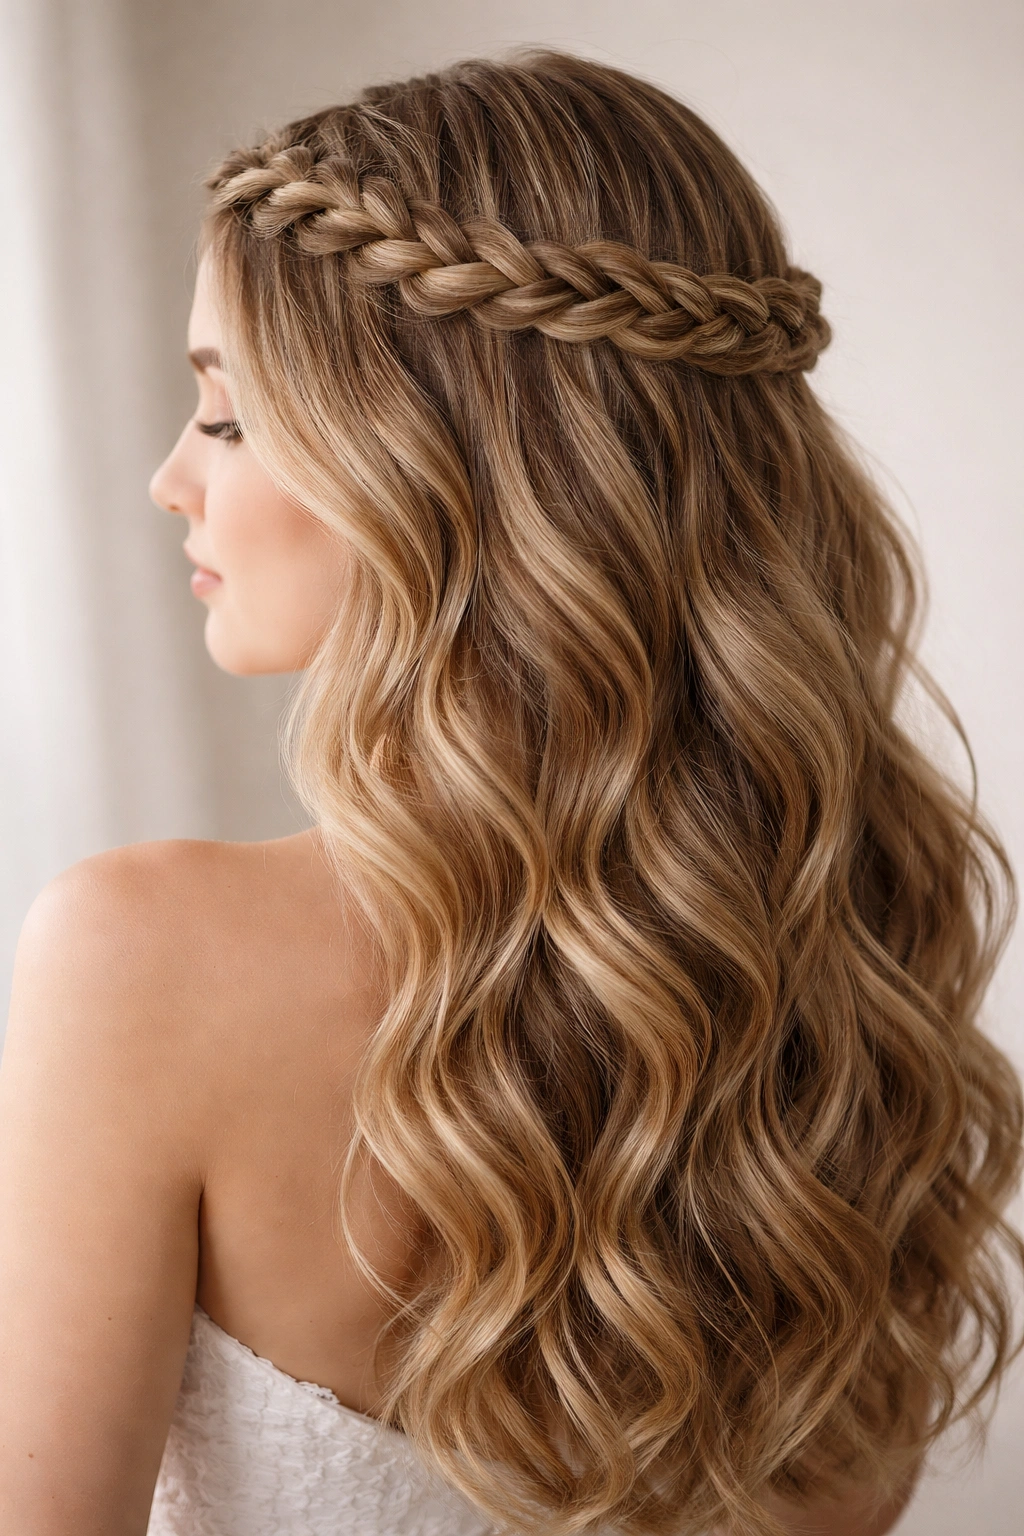
This style is the grown-up version of a crown braid that actually works for prom—instead of a thin, delicate braid that looks cute on younger girls, you create a thicker, more substantial braid that sits like a crown across the top-back of your head and feels appropriately sophisticated. The braid itself can be a Dutch braid (where you weave the strands under instead of over each other, creating a 3D effect), and the rest of your hair cascades down in romantic waves. You get the beautiful detail of a braid with all the movement and length of down hair, which is the best of both worlds for prom.
Constructing a Visible Crown Braid
Section off a piece of hair from one temple, roughly one to one-and-a-half inches wide, and begin a Dutch braid moving back toward the center-back of your head. As you braid, intentionally position the braid slightly toward the back of your crown rather than right at the hairline, so the braid is visible and intentional. Continue braiding until you reach the center-back of your head, then secure the end with a small elastic. Repeat on the opposite side, and tie both braid ends together at the center-back using bobby pins to create a unified crown effect. The key is making the braid visible and prominent; it should look like you purposely created a decorative crown, not like you tried to hide a braid.
Cascading Waves Below the Crown
- Once the braid is secured, use a 1.5-inch curling iron to add waves to all the hair below the braid level, working in vertical sections
- Curl away from your face on both sides so waves naturally fall outward and create width and movement
- Allow each curl to cool completely before releasing—this sets the wave pattern so it moves with you rather than falling straight
- Apply texturizing spray to the lengths of the cascading waves to prevent them from looking too shiny or slick
- Gently brush through waves once they’re completely cool using a wide-tooth comb or paddle brush, softening the curl slightly without losing definition
Worth knowing: Make sure your braid is secure enough to survive dancing and movement. Test it by gently pulling on the braid—it shouldn’t have any give or looseness. If it does, add another pin or two before you call it done.
8. Voluminous Swept-Back Style
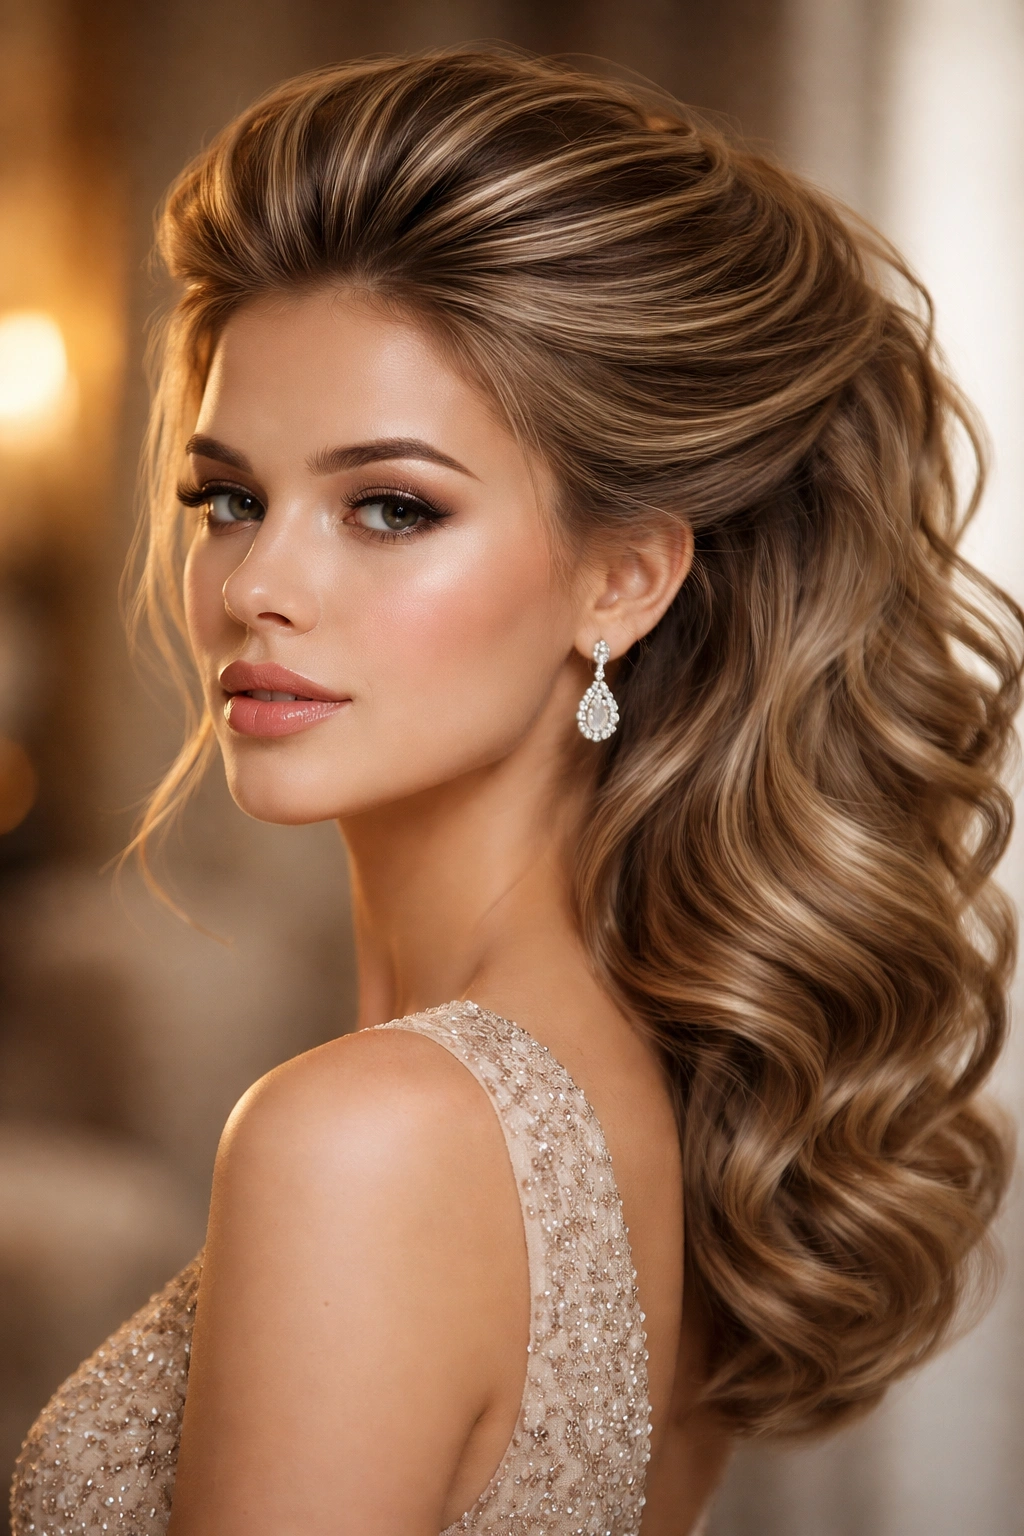
If you love the idea of all your hair off your face but you’re not a bun person, this voluminous swept-back style gives you both. All of your hair is pulled smoothly back from your face but secured loosely at the very back of your head (not at the nape of your neck), allowing the hair to fan out and cascade downward in a voluminous, wavy shape. It’s like a half-up that covers your entire head, but because the elastic or clip is placed so low, it still allows tons of movement and wave visibility. This style works beautifully with any dress and is incredibly forgiving if you’re worried about your hair cooperating all night.
Achieving Volume Without Pulling Too Tight
Start with dry hair that already has soft waves (blow dry it with a diffuser, or curl it gently before sweeping back). Brush your hair straight back from your forehead and temples, but don’t pull it into a strict, tight ponytail. Instead, leave the hair slightly relaxed and voluminous as you gather it, which prevents the pulled-back look from being too severe. Position the elastic or clip at the very back of your head where your crown meets your neck, leaving several inches of hair below the elastic to fan out into waves.
Creating the Voluminous Fan Effect
- Backcomb or tease the section of hair below the elastic slightly to create volume and texture in the cascading portion
- Use bobby pins to position a few strands from the gathered back section strategically around your face for a softer frame
- Apply strong-hold hairspray to the gathered-back portion and moderate-hold spray to the cascading waves—you want the back secure but the waves free to move
- Pull a few small sections slightly from the gathered area (gently, so you don’t disrupt the whole style) to create a slightly undone, romantic effect
- Add a decorative clip or comb at the base of the gathered section if you want a focal point, or keep it simple and understated
Pro tip: The voluminous swept-back look is especially stunning with statement earrings since your ears are completely visible. If you’re planning to wear chandelier earrings or anything with movement, this is the perfect style to showcase them.
9. Soft Waves With Pearl Hair Clips
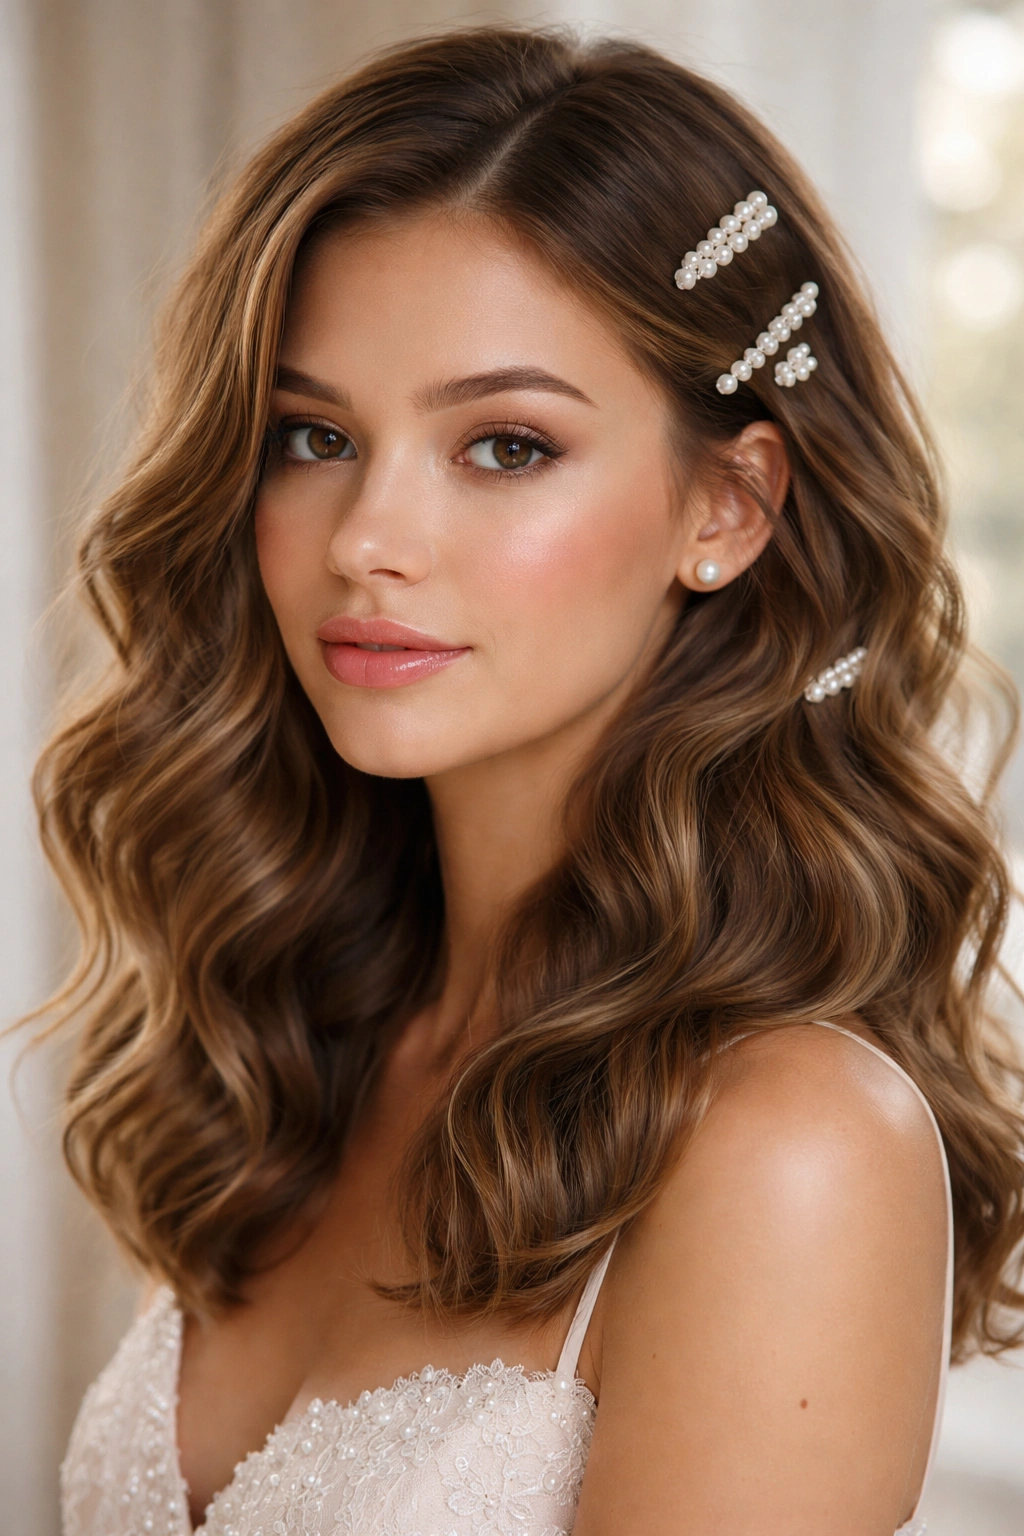
Sometimes the best prom hair is just genuinely beautiful waves paired with carefully placed accessory moments that feel special without being overwhelming. This style starts with soft, touchable waves throughout your entire head of hair—waves created with a curling iron or a wave wand, then gently brushed to soften them slightly so they don’t look artificially curled. Then you add delicate pearl hair clips strategically positioned around your head at varying heights, creating visual interest and sophistication without pulling your hair back or changing the basic wave structure. The pearls catch light and add luxury without requiring complicated styling.
Creating Soft, Brushed Waves
Use a 1.5-inch or 2-inch curling iron to create loose waves throughout your hair, working in sections and allowing each curl to cool before moving to the next. Once all sections are curled, use a wide-tooth comb or paddle brush to gently comb through the waves, softening the curl pattern slightly. You’re aiming for waves that are clearly defined but soft and natural-looking, not ringlets or crisp curls. Apply texturizing spray or light hairspray to set the waves without making them feel stiff or crunchy. The overall effect should be waves that look effortless, like you woke up with perfect hair, even though they’re actually quite intentional.
Positioning Pearl Clips for Maximum Impact
- Place one clip at the temple on one side of your face, angling it slightly toward your ear
- Add a second clip on the opposite side, but at a slightly different height or angle for asymmetrical balance
- Consider a small cluster of pins (two or three pearl clips close together) at the back on one side, creating a focal point without making the style look overdone
- Choose clips in sizes ranging from small to medium; too many large clips looks costume-like rather than elegant
- Position clips so they’re slightly hidden by your waves rather than sitting completely on top—this makes them look like they’re integrated into the style rather than added as an afterthought
Worth knowing: Pearl clips work particularly well if your dress has pearl details, lace, or an ethereal quality. If your dress is more modern or minimalist, you might prefer delicate geometric clips or vintage-inspired pieces instead. Let your dress guide your accessory choice.
10. Twisted Rope Detail Half-Up
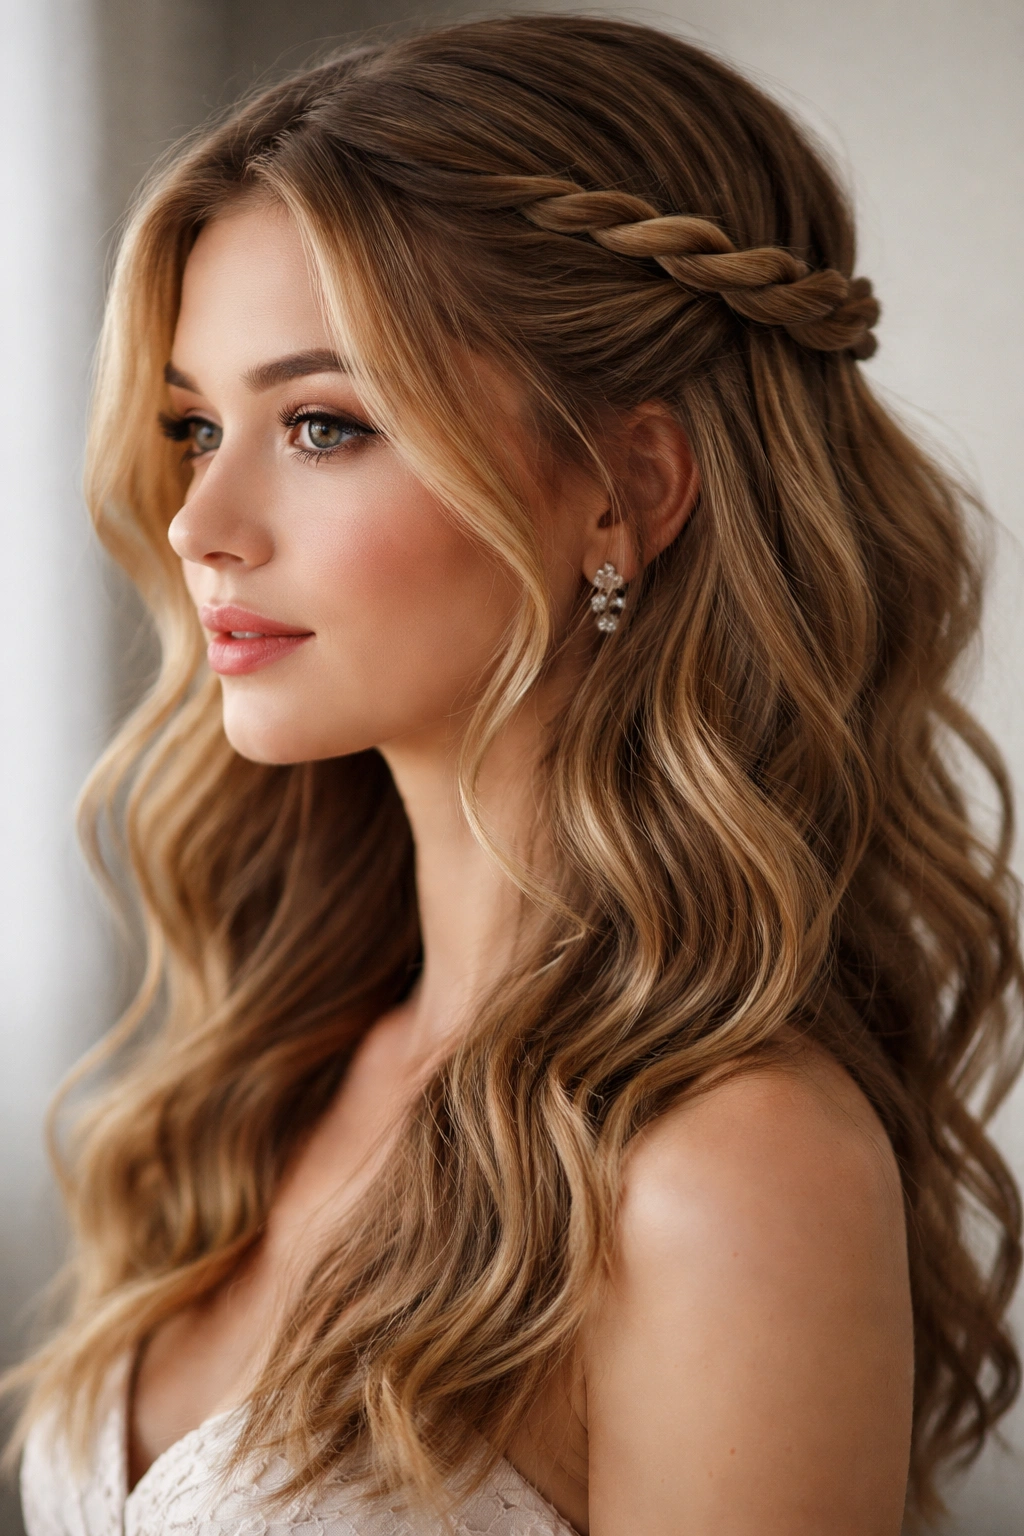
This is the style for when you want a clear focal point in your hair without going full-bun or full-back. Instead of a traditional twist, you create a rope-like detail using a two-strand twist positioned on one side of your head, starting at the temple and traveling back toward the crown. This twisted rope acts as a visual anchor point that’s both practical (keeps hair somewhat back from your face) and decorative (creates obvious intentional styling). The rest of your hair flows in waves below this rope, giving you movement while maintaining obvious design structure.
Creating a Sculptural Twisted Rope
Start at your right temple (or left, depending on preference) and section off a piece of hair about one inch wide. Divide it into two strands and begin a two-strand twist, moving toward the back-center of your head. Don’t add any additional hair to this twist—keep it a simple two-strand rope without incorporating surrounding hair. Continue twisting until you reach the center-back of your head, roughly above where your ears are in line with your skull. Secure the end with a small, color-matched bobby pin and hide it beneath adjacent hair.
Building Waves Below and Around the Rope
- Once the twisted rope is secured, use a curling iron to add waves to the hair not involved in the twist, working in vertical sections
- The waves should be generous and loose, creating obvious movement and flow
- Create subtle waves in the hair directly around the twisted rope as well, so the whole head of hair feels coordinated and intentional
- Use volumizing spray at the roots before blow drying to create lift throughout
- Apply flexible-hold hairspray to the waves so they move with you but maintain their direction and shape
Insider note: This style is particularly flattering if you position the twisted rope slightly off-center rather than perfectly centered on your head. Off-center styling feels more modern and interesting than centered styling, which reads as more formal or traditional.
11. Waves With Delicate Floral Pins
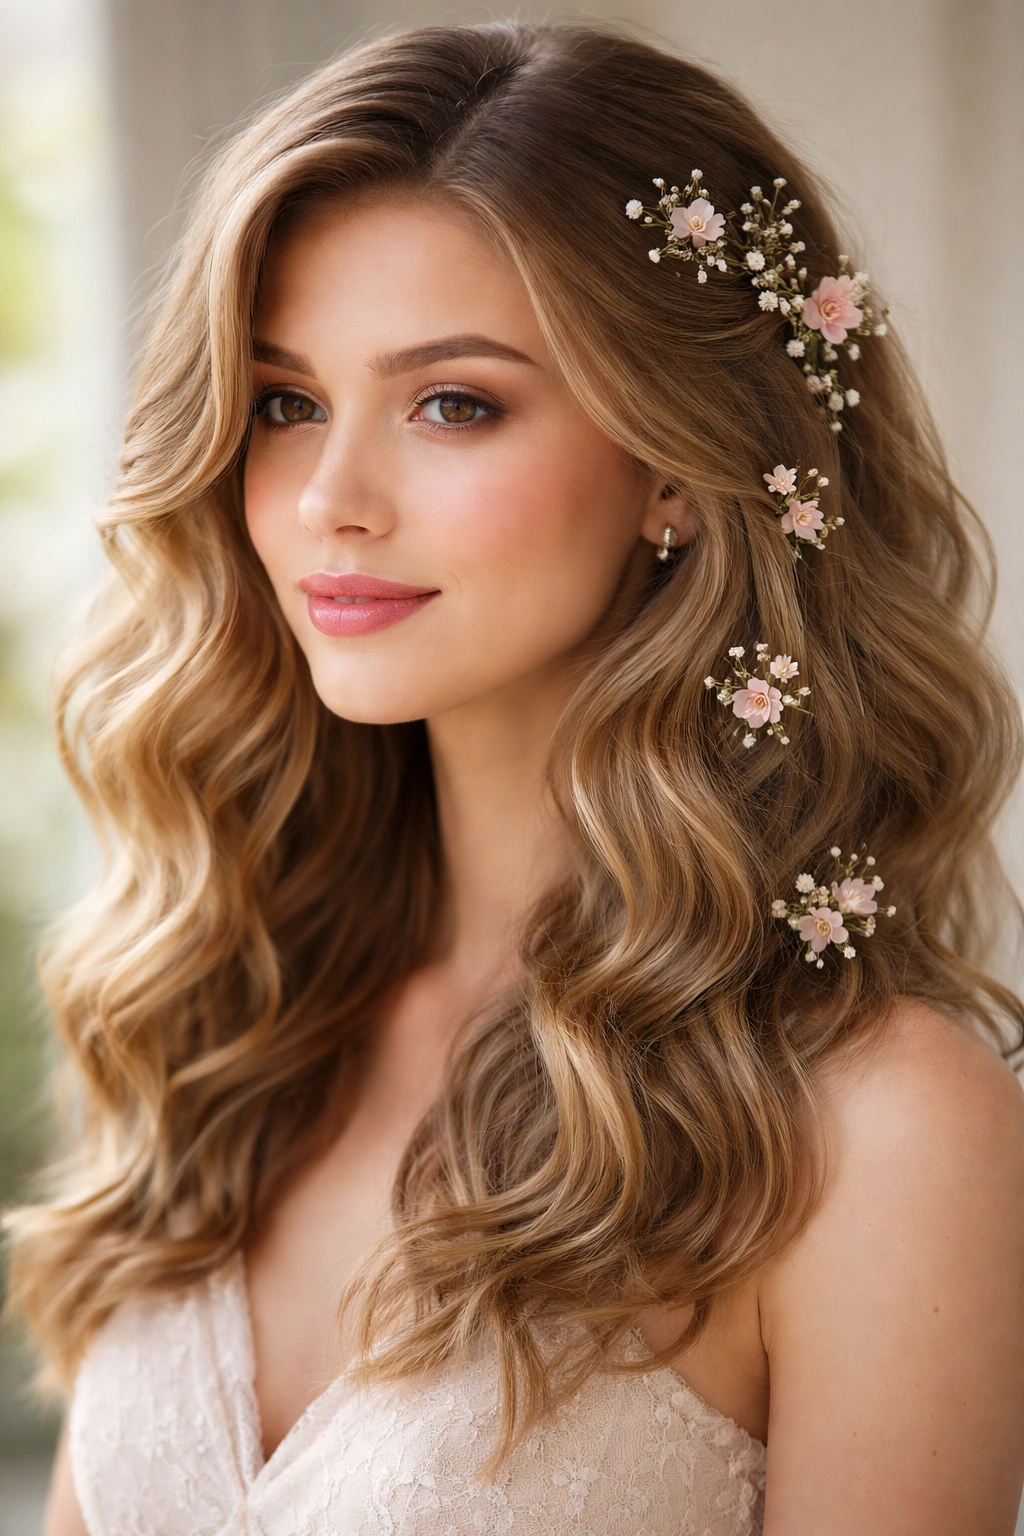
For a more romantic, nature-inspired prom aesthetic, pair beautifully textured waves with delicate floral hairpins strategically positioned throughout your hair. These aren’t big statement flowers, but rather small, delicate blooms (either fresh flowers like baby’s breath or spray roses, or faux flowers designed to look realistic) that nestle into your waves at various heights. This works especially well if you’re wearing a garden-inspired dress, a botanical theme, or if you just want something romantic and ethereal. The flowers add dimension and personality without requiring complicated braiding or twisting.
Creating the Wave Foundation
Start with soft waves throughout your hair using a curling iron and a diffuser blow dry, or a wave wand for a softer approach. Your goal is waves that are defined enough to hold the flowers but soft enough to look romantic rather than structured. Gently brush through the waves once they’ve cooled to soften them slightly, then apply a light texturizing spray to give the waves hold and dimension. The waves should feel organic and touchable, not crispy or overly styled. Your hair is essentially the canvas, and the flowers are the intentional design elements.
Positioning Floral Elements for Dimension
- Tuck small florals into waves near your temples on both sides, positioning them so they’re partially hidden by the wave pattern
- Add another cluster of flowers or a single larger bloom at the back of your head, nestled into the waves at the level of your crown or slightly lower
- If you’re leaving your hair completely down, consider placing flowers along one side only for asymmetrical balance
- If you’re doing a half-up style, position flowers both in the gathered section and in the waves below for visual continuity
- Make sure any flowers you use (fresh or faux) are securely attached or pinned so they don’t fall out during dancing or movement
Pro tip: If using fresh flowers, have them inserted into small water vials that pin into your hair. This keeps them fresh throughout the entire event and prevents them from looking droopy mid-night. Your florist can usually do this if you’re ordering prom flowers anyway.
12. Asymmetrical Waves With Undercut Detail
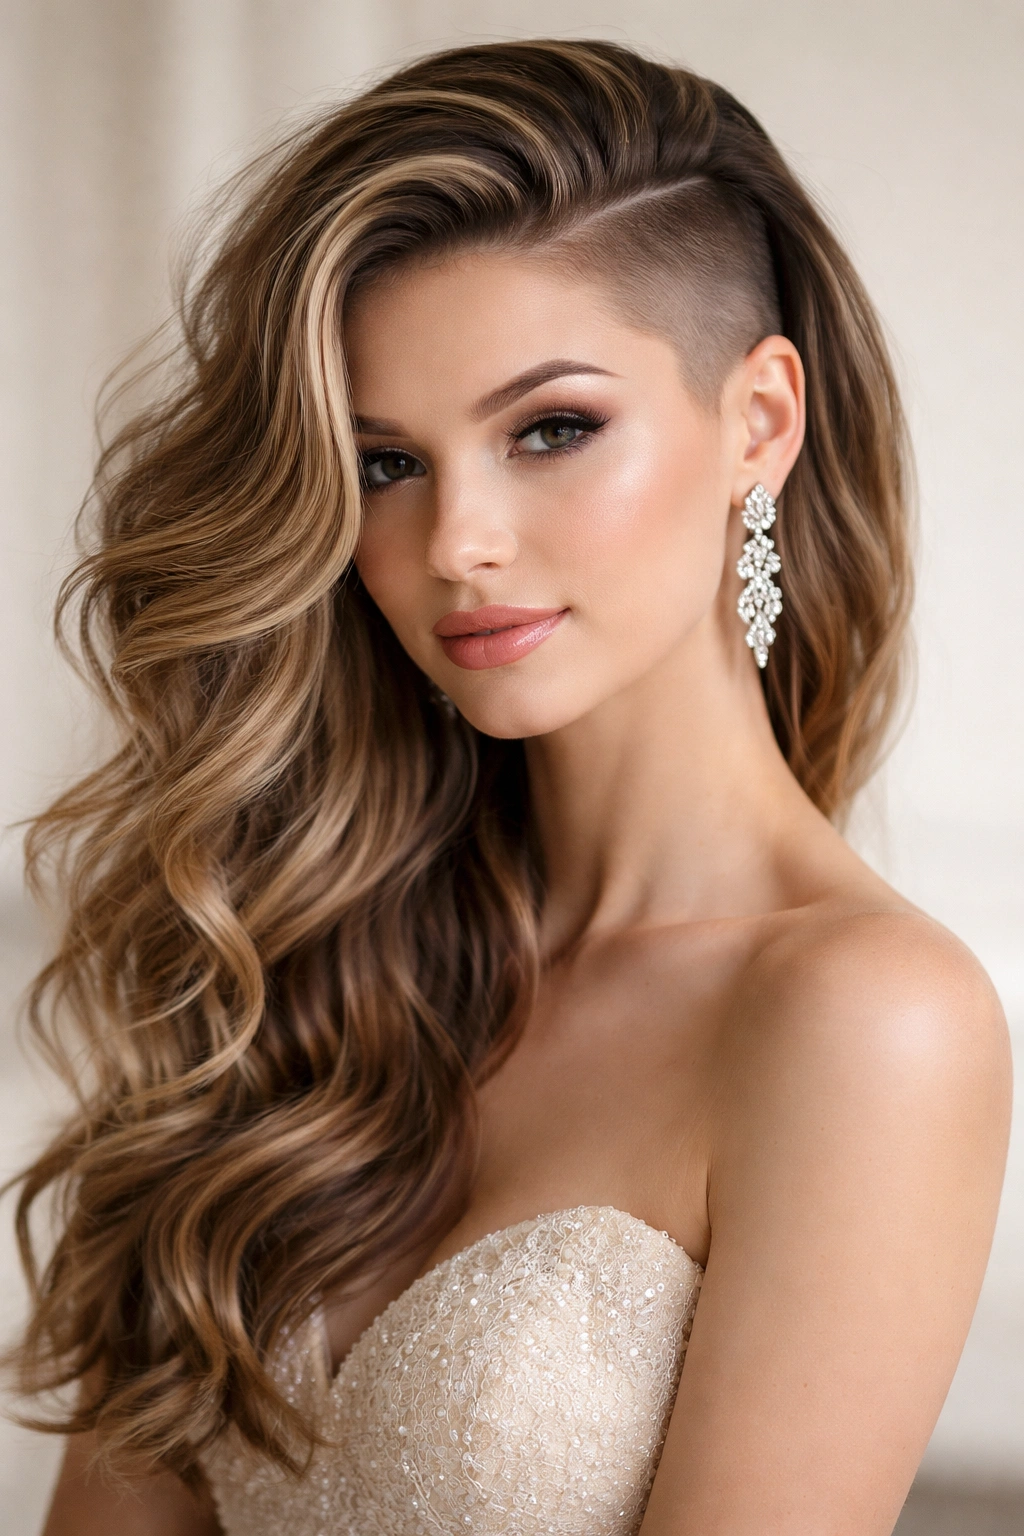
This is the statement-making style for anyone with a bit of bold personality. An undercut—where the hair underneath is trimmed much shorter or shaved—is hidden entirely when your hair is down or pulled back normally, but with this style, you intentionally show it off. You sweep the longer hair to one side, revealing the shaved or closely-trimmed undercut on the opposite side. It’s unexpected, edgy, and absolutely stunning in photos. If you don’t have an actual undercut, you can create a similar effect by closely braiding the underside so it appears hidden and compact, then sweeping long waves over it.
Styling to Feature an Undercut (or Hidden-Braid Undercut)
If you have an actual undercut, blow dry your longer hair and create waves using a curling iron. Once waves are set, use styling gel or strong-hold hairspray on the undercut side to smooth it, then sweep all your longer hair to the opposite side and secure it with bobby pins at the nape of your neck or just behind your ear. This creates a dramatic asymmetrical profile where the undercut is completely visible on the shaved or very-short side.
If you don’t have an undercut but want a similar visual effect, you can create the appearance by tightly french braiding the hair on one side of your head from your temple toward the back. This makes that section appear compact and hidden, creating a similar line of contrast to an actual undercut.
Perfecting the Dramatic Asymmetrical Balance
- Style the longer waves on the sweep-over side generously and with obvious texture so they contrast visually with the minimal undercut side
- Use a flexible hairspray on the sweep-over side so the waves move and feel alive, not stiff
- Keep the undercut side as smooth and neat as possible for maximum contrast
- Make sure bobby pins on the undercut side are either completely hidden or decorative enough to be part of the intentional design
- Consider makeup that’s slightly bolder on the undercut side to balance the dramatic hair asymmetry
Worth knowing: This style photographs like absolute fire—it’s unexpected, visually interesting, and absolutely shows that you put thought into your prom look. It’s the opposite of traditional, which makes it memorable.
13. Romantic Back Braid With Wave Overlay

This style layering technique gives you the best of everything: the detailed, intentional look of a braid, plus all the movement and romance of waves. You create a braid (Dutch braid works especially well here) starting at your nape and working upward toward your crown, then you add waves throughout the rest of your hair that partially cover the braid, creating depth and dimension. The braid is visible but not overwhelmingly prominent; it’s an intentional design detail rather than the entire focus. This works beautifully with long dresses or anything where your back will be visible.
Creating an Upward-Moving Back Braid
Starting at the nape of your neck, section off a small piece of hair and begin a Dutch braid, incorporating hair from both sides as you move upward toward your crown. The braid should travel up the center-back of your head, meeting your crown area. Secure the top of the braid with bobby pins (they’ll be hidden by hair anyway) and gently pull or backcomb along the braid to create a fuller, more textured appearance rather than a sleek braid.
Layering Waves Over the Braid Foundation
- Once the braid is secure, use a curling iron to add waves to all the hair not incorporated in the braid
- Curl in vertical sections, working from the sides and back, creating waves that partially cover the braid without hiding it completely
- The waves should be loose and romantic, not tight or structured
- Allow waves to cool completely before moving on to finishing products
- Apply light hairspray to the waves and slightly stronger hold spray to the braid so it maintains its shape but the waves can move
Pro tip: This style is particularly stunning if you add subtle sparkle or shimmer spray to just the braided portion so it catches light and becomes visible underneath the waves, like an intentional design element rather than something you’re trying to hide.
14. Half-Up Twist With Loose Waves
Sometimes the perfect prom hair is genuinely simple: a soft twist at the back of your crown that’s secured gently, leaving the majority of your hair free and wavy. This style eliminates the “complicated updo” energy while still keeping hair somewhat back from your face, so you get both practicality and romantic movement. The twist itself acts as the detail point—instead of loose and shapeless, your top section has intentional texture and design. This works for literally any hair type and any dress style, which is why it’s such a go-to for anyone who wants reliable elegance.
Creating a Secure-But-Soft Twisted Section
Take a section of hair from the top of your head, roughly from ear to ear across the top, and gently twist it back (don’t make it too tight; you want it to look relaxed). Continue this twist toward the back of your head, stopping roughly at your crown or slightly past it. Secure the twist with bobby pins positioned horizontally so the hold is distributed and secure. Leave some wispy pieces loose around the pinned area for softness, and let the majority of your hair below this twist flow free.
Building Beautiful Waves Below the Twist
- Before twisting, blow dry your hair with a diffuser or use a wave wand to create soft waves throughout
- The waves in the half-down section are the visual focus here, so they should be generous and obvious
- Curl away from your face on both sides so waves naturally frame your face and have movement
- Once the twist is secured, use a curling iron to add additional waves or refresh waves in the lower half of your hair
- Apply moderate-hold hairspray to maintain the twist shape and flexible-hold spray to the waves so they move freely
Worth knowing: This style is forgiving because if a few strands fall out of the twist or become loose during the night, it actually looks intentional and romantic rather than like something went wrong. It’s hard to mess up a half-up twist because looseness is part of the aesthetic.
15. Textured Waves With Silver Accessories
If you’re wearing a metallic dress, a silvery tone in your details, or anything with shine and glamour, pair your waves with intentional silver accessory placement for a polished, coordinated look. This means hair clips, pins, or even thin silver hair wires woven subtly into your waves at strategic points. The silver catches light and adds a modern, sophisticated edge to romantic waves. Unlike floral clips which add softness, silver accessories add modernity and edge while maintaining the wave-focused structure of the style.
Creating the Wave Foundation
Blow dry your hair using a diffuser or round brush to build volume, then use a 1.5-inch curling iron to create defined waves throughout your hair. Once the waves are cool, gently brush through them to create a soft, dimensional texture. The key here is that the waves should be obvious and beautiful enough to be the actual focus of the style; the silver accessories are accents, not the main event. Apply texturizing spray to enhance wave dimension and prevent the hair from looking too slick or shiny.
Strategic Placement of Silver Details
- Place thin silver hair wires or small pins near your temples on both sides, positioning them so they’re partially hidden by the wave pattern
- Add a larger silver comb or decorative piece at the back of your head, nestled into waves at crown-level or slightly lower
- If wearing a half-up style, position silver accents in both the gathered section and the waves below for visual continuity
- Keep the total number of silver pieces to three to five—more than that starts looking costume-like rather than coordinated
- Choose silver finishes that match your dress or jewelry for a truly pulled-together appearance
Insider note: If you’re wearing silver jewelry or a silver clutch, your hair accessories should match that tone so everything reads as one intentional aesthetic rather than random sparkly bits.
16. Open-Back Style With Side Waves
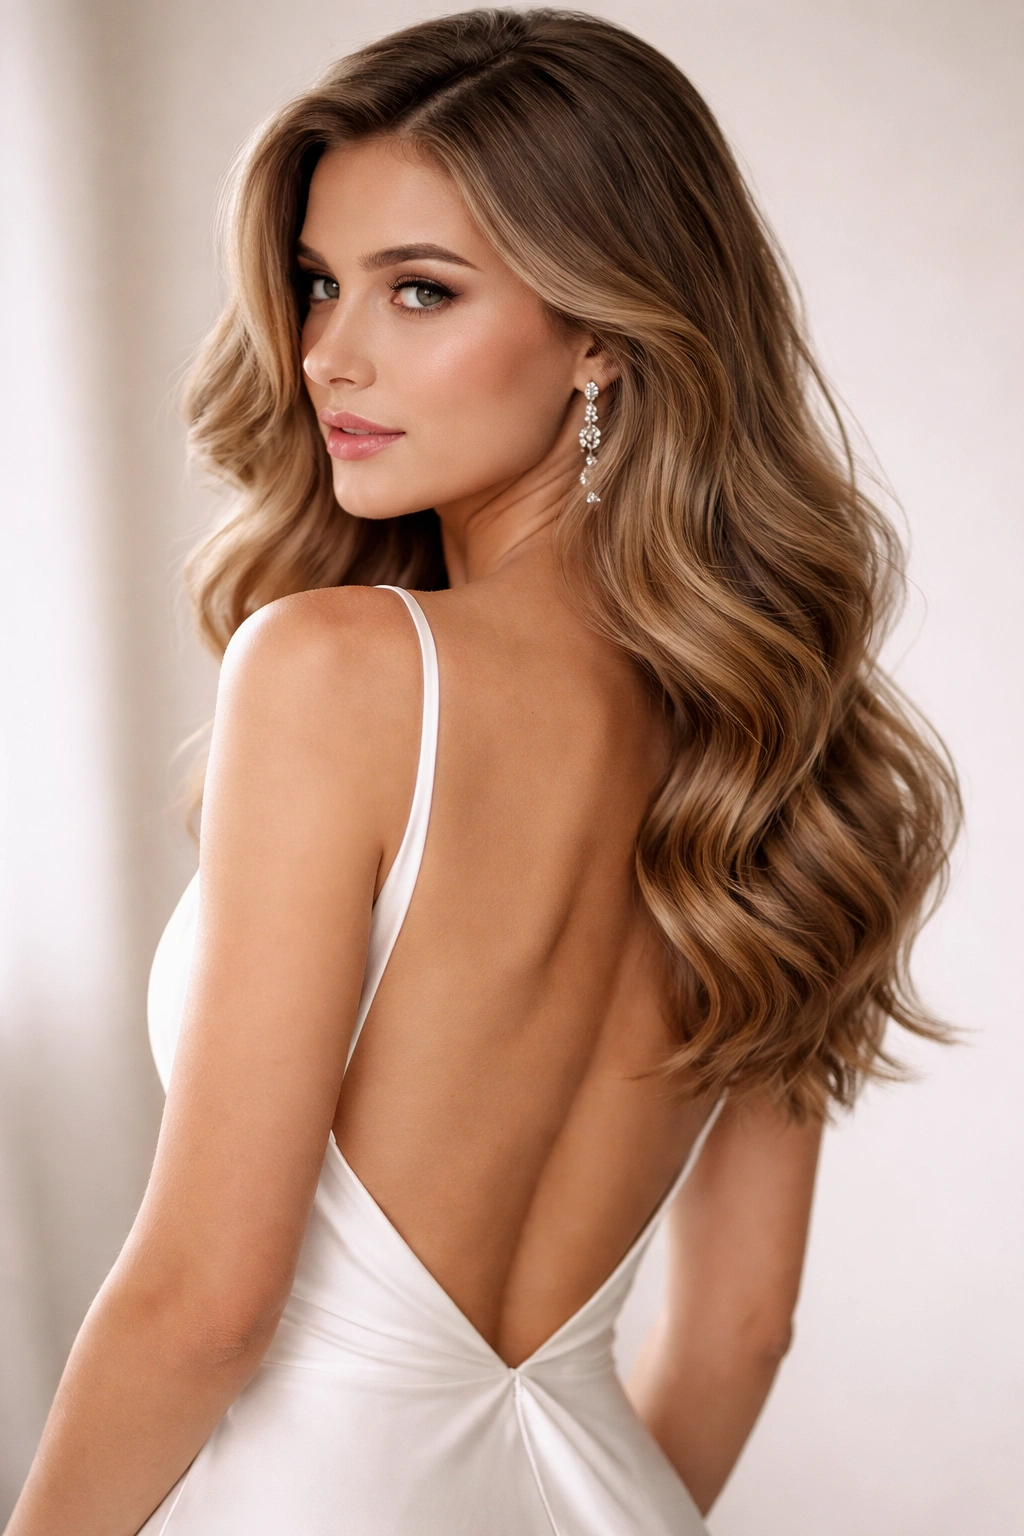
If your prom dress has a stunning open back, don’t cover it with hair. Instead, choose a style that features side waves that fall over your shoulders and collarbone while keeping your back completely clear. You might secure a small section at the crown or create a half-up twist, but the majority of the visual focus is on the waves that frame your face and body while showcasing your dress back. This approach makes your dress the focus while your hair adds movement and dimension from the sides.
Creating Side-Weighted Wave Placement
Blow dry your hair with volume at the roots, then use a curling iron to create waves throughout. As you’re curling, curl the front and side sections more generously than the back, so you naturally have more visible wave texture on the sides. Use larger curl barrels on the sides and slightly smaller on the back to create this effect. This ensures the visual weight of your waves is in the front and sides where they’re visible, not in the back where they’d cover your dress.
Securing While Maintaining the Open-Back Aesthetic
- If doing a half-up style, position the secured section at the very crown, using bobby pins that match your hair color
- Keep the gathered portion minimal so it doesn’t visually compete with the open back of your dress
- Allow waves to fall freely from the half-up section, creating movement and dimension
- Apply texturizing spray to the waves for dimension and flexible-hold spray so they move with you
- Avoid any clips or accessories on the back portion of your hair—keep that area clean and open to showcase your dress
Pro tip: This style photographs beautifully from behind because your dress back is visible, which is something many formal photos feature. Make sure your back is as stunning as your front!
17. Soft Waves With Rhinestone Hair Comb

For maximum glamour without overdoing texture or complexity, pair soft, touchable waves throughout your hair with a single statement rhinestone comb positioned at the back of your head. This is the elegant, one-piece-of-jewelry approach to prom hair—instead of multiple clips and details, you have beautiful waves and one beautiful comb that does all the talking. This works whether your hair is completely down or in a half-up style; the comb adds luxury and intentional styling without requiring complicated techniques.
Creating Soft, Glamorous Waves
Blow dry your hair using a round brush or diffuser to build foundation volume and shape. Once dry, use a 1.5-inch or 2-inch curling iron to create waves throughout, working in vertical sections and allowing each curl to cool completely. The waves should be defined but not crispy—gently brush through once cool to soften them slightly. Apply light hairspray to set without creating a stiff, crunchy texture. Your hair should feel touchable and romantic, not like you used a heavy hand with product.
Positioning the Statement Comb
- Choose a comb that’s substantial enough to make a statement but not so large that it looks costume-like (think cocktail-ring proportions, not tiara proportions)
- Position it at the center-back of your head if your hair is completely down, nestled into waves at roughly crown-level or slightly lower
- If doing a half-up style, position the comb right at the base of the gathered section as both a securing element and a decorative focal point
- Make sure the comb is secure enough to survive dancing—test it by gently pulling on your hair around the comb area
- Choose rhinestone finishes that match your dress and jewelry for a coordinated appearance
Worth knowing: A single statement piece (comb, cuff, or hair wrap) often reads more expensive and sophisticated than multiple smaller pieces. This is especially true for prom, where less is often more elegant.
18. Retro-Inspired Finger Waves With Half-Up
If you’re drawn to vintage glamour, finger waves create an intentional, old-Hollywood elegance that feels period-appropriate for prom. Finger waves are created by using styling product and your fingers (or a pin) to shape waves in a specific direction using hair clips to hold the shape while setting. Combined with a gentle half-up section, you get waves that are obvious and intentional with a touch of retro sophistication. This style works especially well with vintage-inspired dresses, classic updos, or if you just love the feeling of intentional, sculpted styling.
Creating Defined Finger Waves
Begin with damp hair and apply a wave-setting gel or mousse throughout. Using a fine-tooth comb and your fingers (or a pin), create waves by forming the hair into curved shapes and holding them in place with clips while they set. This takes practice and patience, but the result is waves that are clearly defined and obviously intentional. You can create waves throughout your entire head, or just in the front-facing section for dramatic effect. Allow the set to dry completely (either air dry, use a warm blow dryer, or let it set overnight) before releasing the clips.
Adding a Gentle Half-Up to Frame the Waves
- Once your finger waves are set and released, take a small section from the top-back area and create a soft twist or simple gather
- Secure this at the back of your crown using bobby pins that match your hair color
- Leave some wavy pieces in front of this gathered section loose for framing
- Apply flexible-hold hairspray to maintain the finger wave definition while allowing slight movement
- Add a decorative clip at the base of the gathered section if you want an additional focal point
Pro tip: Finger waves look especially stunning in black-and-white photos, which makes this a great choice if you think you’ll have any black-and-white portraits taken at prom or after-parties. The dimensional waves photograph beautifully with high contrast.
Final Thoughts
Your prom hair should feel like an extension of your personality and your dress, not something you’re forcing yourself into because you think you’re supposed to. Whether you choose a simple style like soft waves with a single accessory or something more involved like a braided halo with careful wave placement, the best choice is the one that makes you feel confident and comfortable enough to forget about your hair and focus on actually enjoying prom.
Medium-length wavy hair genuinely has incredible versatility for formal events—you can style it down with full movement, pull portions back for your face to be the focus, or split the difference with a half-up approach. The key is thinking about what works with your face shape, your dress, and your personal comfort level. If you get anxious about hair falling apart, go for something secured like a bun or half-up. If you love the romantic feel of down hair, commit to thorough styling and quality products that will keep waves looking beautiful all night long.
Practice your chosen style at least once before prom night so you know exactly how long it takes, what products you need, and whether you need to adjust anything. Walk around while wearing it, dance a little, move your head side to side—make sure it feels secure and comfortable during actual movement, not just when you’re standing still. Show up to prom feeling genuinely beautiful in a style that’s uniquely yours, and you’ll shine for all the right reasons.