Natural curls do not need to be flattened to look polished. The most elegant hairstyles for natural curly hair keep the texture, then tighten the outline: cleaner part, smoother hairline, better pin placement, a shape that reads from across the room instead of falling apart at the edges.
Flat irons are optional. Structure is not.
What usually makes curly hair look dressed up has less to do with heat and more to do with intent. A low bun that sits at the right spot, a side sweep that shows one cheekbone, a braid that controls the crown without stealing the curl pattern—those details matter more than forcing every strand into the same shape. Curls have their own sense of drama. Use it.
And here is the part people miss: elegance on curly hair often comes from contrast. Sleek at the front, soft at the ends. Tight at the nape, full at the crown. A little shine on the hairline, a little movement everywhere else. That mix feels finished without looking stiff, which is usually the whole game.
1. Side-Swept Curly Puff for Natural Curls
A side-swept curly puff is one of those styles that looks far more styled than it feels. The trick is the diagonal line. Instead of building volume straight up, you sweep the curls toward one side so the whole shape feels intentional and a little sculpted.
Why the Diagonal Line Works
The angle does a lot of visual work for you. It lengthens the face, opens up one side, and makes the puff look less casual than a centered shape. That is useful if your curls are dense or if they tend to bloom outward as the day goes on.
A side-swept puff also gives you room to control the front. Smooth the hairline with a small brush and a thin layer of gel, then stop. Over-slicking is the quickest way to make the style look hard instead of elegant.
- Gather the puff slightly above the ear, not dead center at the back.
- Use a satin scrunchie or stretchy band that does not snag the curl pattern.
- Pin the flatter side with 2 to 4 bobby pins so it stays put.
- Leave a few curls free near the temple if your face needs softness.
Bold tip: keep the puff full, but keep the edges neat. That contrast is the whole look.
2. Low Curly Chignon
A low chignon can make curls look sharper than a blowout, and it usually takes fewer pins than people expect. The reason is simple: curls already have texture, so the bun does not need extra volume or extra decoration. It just needs a clean nape and a deliberate fold.
If your hair is shoulder length or longer, pull it into a low ponytail first, then twist the length loosely and coil it into a flat bun. Do not try to make the bun tiny. A too-tight chignon makes curly hair look squashed, and that is not a flattering trade.
I prefer this style when the occasion calls for something formal but not fussy. It works for weddings, dinner parties, interviews, and any moment when you want your hair off your neck without losing personality. A few face-framing coils are fine. They soften the jawline and keep the style from looking severe.
Use 6 to 8 bobby pins, depending on thickness, and slide them in where the bun meets the head—not just around the outside. That little detail holds the shape far better than pinning the surface.
3. Half-Up Crown Twist
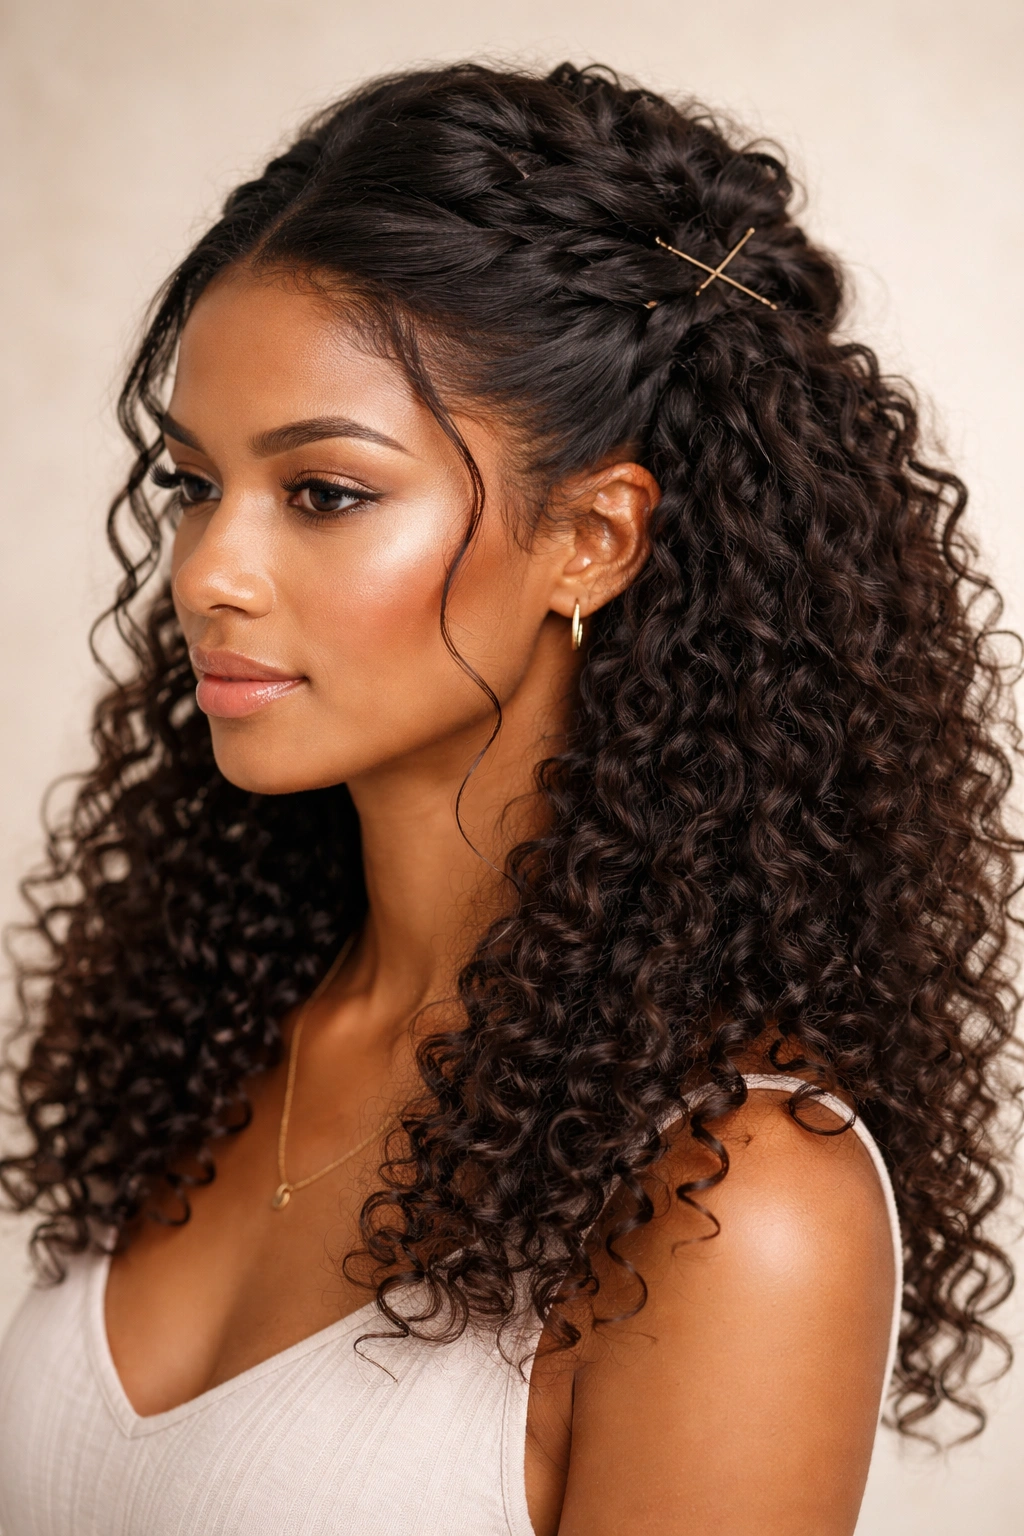
What keeps a half-up curly style from looking too sweet? Control at the crown and restraint everywhere else.
The crown twist works because it lifts the top section while letting the rest of the curls fall naturally. Take a narrow section from each temple, twist it back, and meet it at the crown. Keep the twists close to the scalp. If they puff too high, the whole style starts to feel playful instead of elegant.
How to Style It
Start with curls that are fully dry or mostly dry. Damp roots collapse later, and the style will lose shape right when you need it to stay clean. Use a light cream or leave-in first, then a small amount of gel on the front hairline.
- Take 1-inch to 1.5-inch sections from each side.
- Twist each section back once or twice, not three or four times.
- Cross the pins in an X so the twist stays anchored.
- Let the lower curls keep their own shape.
A half-up crown twist is one of the easiest ways to look finished without hiding your texture. It has polish up top, movement below, and enough structure to survive a long evening.
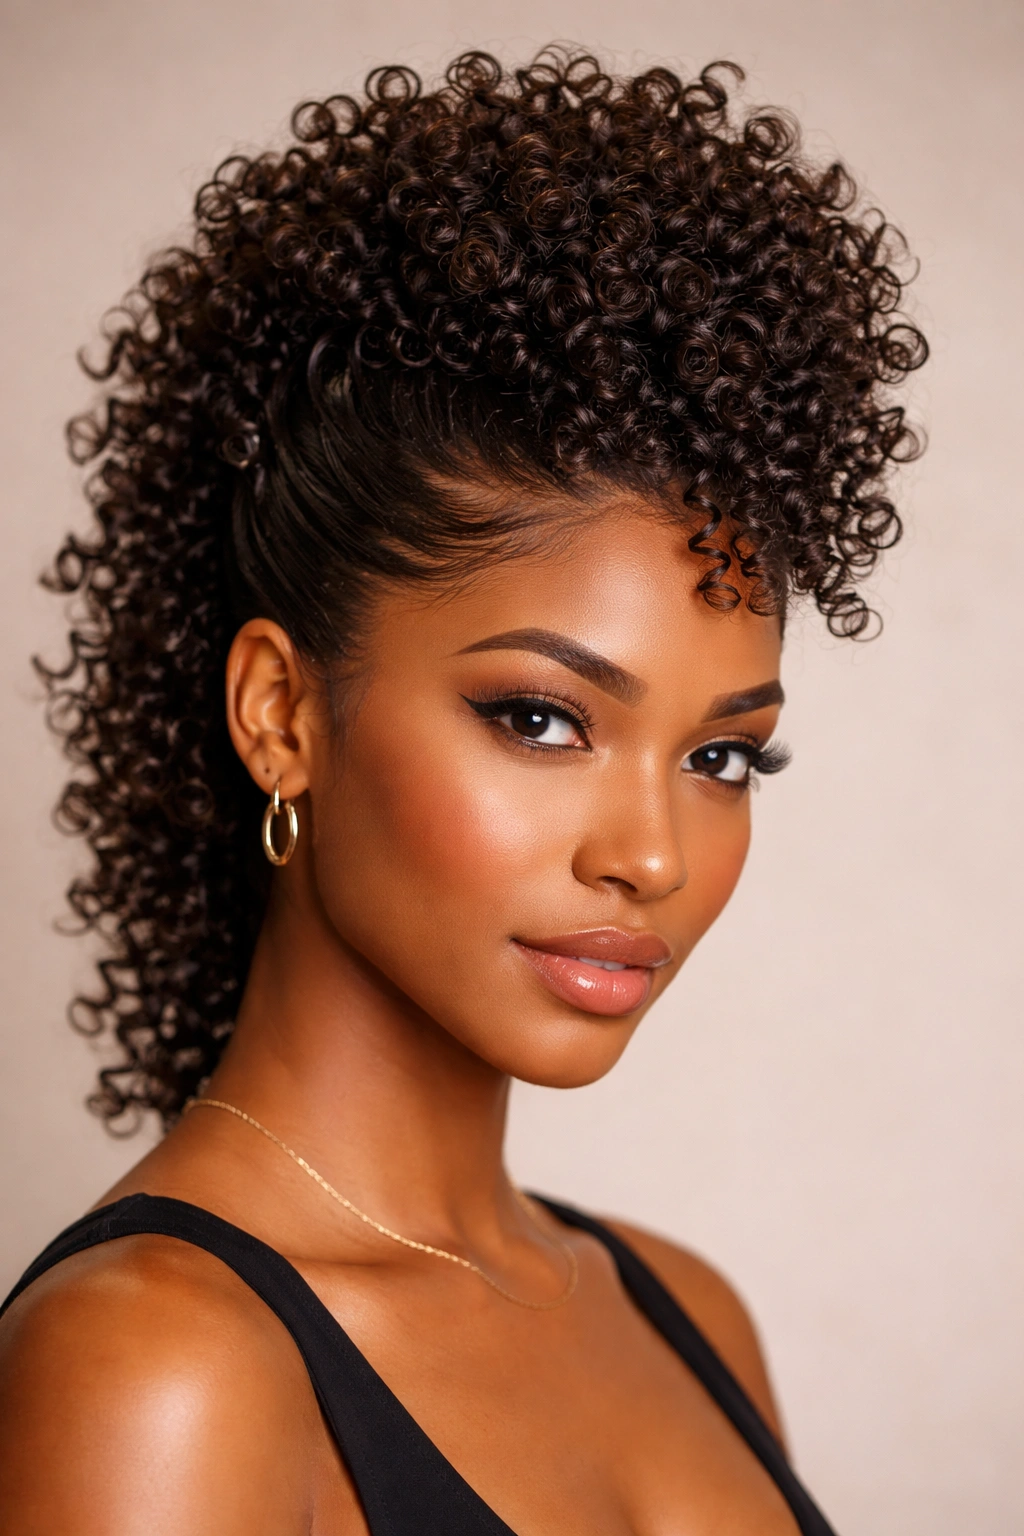
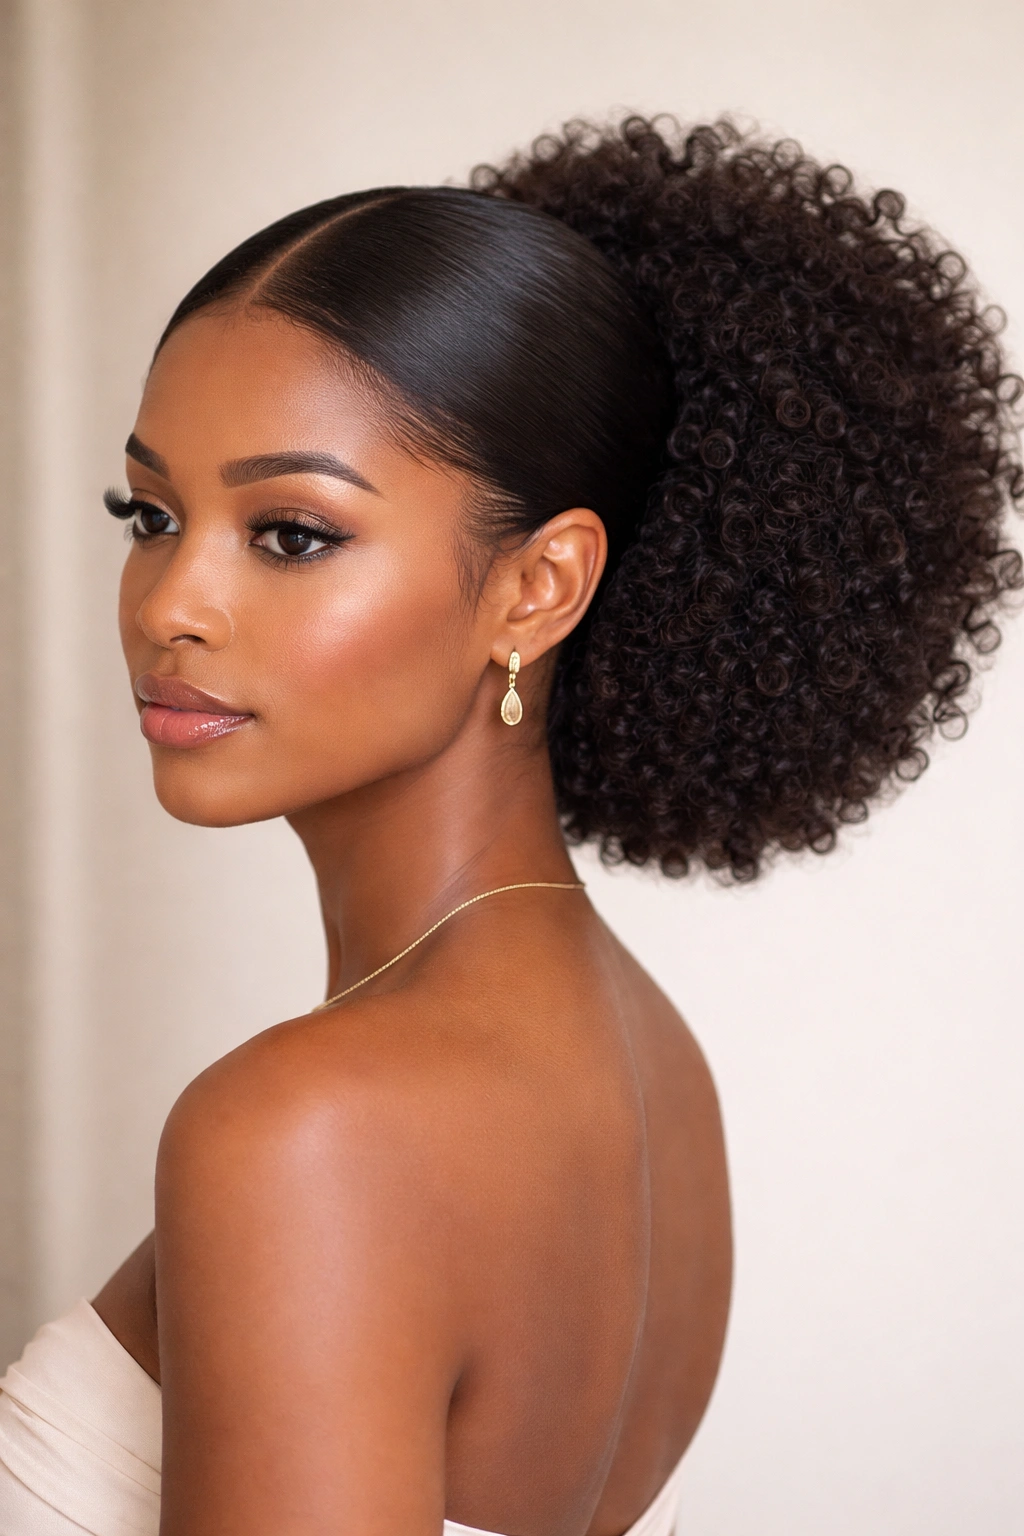
4. Wrapped High Curly Ponytail
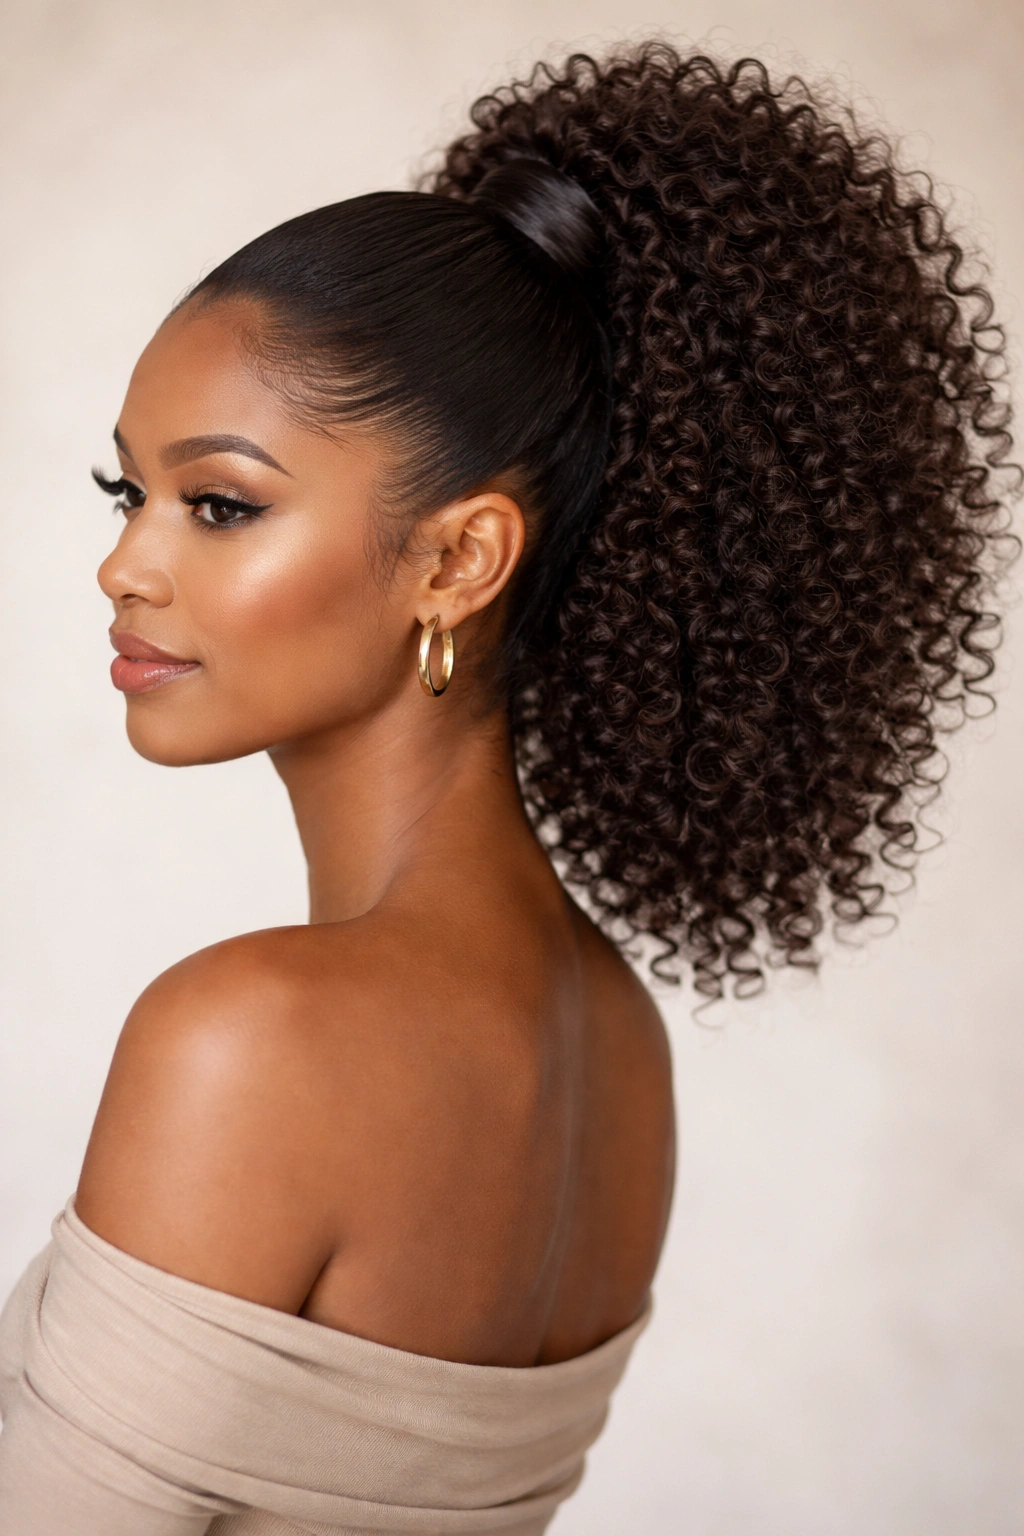
Picture a formal dinner where you want your neck clear, your curls visible, and your hair out of the way when you laugh. A wrapped high ponytail does that job without turning into gym hair.
The detail that matters most is the base. Smooth the crown first, then secure the ponytail high enough to lift the face but not so high that it feels juvenile. The ponytail should sit near the crown, not on top of it like a fountain. That small shift changes everything.
Take a small curl from the ponytail and wrap it around the elastic until the band disappears. Pin the end underneath with one or two bobby pins. It sounds minor. It is not. That wrapped base is what makes the style look deliberate.
If your curls are fine, use a little mousse at the roots before gathering. If they are coarse or dense, a light gel on the hairline plus a few minutes under a scarf will make the crown smoother. Keep the ponytail itself full. The volume is part of the charm.
5. Braided Halo with Loose Curls
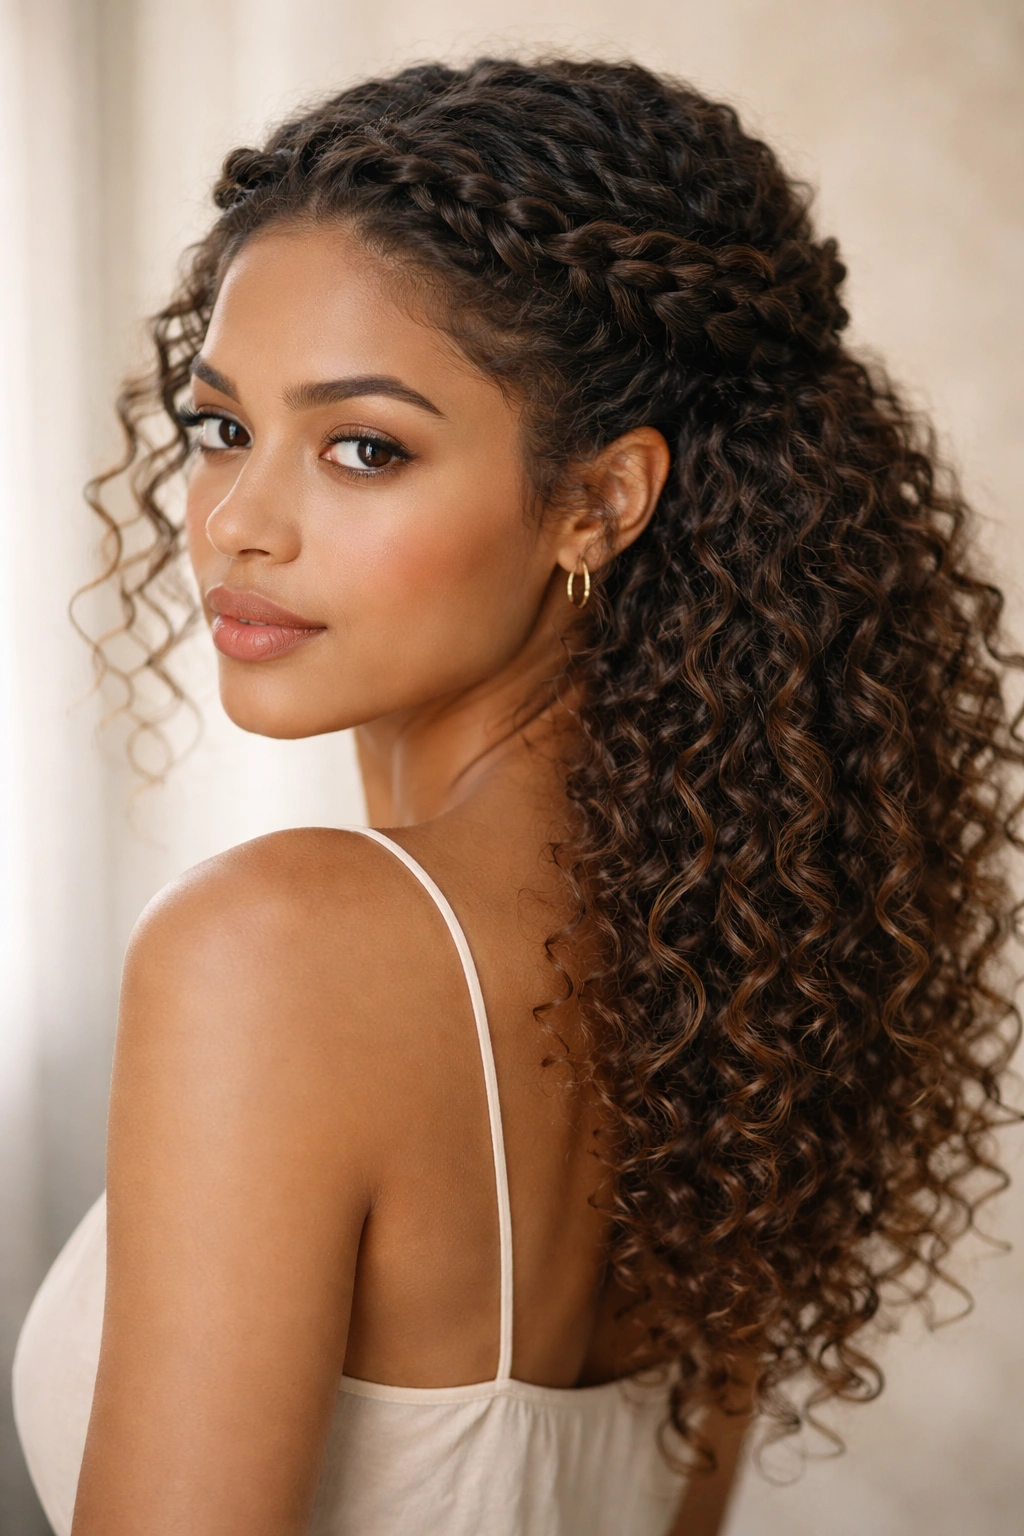
Braids on curly hair have a different feel from braids on straight hair. They look fuller, a little softer around the edges, and much less severe. That is why a braided halo works so well when you want elegance without losing the curl pattern altogether.
The braid should sit an inch or so behind the hairline, not jammed right on the edge. If it is too tight to the forehead, the style can start to feel rigid. A slight gap gives the curls some breathing room and keeps the halo from looking like a headband.
Leave the back curls loose, or tuck them into a soft cluster at the nape if you want more control. Either option works. I like the loose finish when the hair is healthy and defined, because the movement behind the braid gives the whole style a little life. It does not look overworked.
A light leave-in helps a lot here, especially if your hair frizzes at the temples. And if your braid starts to feel bulky, do not fight it by pulling harder. Loosen the sections a little, and let the braid look full. That fullness is half the point.
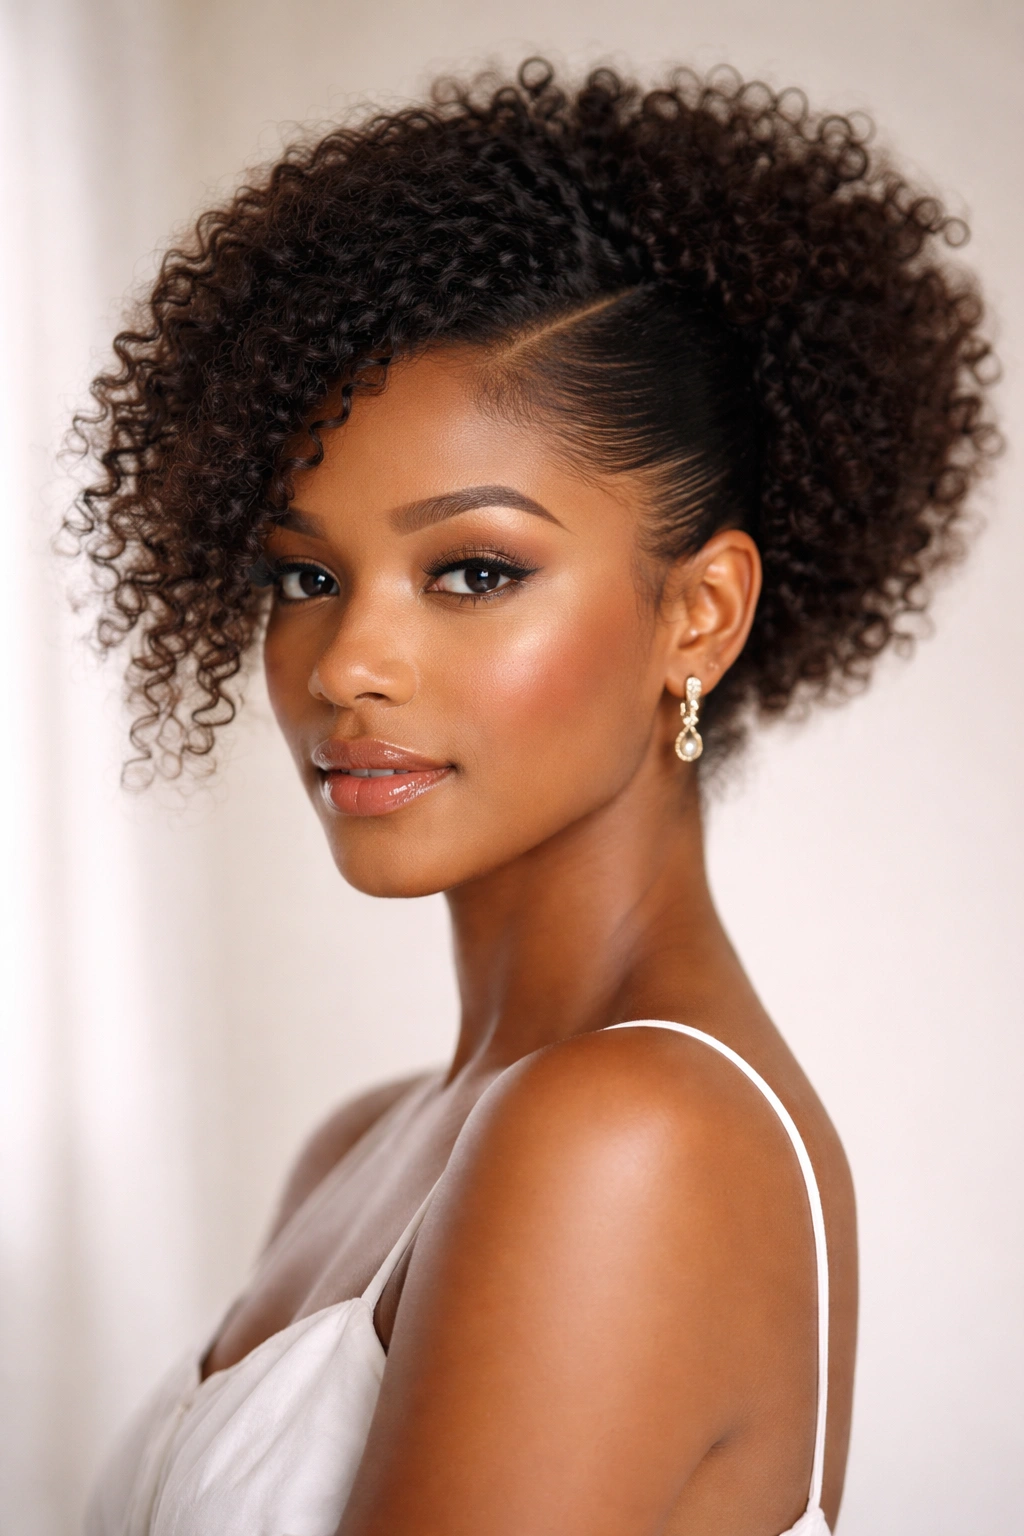
6. Deep Side-Parted Style for Natural Curly Hair
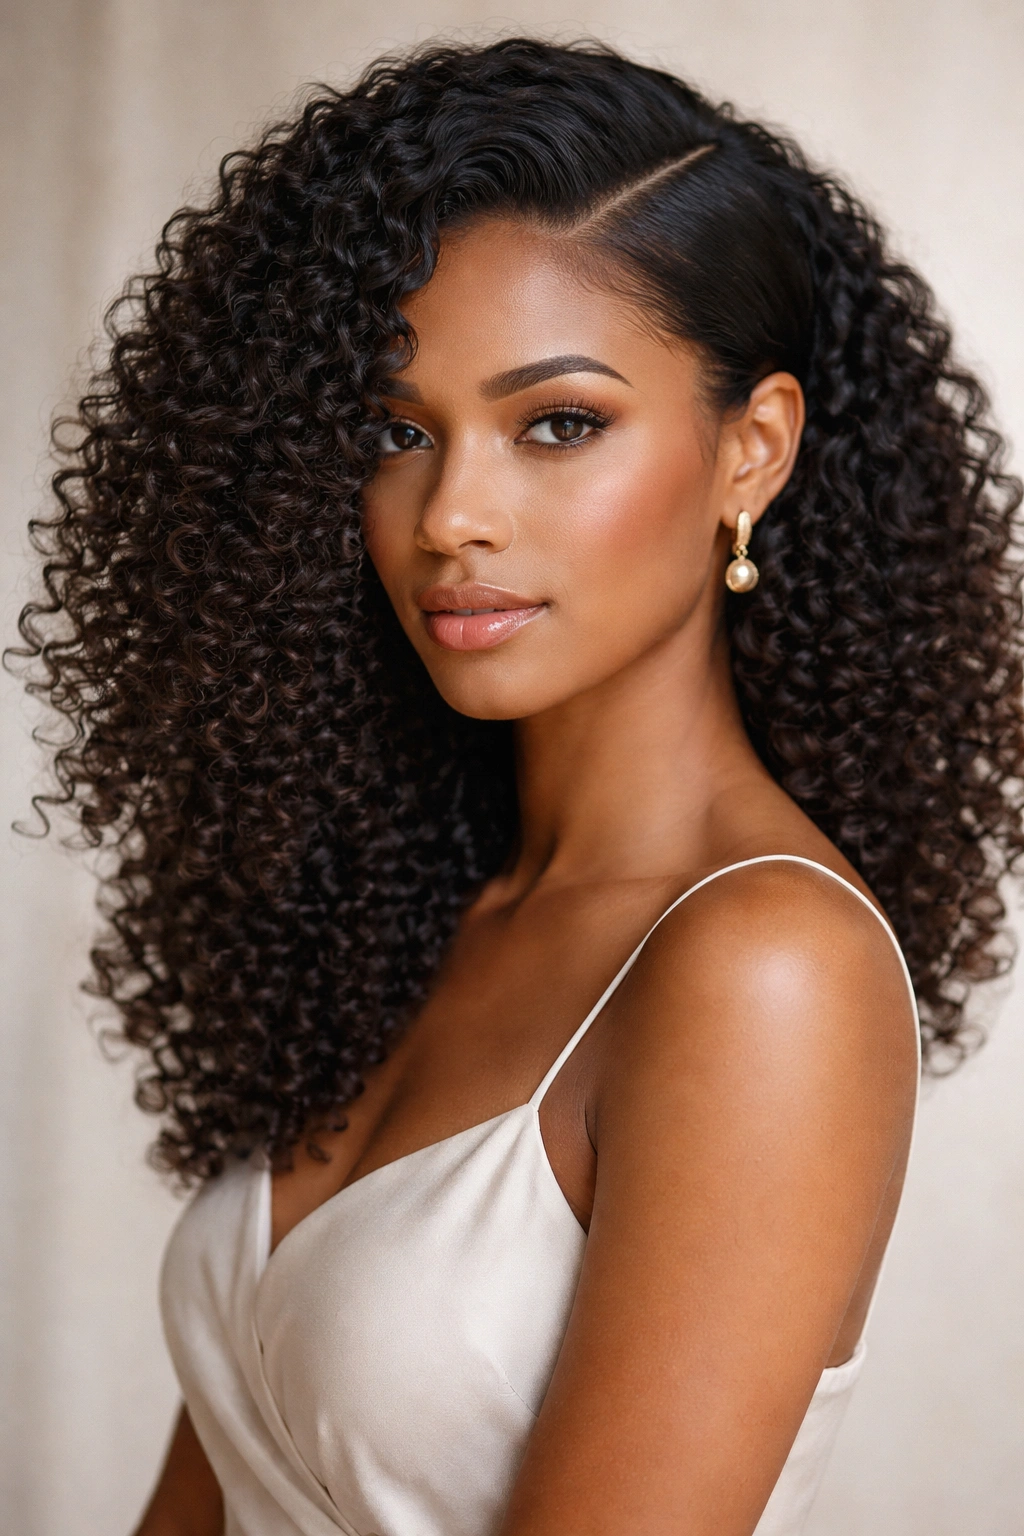
A deep side part is not lazy hair. It is controlled volume.
This style works because it gives the curls a clear direction. One side becomes the anchor, the other side becomes the drama, and the result feels old-school in the best way. It is especially strong if your curls naturally stack toward one side anyway, because you are not fighting the pattern—you are nudging it.
The simplest way to do it is to set the part while the hair is damp, then clip the heavy side away from the face for 10 to 15 minutes while the roots begin to dry. That little wait helps the part hold. After that, add a touch of glossing serum to the outer layer only. Too much product near the crown kills lift fast.
I like this style when the curls themselves are the statement. You do not need a lot of pins, and you do not need a lot of accessories. One tucked side, a clean part, and a curved shape around the face can look more refined than a complicated updo.
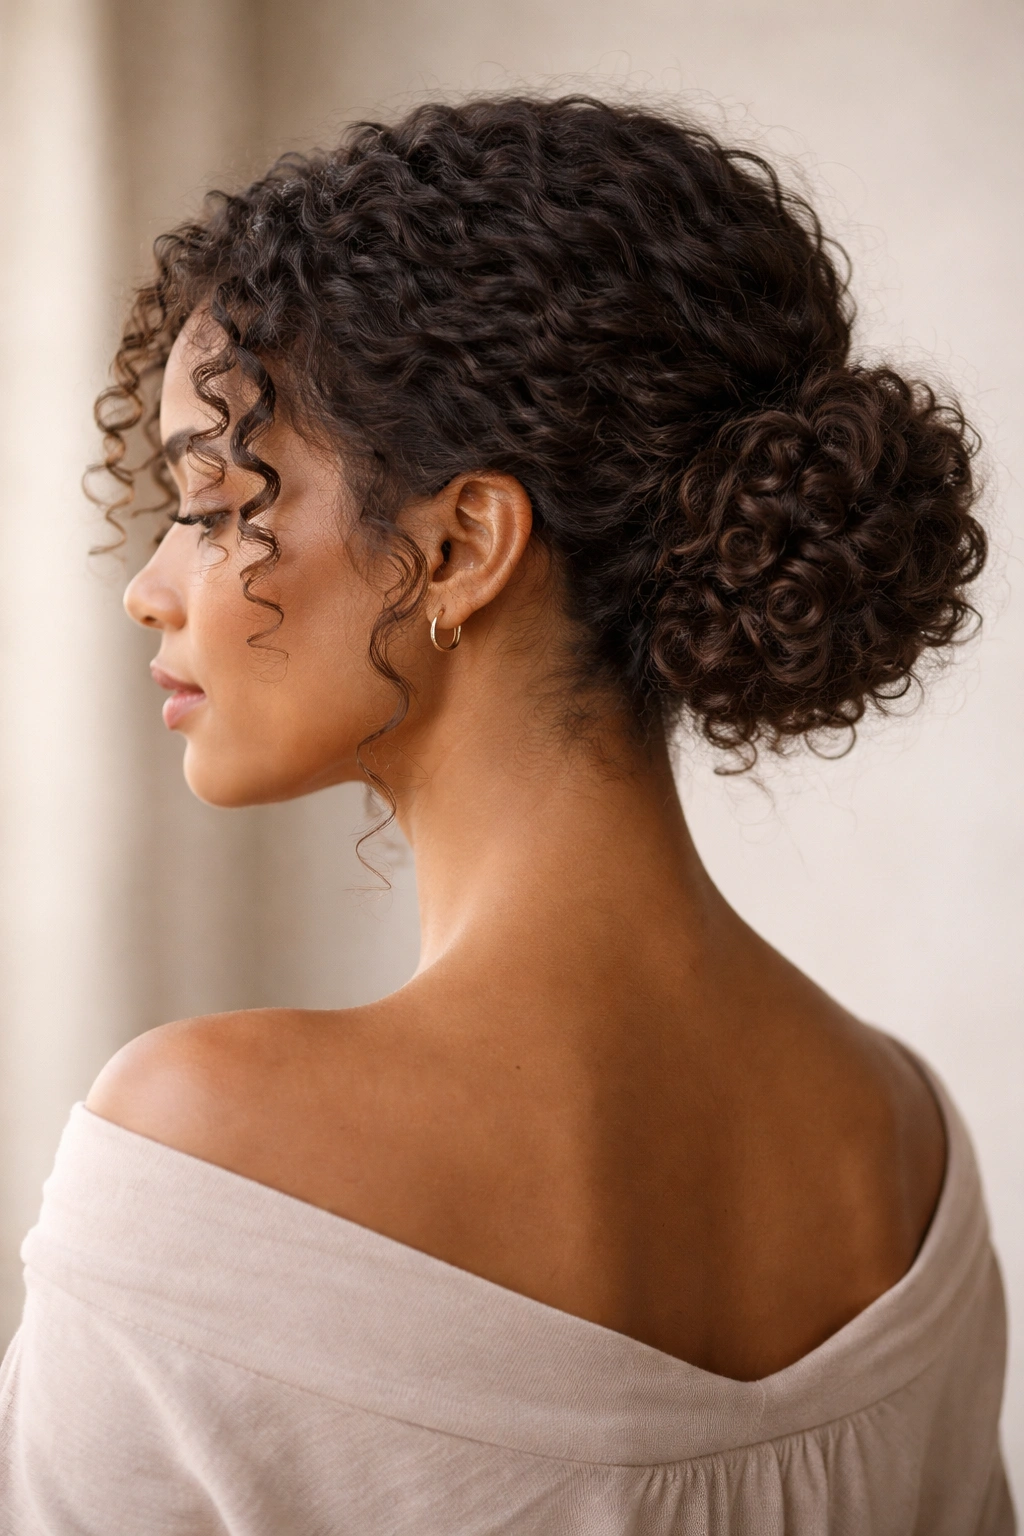
7. Twisted Nape Bun
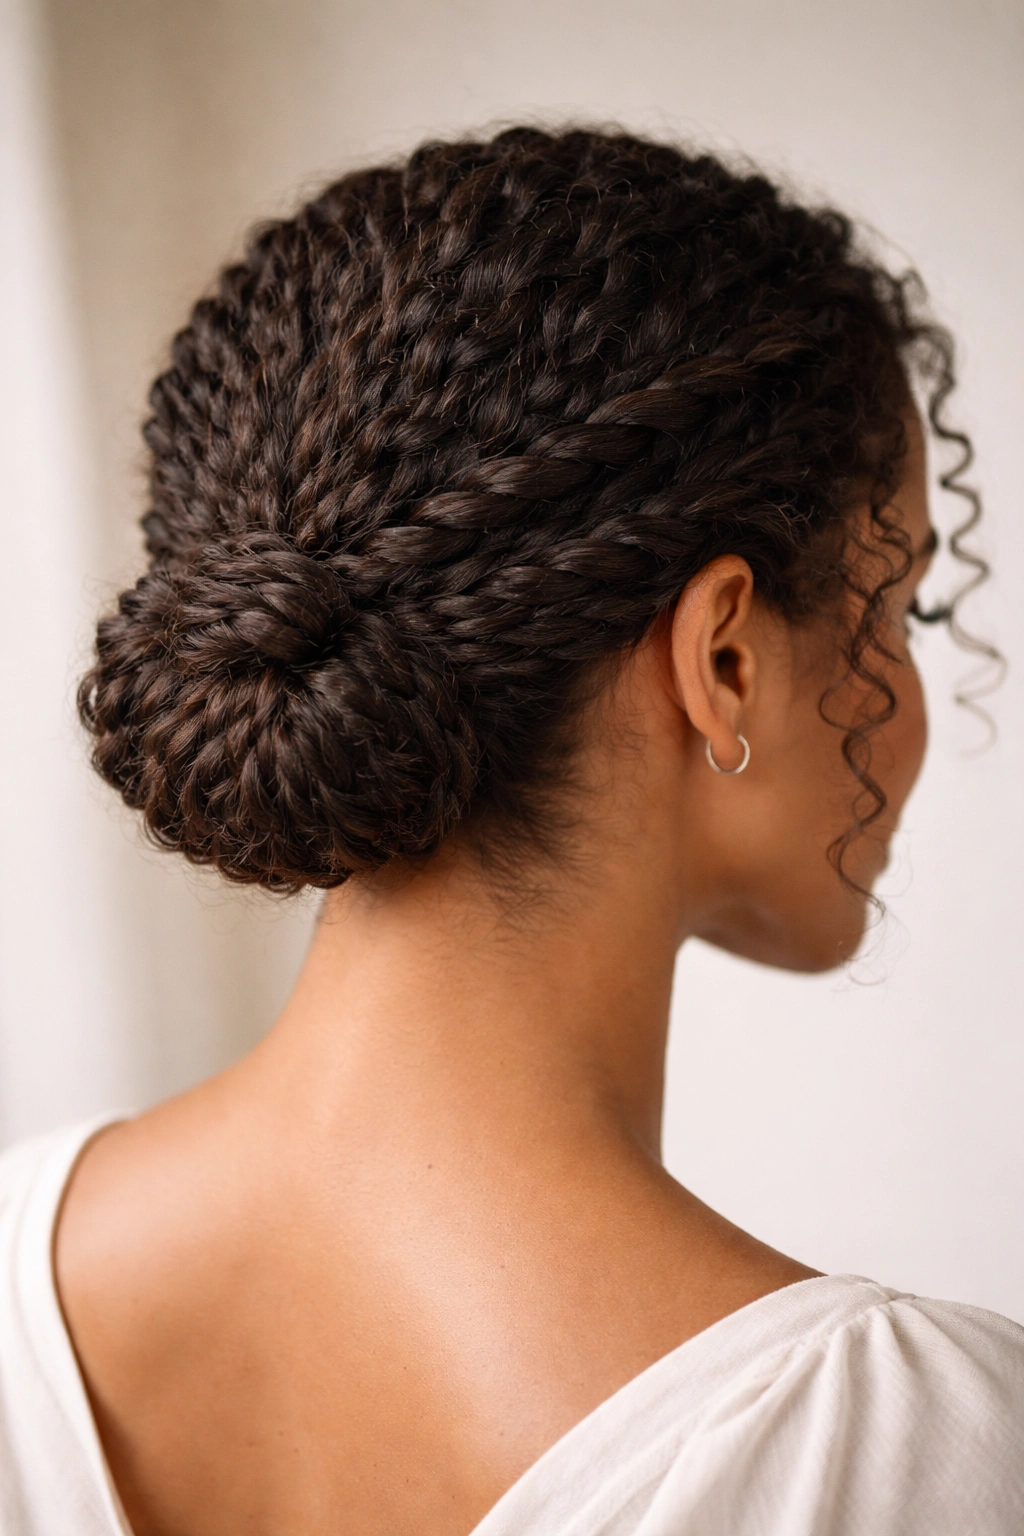
Two rope twists and a handful of pins can do a surprising amount of work. The twisted nape bun is one of those styles that looks intricate from a distance but is actually built from simple parts.
How to Keep It Close to the Head
Divide the hair into three zones: left side, right side, and back. Twist the side sections back toward the nape, then gather everything into a low bun or coil. The key is to keep the twists flat against the head before they meet the bun. If the twists puff outward, the style loses its clean line.
- Use 4 to 6 pins if your hair is medium thickness.
- Use 8 or more if your curls are dense or long.
- Anchor the bun at the nape, not halfway up the back of the head.
- Smooth the front with gel, then leave the bun itself textured.
This is a good style for formal events because it stays close to the head and does not compete with jewelry, scarves, or a high neckline. It also plays nicely with day-two curls, which often have more grip and less slip than freshly washed hair.
8. Curly Faux Hawk
A curly faux hawk looks sharper when the sides are flatter than you think. That is the whole trick. If the sides stay puffy, the style turns messy fast. If the sides are sleek and the center ridge is full, it looks strong and deliberate.
You can build it by pinning the sides low and sectioning the center strip into 3 or 4 loose rows that are pinned or clipped upward. Some people like to braid the center first. I usually skip that unless the curls are especially slippery. The natural texture already gives enough shape.
This style has presence. It is a little bolder than a low bun, but still polished when the edges are neat and the crown is lifted with purpose.
Use gel along the side panels, then a light mist of setting spray once the shape is pinned. The center should stay soft and full, not hard. That contrast between tight and loose is what gives the faux hawk its edge. It also makes the style work for black dresses, tailored jackets, and any outfit that needs a little attitude.
9. Sleek Front, Full Back Puff
Can a puff read formal? Absolutely—if the front is shaped with care.
This version keeps the front smooth and the back full, which makes the whole style look more refined than a standard puff. The front is where the polish lives. Think clean center part or soft side part, brushed hairline, and controlled roots. The back is where the texture gets to show off.
The Detail That Changes the Look
Place the puff lower than you would for a casual daytime style. A mid-back puff or a low crown puff feels more composed. A puff that sits too high can start to feel playful, which is fine on some days, but not when you want something dressier.
- Smooth the front with a toothbrush or small styling brush and a thin layer of gel.
- Keep the puff secured with a band that does not pull the curls flat.
- Fluff the back with your fingers after the band is set.
- Leave the ends defined so the style still reads as curly, not blown out.
This is one of my favorite options for thick curls. It has shape, it holds well, and it still gives you that full, healthy silhouette people notice from across the room.
10. Tucked French Roll for Curls
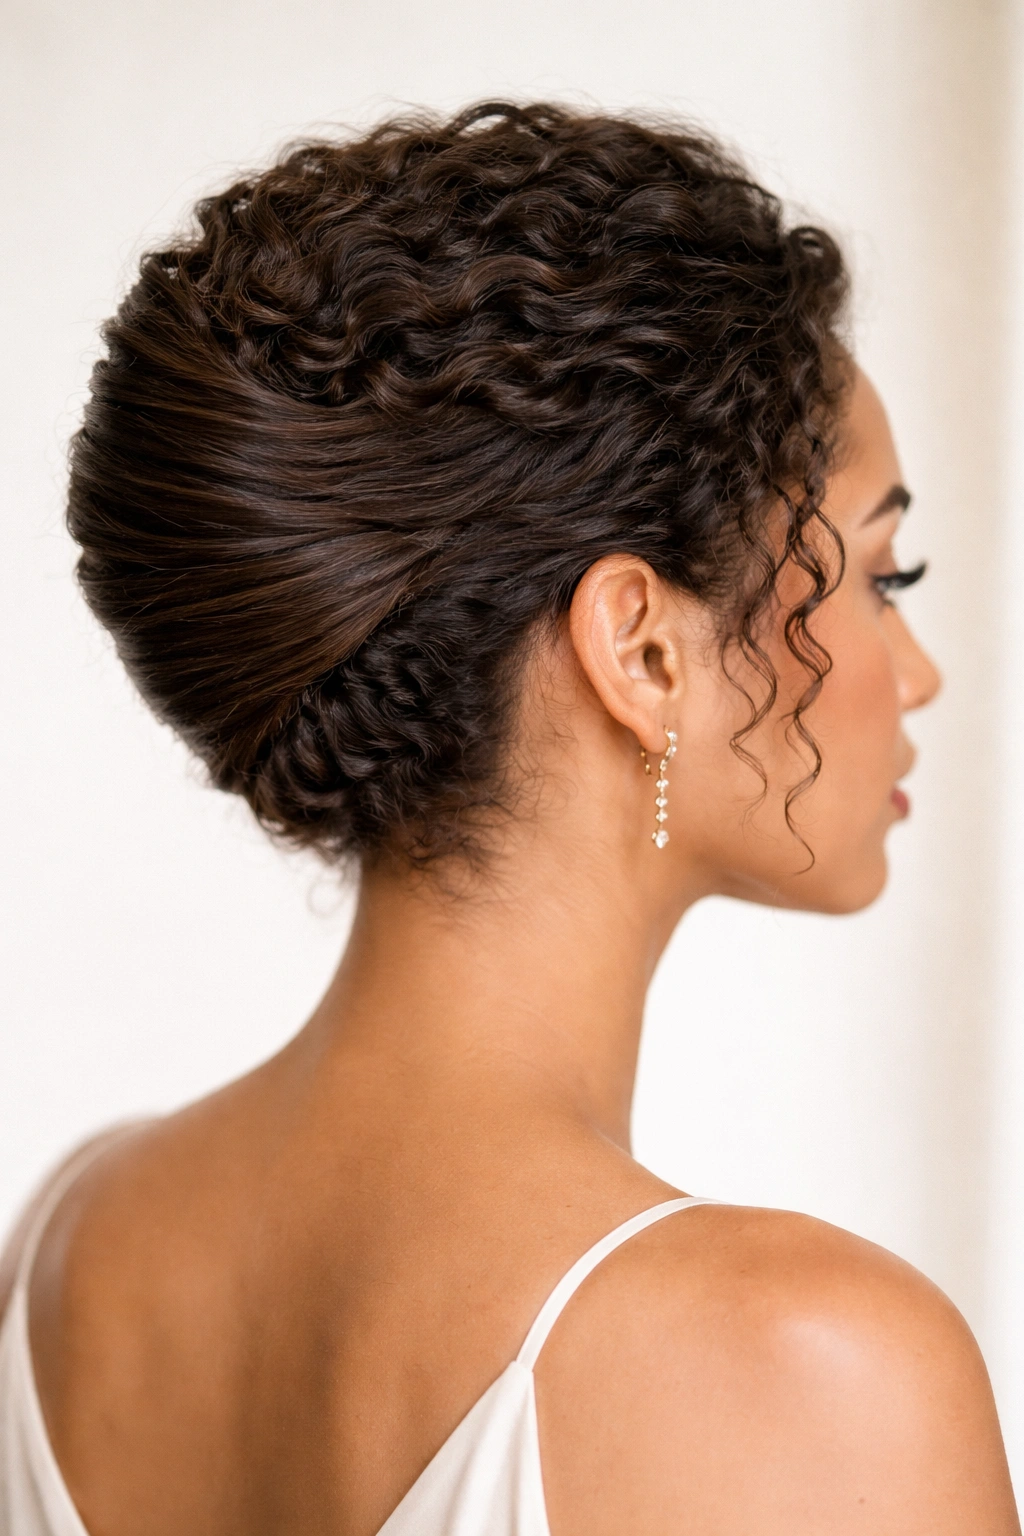
At a wedding or formal dinner, the French roll has a way of surviving everything—hugs, wind, long conversations, the whole deal. On curly hair, it works best when you stop trying to make every strand behave like it belongs in a straight-up textbook version of the style.
Start by smoothing the outer layer of the hair, then gather the length toward one side and roll it upward and inward. The roll should feel snug, but not crushed. Curly hair needs a little room inside the fold, or the shape becomes flat and awkward at the back.
A rat-tail comb helps with placement, but the real work comes from the pins. Use 8 to 10 bobby pins, tucked vertically along the seam of the roll. If you can see a row of pins from the outside, they are probably in the wrong place. Hide them inside the structure.
This style is strongest on hair that is stretched a bit first, even if only with a twist-out or a blow-dry on low heat. It does not need pin-straight hair. It needs a workable surface and enough length to fold.
11. Curly Ponytail with a Braid Accent
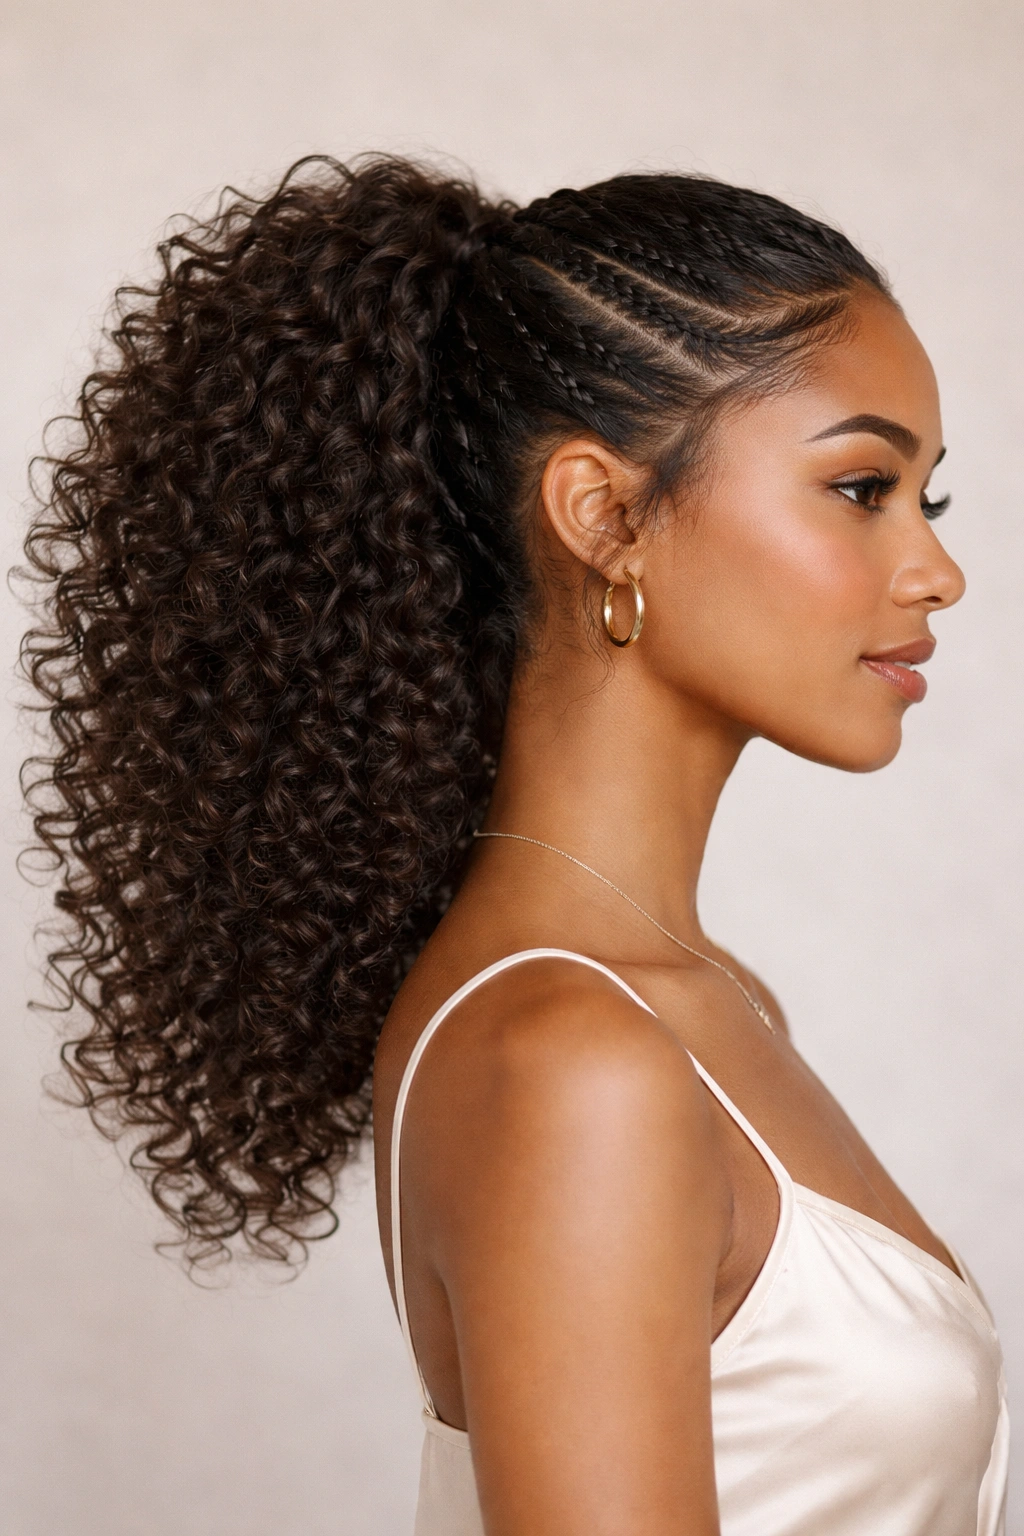
A ponytail with one braid accent keeps the look from sliding into gym-hair territory. That single braid gives the eye something to follow, and it makes a simple style feel finished.
The braid can sit at the temple, along the side part, or close to the nape before the rest of the hair is gathered. I prefer the side position because it shows up better when the ponytail moves. If your hair is dense, braid only a small strip—about 1 to 1.5 inches wide. A giant braid can dominate the style and throw off the balance.
The ponytail itself should stay curly and full. That is the point. You are adding detail, not turning the whole head into a braid project. Wrap a small strand around the elastic if you want the finish to feel cleaner, and let the braid feed naturally into the ponytail.
This style works especially well when you want something that can go from daytime to evening without a reset. It is neat enough for a structured outfit, but relaxed enough that you do not look overdressed.
12. Pearl-Clip Side Sweep
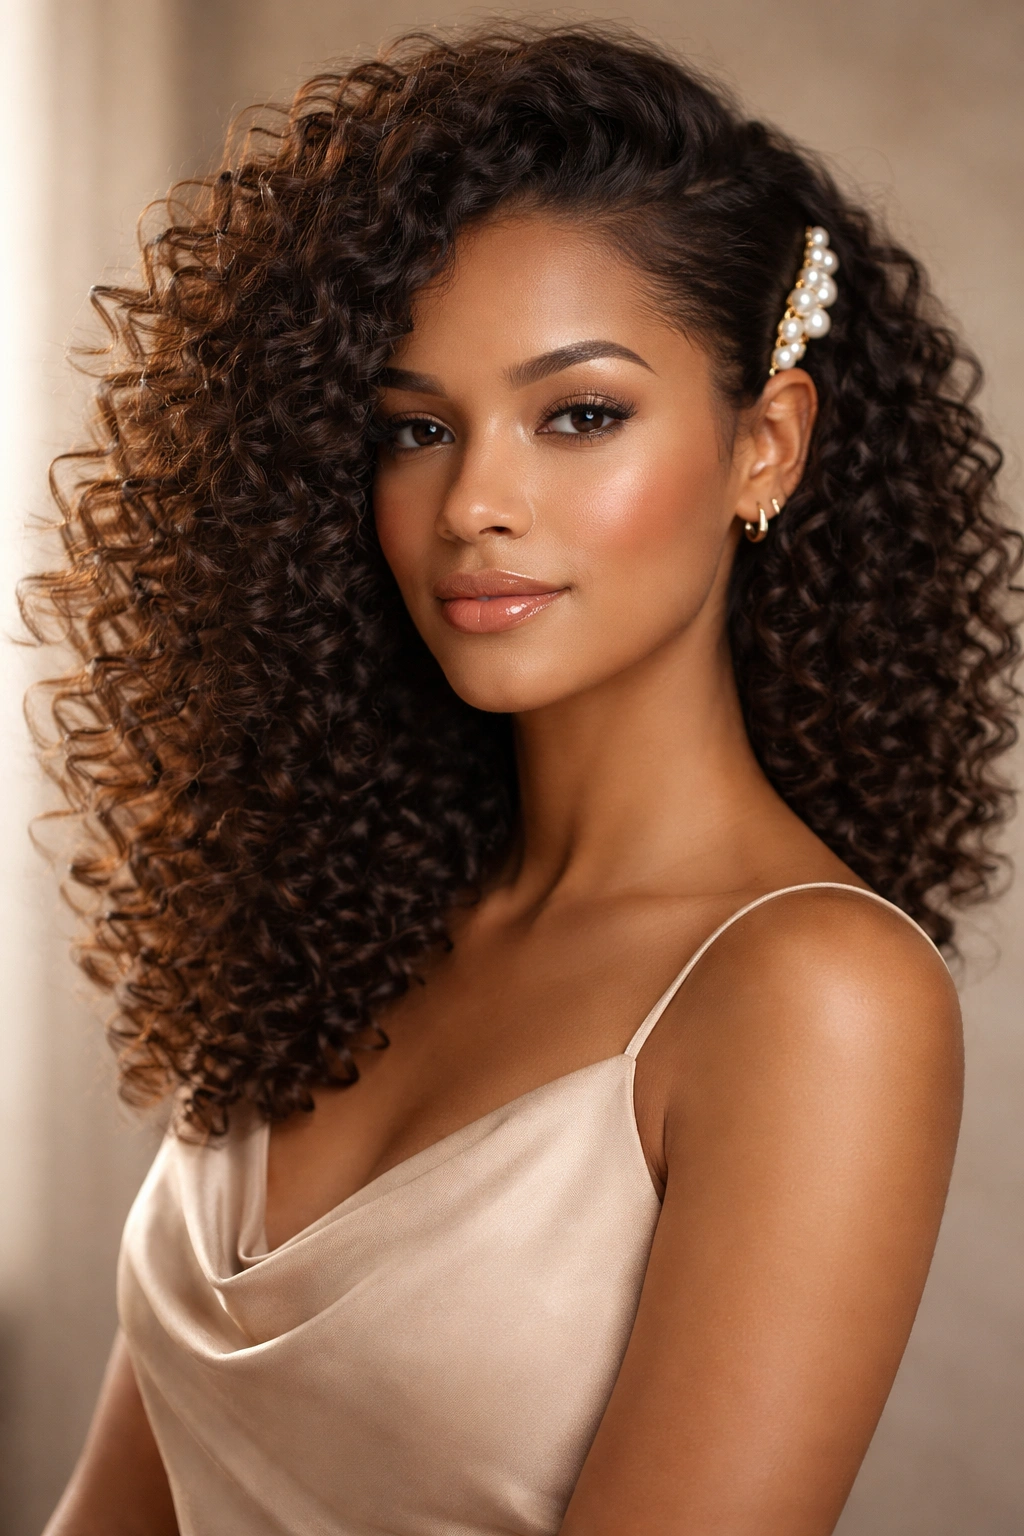
Need a dressy style without a forest of bobby pins? A pearl clip side sweep solves that problem fast.
The appeal here is simplicity. Sweep the curls deeply to one side, smooth just the front section near the temple, and secure it with one strong clip placed slightly above the ear. Not at the temple. Not too far back. The clip needs to sit where it can hold weight without dragging the curls flat.
Pearl clips work because they add a clear visual point without stealing the whole show. But the placement matters more than the ornament. If the clip sits too high, the shape feels awkward. If it sits too low, the curls tumble over it and the style loses its line. One good placement is enough.
This is a smart option for shorter curls, shoulder-length coils, and anyone who wants a formal look in under 10 minutes. The side sweep frames the face, the clip anchors the shape, and the curls keep the rest of the style alive. Simple. Clean. Easy to repeat.
13. Crown Braid into a Low Bun for Natural Curls
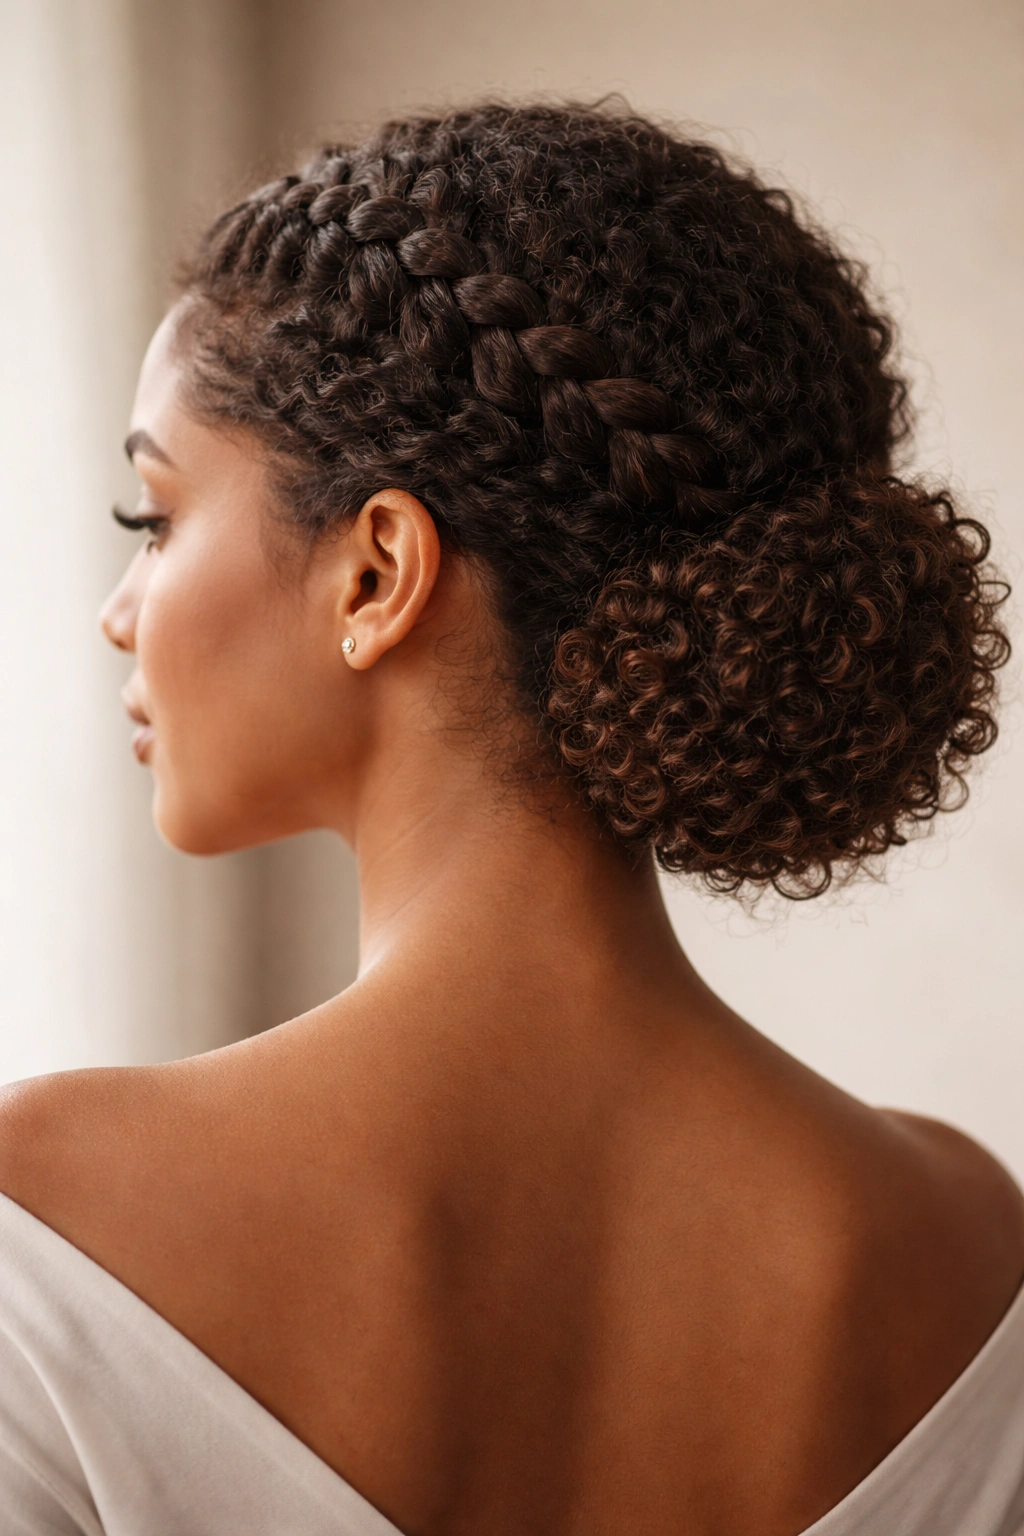
A crown braid into a low bun is the kind of style that holds its shape from the ceremony to the last photo. It has enough structure for a formal setting, but the bun keeps the finish soft at the base instead of severe.
Start the braid at one temple and bring it across the top of the head, or create two smaller braids that meet at the back. Either way, keep the braid snug to the scalp. If it lifts too far away, the crown area starts to balloon, and the style loses that clean outline.
What Makes It Look Formal
The bun should sit low, almost at the nape. That lower placement keeps the braid as the focal point while the bun acts like a quiet anchor. Leave one or two curled tendrils near the ears if you want a little softness around the face.
- Use a light gel or mousse before braiding so the sections stay neat.
- Pin the braid where it meets the bun, not just around the outer edge.
- If your hair is thick, split the bun into two coils instead of forcing one giant wrap.
- Finish with a small mist of flexible-hold spray.
I like this style most on hair that has a little stretch to it. Second-day curls, twist-out curls, or stretched coil patterns all work well. The braid gives the top half a polished line, and the bun keeps the whole thing grounded.
14. Soft Pin-Up Twist with Tendrils

The soft pin-up twist is the style I reach for when I want the front to stay neat but not severe. It has a vintage feel, though not the costume-y version. Just a soft lift at the crown, a few rolled sections, and curls left free around the cheeks.
The twist works best when the hair is divided into smaller sections rather than one large sweep. Each section is rolled back and pinned into place, creating a layered shape at the back of the head. That layered pinning gives the style depth. One flat twist would look plain. Several small ones look intentional.
Leave the tendrils alone unless they are fraying badly. A couple of loose coils near the jawline soften the look and keep the style from feeling overdone. That detail matters more than people think. Curl movement near the face is what keeps the hair alive.
This is a strong option for formal nights when you want something feminine without too much fuss. It also handles humidity better than a fully slicked style, because the loose pieces are part of the design rather than a mistake waiting to happen.
15. Romantic Curly Knot at the Nape
Want one finish that feels romantic without getting fussy? The curly knot at the nape is the answer I keep circling back to.
It starts like a low bun, but instead of coiling the length into a perfect circle, you twist the curls into a loose knot and let the shape stay a little irregular. That irregularity is what makes it pretty. A perfect bun can look formal. A soft knot looks personal.
Keep the crown smooth enough to show intent, but do not chase every flyaway. A few wisps near the hairline make the style feel human. If your curls are long, loop the knot twice and pin the center. If they are shorter, make two smaller knots side by side and hide the ends underneath. Both versions work.
A small amount of shine cream on the outer layer helps here, but use it sparingly. Too much product flattens the texture, and then the knot loses depth. The finished look should feel tucked, not pressed.
This is the style I would choose for a date night, a formal dinner, or any event where you want the curls to look soft, low, and deliberate all at once. Keep the nape neat, let the knot breathe a little, and the whole shape reads as elegant without trying too hard.