Wavy hair is incredibly forgiving when it comes to half-up styles — that natural texture works with you instead of against you, creating dimension and movement that straighter hair can struggle to achieve. The beauty of short half-ups specifically is that they strike the perfect balance between keeping hair off your face and shoulders while still showing off those waves you worked hard to define or enhance. Whether you’re dealing with fine, loose waves or thicker, more pronounced texture, a well-executed half-up gives you the polish of a put-together style without the commitment of a full updo.
Short half-ups are also surprisingly versatile. You can wear them dressed down with a t-shirt and sneakers on a casual afternoon, then add a silk ribbon and some face-framing loose waves for a date night without changing your actual hair. They work for almost any hair length that’s past your collarbone, suit every face shape, and honestly require less styling skill than people assume — especially if you understand how to work with your wave pattern instead of against it.
The real magic of these styles lies in understanding how to anchor them, how much hair to pull up versus leave down, and which techniques bring out your waves’ best features. Let me walk you through 14 short half-up styles that look effortless but actually have enough structure to keep your waves looking intentional all day long.
1. The Classic Twisted Half-Up
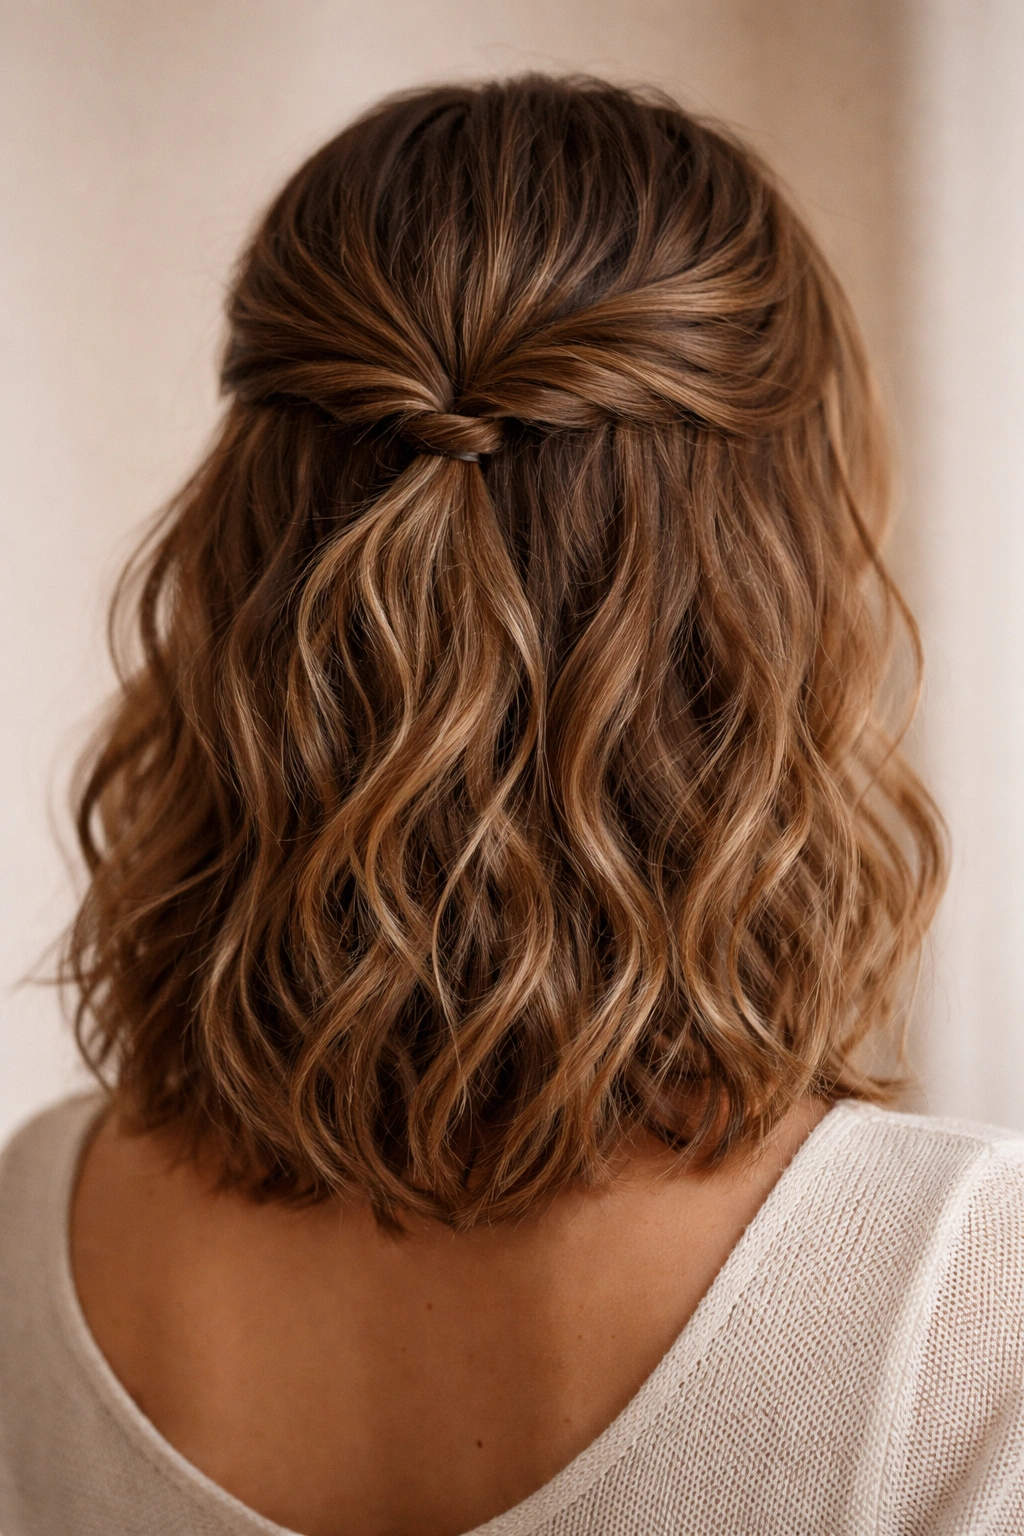
This is the foundational half-up that every person with wavy hair should master because it works with any hair texture and takes genuinely less than 60 seconds to execute. The twist creates natural texture while staying polished enough for work, weekend plans, or family photos.
Why It Works for Wavy Hair
Twisting locks the wave pattern in place rather than fighting against it. When you twist a section of wavy hair, the twist itself becomes a visual anchor that makes even loose, undefined waves look intentional and styled. The tension of the twist also keeps flyaways controlled without making you look slicked-back or overly done.
How to Perfect Your Twist
Start by gathering a section of hair from one temple back to roughly mid-scalp — about 1 to 1.5 inches wide if you have fine hair, up to 2 inches if you have thicker texture. Twist that section loosely (tight twists flatten your waves; loose twists enhance them) all the way from front to back, then secure it with a bobby pin at the crown or with a small elastic if you want a slightly more finished look. The key is keeping tension gentle — your twist should feel relaxed enough that flyaways can still poke out slightly, which is exactly what makes this look effortlessly wavy rather than overly controlled.
Pro tip: Twist away from your face rather than toward it. Twisting away from your face is more flattering for nearly all face shapes because it draws attention upward and creates a subtle lift at the crown.
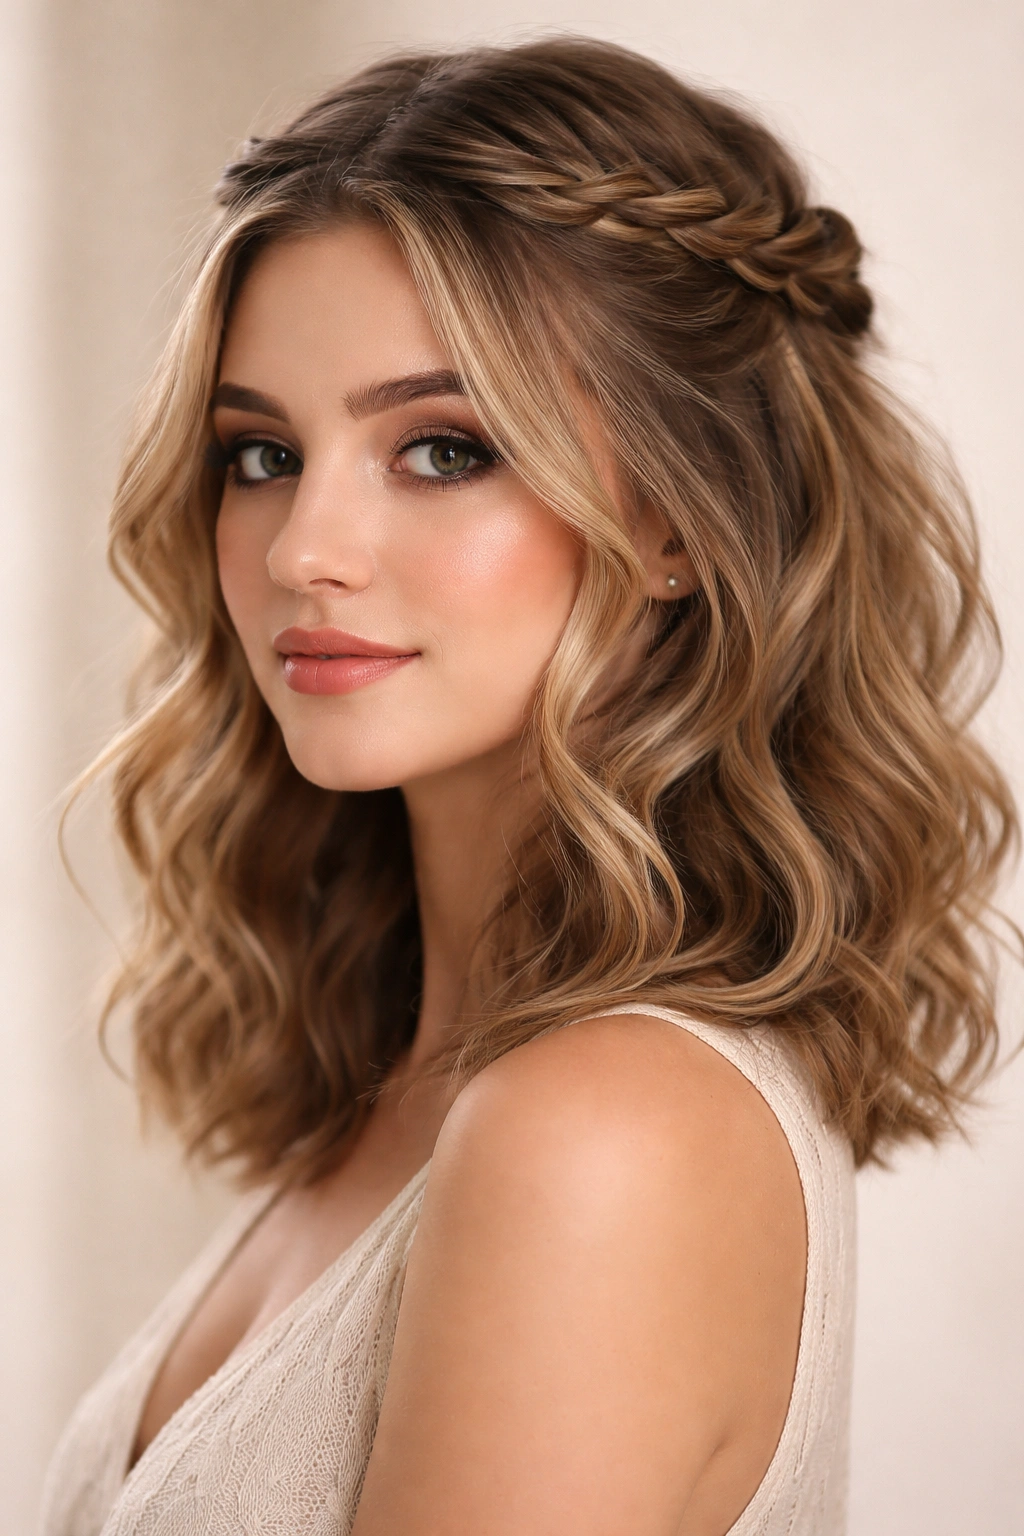
2. The Braided Half-Up with Face-Framing Strands
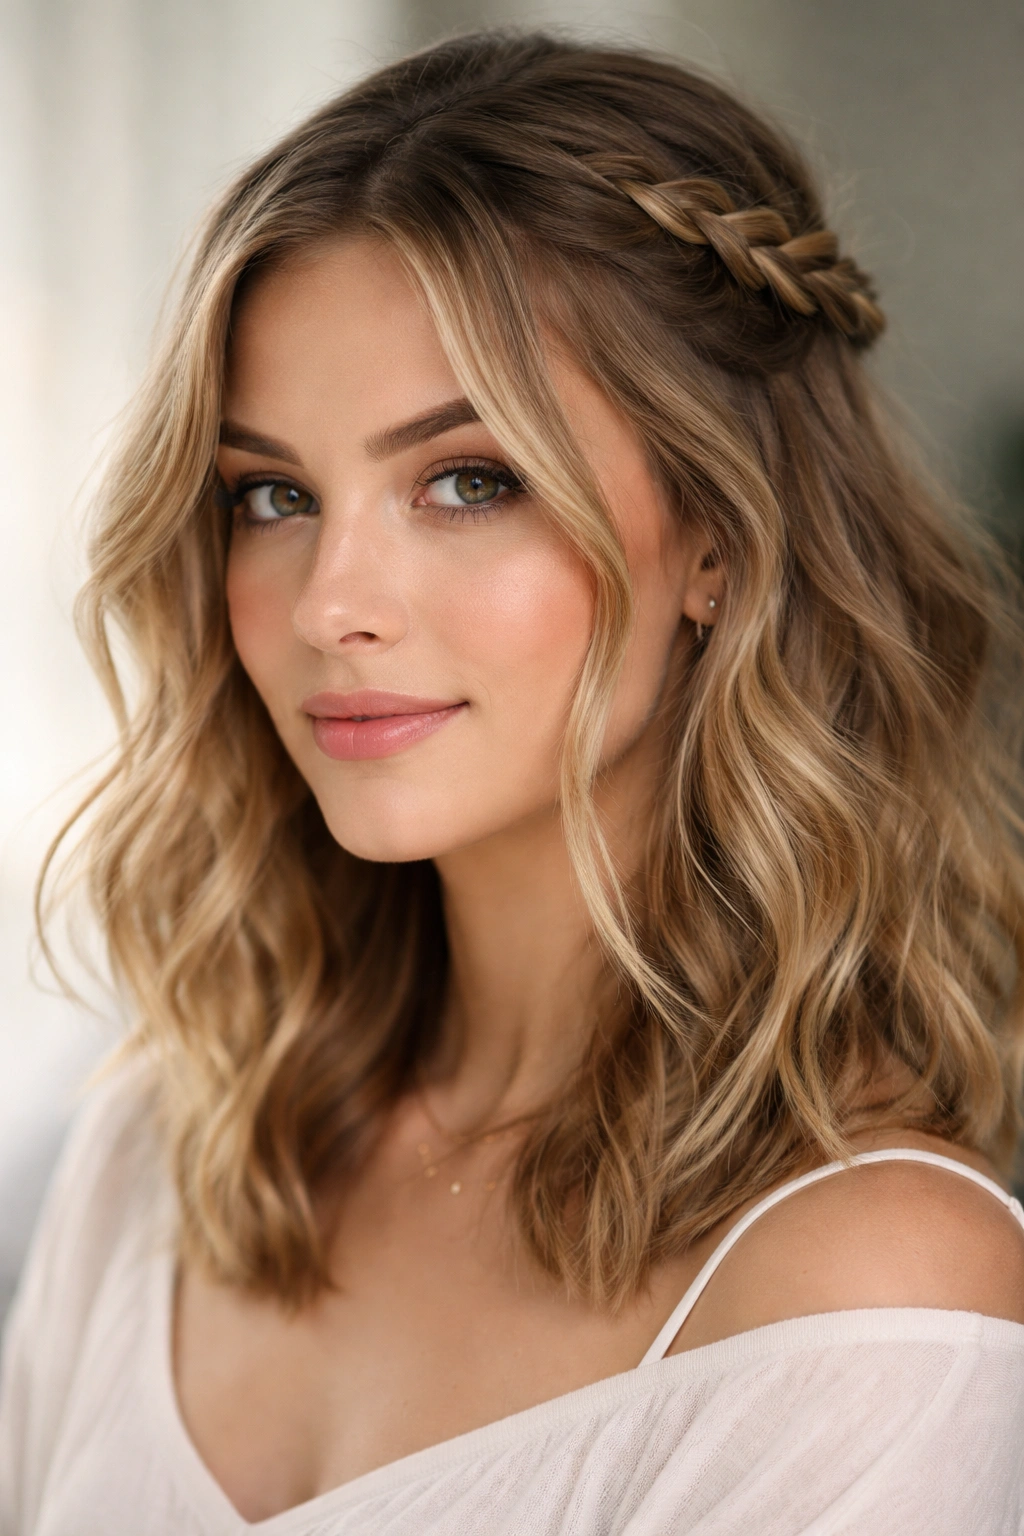
A braid adds sophisticated texture and keeps wavy hair protected and defined throughout the entire day. This style is particularly stunning if you have medium to thick waves because the braid sits beautifully on top of that underlying texture.
What Makes Braids Perfect for Waves
When you braid waves together, you’re not fighting the natural movement — you’re channeling it into a defined pattern that looks intentional. Waves naturally want to create dimension; a braid gives them a framework to express that texture in. Plus, a braid is one of the few hairstyles that actually looks better slightly undone, with wispy pieces escaping, which plays directly into how wavy hair naturally behaves.
Executing the Braid Half-Up
Take a 2-inch section from your temple on one side and begin a loose three-strand braid. Braid it back toward your crown — not so tight that it flattens your waves, but tight enough that it holds structure. When you reach the crown, secure the end of the braid with a bobby pin and leave the rest of your hair down. Then gently pull a few small sections of hair loose around your face to frame it softly. This creates that intentionally undone look that makes wavy hair feel effortless rather than fussy.
If you want even more texture, you can braid a small section on both sides of your head and anchor both braids together at the crown with bobby pins, creating a subtle crown effect without the commitment of a full halo braid.
Worth knowing: Slightly damp wavy hair braids much more easily than completely dry hair. If your waves are dry and resisting the braid, mist them with a light texturizing spray or even plain water, wait 30 seconds, and try again. The moisture softens the wave pattern just enough to allow the braid to catch.
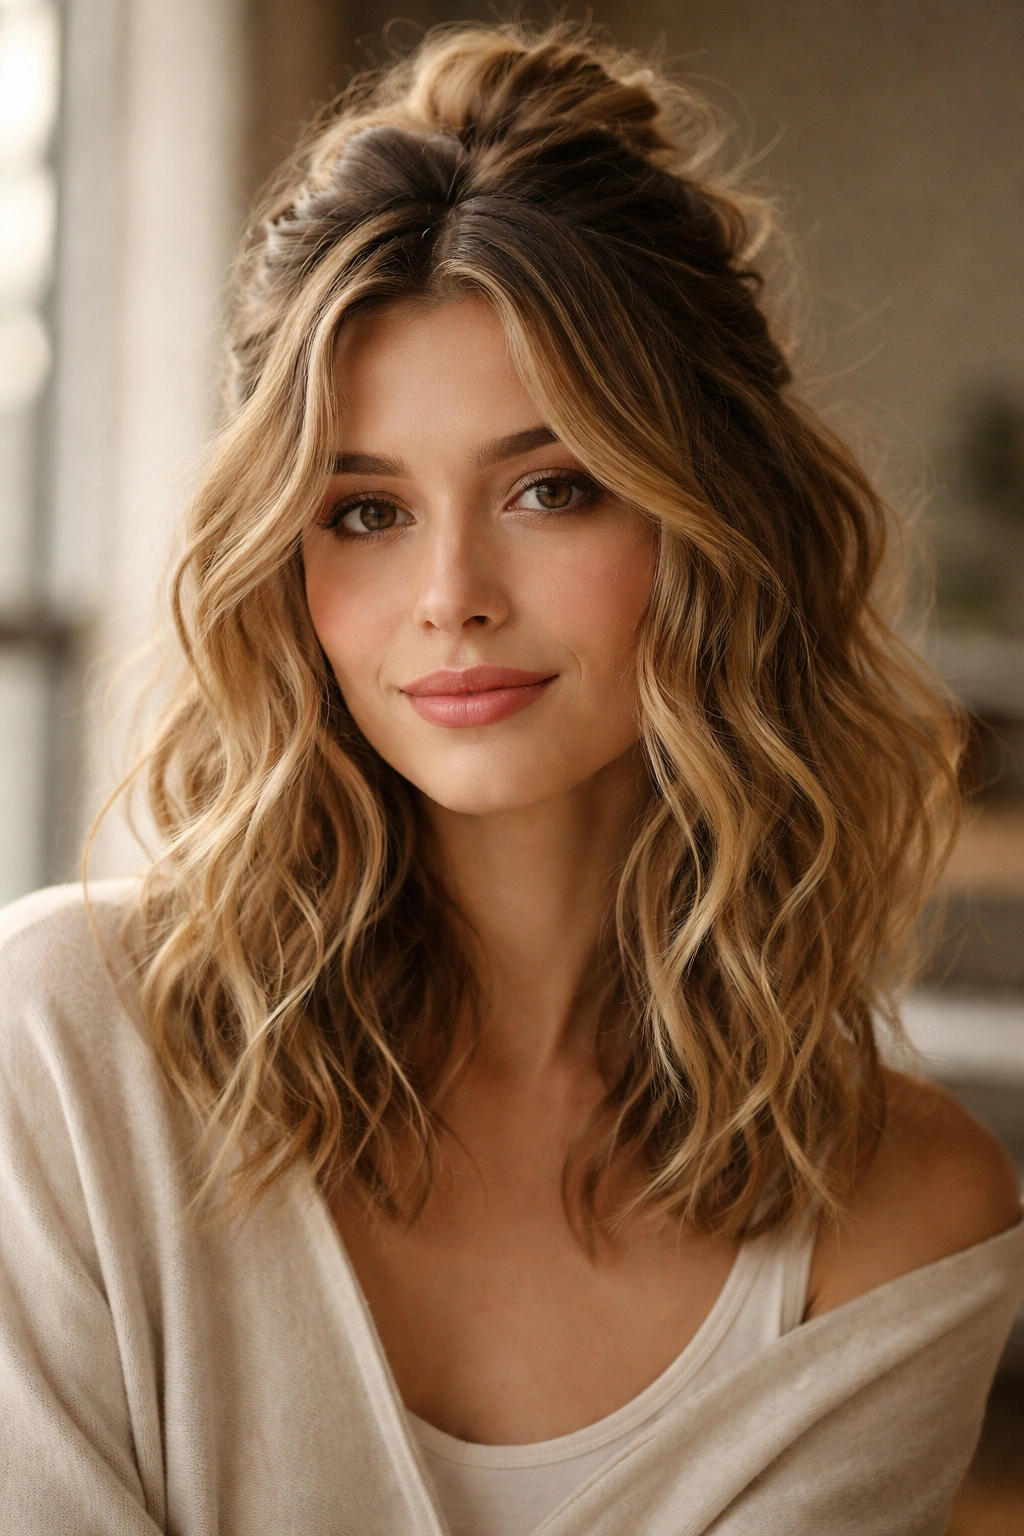
3. The Textured Bun Half-Up
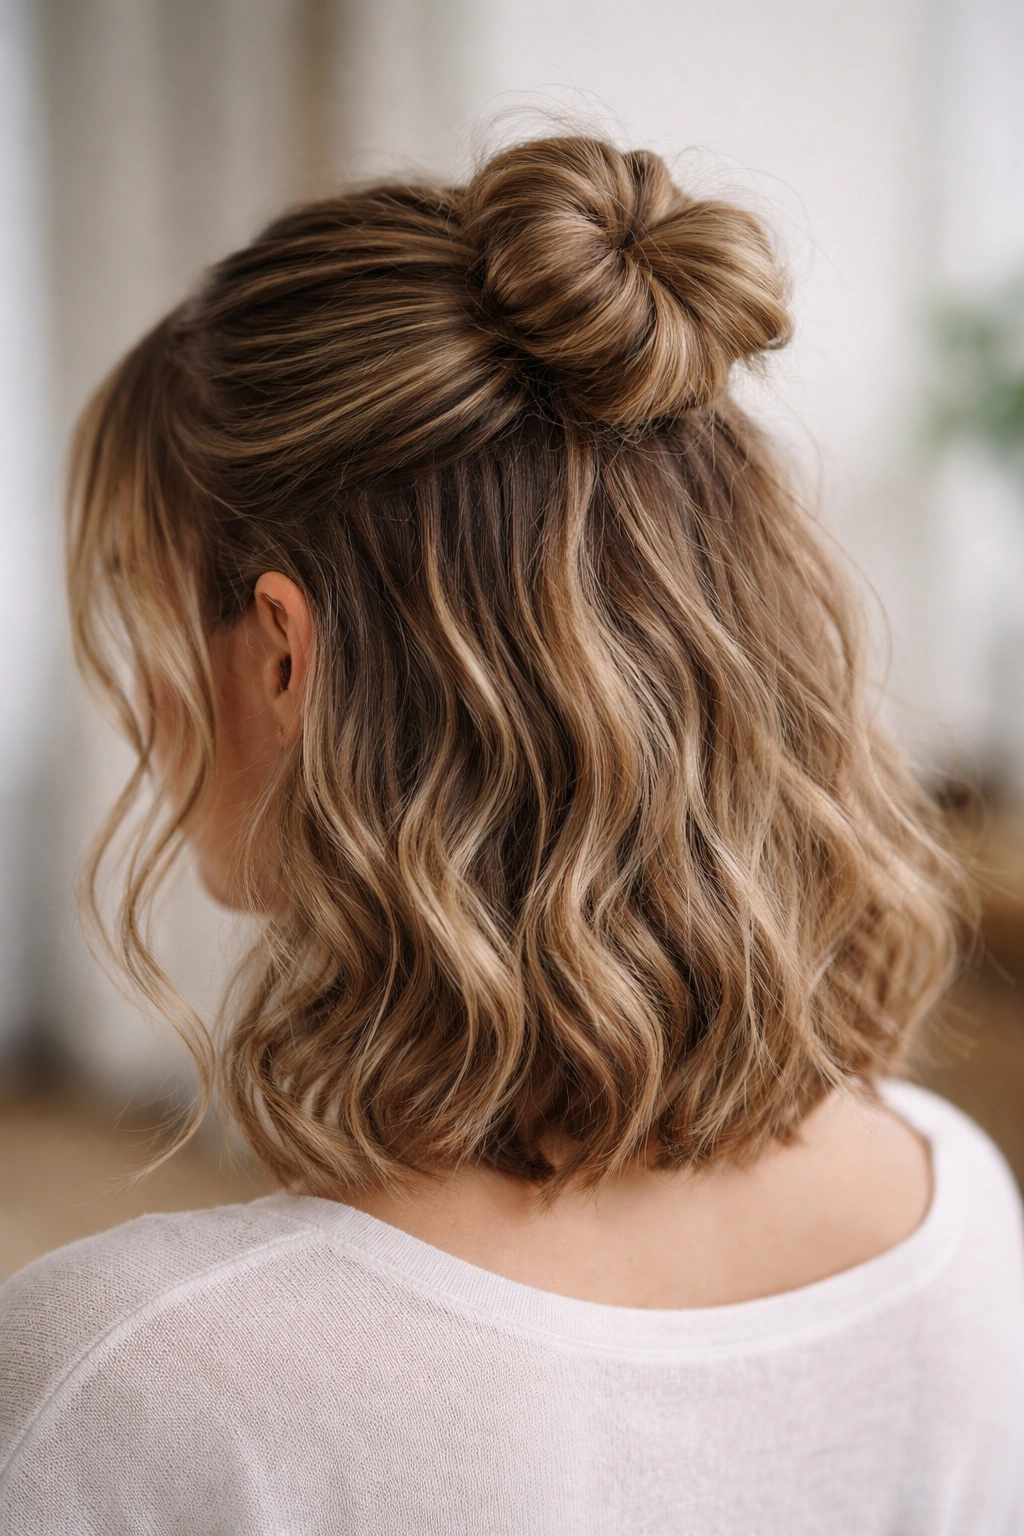
A small bun positioned at the crown creates an instantly polished half-up that works for everything from casual brunch to professional settings. The bun doesn’t have to be perfectly neat — in fact, textured and slightly imperfect looks more sophisticated on wavy hair than a tight, controlled bun ever could.
Building Texture Into Your Bun
The secret to a beautiful half-up bun on wavy hair is building volume and texture rather than smoothing everything flat. Gather your top section into a small elastic at the crown, then backcombing the gathered section very lightly with a fine-tooth comb creates texture that makes the bun look thicker and more interesting. Twist or braid the gathered section loosely, then wrap it around itself to form a soft bun.
Securing Without Sacrificing Movement
Use bobby pins to anchor the bun loosely rather than clamping it down tightly. You want the bun to feel like it could unravel slightly, which is the whole aesthetic of an intentionally undone style. Leaving a few shorter pieces loose around your face softens the overall look and prevents it from reading as too formal or severe.
This style works especially well if you have shoulder-length or just-past-shoulder waves because the length gives you enough hair to build a substantial bun while still leaving enough underneath for that pretty wave texture to show through below.
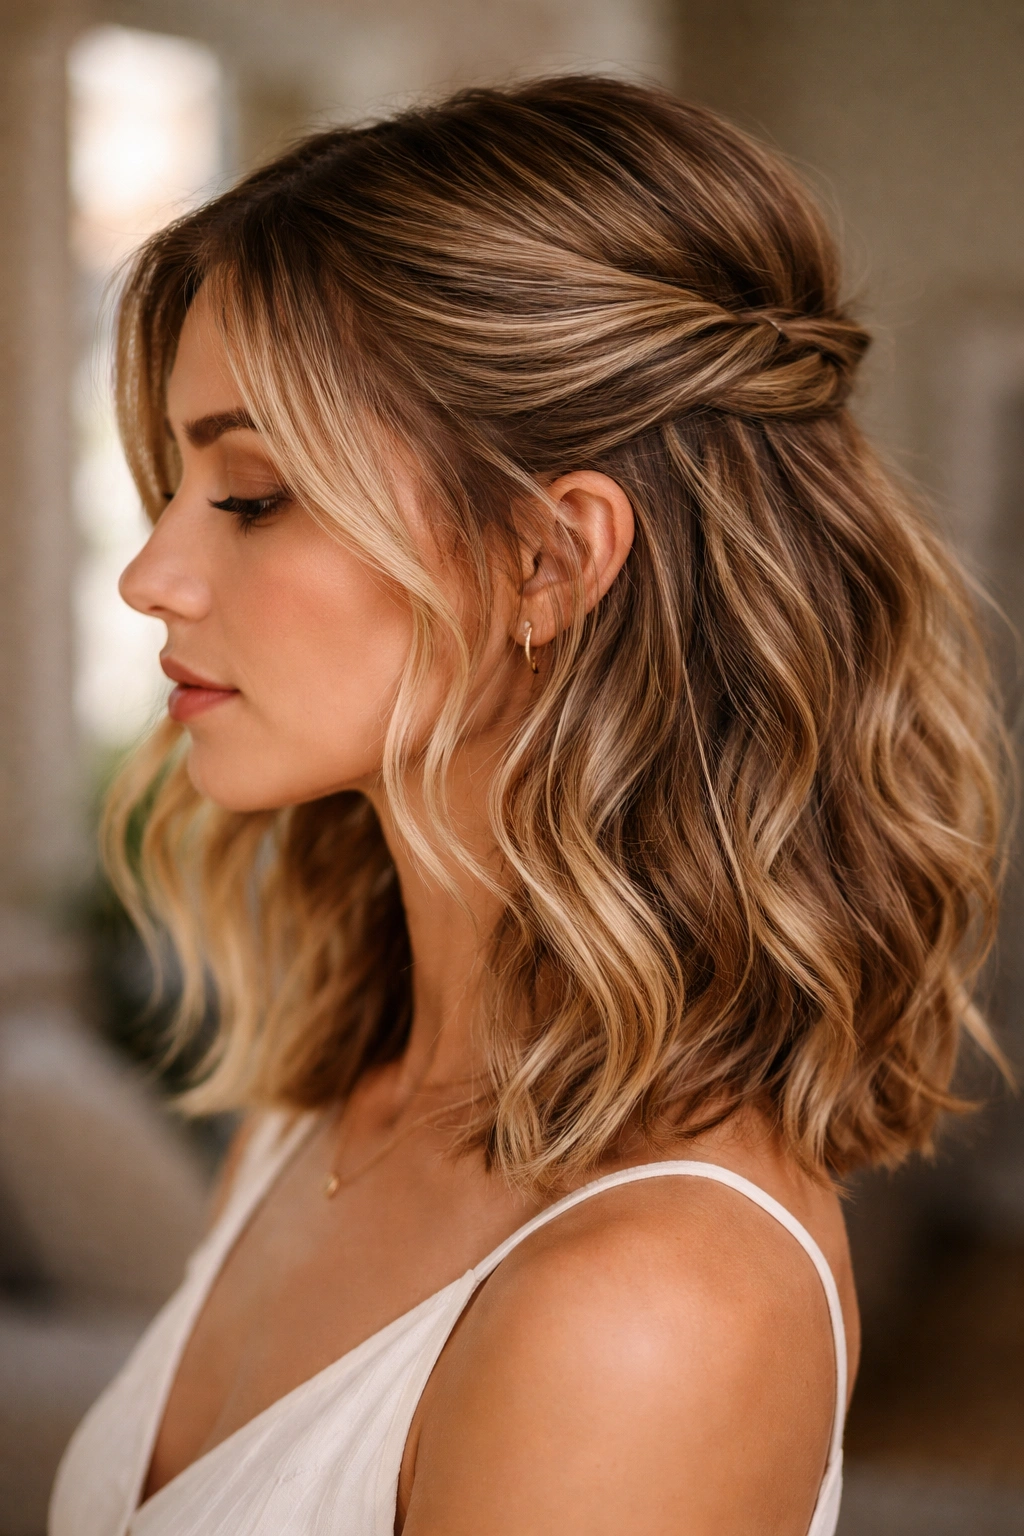
4. The Sleek Pulled-Back Half-Up
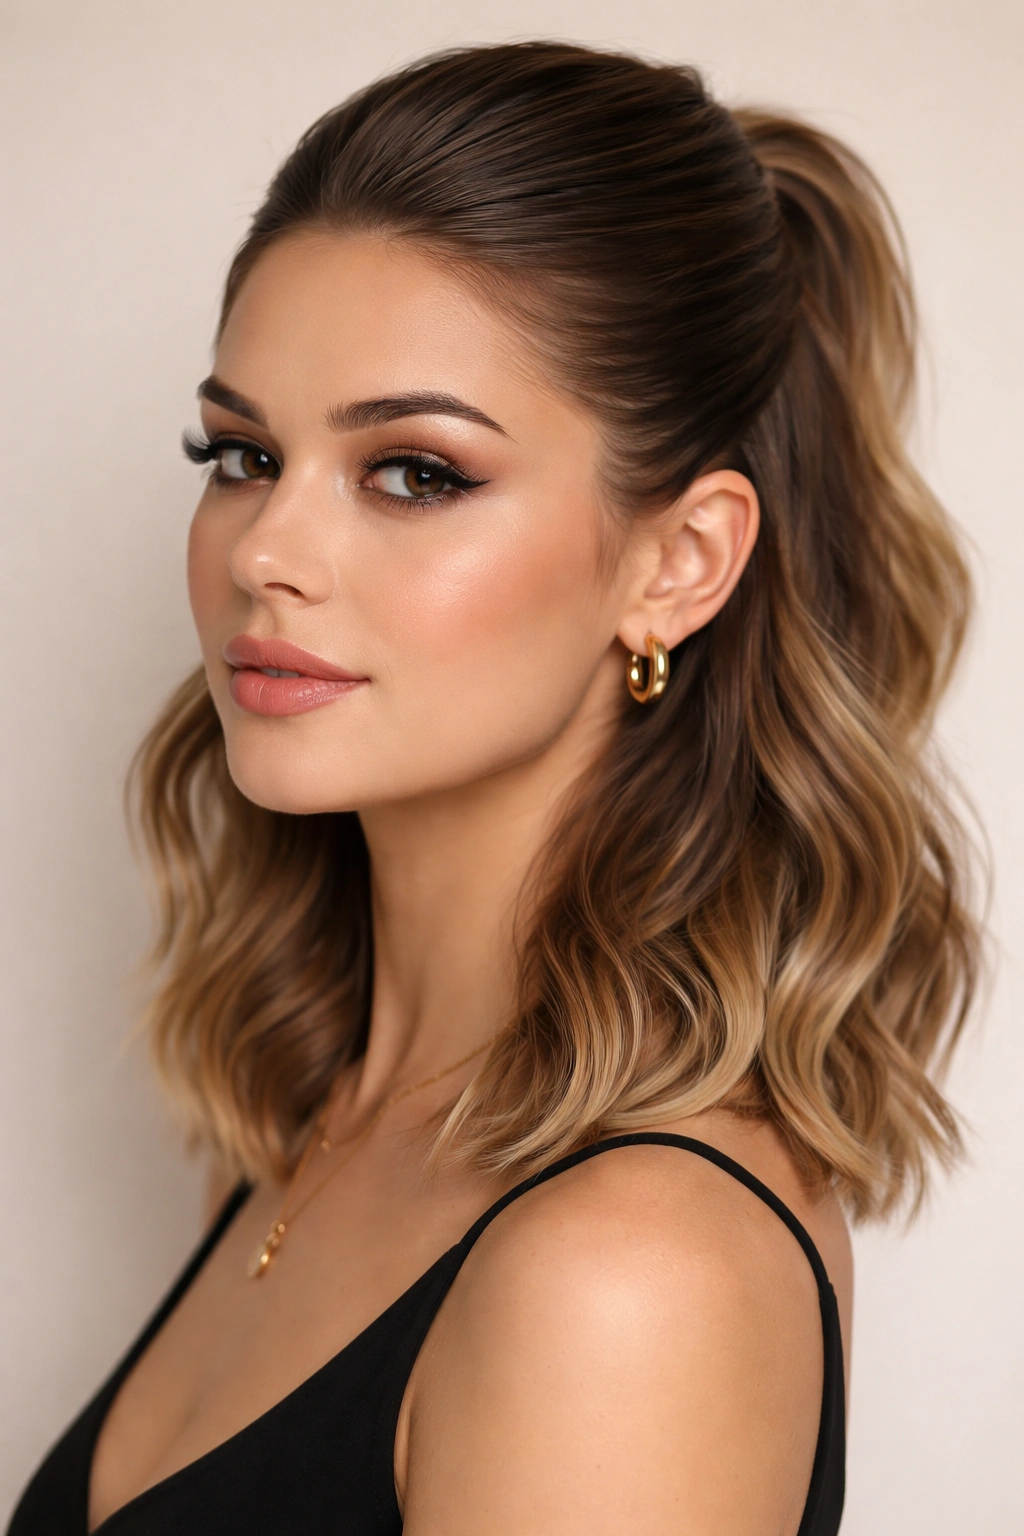
Sometimes wavy hair calls for a bit of contrast, and pairing sleek styling with your waves is a surprisingly elegant move. This half-up takes the top section and smooths it back, creating polish up top while letting your natural waves shine below.
Creating Sleekness on Wavy Hair
Smoothing a section of wavy hair requires a light hand and the right products. Apply a smoothing serum or lightweight anti-frizz cream to the top section before pulling it back — this helps the waves relax enough to appear sleek without completely destroying the wave pattern. Use a fine-tooth comb or a paddle brush with boar bristles to gently smooth the section back.
The Polished Anchor
Pull the top section straight back (not to one side, which can look unintentional) and secure it with a small elastic or a clip at the crown. The contrast between the smooth top and the undisturbed waves below creates a sophisticated silhouette that’s less casual than a full loose style but less formal than a completely controlled updo.
Insider note: This look photographs beautifully because the sleek top catches light differently than the textured waves below, creating visual depth in photos that makes your hair look thicker and more styled.
5. The Half-Up with Pearl Clips

Pearl clips have made a major comeback, and they’re especially stunning on wavy hair because they catch light in a way that draws attention to your wave pattern. This half-up is simple to execute but feels noticeably elevated because of the elegant clip.
Why Pearl Works with Waves
Pearl is inherently feminine and slightly vintage-feeling, which pairs perfectly with the soft, romantic quality of waves. When you use a pearl clip to anchor a half-up, you’re adding a jewelry-like element that makes even a casual outfit feel intentional and styled. The clip also catches light in a way that highlights your waves’ dimension.
Positioning Your Pearl Clip
Gather a section of hair from one or both sides of your head and bring it back to the crown. Instead of using a standard elastic, use a pearl clip to secure it. You can use a claw clip, which holds the gathered section, or a smaller decorative clip that you position where a bobby pin would normally go. The pearl becomes a small focal point that draws the eye to your crown, which is flattering for nearly every face shape.
This style works beautifully for second-day or third-day hair, when your waves have relaxed slightly and you have a bit of texture and separation that makes them look extra voluminous.
6. The Twisted Crown Half-Up
A twisted crown creates the effect of a halo without the full commitment of a braided crown. This style works on shorter wavy hair and creates a genuinely polished look that’s still soft and romantic.
Building the Crown Effect
Instead of doing one central twist, you’re creating two or more twists that work together to frame your entire crown. Start by taking a small section from one temple, twisting it back loosely, and securing it at the center back of your crown with a bobby pin. Then take a section from the other temple and do the same thing, meeting the first twist at the center.
If you have longer short hair (think shoulder-length or slightly longer), you can even do a third twist from the back — taking a small section from the nape and twisting it up to meet the other two twists for a complete crown effect.
Creating Visual Softness
Keep every twist loose and relaxed so that your wave pattern shows through. Pull a few small pieces of hair loose around your face to break up the line of the twists and add softness. This prevents the style from looking too constructed or formal, which is key for keeping wavy hair looking like you rather than like you’re trying too hard.
Real talk: This style is actually easier to execute than it sounds because the twists don’t need to be neat or perfectly uniform. In fact, slightly irregular, wispy twists look more sophisticated on wavy hair than perfectly even ones.
7. The Half-Up with Loose Waves
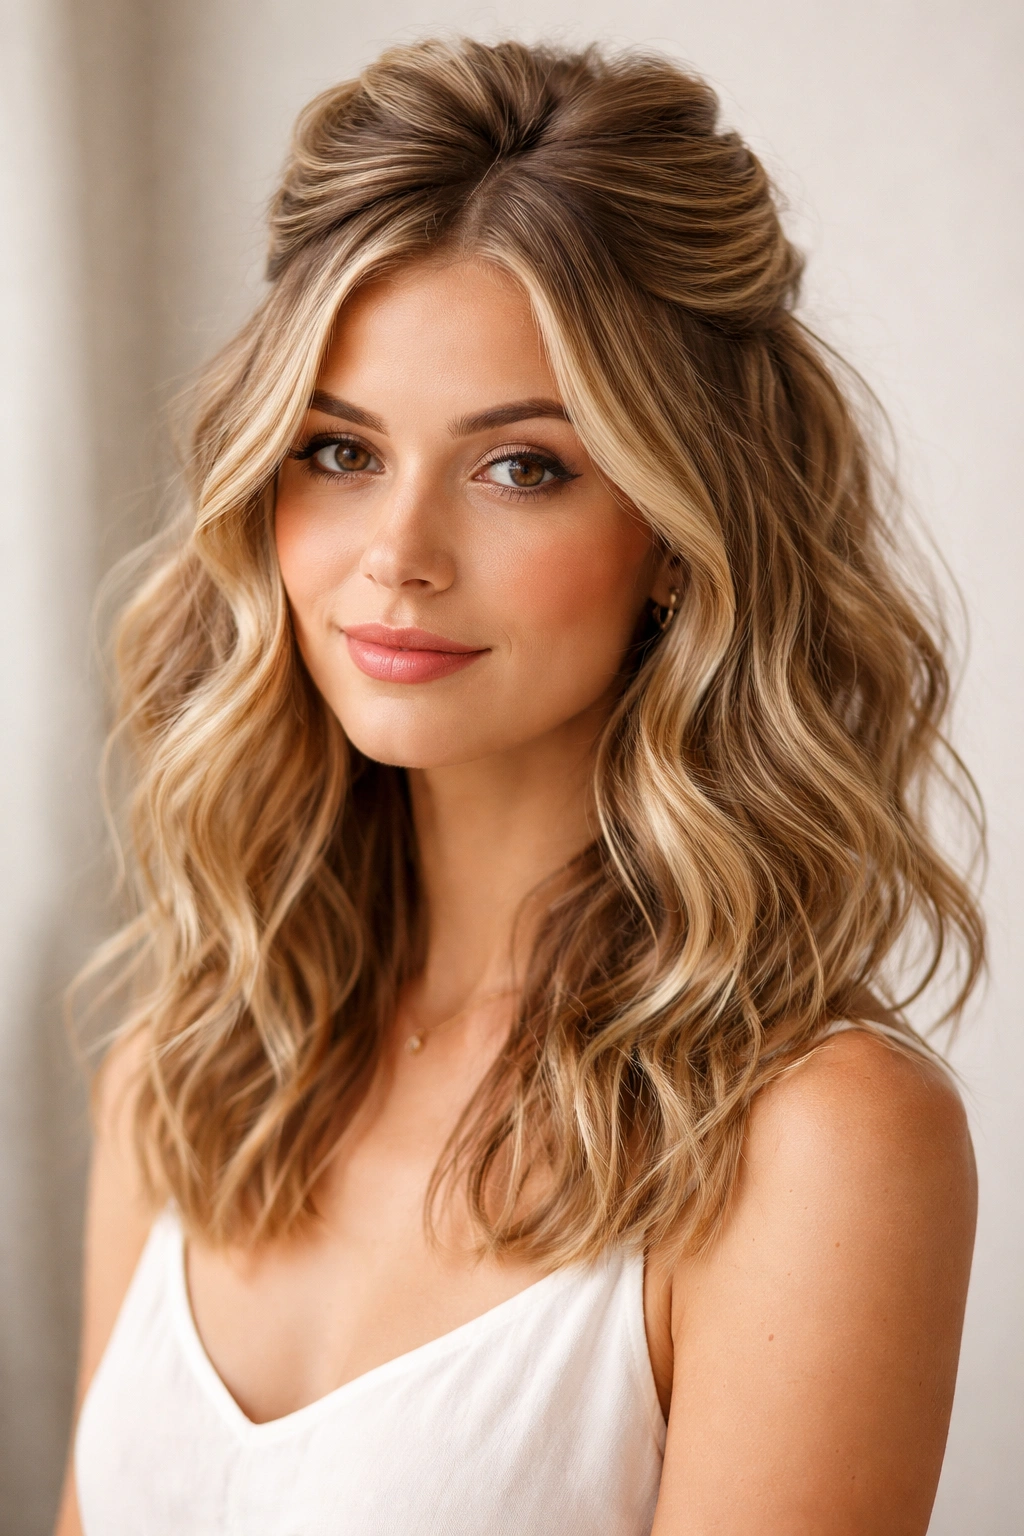
Sometimes the most elegant half-up is one where you’re not doing much at all — just gathering the top section and letting the rest of your hair speak for itself. This style is especially beautiful when you’ve intentionally enhanced or defined your waves beforehand.
Keeping Waves the Star
The point of this style is to show off your wave pattern, so the gathering needs to be subtle enough that it doesn’t distract from the waves below. A small elastic at the crown or even just a few well-placed bobby pins to anchor the top section is all you need. Resist the urge to smooth or style the top section — if anything, make it match the texture of the bottom.
Adding Definition Without Effort
If your waves are naturally loose or you want them to look more relaxed, apply a lightweight wave-defining product to damp hair, then let it air dry or use a diffuser on low heat. Scrunch the product in rather than smoothing it down, which helps your waves develop more defined, separate texture. Once dry, simply gather the top section and you have an effortlessly styled half-up.
This look genuinely works better the second or third day after you wash your hair, when your waves have relaxed slightly and gained more separation and texture. Fresh-from-washing waves can sometimes look a bit limp; older waves have more personality.
8. The Pinned-Back Half-Up
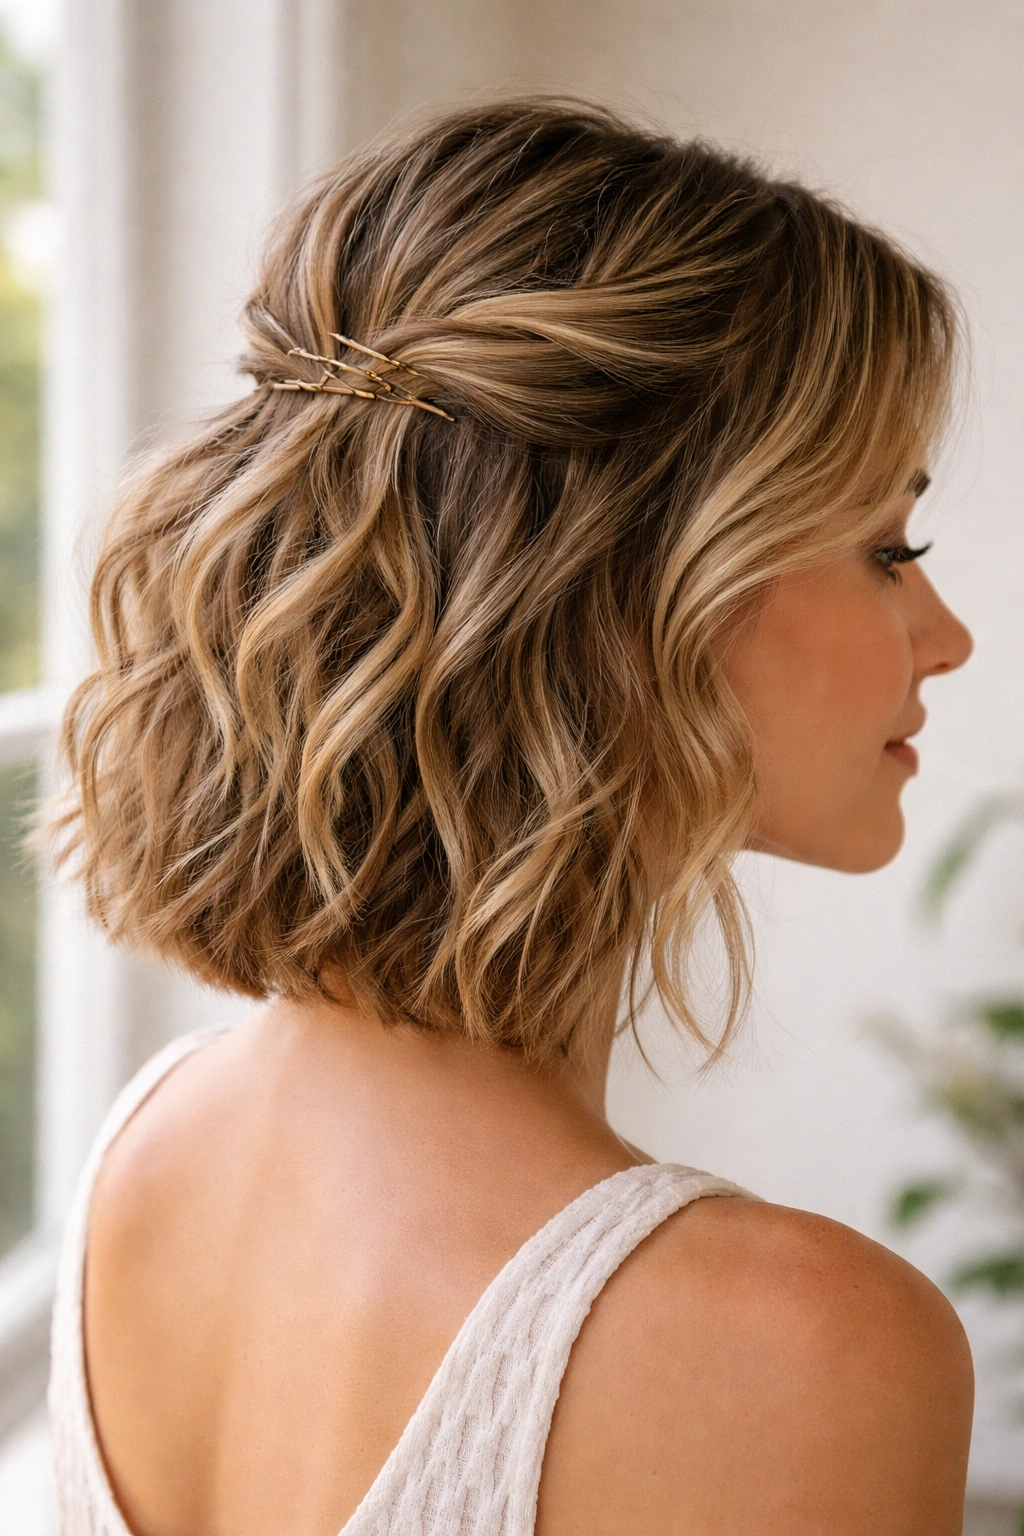
Using bobby pins instead of an elastic creates a different visual effect — less overtly “styled” and more casually polished. This approach works beautifully on wavy hair because the bobby pins disappear into your wave pattern rather than creating a visible anchor point.
Mastering the Bobby Pin Technique
Gather your top section loosely — it doesn’t need to be precisely centered or perfectly shaped. Use two to four bobby pins to anchor it at the crown, positioning the pins so they catch the underlying waves and lock your top section in place. The beauty of this method is that it creates an effect that’s somewhere between a full updo and completely loose hair.
Creating Visual Interest
Because there’s no elastic creating a defined gathering point, this style looks more fluid and less “done.” You can leave wispy pieces around your face that naturally fall out of the pins, and it reads as intentional rather than sloppy. The pins themselves can disappear completely if you hide them in your wave pattern, or you can use them as a design element by choosing decorative bobby pins that match your hair color or add a metallic accent.
This style is particularly useful on shorter wavy hair (chin-length to shoulder-length) because you don’t have much length to work with, and pins are more versatile for shorter lengths than elastics sometimes are.
9. The Half-Up Ponytail Hybrid
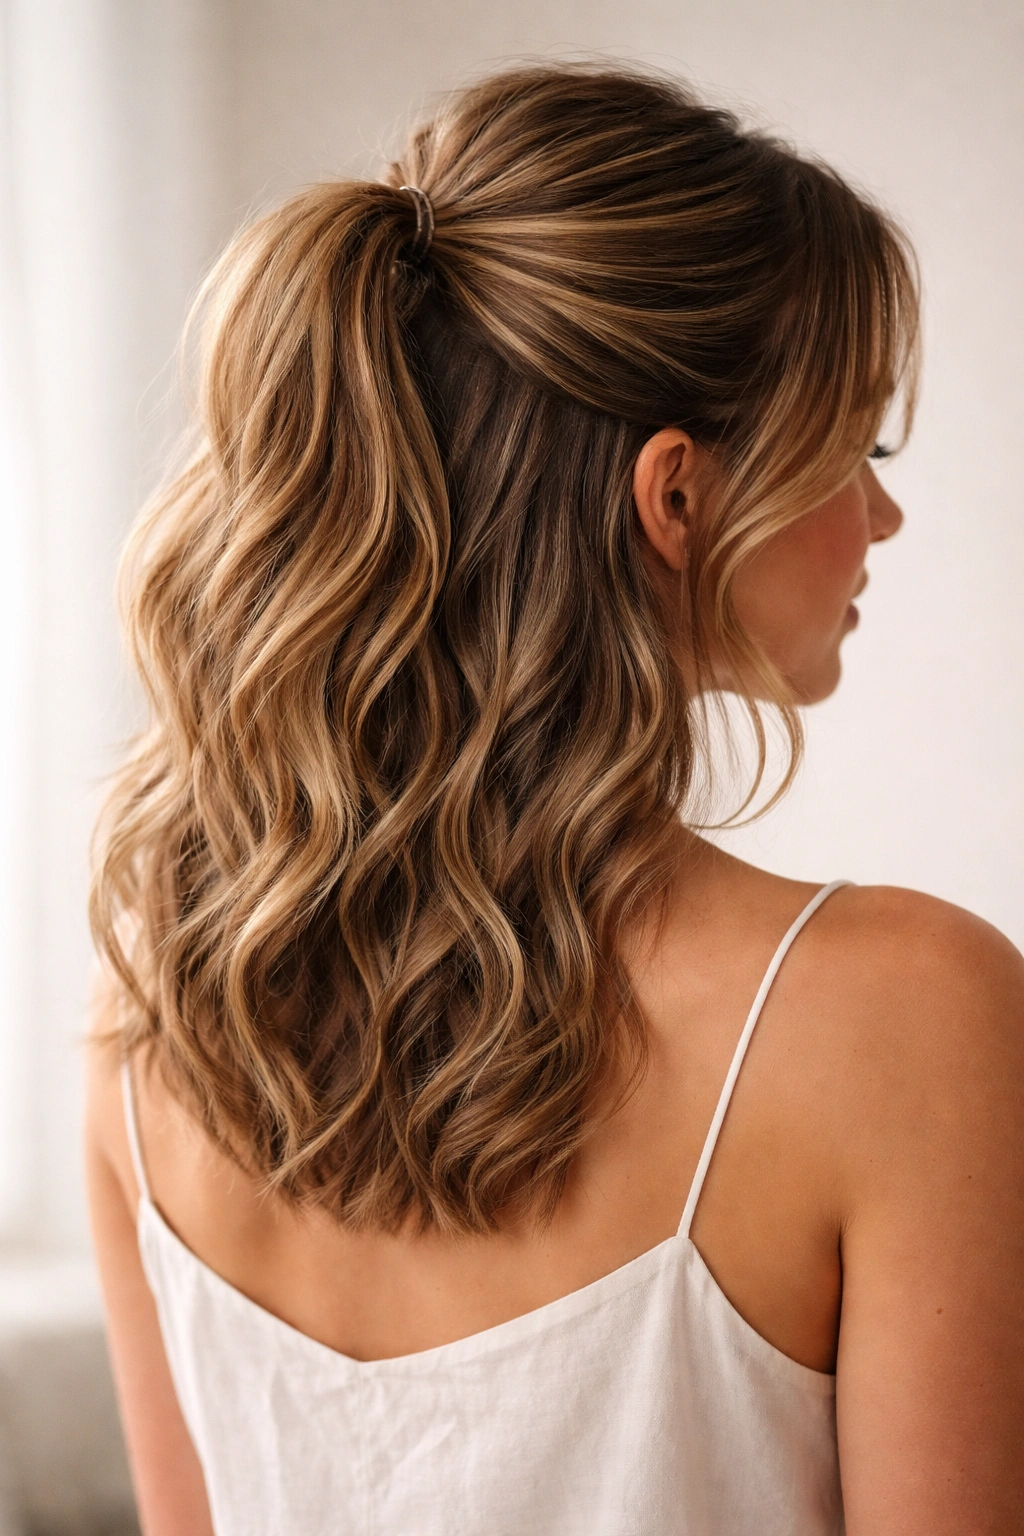
This style sits in the middle ground between a half-up and a ponytail — you’re gathering more hair than a traditional half-up, but not creating a full ponytail. It’s surprisingly versatile and works beautifully on wavy hair because the gathered section has enough volume to feel substantial.
Finding Your Sweet Spot
Instead of gathering just the very top section, take roughly the top third of your hair. This means gathering from roughly mid-ear level all the way back, creating a larger gathered section than a traditional half-up. Secure it with an elastic at the crown, then let the bottom two-thirds hang loose.
Adding Texture to the Gathered Section
Once the section is gathered, gently backcomb it or scrunch it to create texture within the ponytail base. This prevents the gathered section from looking sleek or flat and helps it integrate visually with the loose waves below. You can even wrap a small piece of hair around the elastic to hide it, which creates a polished finish.
This hybrid style works particularly well for athletic activities or for keeping hair out of your face without committing to a full, high ponytail. It’s also great for second-day hair when you want a refresh without fully re-styling.
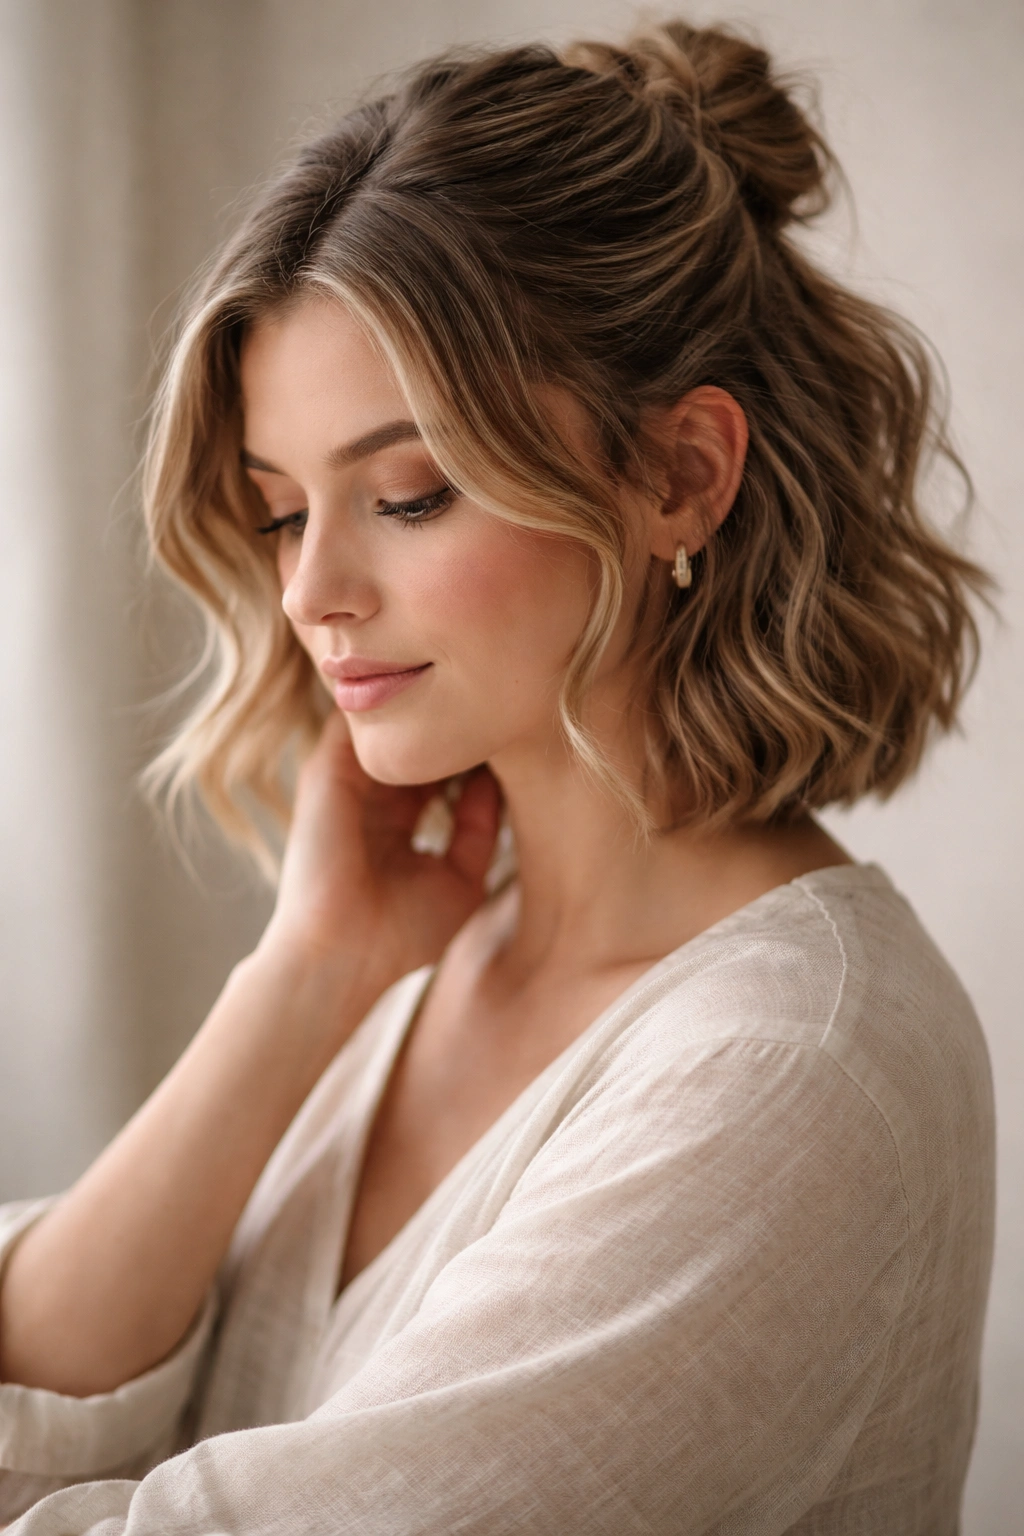
10. The Voluminous Half-Up Bun
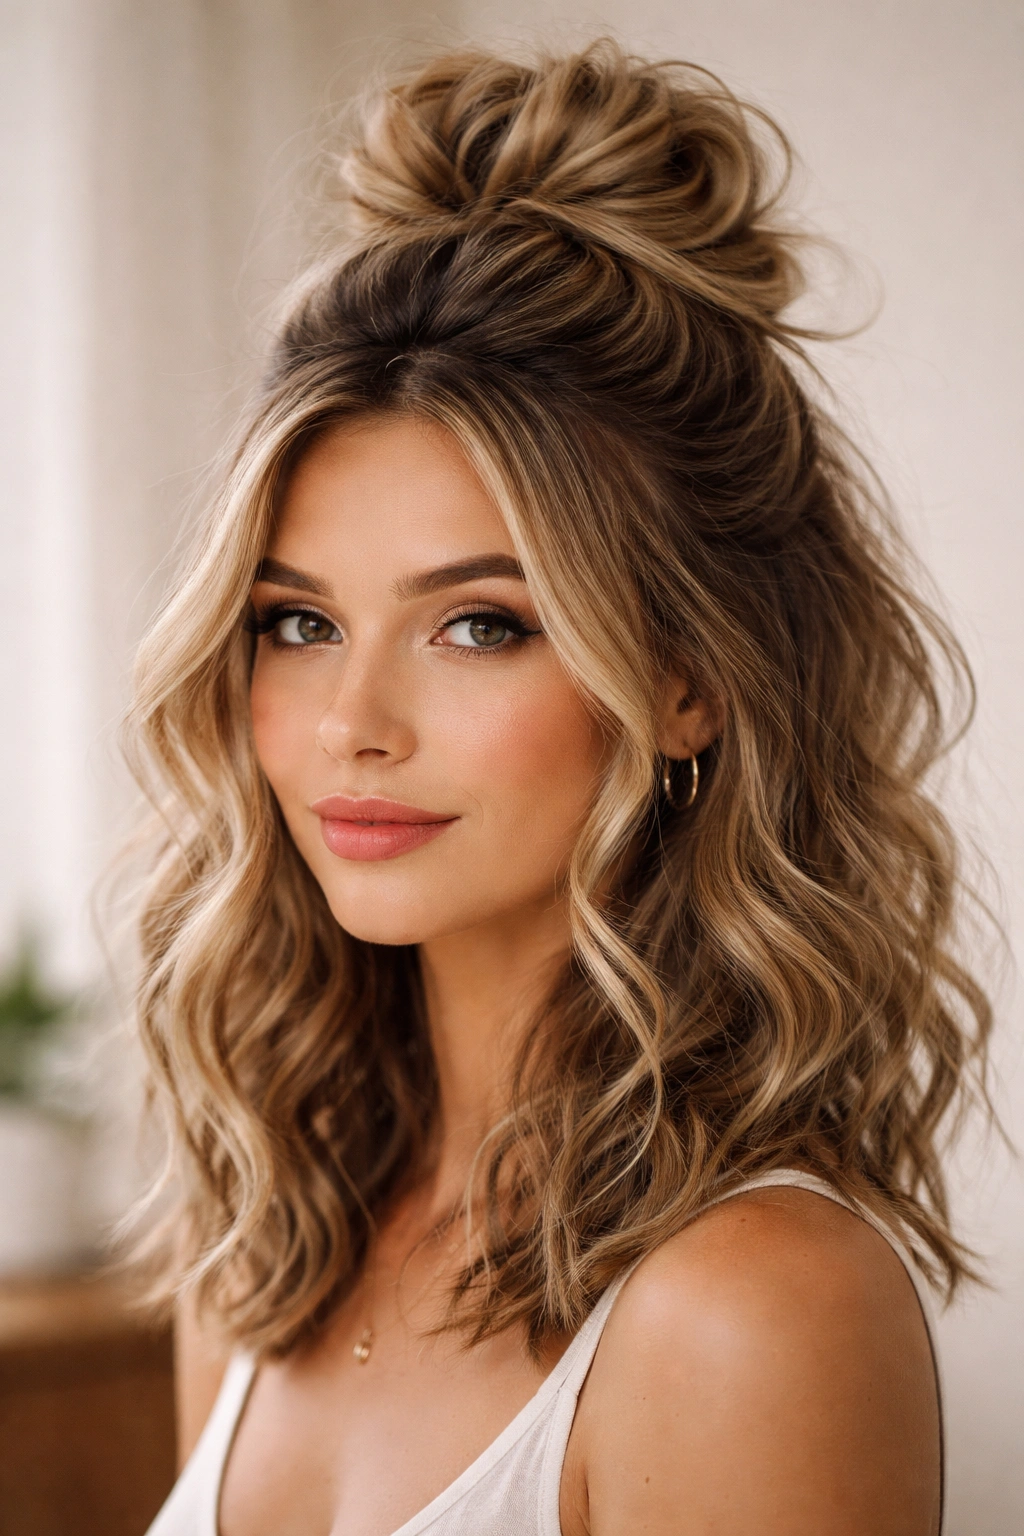
If you want maximum impact with your half-up, a voluminous bun packed with texture is your answer. This style works especially well on thick, wavy hair and creates a noticeably polished look that still feels effortless.
Building Volume Into Your Bun
Start by gathering your top section with a slight tease or backcomb at the root — this creates immediate volume at the crown. Take that gathered section and twist it loosely, then wrap it around itself to form a soft, slightly messy bun. Don’t worry about making it perfectly neat; in fact, the more texture and intentional messiness, the better it looks.
Creating Dimension and Movement
Once your bun is formed, gently pull small pieces loose from around the bun itself to create a softer, less constructed appearance. You want the bun to look like it could fall apart at any moment, which is the whole aesthetic of this style. Pull a few pieces loose around your face as well to soften the overall look and prevent it from feeling too polished.
Use bobby pins to anchor the bun loosely rather than pulling it tight. You’re going for soft and intentional, not controlled and formal. This style photographs beautifully and genuinely reads as more sophisticated than a tightly pulled bun, even though it’s technically less structured.
Worth knowing: This style holds better if your hair has a bit of texture or wave to it already. Try styling it on second or third-day hair rather than freshly washed hair for the easiest execution and the longest-lasting hold.
11. The Half-Up with Claw Clip
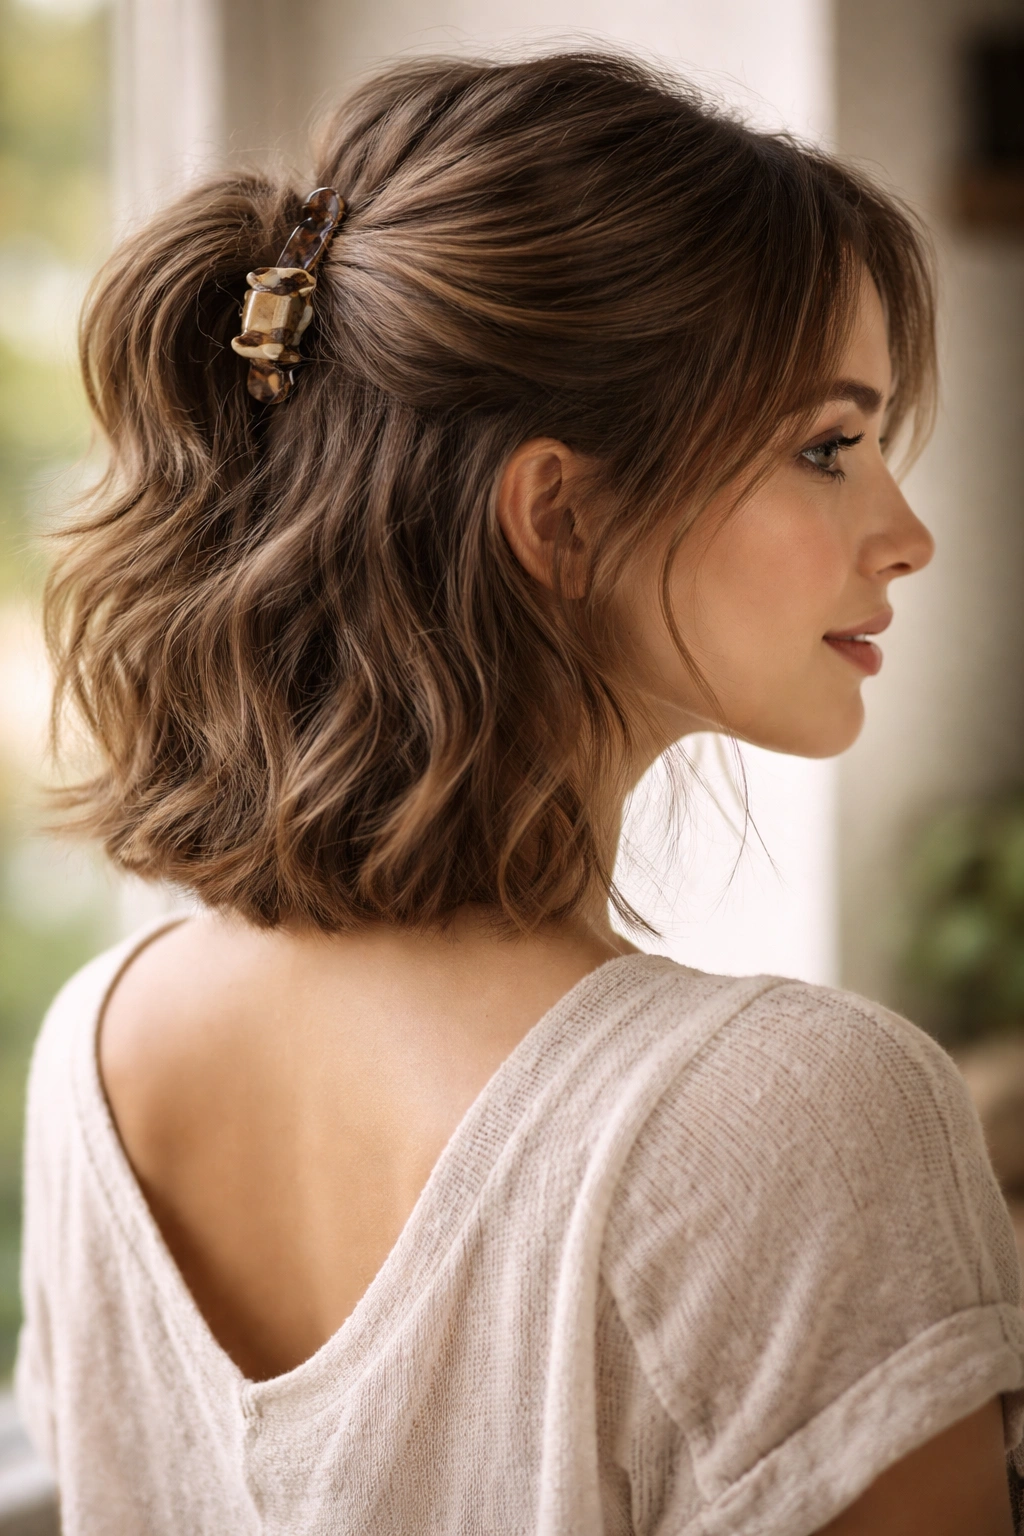
Claw clips are having a major moment, and they’re arguably the easiest way to create a polished half-up in seconds. The clip itself becomes a design element that adds visual interest to your style.
Choosing the Right Claw Clip
Size matters significantly with claw clips for half-up styles. A medium-sized clip (roughly 3 to 4 inches) works best for short hair, while a larger clip can feel overwhelming on delicate features. The color of your clip matters too — matching it to your hair color makes it nearly disappear, while choosing a contrasting color or a patterned clip makes it an intentional design element.
Positioning Your Claw Clip
Gather your top section loosely and secure it with your claw clip at the crown, angling the clip slightly to one side rather than centering it directly at the back of your head. This creates a more interesting silhouette and is more flattering for most face shapes. Leave wispy pieces loose around your face, and you have an instantly polished style.
This method is genuinely foolproof because the claw clip grips your hair without requiring any technical skill. It’s perfect for mornings when you want a put-together look without spending time styling, and it holds well throughout the entire day without causing headaches.
12. The Asymmetrical Half-Up
An asymmetrical half-up creates visual interest and is more flattering on certain face shapes than a centered style. This approach works beautifully on wavy hair because the gathered section on one side creates a different visual balance than gathering from the center.
Building Asymmetry Intentionally
Instead of gathering from the center of your scalp, gather your top section entirely from one side of your head. Take a thicker section than you would for a traditional half-up, pulling from your temple all the way back to roughly the center of the back of your head. Secure it with an elastic or pins, then let the rest of your hair flow naturally below.
Choosing Your Side
For most face shapes, gathering to the side opposite your part is most flattering because it creates visual balance. If you naturally part your hair on the left, try gathering your half-up section on the right side. The gathered section creates volume on that side, which balances out the visual weight of the part on the opposite side.
Leave loose waves on both sides of your face to frame it softly, and this style reads as effortlessly chic rather than overly constructed. It’s perfect for people who find centered styles feel too formal or stuffy.
13. The Half-Up with Ribbon or Hair Tie
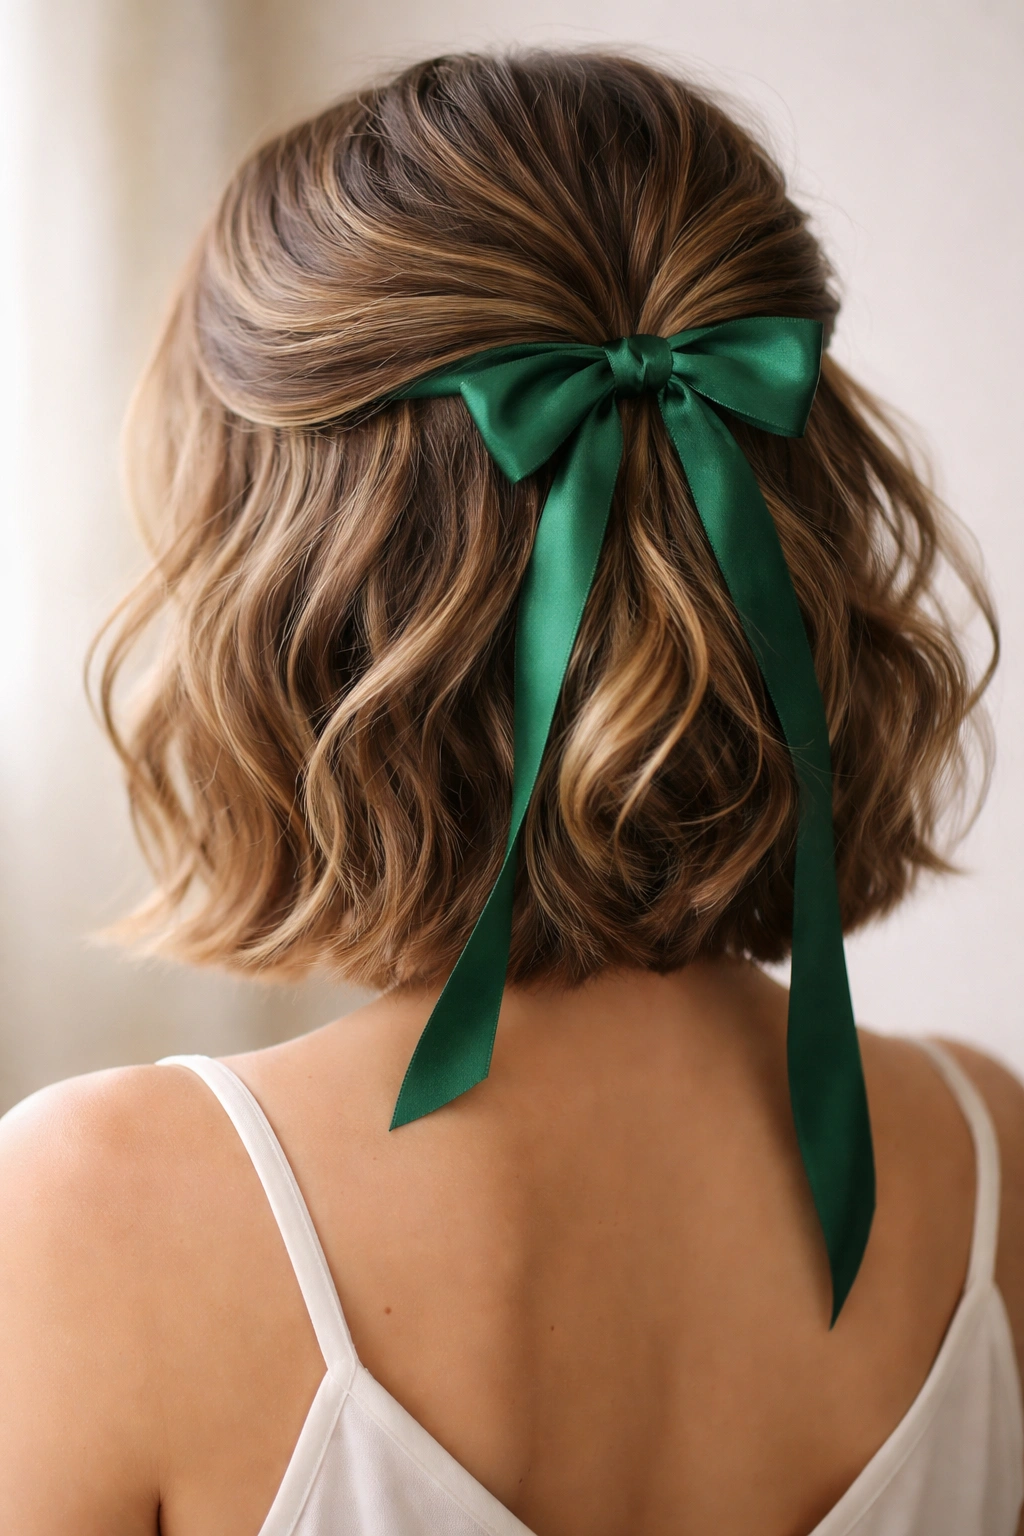
Threading a ribbon through a half-up or wrapping a ribbon around your elastic transforms a simple style into something noticeably more elevated. This approach works beautifully on wavy hair because the ribbon becomes a focal point that draws attention to your crown.
Selecting Your Ribbon
Choose a ribbon in a color that complements your hair and skin tone — silk ribbons in jewel tones like emerald or sapphire are stunning, while soft pastels work beautifully for a romantic vibe. The ribbon thickness matters too; a very thin ribbon can disappear into your hair, while a thicker, wider ribbon (roughly 1 to 2 inches) makes a bolder statement.
Two Ways to Incorporate Ribbon
You can thread a ribbon through your gathered section by loosely braiding it along with your hair before you secure it, which creates a subtle detail that shows mostly when you move. Or you can simply wrap the ribbon around your elastic, tying it in a small bow, which creates a more obvious design element. Both approaches add a hint of sophistication without looking overdone.
This style is particularly lovely for special occasions or for elevating a casual outfit. It’s also surprisingly easy to change your look throughout the day — simply swap your ribbon out for a different color if you’re going from work to an evening event.
14. The Effortless Tousled Half-Up
This final style is honestly the easiest one on the list, which is precisely what makes it so perfect for wavy hair. It’s the approach you use when you want to look like you didn’t style your hair at all, even though you very deliberately did.
The Art of Looking Undone
The tousled half-up is all about embracing your waves’ natural tendency toward texture and separation rather than fighting it. Don’t try to smooth your waves, define them perfectly, or create polished sections. Instead, gently gather the top half of your hair loosely and secure it with a small elastic or a few bobby pins. Leave it slightly uneven and slightly imperfect.
Adding Movement Intentionally
Once your hair is gathered, pull a few pieces completely loose around your face and along the sides to create that intentionally undone effect. Don’t worry about flyaways or pieces that don’t sit exactly where you wanted them. Those are exactly what make this style look effortless rather than overthought.
Pro tip: This style actually looks better the more relaxed you can be about it. If you find yourself trying to smooth flyaways or perfect it, you’re working too hard. The whole point is that it looks like you threw your hair up in five seconds and it miraculously looks good.
Final Thoughts
The beautiful thing about short half-ups on wavy hair is that your natural texture does most of the heavy lifting for you. You’re not fighting against your wave pattern; you’re using it to create effortless polish and movement that straighter hair types have to work much harder to achieve. Whether you’re drawn to the sophistication of a twisted crown, the simplicity of a pinned-back style, or the playfulness of a pearl clip, there’s genuinely a half-up approach that matches your personality and your lifestyle.
The real key is understanding that your waves are your superpower here, not a limitation. The slight imperfection of your wave pattern is what makes these styles look refined rather than stiff. Embrace the texture, lean into the movement, and you’ll find that putting your hair up becomes something you actually enjoy rather than a daily chore. Start with whichever style speaks to you most, practice it twice, and then experiment with the others. You’ll quickly find your go-to style — the one that makes you feel confident and looks like you on your best days.