Red hair has a power all its own, and when you combine it with the structured elegance of braids, you’re creating a look that’s both sophisticated and undeniably bold. A braided ponytail isn’t just practical — it’s a statement. Whether your red is a deep burgundy, a vibrant copper, or a fiery crimson, braiding adds texture, visual interest, and the kind of polished edge that works from the office to a night out.
The beauty of braided red ponytails lies in the endless variations. You can go sleek and controlled with a single Dutch braid, or embrace dimension with multiple braids weaving together. You can add loose, lived-in texture for romance, or keep everything tight and geometric for a modern vibe. Each approach transforms how the red catches the light and how the overall style reads on your face shape and personal aesthetic.
What makes these styles so appealing is that they work across different occasions and hair types. A professional braid keeps longer red hair controlled during a workday without feeling overly casual. A more textured, loosely braided version becomes the kind of romantic foundation that reads perfectly for a date or a casual weekend. And if you have naturally wavy or curly red hair, braids add intentional structure that celebrates your texture rather than fighting it.
Let’s explore twelve distinct braided ponytail styles that make the most of red hair’s natural drama. Each one approaches the braid-to-ponytail combination differently, giving you multiple routes to find the exact look that matches your personal style.
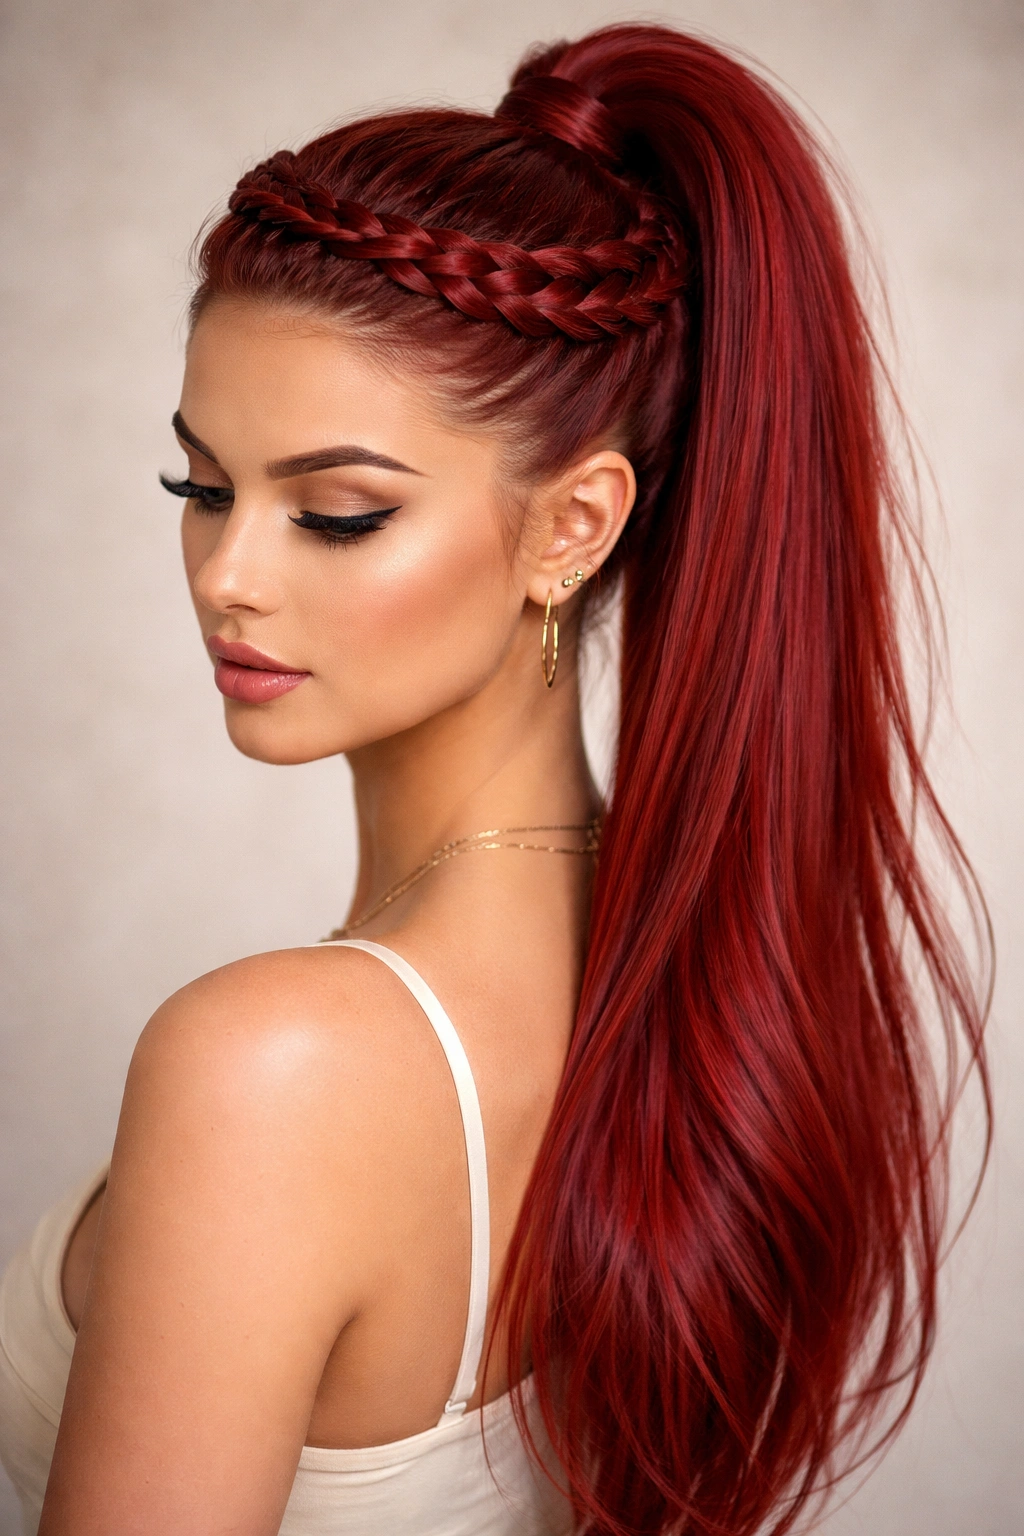
1. Classic Dutch Braid into Fiery Ponytail
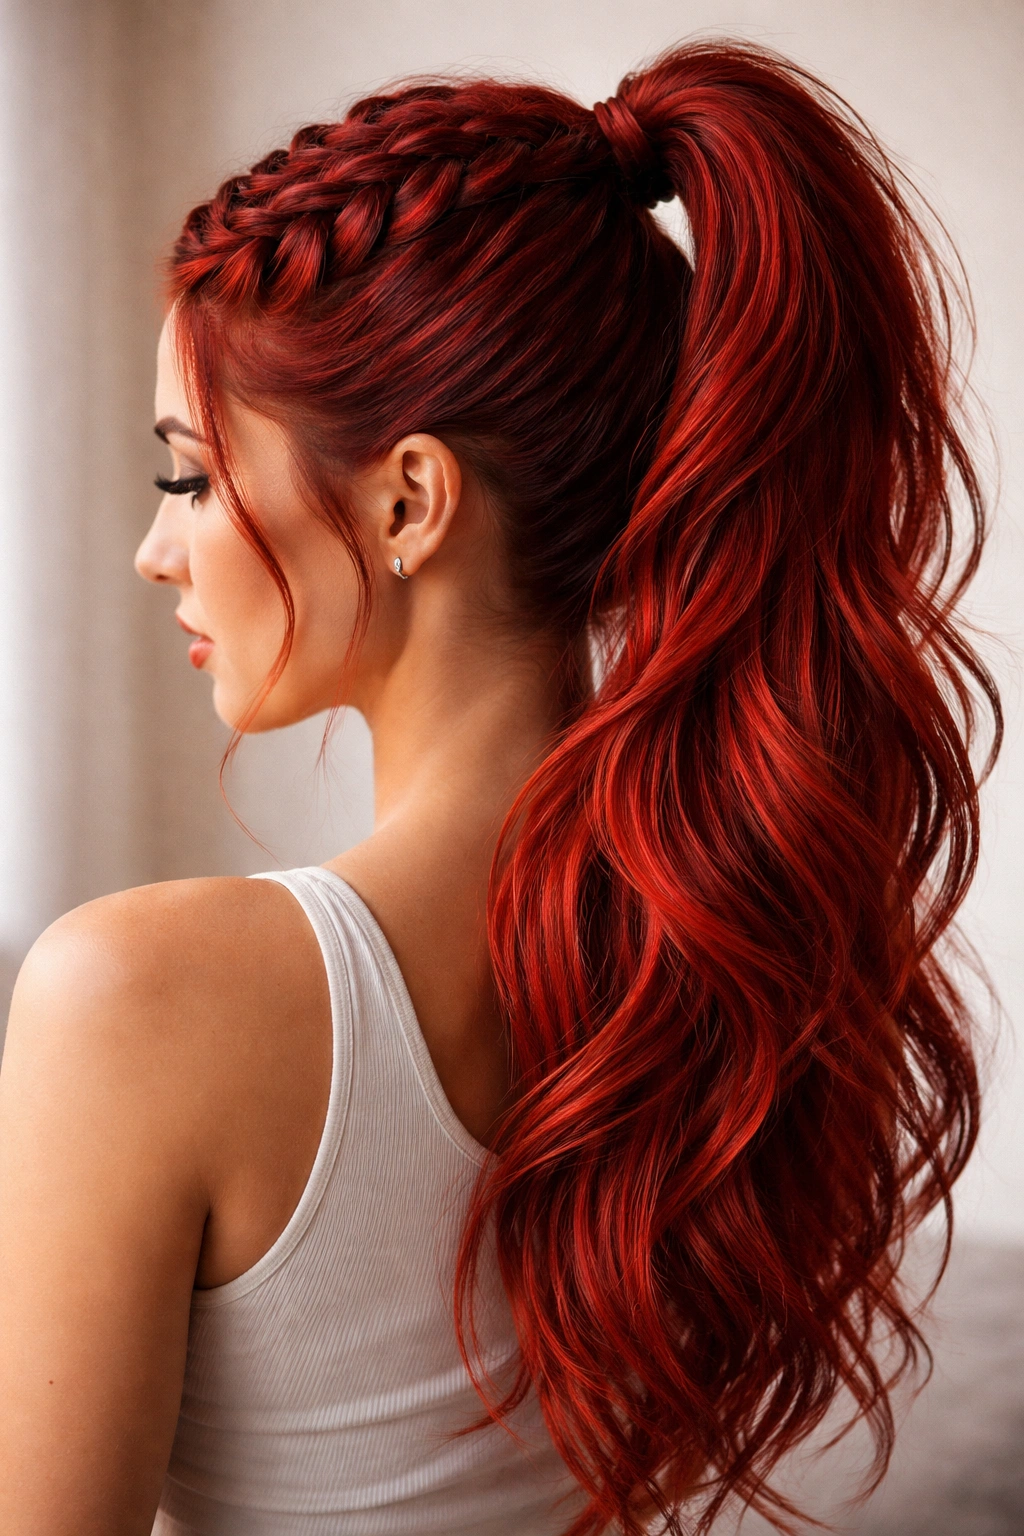
The Dutch braid — sometimes called a reverse French braid — sits raised on top of the head, making it absolutely perfect for showcasing red hair’s color and dimension. Starting at the crown, you weave the braid so it stands slightly outward from the scalp, creating visible definition and texture that photographs beautifully.
As your braid travels down the back of the head, it feeds naturally into a high ponytail. The contrast between the structured, three-dimensional braid and the flowing ponytail below creates immediate visual interest. Your red hair gets to play two roles at once: the braid shows off the individual strands and how light moves through them, while the ponytail demonstrates volume and movement.
Why This Works for Red Hair
The raised Dutch braid creates shadows and highlights across the red tones. As your head moves, those shadows shift, making the color appear deeper or brighter depending on the angle. This constant subtle change keeps the look from ever feeling flat or one-note. The structural braid also frames your face without actually pulling it back, which is a huge advantage if you have a longer face shape or prefer some softness around your temples.
How to Perfect the Technique
Start the braid at the very crown, taking three small sections. Cross each new section under the previous ones (that’s what makes it a Dutch braid, as opposed to the over-crossing of a French braid). Keep the tension even but not overly tight — you want definition without the braid compressing your scalp. As you near the nape of your neck, gradually increase the width of each new section you’re incorporating. This graduated widening creates a braid that looks fuller and more intentional. Once you reach the bottom of your hair, gather everything into your elastic and smooth out any flyaways with a light styling cream.
Pro tip: Mist the finished braid with a texturizing spray before securing the ponytail — this gives the braid extra grip and prevents it from loosening as the day goes on.
2. Rope Twist and Red Ponytail Combination

Not technically a braid, but rope twists create a remarkably similar visual effect with a different mechanical approach. Instead of three interlocking sections, you’re twisting two sections around each other, creating a spiral that’s often a touch more delicate and refined than a braid.
A rope twist borrows light differently than a braid does. The spiral creates a continuous helical path that catches highlights at different points along its length. If your red hair has any natural variation — think darker roots transitioning to brighter mid-lengths — the twist will showcase that gradient beautifully. The twist reads as incredibly polished, especially when you precision-place it on one or both sides before wrapping the hair into a ponytail.
The Sophistication Factor
Rope twists feel more delicate and intentional than braids, which makes them an excellent choice if you want something that reads as effortlessly chic rather than sporty or structured. This is the style that says you put thought into how you look, without appearing like you spent an hour on your hair. Professionals and creative types alike gravitate toward rope twists for that exact reason.
Creating Perfectly Balanced Twists
Take a section of hair from one side of your head, roughly from your temple area. Divide that section in half and twist the two pieces around each other all the way down to ear level. Secure with a small bobby pin that matches your red hair. Repeat on the other side. Once both twists are secure, gather everything into a mid-height or high ponytail. The two rope twists create a frame around your face while the ponytail catches movement and showcases the length of your red hair.
Worth knowing: Rope twists work best on hair that already has some texture — either naturally wavy, or hair that’s been lightly waved with a curling iron beforehand. Completely straight hair can feel slippery, making the twist harder to maintain throughout the day.
3. Waterfall Braid Draped into Bold Red Tail

A waterfall braid is one of the most visually dramatic braiding techniques, and it’s especially stunning when paired with red hair. The defining feature is that as you braid, you’re continuously releasing hair — the effect is that strands “fall” from the braid like water, creating a cascading pattern.
When you waterfall braid a section that goes diagonally across the back of the head and then continue into a ponytail, you create a hybrid style that’s both textured and flowing. Some of your hair is caught in the braid structure, while other strands fall freely, giving you the best of both worlds. The visual result is incredibly feminine and romantic — the kind of style that turns heads but never reads as overdone.
Why Waterfall Works on Red
Red hair’s natural richness means that even the “falling” strands that aren’t part of the braid remain visually engaged. You’re not getting lost in a sea of uniform color — each strand reads individually. The braid itself creates depth and shadow, while the cascading pieces add brightness and movement. The combination is naturally three-dimensional.
Executing a Clean Waterfall Braid
Start a three-strand braid at the temple on one side of your head. Rather than incorporating new hair after each crossover (the way you would with a French braid), you’re going to do a single crossover, then drop the top strand of the braid and replace it with a fresh strand from above. That dropped strand becomes the “water” that falls freely. Keep repeating: crossover, drop the top, pick up fresh hair from above. By the time you reach the far side of the head, you’ll have this beautiful cascade of individual strands falling in a diagonal line while the braid structure itself continues across. Secure the remaining hair into a ponytail at the base of the cascade.
Insider note: The waterfall effect is most visible when there’s clear length difference — this works best on hair that’s at least mid-shoulder length, and looks absolutely stunning on hair that falls past the middle of the back.
4. Double-Braided Sides Merging into One Ponytail
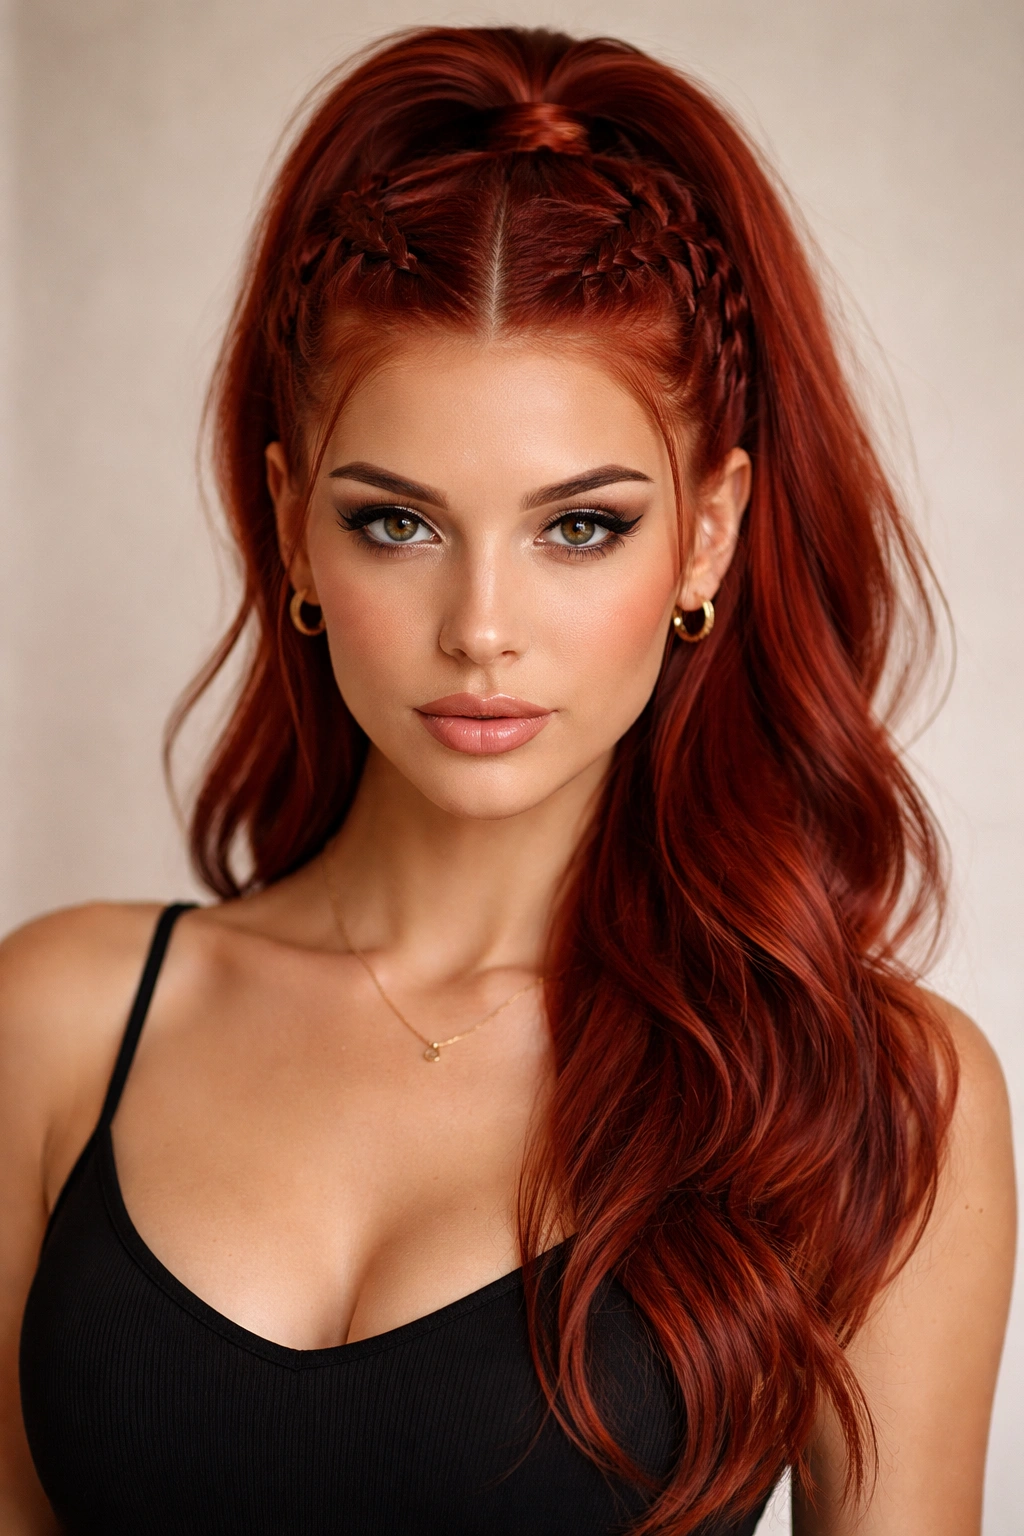
Two braids are always better than one, especially when it comes to creating visual impact. Starting with a braid on each side of your head — positioned roughly from your temple area down toward the nape — you create symmetry and structure that flatters nearly every face shape.
The magic happens where the two braids meet at the base of the head. Rather than securing them as two separate ponytails, you gather both braids plus your remaining loose hair into a single statement ponytail. The result reads as intentional, sculpted, and somehow both sporty and polished at the same time. The red hair gets framed by the braids on both sides while the full volume of your ponytail hangs below.
Balance and Face Framing
Two braids positioned symmetrically create a visual balance that a single central braid can’t quite match. They frame your face on both sides without pulling it back too tightly. This is especially flattering if you have a wider face shape or prominent cheekbones — the braids draw the eye inward rather than outward. And because you’re ultimately gathering everything into one ponytail, you get the security and hold of multiple braids without actually wearing two separate tails.
The Technical Execution
Divide your hair down the center from your forehead to the nape of your neck. Starting on one side, take a section at your temple and create a Dutch or French braid angling slightly backward and downward. Aim to end your braid roughly at the level of your ear on that same side. Repeat on the opposite side. Once both braids are complete and secure, gather all your hair — including the braids and any loose hair from the back and sides — into a single elastic positioned at the base of your skull. You now have two beautiful braids framing your face leading into a full, voluminous ponytail.
Pro tip: If you have fine or medium hair, backcomb the ponytail slightly before securing it — this adds grip and makes the ponytail appear fuller and more intentional.
5. French Braid Crown with Red Ponytail Drop
Imagine a French braid that doesn’t travel straight down, but instead curves around the back of your head like a crown. That’s exactly what this style delivers. Beginning at one temple and curving toward the opposite ear, the French braid follows a path that would make a tiara jealous.
Once the braid completes its arc around the back of the head, you transition into a ponytail that drops from the braid’s endpoint. The crown braid holds some of your hair in place while the ponytail demonstrates the full length and volume of your red hair. You get architectural interest at the top of your head, plus the freedom and movement of a flowing tail below.
Creating the Crown Effect
Start your French braid at the temple on one side, taking three small strands. As you braid, instead of moving straight down the back of the head, angle your braid path slightly to the side and backward, creating an arc. Think of your head as a clock — if you start at 3 o’clock (temple on the right), you’re braiding toward 6 o’clock (base of the back) before curving toward 9 o’clock (the opposite side at ear level). Once you reach that final position, secure the braid with bobby pins. Gather any remaining hair from that point into your ponytail.
Why This Reads as Special Event-Ready
A crown braid elevates any look. The curved path is more interesting and intentional-looking than a straight-back braid. It reads as something you’d wear to a wedding, a fancy dinner, or any occasion where you want to demonstrate that you put thought into your appearance. On red hair, the crown braid showcases the color around the entire perimeter of your head, maximizing impact.
Worth knowing: A crown braid works beautifully whether your hair is freshly washed (for a sleek version) or a day or two old (for a softer, more textured result). The pre-existing texture of older hair actually helps the braid hold more securely.
6. Messy Textured Braid into Voluminous Ponytail
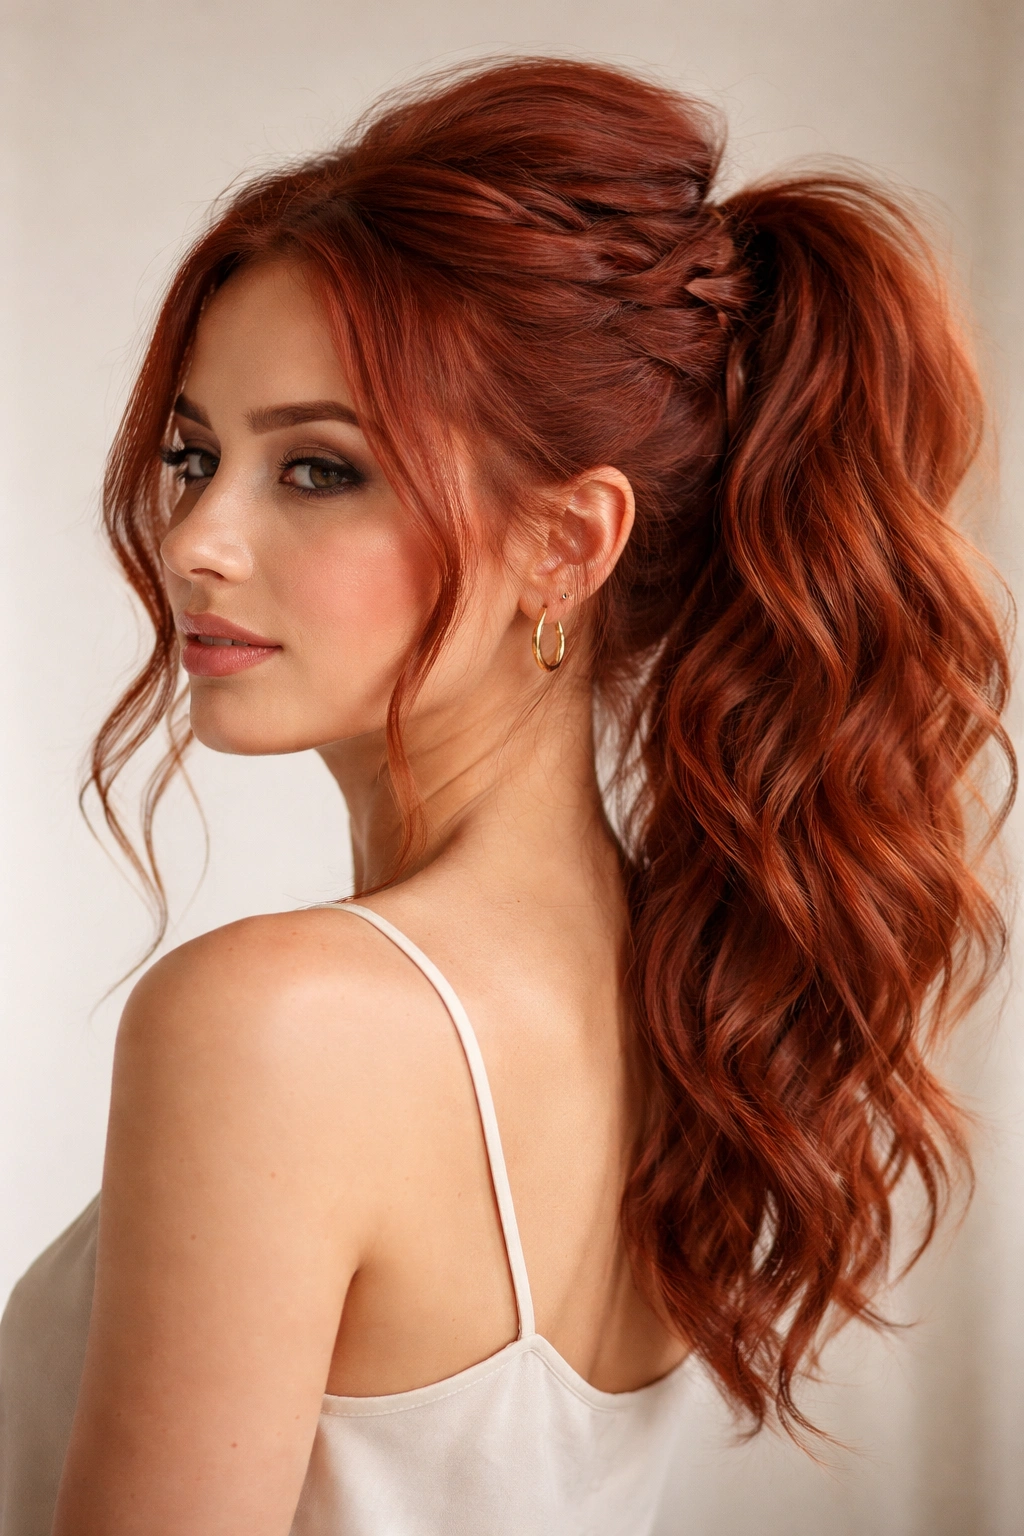
Sometimes the most impactful look is the one that appears effortless. A loosely textured braid — one where you’ve deliberately pulled out small sections to add dimension and fluff — creates an undone, romantically messy aesthetic that works beautifully leading into a voluminous ponytail.
This style begins with intention but celebrates imperfection. You’re not aiming for a tight, precise braid. Instead, you’re creating a braid, then gently loosening it by tugging on small sections throughout its length. The resulting texture reads as softer, more approachable, and somehow more interesting than a tight braid. Transition this textured braid into a full, slightly tousled ponytail, and you’ve created a look that reads as “I’m effortlessly gorgeous” rather than “I spent forty-five minutes on this.”
The Textured Braid Technique
Begin a standard three-strand or Dutch braid (your choice of technique). Once you’ve completed the braid and secured it, go back through and gently pull on small sections to loosen it. Work your way from the crown to the base, creating an uneven, slightly pillowy texture. You’re aiming for the braid to approximately double in width — this takes a minute or two and completely transforms the look. After you’ve textured the braid, gather everything into your ponytail. You can keep the ponytail sleek, or backcomb it slightly and then gently smooth the surface for a textured effect that matches the braid.
Why Loose Texture Flatters Red Hair
Tight styles can make red hair read as harsh or severe on some face shapes, especially if your red is very saturated. A textured, looser braid softens the overall effect. The individual strands catch light more obviously when they’re not compressed by a tight braid, so the red color appears more nuanced and multidimensional. There’s also something undeniably sexy about a style that looks like you didn’t try too hard.
Pro tip: Spray texturizing spray on the finished braid before you loosen it — this adds grip and helps the looser sections stay put throughout the day rather than slowly unraveling.
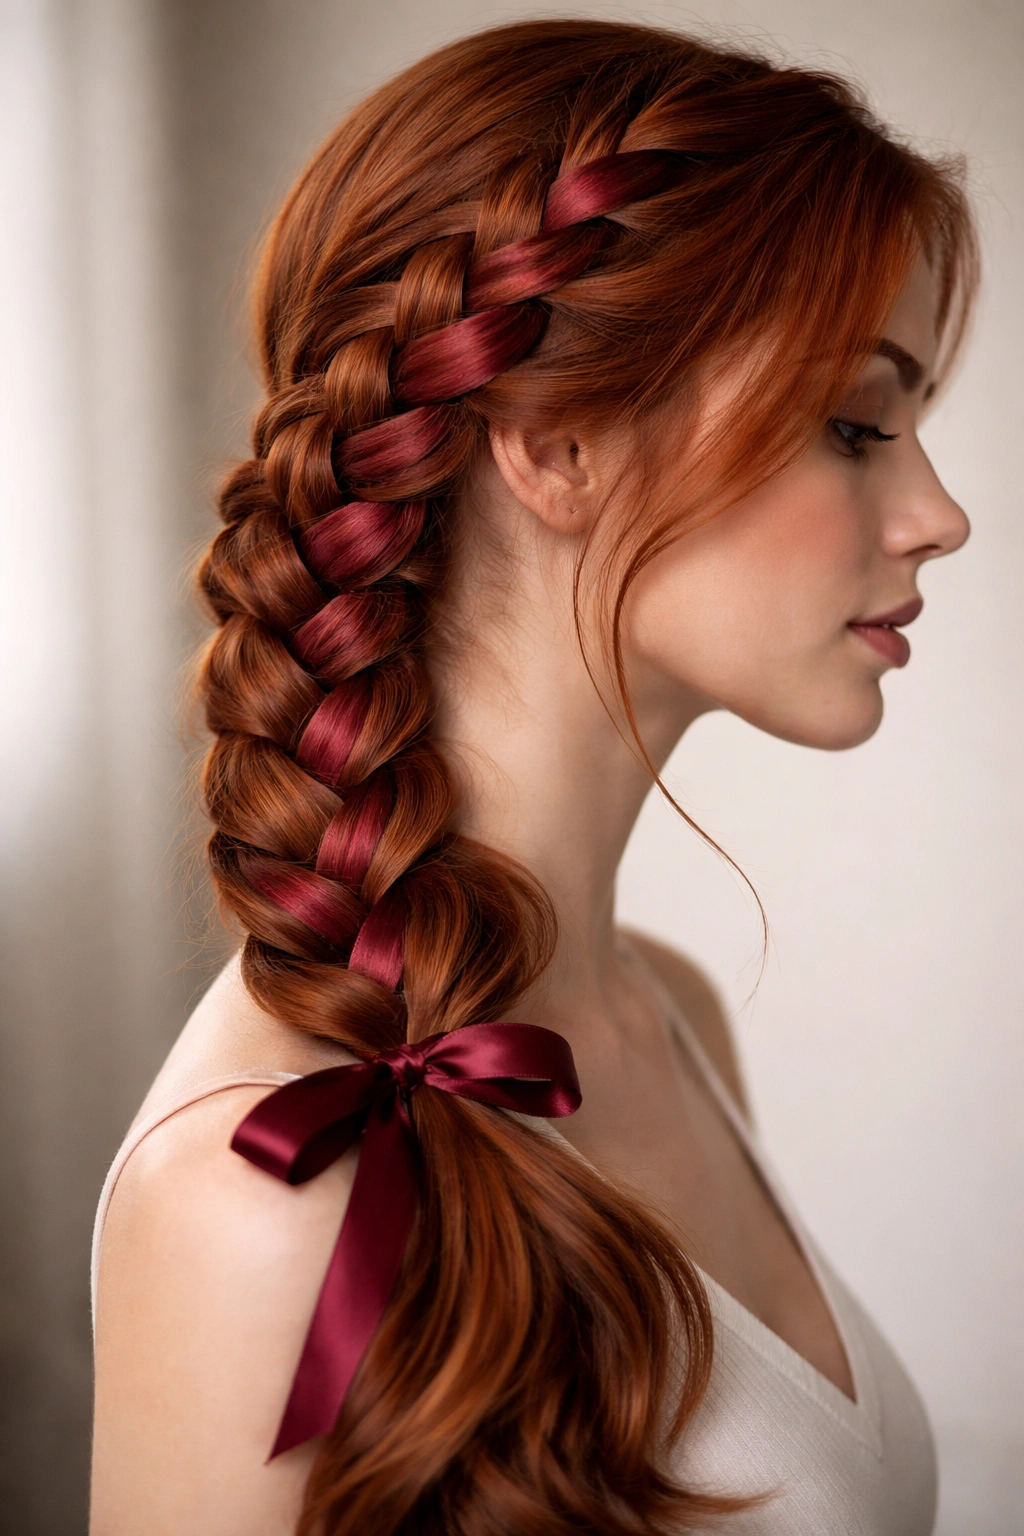
7. Side Braid with Woven Red Ribbon Accent
Adding a ribbon to a braid is a technique that sounds complicated but is remarkably simple to execute. A contrasting ribbon woven directly into a side braid creates a level of visual interest and intentionality that feels elevated and unique.
A side braid creates immediate asymmetry, which reads as more fashion-forward than a centered braid. It also tends to look slightly softer and more romantic than a back braid, since it’s positioned where it frames one side of your face. When you add a ribbon — perhaps a burgundy velvet ribbon to deepen your red, or a cream or gold ribbon to contrast it — the braid becomes an actual design element rather than just a functional hairstyle choice.
Incorporating Ribbon into Your Braid
Choose a ribbon approximately ½ to ¾ inches wide. Begin a three-strand braid at your temple. At the same point where you start your braid, also position the ribbon so it’s ready to be incorporated. Now braid normally, but after every one or two braid crossovers, weave the ribbon through or around one of the strands before the next crossover. The ribbon doesn’t become a fourth strand — it’s accompanying and accenting the braid structure. Continue braiding and ribboning until you reach the end of your hair, then secure both the braid and ribbon with a small elastic. Gather remaining hair into a ponytail, or if your hair is long enough, continue the side braid into the beginning of the ponytail itself.
Ribbon Selection Matters
Velvet ribbon adds richness and catches light beautifully. Satin ribbon creates a sleek, sophisticated appearance. Metallic ribbon (gold, copper, or rose gold) creates glamour and is especially stunning against red hair. Grosgrain ribbon offers a more casual, playful vibe. Your ribbon choice changes the entire tone of the style, so consider the occasion and your personal aesthetic before choosing.
Worth knowing: Thinner ribbons (⅜ inch) are easier to work with for beginners, while wider ribbons create more dramatic visual impact but require a bit more finesse to keep from bunching.
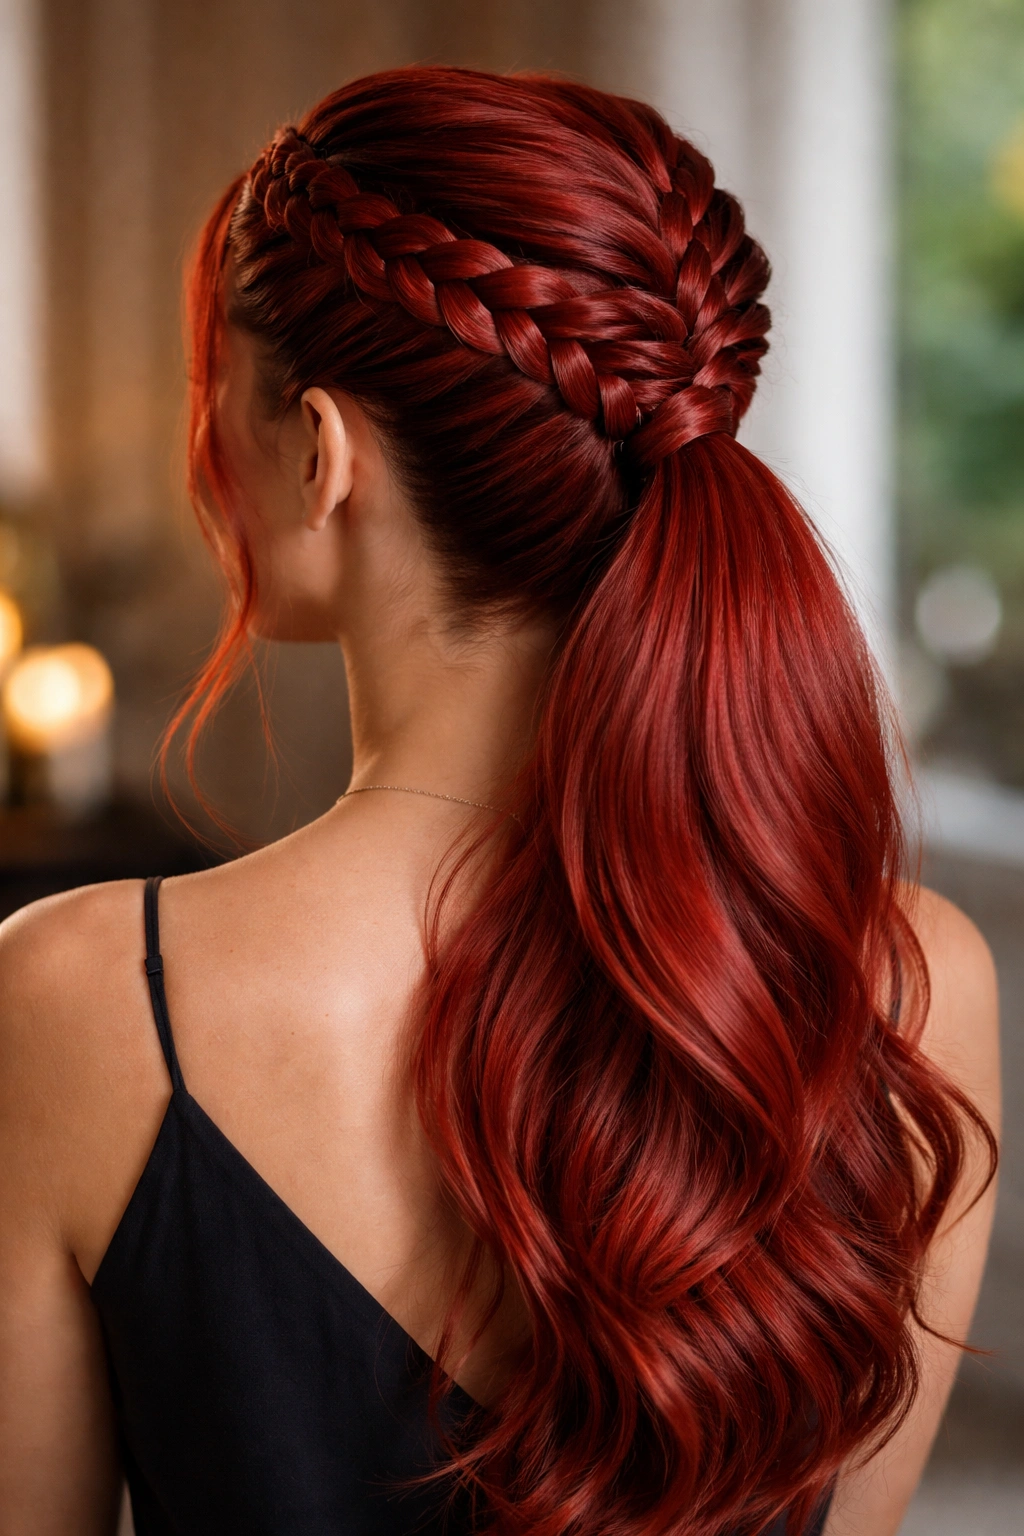
8. Boxer Braid Style Leading to Sleek Red Ponytail

Boxer braids — two Dutch braids running parallel down the back of the head — are the ultimate style for anyone who wants maximum hold and statement impact. The style originated in boxing and athletic contexts because it keeps hair completely secure, but it’s evolved into a fashion choice that works for countless occasions.
Starting with two parallel boxer braids and transitioning into a single low or high ponytail creates an interesting hybrid style. The dual braids read sporty and strong, while the gathered ponytail adds softness. It’s a combination that feels contemporary and somewhat edgy — the kind of style that photographs well and makes a genuine impression. On red hair, the two braids create parallel lines of texture and shadow that showcase the color’s depth.
Creating Symmetrical Boxer Braids
Part your hair down the center from your forehead to the nape of your neck. On one side of the part, start a Dutch braid at your temple and braid straight back, incorporating new hair as you go. Aim to end your braid at roughly the nape of your neck. Repeat on the other side, creating a mirror-image braid. Both braids should travel parallel to each other with a small gap between them. Secure each braid with a small bobby pin or elastic. Once both braids are complete, gather all your hair below them into a ponytail. The two braids sit on top like a crown, transitioning into the flowing ponytail below.
High vs. Low Ponytail Positioning
A high ponytail paired with boxer braids reads youthful and energetic — this is the combination that works for a gym session, a casual weekend, or anyone who simply loves bold, sporty styling. A low ponytail creates something slightly more refined and less athletic-feeling, making the boxer braids feel more fashion-forward and less obviously functional. There’s no wrong choice — it entirely depends on the vibe you’re going for.
Pro tip: Make sure both braids have identical tension — if one is significantly tighter than the other, they won’t look balanced. Stand in front of a mirror and assess both braids side-by-side before securing the ponytail.
9. Braided Halo with Centered Red Ponytail
A halo braid curves around the head, typically positioned at ear-level or just above, creating a circlet effect. When you transition a halo braid into a centered, high ponytail, you create a style that’s both ethereal and structured — romantic and fashion-forward all at once.
The halo braid frames your entire face and head, making it incredibly flattering. Nothing is pulled back tightly, so you get the security and polish of a braid without any severe or unflattering tension. The high ponytail dropping from the halo demonstrates the length and volume of your red hair, while the halo itself adds visual interest and texture at the crown.
Mapping Out Your Halo Braid
Start your braid at one temple, positioning it roughly at ear-level. Rather than traveling straight back, your braid curves around the back of the head like a halo, ending at the opposite temple. This requires you to think of your head as three-dimensional — you’re creating a path that goes straight back at the nape, but travels at an ear-level height around the sides. As you braid, gradually incorporate new hair from below the braiding line (so hair that’s going to be part of your ponytail). Once you’ve braided your way to the opposite temple, secure the end of the braid with bobby pins. Gather all your hair — including the completion of the braid — into a high, centered ponytail.
Creating the Ethereal Effect
A halo braid naturally reads as romantic and somewhat whimsical. Pair it with soft waves in your ponytail rather than keeping everything sleek, and you’ve created a style that’s as appropriate for a special occasion as it is for everyday wear. The red hair gets framed entirely by the halo structure while also having the freedom to move and flow below.
Worth knowing: A halo braid is easier to execute if you have hair at least shoulder-length, and looks absolutely stunning on longer hair (mid-back or longer). The longer your hair, the more dramatic the halo effect becomes.
10. Twisted and Braided Wrapped Ponytail Base
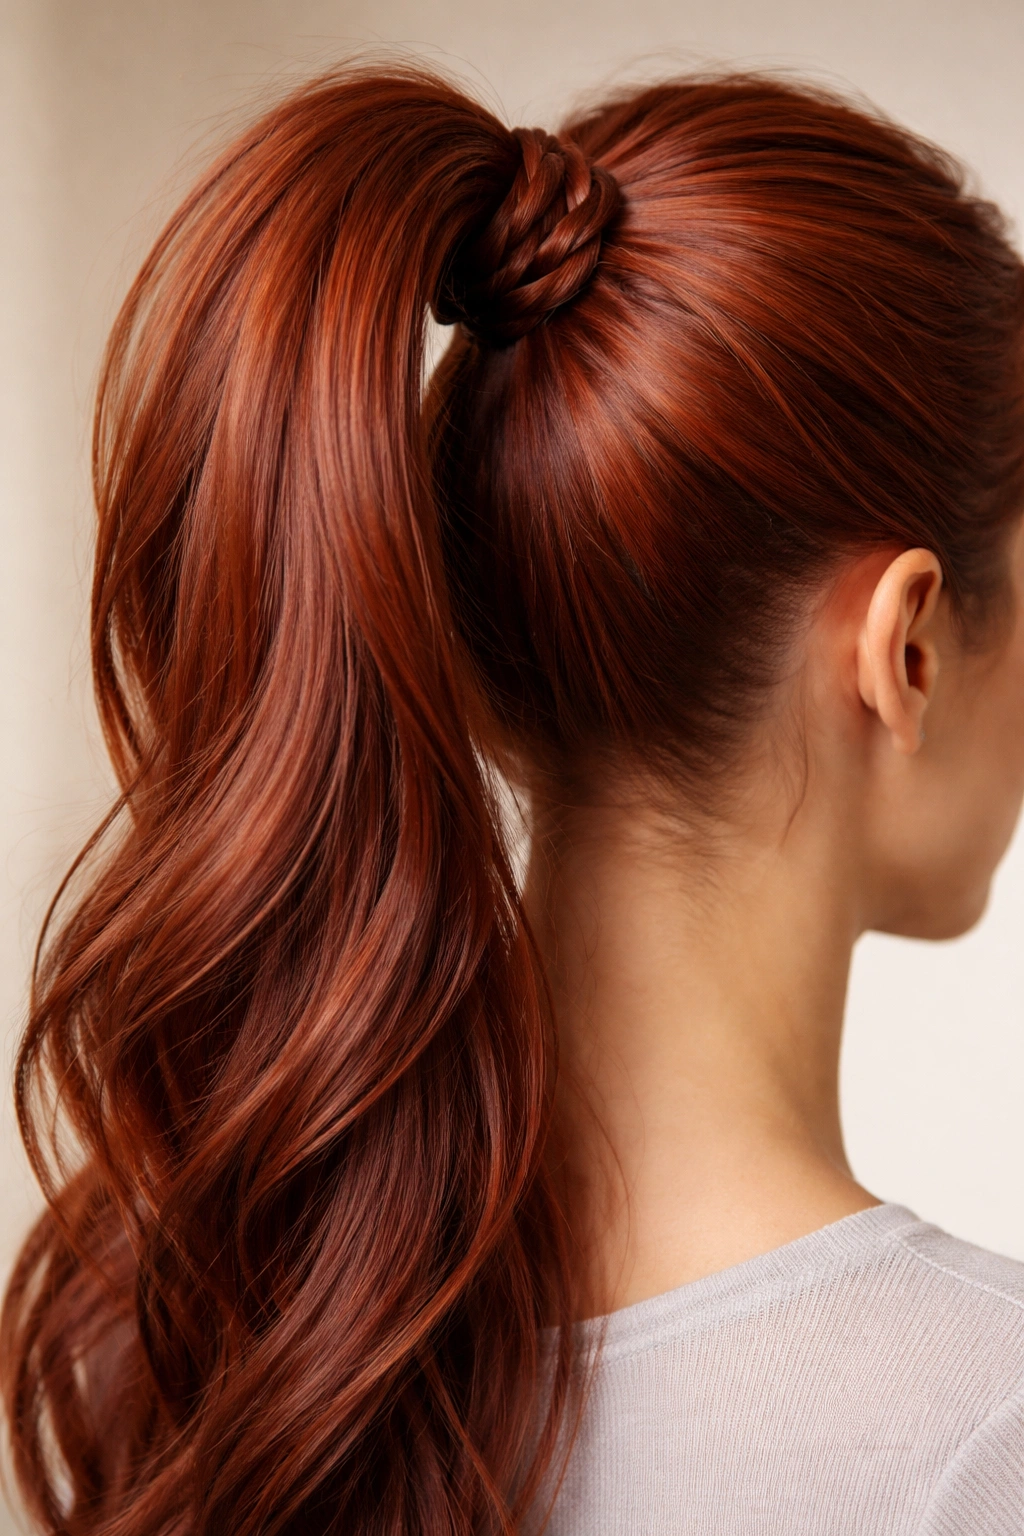
Instead of transitioning braids directly into a ponytail, you can wrap braids or twists around the base of your ponytail. This creates an architectural detail right at your hair’s foundation — the section most people actually look at when they’re talking to you.
Begin with a high or mid-height ponytail. Then, take a small section of hair from within the ponytail and braid or twist it. Wrap this braid or twist around the base of the ponytail where the elastic sits, covering the elastic entirely and creating a finished, polished appearance. Secure the wrapped braid or twist with a bobby pin. The result is a ponytail that looks intentional and sculpted, with zero visible elastic.
The Visual Impact of a Wrapped Base
A wrapped base transforms how a ponytail reads. Without it, you get a simple gathered tail — functional but fairly basic. With a wrapped base, especially one that’s braided or twisted, the ponytail suddenly reads as a deliberate style choice. It’s the kind of detail that indicates you care about how you look. The wrapped section also adds visual interest right at the place where hair naturally draws attention.
Execution Details That Matter
Make your wrapped braid or twist approximately the same width as your elastic — you want it to completely cover the elastic with some overlap. If your wrap is too thin, you’ll see the elastic peeking through, which defeats the purpose. Take that small braided section and spiral it around the base once or twice, then secure with a bobby pin that matches your red hair. Tuck the pin underneath so it’s not visible. If you want extra hold, you can use two bobby pins positioned at opposite points around the base.
Pro tip: This wrapped-base technique works even better if you use a clear elastic rather than a colored one — it’s less noticeable, so if even a tiny bit shows, nobody will see it.
11. Feed-In Braided Edges with Flowing Red Tail
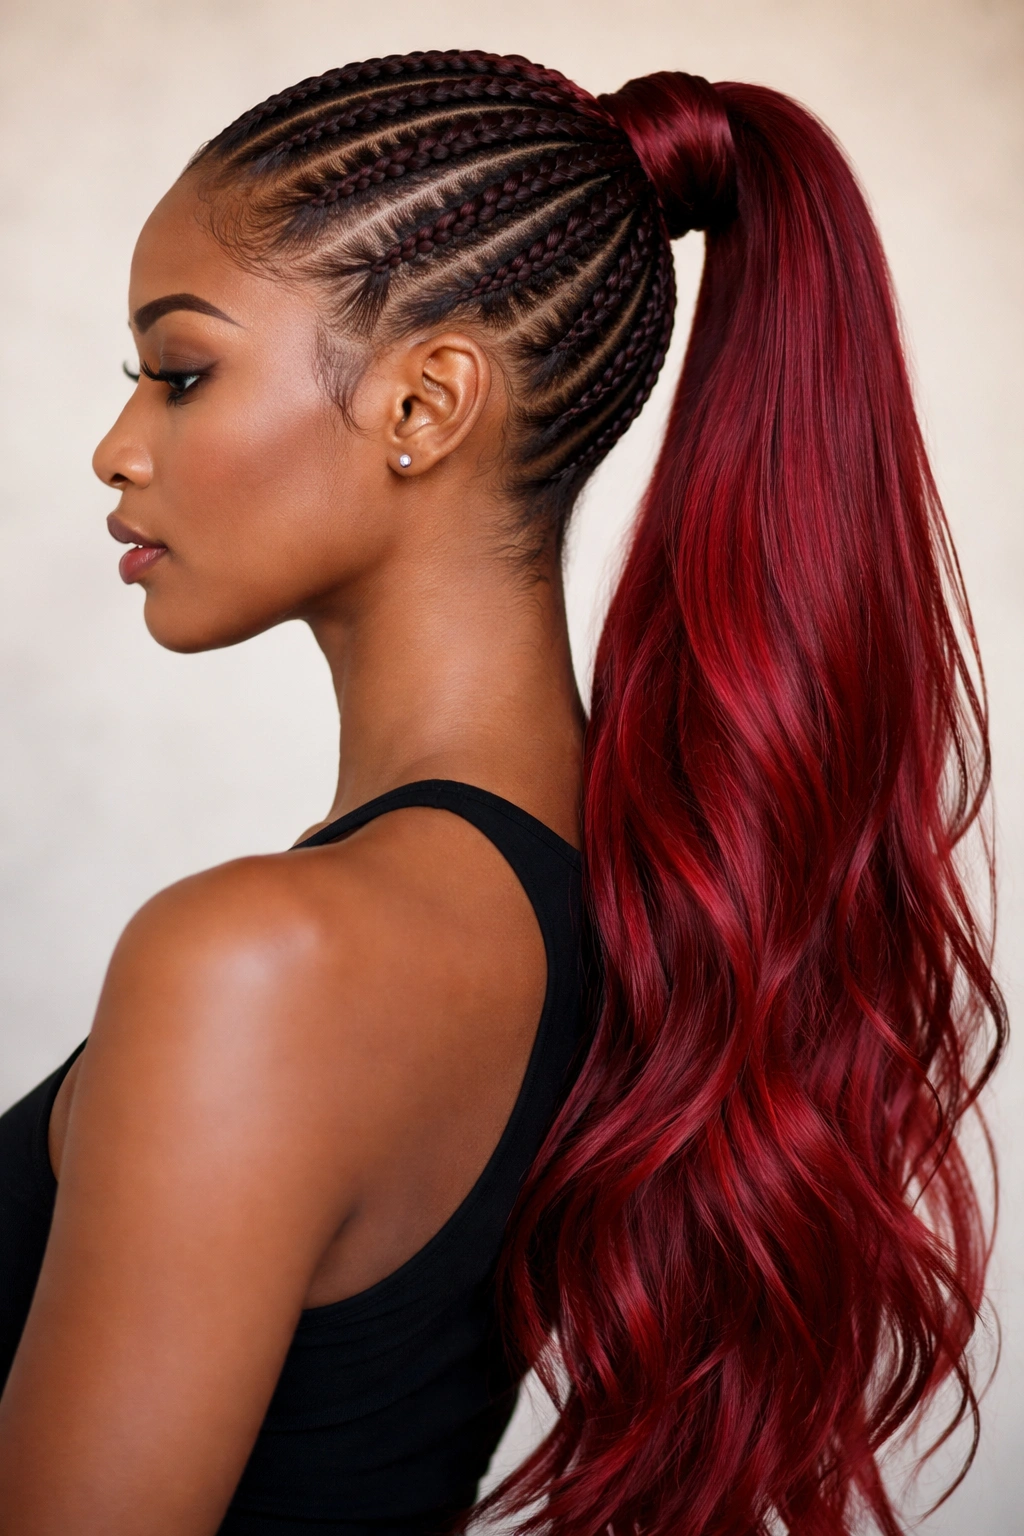
Feed-in braids are a technique where you start with a small braid and continuously feed new hair into it as you travel along your braiding path. The result is that the braid appears to emerge directly from your scalp, creating an incredibly clean, intentional appearance.
Using feed-in braids positioned along the edges of your head — perhaps on both sides, or just on the back — and then transitioning into a flowing ponytail creates a style that’s contemporary and polished. The feed-in technique makes your braids look more professional and refined than a standard French or Dutch braid. Combined with the soft, flowing red hair of your ponytail, you get a style that’s both structured and romantic.
What Makes Feed-In Braids Different
A feed-in braid starts with much smaller individual strands than a French braid does. You begin braiding, and as you move along your path, you continuously add tiny new sections of hair to the braid, rather than adding larger sections in a traditional French braid fashion. This creates a braid that’s thinner and more defined at the crown, gradually thickening as it travels down. The result looks incredibly precise and intentional — the kind of braid you’d get from a professional braider.
Creating Feed-In Braids
Start with three very small sections of hair at your starting point (perhaps at your temple or crown). Begin a regular three-strand braid. After your first braid crossover, add a tiny section of new hair to one of your strands before the next crossover. After the second crossover, add a tiny new section to a different strand. Keep alternating which strand receives the new hair with each crossover. The new hair amounts should be very small — perhaps a ¼-inch section. This is different from a French braid, where you add more substantial sections. Continue feeding in this small new hair until you’ve braided past your ear, or until you reach your ponytail base, then gather everything into your ponytail.
Worth knowing: Feed-in braids require practice to perfect, but the result is worth it — they read as exceptionally polished and intentional.
12. Fishtail Braid into High-Volume Red Ponytail
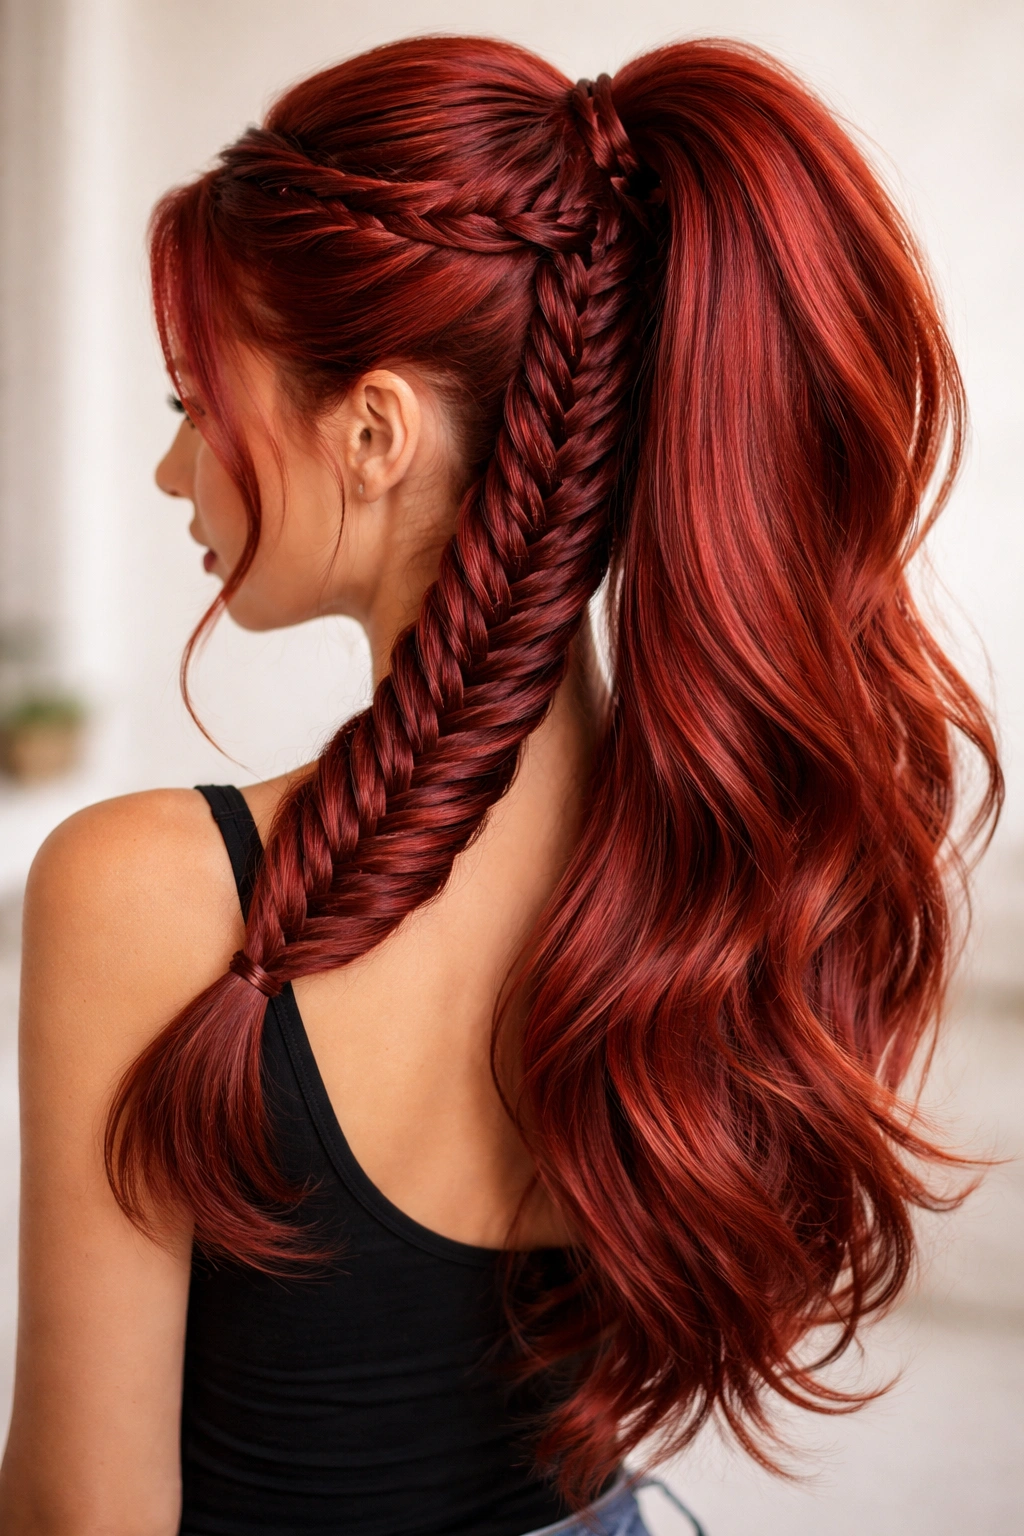
Fishtail braids are created using four strands instead of the traditional three, producing a braid that looks intricate and elegant while actually being very straightforward to execute once you understand the technique. The braid has an incredibly beautiful, delicate appearance that’s especially stunning on red hair because you can see exactly how the individual strands interact.
A fishtail braid transitioning into a high, voluminous ponytail creates a style that reads as both intricate and effortlessly put-together. The fishtail’s delicate appearance makes it seem more complex than it actually is, so you get the visual reward of a complicated-looking style without the actual complexity. Paired with a high, bouncy ponytail, you’ve created a look that’s glamorous and undeniably bold.
Understanding the Fishtail Technique
A fishtail braid uses four strands, but here’s the key: you’re only ever working with two strands at a time, alternating. Start with four roughly equal sections of hair. Take the outermost strand on the right side and cross it over to become an inner strand on the left side. Now take the outermost strand on the left and cross it over to become an inner strand on the right. Keep alternating sides, always taking the outermost strand and bringing it to the inside. Add new hair to your strands as you go (making it a French fishtail), or simply braid without adding new hair for a fishtail that uses only a portion of your hair. The resulting braid is remarkably delicate and intricate-looking.
Why Fishtail Braids Showcase Red Hair
The delicate structure of a fishtail braid creates spaces and shadows between the strands. Light plays through these spaces, making the red hair appear more dimensional and complex than it might in a tighter braid. The braid reads as refined and artistic — the kind of braid someone would wear specifically because it looks beautiful, not just because it’s functional.
Pro tip: A fishtail braid appears even more impressive and delicate if you gently loosen it slightly after you’ve finished braiding — this opens up the structure and lets more light pass through.
How to Prepare Your Hair for Bold Red Braid Styles
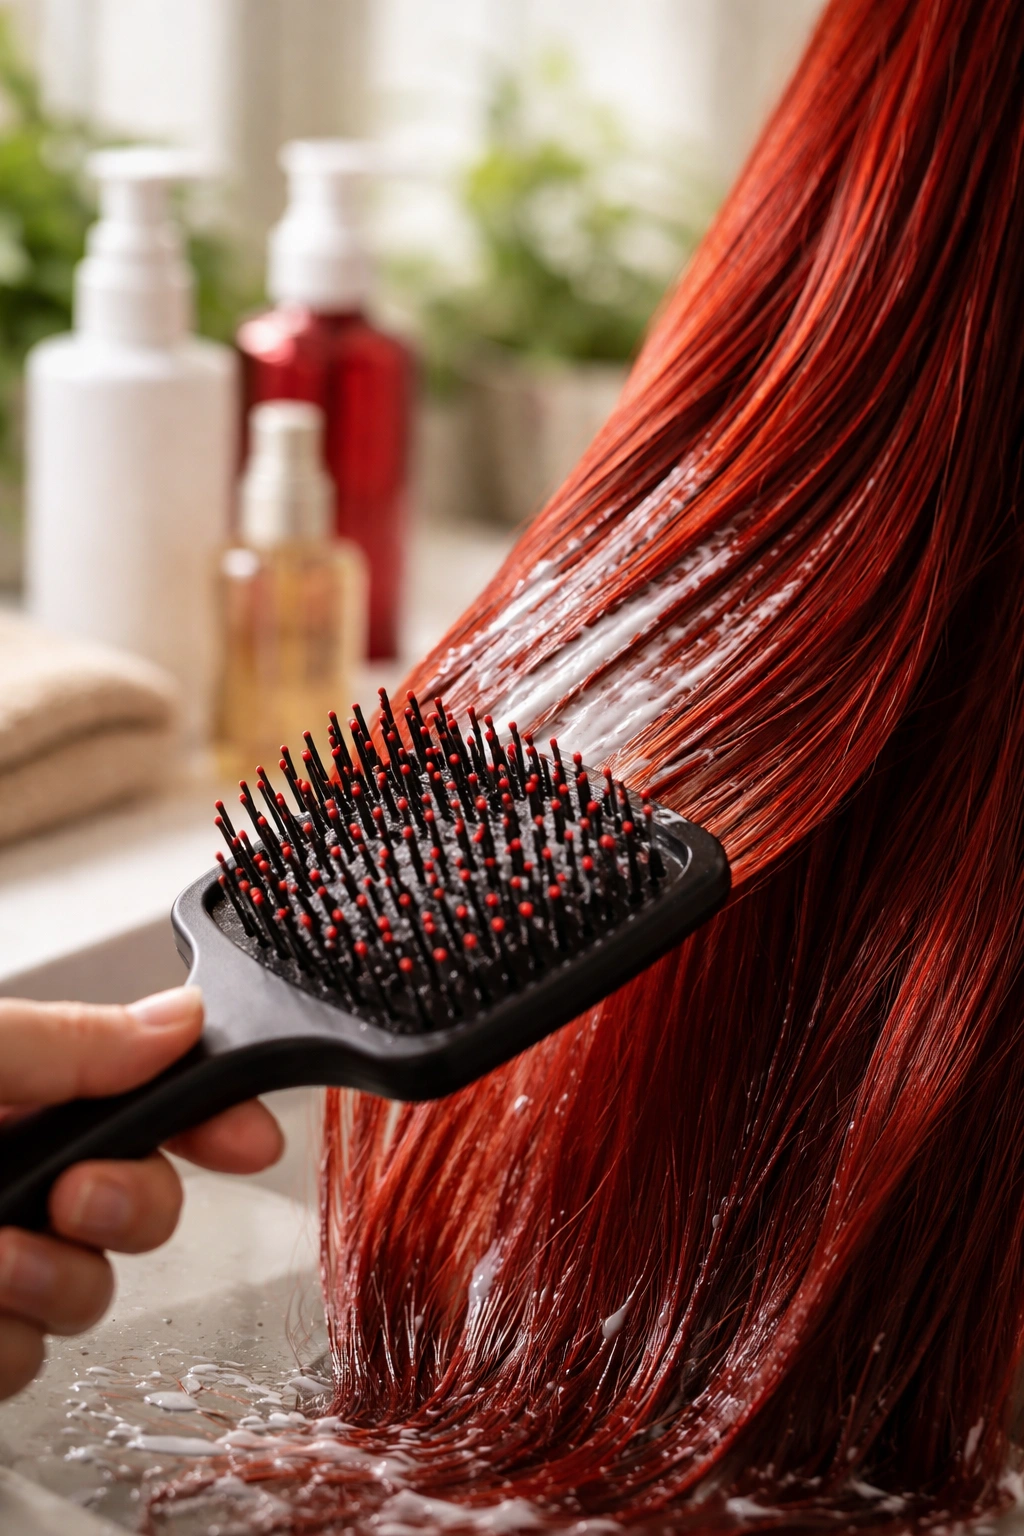
Your hair’s foundation matters enormously when you’re attempting braided styles. Hair that’s in good condition — with plenty of moisture and minimal breakage — cooperates with braiding. Hair that’s dry, damaged, or overly processed can be difficult to work with. It’ll be harder to braid neatly, the braids won’t hold as well, and your red color might not look as vibrant against a compromised hair structure.
Start with a good clarifying shampoo once every two weeks to remove product buildup that can make hair feel slippery and resistant to braiding. Follow with a deeply moisturizing conditioner, focusing on the lengths and ends. If your red hair is color-treated (especially if it’s a vibrant or fashion red that requires lightening), deep conditioning becomes even more important. The coloring process opens your hair’s cuticle layer, making it more porous and thirsty for moisture.
Between washes, dry shampoo is your secret weapon for braiding. Fresh, just-washed hair can be too slippery — your braid sections slide around and won’t hold their structure well. But hair that’s a day or two old, especially when you’ve applied dry shampoo, has more texture and grip. The dry shampoo adds subtle grit that helps sections stay in place as you braid. This is why many people find their braids hold better on the second day after washing.
The Night Before Your Braid
If you know you’re planning an elaborate braided style, consider prepping your hair the evening before. Apply a light styling cream or serum to your hair’s mid-lengths and ends — you want it soft and manageable, not frizzy or dull. If your hair is very straight and slippery, lightly wave or curl it with a curling iron or wand. This added texture gives you so much more grip when you’re braiding. You don’t want dramatic curls — just enough wave that your hair has a bit of tooth to it.
Sleep on your prepped hair (a silk or satin pillowcase helps prevent frizz), and by morning you’ve got hair that’s primed for braiding success. It’ll have the perfect texture, and you’ll have spent minimal time actively styling.
Best Products and Tools for Long-Lasting Braid Ponytails
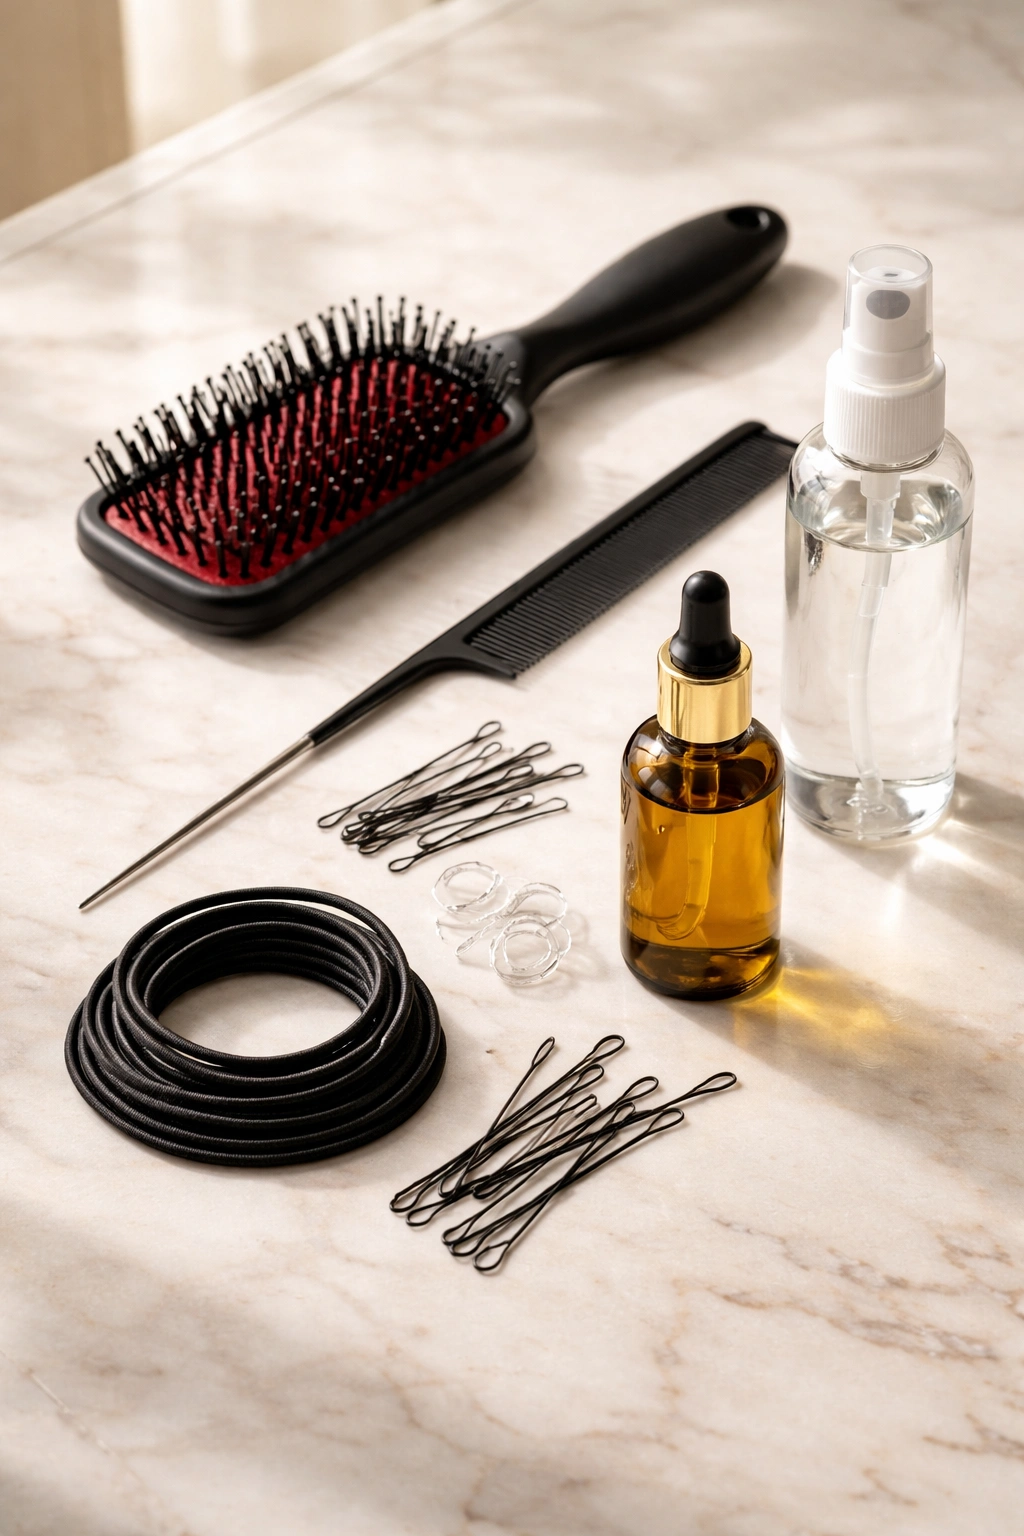
The right tools make a tremendous difference in how smoothly your braiding goes and how long your style holds. You don’t need an arsenal — just a few key items.
A good paddle brush for detangling and smoothing is essential. Look for one with rounded bristles that won’t snag or break your hair. You’ll use this before you braid to remove any tangles, and again when you’re smoothing sections before securing your ponytail. A metal rat-tail comb (the fine-toothed comb with a pointed handle) is invaluable for sectioning your hair precisely and for backcomb-texturizing if you want added grip in your ponytail.
Bobby pins and elastics in shades that match your red hair are crucial — they become invisible against your color rather than standing out obviously. Black bobby pins or brown elastics will be visible against red hair, so shop for matching colors. Velvet-covered elastics grip hair better than standard hair ties and create less breakage. Invest in a few good ones.
For products, a texturizing spray is nearly essential. It adds grip and helps braids hold much longer throughout the day. A light hair oil or serum (applied sparingly to ends and mid-lengths) keeps color-treated red hair shiny without weighing braids down. A light-hold hairspray lets you fine-tune your style — smooth flyaways, set specific braids, or lock your ponytail in place — without the stiffness that comes from heavy hairspray.
Choosing the Right Hairspray
For braided ponytails, you want a flexible hold rather than a locked, concrete hold. You’re looking for hairspray that keeps things in place but still lets your hair move naturally. Test a few different brands to find your preference. Some people swear by drugstore options, while others prefer professional lines available through salons. Price isn’t always an indicator of quality — what matters is how it works on your specific hair.
Apply hairspray while your hair is still positioned correctly — don’t spray and then try to move things around. Hold the can about 8-10 inches from your hair and use a quick, light spritz rather than soaking your hair. Multiple light applications work better than one heavy application.
Styling Tips for Different Hair Types and Textures
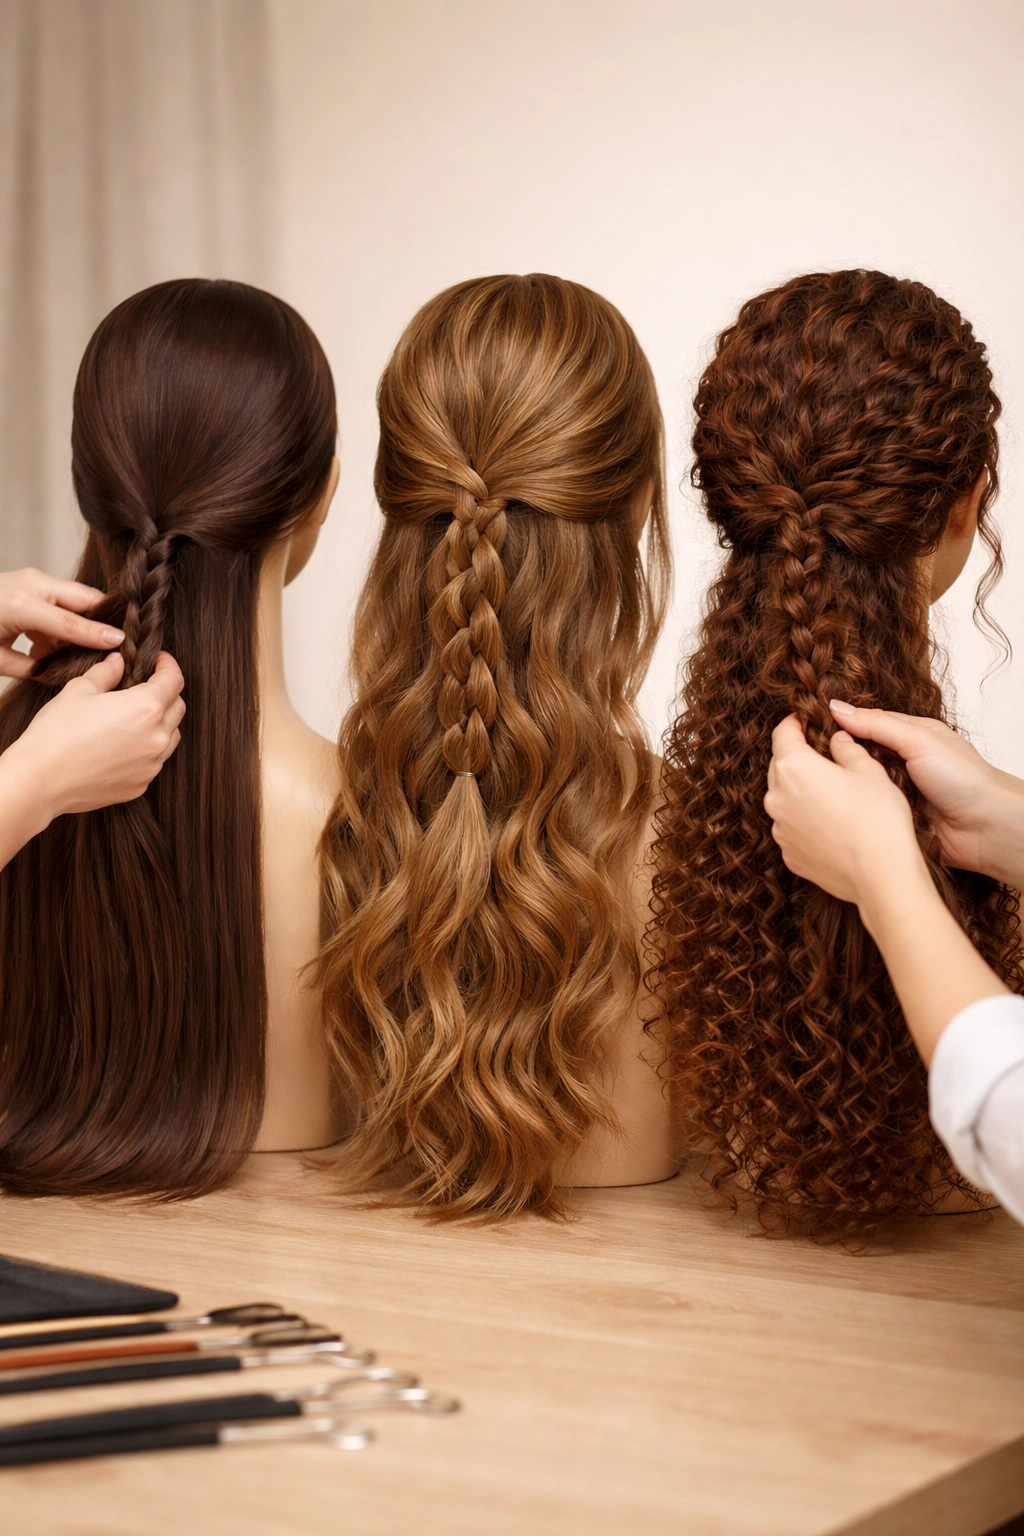
Red hair comes in every texture imaginable. Your approach to braiding should honor your specific hair type rather than fighting against it.
If you have very straight, fine hair, texture is your best friend. Pre-wave your hair with a curling iron, use dry shampoo on the day you’re braiding, and consider backcombing small sections where you’re about to begin braiding. All of these additions give your braiding sections something to grip. Your braids might not hold quite as long as they would on someone with naturally textured hair, so plan accordingly — if you’re wearing the style for a full day, consider rebraiding halfway through or using extra bobby pins to secure specific sections.
Naturally wavy or curly hair is a braider’s dream. Your hair already has texture and grip, so your braids will hold beautifully. Your only consideration is frizz management. Use a smoothing serum or anti-frizz product to control flyaways, especially around your hairline and in your ponytail. The braid itself tends to stay neat without much intervention.
If you have thick or densely textured hair, make sure you’re using sufficiently strong elastics — thin hair ties will struggle to hold the weight of your ponytail. Consider using two elastics stacked together for extra security. When braiding, don’t be shy about taking larger sections — trying to braid with very small, thin sections in thick hair is tedious and often results in loose braids. Embrace the thickness and let your braids be bold and voluminous.
Adapting Braids for Damaged or Colored Hair
Red hair that’s been color-treated requires special care when braiding. The coloring process makes hair more fragile, so you need to be gentler during the braiding process. Avoid styles that pull too tightly on the scalp — this puts stress on already-compromised hair. Textured, looser braids work better than tight, controlled ones. Incorporate conditioning treatments into your routine more frequently than you might for uncolored hair.
If your red hair has any breakage or significant damage, definitely skip the ultra-tight styles. Boxer braids and super-structured styles can actually accelerate breakage on vulnerable hair. Instead, choose styles where some looseness and texture is intentional — messy braids, textured versions, and rope twists all look beautiful while being gentler on compromised hair.
Maintenance and Daily Care for Red Braided Looks
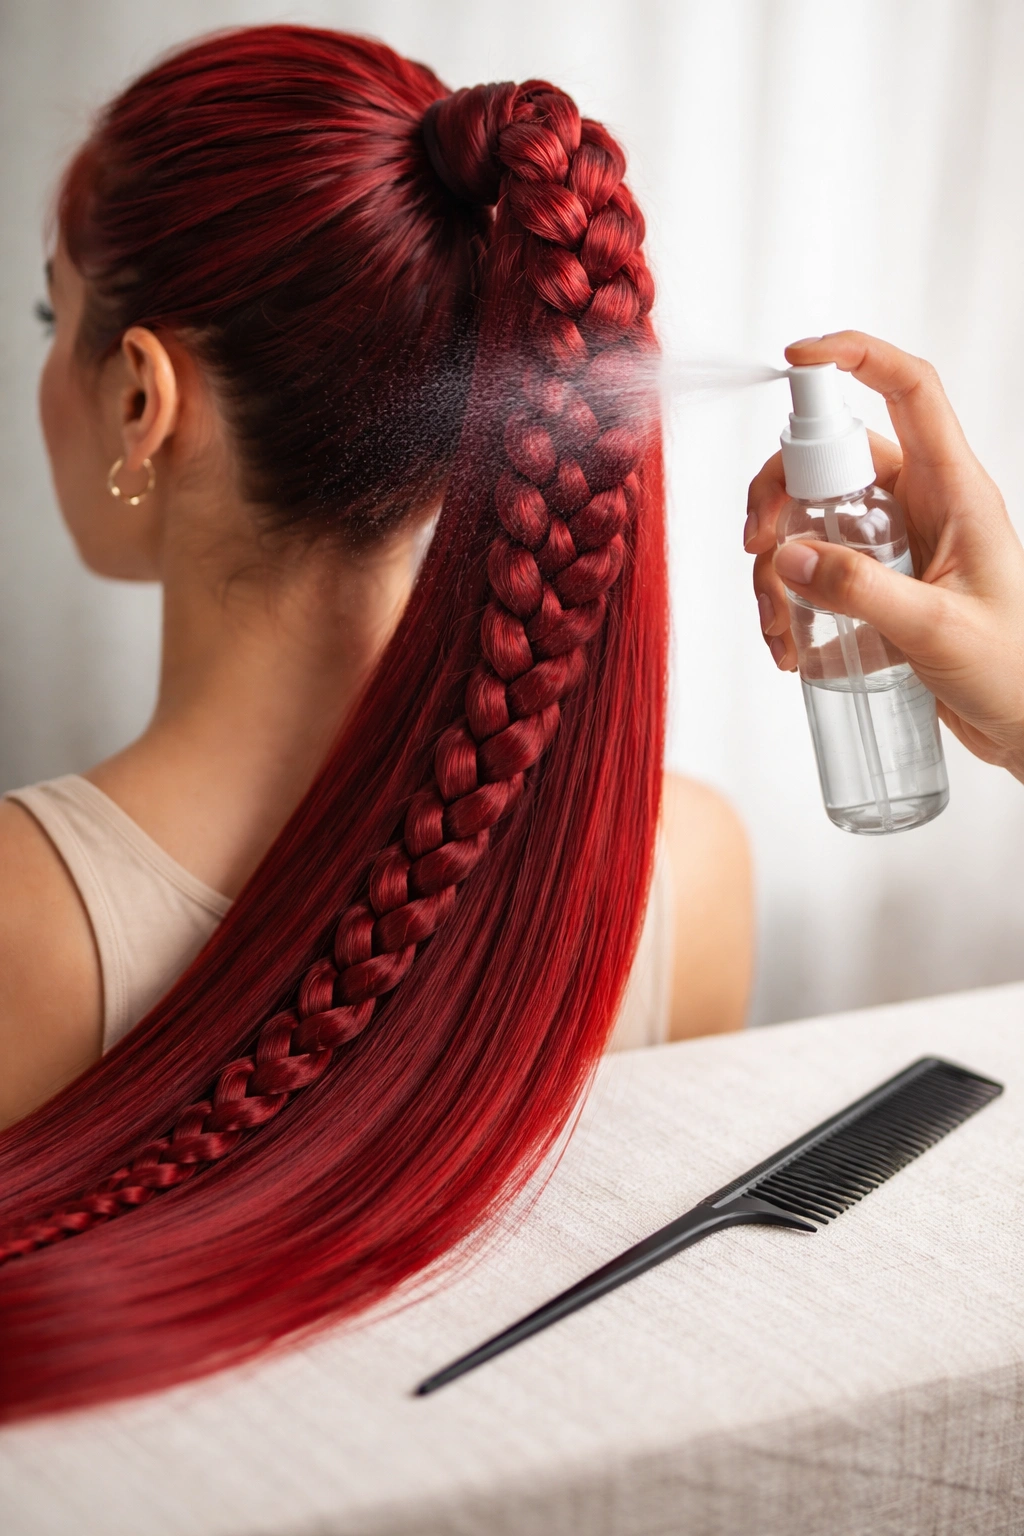
Once you’ve created a beautiful braided ponytail, the goal is keeping it looking great for as long as possible. A bit of maintenance throughout the day goes a long way.
Carry a small bottle of texturizing spray with you, or at least have some available at your desk or in your bag. As your braid loosens slightly throughout the day (completely normal — hair settles and relaxes), a quick spritz of texturizing spray can refresh it and help any loosening sections grip better. A metal rat-tail comb is also helpful for gently smoothing flyaways around your face and hairline.
If your style includes a wrapped braid or twist at the base of your ponytail, check that bobby pin mid-day. As you move, the wrapped section can shift slightly. Repositioning the pin or adding an additional pin takes thirty seconds and keeps everything looking intentional and polished.
Sleeping with Your Braid
If you want your braided style to last into a second day, sleep on a silk or satin pillowcase — this dramatically reduces friction and frizz. Alternatively, loosely braid or twist your ponytail before bed, or wrap it into a low, loose bun. This prevents the ponytail hair from getting creased or flattened against your pillow overnight.
In the morning, if your braid has loosened more than you like, you have options. You can completely rebraid and start fresh (takes 10-15 minutes), or you can use texturizing spray to refresh the existing braid and add grip, combined with gentle smoothing with your rat-tail comb.
Color Protection in Your Braided Style
Red hair in braids is particularly susceptible to fading if exposed to chlorine or saltwater. If you’re planning to swim, don’t wear your braided style in the water. Wet your hair with fresh water first, then apply a leave-in conditioner — this helps minimize how much chlorine or salt your hair absorbs. After swimming, rinse thoroughly with fresh water and follow up with a deep conditioning treatment.
Similarly, sun exposure can fade red hair over time. If you’re spending extended time outside in bright sunlight, consider wearing a hat or using a hair product with UV protection. A lightweight UV-protective spray is available at most beauty supply stores.
Final Thoughts
A braided red ponytail isn’t just a hairstyle — it’s a declaration of confidence and style. You’re not choosing the easiest option, the quickest option, or the path of least resistance. You’re choosing intentionality and visual impact. Whether you prefer the geometric precision of structured braids, the romantic softness of textured styles, or the modern edge of feed-in braids, there’s a braided ponytail approach that matches your personal aesthetic.
The beautiful truth about red hair is that it deserves to be showcased. Braids do that beautifully. They add dimension, movement, and visual interest while demonstrating that you care about how you present yourself to the world. Your red hair is already bold — braiding it just amplifies that boldness in the best possible way.
Start with whichever style feels most achievable based on your current skill level and hair type. A classic Dutch braid into a ponytail is a fantastic entry point if you’re new to braiding. Once you’ve mastered that, experiment with the other options. Each time you practice, you’ll develop muscle memory and understand your hair’s specific needs better. Within a few weeks, styles that seemed complicated will feel intuitive, and you’ll be creating beautiful braided ponytails that make your red hair absolutely sing.