Medium-length hair sits at that sweet spot where you have enough length to play with texture and dimension, but not so much that styling becomes an overwhelming production. Braided ponytails unlock a world of possibilities for this length—they’re the perfect middle ground between simple everyday looks and intricate styles that demand genuine skill to pull off. Whether you’re heading to work, a casual weekend gathering, or somewhere you want to feel put-together, a braided ponytail transforms medium hair from ordinary to intentional in minutes.
What makes braided ponytails so appealing for medium hair is their versatility. You can dial up the polish for professional settings, lean into relaxed texture for casual days, or go full romantic with loose, undone braiding. They work with straight hair, waves, and natural texture. They hide a bad hair day just as easily as they showcase freshly styled locks. Best of all, unlike longer hair that requires elaborate multi-braid constructions, medium-length hair lets you create beautiful braided ponytails with just one or two braids—no need to spend forty minutes wrestling with your own hair.
The styles in this guide range from classic and timeless to modern and unexpected. Some are perfect for when you want your hair completely controlled and polished. Others celebrate a deliberately undone, effortlessly cool vibe. Most can be styled in under ten minutes once you understand the basic technique, and all of them look significantly more sophisticated than a plain ponytail while using the exact same amount of hair length.
These aren’t theoretical styles you’ll find impossible to recreate—they’re practical looks that work on real hair, with real texture, styled by regular people who aren’t professionals. You’ll find specific tips for each one that address the quirks of medium-length hair: how to hide the seam where the braid meets the ponytail, which braids work best for finer hair, and how to make them last all day without the braid sliding out.
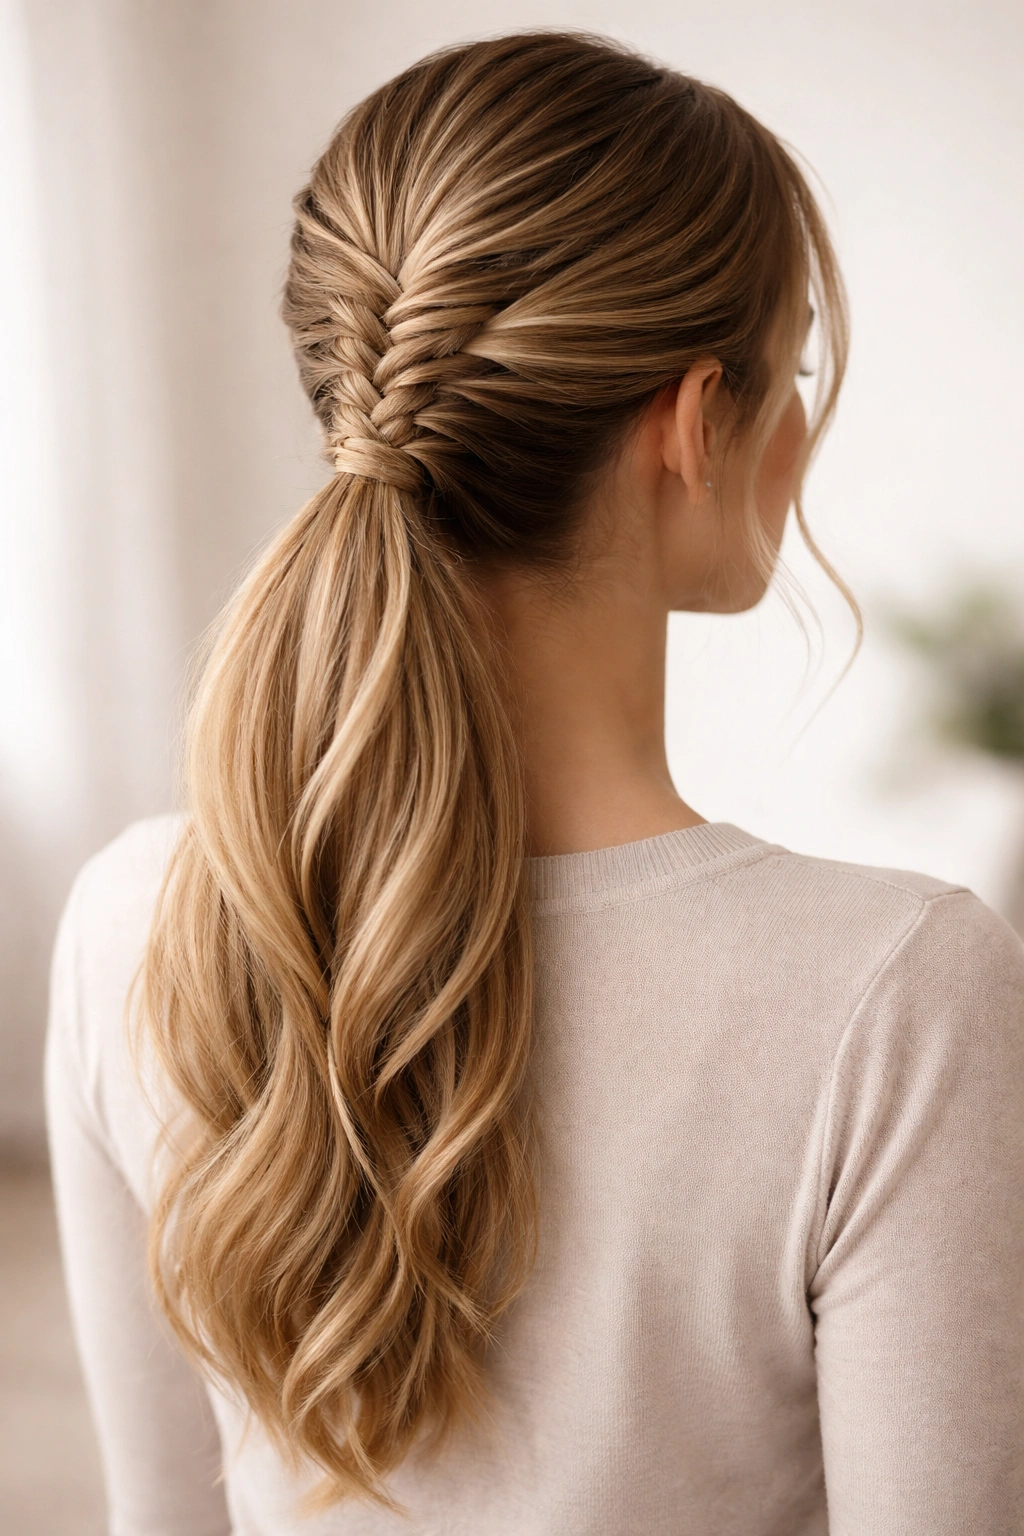
1. Classic French Braid Ponytail
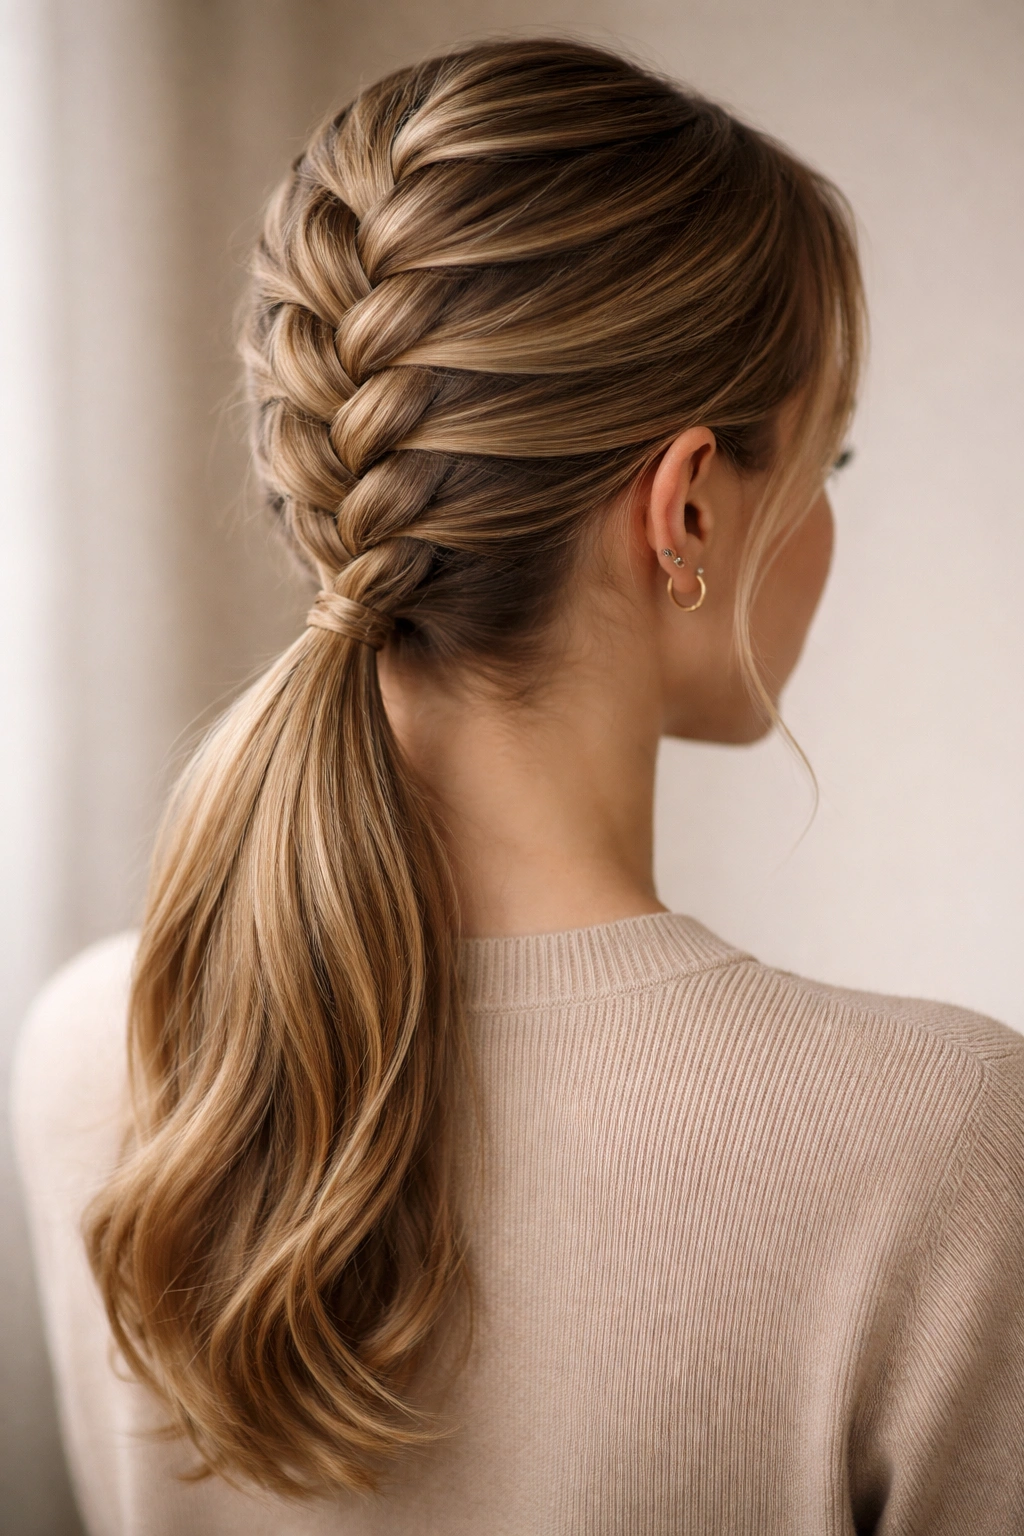
The French braid ponytail is the foundational style that proves braids belong with ponytails. Start the braid at your crown and weave it down the center of your head, gathering hair as you go, before merging it into a ponytail at the base of your skull. For medium-length hair, this creates a polished, intentional look that feels both professional and interesting—all from one simple braid.
Why This Style Works So Well for Medium Hair
The French braid ponytail is wonderfully forgiving for medium lengths because you don’t need enormous volume at the crown to make it look substantial. A braid that starts at your hairline and travels down the center of your head naturally draws attention upward and creates the illusion of more hair density. The style looks intentional and put-together without requiring the kind of thick, heavy hair that longer styles demand. It works equally well on fine, medium, and thick hair textures.
How to Create This Look
- Begin with hair that’s been gently brushed or combed to remove tangles—medium hair shows braid lines more readily than longer hair, so start clean
- Separate a small section of hair at your crown (roughly the width of your three middle fingers placed side by side) and divide it into three parts
- Cross the right section over the middle, then the left section over the middle, just as you would for a standard three-strand braid
- With each crossover, add a small piece of loose hair to the section you’re crossing over, then incorporate it into the braid
- Continue this pattern, working down the center of your head and gathering hair evenly from both sides as you go
- When you reach the nape of your neck, stop adding new hair and finish the remaining length as a standard three-strand braid
- Gather all of your hair (braided and loose) into a low ponytail and secure with a clear elastic
- Gently tug and loosen the braid slightly to add texture and make it feel less rigid
Pro tip: If your braid feels too tight, use a fine-tooth comb to gently backcomb the braid strands before you secure it into the ponytail—this creates a softer, more textured appearance that’s more forgiving of imperfect technique.
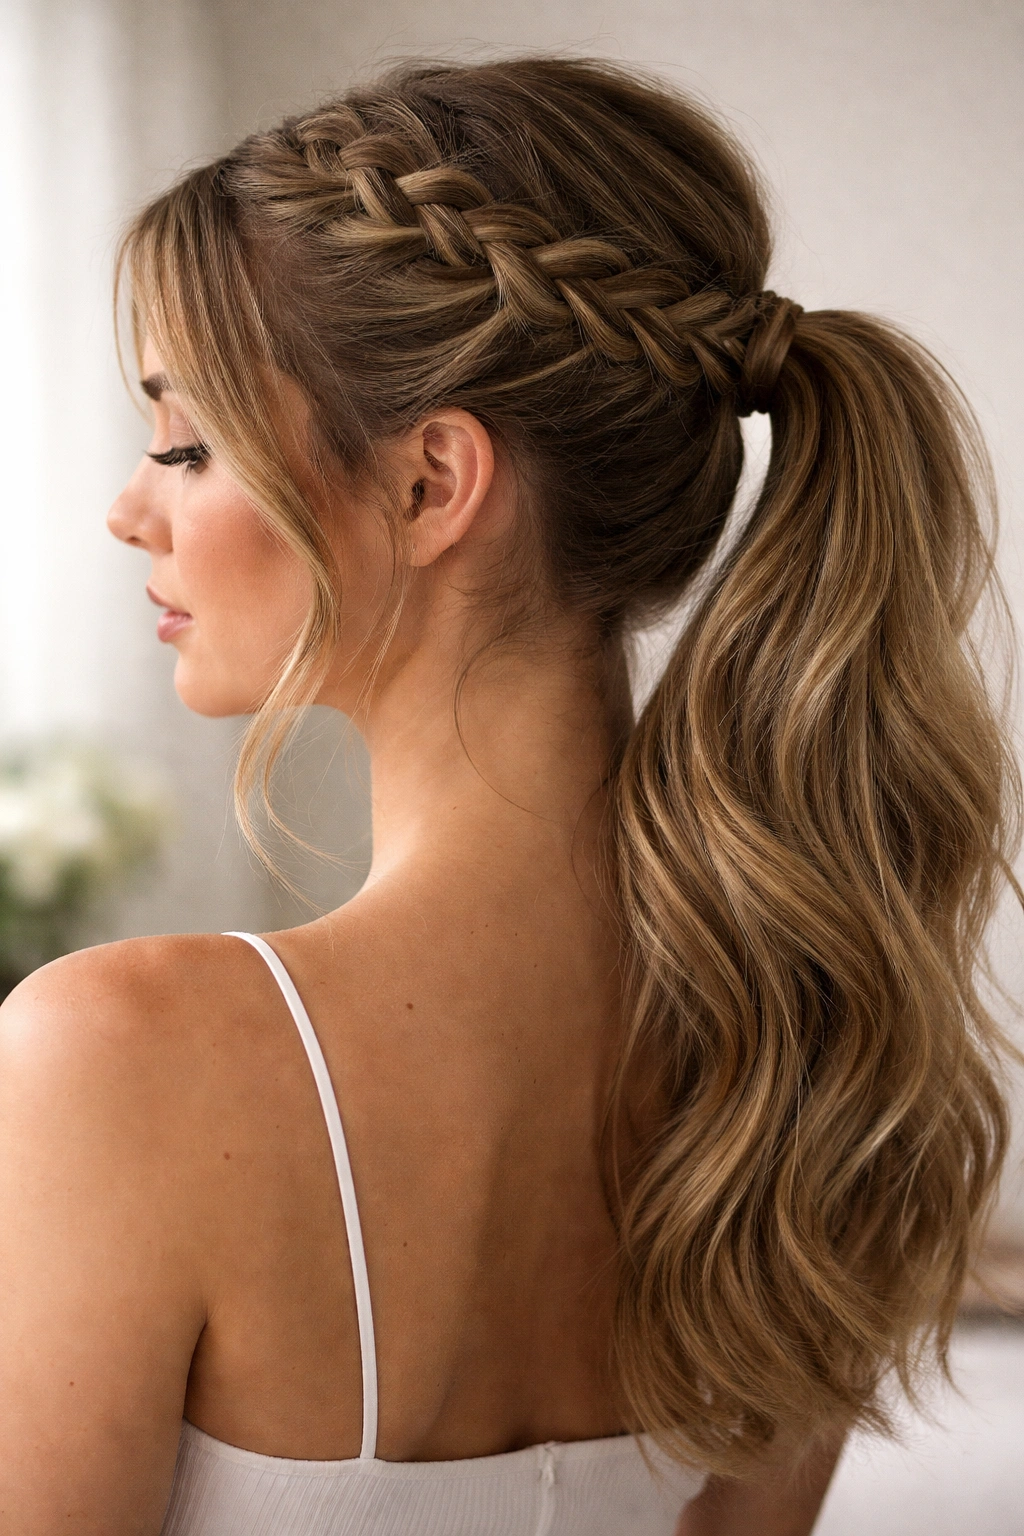
2. Inverted Dutch Braid Ponytail
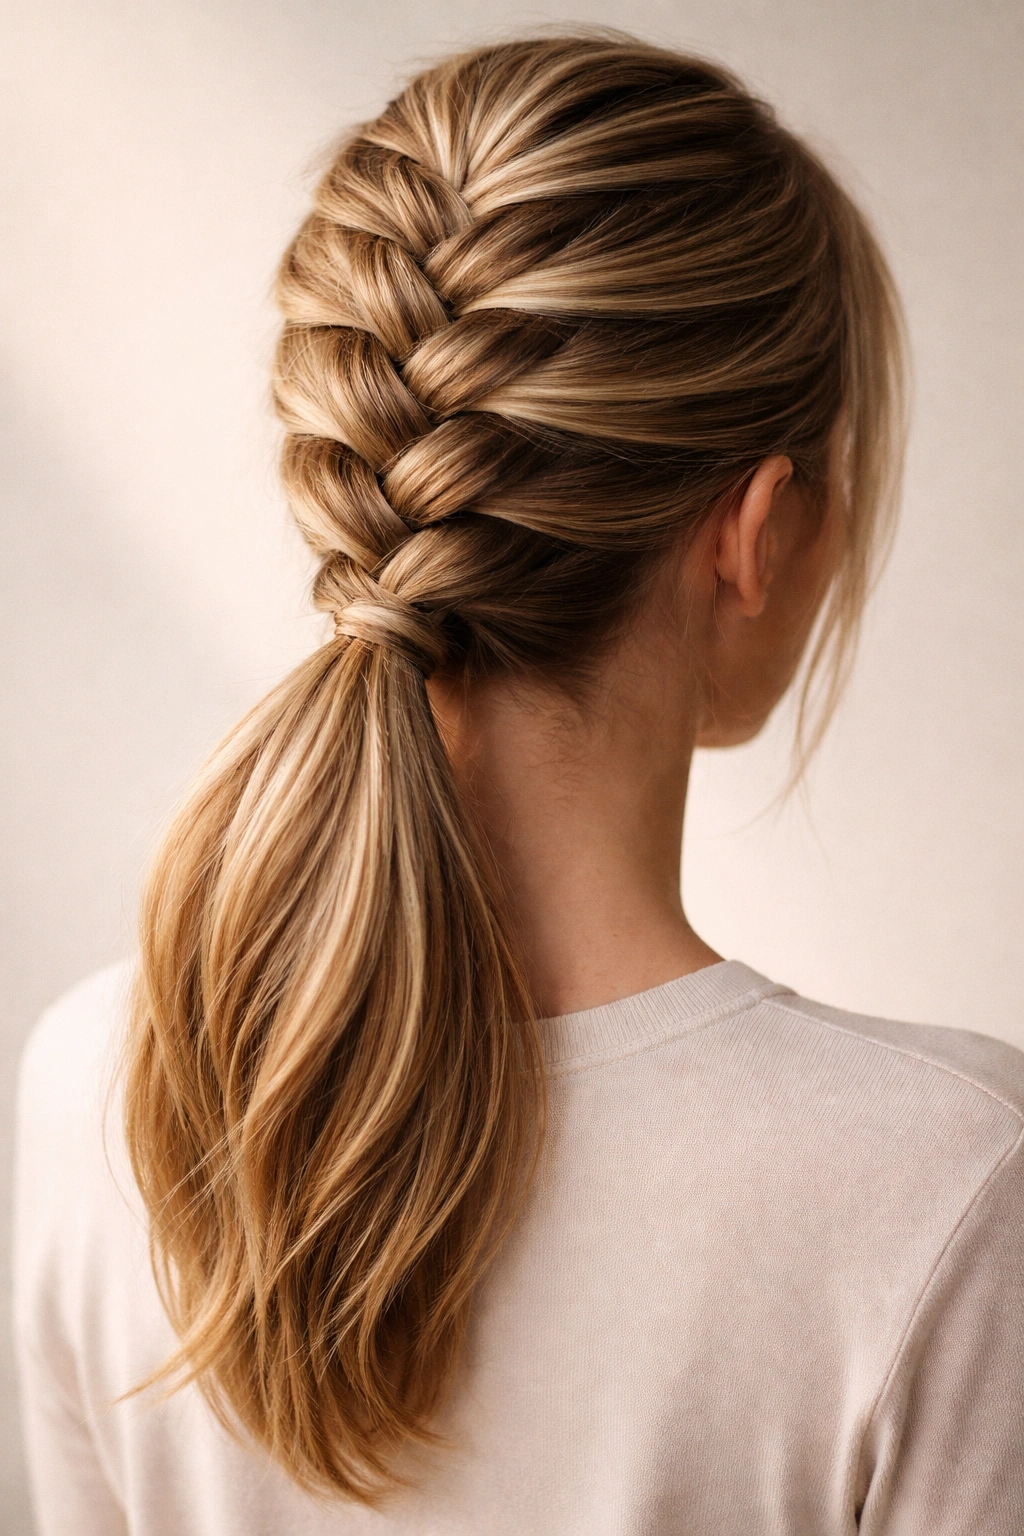
An inverted Dutch braid (also called a reverse Dutch braid) crosses sections under rather than over, creating a raised, three-dimensional braid that sits beautifully on the back of a medium-length head. This style has become incredibly popular because it looks more modern and textured than a French braid, and it photographs beautifully from behind.
The Visual Impact of Underbraiding
When you braid sections under instead of over, the braid builds upward and outward, creating a sculptural effect that catches light and shadow. On medium hair, this three-dimensionality makes a huge difference—an inverted Dutch braid looks richer and more dimensional than a French braid on the same length of hair. It’s still professional enough for work settings, but with a distinctly more intentional, fashion-forward feel. The braid also feels less severe because it sits slightly proud of the scalp rather than being pulled directly into it.
Creating an Inverted Dutch Braid Ponytail
- Start with the same crown section as you would for a French braid—about three inches of hair gathered into three strands
- Instead of crossing right over center, cross right under center, so the strand moves beneath the middle section
- Then cross left under center—again, moving beneath rather than over
- As you continue, add small sections of loose hair to each strand you’re working with, incorporating them under rather than over the center strand
- Work this braid down to the nape of your neck, maintaining an even tension that’s slightly looser than you’d use for a French braid
- Secure the remaining unbraid hair and loose braid length into a ponytail at the base
- Gently stretch and fluff the braid to increase its volume and create dimension
Worth knowing: Inverted braids show every inconsistency in tension more clearly than standard braids, so practice this one a few times in low-pressure situations before wearing it somewhere important—once you get the rhythm, it becomes second nature.
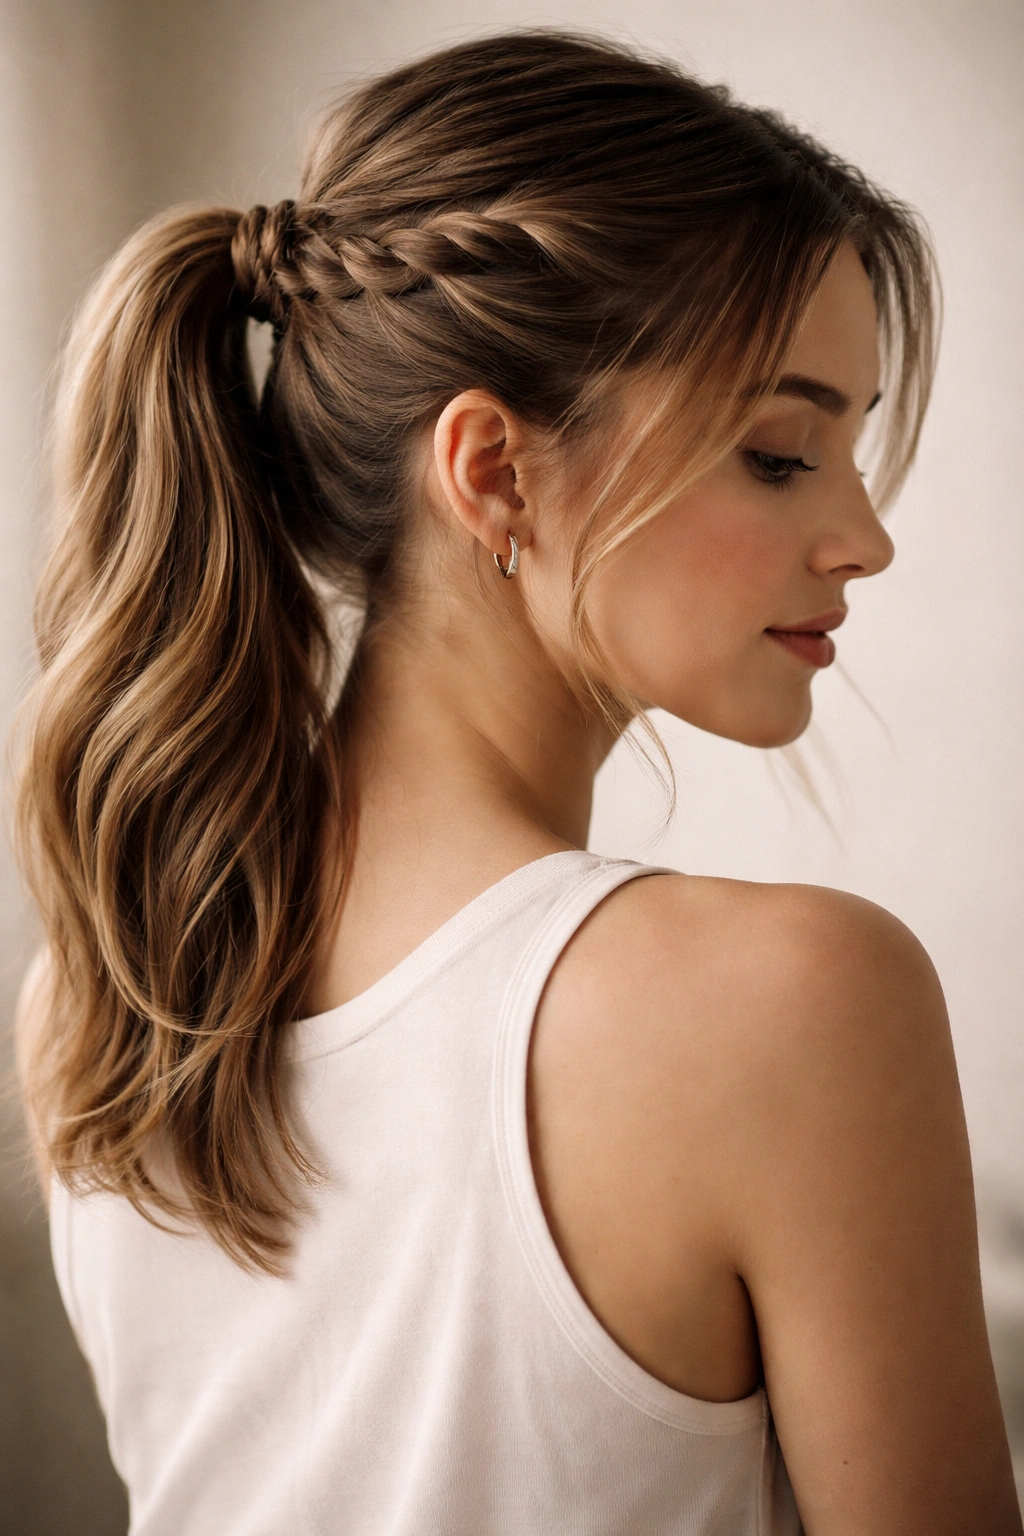
3. Twisted Half-Up Braided Ponytail
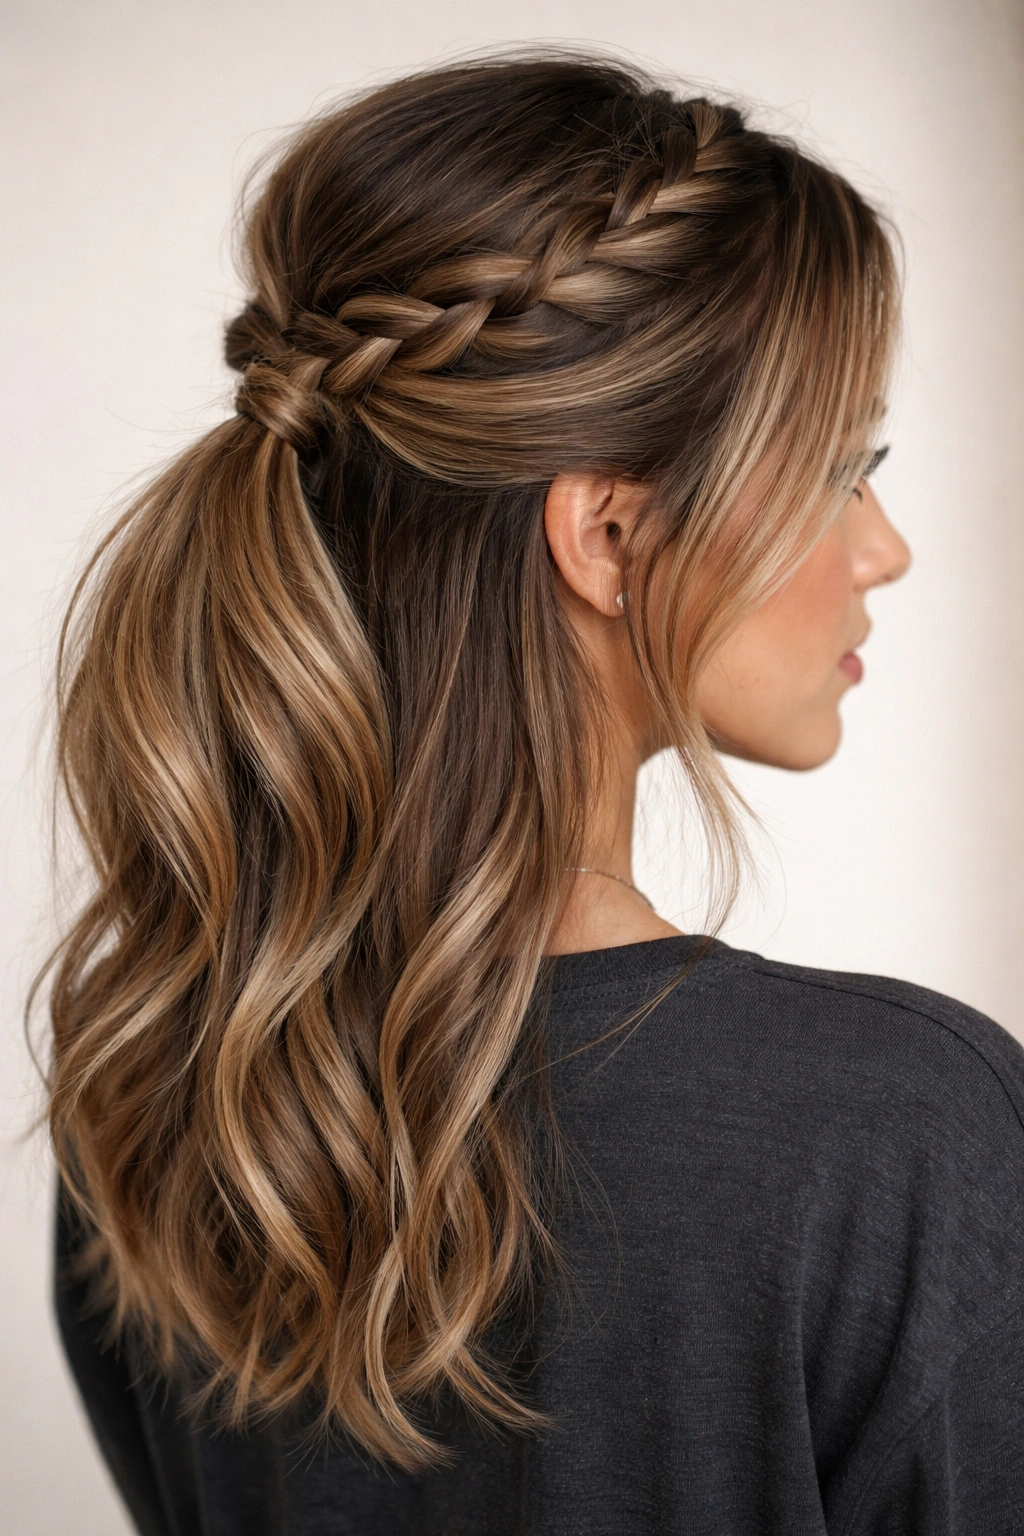
This hybrid style combines the control of a half-up style with the texture of a braid, creating something that feels elegant and modern without looking too formal. Instead of braiding all your hair into a traditional ponytail, you braid only the top section and twist the sides, creating a ponytail that feels more intentional than a simple gather.
Why This Works As a Compromise Style
The half-up braided ponytail is perfect when you want your face completely clear but you don’t want to pull all your hair straight back. It lets you wear your hair down through the length while still creating control at the crown. For medium hair especially, this compromise is ideal—you get the benefit of a braid’s polished appearance in just a section of hair, while the bottom half stays loose and soft. It’s less severe than a full ponytail but more put-together than wearing your hair entirely down.
Building the Twisted Half-Up Braid
- Section off the top quarter of your hair, from temple to temple, creating a clear line at about ear level
- Divide this section into three parts and create a loose three-strand braid, working from your crown toward the back
- Once the braid reaches the back center, secure it with a clear elastic
- Take a small section of hair directly in front of each ear (from the loose bottom section) and twist it loosely
- Gather the braided section, the two twisted sections, and enough loose hair to create a full ponytail at the lower back of your head
- Wrap a small section of hair around the base of the ponytail to hide the elastic—this creates a finished, polished look
- For extra polish, gently tease the braided section with a fine-tooth comb to add softness and dimension
Insider note: This look is forgiving of slightly-flat roots because the braid and twists add so much visual interest at the crown that flat roots actually become less noticeable.
4. Double Braid Wraparound Ponytail
Two braids are better than one, especially when they wrap around to frame a ponytail. This style involves creating a braid on each side of your head, bringing them to the back, and weaving them around the base of a low ponytail. It looks far more complicated than it actually is, making it perfect for anyone who wants to look like they invested serious effort.
The Symmetry and Balance This Style Creates
Double braids inherently create balance and symmetry, which reads as intentional and polished on any hair length. On medium hair, two braids also feel more substantial than a single braid—you’re distributing the texture across your entire head rather than concentrating it in just one line. The wraparound element makes the style feel special-occasion-worthy without being costume-y. It suits every face shape because you’re framing both sides equally.
How to Execute the Wraparound
- Create a French or Dutch braid starting at your temple on one side, working back toward your nape
- Repeat on the opposite side, creating a matching braid that mirrors the first one
- Gather all your hair into a low ponytail at the base of your skull, securing it loosely with an elastic
- Take the first braid and wrap it around the base of the ponytail, securing the end underneath with bobby pins
- Repeat with the second braid, wrapping it in the opposite direction around the ponytail base
- Gently pull and stretch both braids to add texture and volume
- For extra security, use a few bobby pins to anchor the wrapped braids so they don’t slip during the day
Quick fact: This style works beautifully with a sleek, tight base ponytail or a looser, messier one—the braids make whatever you do with the main ponytail look intentional either way.
5. Fishtail Braid Ponytail
A fishtail braid uses a different weaving pattern than traditional braids, creating a delicate, intricate-looking texture from just two strands of hair instead of three. When merged into a ponytail, it creates a sophisticated, romantic effect that works beautifully on medium hair because the finer detail of the fishtail doesn’t disappear into excessive length.
The Delicate Appeal of Fishtail Braiding
Fishtail braids look exponentially more complicated than they are to execute. They’re made from just two main sections instead of three, with small pieces crossed back and forth between them—once you understand the pattern, it becomes almost meditative to create. What makes them special is the final appearance: they look like intricate lattice work or fish scales, much more delicate than a chunky three-strand braid. On medium hair, this delicacy reads as intentional elegance rather than just a smaller version of a longer style.
Creating Your Fishtail Braided Ponytail
- Separate a section of hair at your crown and divide it into two equal sections
- Take a small piece of hair from the outer edge of the right section and cross it over to the left section
- Then take a small piece from the outer edge of the left section and cross it to the right
- Continue this alternating pattern all the way down, keeping your sections even and not too tight
- The smaller the pieces you take from each side, the more intricate and delicate your fishtail will look
- Work the braid down to the nape of your neck, then gather everything into a low ponytail
- Gently stretch and pull the braided sections apart to create that delicate, lacy appearance
- Use a light hairspray to help the texture hold its shape without looking stiff
Real talk: Fishtail braids are harder to master than French braids, but they’re worth practicing—once you get the rhythm, they actually become easier than French braids because you’re not trying to balance three separate sections.
6. Bohemian Loose Braid Ponytail
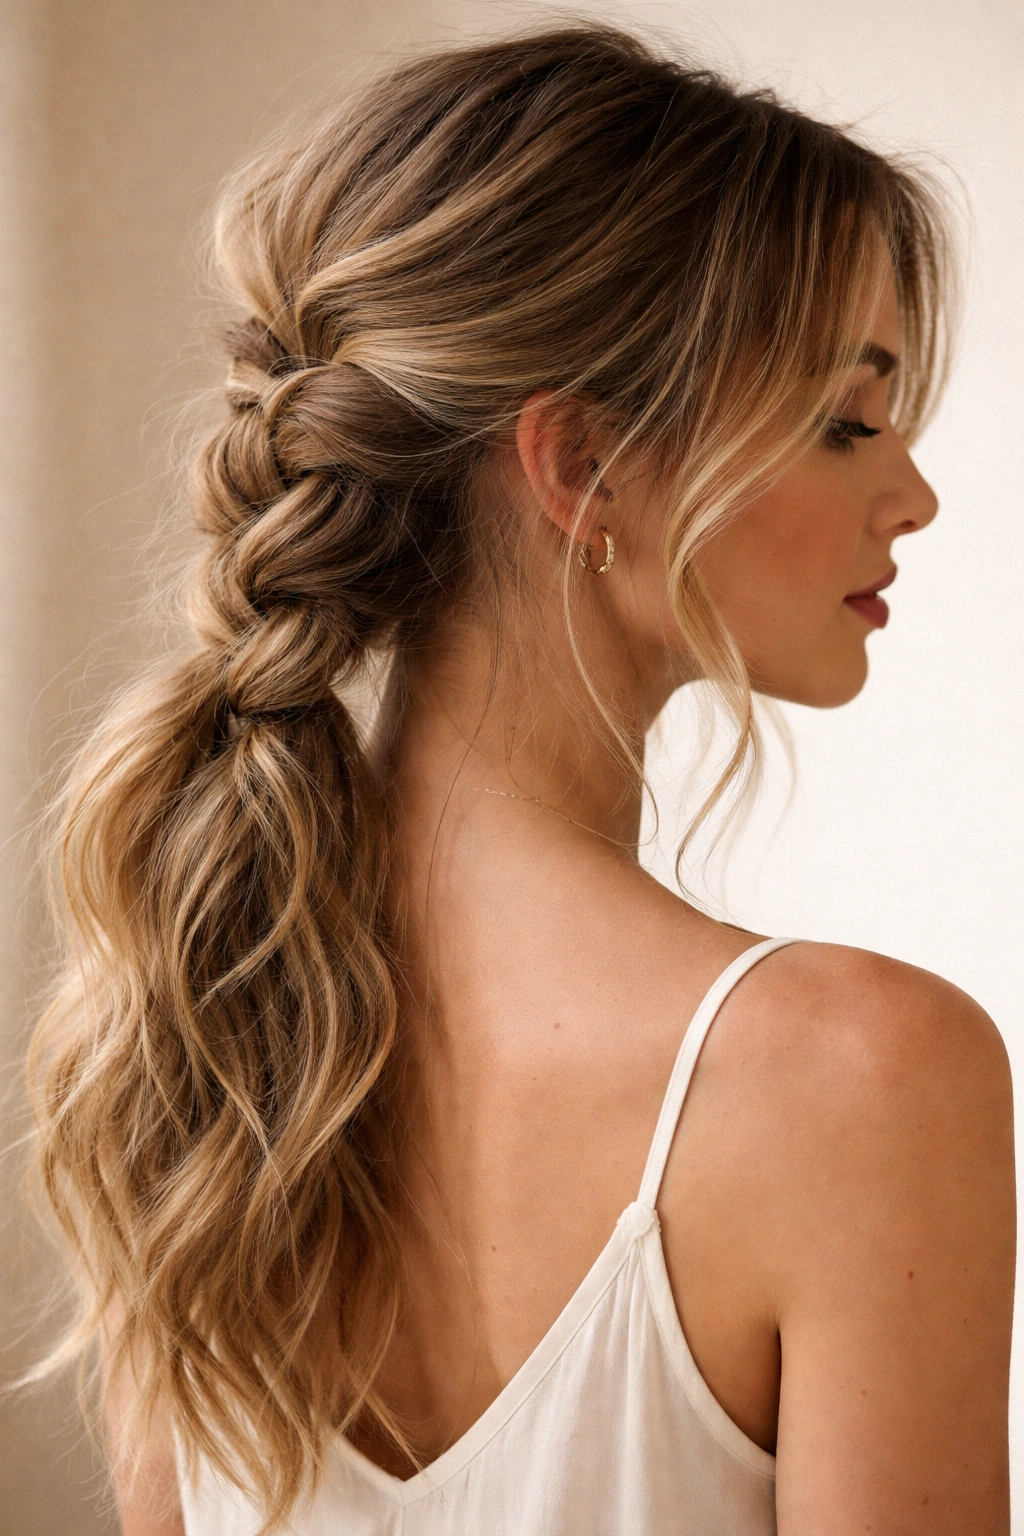
This style is about embracing softness and texture rather than seeking perfect control. A Bohemian braided ponytail starts with loose, undone braiding techniques that intentionally look romantic and effortless. It’s the style to reach for when you want to look like you didn’t try hard, even though you absolutely did.
Creating Intentional Imperfection
The Bohemian aesthetic relies on looseness, on strands that escape, on braids that look like they were created by someone who doesn’t take themselves too seriously. On medium hair, this works beautifully because you don’t have so much length that a loose braid looks sloppy—it looks deliberate. The style suits people who love the idea of a braided ponytail but feel uncomfortable with tight, controlled braiding. It’s also forgiving of texture, damage, and hair that doesn’t cooperate perfectly.
Building the Undone Braid Look
- Start with hair that’s been gently textured—either from waves, from salt spray, or from very light teasing
- Create a braid at your crown using a loose grip, allowing strands to stay quite thick and chunky rather than crossing them tightly
- Don’t worry about stray hairs; they’re actually part of the aesthetic
- Pull and stretch the braid generously as you work, creating a wider, looser appearance
- When you reach the back, incorporate your braid into a low ponytail along with any loose hair
- Pull and stretch the braided sections one more time to maximize that romantic, slightly-undone effect
- Use a light hold hairspray or texturing spray to enhance the natural wave and keep pieces from falling flat
Worth knowing: This look actually photographs better than it feels in person—what seems too loose and messy often looks perfectly romantic and intentional in photos.
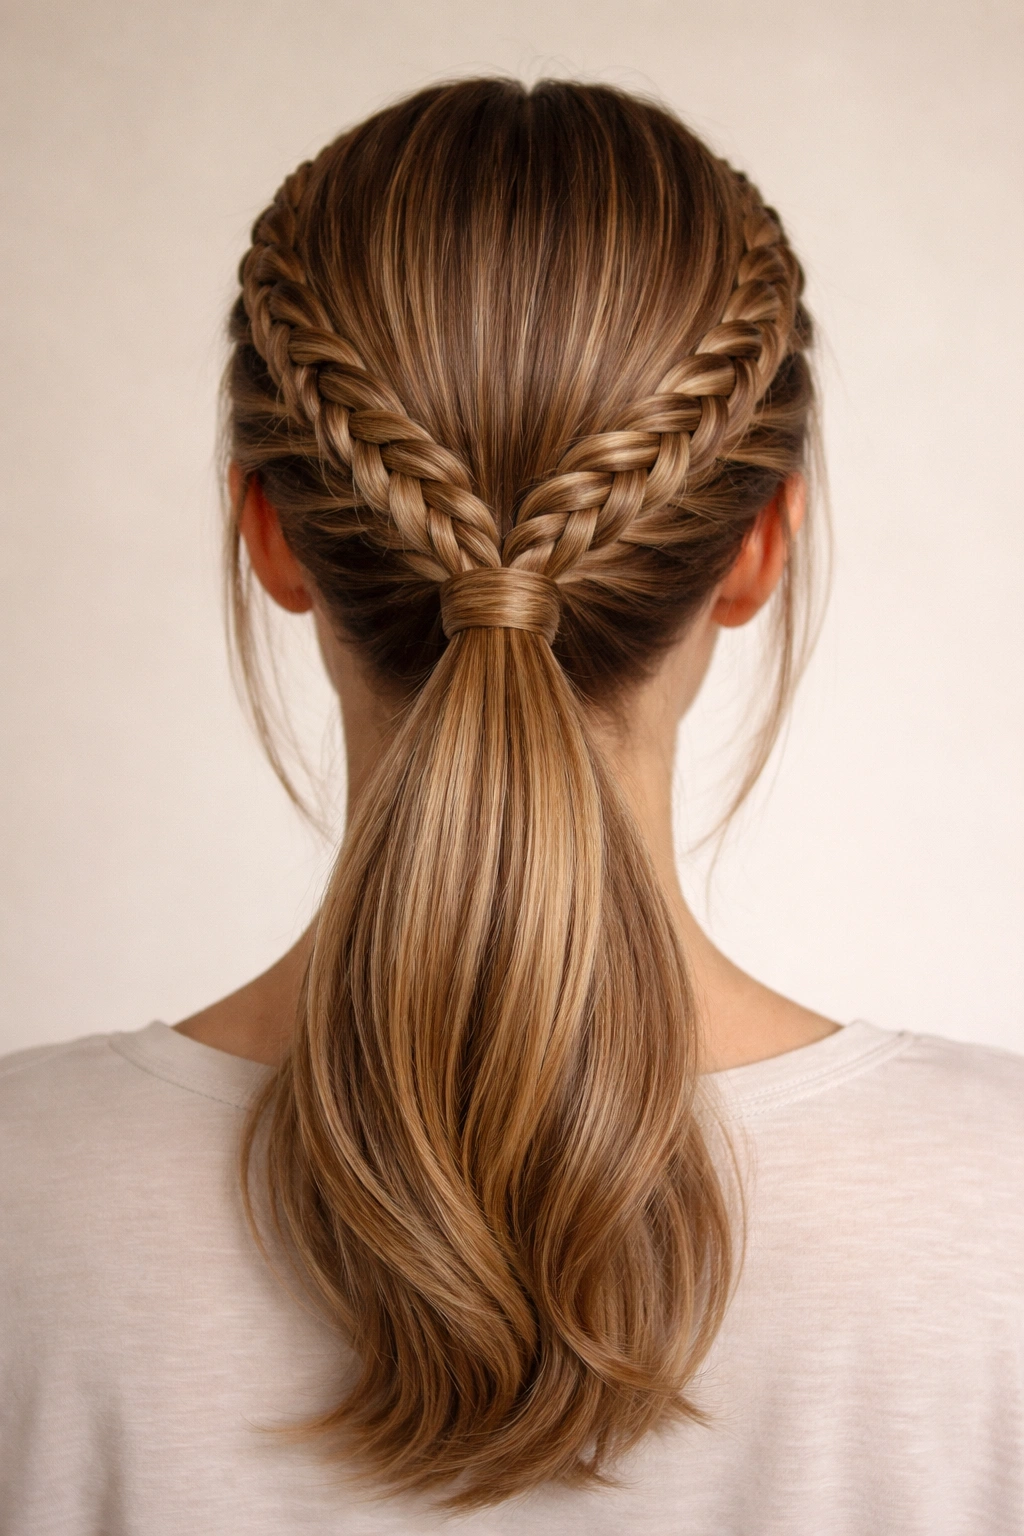
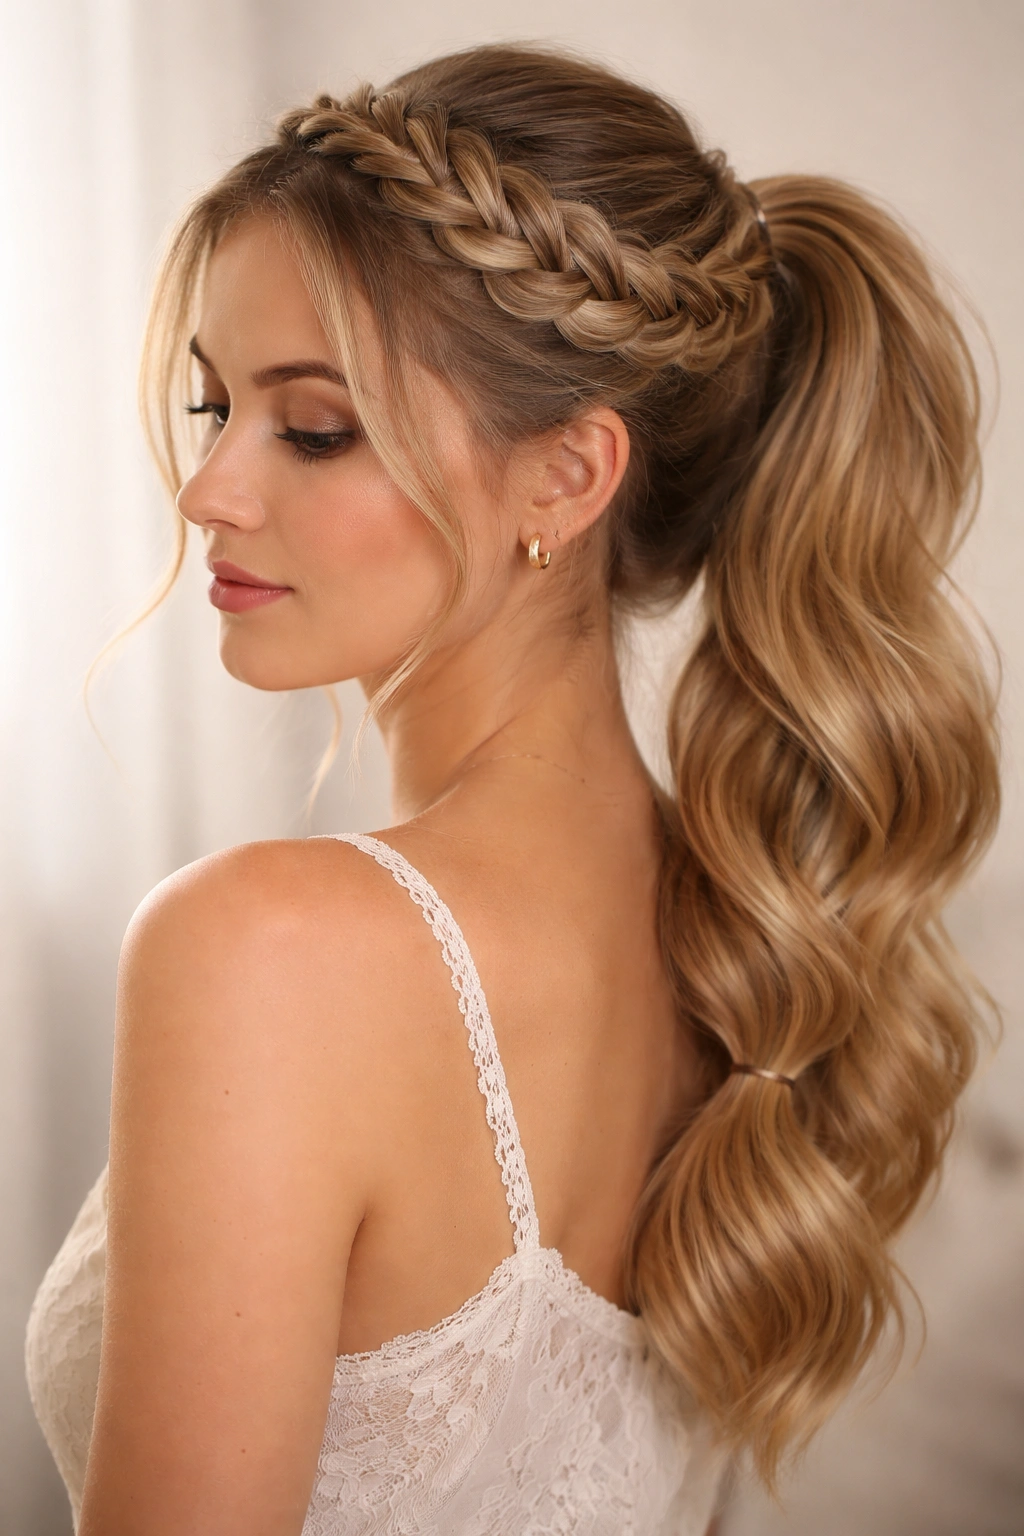
7. Crown Braid Ponytail
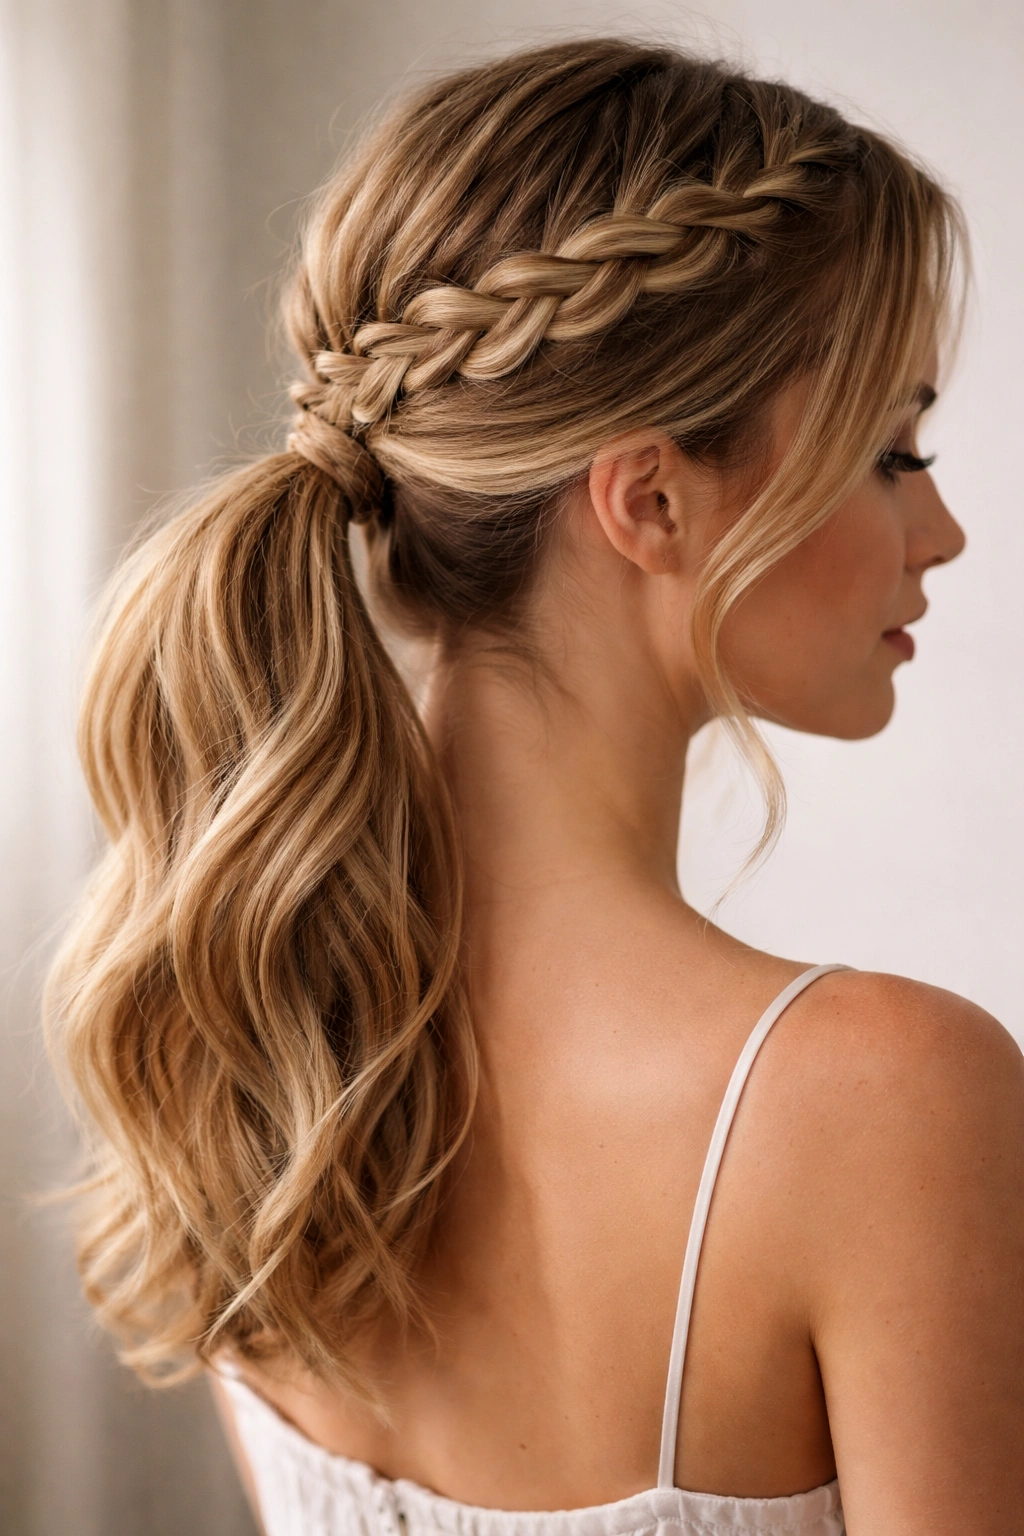
A crown braid wraps around the back of your head, creating a halo effect that’s particularly flattering on oval and heart-shaped faces. When you bring the braid down into a ponytail, it creates a style that’s special enough for weddings or significant events but wearable enough for regular life.
The Romantic Appeal of a Crown
Crown braids have an inherent elegance because they frame your entire head and face. They create height at the crown without requiring teasing or product buildup. On medium hair, a crown braid is achievable without needing the extreme length that makes more elaborate crown styles look best—medium length gives you just enough hair to create a substantial crown without looking like you’re trying too hard.
Creating a Crown That Works
- Take a section of hair from behind one ear and create a standard three-strand braid, working horizontally across the back of your head
- As you braid, gather additional hair from underneath, working toward the opposite ear
- The braid should follow the natural curve of the back of your head, creating that crown effect
- Continue until you reach the opposite ear, then secure the braid loosely
- Gather all of your hair (including the crown braid) into a low ponytail at the nape
- For extra volume, gently tease the crown braid upward before securing the ponytail
- Pull and stretch the braid to add softness and dimension
- Secure with bobby pins hidden underneath for a seamless look
Pro tip: If your crown feels too flat, create the crown braid without gathering additional hair—just braid three thick sections from the loose hair at your sides, creating a braid that sits on top of your actual hair rather than incorporating it.
8. Side-Swept Braided Ponytail
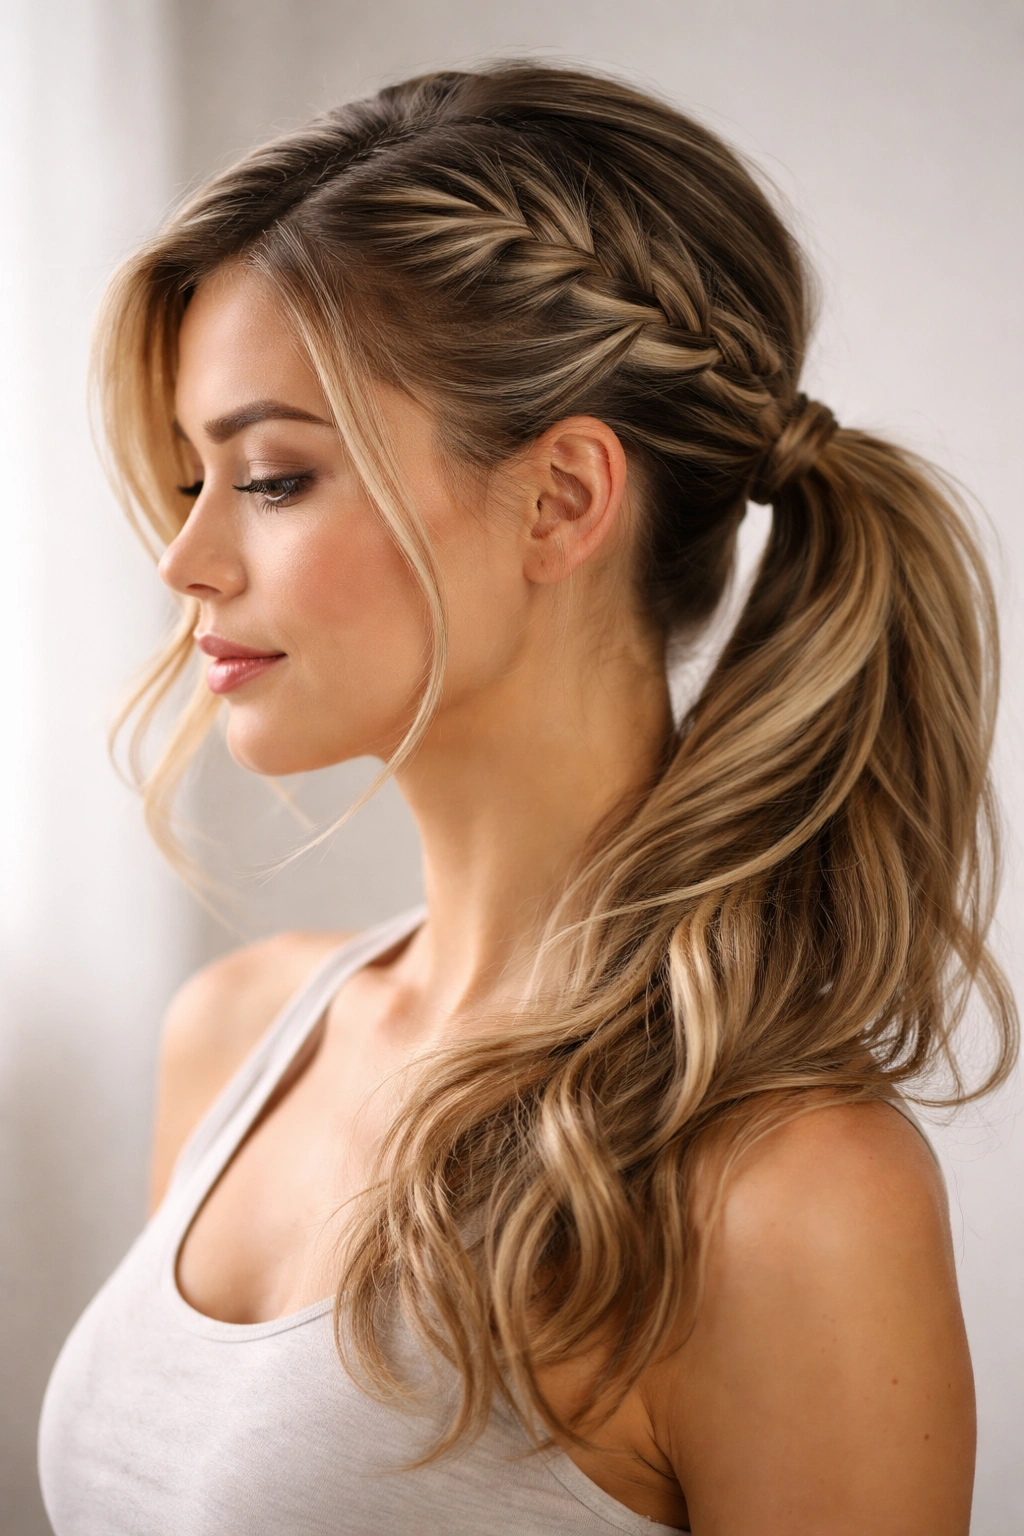
This style sweeps your braided section to one side, creating an asymmetrical, modern look that feels more fashion-forward than a centered ponytail. It works beautifully on medium hair because the length is substantial enough to create visual interest when swept to the side, but not so long that it feels overwhelming.
The Modern Edge of Asymmetry
Asymmetrical hairstyles feel inherently more interesting and intentional than perfectly centered styles. A side-swept braided ponytail takes that principle and applies it to ponytail styling. Instead of your braid traveling straight down the center, it starts at the crown and angles toward one side, creating movement and visual direction. This style particularly suits people with longer faces because the asymmetry can help balance facial proportions.
Executing the Sweep
- Create a French or Dutch braid that angles slightly to one side from the moment you start at the crown
- Rather than working straight down the center, mentally aim for the nape of your neck on the side you’ve chosen
- Keep gathering hair as you braid, but gather slightly more from the opposite side to create that diagonal direction
- Once you reach the nape, secure the braid loosely and let it fall to the side
- Gather all your hair into a low ponytail positioned slightly off-center (toward the side your braid is angling)
- For extra impact, pull and stretch the braid so it becomes wider and more visible
- Consider leaving a few face-framing pieces loose on the opposite side from your braid for extra asymmetry
Worth knowing: This look pairs beautifully with a deep side part, which automatically guides your braid in the right direction.
9. Bubble Braid Ponytail with Side Braid
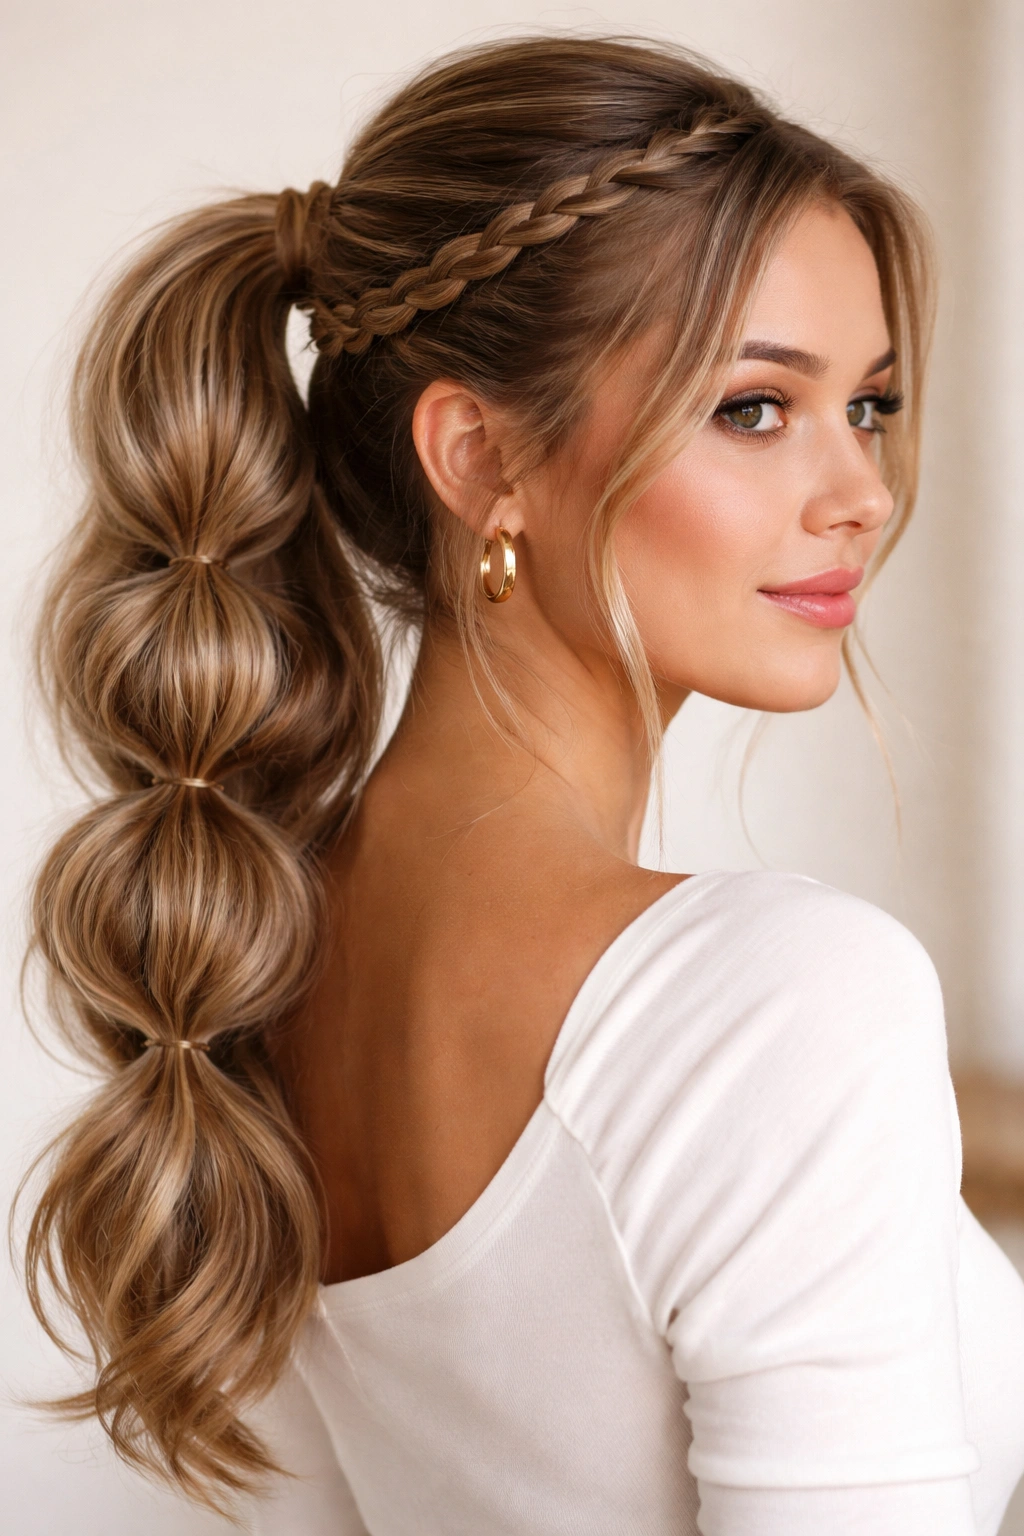
A bubble braid uses elastic bands placed at intervals along a loose braid to create distinct, puffy sections that look playful and textured. When combined with a side braid incorporated into a ponytail, it creates a style that’s modern, youthful, and surprisingly sophisticated despite its playful appearance.
The Textured Interest of Bubbles
Bubble braids create visual interest without requiring complex braiding technique. The technique is simple: create a very loose braid (almost like you’re not trying), then place small elastics or bobby pins at intervals, puffing out each section by gently pulling the braid strands outward. The result is a braid that looks dimensional and textured. When you incorporate this into a ponytail, you’re adding layers of visual interest.
Creating the Bubble Effect
- Create a very loose braid starting from one side, working toward the back of your head
- Rather than keeping the braid sections tight, intentionally make them quite loose and thick
- Once you’ve completed the braid, place a small clear elastic approximately two inches from your crown
- Gently pull the braid section above the elastic outward to create a bubble
- Place another elastic two inches below the first, then pull that section into a bubble
- Continue this pattern down the length of your braid
- Gather your bubble braid and all remaining hair into a low ponytail
- For extra texture, gently stretch and loosen the bubbles even more
- Finish with light hairspray to help the bubbles hold their shape
Insider note: Smaller bubbles look more intentional than large ones—aim for bubbles about the size of a grape or walnut rather than creating oversized sections.
10. Waterfall Braid into Ponytail
A waterfall braid creates the effect of water cascading down the side of your head by dropping sections of hair as you braid, allowing those sections to fall loose. When you incorporate a waterfall braid into a ponytail, you’re combining two techniques that complement each other beautifully: the flowing, romantic quality of a waterfall braid with the polish of a gathered ponytail.
The Romance of the Waterfall Effect
Waterfall braids are visually striking because they create an open, flowing appearance while still incorporating braided texture. Unlike a standard braid that contains all the hair in one section, a waterfall braid deliberately releases strands, creating that cascading effect. On medium hair, this technique creates beautiful visual movement without requiring such length that the effect becomes lost.
Executing the Waterfall
- Create a section at your temple and divide it into three parts to begin a standard braid
- As you cross the sections, instead of incorporating new hair into the outer sections, drop the outer section and pick up a new piece of loose hair
- This dropping and picking up creates the waterfall effect—the dropped section falls loose while you continue braiding
- Work the waterfall braid toward the back of your head, maintaining that dropping pattern throughout
- Once you reach the back, you’ll have a braid with several loose strands cascading down
- Gather everything (the braid, the cascading strands, and all remaining hair) into a ponytail
- The cascading strands will create beautiful visual interest within and around the ponytail base
- Gently tease and loosen the braided portion to add softness and create a more romantic appearance
Pro tip: This style looks especially beautiful on wavy or curly hair because the texture makes the cascading sections more visible and interesting.
11. Milkmaid Braided Ponytail
A milkmaid braid (sometimes called a lace braid or crown lace braid) involves creating a delicate, open braid where you can see through the spaces between the braided sections. When brought down into a ponytail, it creates a style that feels vintage and romantic while still looking modern and wearable.
The Elegant Openness of a Lace Braid
What makes a milkmaid braid special is the deliberate spacing and openness of the braiding pattern. You’re not braiding tightly or even in the traditional over-under pattern—instead, you’re creating a braid where the sections are spread apart enough that you can see the hair underneath. This technique creates a delicate, lacy appearance that reads as elegant and intentional. On medium hair, this creates visual interest without overwhelming the head with too much texture.
Creating the Lace Effect
- Start with a three-strand braid at your crown, but use much thicker sections than you normally would
- Braid very loosely, making each crossover slowly and deliberately
- Instead of pulling the sections tight, spread them slightly apart after each crossover, creating visible space between them
- The visual effect should be almost like a rope that’s been loosened and spread
- Continue this pattern all the way down to the nape of your neck
- Gather all your hair (braided and loose) into a low ponytail
- Gently stretch and separate the braided sections to emphasize the lace effect
- Use bobby pins hidden underneath to reinforce the braid if needed, but avoid tightening it
Worth knowing: This braid requires loose, confident movements—if you try to tighten it or make it perfect, you’ll lose the delicate effect that makes it beautiful.
12. Infinity Twisted Braid Ponytail
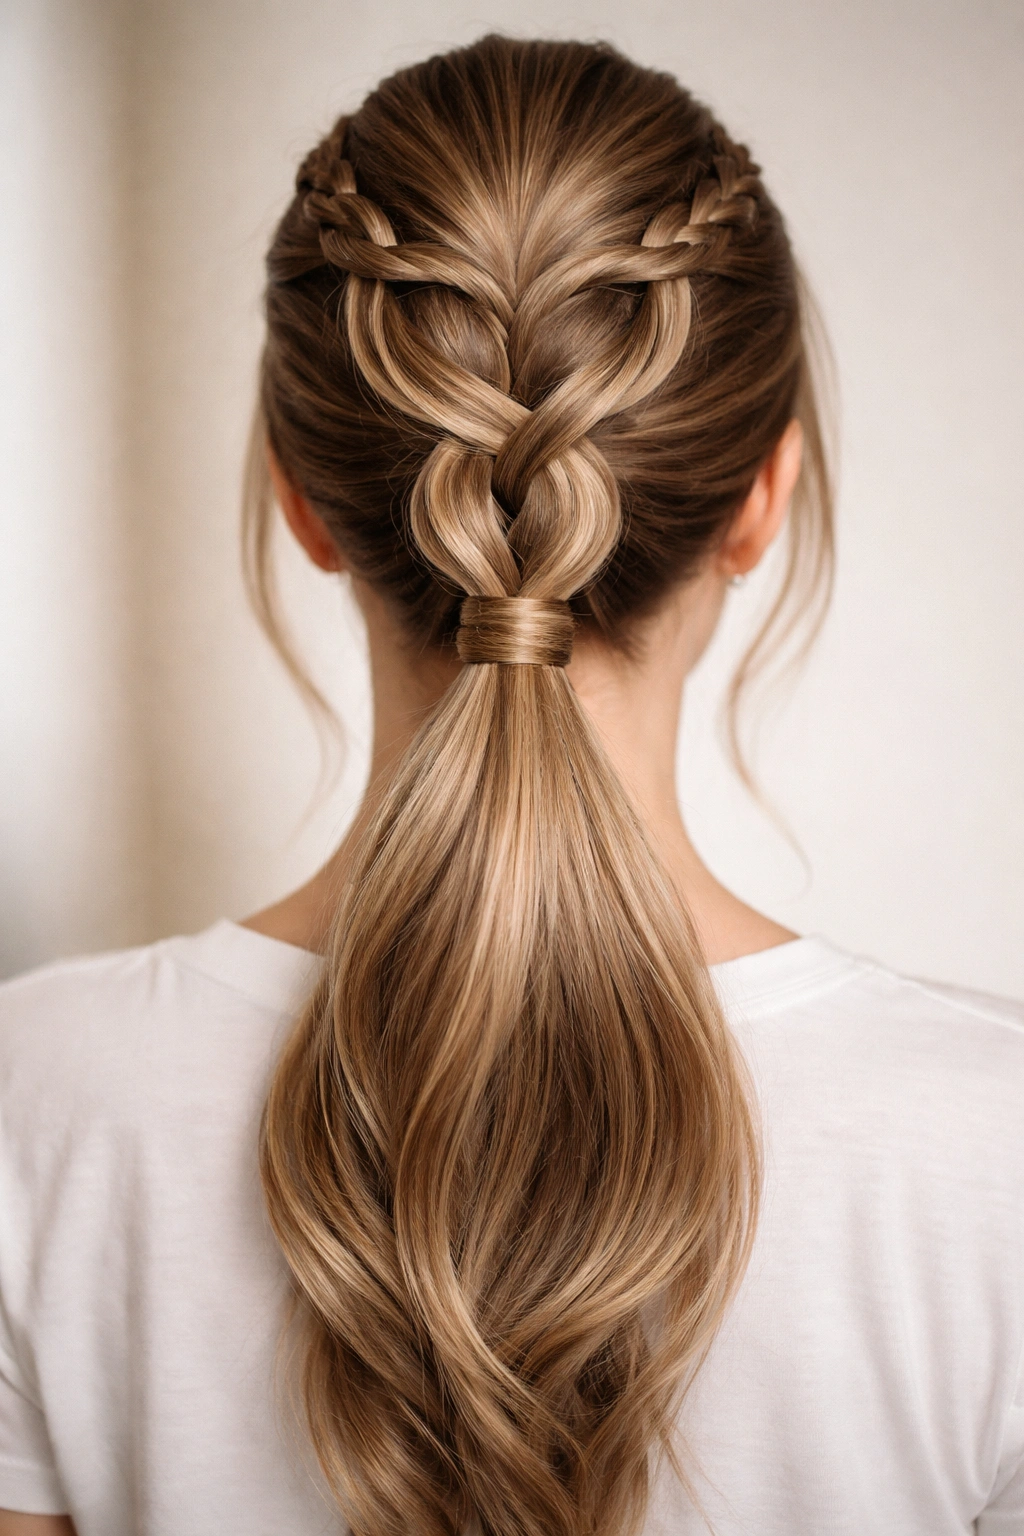
An infinity twist creates a figure-eight or looping pattern with twisted hair sections, giving the effect of complexity without requiring braiding skill. When you incorporate this into a ponytail, it creates a style that looks genuinely intricate and modern.
The Modern Appeal of Twisted Sections
Infinity twists use the same basic principle as standard twists—taking two sections and spiraling them around each other—but with the added element of incorporating them into loops or figure-eight patterns. The visual effect is more complex than a simple twist but actually easier to execute because you’re not balancing three separate sections. On medium hair, infinity twists create modern visual interest that reads as intentional and fashion-forward without looking costume-y.
Executing the Infinity Twist
- Create two sections of hair at your crown, one from each side
- Twist one section tightly around itself, working toward the back of your head
- At roughly the midpoint, loop that twisted section and bring it back toward the center, creating a loop
- Repeat with the second section, creating a matching loop that forms a figure-eight pattern with the first twist
- Gather all of your hair (including the twisted sections) into a low ponytail at the base
- For extra impact, gently stretch and widen the twisted loops to create more visual interest
- Secure the ponytail firmly because the twisted loops sit on top and need strong support
- If needed, use bobby pins hidden underneath to reinforce the twisted sections
Pro tip: This style photographs beautifully from behind because the twist patterns are clearly visible and create interesting visual depth.
Final Thoughts
A braided ponytail transforms medium-length hair from everyday to intentional, and the variety of techniques available means you’ll never run out of fresh options. Whether you’re drawn to the classic elegance of a French braid, the modern edge of an inverted Dutch braid, or the playful texture of bubble braids, there’s a braided ponytail that matches your mood, your skill level, and your hair goals.
What makes these styles work on medium hair is that they’re substantial enough to look finished and intentional, but not so long that they require extreme volume or complicated multi-braid constructions. Most can be created in under ten minutes once you understand the basic technique, and all of them elevate your entire appearance without requiring professional styling.
Start with whichever style speaks to you—if French braids feel approachable, begin there and master the centering and tension before moving on to more complex variations. If you’re drawn to the delicate look of fishtails or the romantic effect of waterfall braids, practice those first and let the simpler styles come naturally. The more you practice any braiding technique, the more automatic your hands become, and the easier it is to create these styles on yourself. Medium hair is genuinely the perfect length for braided ponytails—long enough to create beautiful texture and detail, but short enough that you can manage everything without a second set of hands.