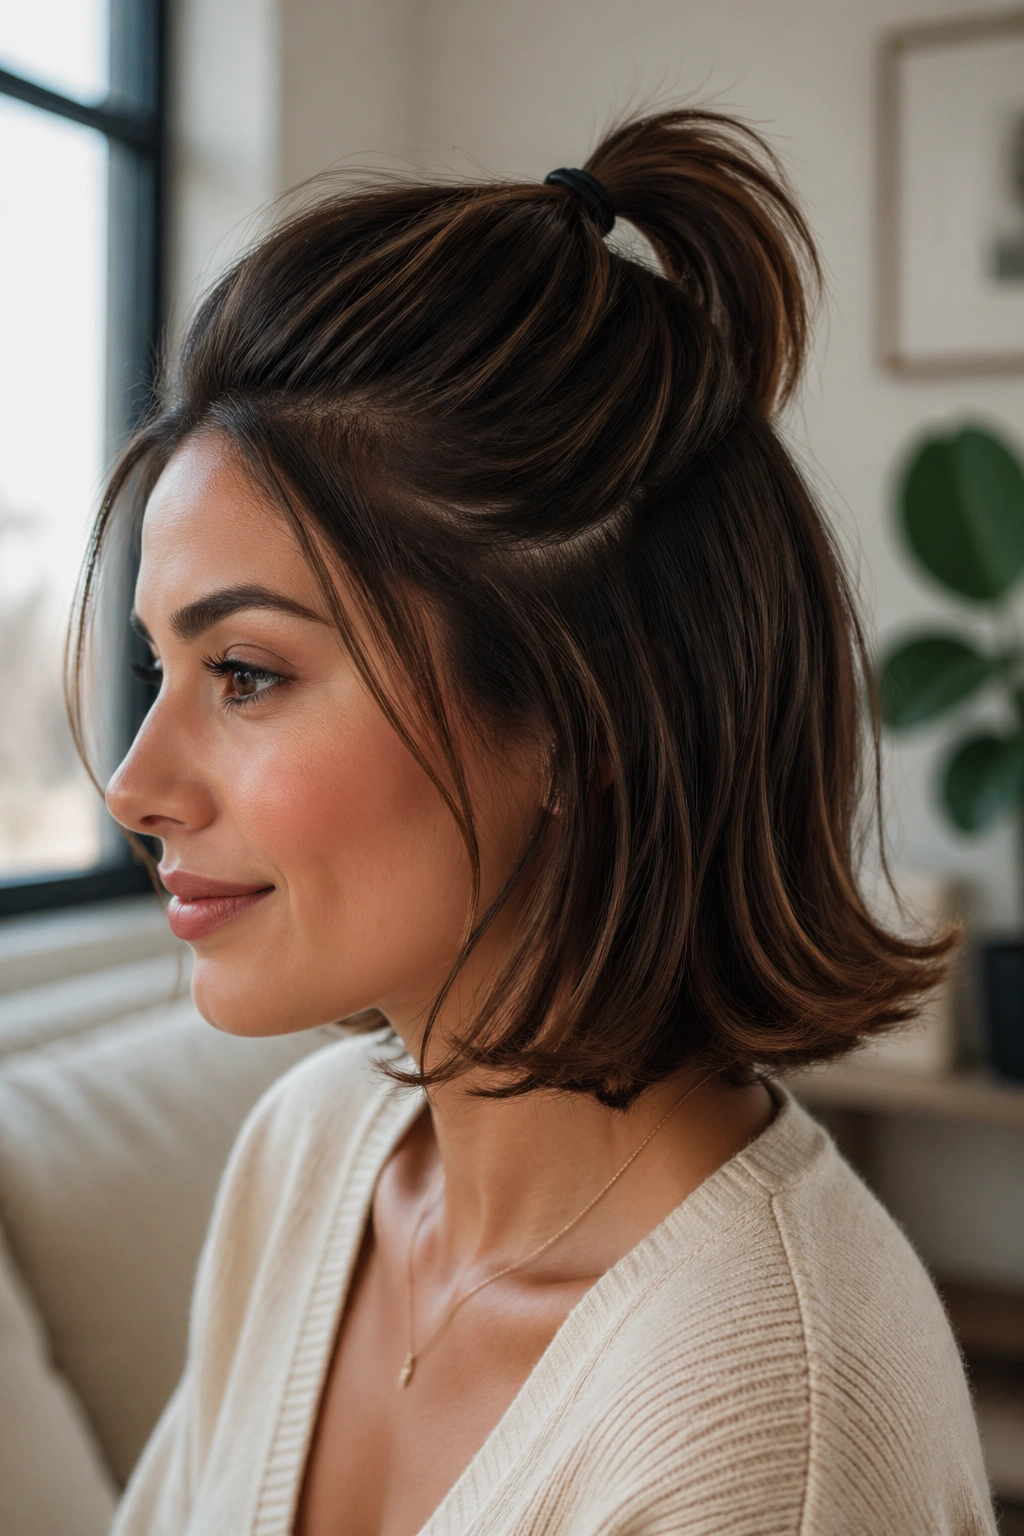
A bob can look polished in five minutes — or look like it gave up halfway through the day. Half up bob styles for short hair sit right in that narrow gap where the cut keeps its shape and the crown gets a little lift. That tiny lift matters more than people think.
Flat roots are the enemy.
The trick is not making the style bigger. It is making the top section cleaner, smaller, and better placed. Short hair usually behaves best when you work with the top two to three inches, leave the ends alone, and let a few face-framing pieces stay loose. I reach for clear elastics, 1-inch bobby pins, a texturizing spray, and a tail comb before I touch anything else.
If your bob is chin length, you can play with twists, knots, clips, braids, and tiny ponytails that would fall apart on longer hair. If it sits higher, the styles need to be more compact and more pinned; that is not a flaw, it is the whole point. The sections below lean on shapes that hold, move, and still look like a real haircut instead of a rushed fix.
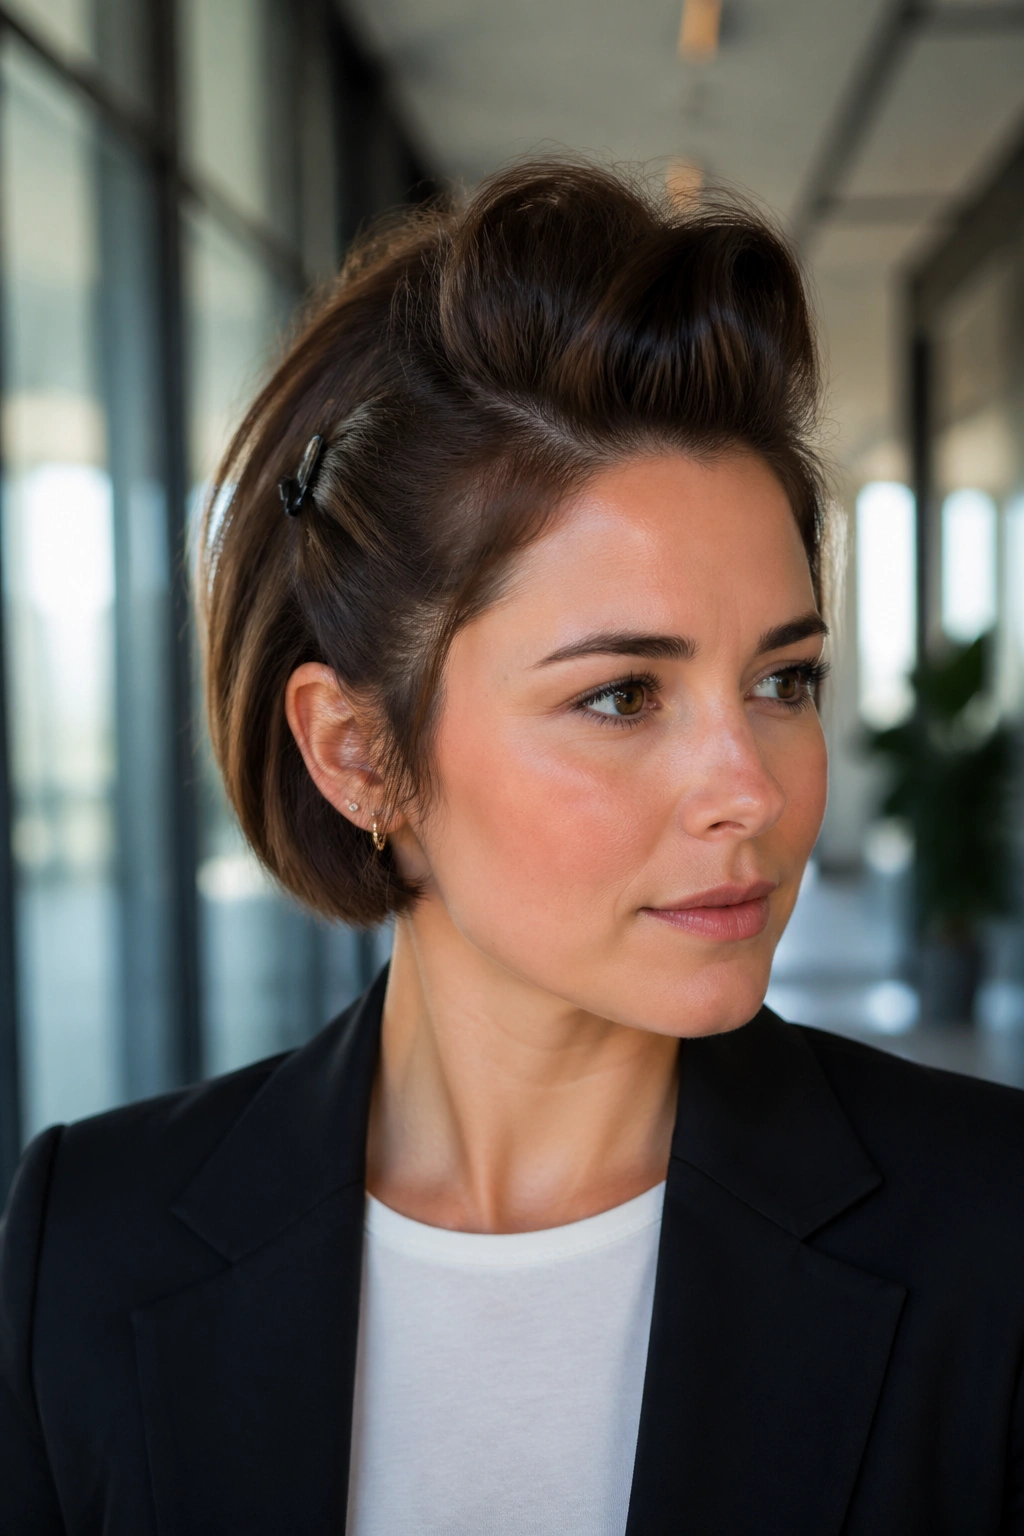
1. Sleek Mini Knot at the Crown
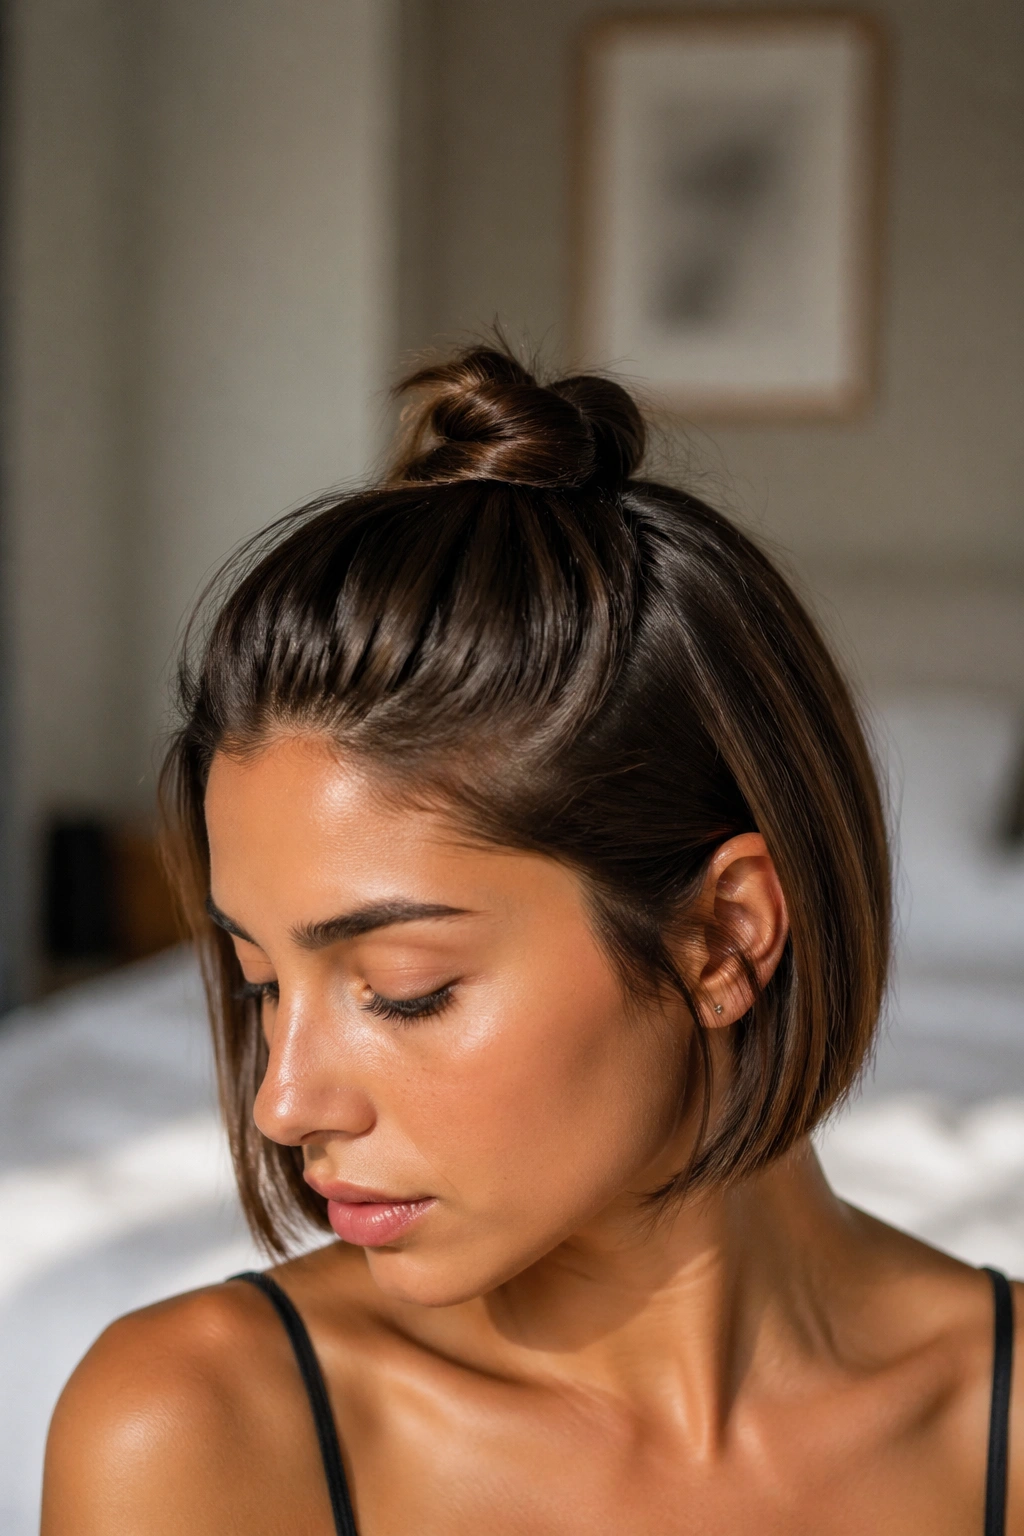
A mini knot is the half-up style I trust when short hair needs to look deliberate fast. The point is not height. It is a small, neat knot that sits close to the crown and keeps the bob’s outline visible.
If the top layer reaches 3 to 4 inches, you already have enough hair to make this work. Pull from temple to temple, gather only the top section, and smooth the sides with a pea-sized amount of cream before you twist. The knot should look compact enough that you can still see the shape of the bob below it.
Why it flatters short hair
Short hair can look heavy when every strand hangs in the same direction. A mini knot breaks that line and gives the crown a slight lift, which helps especially on straight bobs that fall flat by lunchtime. I like leaving the ends tucked, not flared, because a fluffy knot starts to look accidental.
- Section about 1.5 to 2 inches deep at the crown.
- Secure with a clear elastic, then wrap one thin strand around the base.
- Use 2 crossed bobby pins if your hair slips.
- Finish with a flexible hairspray held 8 to 10 inches away from the head.
Keep the knot tiny; if it starts looking like a topknot, you’ve gone too far.
2. Soft Rope Twist With Face-Framing Ends

Why does a rope twist look so good on a bob? Because it keeps the top smooth while the side pieces still move. That mix matters on short hair, where too much control can make the whole cut feel stiff.
A rope twist is easier than a braid and usually sits flatter against the head. Split the front section into two pieces, twist each one inward, and then wrap them around each other as you move back toward the crown. The finished twist should land low enough that the bob still reads as a bob.
How to get the twist to sit low
Start the twist about an inch above the temple, not right on the hairline. If you begin too far forward, the style pulls away from the face and gets severe fast. Leave two thin pieces out near the cheekbones; they soften the line and keep the style from feeling overdone.
A small bend at the ends helps more than a full curl. If your bob is blunt, use a 1-inch curling iron and wrap the ends for about 5 seconds each. Then finger-comb them once they cool so they don’t spring into ringlets.
Soft is the point. That’s the whole appeal here.
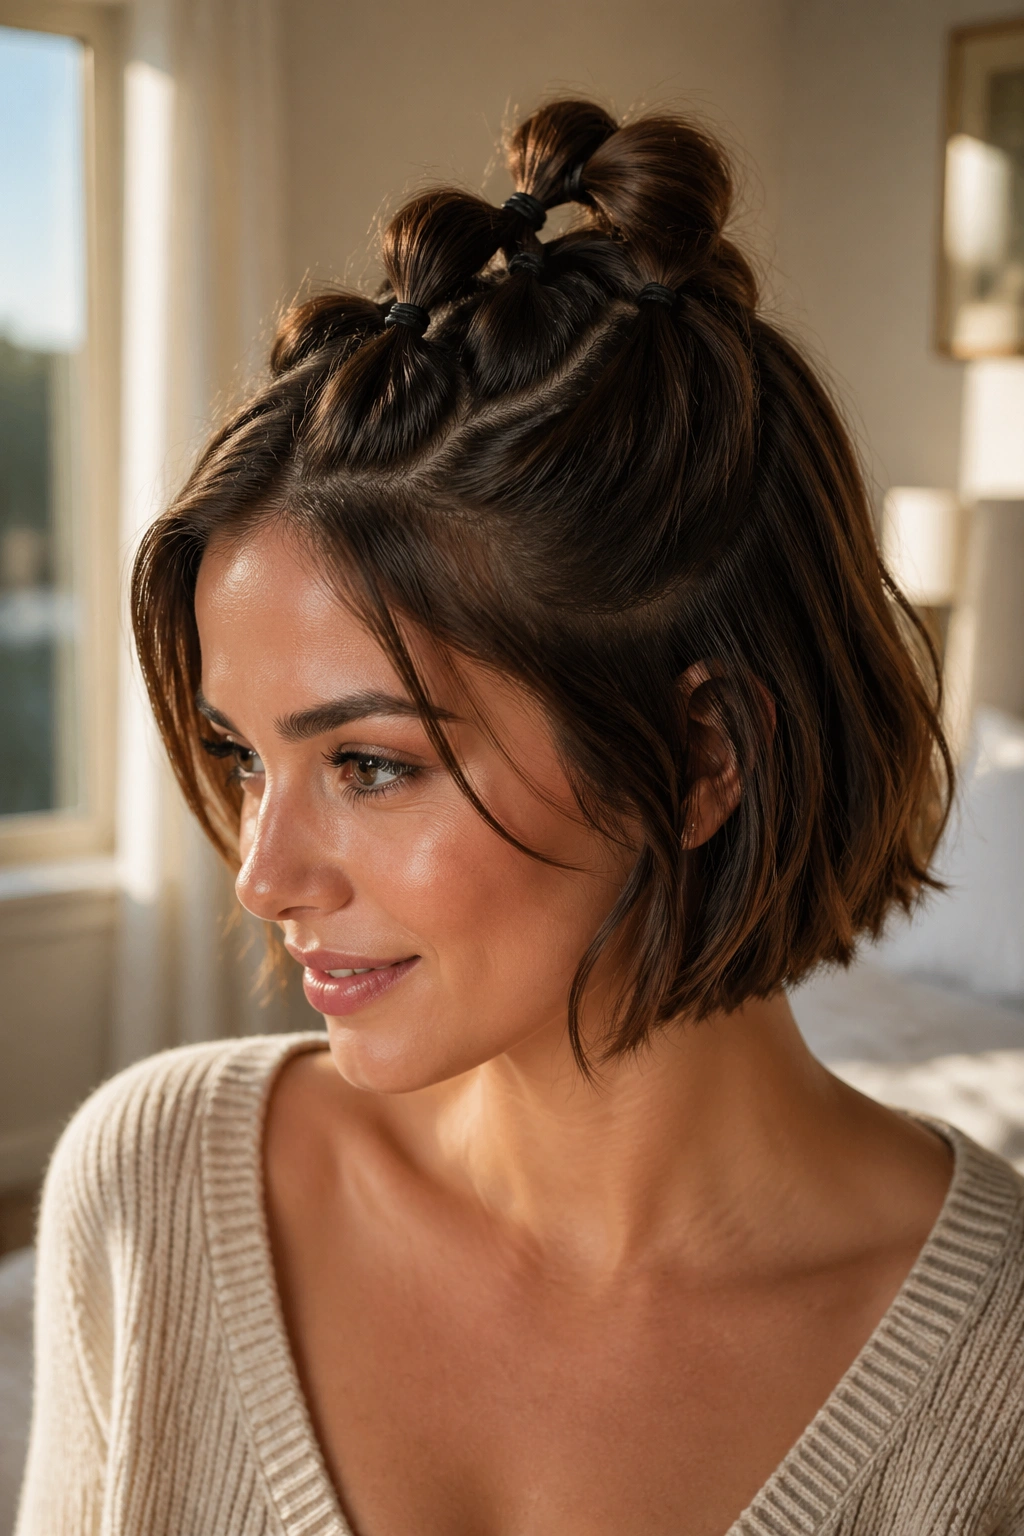
3. Double Mini Buns on a Short Bob
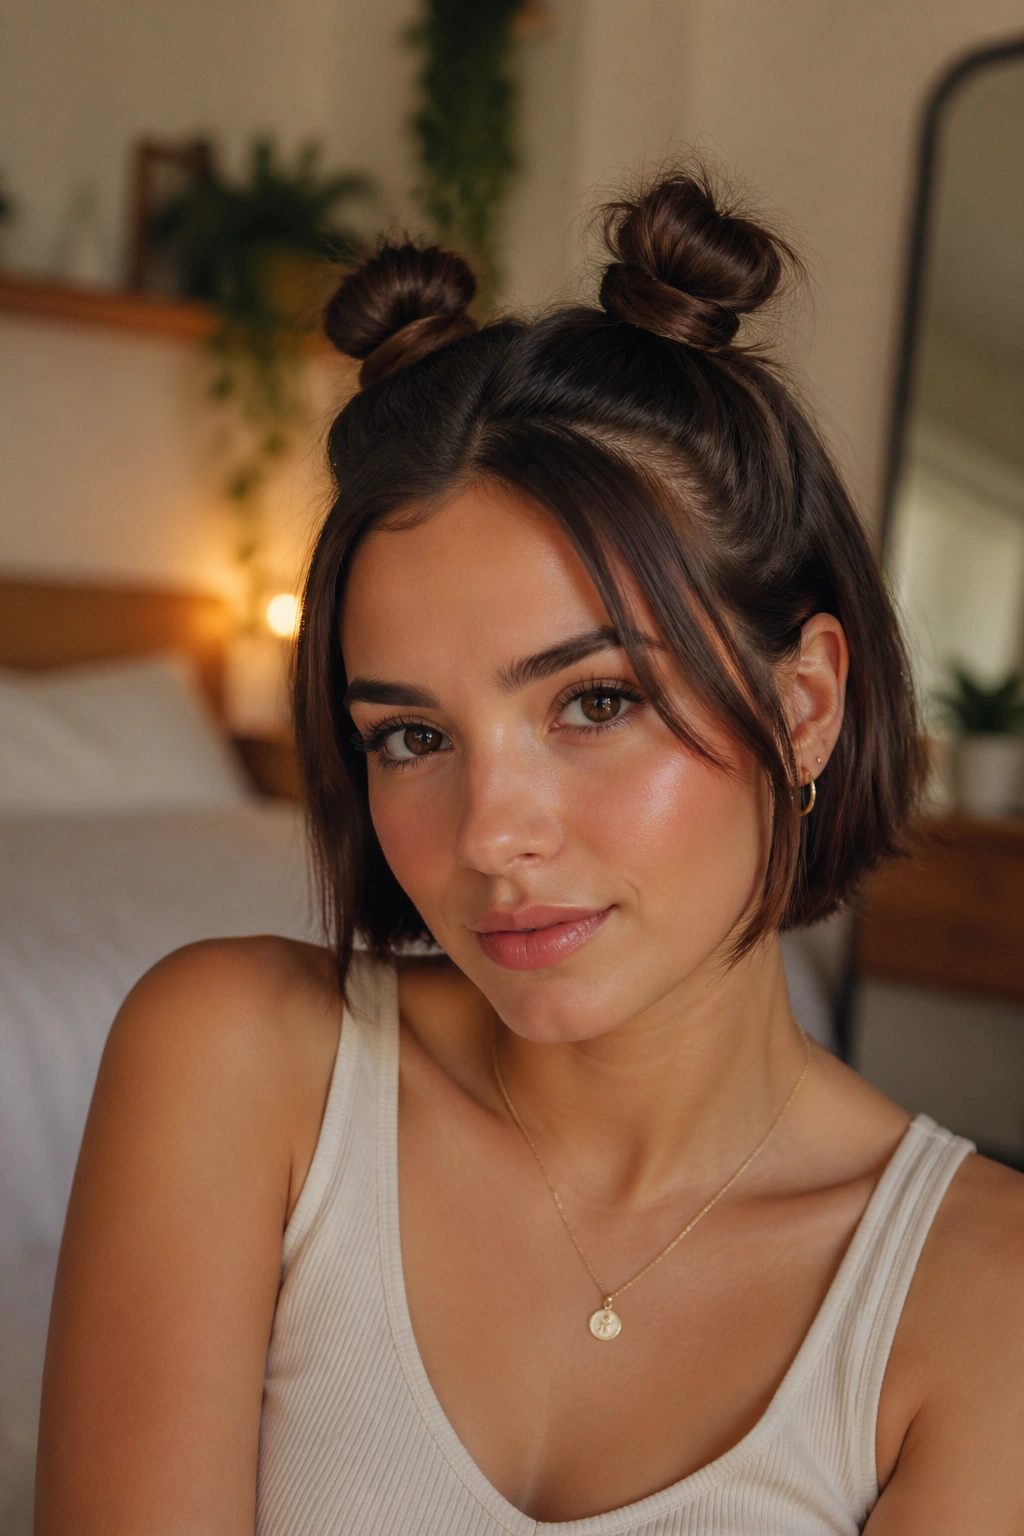
Picture a blunt bob, a loose sweater, and a day when simple hair feels too plain. Double mini buns fix that mood without asking for much length. They also keep short hair from collapsing into the same flat shape it wears every day.
The key is to keep both buns small and slightly offset. I like them just above the crown rather than right at the very top of the head, because centered buns can start to look too eager on short hair. A few wispy ends are fine. They make the style look lived-in instead of school-uniform neat.
- Start with dry, textured hair; day-two hair usually behaves best.
- Divide the top half from temple to temple.
- Twist each side into a bun no bigger than a walnut.
- Pin each bun with 2 or 3 bobby pins.
- Pull tiny bits of fullness at the edges so the buns do not look pasted on.
If one bun ends up smaller, leave it alone. Matching every detail too closely is how the style loses its charm.
4. Side-Swept Half-Up With Oversized Barrettes
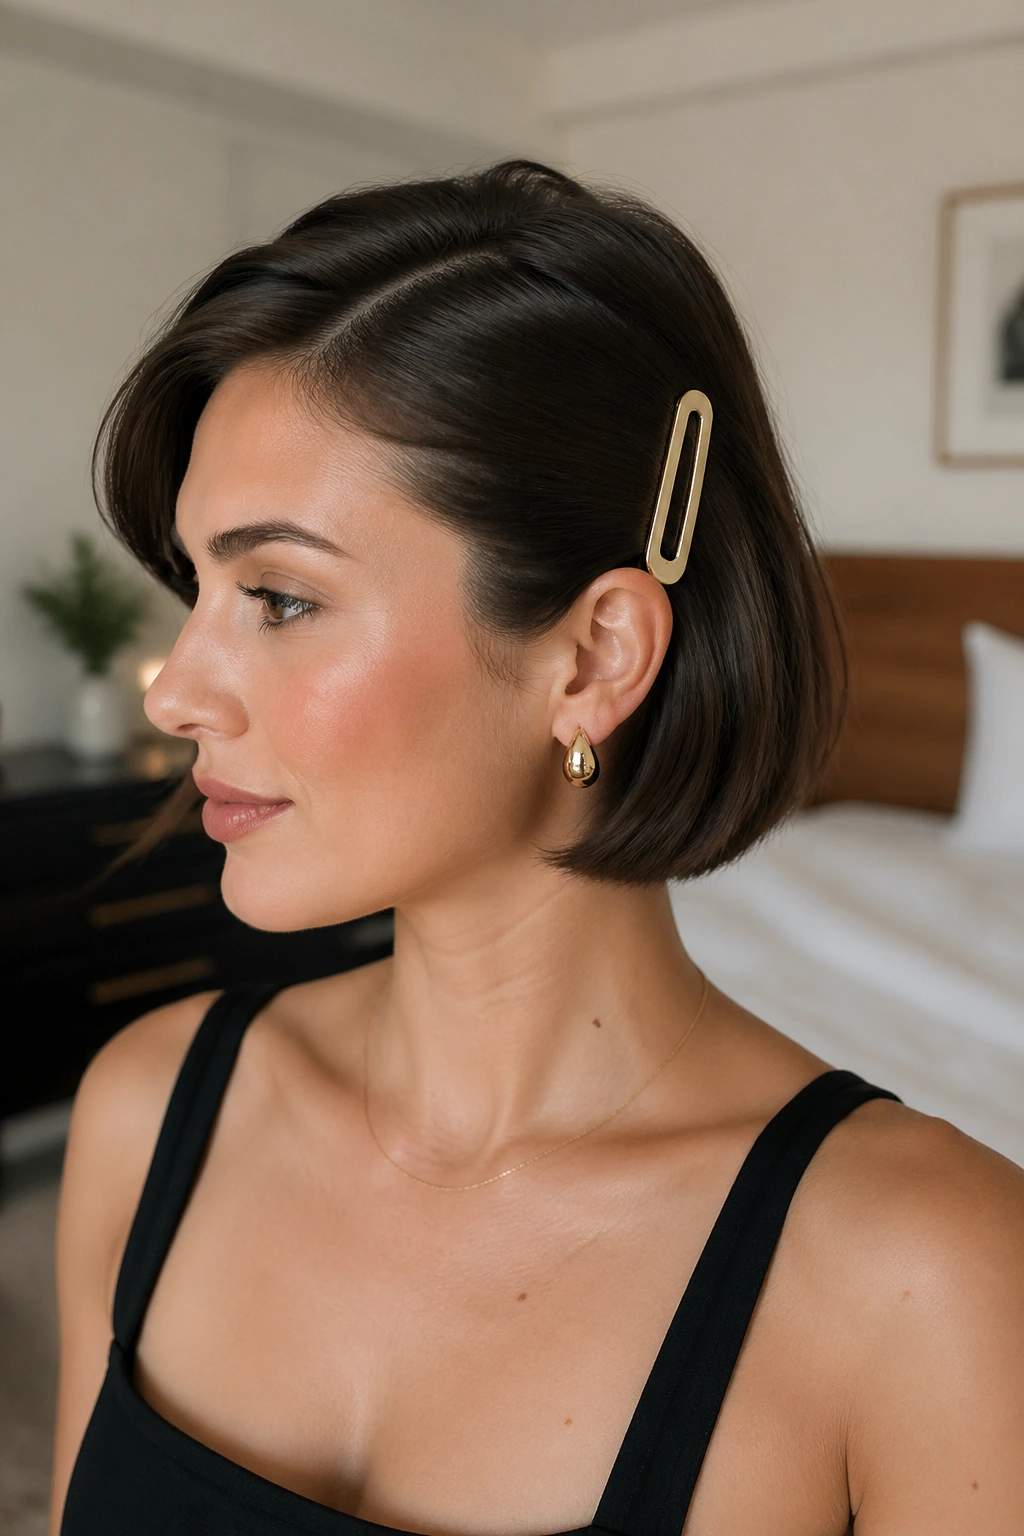
Skip the tiny clips that disappear into the hair. A single oversized barrette usually looks sharper on a bob. It gives the style a clear shape and saves you from stuffing your head with half a dozen hidden pins.
I like this version when the front pieces keep slipping forward or when the haircut has a few layers that refuse to stay tucked. An acetate clip, brushed metal barrette, or matte resin piece can hold enough hair without fighting the cut. The shape matters more than the sparkle.
Make a deep side part, sweep the heavier side back, and clip it just behind the ear or about an inch above it. If the barrette slides, stack two smaller barrettes one above the other instead of wrestling one too-small piece of hardware. That little adjustment keeps the line cleaner.
This style gets better on second-day hair, especially when the ends have a small bend. A sleek bob with a loud clip can look too hard-edged; a bit of texture keeps the whole thing from feeling severe.
5. Braided Half-Up Accent Across the Hairline
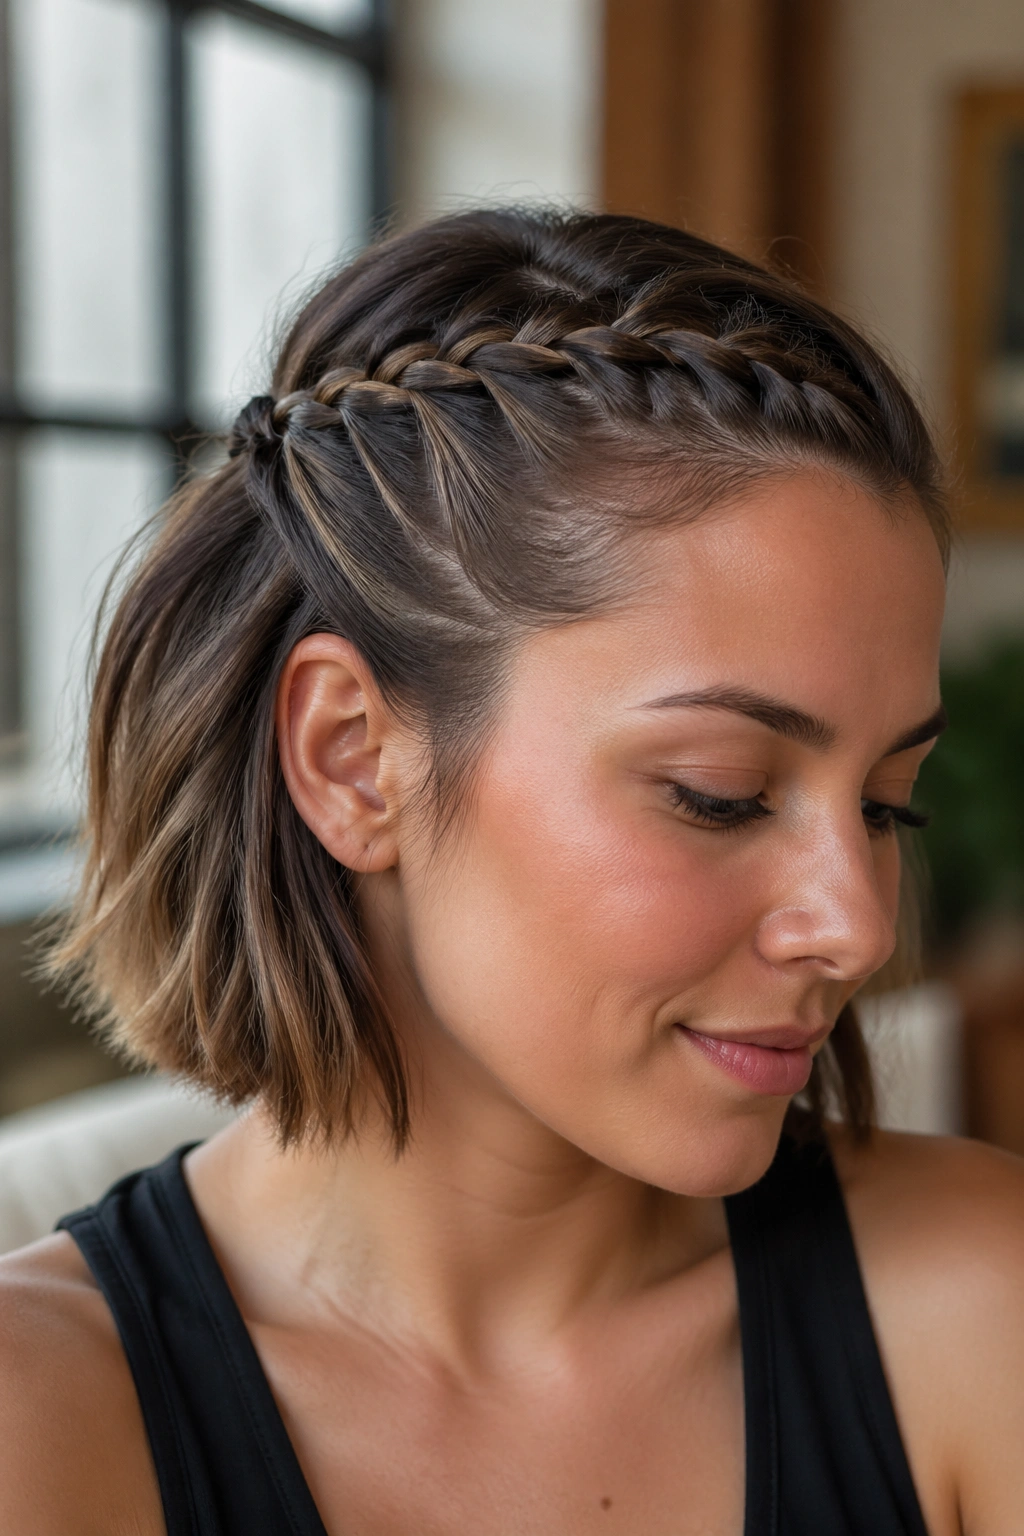
The braid should feel tight enough to hold, but not so tight that the scalp starts to pull. On short hair, that balance matters more than the braid pattern itself. A thin braid that hugs the hairline often looks better than a thick one that fights the length.
Start at the temple, take small sections along the hairline, and keep moving toward the opposite ear or the back corner of the head. You are building a little frame, not a full braid crown. The braid can be narrow; on a bob, narrow usually looks better because it sits close to the head.
Where the braid should sit
Keep it about half an inch behind the hairline, not glued to it. That tiny gap lets the braid breathe and stops the front from looking scraped back. If the bob has shorter layers around the temples, a dab of styling cream on your fingertips helps catch them before they pop loose.
Tight braids can look severe.
When the braid reaches the ear, pin the tail under the rest of the hair and mist the whole style lightly. I like this one for days when the haircut needs a little structure and the rest of the outfit is simple. It gives shape without turning the bob into a helmet.
6. Curled-End Half-Up Ponytail
Unlike a full ponytail, this version keeps the bob’s bottom line intact. That matters. A bob earns its shape from the way the ends sit, and a half-up pony lets you pull the top back without erasing the cut.
Gather the top section from temple to temple, secure it with a clear elastic, and wrap a tiny strand around the base to hide the band. Then leave the lower half free. The finished ponytail should sit small and tidy, with the rest of the bob still hanging naturally underneath.
Why the ends matter
Curl the loose ends outward if you want bounce, or inward if you want a softer curve. A 1-inch iron is enough for most short bobs; smaller barrels can make the ends look too tight and springy. If the haircut is blunt, bend the ends rather than curling the whole head.
This style works especially well on collarbone-skimming bobs and shorter lobs. It also keeps the neck open without pulling the top too tight, which is useful if you hate the feeling of a full ponytail. On fine hair, it tends to stay cleaner longer because the lower half carries the weight instead of every strand fighting the elastic.
7. Bubble Half-Up Ponytail on a Bob
A bubble ponytail is the easiest way to make short hair look styled, not just pinned back. It looks playful, but the setup is practical. The bubbles break up the length so the style reads clearly even on a bob that barely reaches the shoulders.
Place a small half-up ponytail at the crown, then add clear elastics every 1 to 1.5 inches down the gathered section. Gently tug each segment outward between the elastics until it rounds into a bubble. The bubbles should be small on short hair. Big, stretched-out bubbles belong on longer hair and can look lumpy here.
How to keep bubbles round
- Use 3 to 5 clear elastics, depending on length.
- Put the first elastic at the crown, not low at the nape.
- Leave 1 to 1.5 inches between each tie.
- Puff each section with your thumbs rather than yanking it.
A little shine spray helps, but only on the outside layer. Too much product and the elastics start to slide, which ruins the clean line. Keep the bubbles small, and the whole style feels modern without trying hard.
8. Deep Side Twist Tucked Behind the Ear
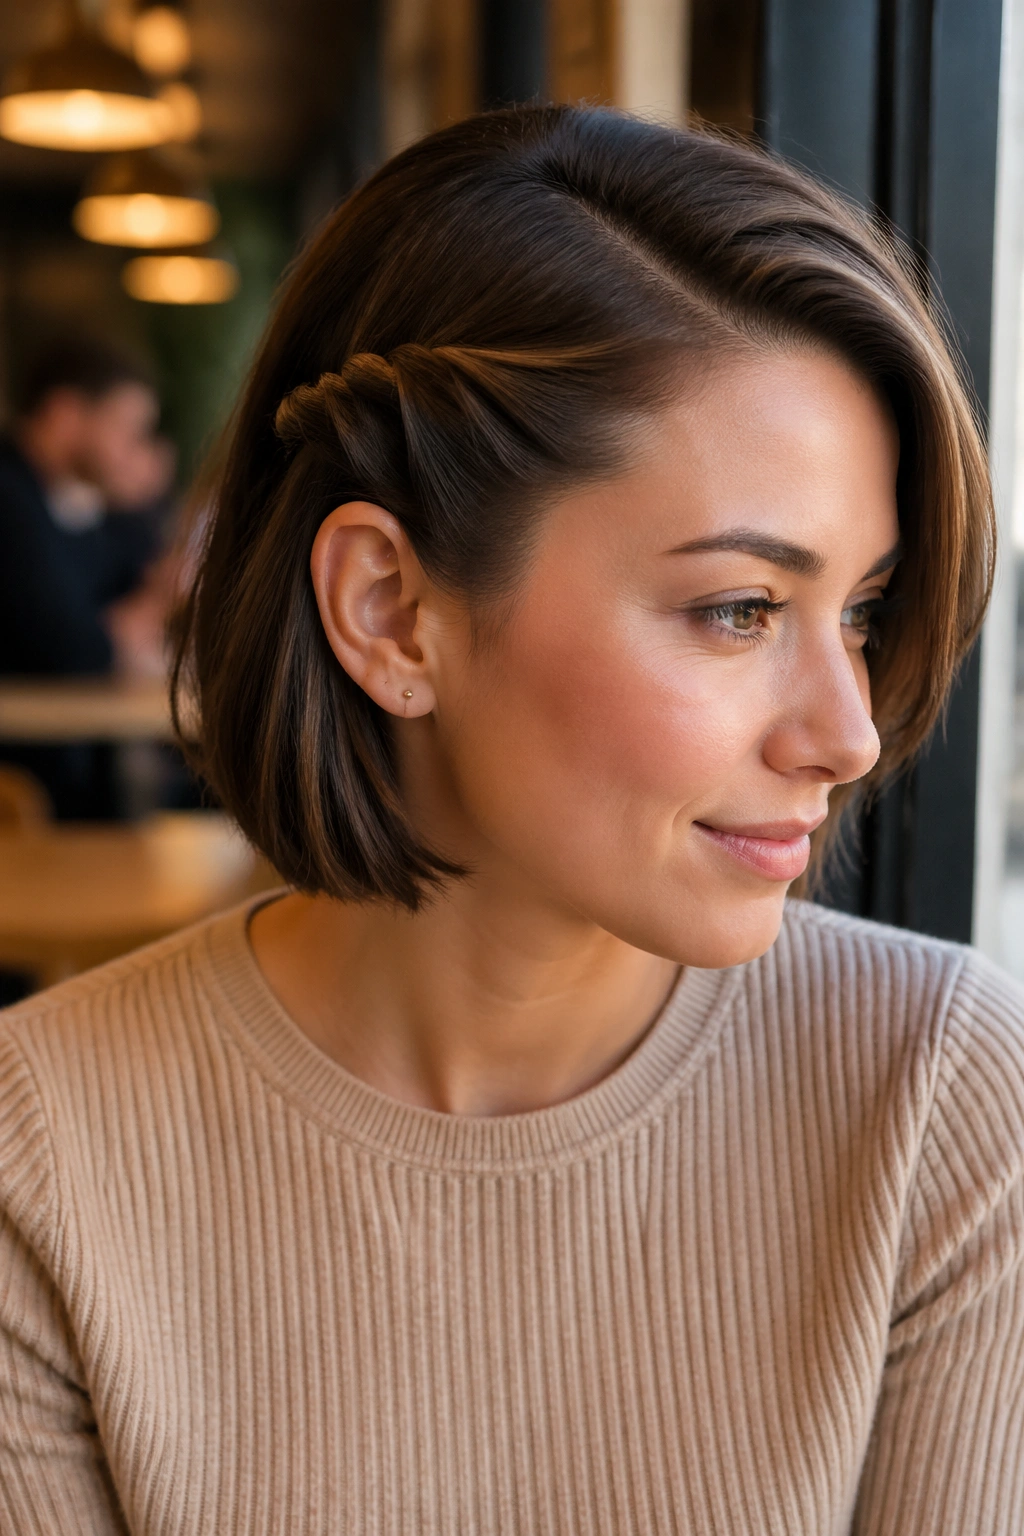
You know that side of a bob that keeps falling into your face? Use it. A deep side twist gives that stubborn front section a job and turns an annoying habit into part of the style.
The move is simple: create a deep side part, twist the heavier side back, and tuck it behind the ear. The twist should start just above the brow line and travel back toward the ear in one clean motion. I like it when the twist sits low and flat, because that keeps the bob from losing its shape.
This style works especially well when one side of the haircut has a stronger bend than the other. Instead of fighting the difference, the twist makes the asymmetry look planned. If the bob is wavy, leave the ends soft. If it is straight, bend the front piece away from the face with a flat iron before pinning it.
A single matte pin usually does the job. If you need more hold, place a second one under it in an X. The style ends up calm and neat, which is a nice change from the usual fight with flyaways.
9. Silk Scarf Half-Up for Short Hair

Tie a silk scarf through a half-up bob and the whole shape softens. It also gives you an easy way to make the style feel finished when the hair itself is too short for a long ponytail or a full wrap.
I like a narrow scarf better than a bulky square folded in half. On short hair, too much fabric can swallow the haircut and make the top look heavy. Fold the scarf into a strip about 1 to 2 inches wide if your bob sits at the chin, or a little wider if the hair reaches the collarbone.
Which scarf width works
- 1 to 2 inches wide for chin-length bobs.
- 2 to 3 inches wide if the bob sits lower.
- Silk or satin if you want less friction on the hair.
- Tie it once and hide the knot underneath the top section.
The scarf can hide a half-up that is more practical than fancy, and I don’t mind that one bit. It also keeps the crown from frizzing out while the ends stay loose and soft. This is one of those styles that looks as good with a plain tee as it does with a blazer, mostly because the scarf does the visual work.
10. Wet-Look Half-Up With Clean Sides
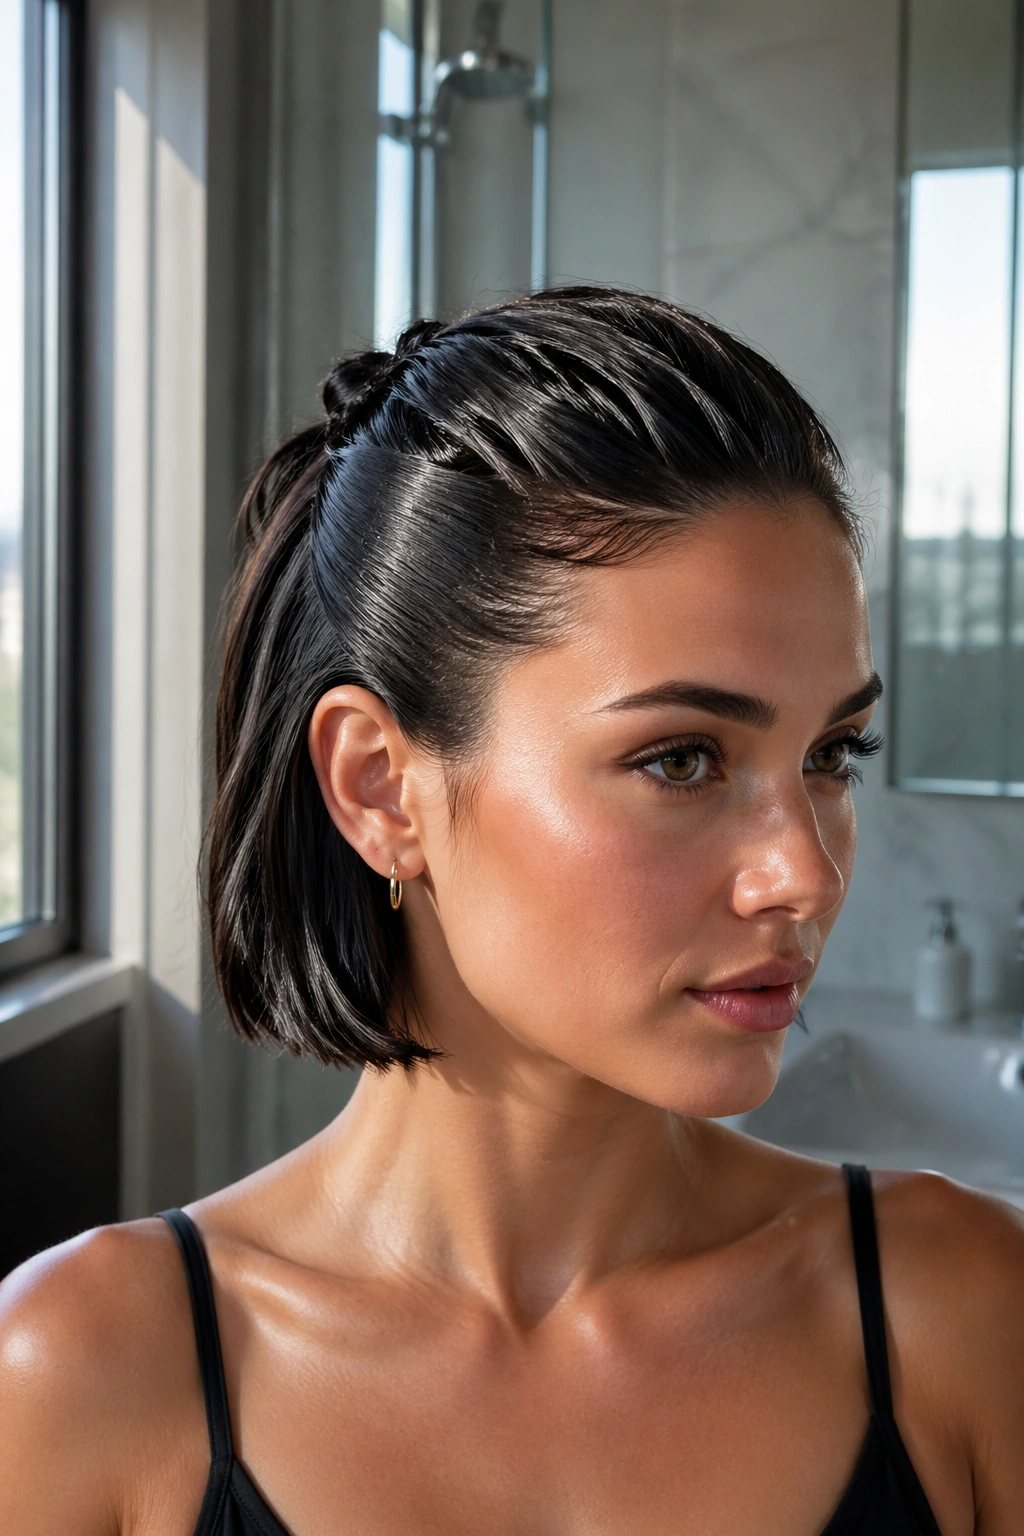
A wet look doesn’t need long hair. On a short bob, it can look sharper because the shape stays visible. The shine draws attention to the cut instead of swallowing it.
Use gel or a strong styling cream on the sides and top, then comb the hair back close to the scalp. Leave the back soft enough to move. You want the crown smooth, not drenched. A pea-to-dime-size amount of gel is usually enough for a chin-length bob, and more than that tends to turn sticky in a hurry.
Less product wins here.
This style makes sense when the haircut itself is blunt and healthy, because the shine shows every line of the cut. If the ends are dry or choppy, the wet look can expose that mess faster than you’d like. A fine-tooth comb and two flat pins at the crown are usually enough to hold the lifted top section without breaking the smooth surface.
I like this one when the rest of the outfit is minimal and the hair needs to do one clean thing. It’s sharp, a little dramatic, and easier to wear on short hair than people expect.
11. Faux Hawk Half-Up Lift
Three things make a faux hawk work on short hair: volume at the crown, tight sides, and a narrow center ridge. Miss one of those and the style starts to wander. Nail all three and the bob gets a shape that feels a little bolder without becoming messy.
Tease just the top 1 inch at the crown, then smooth the outer layer over it so the lift stays hidden. Pin the side sections back close to the head, and leave the center ridge a little taller than the rest. The back should still show the bob’s outline; you are lifting the crown, not building a tower.
Where to put the height
- Add lift about 1 to 2 inches behind the hairline.
- Use 2 bobby pins per side if the hair is slippery.
- Keep the center ridge narrow on rounder faces.
- Press the outer layer with your fingertips after teasing so it sits smooth.
This style has more attitude than the others here, but it still works with a blazer, a plain knit, or a simple black tee. Short hair gives it a strong outline, which is half the fun. If you want edge without losing control, this is the move.
12. Soft Half-Up Style for Fine or Slippery Hair
Unlike the big, showy versions, this one stays close to the head and usually holds longer. Fine hair needs less ambition and better placement. That’s the whole game here.
Use a tiny claw clip or two crossed bobby pins, gather only the top third of the bob, and rough the roots with a little dry shampoo before you clip. If you grab too much hair, the section slides out and the style collapses. Keep the gathered part small enough that the lower half of the bob still moves freely.
The tiny adjustments that matter
- Clip 1 to 1.5 inches of width at the crown.
- Mist texture spray near the roots, not the ends.
- Keep the pulled-back section loose enough to move.
- Press the sides flat with your palms for 5 seconds before you leave the mirror.
I like this one because it looks calm even when the hair is not cooperating. It can be dressed up with a pearl pin or worn with nothing more than a small matte clip, and it never asks your bob to be longer than it is. If your hair slips out of every other half-up style, start here and keep the section smaller than you think.
Short hair likes restraint. The best half-up bob styles for short hair do not fight the cut; they work with its shape, its edges, and its little stubborn bits. Clean sections, good placement, and a pin or clip that actually grips will take you farther than any oversized idea ever will.