Afro twists are the kind of hairstyle that makes a rushed morning look deliberate. They sit in that sweet spot between neat and relaxed, and when the parting is clean and the tension is right, they can carry you through work, errands, school pickup, and dinner without needing a full restart.
Sore edges are not part of the deal.
That matters more than people admit. The American Academy of Dermatology has long warned that repeated pulling at the hairline can cause thinning over time, so a good twist style should feel secure, not tight enough to make you wince when you turn your head. A twist that hurts is not “well done.” It is too tight.
I like afro twists because they are honest hair. They show texture, they work with shrinkage instead of fighting it, and they give you room to choose your mood on a given day. Medium twists can look polished, mini twists can disappear into a low bun, flat twists can calm a busy crown, and a twist-out can give you the kind of shape that looks fuller without asking for heat.
The best part is how forgiving they can be when you pick the right size and finish. A clean section, a little moisture, and a soft hand at the roots do most of the heavy lifting. Small details matter here. A lot.
1. Classic Two-Strand Afro Twists
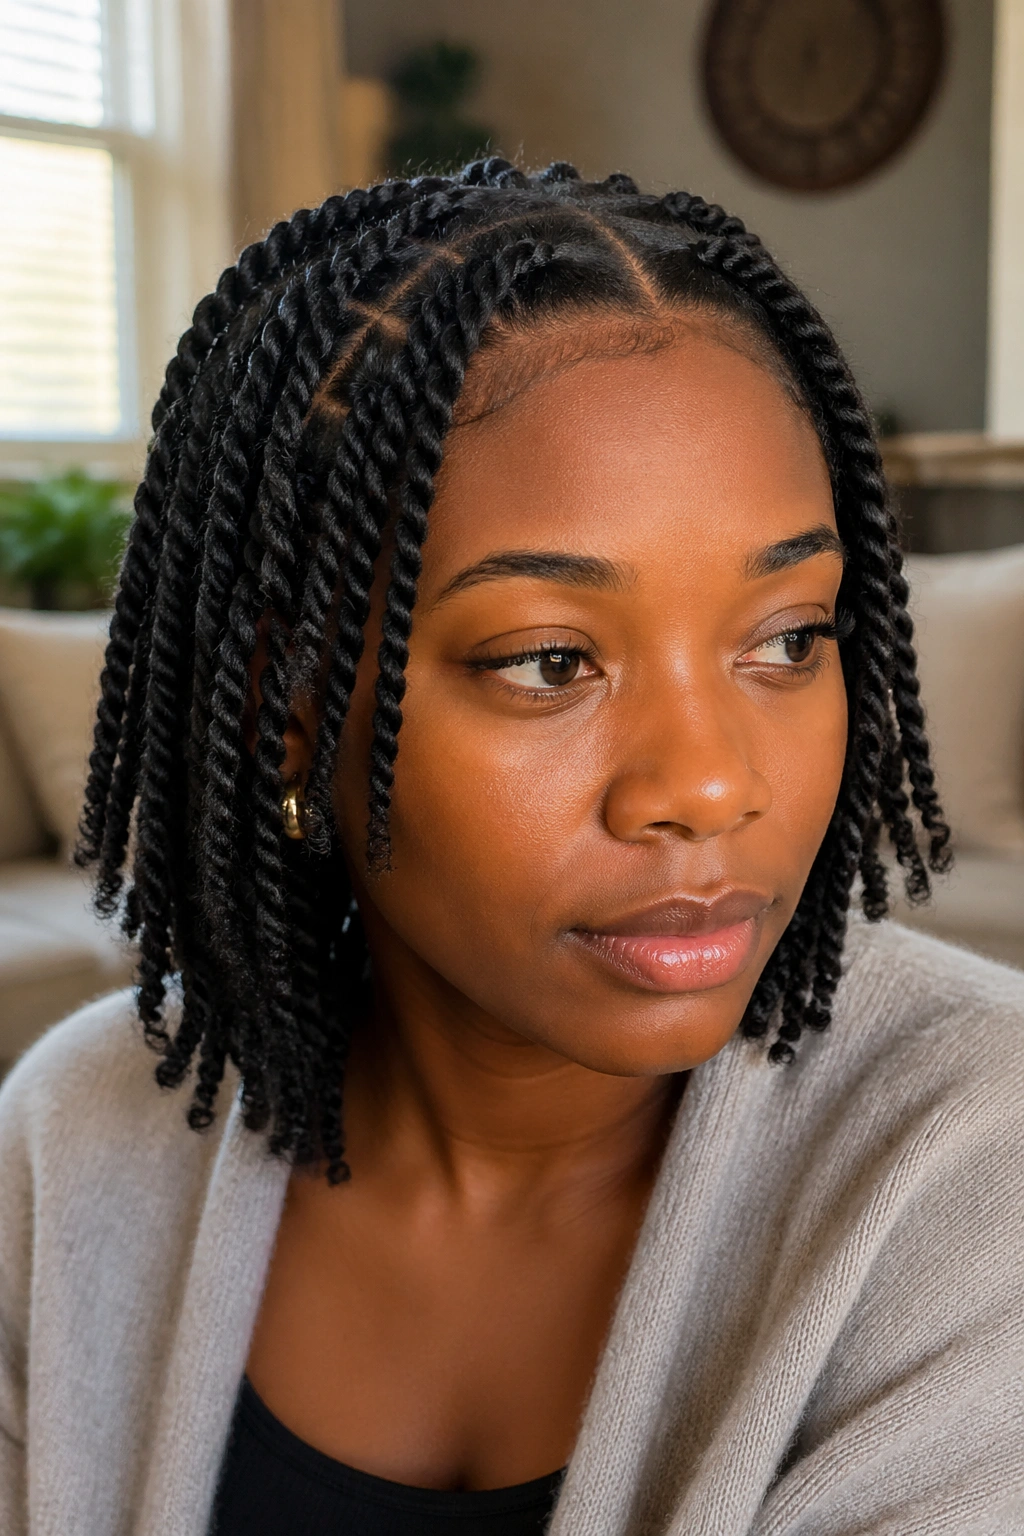
Classic two-strand twists are the starting point for a reason. They are simple, familiar, and easy to live with once they are in. A medium size — think sections around ½ inch wide — gives you a nice balance between speed, neatness, and movement. Too tiny, and the install drags on. Too chunky, and the roots can puff up faster than you want.
Why they stay practical
A medium two-strand twist sits in that useful middle zone where the style still looks tidy on day one and still has some shape after sleeping on it. That is why I reach for it when I want something that works with a scarf, a blazer, a hoodie, or a bonnet and does not complain.
- Use stretched or freshly detangled hair so the twist lays smoother from the root.
- Keep each section close to the same size if you want a more even finish.
- Twist with enough tension to hold, but stop before the scalp feels tugged.
- Seal the ends by rolling them between your fingers if they start to unravel.
The actual styling is straightforward: smooth in a leave-in, add a small amount of cream, then divide the section into two equal pieces and wrap them around each other from root to tip. If your hair likes to frizz at the ends, a tiny bit of gel on the last inch can help. Tiny amount. Not a helmet.
A one-sentence truth: the parts do not need to be perfect to look good.
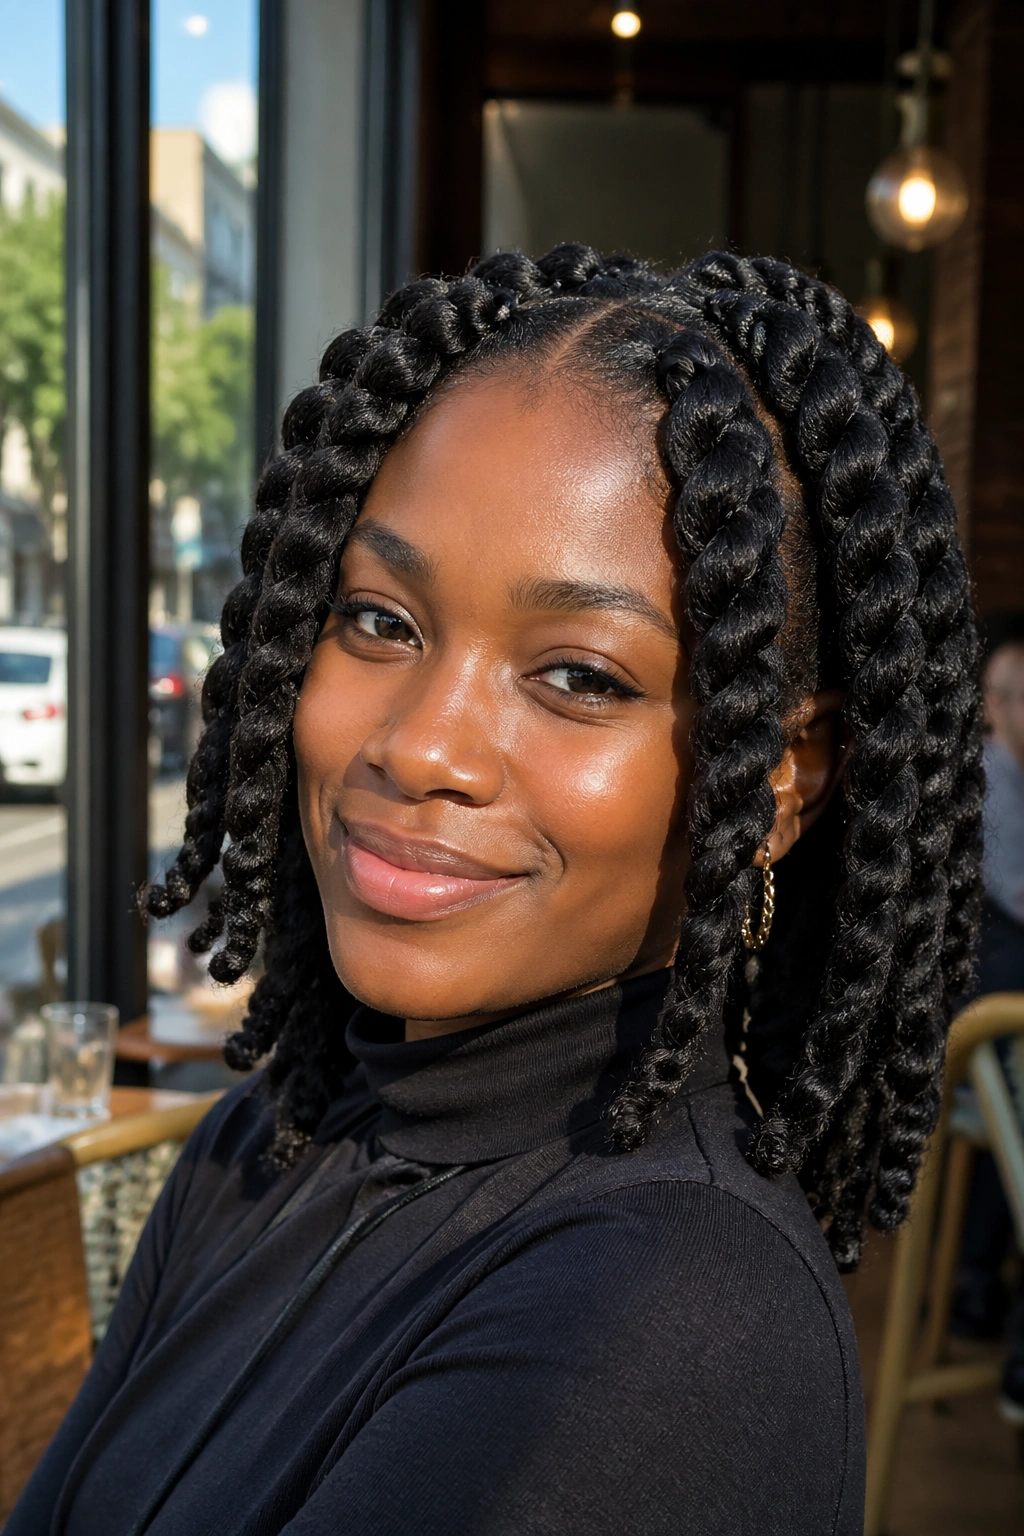
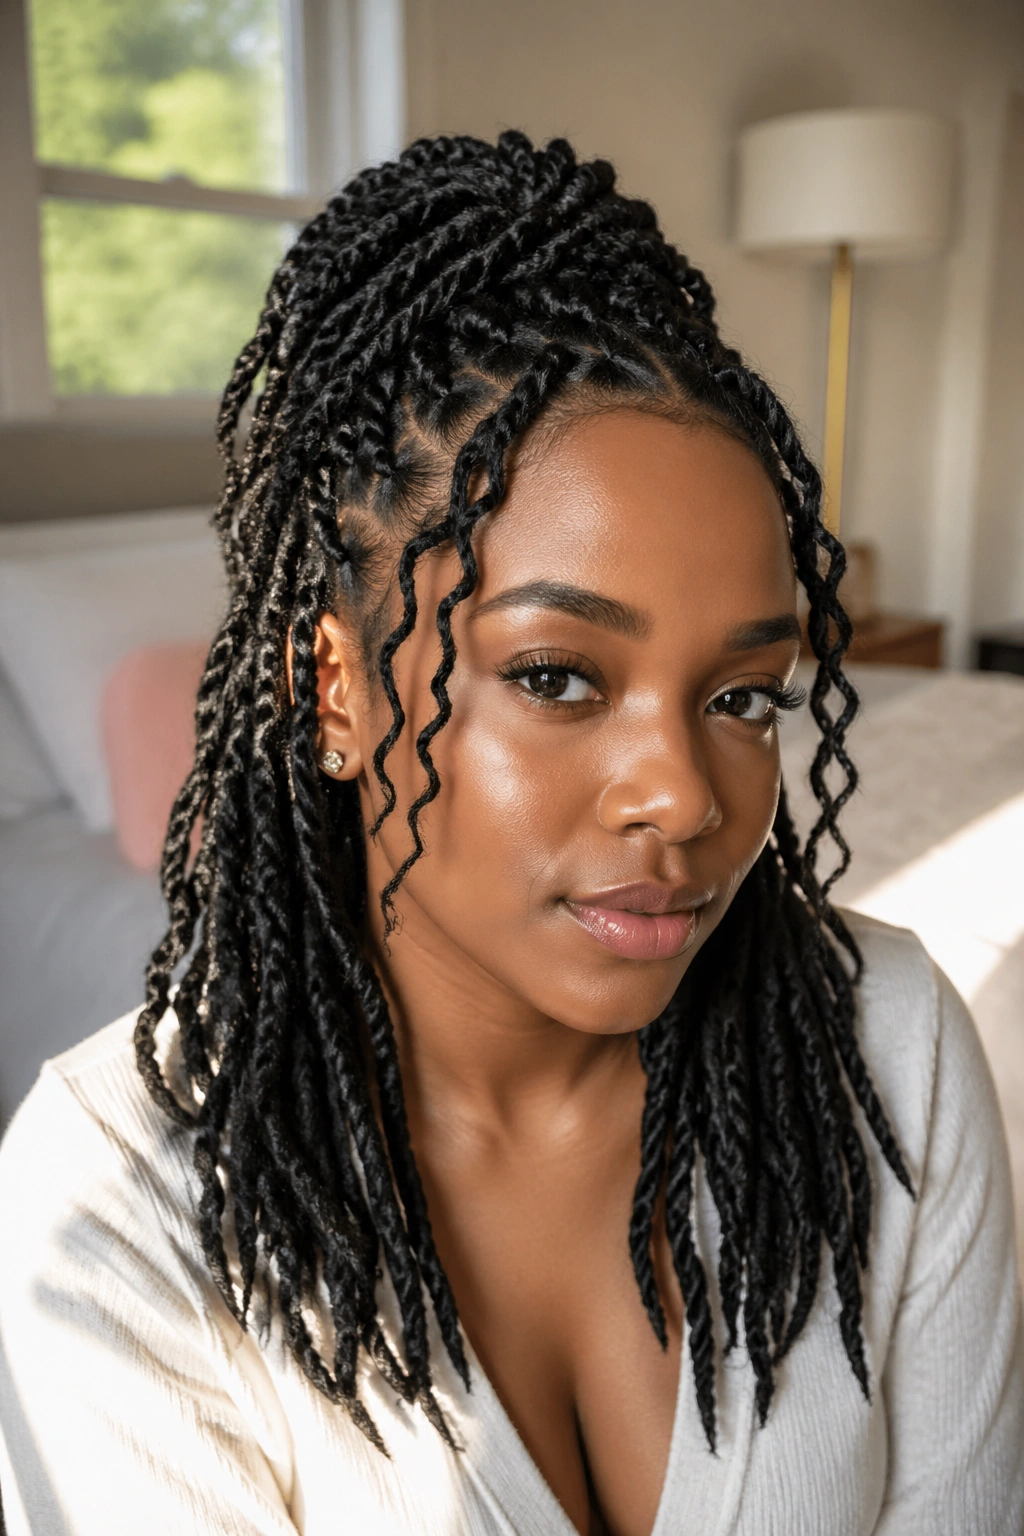
2. Mini Afro Twists for Long-Lasting Shape

Mini twists are the style I recommend when someone wants maximum flexibility later and can tolerate a longer installation up front. They use very small sections — often around ¼ inch wide — which means the finished look feels lighter, moves more, and gives you more styling options. You can wear them down, pin them back, gather them into a puff, or tuck them under a beanie without much fuss.
They also hide a busy week better than larger twists. Once the roots puff a little, mini twists still read as neat instead of messy. That is the whole appeal. They have enough density to look full, but the individual twists are small enough that they blend into each other when you are not trying too hard.
I would not call them fast. They are not. But they pay you back.
For mini twists, I like a lighter hand with product. Heavy cream can sit on the hair and make the twists feel sticky instead of soft, especially if your hair is fine at the ends or prone to buildup near the scalp. A leave-in plus a modest cream is usually enough, and if your hair is very dry, you can mist the section first rather than soaking it.
A good mini twist should feel compact, not stiff. If the ends start to thin out, stop twisting sooner and let the hair coil naturally. That small pause at the end makes a bigger difference than people expect.
3. Chunky Twists When You Want Speed
Need a style that looks finished before your first cup of coffee? Chunky twists are the answer. Bigger sections — around 1 inch wide — cut the styling time way down and give you a fuller, more relaxed look that does not need precision to make sense. They work well on thick hair, stretched coils, and shorter lengths that might feel swallowed by tiny twists.
How to keep them neat
Chunky twists look best when the roots are clean and the sections are straight enough to read as intentional, but not so perfect that you spend an hour parting your head like a map. That is the whole charm. They can look casual and still feel polished.
- Stretch the hair first if shrinkage tends to swallow the shape.
- Use a rat-tail comb only for the part, not for yanking through tangles.
- Smooth the root with a small dab of gel or edge cream.
- Stop twisting when the strand feels springy and holds its spiral.
I also like chunky twists for hair that has a lot of texture because the style does not erase the pattern underneath. It lets the hair look full without making the head feel overloaded. If you are the type who likes a little softness around the face, leave two twists slightly looser at the front and tuck them later if you change your mind.
One more thing: chunky twists are not a great match for people who hate visible parting. The sections show more, and that is part of the look. If you want something sleeker, go smaller or switch to flat twists.
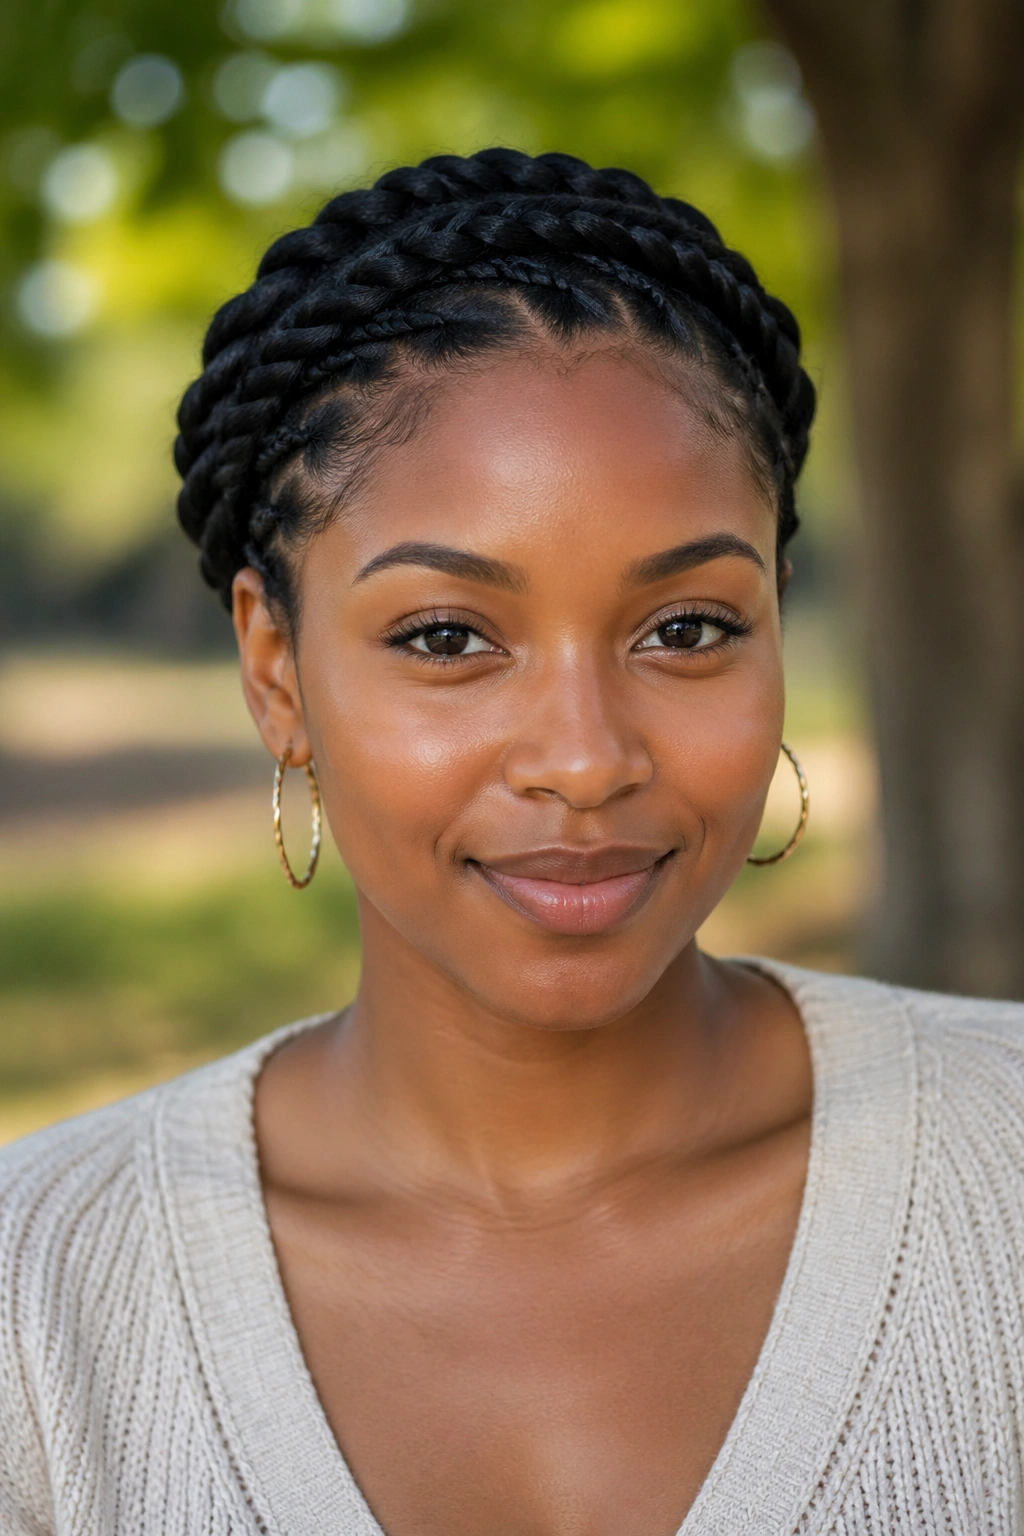
4. Flat Twists Straight Back for Busy Days
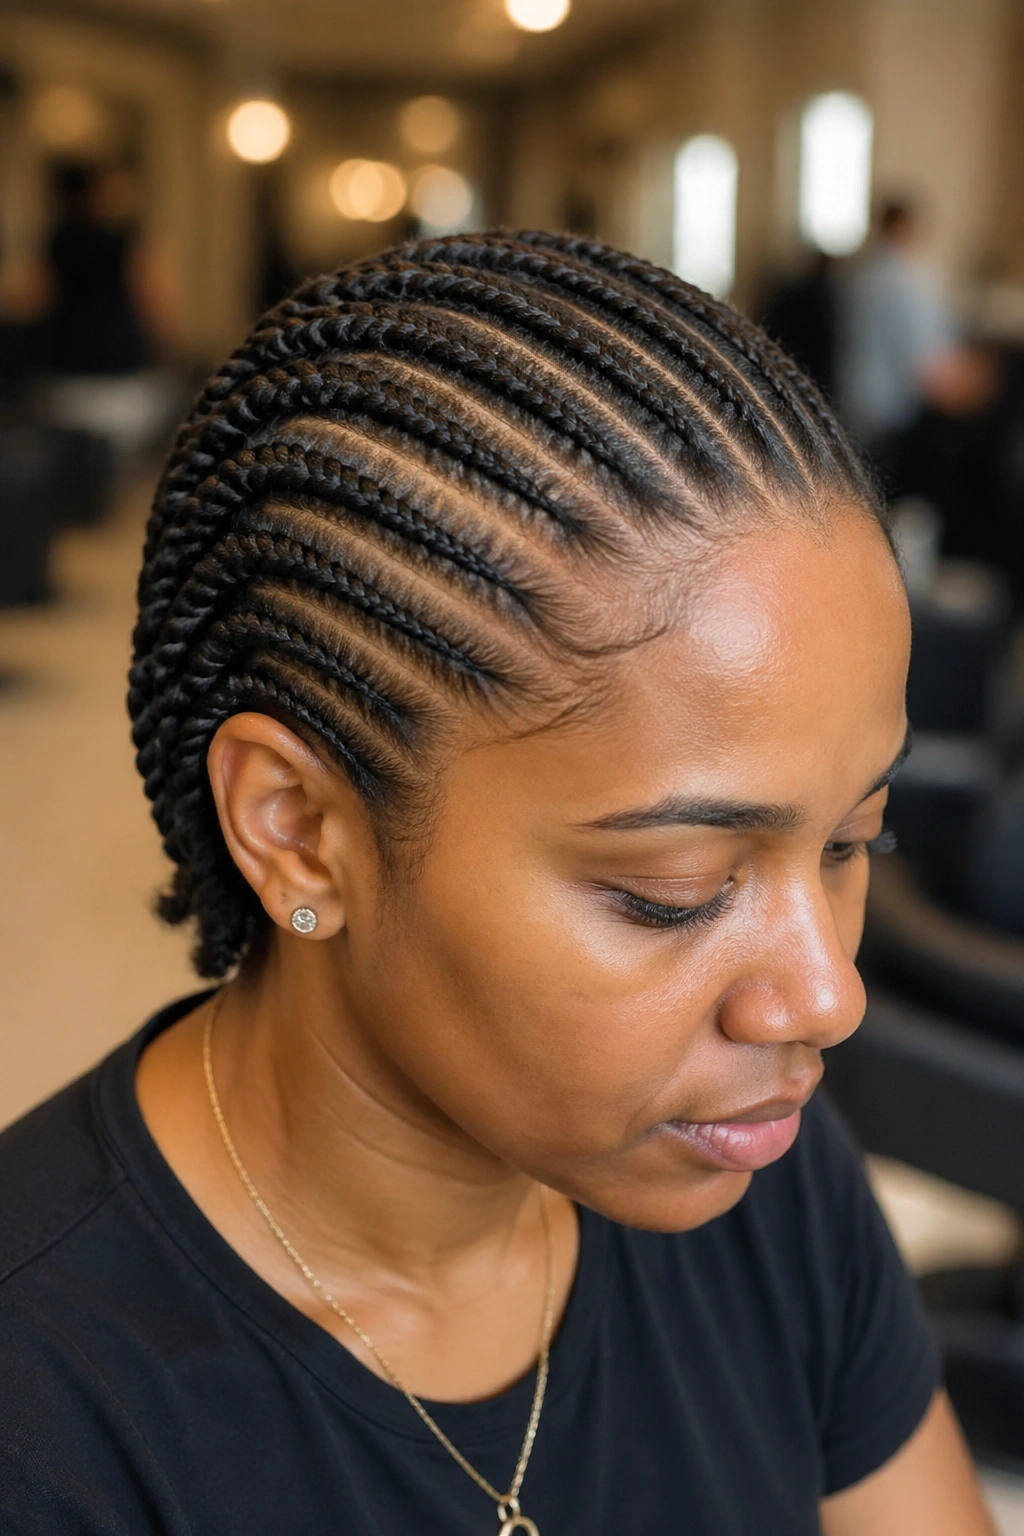
Flat twists are underrated, and I will keep saying that until people stop treating them like the “backup” option. They are one of the neatest ways to keep natural hair close to the scalp, which makes them useful for long workdays, workouts, humid weather, or any morning when you do not want hair in your face.
A straight-back pattern usually means 2 to 6 rows, depending on density and how much hair you want to leave out at the crown. The style sits low, stays tidy, and gives the face a clean frame without looking severe.
A few details that matter
The parting is the thing people rush, and then they wonder why the whole style looks uneven. Take the extra minute to make each row even. It does not need to be razor sharp, but it should be clean enough that your eye does not trip over it. A slightly damp rat-tail comb helps the section lie flatter, and a tiny amount of product near the roots keeps flyaways from sticking up like little antennas.
- Use a soft hold product near the scalp only.
- Keep your grip firm at the root, then loosen slightly as you move down.
- Sleep in a satin scarf so the top stays smooth.
- If the scalp feels sore, loosen the tension and start that row again.
Flat twists are also one of the easiest styles to pair with scarves and hats because they sit so close to the head. That is a small thing, but it matters when you are trying to get dressed quickly and still look put together.
5. Side-Part Flat Twists with a Softer Frame
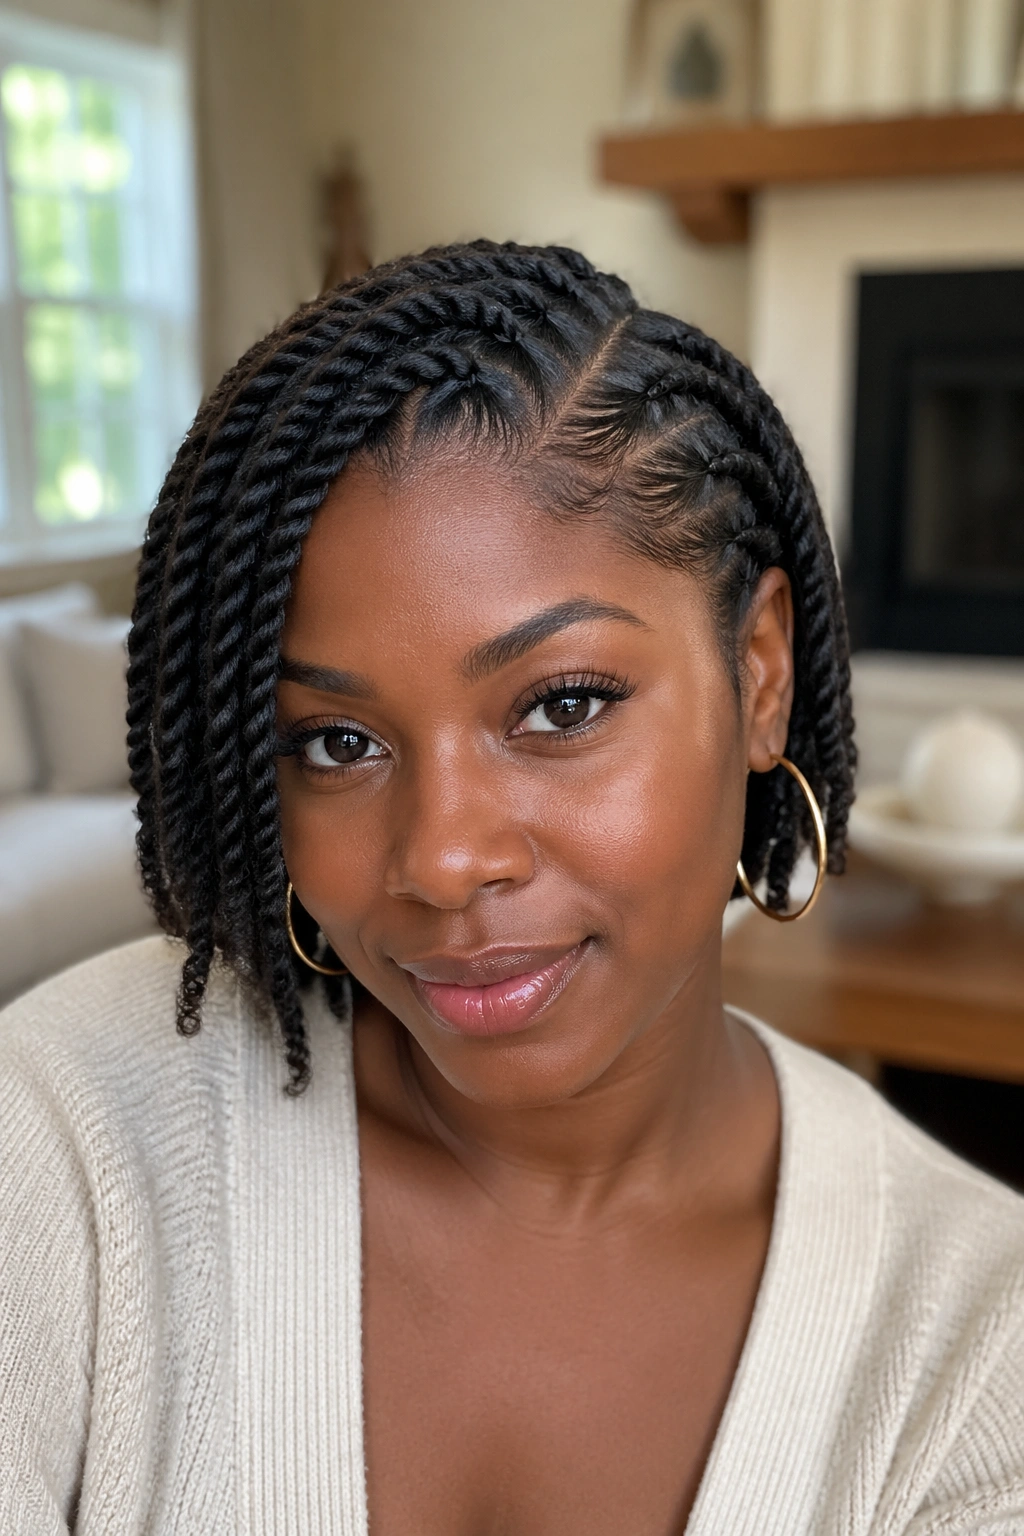
A side part changes the whole mood. Straight-back flat twists feel crisp; side-part flat twists feel a little softer, a little more styled, and a bit easier on the eyes when you want the hair to frame the face instead of pulling everything backward.
This style works especially well if you wear glasses, earrings, or anything around the neck that you do not want fighting for attention with your hair. The asymmetry does the work for you. A deeper part on one side can make the style feel thoughtful without making it fussy, and that is a nice place to be.
I like this look because it is easier to dress up than people assume. Two larger twists on one side and three smaller ones on the other can create a nice flow, especially if the ends are tucked behind the ear or pinned low at the nape. You do not need a lot of accessory drama here. A clean part and a tidy finish already carry the style.
If your hairline is delicate, keep the side part a little farther from the edge. That tiny margin protects the hairline and also keeps the style from looking too tight. I know that sounds like a small detail. It is. Small details are the whole game with twists.
6. Twist-Outs That Turn Set Twists Into Volume
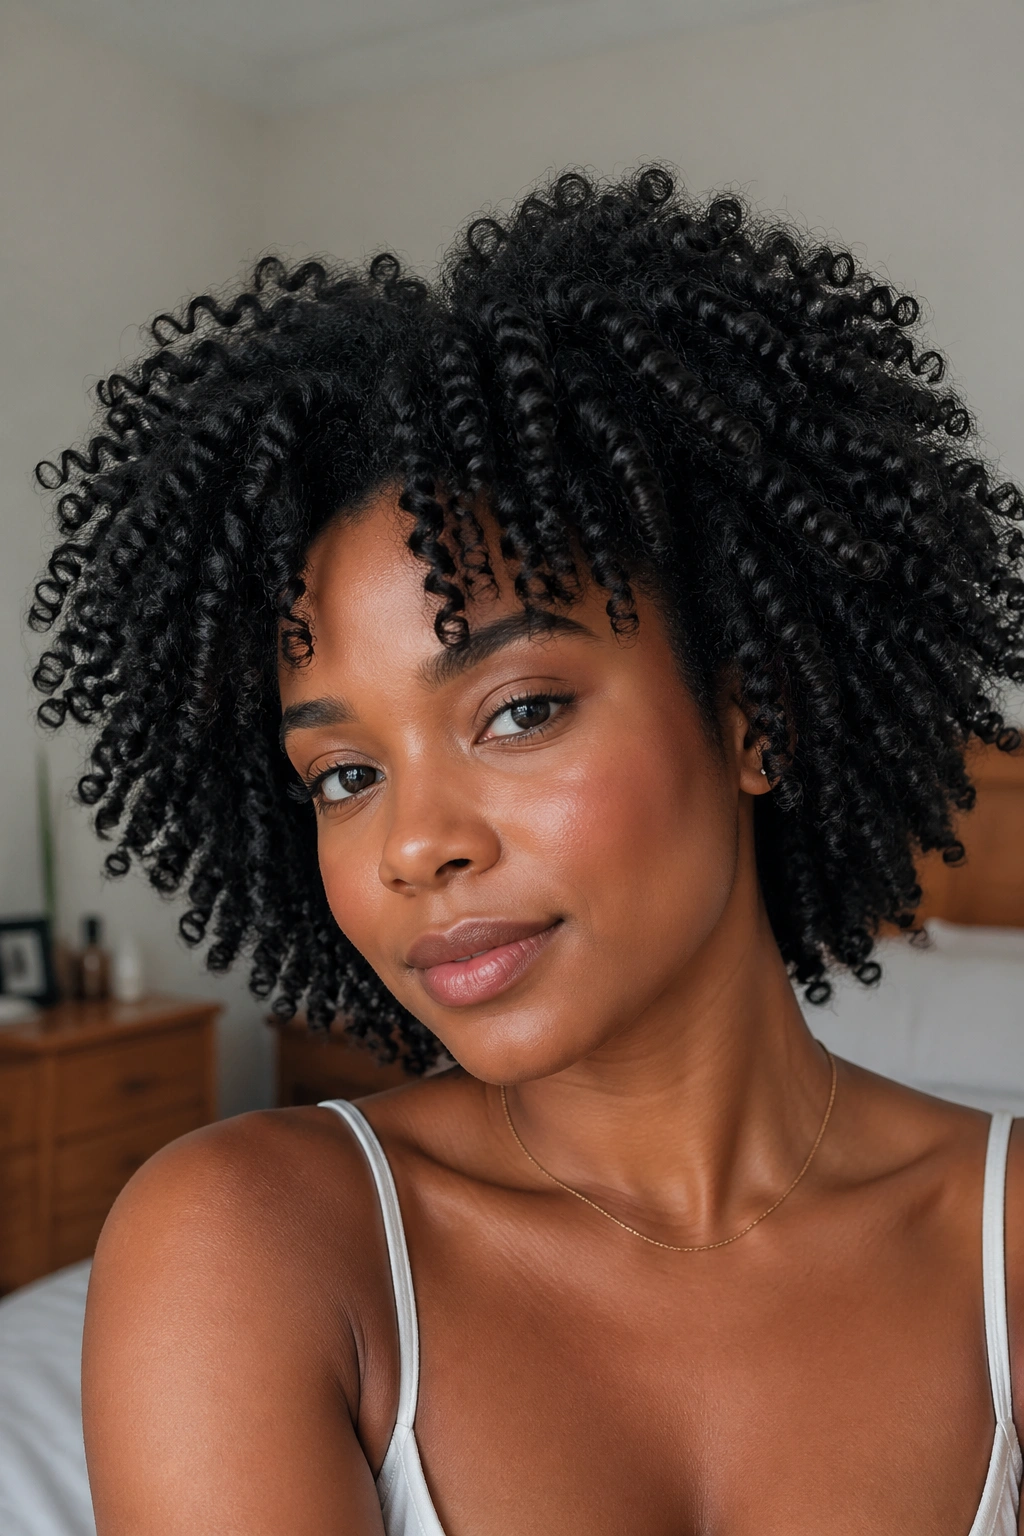
Unlike a style you keep locked in place, a twist-out gives you two looks from one set of hair. First you wear the twists, then you take them down and get the fuller, stretched shape underneath. That is why people keep coming back to it. It gives movement, shape, and a little more room around the face without using heat.
The trick is patience. The twists need to be fully dry before you unravel them, or the definition turns fuzzy fast. If you set them at night, they may need to stay in until the next day depending on density, section size, and how damp the hair was at the start. No shortcut beats dry hair here.
How to get the most from it
A twist-out looks best when you handle it gently and stop touching it once it is separated. The more you rake through it, the faster the curl pattern loses definition. I usually coat my fingertips with a tiny bit of oil before unraveling, then separate each twist once or twice and leave it alone.
- Use medium twists if you want a looser, fuller finish.
- Use mini twists if you want tighter texture and more shrinkage control.
- Separate only after the hair feels completely dry.
- Fluff the roots with your fingertips, not a brush.
This style is good for people who like a little volume without going full blown-out. It also hides a few rough days between washes, which, honestly, is one of the main reasons it survives in real life.
7. Half-Up, Half-Down Twists for Face-Framing Ease
Some mornings you want your hair off your face, but you do not want the commitment of a bun. Half-up, half-down twists solve that problem without looking like you were trying to solve anything. Pulling the top section back leaves the bottom free, which keeps the style relaxed and gives the face a little shape.
Why it works
The style gives you a clean front and a softer back. That makes it useful for long days when you need hair away from your eyes but still want movement around the shoulders. It also works well if the hair is not freshly done and you want to keep the crown neat while letting the ends stay a little loose.
- Gather only the top third of the hair if you want height.
- Use a satin scrunchie or a soft elastic so the hold does not snag.
- Leave a few front twists loose if you want a softer hairline.
- Pin the half-up section if a ponytail gives you too much tension.
I prefer this style on shoulder-length twists or longer because the bottom half has enough weight to fall nicely. On shorter twists, it can look a little top-heavy, which is not bad, just different. If you have a strong side part, you can also sweep the top back from one side and leave the rest to fall naturally. That version has a nice, easy shape and works well with earrings.
8. Low Twisted Buns for Clean, Calm Hair
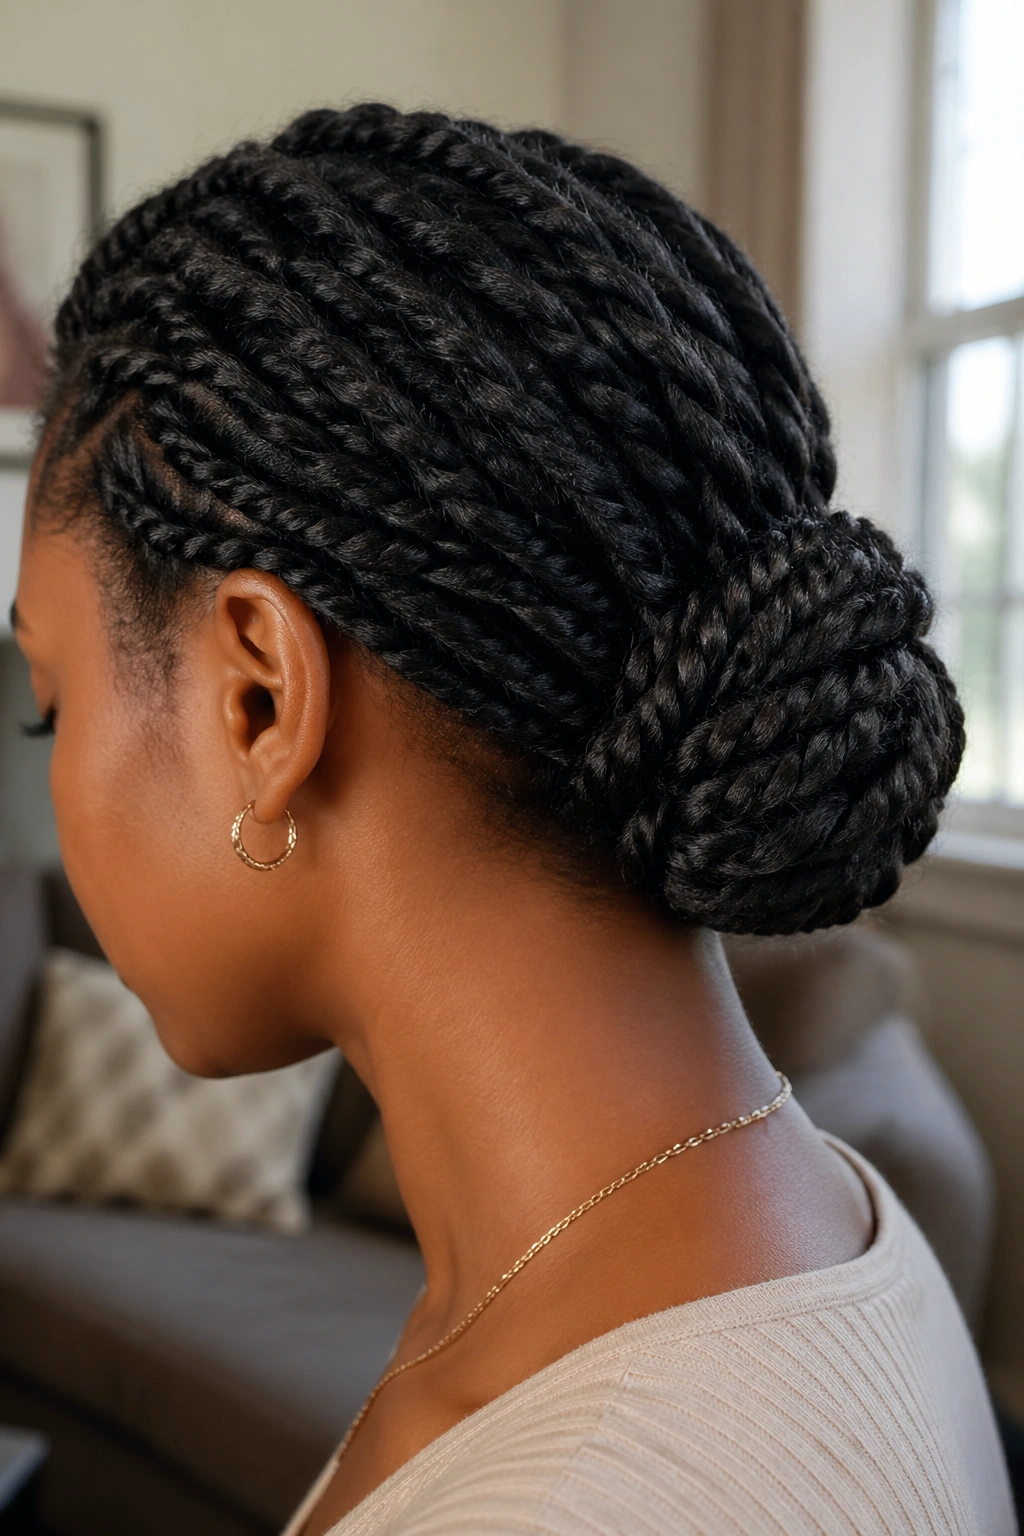
A low bun is boring only if you let it be. On twists, it can look elegant, calm, and practical in a way that plain loose hair sometimes cannot. It keeps the neck free, protects the ends, and works when you need your style to hold through a long day without looking stiff.
The best low buns do not sit like a tight knot at the nape. They sit low, soft, and slightly rounded, which gives them some shape instead of making them look squashed. I like to gather the twists with my hands first, then wrap them into a bun and secure the base with 2 or 3 pins. If the hair is long, the ends can tuck under themselves. If it is shorter, let the bun be a little imperfect. It usually looks better that way anyway.
This style is especially kind to busy schedules because it hides frizz better than loose styles. A little puff at the crown is fine. A little softness around the temples is fine too. What you do not want is a bun pulled so tightly that the face lifts toward the scalp.
If you are dressing it up, a simple metal cuff or one textured pin is enough. Anything louder starts fighting the bun, and the bun does not need help winning.
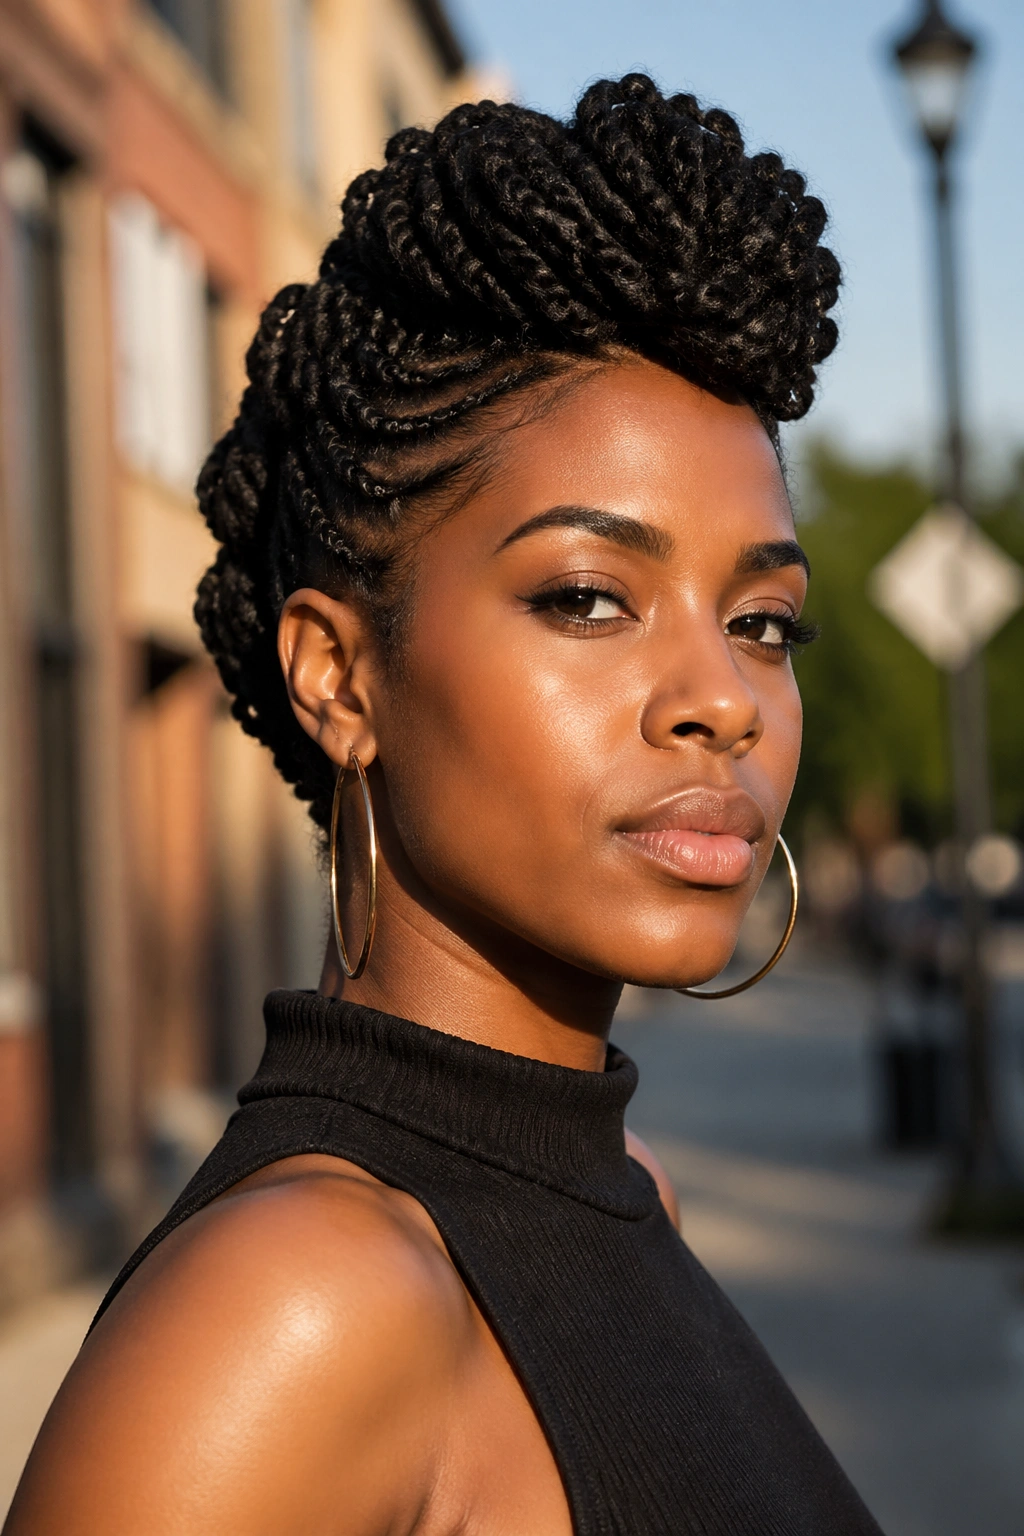
9. Crown and Halo Twists That Keep Hair Off the Neck
Want hair off your neck without pulling your edges back like a facelift? A crown or halo twist does that job beautifully. The style circles the head, usually with flat twists or rope twists laid along the hairline and pinned where they meet at the back. It feels polished, but it does not have to be precious.
How to keep the crown soft
The part near the temples deserves care. That area is delicate, and the style should respect that. Leave a small buffer — about ¼ inch if your hairline is sensitive — so the twist sits close without digging in. That one move changes the whole experience.
- Keep the sections along the front a little larger than the ones at the back.
- Pin the end under the twist path so the finish stays smooth.
- Leave a few baby hairs free if you like a softer frame.
- Use a light hold product rather than packing gel along the entire hairline.
I like halo twists for days when I want the face open and the rest of the head controlled. They also pair well with textured earrings, simple collars, and anything that would get crowded by loose hair. A crown twist does not need much decoration. The shape is already doing enough.
This is one of those styles that can look formal without looking stiff. That balance is rare. And worth keeping.
10. Twisted Frohawks with a Little Attitude
A twisted frohawk is what I reach for when I want the hair to have some height and energy without spending an hour sculpting every strand. The sides are twisted or pinned flat, while the middle section stays lifted and full. The result feels bold, but it still works on an ordinary Tuesday.
It helps if the hair has some texture left in it. A perfectly slicked-down frohawk can look a bit severe, while a softly textured one has movement and shape. I like this style on thick hair because the middle section has enough volume to stand on its own. Thin or short hair can still do it, but the center may need a few extra pins or a tuck-and-fluff approach.
What to watch for
The edges should never feel squeezed. If the side sections have to be yanked back to make the frohawk work, the shape is wrong. You want lift in the center, not pain at the temples.
- Use 6 to 10 bobby pins depending on thickness and length.
- Keep the side sections smooth, not glued down.
- Let the middle section stay a little airy for height.
- Check the back in a mirror before you leave the house.
This style has range. It can feel sporty, sharp, or a little dressy depending on how much volume you leave in the center. And when the twists are done right, it looks intentional without looking overworked.
11. Side-Swept Twist Bobs That Frame the Face

There is something charming about a side-swept twist bob that people forget until they try it. Shoulder-length twists can sometimes hang straight down and feel plain. Sweep them to one side, and the whole haircut changes. The face opens up, one shoulder gets a little drama, and the style suddenly has a point of view.
This works best when the twists are medium sized and long enough to tuck behind one ear. If they are shorter than chin length, the sweep can fall apart fast. If they are much longer, you may need a few pins hidden near the part to keep the shape from collapsing. Either way, the style looks best when it keeps some movement. A bob that is pinned too hard loses the softness that makes it useful.
I like this one for office days, dinners, and anything where I want the hair to look cared for without looking formal. It also shows off earrings nicely, which is a small pleasure but still a real one. The side sweep can be as shallow or deep as you want. A slight tuck gives a more relaxed feel. A deeper sweep reads more polished.
A tiny bit of oil on the fingertips helps the outer twists stay neat when you move them over the shoulder. That detail keeps the ends from looking dry after a few hours, and it takes about ten seconds.
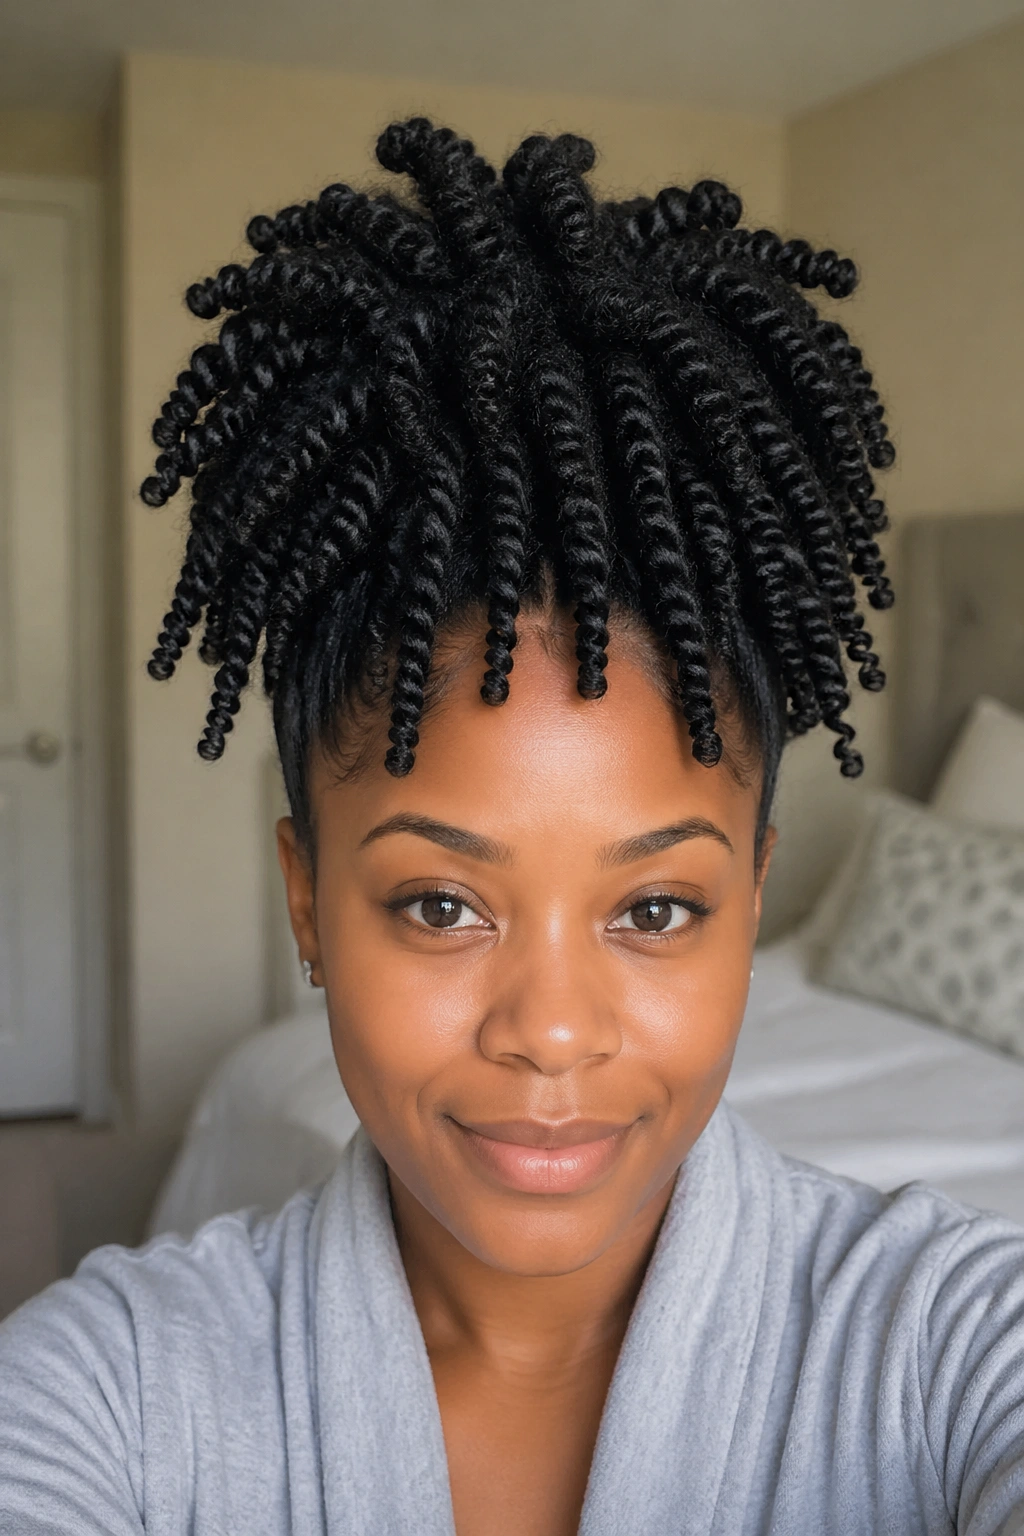
12. Pineapple Twist Puffs for Easy Second-Day Styling
The minute you gather twists high on the head, the whole mood changes. The neck feels lighter, the face looks more open, and the style starts to look like you planned it that way. A pineapple twist puff is one of the easiest ways to make old twists look fresh again without taking them down.
This is especially handy on day two or three, when the roots have settled and the ends still have life. Gather the twists loosely at the crown with a soft scrunchie, let the body of the twists spill forward or upward, and adjust until the shape feels balanced. The hold should be loose enough that the scalp does not feel squeezed when you tilt your head.
A good pineapple is not trying to flatten anything. It keeps the bulk where you want it and lets the style feel casual instead of over-managed. If your twists are shorter, the pineapple turns into a compact top puff. If they are longer, the ends may fan out a little, and that works too.
I also like this style because it survives a bonnet better than people think. You can sleep with the pineapple loose, then shake it out in the morning and only fix the front. A tiny mist of water on the palms can smooth the top if needed, but do not soak the hair. Wet twists lose shape fast and start acting heavy.
Final Thoughts
The easiest everyday twist style is the one that fits your time, your hair density, and your patience level. Medium two-strand twists are the safe starting point. Flat twists and low buns save the day when you want your hair controlled. Twist-outs, frohawks, and side sweeps give you more shape when you want a little extra personality.
Tension is still the real test. If the roots feel sore or the hairline starts to ache, the style is too tight, even if it looks neat in the mirror. Loose enough to live in, firm enough to hold — that is the balance worth chasing.
I would start with one style, wear it for a few rounds of your week, and notice what your hair tells you by day three. Hair gives feedback fast. The smart move is listening to it.